1. Milky Nude + Micro French Stiletto Tips
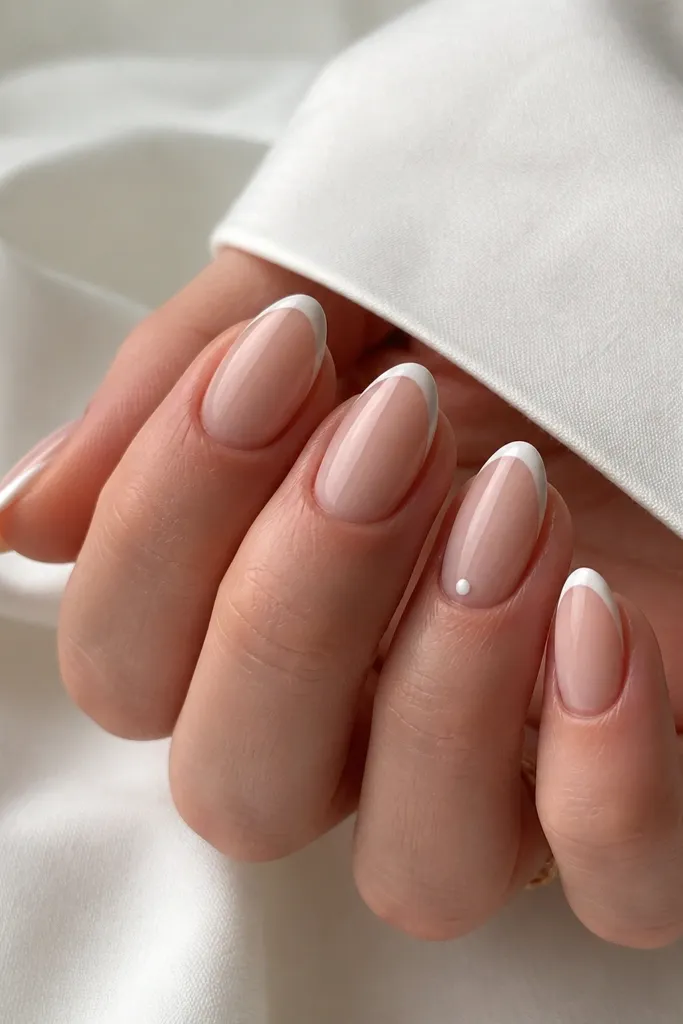
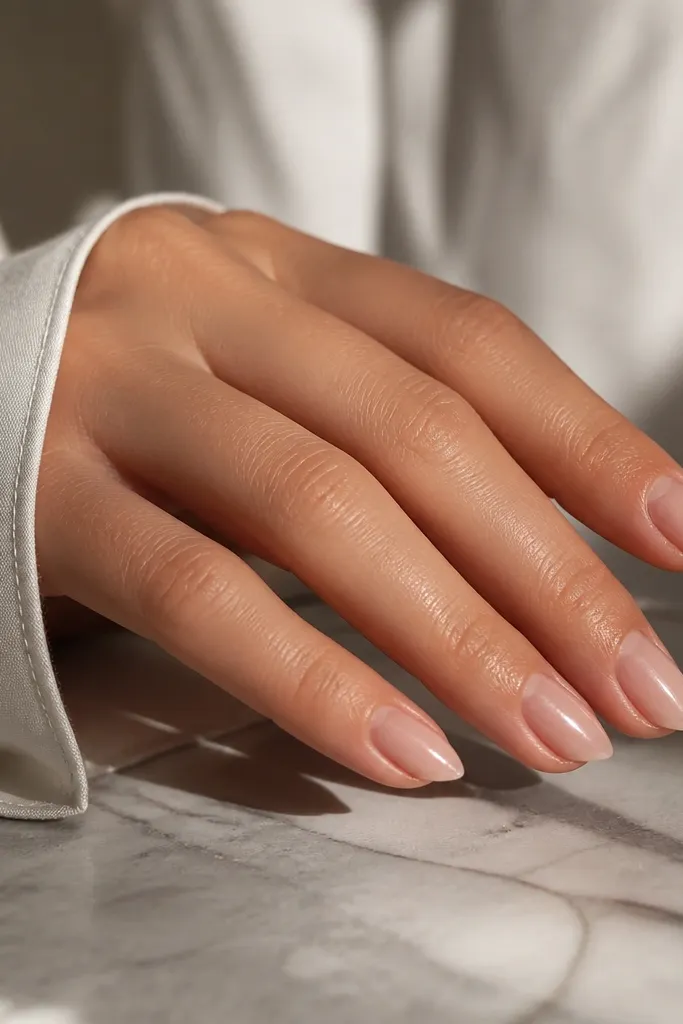
I love this because the nude base blends with your skin and the micro tip keeps the stiletto shape looking intentional. The thin French line also hides small growth because the color break stays close to the tip. Use white that is creamy, not chalky, so it looks smooth at short length. The tiny dot near the cuticle keeps it playful without making it busy.
File the nail into short stiletto, then buff lightly so the milky nude has grip. Apply two coats of milky nude, cure, then use a striping tape guide or a steady freehand to paint a 1 mm French tip that narrows to the point. Finish with a glossy top coat for clean edges.
Editor's noteIf your tips look wobbly, place tape, paint the white, then remove tape while the polish is still tacky for sharper lines.
Watch outSkip thick French tips - they look bulky and cheap on short stiletto.
2. Black Gloss French + Clear Negative Space Triangle
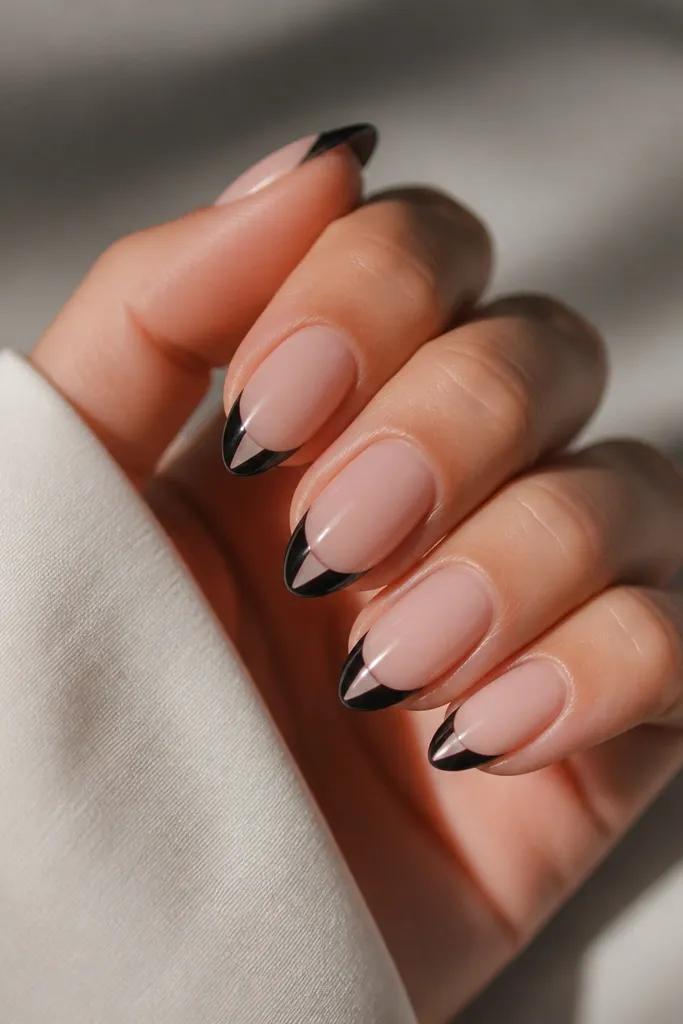
This design makes short stiletto look edgy without needing a lot of color coverage. The negative space triangle gives the nail a "cut-out" effect that reads high-end in photos. Black French polish is bold, and leaving that clear triangle keeps it from looking heavy. It also makes chips less obvious because the design already includes clear gaps.
Use a sheer nude base (almost jelly, not fully opaque). Paint the black French tip with tape to control the curve, then place a small piece of tape to protect a triangle starting about 2-3 mm from the tip center. Seal with glossy top coat so the black stays deep.
Editor's noteFor clean triangles, cut the tape into a tiny wedge shape with scissors and press it flat at the edges.
Watch outDon't paint over the triangle - even a thin bleed ruins the "intentional cut-out" look.
3. Cherry Red Jelly Base + Gold Outline Hearts
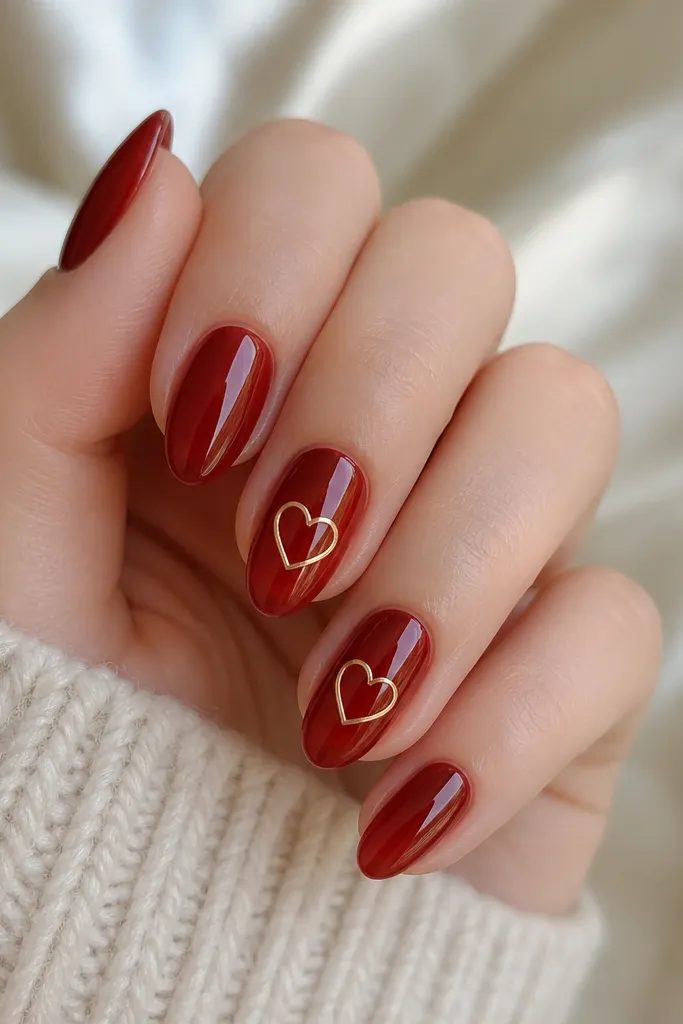
Jelly red makes your nails look juicy and smooth even at short length. Gold outline hearts add a cute detail without taking over the whole nail. The outline style matters - it keeps the heart light and prevents the design from getting chunky. Because the base is semi-sheer, minor chips don't look as harsh.
Start with a cherry red jelly polish and apply two thin coats so it stays translucent. Use a fine liner brush and gold acrylic paint or gold gel liner to draw tiny hearts about halfway up the nail. Cure/set fully, then top coat glossy.
Editor's noteDot two tiny points first, then connect the lines - it's faster than free-drawing a whole heart at once.
Watch outDon't fill the hearts solid - filled hearts look thick on short stiletto.
4. Chocolate Brown Matte + Tan Micro-Lines
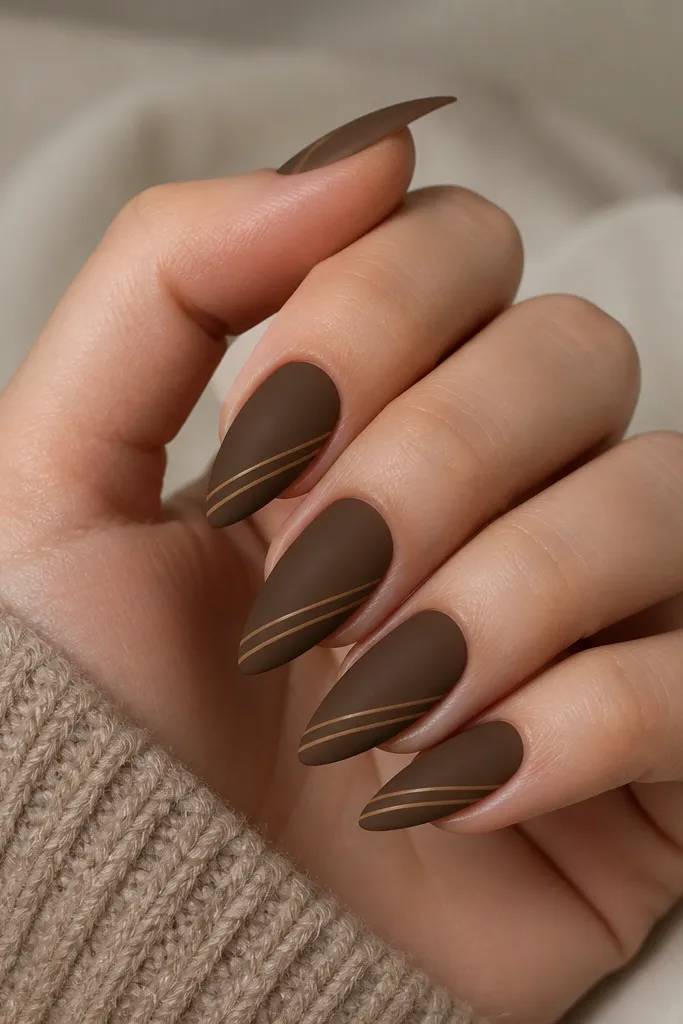
Matte brown looks expensive because it absorbs light and hides tiny surface issues. The tan micro-lines give structure and make the short stiletto point look sharper. Keep the lines thin so they read like fine jewelry, not stripes. This one is perfect for fall outfits and office days because it's quiet but still styled.
Use a matte-finish top coat over chocolate brown gel or lacquer. With a fine detail brush, paint tan micro-lines (about 0.5 mm thick) diagonally, then cure. Finish with a second matte top if your liner is gel and needs sealing.
Editor's noteIf your brush drags on matte polish, lightly wipe the brush tip on a lint-free pad before painting thin lines.
Watch outAvoid chunky stripes - matte + thick lines looks messy on short nails.
5. Rose Nude Ombré Fade + Clear Gloss Tip
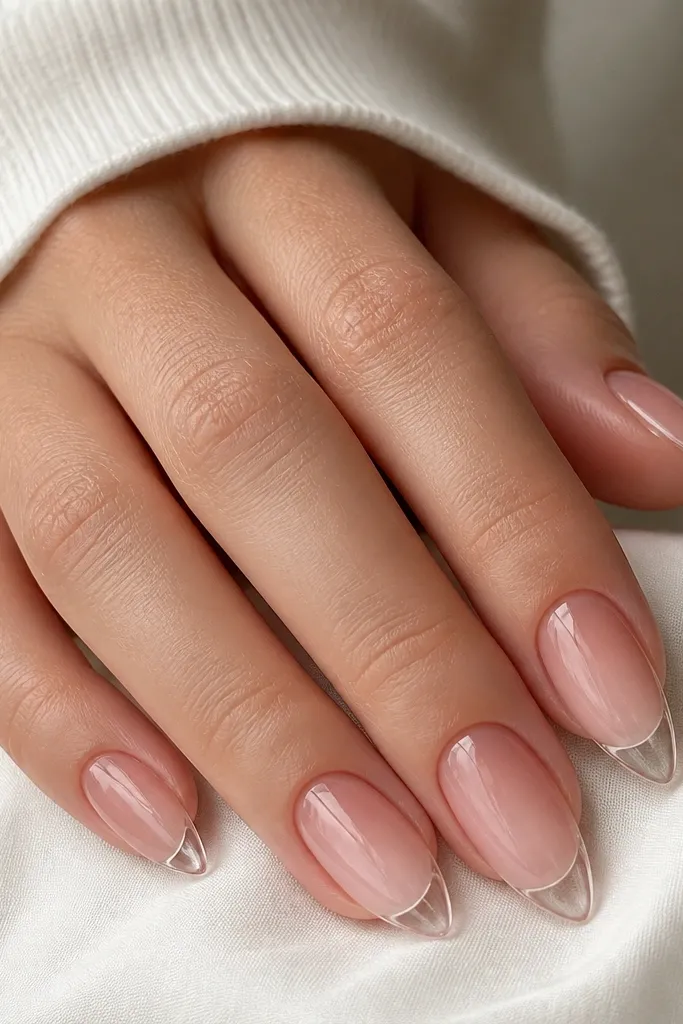
Ombré is forgiving when your nails grow out, and short stiletto looks neat because the fade keeps the point clean. Leaving the tip clearer makes the nail look longer without adding heavy color. This is one of my repeat designs for events because it looks soft and expensive while staying simple. It also photographs well because the light catches the glossy tip.
Paint a rose nude base and blend upward with a makeup sponge, then add a second layer for smoother fade. Keep the tip lighter by wiping off pigment on the sponge before you reach the last 2 mm. Seal with a clear glossy top coat only on the tip area.
Editor's noteUse a sponge with a sharp edge and dab fewer times - too many dabs create muddy gradients.
Watch outSkip harsh tape lines for ombré - they look like a sticker, not a fade.
6. Icy White Base + Silver Chrome Side Swipe
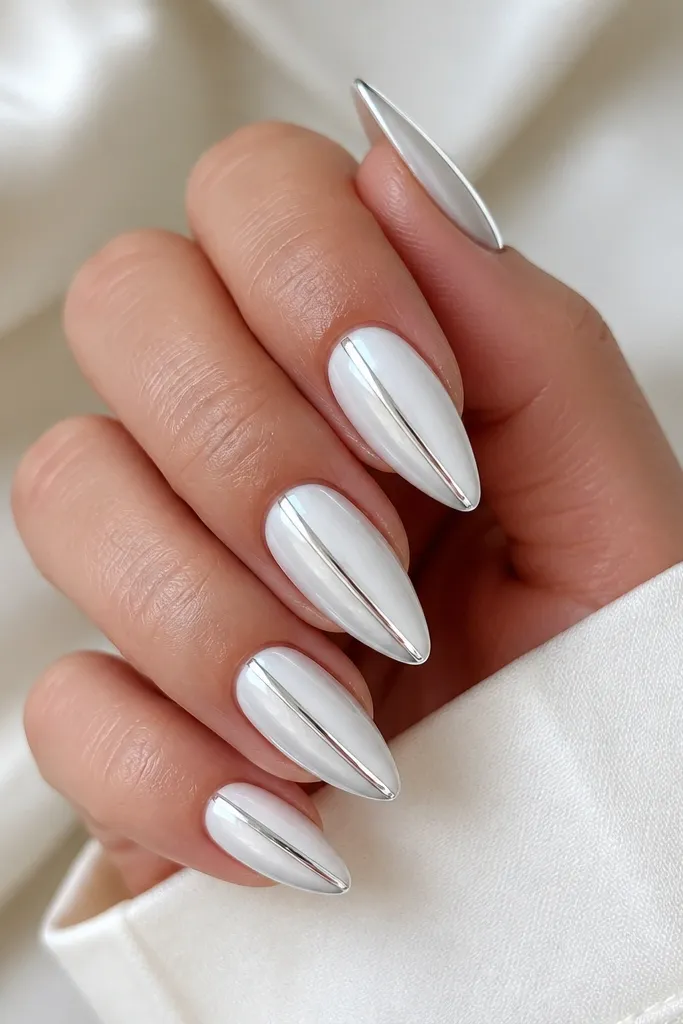
Icy white makes the chrome stripe pop immediately, even on short nails. A side swipe elongates the nail shape because it creates a "line of light" from cuticle to tip. Chrome looks high-end but is still easy if you keep the stripe narrow. This one is perfect when you want glam without glitter fallout.
Use an opaque icy white base in two coats. Apply silver chrome gel or chrome powder on one side stripe, about 1 mm wide, then rub off excess with an applicator. Cure/set, then apply glossy top coat to smooth the surface.
Editor's notePress the chrome stripe with the applicator for a full transfer - the stripe should look mirror-smooth, not patchy.
Watch outDon't make the chrome stripe wide - it turns your nail into a stripe, not an elongated shape.
7. Deep Emerald Matte + Tiny Gold Stud Cluster
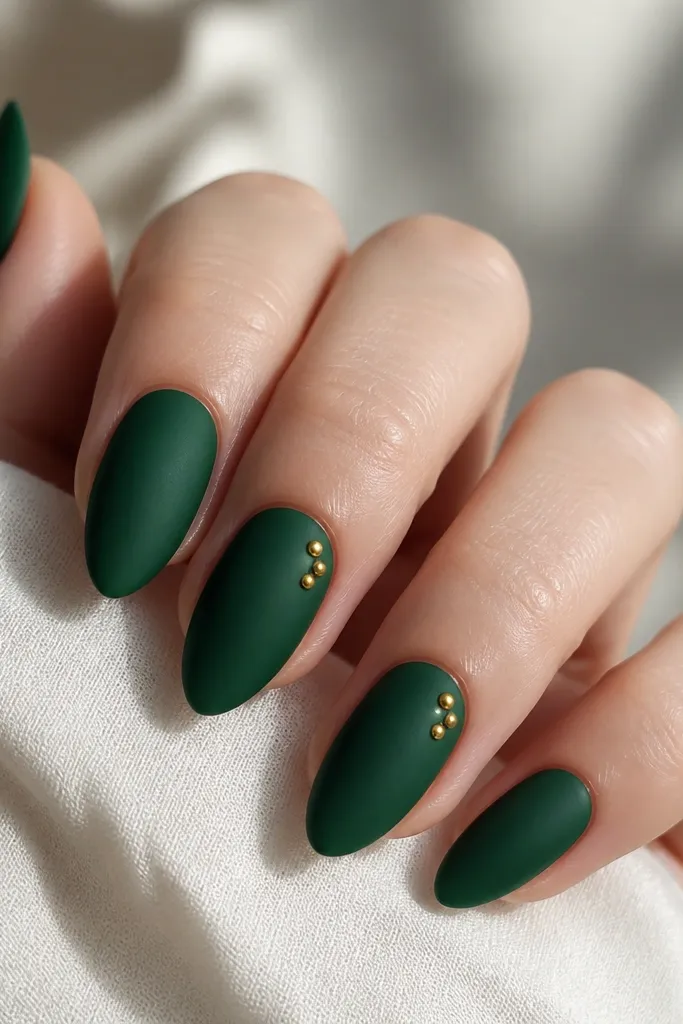
Matte emerald looks rich in real life, and it hides micro scratches from daily wear. The gold stud cluster adds a focal point that stays cute even when the nail grows out slightly. I keep the studs small and grouped so it doesn't look like you glued random gems. This is an easy "going out" look that doesn't require detailed art.
Paint deep emerald in two thin coats, cure, then matte top coat. Place three micro gold studs with gel tack under the cuticle area, leaving about 1 mm space from the skin line. Cure, then finish with a matte top around the studs.
Editor's noteIf studs lift, seal them with a tiny brush of gel on top before your final cure.
Watch outAvoid big studs - they catch on hair and make short nails feel heavy.
8. Nude Pink Base + Black Micro Dots French
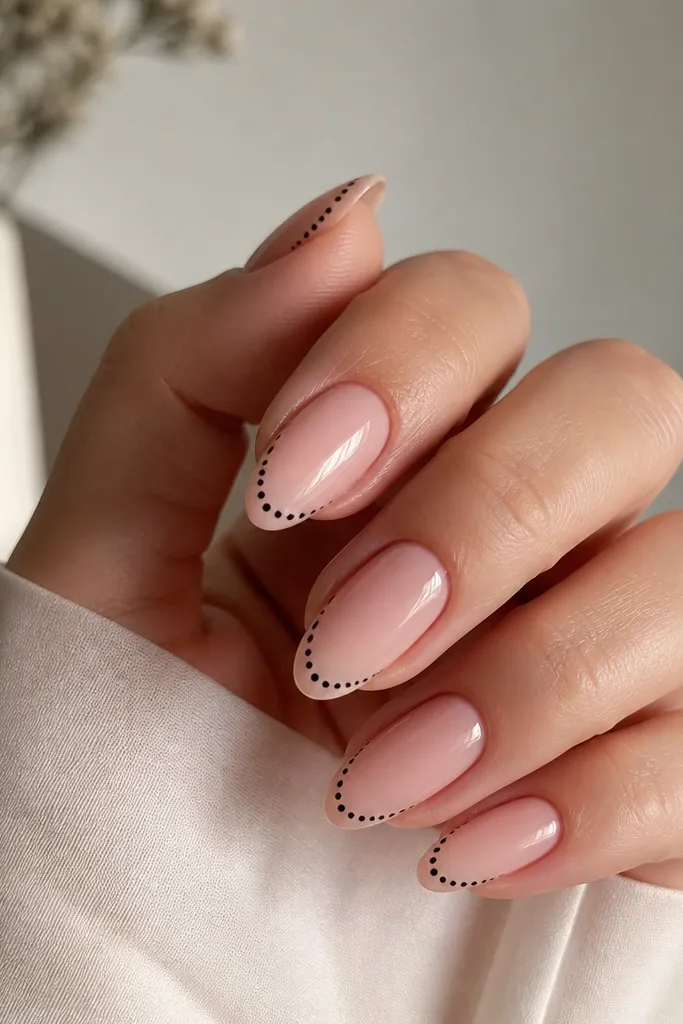
Dotted French reads delicate and it's forgiving if your dot spacing isn't perfect. The black dots add graphic contrast that makes the short stiletto point look defined. This design is my go-to for work because it's still stylish without feeling flashy. It also looks great with gold jewelry since black and nude play nicely together.
Start with nude pink base, two coats. Use a dotting tool and black polish to place dots along the tip edge, following the nail point shape. Keep the dot line about 1 mm thick, then add glossy top coat.
Editor's noteUse a toothpick to correct dot placement while polish is still tacky.
Watch outSkip oversized dots - bigger dots turn it into a blob instead of a French edge.
9. Lilac Cloud Swirl + Glossy Clear Base
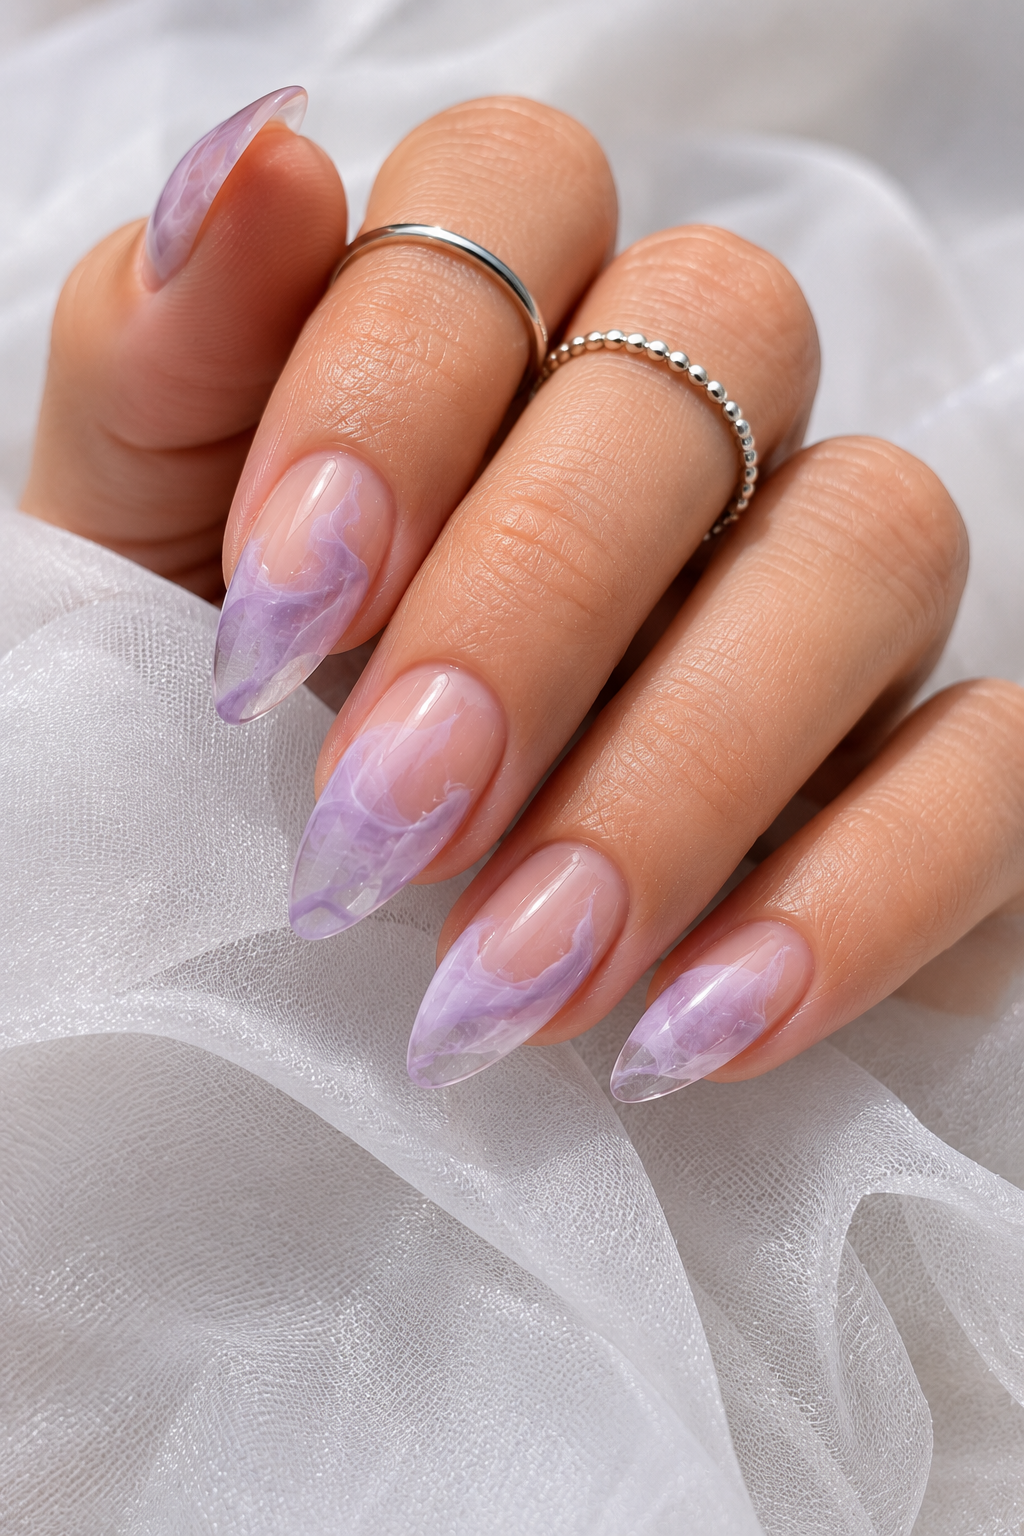
Swirls look extra cute on short stiletto because the nail point frames the design. The glossy clear base makes the lilac look like it's floating on top, not painted flat. I use lighter lilac with a slightly translucent effect so it doesn't get too thick at the tip. This is one of those designs that looks "soft glam" without trying hard.
Apply a glossy clear base or clear builder gel thinly, cure. Add a sheer lilac wash on the lower half, then use a thin brush to paint two to three cloud swirls across the center. Finish with glossy top coat to keep it smooth.
Editor's noteMake your swirls with one continuous curve, then add a second line to thicken one side for dimension.
Watch outDon't over-paint the swirls - too many layers make them look muddy.
10. Matte Nude + Glossy Red Half-Moon Tips
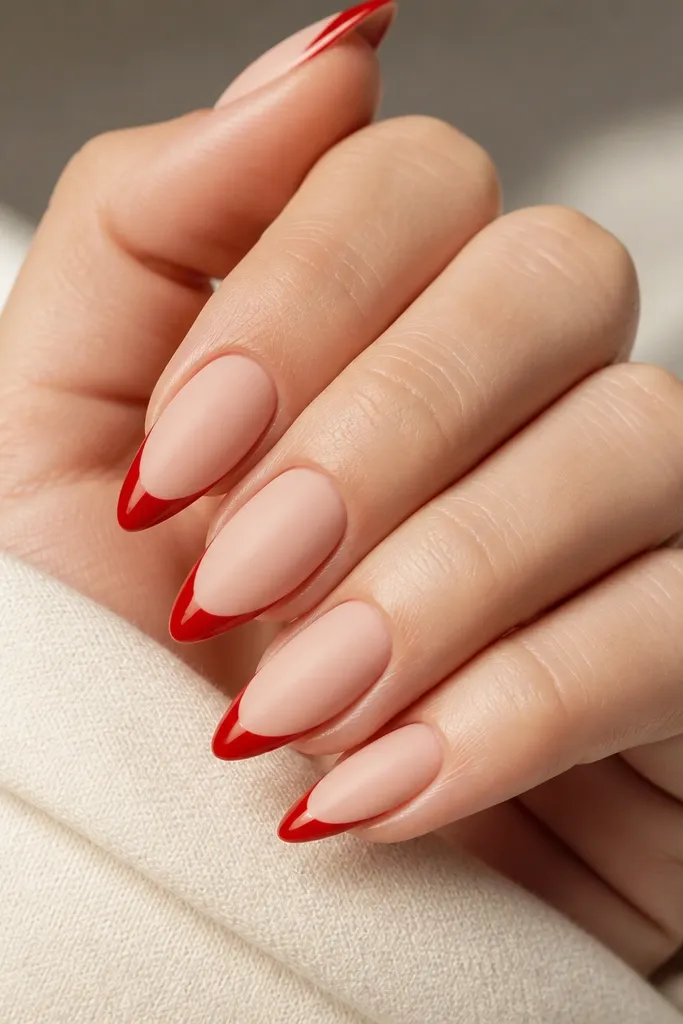
This design tricks the eye into seeing a longer nail because the glossy red catches light at the tip. Matte nude keeps the overall look classy and hides tiny edge wear. The half-moon shape is also easy to repeat across fingers once you get the curve right. It's a strong option when you want red but don't want full red nails.
Apply matte nude base and cure. Use a curved striping guide or a small makeup sponge to create a half-moon red tip shape starting at about 2 mm from the point. Seal with glossy top coat only over the red area, then matte top coat elsewhere.
Editor's noteFor a crisp half-moon, paint the curve first with tape, then fill the inside after curing briefly.
Watch outAvoid blending red into nude with too much pressure - you want a clean edge.
11. Black + Nude Marble Accent on Two Nails
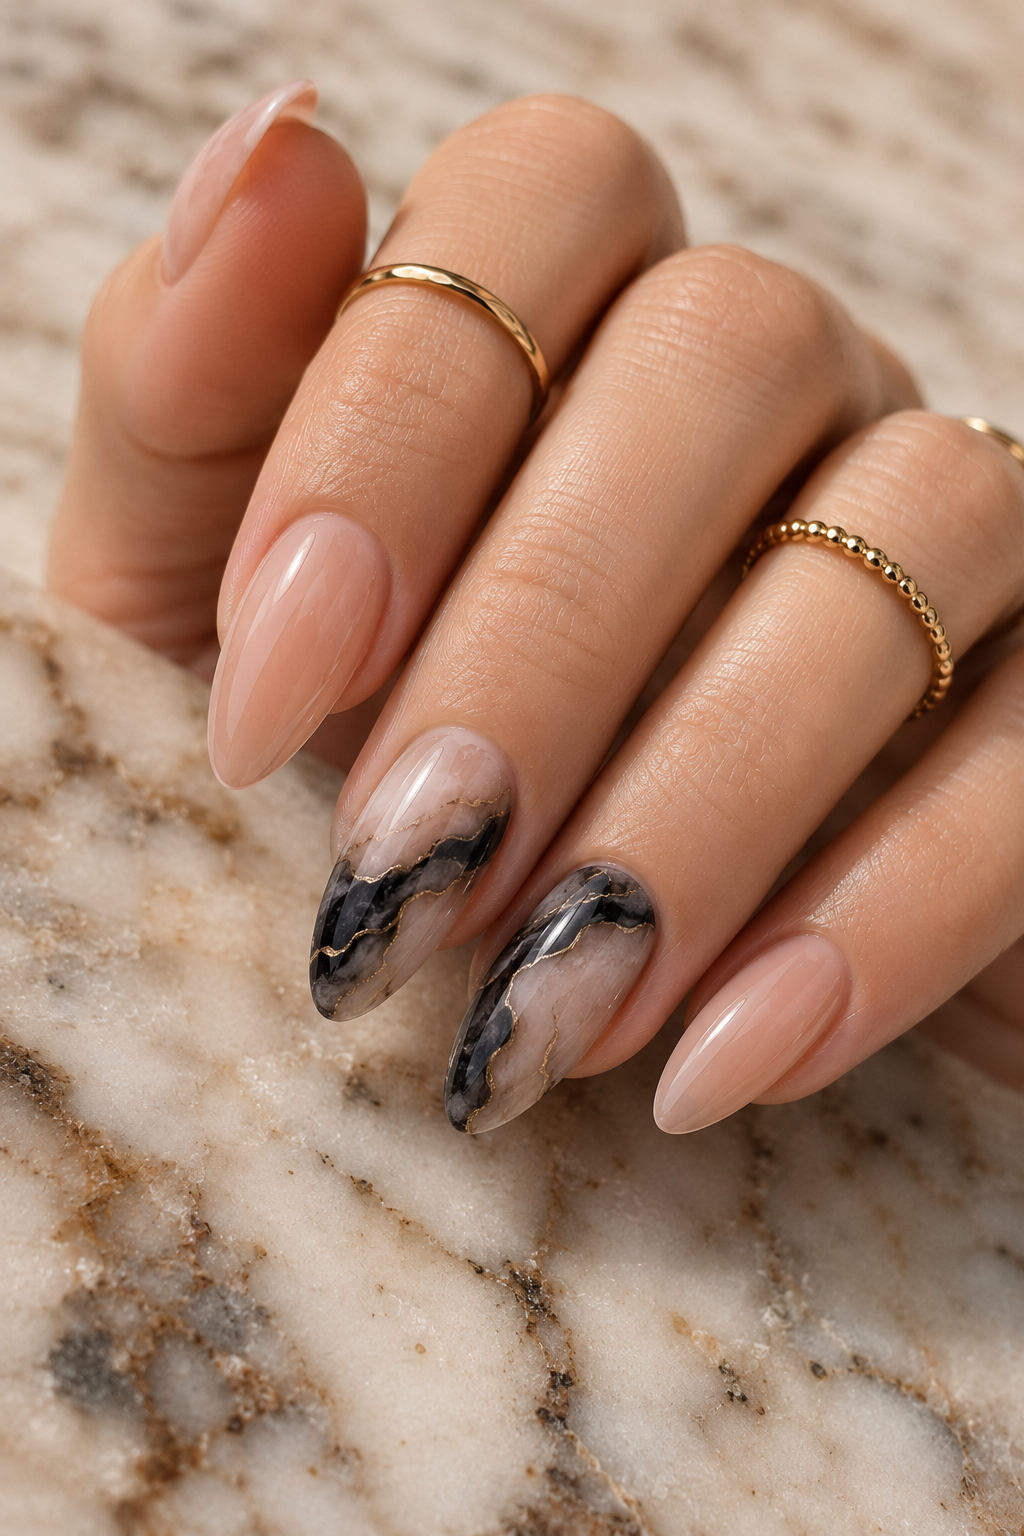
Marble is easiest when you limit it to two nails per hand. The negative space keeps it from looking heavy on short stiletto, and the nude base ties everything together. Black marble with thin white veins looks sharp and expensive without needing thick gel. I always do it with a glossy top coat so the marbling looks like glass.
Paint all nails nude pink glossy. On two accent nails, add a milky nude base, then drag thin black lines with a detail brush. Add tiny white lines between black veins, lightly smudge with the brush tip, then cure and top coat glossy.
Editor's noteUse a thin brush loaded lightly - marble lines should look like pen marks, not paint strokes.
Watch outSkip solid black blocks - marble should have breathing room.
12. Gold Foil Flakes on Clear Pink Base
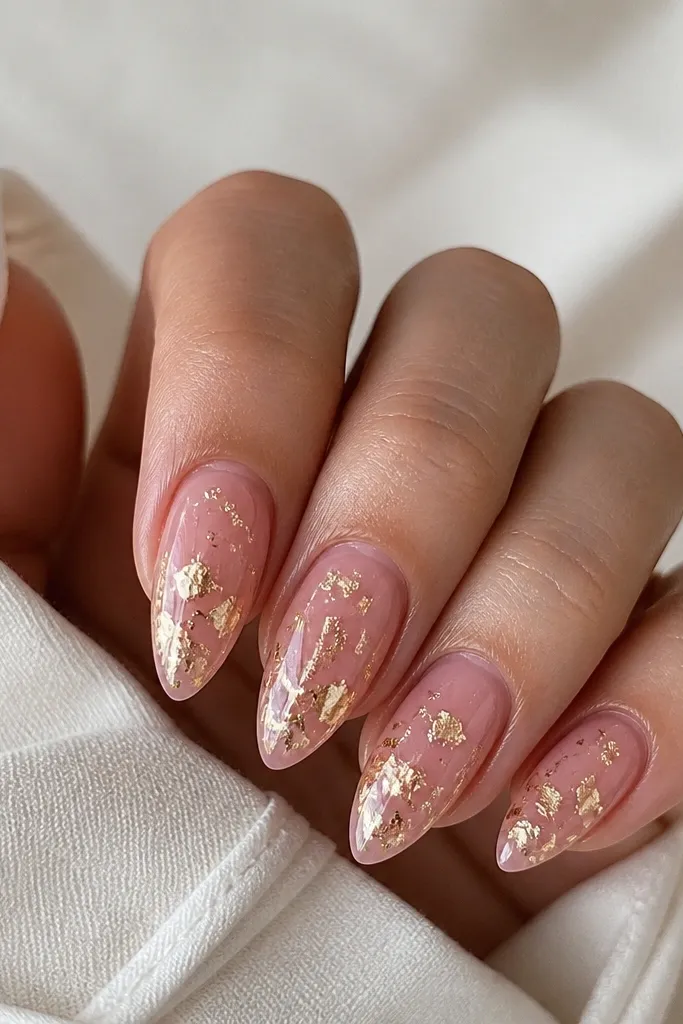
Gold foil on a clear pink base looks like real jewelry because it reflects light in different directions. The key is placement: clusters near the center make the nail look longer, while keeping edges lighter. Foil also hides small chips since the sparkle breaks up the surface. It's one of my favorite affordable short stiletto nail designs for nights out.
Apply clear pink jelly base, cure. Press gold foil flakes onto tacky gel in small clusters, leaving some negative space. Seal with a layer of glossy top coat or foil-friendly gel to lock everything down.
Editor's noteTap foil gently with a silicone tool so it sticks without smearing the base.
Watch outDon't cover the whole nail in foil - it gets dull and looks messy on short stiletto.
13. White Lace Border with Nude Center
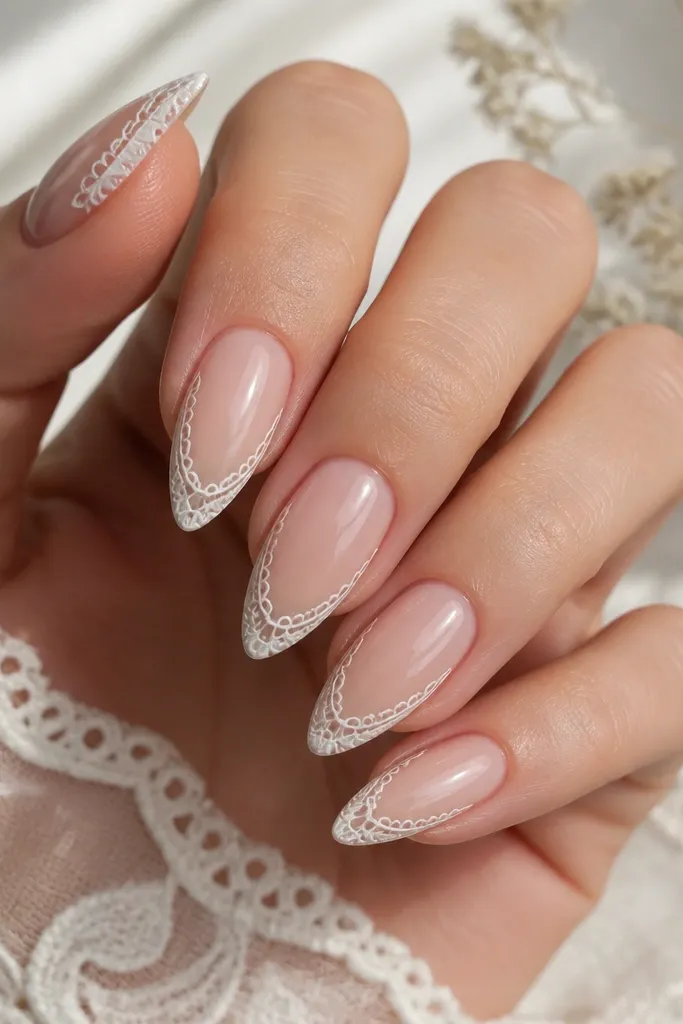
Lace borders look intricate but they're actually quick when you treat them like a frame. The nude center keeps it clean and lengthening, and the white border creates a "dressy" edge. I use a lace stencil or a tiny dotting technique to build the loop pattern. It's perfect for weddings, birthdays, or any time you want soft elegance.
Paint nude glossy base. Use a thin striping brush and white gel to draw a border along both sides of the tip, leaving the center blank. Add small loop marks every 1-2 mm, then cure and top coat.
Editor's noteIf symmetry is hard, do one side first, cure, then mirror the other side using the same number of loops.
Watch outSkip thick white borders - they look like nail polish, not lace.
14. Ocean Blue Tips + White Wave Lines
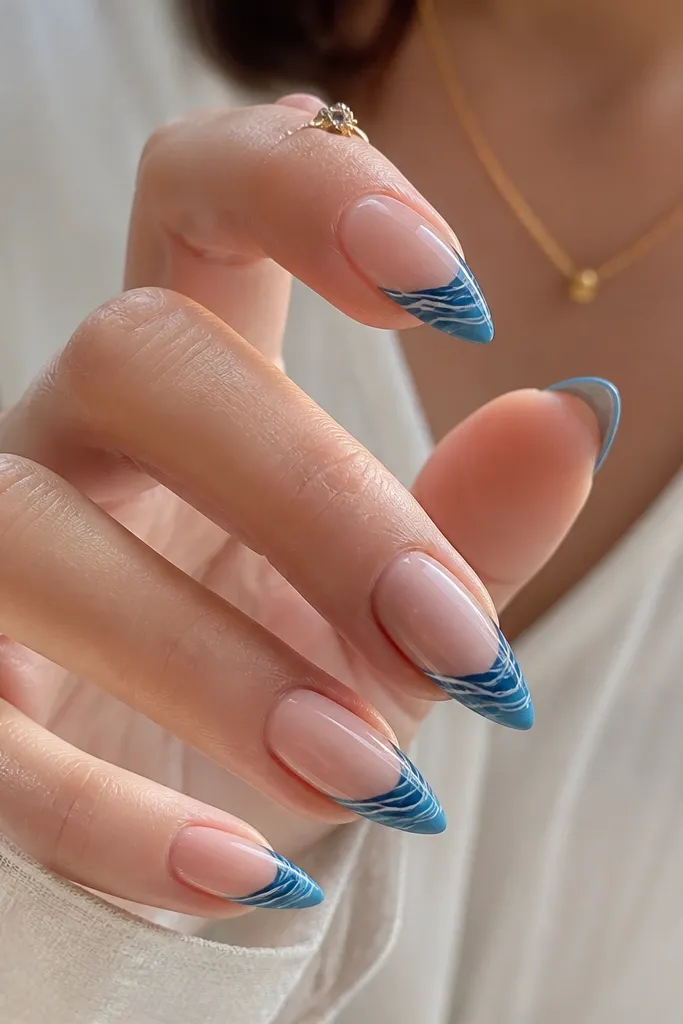
Blue tips make short stiletto look crisp and fresh, and wave lines add movement without needing full nail art coverage. The white lines create a surfboard effect that reads instantly. This design is great for summer, but I also wear it in winter because it pops against dark coats. It's also chip-camouflaging since the busy wave pattern breaks up wear at the tip.
Use nude base with two coats, cure, then tape off a small tip area and paint ocean blue. With a fine liner brush, draw 3-4 thin white wave curves across the blue tip. Finish with glossy top coat for a smooth, glassy look.
Editor's noteKeep the wave lines uneven on purpose - perfect waves look printed and cheap.
Watch outAvoid painting wave lines too thick - thick lines look like streaks.
15. Plum Aura Fade with Black Center Dot
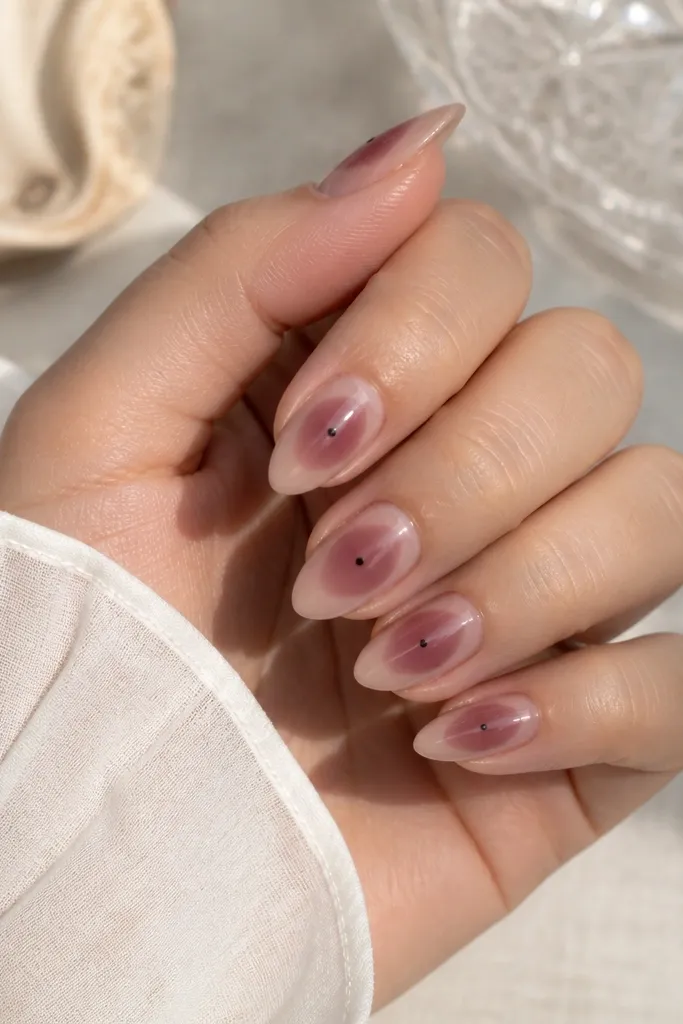
Aura nails look modern and they're forgiving on short stiletto because the center glow hides minor growth. Plum aura is flattering - it reads deeper than lilac but softer than burgundy. The tiny black dot gives a focal point that makes the design feel intentional. This one is easy to repeat across all nails for a full set that looks cohesive.
Paint nude base. Sponge plum polish in a circle around the center, then blend outward so it fades into nude. Add a tiny black dot using a dotting tool at the center, cure, then top coat glossy.
Editor's noteUse a small sponge piece and wipe it on a paper towel first so the aura stays soft, not blotchy.
Watch outDon't make the aura too dark at the edges - it should glow, not ring.
16. Nude Chrome Half Tips (Ombré Chrome)
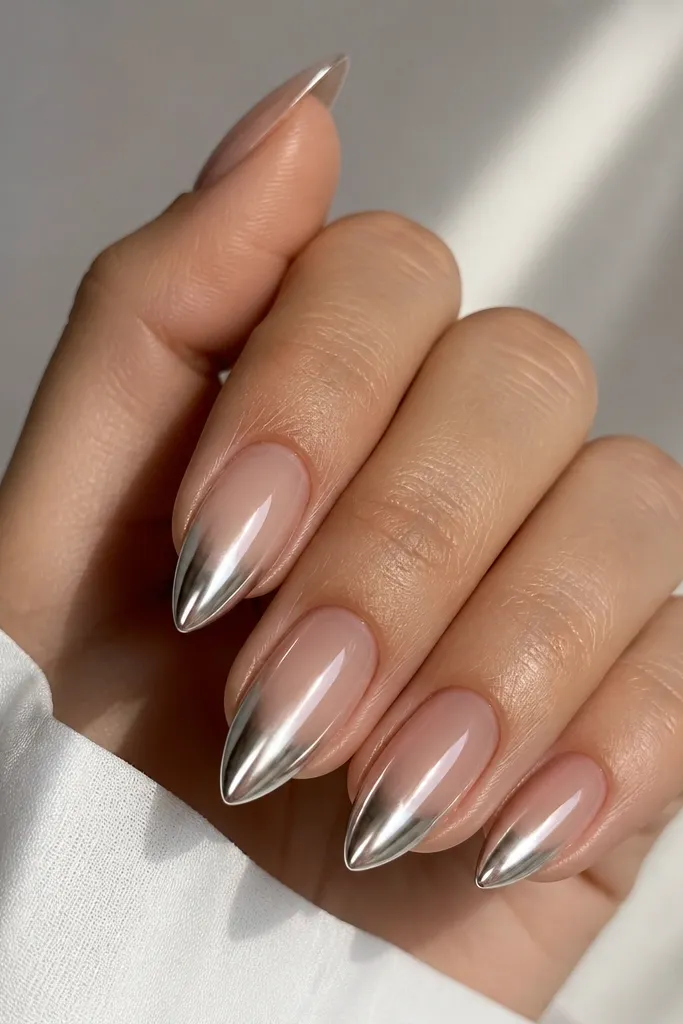
Chrome half-tips look like expensive nail extensions because the shine is concentrated where the eye expects it. Starting chrome at mid-nail makes the short stiletto point feel longer. The nude base keeps it wearable and not too much for daily life. This is one of my repeat "effort looks like work" designs.
Apply nude base, cure. For the chrome, use a chrome powder or chrome gel activated with powder, then apply from mid-nail downward. Blend the chrome edge with a sponge or applicator so there's no hard line. Seal with glossy top coat to lock it in.
Editor's noteIf your chrome edge looks harsh, lightly buff the transition area before top coat.
Watch outAvoid matte top with chrome - it kills the mirror effect.
17. Soft Pink Base + White Star Accent
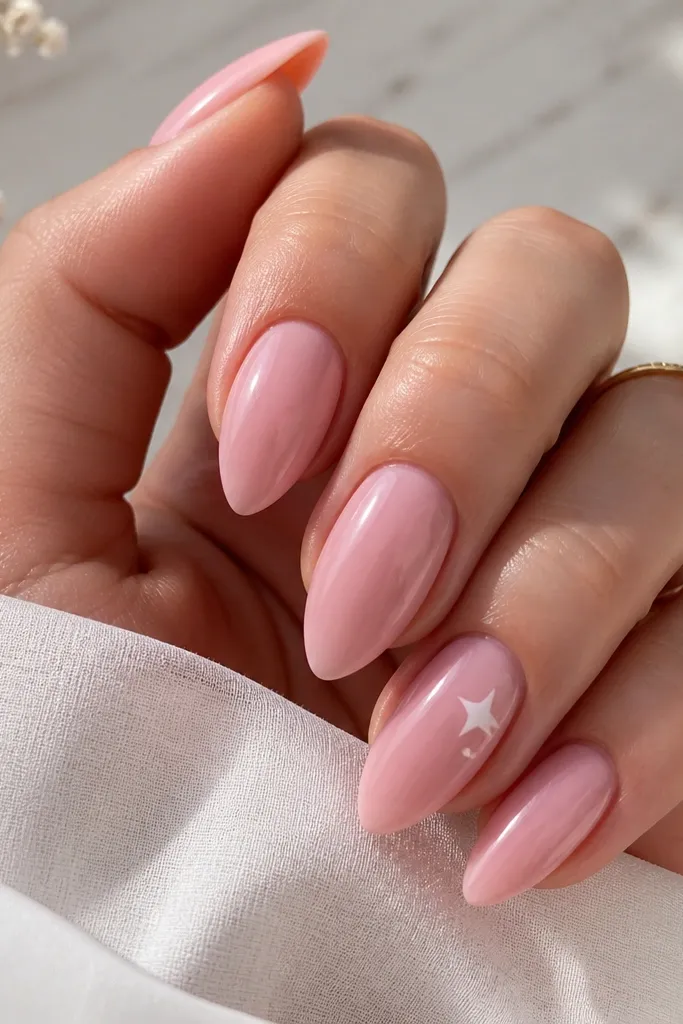
A single star looks cute and graphic, and it suits short stiletto because the shape stays clean at small scale. White on soft pink looks fresh, not harsh. I like adding one tiny dot because it frames the star and gives it balance. This is a simple set you can do when you're running late but still want a "styled" hand.
Paint all nails soft pink glossy. On one or two nails, place a small star decal or paint it with a dotting tool and detail brush. Add a tiny dot to one side, cure, then top coat.
Editor's noteUse star decals if you want perfect points, then press them flat with a top coat layer.
Watch outSkip multiple stars on every nail - it looks like sticker overload.
18. Taupe Marble Veins + Clear Negative Cutouts
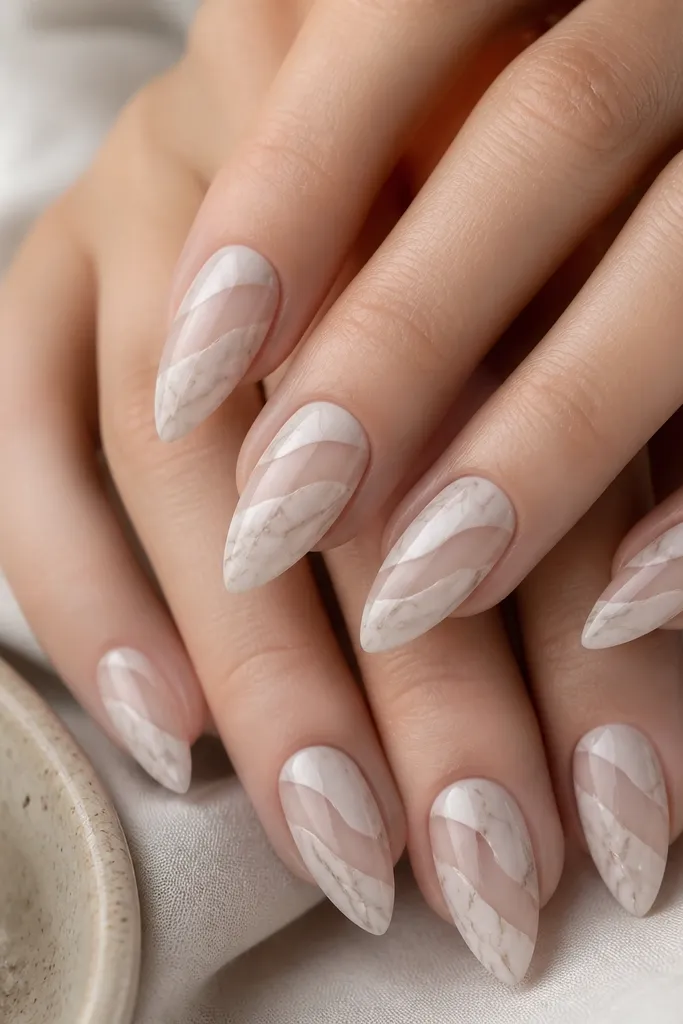
This design looks modern because the clear cutouts break up the marble and make it feel lighter. Taupe marble is wearable and doesn't scream for attention, but it still looks artful. The thin veining keeps it from looking heavy on short nails. It also helps with chips because the clear sections hide edge imperfections.
Paint a milky taupe base and cure. Use striping tape to protect diagonal clear areas while you draw thin marble lines with a taupe-brown gel and a fine brush. Remove tape carefully after curing, then seal with glossy top coat.
Editor's notePress tape down firmly at the edges, then run a fingernail along it to prevent polish bleed.
Watch outAvoid thick veining - it turns into mud at short length.
19. Black Velvet Matte + Nude Bow on One Nail
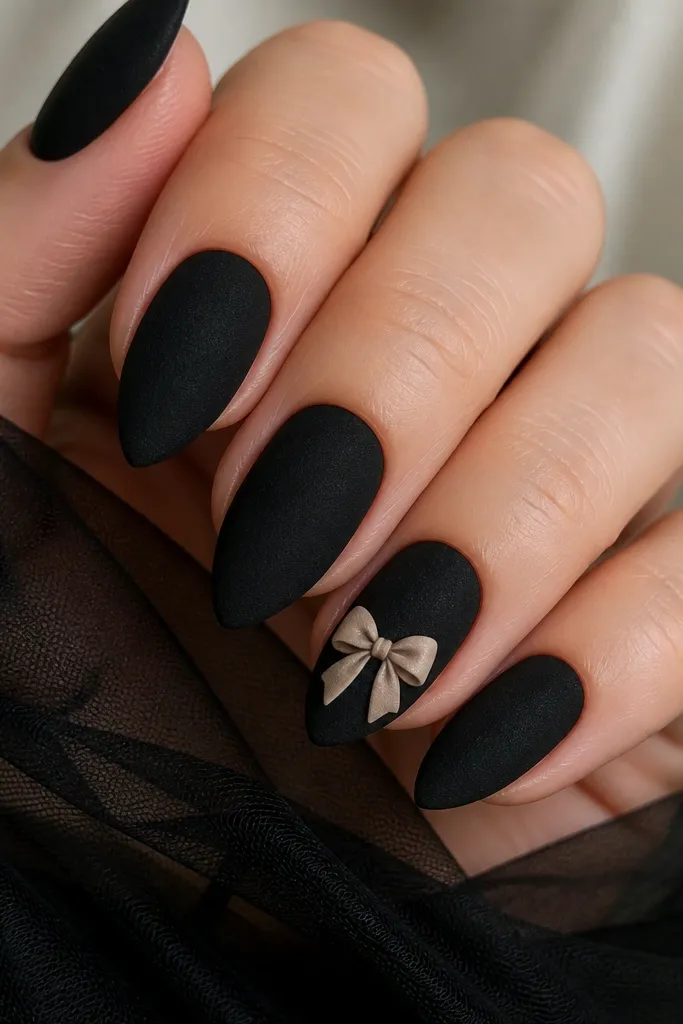
Velvet matte black looks unreal in person, and it makes the nude bow pop without extra color. A bow on only one nail keeps it cute instead of childish. I use a nude bow with a slightly pink undertone so it looks soft against black. The matte finish also hides tiny wear better than glossy black.
Apply black velvet matte polish or matte top coat over black gel. For the bow, paint two curved loops and a small center knot with a nude gel using a fine brush. Place it near the upper-middle or toward the tip depending on your nail size, then cure and add a matte top over everything.
Editor's noteUse a reference bow shape from a sticker sheet and trace lightly with the brush - it speeds up placement.
Watch outSkip glossy top over velvet black - it ruins the velvet effect.
20. Champagne Glitter Fade + Clear Cuticle Halo
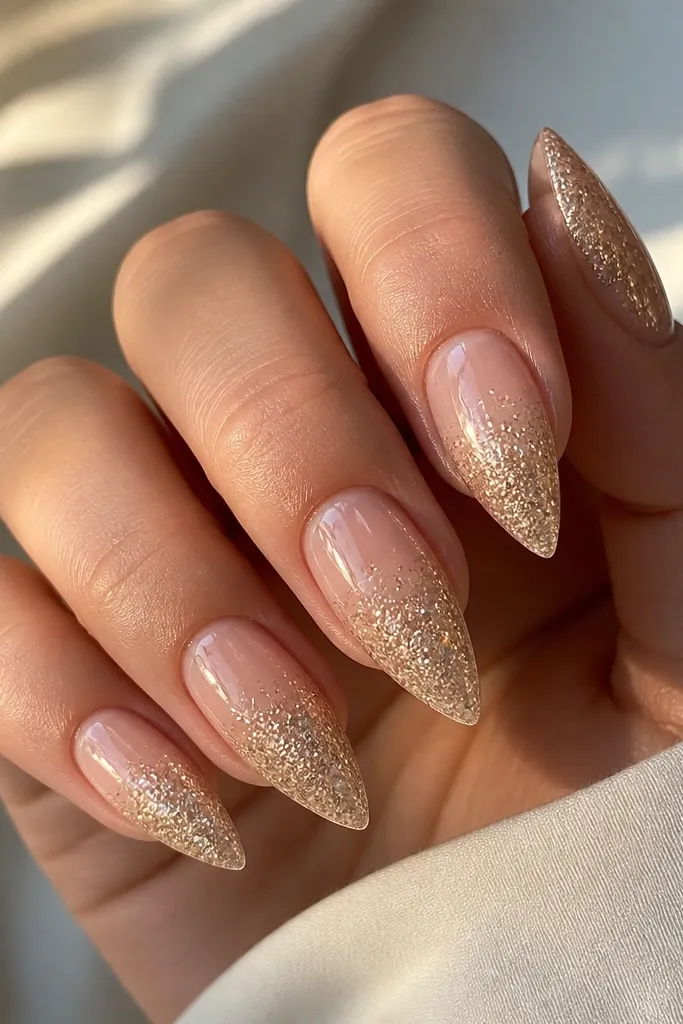
A glitter fade looks festive without looking like glitter bomb chaos. The clear halo near the cuticle is the secret that makes it look intentional and clean, even when your nails grow. Champagne glitter is flattering because it reads warm and blends with nude bases. This is a repeat set for holidays and weekend plans.
Use a sheer nude base and cure. Apply champagne glitter gel starting at the tip, then blend upward with a sponge so it fades. Protect the cuticle area by placing a small piece of tape or using a cuticle guard, then remove before curing. Top coat glossy.
Editor's noteIf glitter is chunky, tap it into place with the sponge instead of painting - it creates a smoother gradient.
Watch outDon't let glitter reach the cuticle - it looks messy on short stiletto.