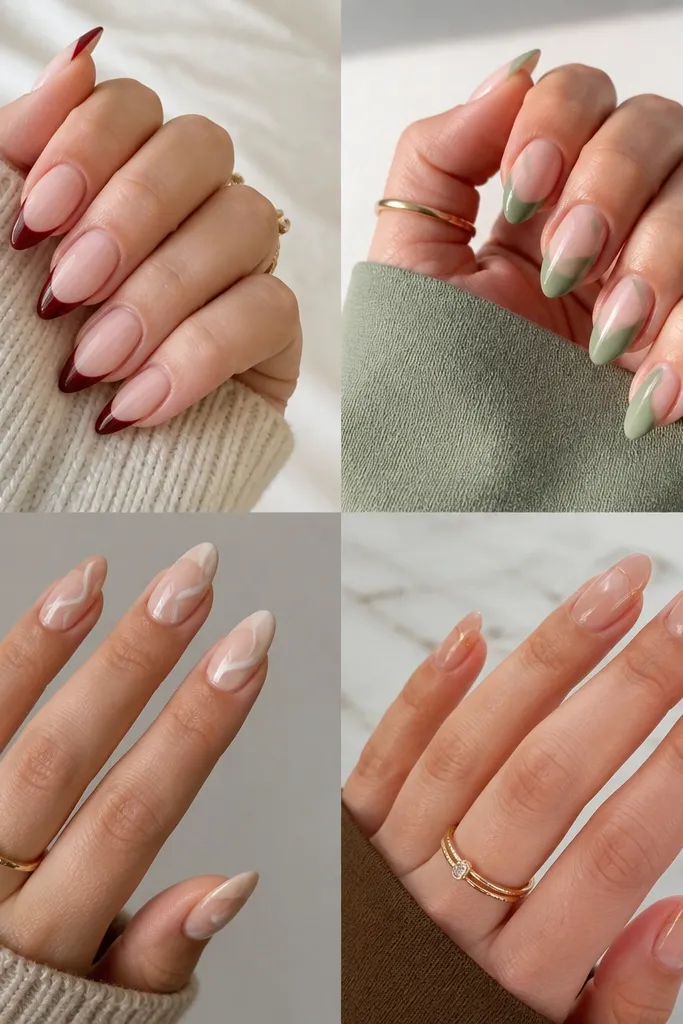
1. Milky Nude Micro French Stiletto
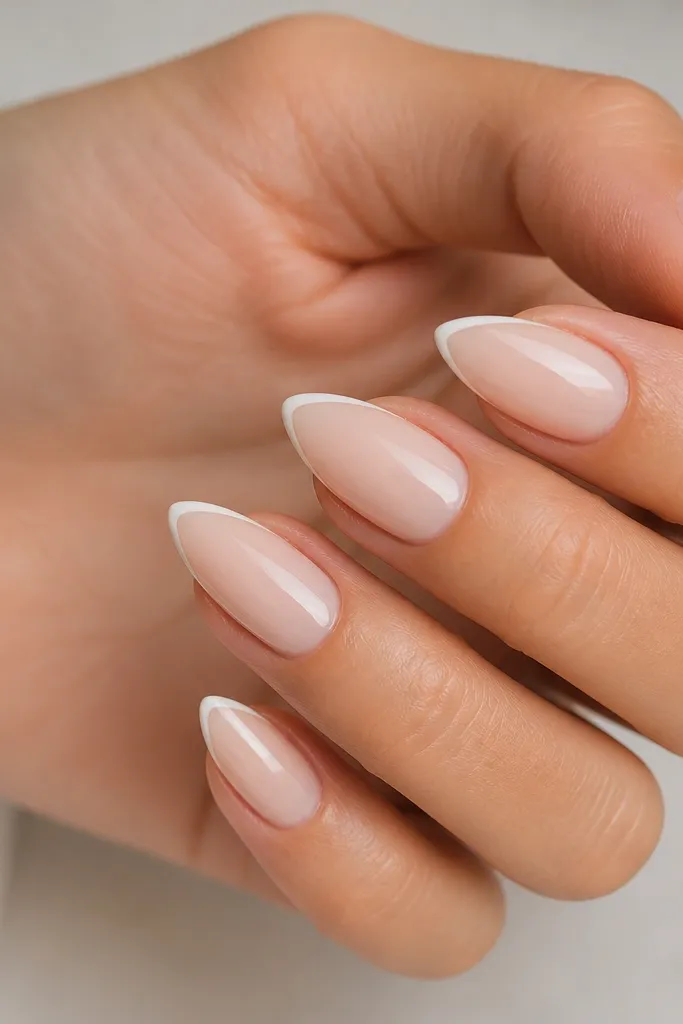
This is the version of French that doesn't overpower short nails. The milky nude base blends the taper so the point looks longer without actually adding length. The micro French line stays narrow, so it frames the tip instead of cutting the nail into a thick block. Glossy topcoat keeps the white crisp and reflective.
Build a sheer milky nude (thin layers) and cure fully each time. Use striping tape or a steady liner brush to paint a 1 mm white arc at the tip, then connect it to the sidewalls near the point. Seal with a high-shine topcoat, and cap the free edge lightly so chips don't start at the tip.
Editor's noteIf your French tip gets too wide, wipe the brush on a paper towel and drag the line from the side toward the center for a thinner arc.
Watch outAvoid a thick French band - on short stiletto it looks like a sticker and makes the nail look wider.
2. Sheer Pink Base with Jet Black Side Stripe
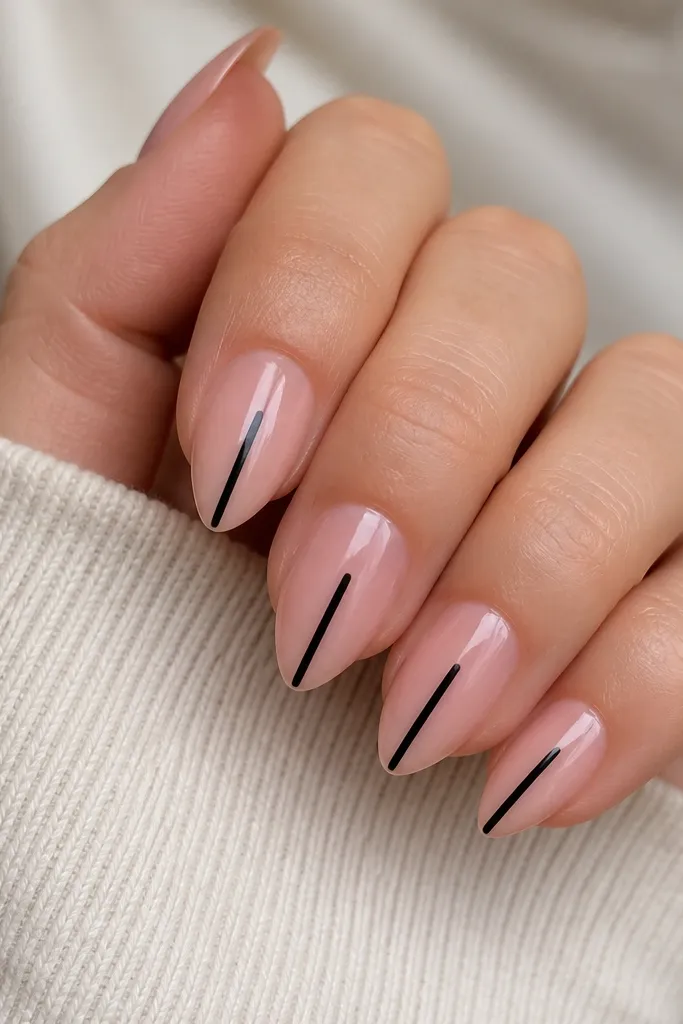
A one-stripe design makes short stiletto look longer because the eye tracks a clean vertical line. The sheer pink base prevents the black from feeling heavy. Keep the stripe narrow and straight so it doesn't break the nail shape. Glossy finish makes the stripe look like glass.
Use a sheer builder gel or sheer polish to get an even pink glow. With a nail liner brush, paint a black stripe about the width of a hair strand, starting under the cuticle and stopping just before the tip point. Add topcoat, and cap the stripe edges so it doesn't peel.
Editor's noteUse a slow, single-stroke pull from base to tip instead of dabbing - dabs create bumps on short nails.
Watch outSkip chunky striping polish - thick lines widen the nail and ruin the stiletto illusion.
3. Chocolate Brown Gloss with Reverse Half-Moon
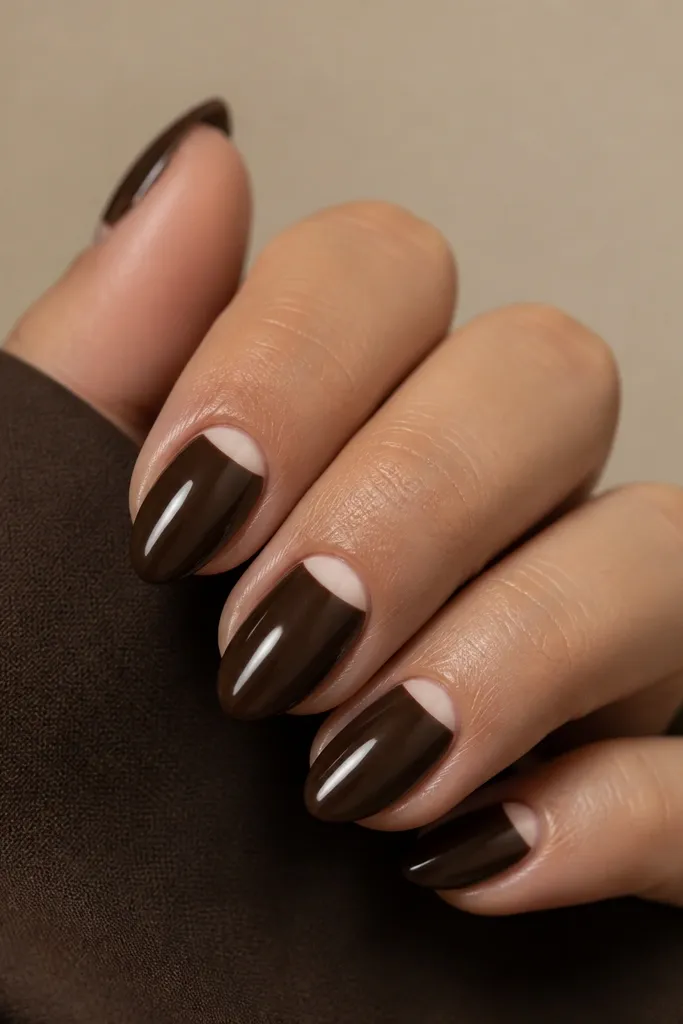
Chocolate brown looks classy and warm, and the reverse half-moon adds a graphic detail without needing extra length. The nude crescent at the cuticle makes the nail look lifted and tidy. A glossy topcoat keeps the brown looking smooth, not patchy. This design works well for work because it's bold but controlled.
Paint two thin coats of chocolate brown, leaving the cuticle area clean. Use a small round makeup sponge or a half-moon stencil to place the nude crescent under the cuticle (not on top of it). Seal with a glossy topcoat and cap the free edge to protect the point.
Editor's noteIf your crescent bleeds, clean the edges with a flat brush dipped in acetone before curing your topcoat.
Watch outDon't place the half-moon too high - it should sit close to the cuticle line for a neat reverse effect.
4. Black Matte with Tiny White Tip Dot
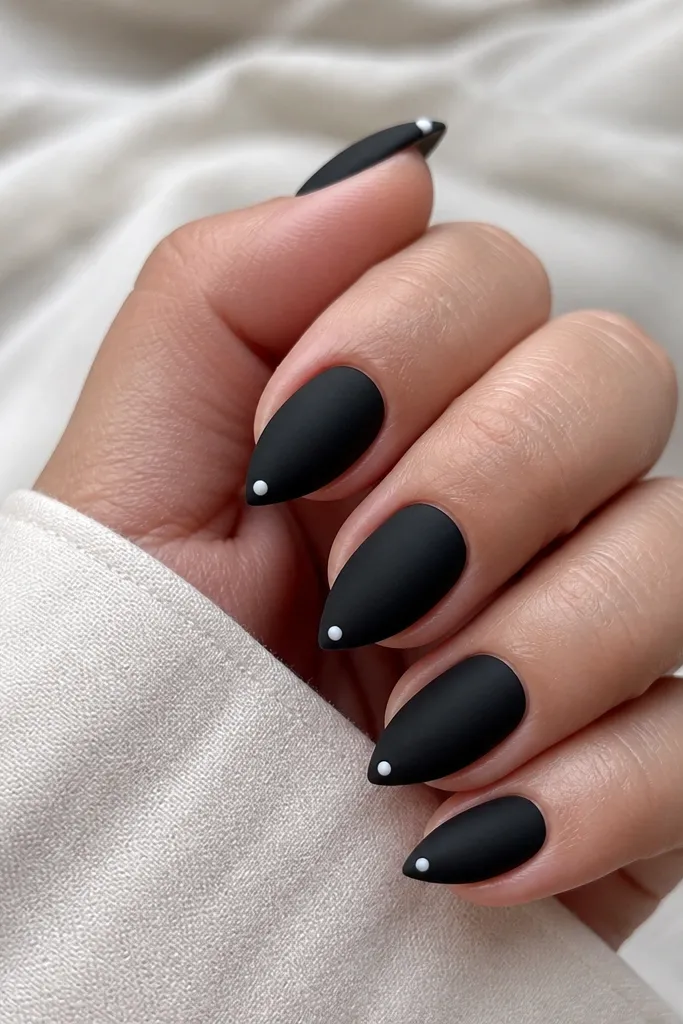
Matte black hides minor ridges and makes short stiletto feel edgy but wearable. The single white dot at the tip acts like a mini focal point, keeping the design light. Because the dot is centered, it visually sharpens the point. Matte + a tiny dot gives contrast without needing lines.
Apply black polish or gel in two even coats and cure. Use a dotting tool to place a white dot about 0.5 mm wide at the center of the tip. Finish with matte topcoat over everything, or for extra pop, use glossy topcoat just on the dot.
Editor's noteLet the black cure fully before dotting - wet matte can drag and smear.
Watch outAvoid multiple dots - more than one makes short nails look messy instead of crisp.
5. Clear Builder Base with Pink Chrome Fade
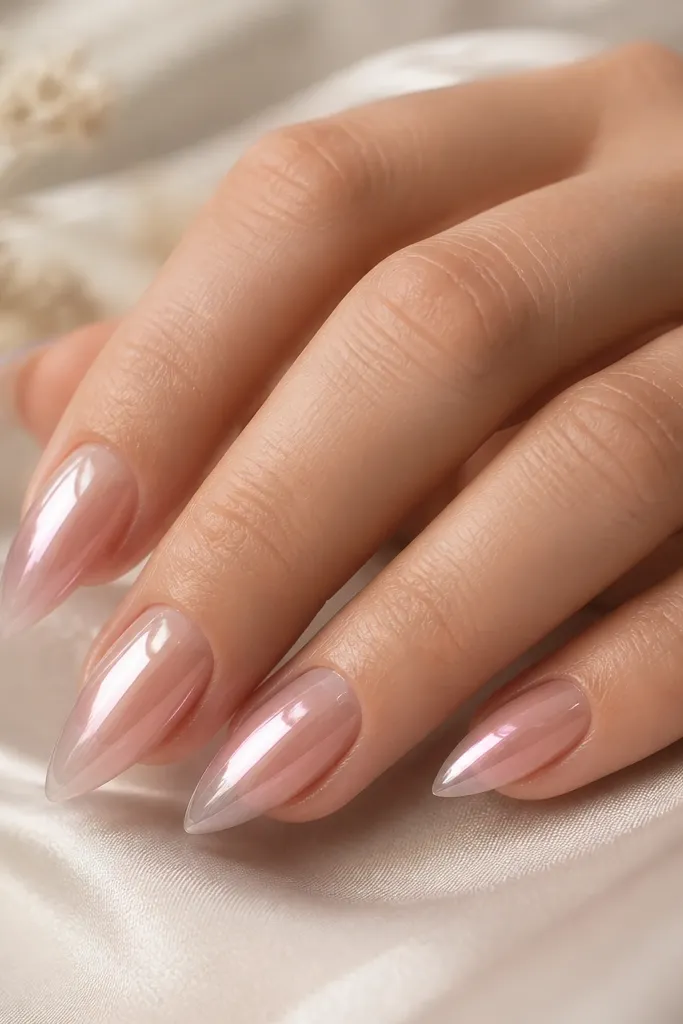
A clear base makes the stiletto taper look sleek and modern. Pink chrome gives a luminous gradient that looks like liquid light on short nails. Starting the chrome mid-nail keeps the cuticle area clean and makes the fade feel intentional. It looks extra good in sunlight because chrome catches every angle.
Use a clear builder gel or soak-off base to get a glassy foundation. Apply pink chrome powder with a sponge applicator from mid-nail to tip, then buff gently downward to fade it. Seal with a thin, non-wipe topcoat to keep the chrome reflective.
Editor's noteUse a light hand with chrome - you can always add more, but removing excess leaves patchy spots.
Watch outSkip thick topcoat over chrome - it dulls the sparkle and makes the gradient look muddy.
6. Creamy Beige Nude with One Diagonal Rhinestone
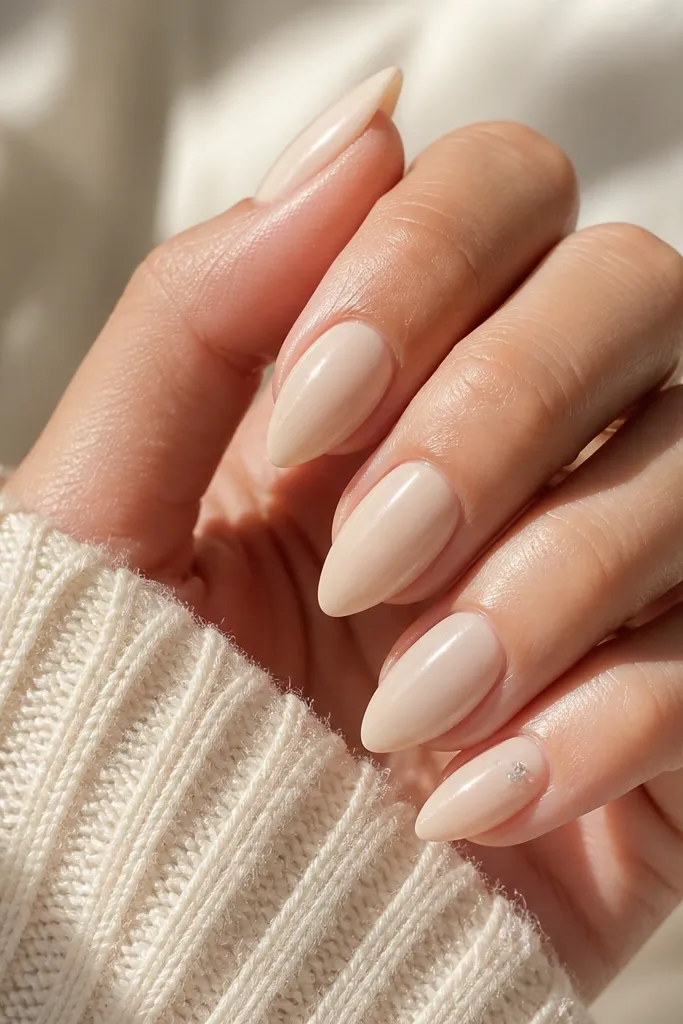
This design is subtle glamour. The creamy nude gives a warm tone that flatters every skin color, and the single rhinestone adds sparkle without making the nail feel heavy. Diagonal placement makes the point look more sculpted because it guides the eye. Gloss keeps the nude smooth and photo-ready.
Paint a creamy beige nude in two coats and cure. Place one small clear rhinestone at the outer third of the nail, angled toward the point (not straight across the tip). Use a dot of gel to anchor, cure, then topcoat carefully around the edges.
Editor's noteIf you're doing just one rhinestone, pick one ring finger nail - it looks intentional instead of random.
Watch outDon't use a big stone on short stiletto - it makes the tip look blunt.
7. Classic Red Micro Outline French
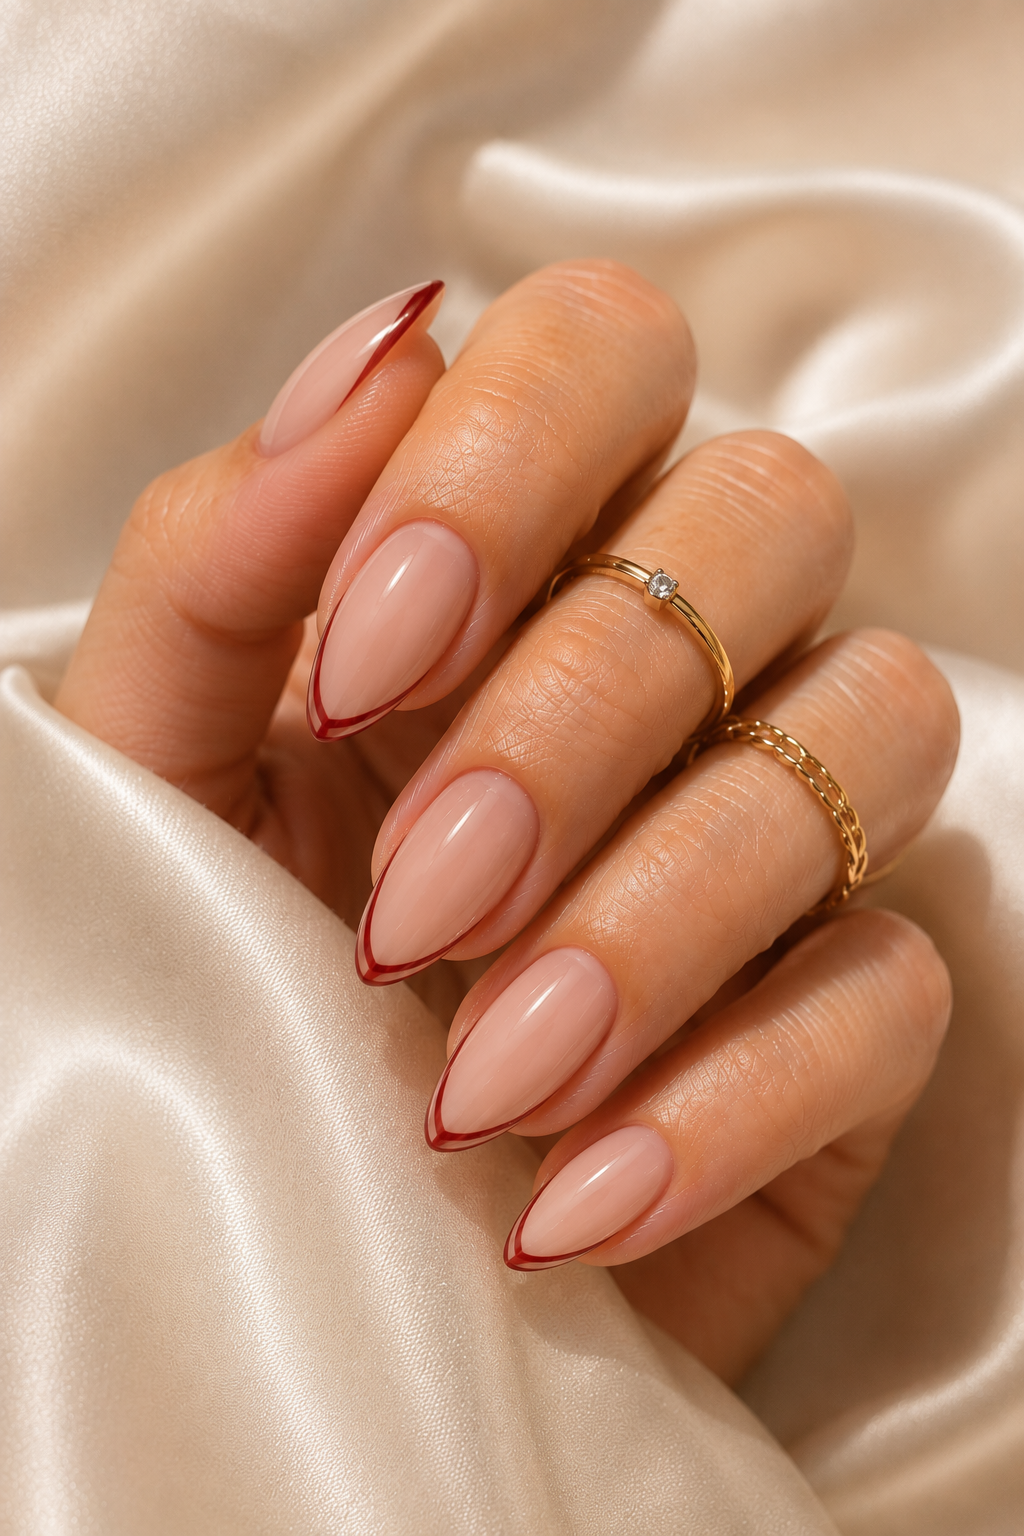
A red tip looks bold, but the micro outline keeps it crisp and wearable on compact nails. The nude border between base and red makes the line look designed, not messy. This is the kind of French that looks sharp in close-up and still clean from across the room. Glossy finish makes the red pop and keeps the outline readable.
Start with a sheer nude base. Paint the tip red in a narrow stiletto shape, then use a fine liner to add a thin nude outline just inside the red edge. Cure each step and seal with glossy topcoat.
Editor's noteUse a gel striping line tool or a very thin brush - the outline needs to be under 1 mm.
Watch outAvoid painting red all the way to the sidewalls too thick - it spreads and makes the outline disappear.
8. Sage Green Sheer Jelly with Silver Foil Flick
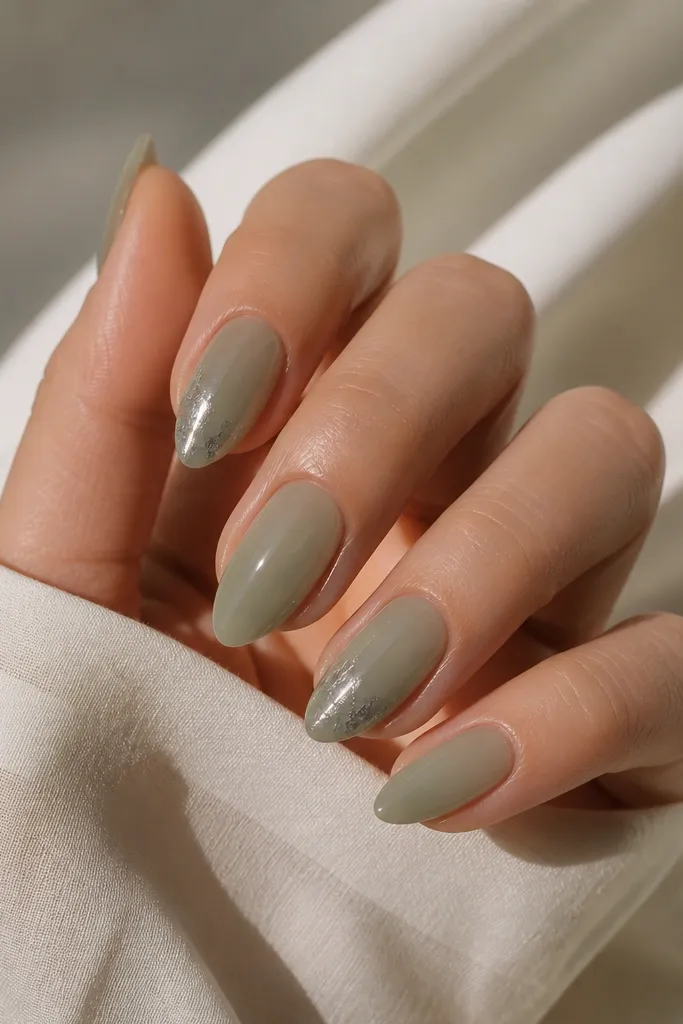
Sheer jelly color makes short stiletto feel light and fresh. Sage green is soft enough for everyday, but it still looks styled. The silver foil flick adds motion and shine without covering the whole nail. It looks like tiny jewelry, especially on the curved tip.
Use a sheer sage jelly gel in two thin layers so the nail still looks translucent. Add a small piece of silver foil with foil gel at the last third, then press lightly and peel. Seal with a glossy topcoat, keeping the foil edges smooth.
Editor's notePlace the foil flick slightly off-center - it looks more natural than perfectly centered.
Watch outSkip full-coverage foil - it can look bulky on short points.
9. Nude Pink with Thin Gold Arc at Cuticle
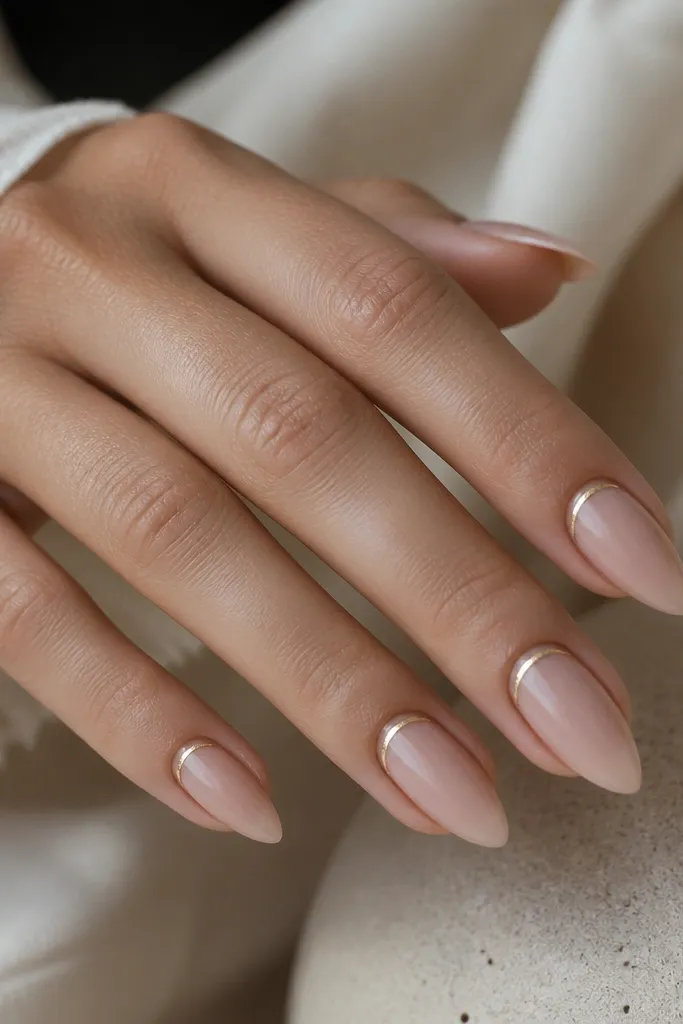
A tiny gold arc gives you that "done" look with zero clutter. The gold sits where light naturally hits, so it makes the nail look polished even in indoor lighting. The nude pink base keeps it wearable. This is one of my go-to designs when I want something fancy but not loud.
Apply nude pink gel polish in two coats. Use gold striping gel or thin gold foil tape and place it as a crescent under the cuticle line, leaving a small gap so it doesn't touch the skin. Cure and topcoat to lock it in.
Editor's noteIf you're using gold foil tape, trim it with cuticle scissors so the arc doesn't kink.
Watch outAvoid thick gold lines - they look like tape on short nails.
10. Black Cherry Gloss with Micro Star on Tip
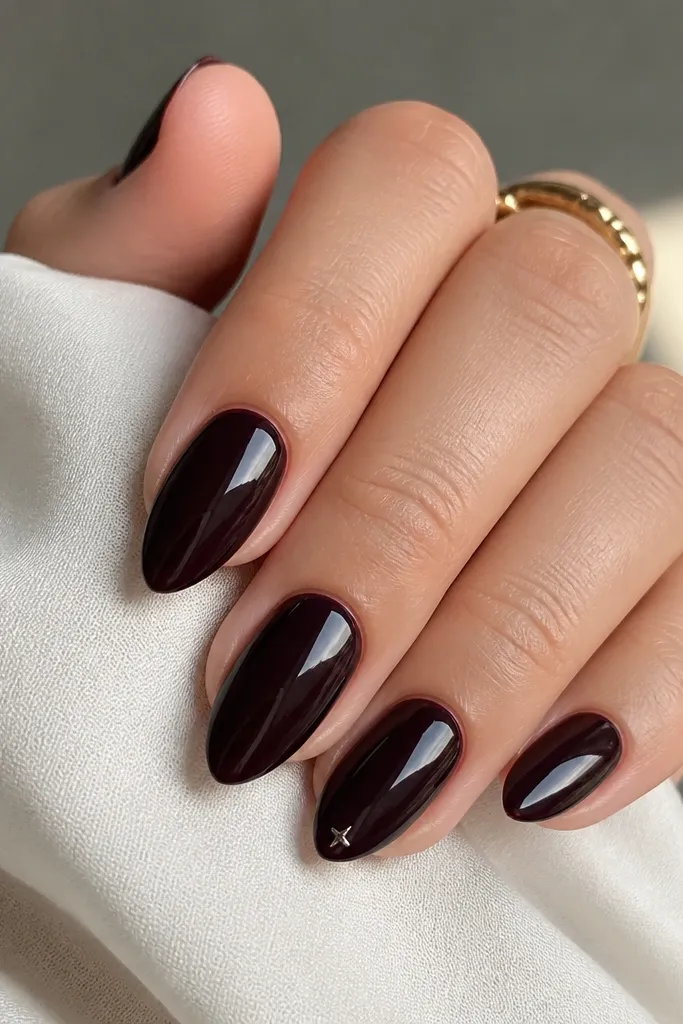
Black cherry reads rich but stays elegant. The micro star is playful without taking over the nail. Centering it near the point makes the stiletto shape look sharper. Gloss makes the cherry color look deep and smooth.
Paint black cherry in two coats, cure fully. Use a tiny nail art brush to draw a small five-point star or use a micro sticker for precision. Seal with glossy topcoat and cap the star area lightly so it won't catch on fabric.
Editor's noteTest the star size on one nail first - too large makes short stiletto look childish.
Watch outSkip big 3D charms on short points - they snag and lift quickly.
11. Clear French Tips with Blush Pink Base
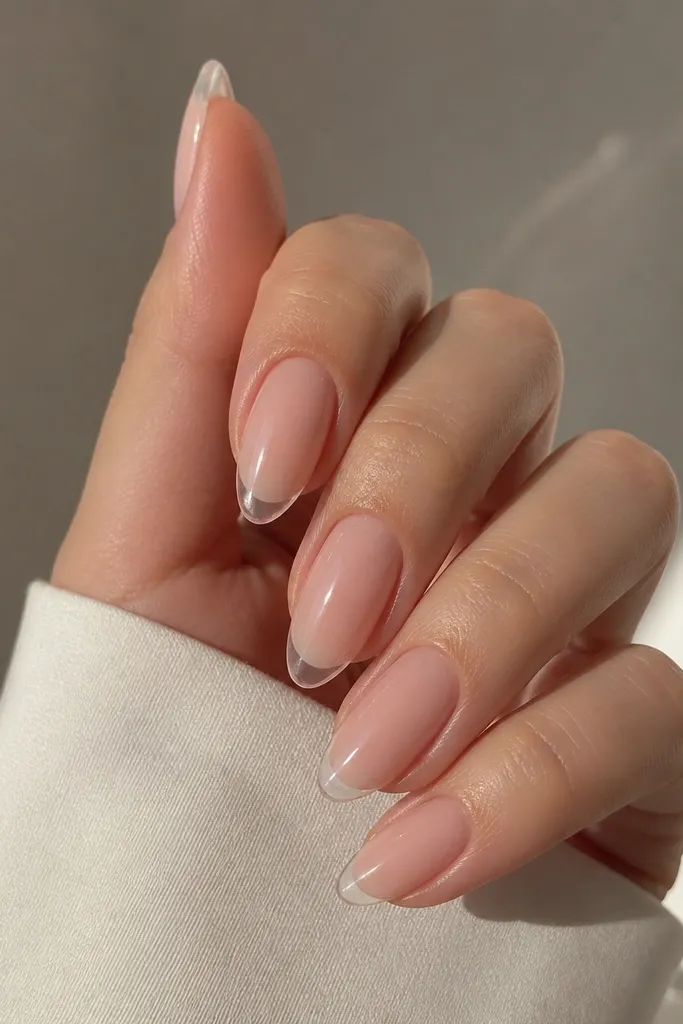
Clear French is sneaky - it makes short nails look longer because the tip blends into the nail rather than adding solid color. Blush pink gives softness and keeps the look flattering. This design is great if you hate white polish or you want a "fresh" look. Glossy finish keeps the clear tip glassy.
Apply blush pink gel polish in thin layers and cure. Use nail tape to mask the tip while you build a clear layer that extends only to the stiletto point. Remove the tape cleanly before topcoat so you don't get a ridge.
Editor's noteIf your clear tip looks cloudy, use a thin clear topcoat and cure longer to smooth it out.
Watch outDon't leave a hard line between pink and clear - it should fade smoothly, not look like two stickers.
12. White Marble Vein on Milky Pink
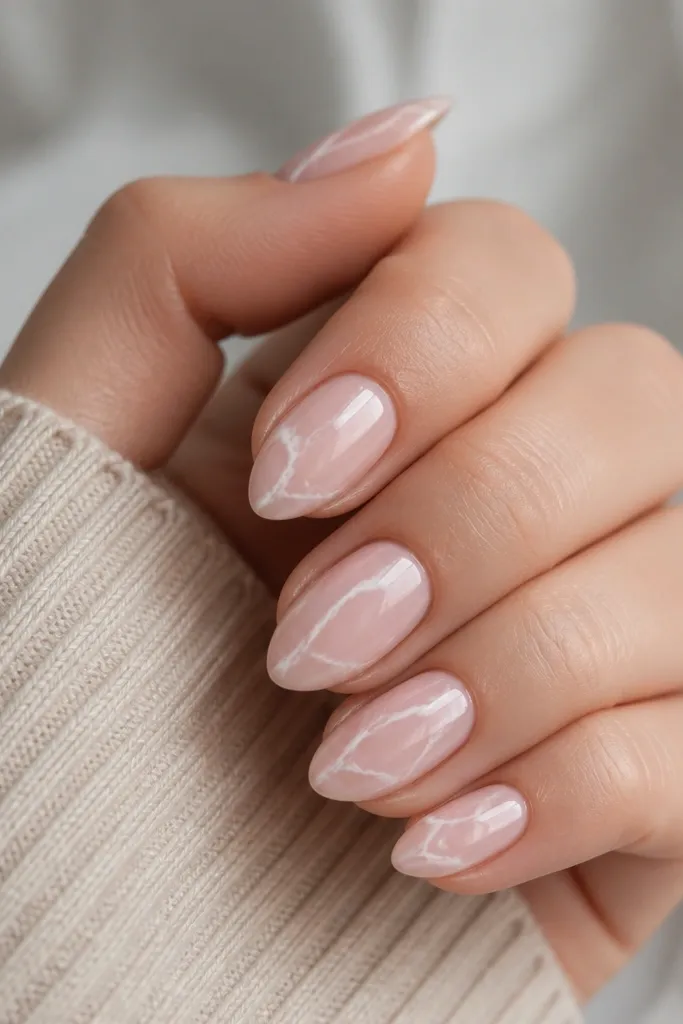
Marble veins look great on short stiletto because the pattern naturally follows the nail's curve. Milky pink keeps it delicate, not harsh. The trick is using thin veins with slight gray undertones so it looks like real stone, not scribbles. Glossy topcoat makes the marble look wet and dimensional.
Paint milky pink in two coats. With a liner brush, draw thin white veins starting near mid-nail and letting them taper as they go toward the tip. Add a tiny gray line next to the white to create depth, then seal with glossy topcoat in two thin coats.
Editor's noteKeep the veins irregular; perfect symmetry looks fake fast on short nails.
Watch outAvoid thick marble strokes - they look like paint pens and flatten the stiletto shape.
13. Rosy Nude with Gold Confetti Specks
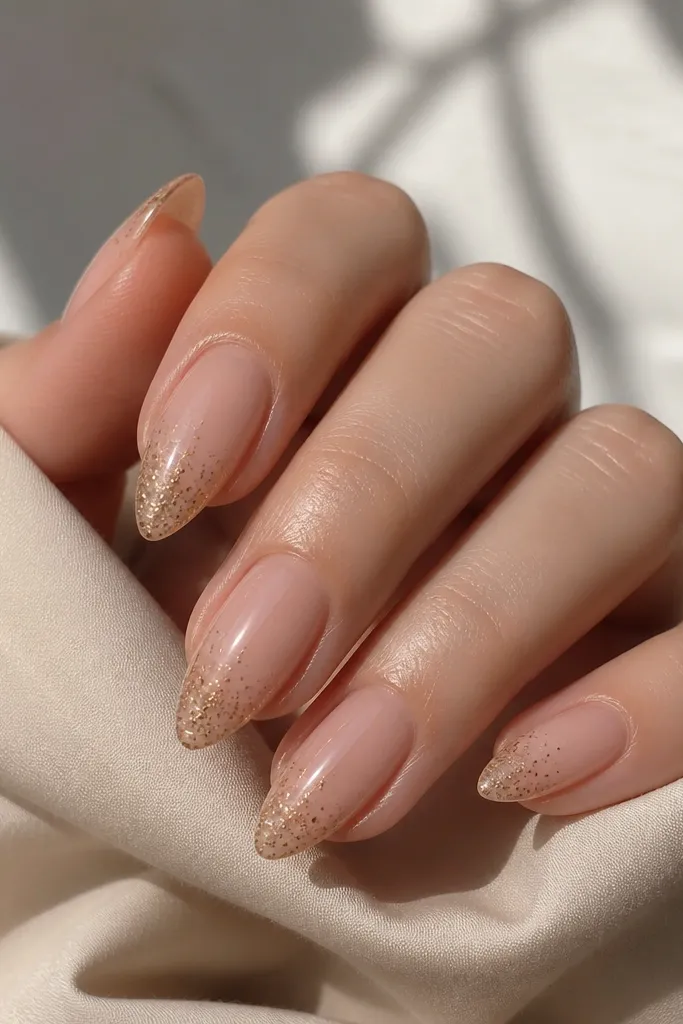
Confetti glitter looks better than full glitter on compact stiletto because it keeps the base clean. Concentrating the specks near the tip makes the point feel brighter and more defined. Rosy nude is flattering and hides any minor staining from glitter. Gloss keeps the surface smooth so it doesn't feel gritty.
Apply rosy nude polish or gel in two coats. Add gold glitter only to the last third using a small brush or sponge, then blend downward with a clean sponge edge. Seal with a glossy topcoat that's thick enough to smooth the glitter but not so thick it floods the design.
Editor's noteIf glitter grabs your cuticles, wipe the nail sides with a lint-free wipe before topcoat.
Watch outSkip full-coverage glitter - it makes short stiletto feel busy and can snag.
14. Icy Blue Micro Chrome Tips
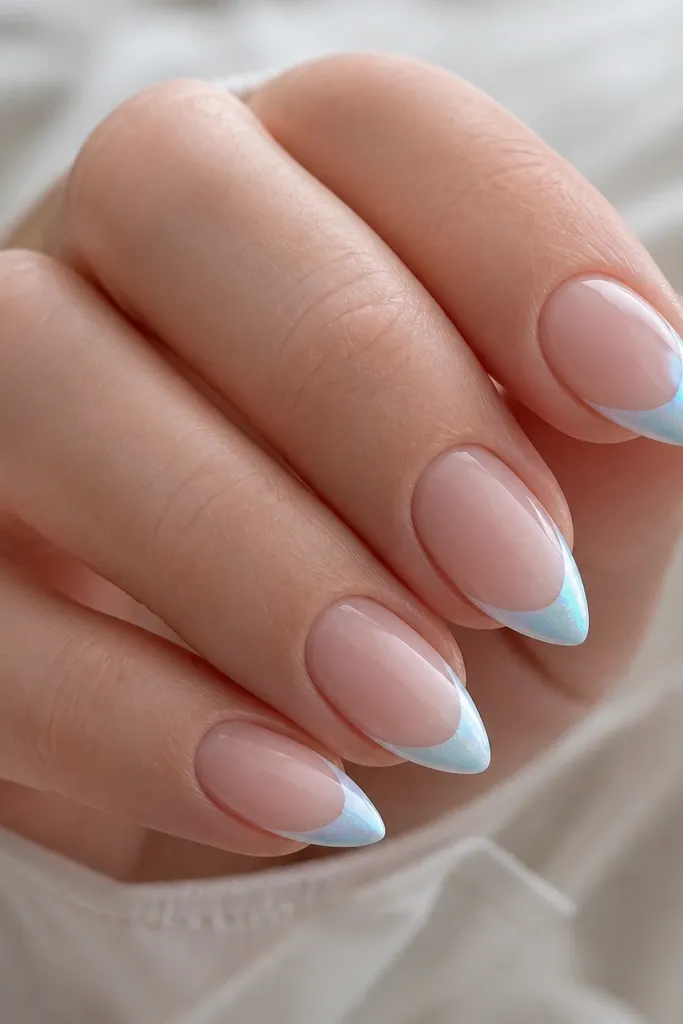
This is a "cold weather" look that still works year-round. The sheer base keeps it light, while the icy blue tip gives the color anchor. Micro chrome on just the tip edge creates a bright rim effect that looks like jewelry. It's sharp and clean without needing extra art.
Use a sheer nude base. Paint icy blue only on the last third and cure. Buff micro chrome powder onto the very edge of the blue tip so it catches light, then seal with a topcoat that won't dull the chrome too much.
Editor's noteUse a foam makeup wedge for chrome application; it keeps the shine controlled and prevents spreading.
Watch outDon't chrome the whole nail - it makes the look flat and less stiletto-shaped.
15. Burgundy Ombre into Nude Tip Fade
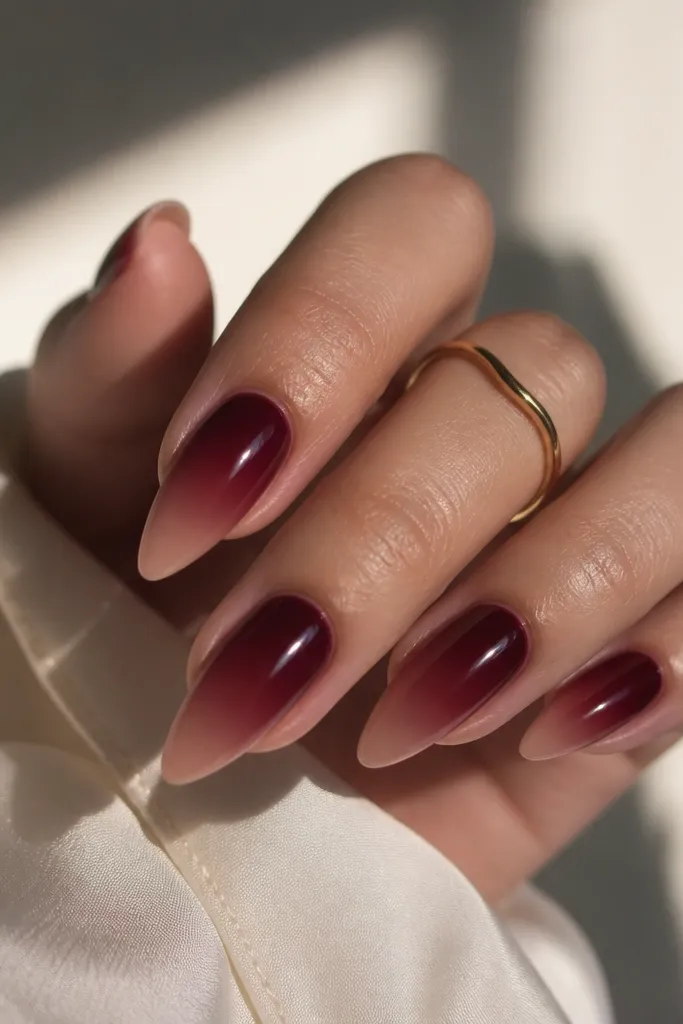
An ombre that fades into nude makes short stiletto look longer than a solid color. Burgundy is deep enough to feel polished, but the nude tip keeps it from looking heavy. The fade hides any minor brush marks because the gradient smooths everything out. Glossy topcoat makes the transition look like melted wine.
Paint burgundy near the cuticle with a thin layer, leaving space toward the tip. Use a sponge to blend burgundy downward and then lighten it as you approach the tip point. Finish by painting the last 1-2 mm nude and sealing with glossy topcoat.
Editor's noteBlend from the center outward with the sponge so the fade stays symmetrical on each nail.
Watch outAvoid a hard color stop at the tip - it makes the nail look like two separate layers.
16. Matte Nude with Glossy Tip Seal
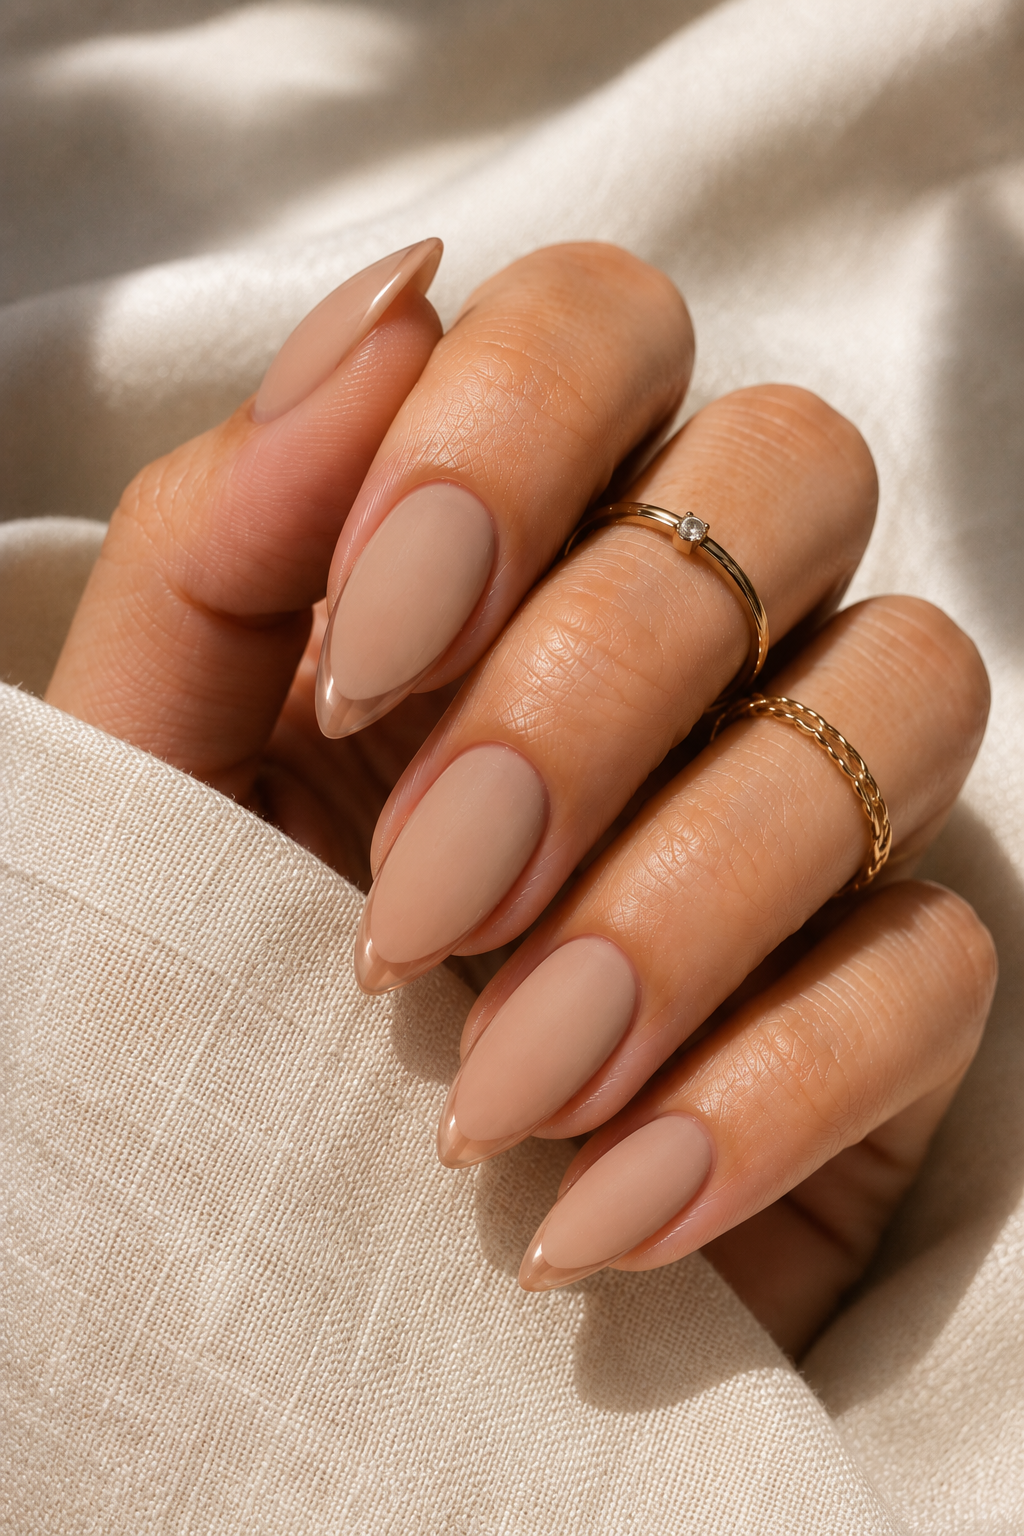
Two finishes give you a high-end look without complex art. Matte nude makes the nail feel smooth and modern, and the glossy tip seal creates a crisp boundary that highlights the stiletto point. The contrast shows up even in low light. This is one of the easiest designs to get right on short nails.
Apply your nude in two coats and cure. Topcoat with matte topcoat across the whole nail. Then use a small brush to apply glossy topcoat only on the last third and cure again, including the free edge.
Editor's noteUse painter's tape as a guide for the glossy cap line so it stays even across nails.
Watch outDon't mix matte and glossy too broadly - if the glossy covers half the nail it looks uneven.
17. Hot Pink Jelly with Clear Negative Space V
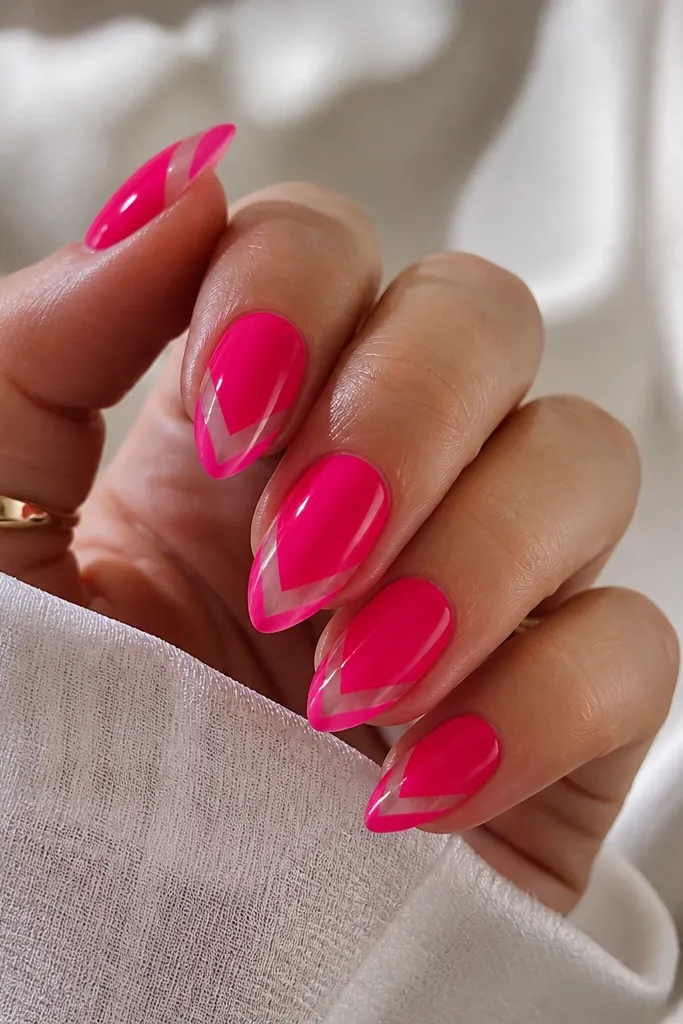
Negative space looks sharp on stiletto because the shape naturally points. The clear V breaks up the hot pink so the nail doesn't look blocky. Jelly finish keeps the pink glossy and slightly see-through, which flatters short nails. It looks bold but stays clean because the design is one clear shape.
Apply hot pink jelly gel in thin layers and cure. Mask a V with striping tape or a pre-cut nail stencil, leaving the V area clear. Paint over the rest, remove the tape carefully, then topcoat to keep the clear V glassy.
Editor's noteMake the V narrow at the tip point and wider as it reaches mid-nail - it matches the stiletto taper.
Watch outAvoid jagged tape edges - they create a rough V that looks cheap on short nails.
18. Lavender Sheer with Silver Line French
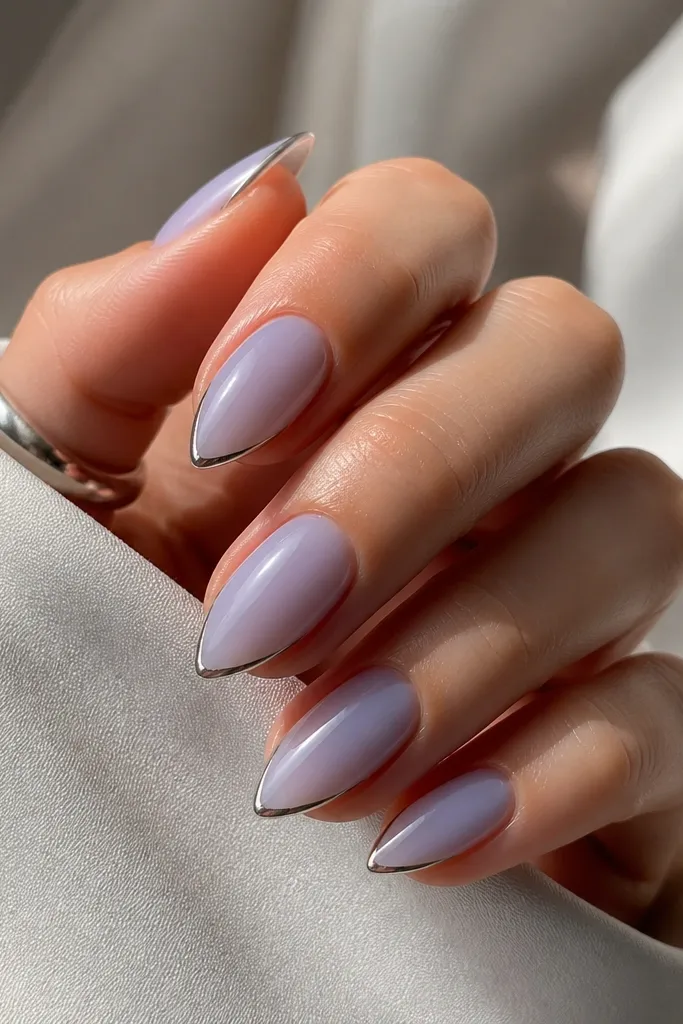
A silver line French gives you French structure without the starkness of white. Lavender is soft and romantic, but the metallic line keeps it sharp. The thin line makes the nail look longer because it traces the tip curve. Glossy finish turns the silver into a clean highlight.
Build a sheer lavender base in two coats, curing fully. Use a thin striping brush to paint a silver line about 0.5-1 mm wide at the tip, following the stiletto point. Seal with glossy topcoat so the line stays smooth and reflective.
Editor's noteWipe your liner brush after each nail so the line stays consistent thickness.
Watch outSkip thick metallic tips - silver that's too wide makes short stiletto look stubby.
19. Taupe Nude with Double Side Metallic Stripe
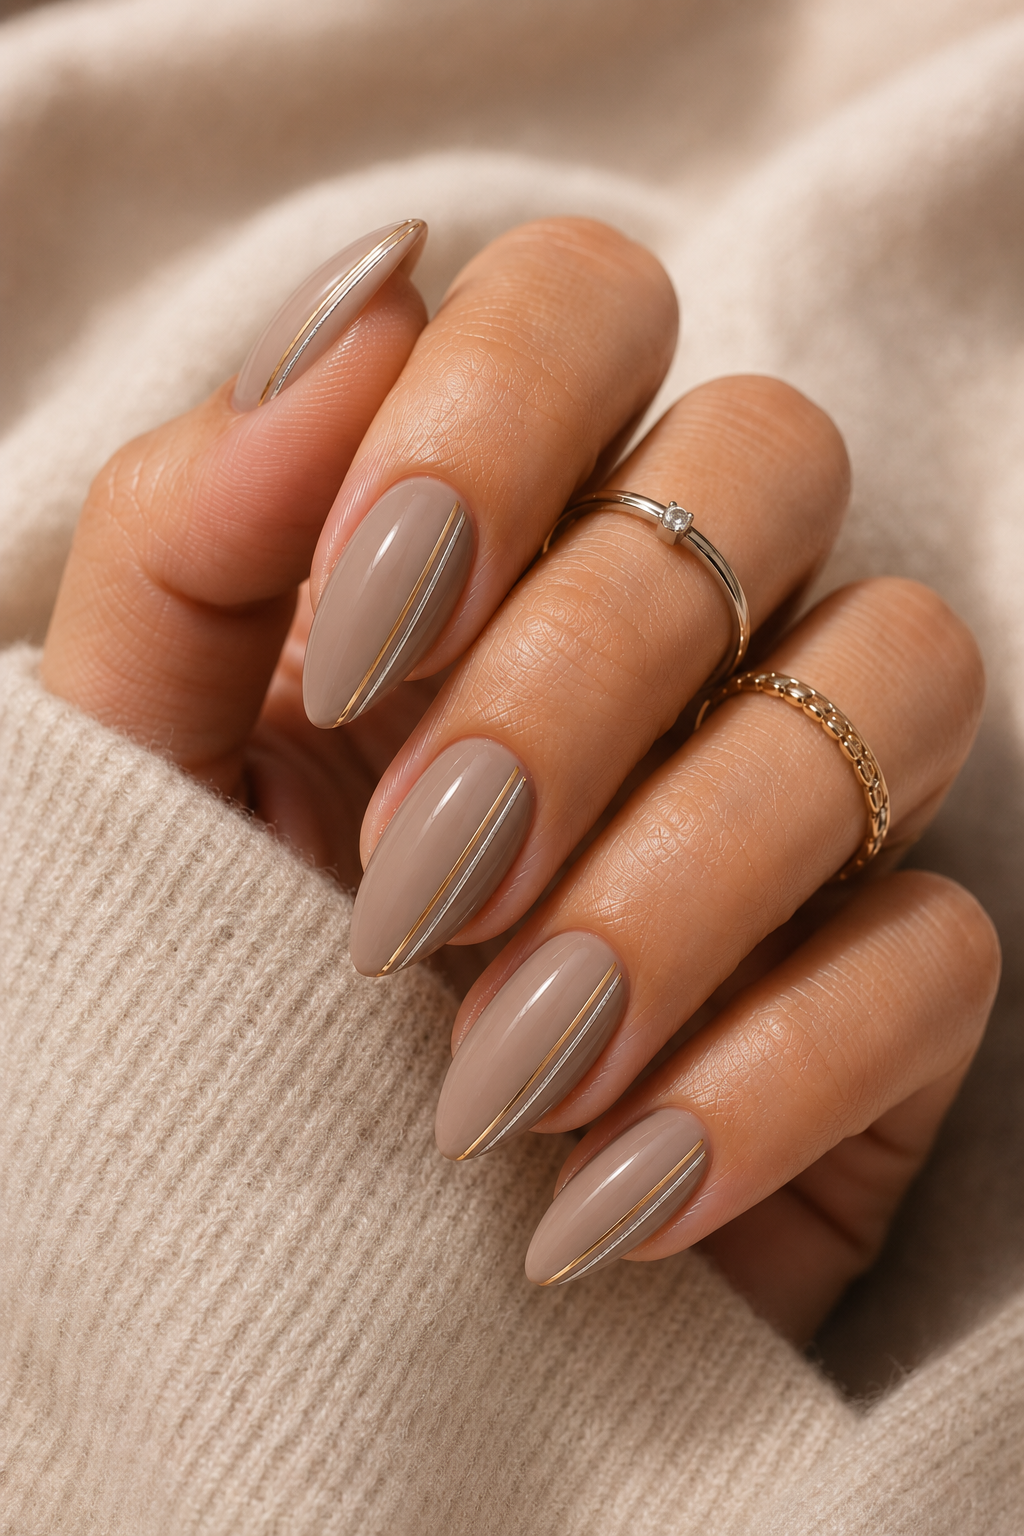
Double side stripes frame the nail and make the taper stand out. Taupe nude is neutral and looks luxe with metallics. Keep the stripes thin so the nail still reads as nude, not like a stripy decal. Glossy topcoat ties everything together and makes the metal look smooth.
Paint taupe nude in two coats. Apply metallic striping tape or paint two thin lines along the left and right sidewalls, stopping 1 mm before the tip point. Cure and topcoat carefully, making sure the stripes don't lift at the edges.
Editor's noteIf you're painting the stripes, use a steady hand and pull from cuticle to tip in one motion.
Watch outAvoid stripes that touch the cuticle - it can look messy on short nails.
20. Charcoal Gray with Clear Crystal Cluster
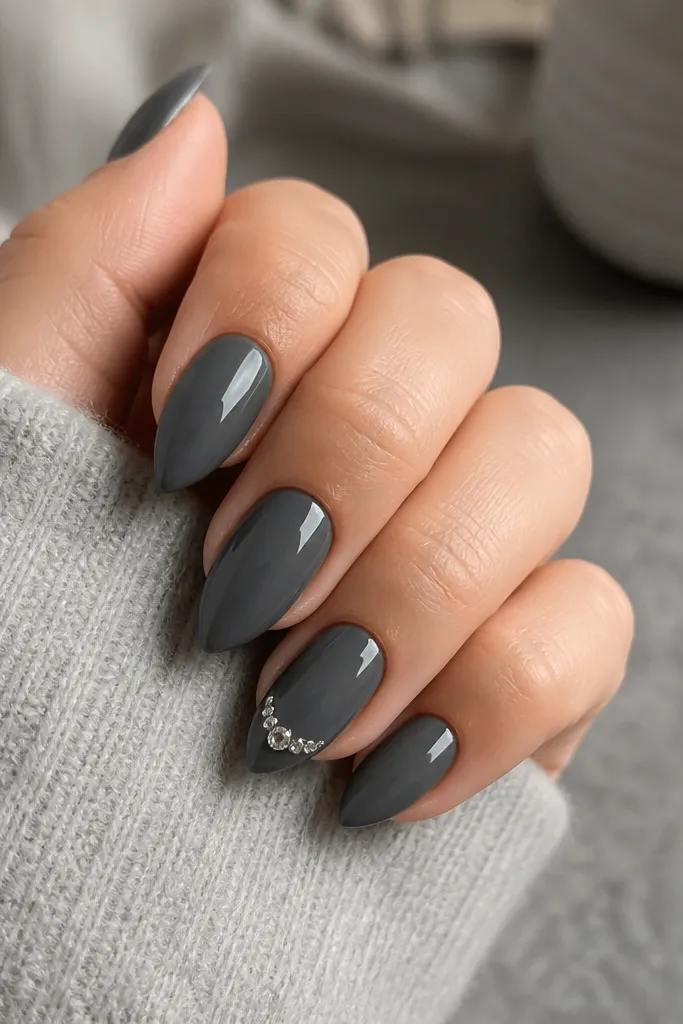
Charcoal gray is edgy and makes clear crystals look like ice. A small arc cluster near the tip keeps the sparkle concentrated where the stiletto point is. You get a glam effect without adding length. Glossy finish on gray keeps the surface uniform so the crystals sit cleanly.
Paint charcoal gray on all nails, cure fully. On one or two nails, place 3-5 small clear crystals in an arc near the tip, leaving the center of the nail free. Use gel to anchor each crystal, cure, then topcoat gently around them.
Editor's noteUse smaller crystals than you think - on short stiletto, scale is everything.
Watch outAvoid a flat back crystal placed too far from the tip - it looks random and catches on sleeves.
21. Peach Nude with Orange Micro Gradient Tips
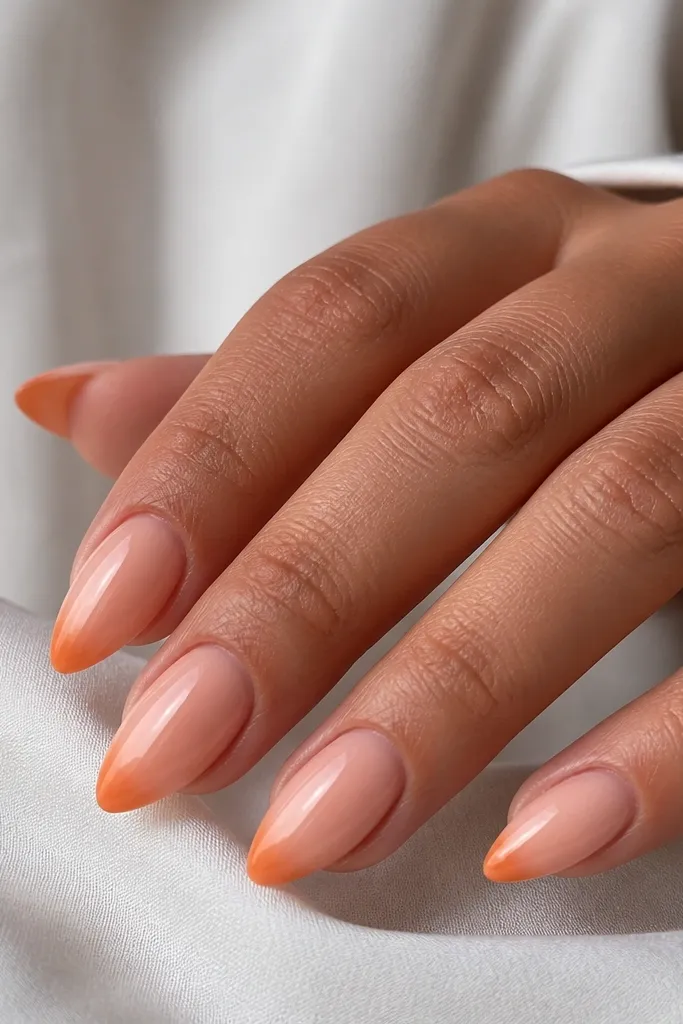
Micro gradient tips look like color sunbeams on short nails. Peach nude is warm and forgiving, and the orange at the tip adds energy while staying compact. The gradient keeps the stiletto shape soft, not harsh. Glossy finish makes the orange look smooth instead of chalky.
Apply peach nude in two coats. At the tip, sponge in orange starting about 2 mm from the point and blend inward so it fades. Cure and seal with glossy topcoat, then cap the tip edge lightly.
Editor's noteUse a makeup sponge with minimal product so the gradient stays subtle and clean.
Watch outDon't overbuild orange - heavy orange on short tips can look like a thick stain.
22. Forest Green Matte with Gold Outline Tip
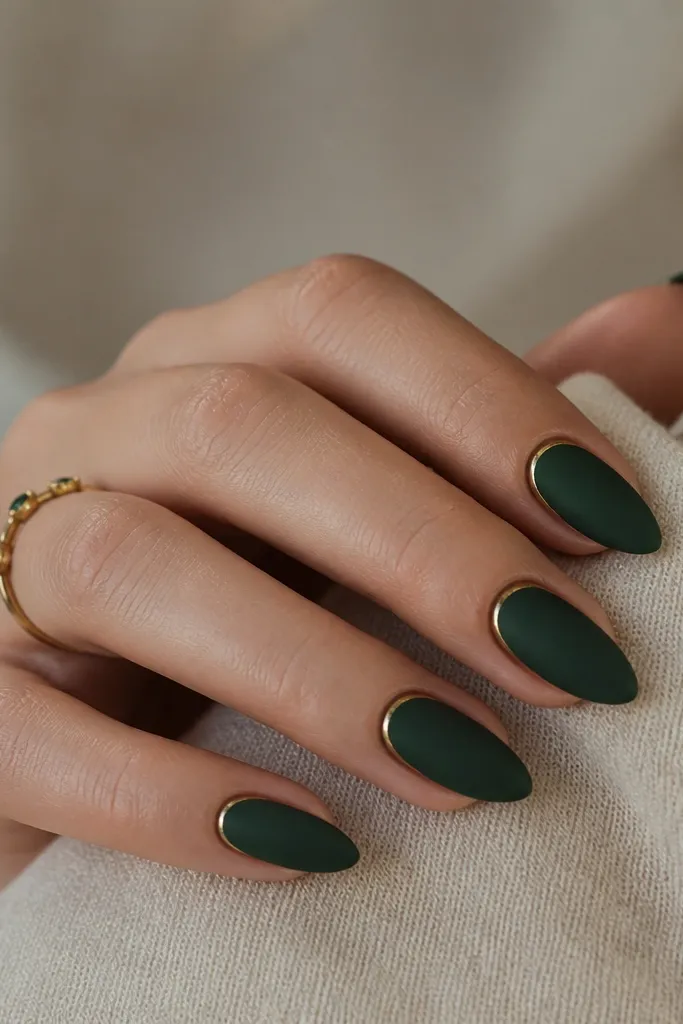
Matte forest green is moody and flattering, and the gold outline makes the point look engineered. The gold line should be thin to keep the design refined. Because the base is matte, the gold catches light like a frame. This is a great option if you want something seasonal that still reads neat.
Apply forest green matte gel or matte polish in two coats. Use a fine gold striping brush to draw the outline along the tip curve, keeping it under 1 mm. Seal with a matte topcoat overall, then apply a tiny amount of glossy topcoat just over the gold line so it stays reflective.
Editor's noteOutline with a steady pull from one side of the tip to the other - don't paint back and forth.
Watch outAvoid gold that's too close to the sidewalls - it can look like it's peeling on short points.
23. White Base with Tiny Nude Speckle Confetti
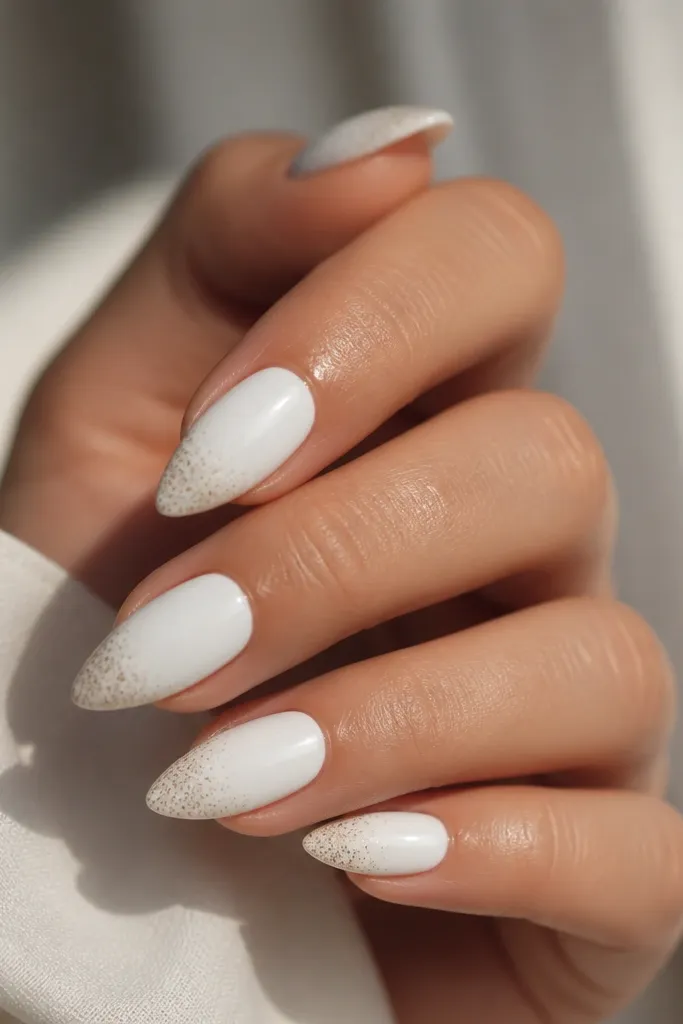
Pure white on short stiletto looks clean, but the speckles keep it from feeling sterile. Nude speckles make the white warmer and more wearable. Concentrating the speckles near the tip adds a soft focus point and makes the stiletto point pop. Glossy finish makes the speckles look like tiny beads.
Paint a smooth pure white base in two thin coats and cure. Use a dotting tool or a toothpick to place tiny nude dots near the tip, leaving the center mostly clear. Seal with glossy topcoat to lock the dots and smooth the surface.
Editor's noteKeep the dots random but light - too many speckles make white look dirty.
Watch outSkip chunky dot paint - thick dots look raised and snag.
24. Classic Red with Negative Space Cuticle V
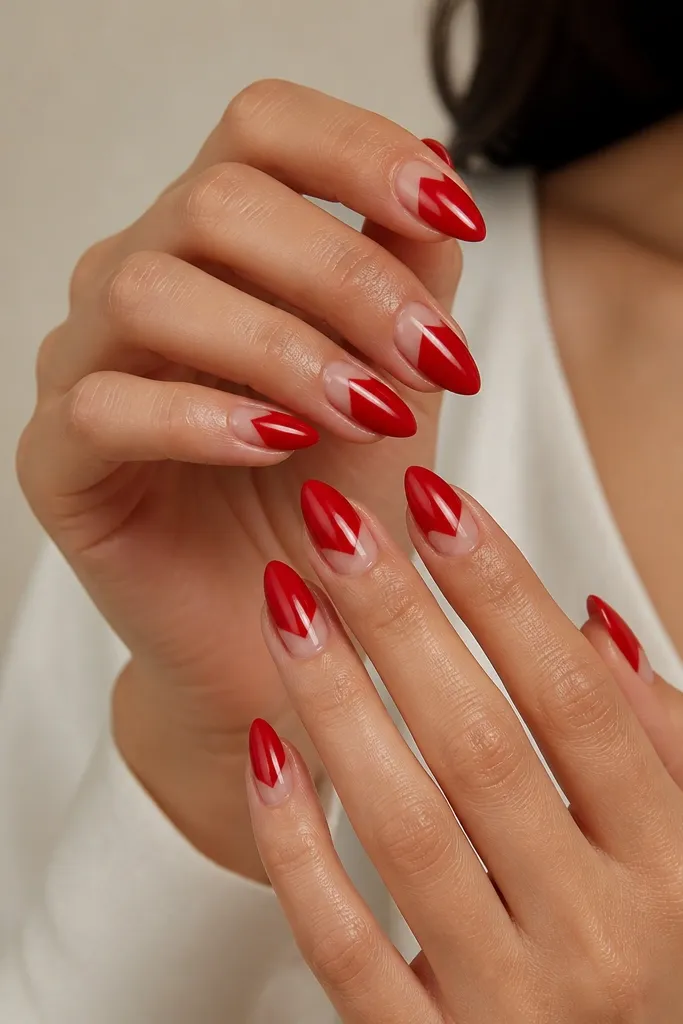
This design gives you a "lifting" effect by carving out space near the cuticle. The negative V keeps the red from feeling heavy and adds a graphic edge. On short stiletto, the cuticle detail is noticeable and makes the nail look more sculpted. Glossy red looks crisp and salon-clean when edges are sharp.
Paint classic red in two coats, but mask a small V near the cuticle with tape or a stencil so that area stays clear. After curing, remove the mask and topcoat carefully around the negative space. Clean the edges with a fine brush dipped in acetone before final curing.
Editor's noteMake the V slightly wider at the top and narrow as it points down - it looks more natural on almond-stiletto shapes.
Watch outAvoid sloppy mask edges - uneven clear space looks like growth gaps.
25. Nude Pink with Micro Black "Outline" at Tip
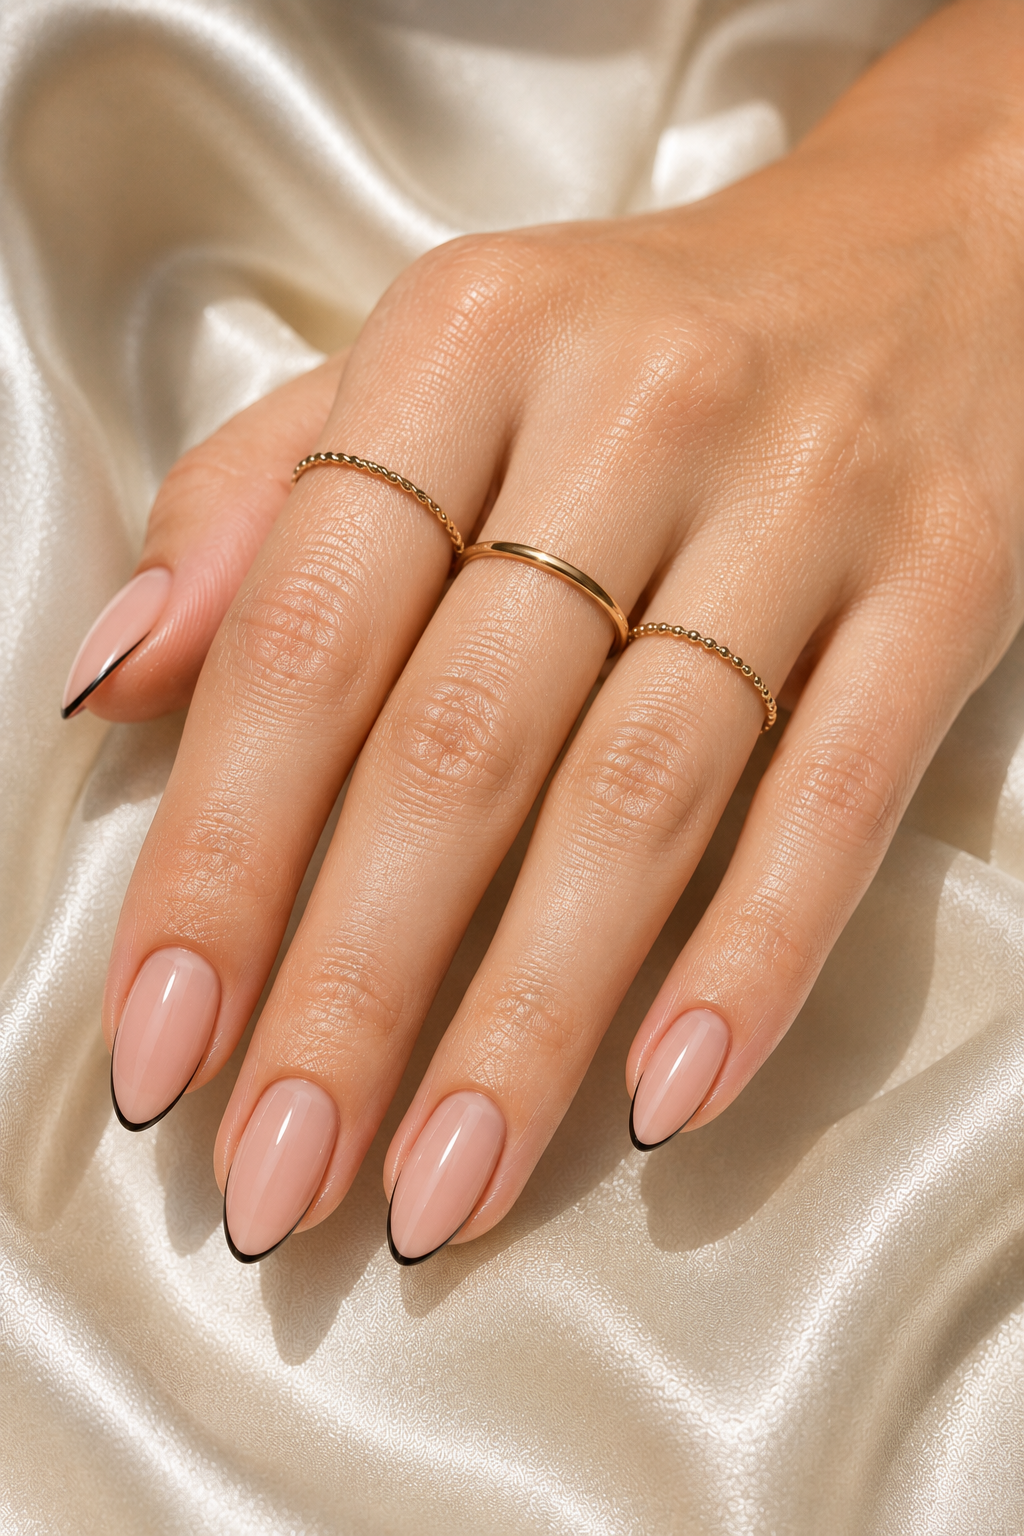
A micro black outline is the easiest way to make short stiletto look sharply defined. The nude base keeps it soft and everyday, while black at the tip gives crisp contrast. Because the outline sits on the edge, it enhances the point without adding bulk. Gloss makes the outline look clean and intentional.
Apply nude pink base in two coats. Use a liner brush to draw a thin black line along the tip edge, following the stiletto curve and leaving a tiny nude gap inside. Seal with glossy topcoat and cap the tip.
Editor's noteIf the line wobbles, clean it with a small flat brush before curing - gel cures fast and locks in mistakes.
Watch outDon't fill the inside with black - outline only keeps it classy.
26. Iridescent Jelly with Tiny Rainbow Foil Bits
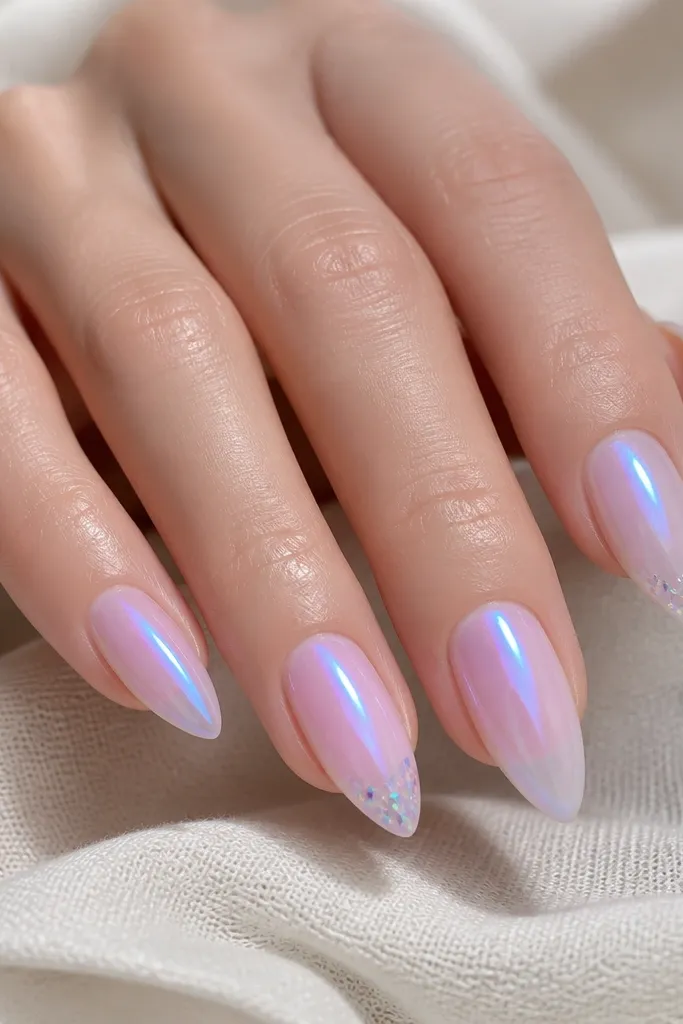
Iridescent jelly makes short stiletto look like it has depth even with minimal art. The rainbow foil bits add sparkle but only where you want attention. This design looks especially good under daylight because the jelly color shifts. It's playful without feeling like a glitter bomb.
Apply iridescent jelly gel in thin layers and cure. On a couple nails, dab a small amount of foil gel at the tip and press tiny rainbow foil pieces in a loose cluster. Seal with a glossy topcoat that doesn't dull the iridescence.
Editor's noteKeep foil pieces small and uneven - that randomness reads more "real" than perfect shapes.
Watch outAvoid large foil shards - they look heavy on short points.
27. Matte Chocolate with Beige Half-Moon and Thin Line
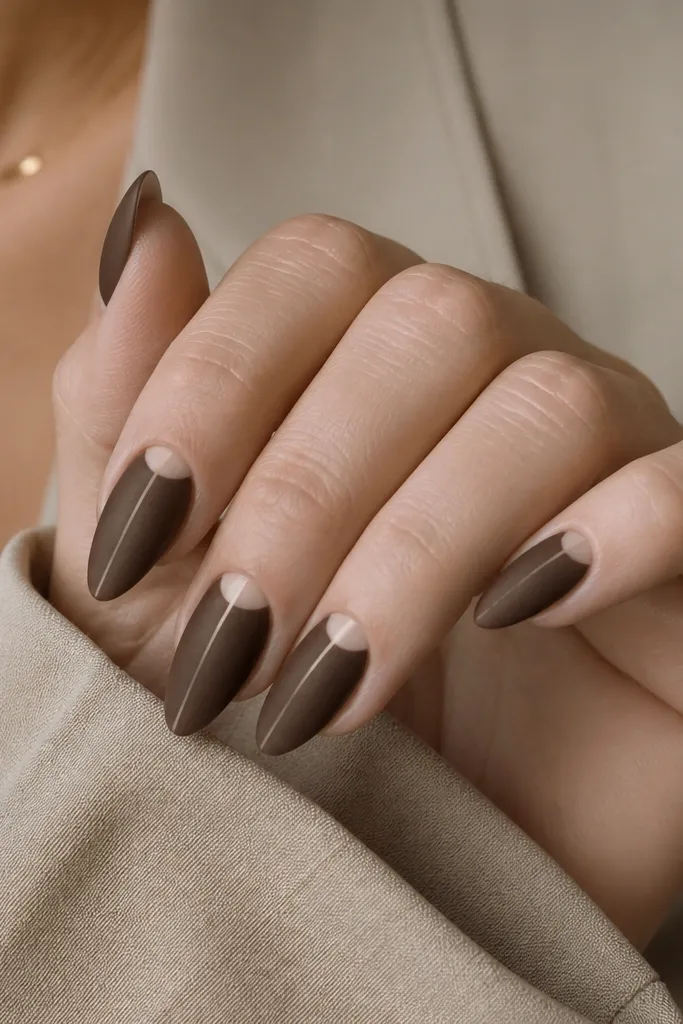
Matte chocolate is a classy neutral, and the beige half-moon gives a warm architectural look. The thin line adds structure so the design doesn't feel flat. On short stiletto, this kind of vertical detail makes the nail look longer. Matte finish hides tiny texture, so the overall look stays smooth.
Paint matte chocolate and cure. Add beige half-moon under the cuticle using a stencil or sponge, then draw a thin beige line down the center with a liner brush. Finish with matte topcoat and seal the line edges with a careful second matte layer if needed.
Editor's noteUse a stencil for the half-moon - freehand crescents on short stiletto are easy to skew.
Watch outAvoid thick line work - it turns the vertical detail into a block.
28. Pink Chrome Ombré Over Sheer Base
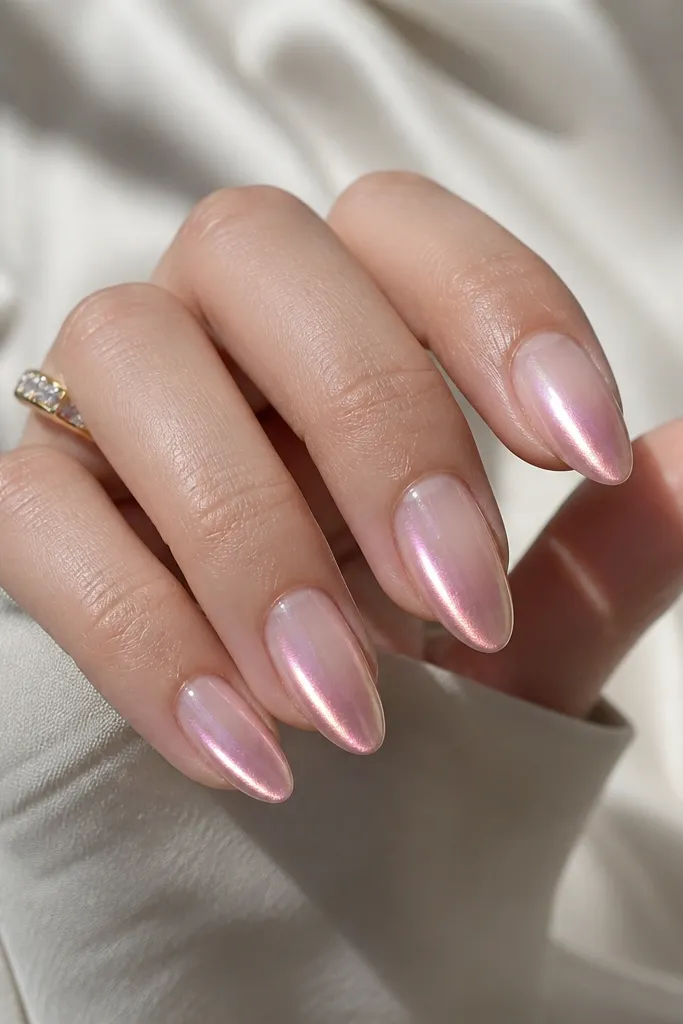
This is the chrome look that still feels wearable because it fades into the sheer base. The heavier tip weight creates a stiletto focus point and makes the nail look sculpted. Pink chrome flatters many skin tones and looks soft compared to silver. It's also easy to refresh because you can touch up only the tip area.
Start with a sheer nude base and cure. Apply pink chrome powder at the tip, then blend upward with a sponge and gentle buff. Seal with a thin topcoat designed for chrome so the shine stays bright.
Editor's noteWork in layers: do a light dust first, then build the intensity at the tip.
Watch outSkip rubbing hard - aggressive buffing can create patchy chrome streaks.
29. Sea Glass Teal with White "Swoosh" at Tip
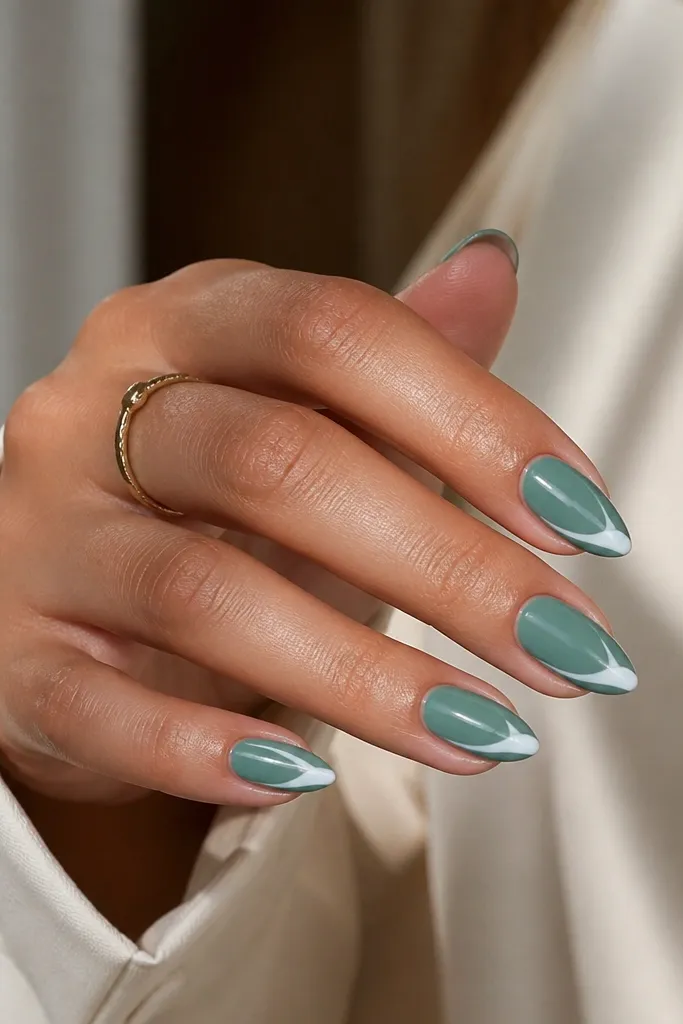
Sea glass teal has that fresh, cool tone that looks great on short stiletto. The white swoosh gives movement and keeps the nail from looking like a solid block. Because the swoosh follows the curve, it highlights the stiletto point instead of fighting it. Glossy finish makes the teal look smooth and watery.
Apply sea glass teal gel in two coats and cure. With a liner brush, paint a thin white swoosh starting around the last third and curving toward the tip point. Leave a little teal space between the swoosh and the sidewall so it looks like a highlight.
Editor's noteMake the swoosh slightly thicker at the start and thinner at the point - it looks more natural.
Watch outAvoid straight lines for this design - straight makes short stiletto look harsh.
30. Clear Negative Space with Micro Gold Studs
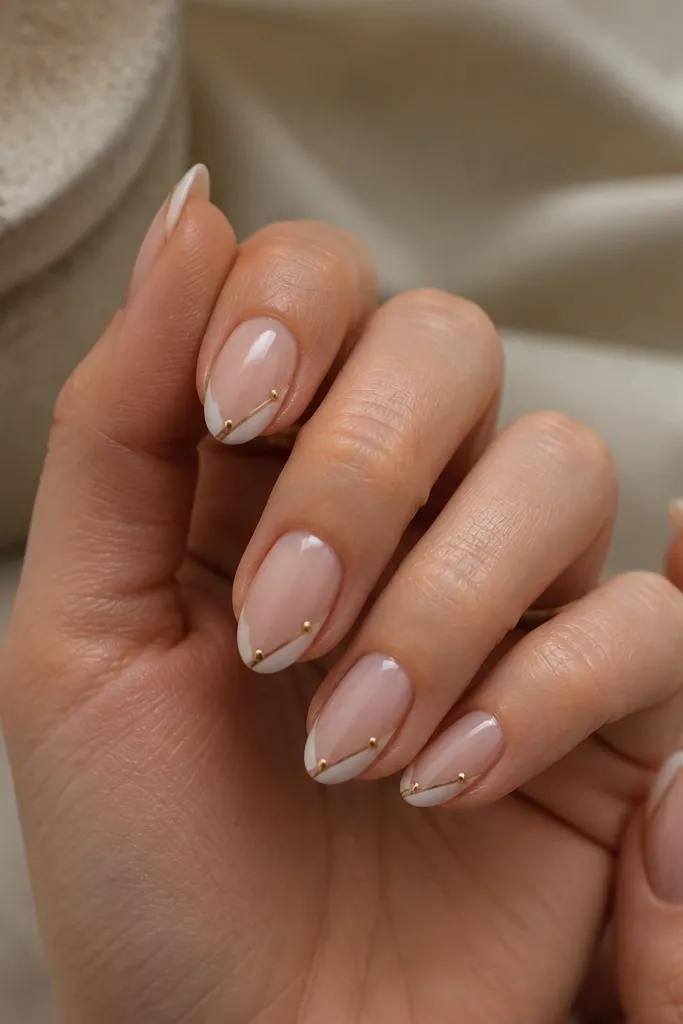
Negative space plus micro studs reads jewelry-like, not costume-like. The clear strips keep the nail light, and the small gold studs catch light at the tip where attention lands. This design is great if you want something different from French but still clean. The studs should be tiny so they don't snag.
Paint a sheer nude base and cure. Use striping tape to mask two narrow clear strips down the nail, then fill the rest with a sheer nude or light pink gel and cure. Place micro gold studs at the tip edge on one side, anchor with gel, and seal with topcoat.
Editor's noteUse tweezers with good grip and place studs only on nails you're comfortable touching up.
Watch outAvoid large studs - they lift faster and snag on fabric.