1. Buttercream Pink Base with Tiny Lemon Dots
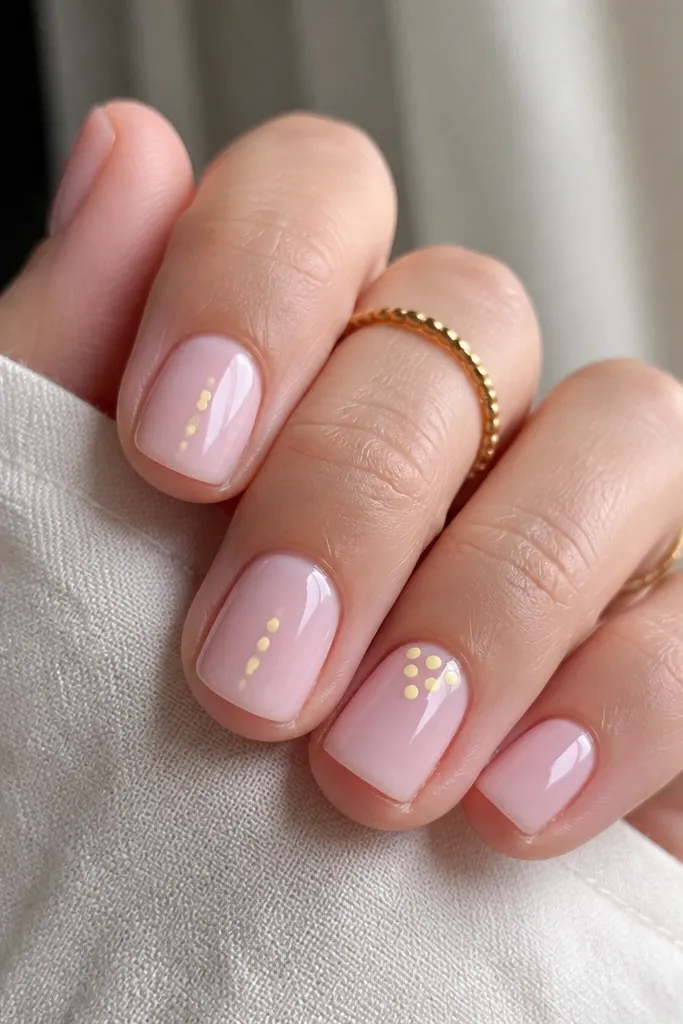
This one looks like a dessert manicure because the pink is sheer and the yellow is used only as dots. The dots sit high on the nail so they catch light and make your hands look brighter without feeling loud. I use a buttery yellow (almost like soft custard) so it reads pastel, not neon.
Paint a milky baby pink base in two thin coats, curing each coat fully. Use a dotting tool or a toothpick to place 4-6 dots per accent nail, keeping them evenly spaced and small. Finish with glossy top coat so the dots look crisp.
Editor's noteDot while the base layer is fully cured and tack-free, then seal the dots with a thin top coat over the whole nail.
Watch outDon't use a thick yellow coat for dots - it spreads and turns into blobs.
2. Half-Moon Cuticle in Light Yellow
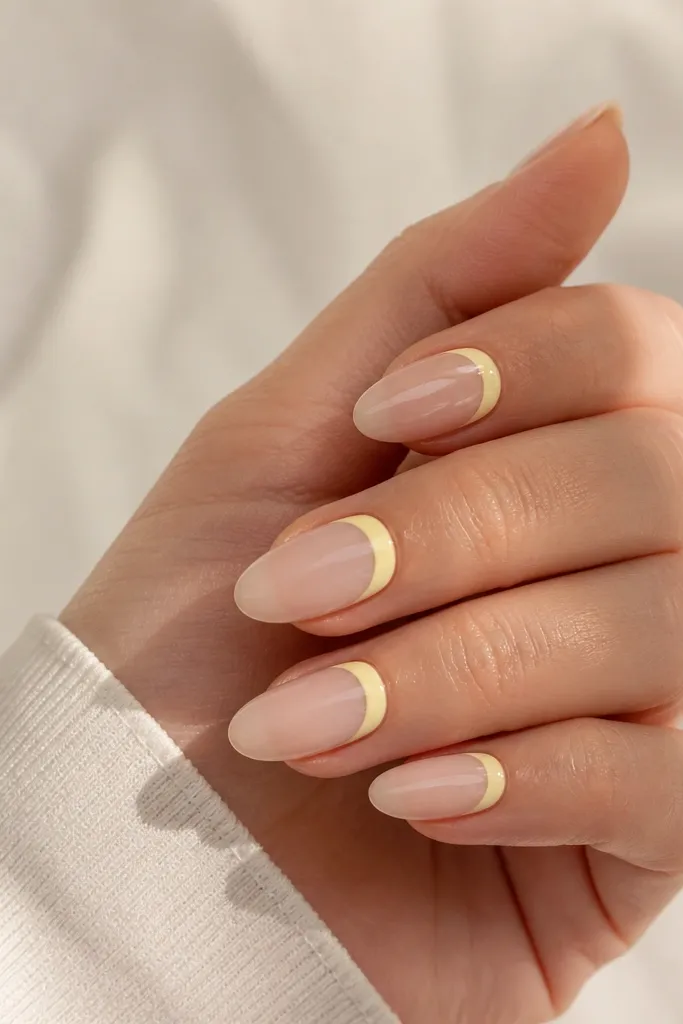
The half-moon shape makes the manicure look intentional even when your nails grow out. Light yellow at the cuticle brightens the hand and frames the nail bed. The sheer pink keeps it airy, so the yellow doesn't take over.
Apply a sheer blush pink base. Use a half-moon nail stencil or a small curved brush to paint a crescent at the cuticle with light yellow. Leave a hairline gap so the boundary looks sharp. Top coat glossy for a polished finish.
Editor's noteUse a stencil for the first one, then switch to a fine detail brush once you like the curve.
Watch outAvoid flooding the cuticle line - it looks messy and drags when you wash your hands.
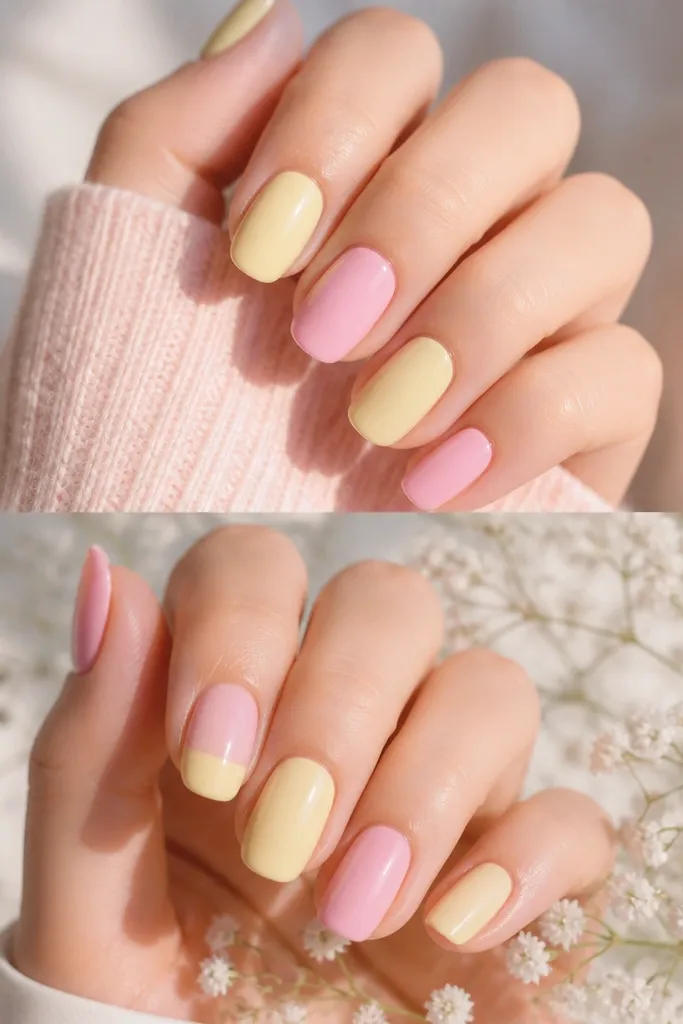
3. Skittle Fade from Pink to Butter Yellow
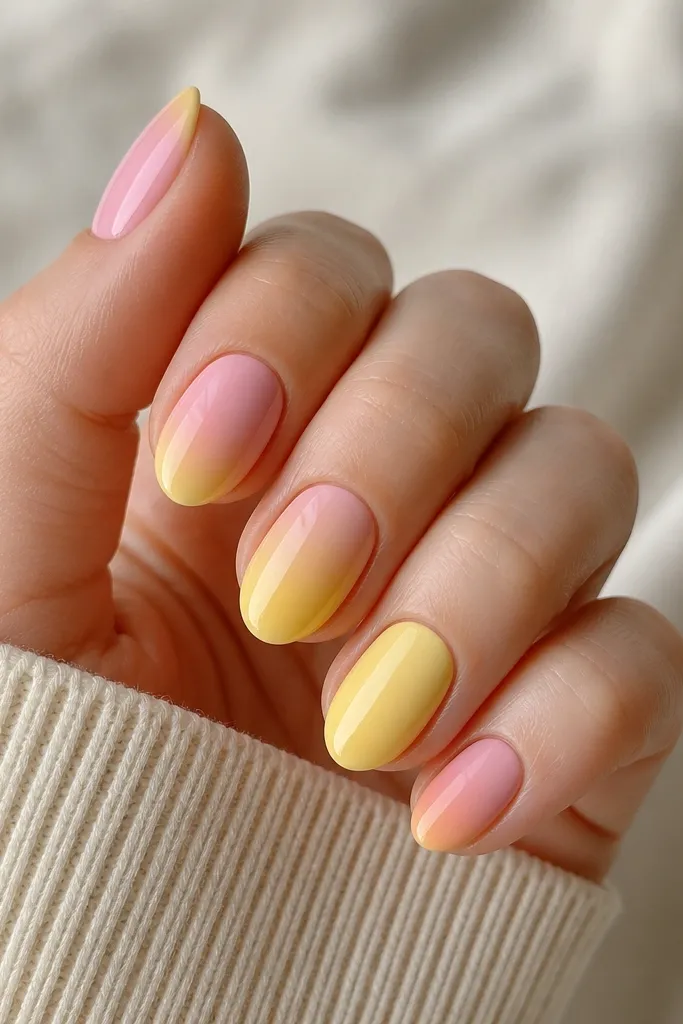
This design is made for people who want color without hard lines. The pink-to-yellow gradient reads smooth and expensive because each nail shifts slightly. It also flatters different nail lengths since the color transition disguises uneven tips.
Start with a sheer pink base. Sponge or makeup-sponge blend light yellow onto the free edge, then soften the middle by tapping over the border. Keep the thumb and pinky lighter so the set doesn't get too yellow-heavy. Seal with glossy top coat.
Editor's noteWarm the sponge slightly with your hands, then tap lightly - it prevents harsh streaks.
Watch outDon't blend too close to the cuticle - you lose the clean pastel look.
4. Milky Pink with One Lemon Stripe Across the Tip
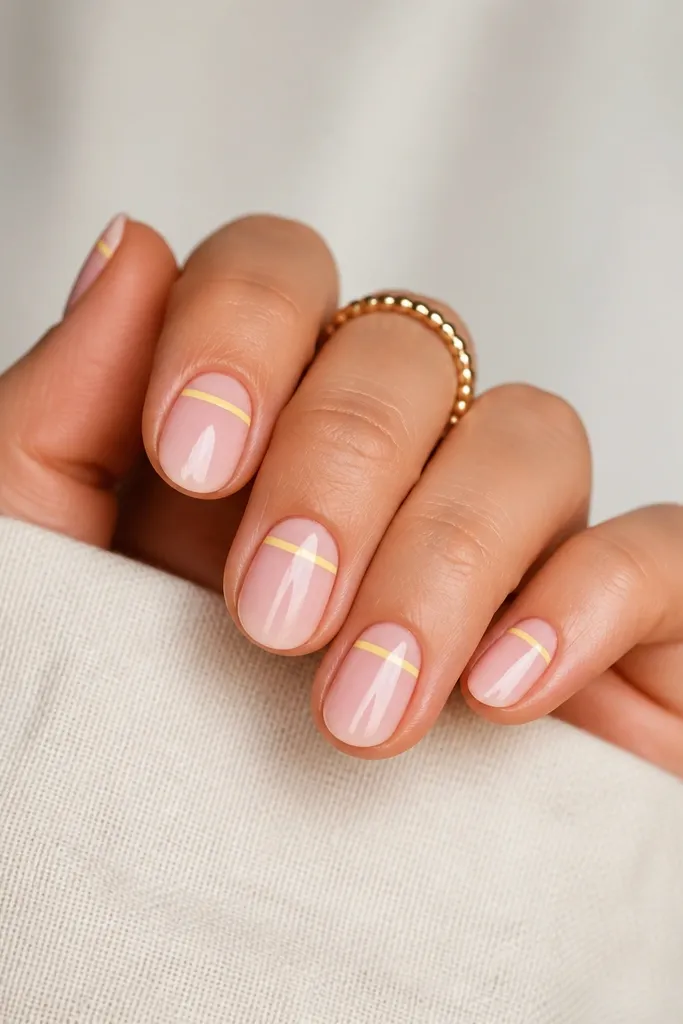
A single stripe is my go-to when I want the manicure to look neat even after a few days. The stripe adds a pop of yellow while the milky pink keeps the overall vibe soft. Because the stripe is thin, it reads classy instead of childish.
Use a milky pink gel or polish as the base in two coats. With striping tape or a thin liner brush, place a straight stripe across the tip area - about 1/3 down from the tip. Cure, remove tape if used, then apply top coat over the stripe edges.
Editor's noteIf your stripe wobbles, cover it with a second thin yellow pass instead of trying to erase it.
Watch outDon't make the stripe too thick - it looks like tape residue.
5. Glossy Pink Jelly with Floating Yellow Confetti
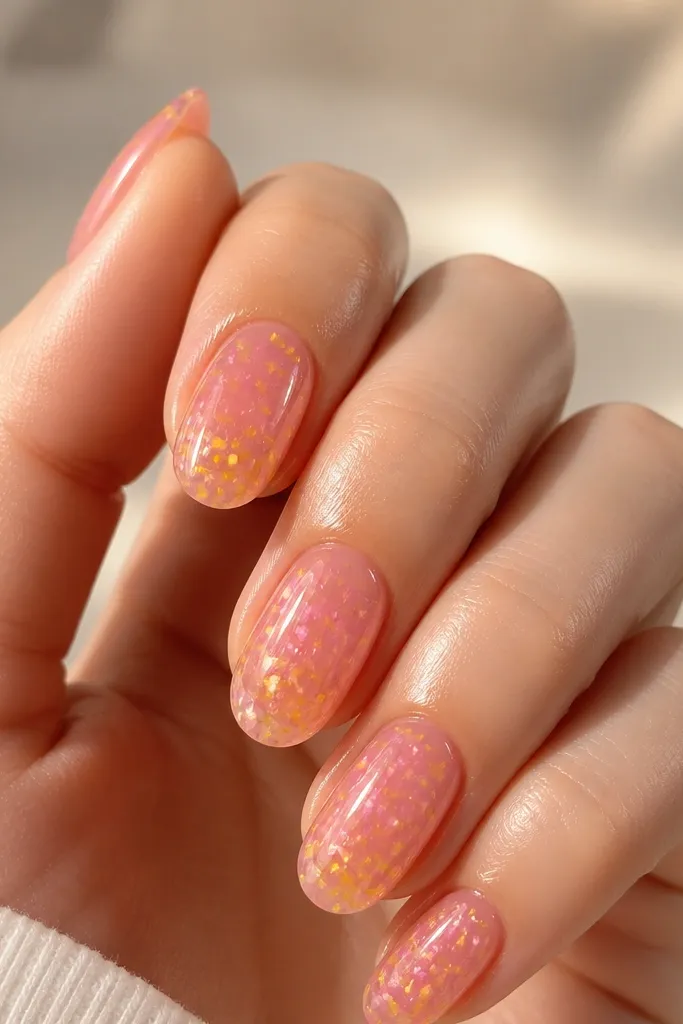
Jelly pink makes yellow look suspended, like candy. The confetti pieces create texture without turning the manicure into full coverage. I love this because it looks cute in motion - the glossy top coat makes the pieces shimmer.
Build a jelly light pink layer (semi-translucent) in two thin coats. Place tiny yellow confetti pieces with tweezers, then cure carefully so they don't drift. Finish with a thicker top coat to fully "embed" the confetti so it feels smooth.
Editor's noteUse a dot of clear gel to "glue" each confetti piece before curing.
Watch outAvoid skipping the embedding top coat - confetti catches on fabric.
6. Matte Blush with Glossy Lemon Half-Accent
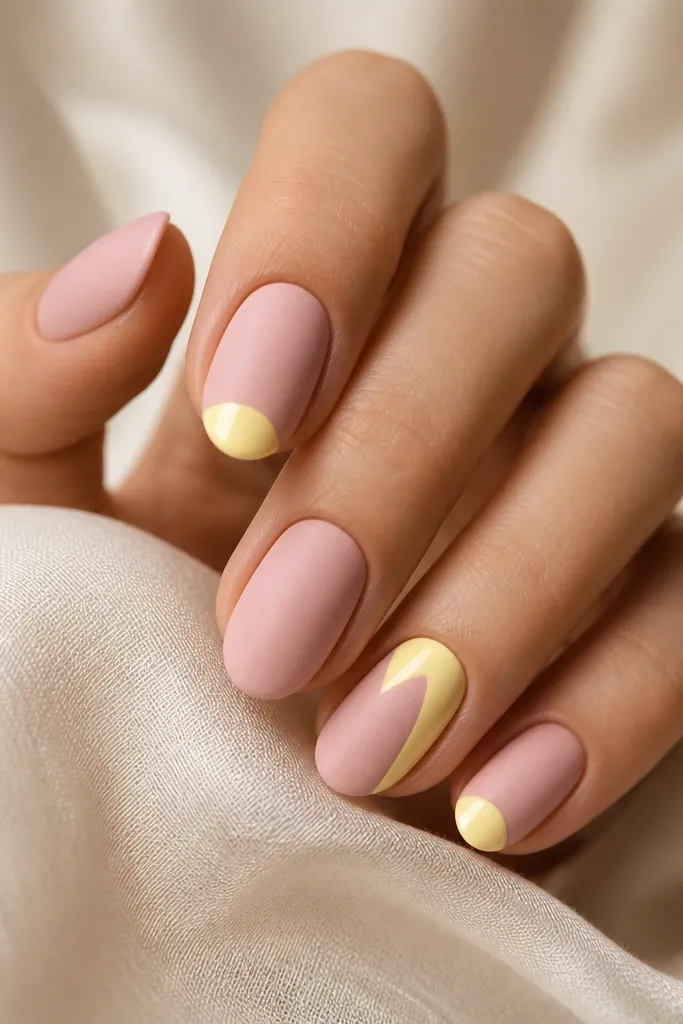
Matte softens the pink and makes the yellow look like a bright sticker placed on top. The contrast is what makes it interesting, even though the palette is simple. It also hides small surface imperfections because matte gel fills light inconsistencies.
Paint the nails in matte-finish light pink gel and cure. For the accent nails, add a curved glossy lemon shape on the top half using a liner brush. Seal everything with matte top coat everywhere except the yellow area, which gets glossy top coat only.
Editor's noteKeep your matte coat thin so it doesn't turn patchy around the cuticle.
Watch outDon't put matte top coat over the yellow - it kills the contrast.
7. Yellow V-French on a Pink Milky Base
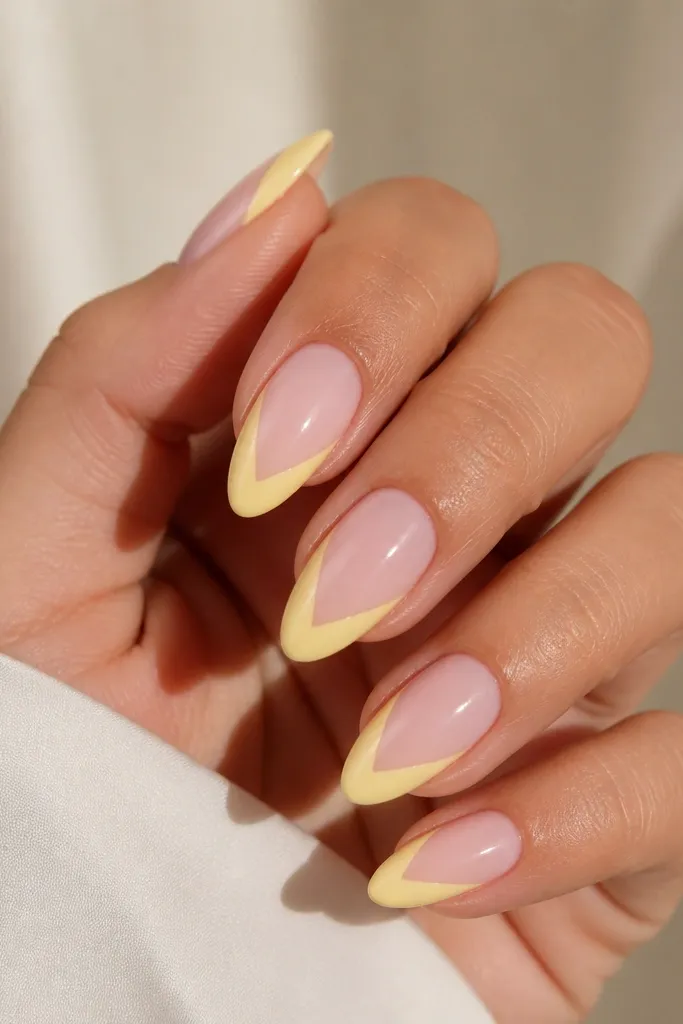
A V-French feels modern and clean because it follows the nail's natural center line. The yellow tip gives you that sunshine effect without covering the whole nail. Milky pink keeps the set from looking too sharp.
Use a milky pink base in two coats. With a V-french guide or striping tape, paint yellow starting at the side edges of the tip and meeting in the center. Keep the V narrow for a delicate look. Top coat glossy.
Editor's noteIf you're freehanding, anchor each side first, cure, then fill the V center so it stays symmetrical.
Watch outAvoid dragging the brush from the center outward - it creates uneven thickness.
8. Dainty Yellow Daisy on Sheer Blush
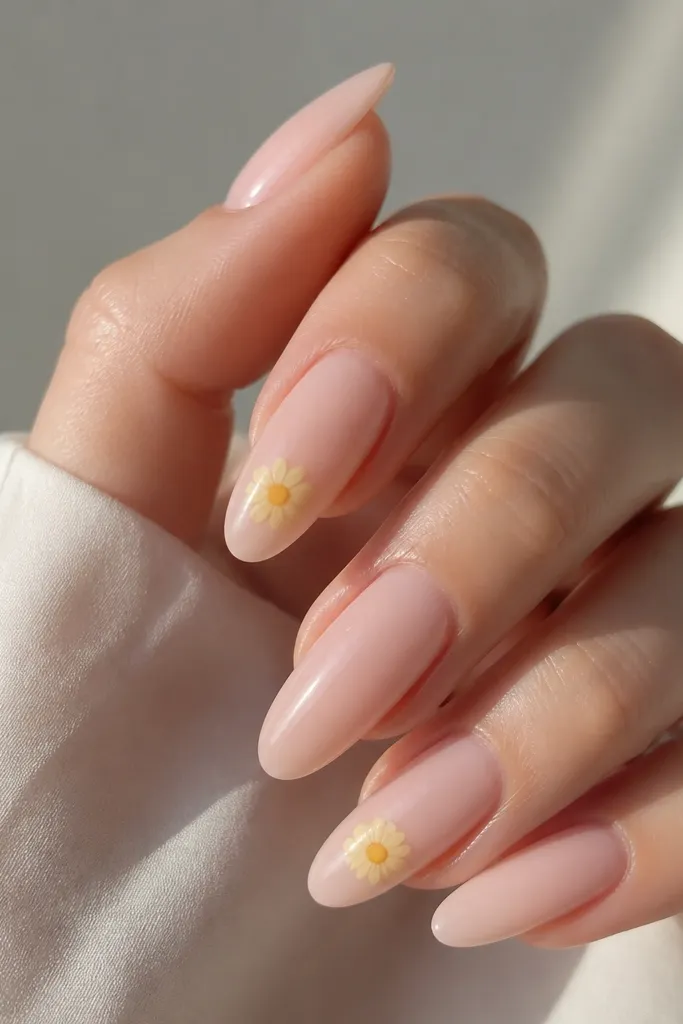
Daisy art works because yellow is already the star color, and pink stays like a soft canvas. Tiny flowers look sweet without getting cartoonish when the petals are small and evenly spaced. I use two shades of yellow: a lighter petal yellow and a darker center yellow.
Start with sheer blush pink and cure. Use a nail art dotter for petal points, then add a tiny darker center. Keep flowers near the lower half so they don't cover the cuticle. Seal with glossy top coat to smooth the art.
Editor's noteDraw the center first, then place petals around it like a clock.
Watch outDon't make the petals too big - they cover the nail and look heavy.
9. Light Yellow Micro-Outline on Pink French Tips
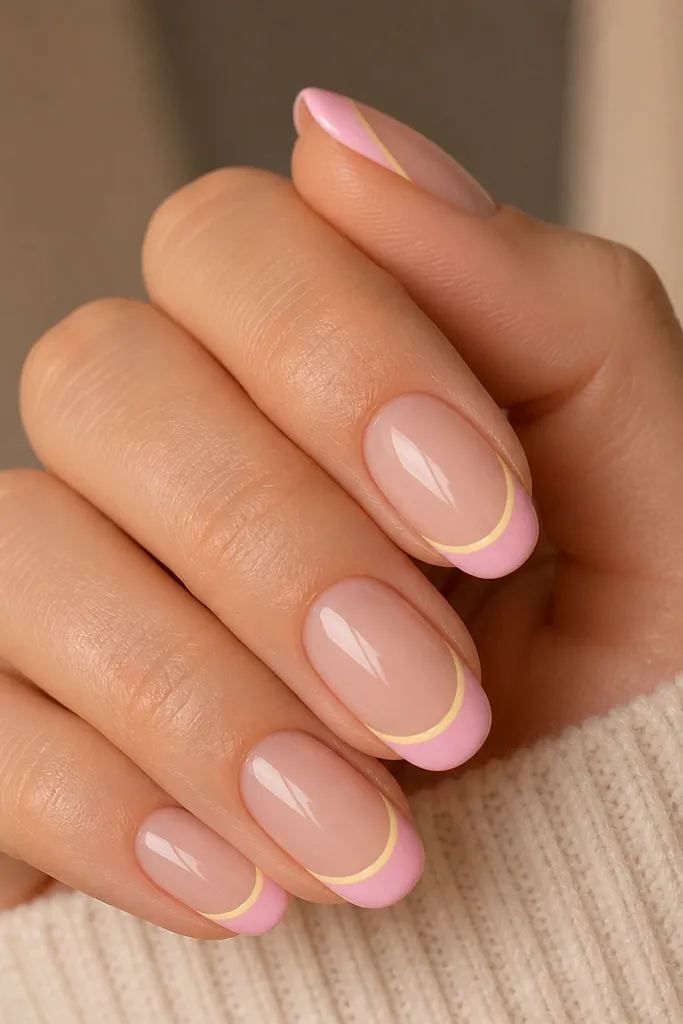
This is a subtle design that still looks special up close. The micro yellow outline makes the French tip look crisp and intentional. Because yellow is thin, it reads "clean" rather than busy.
Paint the base with nude pink. Create a thin French tip in a slightly lighter pink (or keep the tip a touch brighter). Then use a fine liner brush to add a hairline yellow border just outside the French edge. Finish with glossy top coat.
Editor's noteUse striping tape as a straight guide, then remove it while the top coat is still tacky.
Watch outAvoid thick lines - they turn the look into chunky nail art.
10. Pink Swirl with Yellow Creamy Lines
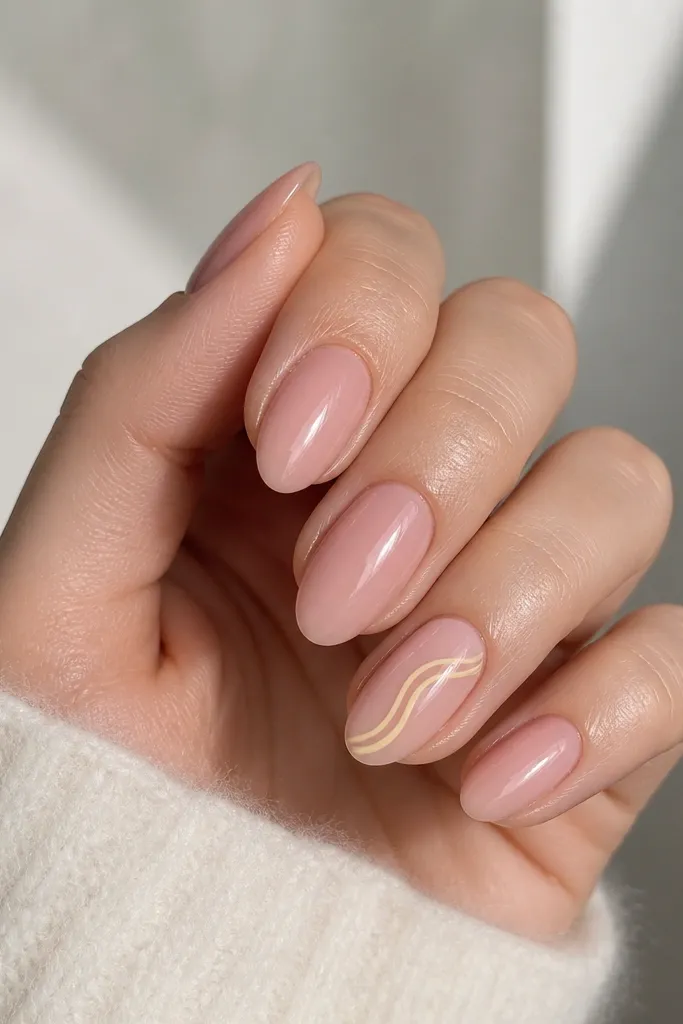
Swirls look hand-drawn and fun, but the pastel palette keeps it soft. Yellow lines over pink look like cream on frosting. I like adding a double-line effect because it creates depth without using extra colors.
Base coat in light pink. Use a thin liner brush to draw a single thick-ish yellow swirl, then trace a thinner line along one side of the first swirl. Cure after the design is dry and neat. Seal with glossy top coat so the swirl edges look smooth.
Editor's notePractice your swirl on a paper scrap first - the curve should start wide and end thin.
Watch outDon't overload the brush with gel - you get blobs and uneven thickness.
11. Yellow Star Accent on Pink Half-Negative Space
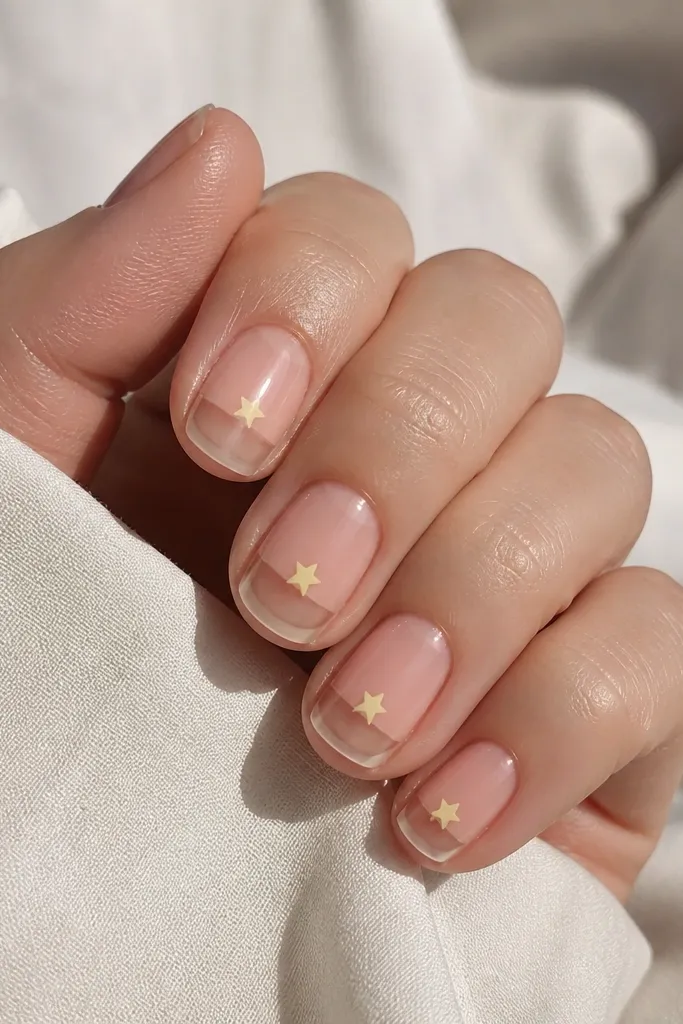
Negative space makes the manicure look modern, and it also helps your nails grow out without obvious gaps. The yellow star gives a focal point so the set doesn't look empty. The sheer pink keeps it airy instead of heavy.
Apply sheer pink and cure. Use striping tape to block off the lower half and keep it clear. Paint the star with light yellow near the boundary between pink and clear. Remove tape carefully and top coat over everything, avoiding flooding into the clear area.
Editor's noteUse a small star stamp if you hate freehand - then outline the stamp edges with liner gel.
Watch outAvoid covering the clear window with pink or top coat - it ruins the negative-space effect.
12. Pastel Gradient Tips with a Soft Yellow Edge
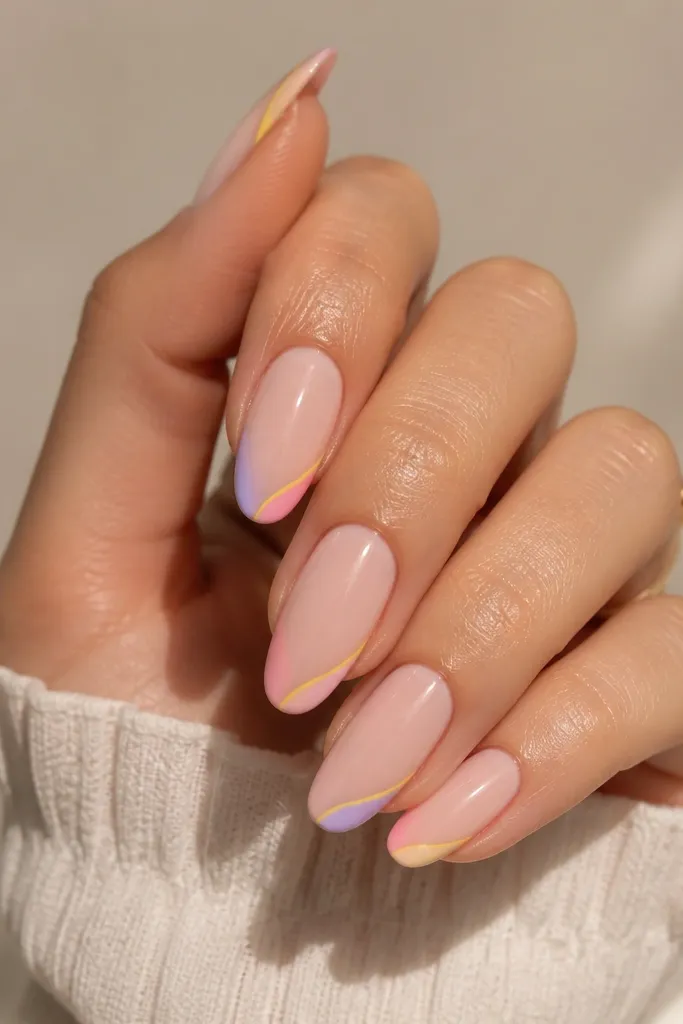
This design is for when you want the yellow to feel like a highlight, not a full color block. The blend looks smooth and natural, and the thin yellow edge makes it look intentional. It also works on short nails because the tip edge is where the eye goes.
Start with a light pink base. Sponge a lighter pink-to-yellow gradient at the tip, then add a thin final yellow line right at the edge. Keep the yellow line super thin so it stays pastel. Cure and finish with glossy top coat.
Editor's noteWipe your brush clean between nails so the gradient stays soft, not muddy.
Watch outDon't let the yellow creep too far down - it turns into a messy ombre.
13. Yellow and Pink Checker Micro-Pattern
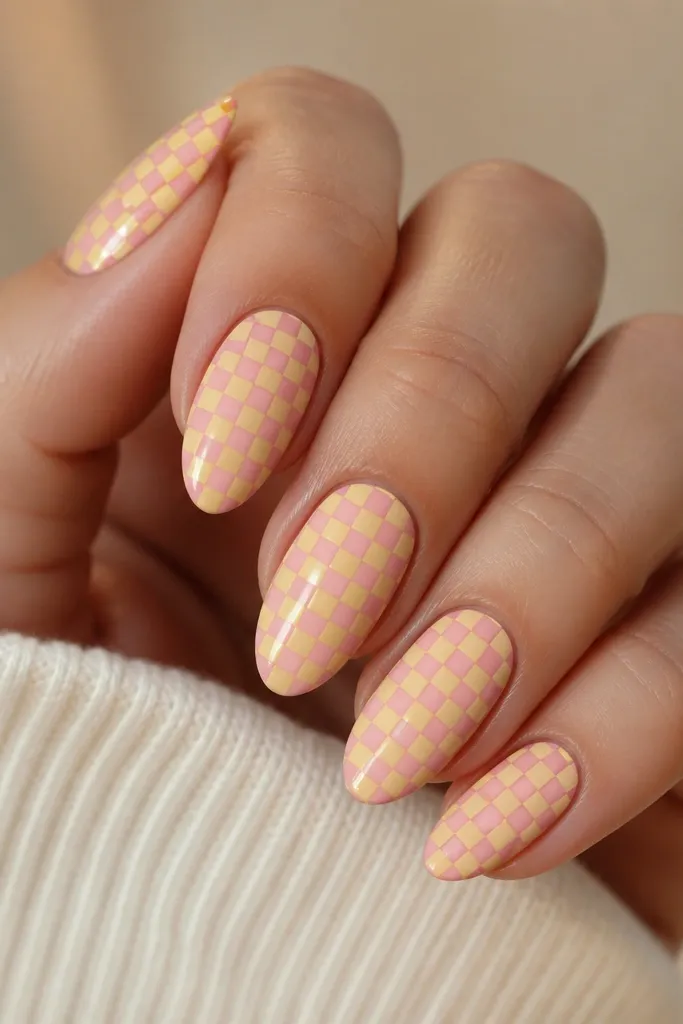
Micro checkers look playful but still tidy when the squares are small and the pattern is confined to the tip. The yellow squares add a retro vibe without making your whole manicure loud. Keeping it to the tip keeps your hands looking neat.
Base coat in light pink. For accent nails, use a thin striping brush to paint tiny yellow squares in a grid near the tip. Alternate with light pink squares (or leave the base showing) to create the checker look. Seal with a glossy top coat in two thin layers.
Editor's noteUse a dotter to place square corners - it helps keep the grid aligned.
Watch outAvoid big squares - they look like kids' nail art.
14. Creamy Yellow Cuticle Fade with Blush Pink Top
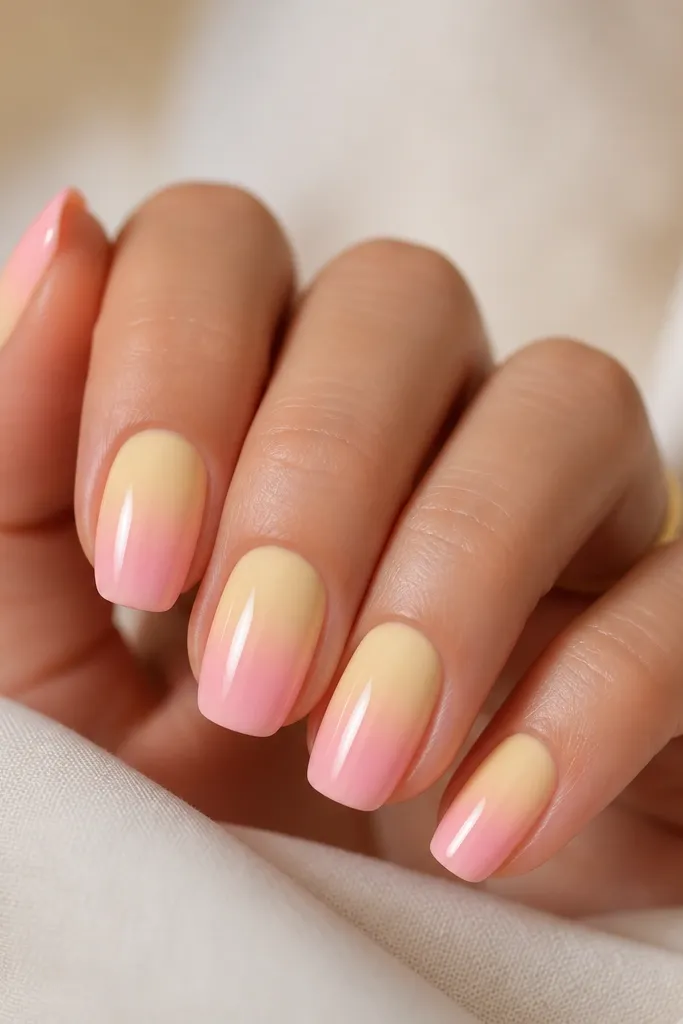
This is the "sunrise" version of the half-moon look. Yellow at the cuticle makes the nail bed look longer, and the blush pink top keeps it sweet. The smooth fade is what makes it look expensive rather than streaky.
Apply a sheer blush base, then sponge light yellow at the cuticle area. Blend upward and outward until it becomes a soft gradient. Clean the edges with a brush dipped in acetone wipe, then cure. Top coat glossy for that creamy finish.
Editor's noteUse a small makeup sponge and tap, don't swipe.
Watch outDon't overwork the gradient - it turns patchy.
15. Light Pink Aura Nails with Yellow Center Glow
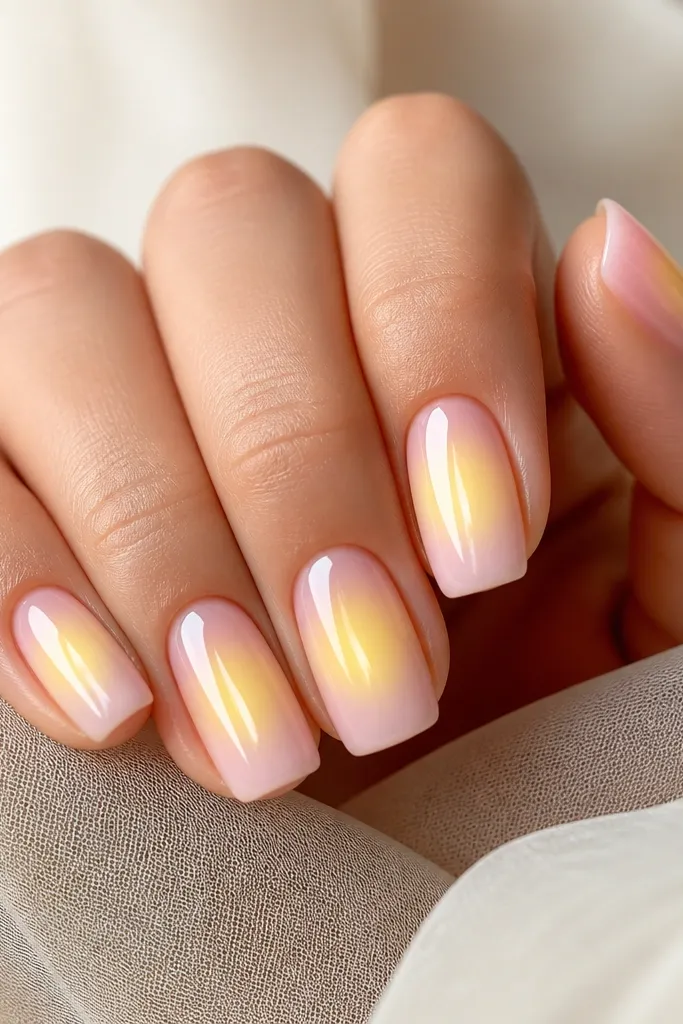
Aura nails are basically a glow effect, and adding yellow in the center makes it look like light shining through. The blush pink halo keeps everything soft and flattering. This looks amazing in sunlight because the center yellow catches the light.
Start with a sheer pink base. Sponge a slightly darker pink around the center to create the aura halo. Then add a small dot of buttery yellow in the center and blend just enough to soften edges. Seal with glossy top coat.
Editor's noteKeep the yellow dot small - the glow effect looks best when it's concentrated.
Watch outAvoid large yellow centers - they look like a blob.
16. Yellow Lined Bow on Pink Background
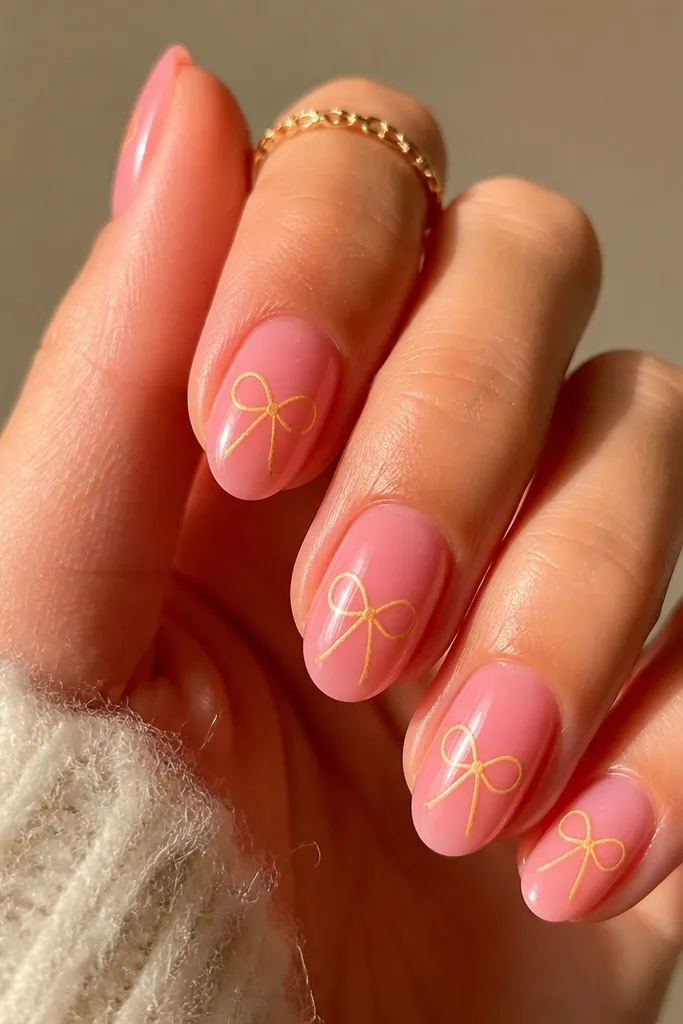
Bows read cute, and the line-only style keeps the design lightweight. Using yellow lines on a pink background makes the bow look crisp without needing heavy fill. It's one of those designs that looks like you tried hard even if you kept it simple.
Base coat in light pink. With a thin detail brush, draw two symmetrical bow loops using light yellow gel. Add a small knot in the center and outline the edges slightly thicker. Cure and apply glossy top coat to smooth the lines.
Editor's noteIf symmetry bugs you, draw one side, cure for 10 seconds, then mirror it.
Watch outDon't fill the bow with opaque yellow - it gets bulky on short nails.
17. Matte Yellow Tips on Glossy Pink
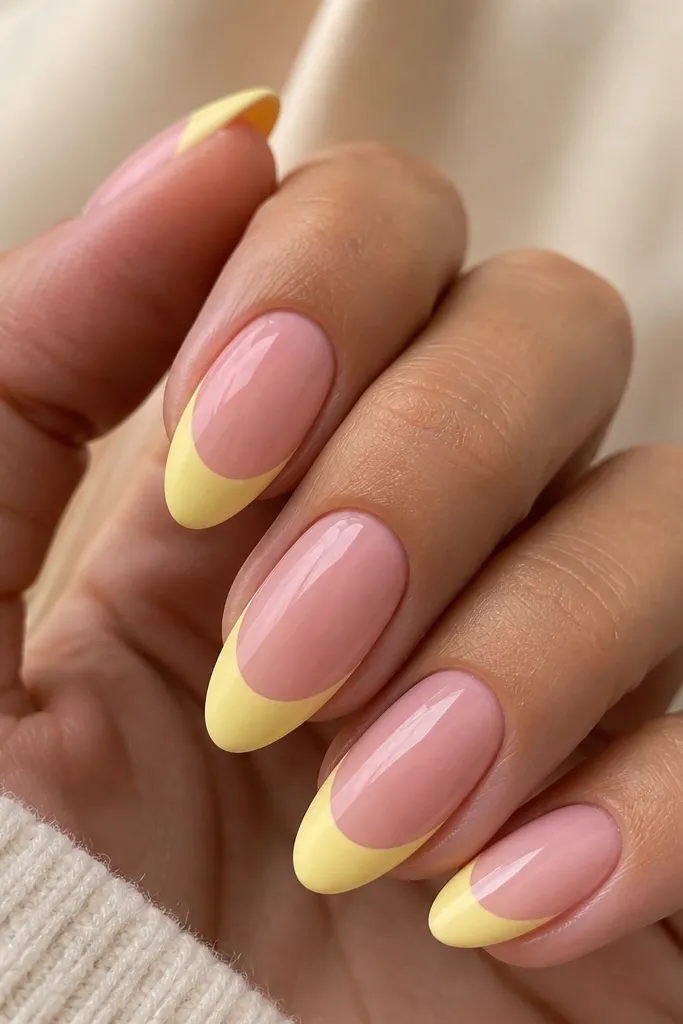
Two textures make the pastel combo feel more styled. Glossy pink reads clean and fresh, while matte yellow looks soft like powder. It's also a good way to make yellow feel calmer.
Paint nails glossy light pink and cure. For tips, apply light yellow and cure. Apply matte top coat only on the tips - keep the rest glossy by using tape or a careful brush to block off the base area.
Editor's noteLet the yellow cure fully before you hit it with matte top coat so it doesn't streak.
Watch outAvoid mixing matte and glossy over the same area - it looks uneven.
18. Pink Jelly Base with Yellow Outline Flowers
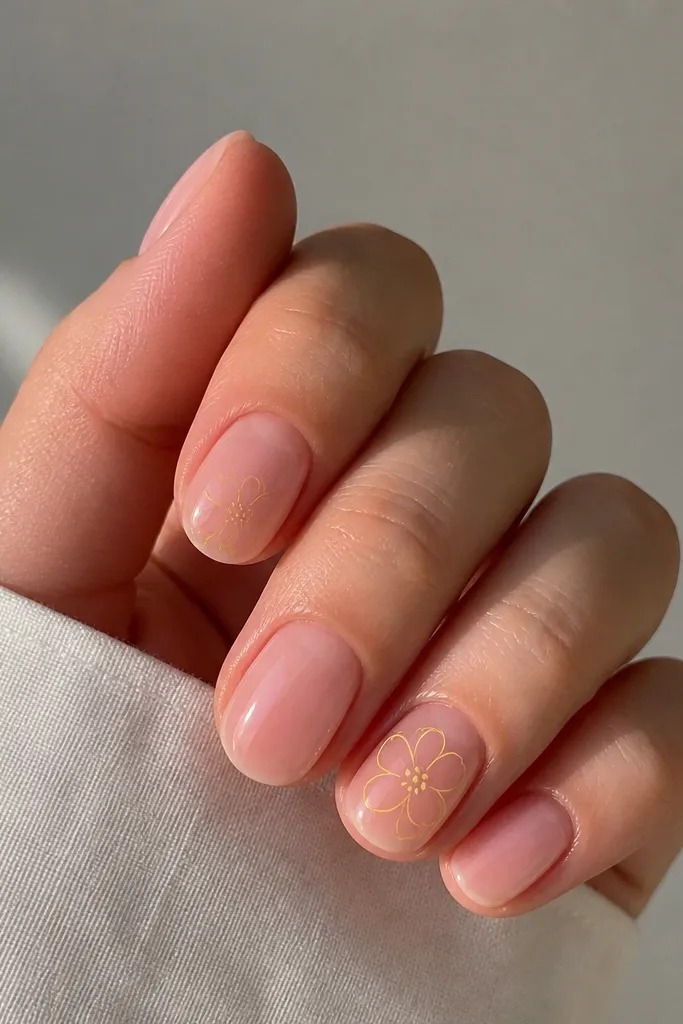
Outline flowers feel airy and wearable, especially on short nails. The jelly base gives depth, while the yellow outline keeps the design from looking flat. It's a clean way to wear light pink and yellow nails without heavy stamping.
Use jelly light pink as your base in two thin coats. Draw outline petals with a fine liner brush using light yellow gel, then add a tiny yellow center dot. Cure and seal with glossy top coat, making sure the liner lines are fully covered.
Editor's noteIf your lines look shaky, thicken them slightly at the ends to hide brush tremble.
Watch outDon't fill the petals completely - outline flowers need that negative space.
19. Yellow Foil Flakes on Pink Milk Nails
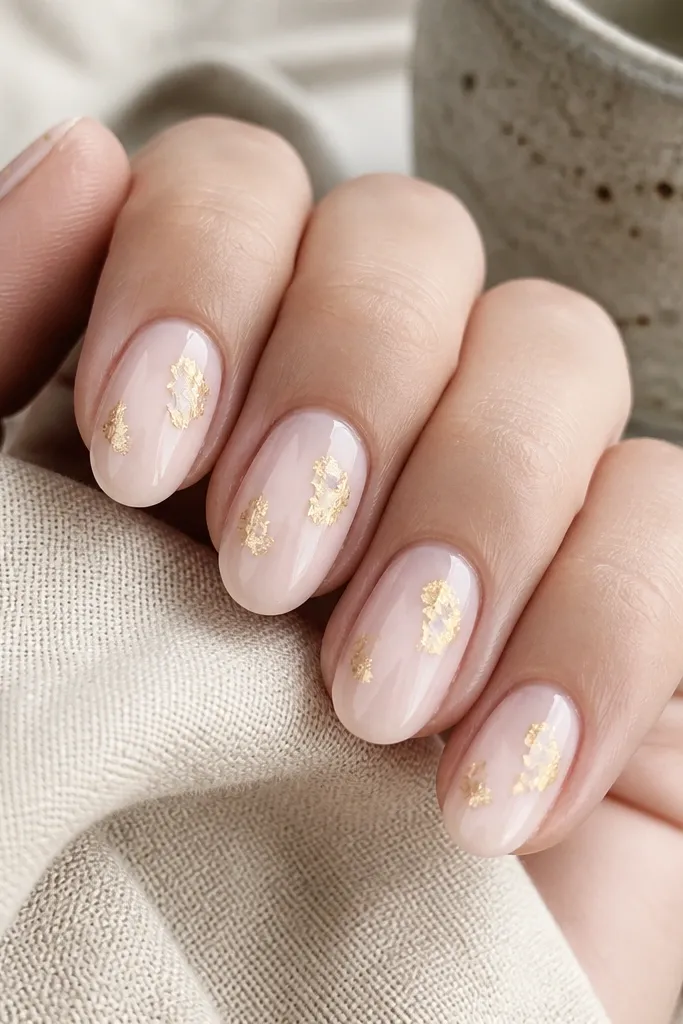
Foil flakes bring sparkle without turning yellow into glitter overload. Milky pink makes the flakes look soft and expensive because the foil reflects light against a creamy background. I like using pale yellow foil so it stays pastel.
Apply milky light pink base and cure. Dab foil adhesive (thin) in small areas, then press pale yellow foil flakes onto it. Use a soft brush to remove loose edges. Seal with two layers of top coat to lock everything down.
Editor's notePress foil with a silicone tool, not your fingers, so placement stays controlled.
Watch outAvoid one thick top coat - foil texture can lift if it's not sealed evenly.
20. Yellow Ombre Half-Skittle with Pink Side
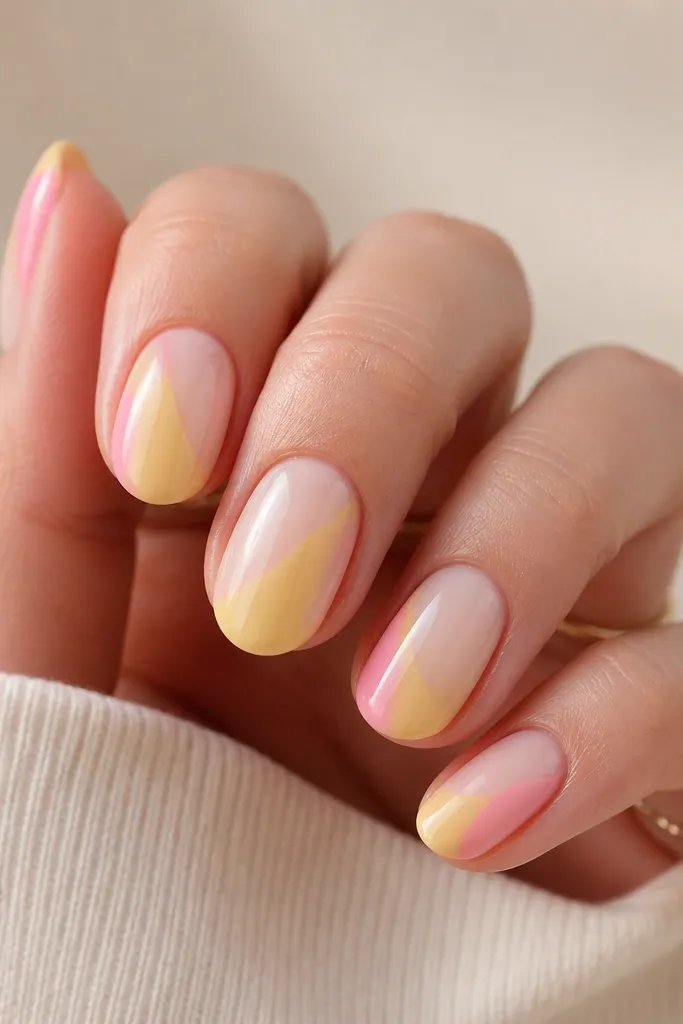
Diagonal splits look bold but still clean when the colors are pastel and the ombre is soft. The yellow side has movement, and the pink side keeps it grounded. This is one of my favorite "different but still wearable" light pink and yellow nails.
Base with light pink, then mask a diagonal line using striping tape. On the yellow side, sponge a pale yellow near the cuticle and deepen slightly at the tip. Remove tape after curing so you get a sharp diagonal edge. Top coat glossy.
Editor's noteChoose a diagonal angle that matches your nail shape - higher on almond, flatter on short squares.
Watch outDon't blend the diagonal edge too much - you lose the split design.
21. Lemon Corner French on Sheer Pink
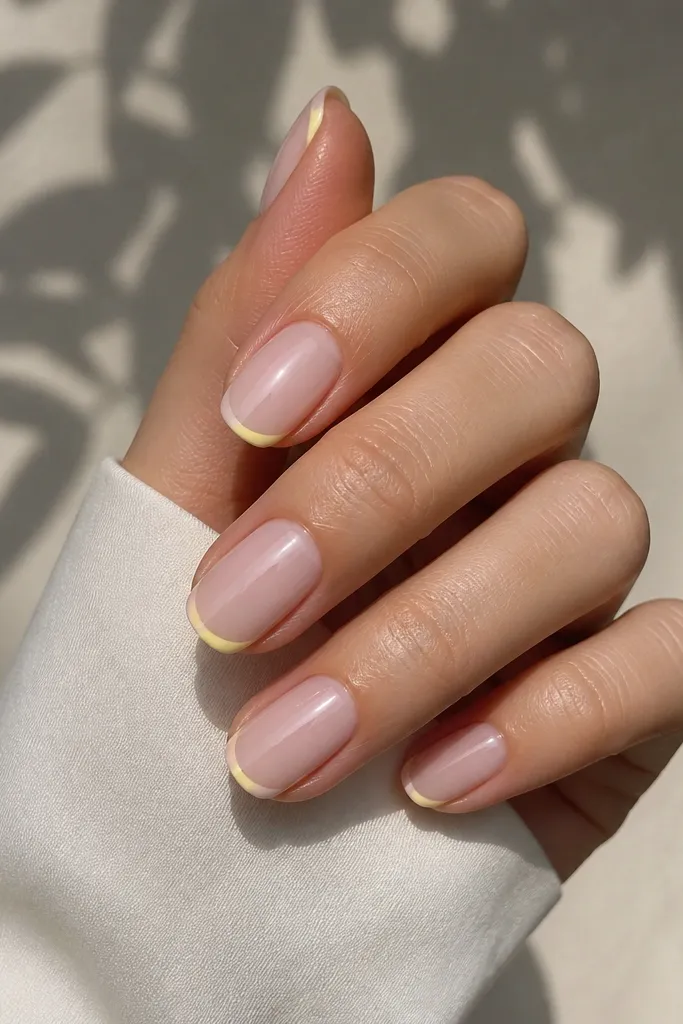
Corner French is subtle and flattering. Yellow only shows in one corner, so it brightens without taking over your whole nail. The sheer pink keeps the design light and makes the corner look crisp.
Apply sheer blush pink in two thin coats. Use striping tape to mask the tip corner at an angle. Paint light yellow only in that corner, cure, then remove tape. Seal with glossy top coat.
Editor's noteKeep the corner about 10-15% of the nail width so it looks intentional, not accidental.
Watch outAvoid painting the yellow too far toward the center - it stops looking like a corner.
22. Pink Base with Yellow Side Lines (Skinnier the Better)
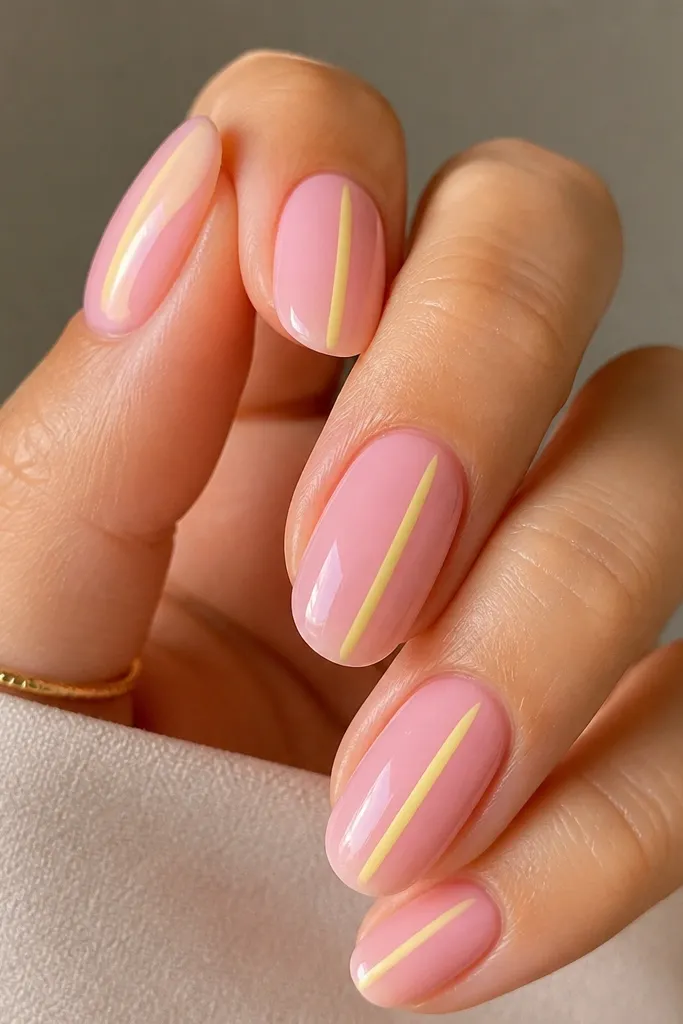
Side lines make nails look longer because the eye follows the vertical direction. Keeping the lines skinny makes the manicure look chic instead of busy. This is a good option when you want light pink and yellow nails but hate big art.
Use light pink base coat. With a striping brush, paint one thin yellow line on each side of the nail, leaving a small gap from the sidewall. Cure and top coat glossy. If you want more impact, add a tiny yellow dot at mid-nail on one accent finger.
Editor's noteUse the same brush pressure on every nail so line thickness stays consistent.
Watch outAvoid wobbly lines - repaint with a fresh brush instead of trying to smooth them.
23. Yellow Sunbeam Lines from Cuticle to Tip
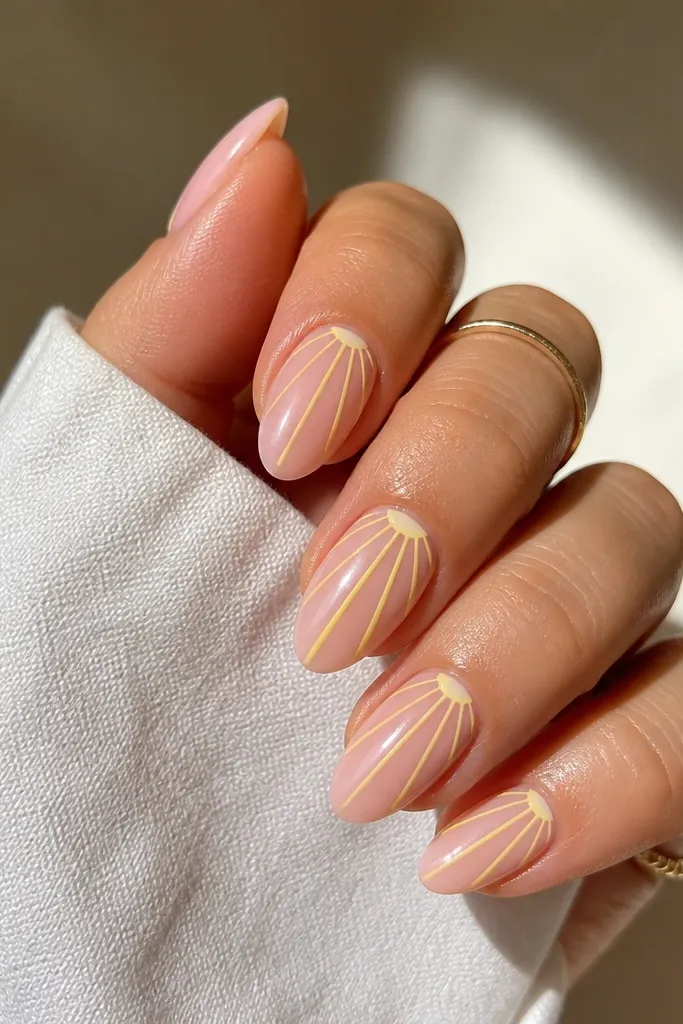
Sunbeams look cheerful and they're easy to customize to your nail length. The sheer pink base keeps it light, and the thin yellow beams create movement without heavy coverage. It's also forgiving because small asymmetry reads natural.
Paint sheer pink and cure. Take a thin liner brush and draw 3-4 yellow lines starting slightly off-center near the cuticle, then taper as they reach the tip. Cure and seal with glossy top coat, covering the lines without flooding near the cuticle.
Editor's noteMake the lines wider at the cuticle and thinner at the tip for a "light streak" look.
Watch outAvoid straight, perfectly even lines - slight variation looks more real and less sticker-like.
24. Pink and Yellow Marble Swirl (Soft Cloud Marble)
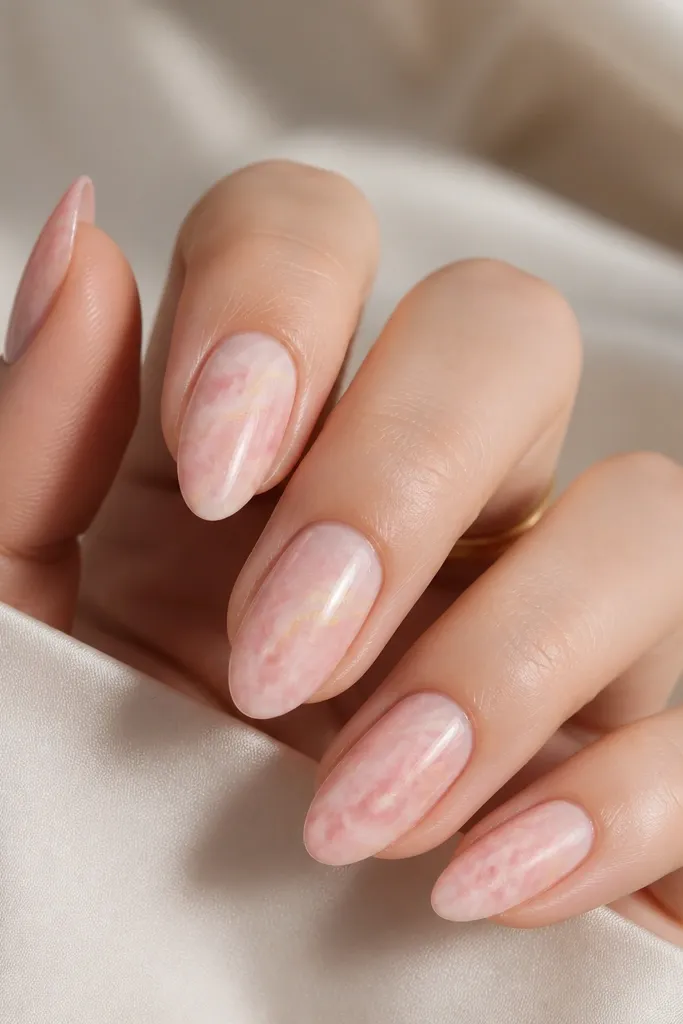
Marble works when the colors are airy and mixed with clear gel so it looks like smoke, not paint. Pink clouds make the yellow feel gentle. I like this version on short nails because the marble swirls hide small bumps and uneven growth.
Base coat in light pink. Add a thin layer of clear gel, then drag a small amount of light yellow through it with a toothpick to create wisps. Don't overmix; leave pink showing. Cure and top coat glossy for smoothness.
Editor's noteUse less yellow than you think - marble looks better when yellow is the accent, not the full color.
Watch outAvoid heavy mixing - it turns into muddy beige.
25. Yellow Beads on Pink Jelly for a 3D Accent
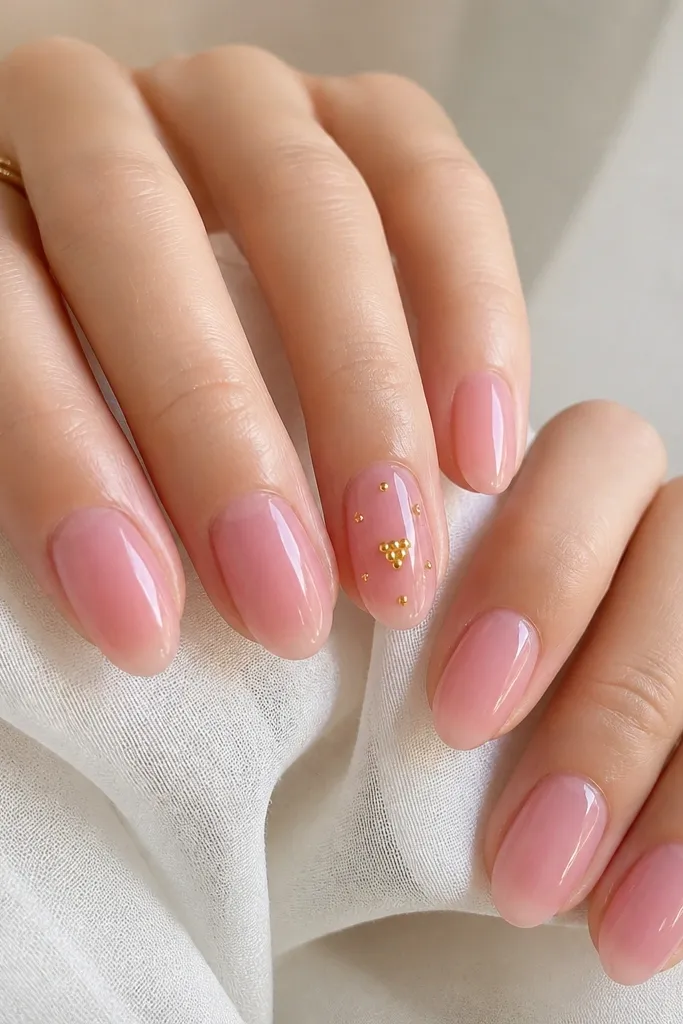
3D beads make the manicure feel special, and yellow beads look like tiny candy pearls against pink jelly. The key is using only a few so it stays wearable. This design gets attention without covering the whole nail in glitter.
Build a glossy jelly light pink base. Place two small yellow beads and one slightly larger bead in the center using gel adhesive. Cure, then cap over beads with clear gel so the top feels smooth. Finish with a final glossy top coat.
Editor's noteCap beads in two thin layers instead of one thick one so you don't get lumps.
Watch outAvoid placing beads too close to the free edge - they pop off faster.
26. Light Pink Nails with Yellow Half-Glitter Tips
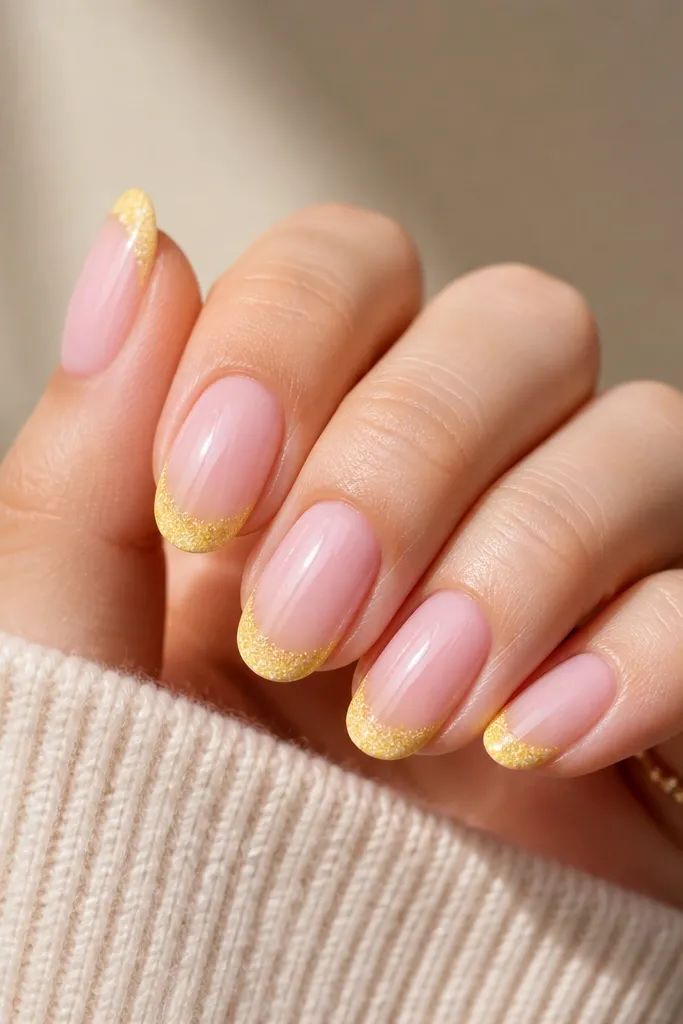
Glitter tips look fun, but a fade keeps them from looking harsh. The pink base stays clean, and the yellow glitter reads like sunshine dust. I like using fine glitter for pastel sets because chunky glitter looks heavy.
Apply light pink base and cure. Dab light yellow glitter from the middle toward the tip, then tap a bit more glitter at the very edge. Blend the border with a clear gel so it fades. Cure and seal with glossy top coat.
Editor's noteUse a sponge to blend the glitter edge so it stays soft.
Watch outAvoid using chunky glitter - it turns the manicure into a thick, gritty layer.
27. Yellow Ink Splatters on a Soft Pink Background
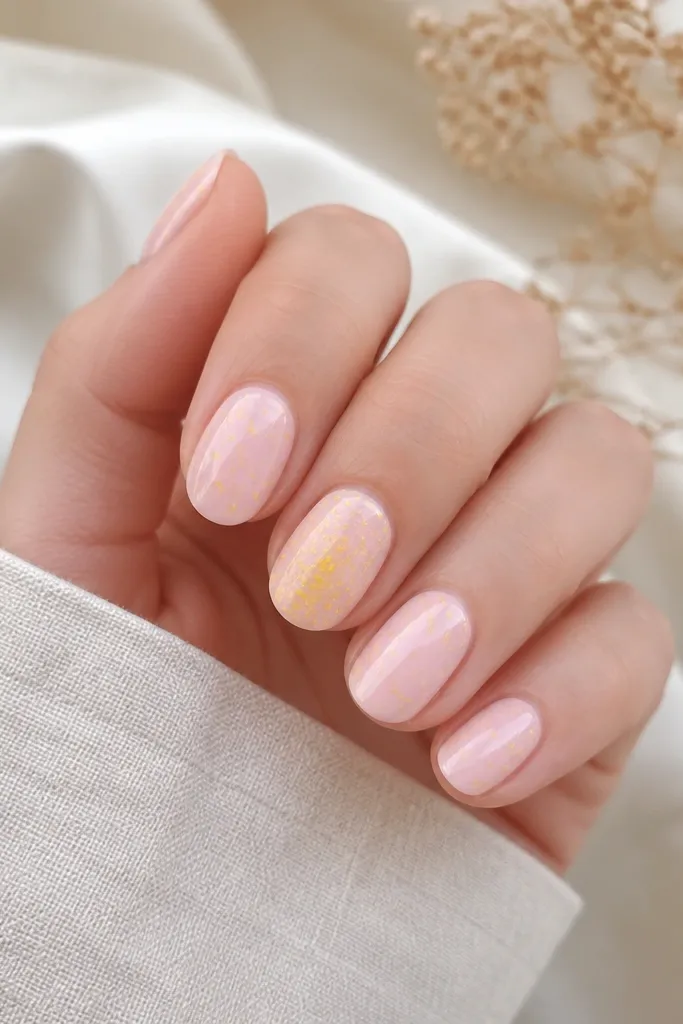
Splatters look artsy and cool, and they hide micro chips because the pattern disguises small imperfections. The pink background keeps the set soft so the yellow feels playful, not aggressive. I use thin, watery gel for splatters so they look like ink, not blobs.
Paint nails light pink and cure. Thin light yellow gel with a little clear gel until it's pourable. Flick with a detail brush to create small splatters, then cure. Seal with glossy top coat in two layers to lock everything down.
Editor's noteTest your flick on a paper first so you get the right size drops.
Watch outAvoid big splatters - they look messy and can flood the cuticle.
28. Yellow Bowtie Accent on Light Pink French
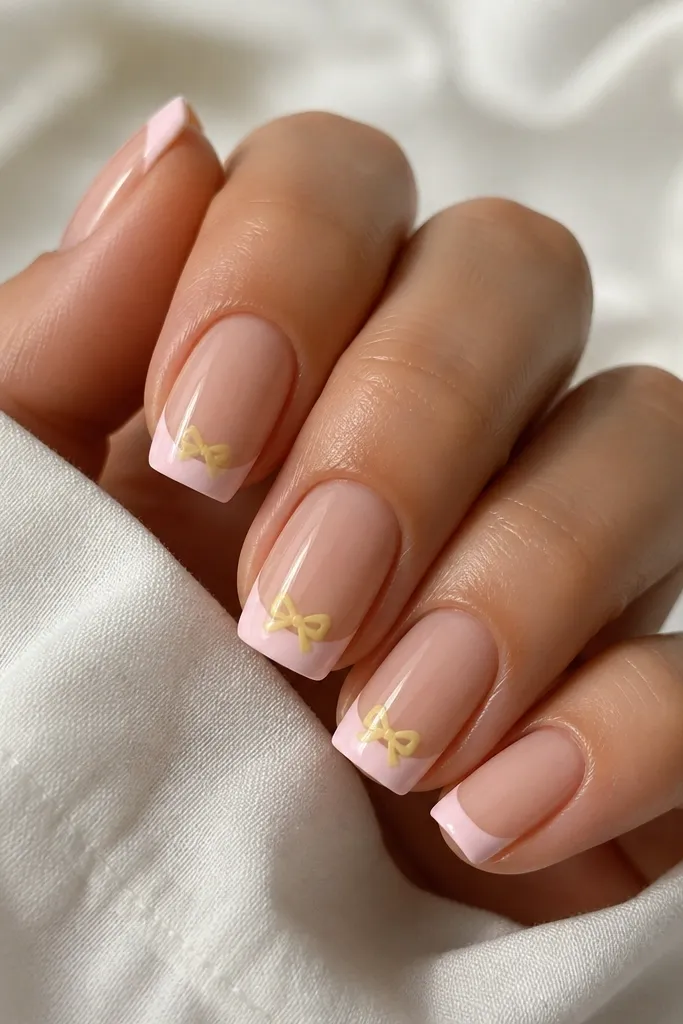
This design combines classic French with a cute focal point. Yellow bowties add structure so the set looks styled, not plain. The light pink French keeps everything cohesive with the target palette.
Paint a light pink base. Create a light pink French tip with a slightly different shade or opacity. On accent nails, draw a bowtie using two small triangles and a tiny center line in light yellow. Cure and top coat glossy.
Editor's noteIf the bowtie looks flat, add a thin yellow outline around it for definition.
Watch outAvoid covering the whole French tip with yellow - it stops reading as a bowtie accent.
29. Pastel Yellow Glow Dot Near Cuticle on Every Nail
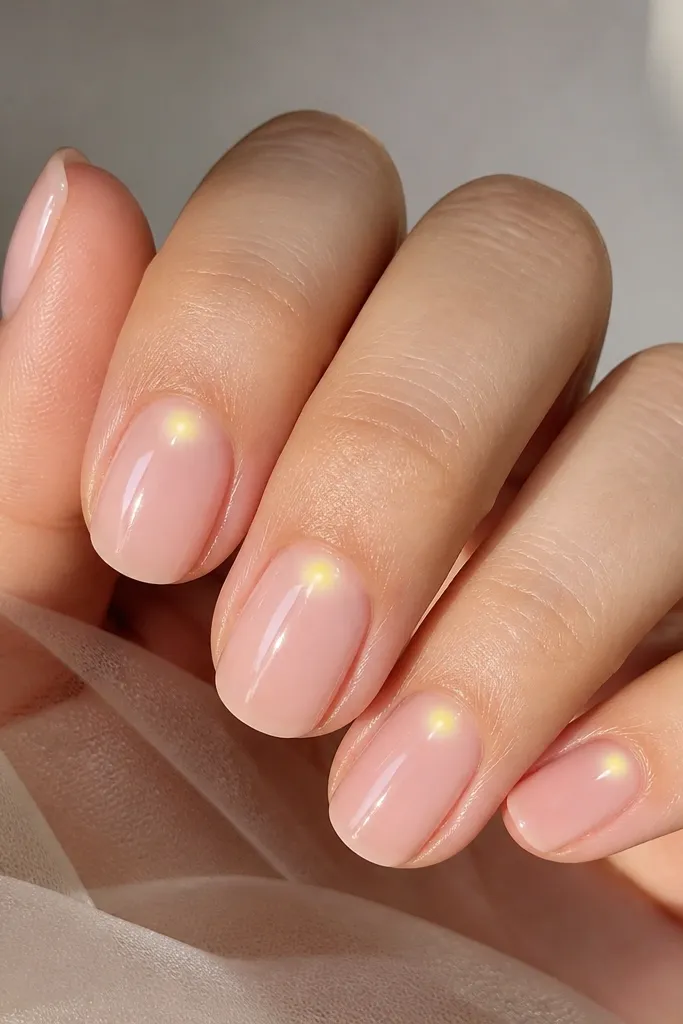
This is the simplest way to wear light pink and yellow nails without committing to full art. The dot near the cuticle makes the nail look fresh and "new," and the halo effect keeps it from looking like a sticker. I do this when I want something cute that still works for work.
Start with sheer light pink. Place a tiny buttery yellow dot near the cuticle and gently blend the edges with a clean sponge or a small brush loaded with clear gel. Cure and seal with glossy top coat.
Editor's noteKeep the dot size consistent - use the same dotting tool tip.
Watch outAvoid placing the dot too close to the edge of the nail - it can catch and chip.
30. Yellow and Pink Swirl Tips with Clear Negative Center
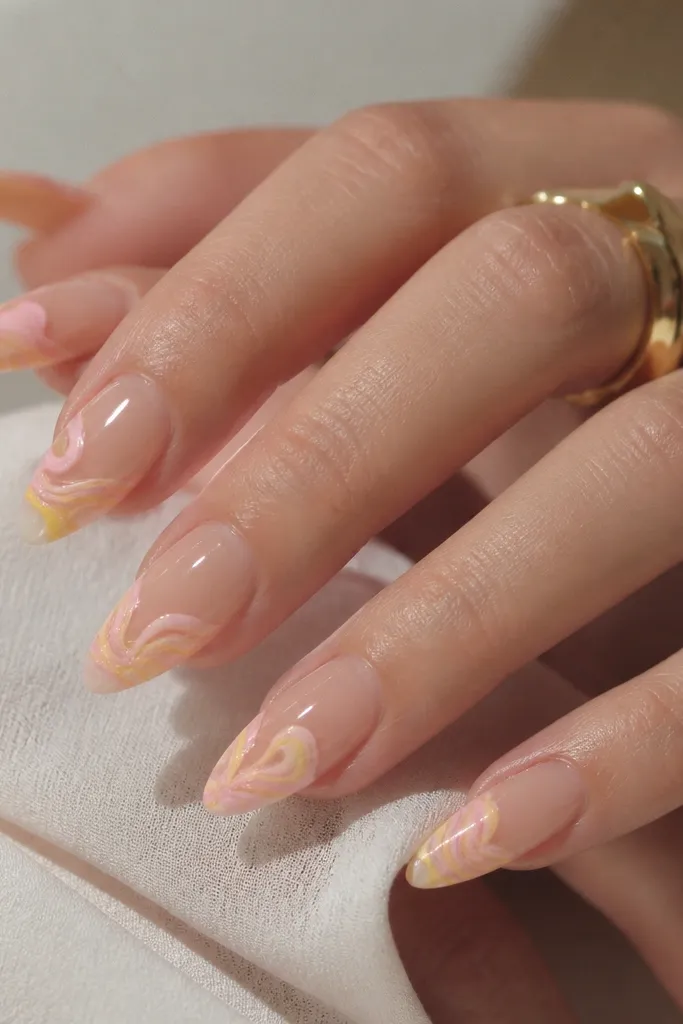
Negative center makes the design feel light and modern. Swirl tips keep the art confined to the part that gets noticed first when you move your hands. The pink and yellow swirls give movement without heavy color coverage.
Apply a sheer base only on the sides and leave a clear center using striping tape guides. Paint swirl lines in light pink and light yellow at the tip area. Remove tape after curing and seal carefully so the clear center stays clear. Glossy top coat makes the swirls look smooth.
Editor's noteUse tape guides that match your nail curve so the clear center stays even across nails.
Watch outAvoid flooding clear areas with gel - it turns the center cloudy.