1. Classic micro French with milky nude
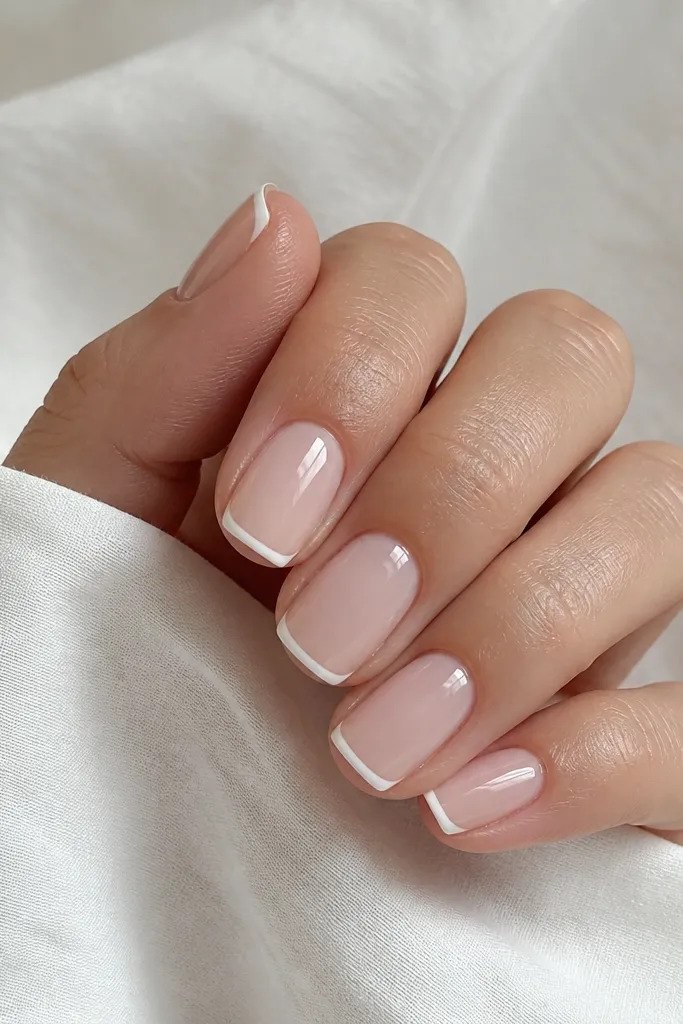
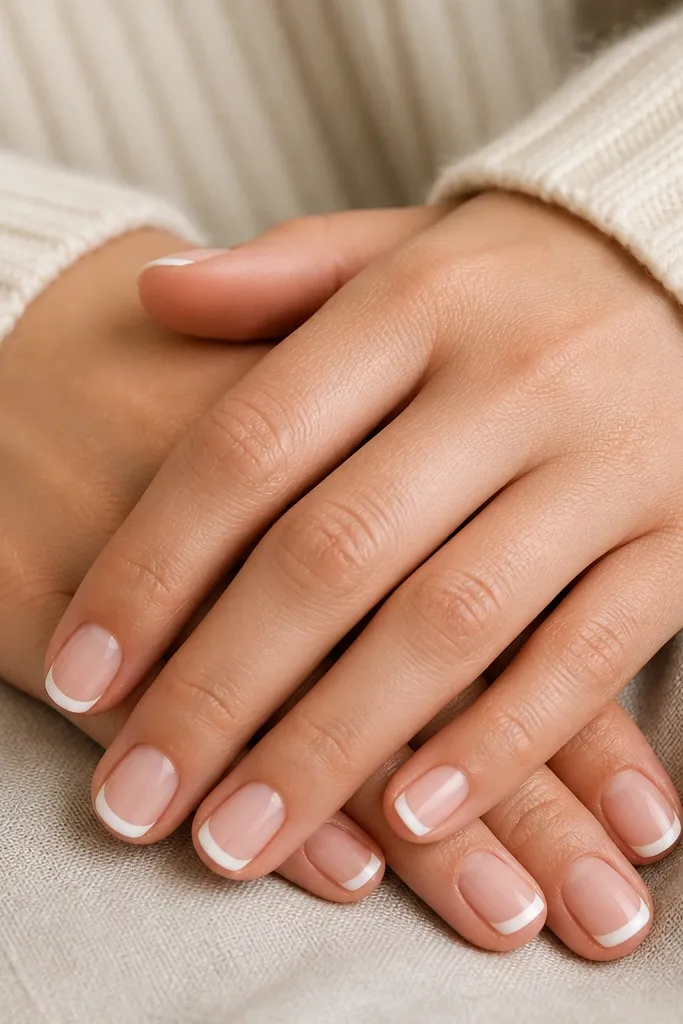
This is the cleanest beginner win because the design is basically two colors. The milky nude base makes the nail look smoother and hides tiny unevenness under the acrylic. The white tip is only a thin arc, so it stays proportional even at 2 mm short length. Glossy top coat makes the white look bright instead of chalky.
Shape first to a short square with softened corners. Place the smile line with a liner brush - aim for a thin U shape, not a thick C. Apply opaque white acrylic or white gel on just the tip area, then blend the edge lightly with a fine buffer.
Editor's noteUse a nail guide card or tape strip to keep the smile line consistent across fingers.
Watch outAvoid thick white tips; they make short nails look stubby.
2. Reverse French white cuticle line
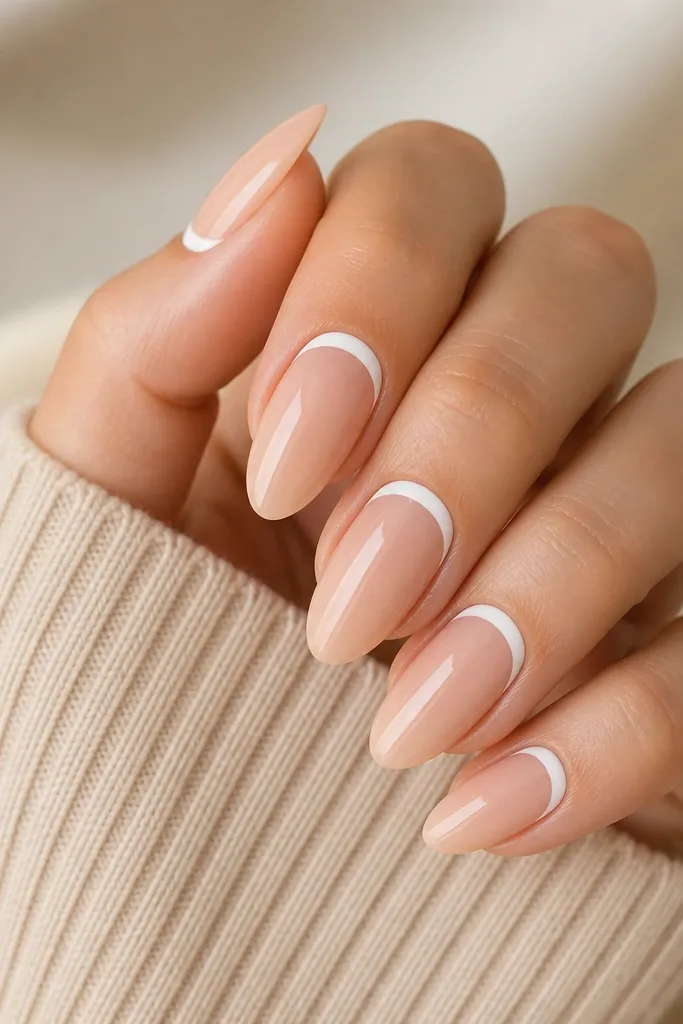
Reverse French shifts attention upward, which flatters short lengths. The white line at the cuticle makes the nail look longer without adding width. A round shape keeps it soft and wearable. The nude stays clear so you see a clean boundary between colors.
File to a short round shape, then buff the shine off the natural nail lightly. Paint a thin white band along the cuticle line with a liner brush, staying a hair's width away from skin. Seal with top coat and cap the edges.
Editor's noteIf your cuticle line wobbles, redo it with a clean-up brush dipped in acetone before curing.
Watch outDon't paint over the skin; it shrinks the line and causes lifting.
3. White tip with tiny dot corners
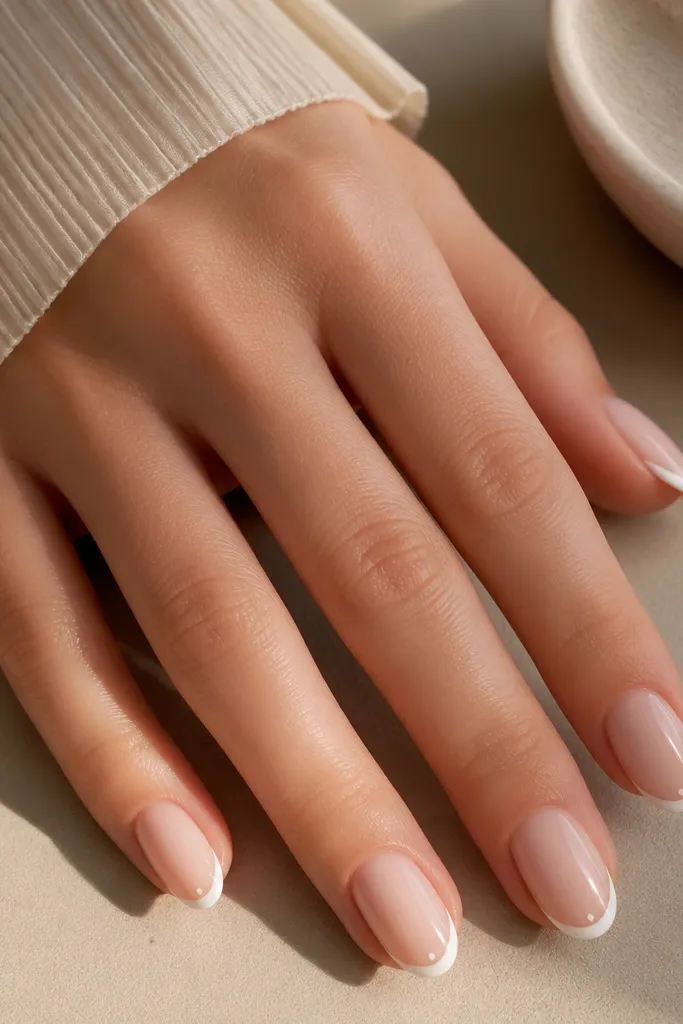
These corner dots add detail without taking over the nail. Because the dots are small and placed at the tip's side corners, the nail still reads as clean and short-friendly. The milky nude makes the dots look crisp instead of floating. Glossy finish keeps the dots reflective.
Start with a thin French tip. Use a dotting tool with opaque white gel/acrylic to place two micro dots near the outer corners of the tip only. Keep dots about the size of a pinhead - if they're bigger than the tip's curve, it looks heavy.
Editor's noteDo the dots last and use light pressure so you don't smear the white tip edge.
Watch outSkip big dots; they turn the design into a "sticker" look.
4. Half-moon white with nude sparkle base
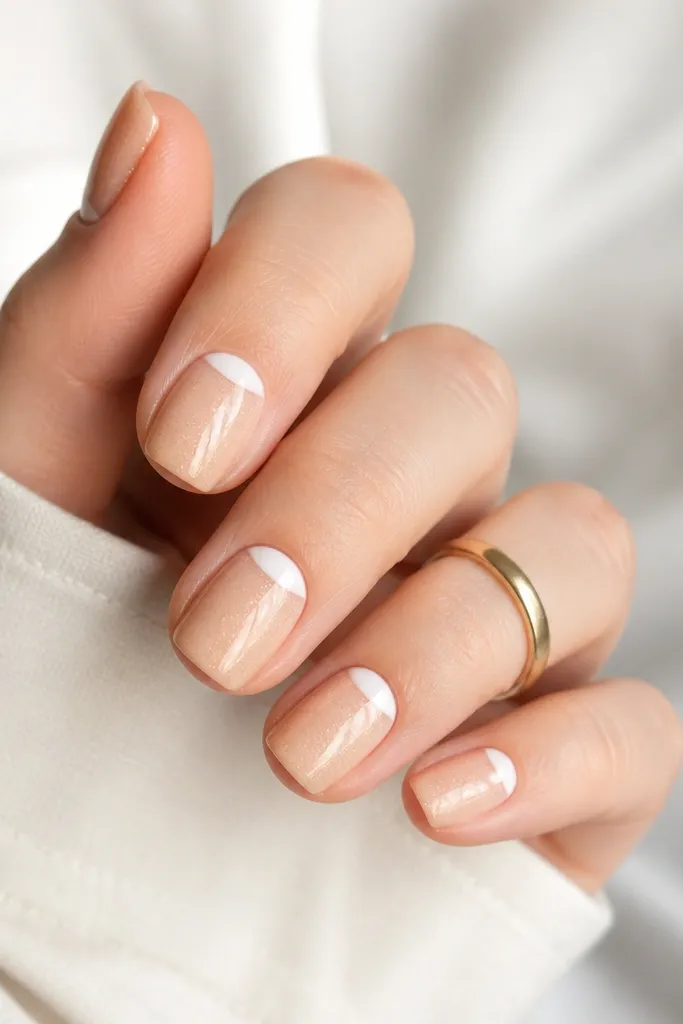
A white half-moon is flattering because it creates a bright focal point close to the nail bed. The fine gold shimmer in the nude base adds light movement under the white shape. This works when you want something more special than plain French but still easy. Glossy top coat makes the shimmer look expensive.
Apply a nude base with a sheer gold micro-glitter mix (not chunky). Paint the half-moon with opaque white gel, keeping the curve narrow. Clean the edges with a small brush, then cap with top coat.
Editor's noteUse a stencil for the half-moon if your cuticle curve is hard to match.
Watch outAvoid chunky glitter; it catches on everything and chips faster.
5. White tip + single thin silver line
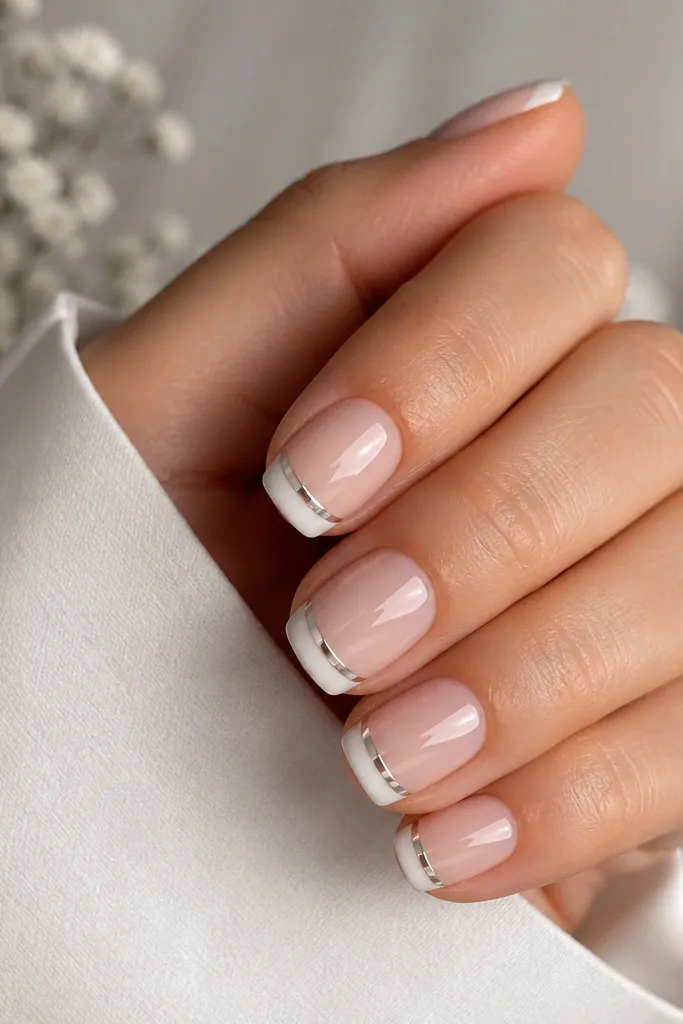
One silver line makes the set look designed without extra steps on every nail. The stripe sits where the eye naturally lands - across the white - so it looks intentional on short lengths. Use a real chrome powder or striping tape for a razor-thin look. This set is great for office days that still need a little shine.
Create a thin French tip first. Add a silver striping tape at the center of the tip, then remove excess and seal over it with top coat. If using chrome powder, apply a small amount and burnish on the stripe area only.
Editor's noteIf you use tape, press it down with a lint-free wipe wrapped around a flat stick.
Watch outDon't add multiple stripes; it crowds the tip on short nails.
6. White tip with micro black outline
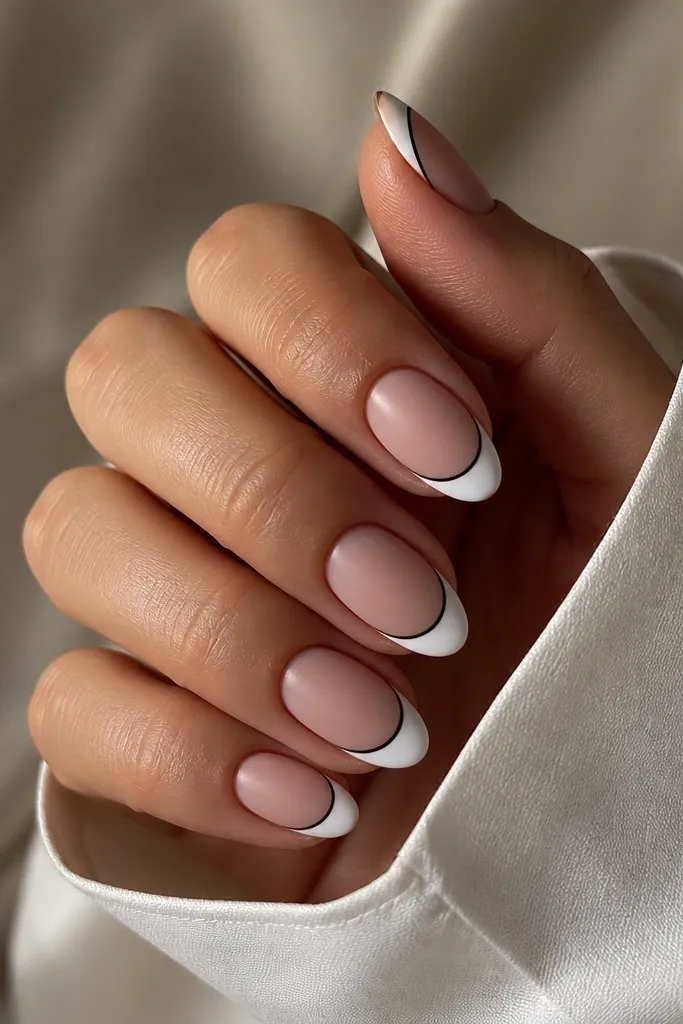
The black outline gives definition and makes the white look sharper. Matte top coat keeps it modern and hides tiny surface scratches from daily wear. This is the design I use when someone's nails always look "almost cute" but not crisp - the outline fixes it. Keep the black line thin like a pencil mark.
Paint the white tip first. Then use a liner brush with black gel to trace the smile line edge lightly on both sides. Cure, then apply matte top coat. If your line gets thick, wipe and redo before curing.
Editor's noteUse gel, not nail art paint, for steadier control with the liner brush.
Watch outAvoid thick outlines; they overpower the short nail.
7. Classic white tip with one tiny heart
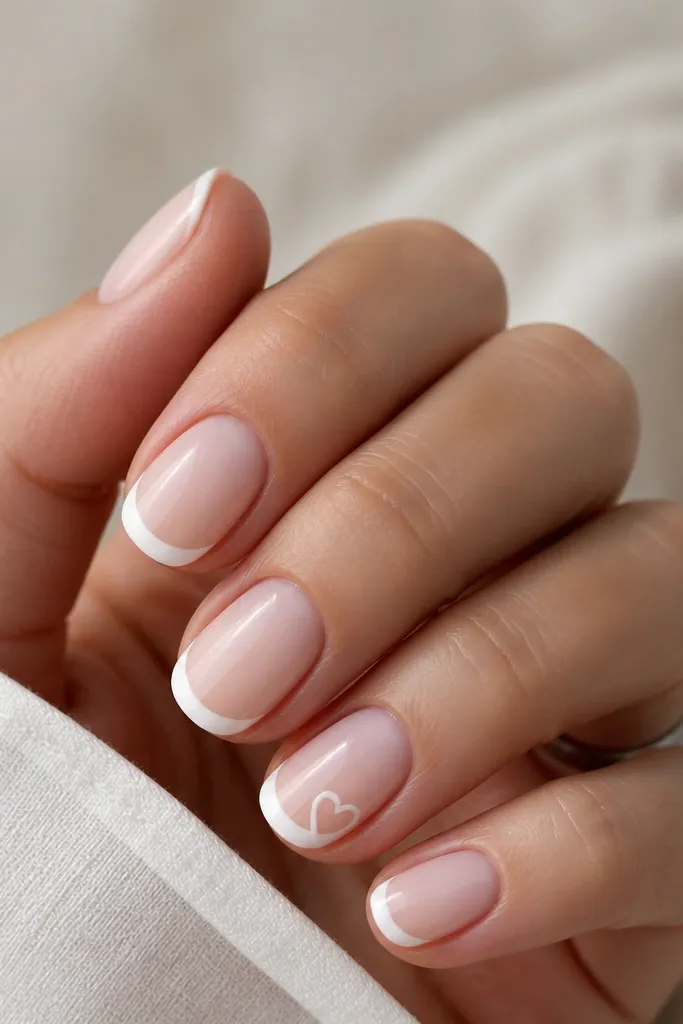
A single heart keeps the set sweet without turning it into a theme. The key is placement - off-center on one nail so it doesn't look like a sticker slapped on. Using an outline heart (not a filled one) keeps it delicate on a small surface. Glossy top coat makes the heart edges look clean.
Do the French tips on all nails. On one accent nail, draw a small heart using a fine liner brush with white gel or acrylic. Keep it about 2 to 3 mm wide, placed near one corner of the tip. Seal with top coat.
Editor's notePractice the heart on paper first - two dots for lobes, then a gentle V and curve back up.
Watch outDon't put hearts on every nail; it makes the set busy.
8. White tip gradient fade
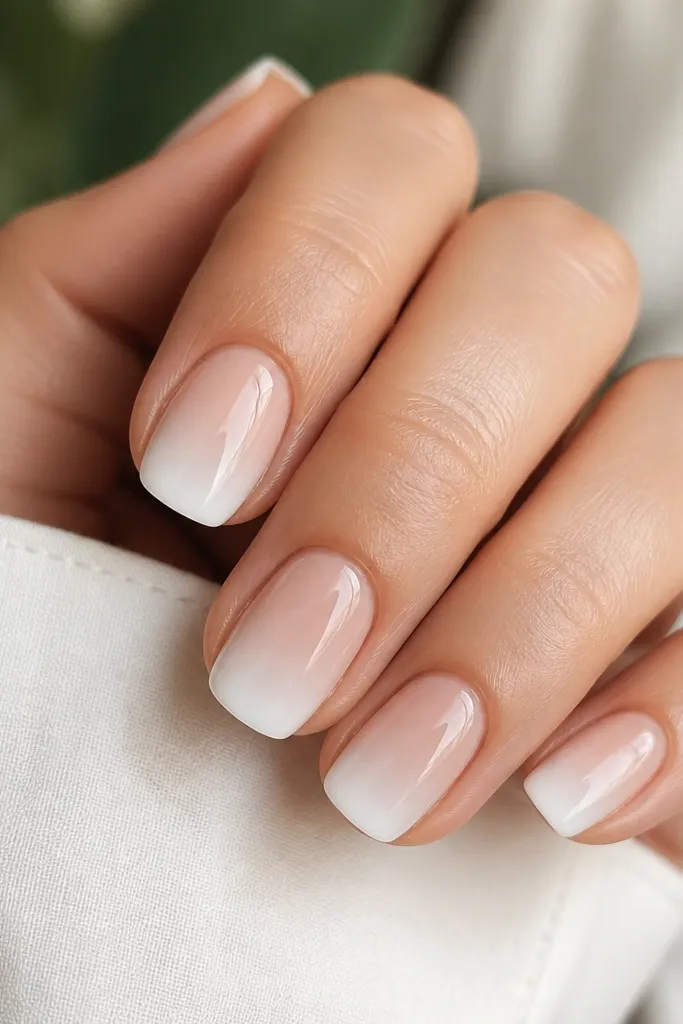
This looks softer than a hard French line and still reads "white nails." The gradient hides minor unevenness in your smile line because the transition is blended. I like this on short nails because it doesn't create a harsh horizontal cut. Glossy top coat makes the fade look smooth.
Apply nude base. Sponge a light white layer starting at the tip edge and blend inward using a makeup sponge or stiff nail art sponge. Build opacity only at the very edge. Cap with top coat and lightly file the surface if needed after curing.
Editor's noteUse a small amount of product on the sponge - too much makes the gradient chalky.
Watch outSkip harsh striping - straight lines across the nail look messy on fades.
9. White tip with nude micro-gloss dots
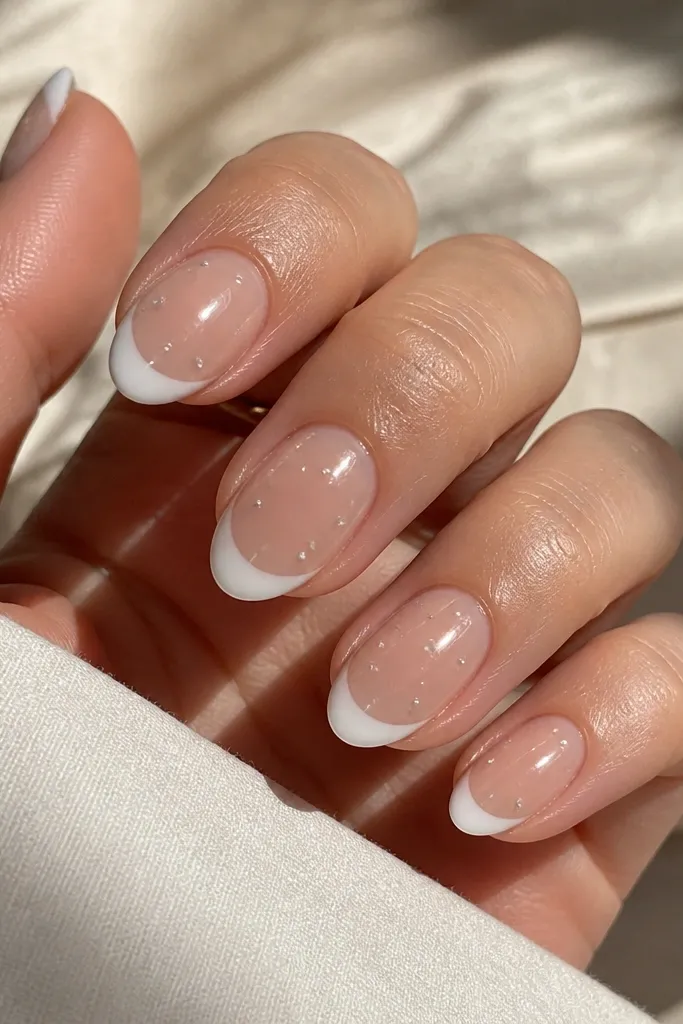
This one is sneaky and cute: the dots are nude, but because they sit under the white edge, they create a "shadow dot" effect. It adds texture without adding color. The glossy dots catch light and make the white tip look more dimensional. It's a great option if you want something different but still minimal.
Do a crisp thin white tip. On the accent nail, place tiny nude dots (nude gel slightly darker than base) in a straight line near the bottom of the white area. Cure and seal with glossy top coat.
Editor's noteDot with the smallest end of your dotting tool and keep spacing even.
Watch outDon't use metallic nude dots; they shift the look from soft to flashy.
10. Tiny white marble veins
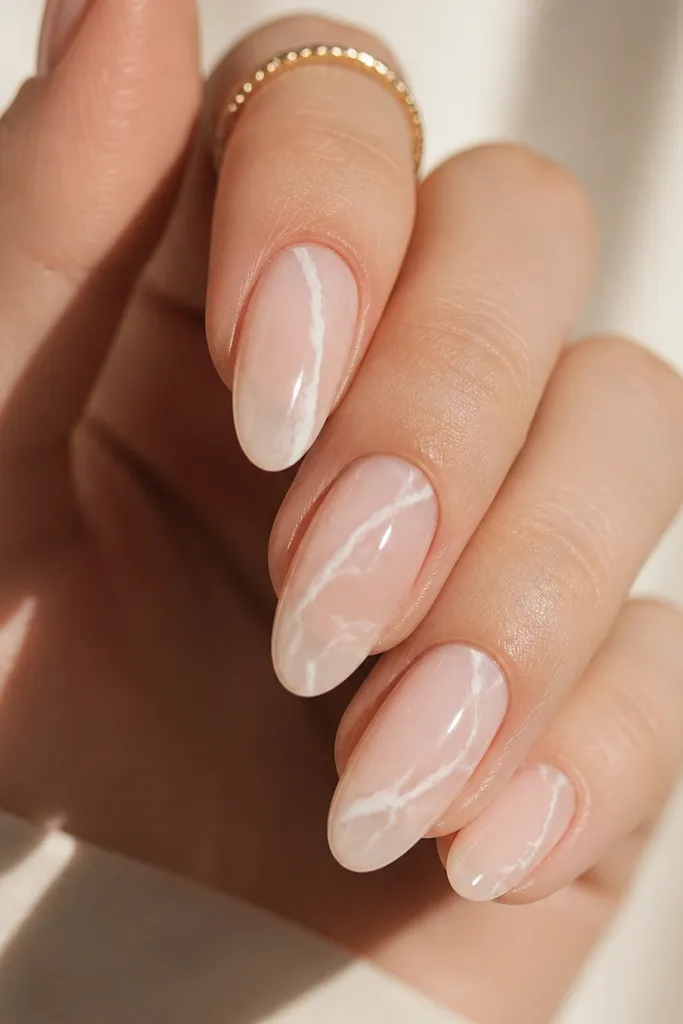
Marble veins look classy even at short length because the pattern is thin. Use a sheer nude base so the veins have contrast without looking heavy. The white veins should be wispy, not chunky - that's what keeps it believable. Glossy top coat makes the veins look like gel under glass.
Apply sheer nude acrylic. With a liner brush, pull thin white lines through the nail, then add small connecting strokes like cracked porcelain. Focus the densest area near the center and let it fade toward the tip. Seal with glossy top coat.
Editor's noteWipe excess paint from your brush between lines so the veins don't thicken.
Watch outAvoid big marble swirls; they swallow the short nail.
11. White tip with diagonal corner slash
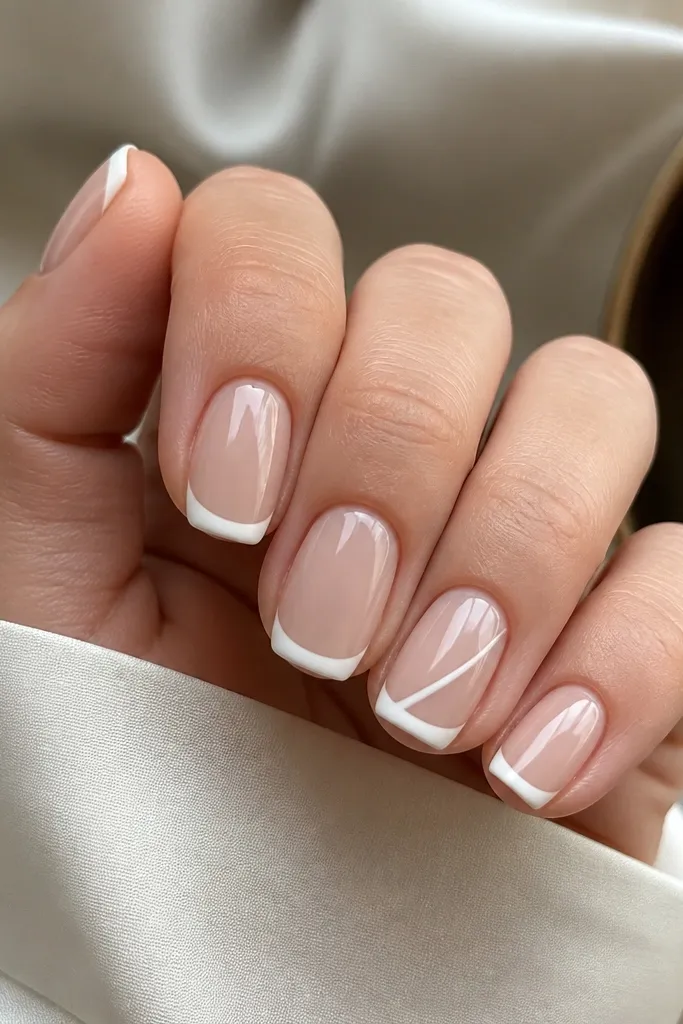
A diagonal slash adds edge and makes the set look styled in two seconds. The slash is white on a white tip, so the effect comes from shape - it creates a cut-out feeling. Use it on one or two nails only so the rest stay clean. Glossy makes the angles crisp.
Create your standard white tip. On an accent nail, add a diagonal band at the outer corner that goes toward the center, then slightly thin the band at the end so it looks tapered. Clean the edges and top coat.
Editor's noteUse striping tape to get the diagonal angle straight, then paint over it.
Watch outDon't add diagonal slashes on every nail; it stops looking intentional.
12. White tip with micro rhinestone row
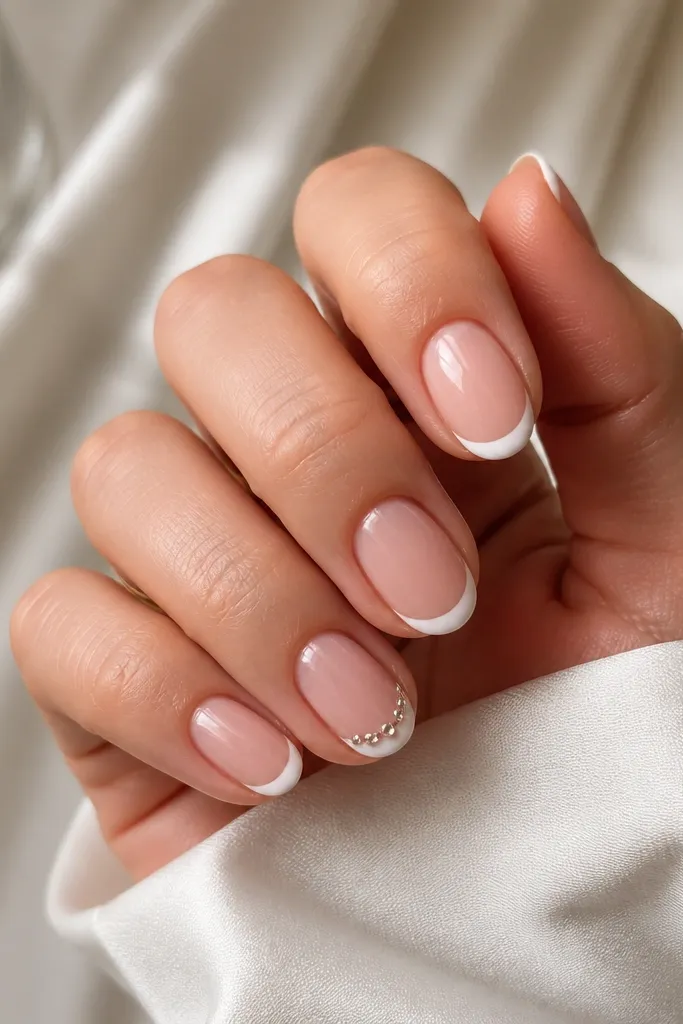
A micro rhinestone row looks like jewelry, but it stays short-friendly when the stones are tiny and few. The row sits right at the smile line so it doesn't crowd the nail bed. Clear stones on white tips look clean instead of bulky. Glossy top coat keeps the stones shiny and helps lock them down.
Do thin French tips. On one nail, place three micro rhinestones along the curve using rhinestone glue. Press gently so each stone sits flat. Seal with top coat using a careful brush so you don't flood around the stones.
Editor's notePlace the center stone first, then match the two outer stones to it.
Watch outAvoid larger stones; they rock on short nails and catch on hair.
13. White tip with tiny pearl cluster
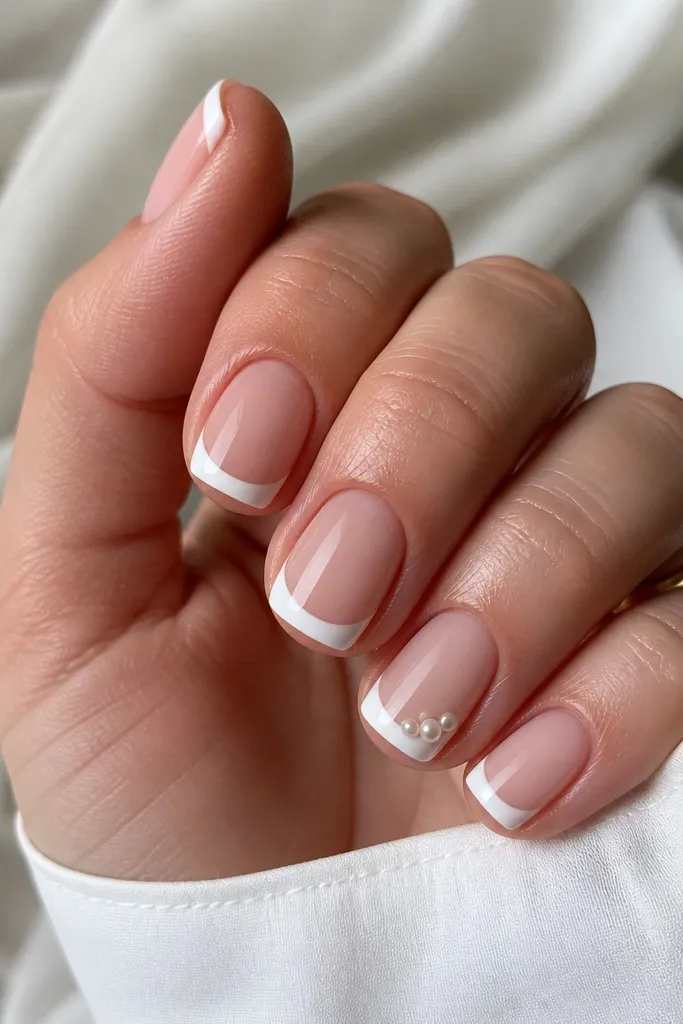
Pearls look soft against bright white, especially when the pearls are tiny and clustered in one spot. This reads romantic without covering the whole nail. Keep the pearl cluster small so the nail still looks neat and short. Glossy top coat over pearls makes them look like they're set in a smooth dome.
Do your base and French tips. Add two flat-back pearls with nail glue near the inner corner of the tip, angled slightly toward the cuticle. Seal carefully with top coat and cap the area around pearls.
Editor's noteUse tweezers with a rubber tip so you don't scratch the pearl surface.
Watch outSkip pearl clusters bigger than a pea; they look heavy on short nails.
14. White tip with nude negative space U
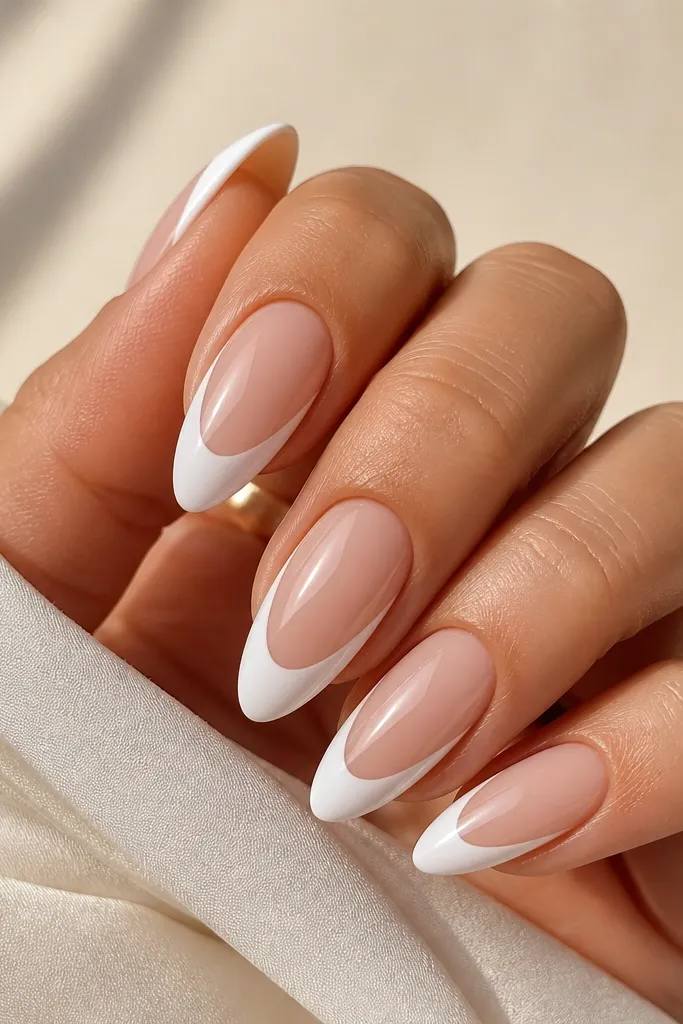
Negative space makes short nails look longer because your eye reads a gap. The nude U cut-out in the middle of the white tip keeps it playful but still clean. It also hides small brush mistakes because the gap is intentional. Glossy top coat makes the cut-out edges look smooth.
Paint the white tip first, then use a small brush dipped in nude gel or cleanup gel to carve the U shape while the white is still workable. Keep the U narrow, about 1 mm wide at the bottom. Seal with top coat and make sure the edges are fully capped.
Editor's noteDraw the U with a liner brush, then refine with a tiny cleanup brush.
Watch outDon't make the U too wide; it turns into a big hole on short nails.
15. White tip with thin blush line
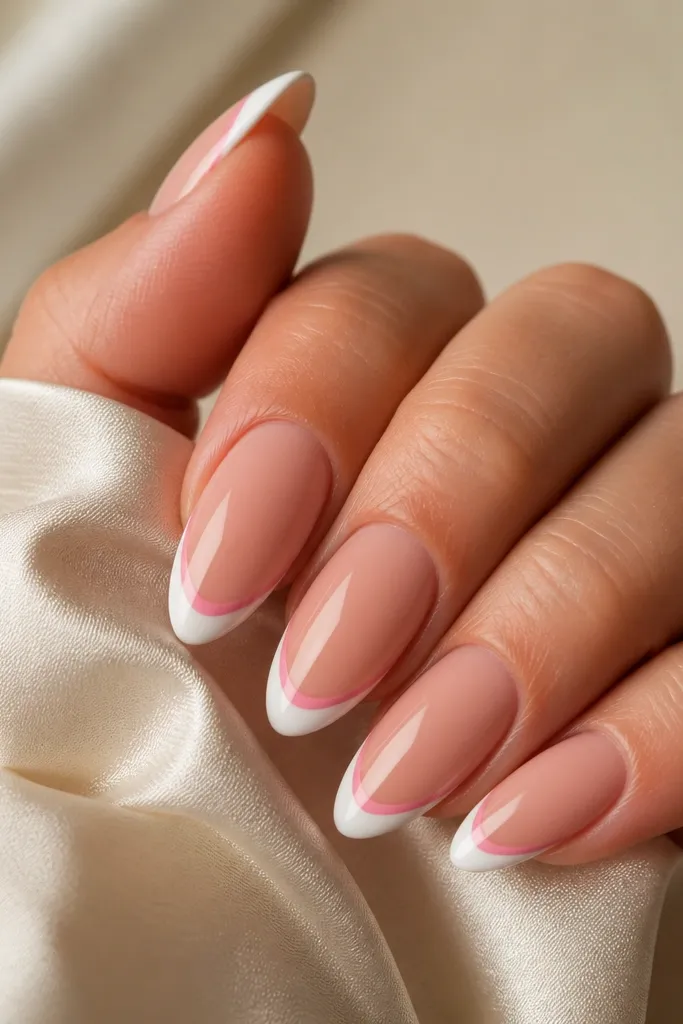
That blush line adds color depth while keeping the set neutral. It separates the white from the nude so the French tip looks sharper. This works great if your nude base is very sheer or slightly pink - the blush line reinforces the tone. Glossy finish makes the blush look smooth and creamy.
Apply nude base. Paint a very thin blush line right where the smile line would be, then fill the tip with opaque white. Keep the blush line thinner than the white arc. Top coat and cap the free edge.
Editor's noteUse a gel polish blush that matches your natural undertone for a more natural look.
Watch outAvoid thick blush bands; they make short nails look like two big blocks.
16. White tip with tiny gold leaf flecks
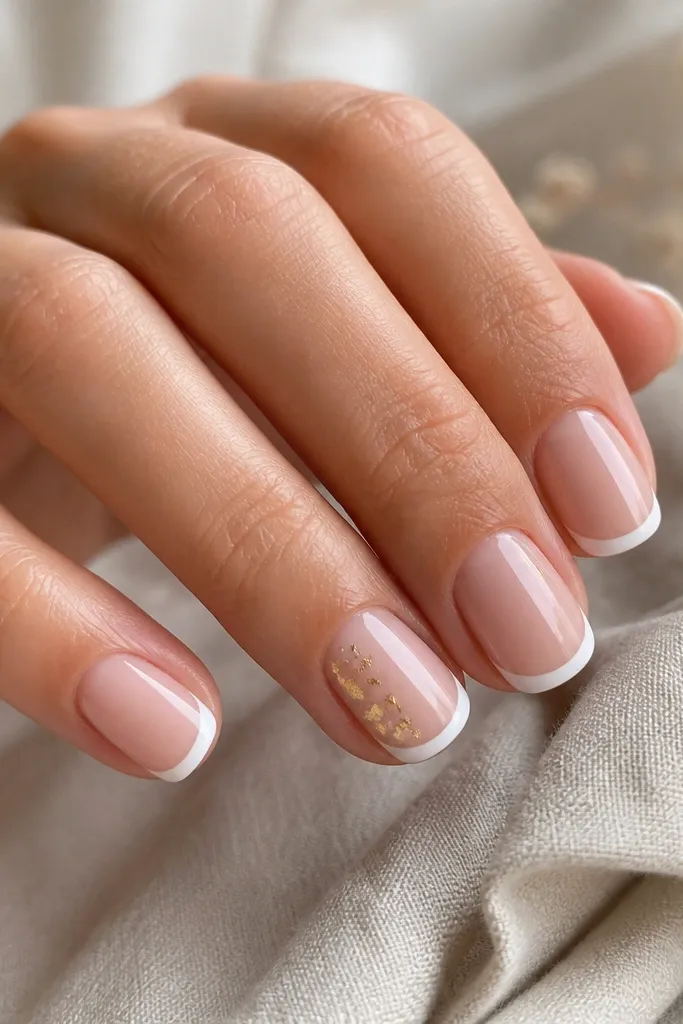
Gold leaf gives that "soft glam" sparkle without adding a lot of bulk. On white tips, flecks look like light reflections instead of decoration. Keep it to just a few pieces near the center of the tip so the nail stays clean. Glossy top coat makes the leaf look sealed and smooth.
Do thin white tips first. Press tiny pieces of gold leaf onto the wet gel or tacky layer on the tip center, then seal with top coat. If your gold leaf lifts, brush on a thin layer of clear gel before sealing again.
Editor's noteUse gold leaf on only 1-2 nails at first. It's easier to keep it classy.
Watch outDon't cover the whole tip; it looks textured and can catch.
17. White tip with micro checker corner
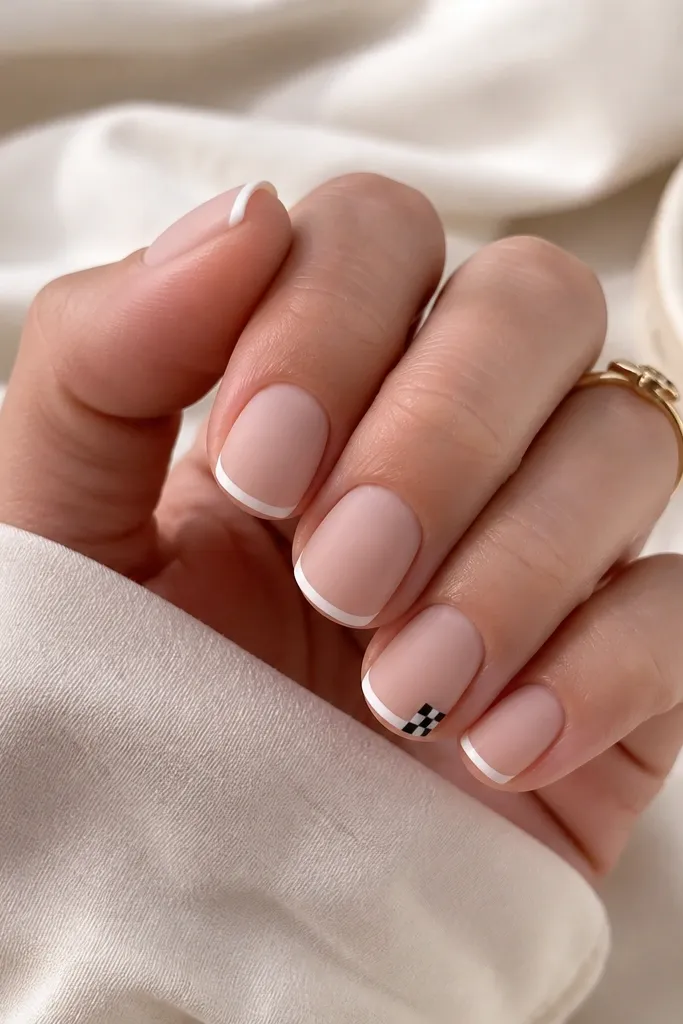
A micro checker corner adds pattern without crowding the nail. Matte top coat makes the pattern look graphic and less shiny, which helps it look intentional on short nails. Use black and white so the design stays tight with the theme. The corner placement keeps it from covering too much surface.
Paint your white tip. On the accent nail, draw a 2x2 or 2x3 grid of tiny squares at the outer tip corner using a liner brush. Use opaque black gel for the dark squares. Seal with matte top coat.
Editor's noteLet each color cure before adding the next square so the lines stay crisp.
Watch outSkip large checkers; they look cartoonish on short nails.
18. White tip with silver half-arc chrome
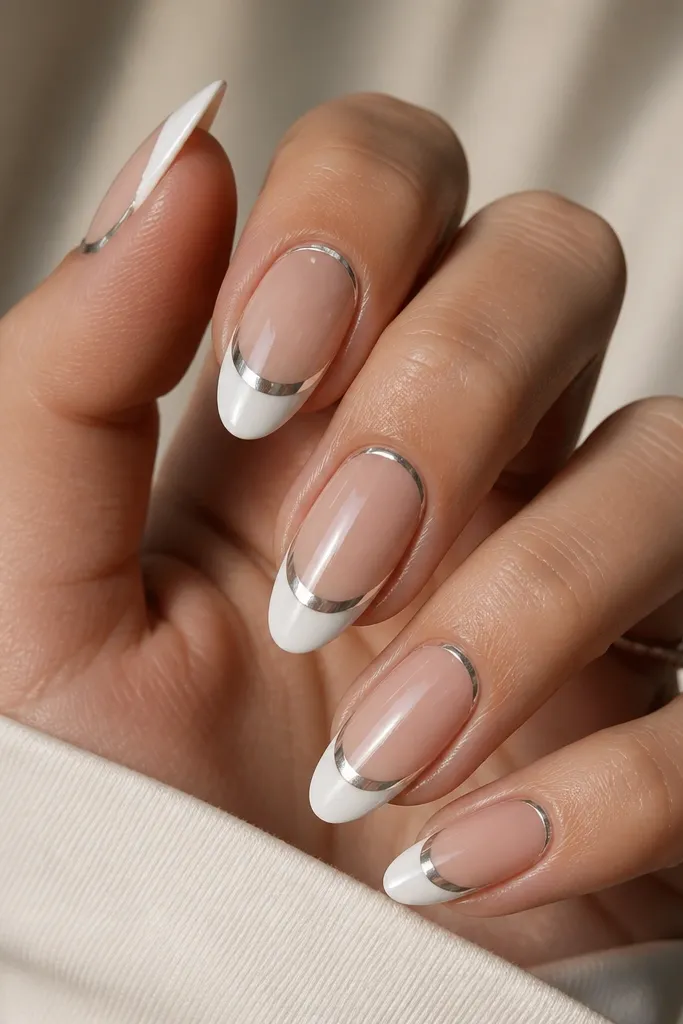
Chrome on white looks like jewelry because the reflection reads clean. The half-arc sits above the smile line, creating a layered effect that makes the tip look deeper. This is a great "going out" option that still works with short length. Glossy top coat keeps the arc reflective and smooth.
Do your white tip on all nails. On the accent nail, apply a thin layer of clear gel where you want the arc, then use chrome powder to rub only in that curved strip. Clean the edges with a dry brush, cure, then top coat.
Editor's noteRub chrome in one direction so you don't get patchy spots.
Watch outAvoid covering the whole tip with chrome; it turns into a stripe-heavy look.
19. White tip with tiny blue micro dots
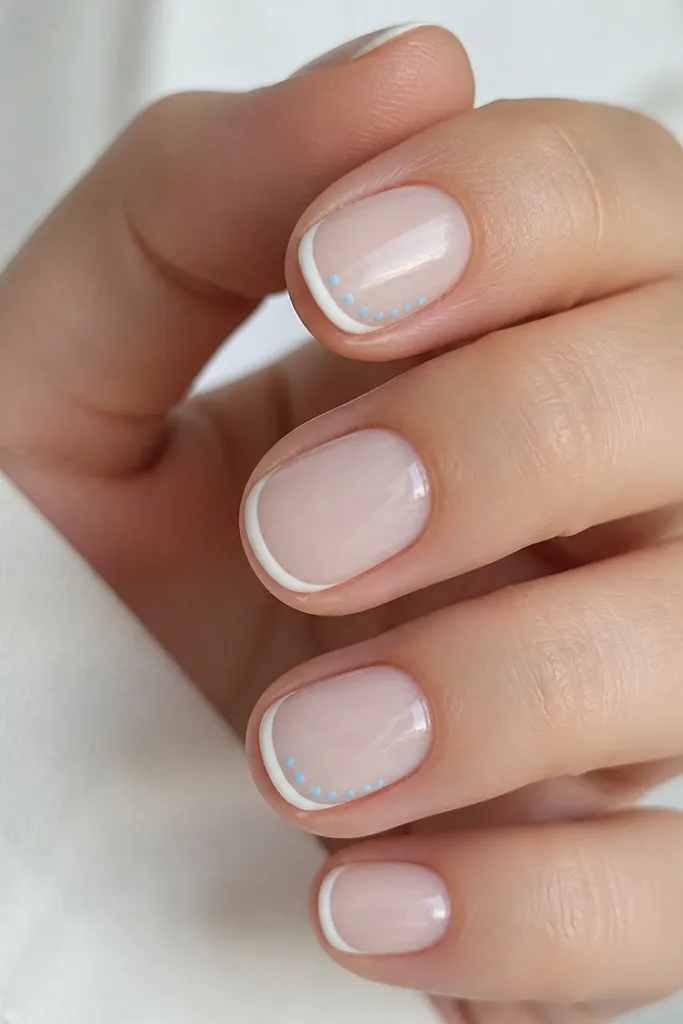
Blue micro dots make white tips feel fresh without adding a whole new palette. The dots are small and placed on the inner edge so the nail stays balanced. Use a sky blue - it reads light and clean next to white. Glossy top coat keeps the dots crisp.
Create thin French tips. On two accent nails, place 3-4 tiny sky-blue dots along the inner side of the tip, spaced evenly. Cure and seal with top coat, keeping the dot area capped.
Editor's noteFor perfect dots, load your dotting tool lightly and stamp once - don't drag.
Watch outSkip teal or dark blue; it can make short nails look heavier.
20. White tip with single line of pearl dots
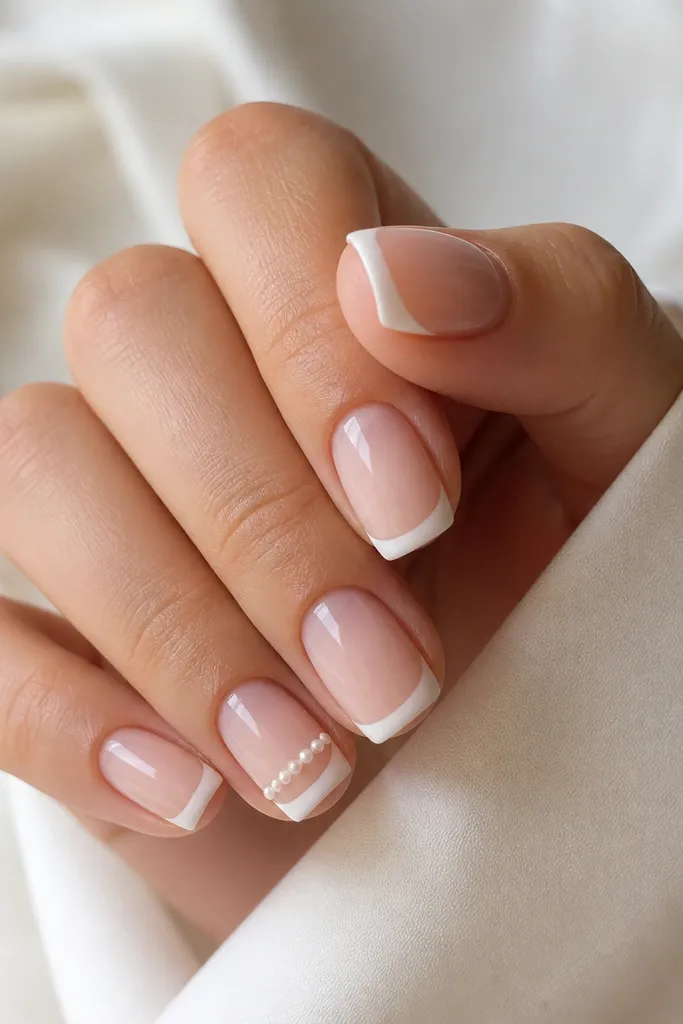
This looks like a delicate bracelet line across the nail. The pearl-like dots add texture but stay minimal because the line is narrow. It's a good choice if you want bling without rhinestones. Glossy top coat makes the dots appear raised and smooth.
Do thin white tips. On one nail, place a straight row of tiny pearl dots using a pearl gel or small dotting in off-white. Keep the line about 2 mm long - half the width of the tip. Seal with top coat and cap the line area.
Editor's noteUse a straight edge under your hand (like a clean card) to keep the row level.
Watch outAvoid thick rows; a wide bead line looks bulky on short nails.
21. White tip with nude ombre base
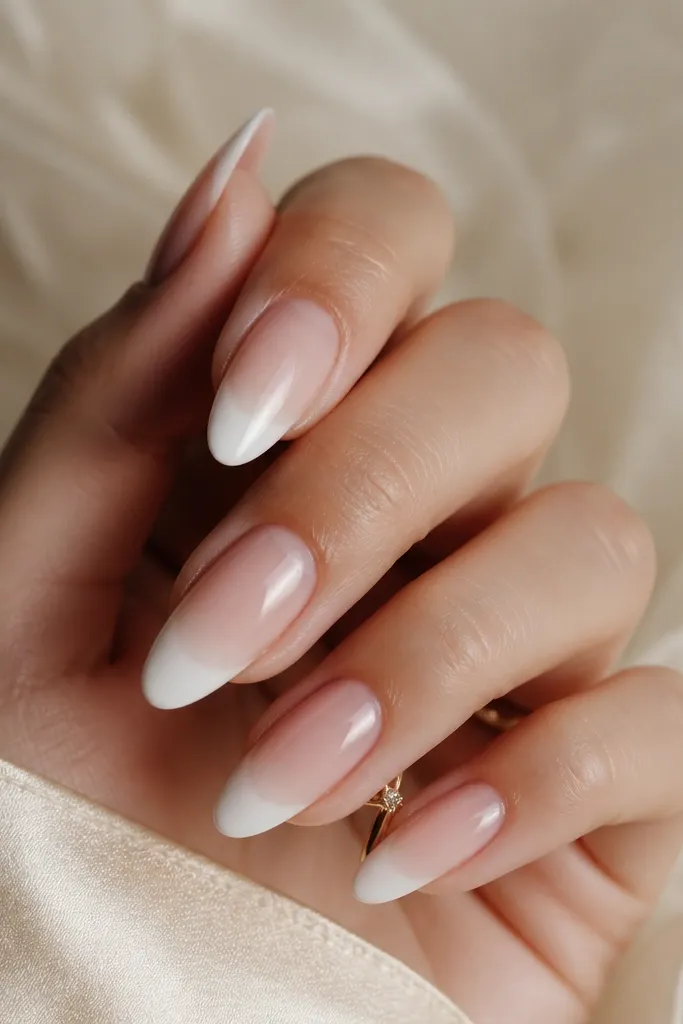
An ombre nude base adds softness and makes the white tip look even cleaner. The gradient from deeper nude to lighter nude makes the nail bed look longer. It also makes it easier to hide tiny filing differences because the base is blended. Glossy top coat gives that smooth, salon finish.
Start with a deeper nude gel at the cuticle, then sponge lighter nude down toward the middle. Avoid blending into the tip area - keep the white tip crisp. Finish with opaque white on the free edge only and top coat.
Editor's noteUse two nude shades that are close, not a huge jump, or the ombre looks banded.
Watch outSkip blending too far into the tip; it dulls the white.
22. White tip with micro floral outline
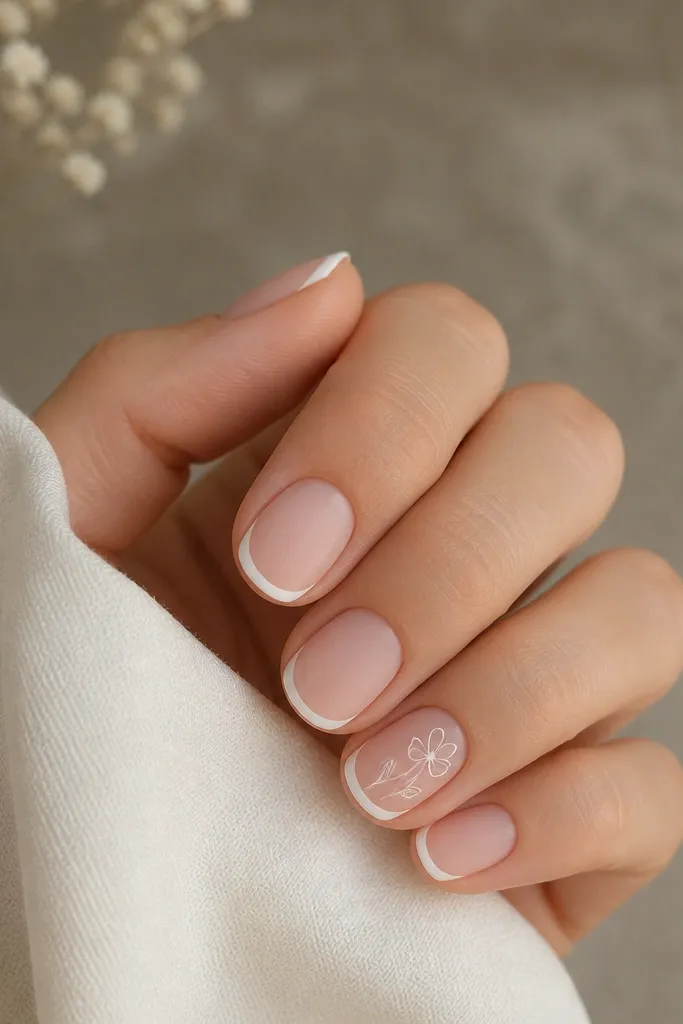
Micro floral outlines look delicate and still read clearly on short nails. Matte keeps the petals soft and avoids shine that can make tiny details look messy. This design is a good "special day" option when you don't want hearts or rhinestones. The outline only uses white, so it matches the set.
Paint your thin French tips first. On one accent nail, use a fine liner brush to draw a small flower - two curved petals and a tiny dot bud. Place it near the outer corner of the tip. Cure, then matte top coat.
Editor's noteDraw petals as thin U shapes; thick petals look cartoonish on a small nail.
Watch outDon't fill the entire flower; outline only keeps it airy.
23. White tip with sheer nude lace pattern
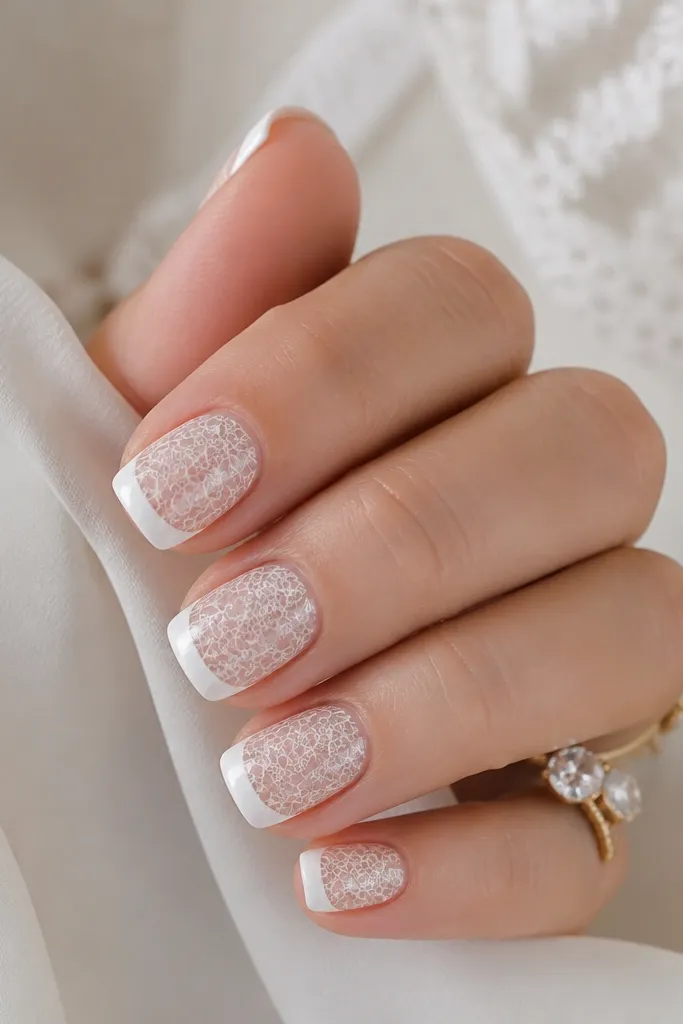
Lace lines add texture while staying light because the base is sheer. The solid white tip anchors the design so it doesn't look like random doodles. This is a "cute but grown" look that still works on short nails when the lace lines are thin. Glossy top coat makes the lace pattern pop without looking raised.
Apply sheer nude base. Use striping gel or thin white gel to draw lace motifs - small arches and connecting lines - mostly in the upper half of the nail. Then apply solid white on the tip. Seal with glossy top coat.
Editor's noteKeep lace lines to the top half so the nail bed still looks clean.
Watch outAvoid thick lace strokes; they look like paint blobs at this size.
24. White tip with tiny red accent stripe
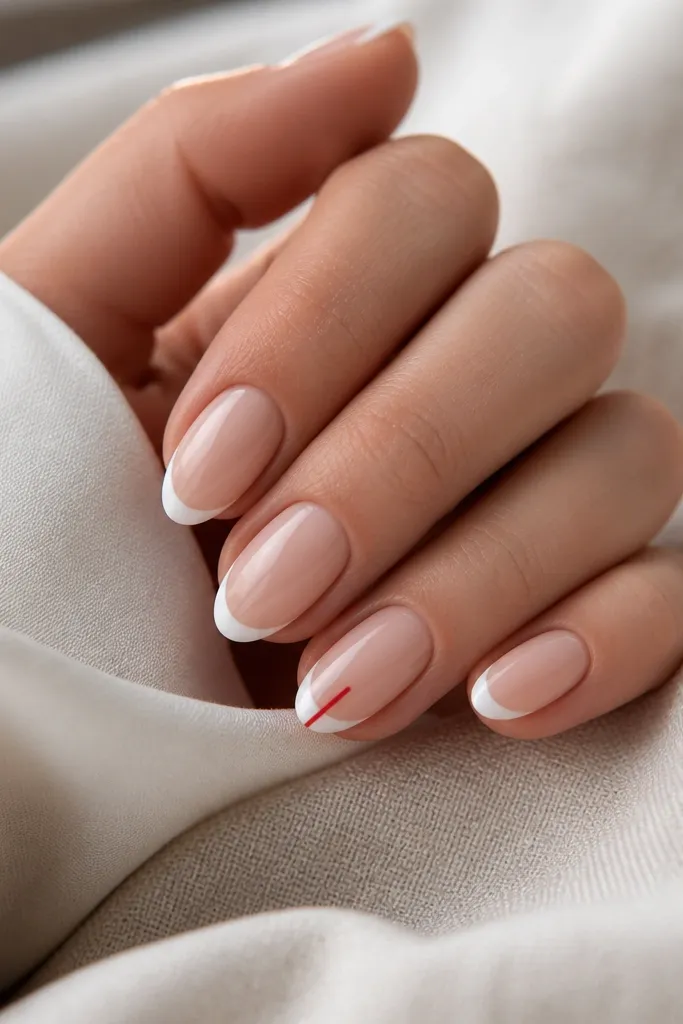
A single red stripe turns the set into a playful accent without changing the whole palette. Red on white looks sharp, especially when the stripe is thin. Place it in the center so it reads balanced on short nails. Glossy top coat keeps the stripe looking like it's sealed in.
Do the thin French tip across all nails. On the accent nail, draw a 1 mm wide red stripe from the middle of the tip down slightly, then cure. Top coat and cap the stripe area.
Editor's noteUse a striping brush with a shorter bristle length for steadier thin lines.
Watch outSkip wide red stripes; they overpower the white tip.
25. White tip with nude cuticle shimmer line
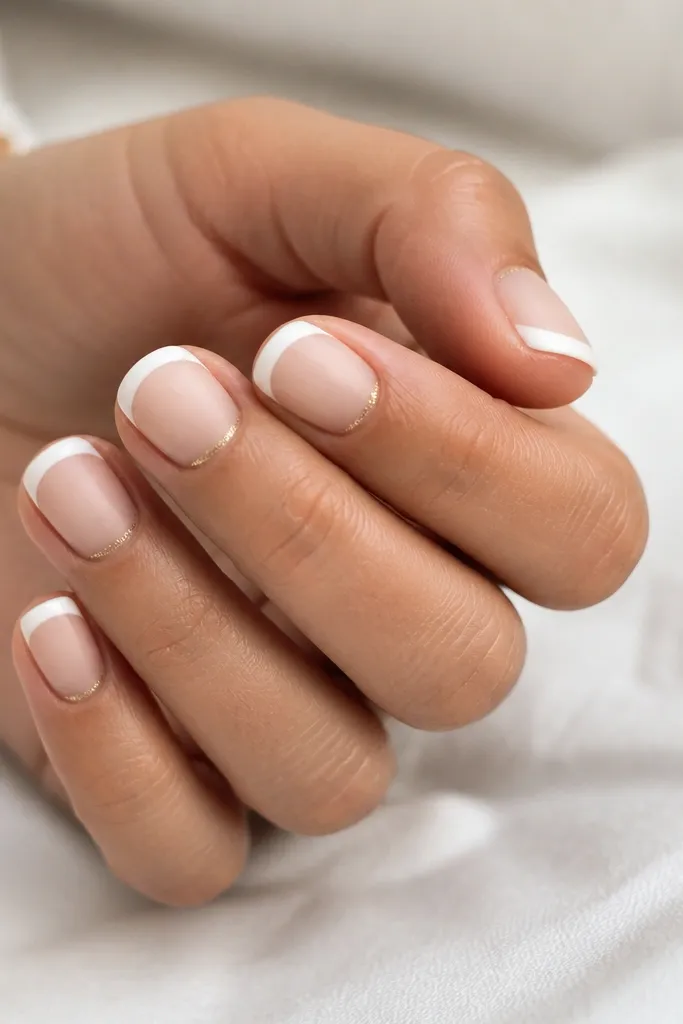
This design stays classy because the shimmer is near the cuticle, not on the whole nail. The champagne line makes your nail bed look healthier, and the matte finish makes it feel soft. The white tip stays the main event. It's a great option for beginners who want detail but don't want tiny shapes.
Apply nude base. Add a thin champagne shimmer stripe right at the cuticle using a striping brush. Then apply opaque white on the tip. Matte top coat seals everything and reduces visible smudges.
Editor's noteKeep the shimmer line super thin - about the width of two brush hairs.
Watch outAvoid glitter that's too chunky; it catches and lifts.