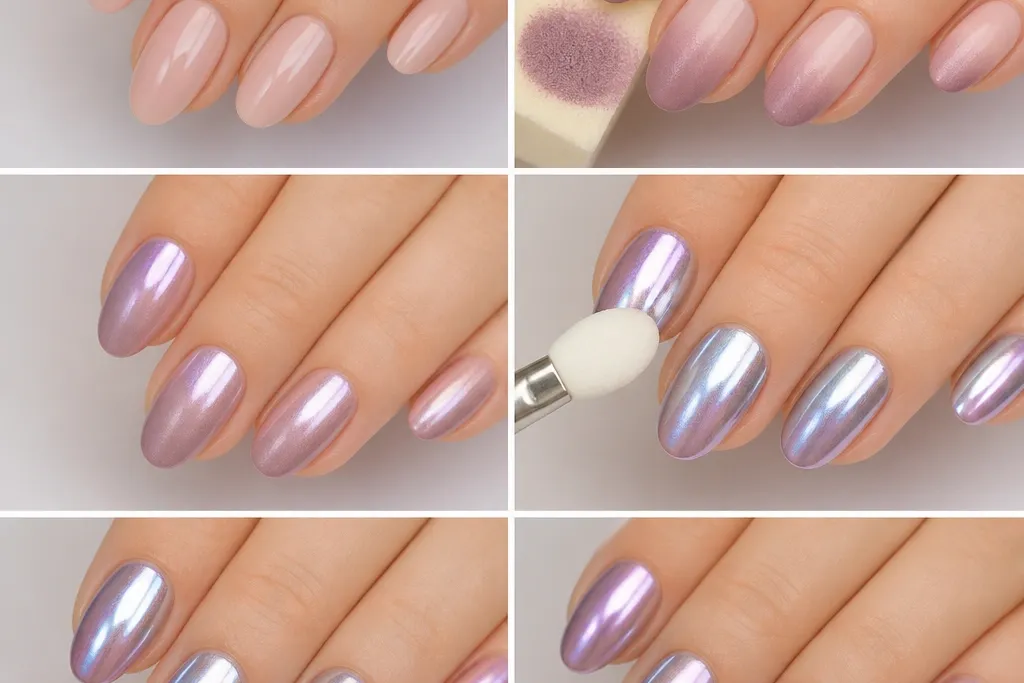

1. Icy Pink to Pearl Chrome Tips
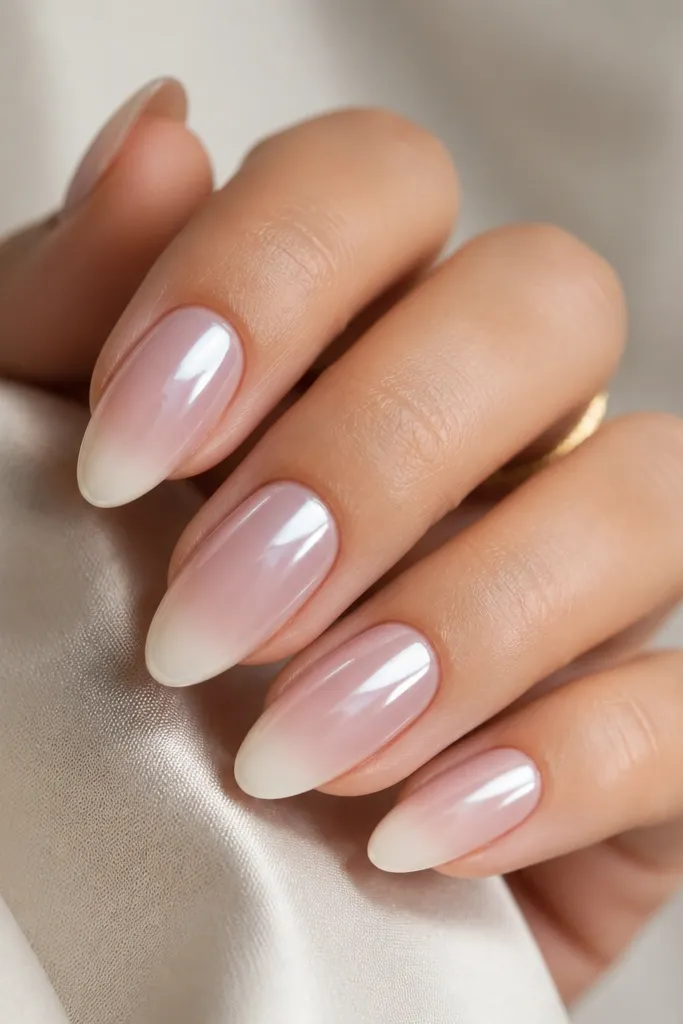
This one flatters almost everyone because the base is a milky pink that matches natural nail color. I've worn it on light, medium, and deeper skin tones and it always looks clean because the chrome is placed high enough to brighten the whole nail. The trick is keeping the ombre subtle - you're not painting a bold color block, you're creating a glow. For daytime events and office days, it reads polished without looking loud.
Start with a sheer pink gel at the cuticle, then add a slightly denser pearl-white at the tip. Blend with a makeup sponge using 2-3 thin layers, curing each time. Apply tacky top coat only on the top third, then press mirror chrome powder on that area and feather the lower edge with a light tap. Seal with non-wipe top coat so the chrome stays mirror-shiny.
Editor's noteIf your gradient looks streaky, wipe the sponge lightly on a paper towel before the next layer.
Watch outDon't put chrome all the way to the cuticle - it makes the nail line look heavy and can snag on hair.
2. Smoky Taupe Fade with Gunmetal Chrome Edge
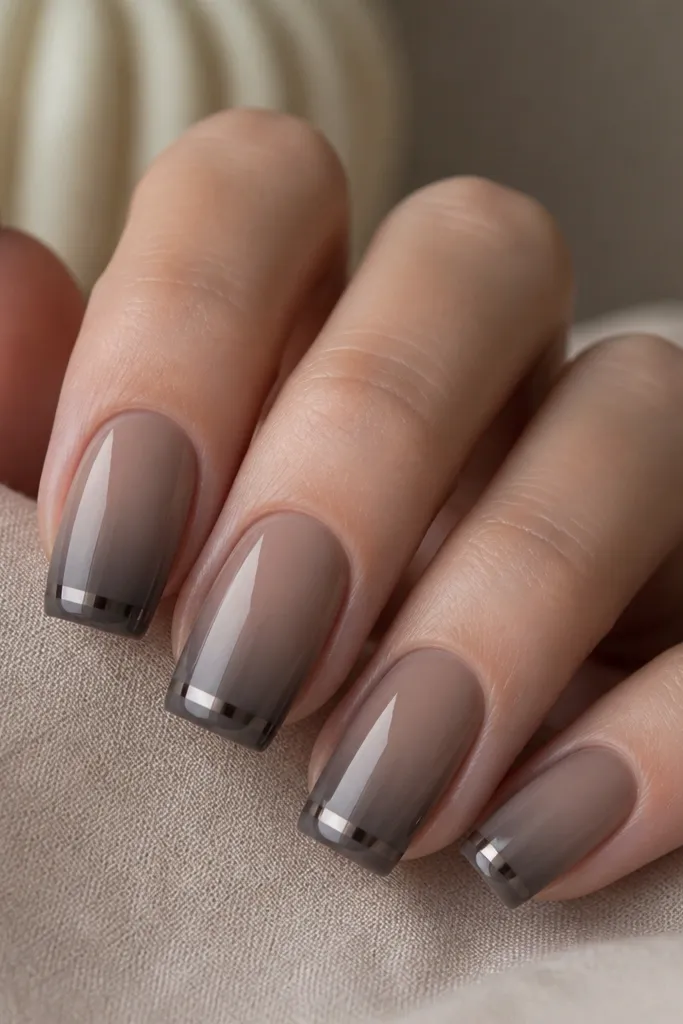
Gunmetal chrome over taupe looks sharp on cool undertones and it also looks flattering on warm skin because taupe balances both. It's the "night out" version of ombre since the chrome is darker and the gradient is moodier. I like this on short-to-medium nails because the chrome strip makes the tips look longer without covering the whole nail. It also pairs well with silver rings and dark outfits.
Paint taupe near the cuticle, then sponge smoky gray into the top of the tip area. Keep the darkest part within the last third of the nail so the ombre reads intentional. Cure the gradient, then apply tacky top coat only on that darkest tip zone. Press gunmetal chrome and feather the outer edge with a clean sponge corner before sealing.
Editor's noteUse a darker taupe gel instead of black - black can make the gradient look muddy after chrome goes on.
Watch outAvoid overloading chrome powder; too much makes the strip look patchy instead of smooth.
3. Reverse Ombre Nude to Chrome Cuticle Glow
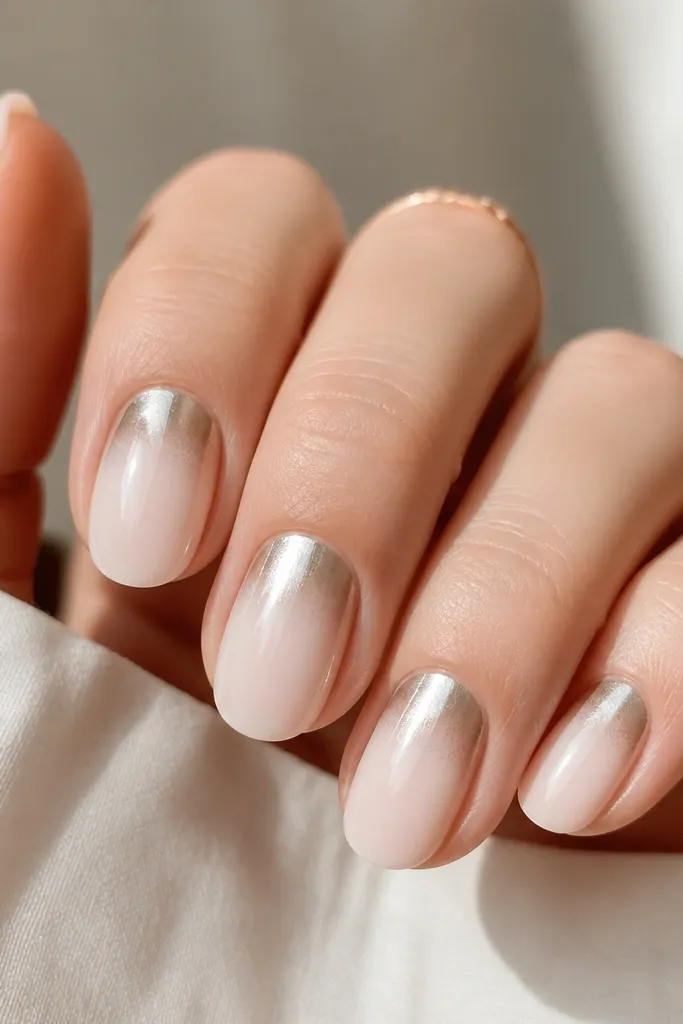
Reverse ombre is the one I reach for when I want the nail to look brighter at the base. It's especially flattering if your cuticle area gets dry or darker, because the bright fade visually cleans it up. The chrome halo near the cuticle makes the nail look like it has a lit border, which is a nice trick for short nails. It also looks great with natural-looking outfits because it doesn't scream neon.
Start with the darkest nude at the tip, then fade lighter toward the cuticle using 2-4 sponge layers. Cure between each layer so the gradient doesn't shift. Apply tacky top coat only around the cuticle area, leaving a tiny gap at the sidewalls if you're prone to flooding. Press chrome powder in a crescent shape and blend the edge lightly with a fingertip wrapped in a lint-free wipe. Seal with non-wipe top coat.
Editor's noteUse a smaller sponge piece for the cuticle area so you don't drag chrome into the ombre fade.
Watch outDon't let the reverse fade hit a hard line at the sidewalls - that's what makes it look amateur.
4. Black Cherry Ombre with Ruby Chrome Top
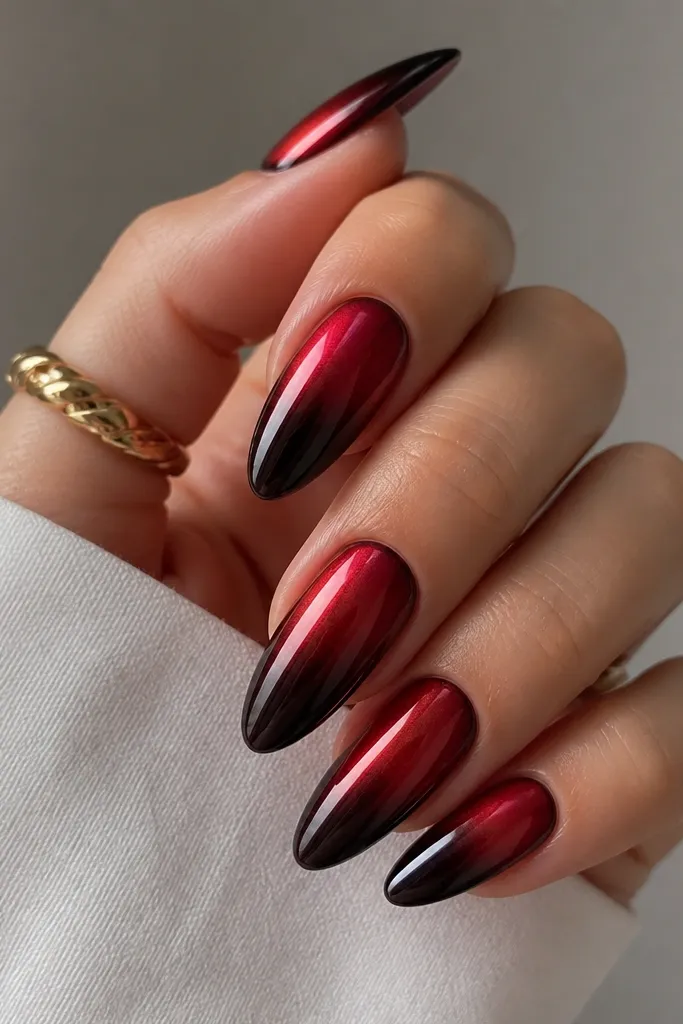
If you love dark nails but hate how they look flat, ruby chrome fixes that. The ombre gives depth, then the chrome adds a red mirror flash that looks unreal under warm lighting. This is flattering on medium to deep skin because the red reads true, not washed out. It's also a strong pick for fall parties and holiday dinners.
Brush a deep cherry gel near the cuticle, then sponge it darker toward the tip using a near-black cherry shade. Build the fade in thin layers so it stays smooth. Cure completely, then apply tacky top coat on the top third only. Press ruby chrome powder onto the tacky layer and feather downward just a little. Finish with non-wipe top coat so the chrome turns glassy.
Editor's noteKeep the darkest gel only at the last 20-25% of the nail for a more graceful fade.
Watch outAvoid using a true black - it can turn the red undertone gray once chrome hits.
5. Champagne Gold Ombre with Soft Mirror Fade
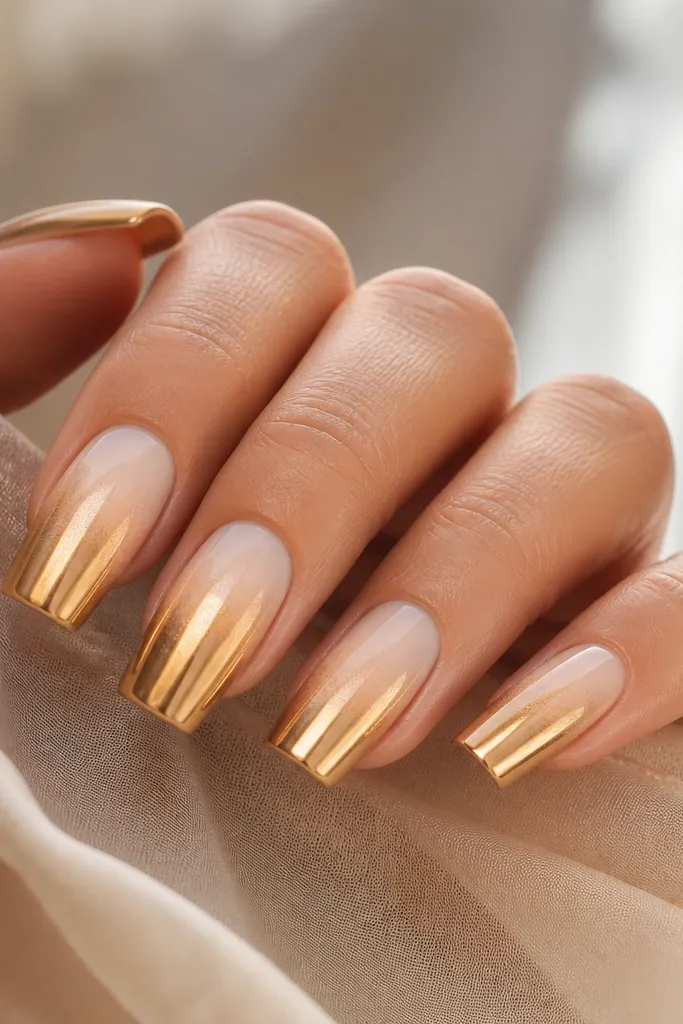
Champagne gold is the "always works" chrome color for parties and weddings. It flatters a wide range of skin tones because it's warm and neutral at the same time. The ombre keeps it from looking like a single solid gold foil, and the chrome adds that metallic reflection you want in photos. I've worn this with both gold and silver jewelry and it still looks cohesive.
Start with a sheer beige-gold gel at the cuticle, then sponge a richer champagne shade into the tip. Blend until you get a smooth fade - 2-3 layers is enough. Apply tacky top coat on the top half, then dust and press gold mirror chrome starting at the tip. Feather upward with a light tap so the intensity fades. Seal with non-wipe top coat.
Editor's noteIf gold chrome looks too yellow, mix a tiny amount of beige-gold into your ombre base to keep it skin-friendly.
Watch outDon't cap the ombre in thick gel before chrome - thickness makes the gradient look cloudy.
6. Lilac Fade with Silver Chrome Cloud
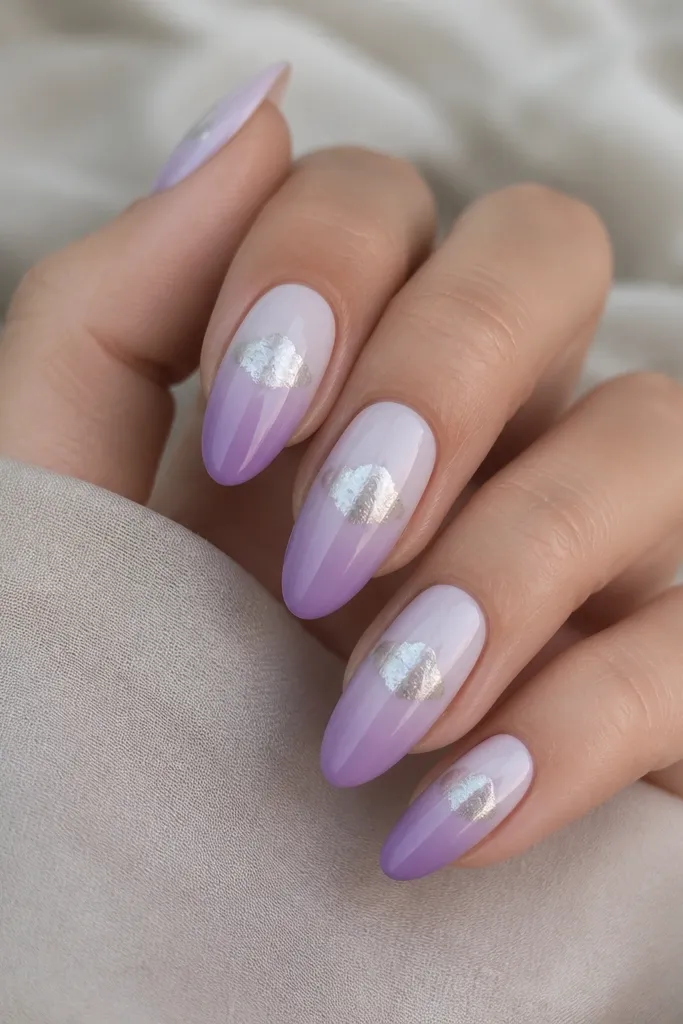
Lilac + silver is the easiest way to make ombre look fresh instead of "winter dull." This combo is flattering on fair to light skin because it keeps the nail bright, but it also works on deeper tones when you choose a richer lavender. The silver chrome reads airy, so it doesn't overpower the gradient. It's a pretty choice for spring events, birthdays, and pastel outfits.
Use a milky lilac near the cuticle, then sponge in a deeper lavender at the tip. Cure between layers until the fade looks like smoke, not stripes. Apply tacky top coat from the mid-nail to the tip, leaving the cuticle area uncovered. Press silver chrome powder and blend the bottom edge with a clean sponge for a soft cloud effect. Seal with non-wipe top coat.
Editor's notePress chrome with short taps instead of dragging - dragging creates lines in mirror powder.
Watch outAvoid skipping the feather step; a straight chrome line looks like a sticker.
7. Emerald Fade with Teal Chrome Mist
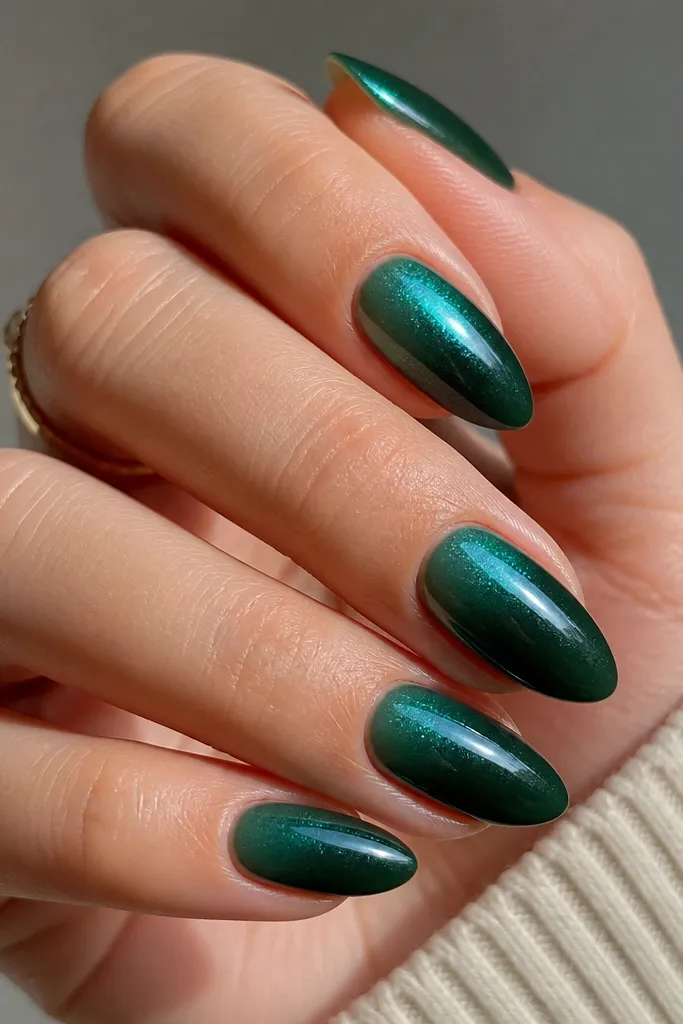
This is the one I do when I want "jewel tones" without heavy nail art. Emerald gel gives depth and teal chrome adds that cool pop when light hits. It flatters medium to deep skin because green creates contrast without looking harsh. It also looks great with matte black outfits and chunky rings.
Start with a sheer green-jade near the cuticle, then build to a deep emerald at the tip using a sponge. Keep the darkest green in the last quarter of the nail. Cure and apply tacky top coat only over the top third. Press teal chrome powder, then feather the lower boundary with a barely-damp sponge (wrung out so it's not wet). Seal with non-wipe top coat.
Editor's noteTest your teal chrome on one nail first; some teal powders lean more blue, and you want the tone to match your emerald base.
Watch outDon't overdo the emerald at the cuticle - it can make the whole nail look too dark.
8. Rose Quartz Fade with Pink Chrome Pop
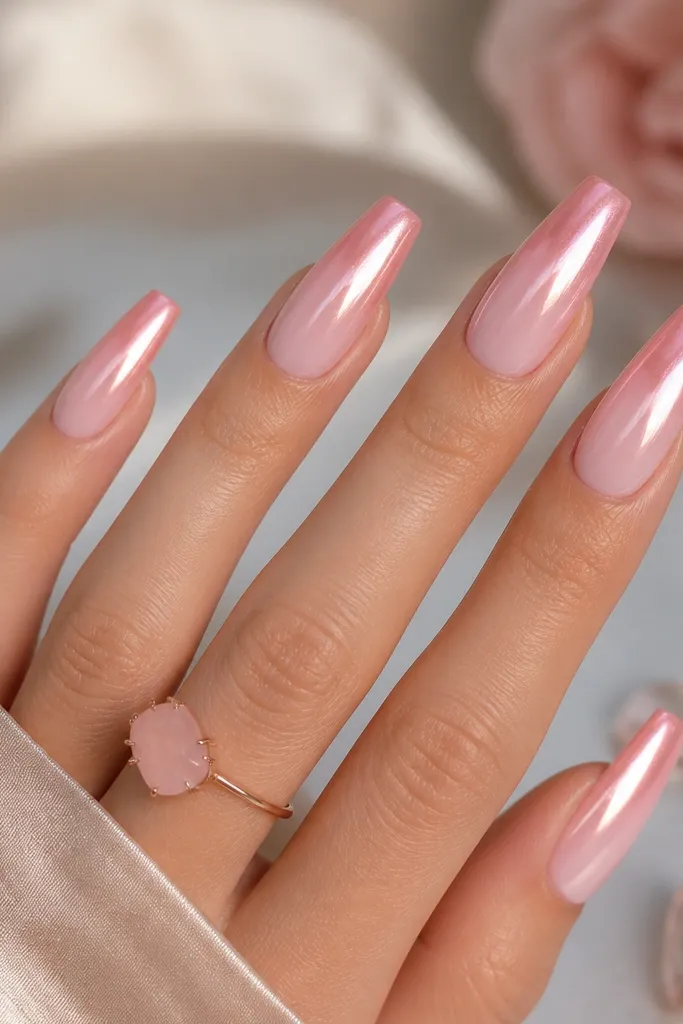
Rose quartz ombre is soft, but chrome makes it look glossy and intentional. This one flatters fair to medium skin because the pink stays light and doesn't turn gray. It also works for short nails since the gradient is smooth and the chrome pop is concentrated where it catches light. I wear this when I want a romantic look that still photographs well.
Paint a sheer blush at the cuticle, then sponge in a dusty rose toward the tip. Build the fade in thin layers so it stays translucent. Cure, then apply tacky top coat on the top third. Press pink chrome powder on top, feathering the edge with a sponge corner. Seal with non-wipe top coat and cap the free edge.
Editor's noteIf the rose gel is too opaque, thin it slightly on a palette so the fade stays airy.
Watch outAvoid thick chrome - thick layers can crack when you flex your nails.
9. White Milky Ombre with Icy Chrome Tips
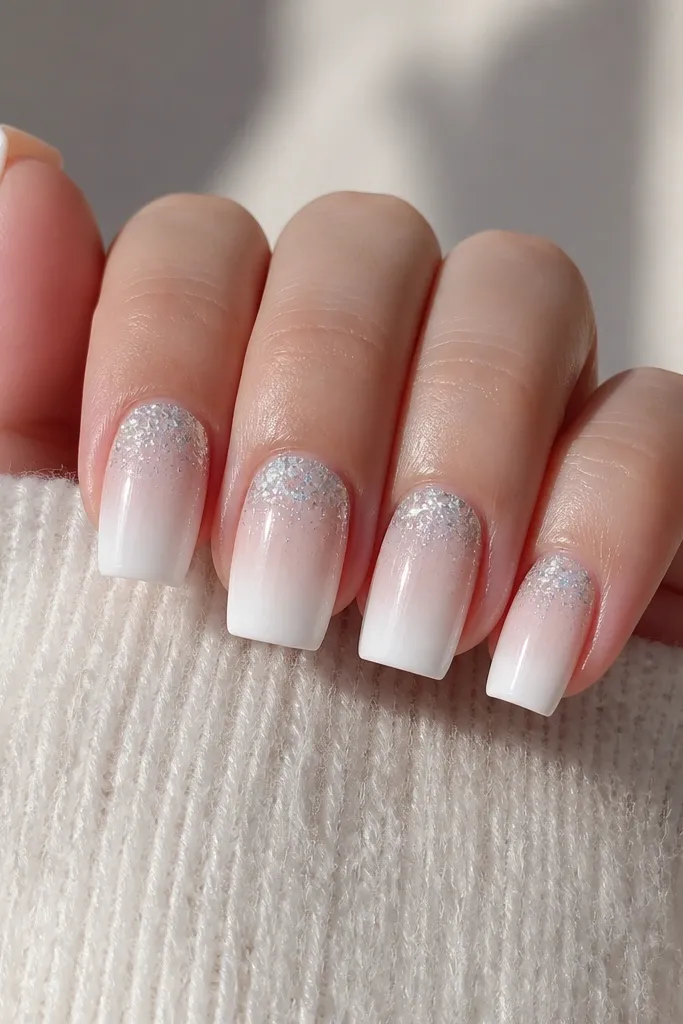
Milky white ombre makes your nails look clean and fresh, and icy chrome makes them look like glass. This is a great option if you hate how dark ombre shows every chip. The white base flatters almost any skin tone, but it really pops on medium to deep skin where contrast reads crisp. It's also perfect for winter weddings and holiday photos.
Start with a sheer base that matches your natural nail tint, then add milky white starting at mid-nail and blending down. Build opacity near the tip with 2-3 layers. Cure fully, then apply tacky top coat only on the top quarter. Press icy chrome and feather the edge slightly below mid-nail. Seal with non-wipe top coat.
Editor's noteUse a white gel that says "milky" or "cloud" so it doesn't go chalky on top of chrome.
Watch outDon't wipe the tacky layer - chrome won't grip the same way.
10. Nude Brown Ombre with Soft Rose Chrome
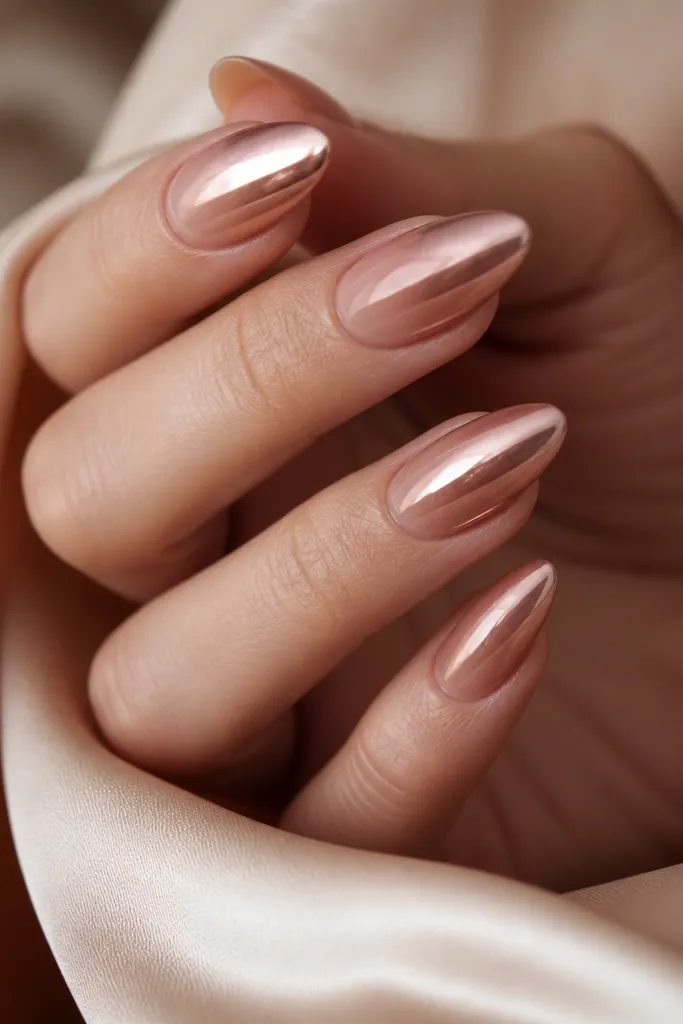
Warm nude-brown ombre looks natural, and rose chrome keeps it from looking too "basic nude." This combo is flattering on medium to deep skin because the caramel fade looks like your natural nail color but upgraded. The rose chrome adds warmth without turning orange. It's a work-friendly design that still looks special when you move your hands.
Use a warm beige gel at the cuticle, then sponge caramel brown into the tip. Keep the gradient smooth and not too dramatic - you want a gentle fade. Cure, then apply tacky top coat starting around the mid-nail up. Press rose chrome powder and feather downward slightly. Finish with non-wipe top coat and cap the tip.
Editor's noteIf your nude-brown looks too red, swap to a taupe-beige base and blend the warmth into the tip only.
Watch outAvoid applying chrome over the entire nude area - it can make the nails look flat and too metallic.
11. Blue Denim Fade with Mirror Steel Chrome
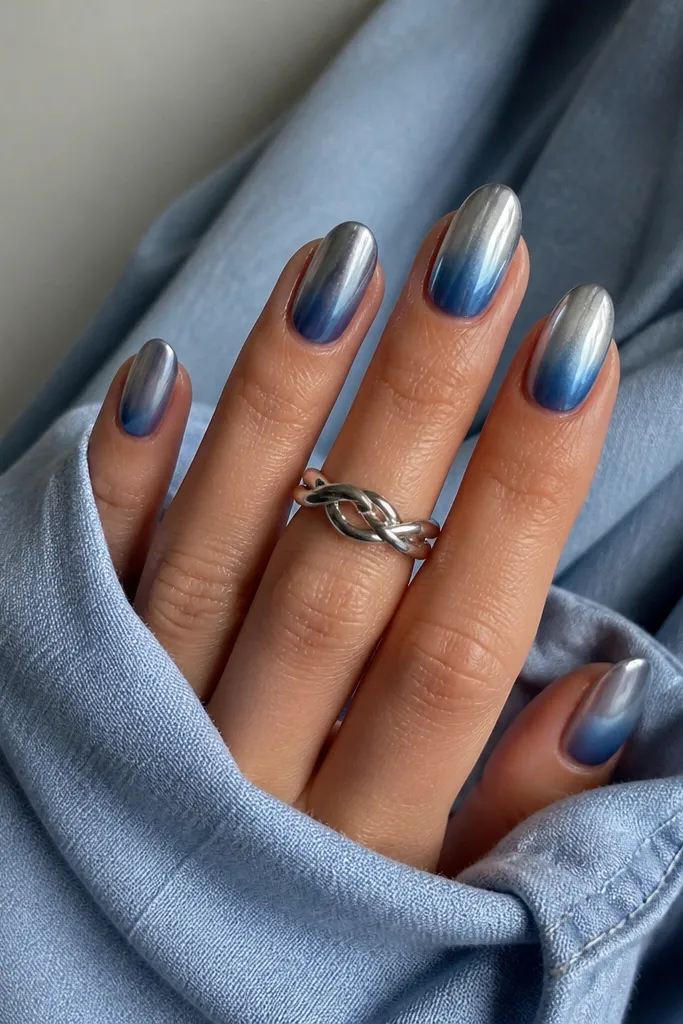
Blue denim ombre looks casual and stylish, and steel chrome keeps it from looking childish. I like this on short nails because the chrome reflection makes the surface look longer and smoother. It flatters light to medium skin tones with cool undertones, especially when you wear silver jewelry. This is a great everyday chrome set for people who want color but not heavy art.
Apply a sheer light blue at the cuticle, then sponge deeper denim blue into the tip. Cure between layers for a clean fade. Add tacky top coat on the top third, then press mirror steel chrome powder starting at the tips. Feather the bottom edge with a clean sponge so it fades upward. Seal with non-wipe top coat.
Editor's noteChoose a blue that's not too purple; purple can fight with silver chrome and look muddy.
Watch outAvoid thick gel at the tip - it makes the ombre look stepped under chrome.
12. Burgundy Fade with Chrome Foil Crackle
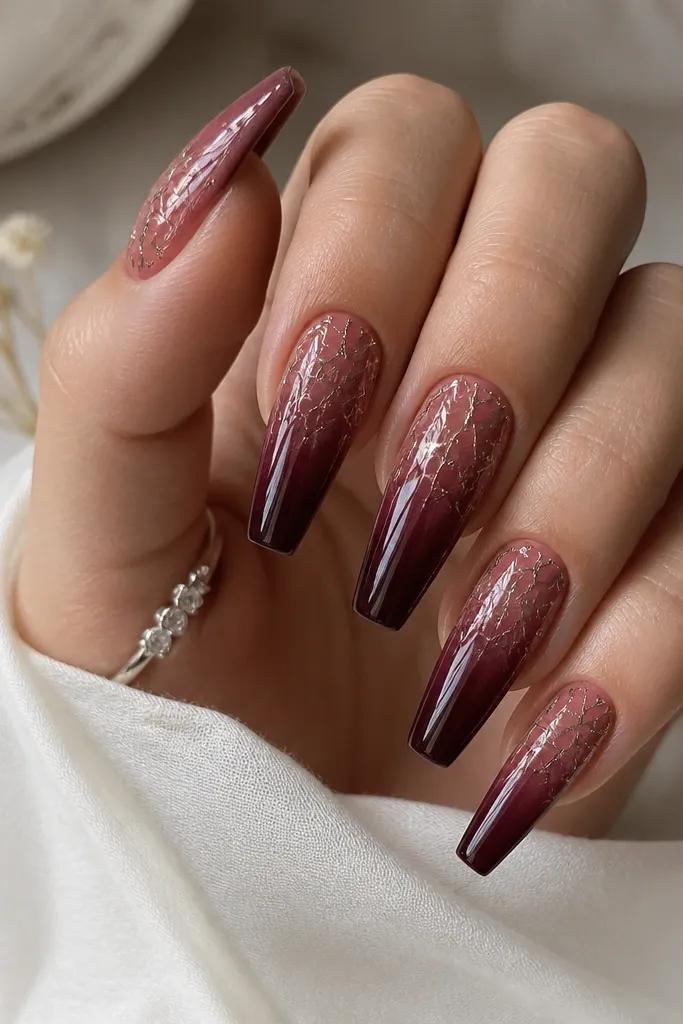
This one gives you the "cracked chrome" look without drawing anything. Burgundy stays rich and flattering on most skin tones, and the chrome crackle adds texture that still photographs clean. I've worn this for dinners and it looks more detailed than it is because the foil effect catches light. It's also a good choice if you want chrome but hate the flat mirror look.
Create a burgundy ombre using berry near the cuticle and wine at the tip in thin sponge layers. Cure and apply tacky top coat across the top half. Press chrome foil crackle (or chrome flakes pressed into tacky gel) in a random pattern, leaving small gaps for the burgundy to show. Seal with non-wipe top coat, using gentle strokes so you don't smear foil pieces.
Editor's notePress foil flakes with a dry silicone tool so you don't crush the pattern.
Watch outDon't over-smooth the foil after sealing; smearing makes it look like dust.
13. Peach Fade with Rose Gold Chrome Halo
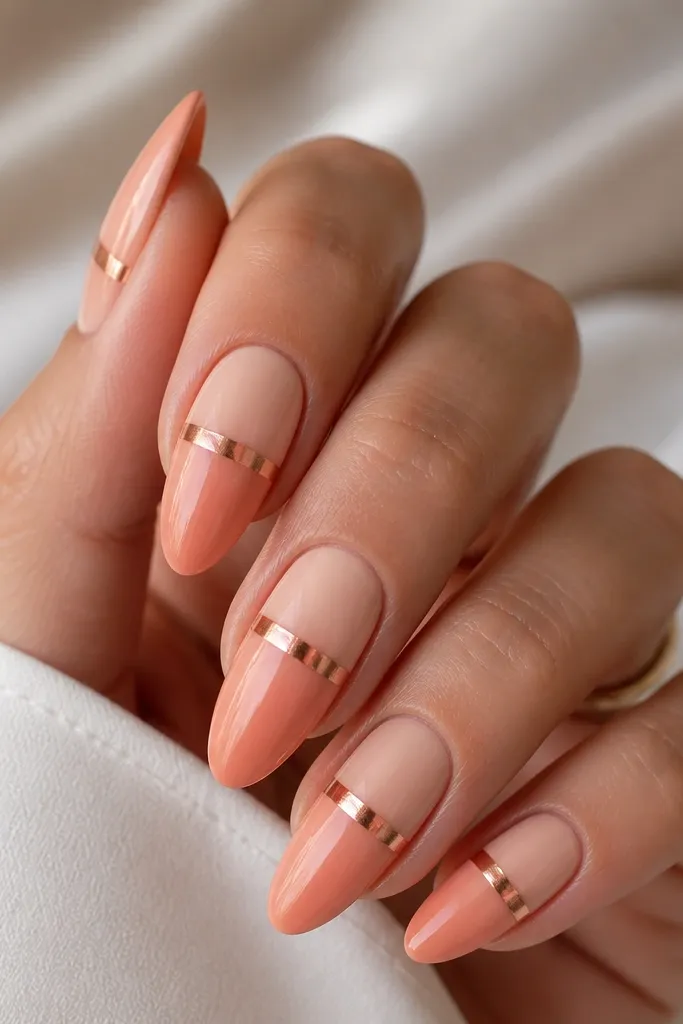
Peach + rose gold is the most flattering warm-toned chrome combo for summer outfits. The ombre keeps it soft, and the chrome halo band makes it look intentional even with minimal design. It flatters fair to medium skin beautifully, and on deeper skin it looks best when the peach base leans a little more caramel. This is a fun set for brunch, vacations, and warm-weather weddings.
Start with a sheer peach at the cuticle, then sponge coral into the tip. Cure and keep the transition smooth. Apply tacky top coat in a band around the mid-nail to top third, not all the way up. Press rose gold chrome in that band, then feather both edges lightly with a sponge to create a halo. Seal with non-wipe top coat.
Editor's noteIf the halo band looks too thick, use less tacky top coat and repeat chrome in a thinner layer.
Watch outAvoid placing the halo too close to the cuticle; it can look like a thick ring.
14. Clear Jelly Ombre with Silver Chrome Gradient
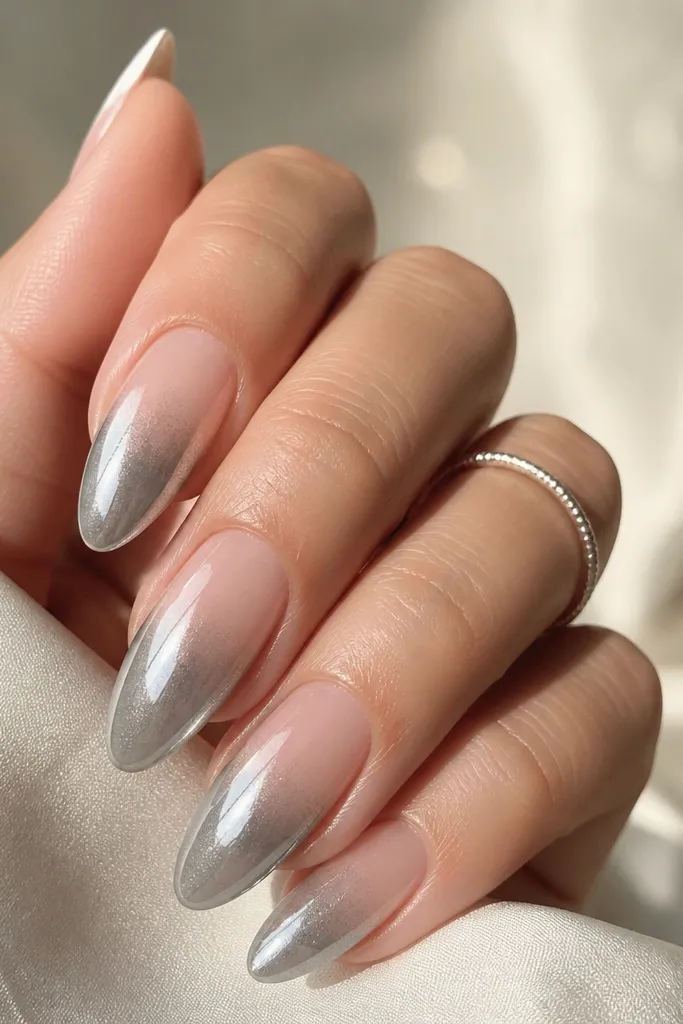
Jelly ombre looks like your nails are glowing from underneath, and silver chrome makes the glow read cooler and sharper. This is flattering on hands with slender nail beds because it doesn't overpower the shape. I like it for events because it looks "fresh" even if you're growing out your nails. It also hides minor surface texture better than opaque ombres.
Use a clear jelly gel as your base, then add pale gray only at the tip and blend upward with a sponge. Cure and repeat until the gray fade looks like fog. Apply tacky top coat from the top third downward in a thin area. Press silver chrome, then lightly lift and re-press near the edge to create a graded chrome fade. Seal with non-wipe top coat.
Editor's noteKeep the jelly base glossy before chrome - dry-looking jelly makes chrome cling unevenly.
Watch outDon't cure too long before chrome; if it's fully hard, chrome won't grab as well.
15. Chocolate Brown Ombre with Dark Mirror Chrome Tips
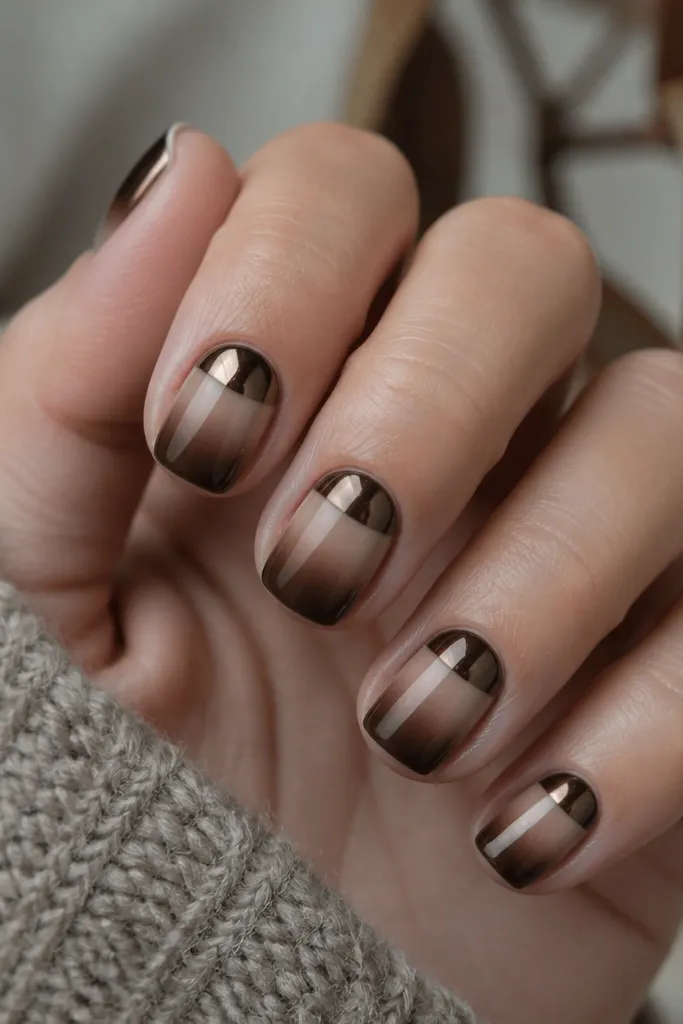
Chocolate ombre is underrated because it looks expensive without being loud. Dark mirror chrome on top makes it feel like a luxury dessert theme. This works on almost every skin tone because the brown range matches natural warmth in hands. It's also super wearable for fall and winter when you want nails that don't clash with darker sleeves.
Use warm beige-brown near the cuticle, then sponge chocolate brown into the tip. Build the darkest chocolate at the last quarter of the nail. Cure fully and apply tacky top coat only on the top quarter. Press dark mirror chrome and feather the lower edge with a clean sponge corner. Seal with non-wipe top coat.
Editor's noteIf your brown looks too red, add a tiny amount of cool taupe gel to your tip shade.
Watch outAvoid using chunky chrome - it makes the top look gritty on brown bases.
16. Tangerine Fade with Holo Chrome Flicks
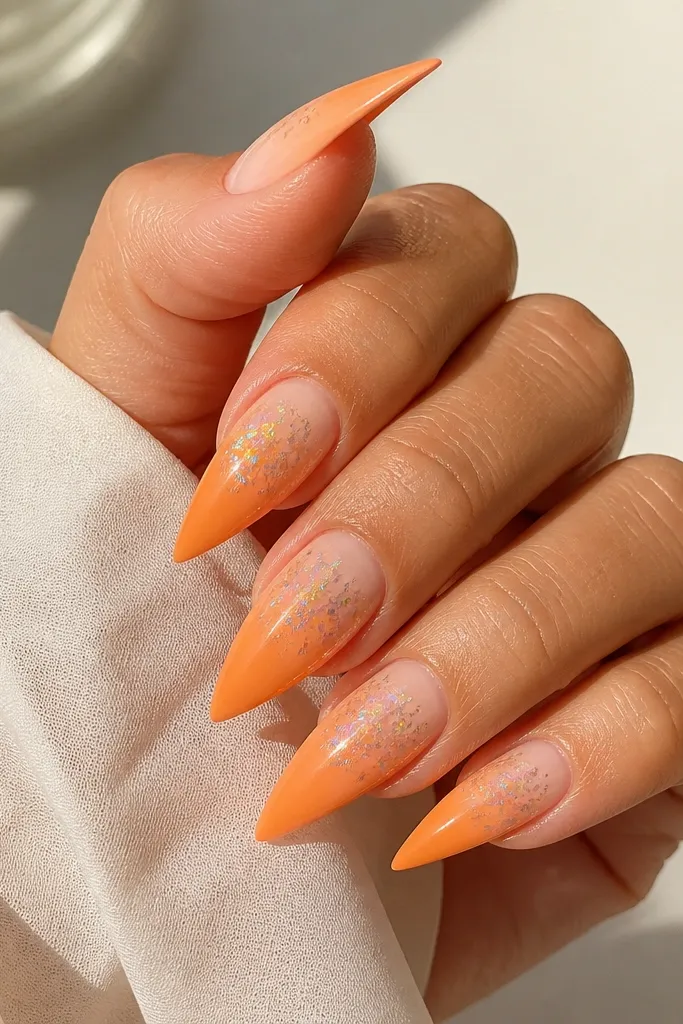
Holo chrome flicks give you movement without filling the whole nail with glittery shine. The tangerine ombre looks bright but still wearable because the fade keeps it soft. This is flattering on fair to medium skin and looks bold on deeper skin when the orange gel is saturated. It's a fun set for festivals and summer nights when you want your nails to catch light from angles.
Start with pale peach at the cuticle, then sponge tangerine orange into the tip. Cure in thin layers to keep the gradient smooth. Apply tacky top coat on the top third, then press holo chrome in small strokes using a folded chrome sponge. Leave gaps so the orange glow shows through. Seal with non-wipe top coat, then cap the tip edges so the flicks don't lift.
Editor's notePress holo in the direction you want the light to travel - from tip upward works best.
Watch outAvoid full-coverage holo on this design; it turns into chunky glitter instead of flicks.
17. Lavender Grey Fade with Iridescent Chrome Fog
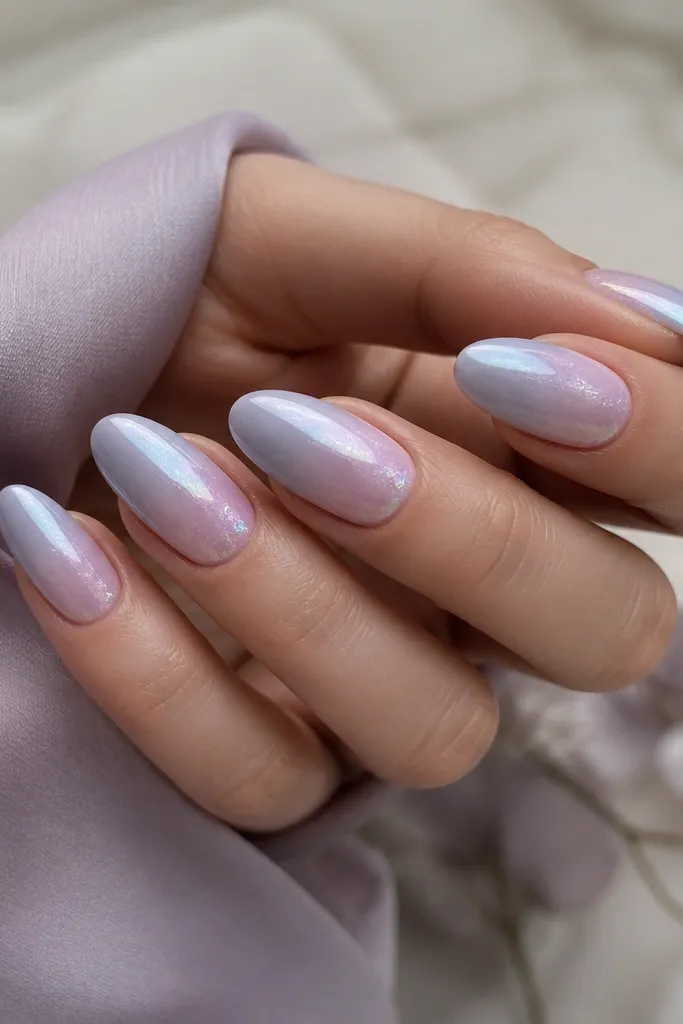
This is the "soft mood" chrome set. Iridescent fog chrome sits lightly and shifts color when you move, so it looks different in every room. The lavender-grey base flatters people who like neutral nails but still want something interesting. I like it for everyday wear because it doesn't scream, it glows. It also looks great on short nails because the chrome fog adds dimension.
Apply light lavender near the cuticle, then blend into a cool grey-lavender at the tip using a sponge. Cure between thin layers until the fade looks cloudy. Add tacky top coat only on the top third. Dust iridescent chrome with a gentle press, then tap off excess so it stays fog-like. Seal with non-wipe top coat for smooth reflection.
Editor's noteIf it looks too strong, apply a second very thin tacky layer and press less chrome the second time.
Watch outDon't pack iridescent chrome thick - it loses the fog effect and looks speckled.
18. Nail Art-Free French Ombre with Mirror Chrome Smile Line
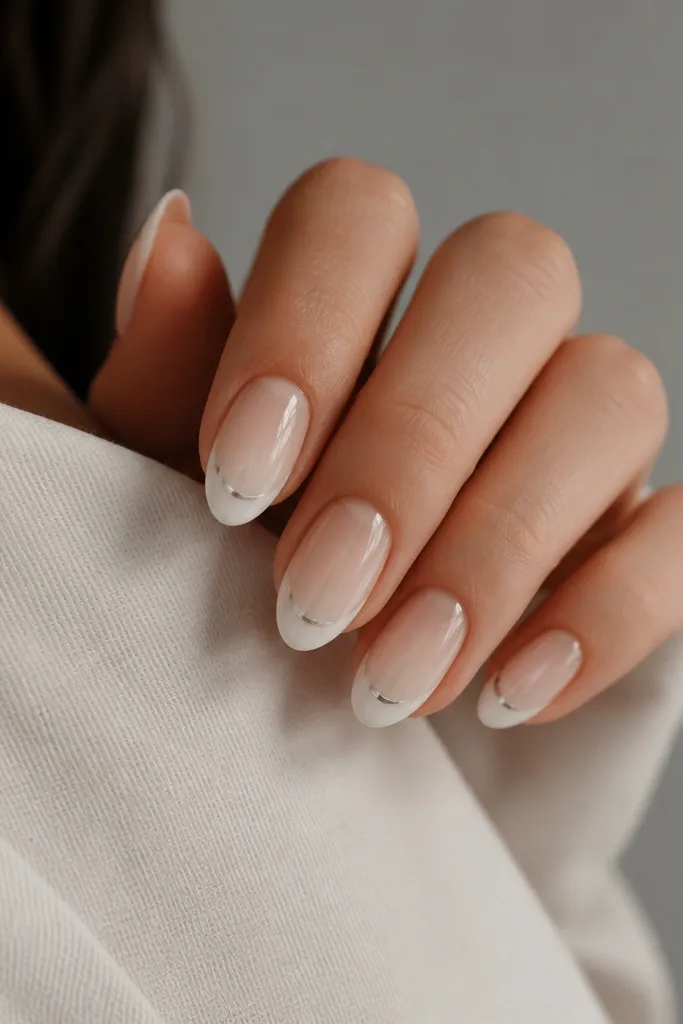
This design gives you a French look without drawing a perfect smile line. The ombre makes the transition forgiving, and the chrome smile adds a crisp focal point. It flatters hands with different nail bed shapes because the smile line sits at a consistent height across nails. I've worn it for bridal events and it looks clean even when you don't want extra embellishments.
Start with a sheer nude base, then sponge white gel from mid-nail to the tip. Keep the white concentrated at the edge so it reads like French. Cure and apply tacky top coat on a curved strip just above the tip line. Press mirror chrome along that curve, then feather the outer edge slightly so it fades. Seal with non-wipe top coat.
Editor's noteUse a French tip guide sticker for your first attempt; peel it off after placing chrome tacky gel so you don't smear.
Watch outAvoid making the smile line too thick; thick chrome looks like a stripe instead of a French detail.
19. Burgundy-to-Beige Soft Ombre with Rose Chrome Crown
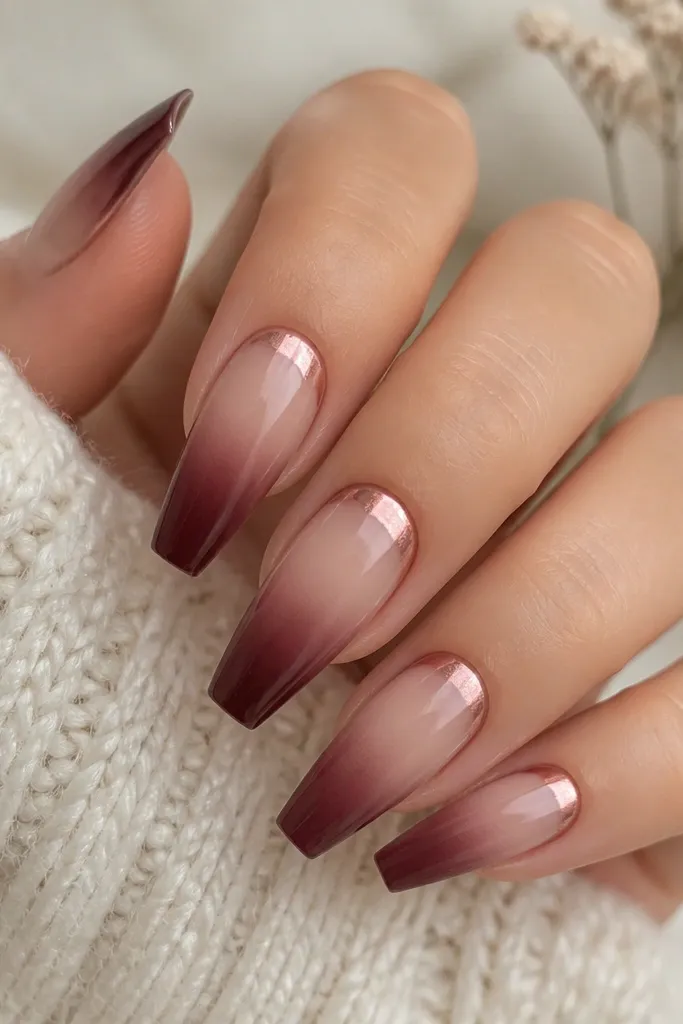
This is a great choice when you want chrome to look like jewelry, not paint. The burgundy-to-beige fade gives warmth and depth, while the rose chrome crown shape frames the nail. It flatters medium to deep skin because the beige keeps it lifted and the burgundy stays rich. I like it for date nights and holiday parties because it looks dressed up with almost no extra steps.
Paint beige near the cuticle and blend burgundy into the tip using 2-3 thin sponge layers. Cure and make sure the center of the nail is slightly lighter than the sides for a natural look. Apply tacky top coat on the top third, leaving the side edges slightly less tacky for a crown shape. Press rose chrome in the center first, then feather outward with a sponge corner to form the crown edges. Seal with non-wipe top coat.
Editor's noteIf you get chrome on the sidewalls, wipe it quickly with a lint-free wipe before curing.
Watch outAvoid rushing the crown edges; uneven edges are what make it look like a mistake.