1. Classic thin French with milky white arc
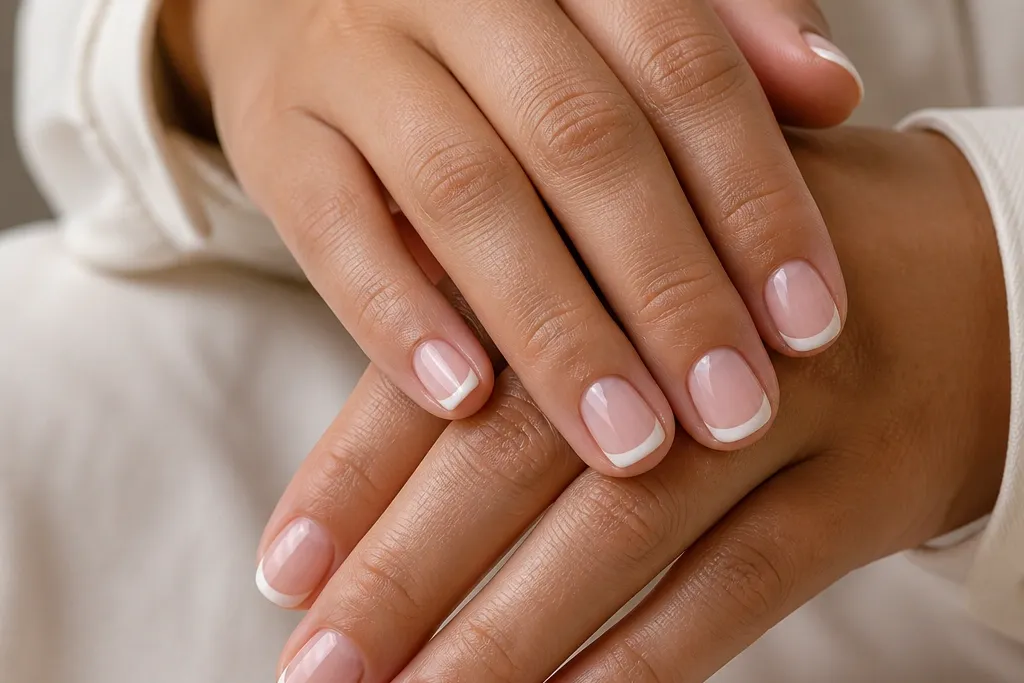
This is the French I keep coming back to when my nails feel too short for anything busy. The milky white is slightly opaque, so it looks smooth even if your nail plate has tiny texture. The nude-buff base makes the finger look longer because it blends into skin instead of creating a hard color break.
Start with a builder gel or gel polish base in a buff pink/nude. Paint a thin white band using a striping brush - about 1 to 1.5 mm wide at the center, curving upward at the sidewalls. Cure, then seal with a glossy top coat for a crisp line.
Editor's noteIf your white looks streaky, do two thin coats instead of one thick coat, curing fully between coats.
Watch outDon't make the white too wide - if it crosses past the mid-point of the nail, it shortens the whole finger.
2. Micro French on a soft pink base
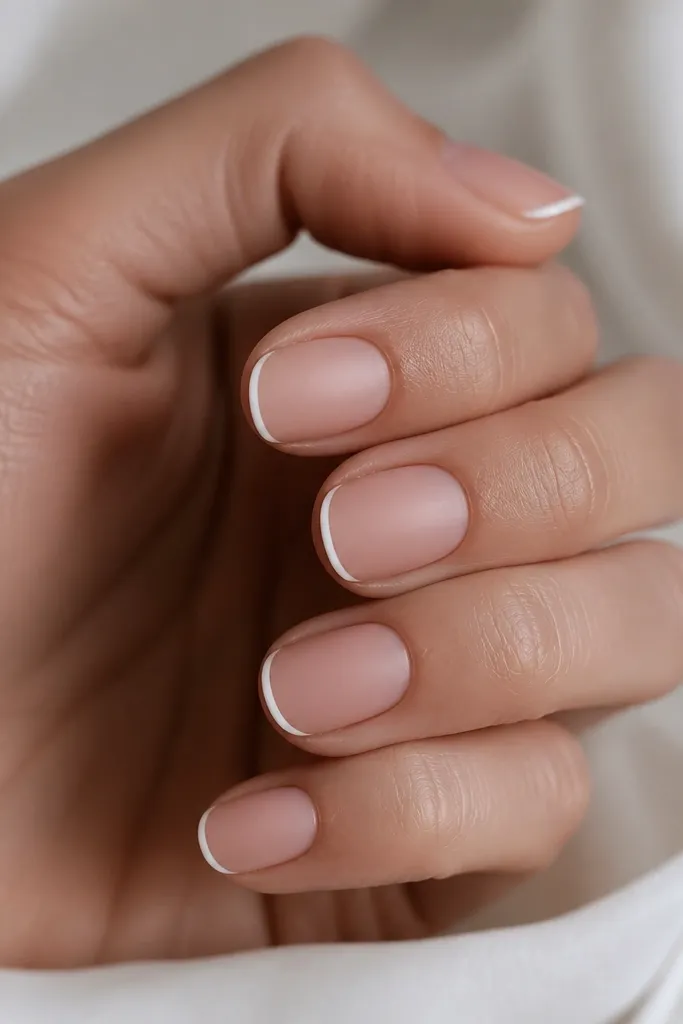
Micro French makes short nails look intentional instead of crowded. The rosy-blush base gives warmth, and the thin white line reads like a highlight. Matte finish softens the edge and helps the French blend smoothly where it meets the nude.
Use a soft pink gel polish as the base, then paint a white line only 0.8 to 1 mm thick. Place it slightly lower than you think - leave a small nude gap between the line and the nail's highest center. Finish with a matte top coat and avoid heavy layering near the tip.
Editor's noteWipe your brush with cleanser often; a damp brush pulls the white into a cleaner arc on short tips.
Watch outAvoid a thick, rounded smile line - it looks like nail art stuck on top instead of a French edge.
3. Reverse French half-moon with thin white border
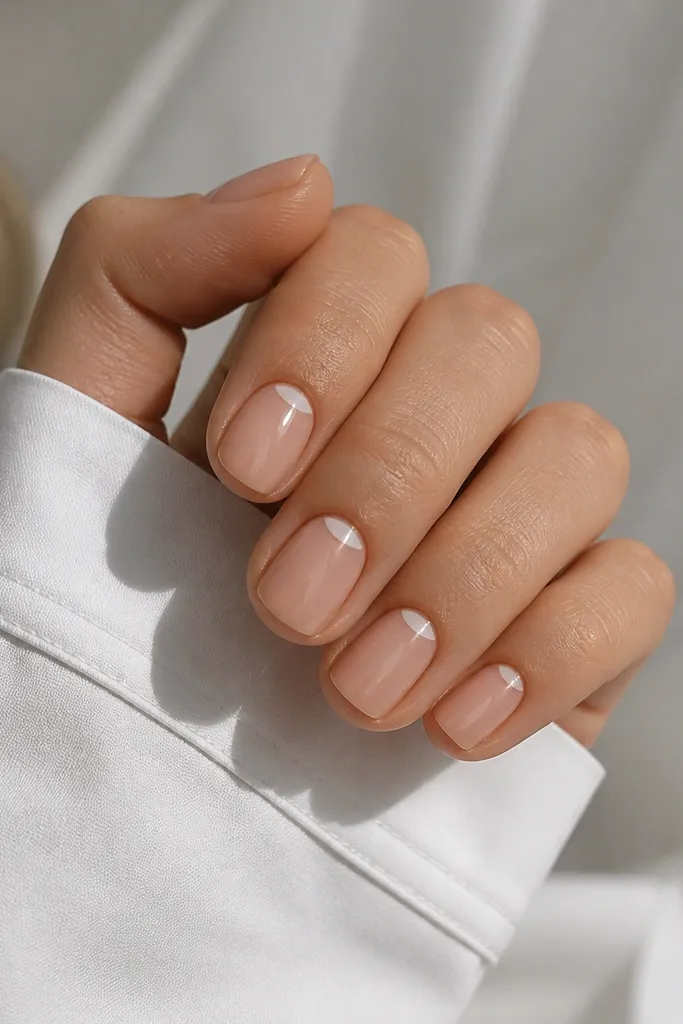
Reverse French is perfect for small nail space because it keeps the white away from the tip where short nails can look chopped. The thin half-moon border frames your cuticle and draws the eye upward. It also looks clean if your nail growth line is visible.
Apply nude base, then use a small liner brush to paint a thin white half-moon around the cuticle. Keep the curve tight and leave the center of the nail nude. Cure and add glossy top coat to smooth the border.
Editor's noteIf the half-moon looks wobbly, use a tiny makeup sponge to clean the edges with a little nude gel, then cure again.
Watch outDon't fill the half-moon too solid - a thick reverse French can swallow the nail bed on short fingers.
4. White French with negative-space side dots
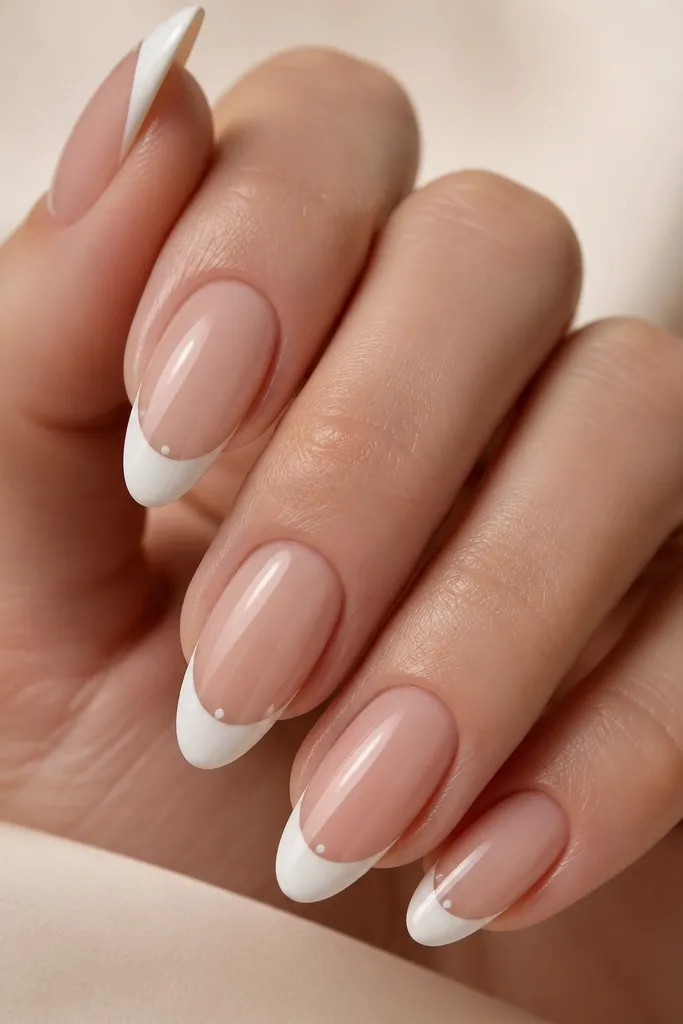
This design keeps the French line clean but adds a quirky detail without taking up space. The tiny "cutout" dots create a focal point that still reads as minimal. Because the dots are negative space, they don't add bulk and they photograph well.
Paint your thin white French tip first. Then, with striping tape or a dotting tool, place two micro tape dots near the side corners at the tip line - leave them clear when you top coat. Pull tape carefully after curing and seal with a glossy top coat.
Editor's noteUse tape dots made for nail art or cut tiny pieces from striping tape; regular masking tape is too thick.
Watch outAvoid placing dots too far up the nail - keep them within 1 to 2 mm of the tip edge.
5. Matte white French with glossy micro stripe
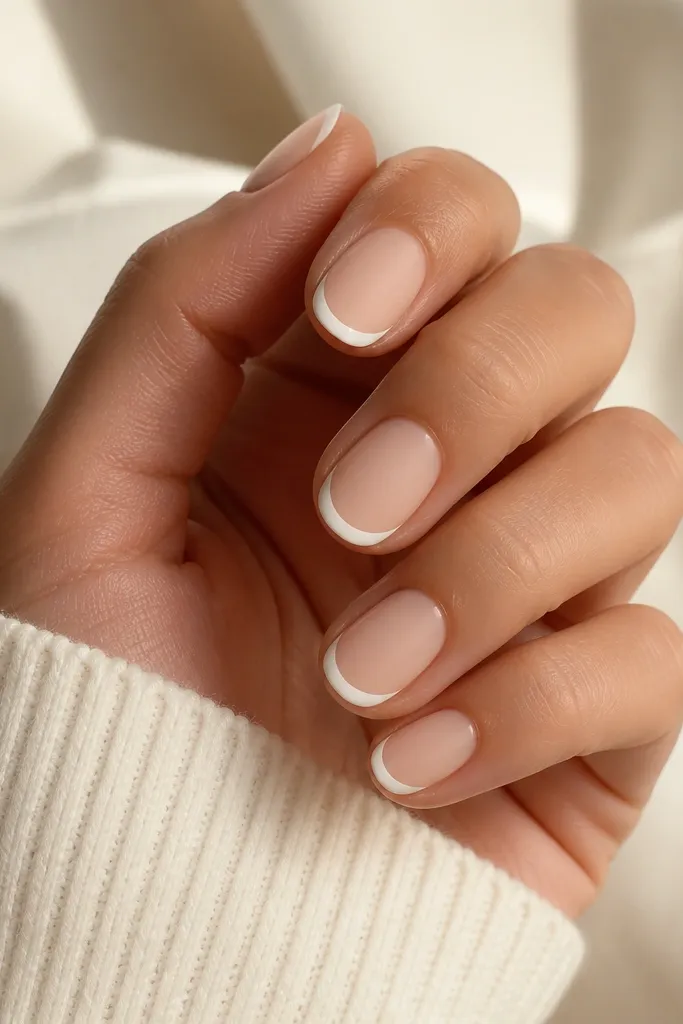
Matte white gives you a soft, fashion look, while the glossy micro stripe adds a sharp highlight that makes the tip look crisp. This combo makes short nails look more "designed" without adding length or width. The gloss stripe also hides tiny brush hairs because it's a straight line.
Base: matte nude. French tip: matte white gel. Then, using a thin liner brush, paint a 0.3 to 0.5 mm glossy stripe right along the inner edge of the French. Cure and finish with a matte top coat on the rest of the nail, but keep the stripe glossy (either top coat around it or use a glossy top just for the stripe).
Editor's noteIf you're not confident, do the stripe last with a gel liner pen so the line stays steady.
Watch outDon't use glossy top coat over the whole nail if you want the matte contrast - the design loses its shape.
6. White French with tiny gold foil corner
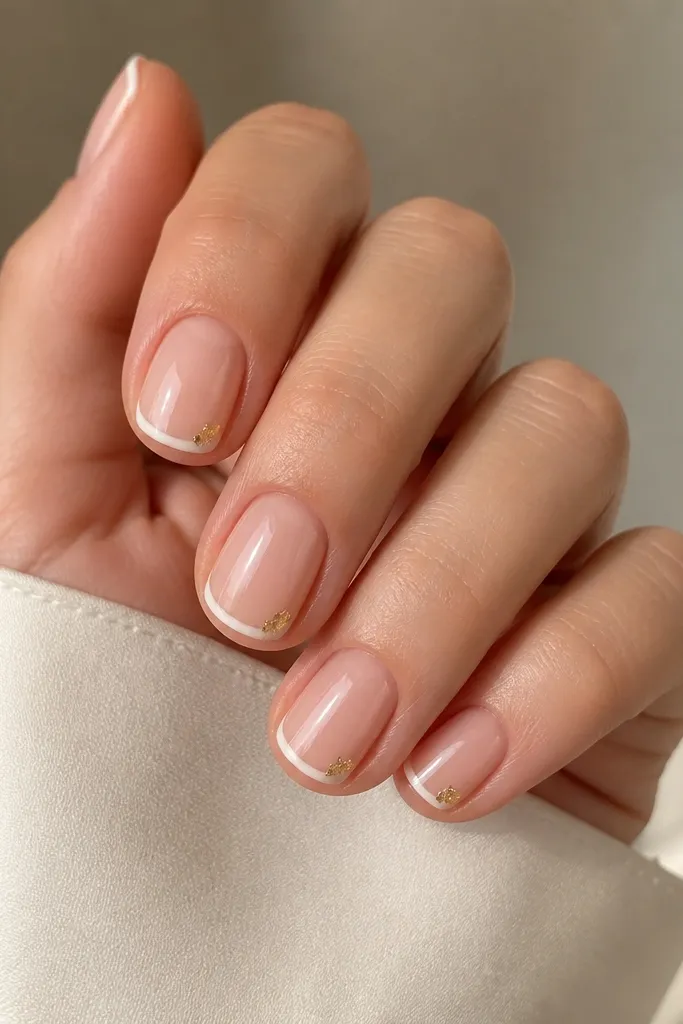
A micro gold foil corner gives the French tip a "jewelry" effect without spreading across the nail. On short nails, corners read best because they mimic the way frames sit on a photo. The gold also warms the white so it doesn't look stark against the skin.
Paint your thin white French tips and cure. Add small bits of gold foil at the outer corners using foil gel or tacky layer. Press lightly, cure, then seal with a glossy top coat to lock the foil down.
Editor's noteUse a toothpick to place foil pieces - your fingers are too big for the corners on short nails.
Watch outAvoid full-foil tips - one fleck per corner keeps it classy.
7. White French with micro dot border at the smile
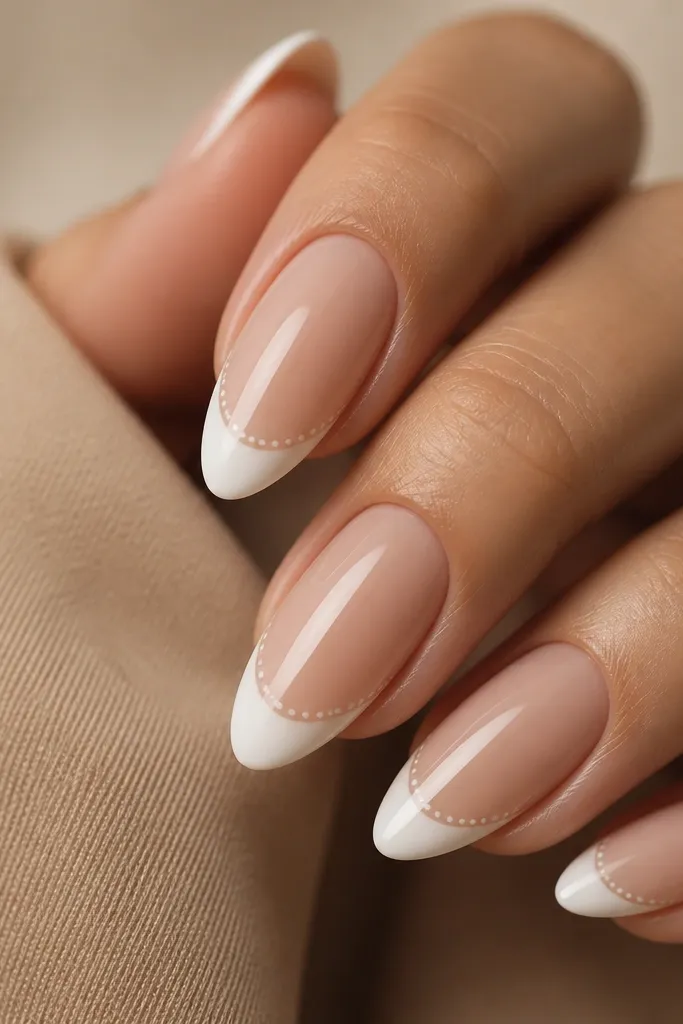
This turns a basic French into a neat pattern without adding width. The micro dots create a scalloped edge effect that looks intentional even when your nails are short. Because the dots sit on the white area, they don't clutter the nude space.
Paint your thin French tip and cure. With a dotting tool, add tiny dots along the smile line - about 0.2 to 0.3 mm each with small gaps. Cure and top coat glossy to keep the dots smooth.
Editor's noteIf dots smear, let the base cure longer and use slightly thicker paint (gel) instead of watery polish.
Watch outDon't make the dots bigger than the tip width - oversized dots turn into blobs on short nails.
8. Double-line French: thin white plus nude inner line
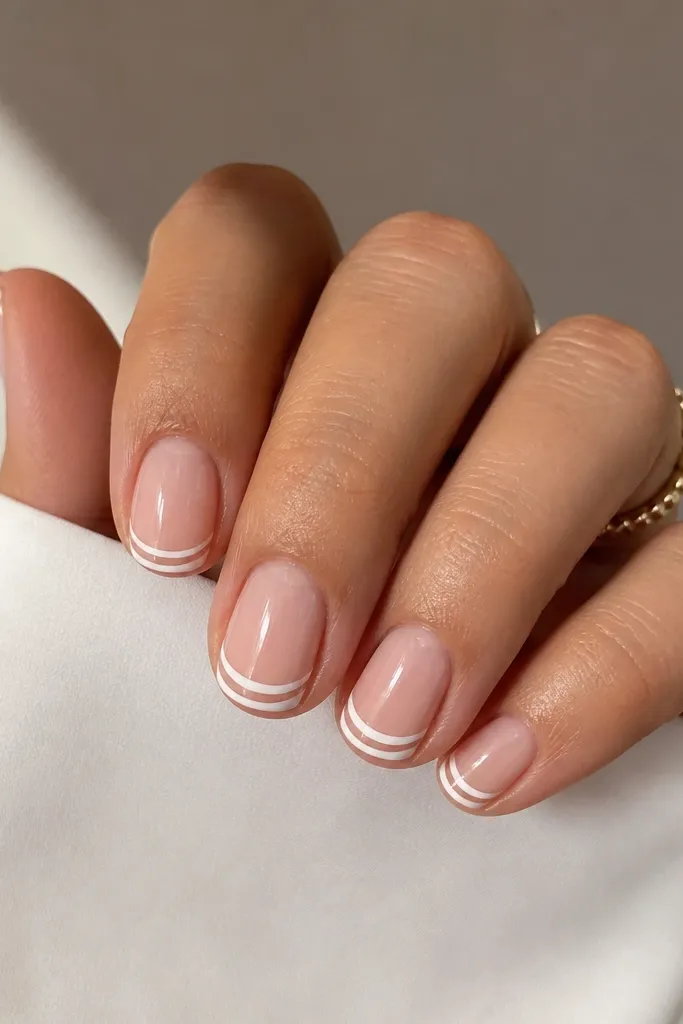
A double-line French gives the look of extra precision. The inner nude gap tricks your eye into seeing more negative space, which makes short nails look longer. It also hides small unevenness because you're defining the shape with two edges.
Start with nude base. Paint the outer French line in thin white (0.8 to 1 mm). After curing, use striping tape or the liner brush to create a thin inner gap and clean it with nude gel if needed. Seal with glossy top coat.
Editor's noteUse striping tape for the inner edge; freehand double lines on short tips wobble fast.
Watch outDon't let the two lines touch - if there's no gap, it stops reading as a deliberate design.
9. White French with tiny black "wing" corner
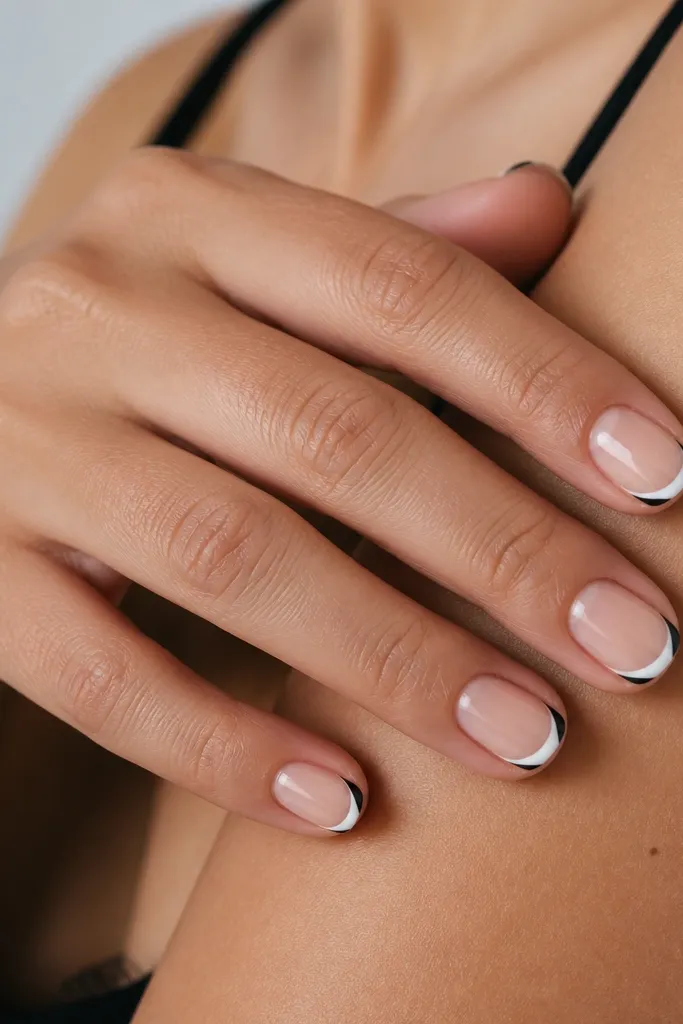
Black at the corner gives a graphic feel and makes the white tip look even cleaner. It's small enough for short nails but bold enough to show in photos. I like this when I want something slightly edgy without adding length.
Paint and cure thin white French tips. With a fine liner brush, add a tiny black wing at each outer corner - about 1 to 2 mm wide. Keep the wing shape narrow so it doesn't cover the sidewall. Top coat glossy to smooth.
Editor's noteUse gel black liner and wipe the brush tip on a lint-free pad before painting the wing.
Watch outAvoid thick black at the corner - it overpowers the nail bed on short fingers.
10. White French with pearlized micro shimmer tips
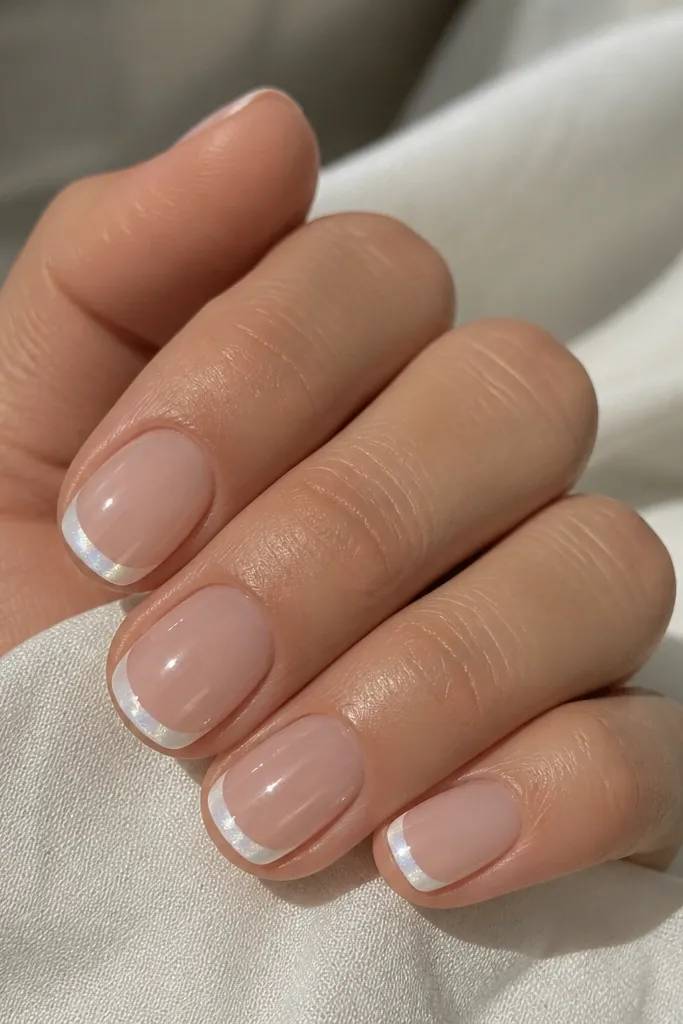
Pearlized white keeps the classic French but adds a soft glow that doesn't look like chunky glitter. On short nails, heavy glitter can make the tip feel heavy. This version stays lightweight while still catching light.
Use a sheer nude base. Paint the French tip with white pearl gel (not chunky glitter). Keep the tip band thin and even. Seal with glossy top coat for a smooth, glassy finish.
Editor's noteIf you only have regular white, mix a tiny amount of pearly top coat into your white gel and test on a nail wheel.
Watch outAvoid full glitter coverage at the tip - it makes short nails look thicker than they are.
11. White French with skinny blush stripe inside the tip
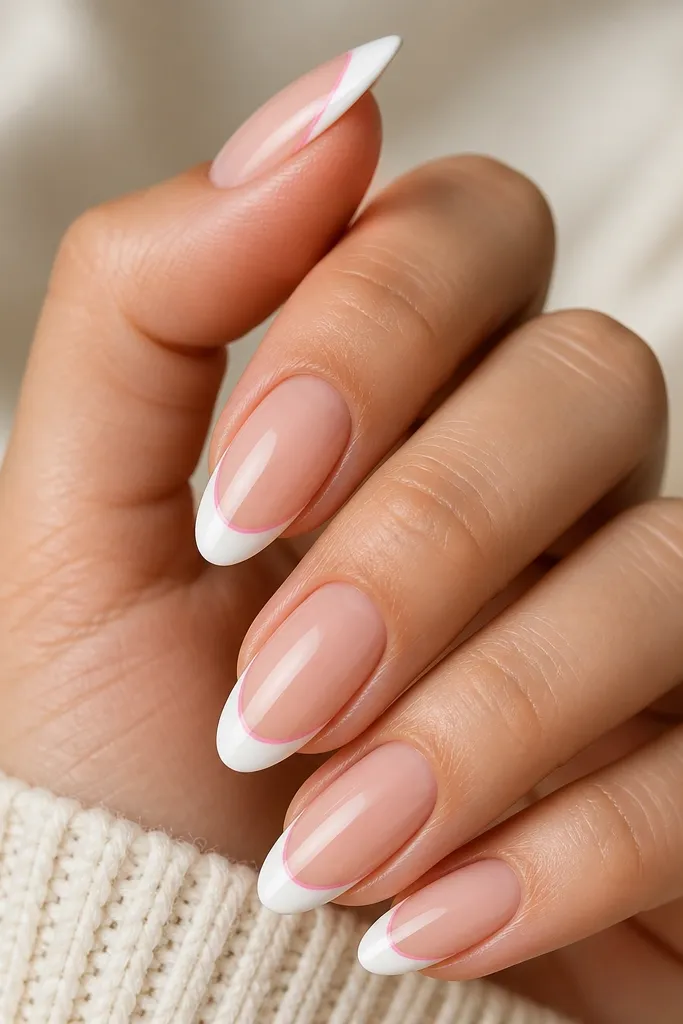
This design adds a second color without expanding the tip. The blush stripe sits inside the white, so it looks like a layered frame. It also keeps the white from looking too cold against warm skin tones.
Base: nude. French: thin white band, cured. Add a 0.5 mm blush stripe inside the white using a striping brush. Cure again and top coat glossy.
Editor's noteLet each layer cure fully before adding the inner stripe - wet gel mixes and blurs on short nails.
Watch outDon't use a stripe that's too wide - wider stripes look like a mistake on small nail space.
12. White French with tiny rhinestone at the center smile
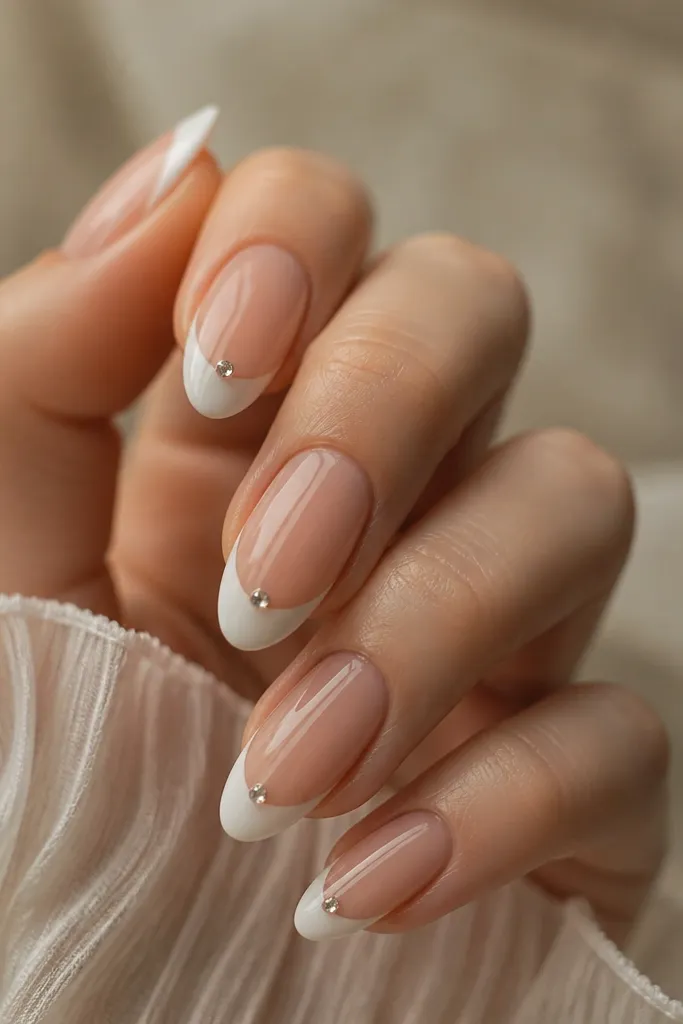
A single rhinestone at the smile reads like a tiny stud and makes the French tip feel intentional. Center placement keeps it balanced and avoids the crowded look that happens when rhinestones multiply on short nails. Clear stones also don't fight with the nude base.
Paint thin white French tips and cure. Use gel adhesive or a dot of clear builder gel to set a single small rhinestone (SS3 to SS5 size). Press with a rhinestone pick, cure, then seal around the stone with top coat so it feels smooth.
Editor's noteAfter curing, run a lint-free wipe over the surface to check for sharp edges before you leave the house.
Watch outAvoid large stones - they lift and snag on short nails.
13. White French with ombre nude-to-white tip fade
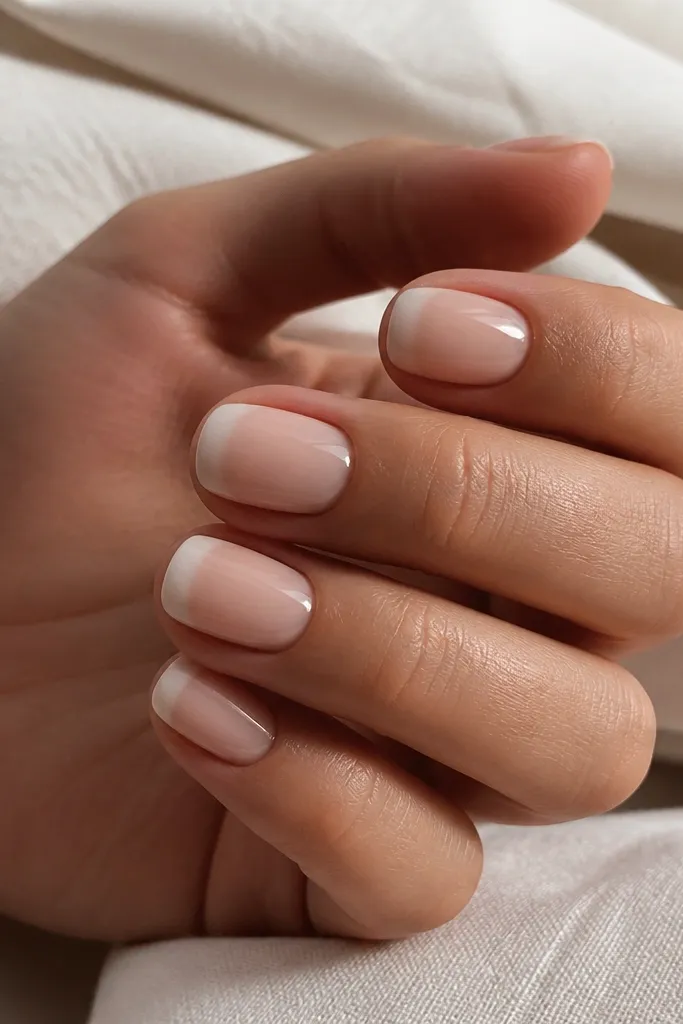
Soft fade tips look longer because the transition is gradual. It's forgiving if your smile line isn't perfectly straight. The white still reads as French, but it doesn't feel like a hard line sitting on top of your nail.
Start with nude base. Sponge-paint a white-to-nude gradient within the tip area using a makeup sponge - keep it confined to the top third. Build opacity gradually: nude to sheer, then more white at the outer edge. Cure and top coat glossy.
Editor's noteUse a small piece of sponge and dab, don't swipe - swiping creates streaky edges on short nails.
Watch outAvoid heavy, opaque white that starts too far down - the fade should stay within the tip zone.
14. White French with thin teal outline at the edges
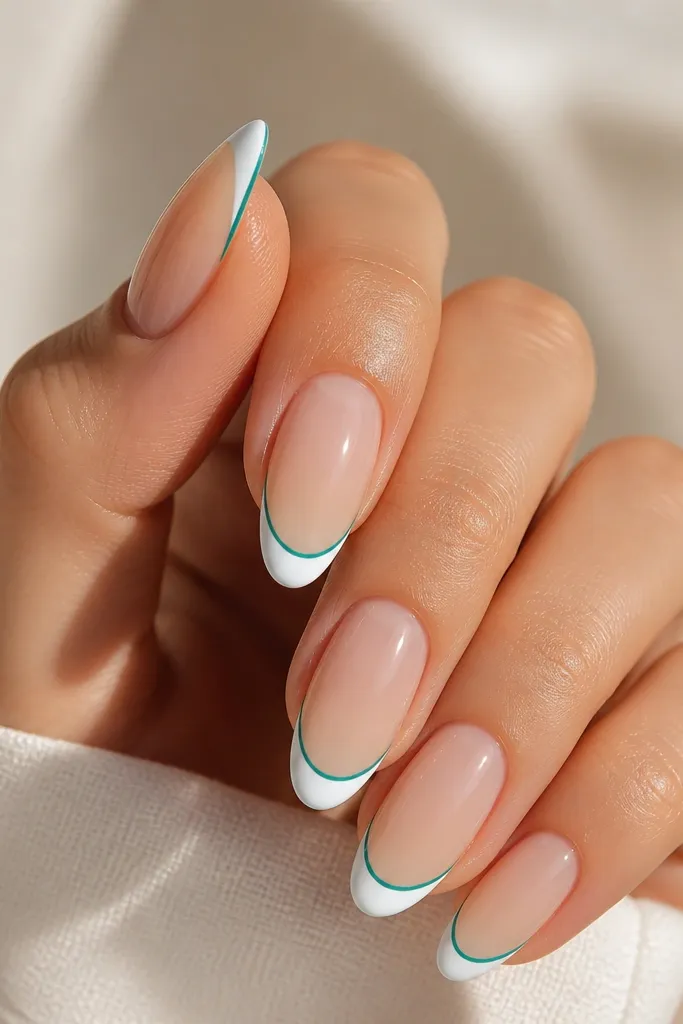
Teal outlines make the French look fresh and a little nautical without taking over the nail. The teal stays on the edge, so the white still dominates the design. It's a great option if you want color but your nails are short and you don't want clutter.
Paint thin white French tips and cure. Using a fine liner brush, draw a teal line along the outer edge of the white, staying under 0.5 mm thick. Cure and top coat glossy.
Editor's noteIf the teal bleeds, clean the brush with gel cleanser and wipe it dry before reloading color.
Watch outDon't outline both sides too thick - thicker outlines make short nails look like they have a frame stuck on.
15. White French with tiny lavender dot cluster
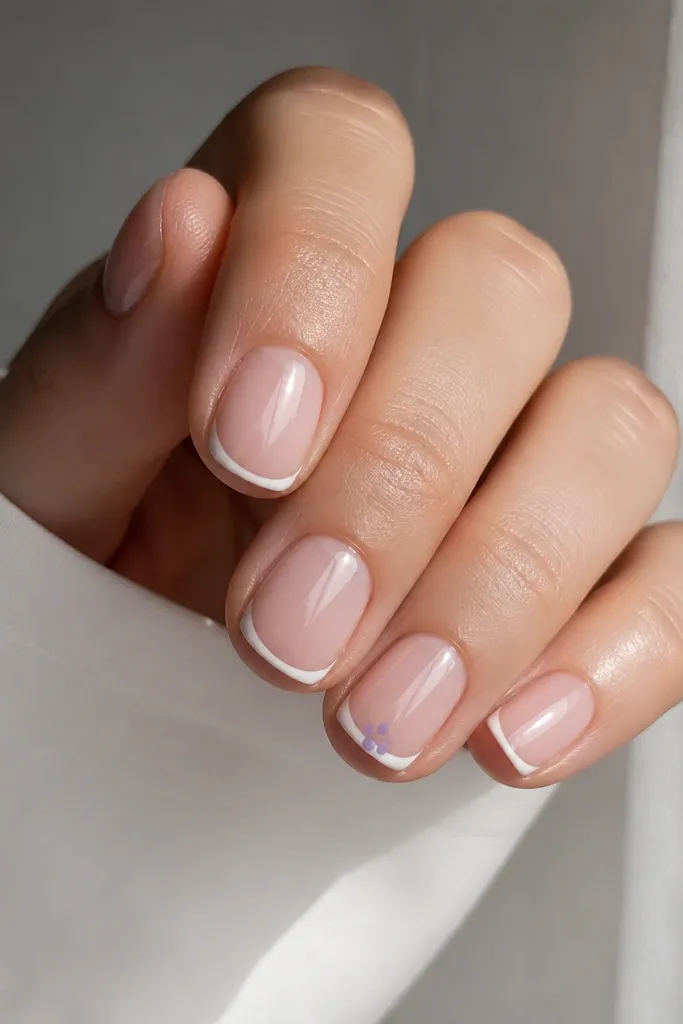
A small dot cluster gives a playful accent while keeping the rest of the nails classic. Lavender dots look soft next to white and nude, and you only need three dots to make it feel like a design. This is the kind of manicure that still looks neat when your nails grow out.
Do thin white French tips on all nails. On one or two accent nails, place three micro lavender dots with a dotting tool within the white tip area near the center. Cure and top coat glossy.
Editor's noteUse a dotting tool size that makes dots about the width of a pinhead - anything bigger crowds short tips.
Watch outAvoid putting dots on every nail - it gets busy fast on short nails.
16. White French with sheer nude glaze top
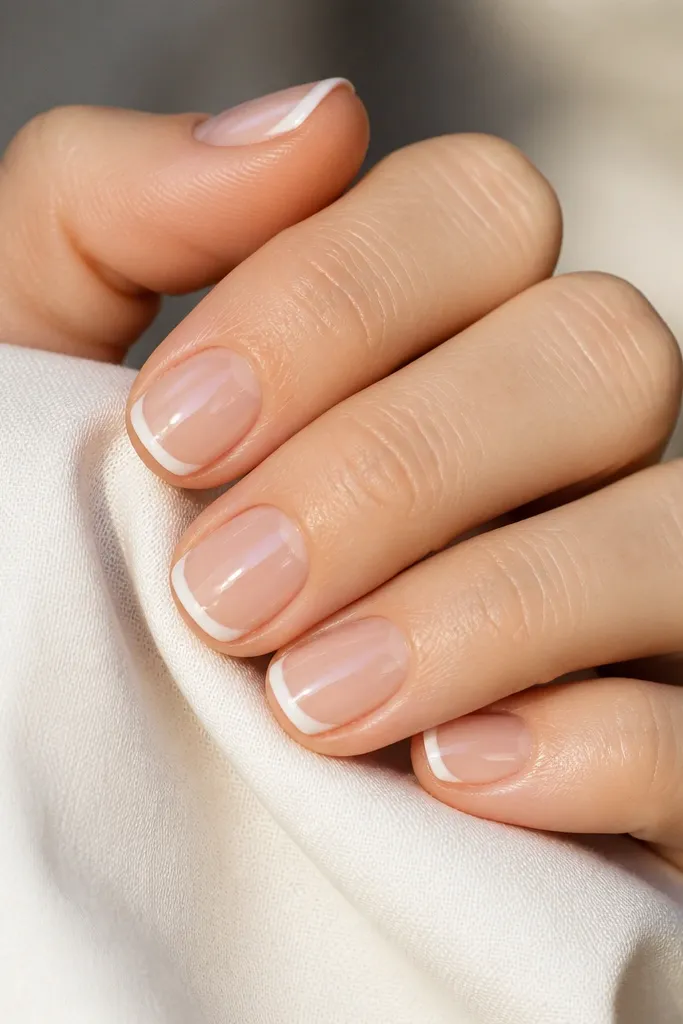
Glazed French tips look expensive because the white isn't chalky. The translucency makes the tip feel lighter and less blunt on short nails. It also hides tiny brush lines because the glaze smooths the surface.
Use a sheer nude base. Paint a translucent milky white gel for the French tip - thin coats, cure, repeat until you like the opacity. Finish with a high-shine glossy top coat or a jelly top coat.
Editor's noteIf your white turns too opaque, stop at two thin coats and seal - you'll keep the glazed look.
Watch outDon't use matte on glazed French - it kills the smooth glass effect.
17. White French with silver micro studs at corners
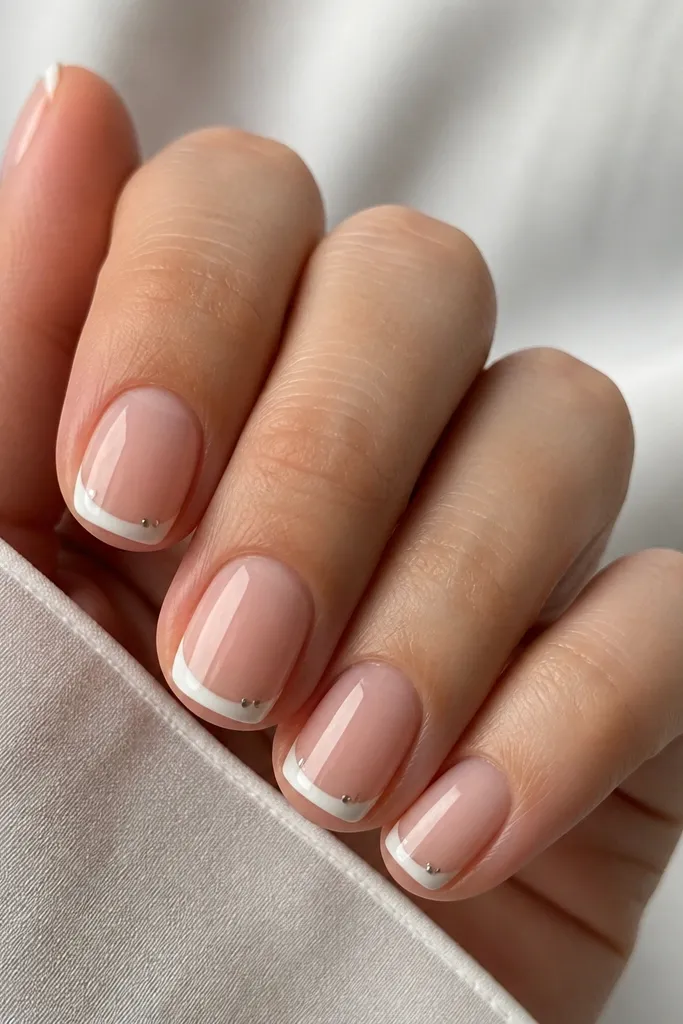
Corner studs add a "clean hardware" vibe and still fit short nail space because they're tiny. Keeping the studs at the corners frames the French line without adding length. Silver looks sharp against white and reads well in daylight.
Paint thin white French tips. Place two micro studs at each outer corner using gel adhesive, then cure. Seal with top coat, making sure you cover the base of the studs so they don't catch.
Editor's notePress studs down gently with the end of a silicone tool so they sit flush.
Watch outAvoid big studs - they lift and snag when your nails are short.
18. White French with thin diagonal slash on ring finger
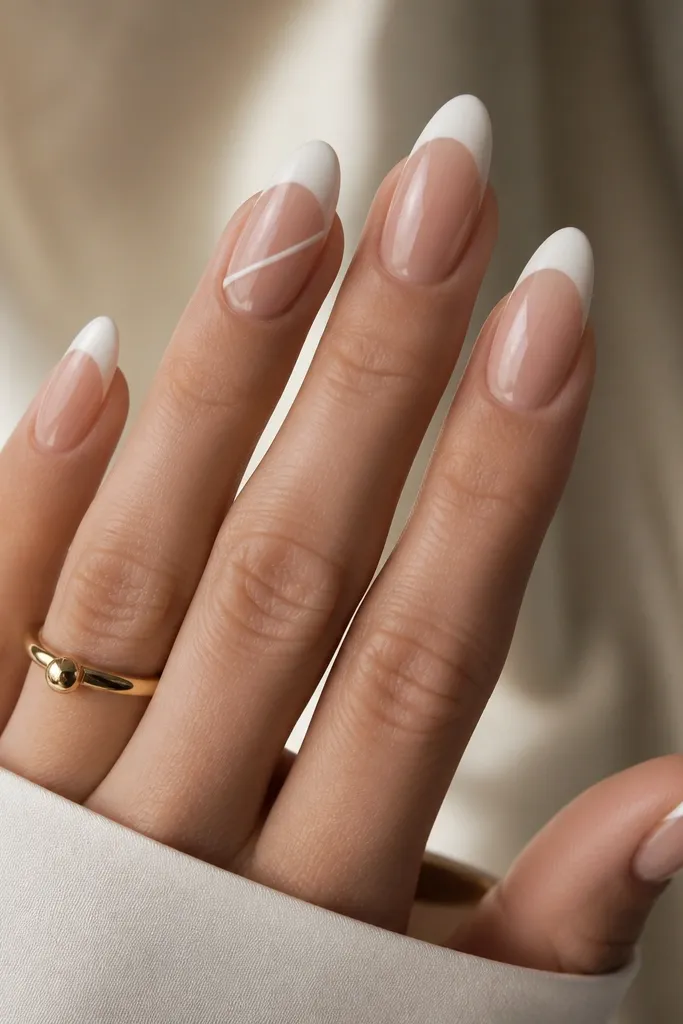
A diagonal slash gives movement and makes short nails look styled. Because it's just one line on one nail, it doesn't compete with the French. The diagonal also draws the eye across the nail, which helps when you want your hands to look a bit longer.
Do the same thin white French tips on all nails. On the ring finger, add one diagonal slash line in white across the nude just above the French line - keep it narrow (about 1 mm). Cure and top coat glossy.
Editor's noteUse a nail art striping brush with a sharp tip and keep the diagonal line consistent thickness.
Watch outDon't add multiple slashes - short nails look messy when you stack lines.
19. White French with nude-to-white gradient half-moon cuticle
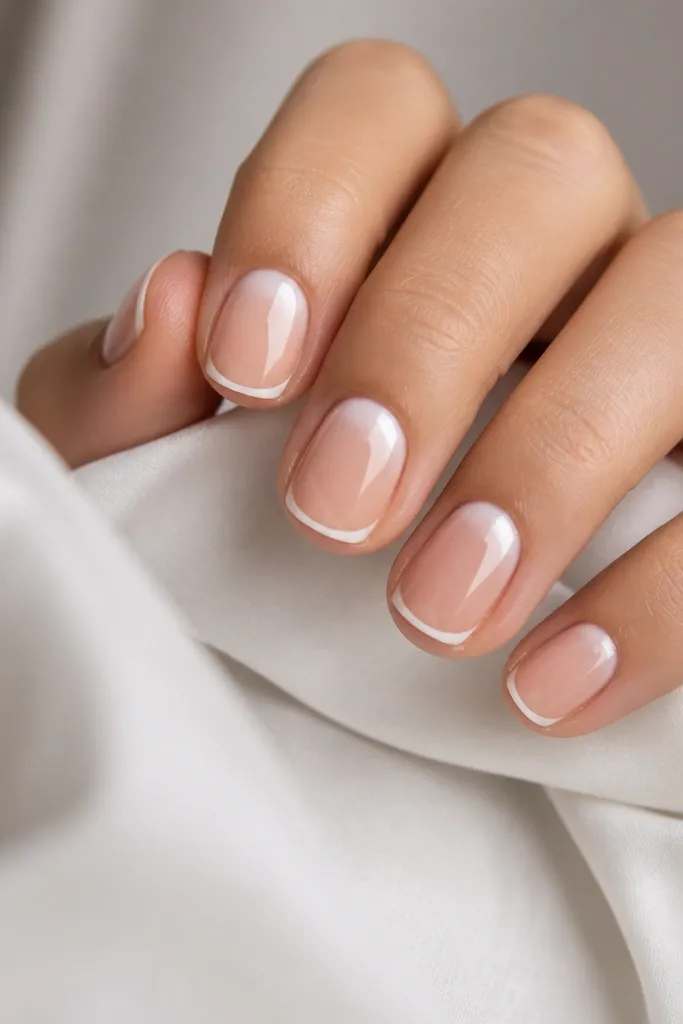
The cuticle gradient makes the nail bed look fuller and adds interest without taking space from the tip. On short nails, gradients are forgiving because the transition hides small unevenness. The combination keeps the classic French look but adds a modern twist.
Base: nude. Paint a half-moon gradient at the cuticle using a small sponge: nude blending into milky white. Then add a thin white French tip band above the gradient area. Cure and finish glossy.
Editor's noteBlend the gradient gently with sponge dabs; harsh lines look fake on gradients.
Watch outDon't put the gradient too high - keep it inside the cuticle zone.
20. White French with tiny black dot near sidewall
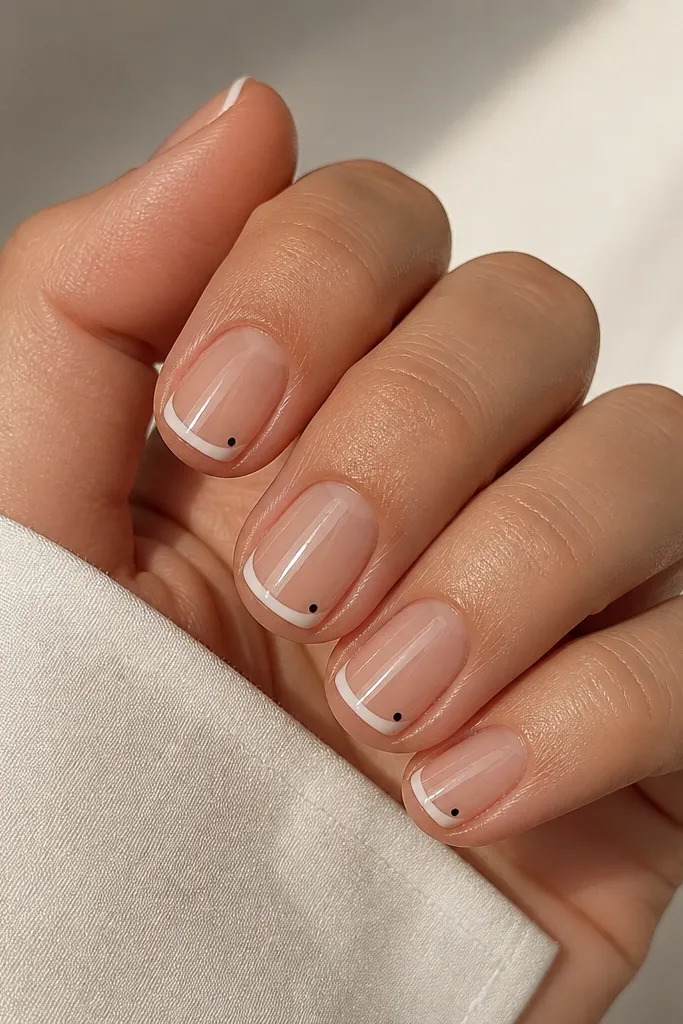
This is one of those details that makes the whole set look sharper. The black dot is small enough to keep the French clean, but it creates a focal point that makes the nails feel "finished." Sidewall placement makes the dot look like it's part of the smile line.
Paint thin white French tips and cure. With a dotting tool, place one black dot about 1 mm from the outer edge within the white tip zone. Cure and top coat glossy.
Editor's noteIf you can't place the dot exactly, place it slightly lower - it still reads, but higher dots can look accidental.
Watch outAvoid multiple dots on the same nail - one dot per nail keeps it crisp.
21. White French with tiny rose-pink chevron
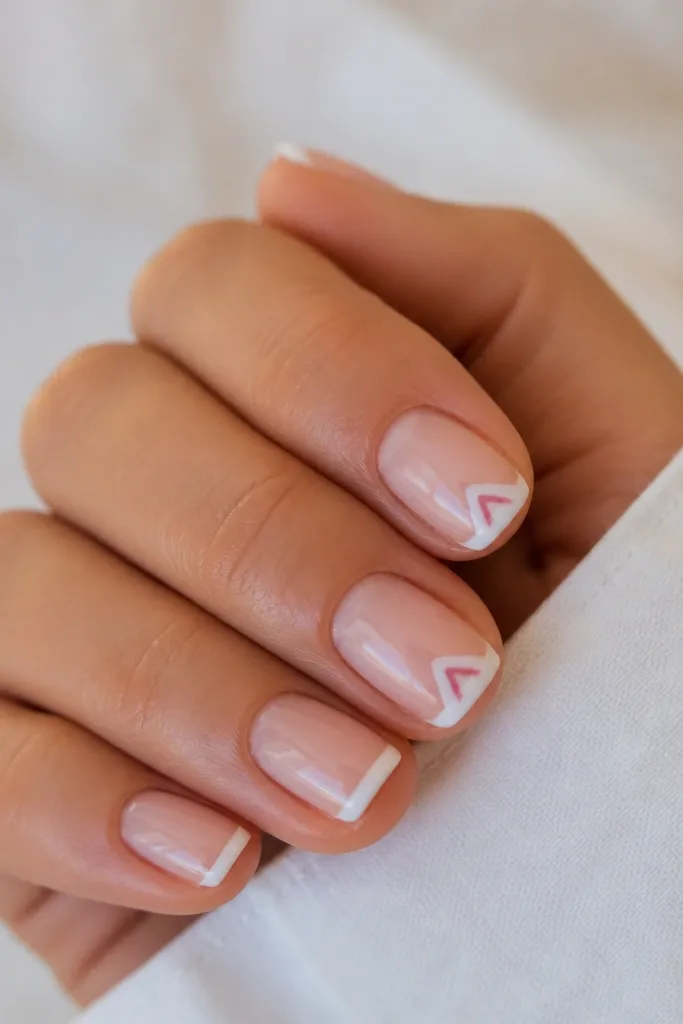
A tiny chevron adds a graphic pattern while staying inside the French zone. Rose-pink chevrons look softer than bright pink and pair cleanly with milky white. This design works great if you want something cute but not overly decorated.
Paint thin white French tips on all nails. On two accent nails, add a small chevron using a striping brush - each arm about 1 to 1.5 mm. Keep it centered and small so it doesn't crowd the tip. Cure and top coat glossy.
Editor's noteDo chevrons in one confident stroke per side, then fill gaps with the brush tip.
Watch outDon't make the chevron too wide - it can look like a sticker on short nails.
22. White French with tiny heart cutout at center
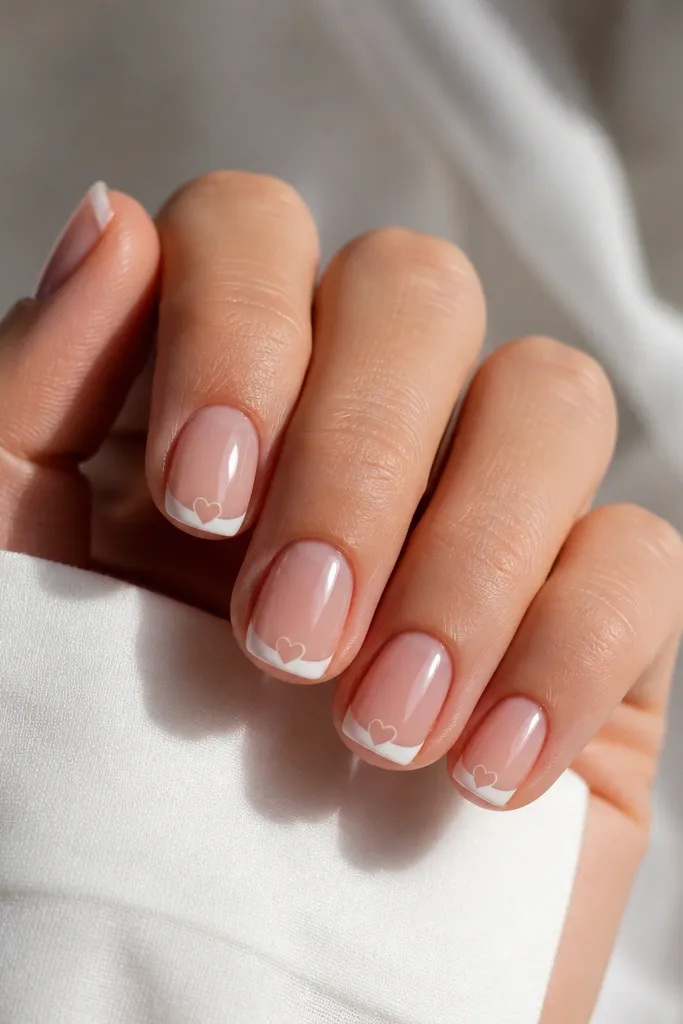
Negative-space hearts look sweet without adding bulk. On short nails, a tiny heart at the center keeps the design playful while still following the thin French rule. The clear heart also makes the manicure look light and airy.
Paint thin white French tips and cure. Place a small heart-shaped piece of striping tape or a pre-cut vinyl stencil at the center of the tip, press lightly, then paint a thin layer of top coat or leave it clear depending on your method. Remove the stencil carefully after curing so the heart stays negative space. Seal with glossy top coat around it.
Editor's noteUse pre-made nail vinyl for hearts; freehand hearts on short nails look uneven fast.
Watch outDon't make the heart bigger than the center of the tip band - oversized hearts look like a blob.
23. White French with micro marble swirls on one nail
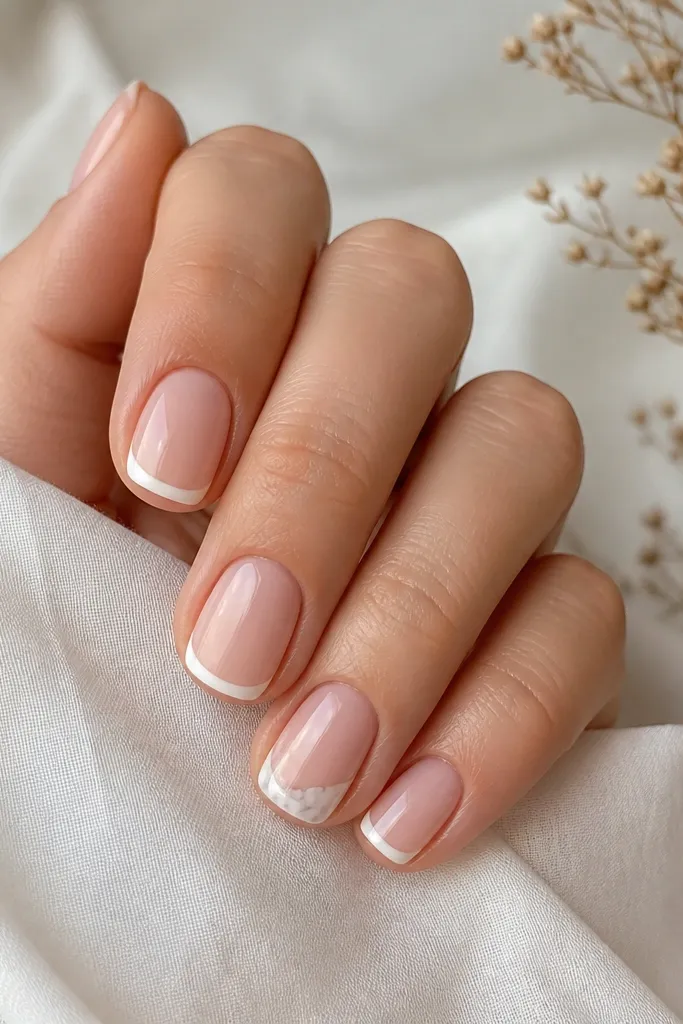
Micro marble adds texture without ruining the French shape. Keep the swirls small and mostly inside the tip so the rest of the nails stay clean and readable. Grey swirls look more believable than black swirls on a small surface.
Paint thin white French tips on all nails. On one nail, add very thin grey lines and swirl them with a toothpick through wet white gel, then cure. Add a second thin milky white coat if the grey spreads too much. Top coat glossy.
Editor's noteMarble looks best when the swirls are thinner than a hair - use a liner brush and less product.
Watch outAvoid full marble across the nail - it overwhelms short nails quickly.
24. White French with nude dot trail from tip to center
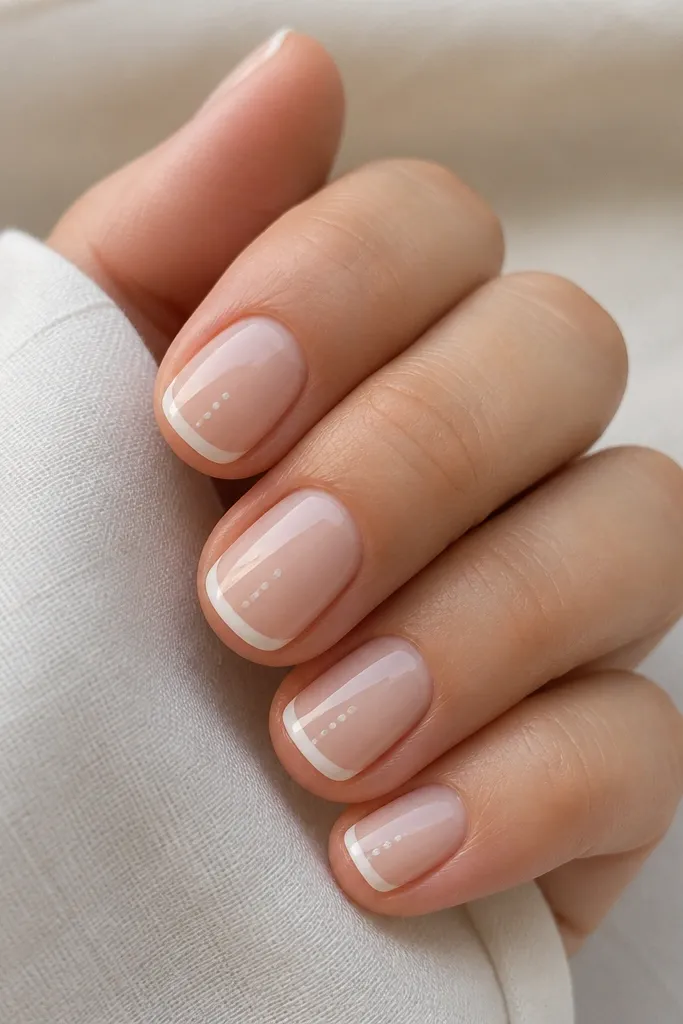
This uses the nude as the "ink," so it stays subtle. The dotted trail pulls the eye downward slightly, which makes the nail feel longer on small fingers. It also looks clean in real life, not just in photos.
Paint thin white French tips and cure. Add a short row of tiny dots in nude gel starting just below the tip line and stopping around the center of the nail. Use a dotting tool and keep the spacing tight. Cure and top coat glossy.
Editor's noteIf the nude dots disappear, add a slightly lighter nude than your base so the dots catch light.
Watch outAvoid too many dots - a long trail makes the nail look busy and shorter.
25. White French with tiny star at outer corner
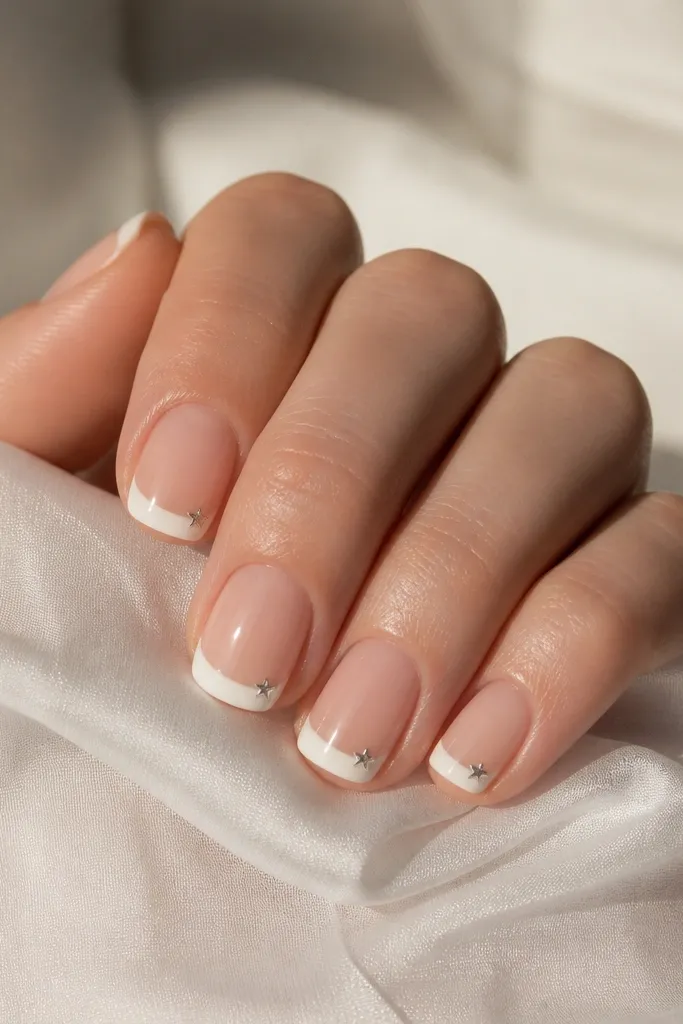
Stars at the outer corner feel fun but still controlled because they sit where the French already frames the nail. Silver stars also match everything, especially if you wear cool-toned jewelry. This is a good "party but short" option.
Paint thin white French tips and cure. Place one tiny star (flat backed) at each outer corner using gel adhesive. Cure and seal with glossy top coat, making sure the star is fully covered for smoothness.
Editor's noteUse a star size that's smaller than your dotting tool head; big stars look cartoonish on short nails.
Watch outAvoid stars on every nail if your set feels heavy - one or two accents look best.
26. White French with thin gold line under the smile
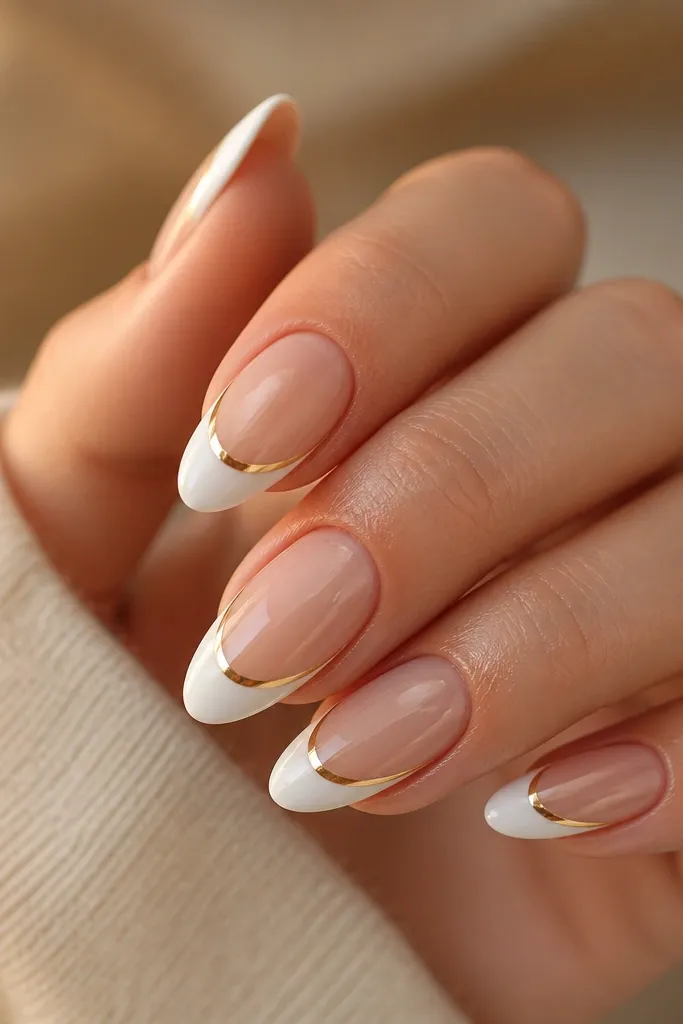
That gold line creates a double-frame effect. It makes the French tip look like it's bordered, which reads polished even with short length. The gold sits on the nude area, so it doesn't thicken the white band.
Paint thin white French tips and cure. Then add a thin gold striping gel line just beneath the smile curve - about 0.3 to 0.5 mm. Cure and finish glossy top coat.
Editor's noteDraw the gold line with a liner brush in one pass, then clean the edges with a small flat brush dipped in cleanser.
Watch outDon't make the gold line too thick - thick lines overpower short nails.
27. White French with soft peach micro dots grid
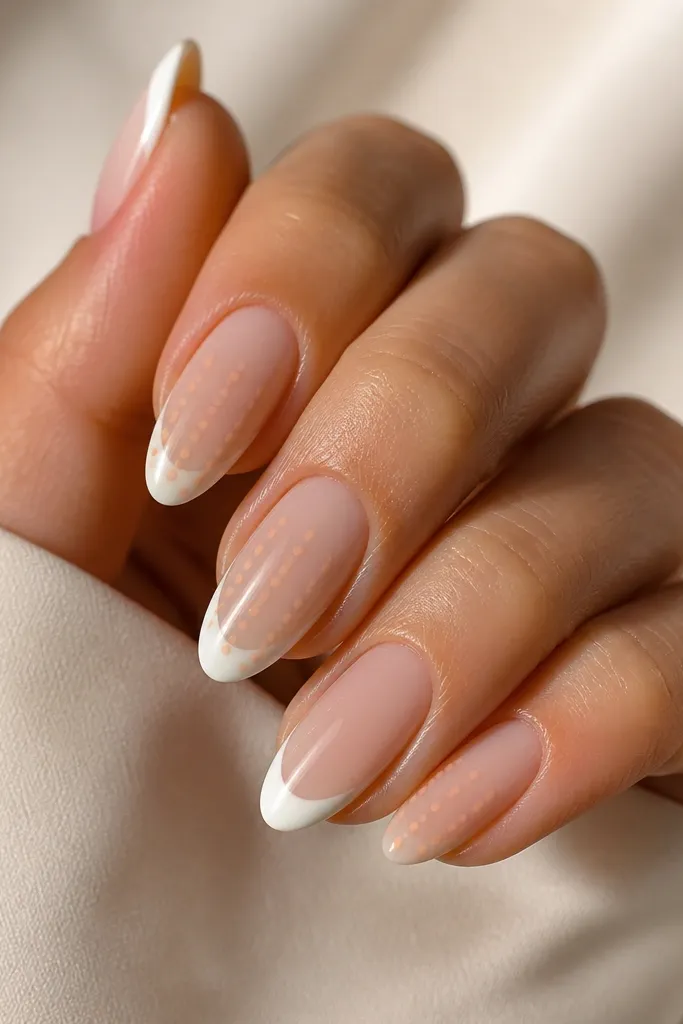
A dot grid is subtle structure. Peach dots look warm next to white and keep the manicure from feeling too stark. Because the pattern sits only in the tip zone, it stays readable on short nails.
Paint thin white French tips and cure. On selected nails, add micro peach dots in a loose grid - 3 rows at most - within the white tip area. Cure and top coat glossy to smooth the dots.
Editor's noteIf your dots look too round and raised, use a thinner dotting gel and cap the design with top coat.
Watch outAvoid a full grid across every nail - it becomes too busy on small nail space.
28. White French with tiny chain-link detail
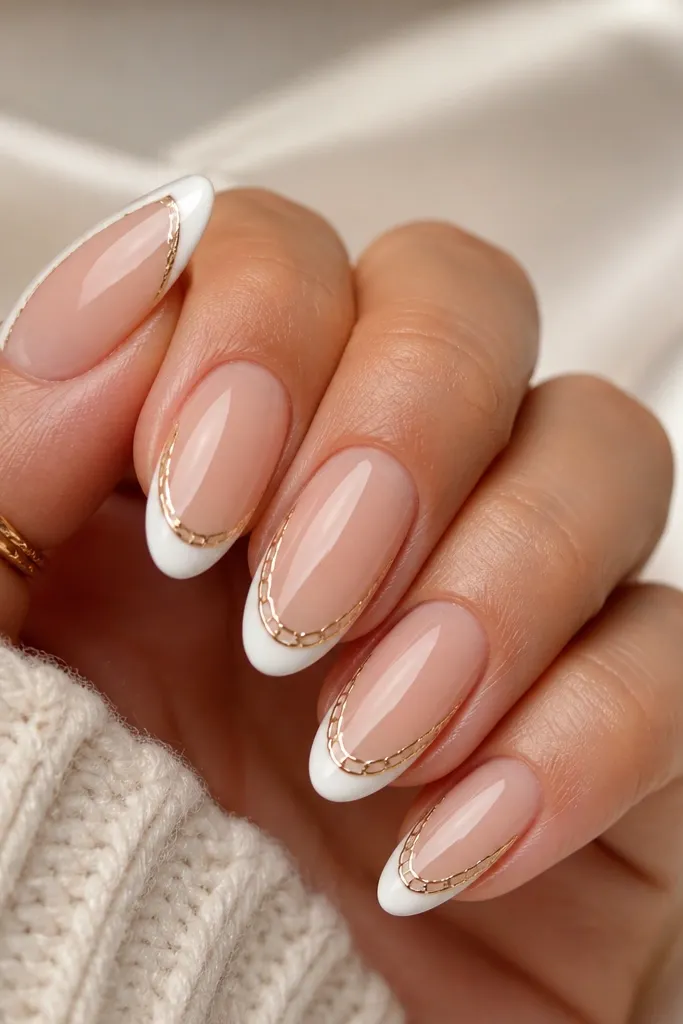
Chain details add a jewelry feel without adding width. Keep it to one nail or one small section so short nails don't look weighed down. Silver chain lines also make the white tip look extra clean.
Paint thin white French tips and cure. On one accent nail, draw a small chain-link using silver striping gel - each link about 1 mm wide. Keep the chain within the tip band and cure. Seal with glossy top coat.
Editor's noteUse a nail art pen if you have one - chain links are easier when the line stays consistent thickness.
Watch outAvoid thick chain lines - heavy gel makes the links look like blobs.
29. White French with tiny lace stamp effect
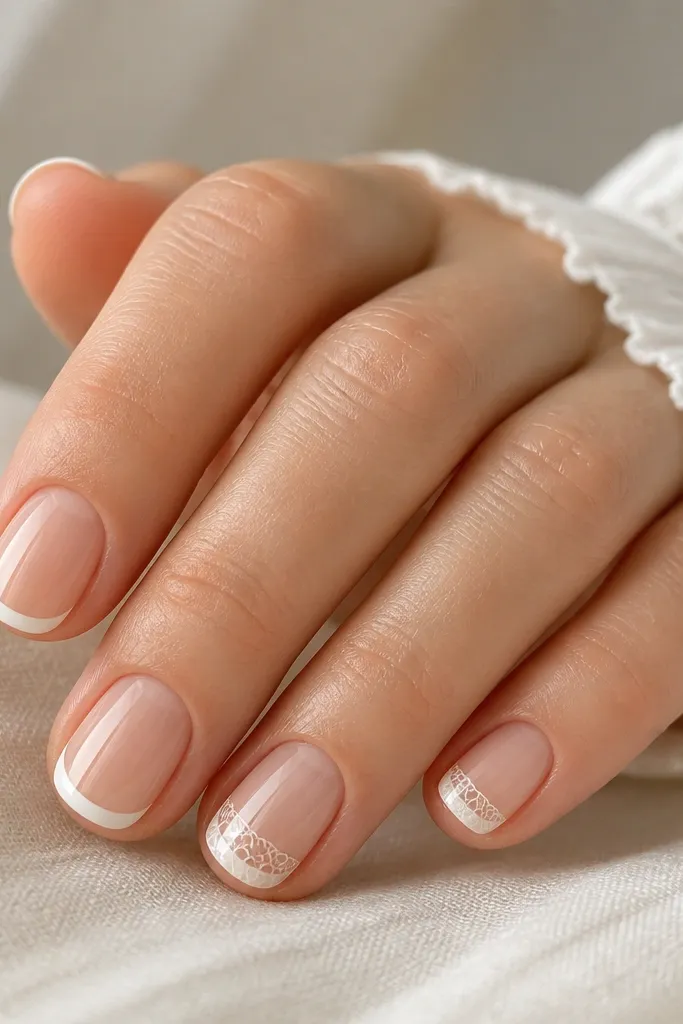
Lace stamping gives texture that still reads as French. The pattern looks delicate when it stays faint, not fully opaque. It also works well when your nail surface has minor ridges because the pattern breaks up shine.
Paint thin white French tips and cure. Apply a lace stamping plate using white stamping polish or opaque gel, then stamp only the tip area. Clean the stamp edges quickly and cure. Finish glossy top coat.
Editor's noteDo a test stamp on a spare nail first - lace plates vary in how dense they transfer.
Watch outAvoid heavy stamping - if the lace fills the whole tip, it looks like lace sticker paper.
30. White French with blush "smile" shadow under tip
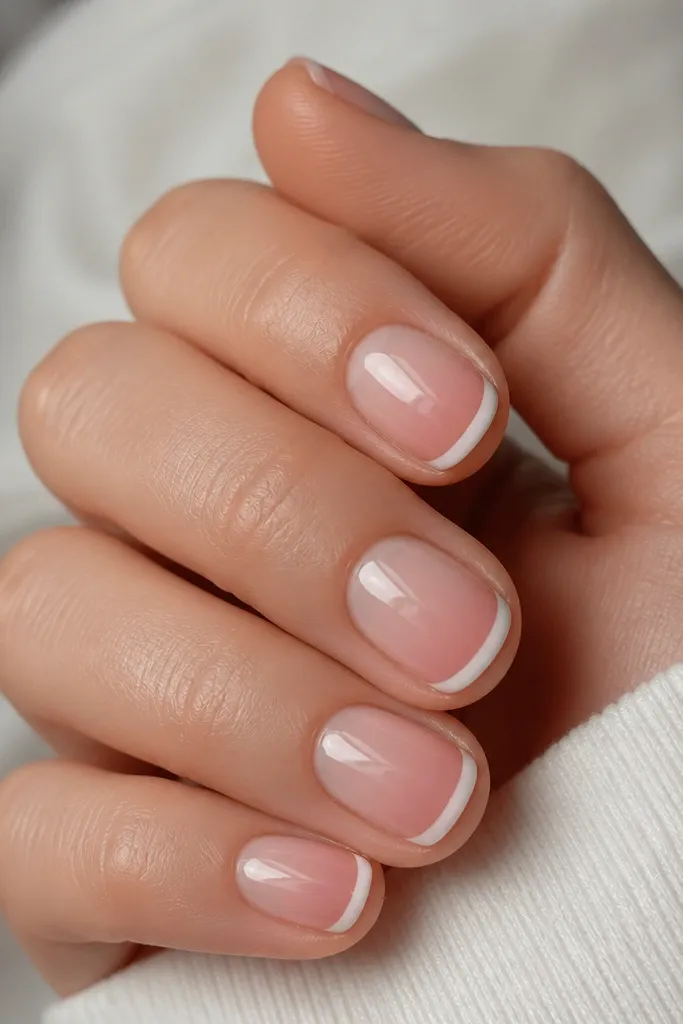
A blush shadow under the white tip makes the French look softer and more blended. It also tricks the eye into seeing a longer curve because there's a gentle gradient. This is one I do when I want French tips to look expensive but not sharp-edged.
Paint nude base. Add thin white French tips and cure. Then sponge a very light blush gel right under the smile line, keeping it within 1 to 2 mm of the edge. Blend with a brush, cure, and top coat glossy.
Editor's noteUse a tiny makeup sponge and tap lightly - blush shadow should look like a tint, not a stripe.
Watch outAvoid a dark blush shadow - it turns into a harsh line on short nails.