1. Milky Pink to Rose Fade with Silver Half-Mirror
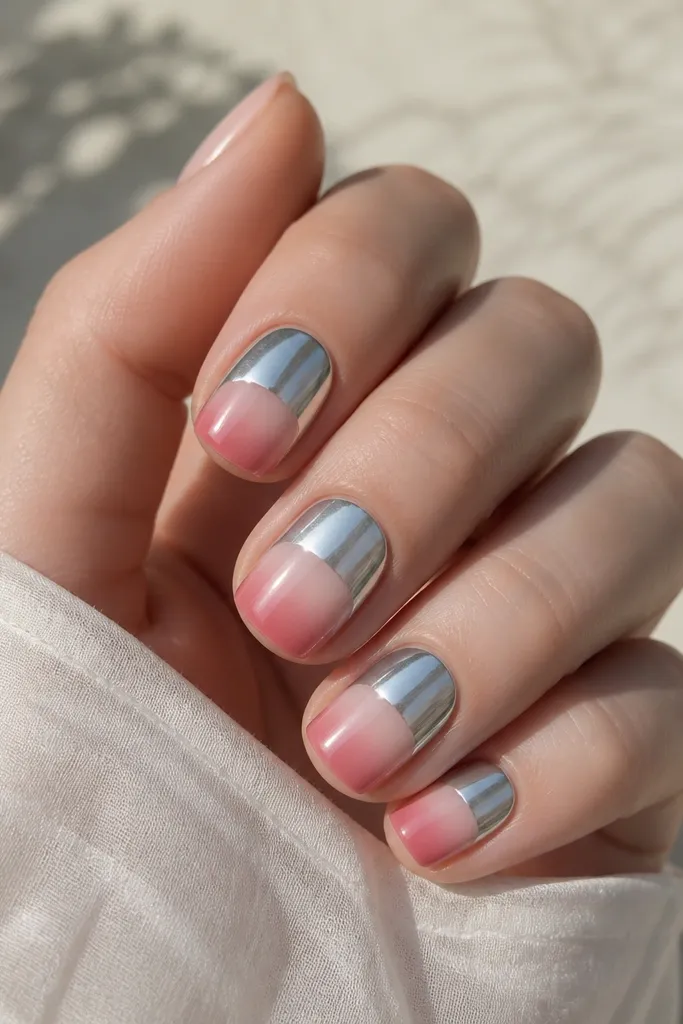
I do this when I want clean, pretty nails that still look like chrome. The base is a milky pink that's almost sheer, then I sponge in dusty rose so the tip looks like it's blushing, not painted on. Silver chrome on the top half gives that "jewelry shine" without overpowering the ombre. It flatters fair to medium skin because the milky pink makes the nail bed look longer, and the rose tip adds warmth. Wear it for workdays, brunch, and any time you want soft glam instead of loud glitter.
Start by painting a glossy milky pink base over the whole nail. Then sponge dusty rose only on the outer half of the nail and blend toward the cuticle with 2-3 light taps, keeping the fade width narrow. Cure, then apply chrome gel or tacky layer only on the top half of the nail (about 1/2 the length). Press silver chrome powder onto the top half, tap off the excess, and seal with a thin top coat over the chrome area.
Editor's noteKeep the darkest rose edge thinner than you think - it should look like a soft blush line, not a stripe.
Watch outAvoid chrome across the full nail if your ombre fade is still patchy; the mirror finish will show every uneven spot.
2. Nude Beige Ombre with Champagne Chrome Tips
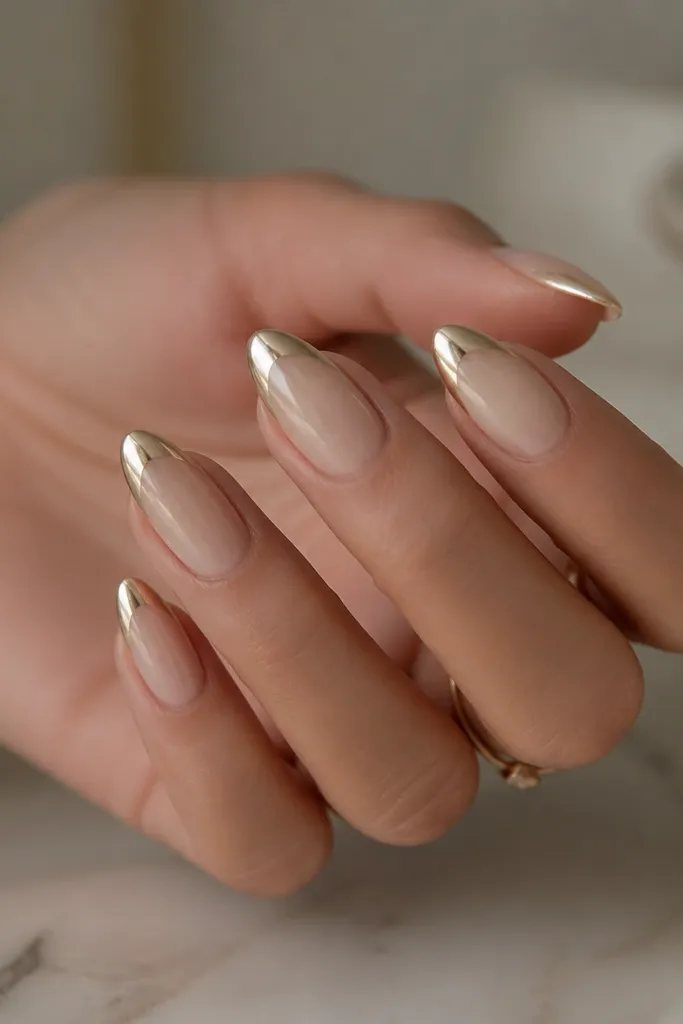
This one is for warm undertones and "I want pretty but neutral" days. The nude beige starts creamy at the cuticle and fades into a slightly deeper beige at the tip, so it looks like natural nail color with depth. Champagne chrome on only the last 1/4 to 1/3 makes the nails look expensive even under indoor lighting. It's flattering on medium to long almond shapes because the tip chrome elongates visually. I wear this to weddings as guest nails and to dinners when I don't want bright color.
Paint a nude beige base that matches your skin tone closely, then leave it glossy. Sponge a slightly darker beige at the tip, aiming for the darkest area to cover 1/3 of the nail length. Blend the edge with a clean sponge corner so there's no hard line. Cure and apply a tacky layer only on the tip zone, then press champagne chrome powder onto that area. Seal with top coat carefully, avoiding dragging the brush back through the chrome edge.
Editor's noteUse a slightly warm nude (peachy-beige) if your skin pulls golden - the ombre will look like it belongs to your hand.
Watch outSkip cool-toned pink chrome over warm beige ombre; it can make the gradient look gray.
3. Lavender Smoke Ombré with Iridescent Chrome Edge
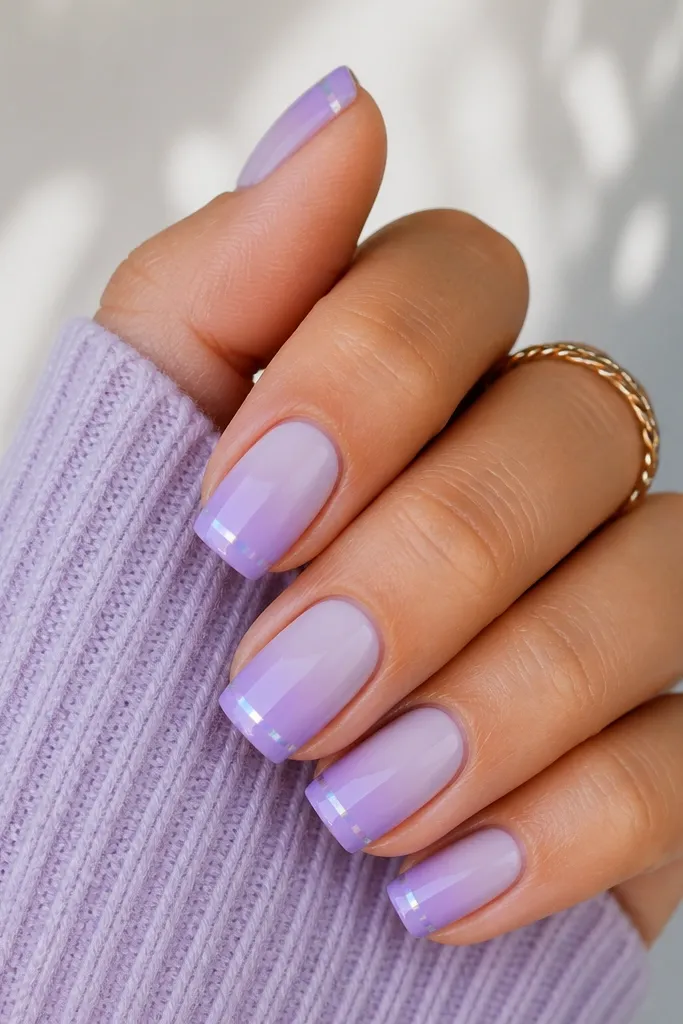
I love this when I want something different from the usual nude or pink ombre. The lavender ombre has a smoky quality because the tip color is richer and slightly gray-lilac, not bright purple. The iridescent chrome edge is thin - like a metallic bookmark - so it adds sparkle without turning the whole set into a disco ball. It looks great on light skin and also on deeper skin tones because lavender pops against warm and cool undertones when the fade is soft. This is my go-to for spring events and photos where you want color that still feels classy.
Start with a pale lavender cream polish across the full nail. Sponge a deeper smoky lilac only on the outer tip area, then feather it toward the middle with quick taps. Cure until fully hard, then apply chrome gel or tack only on the last 2-3 mm of the nail. Press iridescent chrome powder along that edge and wipe off the loose powder. Seal with top coat, keeping the brush light so you don't smear the iridescent reflection.
Editor's noteIf your lavender looks chalky, mix in a glossy top coat layer before you sponge the darker shade.
Watch outDon't make the purple fade too abrupt; a harsh purple line reads like sticker nails.
4. Peachy Nude to Apricot Ombre with Pink Chrome Top
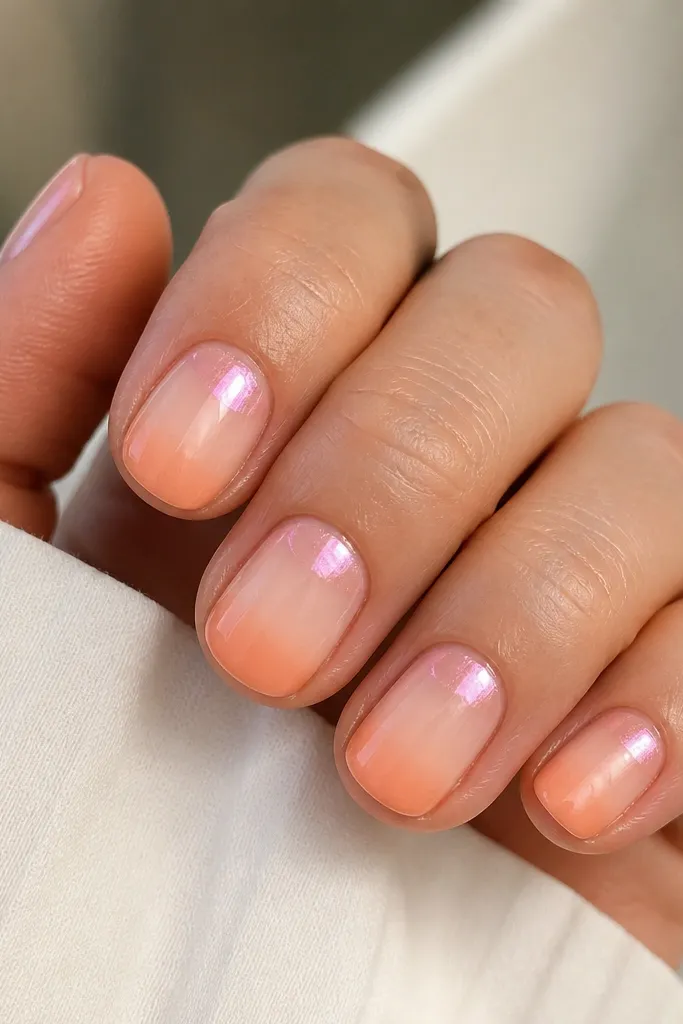
This is the "soft vacation" manicure that still looks polished. The ombre goes from peachy nude to apricot, so it warms up your hand instead of making it look pale. Pink chrome on the top third creates a halo effect - your nails catch light at the cuticle edge and look extra tidy. This flatters fair skin because peach tones brighten without turning orange; it also flatters medium skin because the apricot tip adds a healthy glow. I wear this with gold jewelry and simple outfits.
Apply a glossy peachy nude base, then sponge apricot starting around the middle and working toward the tip. Keep the darkest apricot band about 1/3 of the nail length, and blend the top edge so it disappears into the nude. Cure, then paint a thin tack layer on the top third only. Press pink chrome powder into that zone, tap off, and seal with a careful top coat that doesn't flood the gradient.
Editor's noteFor extra smoothness, use a sponge that's slightly damp (not wet) so your color transitions blend cleanly.
Watch outAvoid using a glittery apricot polish for the ombre; it makes the fade look grainy under chrome.
5. Clear Jelly Ombré with Silver Chrome Over the Fade
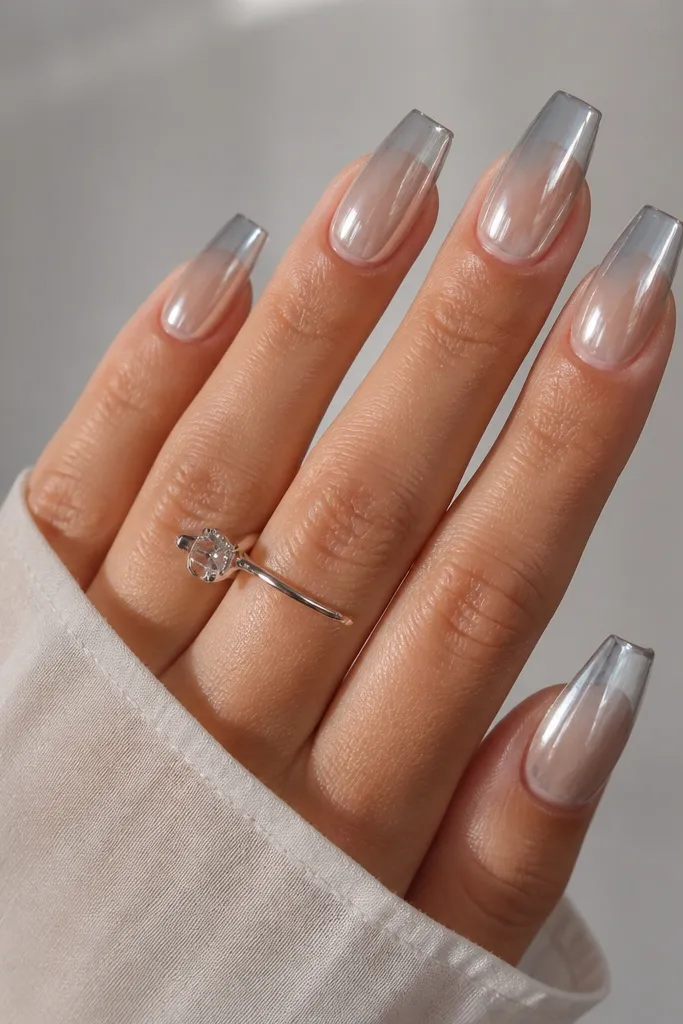
This one tricks the eye into thinking your nails are longer and glassy. The ombre is built on a clear jelly base, so the fade looks like it's suspended in liquid. I use a soft gray tip so it doesn't turn muddy - the chrome then reflects light without looking harsh. Silver chrome over the whole nail gives maximum shine, but the jelly base keeps it from looking heavy. It flatters almost everyone because it's translucent and doesn't fight your skin tone. I wear it for parties and also for "I want my hands to look expensive" weeks.
Start with a clear jelly base and cure. Sponge a thin layer of soft gray at the tip and blend upward, keeping the gray semi-sheer so you still see through it. Cure again. Apply chrome gel across the whole nail (not just the tip), then press silver chrome powder all over. Finish with top coat over the chrome, but keep it thin so you don't dull the mirror effect.
Editor's noteIf the chrome looks too opaque, do a second thin jelly layer over the ombre before chrome.
Watch outDon't skip curing between ombre and chrome; sticky layers smear the gradient.
6. Chocolate Brown to Nude Ombre with Copper Chrome Line
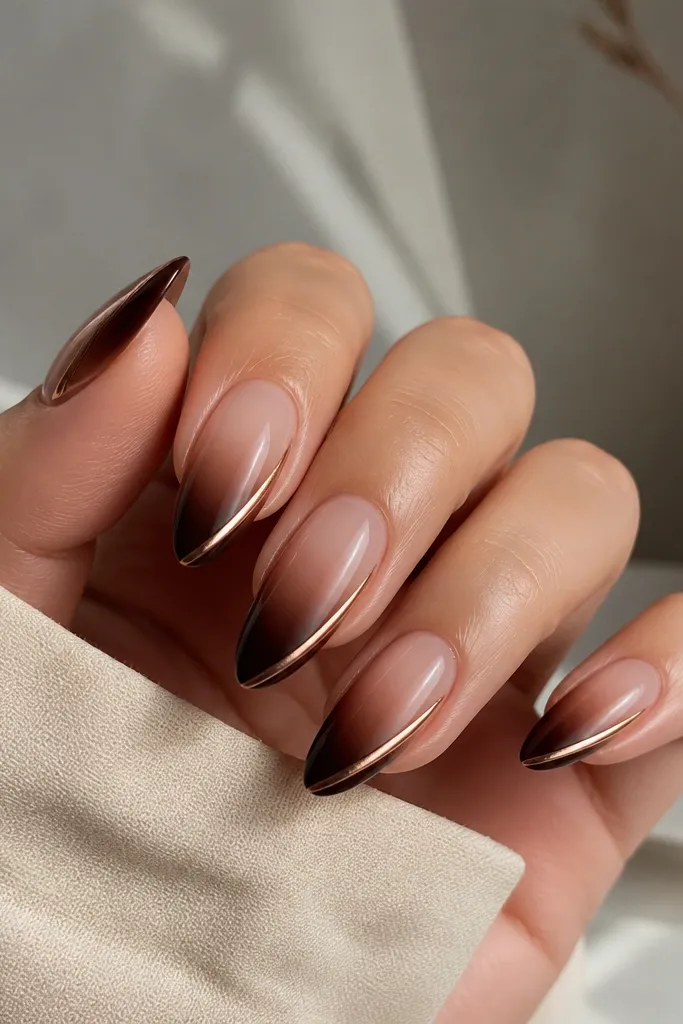
This is the most wearable "fall" ombre chrome combo I make. The base is a nude beige, and the fade goes into chocolate brown, so it looks like toasted caramel, not harsh brown paint. Copper chrome is placed as a line near the side edge - it looks like jewelry detail instead of full chrome coverage. It flatters medium to deep skin because warm browns and copper make the hand look rich. I wear it to coffee dates, casual dinners, and any day I'm wearing a brown sweater.
Paint a nude beige base and cure. Sponge chocolate brown starting at the tip and blend toward the middle, keeping the darkest area in the last 1/3 of the nail. Clean up the edges with a small brush dipped in polish remover. Apply a tacky strip layer with chrome gel only along one side near the tip (about 2-3 mm wide). Press copper chrome powder onto that strip and seal, then lightly cap the free edge with top coat.
Editor's noteUse a strip brush to keep the copper line straight - crooked lines are what make sets look DIY.
Watch outAvoid full copper chrome over brown ombre; it can go flat and look like metallic dust.
7. Sage Green Fade with Gold Chrome Crescent
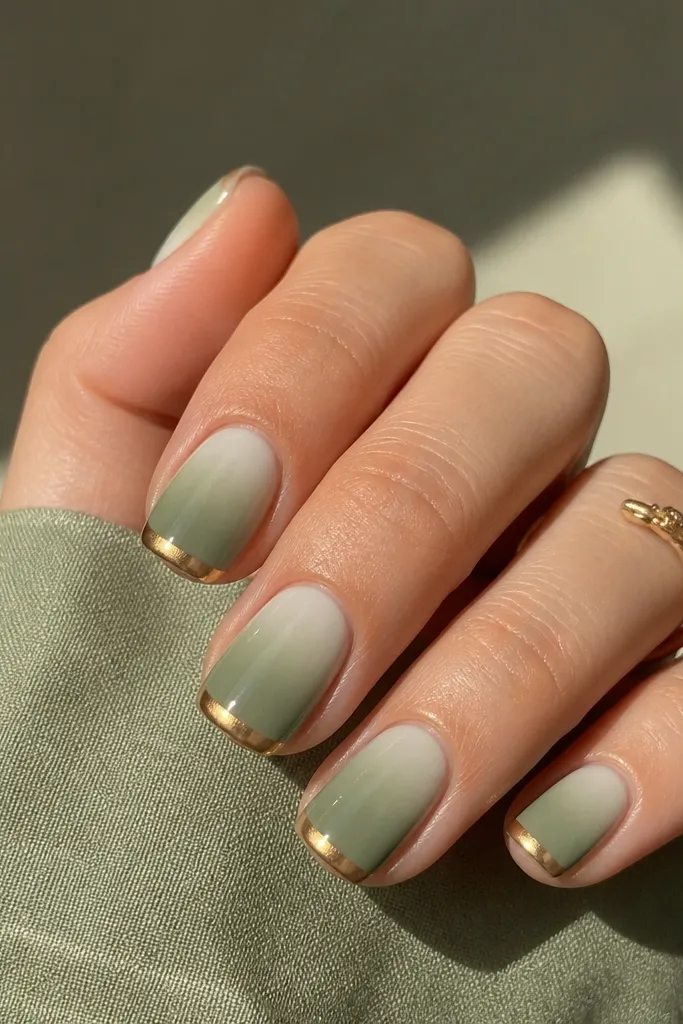
Sage ombre looks soft, but adding gold chrome makes it feel intentional. The fade starts with pale minty sage and deepens to a slightly gray green at the tip. The gold chrome crescent sits at the free edge like a smile line, so you get shine without covering the whole nail. This flatters cool and neutral undertones and looks incredible with silver rings too because sage has that muted balance. I wear this when I want a calm color that still photographs bright.
Apply a pale sage base and cure. Sponge deeper sage at the tip and feather upward until the fade is smooth, with the darkest green covering about 1/3 of the nail length. Clean the cuticle edges. Brush chrome gel in a curved band across the free edge, then press gold chrome powder into the band. Tap off excess and seal with top coat, keeping the band crisp.
Editor's noteMake the crescent slightly wider on the index and middle fingers so the set looks balanced in photos.
Watch outDon't put chrome gel all over the free edge if your ombre is still wet; you'll get cloudy chrome.
8. Sky Blue to White Ombre with Chrome Snow Cap
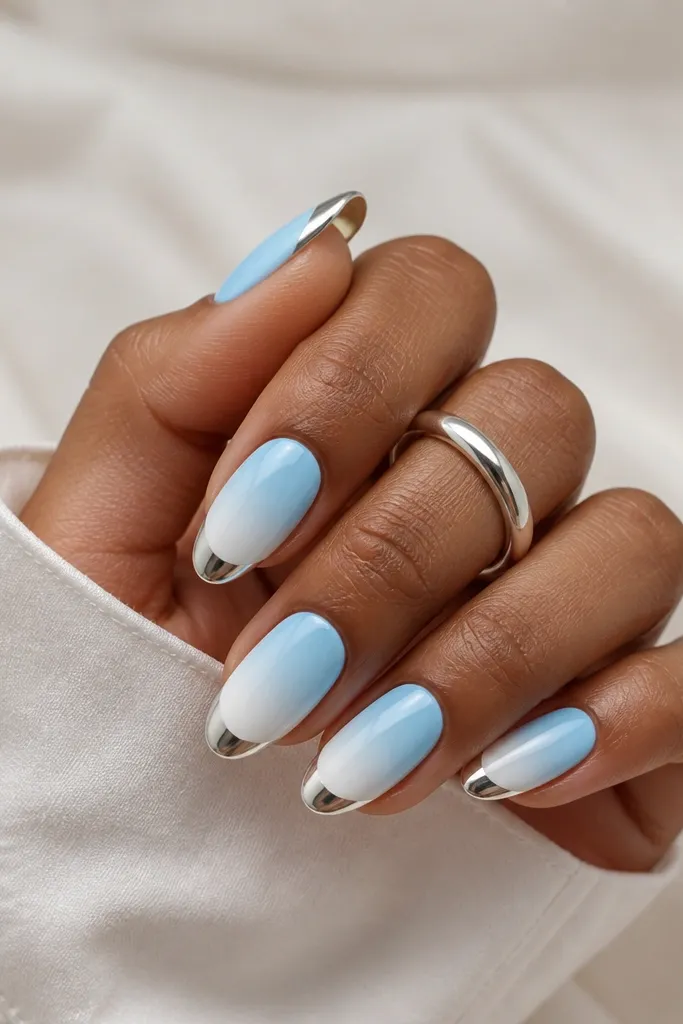
This is the ombre chrome I wear when I want "clean and airy" hands. I start with sky blue near the middle and blend into a milky white tip, so it looks like a winter fade without looking frosty. The chrome snow cap is only on the white tip zone, which makes the nails look crisp like fresh snow. Silver chrome works best here because it doesn't fight the blue. It flatters fair to medium skin because the white tip brightens the nail bed. I wear it for winter parties and holiday photos.
Paint a milky white base across the nail, then sponge sky blue starting around the middle and blending upward and downward until the fade is smooth. Keep the tip mostly white so it reads bright. Cure. Apply tacky layer only on the top of the white tip (about 2-4 mm) and press silver chrome powder there. Seal lightly so the chrome stays mirror-clear.
Editor's noteIf your white looks yellowish, use a pure white gel polish for the tip so the chrome looks cooler.
Watch outAvoid using blue with shimmer in the ombre; it competes with the chrome cap.
9. Burgundy to Nude Ombre with Blackened Chrome Tips
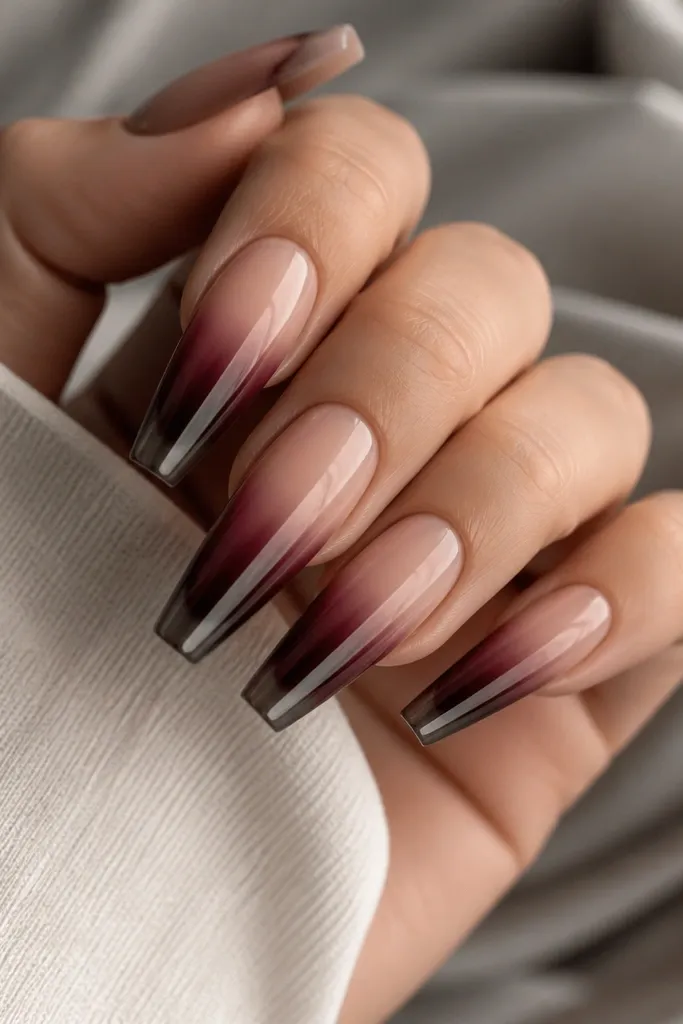
This is my "night out" set because the ombre stays classy and the tips go dark-mirror. Nude beige near the cuticle keeps it wearable, while burgundy adds depth without looking like full black. Blackened chrome on the tips makes the reflection softer, so it looks expensive instead of edgy-chaotic. It flatters olive and medium-deep skin especially well; the burgundy makes skin look warmer. I wear this with dark lip colors and gold hoops.
Start with a nude beige base, glossy. Sponge burgundy onto the last 1/3 of the nail and blend upward until the fade is smooth with no line. Cure fully. Apply chrome gel or tack only on the tip zone and press blackened chrome powder to coat evenly. Tap off and cap with top coat over the chrome, using a thin layer so it doesn't dull too much.
Editor's noteDo a slightly lighter nude than you think - the burgundy looks richer when the base isn't too close to your skin tone.
Watch outDon't chrome the entire nail if you used a thick burgundy sponge layer; texture shows through mirror finishes.
10. Rose Quartz Ombre with Holographic Chrome Center
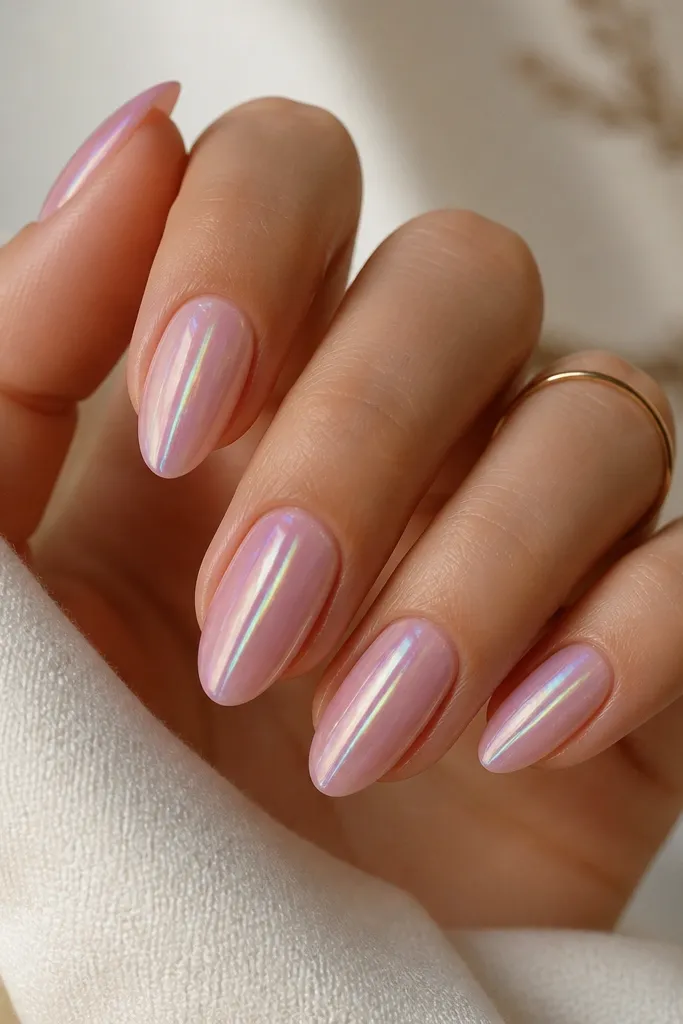
This one looks like crushed stone when it catches light. I build a rose quartz ombre with two pinks: pale blush near the cuticle and dusty rose near the tip, both glossy. Then I place holographic chrome as a center stripe so it flashes rainbow without covering everything. It flatters most skin tones because the base is neutral pink, and the center stripe elongates the nail visually. It's great for dates and festivals, and it still looks neat for everyday because the chrome is controlled.
Paint pale blush across the nail and cure. Sponge dusty rose on the tip and feather upward to the middle, keeping the transition soft. Clean the sides. Apply chrome gel along the exact center line of the nail, starting about 2 mm from the cuticle and stopping before the tip. Press holographic chrome powder on the stripe, tap off, then seal with a thin top coat that caps the edges.
Editor's noteUse a strip of clear tape as a guide to keep the chrome stripe straight while you apply gel.
Watch outAvoid wide chrome stripes; they make the set look messy and reduce the "stone" effect.
11. Monochrome Taupe Ombre with Mirror Nude Chrome Half
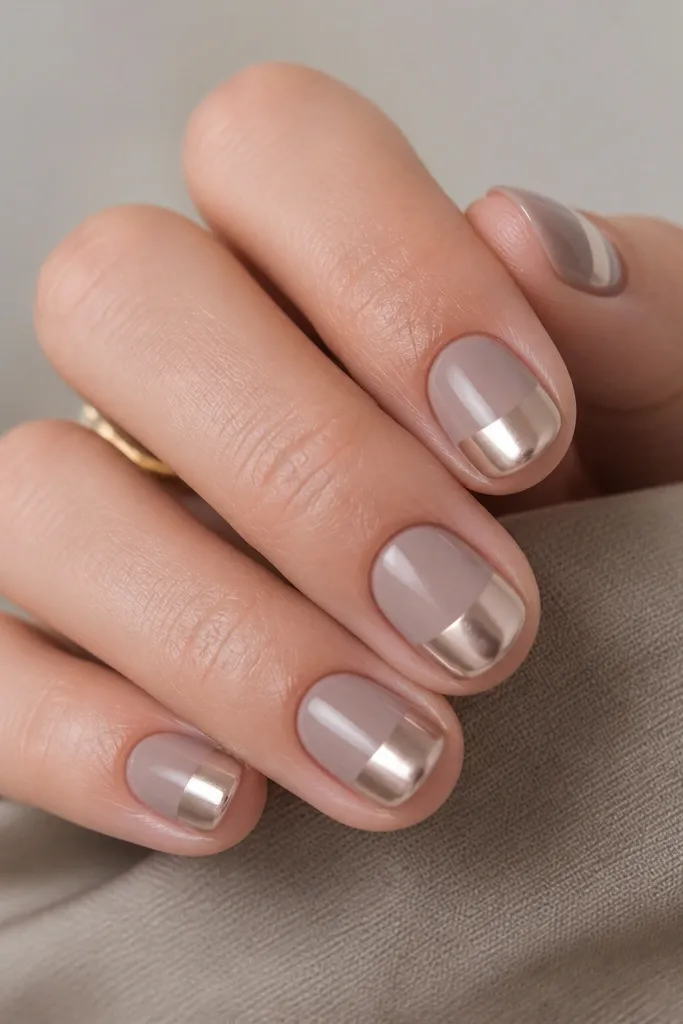
Taupe ombre is the "my nails look naturally expensive" look. The fade is monochrome: light beige-taupe near the cuticle into mid taupe at the tip, so it never clashes with your wardrobe. Mirror nude chrome on the bottom half adds a soft reflective sheen that still looks grown-up. This flatters fair, olive, and deeper skin because taupe sits between cool and warm. I wear it when I want something neutral but not boring.
Apply a light beige-taupe base and cure. Sponge mid taupe only on the outer tip area, blending until it covers roughly the last 1/3 of the nail length. Cure again. Paint chrome gel on the bottom half only, then press mirror nude chrome powder into that zone. Seal, and do a quick wipe on the chrome edge with a lint-free pad so it stays crisp.
Editor's noteIf taupe looks too gray on you, swap the base for a beige-tan nude and keep the tip taupe slightly warm.
Watch outDon't over-darken the taupe tip; too much brown makes the chrome look muddy.
12. Hot Pink to Fuchsia Ombre with Silver Chrome Cuticle Fade
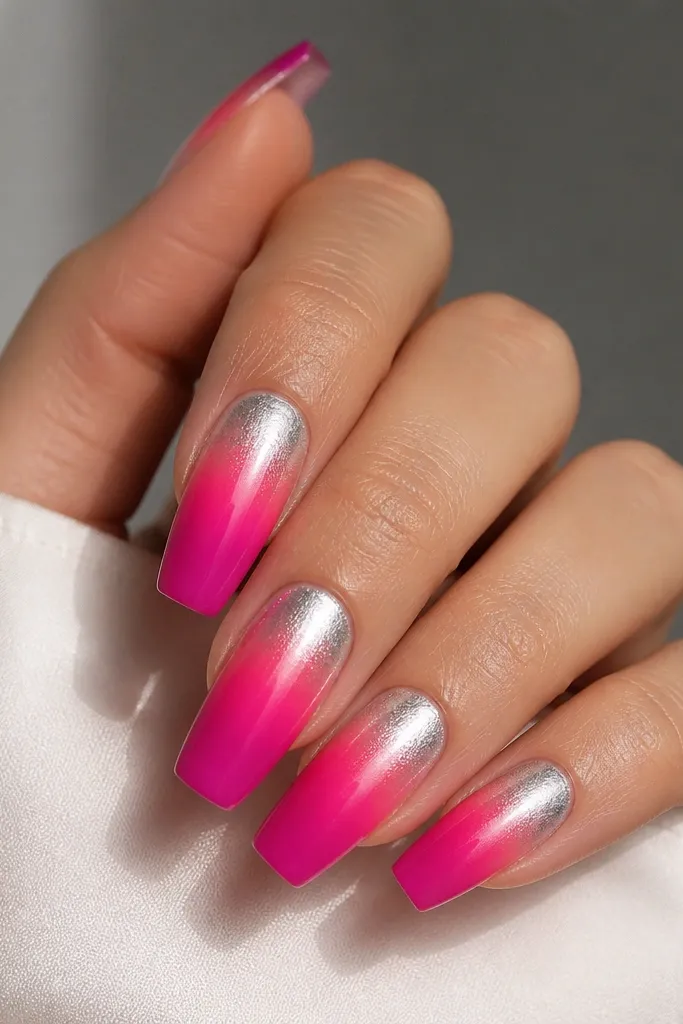
This is the loud-but-clean version of ombre chrome. The ombre goes from hot pink near the cuticle into fuchsia at the tip, so the nail looks like it's glowing from within. Silver chrome at the cuticle zone gives a "frosted glass" effect when you move your hands - it catches light at the top of the nail first. I love it on medium and long shapes because the cuticle area has space to look intentional. It's flattering for fair to medium skin, especially if you wear pink blush or cool lip colors.
Start with a hot pink glossy base. Sponge fuchsia onto the tip and blend upward until the darkest fuchsia band covers about 1/3 of the nail. Cure. Apply chrome gel near the cuticle and blend it slightly thinner as you move down the nail so it fades out by the mid-point. Press silver chrome powder into the gel, tap off, then seal with top coat.
Editor's noteUse a small makeup sponge corner to blend the fuchsia edge - big circles leave a donut pattern under chrome.
Watch outAvoid leaving the chrome line too thick at the cuticle; it can look like a sticker border.
13. Turquoise Ombre with Gold Chrome Micro-Glaze
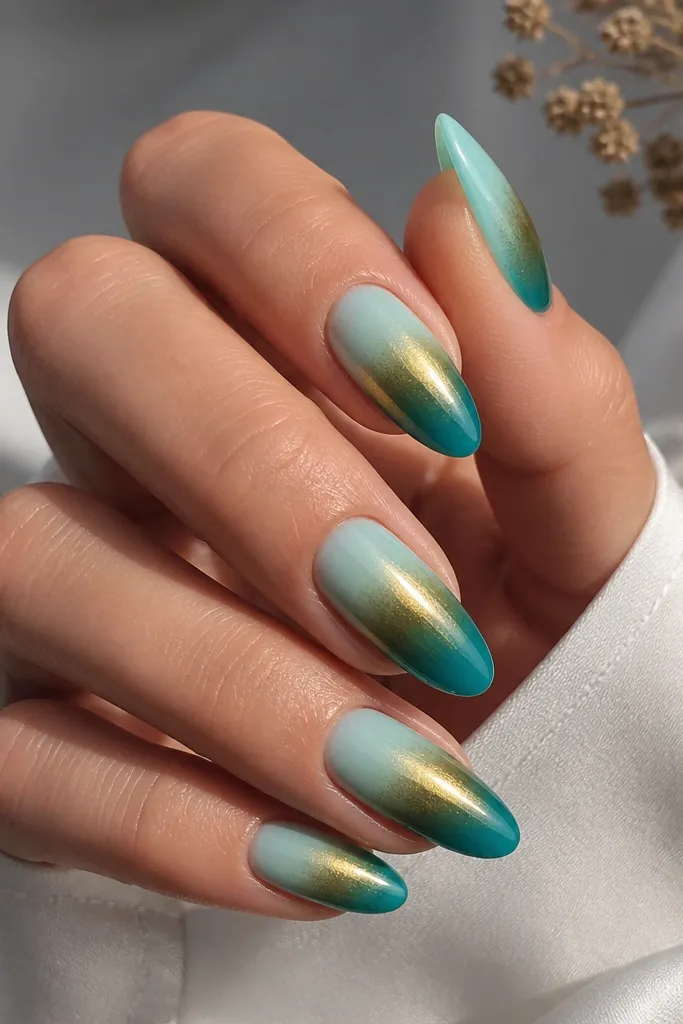
Turquoise ombre always looks fresh, and gold chrome makes it feel like vacation jewelry. I use pale aqua near the cuticle so the nail bed stays bright, then deepen to teal at the tip for contrast. The gold chrome is a micro-glaze placed over the middle band only, so you get shine when your hand moves but you still see the ombre. This flatters medium and deep skin because the blues pop hard without looking harsh. I wear it with white tops and gold bangles.
Apply pale aqua as the base and cure. Sponge teal at the tip and feather upward until the fade is smooth, darkest at the last 1/3. Cure again. Apply chrome gel in a middle band (about 3-5 mm tall), avoiding the cuticle and tip zones. Press gold chrome powder onto that band, tap off, and seal with top coat only on the band edges so it stays mirror-bright.
Editor's noteIf your gold looks too yellow, choose a rose-gold chrome powder and keep the turquoise slightly gray.
Watch outDon't chrome the whole nail; teal already has strong color and full chrome can look heavy.
14. Olive Nude Ombre with Silver Chrome Sidewall
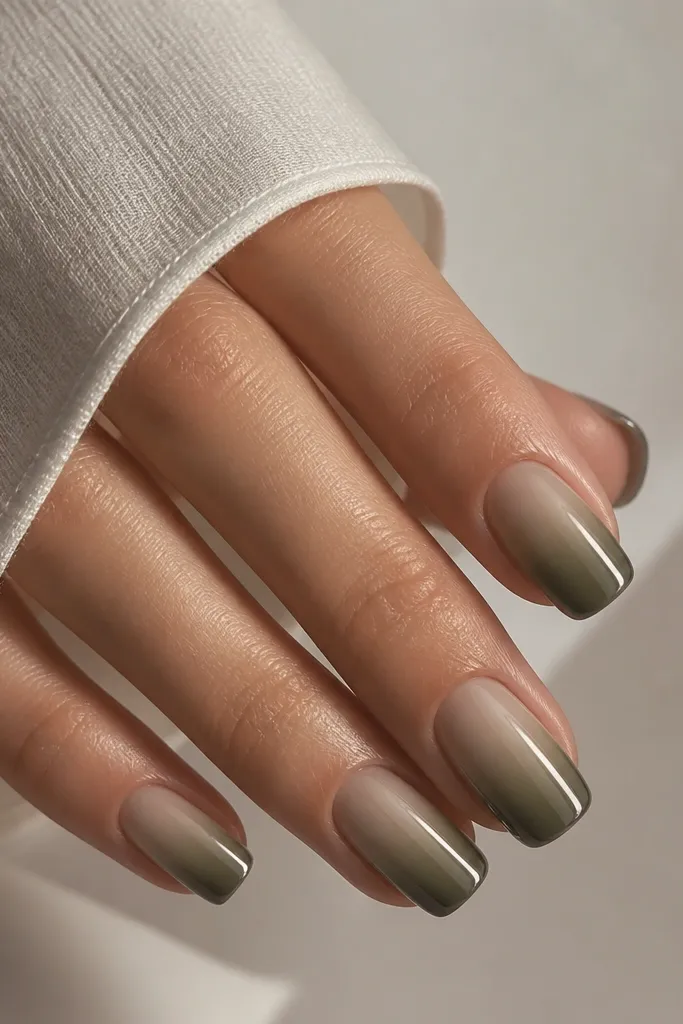
This is my go-to for people who want chrome but hate "full mirror" nails. The base is an olive nude that matches the green undertone in your skin, then it fades into deeper olive at the tip. Silver chrome is placed along the sidewalls near the free edge, which frames the nail and makes it look sharper. It flatters olive and neutral undertones, and it looks good on short nails because the chrome is controlled. I wear it to work when I want something different from plain nude.
Paint a light olive nude base and cure. Sponge deeper olive on the tip and blend toward the middle, keeping the fade narrow and smooth. Clean around the cuticle. Apply chrome gel along both sidewalls near the free edge, about 2-3 mm wide, and avoid the center. Press silver chrome powder into the gel, tap off, then seal with top coat that caps the side edges.
Editor's noteUse a cotton swab to remove excess chrome from the center before sealing - it keeps the sidewall look crisp.
Watch outAvoid chrome splatter near the cuticle; it makes the whole manicure look rushed.
15. Classic French Ombre with Rose Gold Chrome Tips
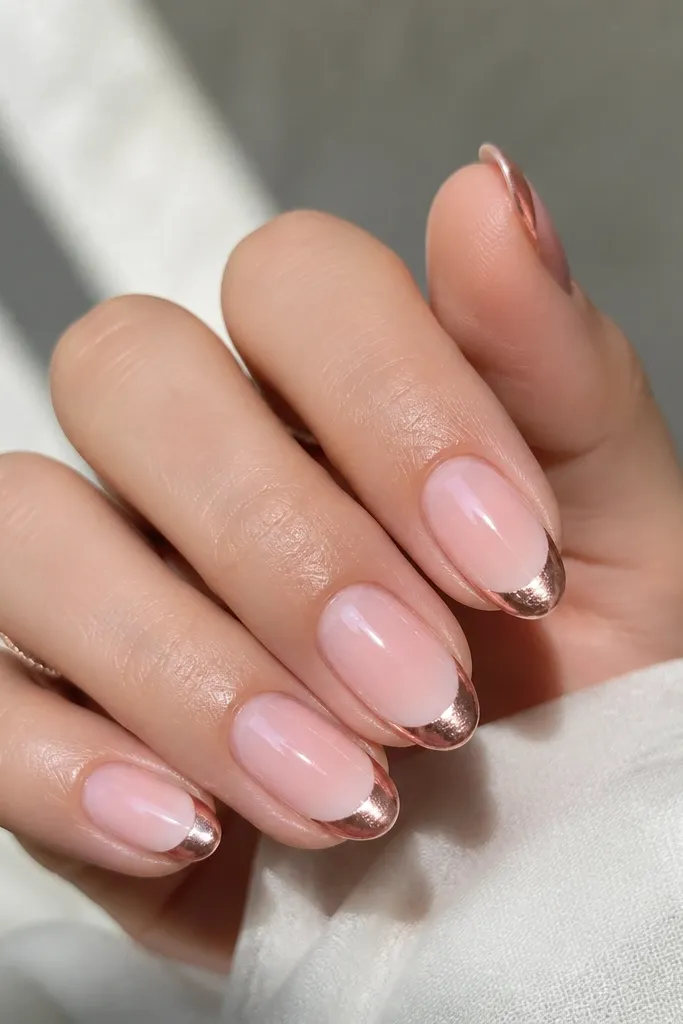
This is the safest "cheap ombre chrome nails" set because it mimics a French manicure but adds modern shine. The ombre is a classic nude-to-white fade, with the white concentrated at the tip so it looks like clean nail art. Rose gold chrome on the tip adds warmth and looks gorgeous with both silver and gold jewelry. It flatters any skin tone because the nude base is neutral and the white tip brightens. It's perfect for bridal showers, birthdays, and days you want neat nails without looking boring.
Start with a nude-pink base that's glossy and close to your skin tone. Sponge a soft white at the tips and fade it back toward the middle until it looks like a French ombre, not a stripe. Cure. Apply tacky layer only on the last 2-3 mm of the white tip. Press rose gold chrome powder onto the tack, tap off, and seal with a thin top coat.
Editor's noteKeep the white tip slightly translucent; fully opaque white can make the chrome look too harsh.
Watch outDon't over-paint the white - thick white under chrome looks chalky in daylight.
16. Charcoal Ombre with Steel Chrome Half-Mirror
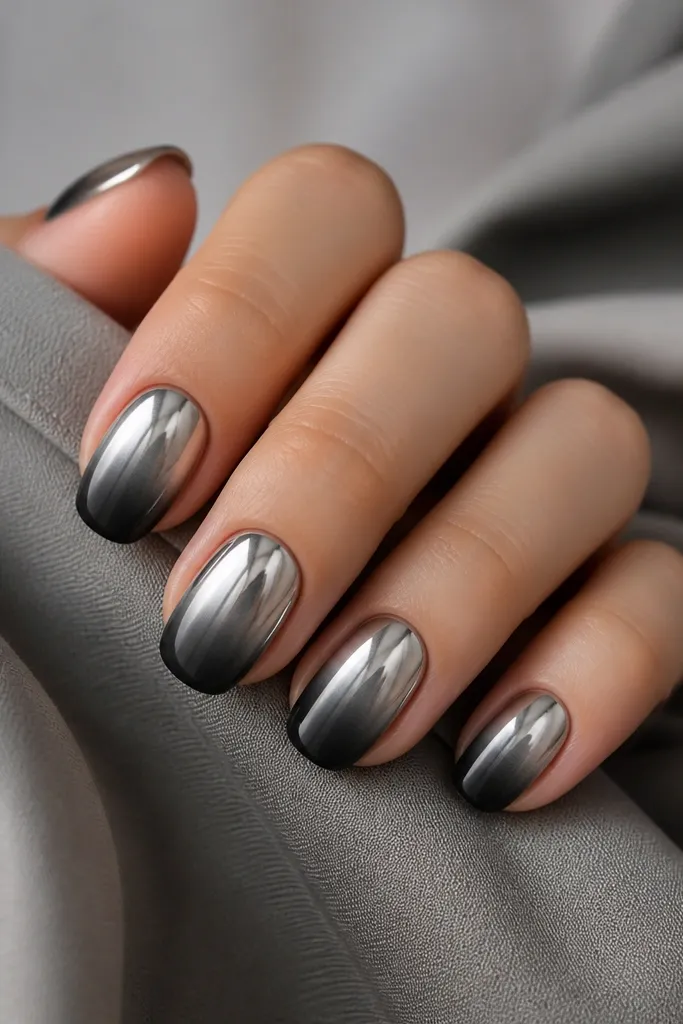
Charcoal ombre looks expensive because it's moody but still controlled. The fade uses a light gray near the cuticle and deep charcoal at the tip, so the transition reads smooth instead of muddy. Steel chrome on the top half gives a cooler mirror effect that looks incredible under office lights and at night. This flatters fair and medium skin because the gray tones keep everything crisp. I wear this with black outfits and silver rings when I want a strong manicure without glitter.
Paint a light gray base and cure. Sponge dark charcoal onto the tip and blend upward until the darkest area is the last 1/3 of the nail. Cure fully. Apply chrome gel only on the top half, keeping the edge straight and clean. Press steel chrome powder, tap off, then seal with top coat to lock it in.
Editor's noteWipe the brush on a lint-free pad before you paint the chrome gel edge so it doesn't drag through the ombre.
Watch outAvoid using black polish as the tip color; it makes the ombre look flat and the chrome reflects dull.
17. Creamy Vanilla Ombre with Pearl Chrome Sprinkle
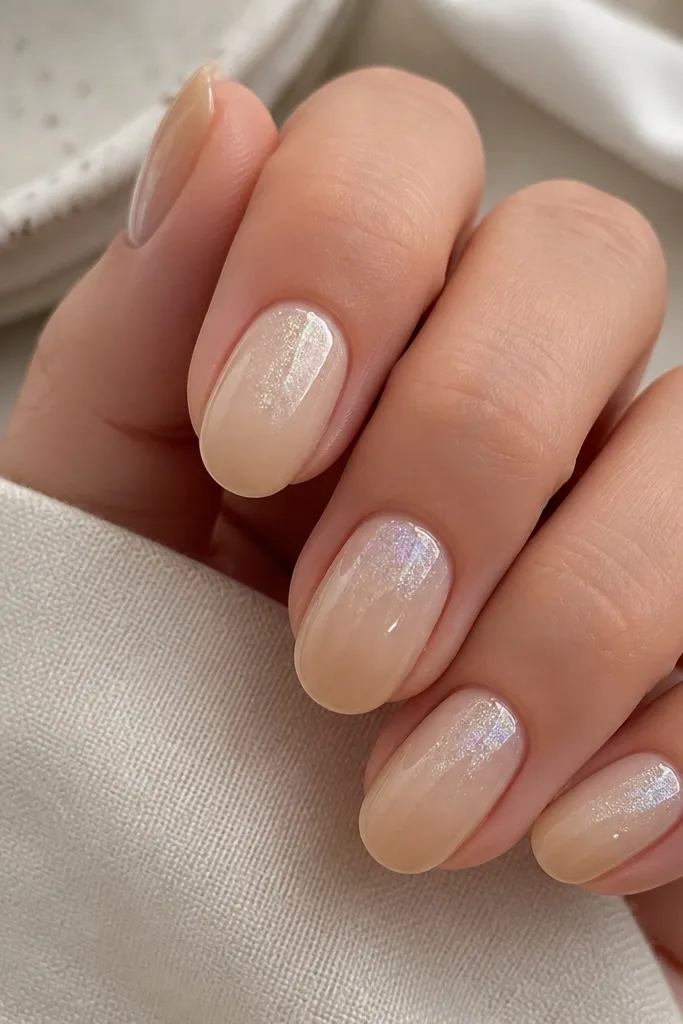
This is for when you want chrome but hate that harsh mirror look. The ombre starts sheer and creamy, then deepens to warm beige at the tip so it looks like vanilla frosting. Pearl chrome sprinkled over the upper half gives soft glow and a "lit from within" feel. It flatters fair skin because it brightens, and it also works on deeper skin because warm beige keeps it flattering. I wear this for everyday, especially when my outfits are neutral and I want my hands to look polished.
Apply a sheer cream base and cure. Sponge warm beige at the tip and blend upward with gentle taps so the fade stays airy. Cure. Apply a tacky layer only on the top half, then press pearl chrome powder lightly so you see some base underneath. Tap off excess and seal with a thin top coat over the chrome area.
Editor's noteIf pearl chrome looks too chunky, press it on with a firm sponge rather than brushing - it smooths the coverage.
Watch outAvoid heavy pearl chrome on the entire nail; it can look dusty instead of glossy.
18. Red Velvet Ombre with Ruby Chrome Band
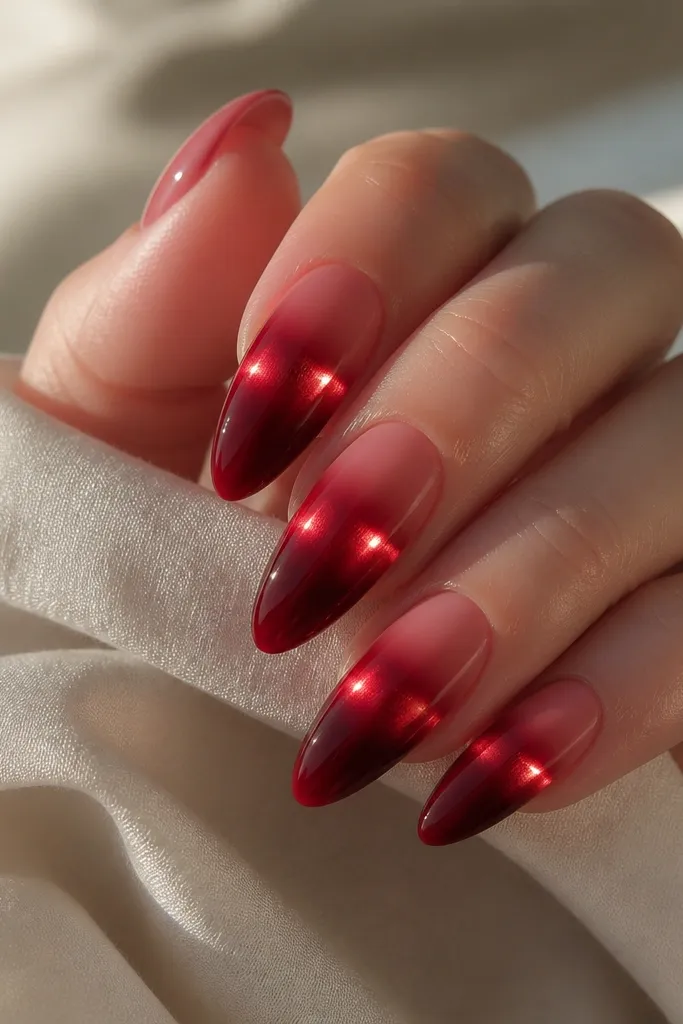
Red velvet ombre is the romantic version of dark chrome nails. I start with a soft pink-red near the cuticle, then sponge into rich velvet red at the tip for depth. The ruby chrome band across the middle is where the set gets its "high-end" look - it catches light like a strip of glass. This flatters medium to deep skin because red warms and brightens, and it also looks stunning on fair skin with cool undertones. I wear it to date nights, holidays, and any time I want my nails to look like lipstick.
Paint a soft pink-red base and cure. Sponge rich velvet red on the tip and blend upward until the deepest color covers about 1/3 of the nail. Clean up the sides. Apply chrome gel in a horizontal band across the middle (about 3-4 mm tall), keeping it centered. Press ruby chrome powder onto the band, tap off, and seal carefully so you don't smear the gel edge.
Editor's noteUse a strip of tape to define the band line before you brush on chrome gel for a crisp result.
Watch outAvoid a band that's too wide; it makes the ombre look like two separate manis.
19. Gold Nude to Tan Ombre with Clear Chrome Overcoat
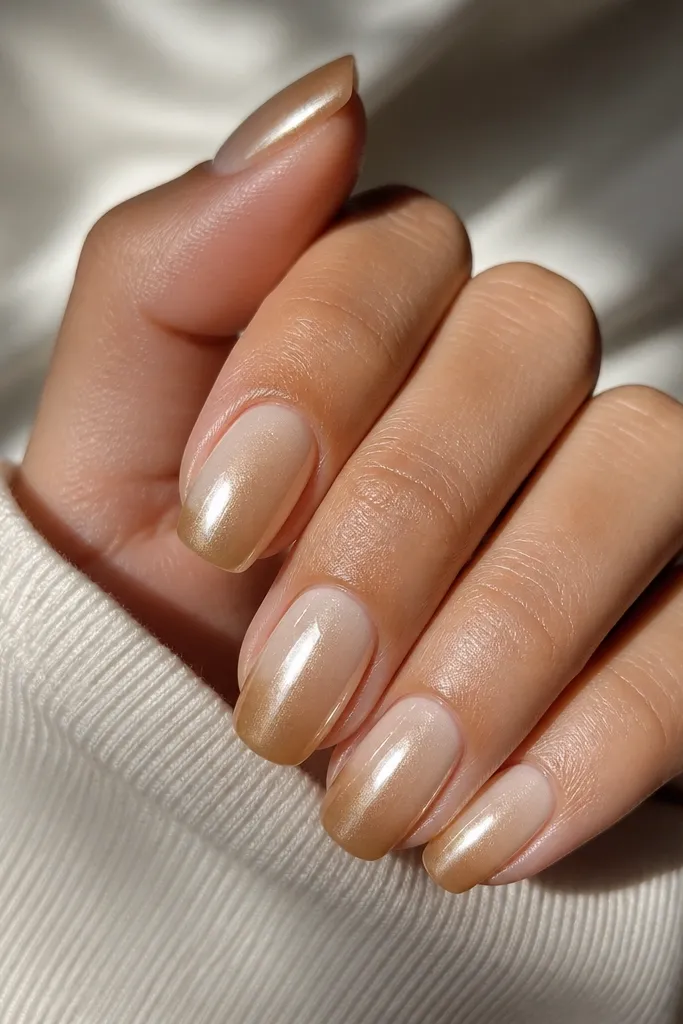
This is the "expensive but subtle" chrome look. The ombre is built from a gold nude near the cuticle to a tan tip, which keeps the set warm and flattering. Clear chrome overcoat gives a glassy reflective finish without adding extra color, so the ombre still reads. It flatters nearly everyone because it doesn't fight your skin tone - it just enhances it. I wear this when I want mirror shine for events but I'm wearing patterned outfits and don't want the nails to compete.
Apply a glossy gold nude base and cure. Sponge tan at the tip and blend upward until the darkest area is the last 1/3 of the nail length. Cure and check for smoothness. Apply chrome gel across the entire nail, then press clear chrome powder evenly. Tap off excess and seal with top coat, keeping the layer thin so the glass finish stays bright.
Editor's noteIf your clear chrome looks too faint, do a second thin chrome gel pass just on the tip fade area.
Watch outAvoid matte top coat before chrome; it kills the reflective look.
20. Black Cherry Ombre with Silver Chrome Cuticle Vein
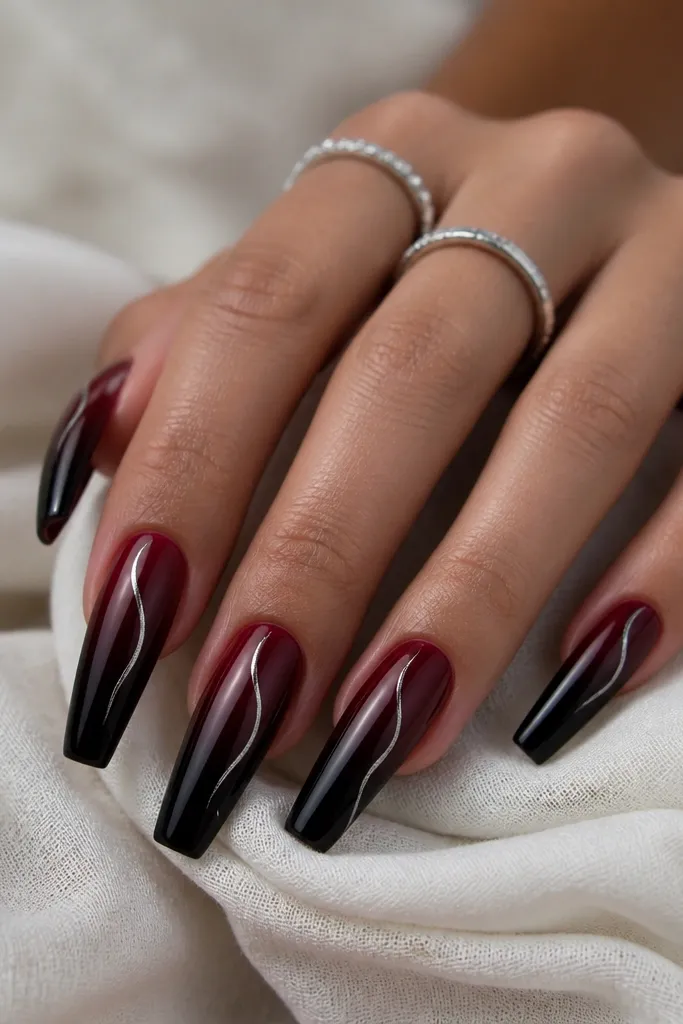
This is the moody set that still looks artsy, not messy. The ombre goes from deep berry near the cuticle to near-black at the tip, so it has a smooth dark fade. Silver chrome as a thin curved "vein" near the cuticle gives a lightning-bolt reflection when you move your hands. It flatters medium-deep and deep skin because the black cherry makes skin look even-toned and rich. I wear it for Halloween season and winter nights when my outfits are dark and dramatic.
Apply a deep berry base and cure. Sponge near-black cherry at the tips and blend upward until the darkest zone covers about 1/3 of the nail length. Cure again. Use a fine brush to apply chrome gel in a curved vein shape starting 1-2 mm from the cuticle and tapering toward the middle. Press silver chrome powder onto the gel vein, tap off, and seal with top coat over the vein area.
Editor's noteKeep the vein thin - about the width of a hair strand - so the reflection stays delicate.
Watch outAvoid thick chrome lines; they look like accidental smudges on dark ombres.