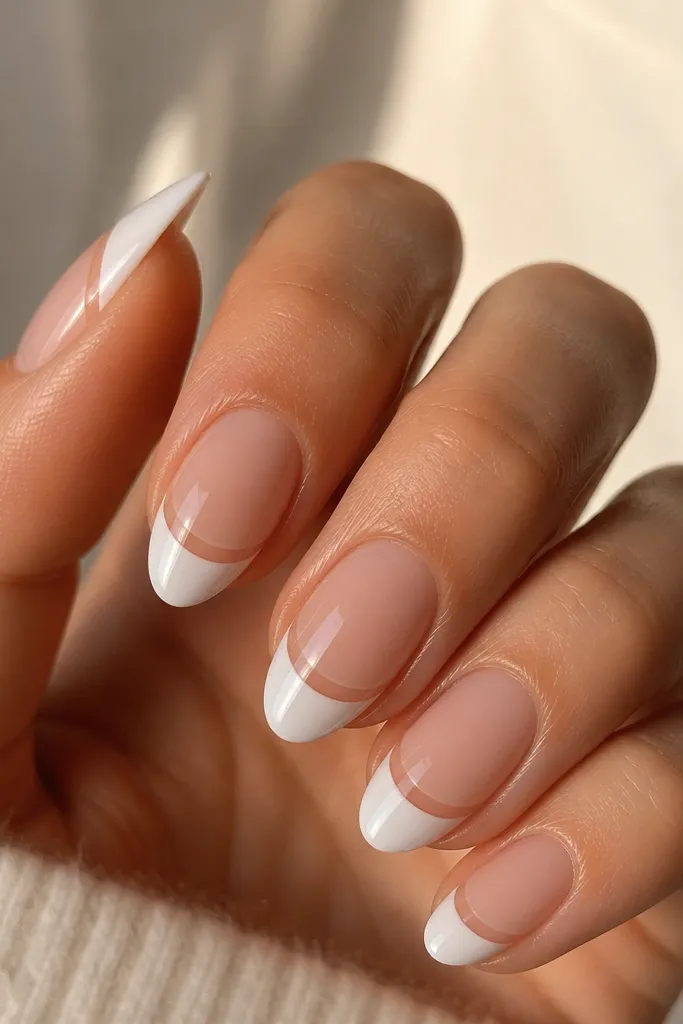
1. Micro French with a sharp tape smile
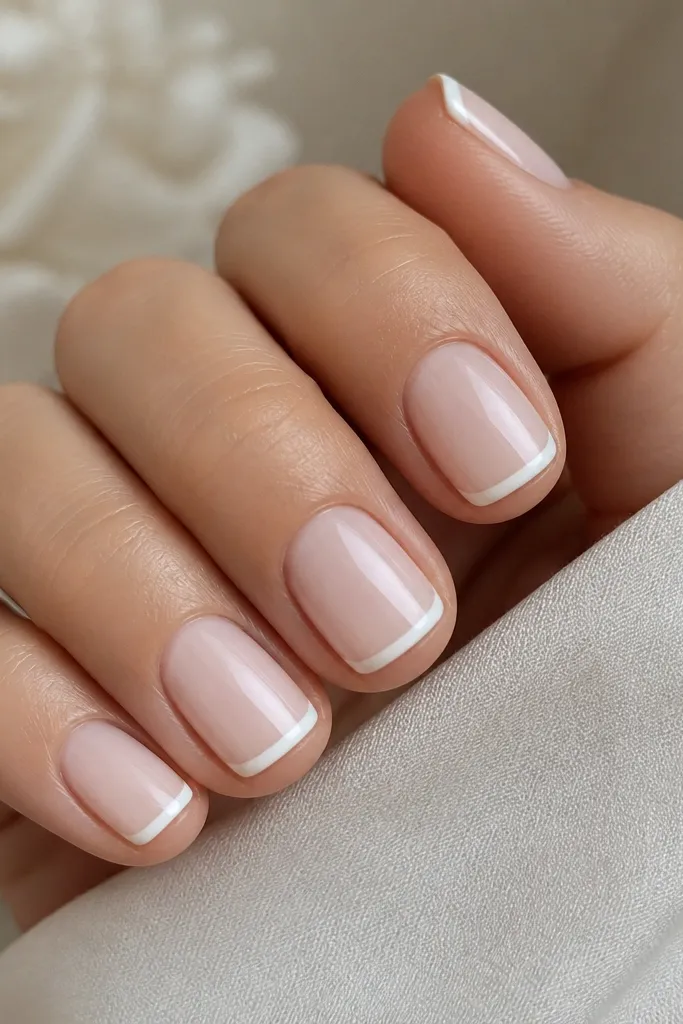
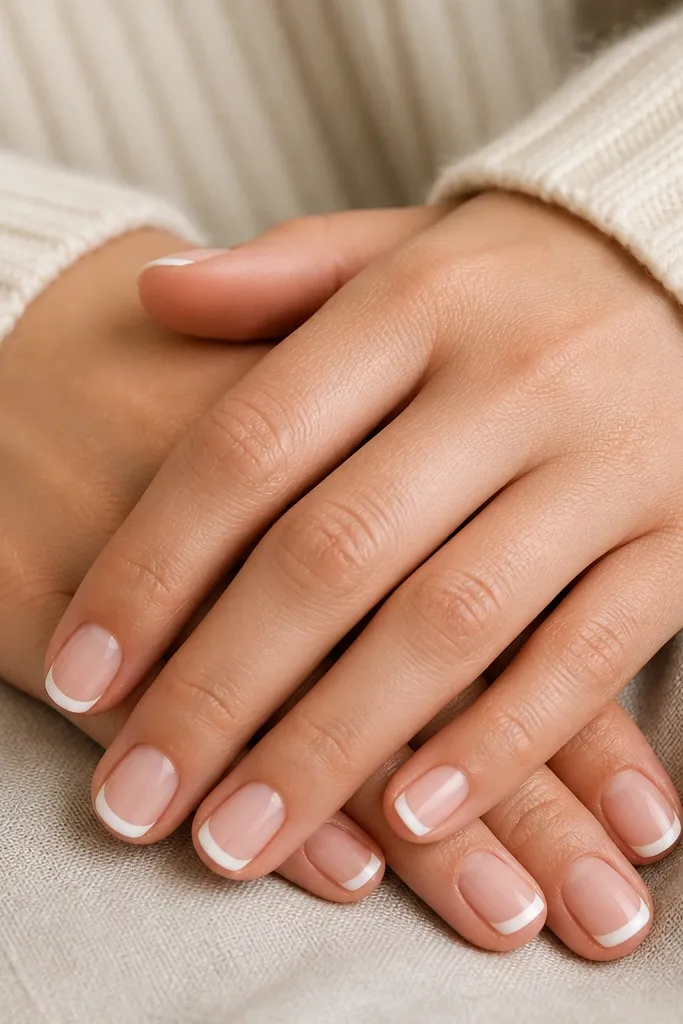
This is the "always works" look for short nails because the French line is narrow enough to look crisp instead of bulky. I keep the base sheer nude (not pinky) so the white reads bright. The key is the tape smile - it gives you a straight curve without wobbling. It looks polished with work clothes and still cute with athleisure.
Paint a sheer nude base and cure fully if you use gel. Place striping tape where you want the tip line, press it flat, then paint two thin coats of opaque white. Remove the tape after the white is set enough to not smear, then seal with top coat.
Editor's noteIf your white bleeds under tape, wipe the tape edge with a tiny bit of alcohol on a lint-free wipe before applying.
Watch outAvoid wide French tips on short nails - they look like a sticker edge and grow out awkwardly.
2. White cap tips with nude negative space
Instead of a full French, you get a cap that looks neat and modern. The nude sides make the nail look longer, which matters when you're keeping length short. I like this for weeks when my cuticles are a little dry because the design hides small imperfections. It also photographs well because the white area is compact and high-contrast.
Use a nude base in one thin layer. With a thin brush, paint a rounded white cap centered on the tip, leaving a 0.5-1mm nude gap on both sides. Clean up the edges with a brush dipped in acetone, then top coat.
Editor's noteAngle the brush so the white edge is thinner at the sides - that's what keeps it looking like a cap, not a block.
Watch outSkip heavy overpainting at the corners - it makes the cap look too wide for short nails.
3. Half-moon white at the cuticle
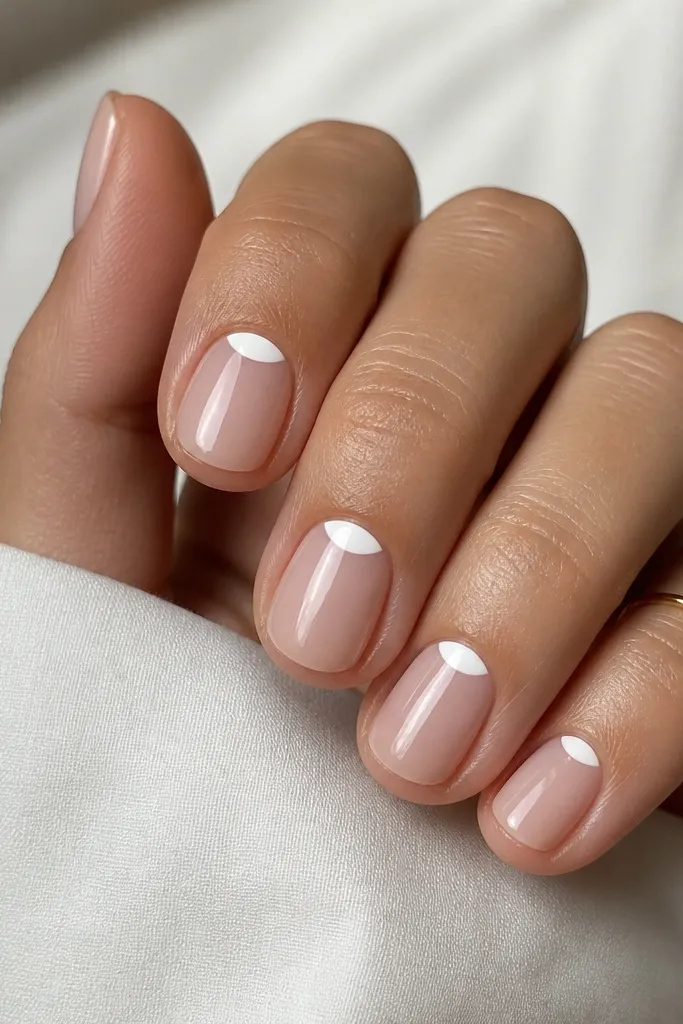
Half-moon shapes look graphic even on tiny nails. The white at the cuticle makes your hands look tidy, and it doesn't require a lot of length to read. I like a sheer base so the half-moon looks intentional instead of like a thick growth line. This is one of my go-to looks when I want something clean but not plain.
Apply a sheer nude base and let it set or cure. Use a half-moon stencil (or a small makeup sponge + stencil) and stamp the white into a tight curve at the cuticle. Keep the half-moon about 2mm tall, then top coat.
Editor's noteUse a slightly tacky base for gel so the stencil doesn't let the white smear.
Watch outDon't make the half-moon too high - on short nails it can overlap the skin and look messy.
4. White dot corners on sheer nude
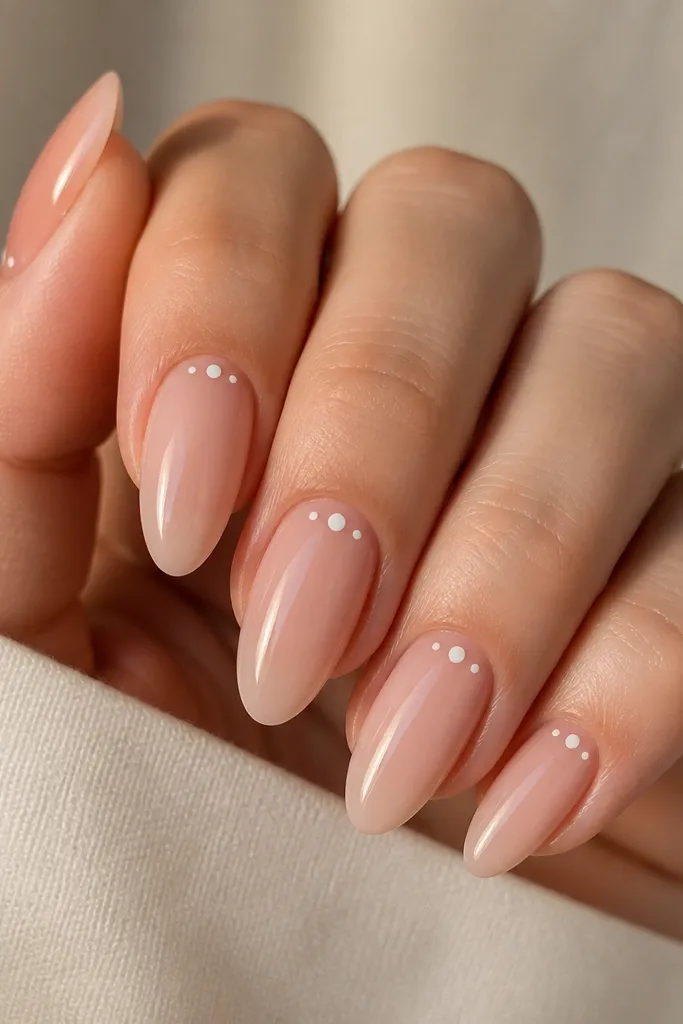
This is the "subtle but cute" version of nail art. The white dots are small enough to look intentional, not childish, and they don't demand symmetry across every finger. It also hides micro chips because the dots keep the eye moving. I wear it when I'm between bigger designs.
Start with a sheer nude base. Use a dotting tool (0.8-1.0mm) to place one dot near the top outer corner, about 0.5mm from the side and 1mm from the tip line. Let dry or cure, then add top coat.
Editor's noteIf your dots spread, use a thicker white polish or let the first coat fully dry before adding a second dab.
Watch outAvoid big dots - on short nails they look like paint blobs.
5. Tiny white bows with nude base
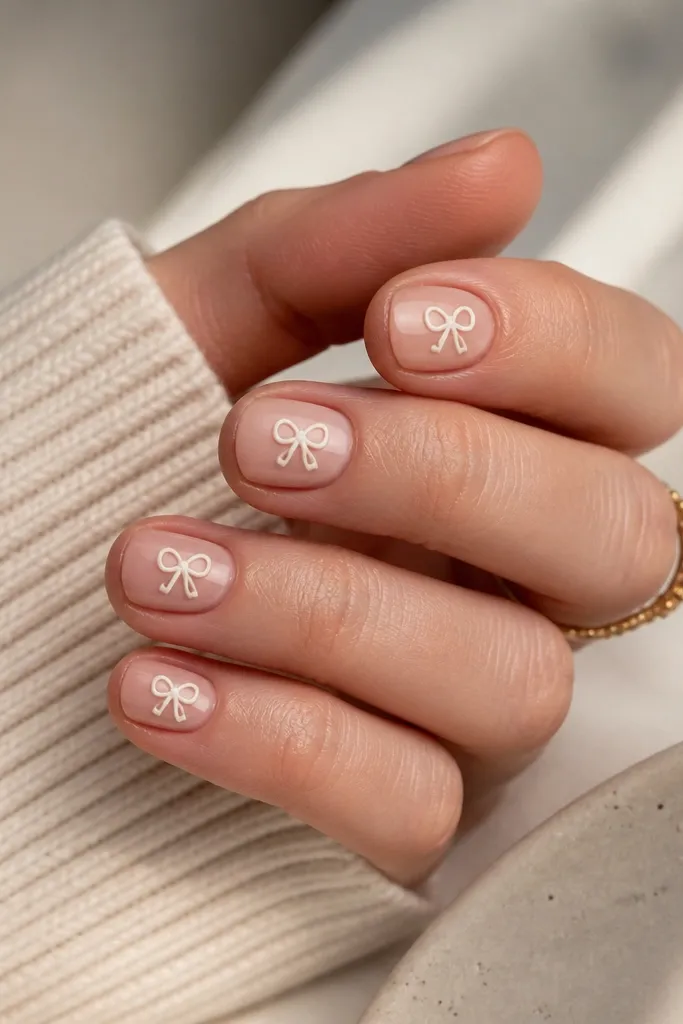
Bows can look childish, but on short nails they look sweet and sharp when you keep them tiny and centered. I paint a simple bow outline first, then fill it in with dense white so it stays opaque. The nude base keeps it wearable for everyday. This one is a crowd-pleaser at brunch and photos.
Paint nude base, cure fully. With a nail art brush, draw two small teardrops for the bow loops, then a tiny knot in the middle. Fill with white in one thin layer so it doesn't get bumpy, then seal with a glossy top coat.
Editor's noteUse a matte top coat over the bow only if you want a softer look against the glossy nude.
Watch outSkip thick 3D gel on tiny nails - it lifts faster at the corners.
6. White stripe on the center (one-line minimal)
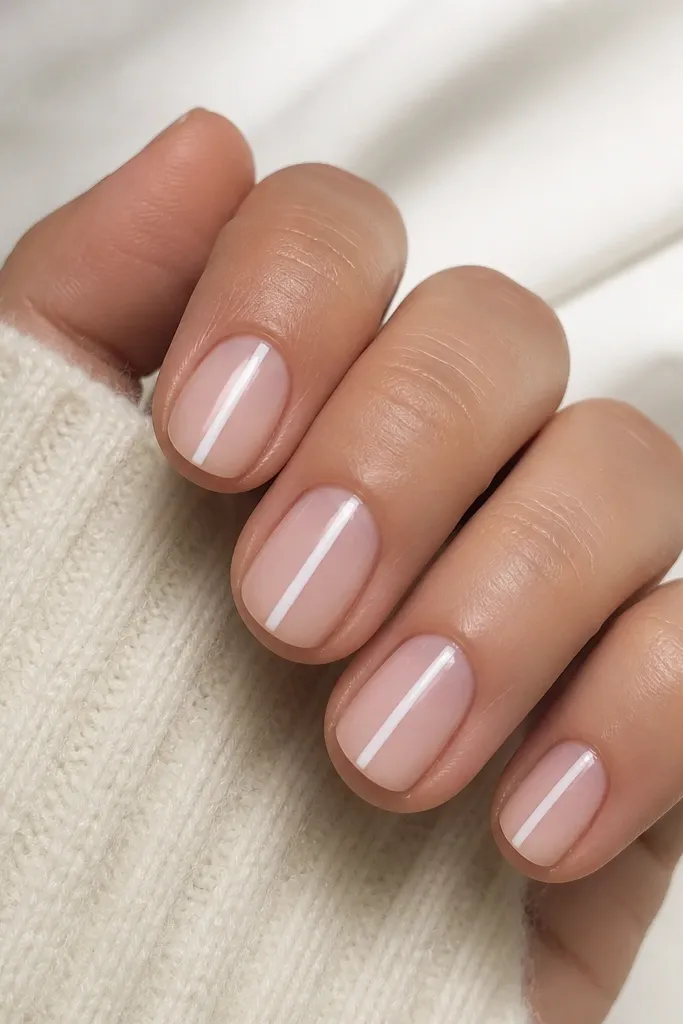
One vertical stripe makes short nails look longer instantly because it creates a clean line. The trick is keeping the stripe thin - about the width of a credit card edge in real life, not a marker line. I like this when I'm wearing long sleeves and want something graphic without extra bulk. It's also easy to redo if one nail chips.
Apply nude base and cure. Use striping tape or a thin liner brush to paint a 1mm white stripe down the center, ending 1mm short of the free edge. Remove tape carefully if you used it, then top coat.
Editor's noteLightly drag the liner brush along the nail surface instead of pressing - pressure makes the stripe widen.
Watch outAvoid stripes that reach the very edge - they catch on snag points and chip first.
7. White checker tip with nude base
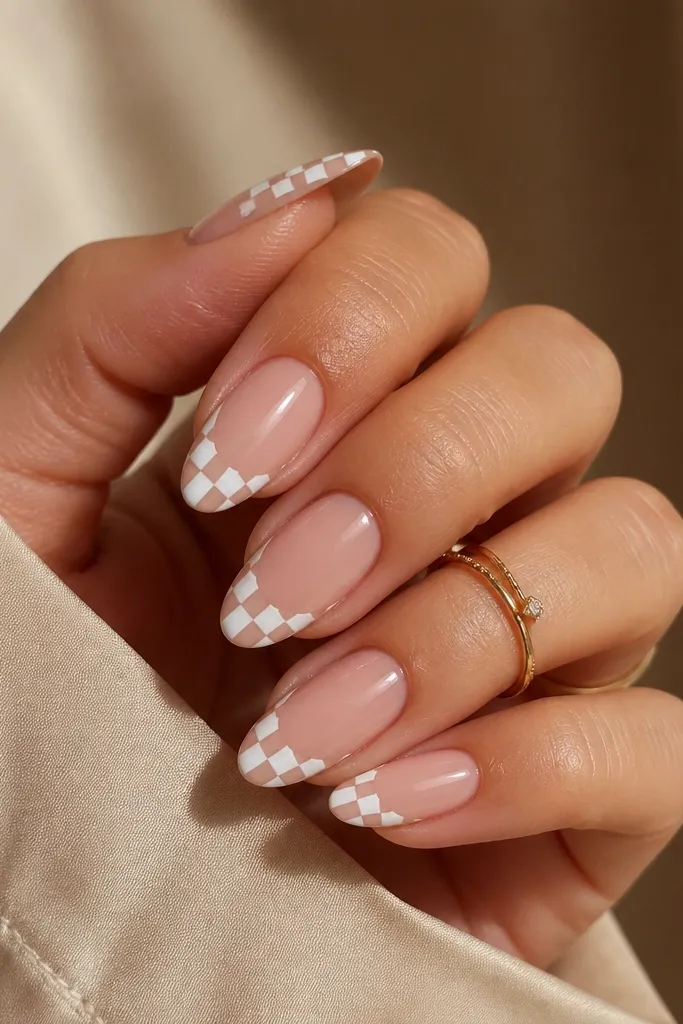
Checker tips look playful without being loud because the pattern is confined to the tip band. On short nails, that confinement is everything - it keeps the nail from feeling crowded. I do white-on-nude so the pattern stays crisp and budget-friendly. It also makes your tips look "fresh" even as they grow out.
Paint nude base and cure. Use a stamping plate with checker tips if you have one, or mark a grid with thin tape squares. Fill each small square with opaque white, then seal with top coat.
Editor's noteIf hand-painting, do two rows only - it takes less time and still reads like checkers.
Watch outAvoid uneven square sizes - the pattern looks sloppy fast on short nails.
8. Reverse French: white base edge with nude tip
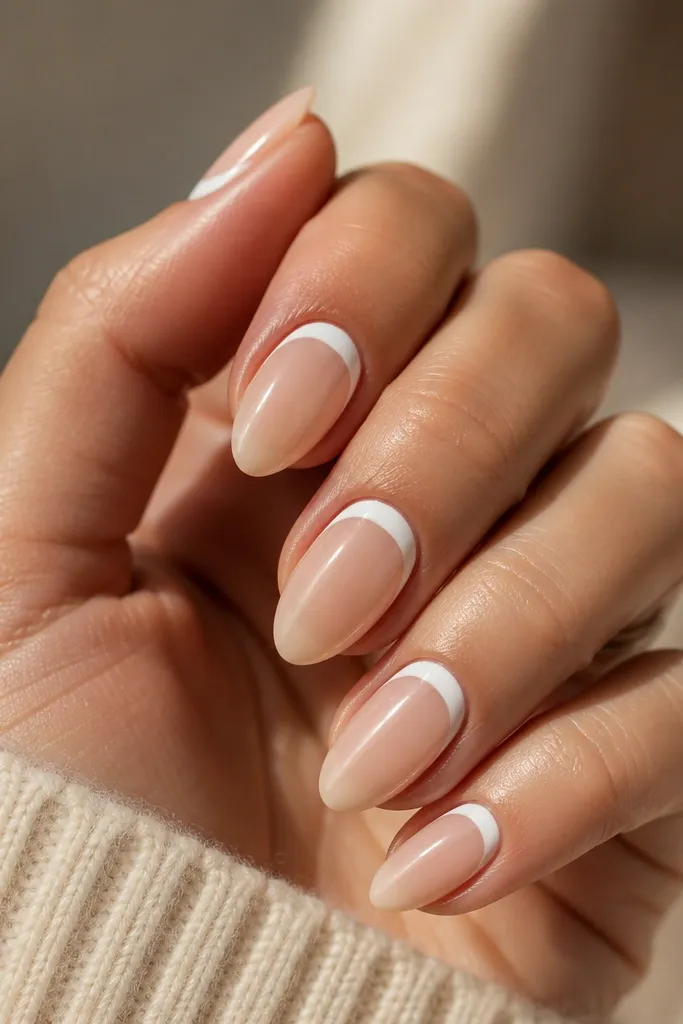
Reverse French flips the usual look and makes your nail bed look clean and structured. The white near the cuticle pulls attention upward, which helps short nails look more deliberate. I keep the white band narrow so it doesn't thicken the nail. This one also hides small growth-line unevenness because the band covers it.
Use a sheer nude base. With striping tape placed slightly below the cuticle curve, paint two thin coats of white up to the tape edge. Remove tape, then top coat. Keep the band height around 2mm.
Editor's notePress tape along the sidewalls firmly so the band edge stays sharp.
Watch outDon't paint white too close to the skin - it causes lifting and smudging.
9. White marble swirls on nude (quick scribble)
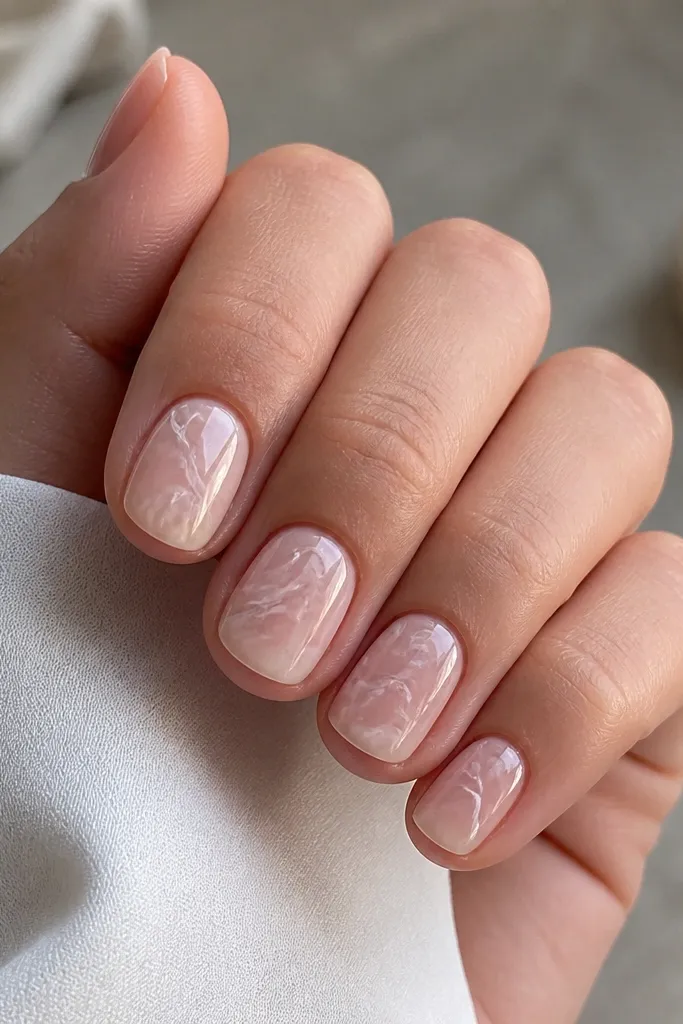
Marble looks harder than it is. On short nails, thin white swirls give the marble effect without needing grey or black. I do it with a white gel polish and a cheap detail brush, then lightly blend the lines while it's still workable. It's elegant for work and fun for weekends.
Apply nude base and cure. With a detail brush, draw 3-5 thin white swirls across the nail, leaving nude space between lines. Use a second clean brush lightly to blur one or two edges for a marble feel, then cure and top coat.
Editor's noteKeep swirls away from the sidewalls by 0.5mm so they don't smear during cleanup.
Watch outAvoid filling the nail with dense white - it turns into solid blobs instead of marble.
10. White floral micro cluster (two-petal flowers)
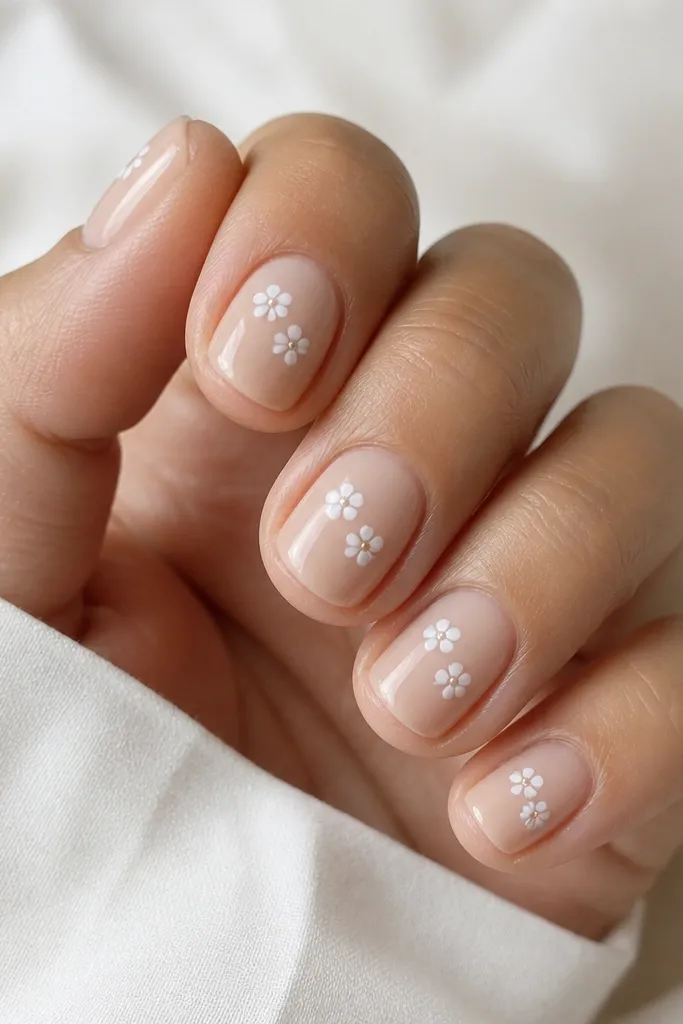
Micro flowers look cute because they're small enough to stay crisp on short nails. I keep the flower count low: two or three petals per flower, one or two flowers per nail. White-on-nude gives that clean, fresh look without needing extra colors. It's also a good design when you want something feminine that still feels modern.
Paint nude base and cure. Use a dotting tool to place the flower centers, then add two teardrop petals on each side using a liner brush. Keep the cluster within the middle third of the nail, then top coat.
Editor's noteLet the center dot dry/cure before adding petals so the petals don't spread.
Watch outSkip big petals - they take over short nails and look like stickers.
11. White stars on sheer nude
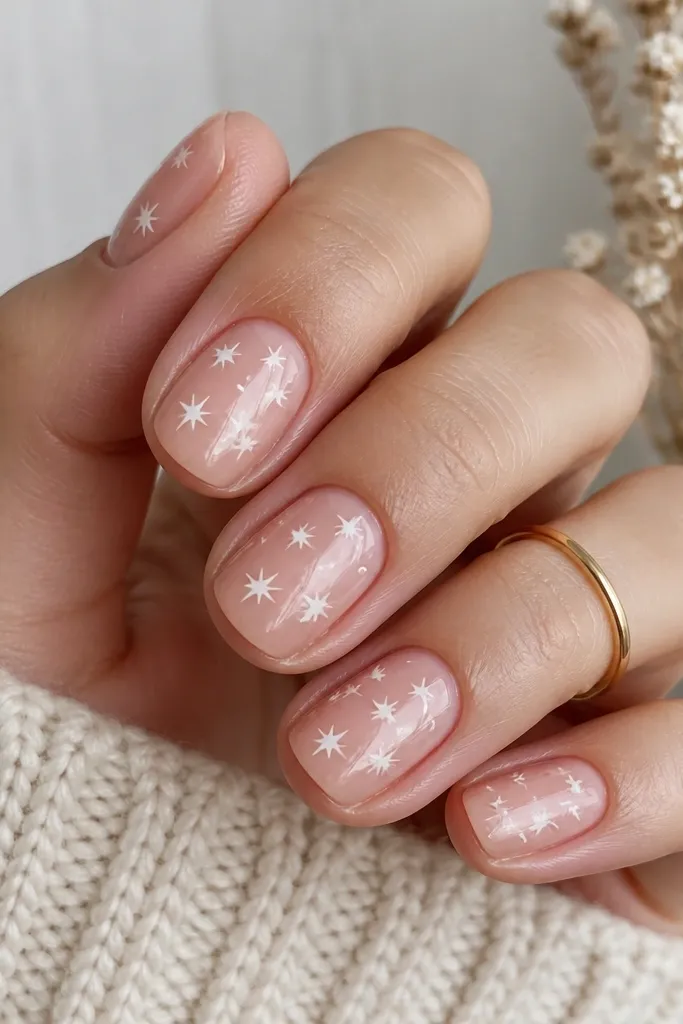
Stars read fun but still clean when they're white and small. I use them like confetti: one star near the tip on two nails and one near the center on the others. The negative space keeps the look light. This is a great pick for a budget because star stamps or nail sticker sheets cost less than full hand-painted sets.
Start with a sheer nude base. Use a star stamping plate or tiny star stickers, then press lightly and seal. If hand-painting, use a thin brush to draw a five-point star and fill with white in one pass.
Editor's noteSeal with two thin top coats instead of one thick one so the stars don't look raised.
Watch outAvoid placing stars too close to the sidewalls - they lift and snag first.
12. White lace outline on one accent nail
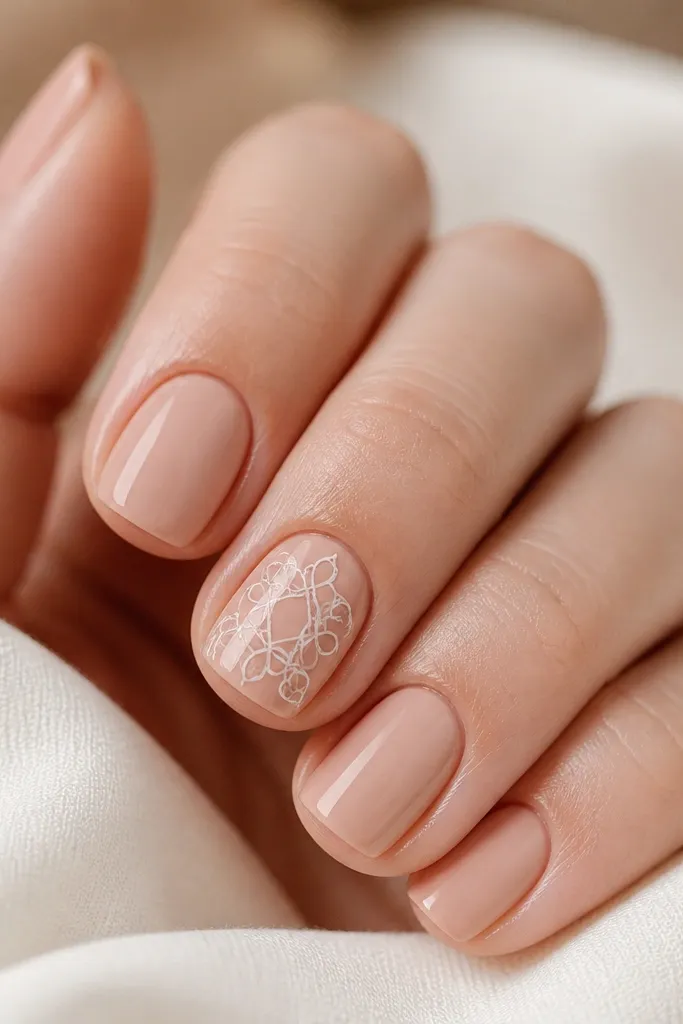
Lace looks fancy when it's only on one nail. On short nails, an outline pattern gives texture without adding thickness. I do a single accent so the design stays classy and doesn't feel busy. It's perfect when you want "done" nails for dinner or a date.
Paint all nails nude and cure. On the accent nail, use a lace stamping plate or a lace stencil and stamp/paint thin white lines. Keep the lace within the middle and leave 1mm empty space near cuticle and tip.
Editor's noteIf your lace looks thick, use a smaller stamper or wipe the plate harder before stamping.
Watch outAvoid doing lace on every nail - it makes short nails look crowded.
13. White gradient tips (airbrush look, no airbrush)
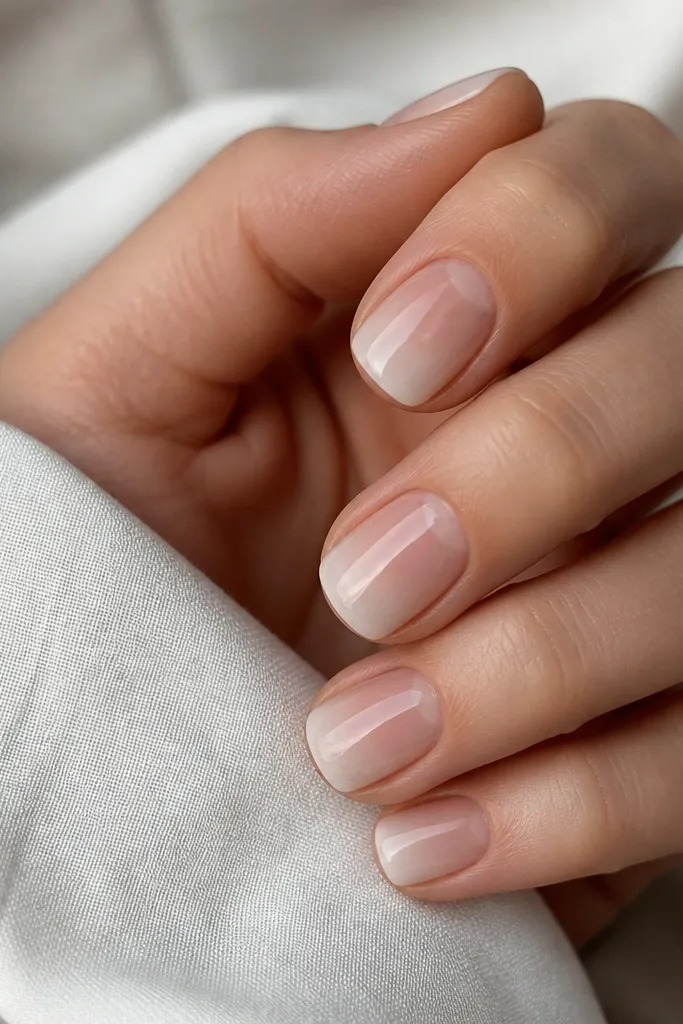
A gradient tip makes short nails look softer and longer. You don't need an actual airbrush; a makeup sponge and a dense white polish gets you 80% of the look. The key is blending while the polish is still slightly tacky so it melts together. It's also very forgiving if your nails aren't perfectly even.
Paint nude base and cure. Dab a small amount of white polish onto a makeup sponge, then press lightly onto the tip area and lift - repeat until you get a fade. Clean the edges with a flat brush dipped in remover, then top coat.
Editor's noteUse a fresh sponge corner for each nail so the blend stays light, not muddy.
Watch outAvoid pressing hard on the sponge - it leaves a cloudy band instead of a fade.
14. White stripe + tiny dot combo
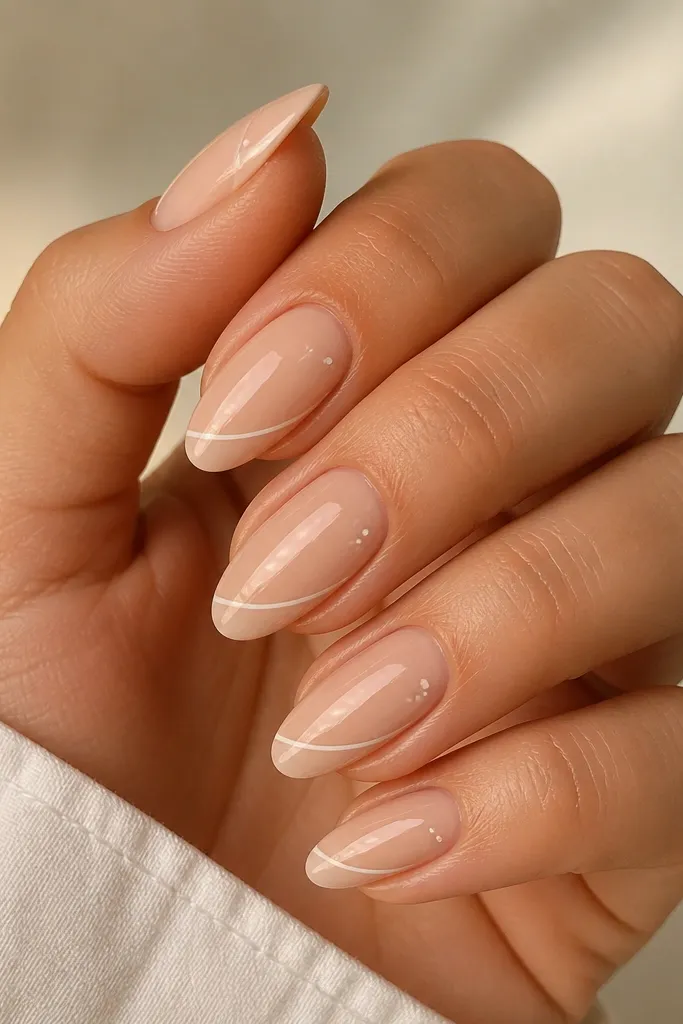
This combo looks like a tiny graphic logo. The stripe anchors the design, and the dot adds a focal point without adding extra work. I keep the stripe thin and the dot centered so it looks intentional. It's budget-friendly because you can do it with one liner brush and a dotting tool.
Apply nude base and cure. Paint a thin white stripe across the nail about 1-2mm above the tip. Add one dot directly above the center of the stripe. Seal with top coat.
Editor's noteIf your stripe looks wobbly, use a striping tape guide for the first pass, then remove it before adding the dot.
Watch outSkip two or three dots - on short nails it turns into clutter fast.
15. White outline hearts on nude (minimal love)
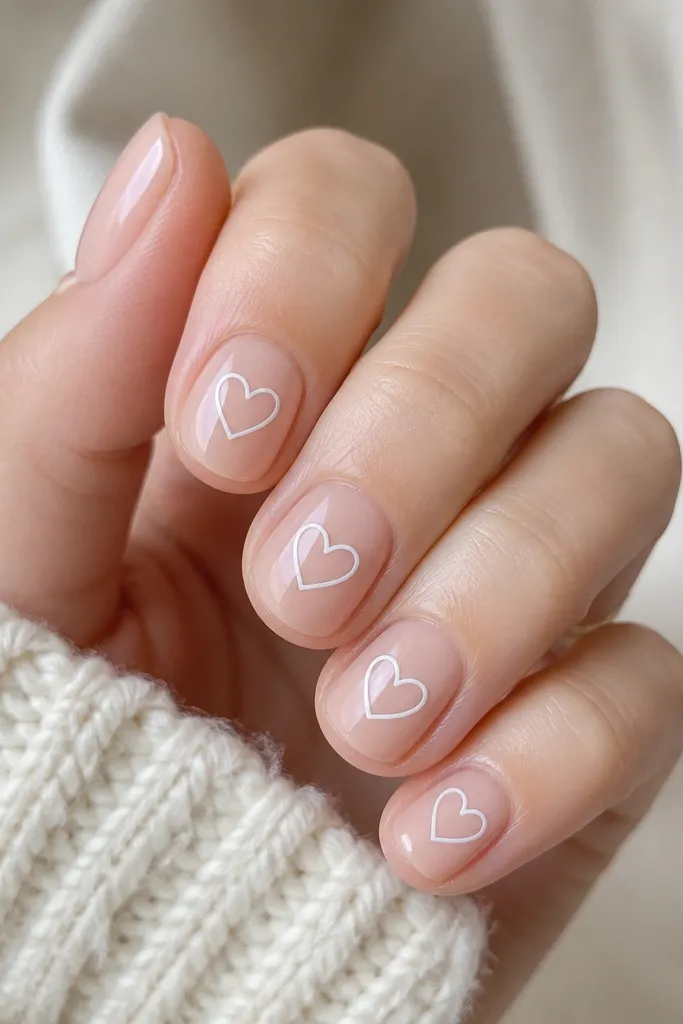
Outline hearts look crisp and modern because you're not filling the whole shape with thick white. On short nails, hollow hearts keep the nail looking airy. I do one heart per nail on two accent fingers and leave the rest plain nude. It's cute without being "teen manicure" territory.
Paint nude base and cure. Use a thin liner brush to draw a small heart outline (about 3mm wide) and leave it unfilled. If you want it bolder, fill just the center with a micro dot. Top coat carefully so lines stay sharp.
Editor's noteUse light hand pressure for outlines; thick lines look messy when the nail is short.
Watch outAvoid hearts that touch the sidewalls - they smear when your hands move.
16. White outline stars with negative space
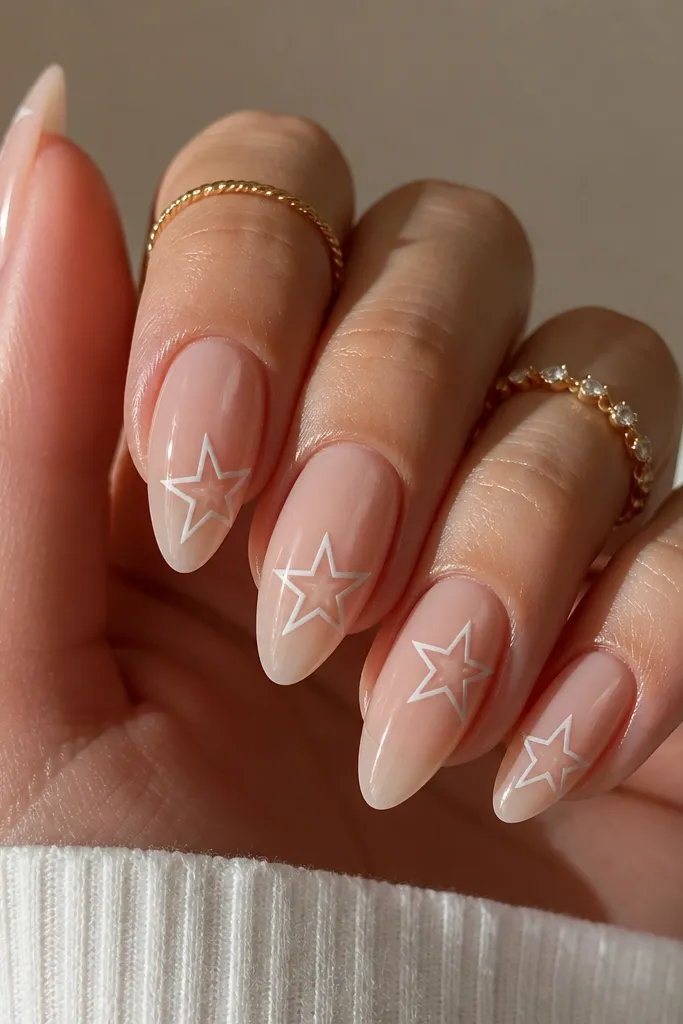
Outline art reads cleaner than filled shapes on small nails. The negative space inside each star makes the nail look airy, and the white lines stay crisp. I like this when I want something playful but still work-appropriate. It also grows out better because the design sits in the middle rather than at the tip edge.
Start with a sheer nude base. Use a thin liner brush or star stamp to place outlines. If hand-painting, draw the points first, then connect them with one smooth stroke. Seal with top coat.
Editor's noteAfter outlining, wait 60 seconds before top coat so the lines don't drag.
Watch outSkip thick marker-style outlines - they look heavy and cheap on short nails.
17. White "cuticle frame" with two thin lines
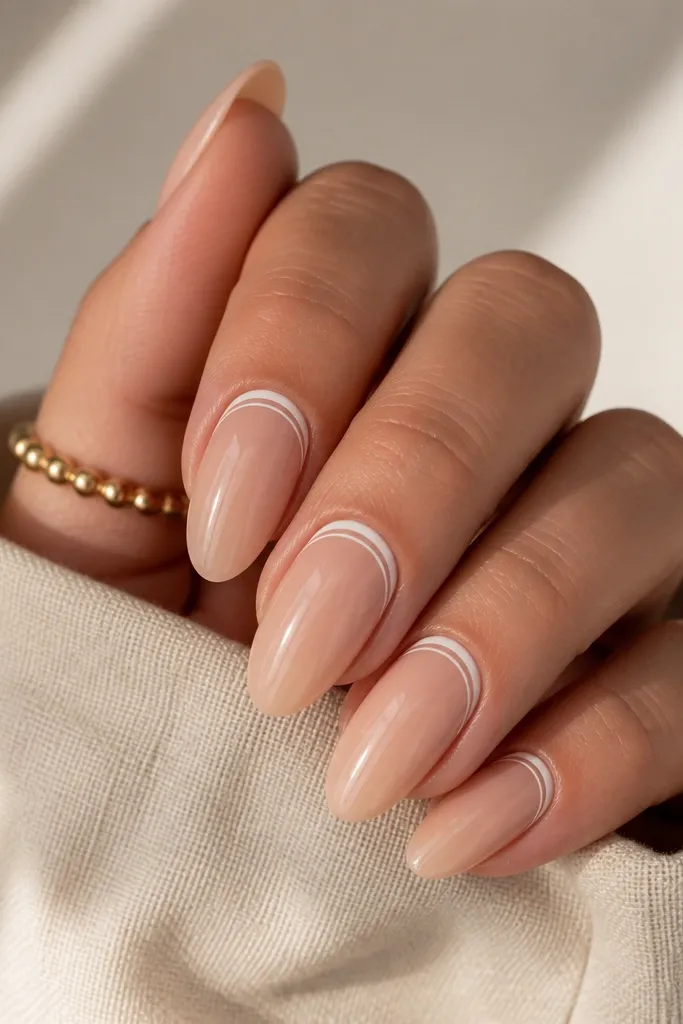
This look gives the illusion of a neat frame around your nail bed. It's graphic, not busy, and it makes short nails look more structured. The design uses thin striping, so it stays light and doesn't lift like thick decals. I wear it when I'm tired of French tips but still want polish that looks intentional.
Paint nude base and cure. Place two thin strips of striping tape on either side of the cuticle curve, leaving a small gap between them. Paint white between the tapes with a liner brush, remove tape, then top coat.
Editor's noteMake the frame lines slightly angled inward toward the center - it flatters the nail shape.
Watch outAvoid wide frames - they cover too much of a short nail and look like a bandage.
18. White drip accent on a nude base
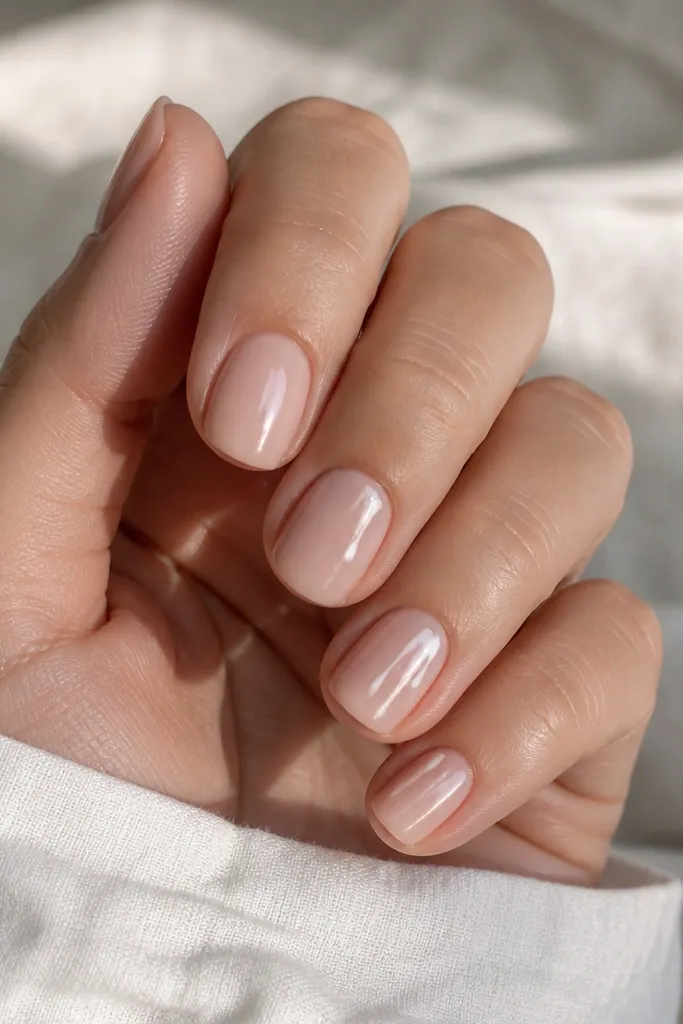
Drips look edgy, but the trick is keeping the drips short and controlled. I use dense white so the drip lines stay opaque and don't turn grey. When you place the drip on only one nail, it looks cool instead of chaotic. This is a great "going out" option that still fits budget-friendly tools.
Paint all nails nude and cure. On the accent nail, place a small dot of thick white polish near the center, then pull it down with the brush tip to create a short drip (2-3mm). Let it level for a minute, then top coat.
Editor's noteUse a thicker polish for the drip base; thin polish spreads and looks like water spots.
Watch outSkip long drips - short nails need the drip to stay within the nail width.