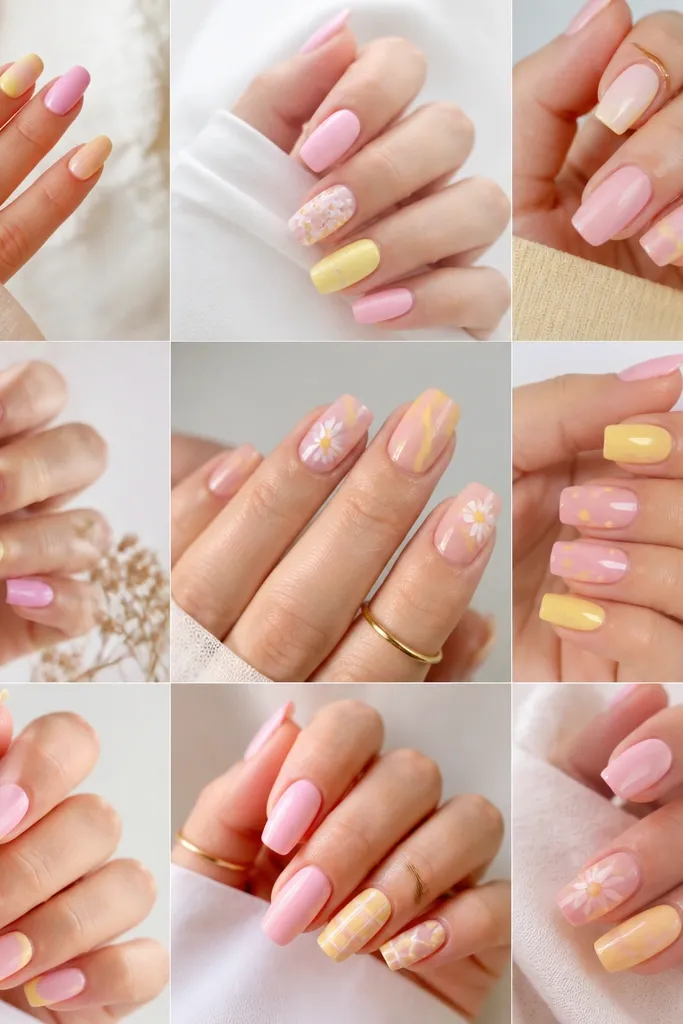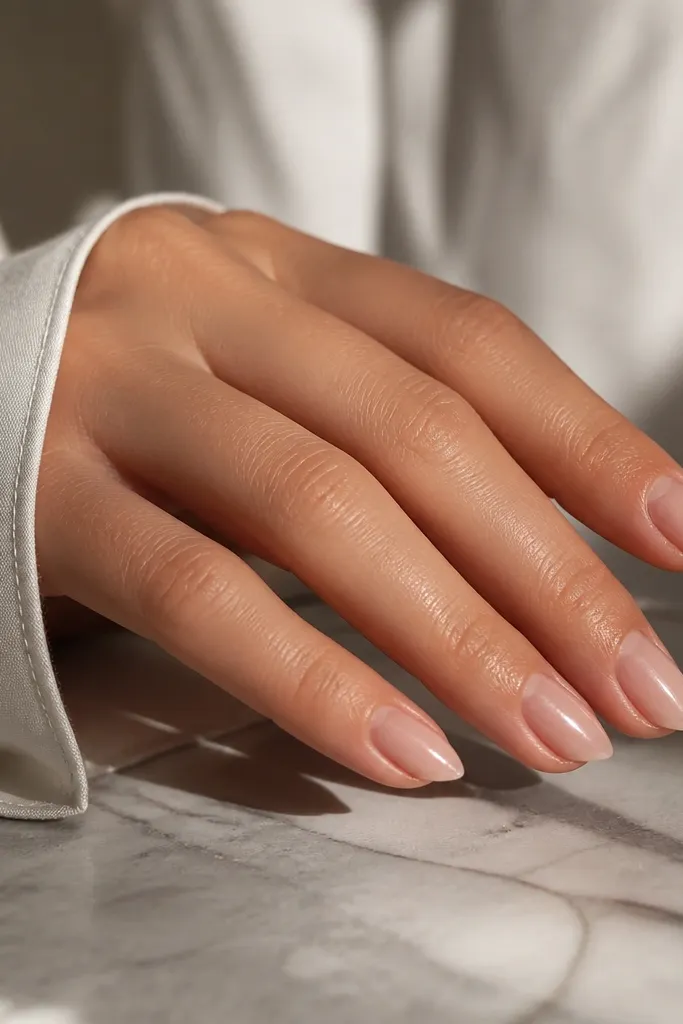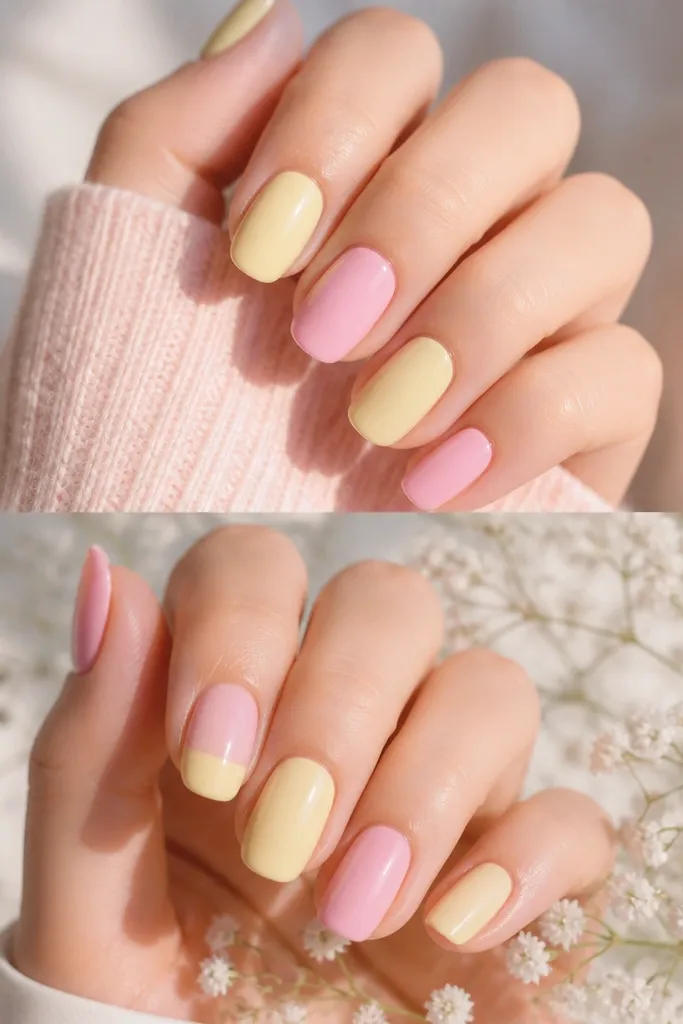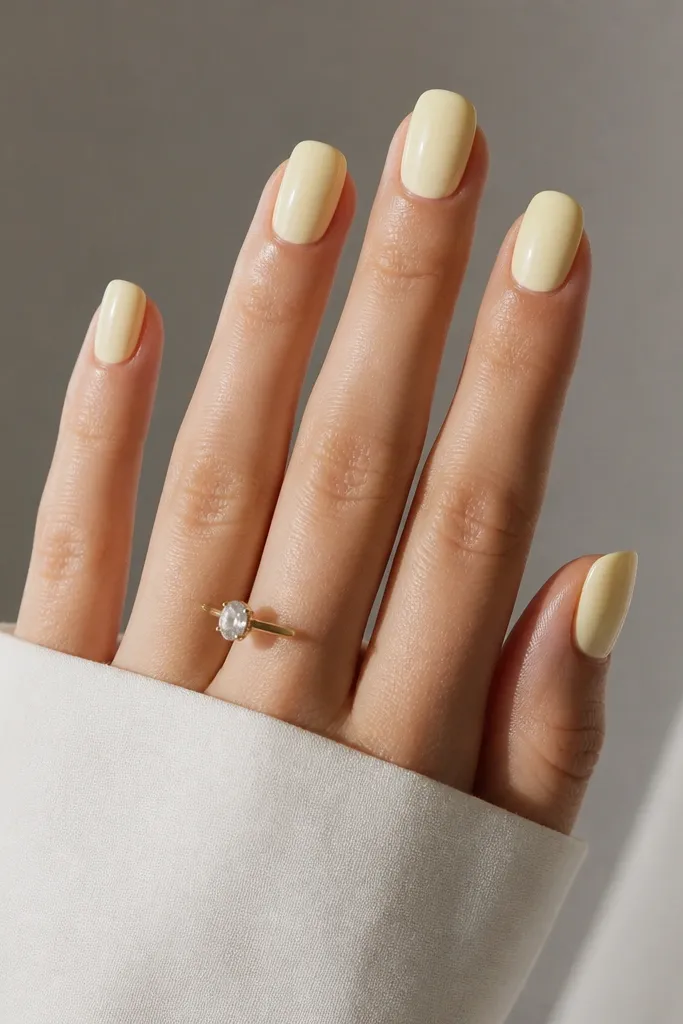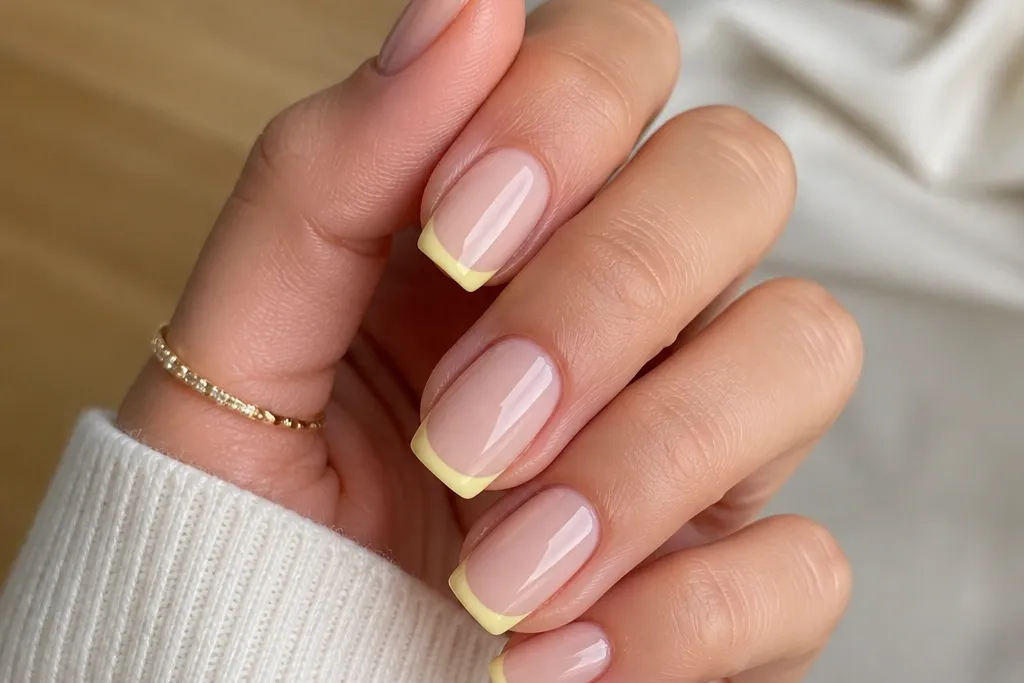
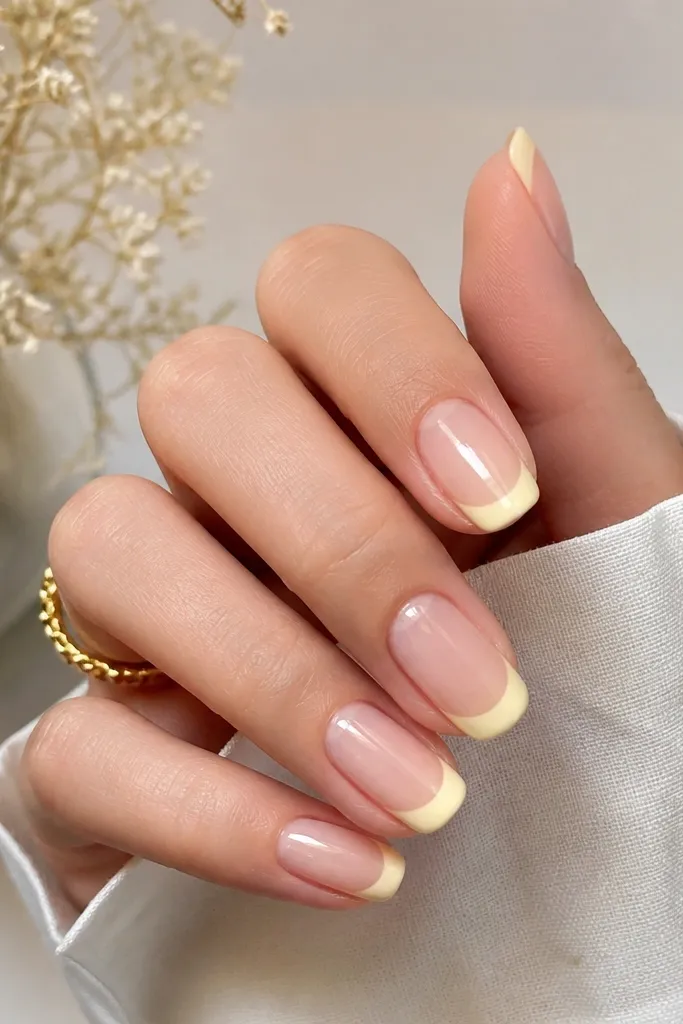
1. Butter Yellow Classic French with Micro Smile Line
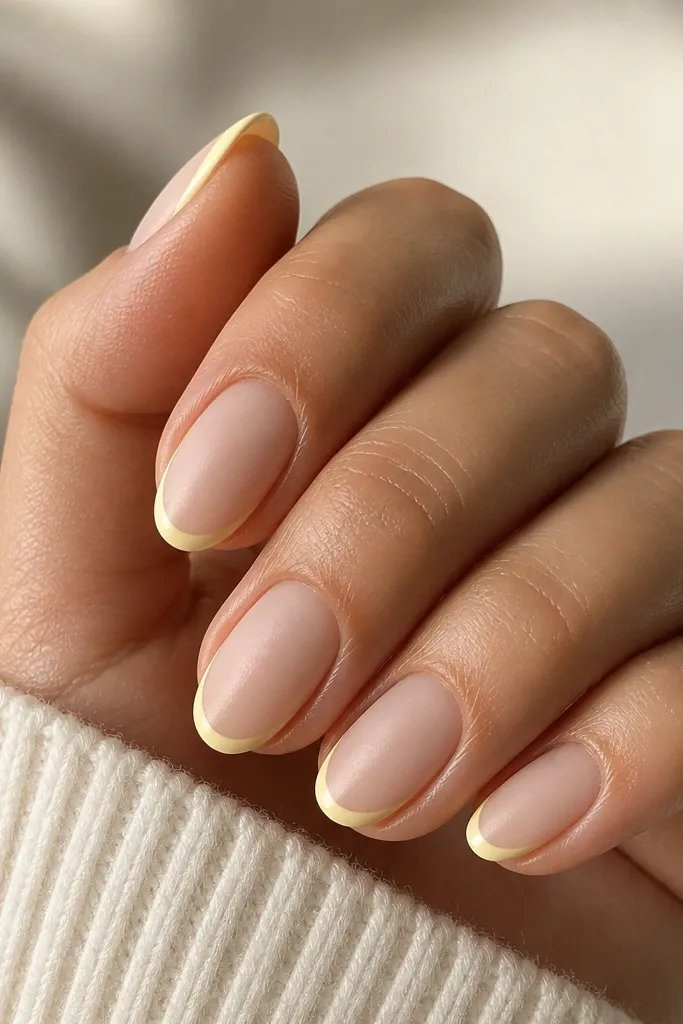
This one looks clean because the yellow is opaque and the tip is narrow. A micro smile line keeps the French from spreading, so the yellow reads "light" instead of "bold." I like a satin nude base under it because it softens any minor imperfections and makes the yellow look even. The result is bright but calm, like lemon tea on a sunny day.
Paint a satin sheer nude base (or sheer nude gel) in two thin coats. Apply 2 coats of pastel butter yellow only on the tip, keeping it around 1.5-2mm wide. Use a liner brush to refine the smile line before top coat.
Editor's noteAfter curing, wipe the nail with 70% isopropyl alcohol and check the edge under a desk lamp. Fix any tiny gaps with a micro brush.
Watch outDon't make the yellow tip too wide - it turns the look into a block instead of a French.
2. Light Yellow French with Diagonal Cat-Eye Tip
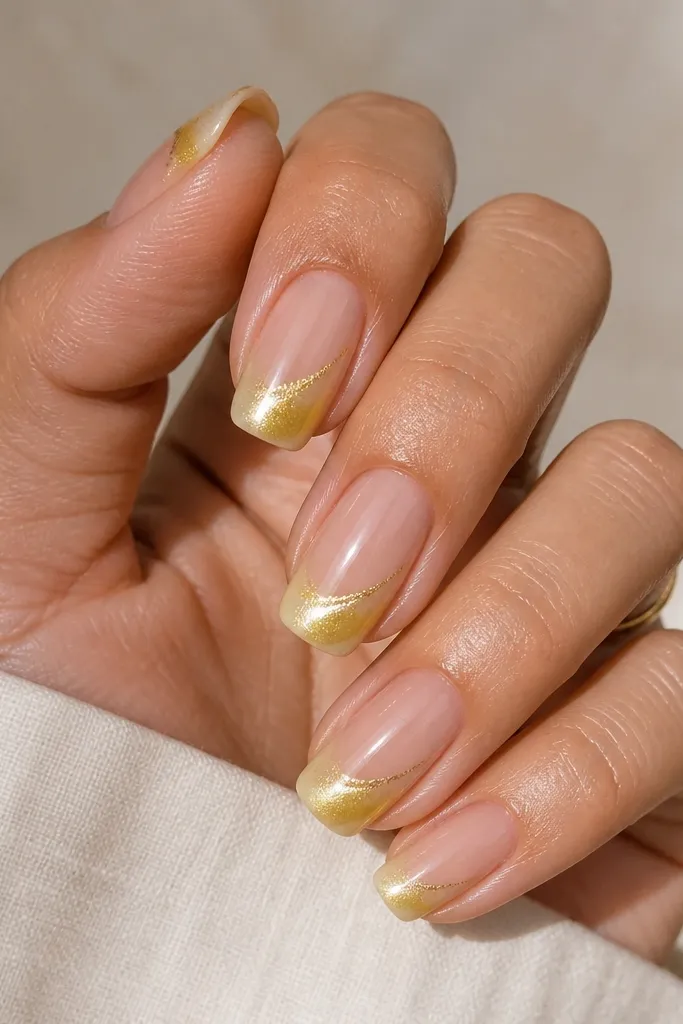
Diagonal tips make light yellow feel more fashion-forward without changing the color. Cat-eye gel adds a soft magnetic streak that looks intentional, not glittery. I use a light cat-eye yellow so the glow stays delicate. The diagonal placement keeps your eye moving and makes the nail look longer.
Do a clear nude base and cure. Paint the diagonal tip with light yellow cat-eye gel, then magnetize after the first cure if your brand requires it. Keep the diagonal line centered, so the tip still reads like a French.
Editor's noteMagnetize for 8-12 seconds on a flat surface and don't move the magnet - the streak will blur.
Watch outSkip top coat too soon after magnetizing - the gel can smear and lose the cat-eye line.
3. Soft Lemon French with Thin White Outline
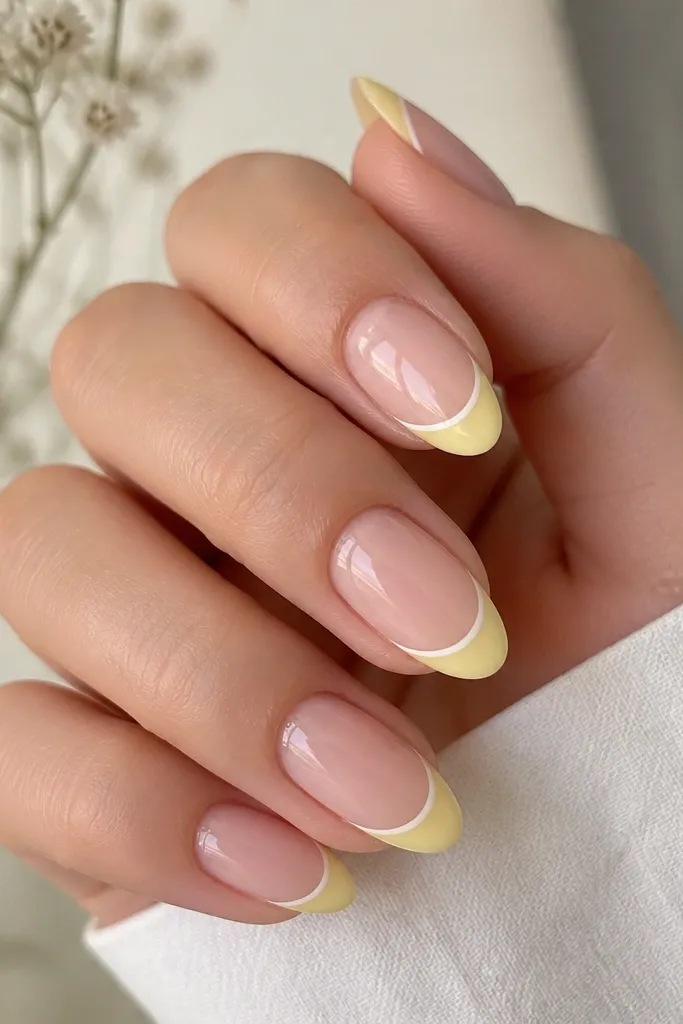
This design works because the white outline creates a crisp boundary that makes the yellow look extra clean. The yellow stays light, while the white adds definition without making it heavy. I use a creamy lemon base and a super thin white gel for the outline. It looks like a salon French even when you're doing it at home.
Apply sheer pink base in 2 coats and cure. Paint the lemon French tip in 2 thin coats. Add a thin white gel outline along the smile curve using a 00 liner brush, then cure again before top coat.
Editor's noteIf your outline wobbles, place a tiny dot of gel at each end first, cure briefly, then connect the dots.
Watch outDon't outline before the yellow is fully cured - the white can drag through the yellow.
4. Pastel Yellow French with Tiny Star Dust
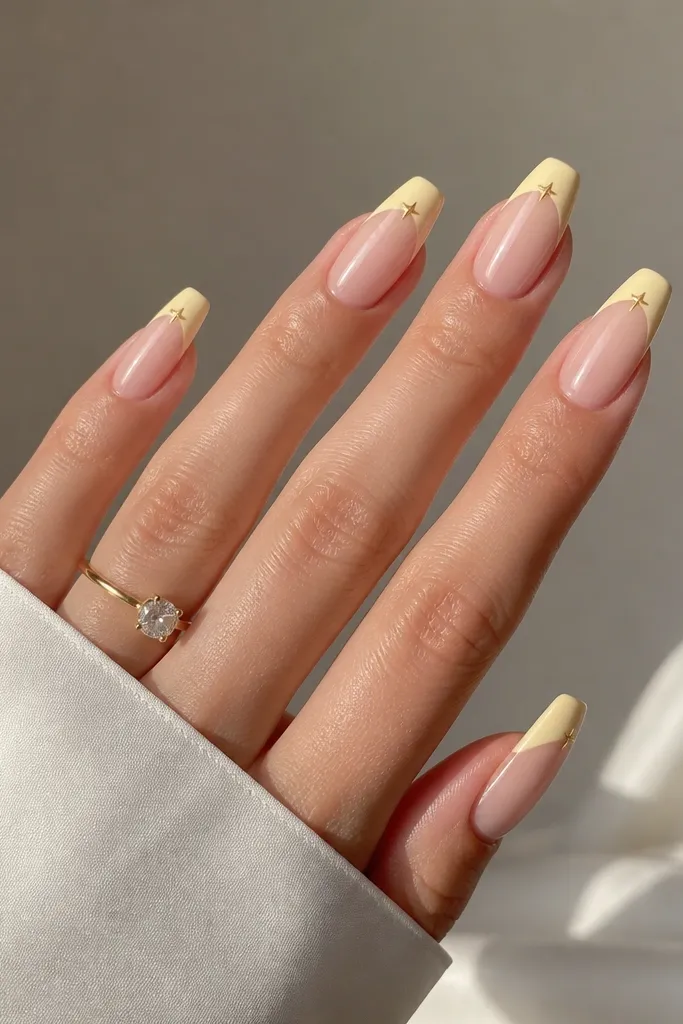
Tiny stars keep the design playful without turning it into a full glitter nail. Light yellow is the perfect background for small gold accents because it warms the gold. I keep the stars minimal - just 1-2 per nail - so it still reads "French." The nails look like you planned them for a party, but they wear well daily.
Do a nude base, cure. Paint the yellow French tip, staying narrow and even. Place 2 small gold star decals in the tip center, then seal with a thin clear top coat layer.
Editor's notePress decals into wet top coat only once. If you reposition too many times, they lift at the edges.
Watch outDon't cover the whole tip in star glitter - it stops looking like French.
5. Light Yellow French with Glossy Base and Matte Tip
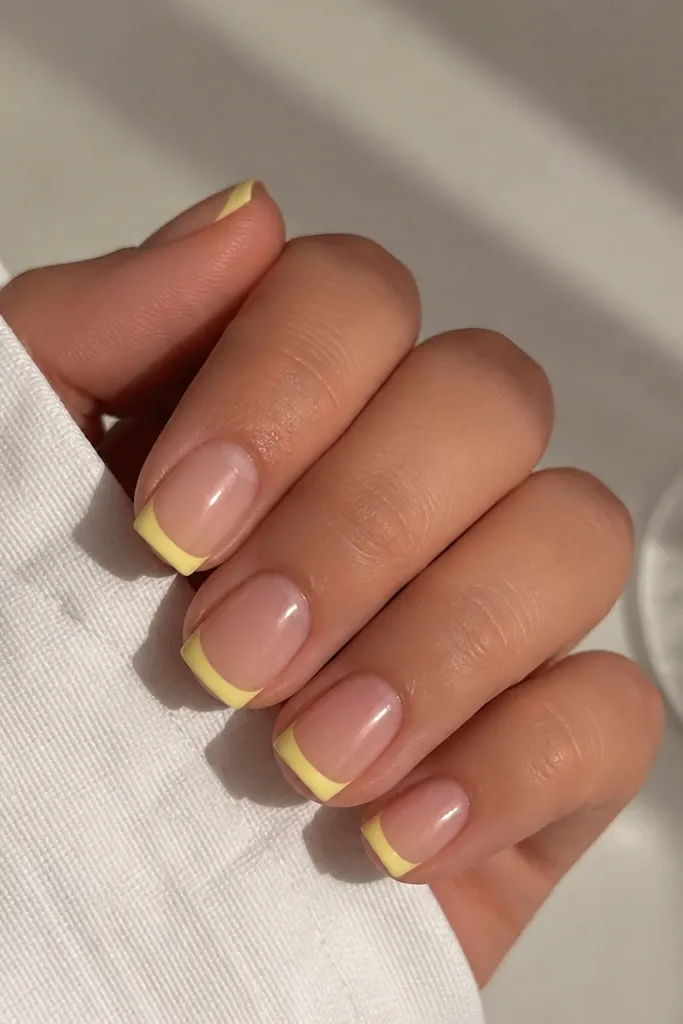
Mixing finishes makes the yellow look smoother and more expensive. Glossy base reflects light, while matte tip absorbs it, so the French line stands out. I like this when you want the yellow to feel soft instead of "painted." The contrast also hides micro-bubbles and tiny streaks in the matte layer.
Build a glossy nude base in 2 coats. Paint the light yellow French tip, cure, then apply a matte top coat only over the tips. Keep the smile line clean by trimming excess with a small lint-free brush.
Editor's noteUse a separate matte top coat brush or clean your brush well. Matte top coat dries fast and can streak.
Watch outDon't matte the whole nail - you'll lose the crisp French contrast.
6. Daffodil Yellow French with Negative Space Half-Moon
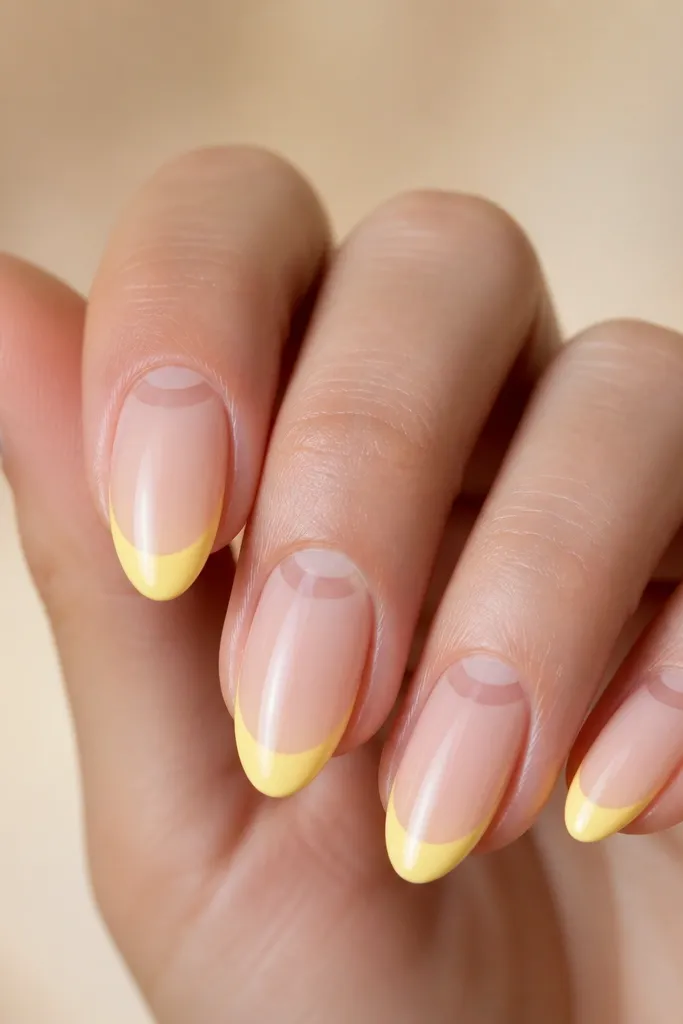
Negative space makes light yellow look designed instead of "painted on." The clear half-moon near the smile line breaks up the color and makes the tip feel lighter. I use a slightly brighter daffodil yellow here because the negative space keeps it from overwhelming. It's a great option if your hands want something different but you still want a French shape.
Apply sheer nude base. Paint the French tip in daffodil yellow around a half-moon area you leave bare. Use a tiny piece of striping tape to mask the half-moon while you paint, then remove carefully after curing.
Editor's noteMask with tape, not freehand, if you want the half-moon perfectly centered.
Watch outDon't use a very thick gel for the tip - it can bleed into the negative space.
7. Light Yellow French with Micro Glitter Fade at Tip Edge
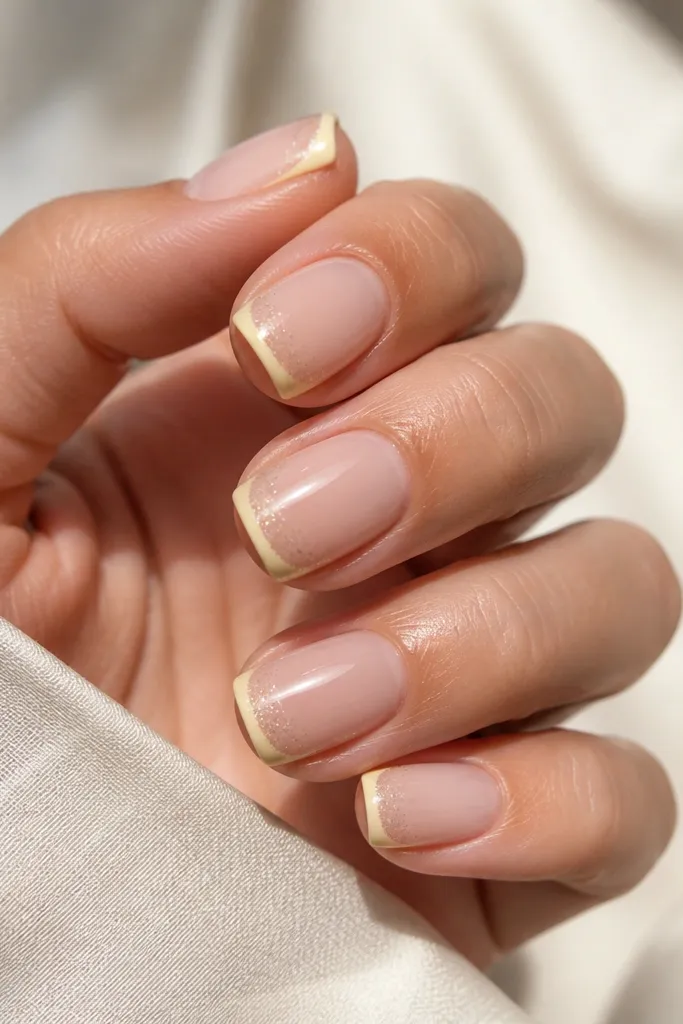
A micro glitter fade adds sparkle without changing the French layout. The fade at the very edge makes the tip look dimensional, like it catches sunlight when you move your hands. I use a fine holographic micro glitter that is mostly transparent. It keeps the yellow looking airy instead of chunky.
Paint the yellow French tip and cure. Dab a tiny amount of micro glitter gel only at the outer 1/3 of the tip, then blend inward with a sponge tip or the side of a brush. Cure and seal with a glossy top coat.
Editor's noteUse a light touch with glitter gel. Too much at once makes a hard ridge.
Watch outDon't dust loose glitter directly - it embeds unevenly and feels gritty.
8. Sunburst Yellow French with Thin Orange Corner Strokes
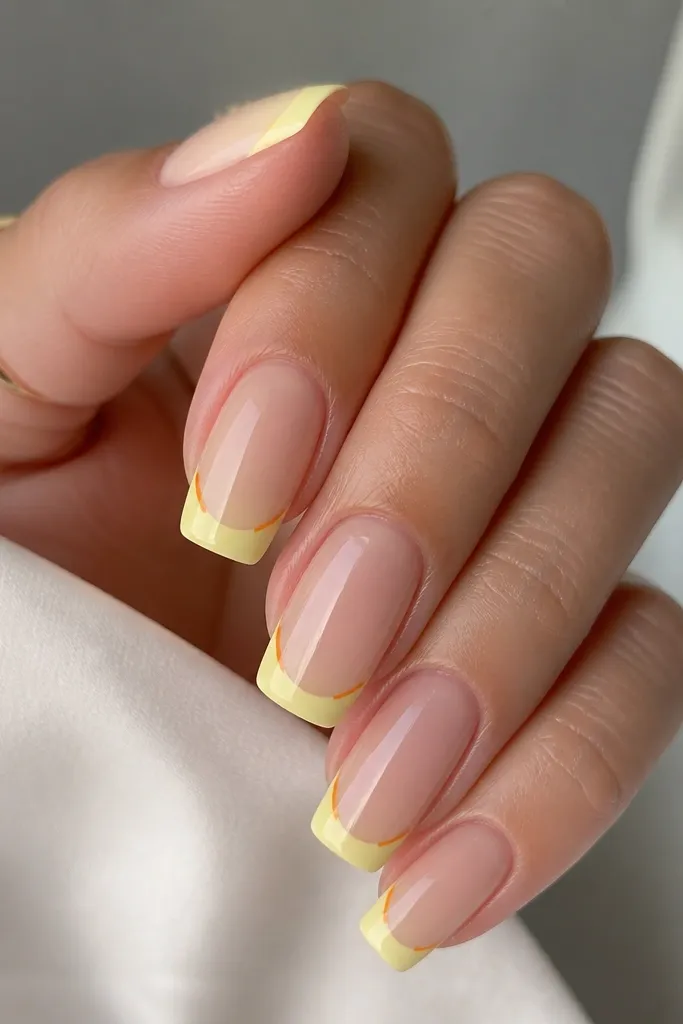
Tiny orange corner strokes make the light yellow look like it's glowing from behind. It's a simple trick that adds "sun" energy while keeping the main color pastel. I use thin strokes, not blobs, so it still reads like French. The orange is warm but controlled, which keeps it from turning into a two-tone mess.
Base nude, cure. Paint the yellow tip in 2 coats. With a 00 liner brush, add a short orange stroke at each corner of the smile, then cure and top coat.
Editor's noteKeep the orange strokes shorter than the width of your nail. Long strokes start looking like chevrons.
Watch outDon't overdo orange - it steals attention from the French shape.
9. Creamy Yellow French with White V-Cut Tips
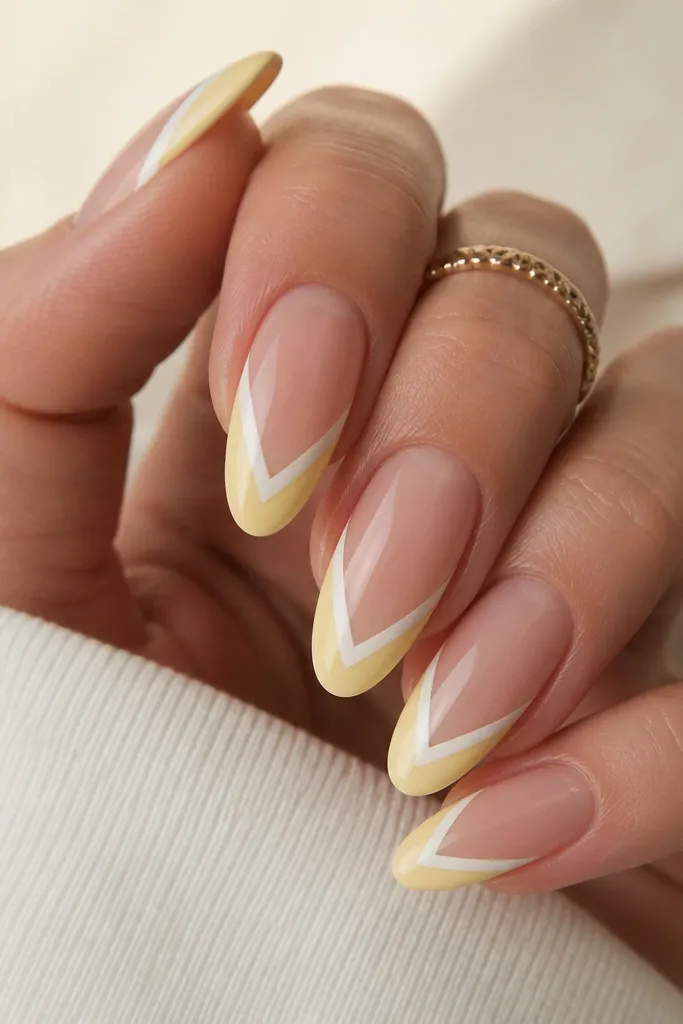
The V-cut ending makes the light yellow feel custom and a little edgy. The thin white line defines the center point so it doesn't look like a smudged tip. I like this on almond shapes because the V follows the natural curve. It's a clean design that still looks playful.
Use nude satin base. Paint the yellow French tip, then carve the center edge into a subtle V using a liner brush. Add a thin white gel line along the V edges, cure, and finish with glossy top coat.
Editor's notePractice the V on a paper nail guide or an old swatch first. Your hand learns the angle fast.
Watch outDon't make the V too deep. Deep V cuts can look like damage instead of design.
10. Light Yellow French with Pearlized Sheen Top Coat
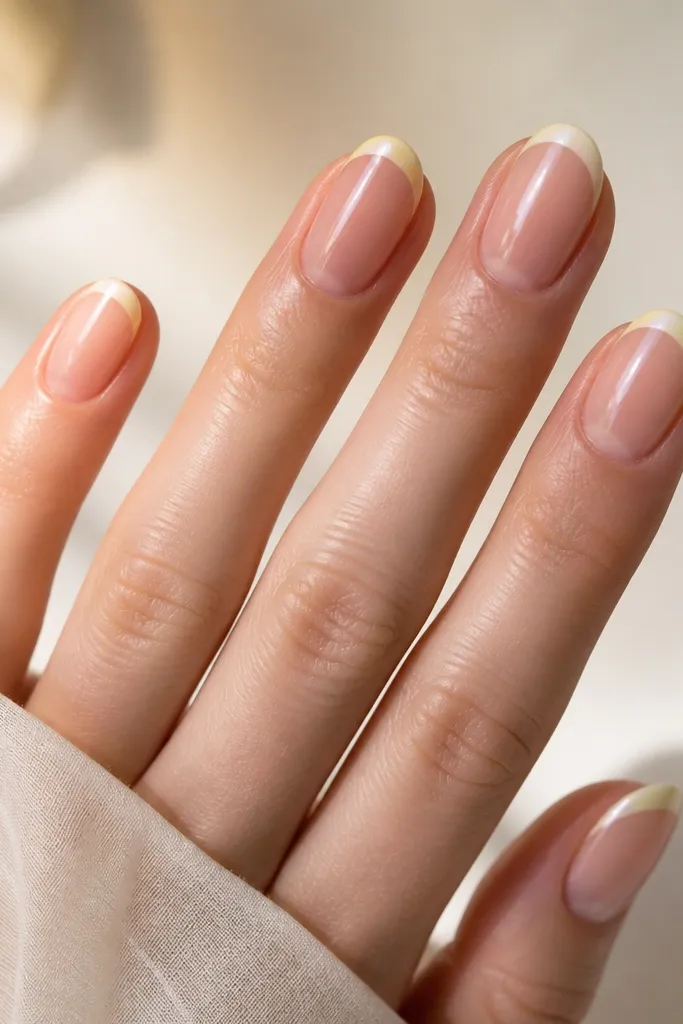
Pearlized sheen makes pastel yellow look smoother and more expensive. Instead of flat color, you get a soft glow that looks good in daylight and indoors. I use a pearl top coat over just the tip so the base stays simple. It reads like a salon finish without adding patterns.
Base sheer pink, cure. Paint light yellow French tip in 2 thin coats. Apply normal glossy top coat to the whole nail, then use pearlized top coat only on the tips and cure fully.
Editor's noteApply pearlized top coat in thin layers. Thick coats look cloudy on pastel colors.
Watch outDon't skip full cure - pearl top coats can stay tacky if the gel is under-cured.
11. Butter Yellow French with Tiny Dots in a Single Row
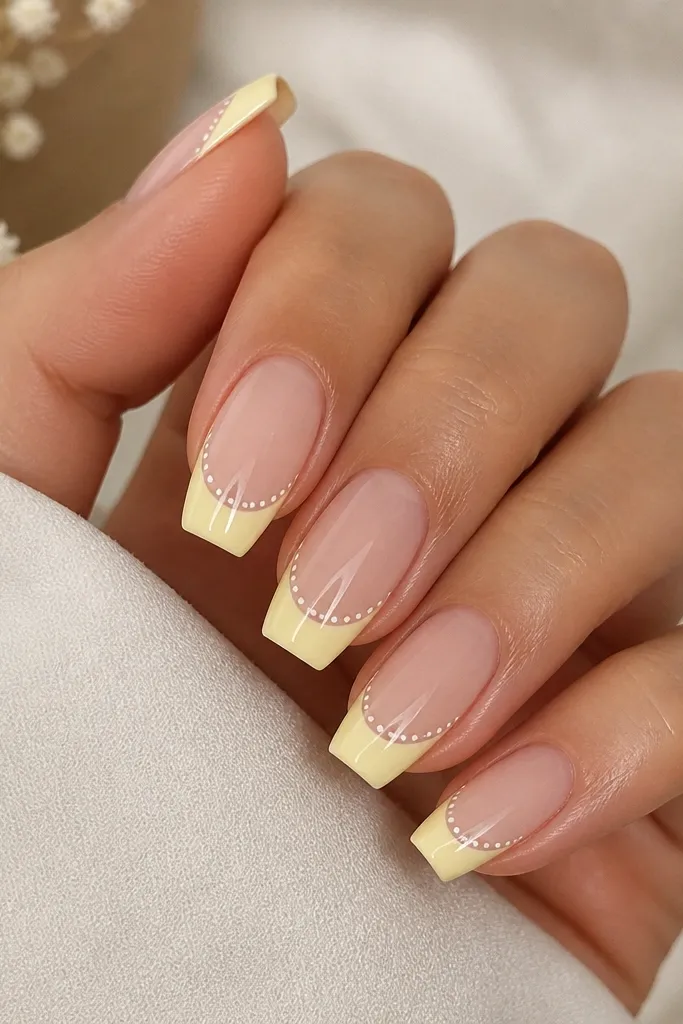
One-row dot placement looks intentional and keeps the design from turning busy. White dots on yellow pop without changing the pastel vibe. I place them centered and evenly spaced so your eye reads a clean line. It's a fun option when you want "cute" but still classy.
Paint nude base, cure. Add butter yellow French tip. Use a dotting tool (or toothpick with a cleaned tip) to place 5-7 tiny white dots along the smile line. Cure and seal with a glossy top coat.
Editor's noteDip the dotting tool lightly. If you load too much gel, dots spread and lose their round shape.
Watch outDon't scatter dots across the whole tip - it stops looking like French.
12. Light Yellow French with Thin Gold Foil Strip
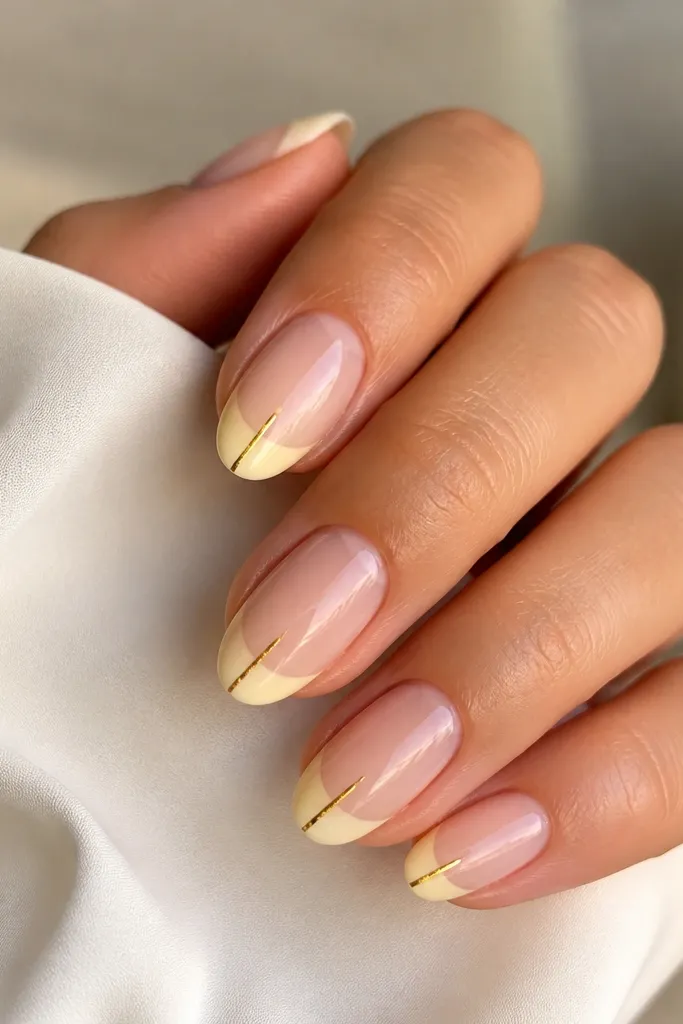
A single vertical foil strip makes the nail look longer and more expensive. Light yellow keeps the gold from feeling harsh, so it looks warm instead of metallic and loud. I keep the foil strip narrow and slightly uneven at the edges, like real foil, not like a printed line. It's one of my favorite "easy wow" combos.
Base nude, cure. Paint a thin, even light yellow tip. Place a small piece of gold foil in the center and press it down with tweezers or a foil applicator, then seal with a clear gel top coat.
Editor's noteCut the foil into skinny strips first. Big foil pieces are harder to place neatly on a tip curve.
Watch outDon't cover the entire tip in foil - it turns into a chunky gold nail.
13. Pale Yellow French with Outline-Only Smile Line
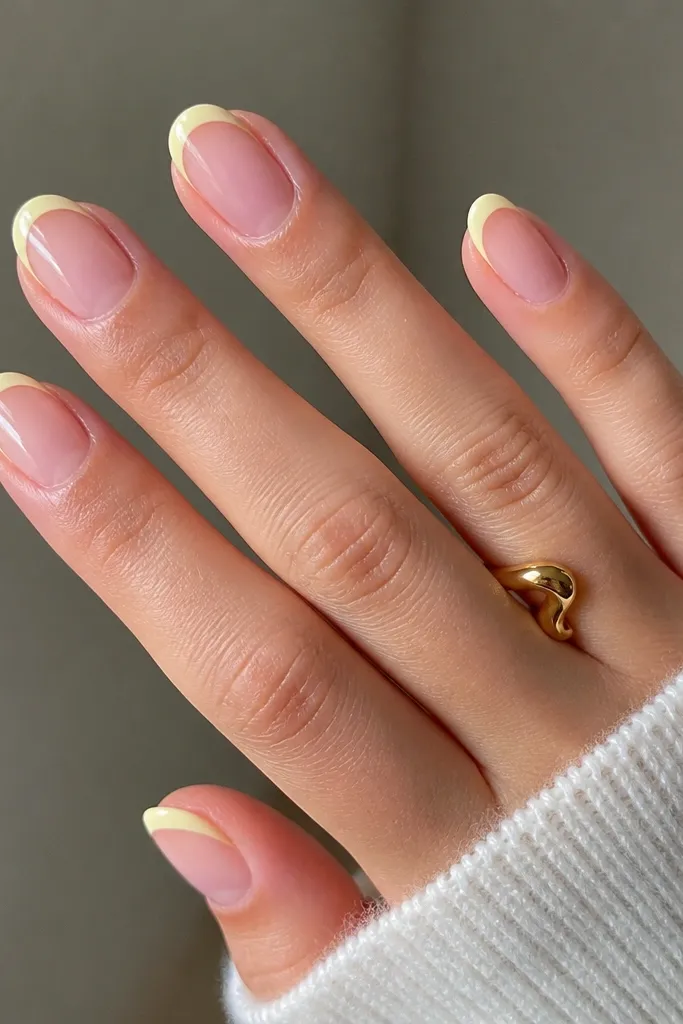
This one is for when you want light yellow nails easy but you're not confident painting full tips. By keeping the fill minimal, you reduce streaks and uneven coverage. The outline still reads like French from a distance, especially in photos. It's also great if your nail beds are short and you want the tip to look delicate.
Start with a clear or sheer nude base. Mask the smile curve with guides or tape, then paint only the outline fill area with pale yellow. You can use a brush to clean the inner edge so it stays sheer. Cure and top coat.
Editor's noteUse guide strips so the smile curve stays even on every nail.
Watch outDon't overfill the outline. Thick edges look like a sticker instead of gel.
14. Light Yellow French with Wavy Gel Skirt
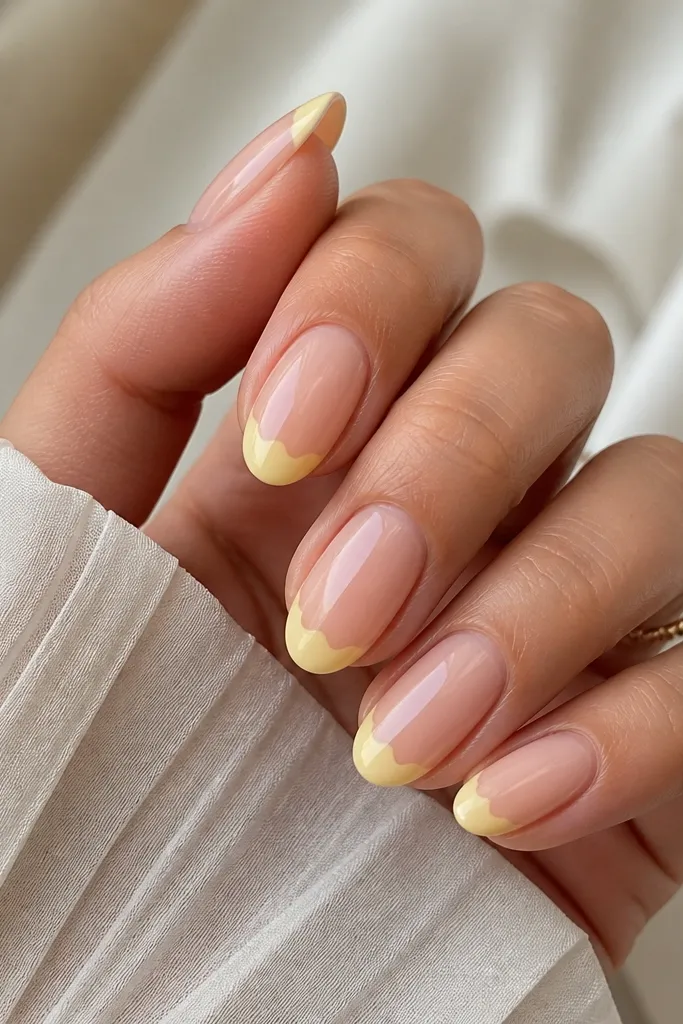
Waves add movement while staying within a French layout. Light yellow makes the waves look soft instead of sharp. I keep the wave height low so it doesn't turn into a zigzag pattern. This is a good design for people who hate straight lines.
Paint nude base, cure. Apply light yellow to the tip area, then use a liner brush to create gentle waves along the lower edge. If you're using guides, remove them after the first cure and reshape the wave line. Seal with glossy top coat.
Editor's noteWipe your brush on a lint-free wipe between nails so the wave line stays crisp.
Watch outDon't make waves too tall - it looks like a broken French line.
15. Soft Yellow French with Tiny Heart in the Center
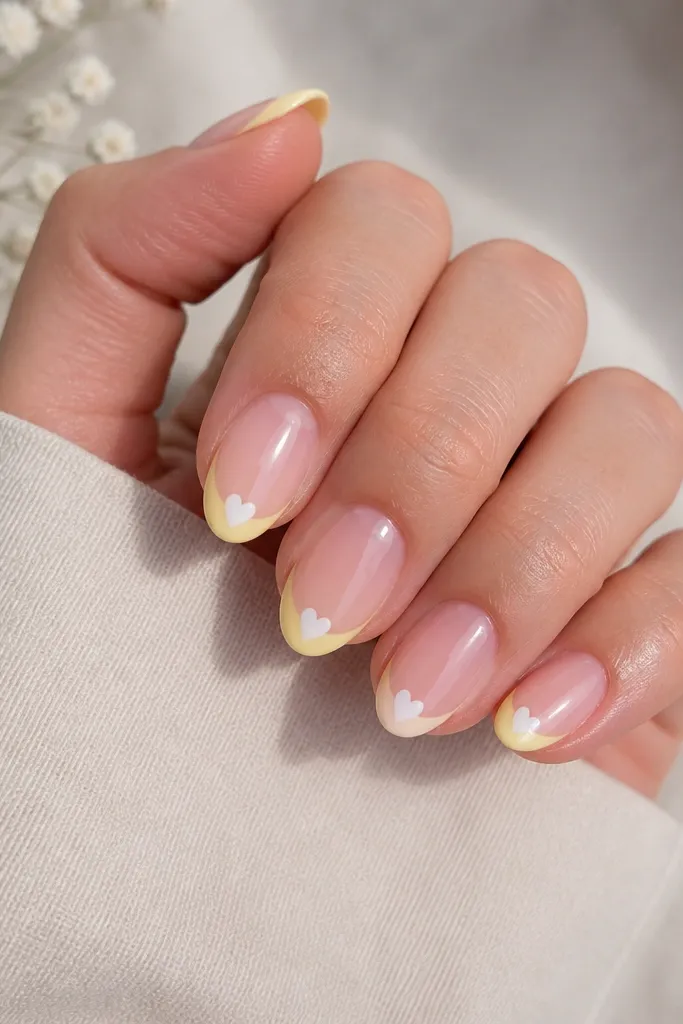
A single heart keeps the look sweet without clutter. White hearts on pastel yellow look fresh and clean, especially when the heart is tiny. I place it slightly above the tip center so it doesn't sink into the smile line. It gives an instant "date night" vibe.
Base sheer pink, cure. Paint light yellow French tips in two coats. Use a toothpick or a 10/0 detail brush to draw a tiny heart, cure, then top coat.
Editor's noteIf your heart looks lopsided, draw one side first, cure 10 seconds, then mirror the other side.
Watch outDon't use big hearts. Large hearts make the French look childish.
16. Light Yellow French with Clear Jelly Top Over Color
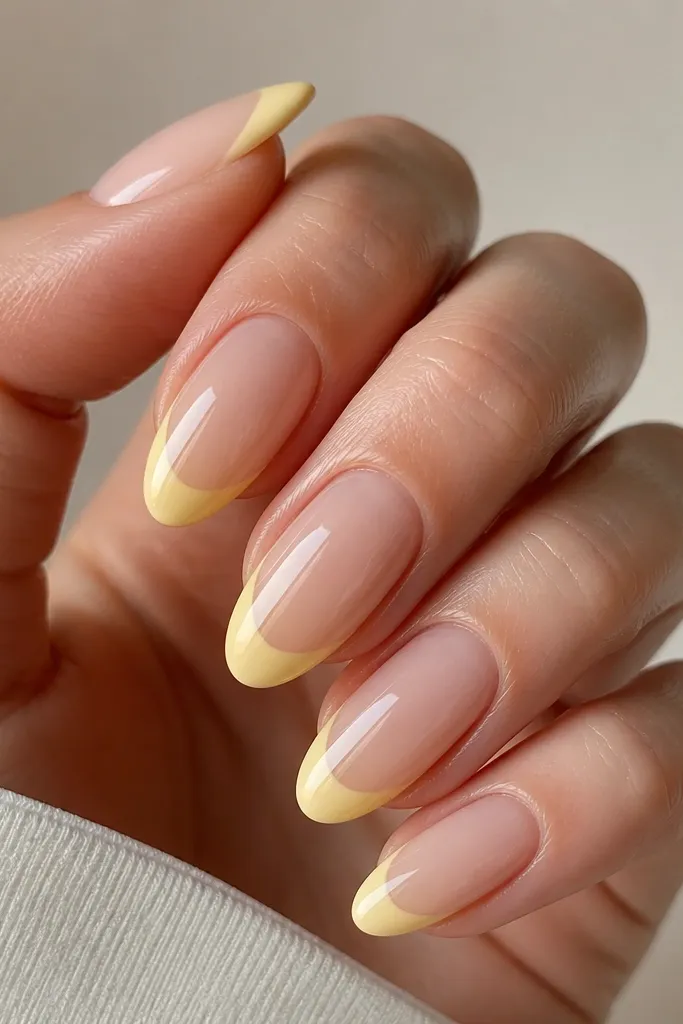
Jelly layering makes light yellow look like it has depth, not flat paint. The clear layer smooths the surface so it looks glassy. I like this when you want the tip to look softer and more wearable. It also helps if your yellow coverage isn't perfectly even.
Paint a sheer nude jelly base. Apply light yellow French tip in 1-2 thin coats (don't go too thick). Then apply clear jelly top gel over the tips only, cure, and finish with glossy top coat.
Editor's noteKeep each jelly layer thin. Thick jelly can cause shrinkage lines at the smile edge.
Watch outDon't skip a clear jelly layer if you want a smooth, salon-glass finish.
17. Lemon Yellow French with Thin Black Side Lines
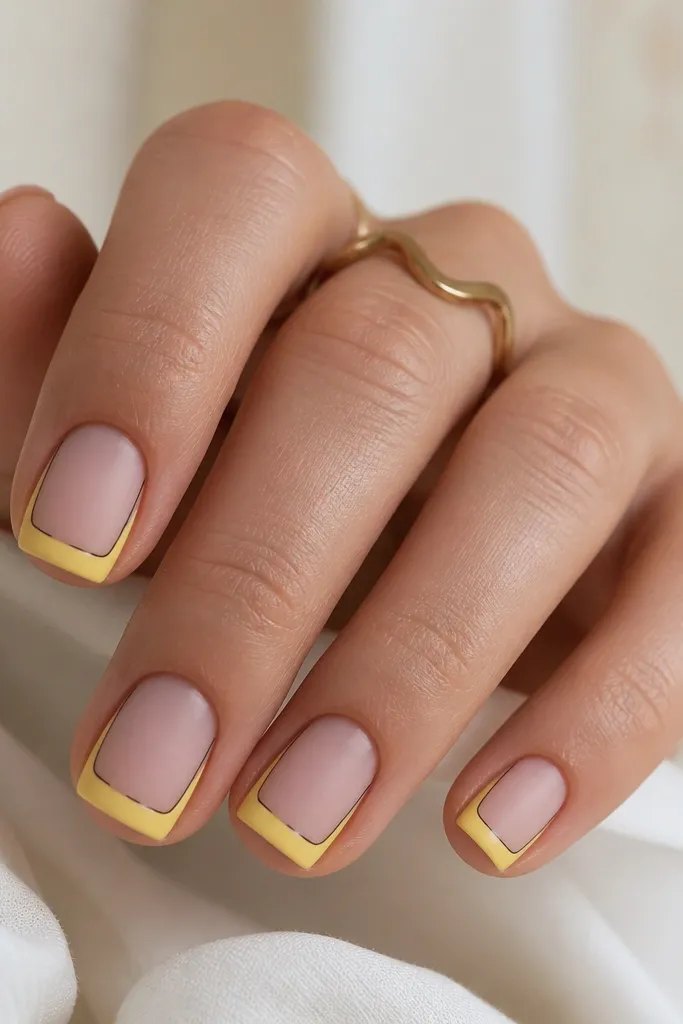
Black lines add contrast and make light yellow look crisp, not washed out. I like the matte base here because it prevents the black from looking glossy and harsh. This design reads modern and a little graphic, even with a pastel color. It's also great for people who want the French look but prefer it less delicate.
Do a matte nude base. Paint lemon yellow tips, keep them even. With a 00 liner brush, draw one thin black line along the left and right edges of the tip, cure, then seal with glossy top coat only over the tips.
Editor's noteLet the black gel level for 5 seconds before curing so it stays straight.
Watch outDon't draw thick black - thick lines make pastel look cheap fast.
18. Light Yellow French with Peach Ombre Edge
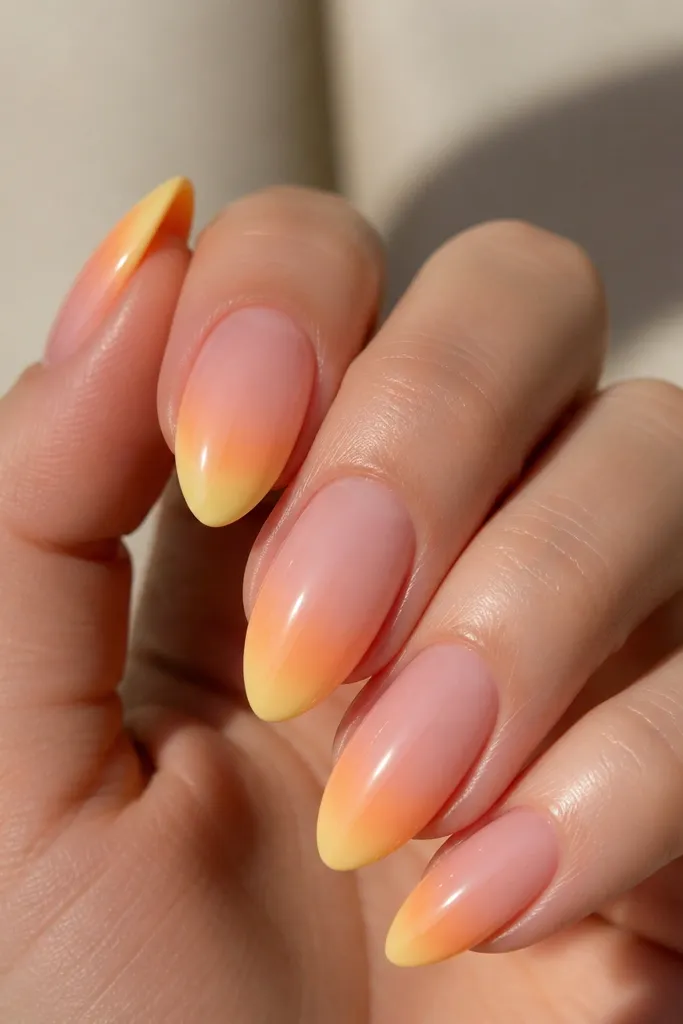
The peach ombre edge makes the French tip blend naturally into the nail, so it looks smooth instead of harsh. Light yellow plus peach reads warm and flattering. I keep the gradient only along the lower edge of the tip so you still get a French silhouette. It's one of the easiest ways to make pastel look dimensional.
Paint nude base and cure. Sponge a thin peach layer at the very bottom edge of the tip area, then overlay with light yellow gel on top. Use a small makeup sponge and wipe off excess before tapping. Cure and top coat.
Editor's noteUse a barely loaded sponge. If you see strong peach patches, it will look muddy.
Watch outDon't blend the entire tip into peach - you'll lose the French shape.
19. Pale Yellow French with Dainty Floral Micro Decals
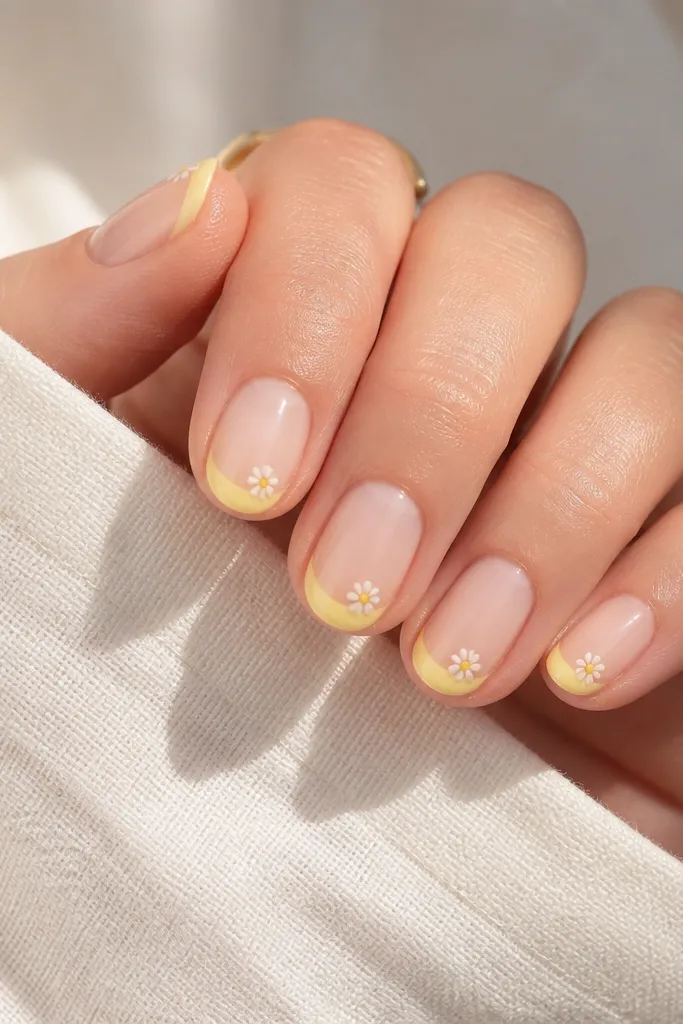
Micro floral decals look best when they sit inside the French area, not across the whole nail. Light yellow gives the flowers a clean background and makes the whites look brighter. I use one small decal per nail so it stays airy. It's a sweet look that still feels grown-up.
Apply nude base, cure. Paint pale yellow tips and cure. Place micro floral decals using tweezers, then seal with a thin clear gel layer so the decal edges don't lift.
Editor's notePress decals with a silicone-tipped tool for 10 seconds so they conform to the curve.
Watch outDon't use big nail stickers - they wrinkle at the tip curve.
20. Light Yellow French with Half-Gloss Tip and Chrome Corner
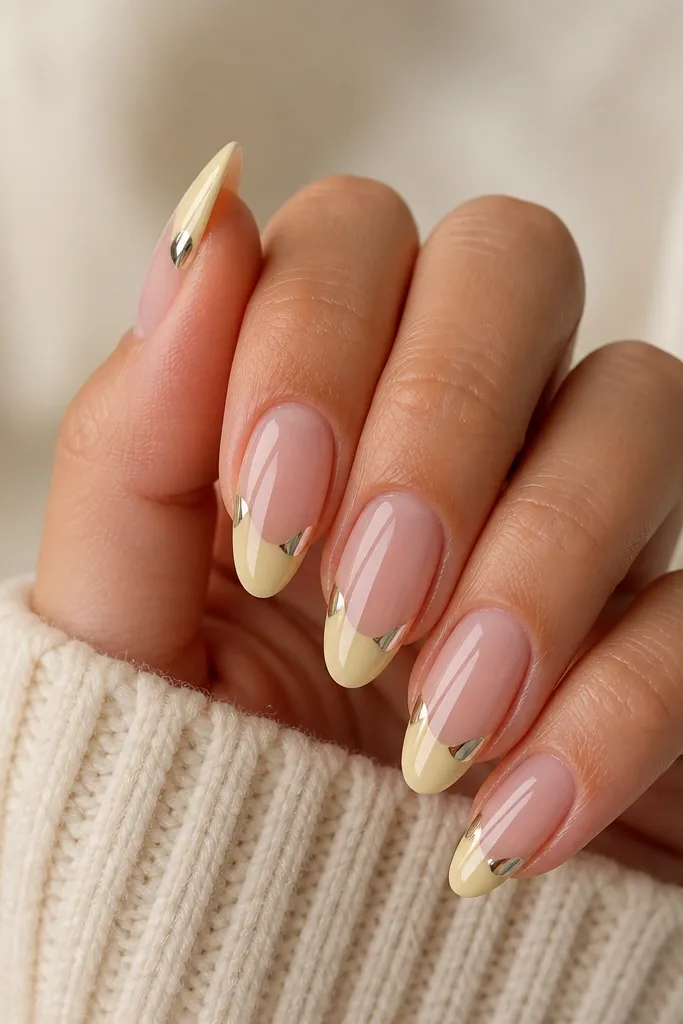
A satin tip with one chrome corner gives you that "manicure detail" effect without doing full chrome nails. The chrome corner catches light and makes the pastel yellow look intentional. I keep the chrome only at one corner so it doesn't overpower. This looks amazing in photos because the corner flashes when you move.
Nude glossy base, cure. Paint light yellow French tip and cure. Apply matte top coat over the tip for satin. Then rub gold chrome powder only on the outer corner, seal with a thin top coat.
Editor's noteUse a small piece of foam to buff the chrome corner. It keeps the shape tight.
Watch outDon't chrome the whole tip - pastel turns metallic and heavy.
21. Creamy Yellow French with White Striped Tape Line
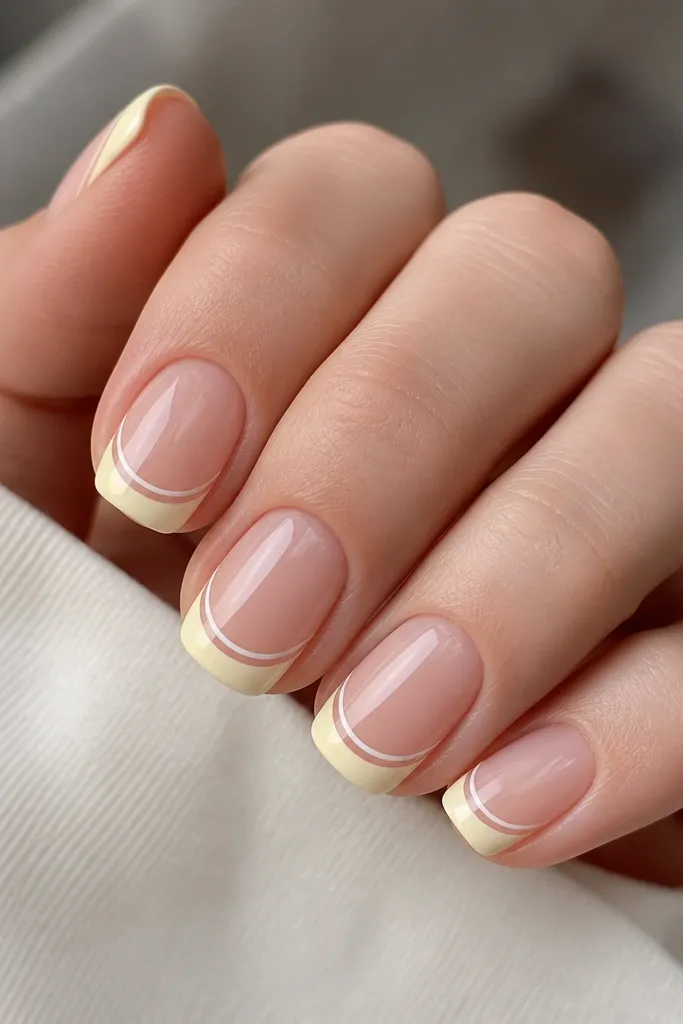
Tape gives you a line so straight it looks like it was done with a stencil. The white striped line inside the French makes the yellow feel layered and crisp. I like thin tape, not wide. It also helps if your hand shakes when you draw close to the cuticle curve.
Base nude, cure. Apply French tip guides or regular tape for the yellow shape. After yellow cures, remove guides and place thin striping tape parallel to the smile line, leaving a tiny gap. Paint the gap white, cure, then remove tape and top coat.
Editor's noteRemove tape while the gel is still slightly tacky if your brand allows it - you get a cleaner edge.
Watch outDon't rush tape removal. Pulling too fast can lift the yellow edge.
22. Light Yellow French with Tiny Rainbow Micro Lines
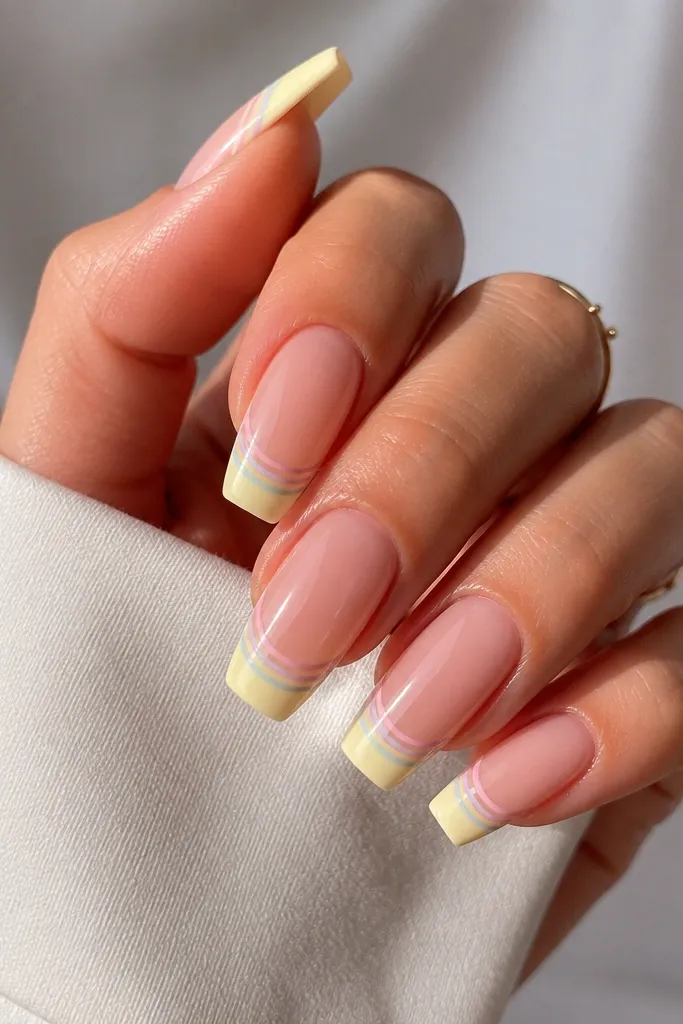
Micro rainbow lines add color without turning the nail into a full rainbow design. Light yellow keeps everything soft, so the rainbow reads playful instead of loud. I keep the lines thin and spaced, like someone drew them with a technical pen. This is a great choice for spring and birthdays.
Base nude, cure. Paint light yellow French tip and cure. Use a 000 detail brush to draw 3 tiny lines across the tip center in pastel blue, pink, and mint. Cure and top coat with glossy gel.
Editor's noteDo lines in one direction only. If you redraw, they thicken and look uneven.
Watch outDon't add glitter on top of rainbow lines - it blurs the colors.
23. Soft Daffodil French with Two-Tone Yellow Ombre Center
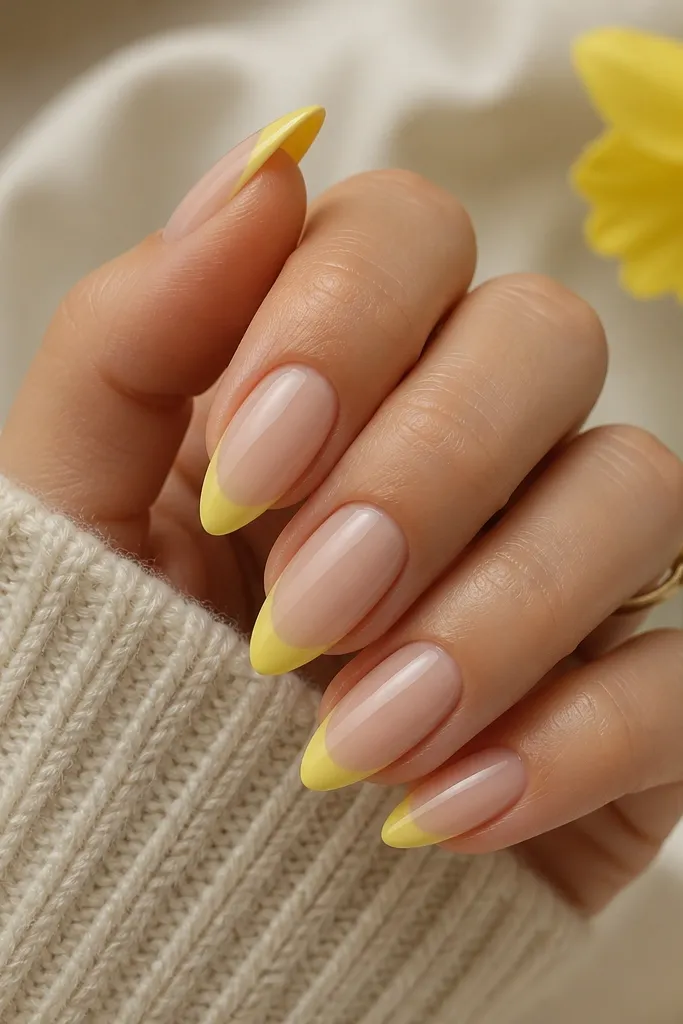
Two-tone yellow ombre makes the tip look dimensional while staying in the same color family. Dark-to-light within the tip gives you depth without needing extra art. I use one slightly deeper daffodil shade on the outer edges and a lighter butter shade in the center. It's subtle but noticeable up close.
Use satin nude base. Paint the French tip with the deeper daffodil yellow first. Sponge or brush the lighter butter shade only at the center of the tip and blend outward lightly. Cure and finish with glossy top coat.
Editor's noteBlend with a clean brush lightly, not aggressively. Over-blending makes it look cloudy.
Watch outDon't use two yellows that are too different - you'll get a stripe instead of ombre.
24. Light Yellow French with Pearl Dot Border
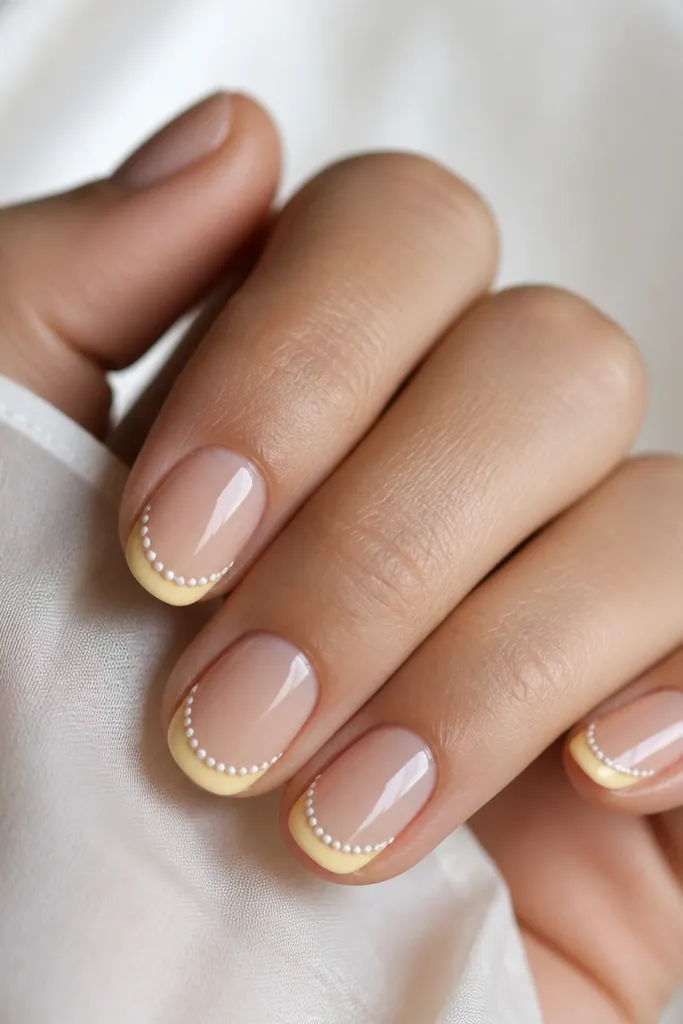
A pearl dot border makes the French line look like jewelry. Light yellow is the perfect backdrop because it keeps pearls from looking gray. I use tiny pearl beads or gel pearls and place them only along the smile curve, so the nail stays elegant. It looks great for weddings, dinners, and any time you want "pretty" without big gems.
Paint nude base and cure. Apply light yellow French tips. Place tiny pearl dots along the smile curve with nail glue or a clear gel tack layer, then press gently. Seal with top coat in two thin layers to lock the pearls down.
Editor's noteDo pearls on every other nail first. If it feels too much, you still get the effect without going all-in.
Watch outDon't pile pearls in the corners - it makes the French line look lumpy.
25. Pastel Yellow French with Clear Negative Center Stripe
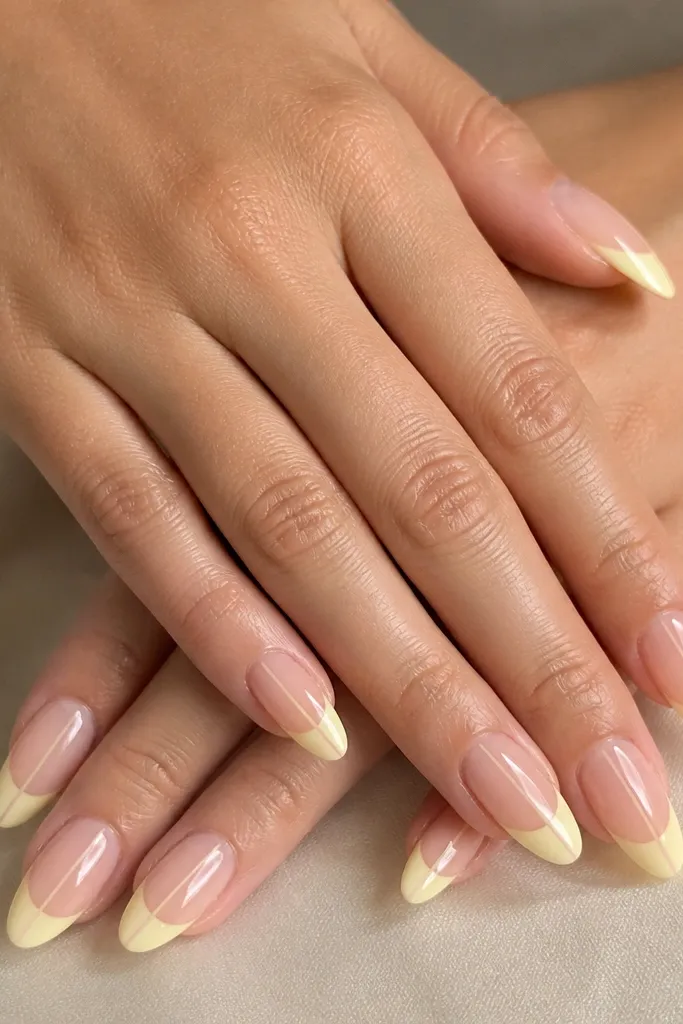
That clear stripe makes the tip look lighter and more graphic. It also helps if your French edge isn't perfectly symmetrical because the center stripe pulls the eye inward. I use a pastel yellow that stays creamy and doesn't get patchy on the edges. This design is clean, modern, and still soft.
Base sheer nude, cure. Mask a thin vertical center stripe with striping tape. Paint the light yellow French tip around it and cure, then remove tape. Seal with glossy top coat.
Editor's notePress tape with a cuticle pusher so no gel creeps underneath.
Watch outDon't use thick gel under the tape - it can seep and ruin the clear stripe.