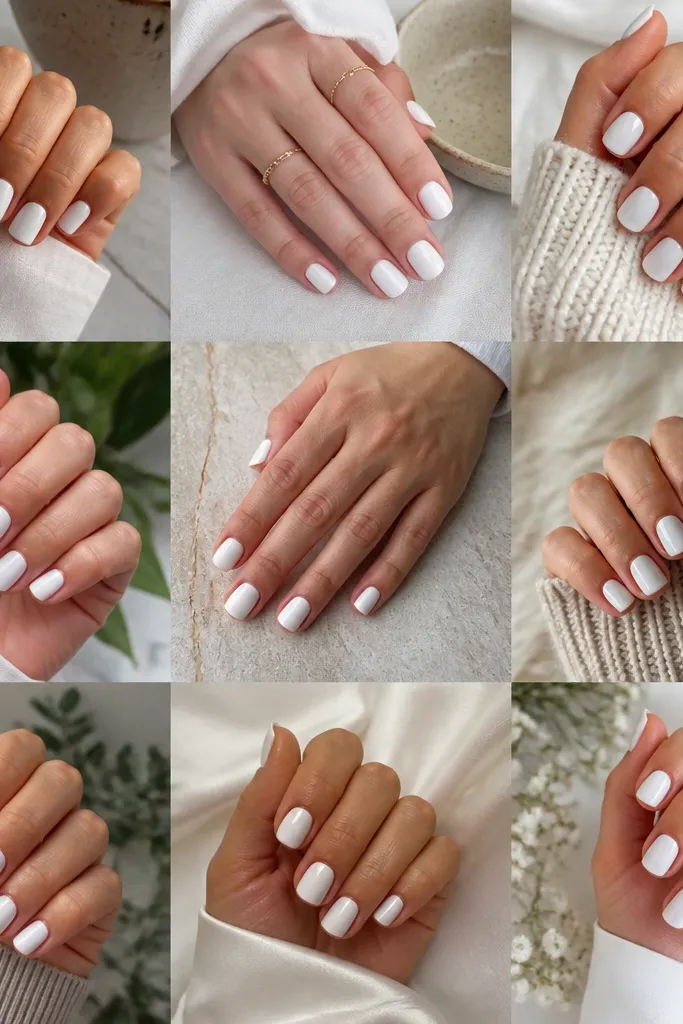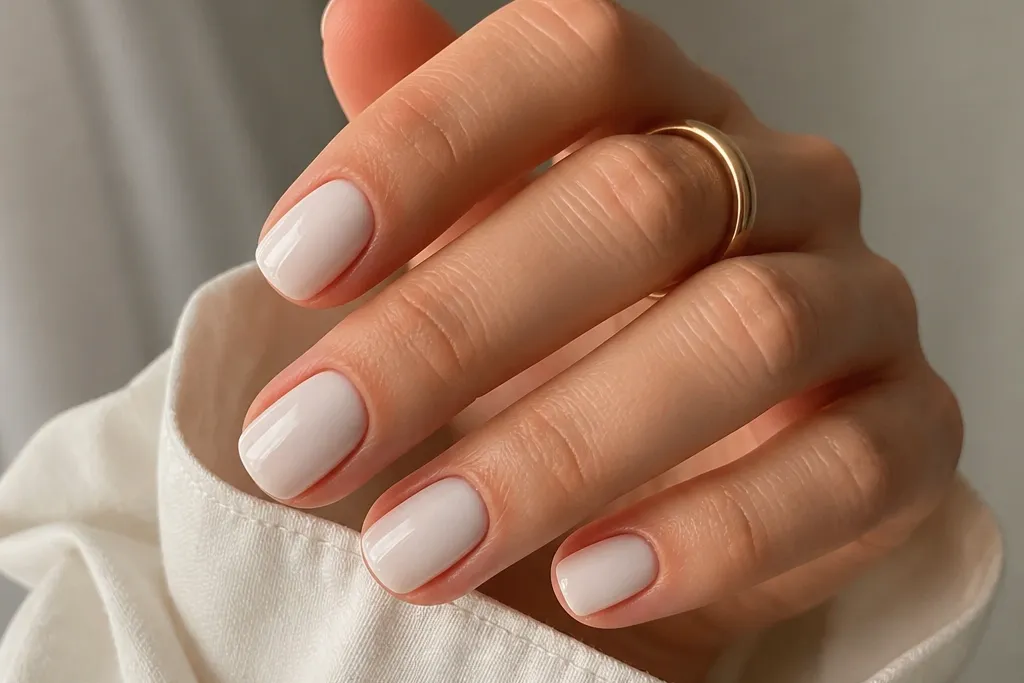

1. Cloud Milky Solid With Glass Top Coat
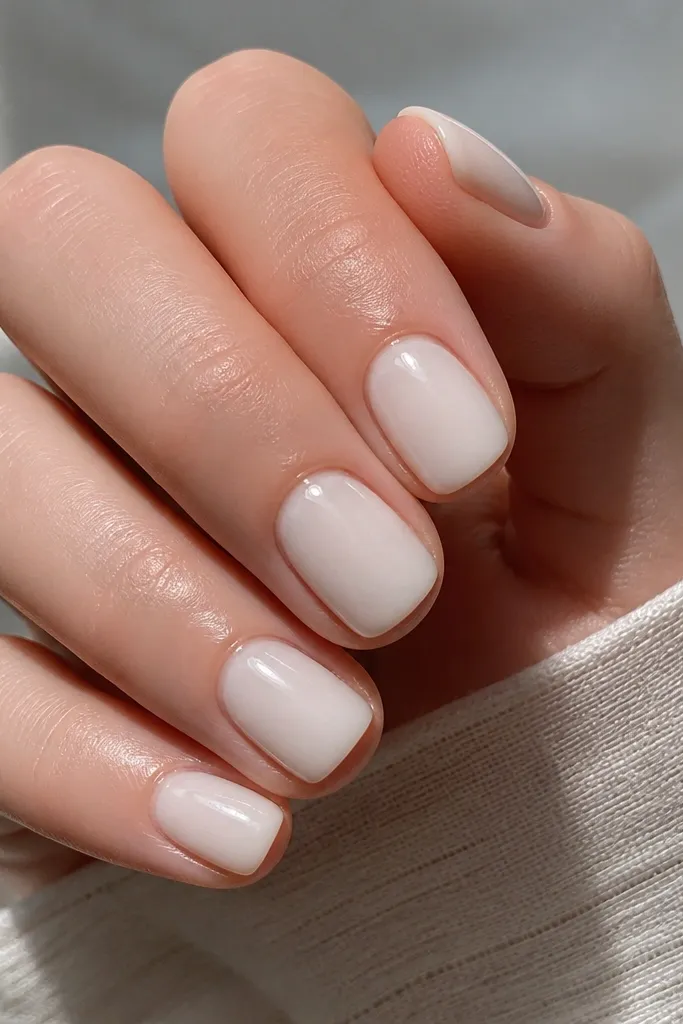
This is the base that makes the whole short milky white nails aesthetic work. Milky white laid down in 2 thin coats looks like a sheer veil over your natural nail, so your nail bed shape stays in charge. The glossy top coat makes the milky shade look deeper and more "dreamy" instead of flat. It's also the easiest look to refresh when you're between appointments.
File into soft squoval. Apply milky white gel or polish in 2 very thin coats, keeping the product about 0.5 mm away from the sidewalls. Finish with one thick-but-level top coat and wipe the tacky layer if you're using gel.
Editor's noteFloat the second coat slightly closer to the cuticle than the first so the center looks extra creamy.
Watch outDon't do one thick coat - it turns milky white into streaks and makes short nails look bumpy.
2. Milky French With a Half-Moon Fade
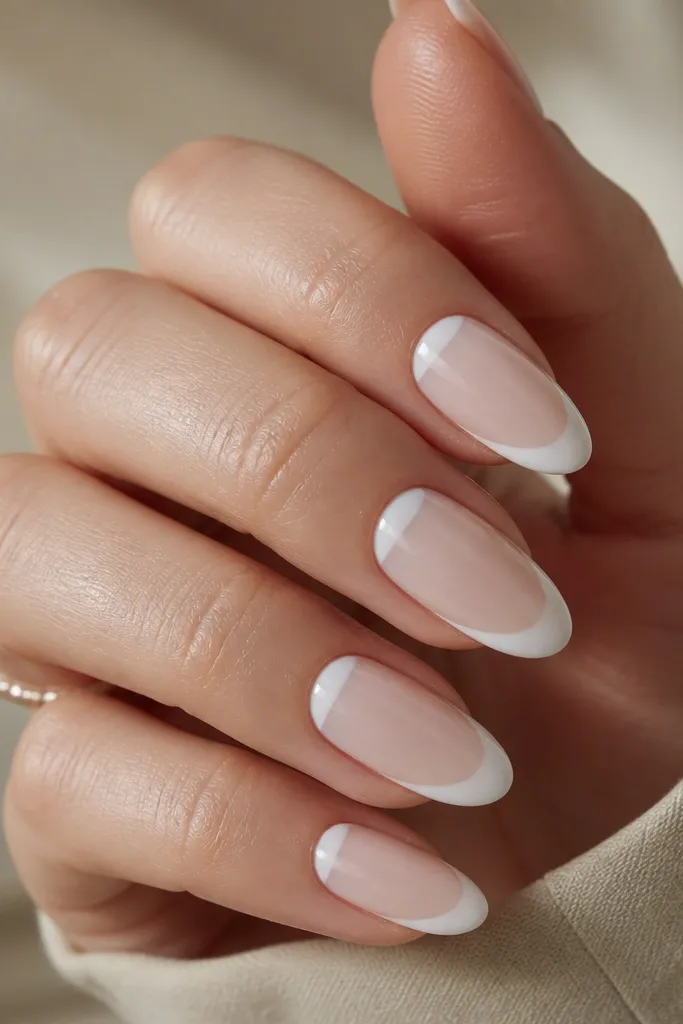
French tips can look too intense on short nails, so I soften the line with a fade. The milky white tip starts opaque at the very edge, then thins toward the center. The half-moon at the cuticle keeps it balanced and makes the nail look longer without adding extra length. It reads clean and romantic, not graphic.
Use a thin striping brush for the tip. Paint a small arc at the free edge, then lightly drag the white inward with the brush tip while it's still wet. Add the half-moon right at the cuticle - keep it small, about 1/3 of the nail width.
Editor's noteIf your smile line is hard to see, place a dot of milky white at each corner first, then connect them with the brush.
Watch outSkip a sharp, opaque line that stops abruptly - that's what makes it look like a sticker.
3. Milky White Reverse French On Short Nails
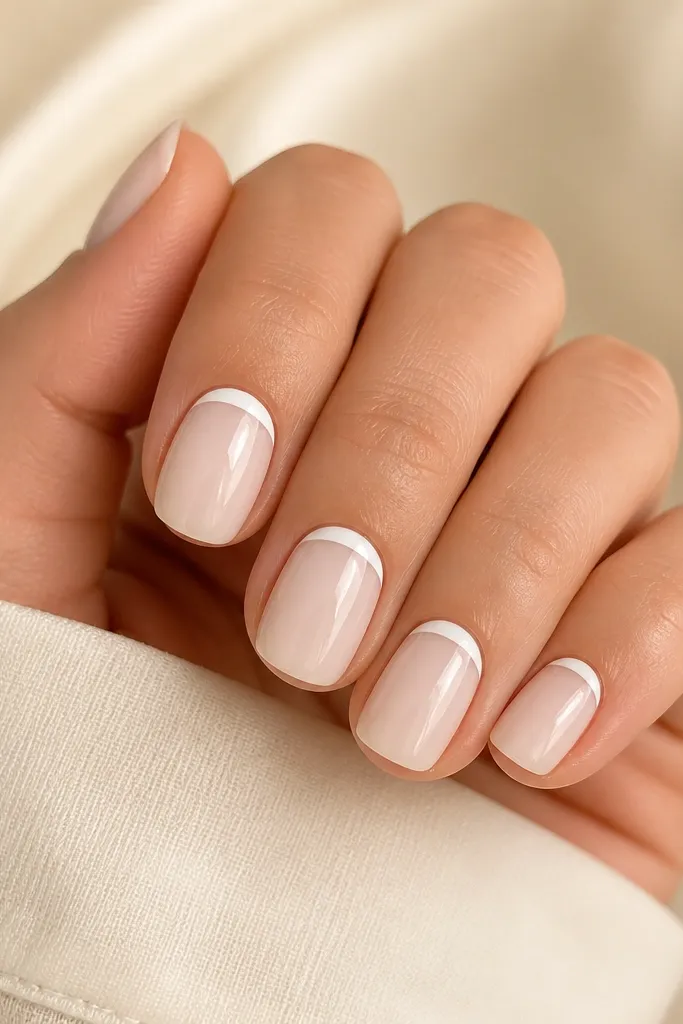
Reverse French makes short nails look intentional because the focal point sits near the cuticle where your eye expects design. The milky band gives a soft "glow frame" and keeps the rest of the nail natural. This one is super flattering if you have ridges or uneven natural nail tone because the nude base smooths the look. It also hides small imperfections as it grows out.
Start with a sheer nude base (pink-beige or milky nude). Paint a U-shaped band in milky white over the cuticle, leaving a small gap on each sidewall to prevent flooding. Seal with glossy top coat and clean the edges with a brush dipped in remover.
Editor's noteMake the band thinner than you think - around 1 mm wide at the center looks best on short nails.
Watch outDon't cover the entire cuticle skin - it should sit on the nail plate, not smear.
4. Sheer Milky Base With Micro Dot Cluster
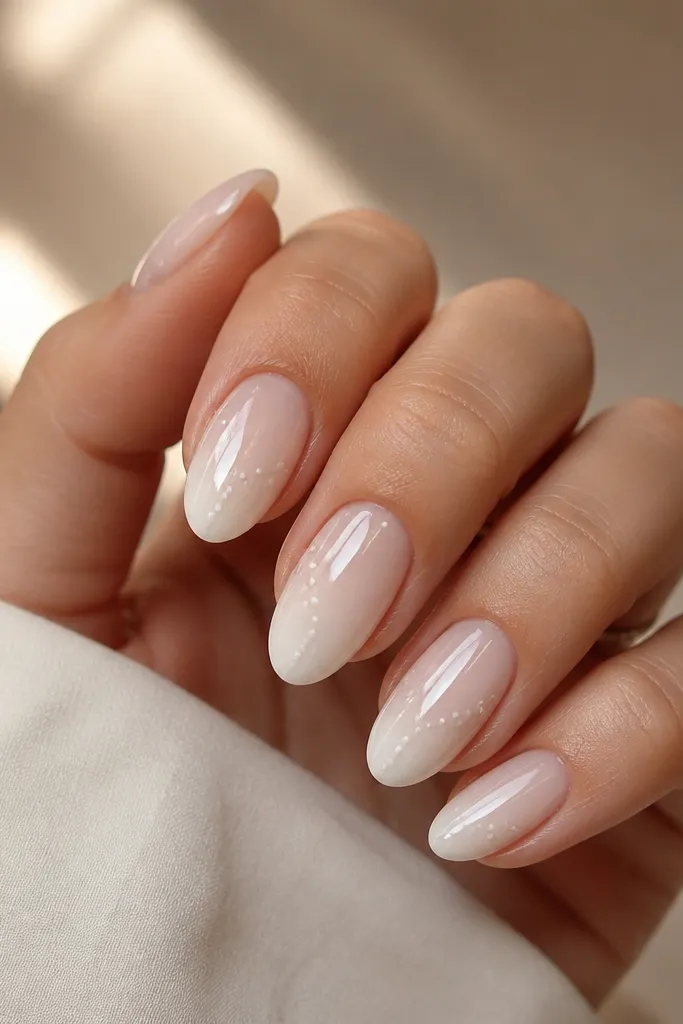
This design keeps things dreamy without turning your nails into a busy pattern. The base is semi-sheer, so it looks like the dots are floating on top. I use dots because they scale well on short nail beds - they don't need long space to look cute. A small cluster near the middle elongates visually.
Paint a sheer milky base in 2 thin coats. On the ring finger, use a dotting tool to place 1 larger dot in the center, then 2 smaller dots slightly above and below. Add one dot on each side at the same height so the cluster feels balanced.
Editor's noteSeal with top coat in two passes: one light coat to lock the dots, then a second thicker coat for shine.
Watch outDon't put dots too close to the free edge - they can chip first and look messy.
5. Milky White Half-Side Accent
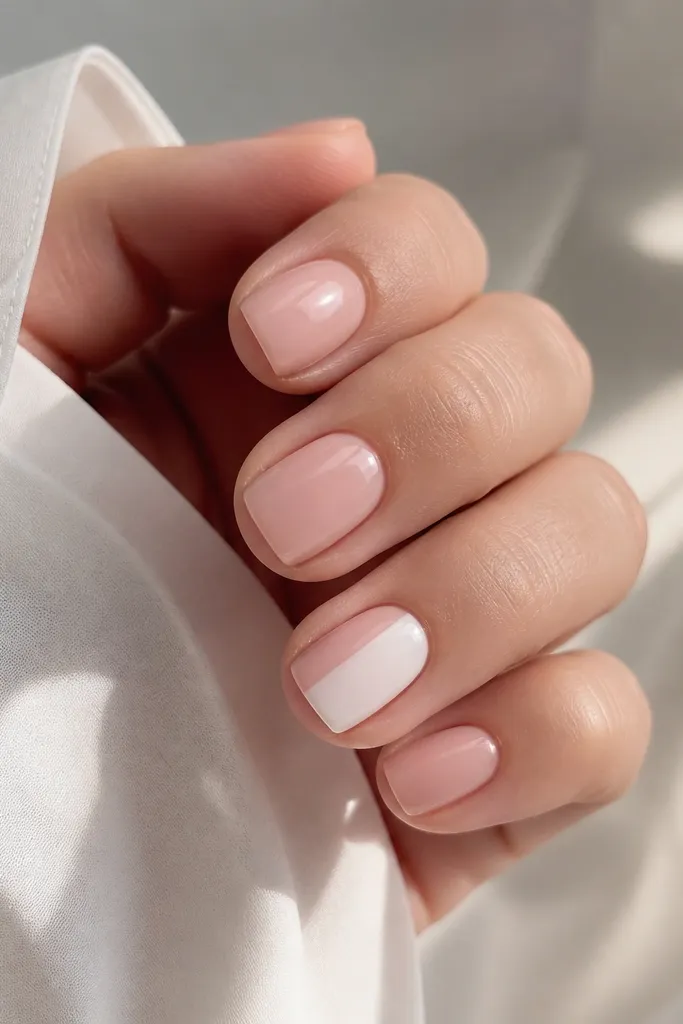
Half-side accents make short nails look modern and longer because the line creates a vertical path. Milky white on the outer half also hides staining and makes the nail look smoother. I like this on a nude base because the contrast is soft, not harsh. It's a great option when you want something different but still minimal.
Use a nude-pink base gel or polish. Paint milky white from the outer sidewall to about the center line, keeping the boundary crisp but not thick. Cap with glossy top coat; keep the accent nail only or do it on two nails max.
Editor's noteUse striping tape for the boundary, then remove it while the polish is still slightly wet.
Watch outDon't make the milky area too wide - it should be about half, not two-thirds.
6. Milky White Ombré Tips That Melt
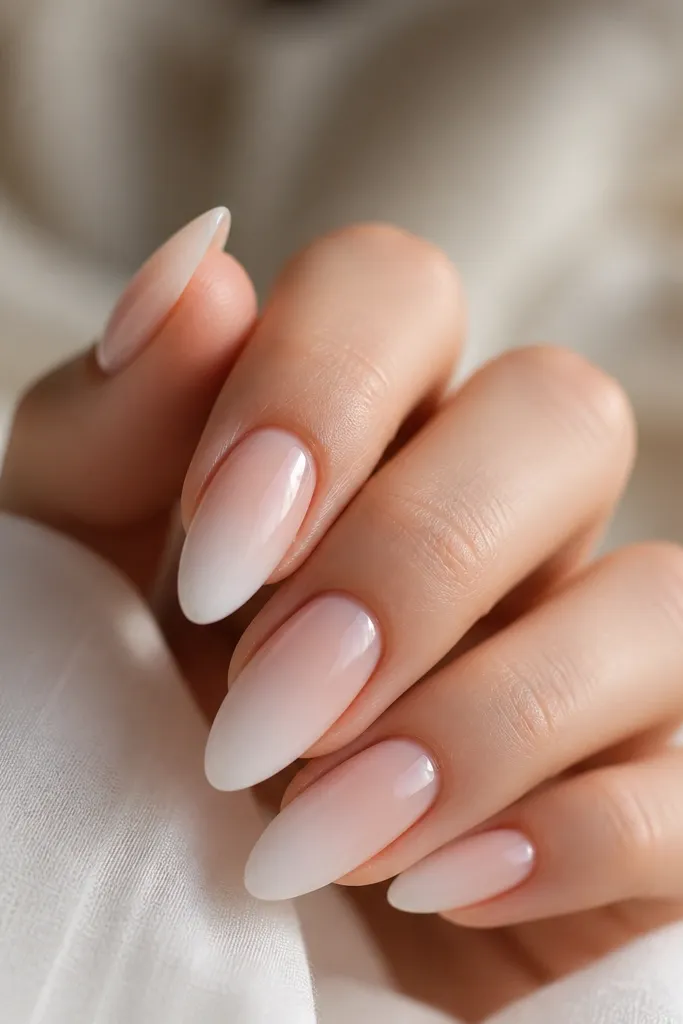
Ombré works on short nails when it's tight and blended, not when it's a big gradient. The milky white "melts" into the nude base so the free edge looks soft and rounded. This is one of my favorite short milky white nails aesthetic looks because it hides uneven filing lines. It also grows out cleaner than a hard French line.
Apply nude base first. Sponge milky white at the very tip using a makeup sponge, then blend upward with a second sponge that has almost no product. Clean the edges with a small brush and remover. Seal with a glossy top coat.
Editor's noteUse a thin layer of base before sponging so the milky blends smoothly instead of grabbing.
Watch outDon't leave a visible "halo" line where the sponge ends - blend higher than you think.
7. Milky White Skittle Nails With One Pearly Twist
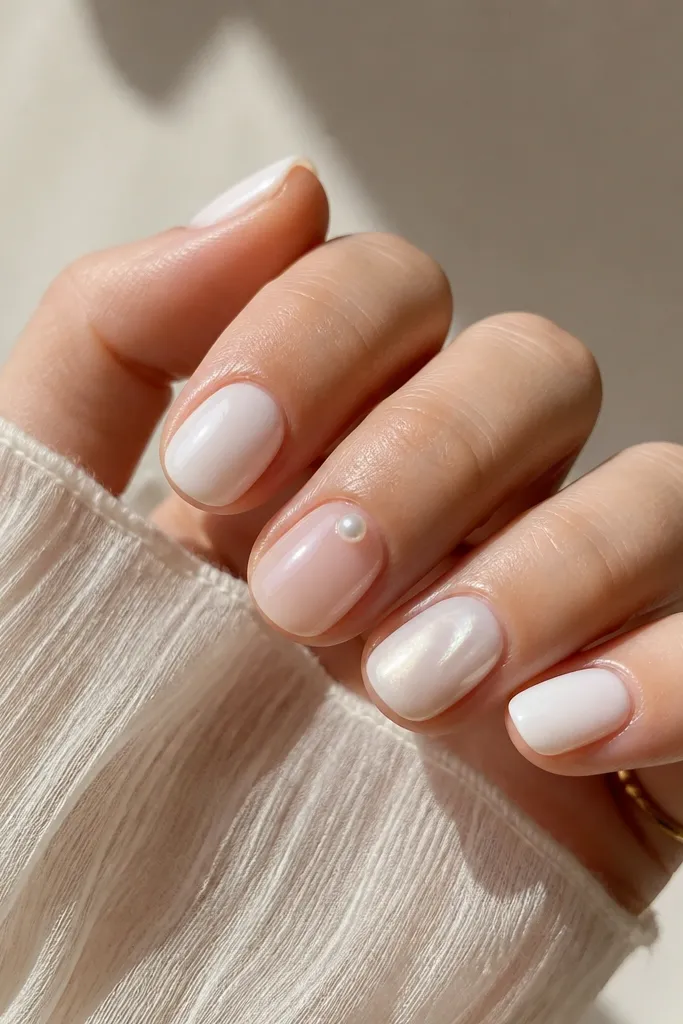
Skittle nails can look messy on short lengths, but this version stays controlled. You vary texture, not color, so everything still feels cohesive. The pearl at the cuticle gives that dreamy "jewelry" vibe without needing long nails. Milky white also makes pearls look softer instead of too stark.
Do solid milky on index, middle, and pinky. On ring finger, place a single flat-back pearl near the cuticle center (about 1 mm from the cuticle line). On thumb, paint sheer milky and add a faint diagonal shimmer line using a pearly white chrome powder.
Editor's notePress pearls gently into a thin layer of top coat so they sit flat and don't catch on fabric.
Watch outSkip multiple pearls - on short nails it turns into bulk fast.
8. Milky White Diagonal Negative Space
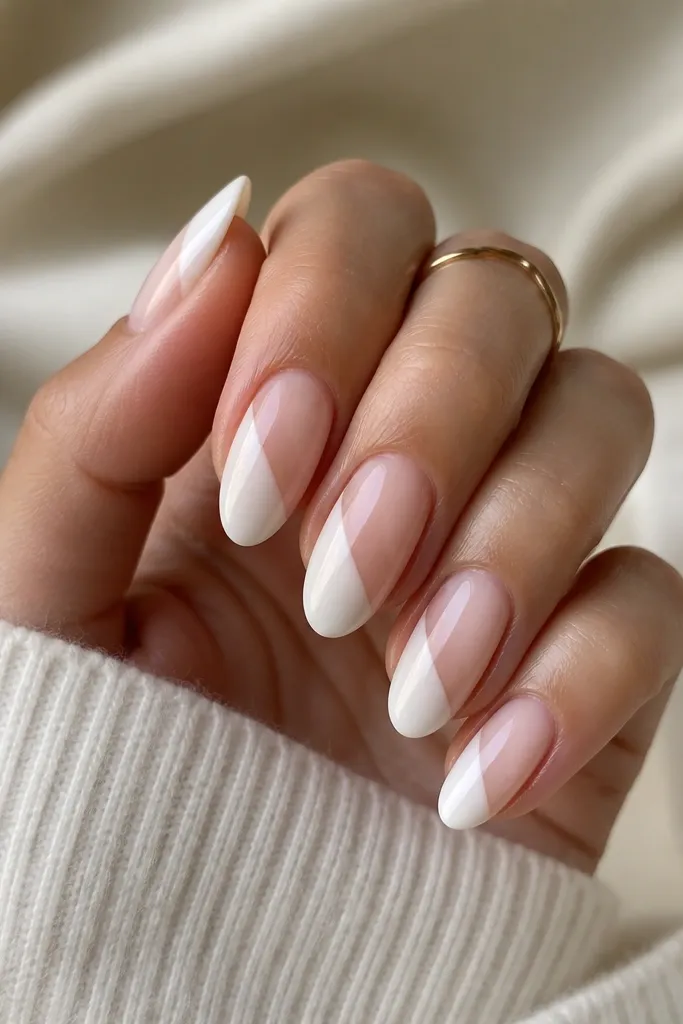
Negative space makes short nails look intentional and gives your eyes a place to rest. A diagonal stripe is flattering because it creates a longer visual path than a straight line. Milky white stays soft against the nude, so it feels dreamy instead of geometric and sharp. This is a good pick if your nails grow out with slight ridges - the design distracts.
Tape a thin diagonal guide across the nail, leaving the negative space triangle unpainted. Paint the stripe with milky white in 1-2 thin coats. Remove tape before it fully cures (if gel, cure after removal). Add glossy top coat to seal edges.
Editor's noteKeep the stripe thickness around 1.5 mm on short nails so it doesn't swallow the nail.
Watch outDon't use opaque white - the stripe should look milky and soft, not solid white paint.
9. Milky White Micro French On Every Nail
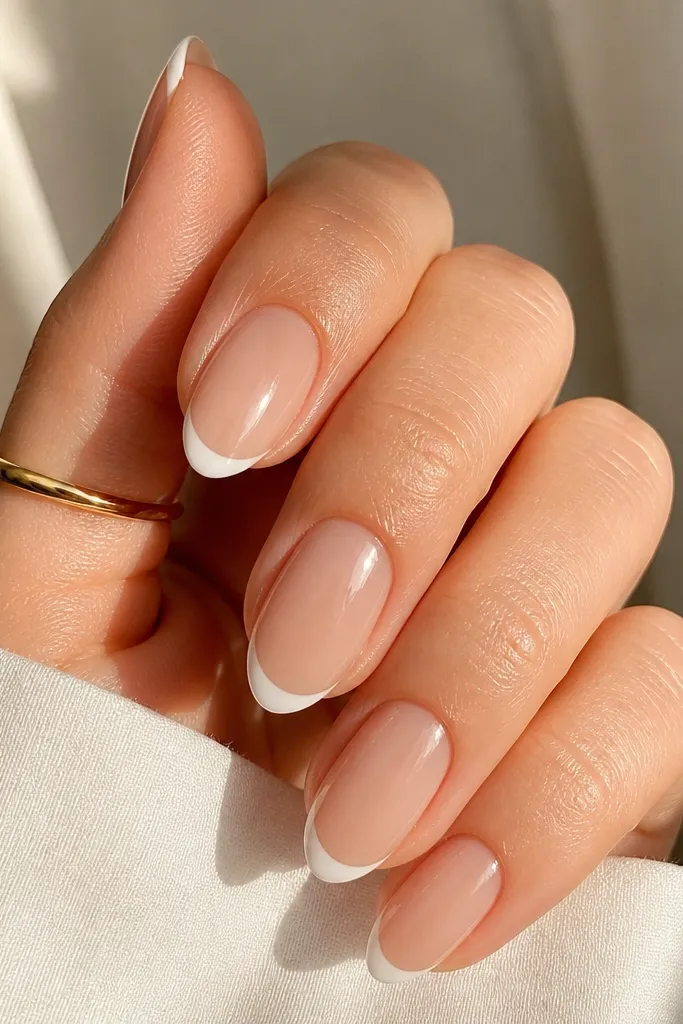
If you love French but hate the bold look, this is the answer. Micro French gives you that "fresh manicure" feel without making short nails look stubby. Milky white keeps it romantic and soft, and the thin line makes it grow out better. It's also quick: you can do it in one sitting.
Use a nail guide or just look for the natural free edge line. Paint a thin milky white arc only on the tip - no filling toward the center. Two thin coats max, then top coat. Keep each tip line consistent across nails.
Editor's noteStart the arc right at the sidewalls and keep the center slightly thinner for a natural curve.
Watch outDon't bring the line too far down - micro French should stay near the edge.
10. Milky White Marble Vein Accent
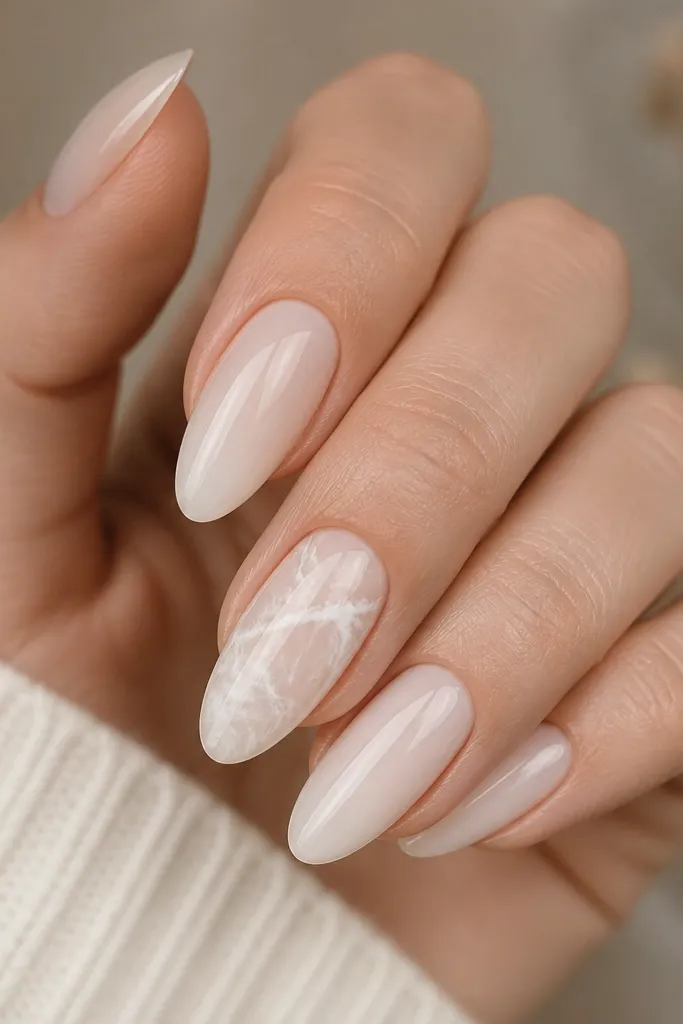
Marble is one of those looks that can go cheap fast if the lines are thick. This version keeps the veining super thin and foggy, so it looks like marble dusted over milky white. The pale gray and a whisper of blue make it feel cool-toned and dreamy. On short nails, one marble accent nail is enough.
Paint all nails milky white in 2 thin coats. On the ring finger, use a fine liner brush to draw 2-3 wispy veins in light gray, then add one tiny blue vein. Blend the edges with a barely-dry brush so it stays soft. Top coat heavily.
Editor's noteUse gel striping medium if your liner brush drags - it helps the lines look cloudlike.
Watch outDon't draw bold black veins - they overpower the milky softness on short nails.
11. Milky White With Tiny Star Dust
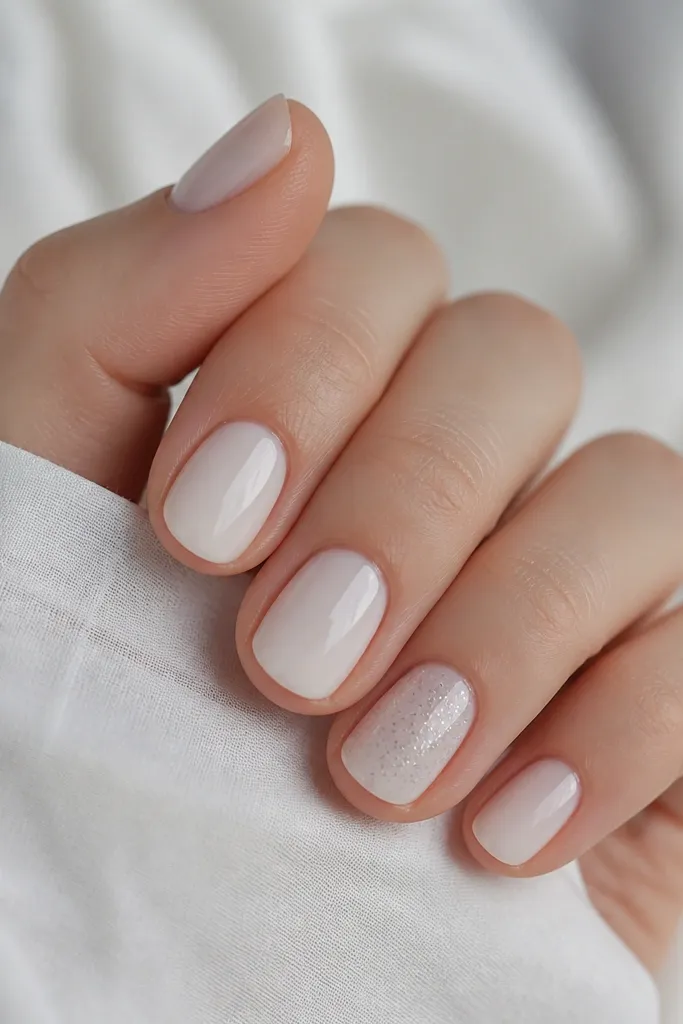
This look gives you sparkle without the chunkiness that kills short nails. The glitter is concentrated in a small area so it reads like light catching, not like a full glitter coat. Milky white makes the silver look cooler and softer. It's perfect for nights out, but the base stays classy enough for daytime.
Do all nails milky white. On the accent nail, dab a small amount of holographic micro glitter gel in the center using a tiny sponge. Keep it under half the nail surface. Seal with top coat so the glitter looks suspended.
Editor's noteIf glitter feels gritty, add one extra thin top coat layer after curing.
Watch outSkip chunky glitter - it lifts at the free edge quickly.
12. Milky White Pearl Outline Half-Moon
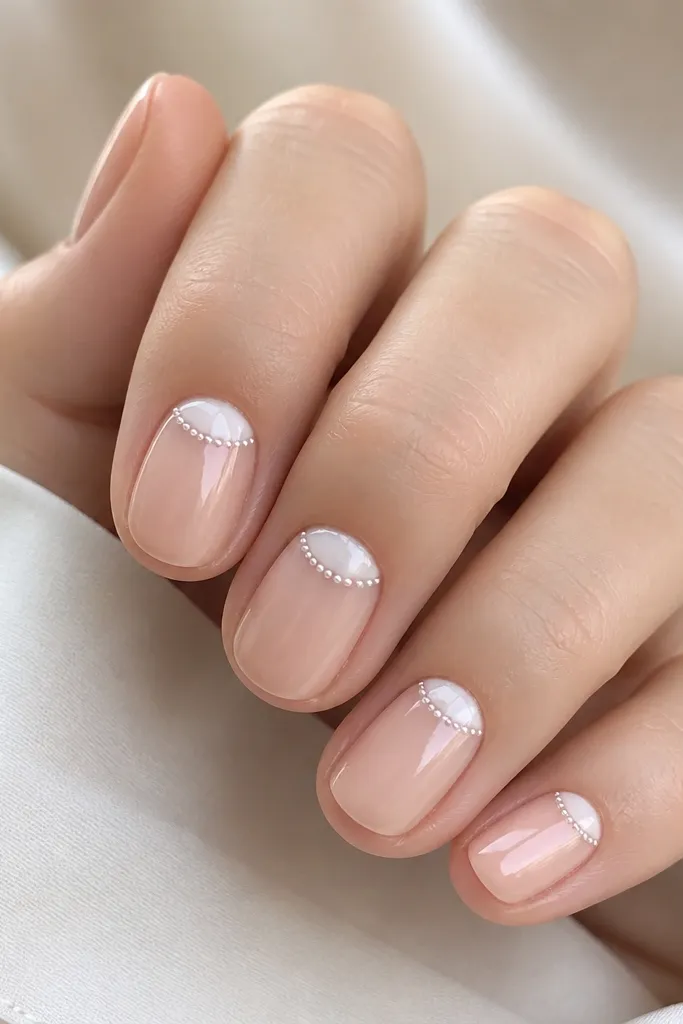
The pearl outline turns a simple reverse French into jewelry. The half-moon shape is flattering because it follows the natural nail curve. Milky white stays soft, and the pearl dots add dimension without needing crystals. It looks expensive because the outline is thin and controlled.
Start with sheer nude. Paint a milky half-moon band at the cuticle. Then use a dotting tool to place tiny pearl dots along the top edge of the half-moon, leaving a tiny gap at each corner. Top coat twice to smooth over dot texture.
Editor's noteUse a toothpick to nudge dots into a straight line while top coat is still workable.
Watch outDon't make the pearl line too thick - thick lines look like paste on short nails.
13. Milky White With Thin Rose-Gold Line
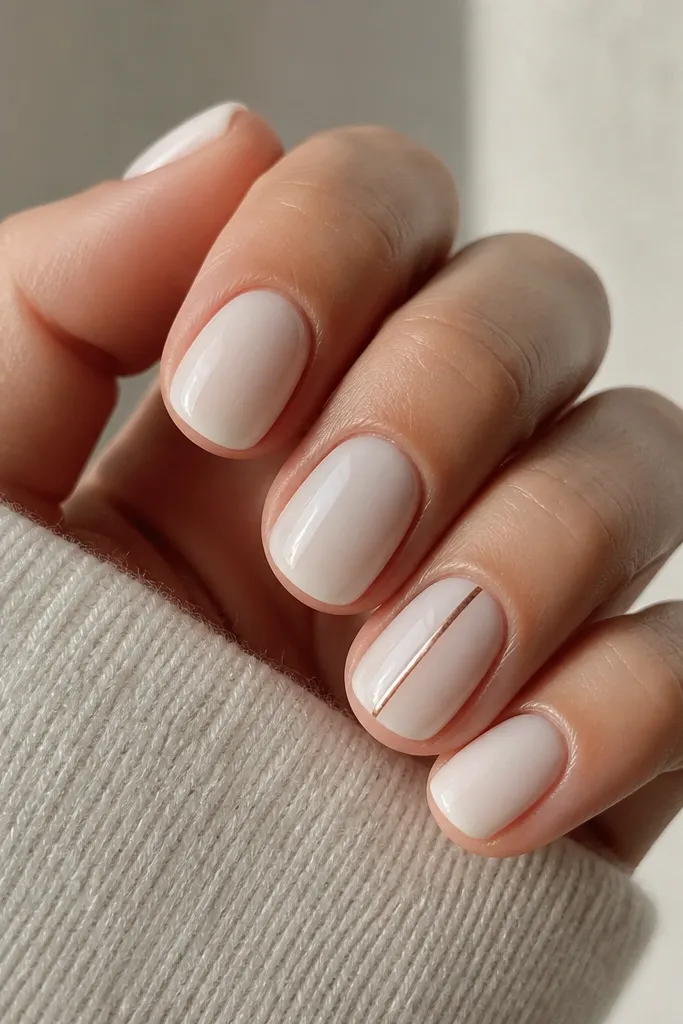
A single thin line gives structure to short nails. Rose-gold looks soft against milky white, so it keeps the dreamy vibe instead of making it feel harsh. The vertical placement makes your nail look longer and slimmer. This is one of those designs that always looks good in photos because it catches light cleanly.
Paint all nails milky white. On the accent nail, place a vertical striping tape line or paint a thin gel line with a striping brush. Aim for the center, leaving 1-2 mm from sidewalls. Remove tape carefully if used, then top coat.
Editor's noteIf you paint the line by hand, do it in one steady pass and don't go over it - gel lines get thick fast.
Watch outAvoid chunky metallic foil - it lifts and wrinkles on short nails.
14. Milky White Tiny Butterfly Wing On One Nail
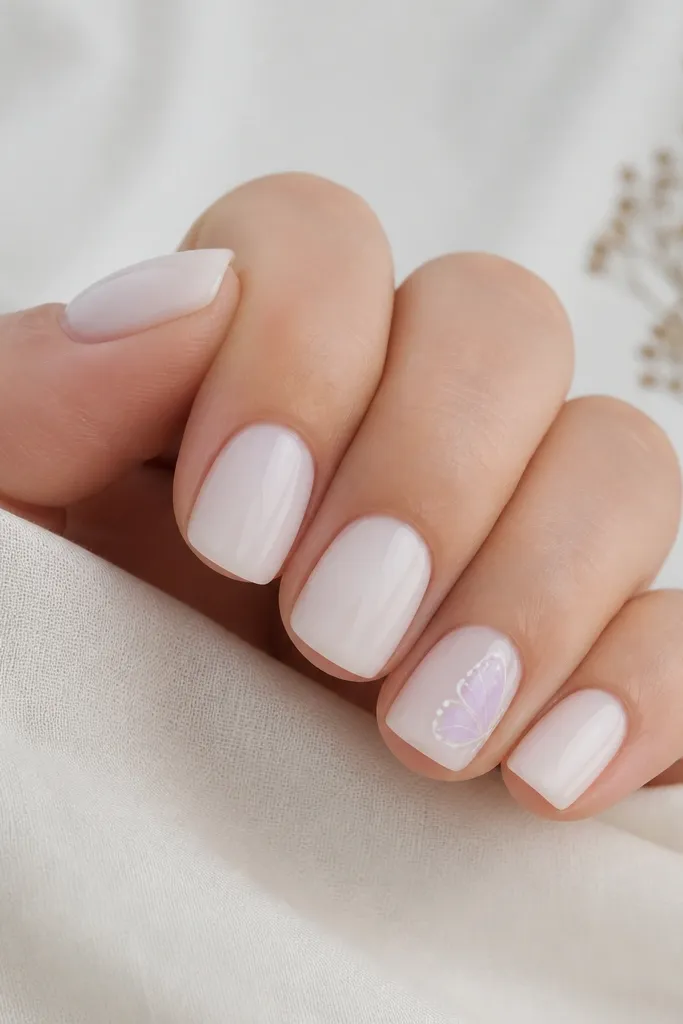
A micro butterfly reads sweet, not childish, when it's small and placed in the center. I keep wings outline-only with pale lavender and white dots for a "wing shimmer" effect. Milky white base makes the lavender look soft and dreamy. One accent nail keeps it wearable.
Base coat milky white on all nails. On the accent nail, use a thin liner brush to draw a small wing shape on each side of the center line. Add a few tiny white dots to suggest texture in the wing. Seal with top coat, then cure fully.
Editor's noteUse lavender only as a tint - keep it light so the design stays airy.
Watch outDon't fill the butterfly in with thick color - that makes short nails look bulky.
15. Milky White With Clear Jelly Tip
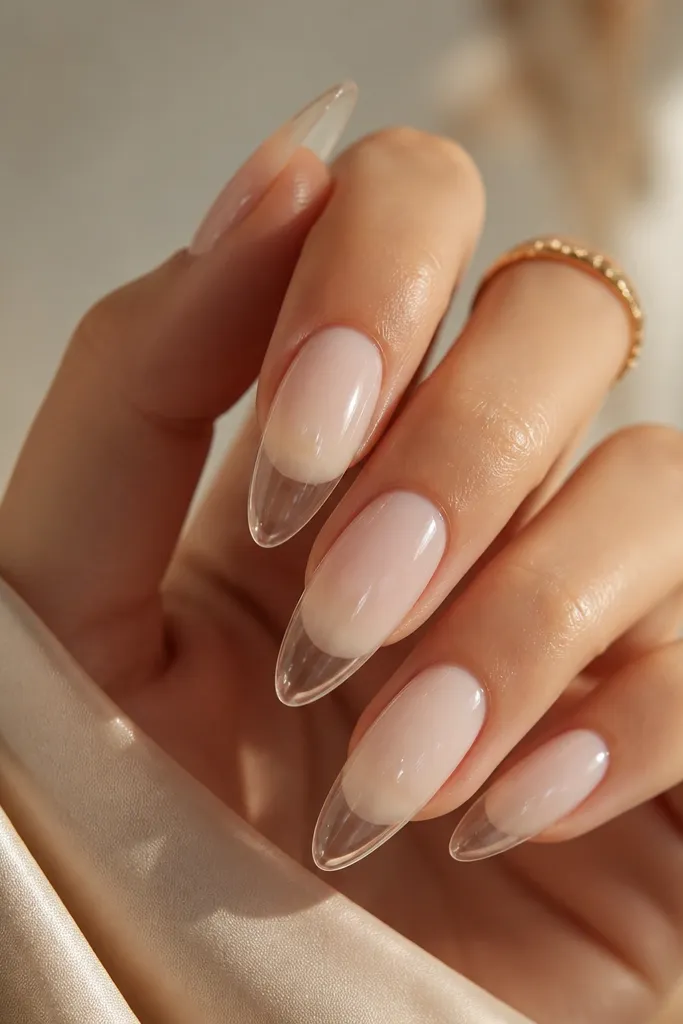
Layering milky and clear jelly makes short nails look like they have depth. The clear jelly at the tip reflects light and makes the milky portion look suspended. This is the closest DIY look I've found to salon "gel thickness" without actually growing the nail long. It also hides small tip imperfections because the jelly layer smooths them.
Apply milky white to the lower 2/3 of the nail, leaving the extreme tip for later. Then add a clear jelly layer over the tip area and slightly overlap onto the milky edge. Finish with a thick glossy top coat to lock the layers.
Editor's noteKeep the jelly layer thin at first, cure, then add a second thin layer if you need more depth.
Watch outSkip thick jelly in one go - it can shrink at cure time and create a ridge.
16. Milky White Confetti Specks In Pearl Nude
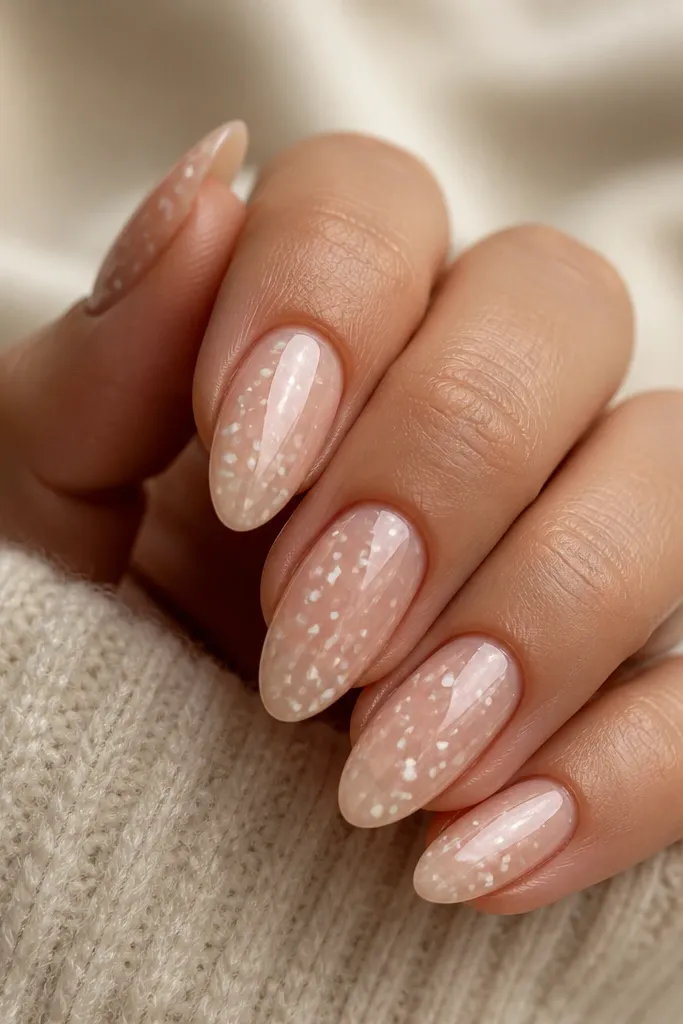
Confetti specks add motion without heavy art. I like pearl nude specks because they blend into milky white and look like soft reflections rather than glitter. Concentrating them near the cuticle makes the nail look brighter at the base. It's also good for hiding micro chips - the specks disguise them.
Paint milky white base. On one or two nails, dab a small amount of pearl nude micro glitter or pigment near the cuticle using a sponge and tap lightly so it stays sparse. Add a few flecks toward the center, then top coat thoroughly.
Editor's noteIf specks look too dense, run a clean brush lightly over the surface before curing to thin them out.
Watch outDon't spread glitter across the entire nail - it loses the dreamy softness.
17. Milky White With Scattered Clear Crystals
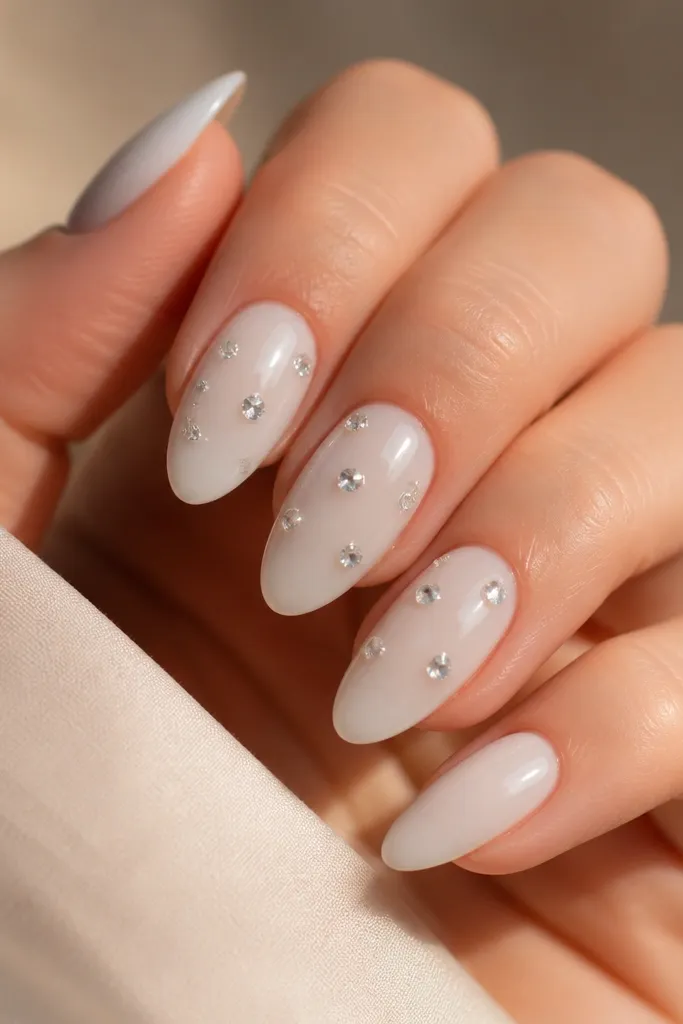
Crystals on short nails work when you keep them small and spaced out. Clear crystals on milky white look like light bubbles. The milky base makes sparkle feel gentle instead of too glam. This look is great for weddings, birthdays, or any "dress up" day when you want something special but still short.
Do milky white on all nails. Use nail glue or gel builder to place 2-4 crystals on the accent nail in a loose cluster, keeping at least 1 crystal-width between them. Press gently and cure. Cap with top coat carefully so the edges don't snag.
Editor's notePlace crystals slightly above the center so they catch light when your hand moves.
Watch outDon't pile crystals near the cuticle - they lift and snag when you wash your hands.
18. Milky White With Tiny Chrome Arc
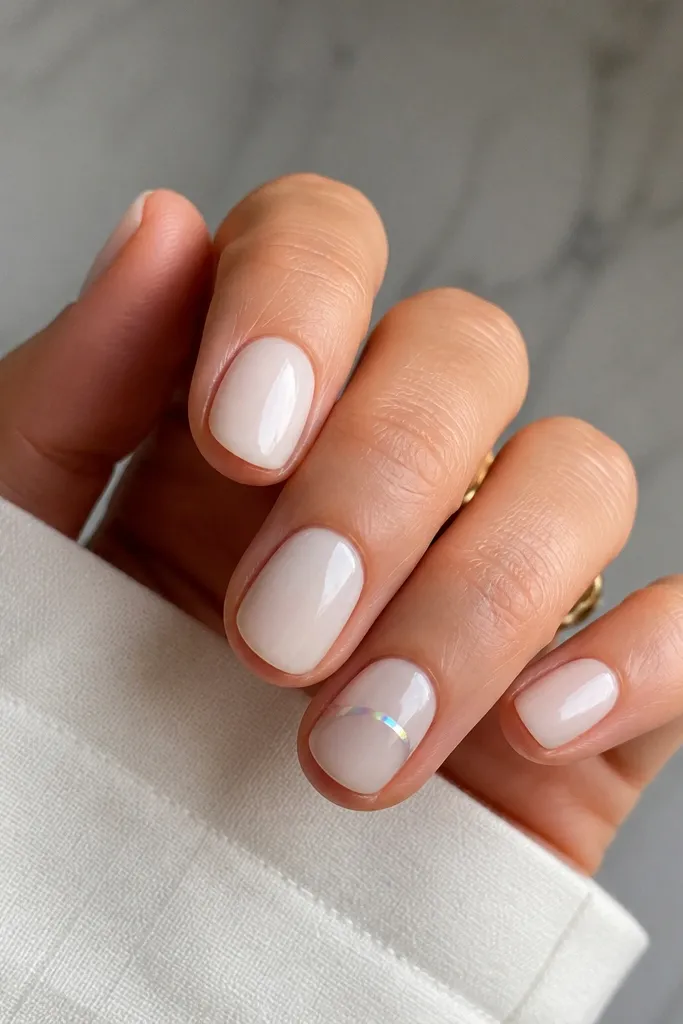
Chrome arcs look futuristic but still delicate on short nails. The arc shape mimics a smile line, which visually lengthens your nail bed. Milky white makes chrome look softer, not harsh. I keep the arc small so it doesn't become a full mirror effect.
Base coat milky white. On the accent nail, use a thin brush to paint a tiny curved guide line in clear gel, then rub chrome powder over it. Tap off excess and seal with top coat. Keep the arc about 2-3 mm long at the center.
Editor's noteUse a small foam applicator for chrome so you don't smear it beyond the arc.
Watch outAvoid full chrome coverage - short nails get shiny in the wrong way and look uneven.
19. Milky White With Micro Lace Outline
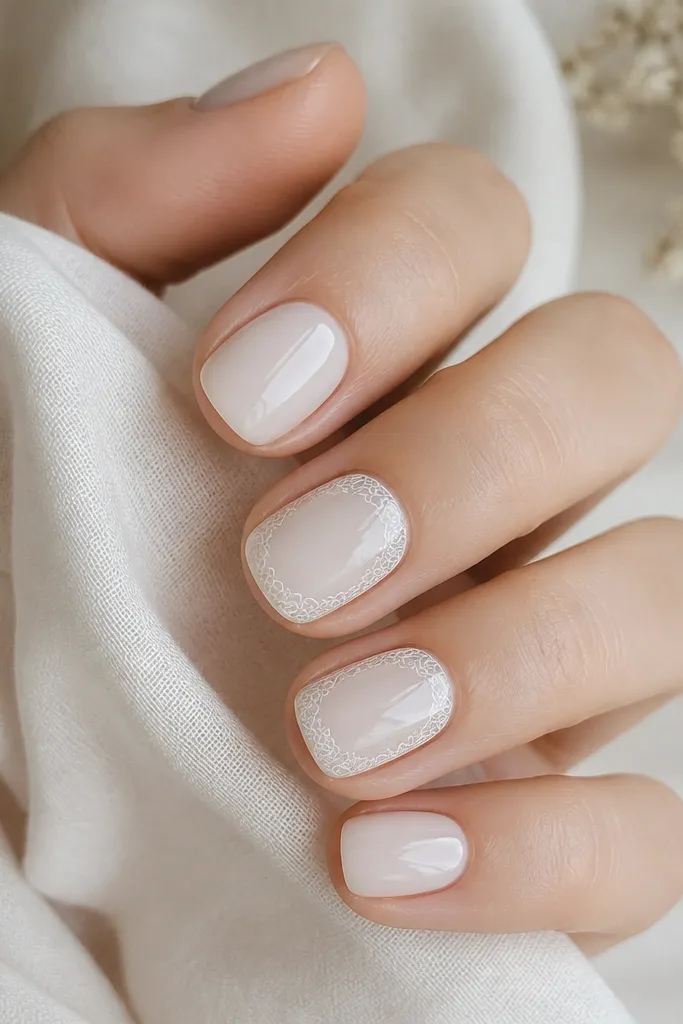
Lace outlines read romantic even when the nail is short. I do lace as an outline near the sidewalls, not a full lace print, because full patterns look busy. The off-white lines stay close to milky white, so the texture feels subtle. This one looks extra good in daylight because the outline catches light.
Use a milky white base. On accent nails, paint thin off-white lines in a vertical pattern that curves slightly along the sidewalls. Add tiny "loop" shapes at the edges to mimic lace. Top coat with a smooth, glossy finish so the lines don't look raised.
Editor's noteIf you're hand-drawing, do one side first, then mirror it with the other side for symmetry.
Watch outSkip thick lace lines - they make short nails look clumpy.
20. Milky White With Frosted Matte Base And Gloss Top Accent
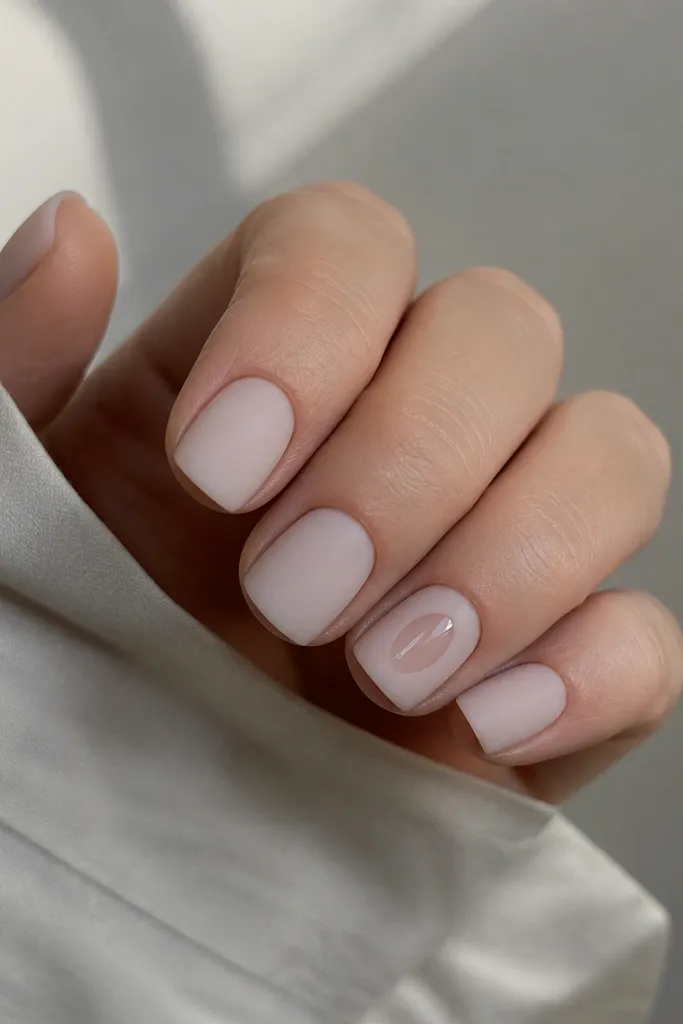
Matte milky white looks soft and expensive, like powdery clouds. Then the glossy patch adds a "dreamy highlight" that makes short nails look dimensional. This combo is great if you're bored of full gloss and want something different that still fits the short milky white nails aesthetic. It also hides tiny surface imperfections better than full gloss.
Apply milky white and cure fully. Apply matte top coat to all nails. On the accent nail, block off a small oval in the center with tape, then paint glossy top coat over just that area. Remove tape after it's set and cure again.
Editor's noteKeep the glossy patch small, about 2 mm wide, so it looks like a highlight, not a sticker.
Watch outDon't matte the cuticle area too thick - it can look dusty and dry.
21. Milky White With Pale Pink Cuticle Glow
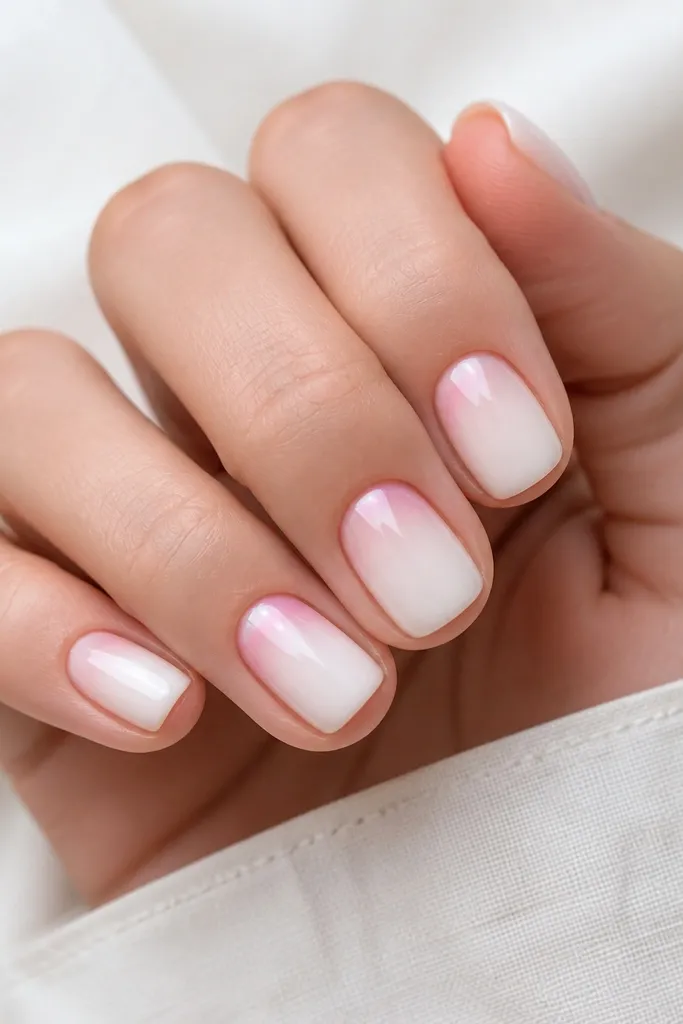
This design adds warmth without changing the milky vibe. The pale pink wash at the cuticle makes the nail look healthier and gives a gentle blush effect. As it fades outward, it keeps the focus near the base where short nails need help. The result feels dreamy and flattering on fair and medium skin tones.
Start with milky white base. Add a tiny amount of pale pink gel at the cuticle and blend inward with a thin brush or sponge while it's still workable. Keep it under 1/3 of the nail length so it stays subtle. Top coat glossy.
Editor's noteBlend with a mostly clean brush - you want fog, not a stripe.
Watch outAvoid hot pink near the cuticle - it looks like a bandage on short nails.
22. Milky White Swoop Line Over Nude Base
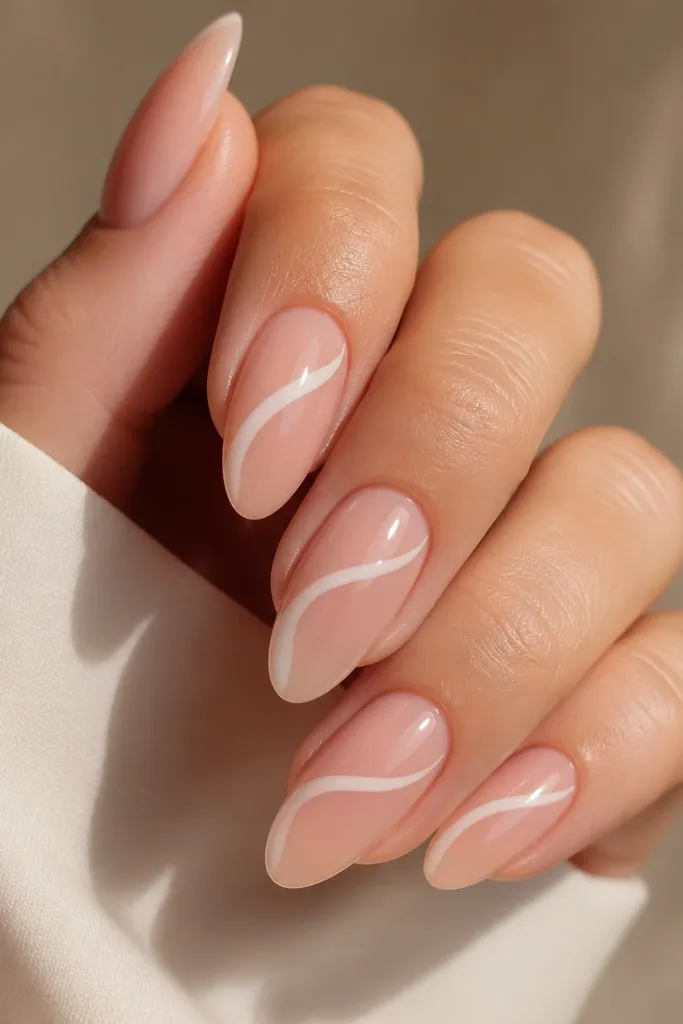
A single swoop line brings motion and makes short nails feel styled. Milky white over nude stays soft and dreamy, and the curved line makes the nail look more sculpted. I like this for everyday because it looks different from standard French but still easy to read. It also grows out without obvious "line breaking" because the line is diagonal.
Use a nude-pink base. Paint a milky white swoop line with a striping brush, starting near the cuticle center and sweeping toward the free edge at a slight angle. Keep the line thin, about 1 mm. Top coat to smooth and shine.
Editor's notePractice on a paper first - the swoop is all about one clean motion.
Watch outDon't go thick on the line - thick curves make short nails look wider than they are.
23. Milky White With Tiny Bow Accent
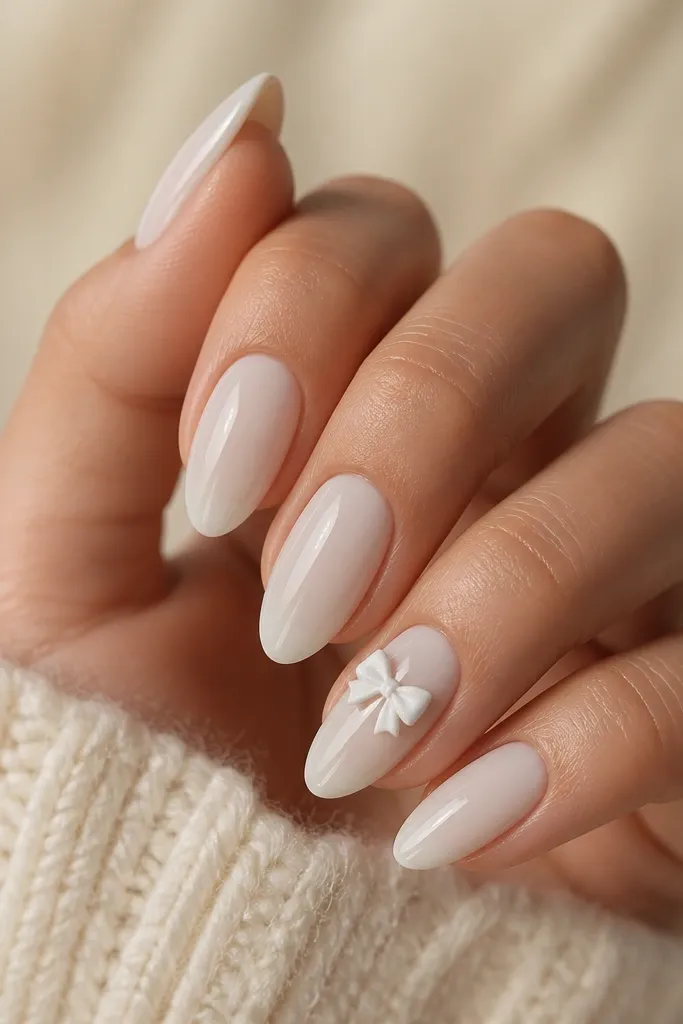
A micro bow is cute without turning your nails into a cartoon. The bow shape is small and sits near the center, so it looks balanced on short nail beds. Milky white makes the bow look soft and sweet instead of stark. This is one of my go-to "date night" looks because it's playful but still clean.
Base coat milky white on all nails. On the ring finger or thumb, use a dotting tool to place two tiny loop shapes (each about 1.5 mm wide) and connect them with a small dot in the center. Outline the bow lightly with a slightly thicker milky gel if needed. Top coat carefully to keep the bow flat.
Editor's noteIf the loops look uneven, add a single thin line of milky gel to correct the edges before curing.
Watch outAvoid big bows - anything wider than the nail bed makes short nails look cramped.
24. Milky White With Pearly Center Dot And Side Glow
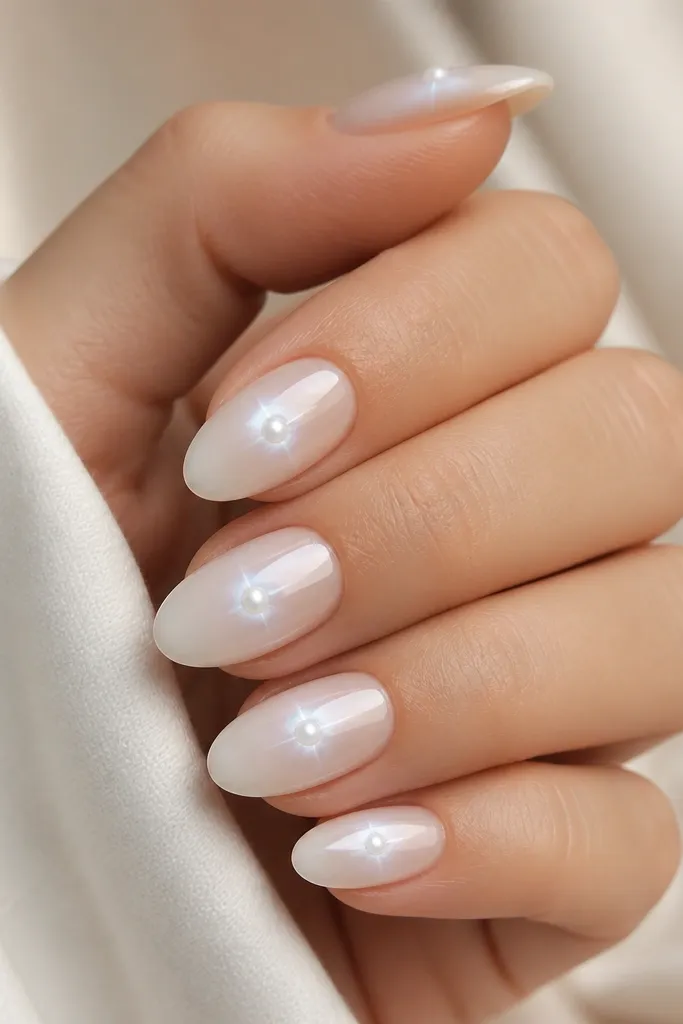
This look is like a tiny halo. The central pearly dot catches light and makes the nail look polished even if you don't add other art. The side glow is subtle - it's more shimmer than color - so it keeps the dreamy milky vibe. I like it because it looks good in both indoor lighting and bright sunlight.
Paint milky white base. Place a small pearly dot near the center of each nail using a dotting tool. Add a faint shimmer near the sidewalls with a small makeup brush and pearly powder gel, then blend with top coat. Cure and finish glossy.
Editor's noteUse a smaller dot than you think; short nails need tiny accents to look refined.
Watch outDon't overdo side shimmer - heavy shimmer makes nails look textured and cheap.
25. Milky White With Thin Half-Moon Crystal Corner
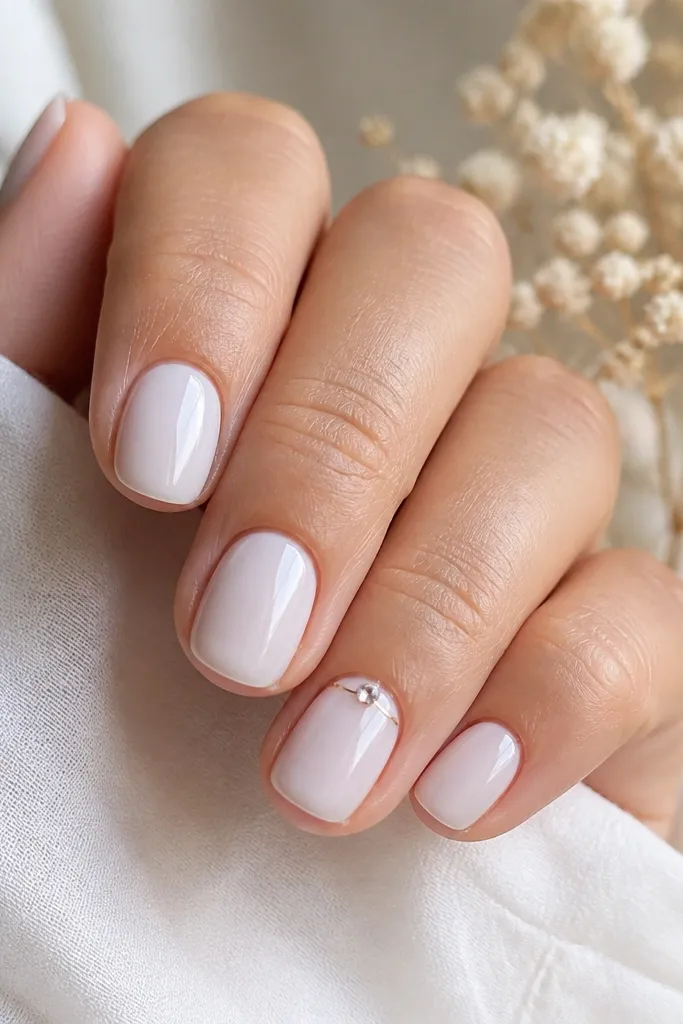
This is an asymmetrical version of the half-moon that looks cool and delicate. One corner detail keeps the design from looking too symmetrical or bridal-only. The crystal adds a sharp highlight against the soft milky base, so the contrast feels intentional. It's also great if you want something "special" without lots of painting.
Base all nails milky white. On the accent nail, draw a thin half-moon curve at one cuticle corner using clear gel and a fine brush, then place one tiny crystal at the highest point. Seal with top coat, making sure the crystal is fully covered at the edges.
Editor's notePlace the crystal slightly off-center toward the nail center so it catches light when you flip your hand.
Watch outSkip multiple crystals on the same corner - it looks crowded on short nails.