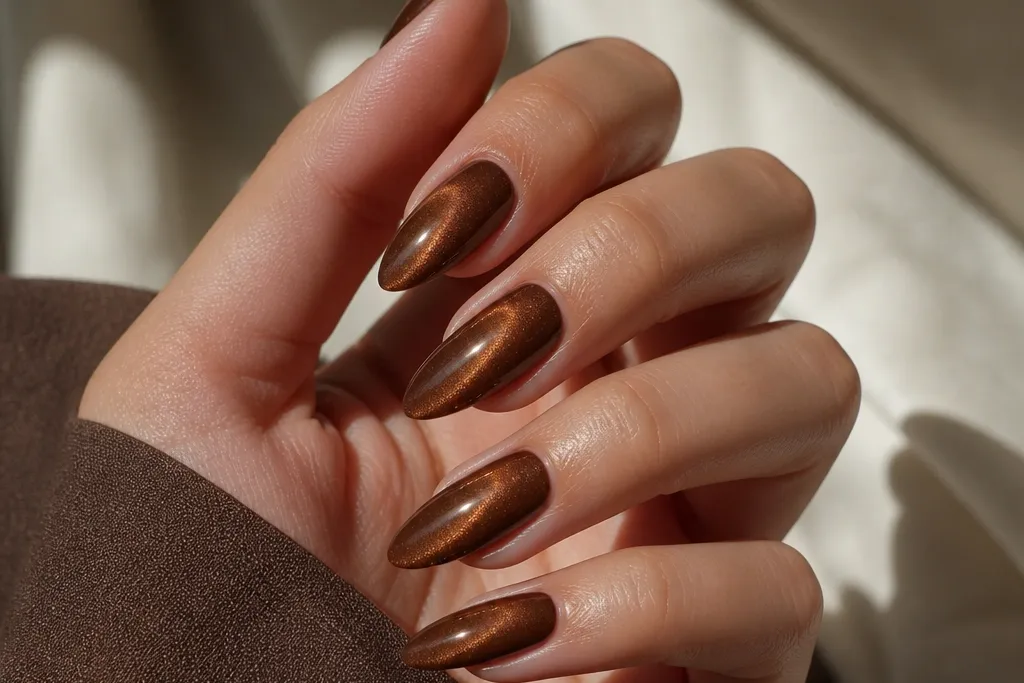
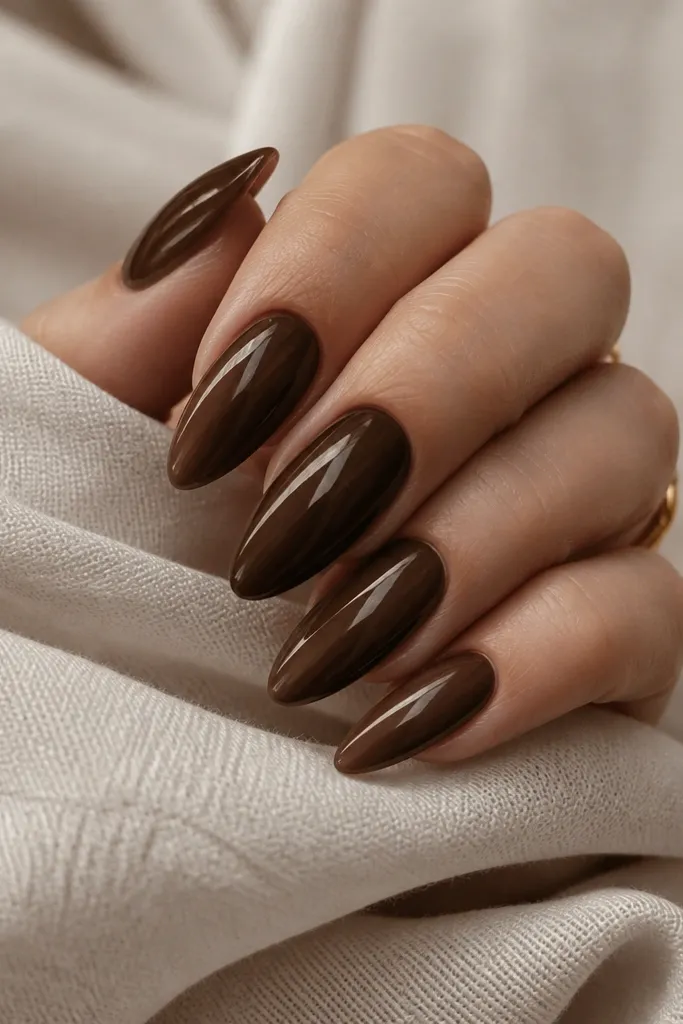
1. Espresso Spotlight Almond
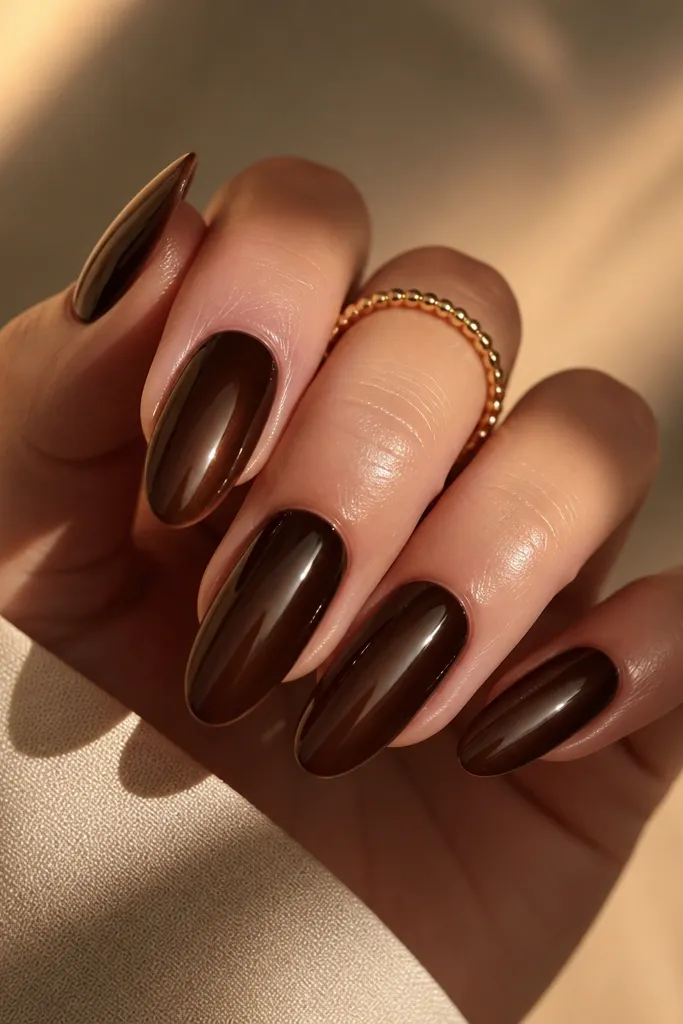
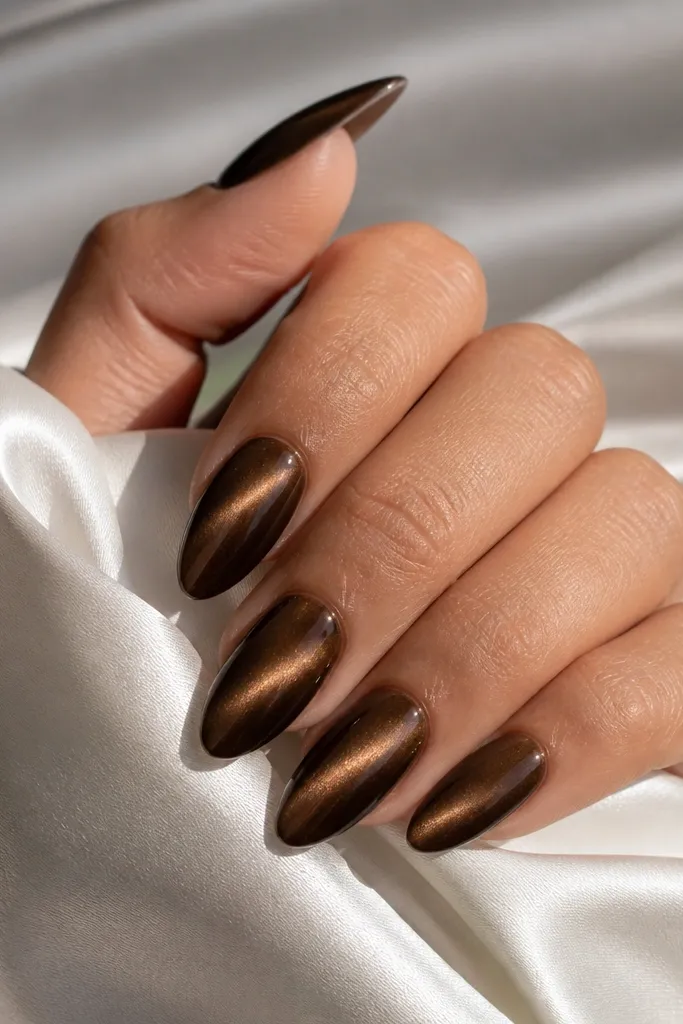
This is the classic aesthetic brown cat eye nails look: a near-black espresso base with a tight, bright center stripe. The stripe turns the whole set into something dimensional, even though the design is only one color. I like this version because it reads dramatic in photos and still looks clean in real life. The glossy finish makes the stripe look like it's lit from within.
Use an espresso magnetic brown gel and magnet it close to the nail for a crisp line. Keep your nail length medium-long almond so the stripe has room to travel. Cure each nail fully before moving on, then seal with a high-shine top coat.
Editor's noteHold the magnet steady for 6-8 seconds, then cure immediately - you want the stripe to freeze in place.
Watch outDon't over-magnet from far away - it turns the stripe into a cloudy blob.
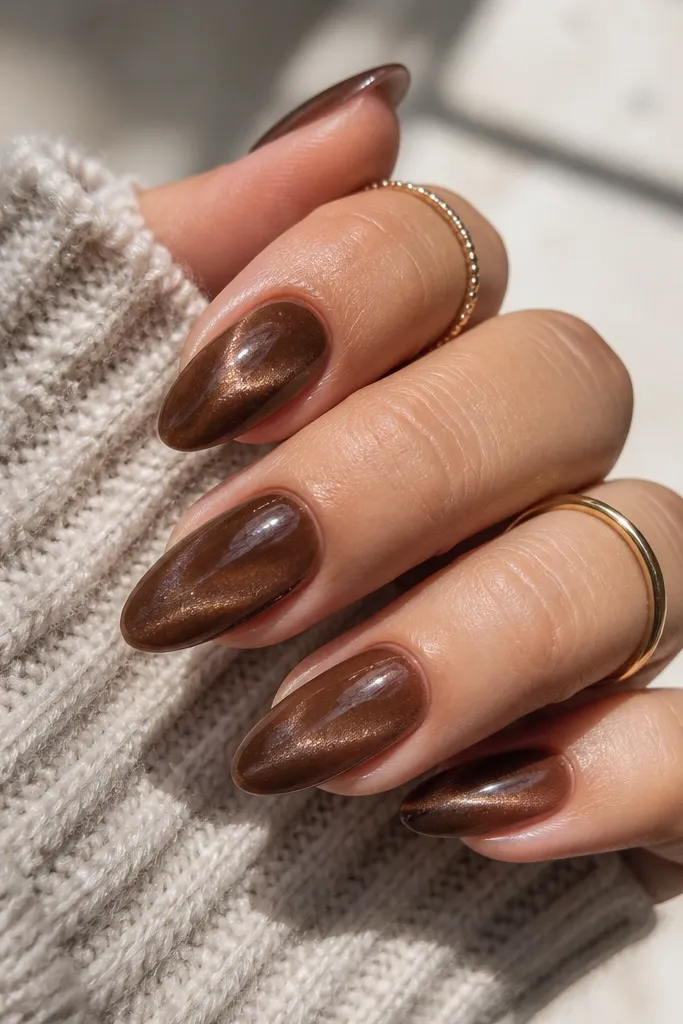
2. Cocoa Soft Cat Eye Squoval
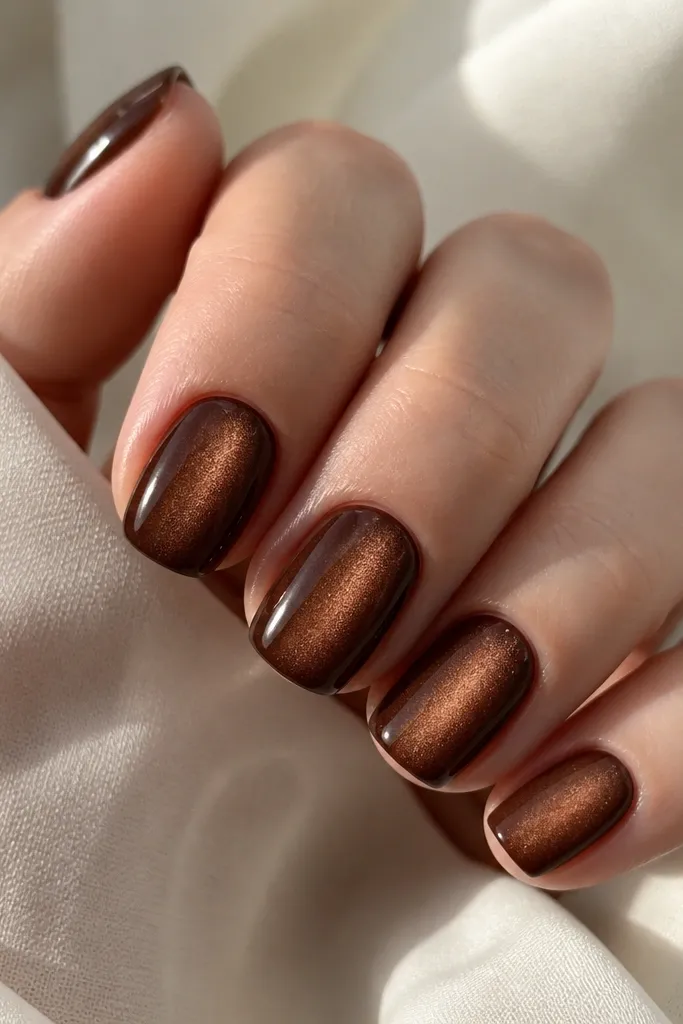
Cocoa-brown cat eye nails look more "friendly" than espresso. The stripe is slightly wider and less intense, which flatters hands that want a subtle glow. This version works great for everyday wear because it doesn't look too heavy. The warm brown also looks good with gold jewelry.
Choose a cocoa-toned magnetic brown gel and magnet at a slightly farther distance than espresso sets. Aim for a centered stripe but let it be a little wider - it's part of the charm. Finish with a thick, even top coat so the surface stays glassy.
Editor's noteIf the stripe looks too sharp, move the magnet 1-2 cm farther and hold the line for the same time.
Watch outDon't use a super-thin first coat - it can make the stripe look patchy.
3. Brown Cat Eye with Micro Gold Foil Edge
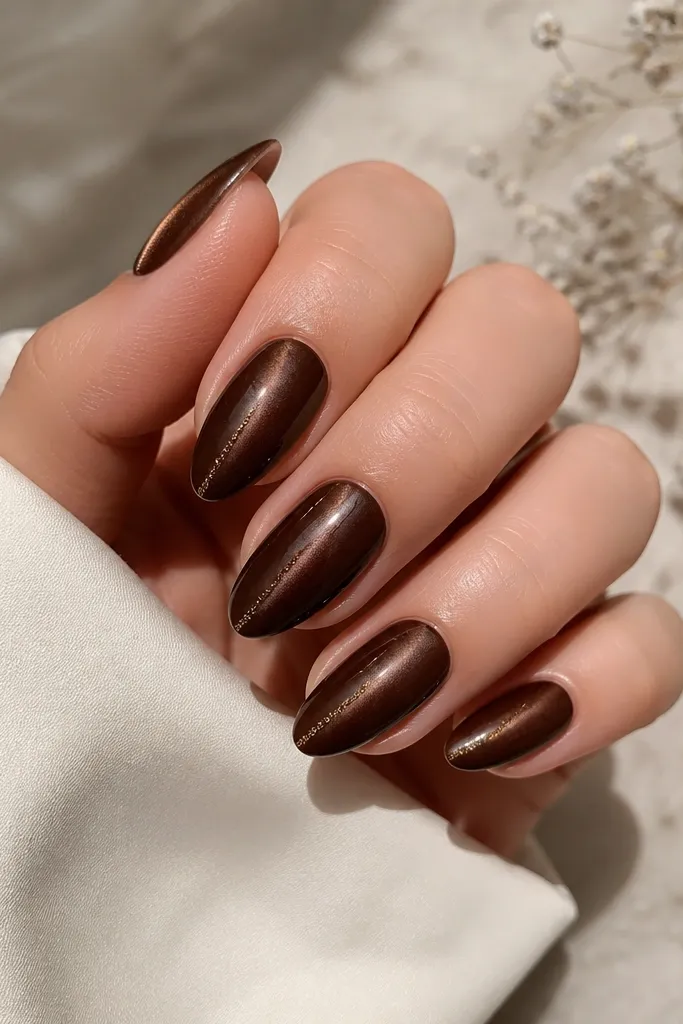
This adds just enough sparkle without turning the set into full-on glitter. The micro gold foil catches light at the same time the cat-eye stripe does, so you get two light sources. It still reads like aesthetic brown cat eye nails because the brown stripe is the main event. The foil is placed only at the edge to keep it sleek.
After magnet curing the brown, press micro gold foil fragments along the outer half of each nail, about 1-2 mm from the edge. Use a thin layer of foil gel or tacky layer to grab the foil, then cure. Seal with top coat, keeping the surface smooth so the foil doesn't snag.
Editor's noteUse smaller foil pieces than you think - oversized chunks make the set look bulky.
Watch outDon't cover the whole nail in foil; it fights the cat-eye stripe.
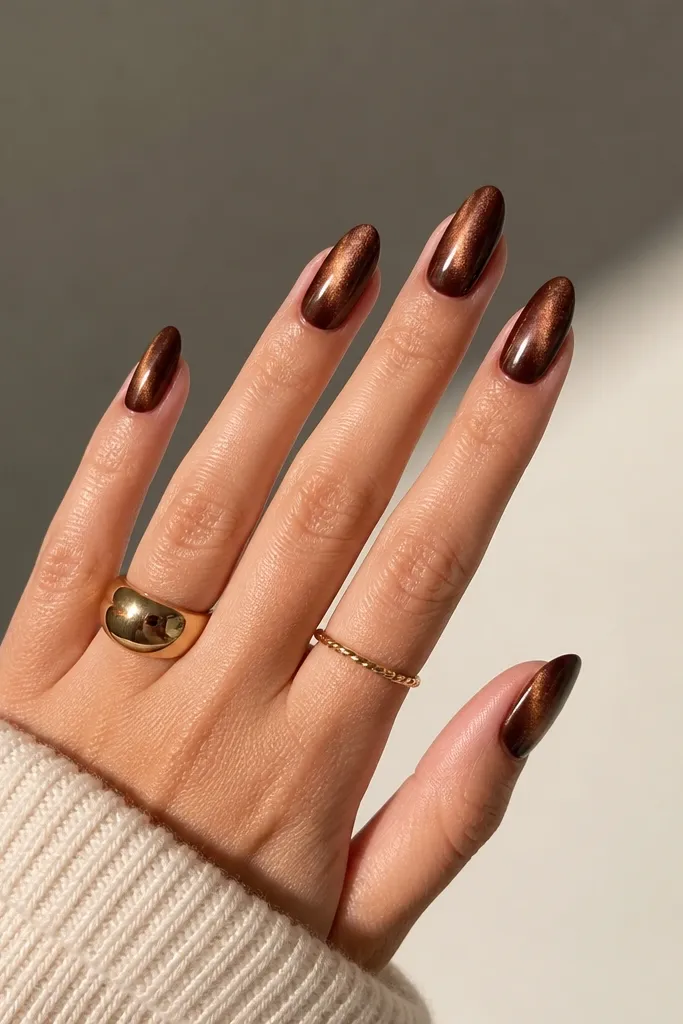
4. Reverse Magnet Brown Flame Tip
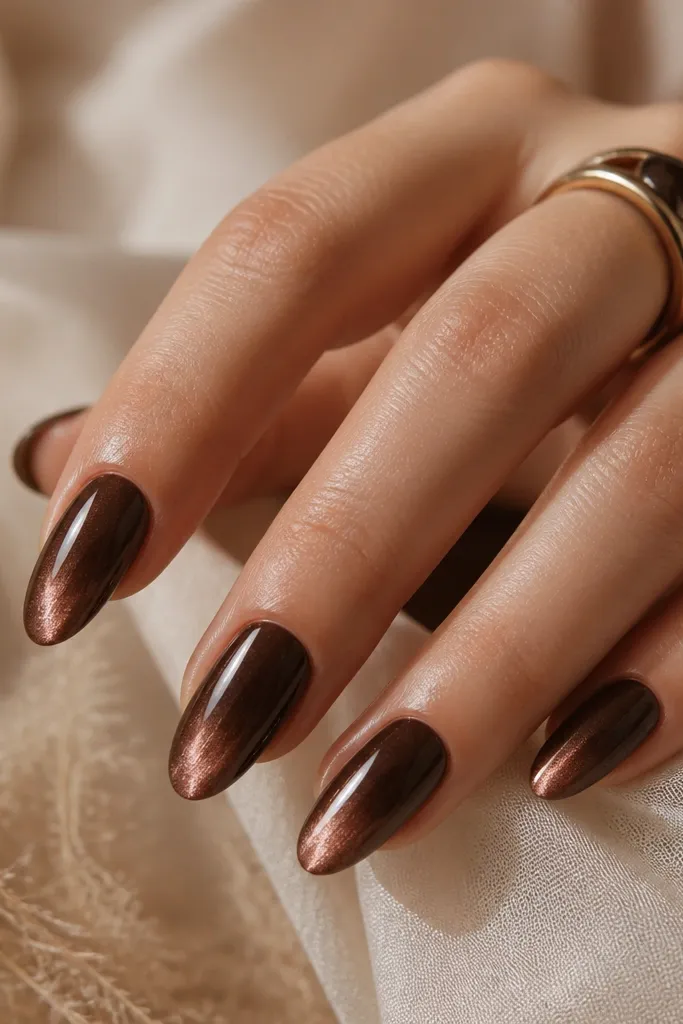
Reverse magnet makes the stripe "pull" upward and flare near the tip. The result looks like a soft flame effect while staying clean and wearable. It's one of my favorite ways to make brown cat eye nails look custom without extra art. The flare creates a focal point even on shorter lengths.
Apply your dark brown cat-eye gel and cure the first coat. For the second coat, magnet the nail from the tip direction so the stripe gathers near the end. Hold for 6 seconds, then cure. Top coat seals the fade so it looks smooth, not striped.
Editor's noteIf you want more flame, magnet closer to the tip and shorten the hold by 1-2 seconds.
Watch outDon't magnet the whole nail the same way twice - the stripe will look double and messy.
5. Brown Cat Eye Half-Moon Cuticle Glow
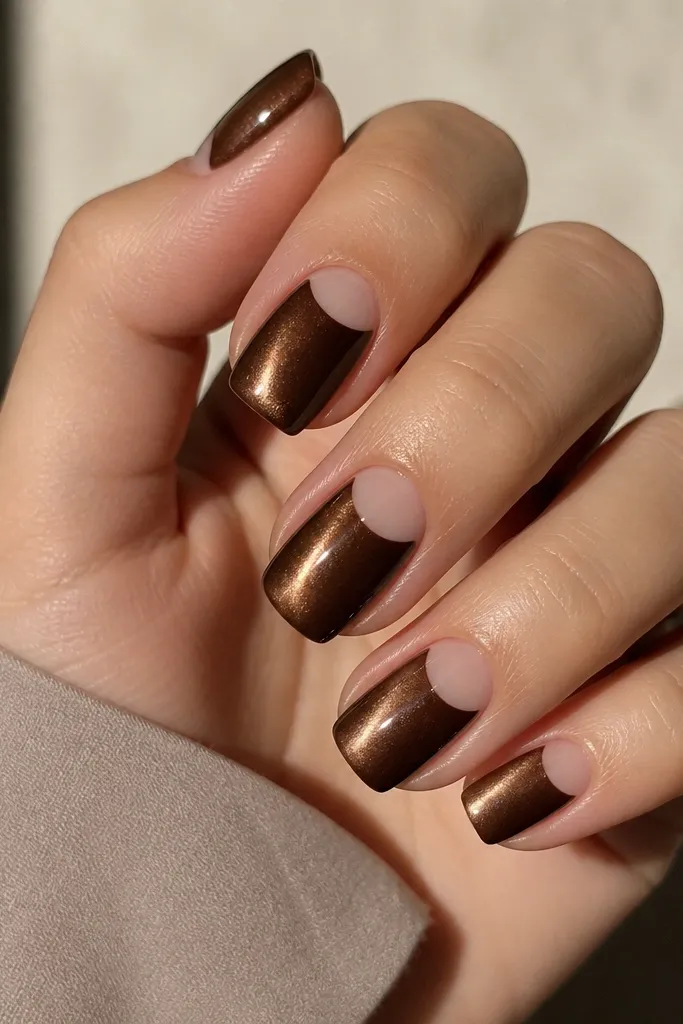
The trick here is contrast. A nude half-moon under the center stripe makes the cat eye look brighter and more intentional. It turns a plain magnetic set into something that looks styled. The half-moon also hides any tiny cuticle application lines.
Paint a nude gel half-moon near the cuticle (leave the center stripe area open so you can magnet cleanly). Cure that nude, then apply dark brown cat-eye gel over the rest of the nail. Magnet as usual and seal with top coat.
Editor's noteKeep the half-moon thin - about 1/3 of the nail width - so it reads like a design, not a patch.
Watch outDon't let brown gel flood onto the half-moon; it kills the contrast.
6. Chocolate Marble Cat Eye Swirls
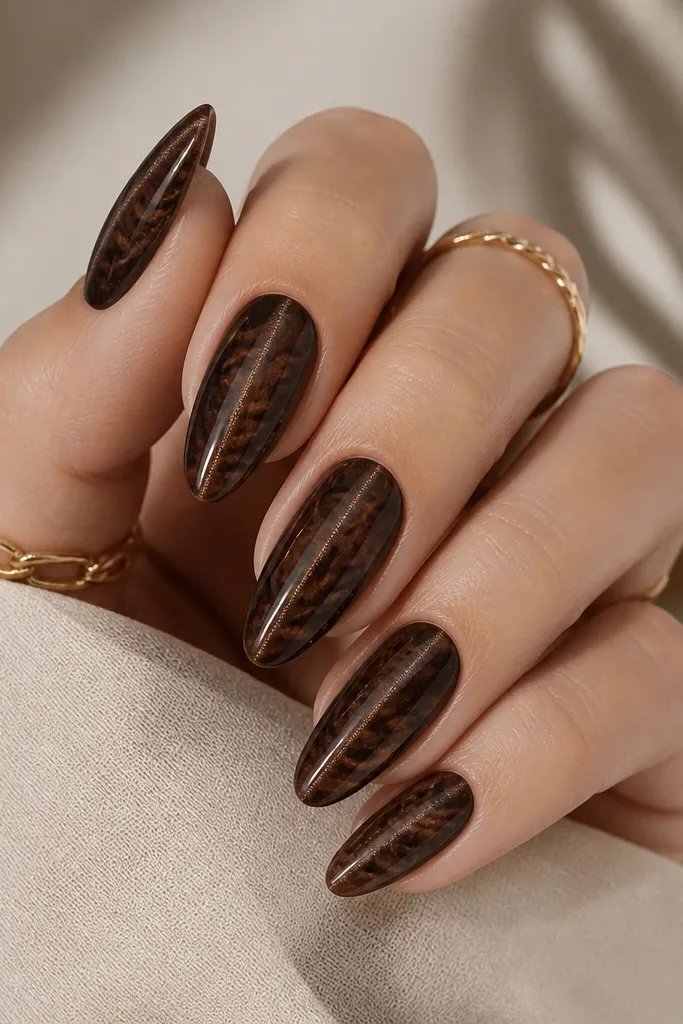
This one looks like marble but still keeps the cat-eye stripe as the main line. The lighter brown swirls make the stripe look deeper, like it's embedded in chocolate. It's a great option when you want aesthetic brown cat eye nails that look high-effort without adding rhinestones.
Start with a dark brown magnetic base and magnet it. Before fully curing the second coat, drag a thin brush with a lighter brown gel through the surface in 2-3 quick swirls. Cure, then top coat. Keep the swirls away from the center stripe so the stripe remains crisp.
Editor's noteUse a thin liner brush and fewer strokes - marble that's too busy looks muddy.
Watch outDon't swirl too much over the stripe - it turns the line fuzzy.
7. Smoky Brown Cat Eye with Matte Top
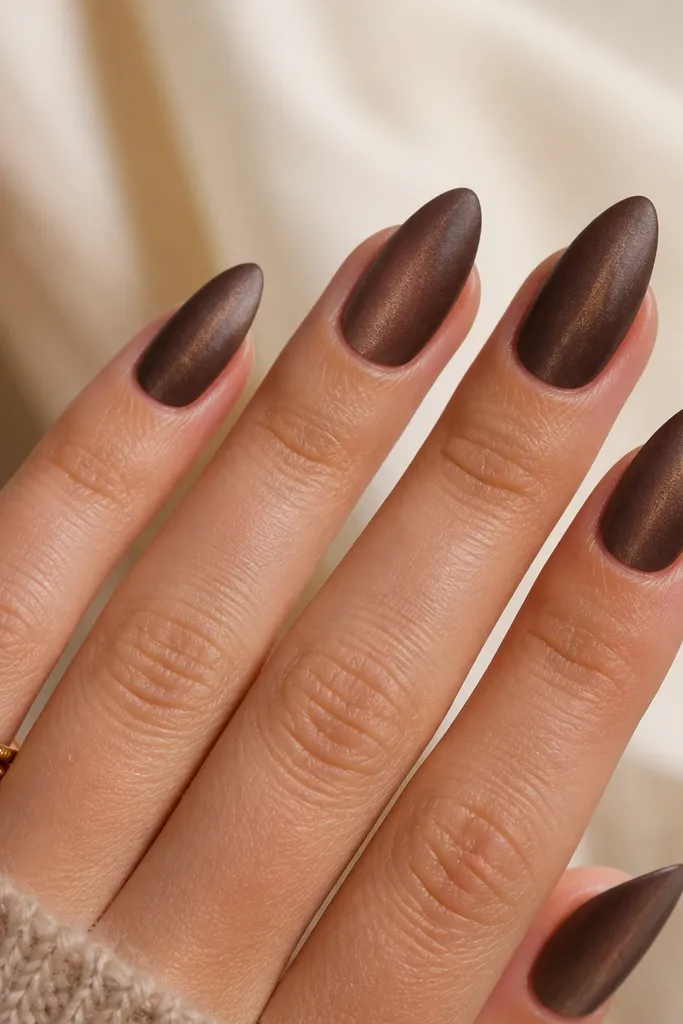
Matte changes the vibe instantly. Instead of glossy spotlight, you get a velvety glow that makes the stripe look like it's coming from inside the nail. This style looks especially good on darker browns because matte hides micro imperfections. It's also great if you want cat-eye nails that don't scream "party."
Do your magnetic brown gel as usual and cure. Apply matte top coat over the whole nail, then avoid heavy buffing afterward. If you want extra contrast, you can leave the center stripe glossy with a strip of regular top coat.
Editor's noteIf your matte top coat looks patchy, apply a slightly thicker layer and cure fully.
Watch outDon't matte over a too-thin magnetic layer - it can look streaky.
8. Brown Cat Eye + Clear Negative Space V
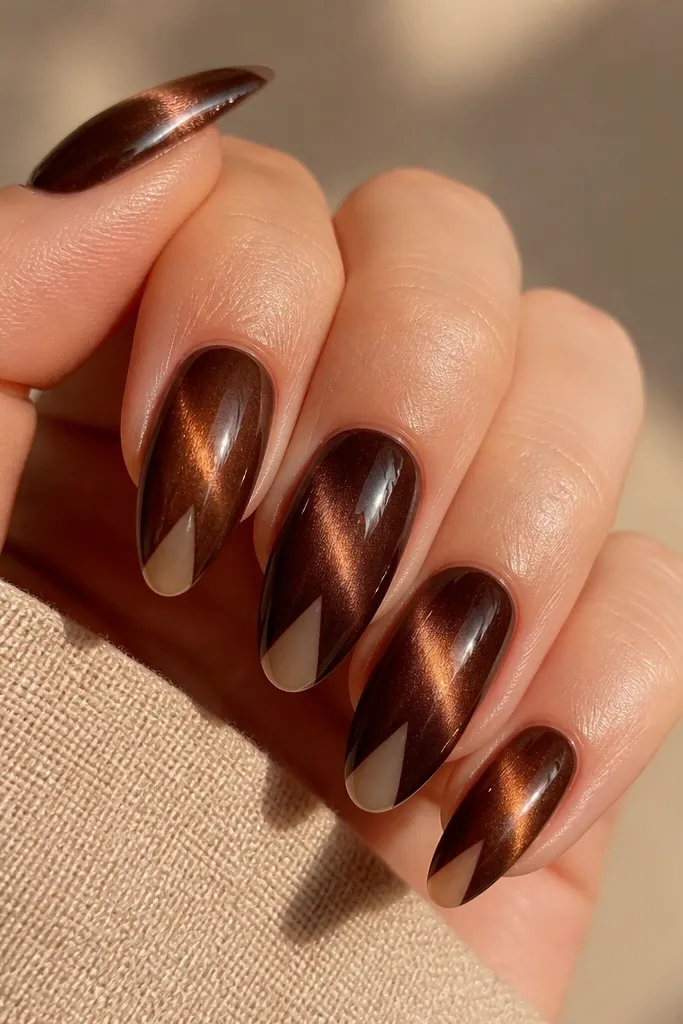
Negative space makes cat-eye nails look modern and cleaner. The V shape frames the stripe, so your eye keeps traveling down the nail. It also helps if your cuticle area isn't perfect - the clear area pulls attention away from edges. This is one of the most "editorial" versions of aesthetic brown cat eye nails.
Use a peel-off base or clear gel to create the V shape. Apply brown cat-eye gel on both sides of the V, magnet, and cure. Carefully cap the edges with top coat so the V stays crisp and doesn't chip.
Editor's noteUse a thin striping brush to outline the V before you commit with color.
Watch outDon't smear brown gel over the V - clean boundaries are what make this look expensive.
9. Caramel Brown Cat Eye with Thin White Line
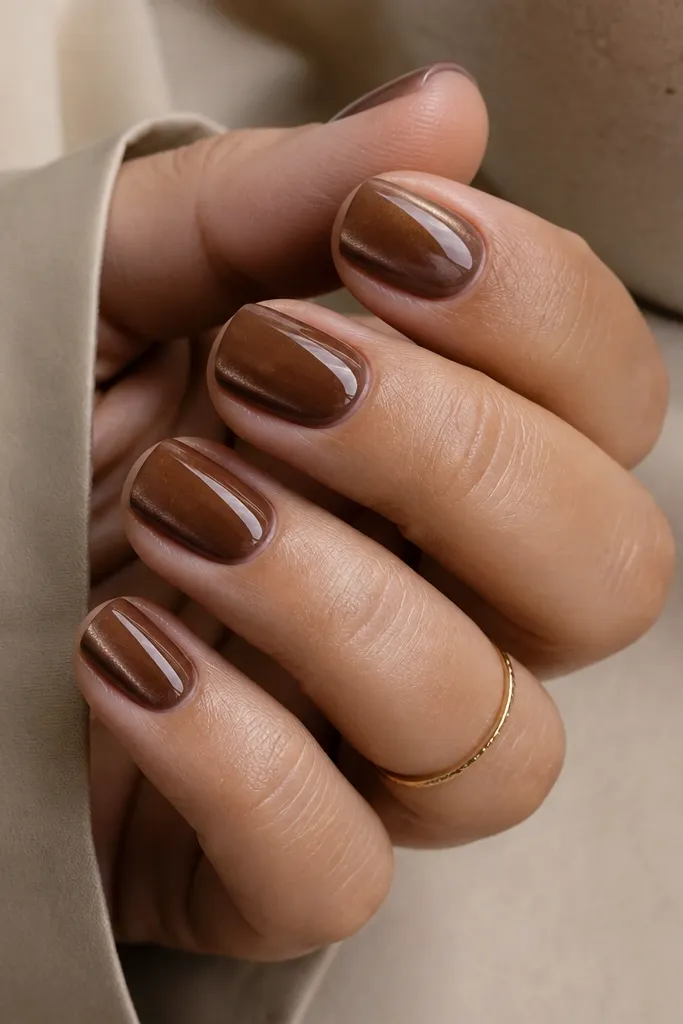
Caramel brown gives a warm, amber glow, and the thin white line adds a clean graphic element. The result looks sharp in daylight but still soft because the base is warm. This is one of the easiest ways to make aesthetic brown cat eye nails look "designed" without heavy art.
Apply caramel magnetic brown gel and magnet for the center stripe. After curing, use a striping brush with white gel to draw a thin line parallel to the magnet stripe, leaving about 1 mm gap. Cure and finish with top coat.
Editor's noteUse gel paint, not acrylic paint, so the white stays smooth and glossy.
Watch outDon't make the white line thick - chunky white makes it look like nail tape.
10. Deep Brown Cat Eye with Bronze Micro Glitter
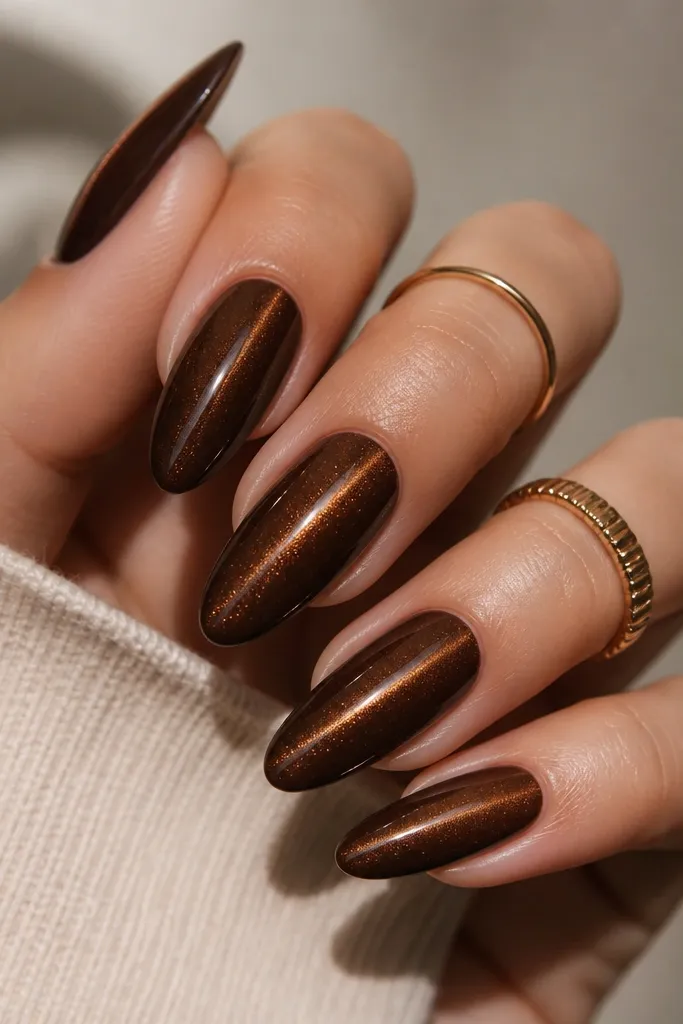
Micro glitter changes the way the stripe reflects light. You still get a crisp cat-eye line, but the brown base has a subtle sparkle underneath. It's a good choice for events where you want the nails to look gorgeous up close. The key is using micro glitter so it doesn't turn the stripe cloudy.
Apply deep brown magnetic gel and magnet it on the first coat. On the second coat, mix a tiny amount of bronze micro glitter into a clear gel, then brush over the nail while keeping the center stripe area clean. Magnet again briefly, cure, and top coat.
Editor's noteKeep the glitter layer thin - you should still see the magnetic depth.
Watch outDon't use chunky glitter - it breaks the cat-eye effect.
11. Brown Cat Eye with Taupe Ombré Tip
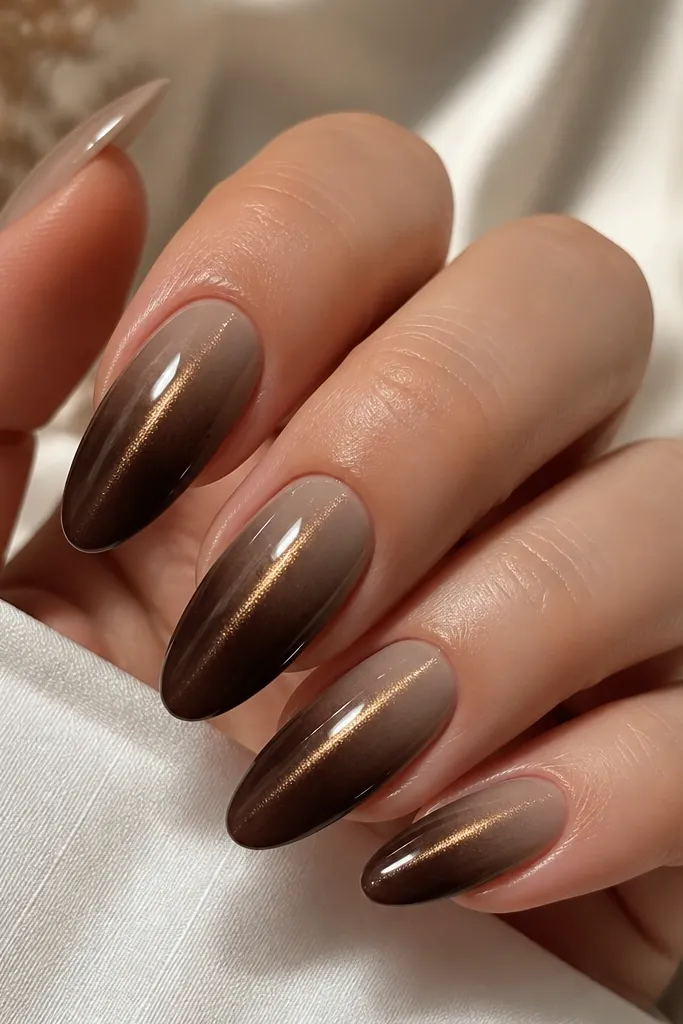
A taupe ombré tip gives this set a soft, fashion look. The cat-eye stripe stays the focus, but the fade makes the nails feel styled and longer. This works especially well on medium almond because the gradient follows the nail shape. The contrast is subtle - not harsh.
Start with deep brown cat-eye gel on the whole nail and magnet/cure. Add taupe gel at the tip and blend down 2-3 mm with a sponge or ombré brush. Magnet only on the brown area if you can, so the stripe doesn't distort in the taupe fade. Seal with top coat.
Editor's noteBlend the ombré while the gel is still slightly tacky for a smoother transition.
Watch outDon't blend too far down - then the stripe loses its intensity.
12. Burnt Umber Cat Eye with Copper Lining
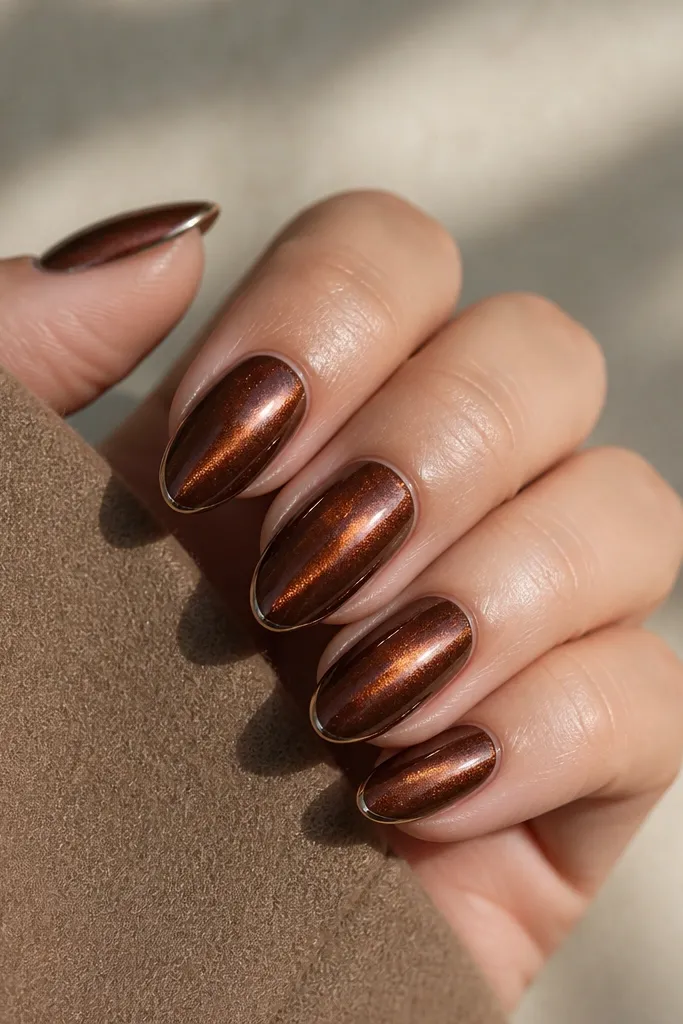
Copper lining adds a warm metal frame around the nail, which makes the brown stripe look even brighter. The lines are fine and controlled, so it still reads as aesthetic brown cat eye nails, not heavy nail jewelry. This set looks great with sweaters, boots, and gold rings. The copper also complements burnt umber perfectly.
Magnet your burnt umber cat-eye gel and cure. Use a striping brush to draw a thin line along each sidewall and a micro line near the cuticle curve. Cure, then top coat. Keep the lining about 0.5-1 mm inside the edge so it doesn't lift.
Editor's noteUse copper gel liner with a slightly thicker consistency so the line stays crisp.
Watch outDon't line over a wet tacky layer - it smears and turns the copper dull.
13. Brown Cat Eye with Tiny Rhinestone Cluster
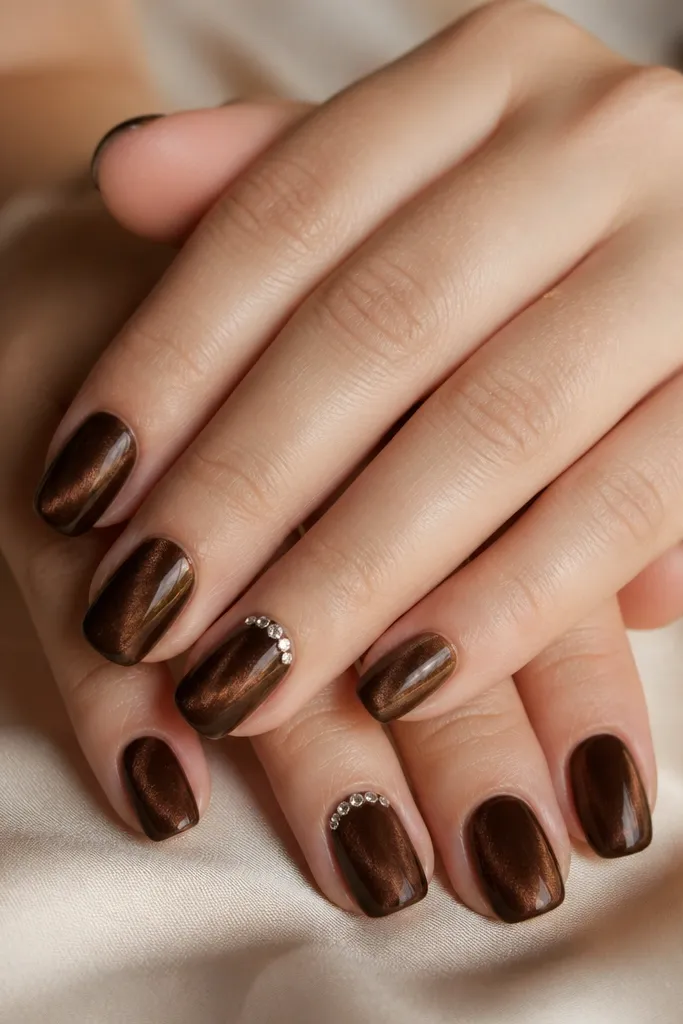
This is the "just enough" version of rhinestones. A tiny cluster at the cuticle makes the set look dressed up while keeping most nails clean. The cat-eye stripe creates the main glow; the stones catch light when you move your hands. I like placing stones on the ring finger and middle finger only - it keeps the look intentional.
Do magnetic brown on all nails first. For the accent nails, add a dot of clear builder gel at the cuticle center, place 3-4 tiny rhinestones, then cure. Finish all nails with top coat, and cap the stones lightly so they don't snag.
Editor's noteUse stones that are 1.0-1.5 mm - bigger ones overpower brown cat eye.
Watch outDon't put rhinestones on every nail - the cat-eye effect gets lost.
14. Mocha Cat Eye + Satin Nude Base
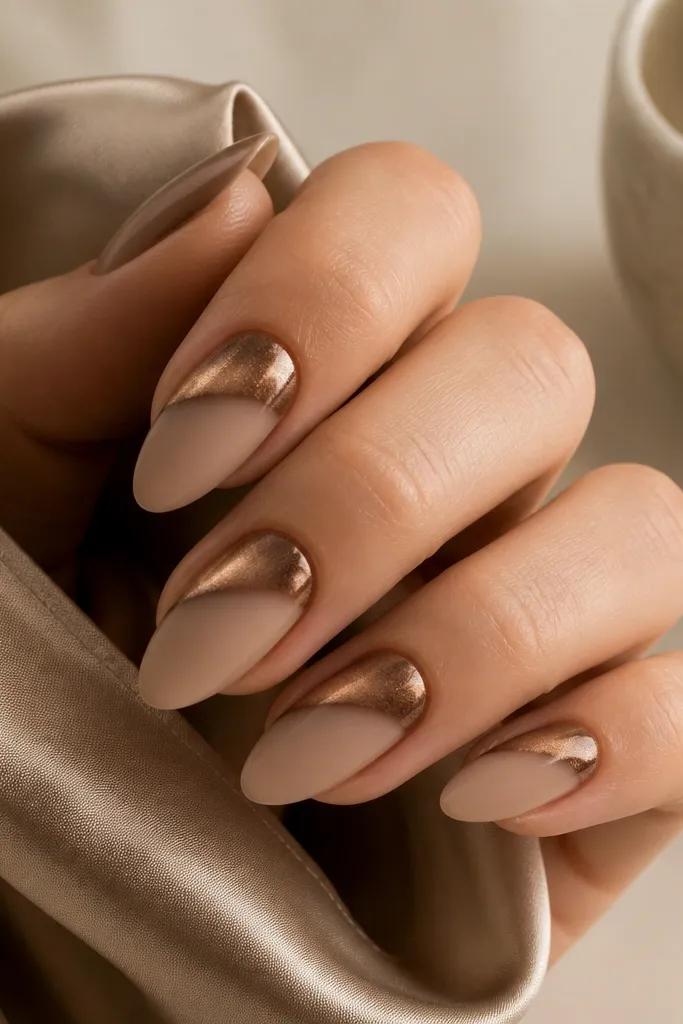
Separating the nude base from the mocha stripe makes the cat eye look like it's floating. The satin nude (not glossy) adds a soft, skin-tone background so the brown stripe pops. This is one of the prettiest versions for everyday outfits because it looks clean and flattering. The contrast also makes your nails look longer.
Start with a satin nude gel on the bottom half of each nail, cure it. Apply mocha cat-eye gel only on the upper half and magnet it so the stripe centers in that section. Top coat goes on the cat-eye part for gloss, and you can use matte top on the nude if you want the two finishes to stay distinct.
Editor's noteMask the line between nude and brown with a thin strip of tape to keep the split sharp.
Watch outDon't use a glossy nude base - the contrast disappears.
15. Dark Brown Cat Eye with Patent Black Tip
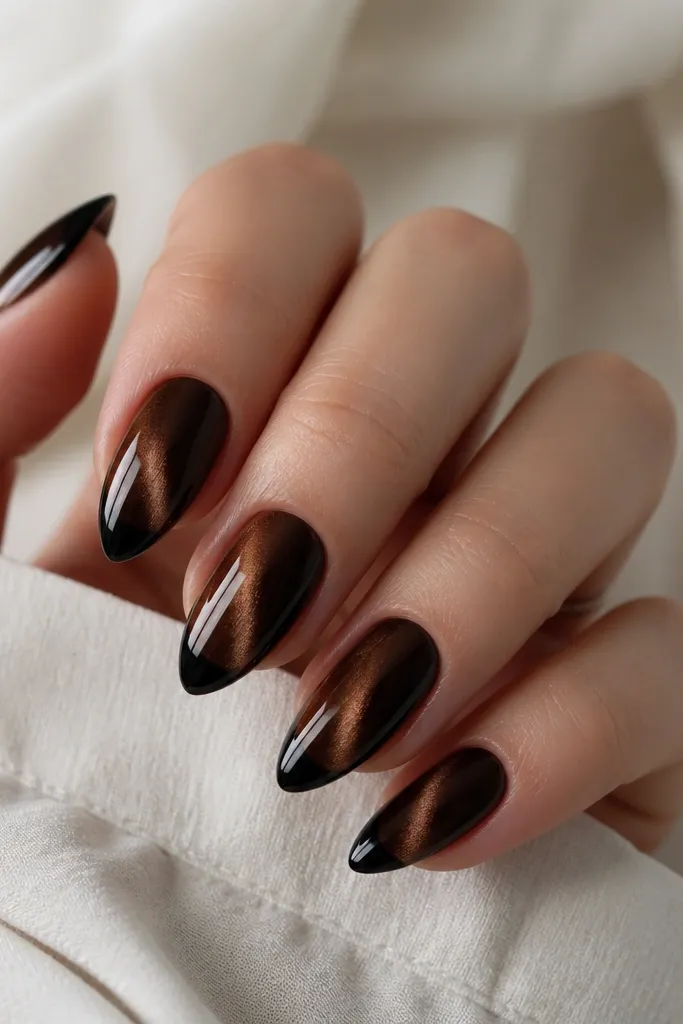
This set looks like a high-fashion French manicure, but the stripe keeps it interesting. The patent black tip adds depth and makes the brown stripe look even richer. I like that it hides minor tip wear because the black is bold. It's a clean way to wear aesthetic brown cat eye nails when you don't want sparkle or art.
Magnet your dark brown cat-eye gel and cure. Create a straight or slightly rounded tip with glossy black gel, keeping it 1-2 mm below the free edge. Magnet again lightly on the brown area if needed, then cure and top coat over everything for a smooth glass finish.
Editor's noteUse a thin nail art brush and do the black tip in two thin coats so it stays even.
Watch outDon't paint the black over the magnet stripe area - it dulls the cat-eye line.
16. Brown Cat Eye with Pearlized Nude Side Swipes
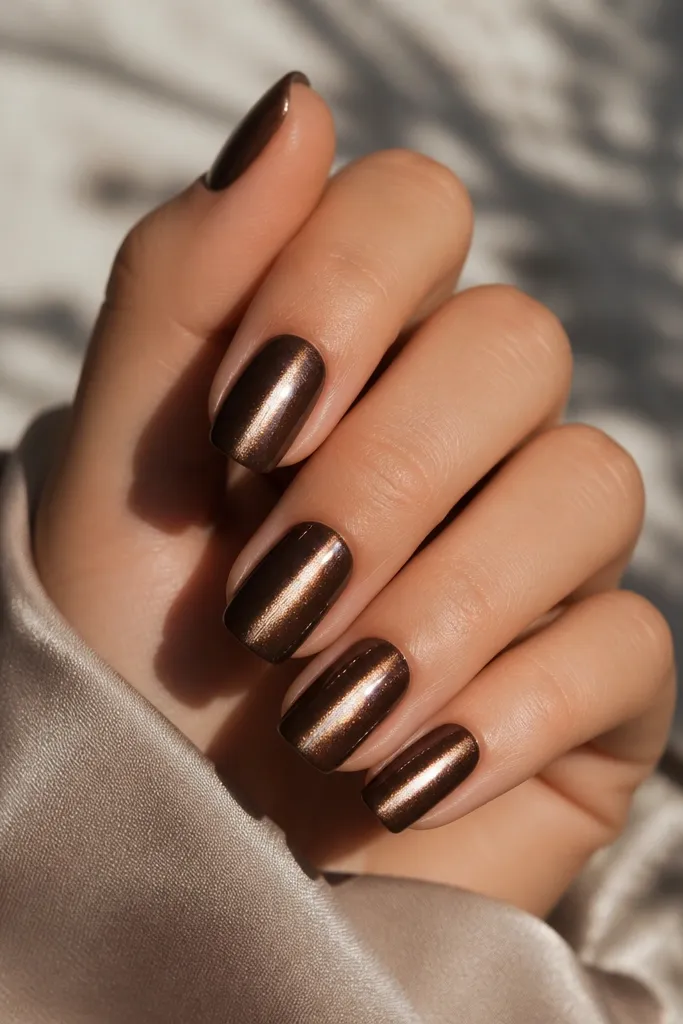
Pearlized nude side swipes make the stripe look brighter by framing it. The pearly tones add a soft "light" around the magnetic highlight, like a halo. This works because the side swipes are thin, so the cat-eye line still reads as one continuous spotlight. It's a good alternative to gold foil if you want something calmer.
After magnet curing the dark brown, paint two thin vertical swipes of pearlized nude gel on each side of the stripe. Keep them about 1 mm thick and centered vertically. Cure and seal with top coat, then wipe the surface for a smooth finish before curing.
Editor's noteUse less gel than you think - pearl swipes look best when they're translucent.
Watch outDon't let the swipes touch the stripe - it blurs the center highlight.
17. Cinnamon Brown Cat Eye with Copper Ombre Cuticle
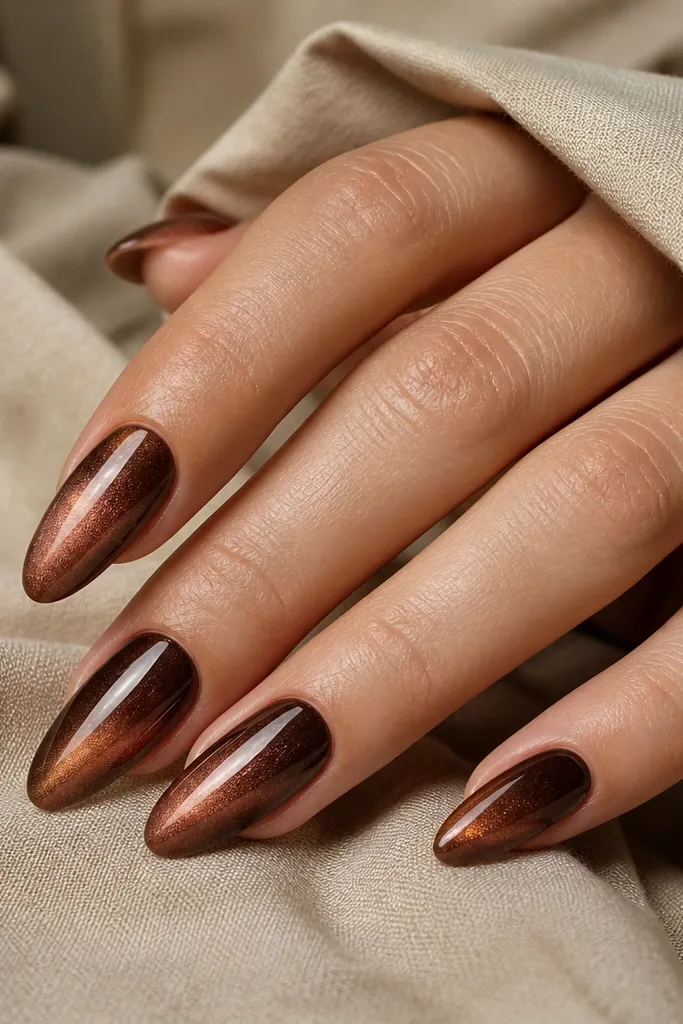
Copper at the cuticle makes brown cat eye nails feel warmer and more dimensional. The ombré glow acts like a second light source under the stripe. I love this look for fall because cinnamon browns look natural with copper jewelry. It also makes the nails look extra glossy even if you keep the top coat normal.
Start with cinnamon brown cat-eye gel on the whole nail and magnet it. Add copper gel near the cuticle and blend upward 2-3 mm using an ombré sponge. Magnet briefly only after the copper is placed if you want the stripe to stay crisp - otherwise cure the base first and magnet just the brown area. Top coat seals everything.
Editor's noteBlend copper with a sponge that has almost no product left to keep the ombré airy.
Watch outDon't overdo copper - heavy pigment turns it into a blob at the cuticle.
18. Espresso Cat Eye with Clear 3D Bow Charm
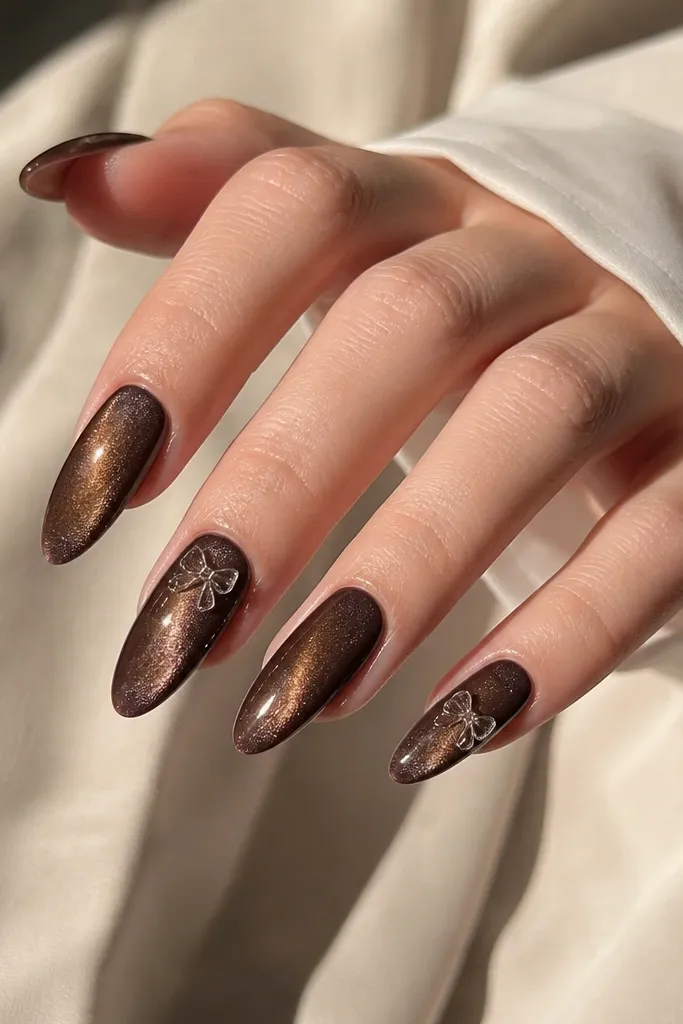
A clear bow charm adds a playful "glam" without covering the stripe. Because it's transparent, the magnetic glow still shows through around it. It looks cute for birthdays and nights out, but it doesn't feel like full-on costume nail art. This is the kind of set people ask about because it looks sculpted.
Magnet your espresso cat-eye and cure. Place a small clear 3D bow charm using strong gel or nail glue, then cure. Build a thin layer of clear gel over the bow to level the surface before top coat.
Editor's noteCap the charm with gel so it feels smooth when you run your finger over it.
Watch outDon't skip leveling - raised charms catch on hair and clothes.
19. Brown Cat Eye with Vertical Nude Stripe Divider
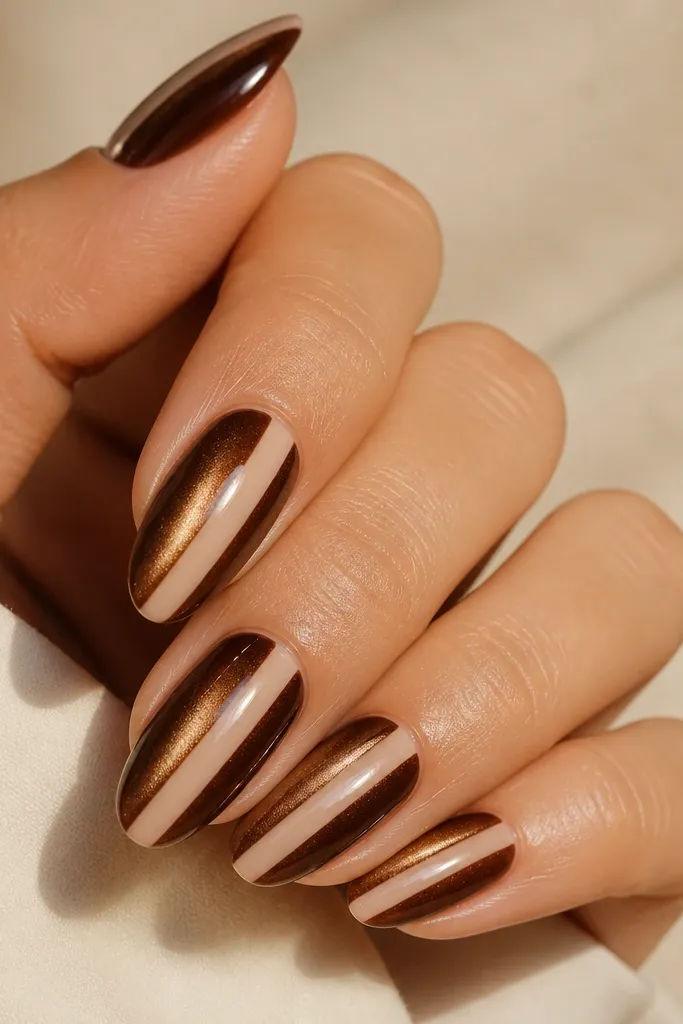
This design flips the usual cat-eye effect. Instead of one glowing line, you get a nude divider that makes the stripe feel like it's framed. Dark brown on both sides keeps it dramatic, while nude keeps it clean. It looks striking in photos because the center divider catches light differently than the magnetic brown.
Use striping tape or a thin brush to create a narrow nude center line. Cure the nude divider first, then apply brown cat-eye gel on both sides, magnet, and cure. Remove tape carefully after curing so edges stay sharp. Finish with top coat for a smooth, glassy look.
Editor's noteAim for a divider width of about 1-2 mm so it reads as intentional, not accidental.
Watch outDon't freehand the center nude - uneven width looks messy fast.
20. Brown Cat Eye with Glittery Taupe Aura
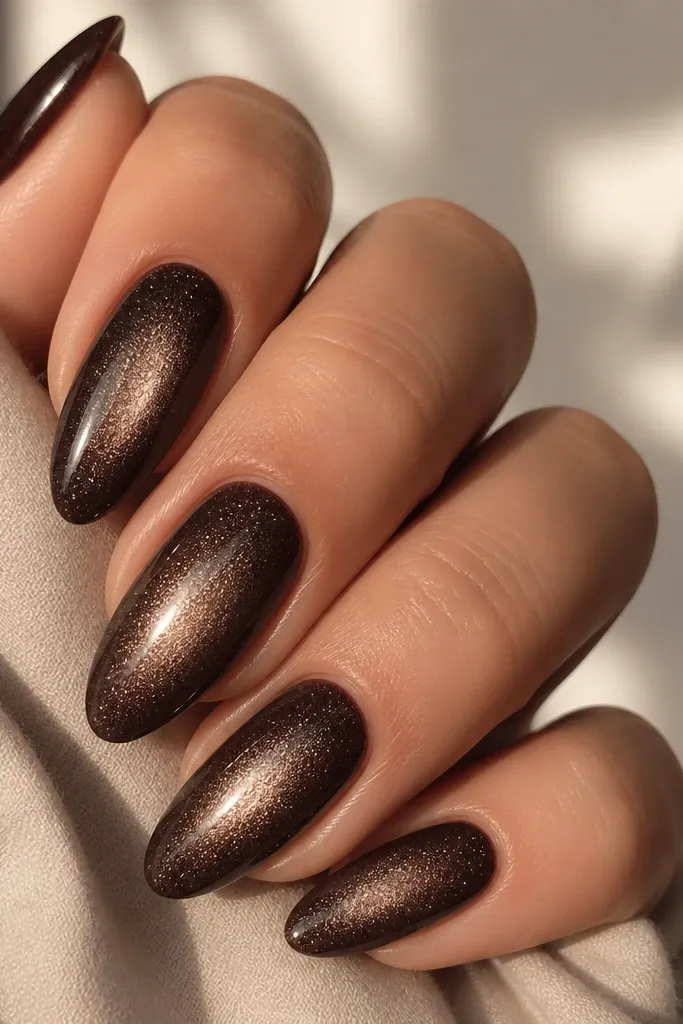
An aura effect makes the cat eye look like it's glowing. The taupe glitter is placed around the stripe, so the center line stays brightest. This reads dreamy without losing the magnetic crispness. It's a great choice when you want aesthetic brown cat eye nails that look like "soft light" rather than hard shine.
Magnet your dark brown first and cure. Apply a thin layer of clear gel around the stripe area (not on the stripe line itself), then tap taupe micro glitter into the clear gel to build an aura around the center. Cure and top coat lightly so the glitter doesn't dull.
Editor's noteUse a makeup sponge to tap glitter for a smooth aura edge.
Watch outDon't pack glitter directly on the stripe - it turns the cat-eye line grainy.
21. Dark Chocolate Cat Eye with Black Lace Line
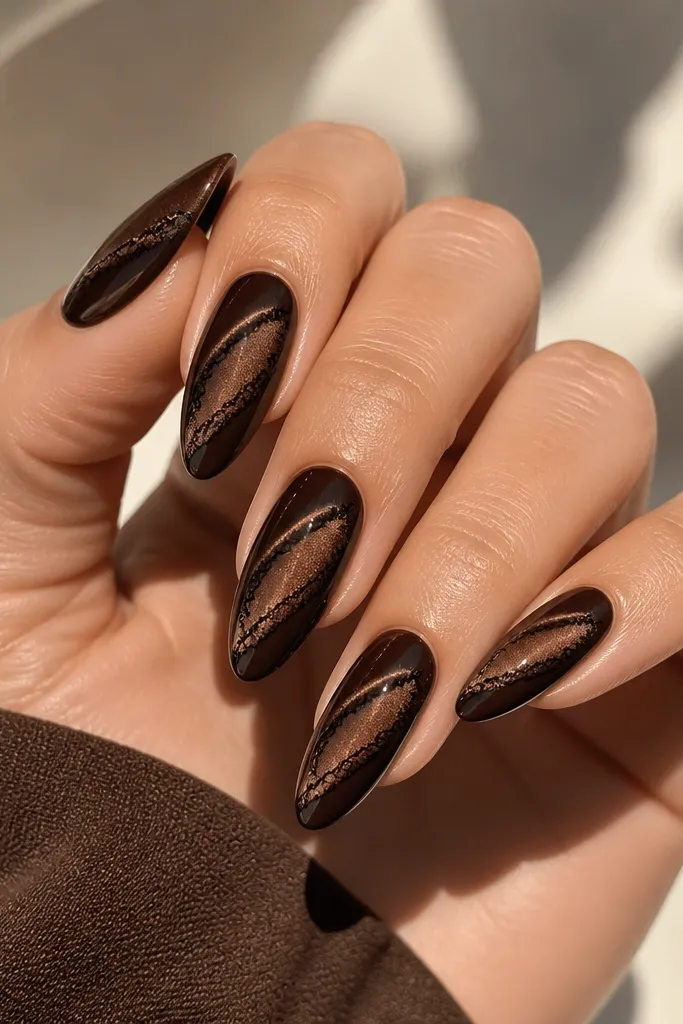
Black lace line art adds a fashion edge to dark chocolate cat eye nails. The lace is thin and curving, so it looks delicate against the deep brown. The cat-eye stripe still pulls attention because it stays centered and glossy. This set is perfect for nights out when you want something dramatic but not covered in rhinestones.
Magnet your dark chocolate brown and cure. With black gel liner, draw a simple lace curl starting near the mid-nail and ending near the tip on one side. Keep the line narrow and let the brown background show through. Cure and finish with top coat.
Editor's noteDo lace on just two nails if you want it subtler.
Watch outDon't draw thick lace - it looks like a sticker.
22. Brown Cat Eye with Textured Velvet Stripe
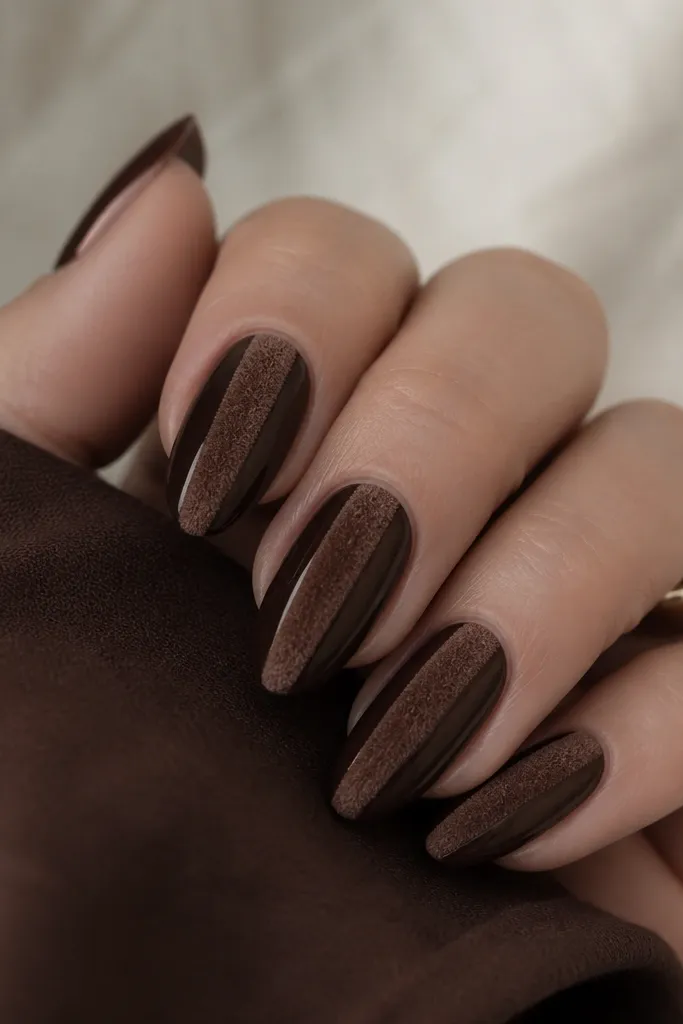
Textured velvet stripe makes the cat eye feel tactile. The center looks like a soft suede stripe, while the rest stays glossy, so the contrast is obvious. This is one of the most "wow" aesthetic brown cat eye nails sets for close-up photos. It also hides tiny surface imperfections because velvet powder flattens the look.
Magnet your deep brown base and cure. Apply a thin strip of clear gel exactly along the center stripe, then dust velvet powder over it and tap off the excess. Cure carefully if your velvet system requires it, then top coat only on the glossy areas so you don't flatten the velvet stripe.
Editor's noteSeal the sides with top coat first, then leave the velvet stripe alone for texture.
Watch outDon't top coat over the velvet stripe - it turns into a shiny smudge.
23. Mocha Brown Cat Eye with Tiny Star Confetti
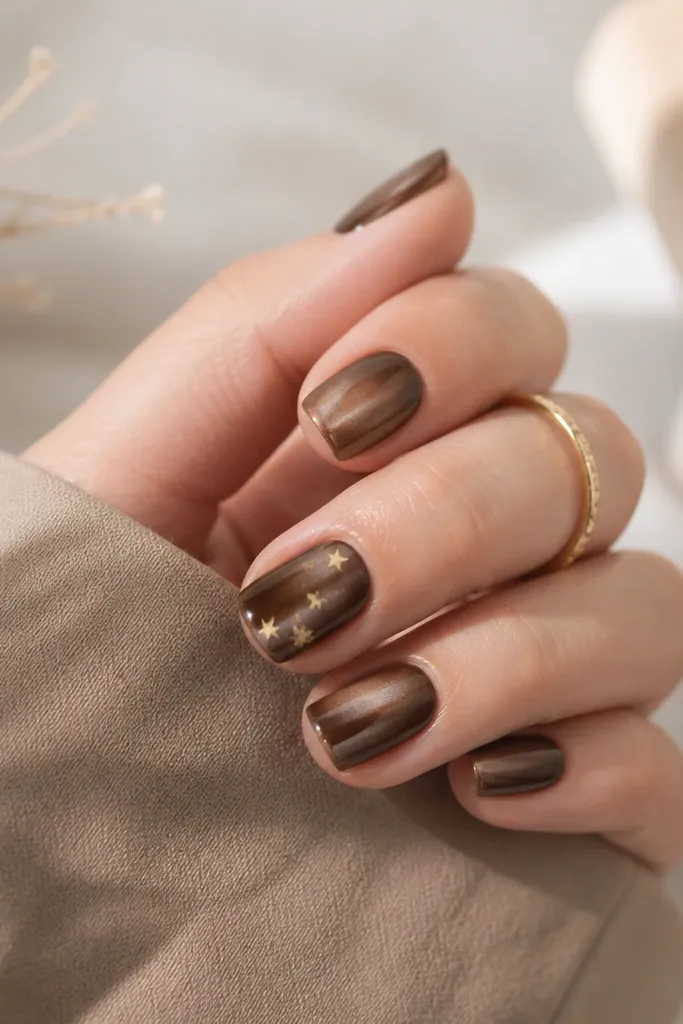
Tiny star confetti makes brown cat eye nails look celebratory without covering the stripe. Mocha brown is warm enough that the gold stars don't look harsh. I like scattering just a few pieces so the set stays sleek. When you move your hands, the stars flash and the cat-eye stripe keeps glowing.
Magnet and cure mocha brown on all nails. On the accent nail, brush a small patch of clear gel near the tip, place 3-6 tiny gold star confetti pieces, then cure. Cap with a thin layer of builder gel so the confetti feels smooth.
Editor's noteUse fewer stars than you think you need - the negative space makes it look intentional.
Watch outDon't scatter confetti across every nail - it competes with the magnetic highlight.
24. Brown Cat Eye with Aurora Green-Flash Underlay
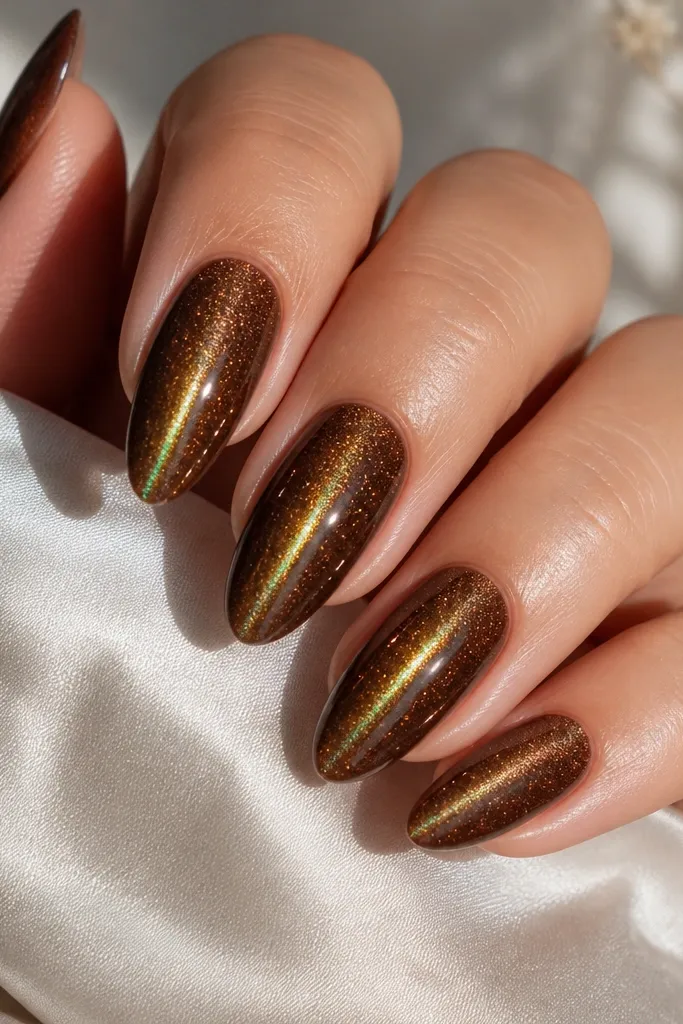
This is the "brown but not boring" version. The green flash shows up when light hits at an angle, so the set looks different from every direction. The cat-eye stripe stays the main line, but it gains an aurora shimmer under it. If you want aesthetic brown cat eye nails that turn heads in photos, this one does it.
Start with a thin underlay of a brown-leaning aurora gel (or a green-flash iridescent base) and cure. Apply brown magnetic cat-eye gel on top and magnet it so the stripe centers. Cure fully and seal with top coat for a glassy surface.
Editor's noteCheck the nails under a strong overhead light before you finish - that's where the green flash shows best.
Watch outDon't use a full green base - it shifts the set away from brown.