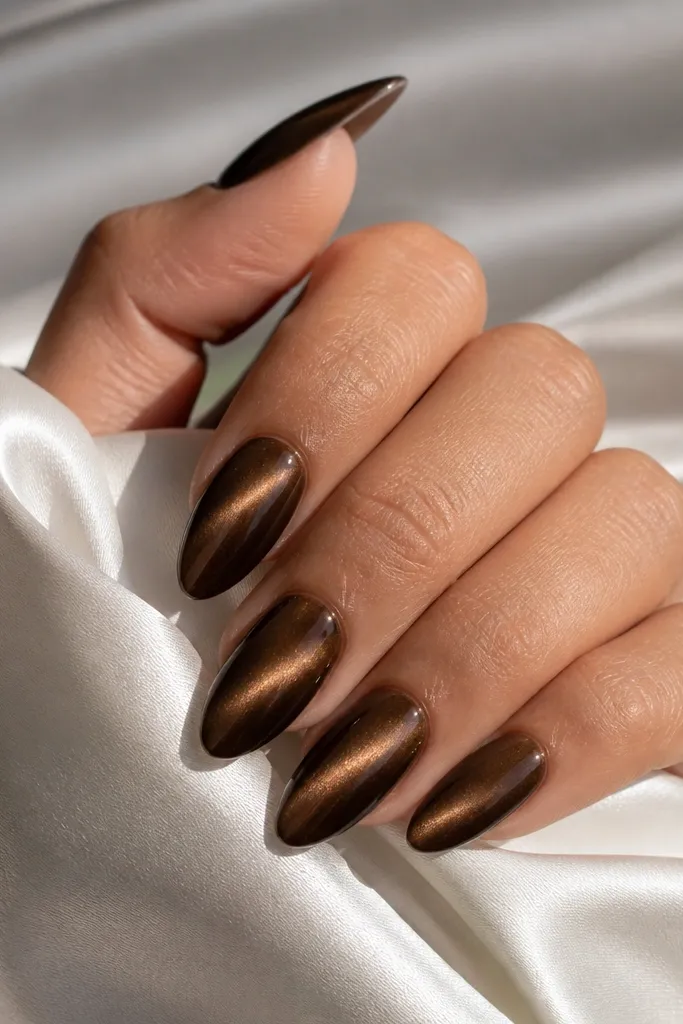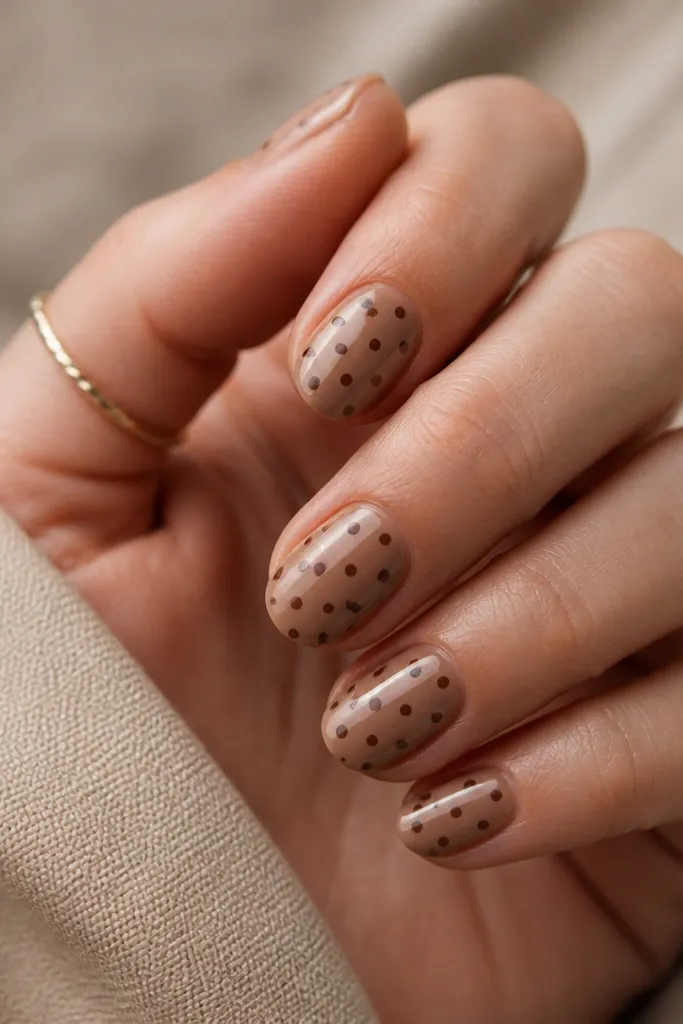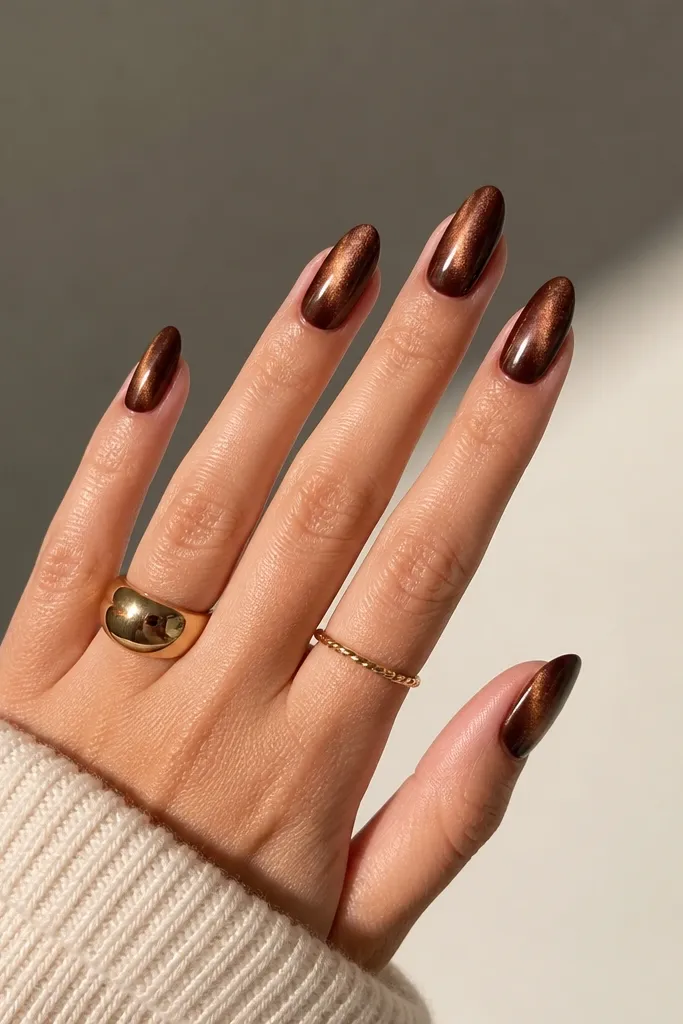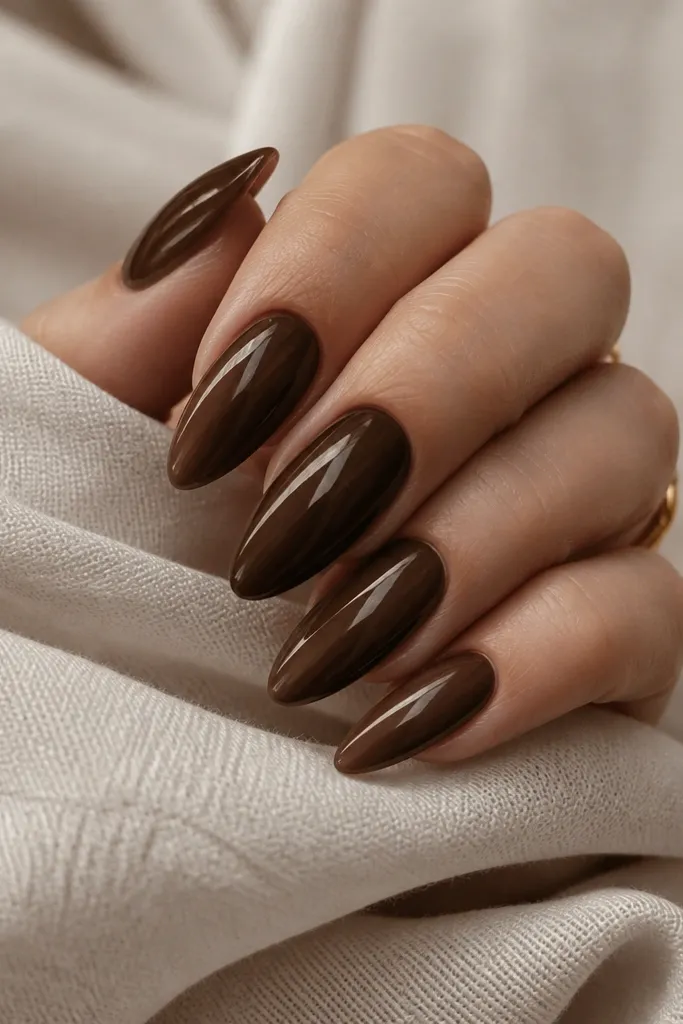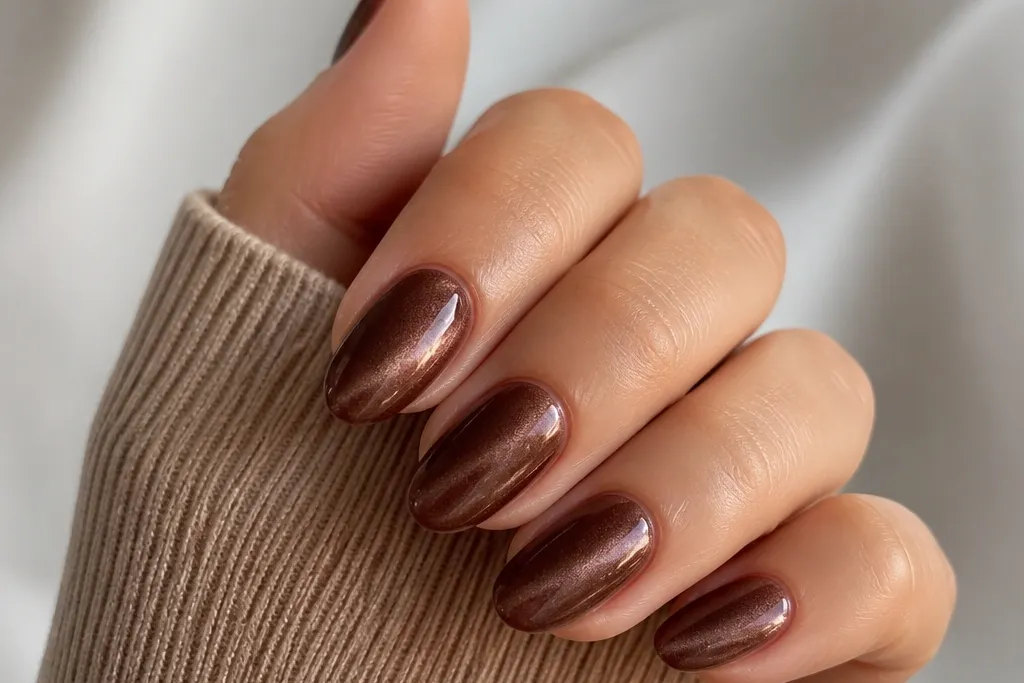
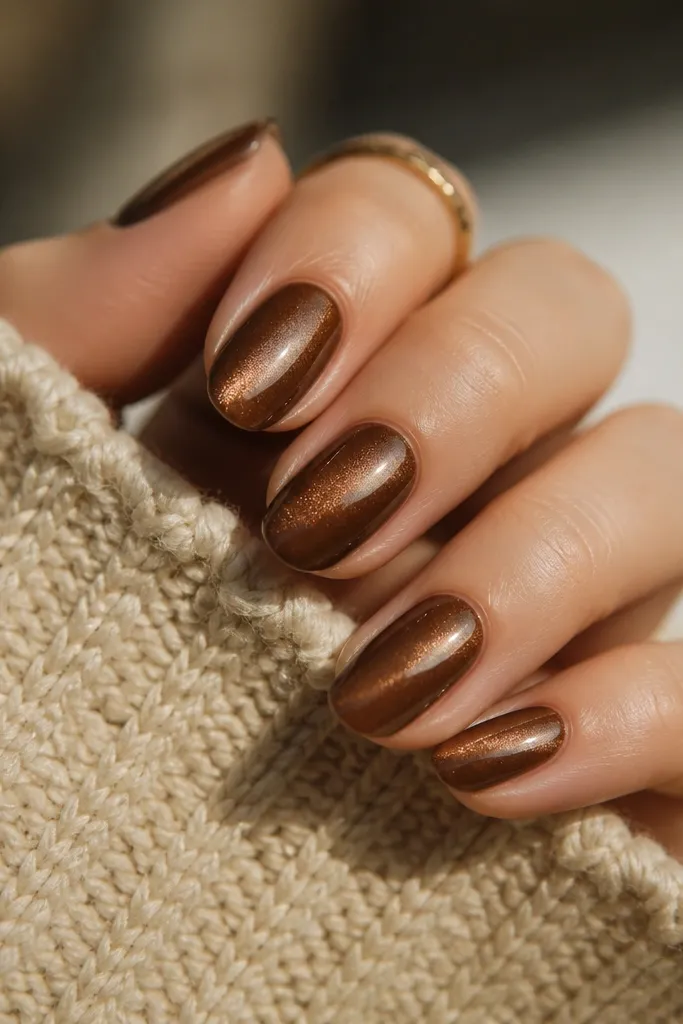
1. Espresso Cat Eye with One Gold Micro-Stripe
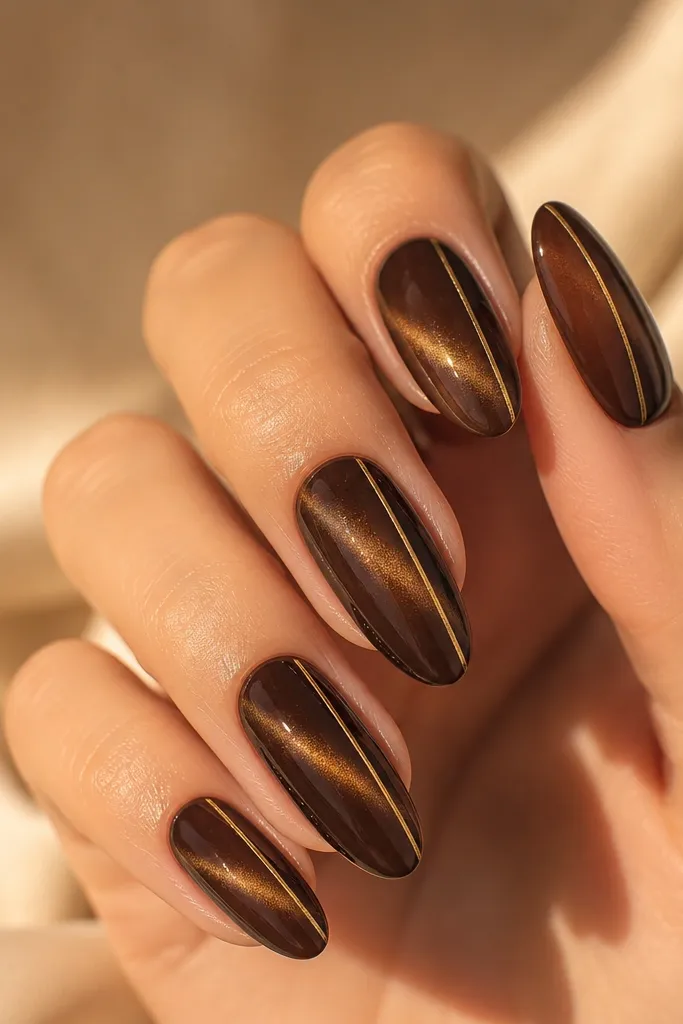
This design is the easiest way to look "styled" while keeping the cat eye as the star. Espresso brown gives a near-black depth, and the gold micro-line catches light exactly where the cat eye already brightens. The result looks intentional, not random, because the gold stripe follows the same center placement.
Do the cat eye first: apply a thin espresso magnetic brown, magnet it vertically, and cure. For the gold, use a fine striping brush or gold gel liner and draw one straight line centered on the ring finger only. Keep the line about 1/6 the width of the nail so it doesn't overpower the shimmer.
Editor's noteIf your gold line looks thick, do two light passes instead of one heavy stroke.
Watch outSkip thick striping gel - it smears the cat eye stripe and makes the finish look bumpy.
2. Caramel Cat Eye Half-Moon Cuticle Glow
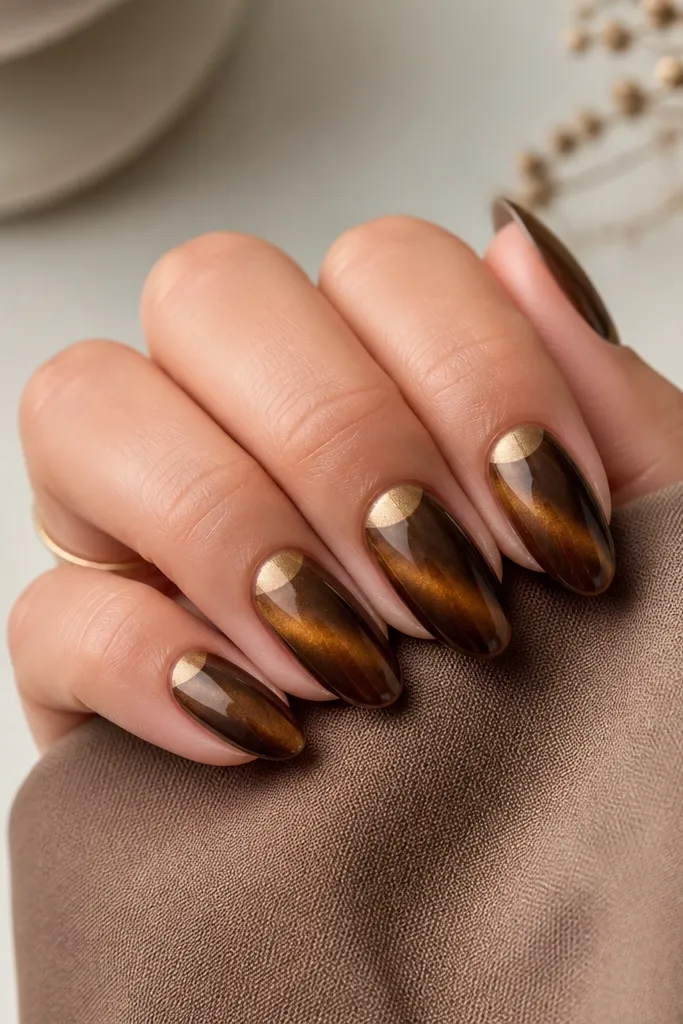
A half-moon at the cuticle makes the cat eye feel like a glow from underneath. Caramel brown is warm and flattering, and it blends nicely from lighter gold near the cuticle into deeper brown toward the tip. This reads luxurious even with minimal extra work.
Magnet the caramel cat eye diagonally (top-left to bottom-right) for each nail. After curing the magnetic layer, sponge a thin amount of lighter caramel-gold gel right at the cuticle, keeping it rounded like a crescent. Cure again, then top coat.
Editor's noteUse a makeup sponge cut into a small wedge so you can dab the half-moon without getting polish on the sidewalls.
Watch outDon't paint the half-moon too far down the nail - it turns into a band and hides the cat eye.
3. Chocolate Cat Eye with Thin Reverse French Tips
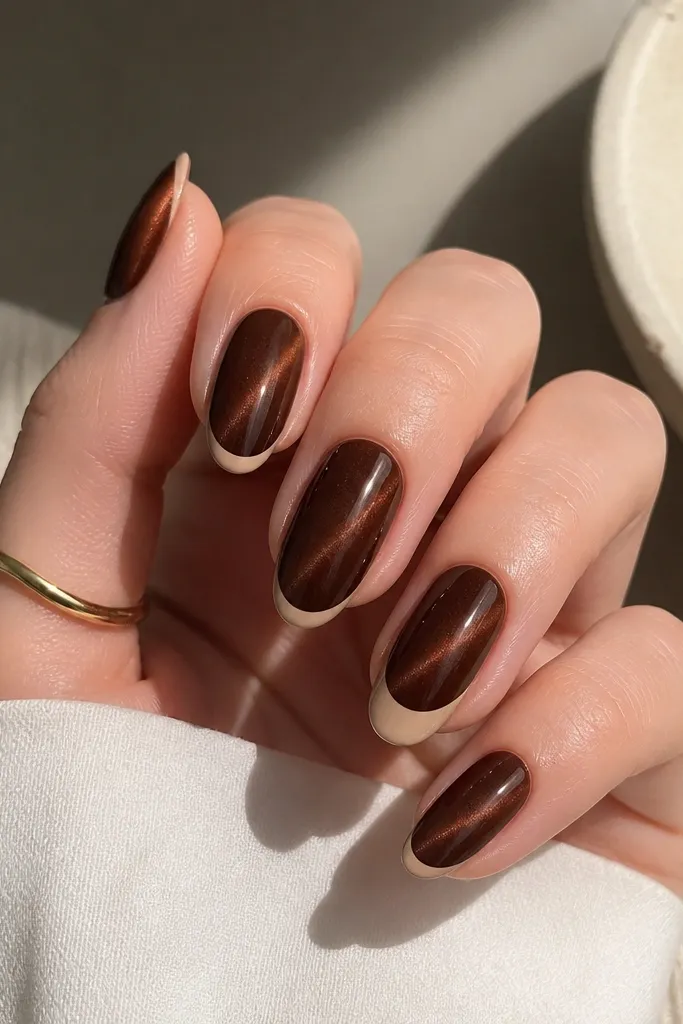
Reverse French tips make the manicure look crisp and clean, and they frame the cat eye line instead of covering it. Chocolate brown provides strong contrast against a warm nude-beige edge, so the shimmer still looks bright. This design is great when you want cat eye but you also want structure.
Magnet your chocolate cat eye diagonally, then cure. On each nail, paint a thin nude-beige arc starting at both side walls and meeting in the center near the tip. Keep the arc narrow, about 1-2 mm from the edge line, then top coat.
Editor's noteUse nail tape as a guide: stick it at the tip angle, paint the arc, cure, then pull the tape before top coat.
Watch outDon't cover the entire tip with nude - the reverse arc should look like a frame, not a full replacement color.
4. Warm Taupe Cat Eye with Tiny Nude Dot Cluster
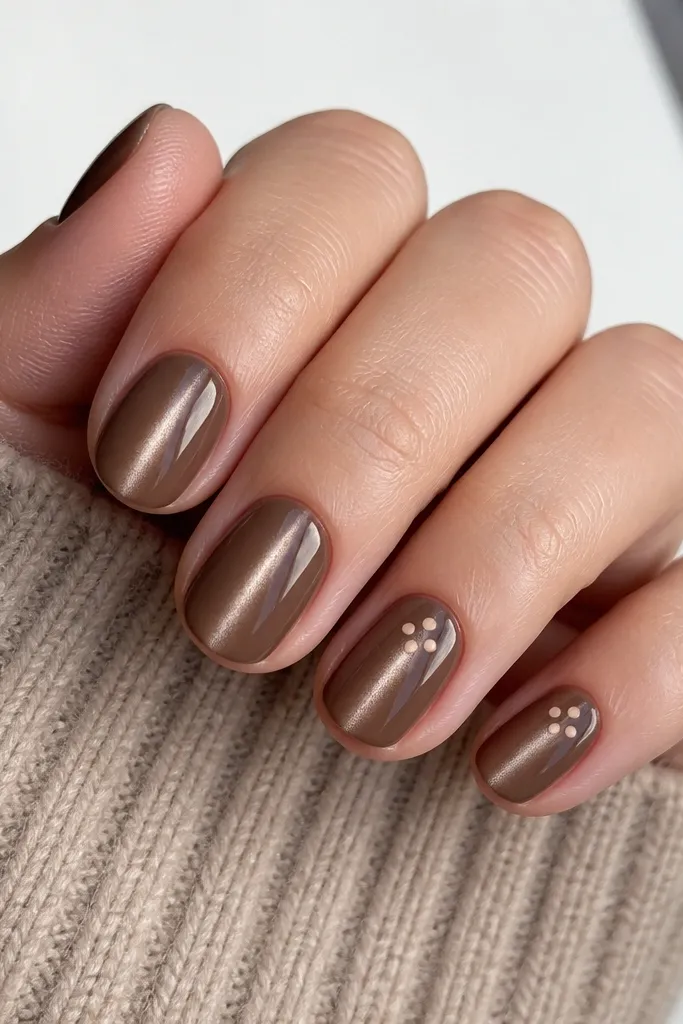
Tiny dots add movement without pulling focus from the magnetic line. Warm taupe still gives the cat eye glow, and nude dots blend into skin tones so they look delicate. Placing the dots in the upper third keeps the design balanced and avoids a cluttered look near the cuticle.
Magnet the warm taupe vertically for a straight stripe. After curing, use a dotting tool with nude gel to place three dots: two near the sides and one centered slightly lower. Cure the dots, then add a glossy top coat to lock them in.
Editor's noteIf your dots spread, use thicker gel and cure each dot layer for 30 seconds before adding more.
Watch outSkip large dots - they turn into blobs and hide the cat eye's sharp center line.
5. Terracotta Brown Cat Eye with Burnished Copper Outline
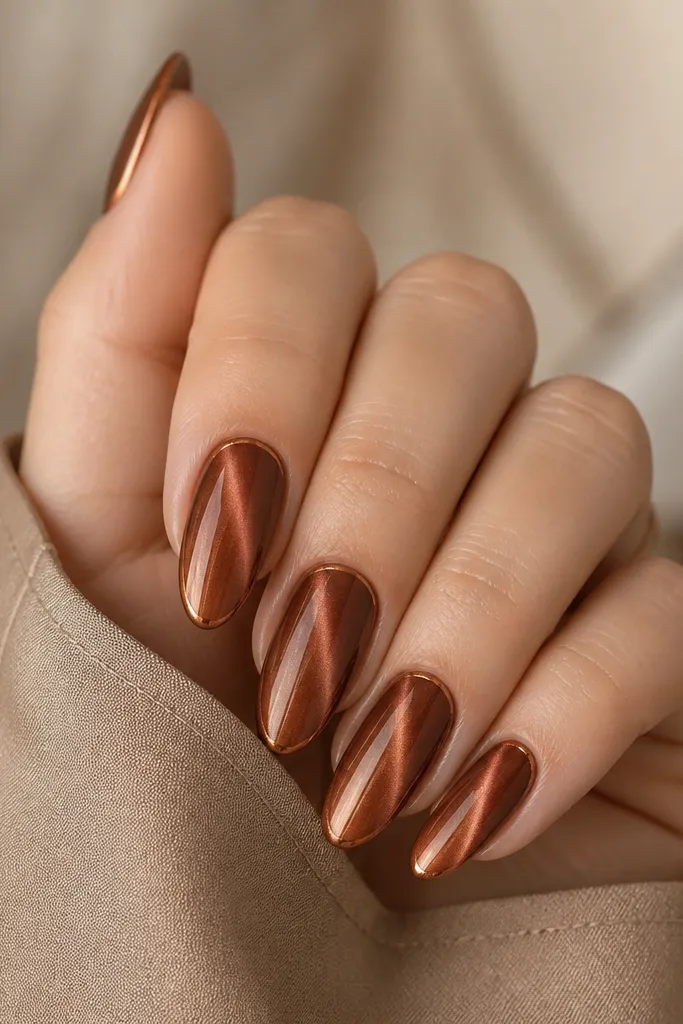
Terracotta brown has a reddish warmth that makes copper accents look like real metal. The copper outline gives a "jewelry frame" effect, which makes the cat eye look sharper. This design looks amazing in fall light because it catches warm tones instead of going flat.
Magnet your terracotta brown on a diagonal and cure. Use a fine liner brush with copper metallic gel to trace a thin border along the outer edge - not the whole perimeter, just the sidewalls and the tip curve. Cure, then top coat.
Editor's noteKeep the outline to about half the nail's perimeter so it stays airy, not heavy.
Watch outDon't outline too close to the cuticle - copper near the skin can flood and look messy.
6. Mocha Cat Eye with Negative Space Side V
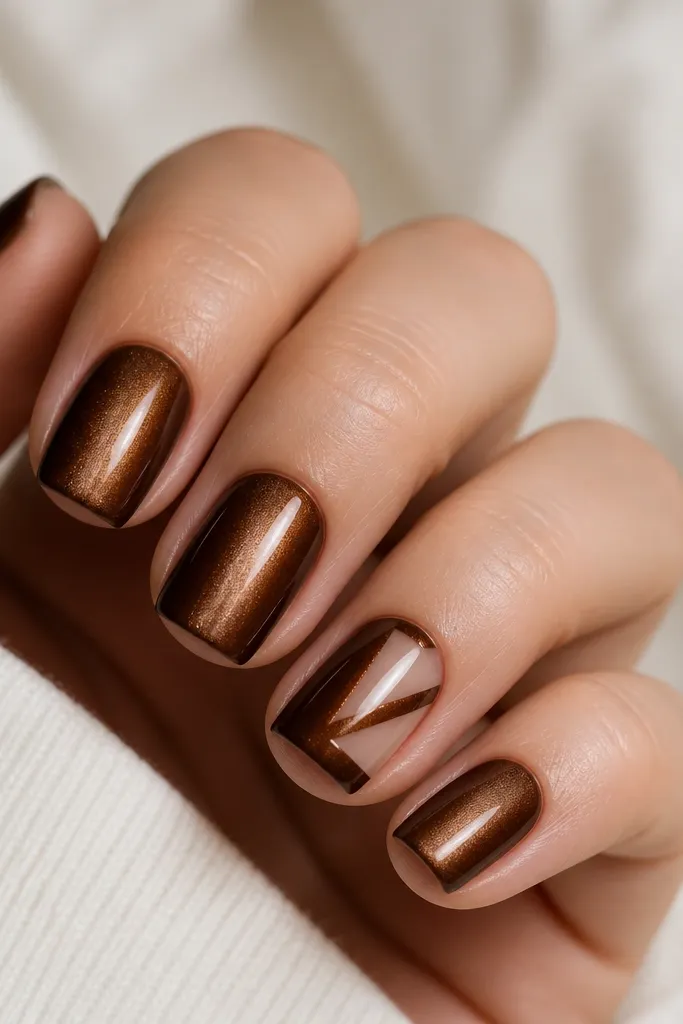
Negative space V shapes make the manicure look modern and slimming. The cat eye stripe stays centered, so the V reads as a design frame rather than a distraction. Mocha brown is forgiving and hides minor edge imperfections.
Magnet mocha cat eye vertically and cure. For the V, use a thin brush to paint brown gel on one side only, leaving a clean gap in the shape of a V. Cure, then clean up edges with a brush dipped in alcohol before top coat.
Editor's noteUse a striping tape cut into a V to get sharp lines on your first try.
Watch outAvoid covering the negative space gap with thick gel - it kills the crisp shape.
7. Brown Cat Eye Ombré Fade into Nude Base
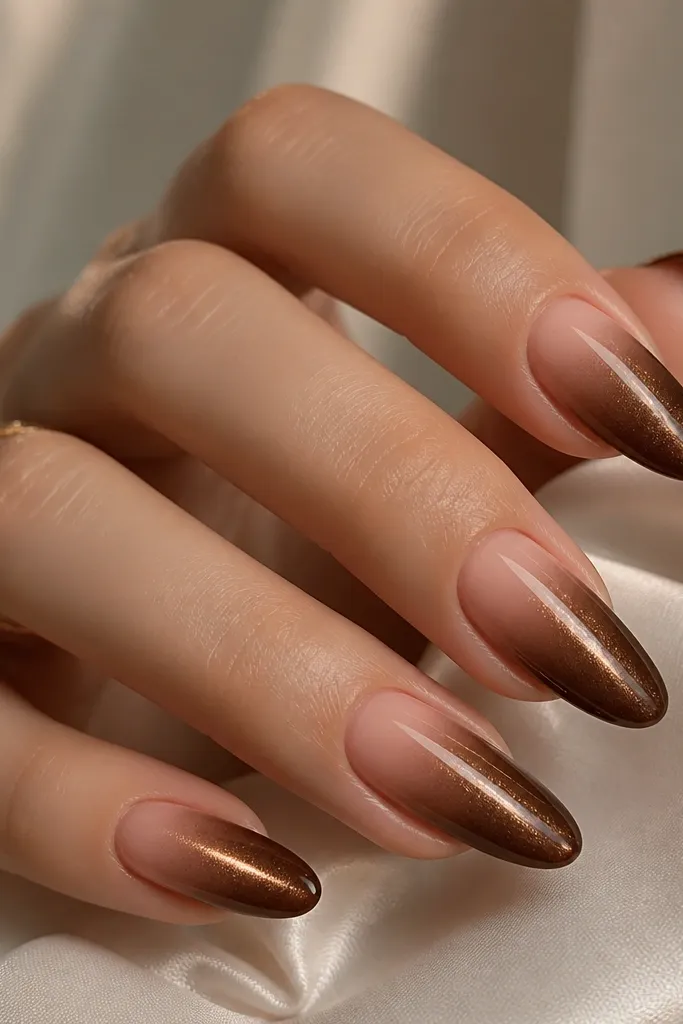
This looks like a gradient jewelry piece. Nude at the cuticle keeps it wearable, while the cat eye shimmer in the tip area gives depth where fingers catch light. The ombré also makes the manicure forgiving for regrowth.
Start with a nude gel base and cure. Sponge or brush a thin layer of brown cat eye magnetic polish on the lower half only, then magnet it vertically before curing. Blend the edge between nude and brown with a soft brush so there's no hard line.
Editor's noteMagnet only the brown area - if you magnet over nude, the stripe can look dusty.
Watch outSkip a harsh sponge edge - it makes the fade look like a sticker line.
8. Chai Latte Cat Eye with Matte Top Coat and Glossy Accent Line
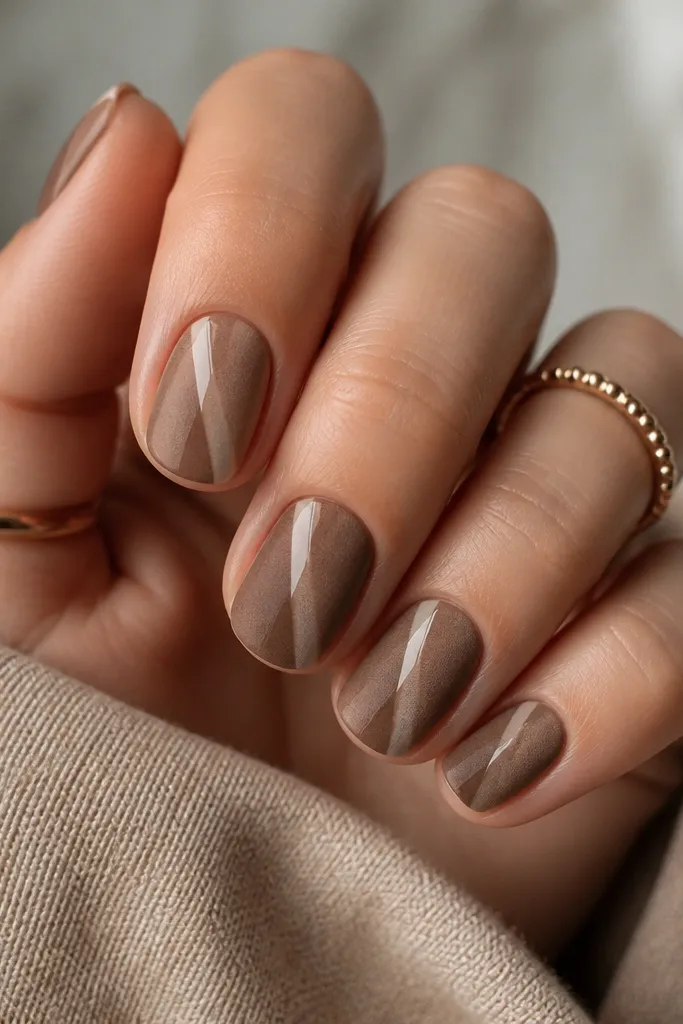
Matte top coat changes brown cat eye from glossy "wet" to soft "velvet." The contrast line brings the shimmer back to center so the cat eye still feels bright. This is the design I reach for when I want cat eye but I don't want high shine on every finger.
Magnet chai latte brown diagonally, cure, then apply matte top coat to all nails. Use glossy gel liner to draw one center line on each nail, cure, then leave the rest matte. Keep the glossy line narrow and straight.
Editor's noteSeal the glossy line with a thin glossy top coat only on top of the line, not the whole nail.
Watch outDon't mix matte and glossy too thick - thick glossy gel can create ridges under light.
9. Dark Brown Cat Eye with Gold Foil Flecks on the Ring Finger
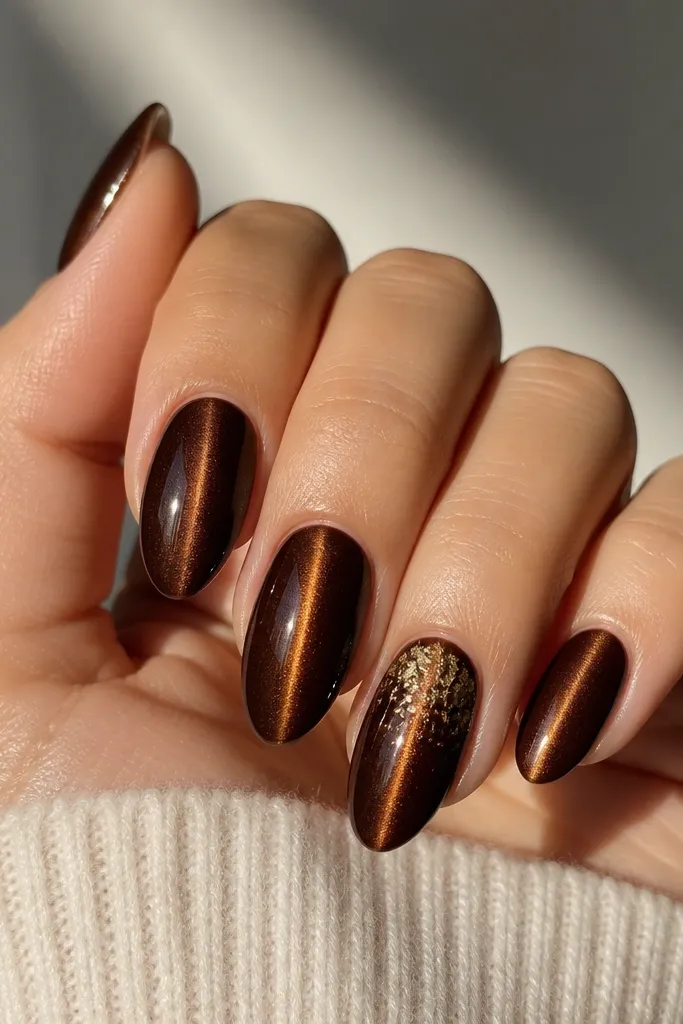
Foil flecks add sparkle without needing paint details. Dark brown makes gold foil look crisp instead of yellow-green. The upper third placement keeps it classy and stops the foil from looking like a late-night glitter disaster.
Magnet dark brown vertically and cure. On the ring finger, apply a small amount of foil gel (or tacky layer from your process) only to the upper third, then press gold foil pieces lightly. Cure and top coat carefully so the foil stays flat.
Editor's noteUse smaller foil pieces than you think - tiny shards look more intentional on brown.
Watch outSkip heavy foil coverage - it turns the cat eye into a background texture.
10. Caramel Cat Eye with Micro Rhinestone Bow on One Nail
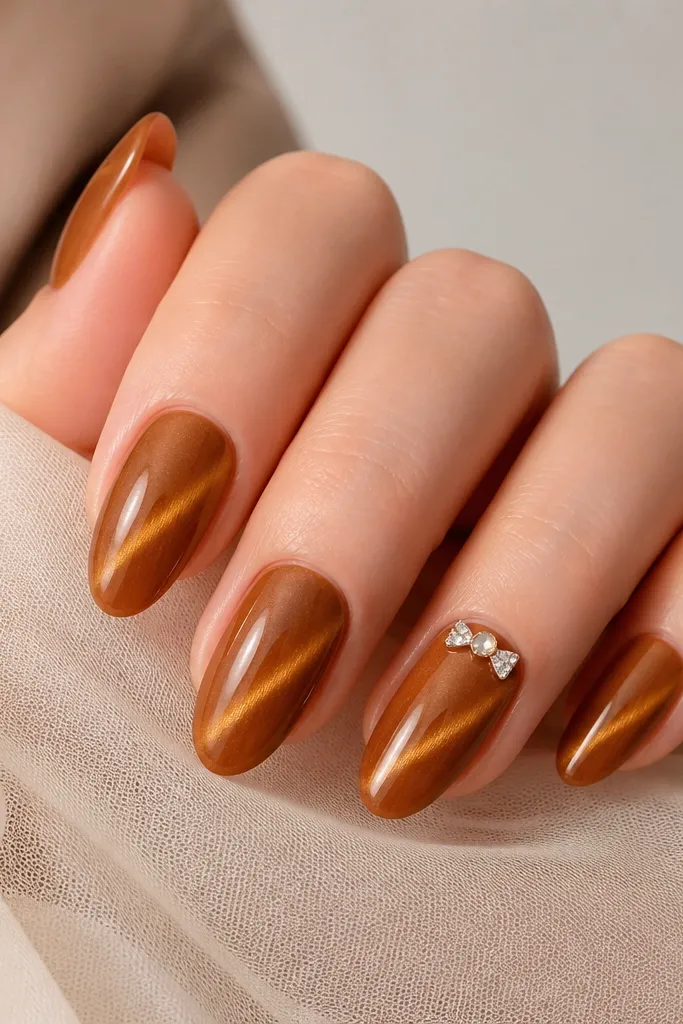
A micro bow gives the cat eye a sweet, wearable focal point. Caramel brown is warm enough that rhinestones don't look icy; they look like little gold highlights. This is a good "special occasion" design that still feels beginner-friendly because the bow is tiny.
Magnet caramel cat eye diagonally on all nails and cure. Place gel adhesive on the ring finger where the bow will sit and set three rhinestones: two for the loops and one for the center. Cure, then top coat with a thin layer so stones don't pop up.
Editor's noteUse a toothpick to nudge rhinestones into place before curing.
Watch outDon't place stones too low - they will catch on sleeves and snag polish.
11. Espresso Cat Eye with Double Magnet X Cross Line
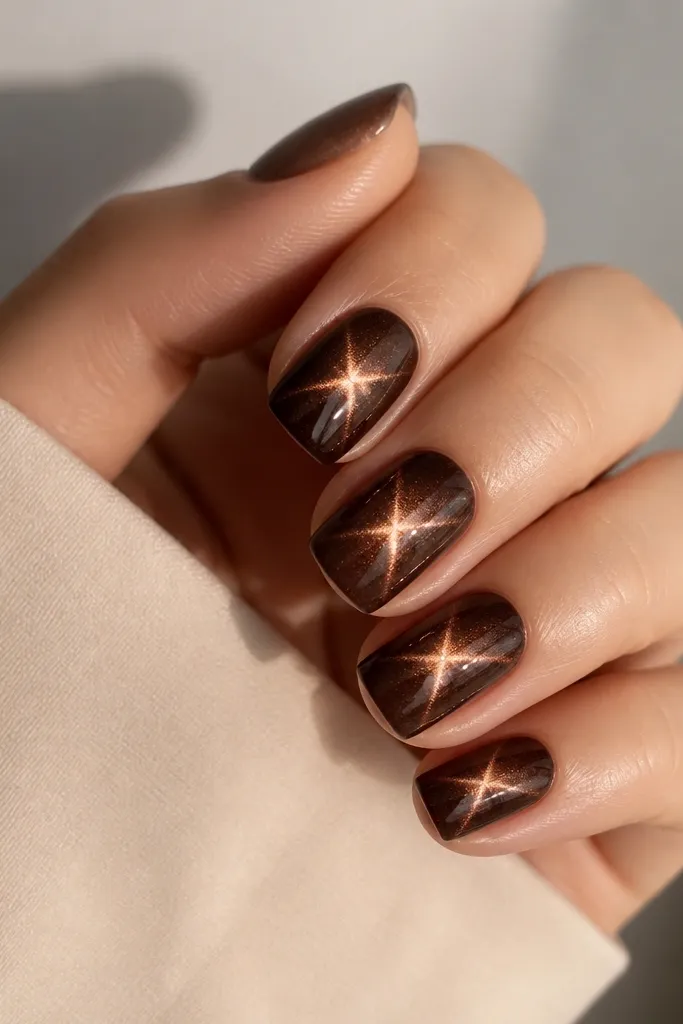
The X-cross effect is what makes cat eye look like a design, not just a shimmer. Espresso brown makes the cross line look sharp because the base is dark. You get a bright "knot" in the middle where the two magnet pulls meet.
Apply a thin espresso magnetic layer and cure-ready. Magnet once vertically to get the center line, then without wiping, magnet again from a diagonal direction to create the crossing. Hold 10-15 seconds each pull, then cure. Finish with top coat to smooth the surface.
Editor's notePractice on one nail first so you learn the magnet angle that gives you a clean X.
Watch outAvoid thick polish - extra pigment makes the cross blur into a gray smear.
12. Chestnut Cat Eye with One Side Silver Liner
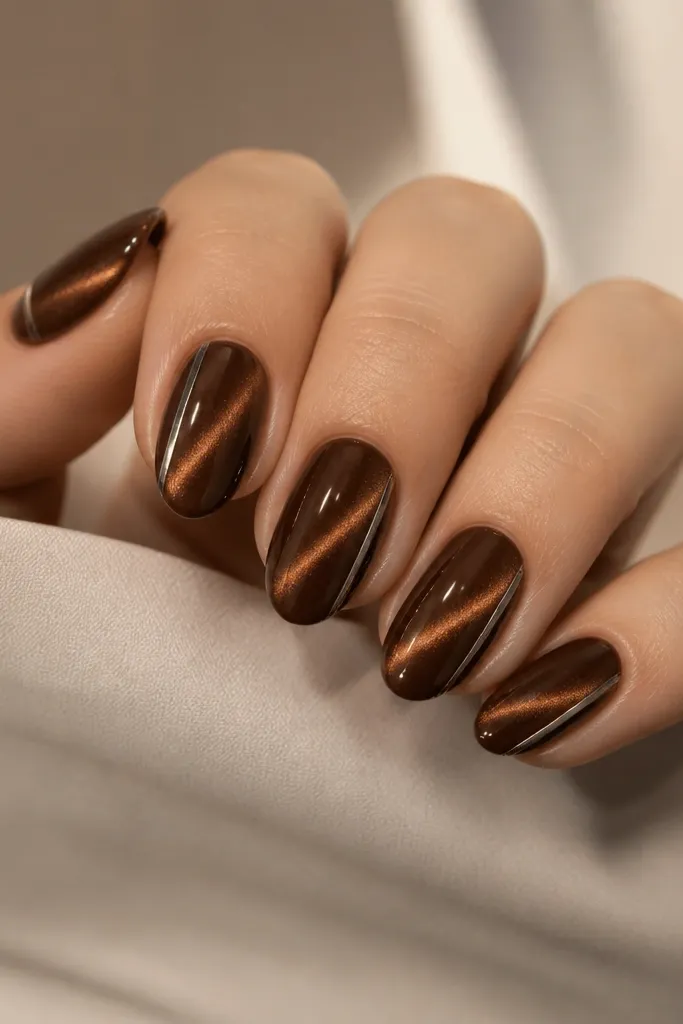
Silver liner plus brown cat eye gives that "cool jewelry" contrast. The sidewall placement makes the nail look longer and keeps the shimmer line visible. It's also easy to correct because you can repaint the liner without disturbing the magnetic base.
Magnet chestnut brown on a diagonal and cure. Use silver gel liner and draw a thin line along one sidewall - keep it parallel to the cat eye's diagonal angle. Cure and top coat.
Editor's noteIf your liner shakes, rest your hand on a table and use short brush strokes.
Watch outSkip drawing both sides - double silver can overpower a brown cat eye stripe.
13. Nutmeg Cat Eye with Tiny Star Dot at the Cat Eye Peak
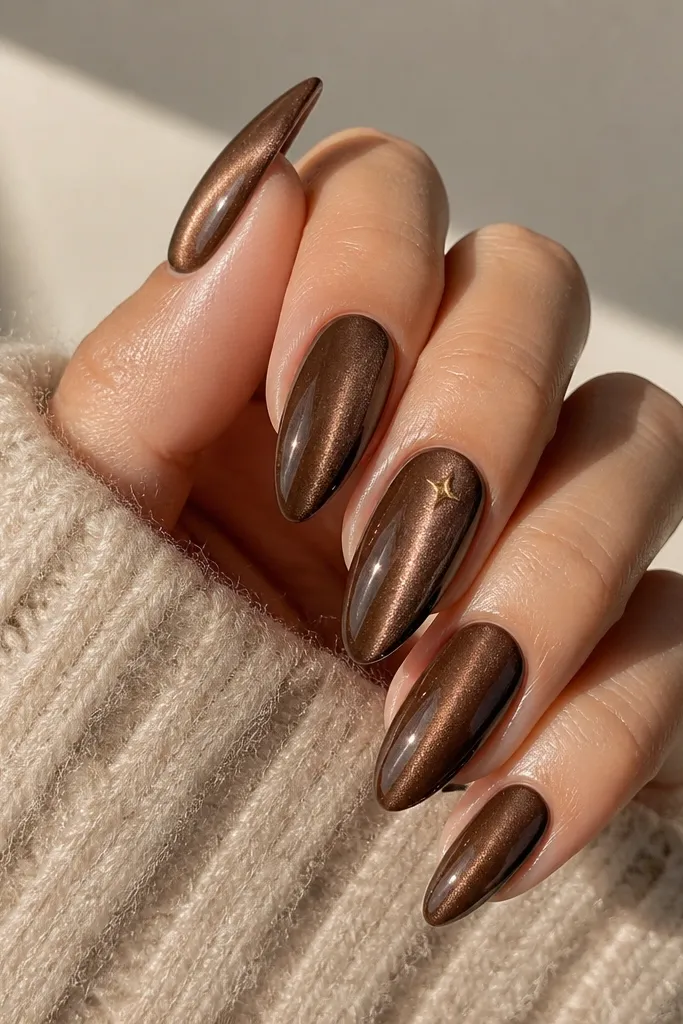
Placing a single tiny star exactly at the cat eye's brightest peak makes the manicure look like it has a "center point." Nutmeg brown is warm and slightly lighter, so the star doesn't look heavy. This is a great option when you want a bit of fun without adding lots of shapes.
Magnet nutmeg cat eye vertically and cure. With a small star stamp or a star dot tool, add a tiny gold star near the upper third aligned with the center stripe. Cure and top coat.
Editor's noteUse a dotting tool to place the star, then drag the point edges lightly with the tip.
Watch outAvoid big stars - they cover the shimmer highlight and look cartoonish.
14. Brown Cat Eye French with Thin Curved Top Edge
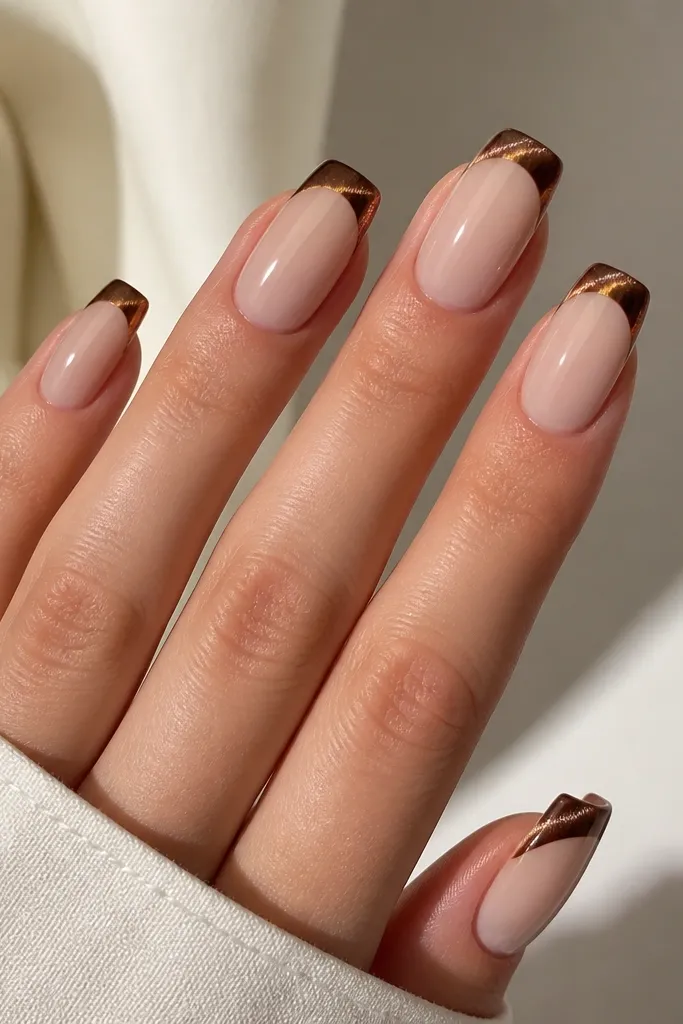
This French-style band looks clean and intentional, especially on longer nails. The sheer nude base lets the cat eye band stand out without making your hands look covered. It also hides small mistakes because the band is only at the tip.
Start with a sheer nude gel base and cure. Apply brown magnetic polish only across the tip band width, about 2-3 mm thick, then magnet it so the stripe runs along the band. Cure and top coat.
Editor's noteUse a French guide strip for the arc so both sides match.
Watch outDon't bring the band too far down - it turns into an ombré and loses the French shape.
15. Cocoa Cat Eye with Milky Brown Marble Vein
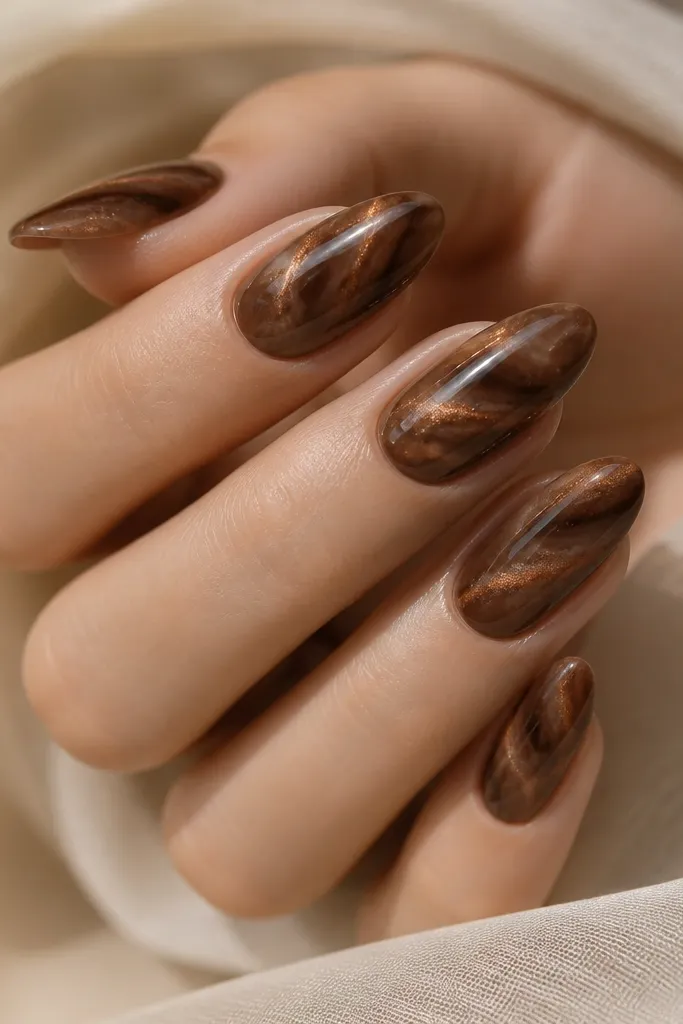
Marble veins add softness around the cat eye, and the milky brown color keeps it from looking harsh. The cat eye remains the brightest element, while the marble gives texture. This design looks expensive because it looks organic instead of stamped.
Magnet cocoa brown diagonally and cure. With a thin brush, paint milky brown gel veins over the cured cat eye, keeping them light and mostly around the sides of the stripe. Add two or three vein lines per nail, then cure and top coat.
Editor's noteUse a gel that's slightly translucent - opaque marble kills the glow.
Watch outAvoid heavy marble coverage - it can turn the cat eye into a background pattern.
16. Espresso Cat Eye with Reverse Glitter Cuticle Arc
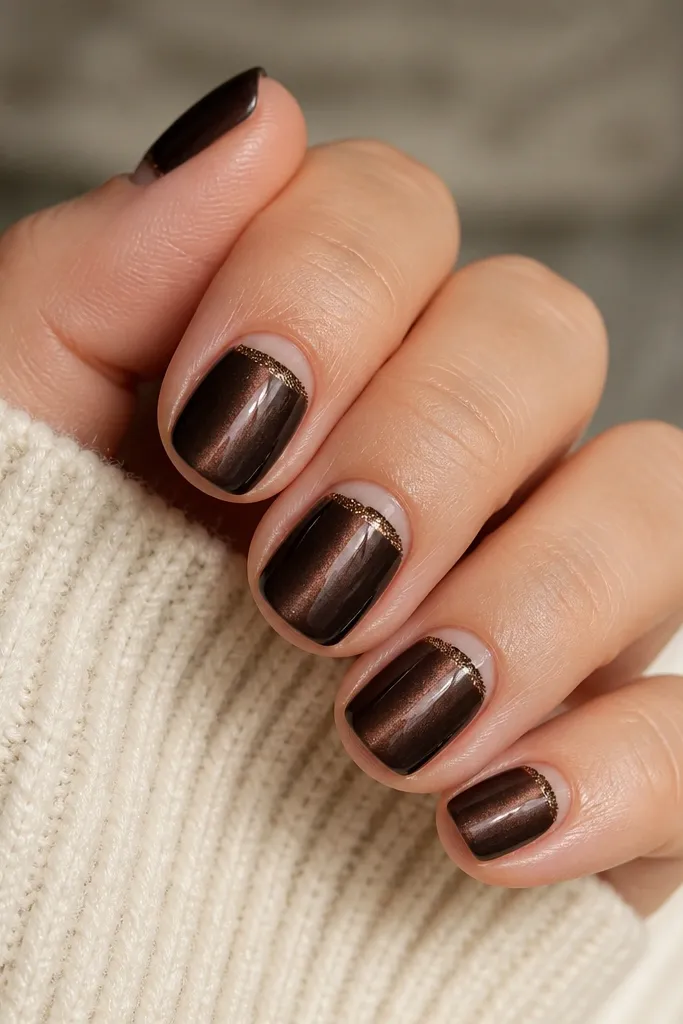
A glitter arc at the cuticle looks like a halo and makes the nails look fuller. Because it sits right where nails naturally catch light, it also makes the cat eye look brighter. Espresso brown is dark enough that the glitter reads defined, not messy.
Magnet espresso cat eye vertically and cure. Apply a thin layer of glitter gel only in an arc near the cuticle, about 1 mm thick, then cure. Leave the center aligned with the stripe so the cat eye remains the focal point.
Editor's noteUse a fine glitter that stays in place - chunky glitter makes the arc uneven.
Watch outDon't flood glitter into the sidewalls - it will lift and snag.
17. Caramel Cat Eye with Chocolate Drip at the Tip
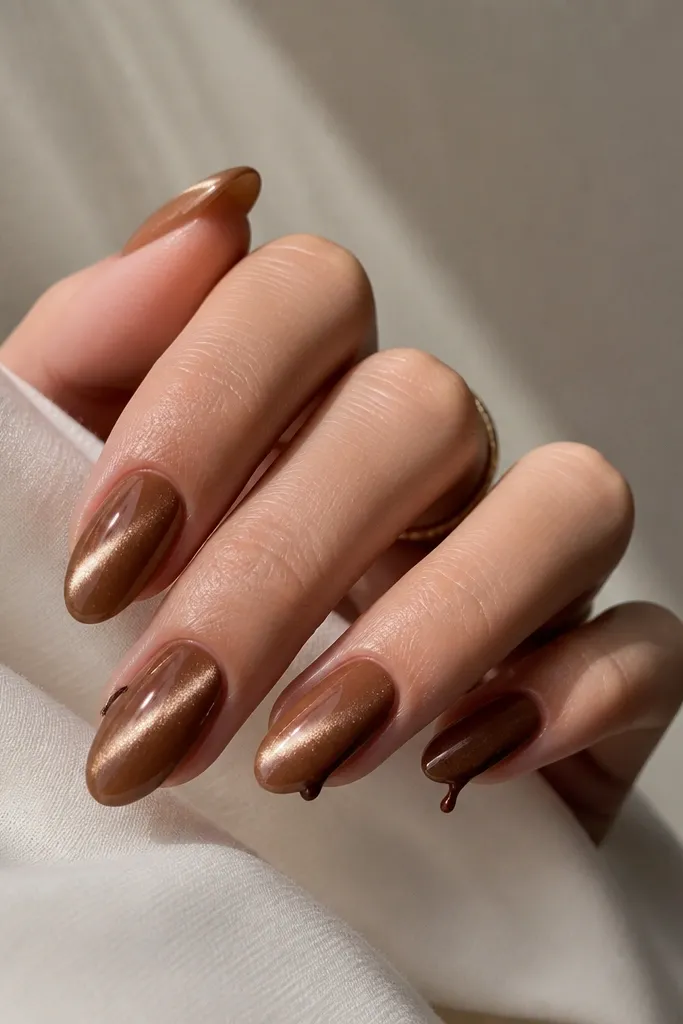
The drip detail adds an edgy twist while still being small enough for everyday wear. Caramel base makes the drip contrast pop, and the cat eye keeps the look dimensional. This works best when the drip is tiny and placed off-center.
Magnet caramel cat eye diagonally on all nails and cure. On the accent nails, use a thick chocolate gel to pull a small line from the tip edge down 1-2 mm, then cure. Keep the drip thicker at the top and thinner at the bottom for a realistic look.
Editor's noteChill your gel slightly in a cool room if it's too runny.
Watch outAvoid big drips - they look like smudges and ruin the cat eye's clean stripe.
18. Mocha Cat Eye with Clear Negative Center Line
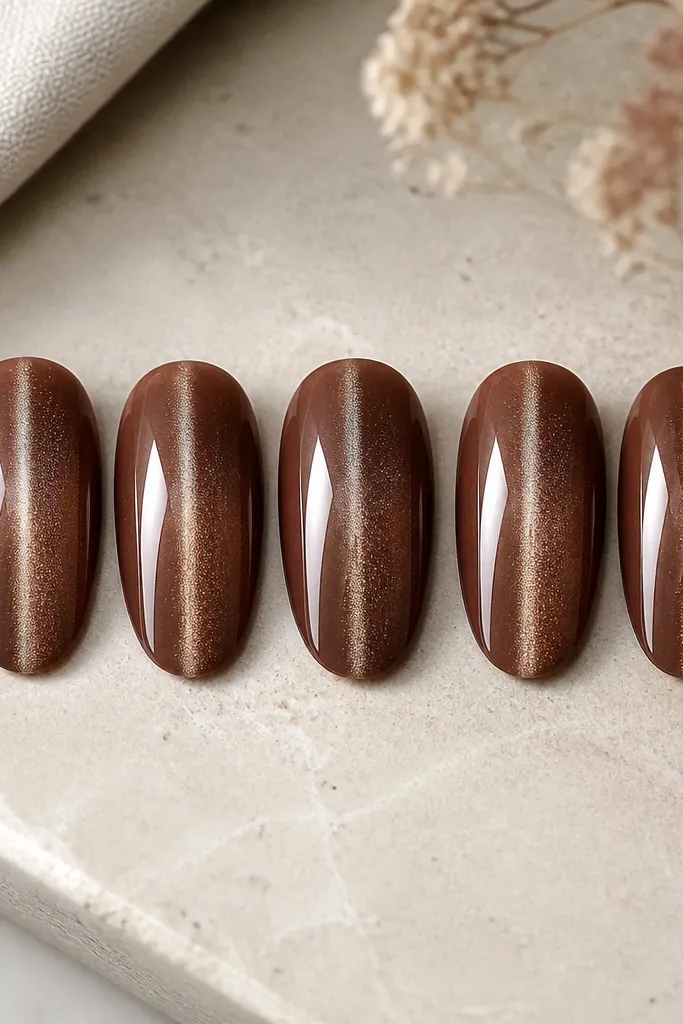
A clear center line makes the manicure look like it has "depth glass" over the shimmer. The cat eye stripe still shows, but the negative line gives a sharp, graphic edge. Mocha brown is dark enough that the clear line stands out without needing extra color.
Magnet mocha cat eye vertically and cure. Use liquid latex or nail barrier over the center stripe before applying the magnetic polish, or after curing, paint a thin clear gel strip down the center and cure. Finish with top coat on everything except the clear strip if you want extra crisp glass effect.
Editor's noteIf you use latex barrier, pull it while the polish is still slightly tacky for cleaner edges.
Watch outAvoid a wide clear strip - it makes the nail look underdone.
19. Chestnut Cat Eye with Matte Base and Glossy Center Stripe
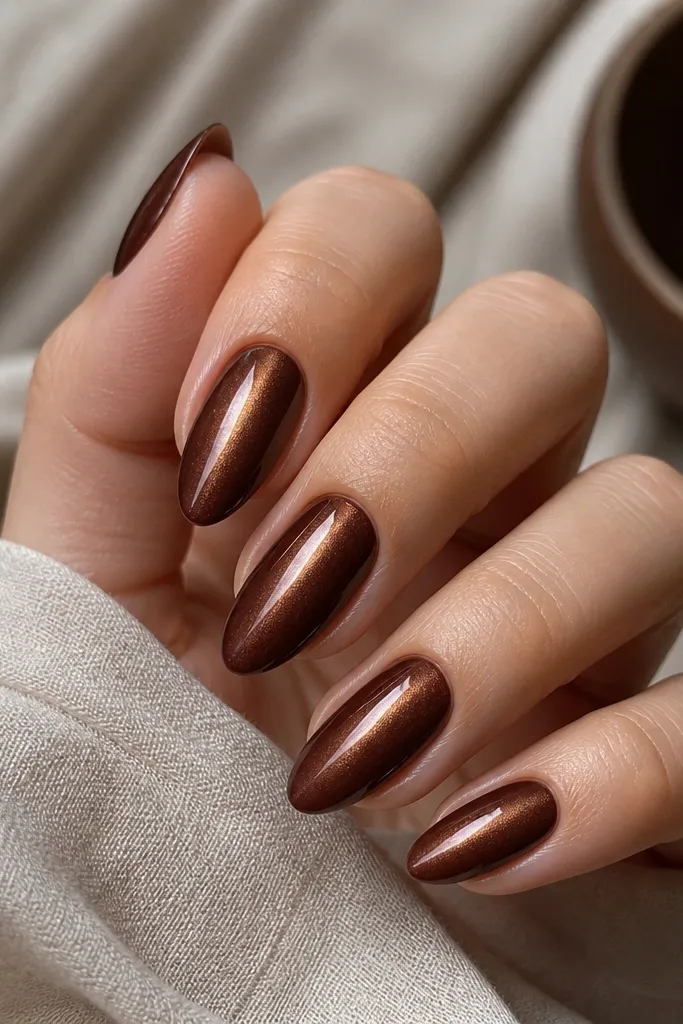
This is the "expensive hoodie" look - soft brown with one bright line. Matte hides minor texture, which is why this works well for beginners. The glossy stripe keeps the cat eye effect strong even under matte lighting.
Magnet chestnut cat eye vertically and cure. Apply matte top coat over the whole nail. Then paint a thin glossy gel stripe in the exact center and cure, leaving the rest matte. Top coat the glossy stripe with glossy top coat only.
Editor's noteUse the cat eye highlight itself as your guide for where the center stripe should go.
Watch outDon't put matte top coat over the stripe area after you paint it glossy - it dulls the contrast.
20. Caramel Cat Eye with Gold Half-Frame at the Tip Sides
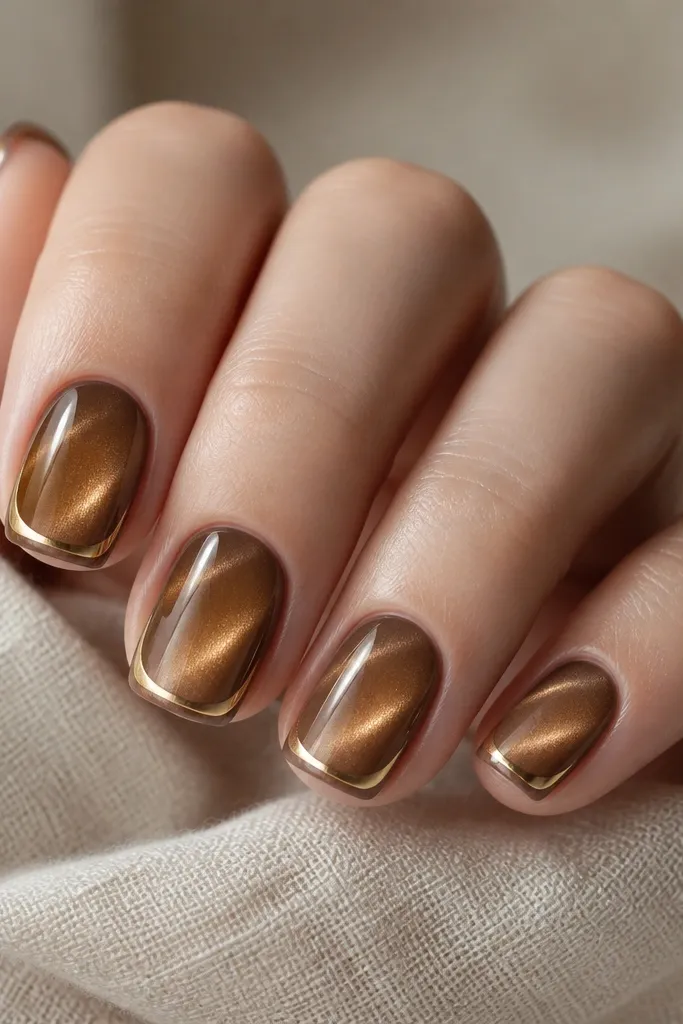
Half-frame accents look like jewelry settings without needing a full border. Caramel cat eye gives a warm glow, and the gold arcs add definition at the ends of the nail. This design is subtle but it photographs really well because it creates little points of shine.
Magnet caramel cat eye diagonally and cure. Paint gold metallic gel arcs only at the tip corners, leaving the center tip area open. The arcs should curve inward slightly and stop before reaching the center stripe.
Editor's noteUse a nail art brush with a pointed tip so the arcs look like tiny parentheses.
Watch outAvoid full gold outlines on all edges - it turns the manicure into a heavy border.
21. Dark Brown Cat Eye with Micro Studs in a Diagonal Line
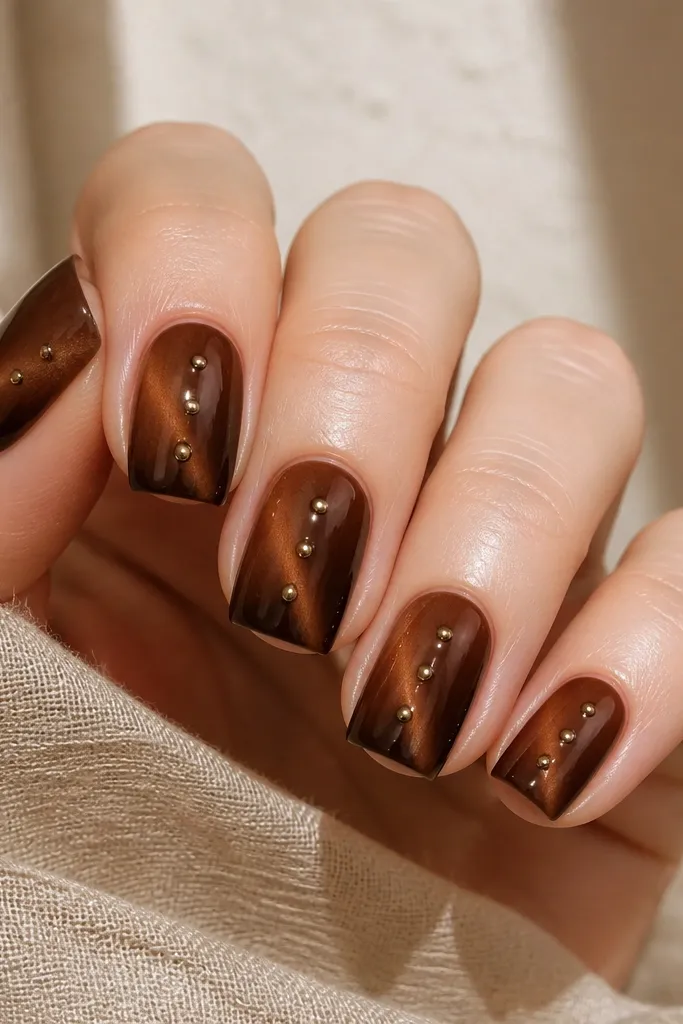
Micro studs add sparkle without covering the shimmer. When you place them right along the cat eye diagonal, the line looks even brighter. Dark brown is strong enough to make the studs look crisp, not dull.
Magnet dark brown cat eye diagonally and cure. Mark three spots along the center diagonal - upper third, middle, and just above the tip. Use gel adhesive, set flat-back studs, cure, then top coat carefully around the studs.
Editor's notePress studs in with a silicone-tipped tool so they sit flush.
Watch outDon't set studs too close to the cuticle - they lift faster.
22. Nutmeg Cat Eye with Nude Lace-Look Curve (No Stamping)
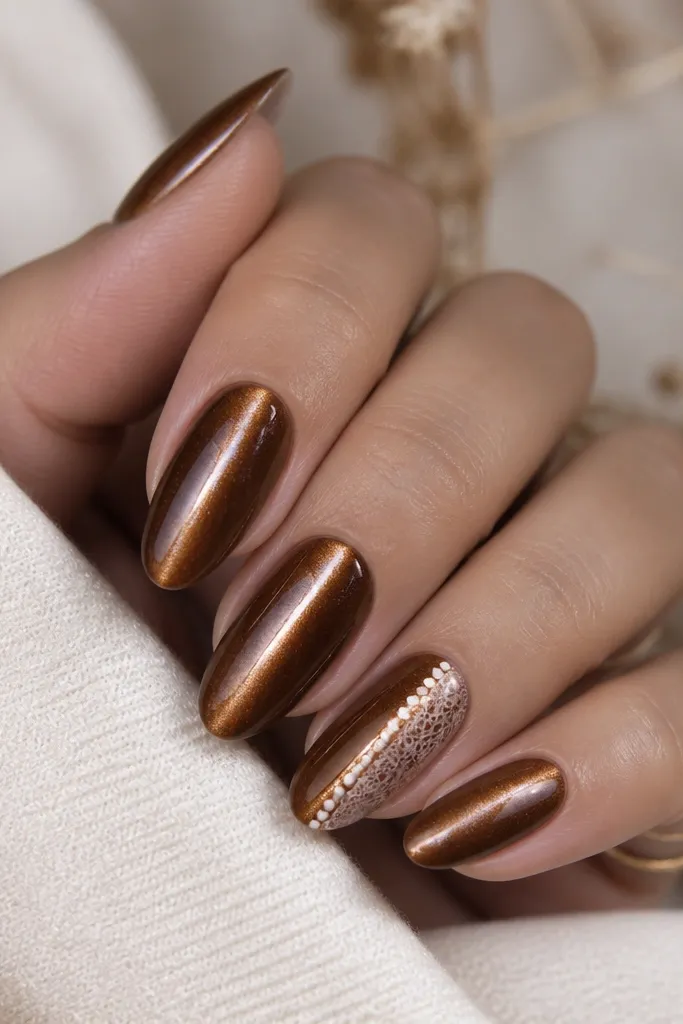
You can fake a lace curve without stamps by using a dot-and-line technique. Nude lace over nutmeg brown looks delicate, and the cat eye stripe keeps everything grounded. This is a good way to add detail when you don't want full nail art coverage.
Magnet nutmeg cat eye vertically and cure. On the accent nail, use a dotting tool to place tiny nude dots in a curved line, then add a few short micro lines between dots with a thin brush. Cure and top coat.
Editor's noteKeep the lace curve thin - aim for about the width of a hair strand.
Watch outAvoid thick lace lines - they look like paint, not lace.
23. Chocolate Cat Eye with Shimmer Gradient from Sidewall
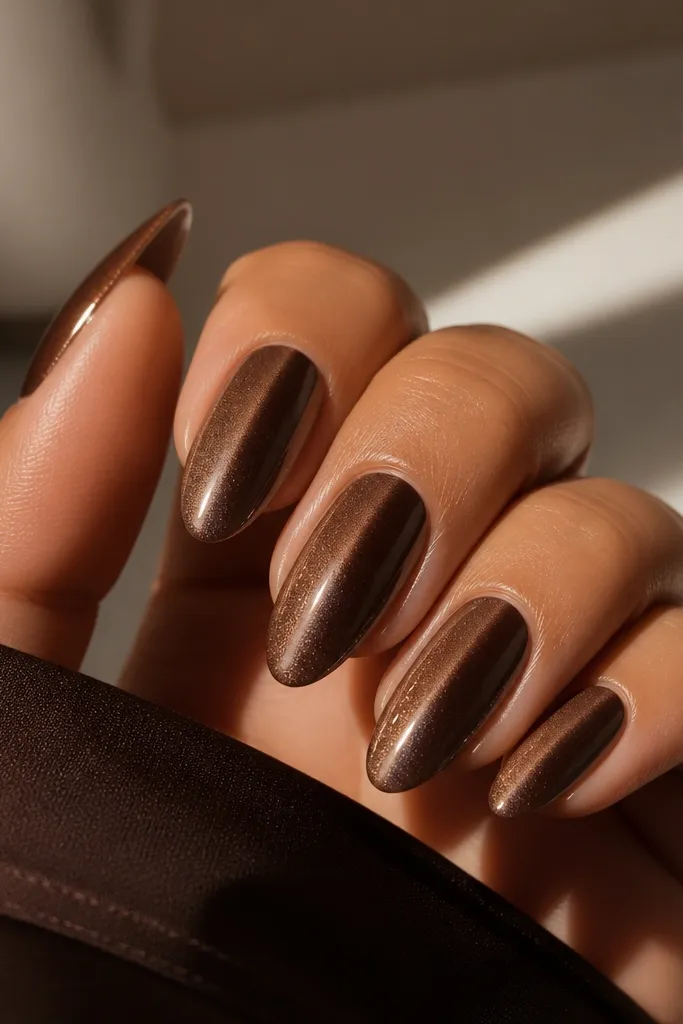
A sidewall gradient makes the cat eye look like it's lit from within. Chocolate brown stays rich, and the lighter shimmer gives a glow without adding a second full color. This design is flattering because it visually narrows the nail.
Magnet chocolate cat eye vertically and cure. Apply a slightly lighter brown shimmer gel or magnetic shade only on the left side from mid-nail to tip, then blend softly toward the center. Magnet lightly again only if your lighter shade is also magnetic - otherwise, just blend and cure.
Editor's noteBlend with a clean sponge or soft brush - stop as soon as it looks even.
Watch outDon't blend into the cat eye stripe too aggressively - you'll blur the brightest line.
24. Caramel Cat Eye with Brown Butterfly Outline (One Nail)
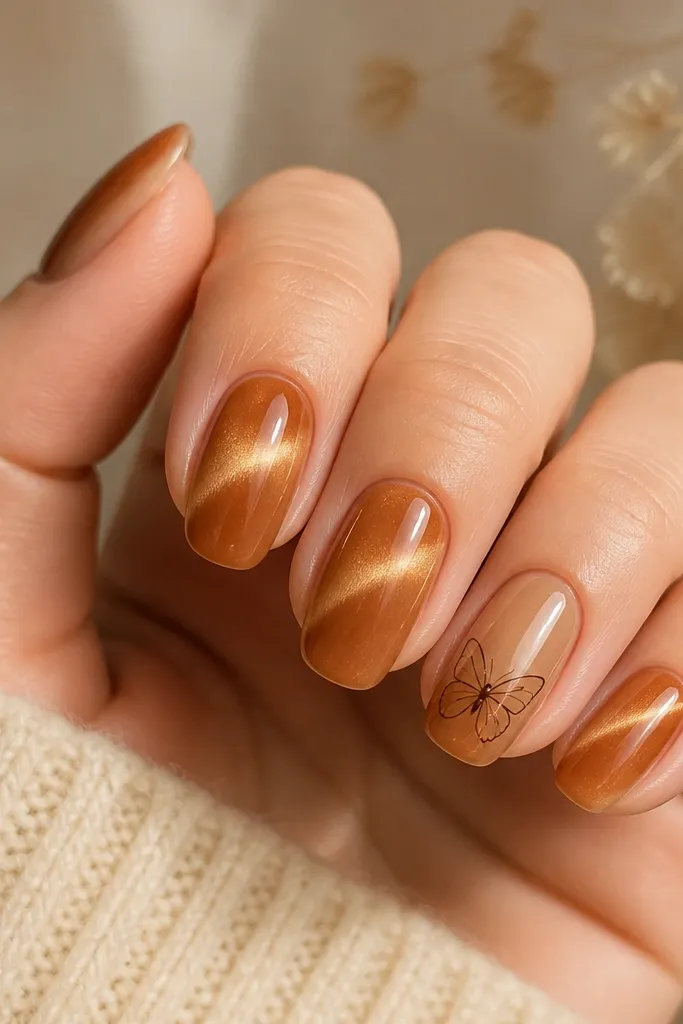
A butterfly outline looks cute and artsy without needing thick filled shapes. Caramel cat eye makes the outline stand out because the base is warm and luminous. Keeping it to one nail keeps it from looking like a craft project.
Magnet caramel cat eye diagonally and cure. On the accent nail, use a fine liner brush to draw a butterfly outline in darker brown gel: two wing arcs, a slim body line, and tiny inner wing marks. Cure and top coat.
Editor's noteUse gel liner pens if your brush shakes - they give steadier lines.
Watch outAvoid filling the butterfly solid - filled shapes cover the cat eye highlight and feel heavy.
25. Espresso Cat Eye with Pearl Teardrop at the Cat Eye Peak
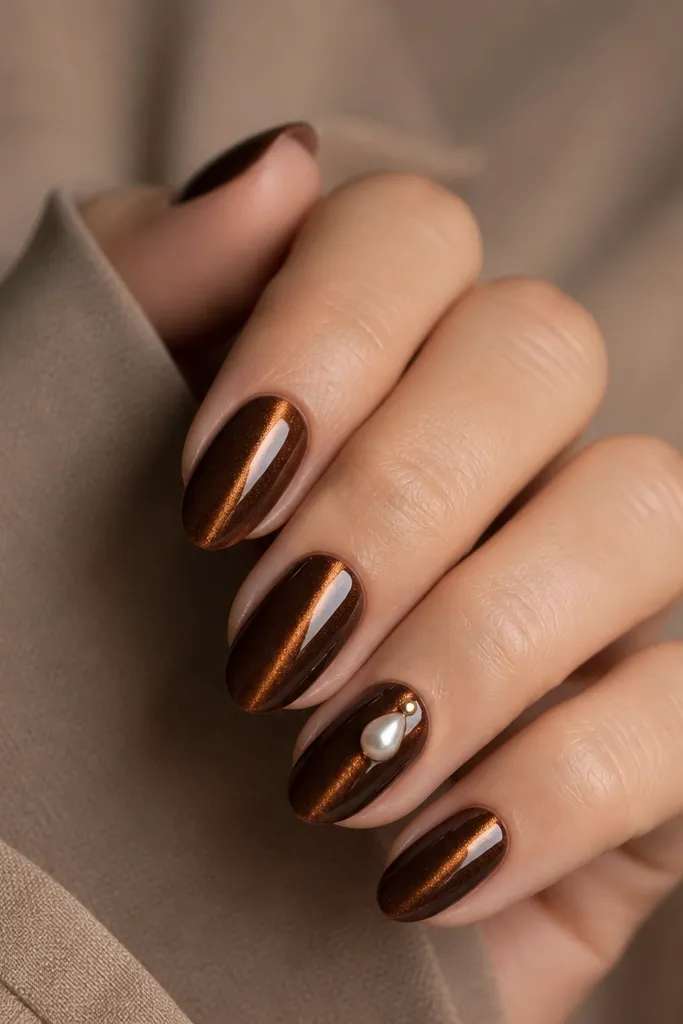
A single teardrop gem makes the cat eye feel like it has a focal pendant. Espresso brown gives a dark backdrop so the pearl detail looks bright and clean. This design reads classy even when you wear simple outfits.
Magnet espresso cat eye vertically and cure. Place gel adhesive at the cat eye peak point on the ring finger and set one teardrop pearl gem. Add a tiny gold dot next to it if you want extra sparkle, then cure and top coat.
Editor's notePlace the gem slightly above center on the nail so it doesn't sink into the shimmer line.
Watch outDon't add multiple gems - three or more makes it look costume-y fast.