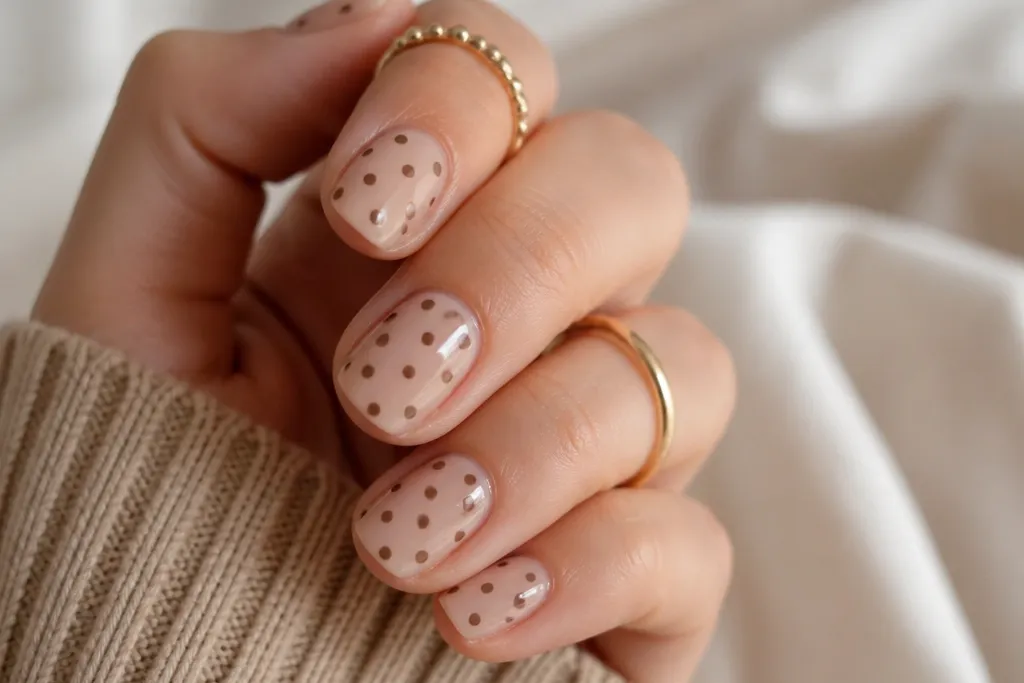
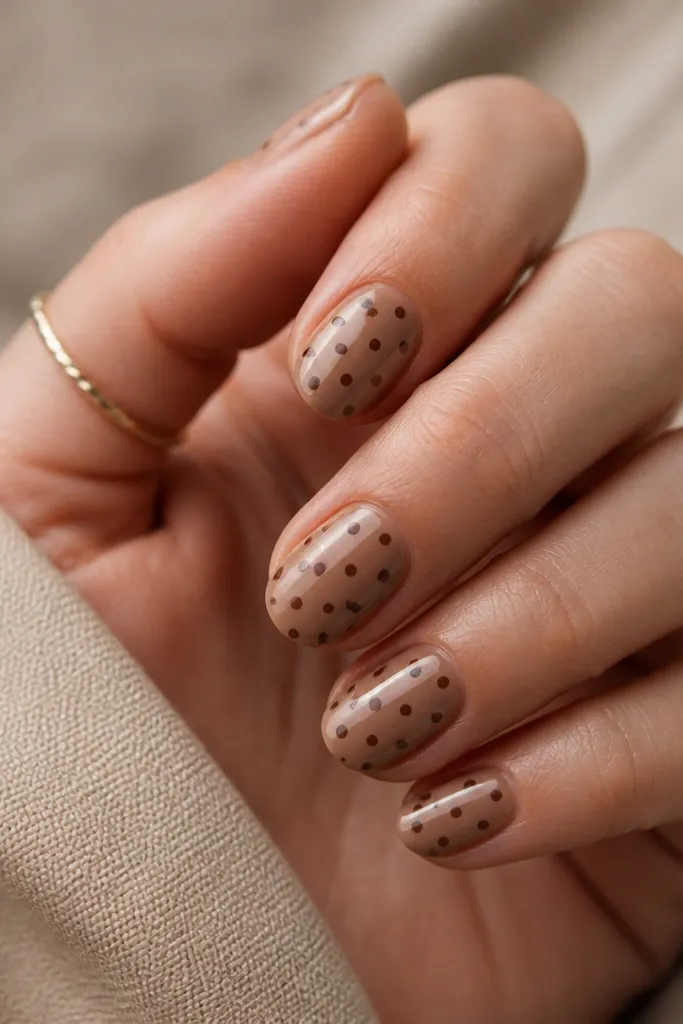
1. Micro Half-French with Chocolate Dot Freckles
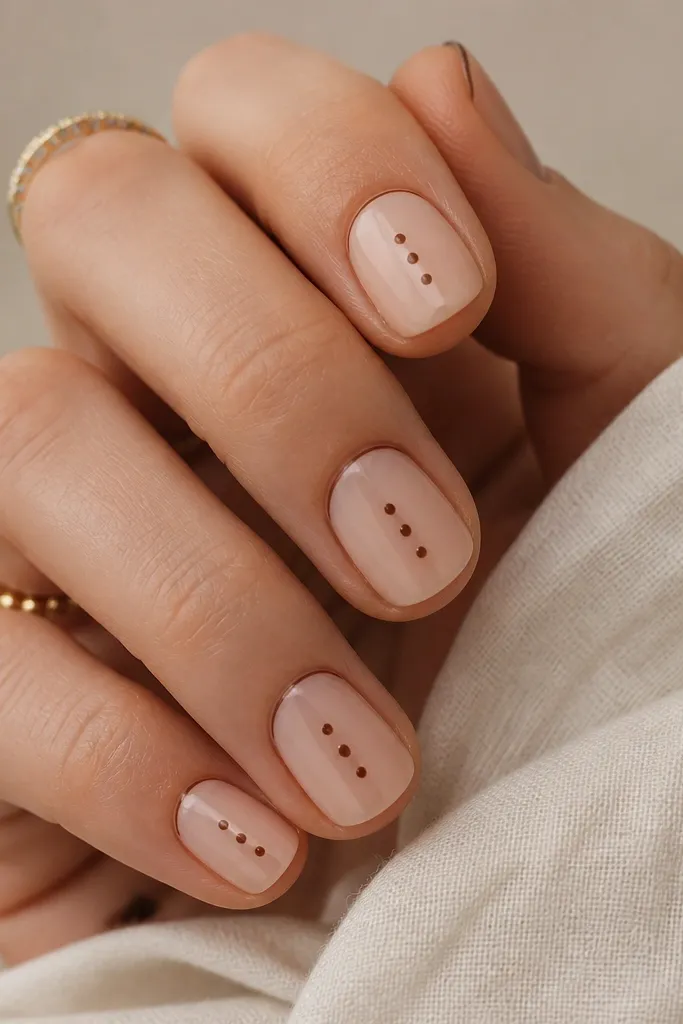
This design keeps the pattern small by using a half-French instead of a full tip, so you get contrast without crowding. The dots are chocolate-brown with a glossy topcoat so they look like painted freckles, not blobs. A centered vertical row makes short nails look longer because your eye tracks straight up. It's also forgiving if your French line isn't perfectly symmetrical.
Start with a sheer nude base, then paint a micro half-French about 1/6 of the nail length. Use a dotting tool to place three dots in a vertical line centered on the nail. Keep dot spacing around 1 mm so the dots stay distinct. Finish with a thick gel topcoat for a glassy surface.
Editor's noteIf your dots want to smear, cure the French line first, then dot after the base is tack-free.
Watch outDon't use large dots - they will overpower a half-French and make the nail look crowded.
2. Nude French with Two Brown Dots at the Smile
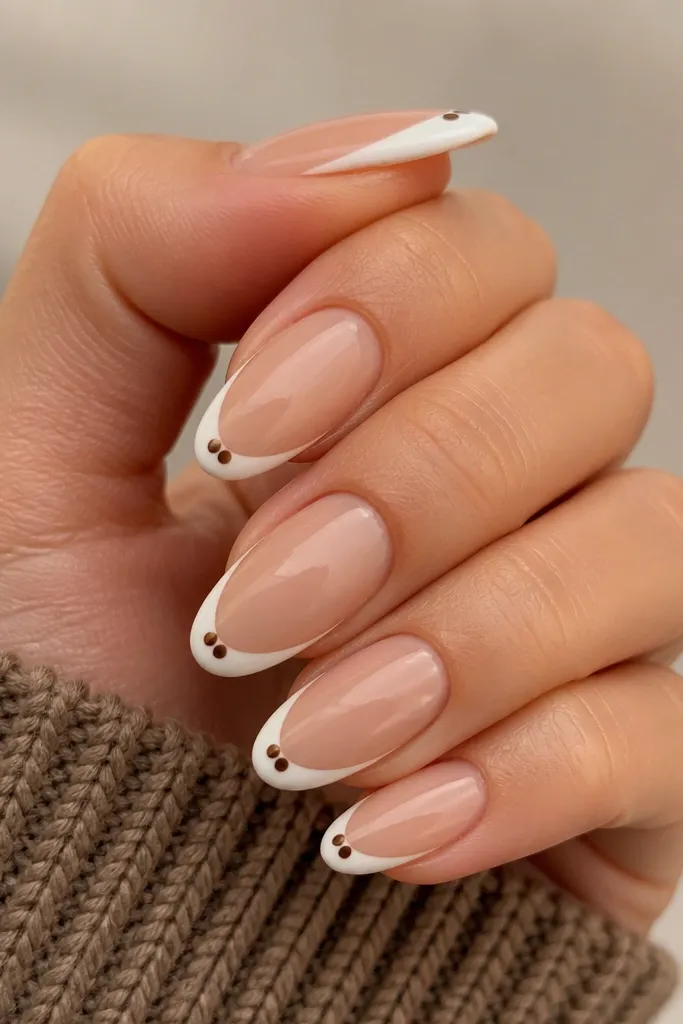
Two dots is the cleanest way to keep polka dots "small space" friendly. Placing them along the smile curve makes the design feel balanced even when your nails are short. The thin French line keeps the nail looking neat and extends the visual length. Use a warm medium-brown for the dots so they read clearly against nude.
Paint a classic thin French tip, then cure. Dip your dotting tool, wipe off the excess, and place two dots at the left and right of the center, touching the inner edge of the French. Keep the dot diameter around 1-1.2 mm. Seal with topcoat, paying extra attention to the dot edges so they don't lift.
Editor's noteUse the French smile as your guide - place dots where the smile curves upward the most.
Watch outSkip putting dots in the middle of the nail - the top placement is what keeps it looking French, not random.
3. Taupe Micro Tip with One Dot Per Nail
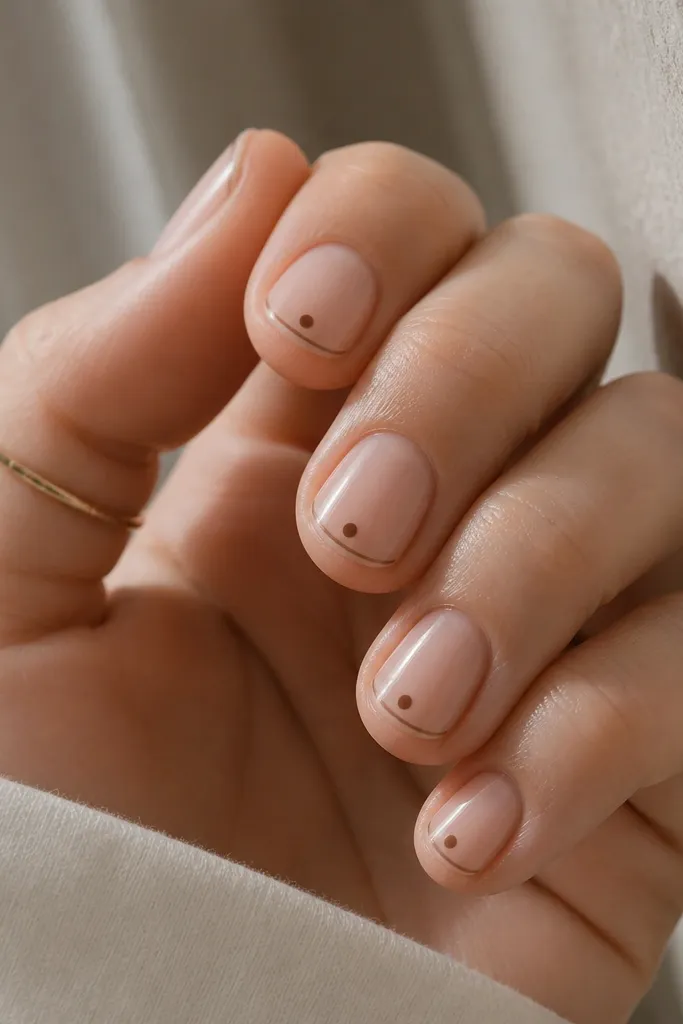
This is the "minimal but cute" option that still gives polka dot energy. One dot makes your nail look intentional and clean, and the taupe micro tip keeps it subtle. The centered placement adds length because there's a clear vertical focal point. Gloss makes the dot look crisp and raised slightly under the topcoat.
Use a sheer nude base, then paint a micro tip that's only about 1-2 mm tall. Cure and clean edges. Add one dot in the center about 0.5 mm below the tip. Topcoat twice if you're working with press-ons to prevent dull-looking dot texture.
Editor's notePractice the dot on a scrap nail first - one dot needs the right size or it will look too heavy.
Watch outDon't choose a very dark brown if your base is pale - it can look harsh on one small dot.
4. Half-French with Side-Shift Dots
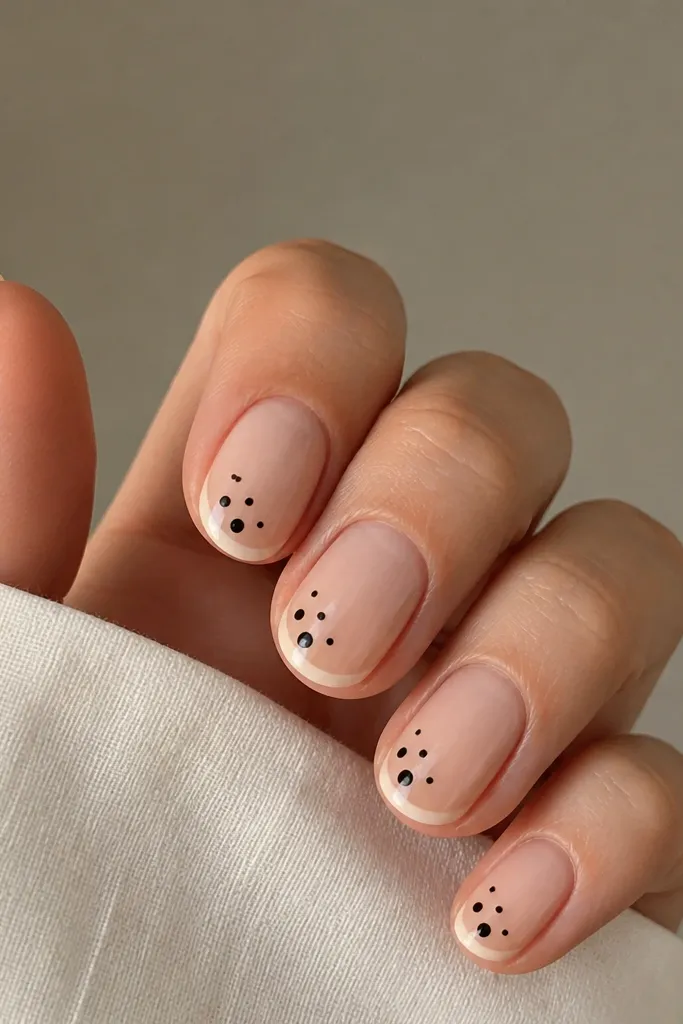
Side-shift dots add movement without adding more dots. The half-French gives you a clean top boundary, and the diagonal cluster makes the nail feel styled rather than flat. I like this one when one hand feels "too symmetrical" - it breaks the pattern in a flattering way. Use a medium brown and keep the diagonal line tight so it doesn't drift off the nail.
Paint the half-French in a thin arc across the top edge. Place three dots starting near the left side of the center line, then angle them down toward the middle. Keep dot size consistent and space them about 1 mm. Seal with a glossy topcoat and cap the free edge lightly.
Editor's noteAngle the dots to match your nail's natural curve - it looks more professional than a straight diagonal.
Watch outAvoid placing dots too close to the sidewall - they can look messy when the nail grows out.
5. French Tip with Polka Dot Confetti Line
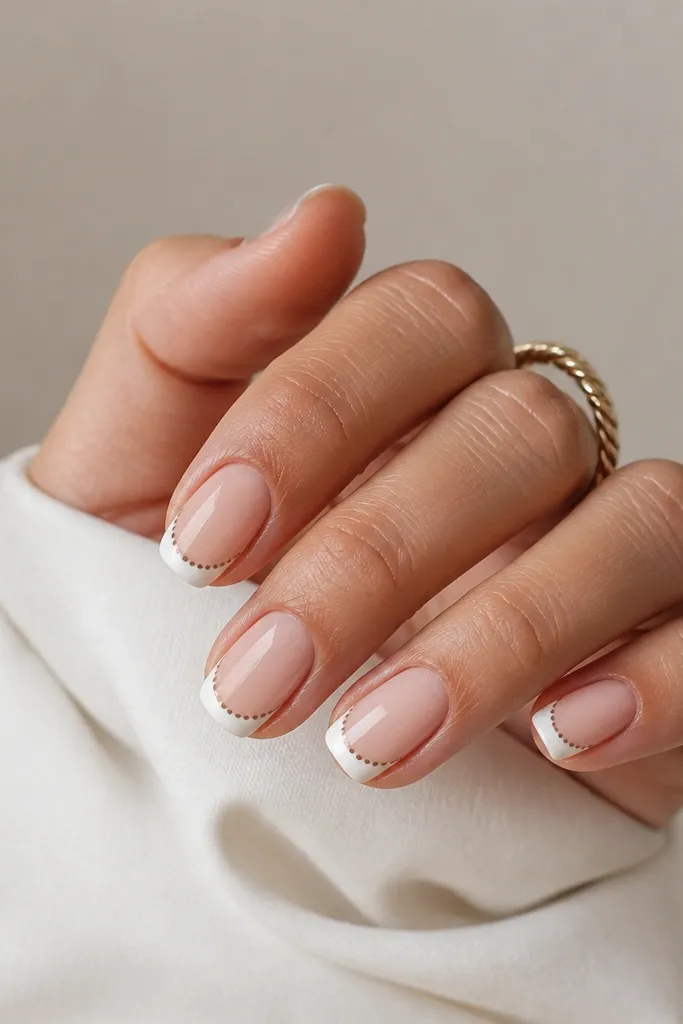
This design turns the polka dot into a border, so it stays contained in the tip area. The row of dots creates a crisp line that reads as "intentional" from a distance. I like it on workdays because it looks neat, not playful-chaotic. Use a slightly lighter brown than your French tip so the dots pop.
Paint your French tip, then cure. With a smaller dotting tool, place dots along the inner edge of the French tip, keeping the row straight. Use about 5-7 dots per nail depending on length. Topcoat with two thin layers so the dots stay smooth and don't shrink.
Editor's noteKeep your dot spacing even by counting dots before you start painting.
Watch outDon't let the dot row wander - a wobbly border makes the whole nail look DIY.
6. Chocolate Dots Inside a Thin French Outline
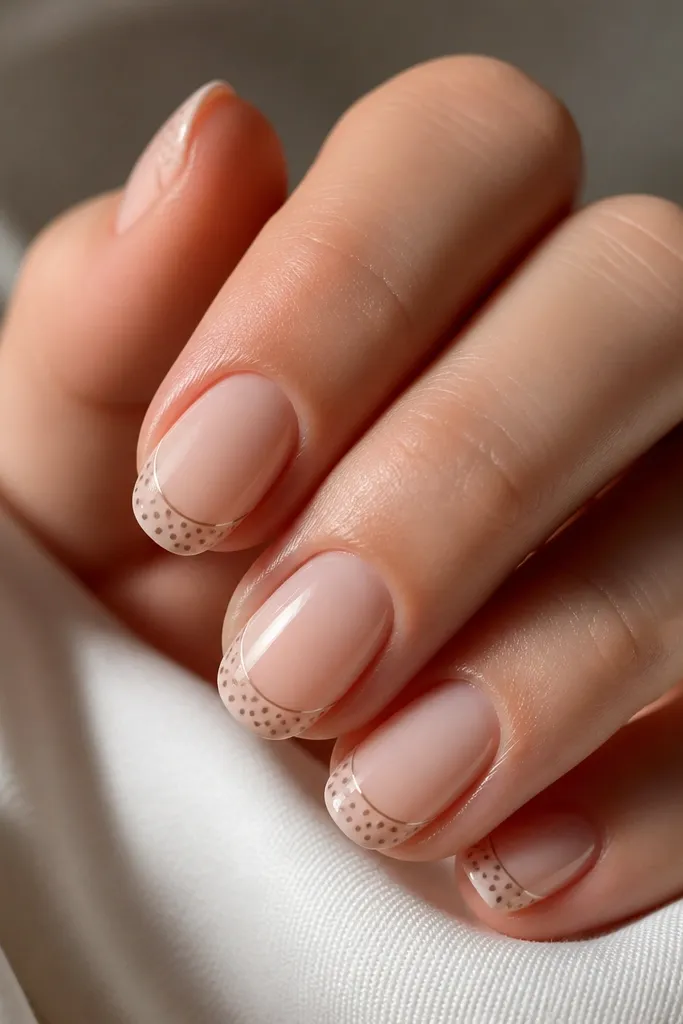
Instead of dots scattered across the nail, this puts them in a "panel" so small nails still look designed. The thin French outline gives a boundary, and the dots fill that boundary evenly. This works because your eye reads the outline first, then the dots. Use a warm chocolate brown and keep dot size tiny so the panel doesn't look too busy.
Paint a thin French outline, cure, and then fill the interior with tiny dots. Aim for 8-12 dots per nail depending on nail width. Make sure the outermost dots don't cross outside the outline. Finish with a glossy topcoat and wipe the edges with a brush dipped in cleaner.
Editor's noteIf your dots merge, wait 10-15 seconds after placing each dot before curing, so pigment levels slightly.
Watch outSkip thick French paint - thick lines shrink the space and make dot placement harder.
7. Matte Nude with Gloss Brown Polka Dots
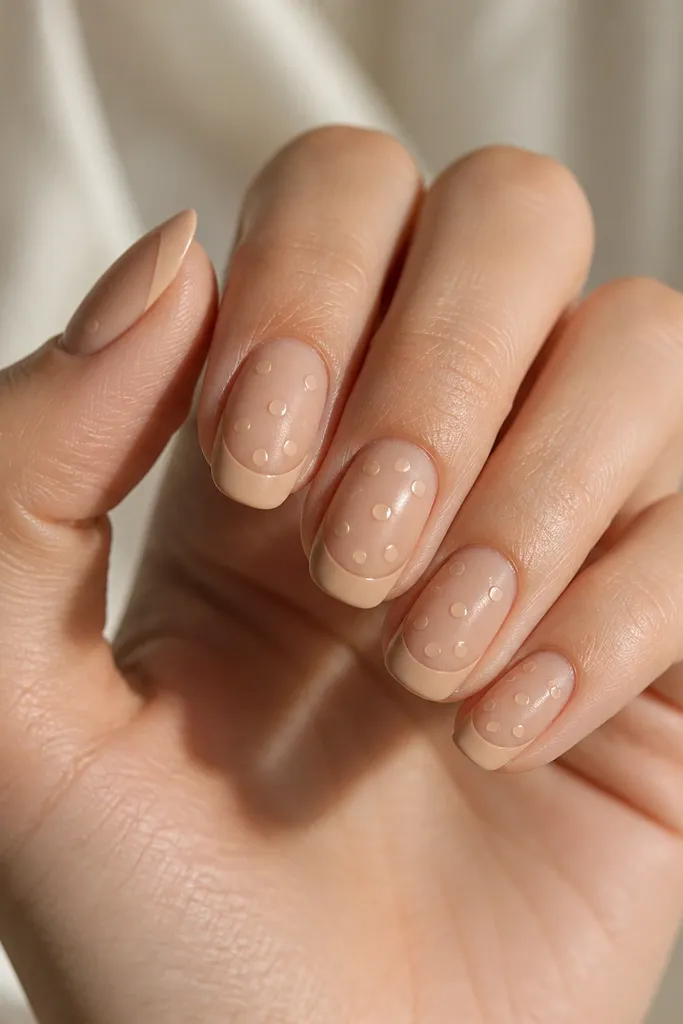
This one looks expensive because it mixes finishes. Matte base makes the dots look like little enamel stickers, while glossy dots catch light. Brown reads soft against nude when matte, and the shine on the dots keeps it from looking flat. I use a slightly lighter brown than usual so the gloss pops.
Apply nude base and cure. Paint a matte French tip area (or cure normally then apply matte topcoat to the whole nail). Dot with glossy brown gel and cure. Seal with a matte topcoat everywhere except over the dots - or use a gel topcoat only on the dots if you want extra shine contrast.
Editor's noteUse a thin brush to clean dot edges before curing so the gloss border is crisp.
Watch outDon't matte the dots - glossy dots on a matte nail are the whole point.
8. Brown Chrome French Tip with Tiny Polka Dots
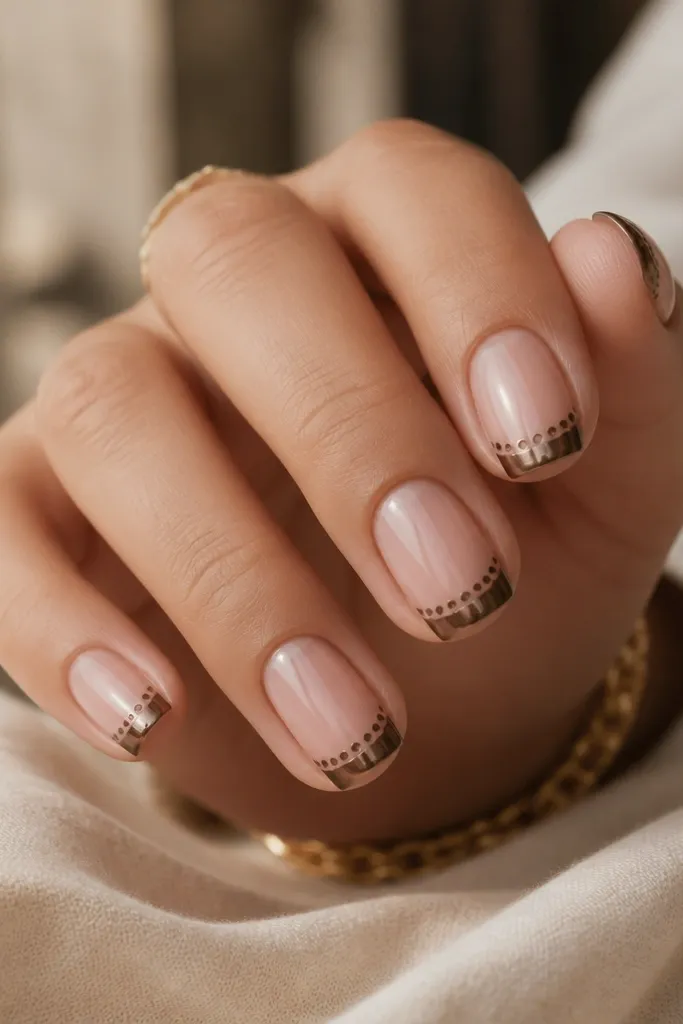
Chrome on the tip gives you instant polish, and the tiny dots keep it from looking like a plain metallic manicure. The dots look sharp because chrome reflects light strongly, so even small circles read clearly. Choose a darker brown for dots than your chrome so they don't blend into the shine. This is the "date night short nails" version.
Paint nude base and cure. Apply brown chrome powder to the French tip area with a sticky gel layer, then cure. Dot on top using a dark brown gel with a dotting tool. Keep dots small (about 1 mm) so they don't smear across the metallic surface. Topcoat lightly to avoid dulling the chrome too much.
Editor's noteUse a slightly thicker dot gel so it domes and doesn't run on chrome.
Watch outAvoid heavy topcoat over chrome - it can turn the tip silver-dull.
9. Warm Nude French with Brown Dot Ladder
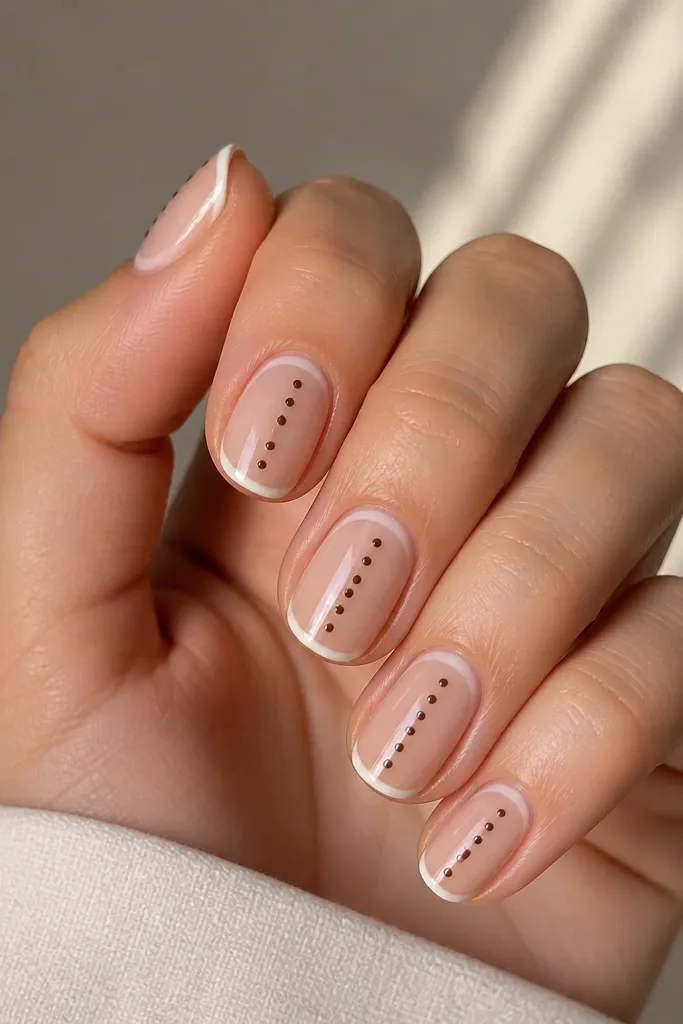
A dot ladder makes the nail look longer because the pattern goes straight up and down. Keeping the dots under the French gives you separation from the tip line. This is a great choice when you want polka dots but you're not in the mood for full coverage. Use warm medium brown and keep the dots consistent in size for a clean ladder effect.
Paint a thin French tip and cure. Place five dots in a straight vertical line starting just under the inner edge of the French tip. Space dots about 1 mm apart. Topcoat and cap the free edge so the dots stay smooth.
Editor's noteMark a center guideline with a faint line using gel and wipe it off after curing.
Watch outDon't vary dot sizes - a random ladder looks messy on short nails.
10. Satin Brown French with Polka Dot Center Burst
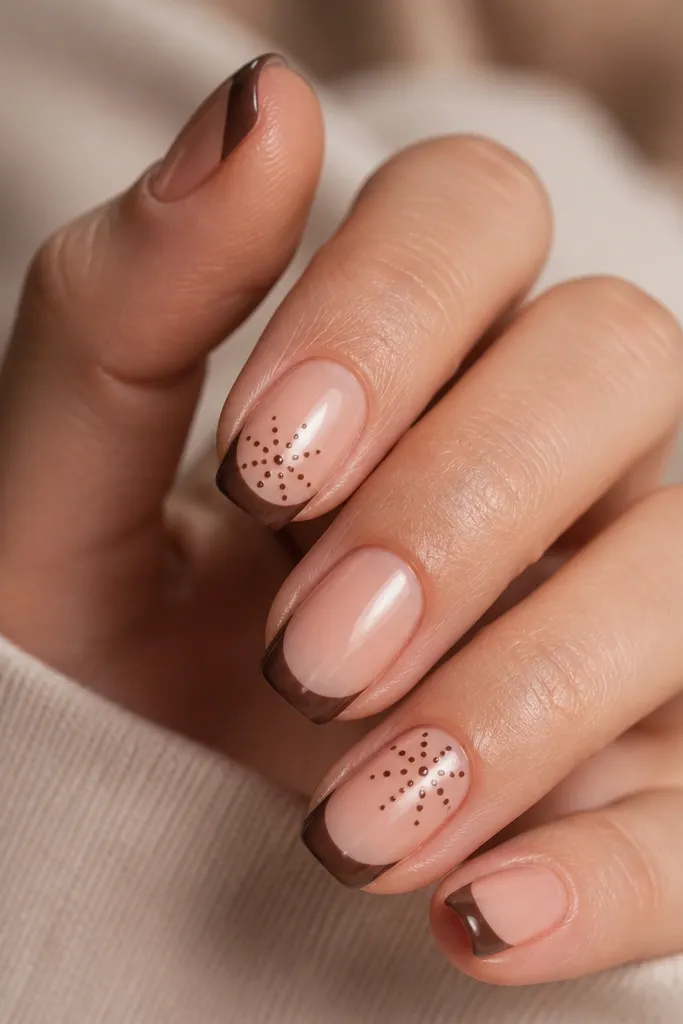
A satin brown tip looks softer than glossy, and the burst of dots gives you a focal point without covering the whole nail. The biggest dot in the center makes the design feel intentional and "designed," not scattered. This works well on short nails because the cluster sits where your eye naturally lands. Choose a warm brown and keep the cluster tiny - think 5-7 dots.
Paint a satin brown French tip and cure (satin can come from using a satin topcoat over the tip area). Add a small dot cluster in the center under the tip line: place one larger dot, then surround it with smaller dots. Keep the cluster within the nail width so it doesn't hit the sidewalls. Seal with a glossy topcoat over the dots only if you want them to pop.
Editor's noteUse a bigger dot for the center and a smaller dot for the outer dots so it reads as a burst.
Watch outAvoid placing the cluster too low - it should live near the tip area for small-space balance.
11. Nude Base with Brown Dots on the French Edge
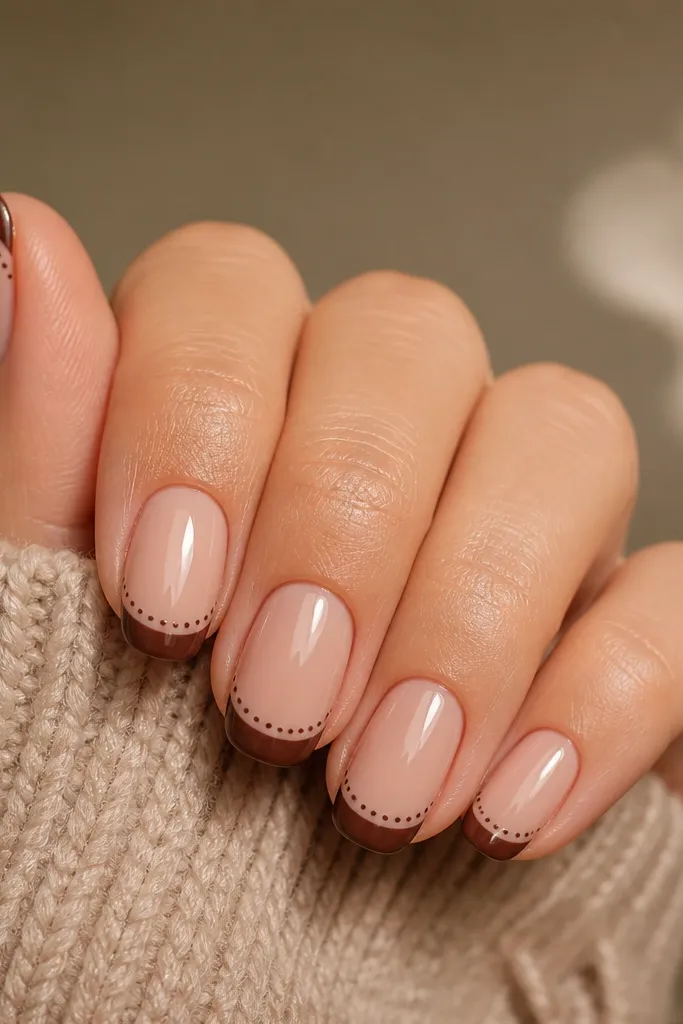
This design creates a stitched look by letting dots straddle the boundary between French and nude. It works because you get contrast right where the eye expects it. Dots that cross the edge look like they're part of the French line, not pasted on top. Use a medium brown that matches the French tip color family.
Paint a thin French tip and cure. Place dots right at the inner edge so they overlap both the French and nude areas. If your dots smear, use gel paint with a thicker consistency. Aim for 3-4 dots per nail depending on width. Topcoat normally, then check the edges with a detail brush.
Editor's noteIf you want extra precision, place the dot first on nude, then drag the edge of the dot slightly into the French before curing.
Watch outDon't make dots perfectly symmetrical if your French line is curved - slight asymmetry looks more natural.
12. Chocolate Polka Dot French with Negative Space Half-Moon
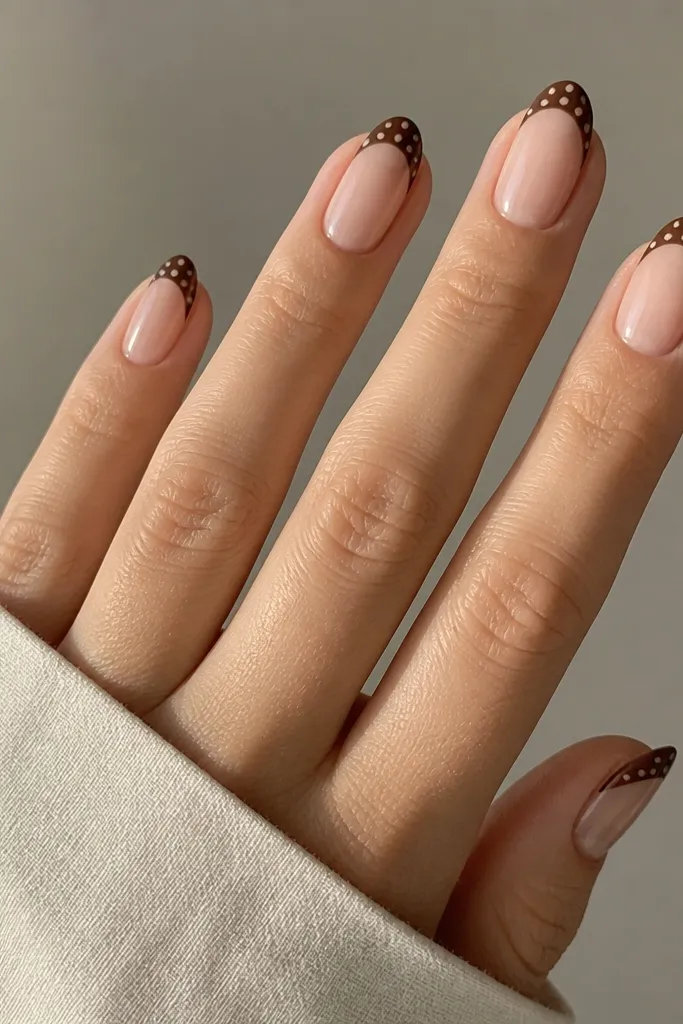
Negative space makes the dots look lighter, which is what you need for small nails. The little half-moon cutout breaks the pattern without adding more elements. This looks clean even with tiny dots because the nude gap gives your eye a rest. Use a warm chocolate brown and keep the half-moon centered.
Paint a brown dotted French tip area: dot across the tip zone. Before curing, leave a small half-moon in the center by either skipping dots there or wiping a tiny arc clean with a brush. Cure, then topcoat with gloss. The half-moon should be about the width of one dot.
Editor's noteUse tape or a thin strip of nail vinyl as a guide for the half-moon gap.
Watch outAvoid a big gap - the design stops reading as French if the negative space is too large.
13. Taupe French Tip with Diagonal Two-Dot Rows
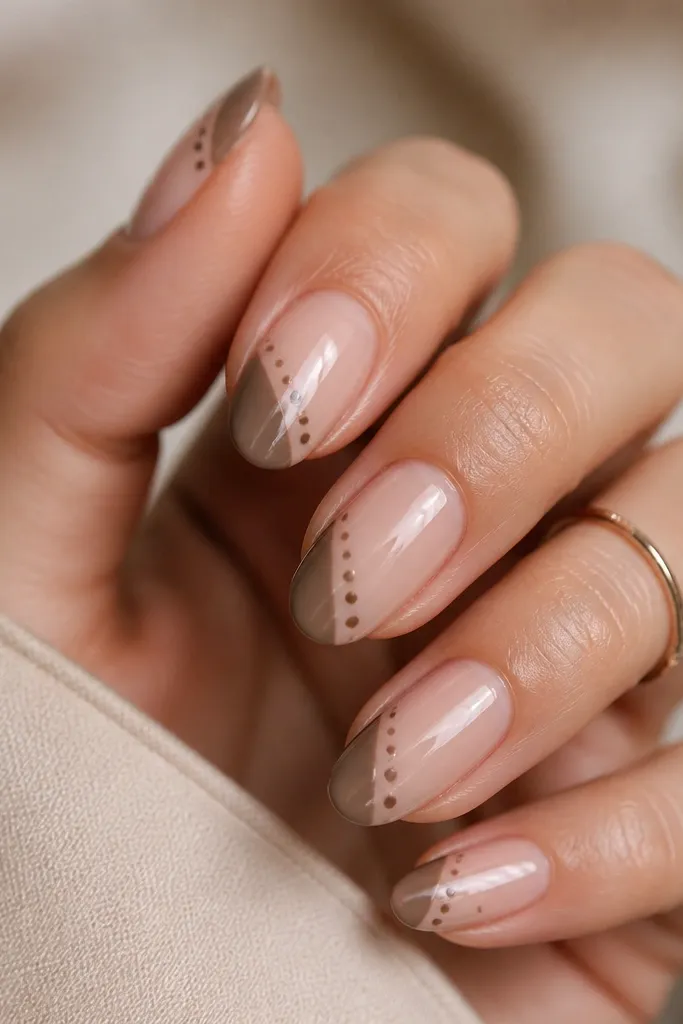
Diagonal rows add energy while staying compact. Two rows keeps it from looking like a busy print, and the diagonal placement flatters the nail shape. Taupe French keeps the overall look soft, and the brown dots add the polka contrast. This one is great if you want polka dots but hate symmetrical patterns.
Paint a thin taupe French tip and cure. Place two diagonal lines of two dots each, starting near the left edge of the tip and ending near the right. Keep dot size consistent and spacing tight so the rows read as lines. Topcoat with gloss for crisp edges.
Editor's noteUse the dotting tool handle as a straight edge for the diagonal alignment.
Watch outDon't go beyond two dots per row - more dots makes it look like accidental stamp marks.
14. Brown Polka Dot Reverse French (Cuticle Dots)
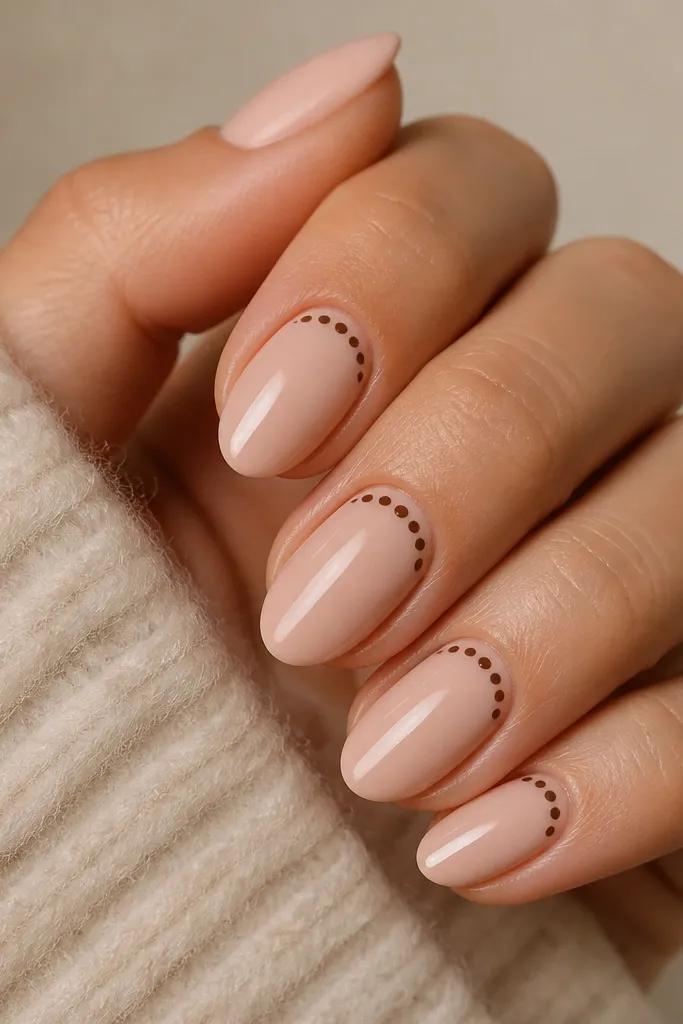
Reverse French shifts the focus to the cuticle area, which works when you don't want a full tip. The polka dots inside the cuticle band look like tiny buttons. This design is also good for very short nails because the pattern sits where the nail is naturally widest. Keep dots small and centered so it doesn't look like a smudge.
Paint nude base and cure. Create a thin reverse French band (about 1-2 mm tall) near the cuticle using brown gel. Add 3-4 tiny dots centered inside that band. Cure and then topcoat. If you're prone to lifting at the cuticle, use a careful base coat and cap the edges lightly.
Editor's noteUse a dotting tool with a pointed tip for cuticle dots so you don't flood the skin line.
Watch outAvoid dots too close to the cuticle - they can lift and smear during cleanup.
15. Chocolate Dot Half-Moon French
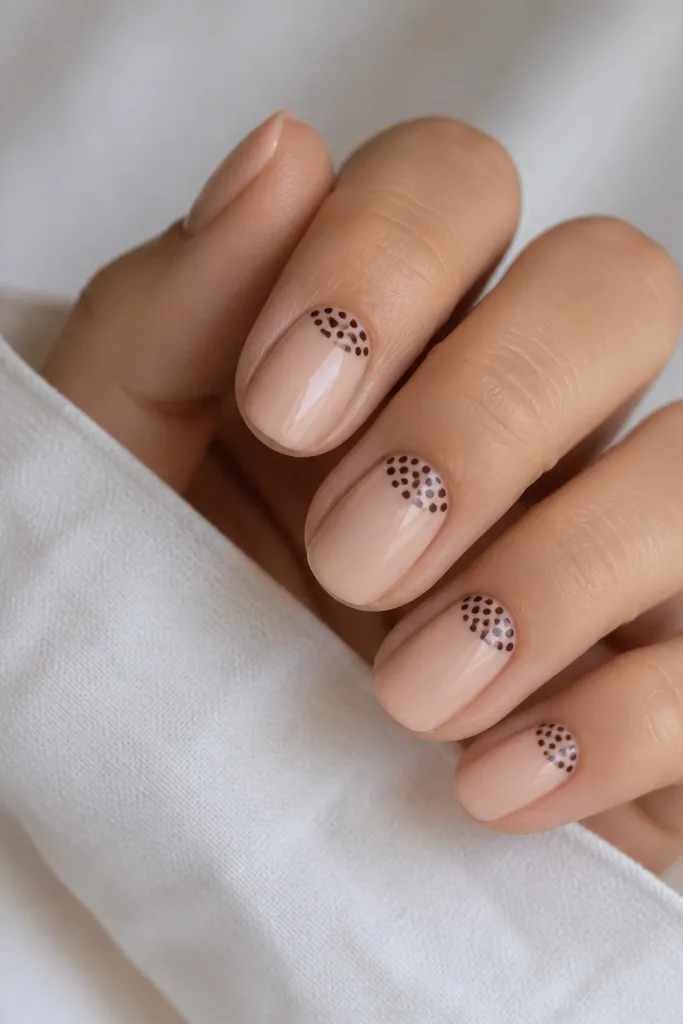
Instead of painting a full French arc, this uses a half-moon filled with dots, which keeps the pattern compact. The dotted half-moon reads like a French tip even on short nails. Brown dots look extra cute here because the shape is clear. Use tiny dots and keep the half-moon centered for the best effect.
Skip the full French line. Use the dotting tool to build a half-moon arc at the top of the nail: start at the left edge, place dots along the curve, then fill toward the center. Leave a clean nude area below. Cure and apply gloss topcoat to smooth the dots.
Editor's noteDo the outline first - set a dot path for the half-moon curve, then fill inside.
Watch outDon't overfill the half-moon - if dots reach too far down, it stops looking like a tip.
16. Brown Polka Dot French with Micro Glitter Edge
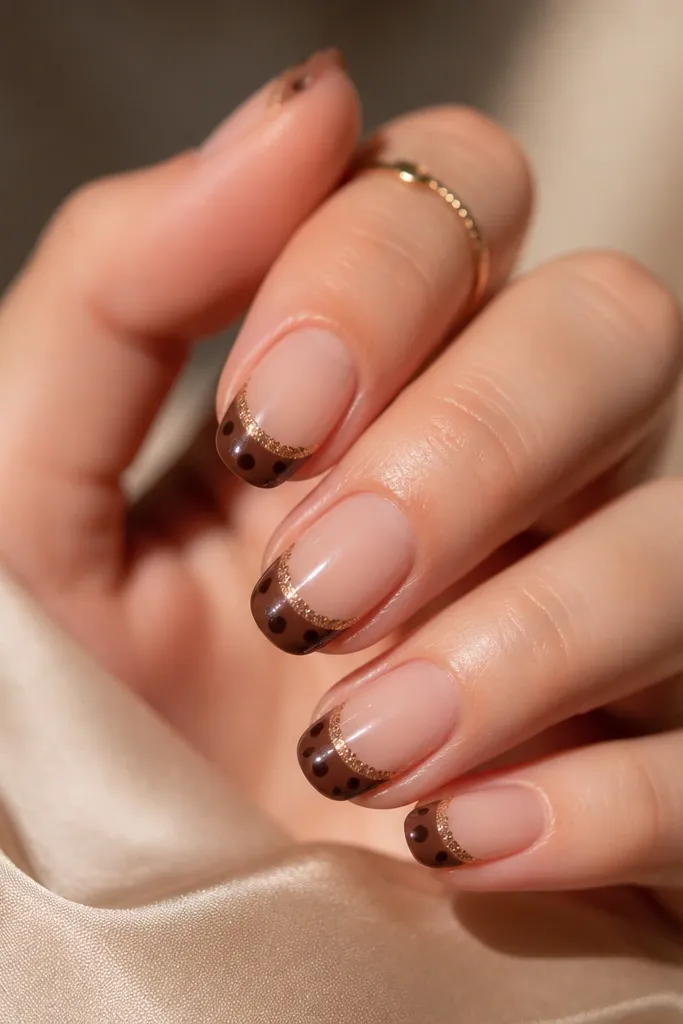
A glitter edge makes the French line look sharper, which helps small-space designs hold their shape. The dots sit under the glitter so the glitter stays as a highlight, not as a second pattern. Use fine brown glitter so it doesn't look like chunky confetti. This looks great on parties because it catches light without taking over.
Paint a thin brown French tip and cure. Add a tiny strip of fine brown glitter right along the outer edge of the French line using a gel adhesive or glitter gel. Place 3-4 tiny polka dots just under the glitter strip. Seal with a glossy topcoat that covers glitter and prevents rough texture.
Editor's notePress the glitter strip gently with a silicone tool so it lays flat.
Watch outSkip chunky glitter - it feels rough and ruins the clean nail shape.
17. Glossy Nude with Brown Dots and a Double-Line French
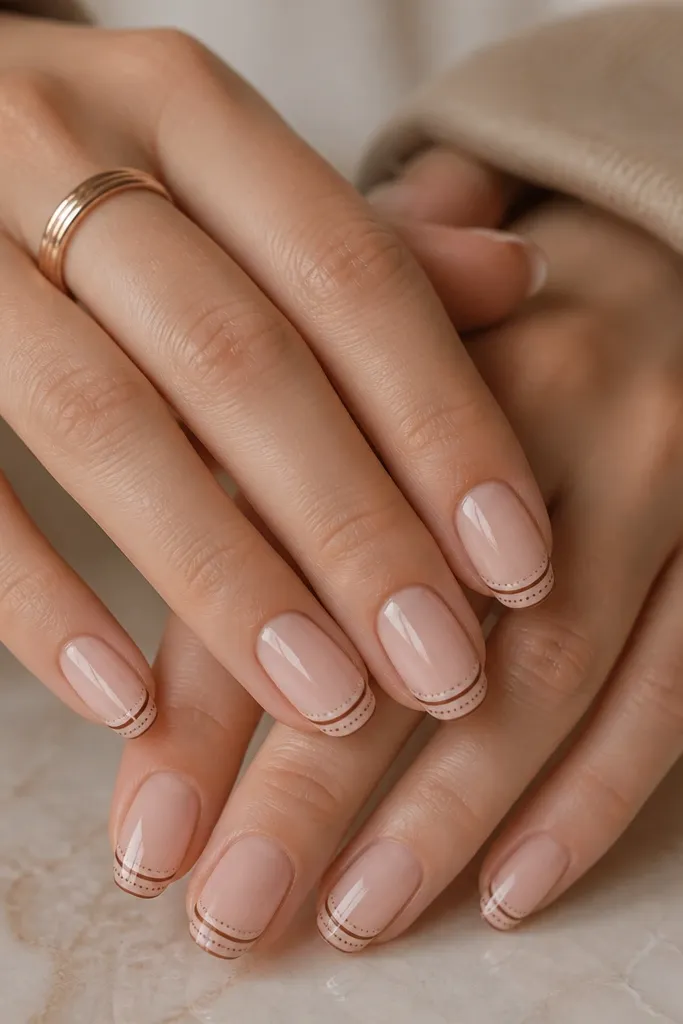
Double-line French creates a built-in frame for the dots, which keeps small nails from looking overwhelmed. Dots between the lines read like a pattern strip. Glossy nude makes everything look clean and reflective. Use the same brown shade for both lines and dots so the frame feels cohesive.
Paint a thin French line and cure. Add a second line just above it, leaving a narrow gap. Dot tiny circles in the gap, keeping dots centered and spaced evenly. Cure and topcoat twice for smoothness over the dot texture.
Editor's noteUse a striping brush for the double lines so they stay straight on short nails.
Watch outDon't make the gap too wide - a wide gap turns the nail into two separate designs.
18. Matte French with Gloss Brown Dot Corners
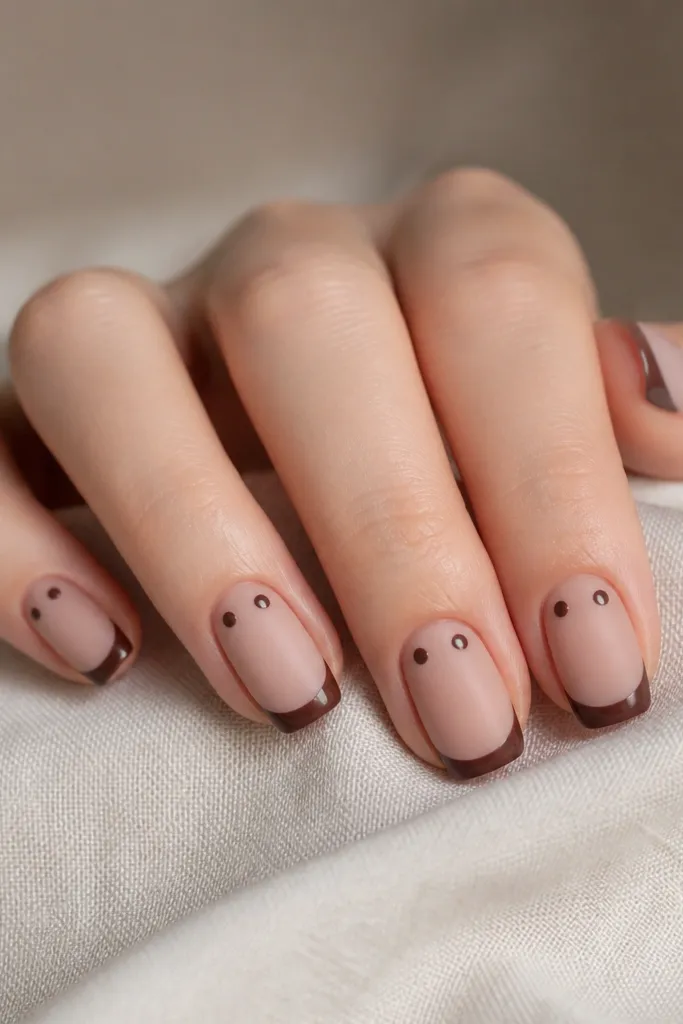
Corner dots are small-space magic because they keep the center clean. Matte French softens the look, and glossy dots add that light-catching contrast. It's subtle, but from across the room it reads as polka dots. Use a medium brown for both matte and gloss so the tones match.
Apply nude base and matte topcoat. Paint a matte brown French tip and cure. Dot two circles in the upper corners of the tip area - one near the left smile edge, one near the right. Add glossy topcoat only over the dots. Cure again.
Editor's noteAim for dots the size of a pencil eraser head - if they're bigger, the corners look heavy.
Watch outAvoid placing corner dots too low - they should live in the tip zone.
19. Brown Polka Dot French Tip with Center Stripe
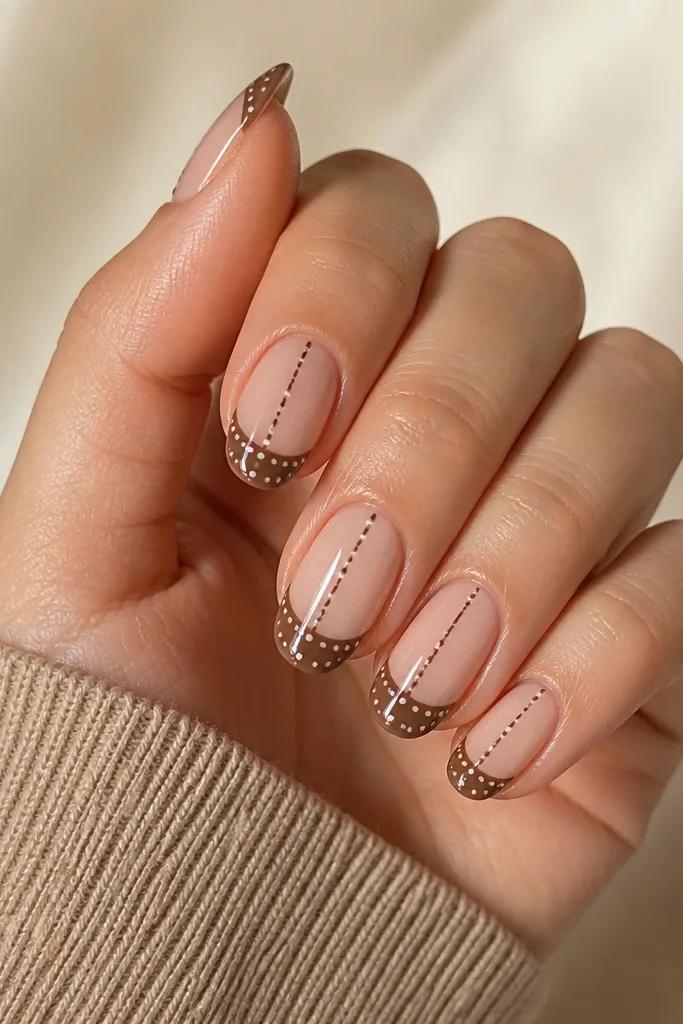
A center stripe gives structure and helps the dots feel coordinated. The dots on either side keep the pattern cute without flooding the nail. This is the best option when your dot placement tends to wander - the stripe anchors it. Use a narrow stripe brush and keep the stripe straight before you add dots.
Paint a thin brown French tip and cure. Draw a thin vertical stripe from just under the French toward the middle of the nail. Add tiny dots on both sides of the stripe near the French edge, about 2-3 dots per side. Topcoat with gloss.
Editor's noteKeep the stripe thinner than you think - on short nails, thick stripes look cartoonish.
Watch outDon't put dots across the entire tip - keep them near the top so the stripe stays readable.
20. Taupe French with Brown Dot Outline Around the Tip
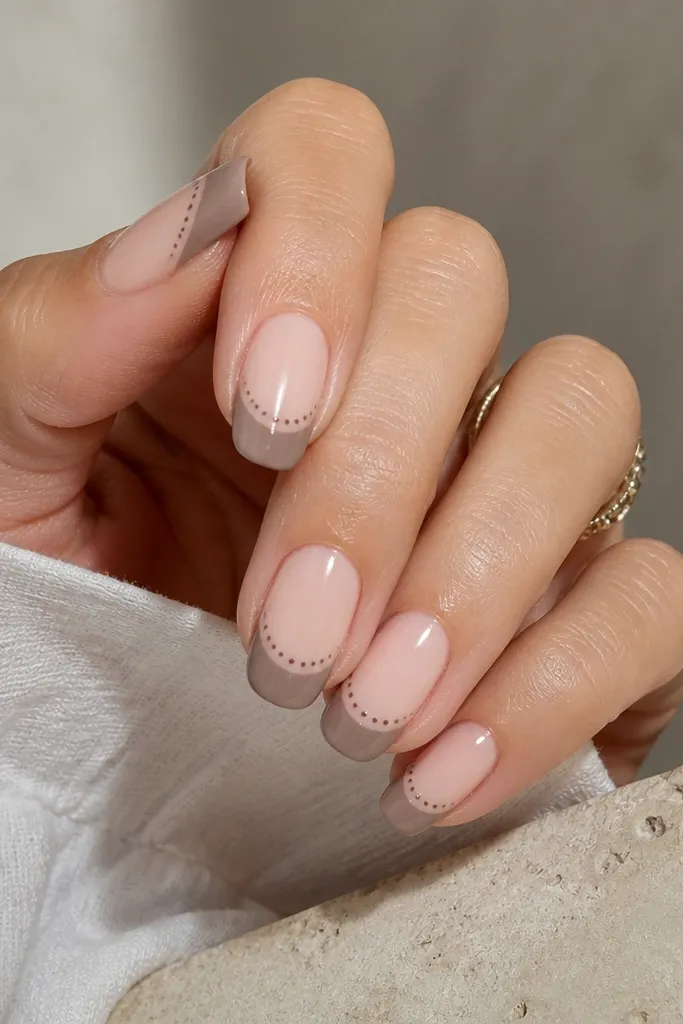
An outline of dots frames the French line and makes it look crisp even if your arc is slightly uneven. The taupe tip stays soft while the dark-brown dot outline adds definition. This design looks sharp on small nails because it uses the tip curve as a guide. Keep the outline dots evenly sized so the halo doesn't look jagged.
Paint a taupe French tip and cure. Using a smaller dotting tool, place dots along the inner curve of the French tip, leaving space between the dots. Stop the outline before it hits the sidewalls if you want a cleaner look. Topcoat gloss and cap the edges.
Editor's noteIf your arc wobbles, follow the curve of your nail - dot outlines forgive small mistakes.
Watch outAvoid thick dot borders - chunky dots make the arc look like a sticker.
21. Chocolate Dot French with Nude Gap Line
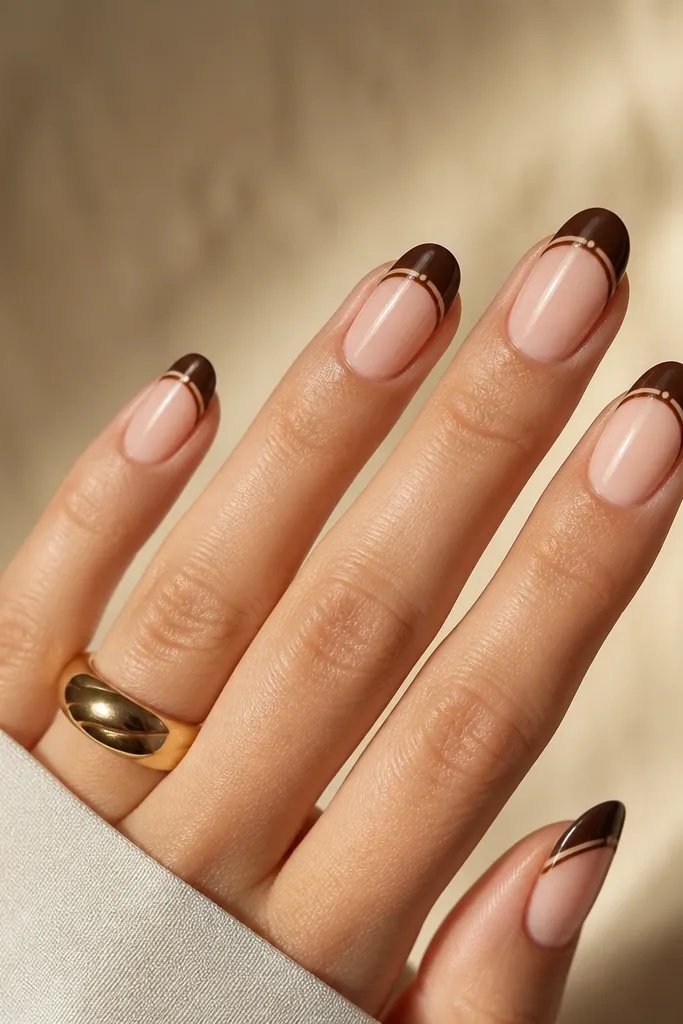
That tiny nude gap breaks the pattern into two sections, which keeps small nails from looking too full. The dots stay compact because you're effectively designing two mini bands. It looks intentional and graphic. Use a warm chocolate brown and keep the gap line straight so it feels clean.
Paint dots across the top French zone in a thin band. Use a striping brush dipped in cleaner to clear a straight nude line through the dots before curing, or leave the gap by skipping dots in that row. Cure and topcoat glossy. The gap line should be about the height of one dot.
Editor's noteUse a nail vinyl strip as a guide for the gap line if you're nervous about straightness.
Watch outDon't make the gap too wide - it turns into a separate design element.
22. Brown French with Tiny Dots and a Single Accent Nail
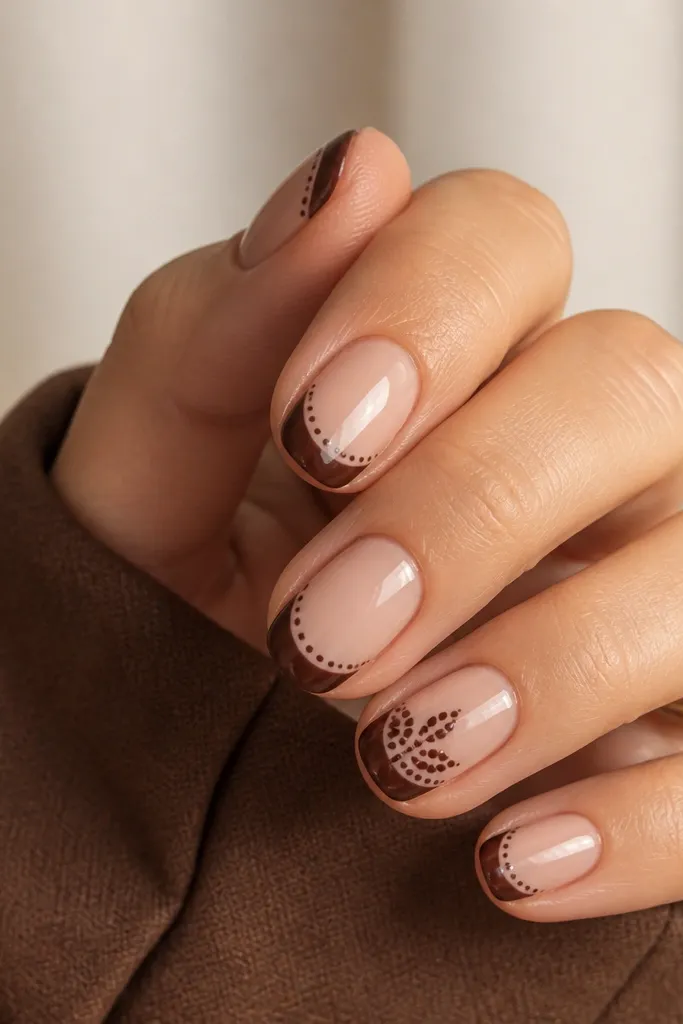
This is the easiest way to make the manicure look "styled" without changing everything. Keeping the base design consistent makes the accent nail feel deliberate instead of random. The ring finger gets a little more dot density so it reads like a focal point. Use the same brown shade for all nails so it feels cohesive.
Do the thin French tip on every nail. For most nails, place two dots centered - one near the inner edge and one slightly lower. On the ring finger, place 6-8 dots across the tip zone in a small arc. Cure and topcoat all nails the same way for consistent shine.
Editor's noteMatch the accent nail dots to the width of that nail - don't copy dot spacing from a wider nail.
Watch outAvoid adding extra accents on multiple nails - it turns into a pattern overload.
23. Glossy Nude with Brown Polka Dot Tie-Loop French
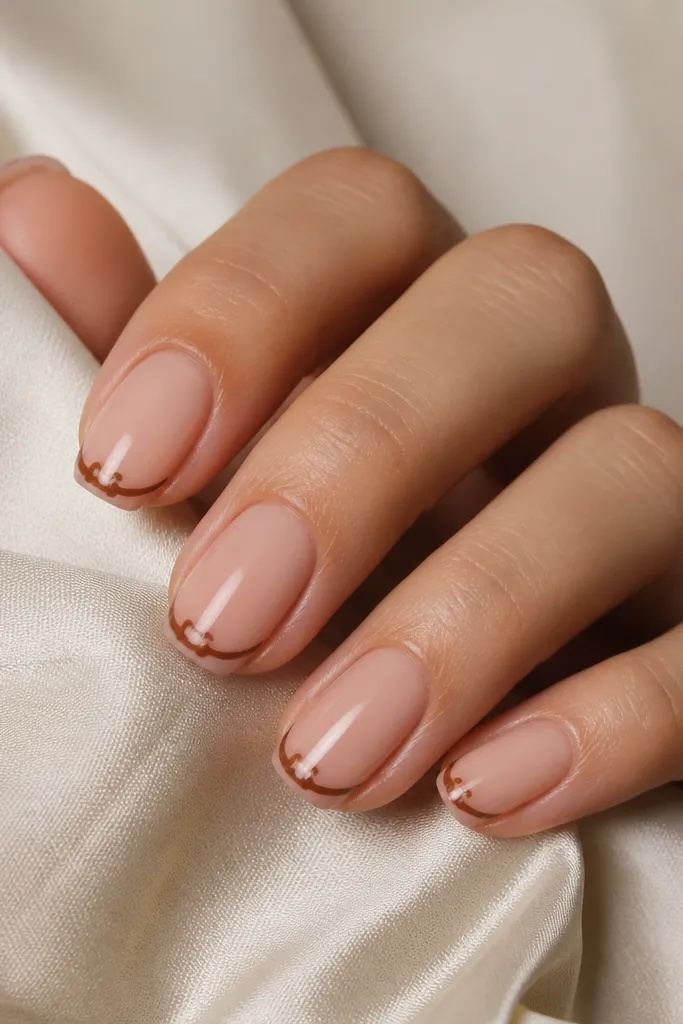
This one is a cute twist that still fits small space. The loop motif uses dots and a tiny connector line, so it looks like a mini bow without needing a 3D bow. The French tip stays thin, and the loop sits in the center so the design reads as a focal point. Use a warm medium brown for the dots and the connector line.
Paint a thin French tip and cure. Place two dots close together in the center like the sides of a loop. Use a striping brush to connect them with a short curved line, then place one tiny dot in the center of the loop. Topcoat with gloss to smooth the line.
Editor's noteKeep the connector line thinner than the dot diameter so it doesn't look like a blob.
Watch outSkip thick lines - they make the loop look like a scratch on short nails.
24. Brown Polka Dot French with Cuticle Mini Star
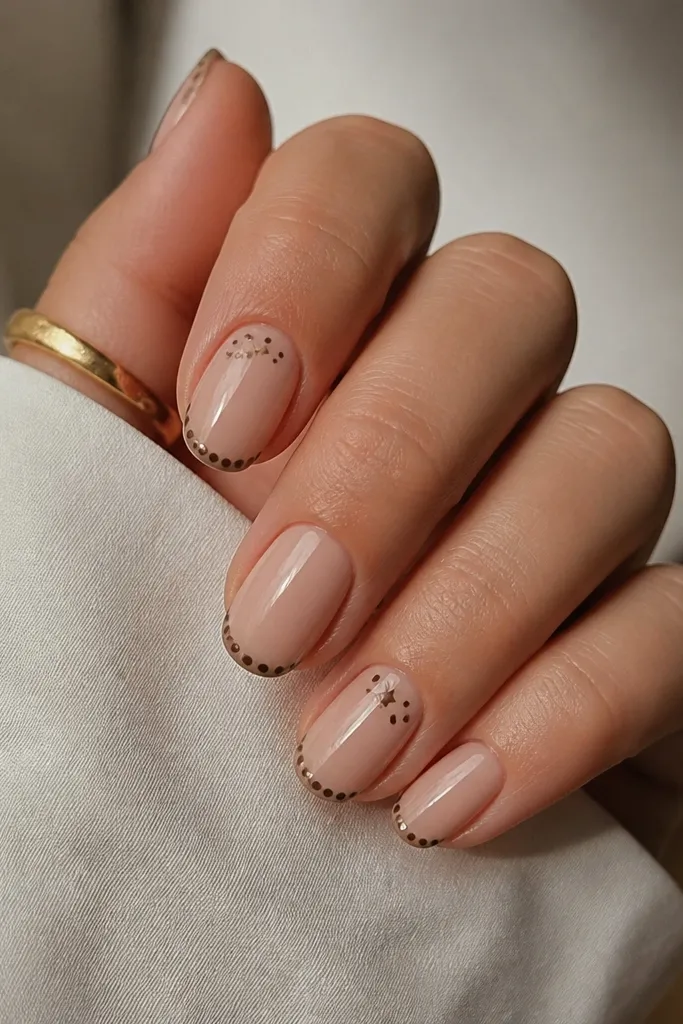
A tiny star near the cuticle adds personality while keeping the polka dots in the French area. The star is small enough to feel like an accent, not another theme. This works especially well on short nails because the cuticle area is visually close to where your fingers move. Use the same brown as the dots so everything feels like one set.
Create the dotted French tip by placing tiny dots across the top zone. On accent nails, add a tiny star near the cuticle using a nail art stencil or a fine brush. Keep the star size about half the dot diameter. Cure and topcoat, then clean around the cuticle line.
Editor's noteUse a stencil for the star if your freehand line wobbles.
Watch outAvoid adding stars on every nail - it competes with the polka dots.
25. Deep Brown French with Light Brown Polka Dots
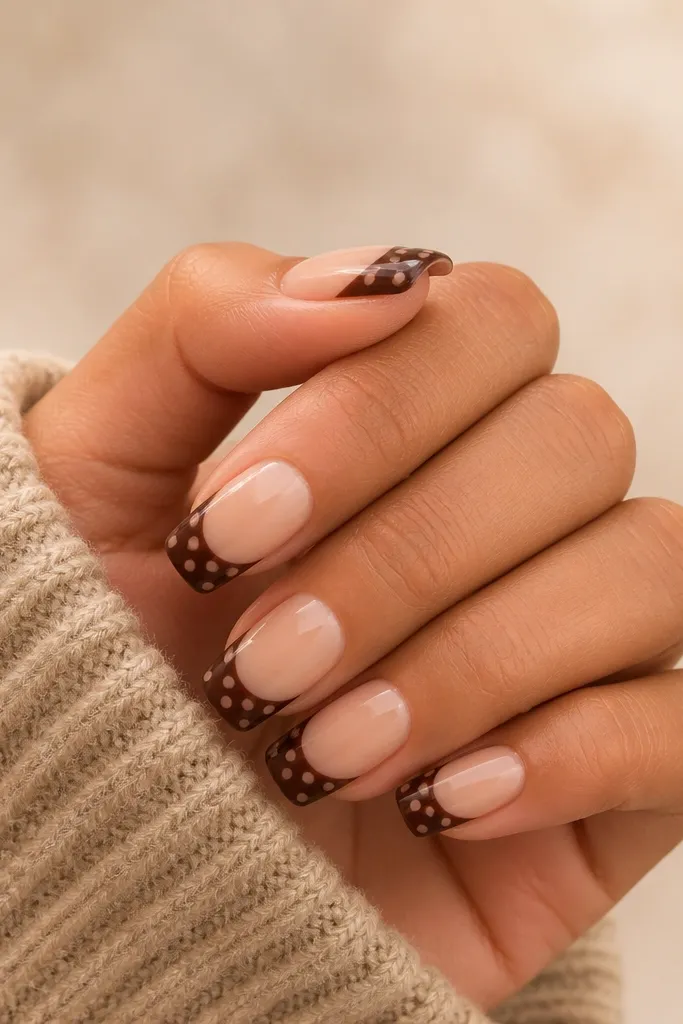
Switching to a lighter dot shade makes the dots look airy, which matters on short nails. The deep French tip gives a strong outline, and the lighter dots read as pattern rather than weight. This also helps if your brown looks too dark on camera - the lighter dots keep it balanced. Keep dot size tiny and spacing consistent.
Paint a deep brown French tip and cure. Use a lighter brown for dots and place them centered in the tip zone. Aim for 7-10 dots per nail depending on nail width. Seal with gloss topcoat and cap the edges.
Editor's noteTest the lighter dot shade on a scrap nail first - too light makes the dots disappear.
Watch outDon't use two browns that are too far apart - it can look like a color mismatch.
26. Brown Polka Dot French with Tiny Heart Center
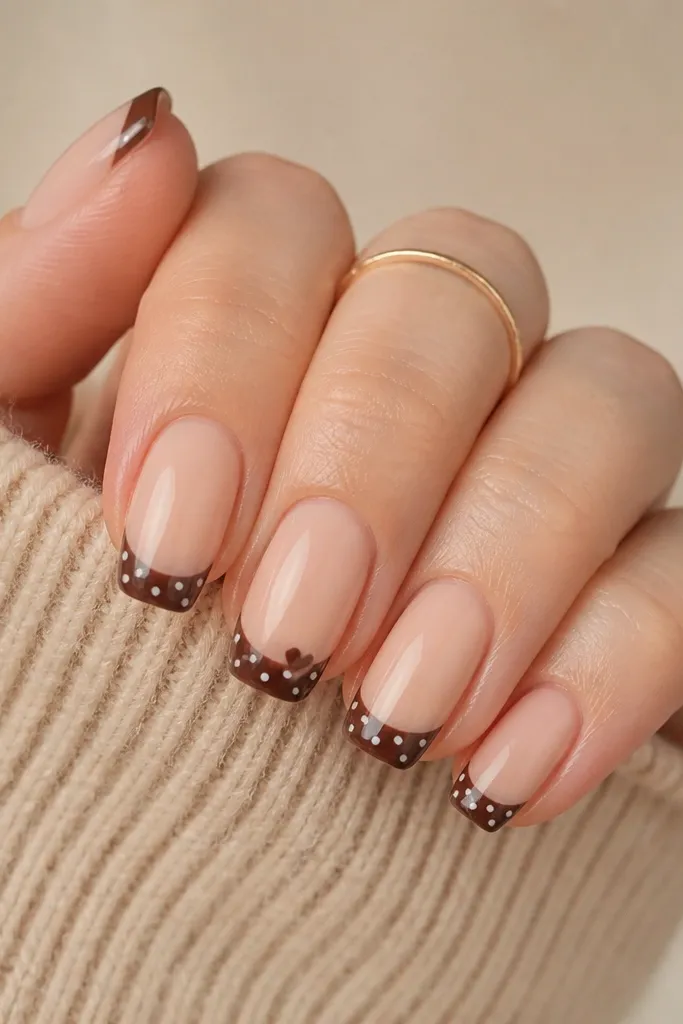
The heart gives a sweet focal point but stays compact enough for small space. Using dots to build the heart keeps the look aligned with the polka theme. The dotted French keeps it playful, while the heart adds romance without covering the whole nail. Use a warm brown for everything and keep the heart small.
Paint a dotted French tip with tiny dots. On each nail (or just ring finger), place a small heart in the center using two dots for the lobes and a curved line for the bottom point. Cure and topcoat gloss. The heart should be about one dot diameter wide.
Editor's noteUse a dotting tool to place the heart lobes, then connect with a striping brush.
Watch outAvoid making the heart too big - it steals attention from the French dots.
27. Brown Polka Dot French with Negative Space Side Bars
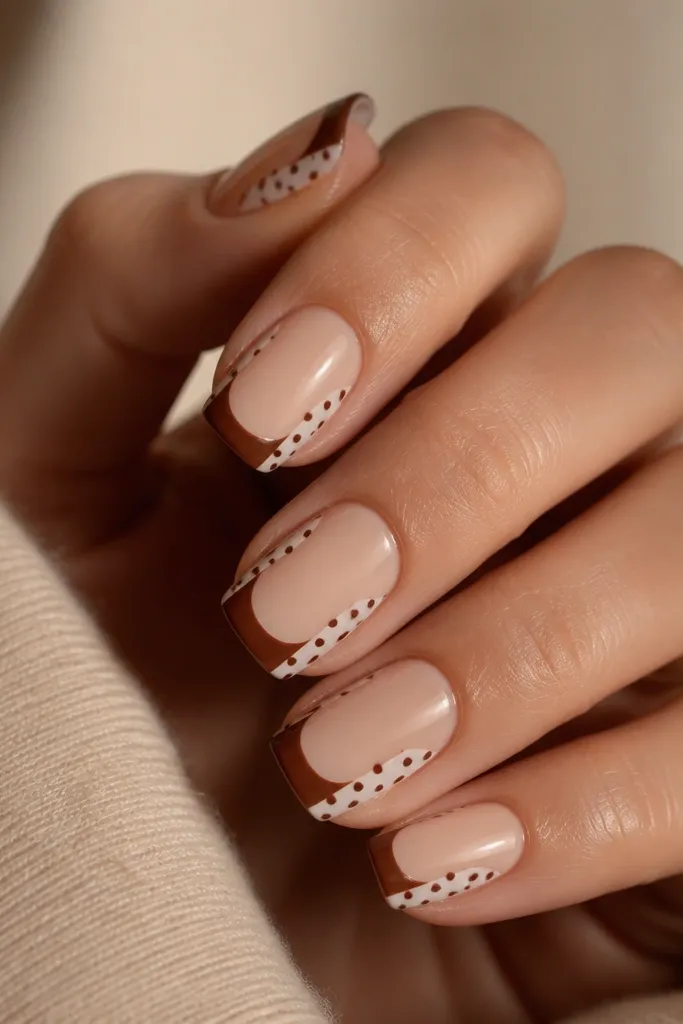
The negative side bars keep the dots from filling the whole tip area, which is exactly how you make small space patterns look clean. The missing-dot bars make the French tip look like it has structure. This is a graphic look that still feels feminine because the dots are soft circles. Use a medium brown and keep dots tiny for a neat grid.
Create the dotted French tip by placing dots across the top zone. Before curing, leave two thin nude bars along the left and right sides by skipping dots in those columns. Keep the bars narrow - about the width of one dot. Cure and topcoat gloss.
Editor's noteUse a thin nail vinyl strip as a guide for the nude bars if you want straight edges.
Watch outDon't leave huge nude bars - it makes the dots look accidental.
28. Taupe French with Polka Dot Half-Grid
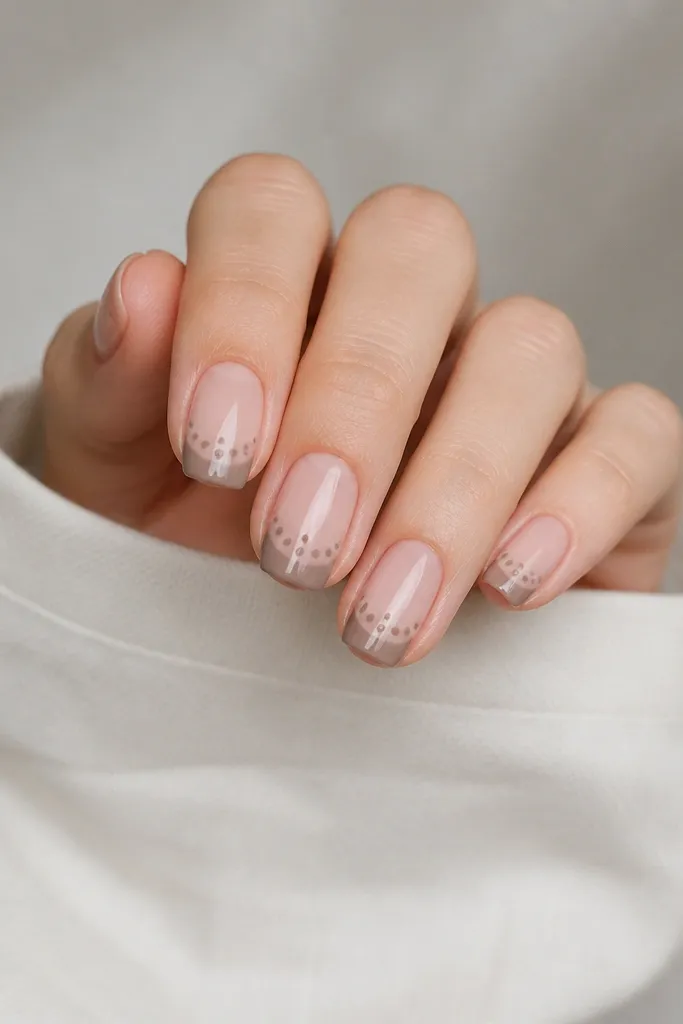
A half-grid keeps polka dots organized, which is what short nails need. The taupe French feels soft, while the dots create a structured pattern. It's a modern look that still reads as French tip. Keep the grid small: two rows is enough.
Paint a thin taupe French tip and cure. Place two rows of dots across the tip area, centered and evenly spaced. Use 3 dots per row if your nail is narrow, 4 if it's wider. Leave the area below the dots nude. Topcoat gloss and cap the free edge.
Editor's noteCount your dot positions before you start so both rows match perfectly.
Watch outAvoid filling the entire tip with a full grid - it looks busy on small nails.
29. Brown Polka Dot French Tip with Skinny Center Gap
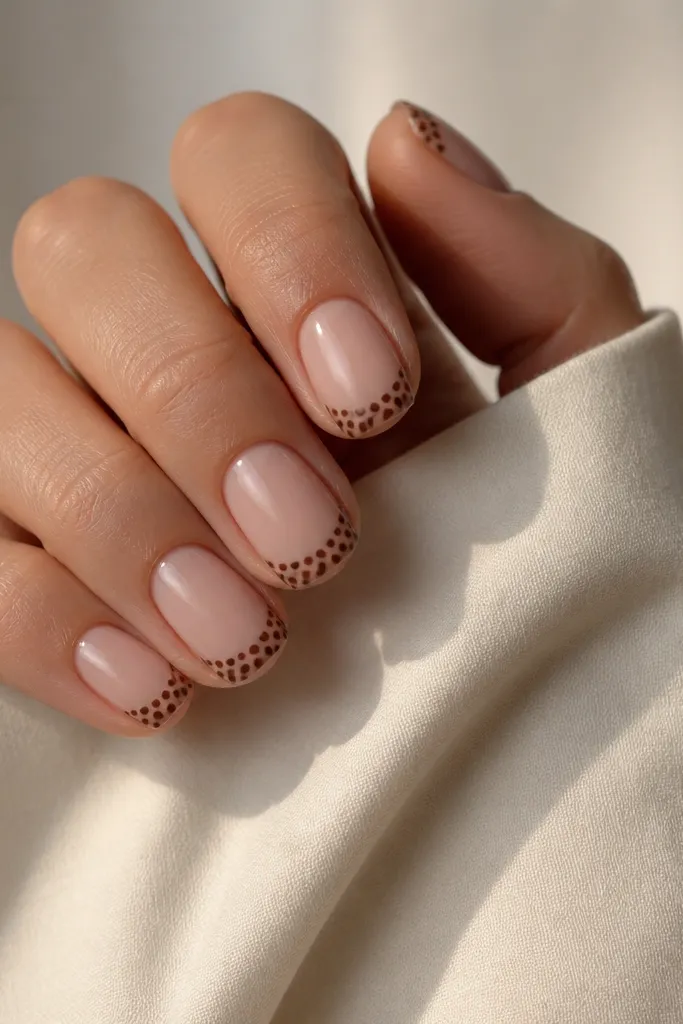
This is like a "polka dot stripe" without painting stripes. The skinny center gap makes the dots look lighter and gives your eye a clear vertical line. It also hides tiny French line imperfections because the dots don't have to fill the center completely. Use warm chocolate brown and tiny dots.
Dot across the tip zone in a tight band. Leave a narrow center column empty by skipping dots in that vertical spot. The gap should be about the width of one dot. Cure and topcoat gloss twice if you want a smooth finish over dot edges.
Editor's noteUse the handle end of a dotting tool as a guide to keep the gap straight.
Watch outDon't make the center gap too wide - it turns into a stripe instead of a small-space dot design.
30. Chocolate Dot French with Gold Micro Accent Line
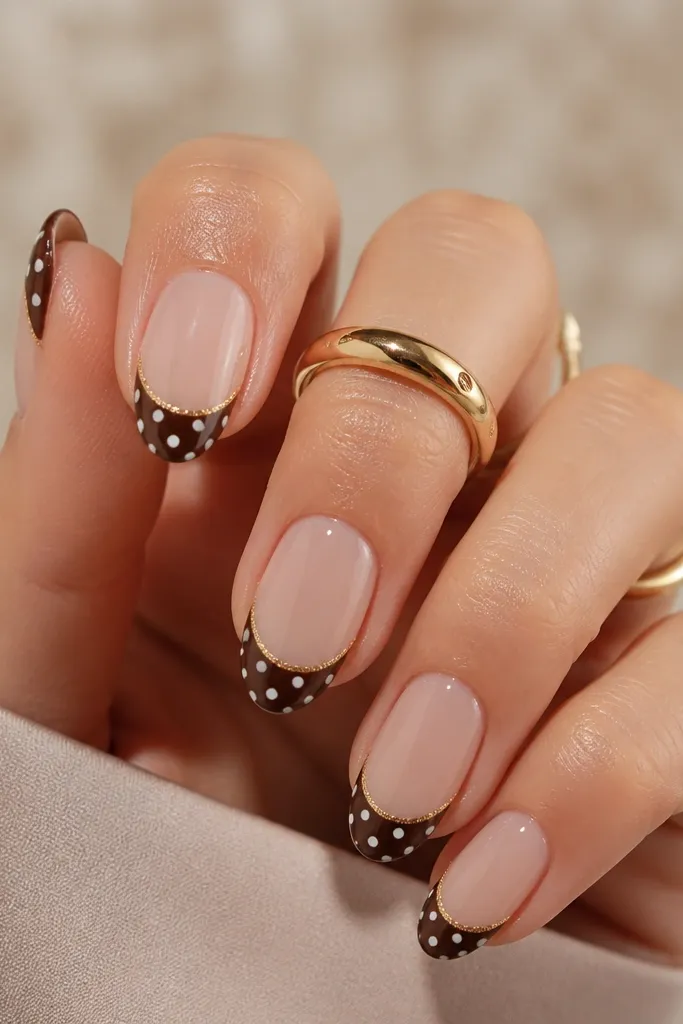
Gold at the edge makes the French look sharp and polished, and it helps the brown dots look more deliberate. The gold line is thin, so it doesn't compete with the polka pattern. I use it when I want the manicure to look "done" without adding glitter. Keep the gold line straight and close to the tip edge.
Paint a dotted French tip in warm chocolate brown and cure. Add a micro gold line along the outer edge of the French tip using a striping brush and gold gel paint. Place two tiny dots centered on most nails, and add a third dot on one accent nail. Topcoat gloss to seal everything.
Editor's noteLet the gold line cure fully before topcoat so it stays crisp and doesn't smear.
Watch outSkip thick gold foil strips - fine gel paint looks cleaner on short nails.