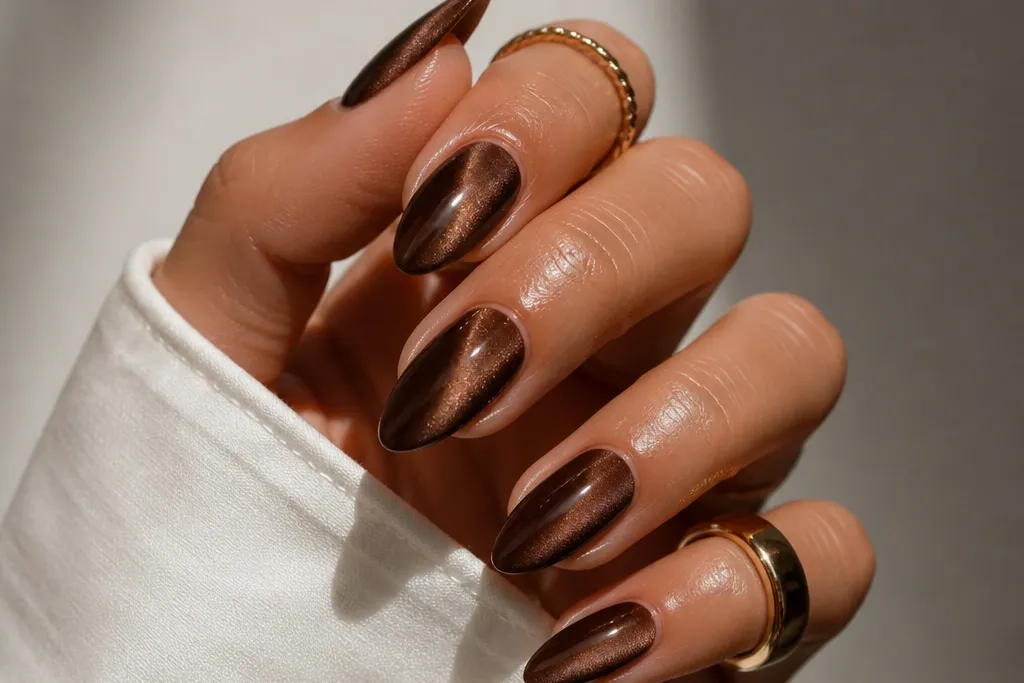
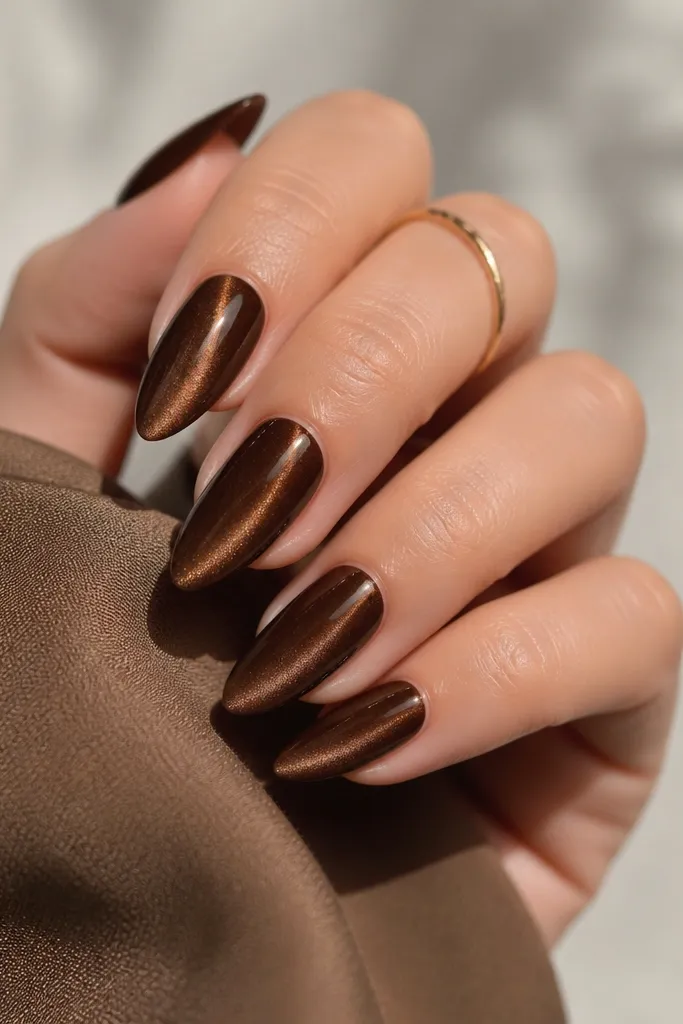
1. Espresso Eye with Micro-Glitter Topcoat
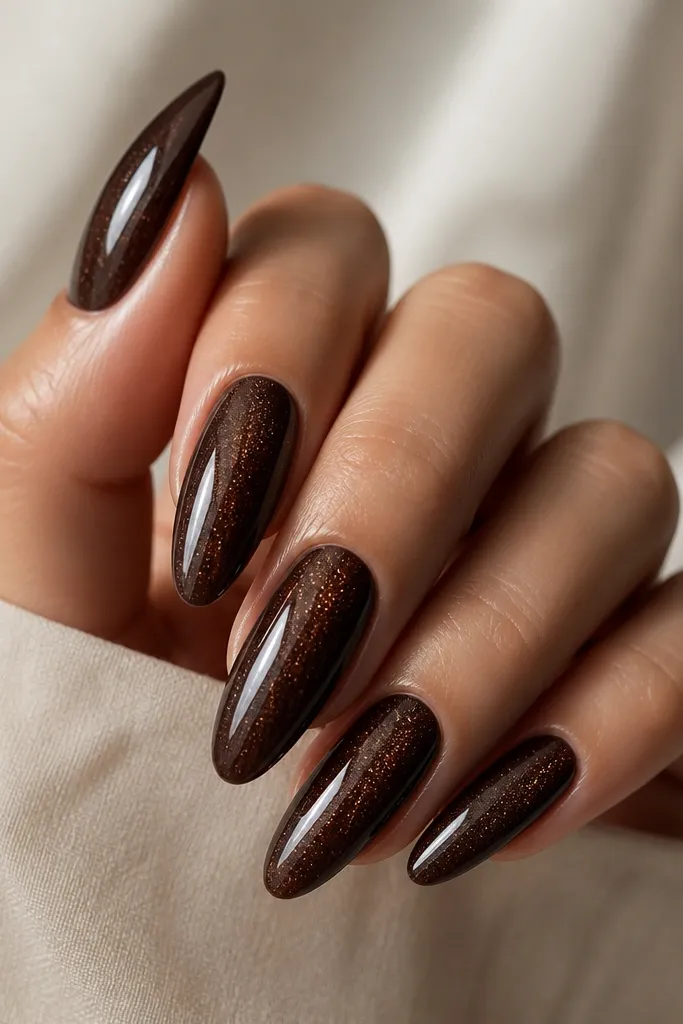
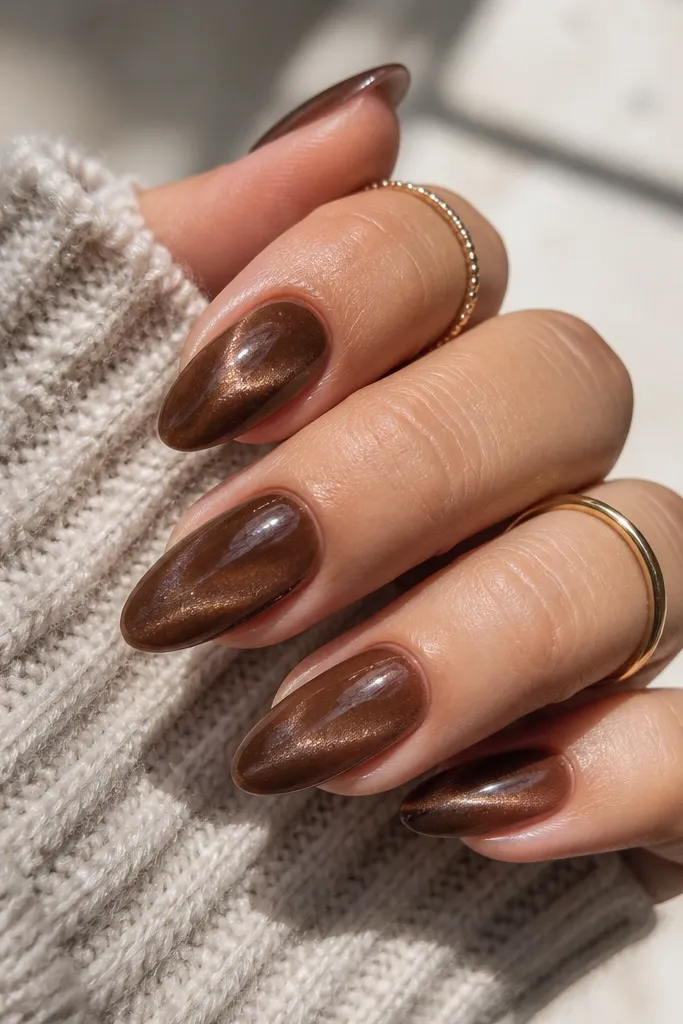
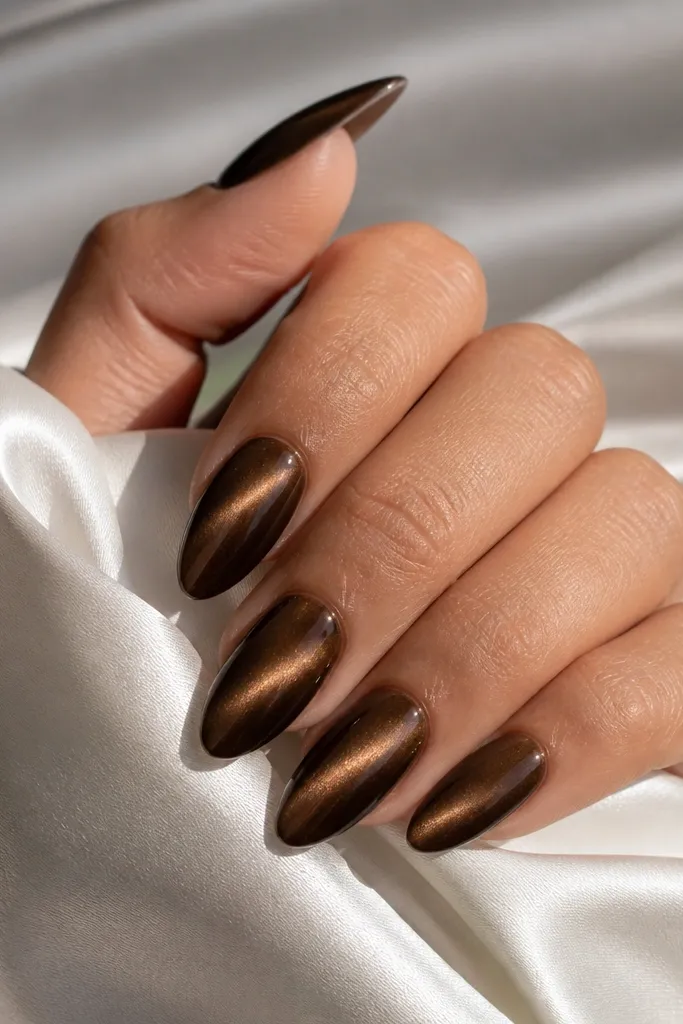
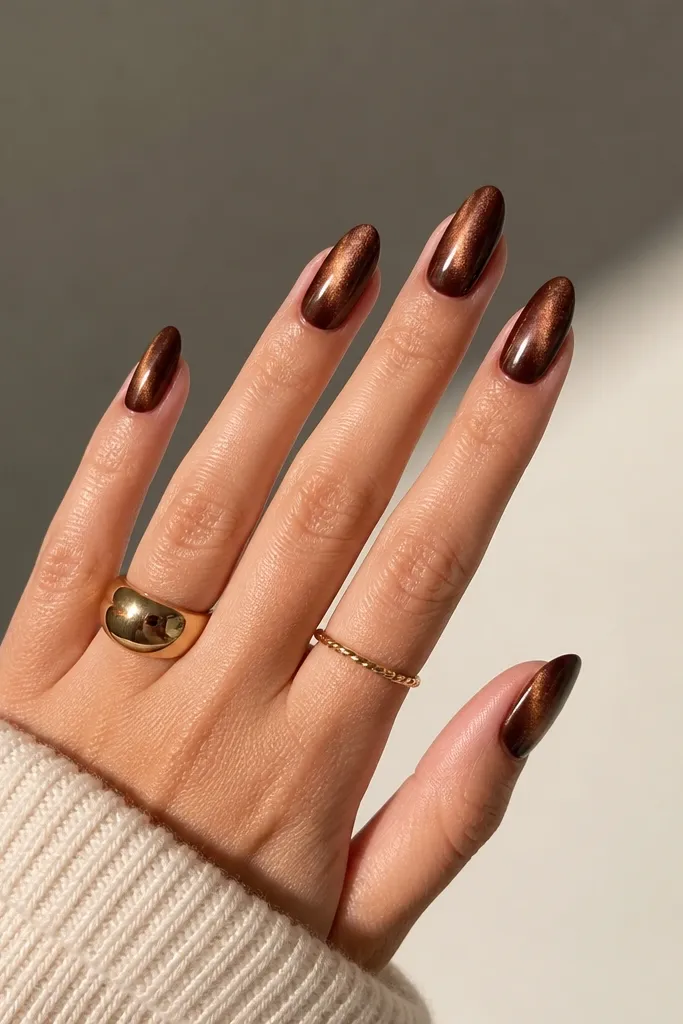
This is the "clean but not boring" version of aesthetic brown cat eye nails. The espresso base makes the magnetic line look almost black, so the stripe pops even in shade. The micro-glitter topper catches light without turning your nails gritty, and it keeps the eye stripe looking dimensional instead of flat.
Paint two coats of espresso cat-eye gel, cure each coat fully. Magnet the first coat only if your gel is thick enough; otherwise magnet the second coat for a brighter stripe. Finish with a sheer topcoat that has ultra-fine glitter (not chunky) so you still see the eye through the shine.
Editor's noteUse a flat magnet and hold it straight above the nail for the full 10-15 seconds so the line stays dead center.
Watch outSkip chunky glitter - it blurs the magnetic stripe and makes the nails look rough.
2. Deep Umber Cat Eye with Gold Foil Crescent
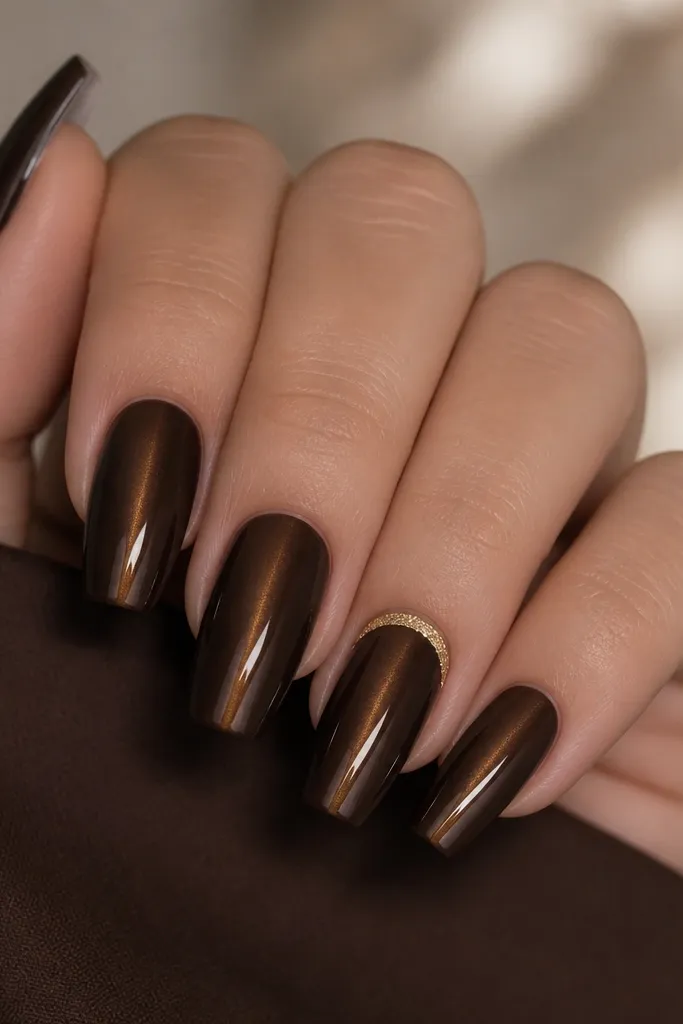
Warm umber + gold foil is a combo I keep coming back to because it looks expensive without trying hard. The gold crescent frames the nail without covering the magnetic eye, so the stripe still reads clearly. When the foil sits near the cuticle, it looks like a soft halo that makes hands look brighter.
Do two coats of deep umber cat-eye gel, then magnet on the final coat. For the foil, press gold leaf into a small curved arc at the cuticle area using a tacky layer (or foil glue), then seal with a thin topcoat. Keep the crescent narrow - about 1-2 mm tall - so it doesn't crowd the eye.
Editor's notePlace the foil only on the ring finger and keep the rest plain - it makes the effect intentional in photos.
Watch outDon't cover the eye stripe with foil; it turns the magnet line into a muddy streak.
3. Chocolate Marble Cat Eye Swirl
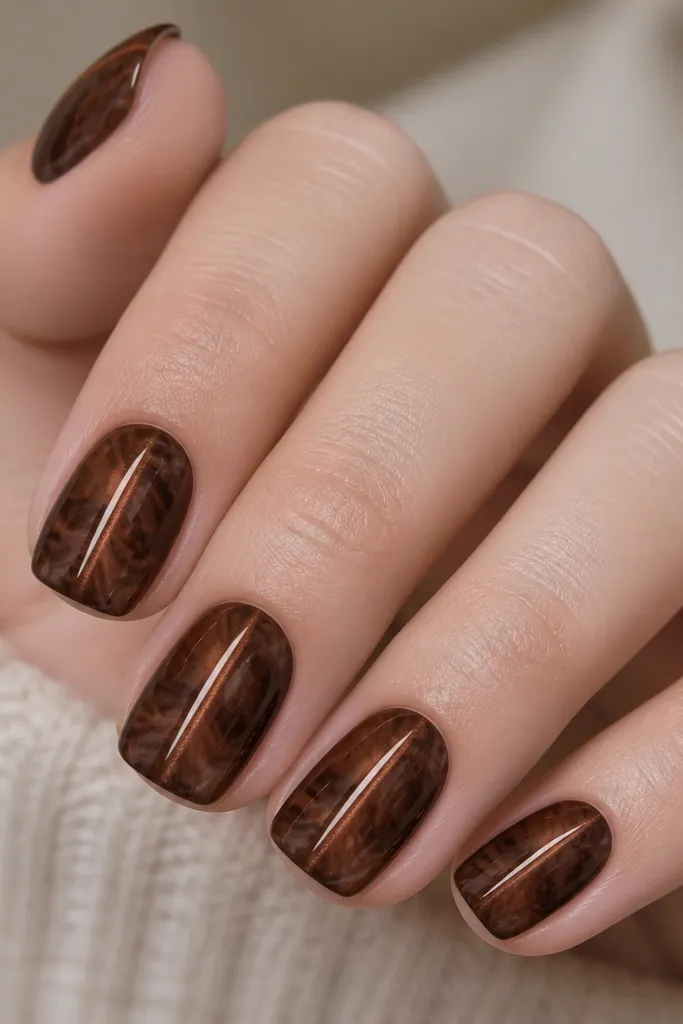
Marble can easily look random, but chocolate marble with a cat-eye line looks controlled. The swirling darker pieces make the stripe look like it's carved into the nail. This is a great option when you want cat-eye drama but still want a brown that feels wearable.
Use a chocolate brown base gel. Before curing the second coat, drag a darker brown gel through the wet layer with a thin silicone tool or toothpick to create a swirl. Magnet after the marble is placed, then cure. Finish with a thick topcoat so the marble edges look smooth.
Editor's noteKeep the marble movement mostly in the lower half of the nail so the stripe stays crisp from cuticle to tip.
Watch outDon't over-blend the marble - if the swirl smears, the eye stripe loses contrast.
4. Oxblood Eye with Matte Top + Gloss Stripe
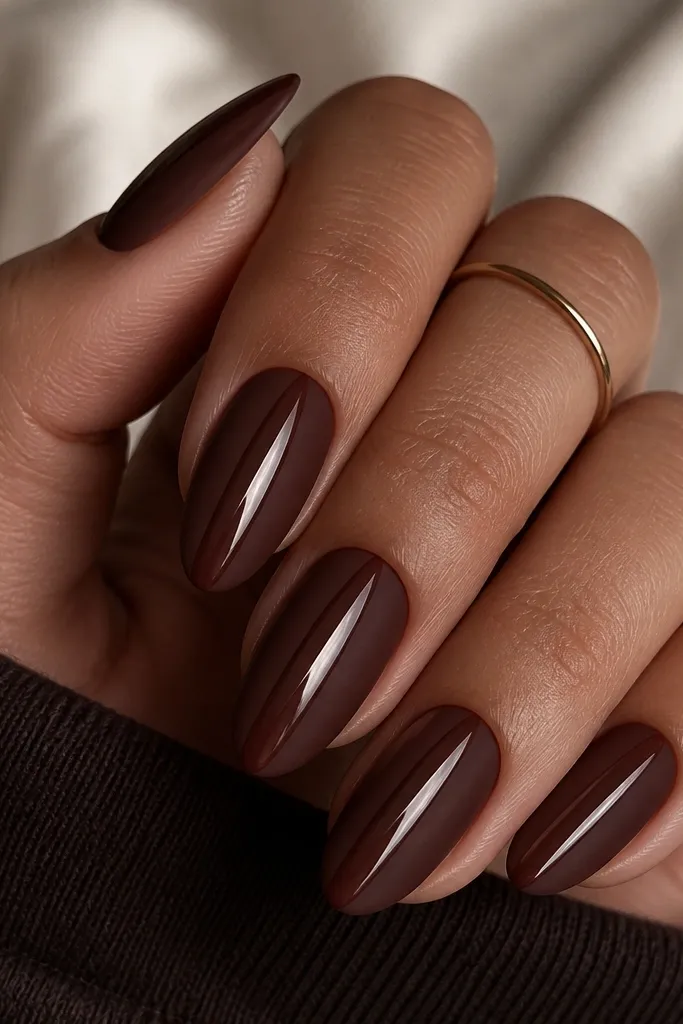
This one gets compliments fast because it's the only cat-eye set that changes texture. Matte topcoat makes the brown look velvety, and the glossy stripe still looks like a beam of light. The contrast makes the magnet effect look sharper even without extra gems.
Paint and magnet as usual, then cure. Apply matte topcoat over the nails, cure again. To keep the stripe glossy, use a thin striping brush to paint glossy topcoat only where the cat-eye line sits, then cure.
Editor's noteUse a striping brush and steady your hand on the table - the stripe needs a straight edge to look intentional.
Watch outDon't skip curing between matte and glossy coats; otherwise the textures smear together.
5. Cocoa Eye with Tiny Rhinestone Teardrop
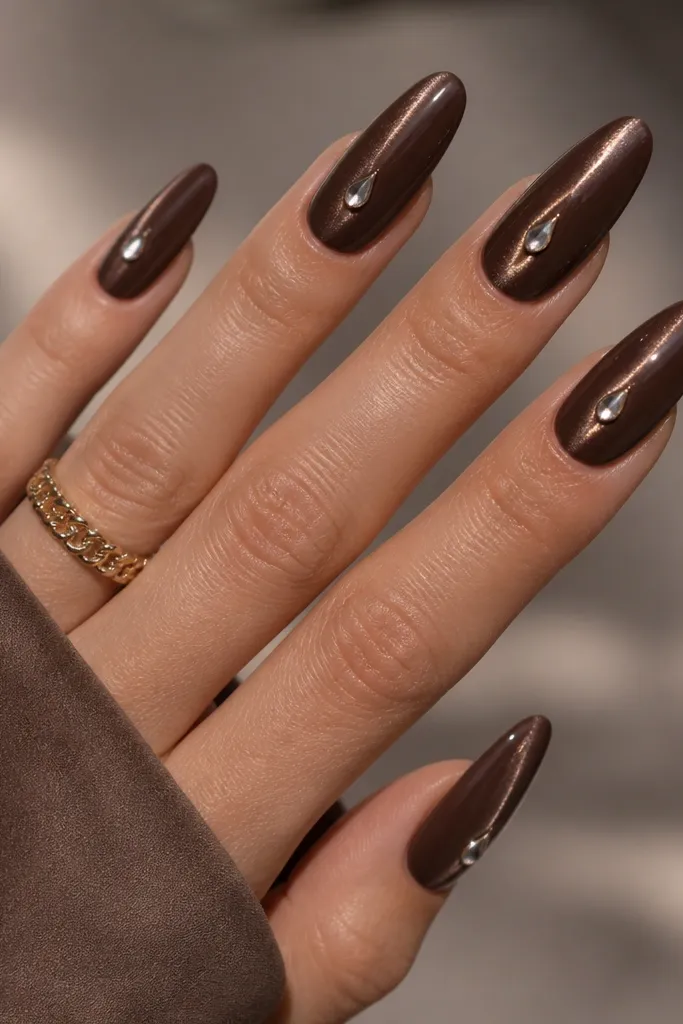
A single rhinestone is enough when your base is dark and the eye stripe is clean. The teardrop shape echoes the curve of the cat-eye, so it looks like the nail has a guided highlight. This set is perfect for date nights because it sparkles without looking heavy.
Do two coats of cocoa cat-eye gel and magnet on the final coat. Place one small teardrop rhinestone (2-3 mm) using nail glue on top of a cured tacky layer, then cap with a thin topcoat. Try to align the rhinestone's point with the stripe so your eye looks "pulled" upward.
Editor's noteUse a dotting tool to nudge the rhinestone into perfect alignment before curing.
Watch outAvoid big stones - they cover the stripe and make the nail look crowded.
6. Espresso Eye with Nude Outline French
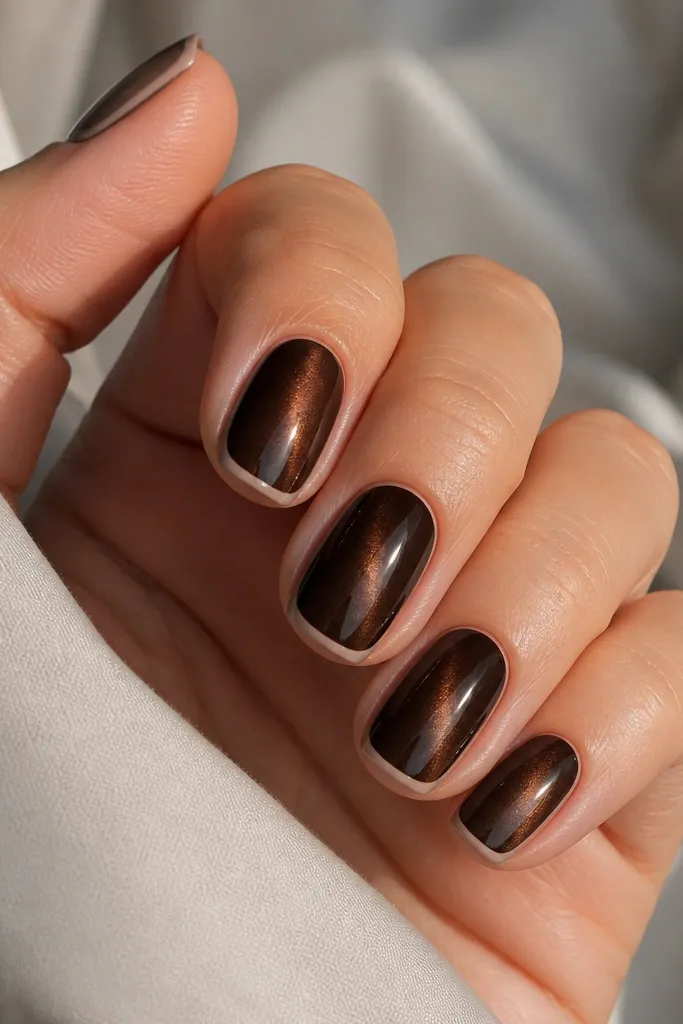
French outlines look chic on brown cat eye because the negative space makes the stripe look even brighter. The nude border also softens the dark brown so it doesn't feel heavy. This is one of my go-to sets for work because it reads polished in plain lighting.
Apply espresso cat-eye gel and magnet on the last coat. For the French outline, use a nude striping gel and draw a thin U at the free edge, leaving a 1 mm gap from the sidewalls. Keep the outline narrow so your stripe remains the focal point, then seal with high gloss topcoat.
Editor's noteUse nail tape to hold the curve steady for the French outline - freehand U shapes often look uneven.
Watch outDon't fill the whole tip with nude; a full nude tip kills the cat-eye effect.
7. Warm Umber Eye with Copper Chrome Dust
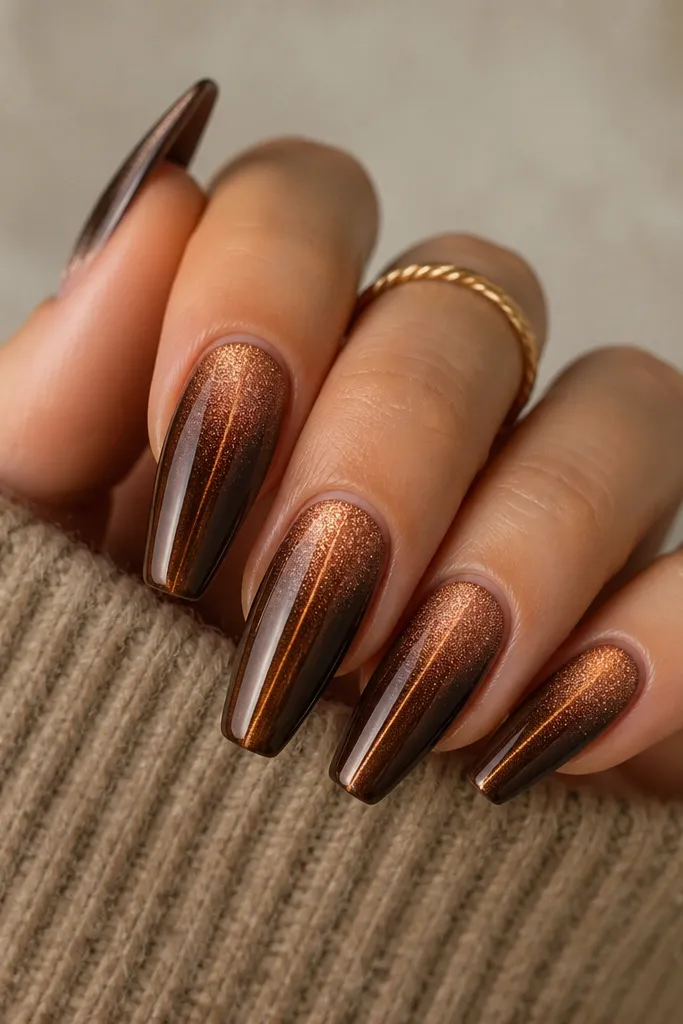
Copper chrome on warm umber makes the magnet stripe look like it has heat. The key is keeping the chrome limited to the top third so the eye stays readable. In photos, this gives a metallic glow right where light hits your nails.
Paint warm umber cat-eye gel and magnet. After curing, apply a thin layer of clear tacky gel only on the top third, then rub in copper chrome powder with an applicator sponge. Brush off excess, then topcoat carefully so you don't smear the chrome.
Editor's noteSeal chrome with two thin topcoat layers instead of one thick layer to avoid dulling.
Watch outDon't swipe chrome over the whole nail; it turns the stripe into a flat metallic area.
8. Dark Brown Cat Eye with Black Lace Overlay
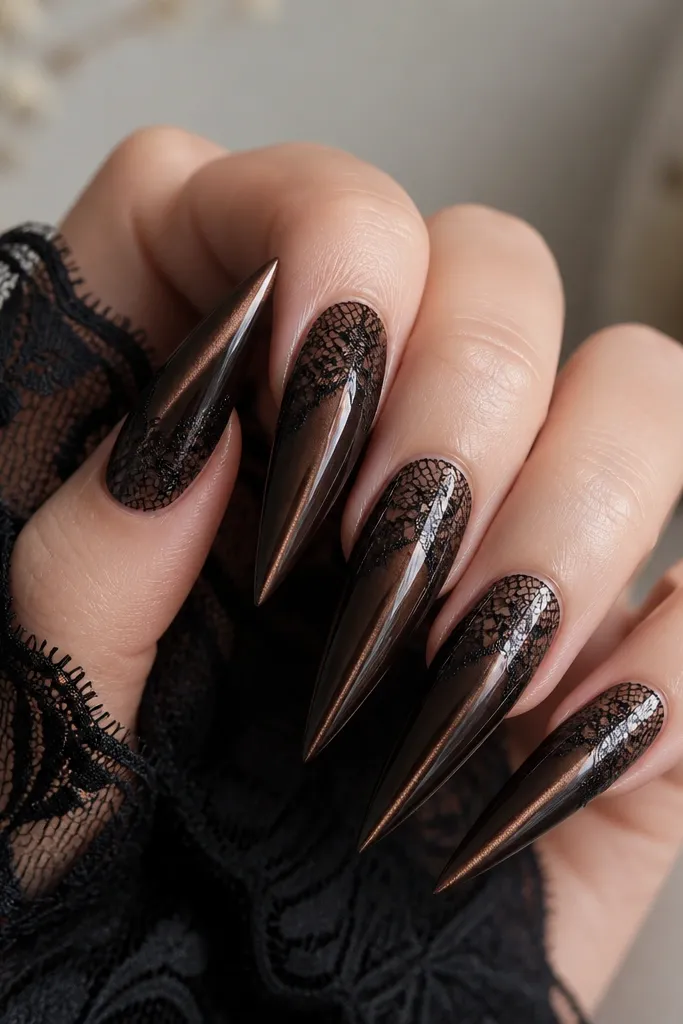
Lace + cat eye looks like you tried harder than you did. The lace overlay adds texture without changing the brown tone, and the stripe still acts like the main highlight. This style looks especially good on stiletto or long almond because the lace has room to breathe.
Paint and magnet dark brown (espresso or near-black brown). Seal with a thin topcoat, then apply black lace decal pieces on the upper half. Press edges down and trim at the free edge, then cap with glossy topcoat and cure.
Editor's noteUse small lace sections that end right under the stripe highlight so the eye stays visible.
Watch outSkip chunky lace decals that wrinkle; wrinkles show through glossy topcoat.
9. Caramel Espresso Gradient Eye
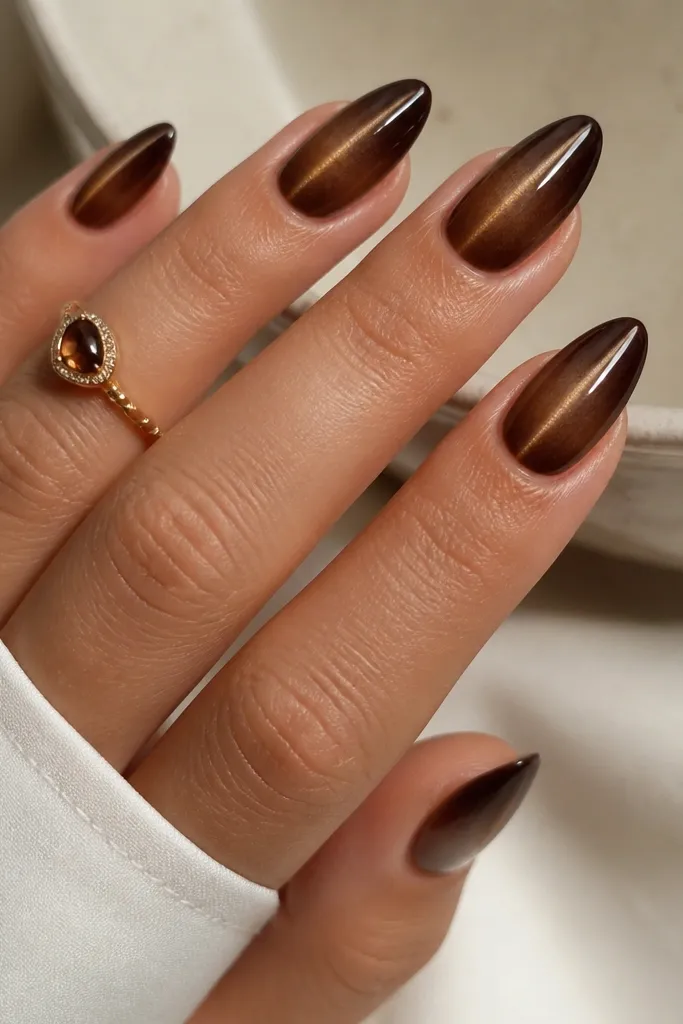
A brown gradient makes the cat-eye look like it has depth, not just a line. Caramel near the cuticle adds warmth, while espresso at the tip creates contrast so the stripe stands out. The result reads soft-to-bold, which is why this set works for both casual and dressed-up days.
Start with caramel gel at the cuticle area, blend into espresso toward the tip using a sponge or a gradient brush. Cure, then do a final thin coat that evens the surface and lets the magnet work cleanly. Magnet the final coat so the stripe stays centered despite the gradient.
Editor's noteBlend the gradient thin. Thick gradient layers make the magnet stripe look bumpy.
Watch outDon't create a harsh line between caramel and espresso; it looks like a sticker edge.
10. Mocha Eye with Pearl Dust Accent
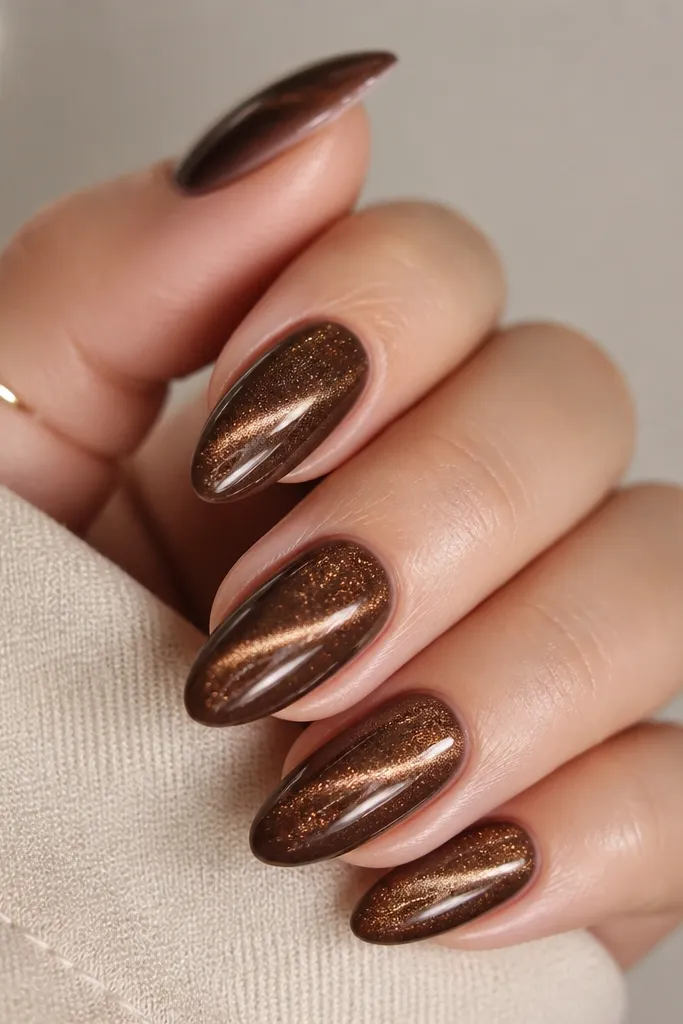
Pearl dust on mocha gives a soft glow that still feels grown-up. The cat-eye stripe keeps the look from going too sweet. I like this because it looks clean even when your hands are moving around - pearls catch light but don't sparkle loudly.
Apply mocha cat-eye gel and magnet. For accent nails, apply a tiny amount of clear tacky gel around the cuticle and tap pearl powder in a circular shape. Seal with a glossy topcoat that's slightly thicker over the pearl area to keep it smooth.
Editor's noteKeep the halo small - about 2 mm from the cuticle - so it frames the eye instead of covering it.
Watch outDon't use chunky pearl beads; they snag and lift at the edges.
11. Smoky Brown Eye with Silver Foil Edge
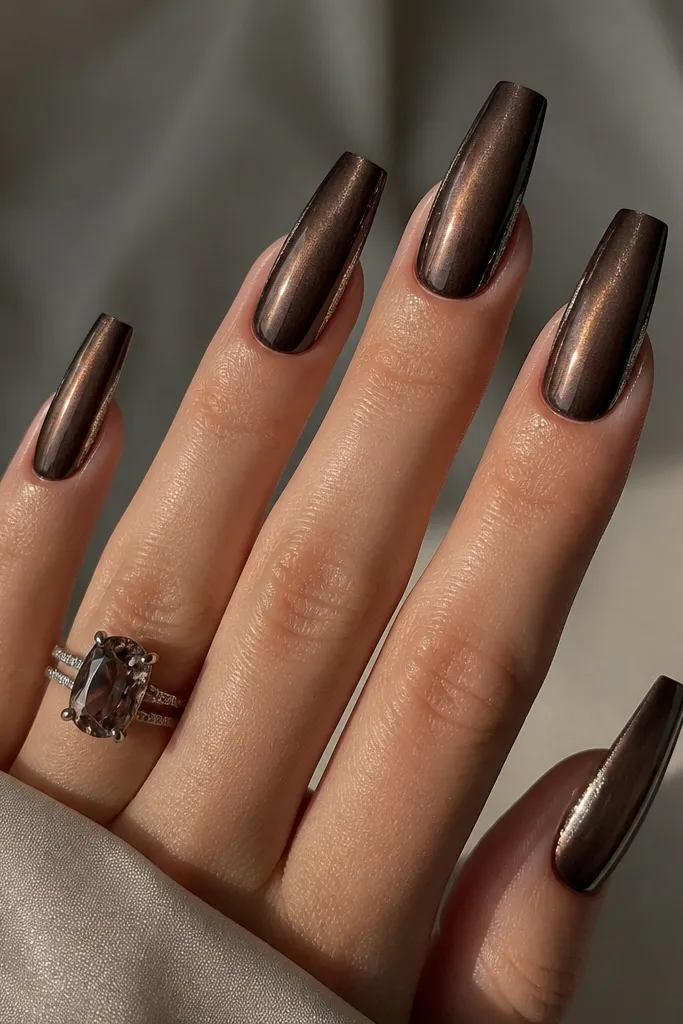
Silver foil edge gives you that "fashion nail" look while keeping the base dark and moody. The stripe gives the cat-eye effect, and the single foil edge adds a clean highlight that looks sharp in motion. This is a great choice if your jewelry is silver and you want your nails to match.
Use a smoky dark brown cat-eye gel and magnet for a centered line. Apply silver foil glue along one sidewall, then press foil and trim at the tip. Seal with glossy topcoat, but cap the foil edge with extra care so it doesn't lift.
Editor's noteFoil looks best when it's only on one side. Two-sided foil turns it into a thick stripe that hides the eye.
Watch outDon't let foil cross the stripe line; it breaks the cat-eye focus.
12. Dark Brown Cat Eye with Nude Micro Dot Lining
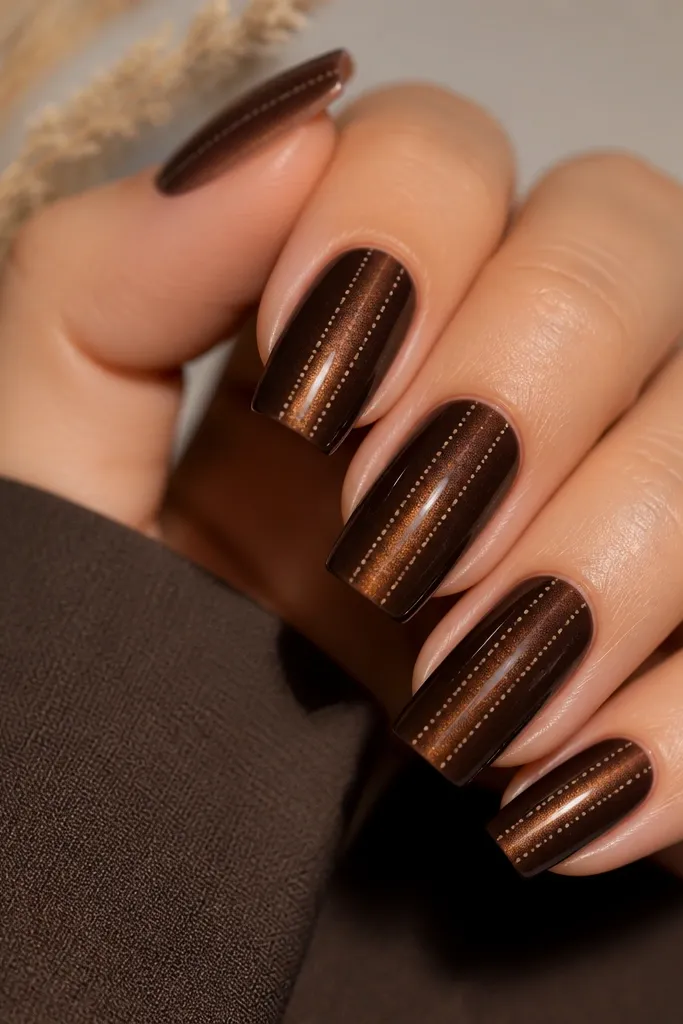
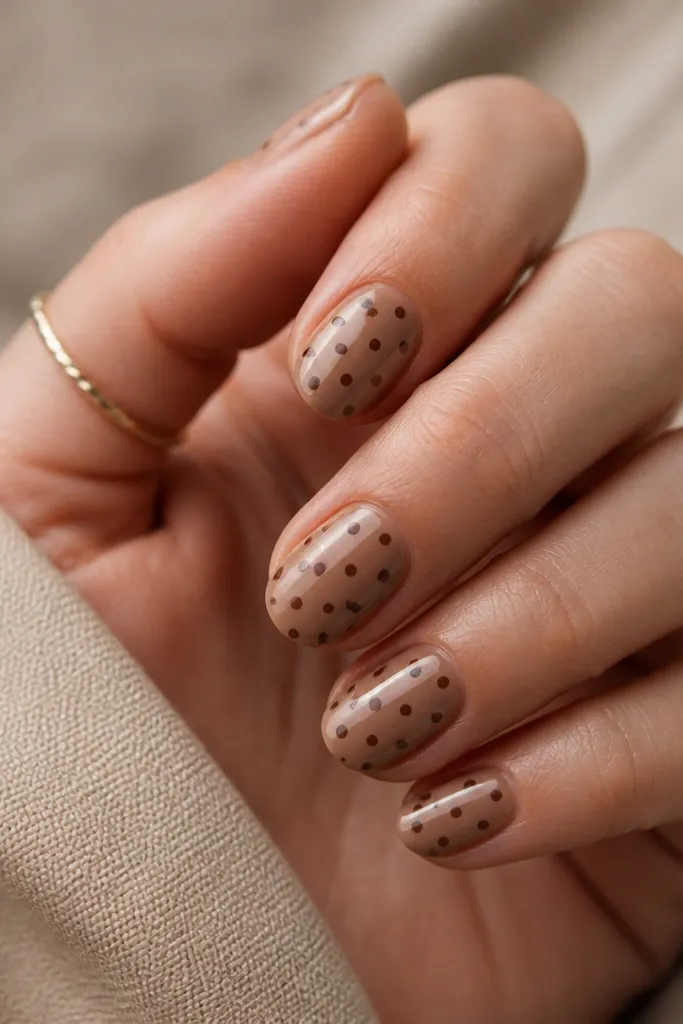
Micro dots make brown cat eye look graphic and modern. Because the dots are nude, they don't fight the stripe - they guide your eye down the nail. This is a good set if you want something that looks "designed" but still works with everyday outfits.
Paint dark brown cat-eye gel and magnet on the final coat. Use a nude striping gel and a dotting tool to place dots in two thin rows that flank the stripe. Keep the rows about 1 mm away from the stripe so the stripe stays the hero.
Editor's noteDo dots after magnet curing, not before. The magnet can smear fine lines if you place them too early.
Watch outSkip large dots. Big beads look like cheap nail art stickers.
13. Caramel Swirl Eye on Clear Base
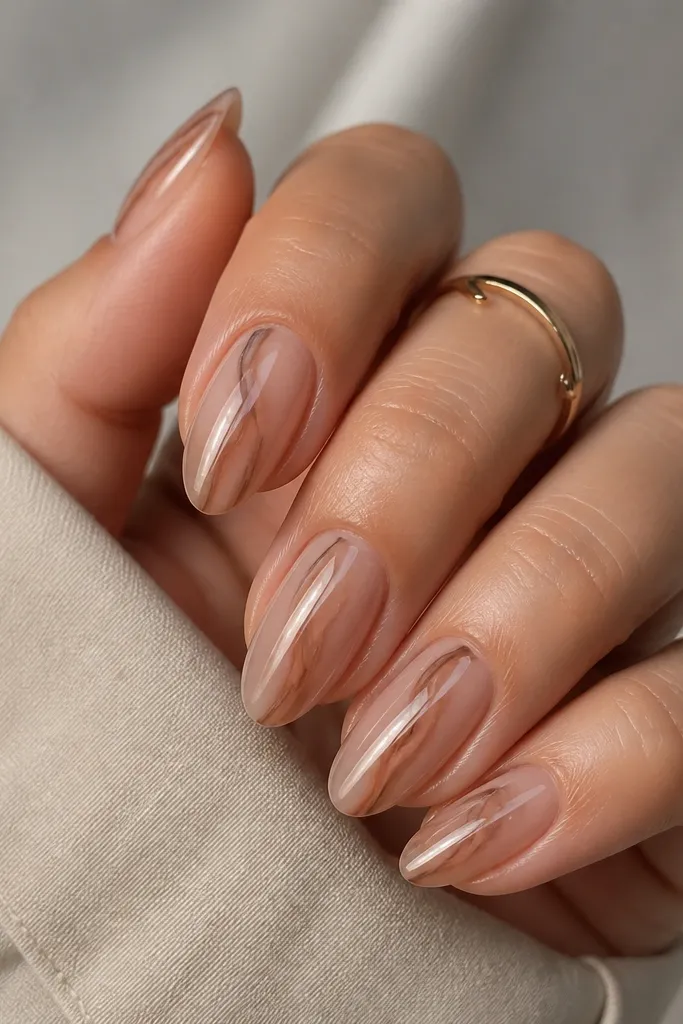
This is the "see-through but still brown" option. A clear nude base makes the stripe look like it's floating, and caramel swirls add movement without covering the nail surface. It's softer than a full-coverage brown cat eye, which means it grows out nicer.
Start with a clear nude builder gel base and cure. Add caramel swirl lines with a thin brush, then apply a thin brown cat-eye gel layer over it. Magnet the final layer so the stripe sits on top of the swirl.
Editor's noteKeep the swirl lines thin and slightly off-center so the cat-eye stripe looks balanced.
Watch outDon't make the clear base too thick. Thick clear layers make the stripe look cloudy.
14. Black-Brown Eye with Rose Gold Spark Line
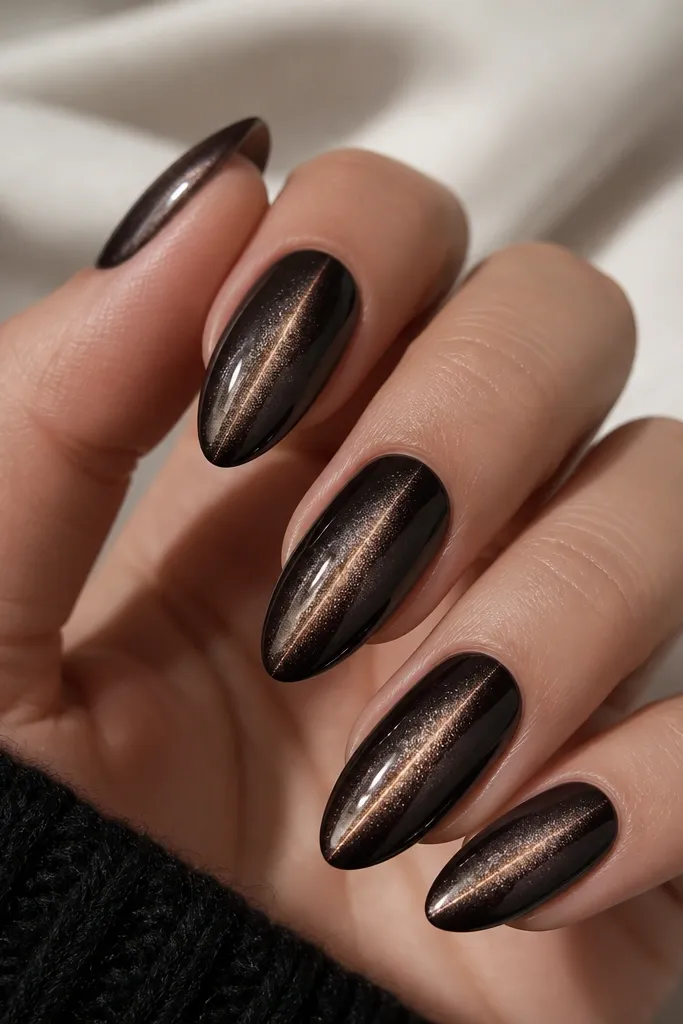
Rose gold spark turns the cat-eye stripe into a "light beam" effect. The black-brown base gives you that deep contrast, and the spark line sits right where your eye already wants to look. It's a small change that makes the whole set feel more special.
Do two coats of black-brown cat-eye gel and magnet. After curing, paint a thin line of rose gold glitter gel directly over the stripe with a striping brush. Cure again and seal with glossy topcoat.
Editor's noteUse glitter gel that stays smooth. If it feels gritty before topcoat, it will feel gritty after too.
Watch outDon't over-thicken the spark line; a fat stripe looks like a crack in photos.
15. Mocha Eye with Chocolate Rhinestone Cluster
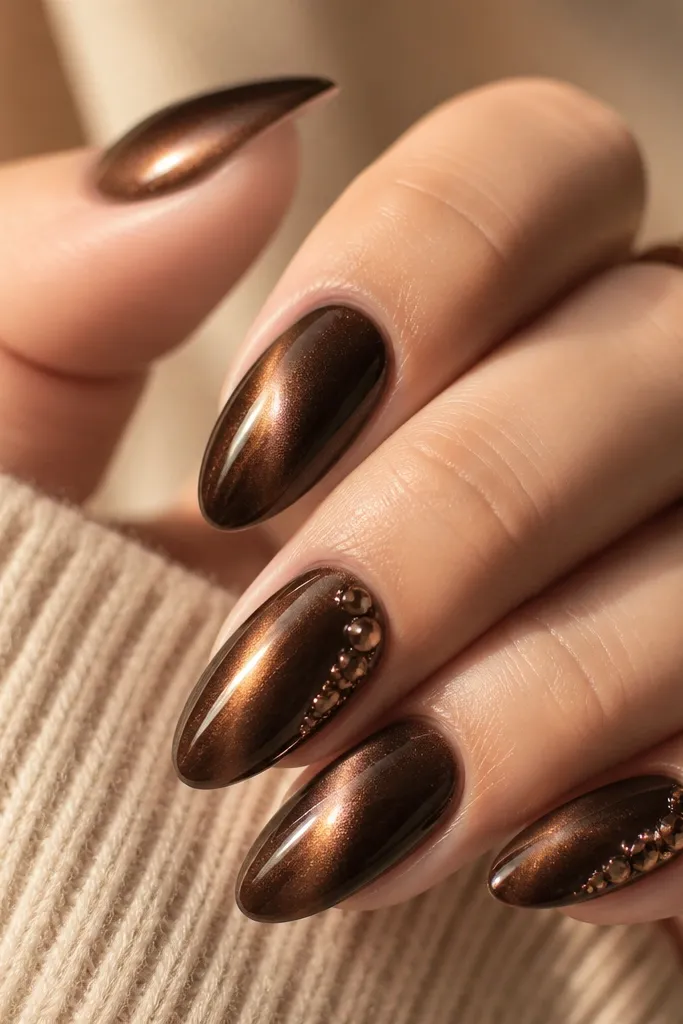
Clusters can look heavy, but a small half-moon cluster keeps this classy. The dark stones match the brown base, so nothing looks out of place. The cat-eye stripe still runs through the center so the nail doesn't become just a gem pile.
Paint and magnet mocha brown for all nails. On the ring finger, place 3-5 small round or teardrop rhinestones in a half-moon shape just above the midline, aligned with the stripe. Cap with a thick glossy topcoat and cure fully.
Editor's notePress stones into a thin layer of clear builder gel so they sit flush.
Watch outDon't place stones directly on the cuticle edge; lifting makes them pop off fast.
16. Dark Umber Eye with Brown Tortoiseshell Tips
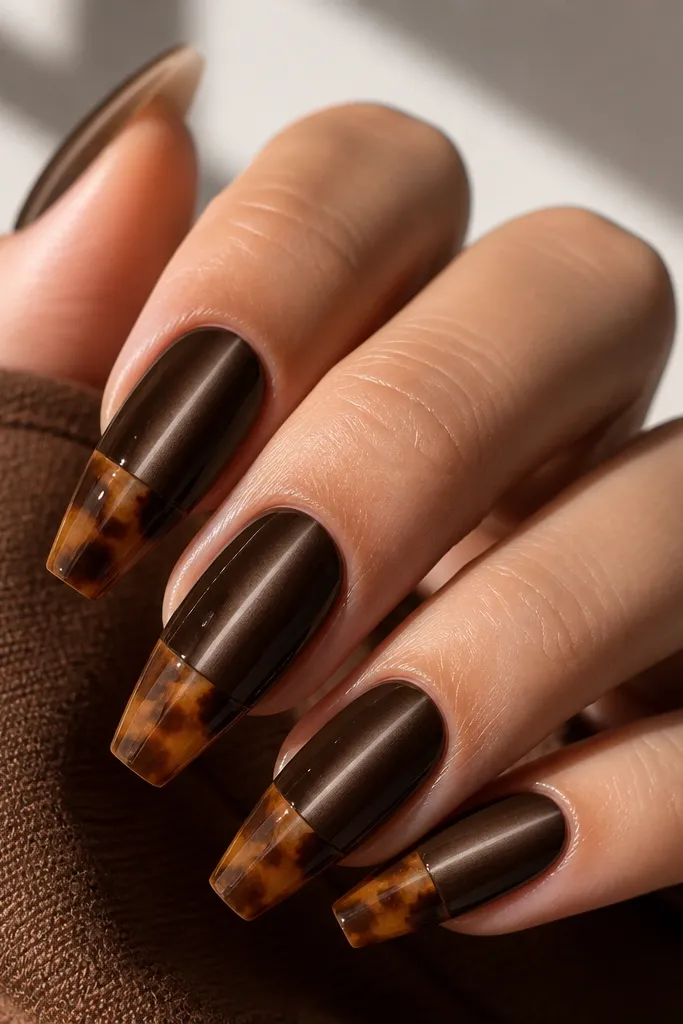
Tortoiseshell tips make brown cat eye feel designer. The pattern mirrors the warm tones in the stripe, so your nails look cohesive instead of two separate ideas. It also keeps the accent area only at the tip, which makes the set look neat as it grows.
Paint and magnet dark umber. At the free edge, sponge or brush on a caramel base, then add thin irregular lines with a darker brown and amber. Blend the edges so the pattern fades into the solid upper half. Finish with glossy topcoat for a smooth "shell" look.
Editor's noteKeep the tortoiseshell zone to the last 1/3 of the nail for the cleanest line.
Watch outDon't make the tortoiseshell too busy. If every nail has 10+ lines, it looks messy.
17. Espresso Eye with Smoky Gray Underline
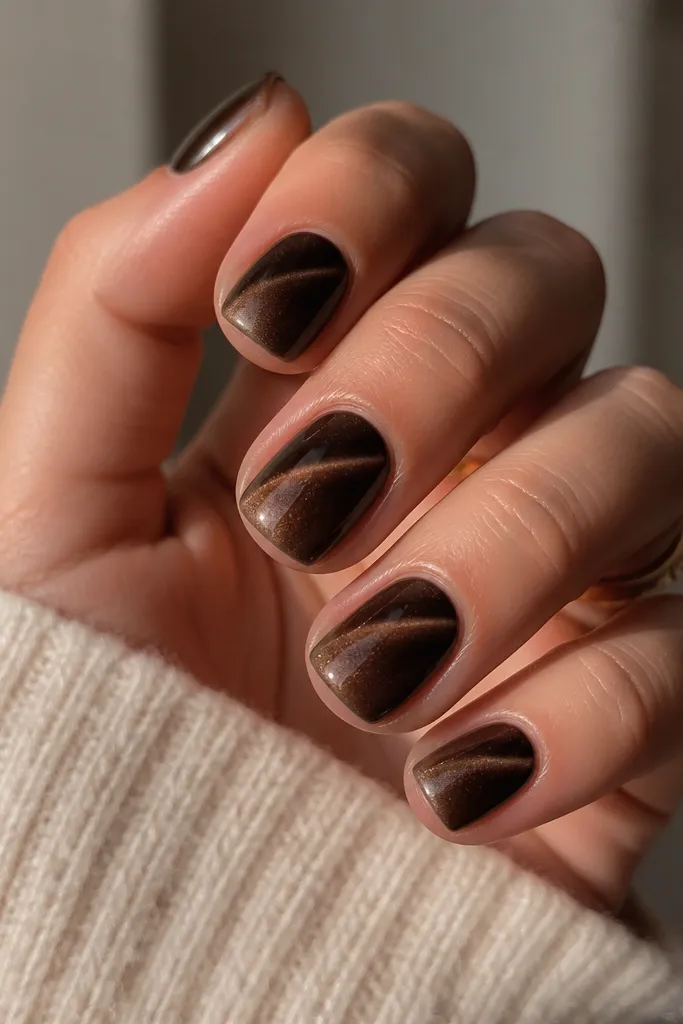
This design gives the stripe extra depth by adding a subtle shadow under it. Espresso keeps everything dark and moody, and the gray underline makes the stripe look like it's floating above the base. It's a small detail that reads like a professional finish.
Paint espresso cat-eye gel and magnet. After curing, use a smoky gray gel to draw a thin line just under the stripe, leaving a 0.5 mm gap. Soften the gray at the tip with a dry brush, then topcoat glossy.
Editor's noteUse a liner brush with a sharp tip. Blunt brushes widen the underline fast.
Watch outSkip solid gray - it looks like a crack instead of a shadow.
18. Warm Umber Eye with Sheer Nude Base Fade
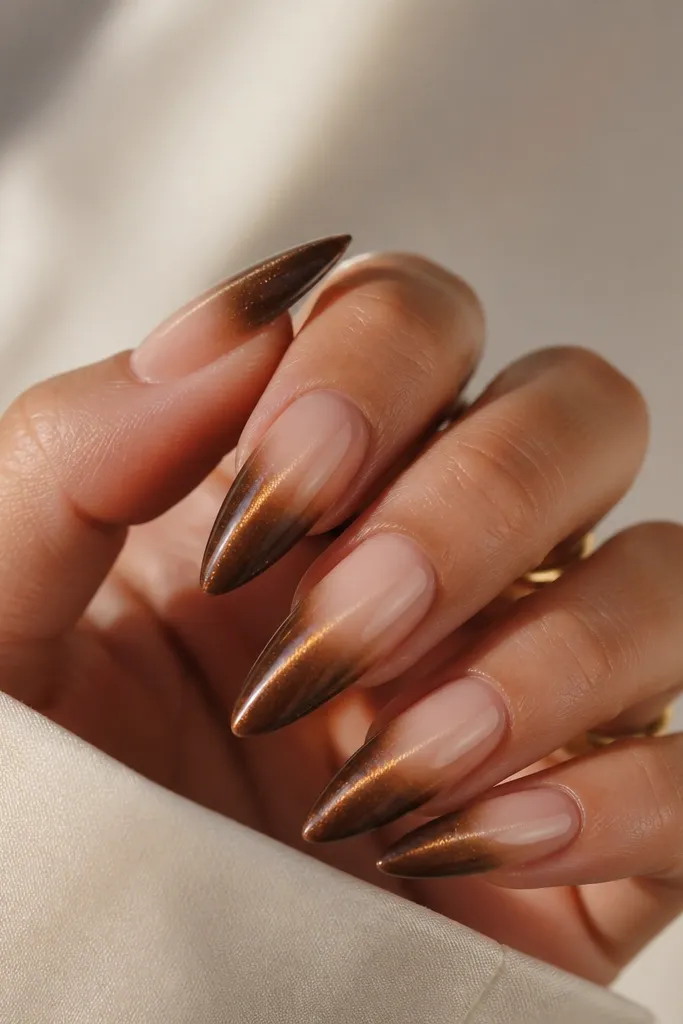
A nude-to-brown fade makes this look flattering and wearable. The eye stripe stays visible because the brown layer thickens toward the tip, where magnetism shows strongest. It also hides growth better than full coverage, which matters if you wear this longer than a week.
Apply sheer nude gel at the cuticle and blend into warm umber with a sponge. Cure, then add a final thin brown cat-eye layer to sharpen the stripe. Magnet that final layer, then seal with glossy topcoat.
Editor's noteBlend the fade higher on the nail if your nails stain easily - it makes the brown look smoother as it grows out.
Watch outDon't leave a patchy brown layer near the cuticle. Patchiness kills the stripe clarity.
19. Dark Brown Eye with Copper Line Art
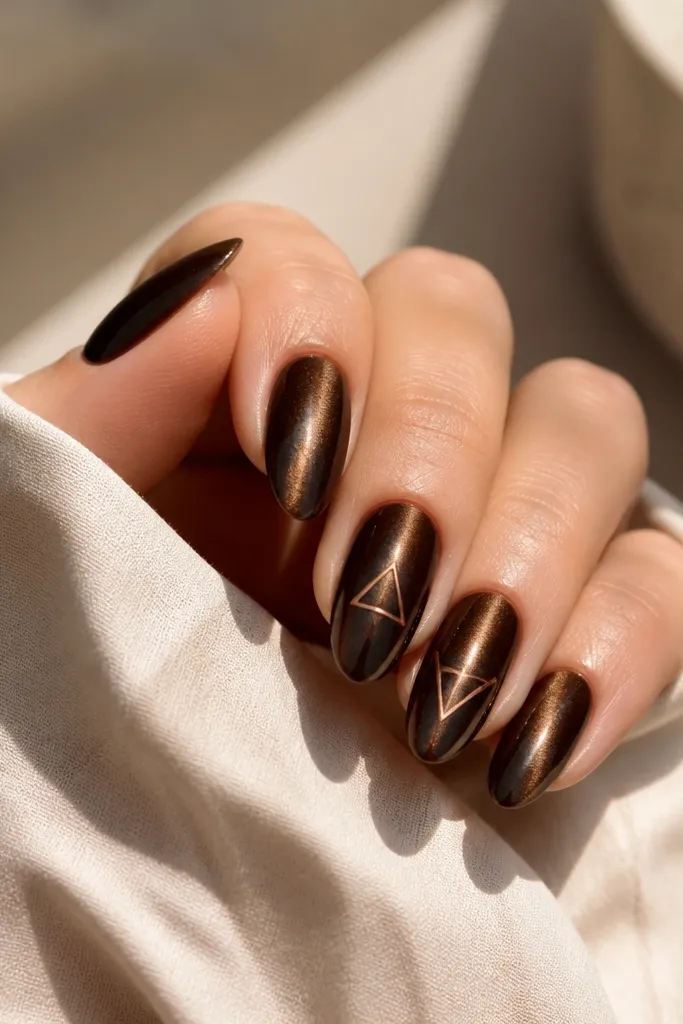
Copper line art adds structure to a cat-eye set. The stripe gives the motion highlight, and the geometric lines make it feel intentional. This is one of my favorite "going out" designs because it looks clean even under flash photography.
Do dark brown cat-eye on all nails and magnet. On the accents, use copper striping gel to draw a triangle or chevron that points toward the stripe, leaving space between the lines and the stripe. Cure and topcoat glossy to keep the lines crisp.
Editor's noteKeep line art only on the ring and middle fingers. More nails makes it look busy fast.
Watch outAvoid metallic paint that smears - it blurs the lines and makes the set look sloppy.
20. Mocha Eye with Sheer Brown Ombré Base
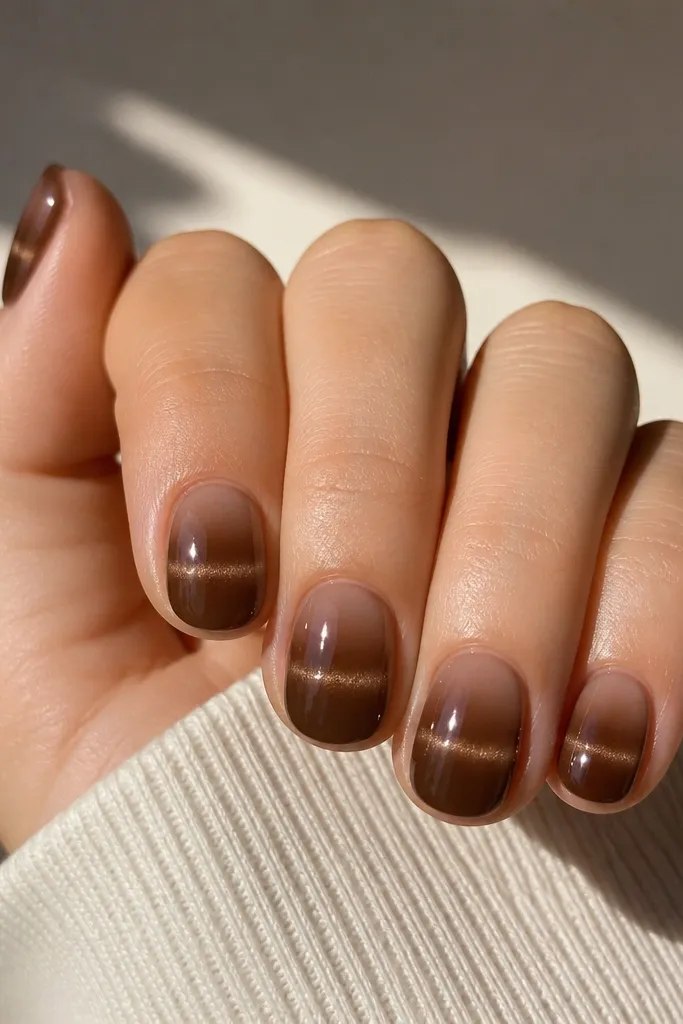
Sheer ombré makes brown cat eye look like it's grown into the nail. The stripe appears stronger where the ombré deepens, so you get that "eye" focus without needing a thick magnet layer. This is great if you hate heavy nail feel.
Use a sheer brown gel at the cuticle and sponge darker mocha toward the tip. Apply a thin cat-eye layer over the whole nail to even the surface, then magnet on that layer. Topcoat glossy and build one extra thin topcoat over the stripe for a smooth finish.
Editor's noteLet each gel layer cure longer than the minimum time on the bottle if your lamp runs cool.
Watch outSkip thick ombré. Thick layers create bumps that show under the glossy topcoat.
21. Oxblood Eye with Burgundy Velvet Accent
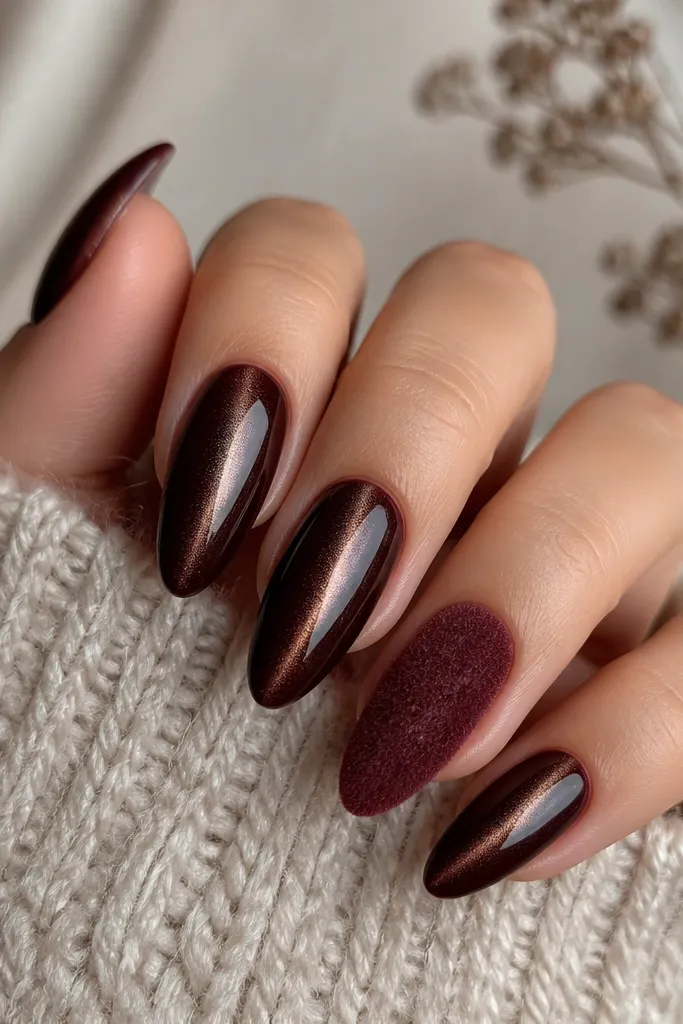
Velvet powder on one nail makes the cat-eye set feel like a full manicure, not an experiment. The fuzzy texture turns the accent into a focal point, and the glossy stripe on the other nails keeps it balanced. Burgundy velvet also looks stunning against deep brown in indoor lighting.
Paint and magnet oxblood cat eye for all nails. On the accent, apply a thin layer of dark burgundy base gel, cure partway if your powder requires it, then tap velvet powder on and press gently. Seal velvet with a soft matte top only if your product allows sealing; otherwise keep it unsealed and avoid heavy washing.
Editor's noteUse velvet on only one nail per hand. More than that looks like the manicure is wearing off.
Watch outDon't rub velvet after it's set. Rubbing creates bald patches.
22. Smoky Brown Eye with Clear Jelly Half-Moon
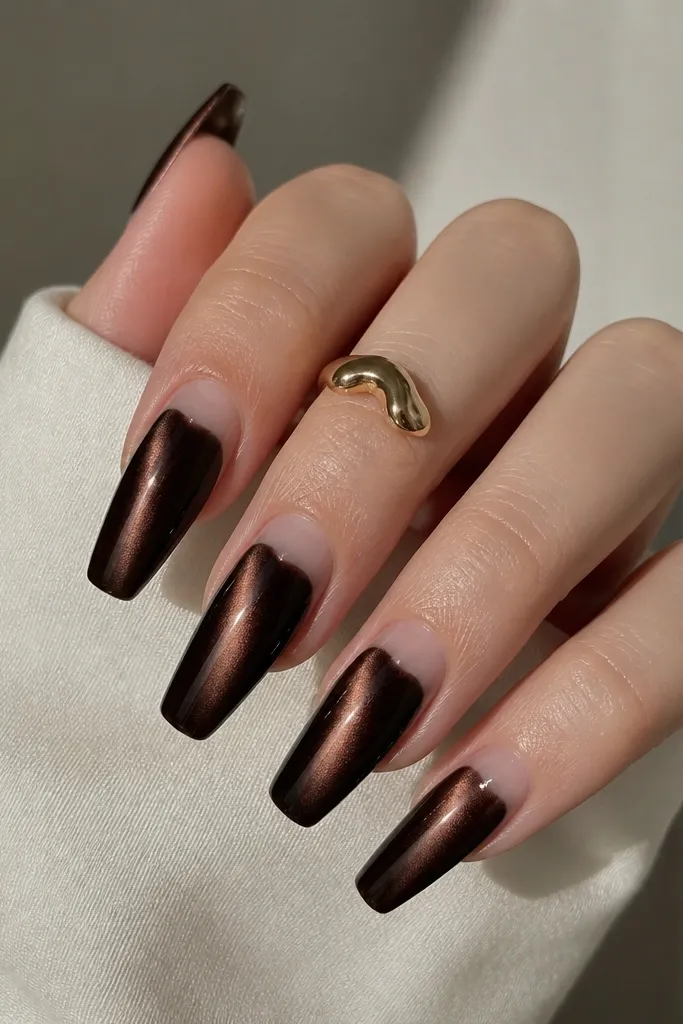
The clear jelly half-moon makes the nail look airy while keeping the cat-eye effect strong. It also gives you a built-in "highlight" under the stripe, so the eye looks more centered and bright. This is a clean choice if you like nail art but hate full coverage.
Create a clear jelly base at the cuticle by leaving a half-moon area free or using a clear builder gel mask. Paint smoky dark brown on the rest of the nail, then magnet the final brown layer so the stripe starts just above the half-moon. Topcoat glossy across the whole nail, including the jelly area.
Editor's noteUse a small brush to draw a crisp half-moon edge before you cure.
Watch outDon't make the half-moon too big. If it takes over the nail, the stripe looks off-center.
23. Espresso Eye with Pearl + Crystal Line at Cuticle
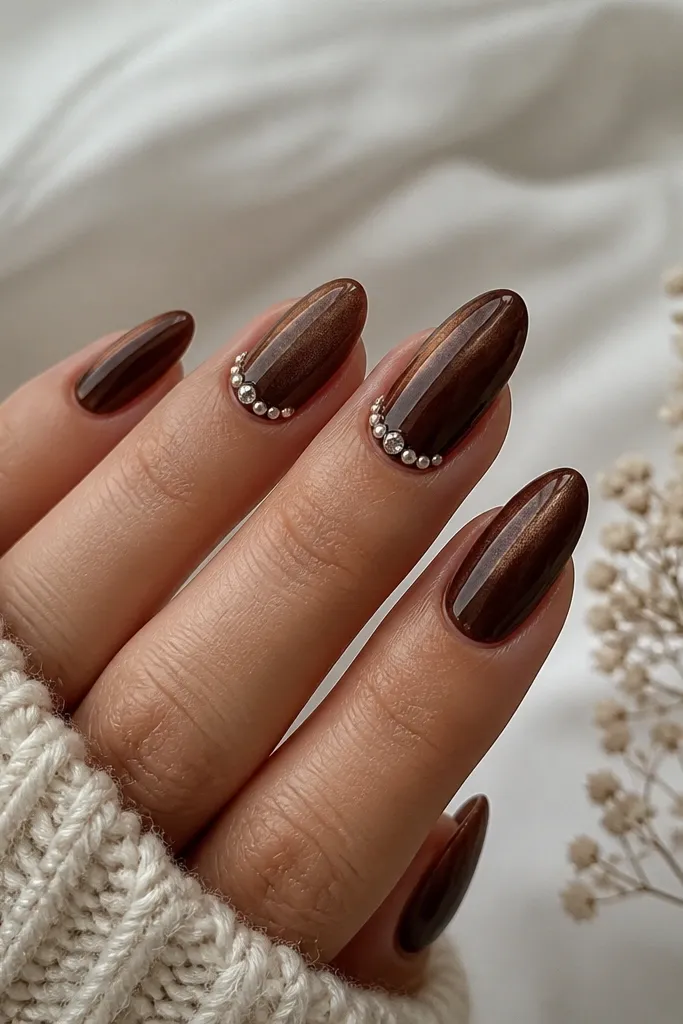
A cuticle line of tiny pearls reads delicate and expensive, especially on dark brown cat eye. The cat-eye stripe stays the main highlight, and the cuticle row adds a second shimmer that catches light when you move. This is perfect for weddings, holiday parties, or any time you want hands to look "done" in photos.
Do espresso cat-eye on all nails and magnet the final coat. On accents, place micro pearls (1.5-2 mm) in a straight line along the cuticle, leaving the stripe area clear. Add one or two small clear crystals at the center of the row. Seal with a glossy topcoat, capping each pearl so it doesn't snag.
Editor's noteKeep the pearls tiny. Big pearls create gaps and lift.
Watch outSkip a thick blob of glue. It shows as bumps under glossy topcoat.
24. Deep Umber Eye with Dark Brown Holo Shards
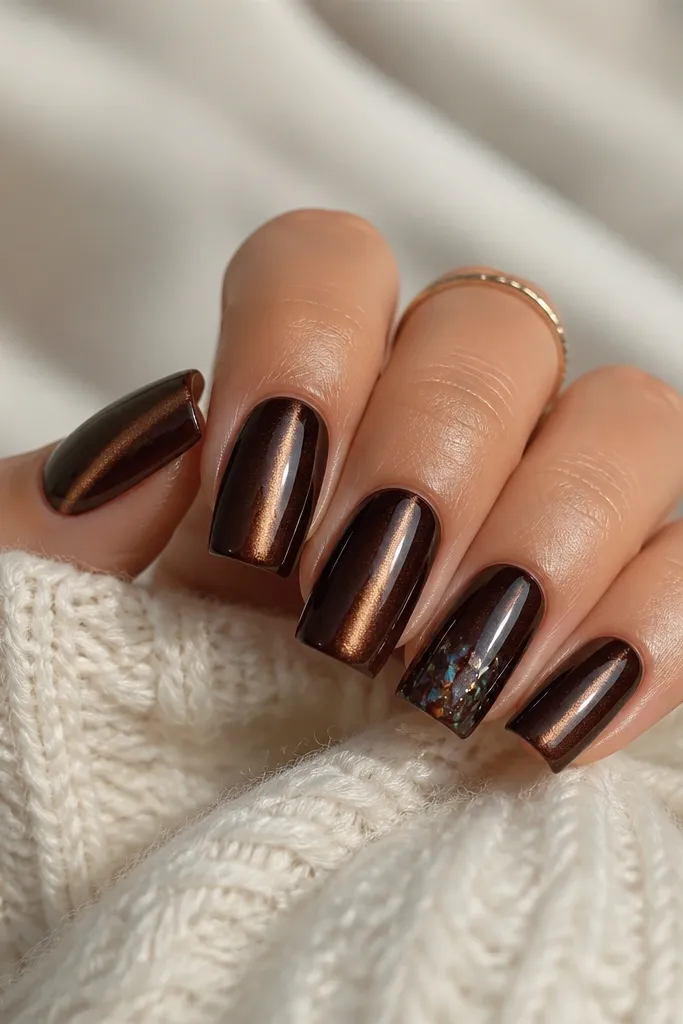
Holo shards on deep umber look like trapped light without turning your nails into neon. The magnet stripe gives the vertical "eye," while the shards add scattered sparkle near the tip. It's a photo-friendly set that still stays brown and moody.
Paint and magnet deep umber for all nails. On the accent nail, place dark holographic shards on the top third using a thin layer of clear gel, then spread a little gel over them to lock them down. Cure, then topcoat thick enough to smooth shard edges.
Editor's noteUse a topcoat that's slightly thicker. Thin topcoat won't fully cover shard texture.
Watch outDon't pile shards too close to the stripe - it turns the eye into chaos.
25. Chocolate Eye with Reverse French Nude Cuticle Frame
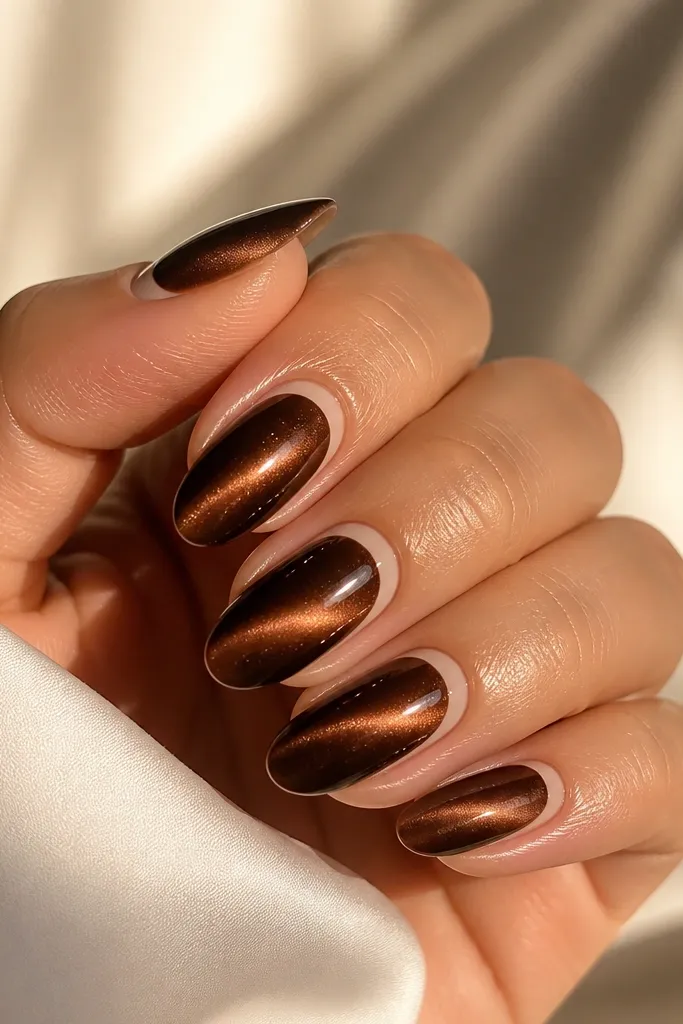
Reverse French frames are flattering because they make your nail bed look longer. On chocolate cat eye, the nude frame also keeps the brown from feeling heavy at the base. The magnetic stripe still runs through the center, so the eye effect stays front and center.
Apply chocolate cat-eye gel and magnet on the final coat. Use a nude striping gel to outline the cuticle border, leaving the stripe area uninterrupted. Keep the frame thin - about 1 mm - and cap with glossy topcoat for a smooth edge.
Editor's noteUse nail tape to mark the curve before painting the nude frame. It keeps both hands symmetrical.
Watch outDon't let nude gel flood under the cuticle. It looks messy and lifts sooner.