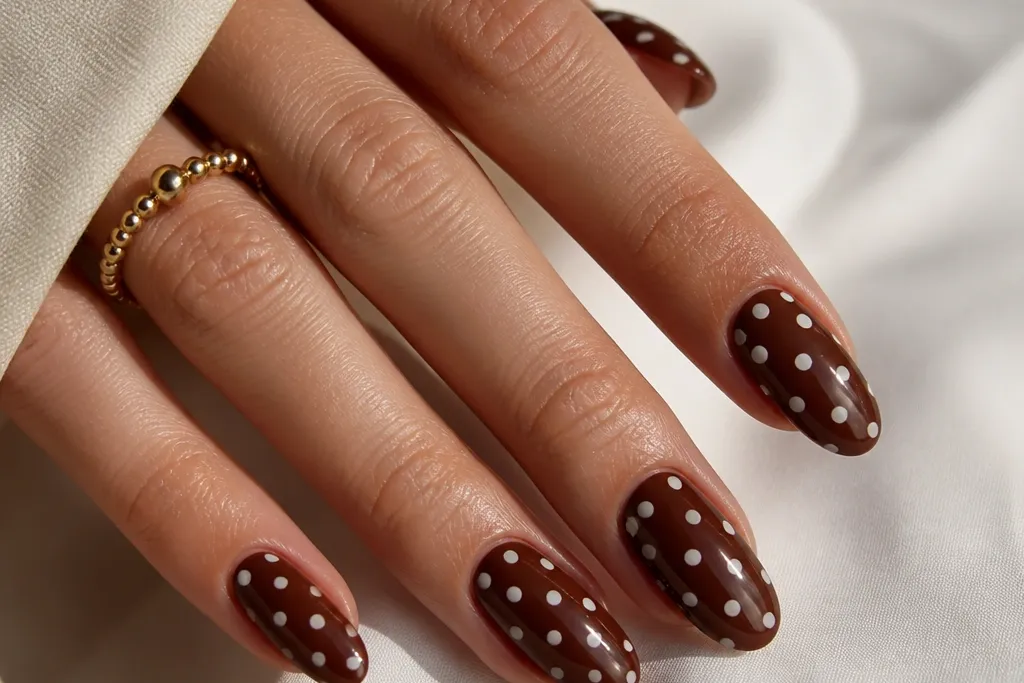
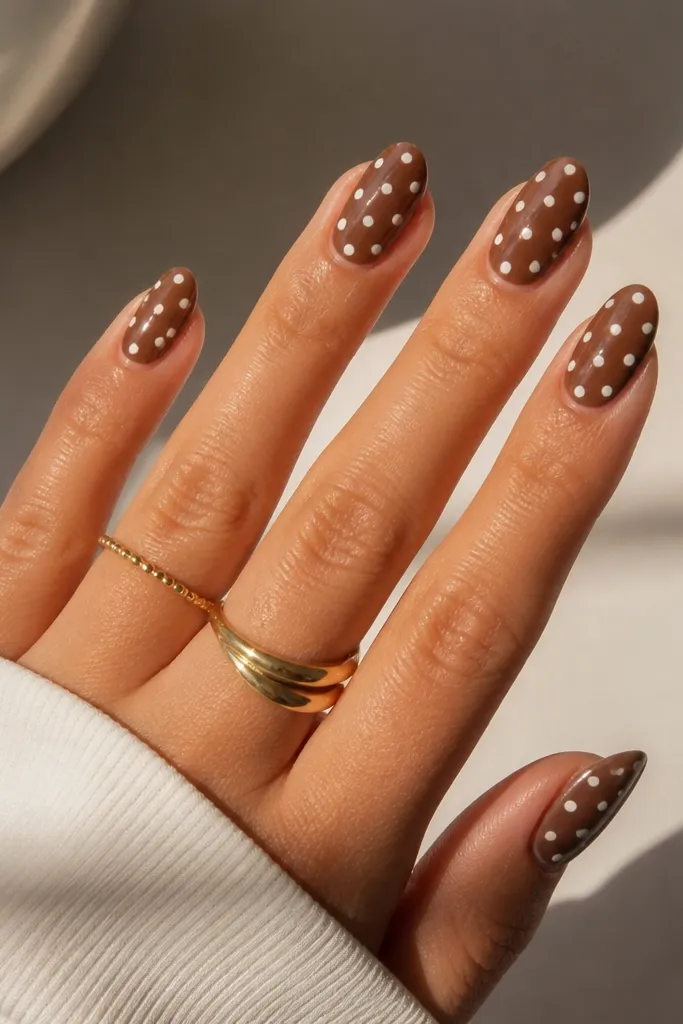
1. Caramel Nude Base With Tiny Corner Dots
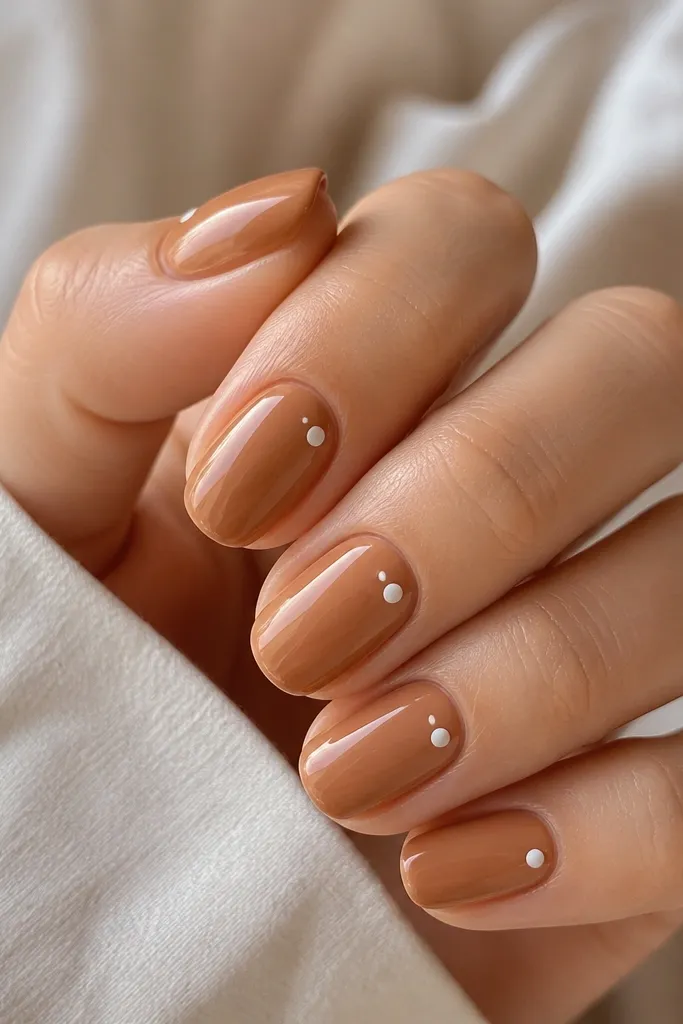
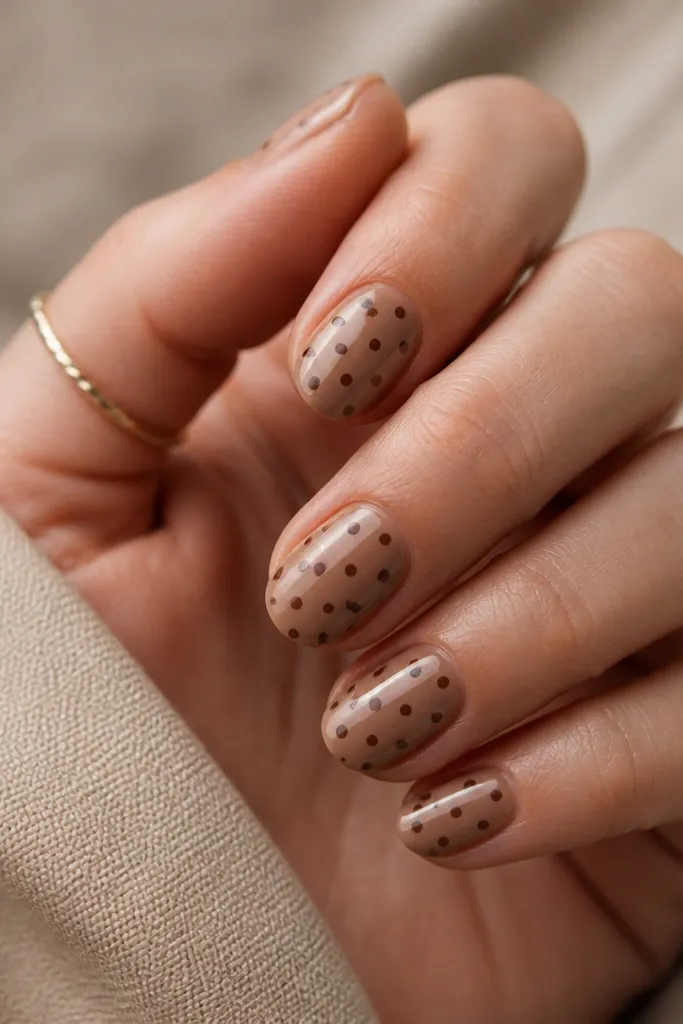
This one looks expensive because the brown is light and creamy, and the dots are small enough to feel intentional. The corner placement makes the nail look longer by guiding the eye along the side. I like it when you want polka dots but still want a "work-safe" vibe. The glossy top coat keeps the dots looking like crisp stickers.
Use a caramel nude gel or polish (think warm beige-brown) as your base. Paint one dot near the outer corner on each nail, then add a second dot slightly lower, keeping them about half a nail-width apart. Keep the dots under the halfway mark so they don't crowd the tip.
Editor's noteAfter dotting, drag the brush lightly around the dot edge with top coat so the rim seals flat.
Watch outDon't make the dots too big on short nails - big dots swallow the nail and look messy.
2. Chocolate Brown Half-Moon Dots
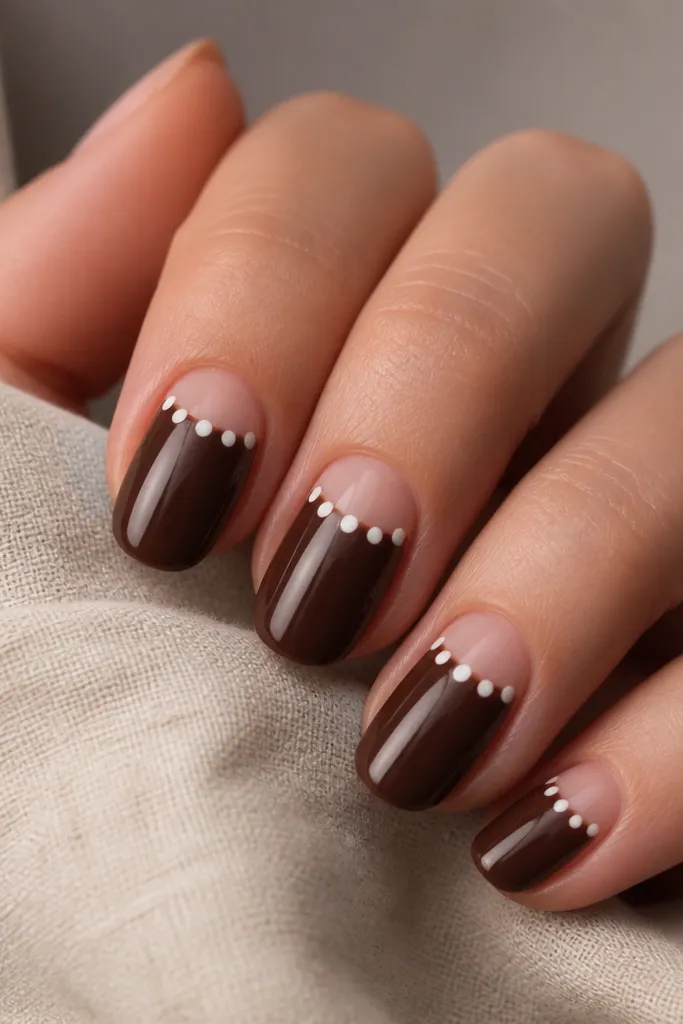
The half-moon nude gives a clean break in color, and the dots make that break feel playful instead of harsh. The white dots sit right on the transition so they read crisp and intentional. Chocolate brown also looks rich under indoor light without turning black. This design works great if you love negative space but still want a graphic element.
Paint a chocolate brown base, then leave a crescent of nude at the cuticle (use a small sponge to tidy the curve). With a dotting tool, place three white dots along the curve of the half-moon. Finish with a glossy top coat so the transition line doesn't catch.
Editor's noteUse a striping brush to clean the half-moon edge before you dot - one clean line makes the whole set look pro.
Watch outSkipping the cleanup around the half-moon edge makes the dots look like they're floating on a blurry line.
3. Toffee Brown Diagonal Dot Trail
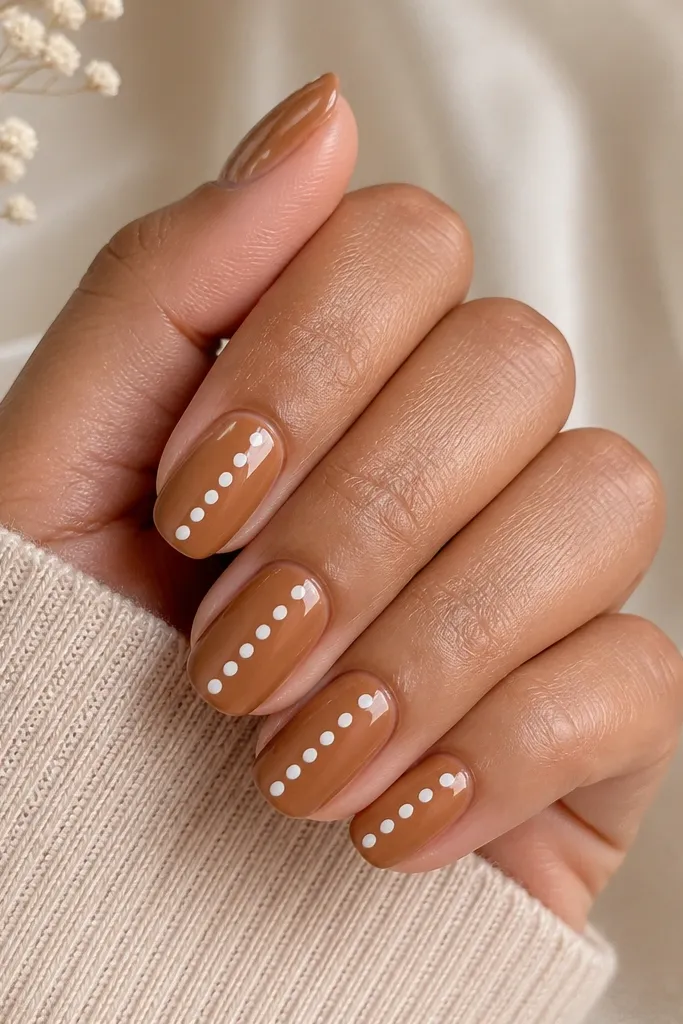
Diagonal dots look like motion. The warm toffee brown keeps it soft, while the evenly spaced white dots create a graphic rhythm. This is the design I reach for when I want polka dots that don't feel childish. It also makes nails look longer because the diagonal line pulls the eye upward.
Start with toffee brown as a full base. Mark a faint diagonal using a dotting tool corner press - then fill with white dots at equal gaps (about one dot-width between dots). Keep the diagonal off-center so it doesn't split the nail into two equal halves.
Editor's noteIf your dots start to smear, reload your brush lightly and press straight down - no dragging.
Watch outDon't place the diagonal too close to the sidewalls or it will look like the dots are sliding off.
4. Mocha Marble Brown With White Dot Specks
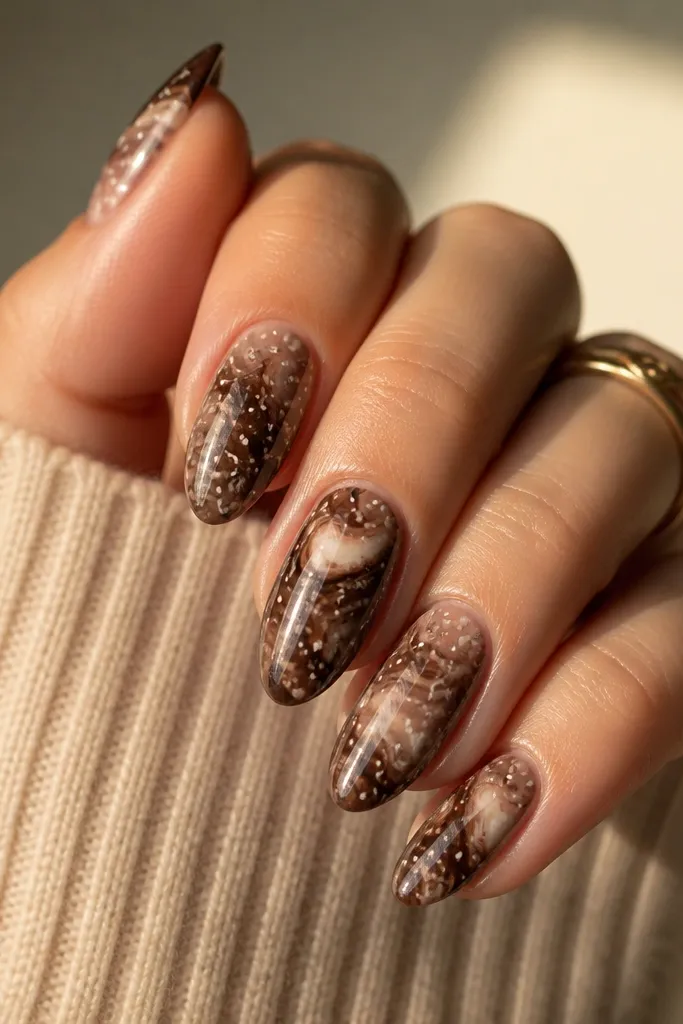
Marble gives depth, and the dot specks add a clean graphic texture over the chaos. The white stays bright against mocha, so it doesn't disappear. This design is great if you want polka dots but your brain likes a little complexity. It also photographs well because marble catches light while dots stay sharp.
Make a simple marble by using a sponge with two browns and then dragging a thin brush through while still tacky. Add tiny white dots with a dotting tool - keep them mostly in the center and a few near the edges. Seal with top coat, then do a second thin top coat around the dots to smooth any raised edges.
Editor's noteUse a toothpick to place one or two larger dots - it makes the speck pattern look intentional.
Watch outDon't overdo the white specks; too many turns it into random dots and loses the "designed" feel.
5. Walnut Brown Matte With Glossy White Dot Caps
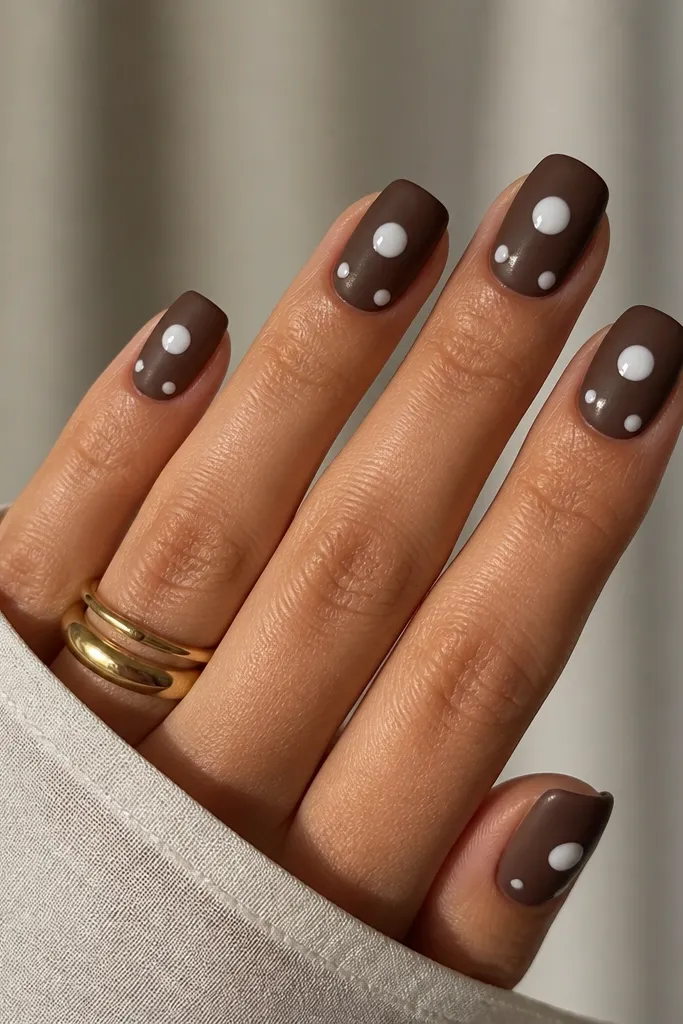
This is the contrast look: matte brown makes the white dots look brighter, and the glossy cap makes them stand out like candy. The placement keeps it playful without going full cartoon. I like it for fall outfits because walnut reads warm and grounded. The texture contrast also hides tiny application streaks in the brown.
Apply matte top coat over the walnut brown base first. Then paint the white dots and finish with a glossy top coat only over the dots (use a smaller brush so you don't erase the matte effect). Keep the dots slightly raised so the glossy dome catches light.
Editor's noteLet the matte top coat cure fully before you dot, or the white can pull into the surface.
Watch outDon't put glossy top coat over the entire nail - you'll lose the contrast that makes this one pop.
6. Caramel Chrome Tips With White Dot Border
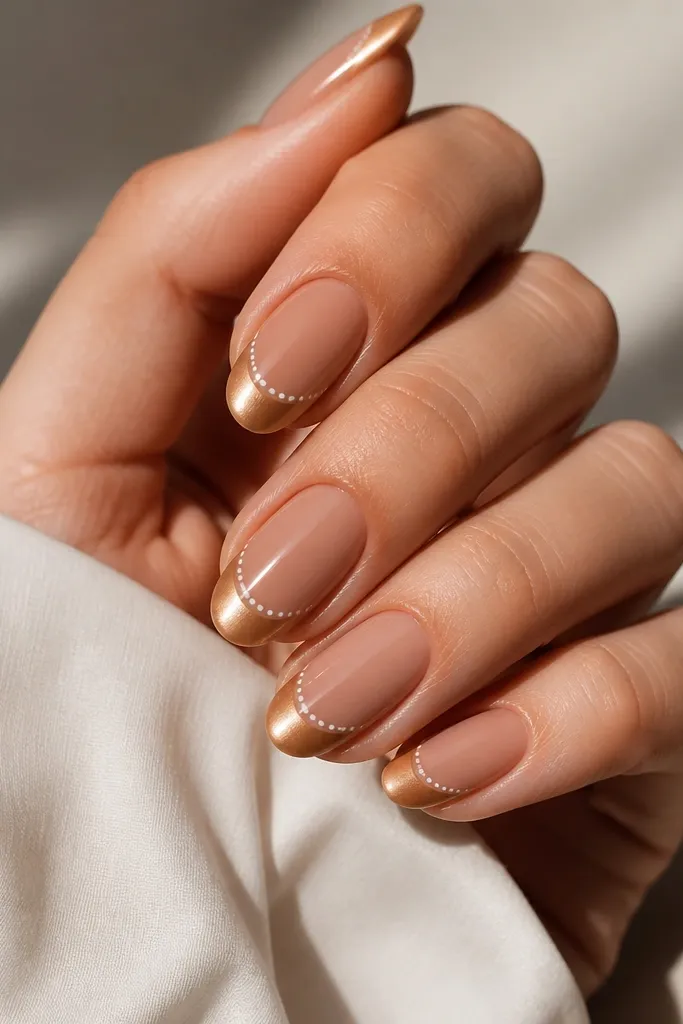
Chrome tips give you that "done" look instantly, and the dotted border keeps it from feeling too plain. The warm caramel chrome pairs cleanly with opaque white, and the border makes the tip feel framed. This is a strong choice for events because it reads polished even on simple nail shapes. The dots also hide minor tip-line imperfections.
Use a nude brown base, then create tips with caramel chrome powder or chrome gel. Add a thin white line just below the chrome edge, then dot along it with small dots. Finish with a high-shine top coat to lock chrome and smooth the dotted line.
Editor's noteSeal chrome with two thin top coats, not one thick coat, to avoid shrinkage.
Watch outDon't skip a white line under the dots - dots alone can look uneven on reflective chrome.
7. Espresso Brown French With White Dot Cuticle Row
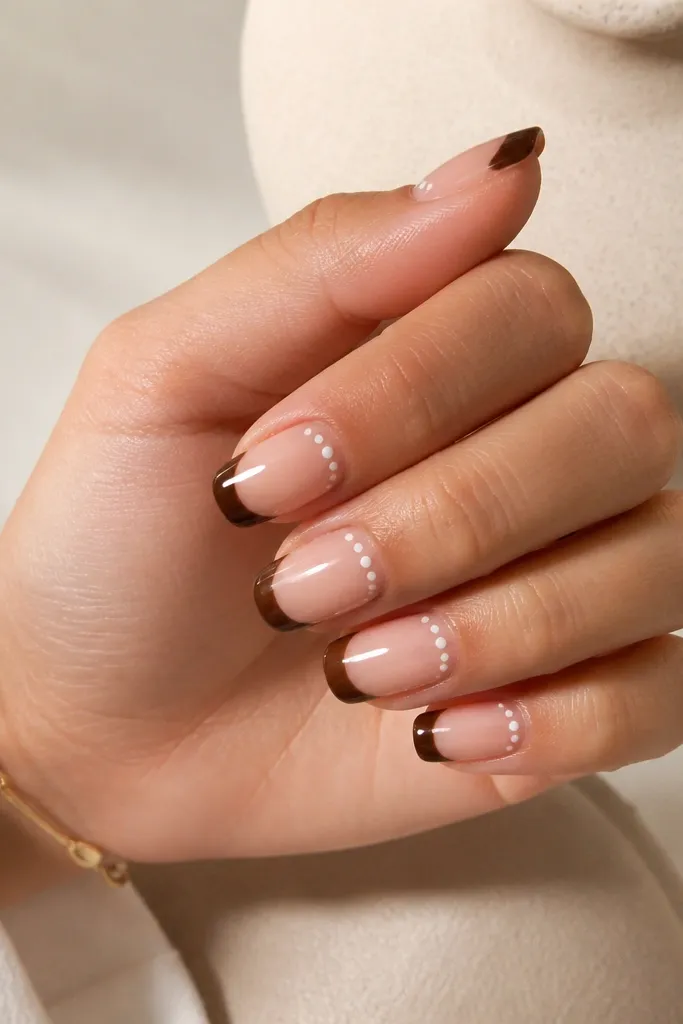
French tips are clean, but adding a cuticle row of dots makes the set feel styled instead of basic. Espresso brown is deep and crisp, so the white dots look high-contrast. This layout also balances the bold tip with a smaller graphic near the base. It's one of my favorite "going out" designs because it looks intentional from across the room.
Paint a nude base, then do espresso French tips with a striping brush and a steady hand. Under the cuticle, place a row of small white dots that stretch from sidewall to sidewall. Keep the dots slightly off the cuticle line so they don't overlap your skin area too much.
Editor's noteUse a dotting tool with a smaller head than you think - cuticle rows look cleaner with tighter dots.
Watch outDon't let the cuticle dots touch the cuticle - it chips faster and looks sloppy.
8. Milk Tea Brown With One Big White Dot Center
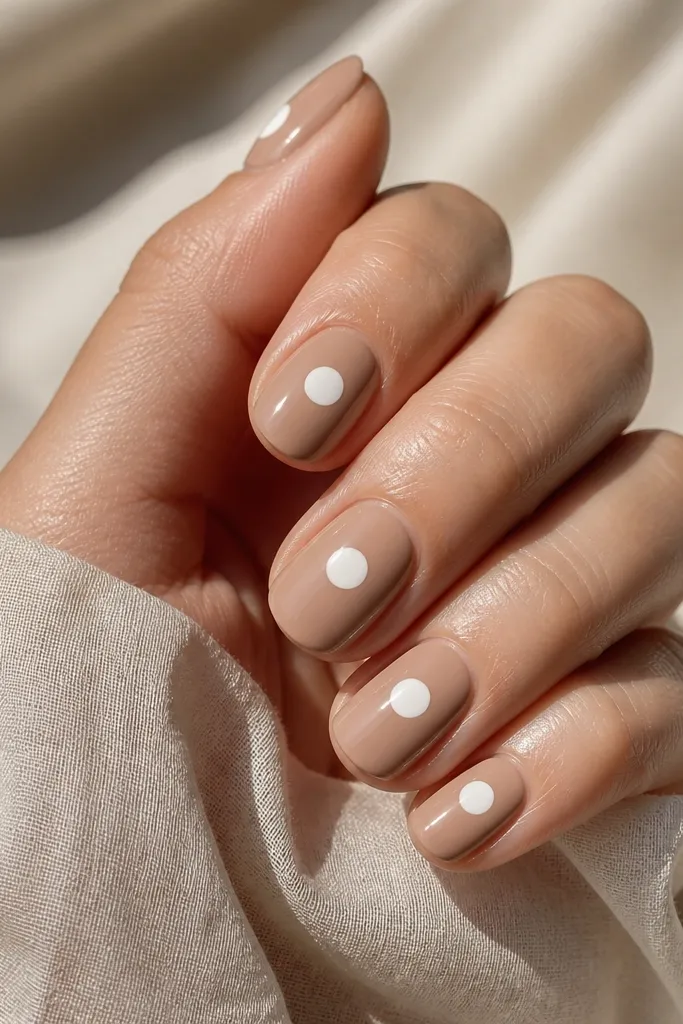
One big dot is bold without needing a pattern. Milk tea brown is light enough that the white doesn't look stark, but it still reads clearly. The center placement makes each nail look balanced and symmetrical. This design is also easy to keep neat even if your hands aren't steady.
Paint full milk tea brown base. Place one large dot in the center, about halfway between cuticle and tip. If your dot spreads, wait 20-30 seconds and then go over the center again with a tiny dab to sharpen the circle.
Editor's noteIf you're using regular polish, cap the dot edge with top coat once it's tacky so it stays round.
Watch outDon't put the big dot too high or too low - off-center looks like a mistake.
9. Vintage Brown With White Polka Dot Chevron
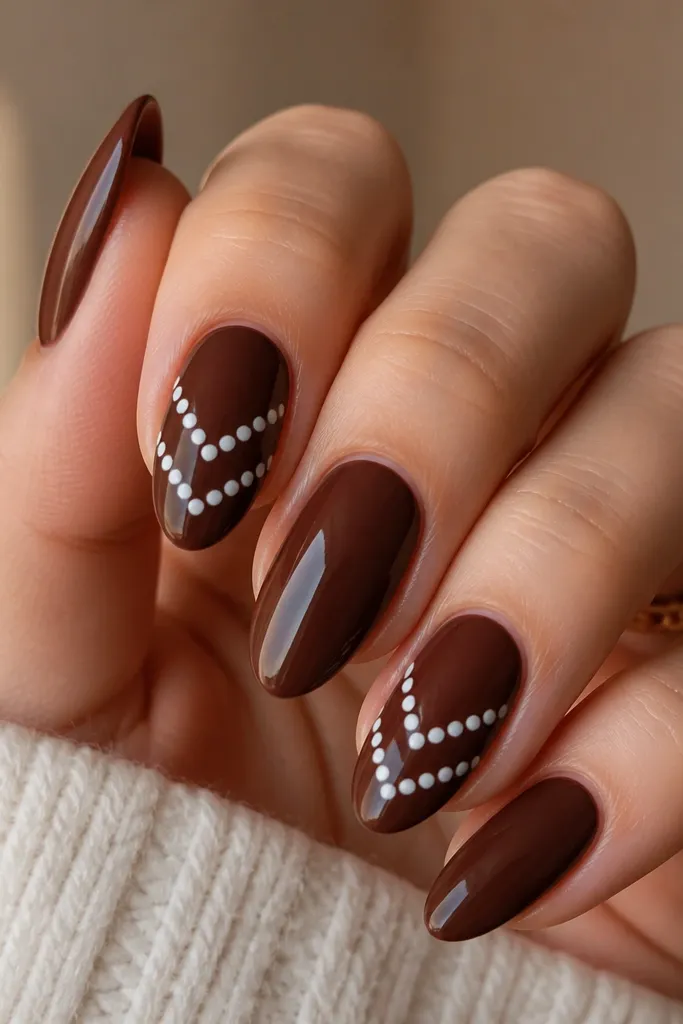
A chevron pattern looks graphic and stylish, and using dots instead of solid lines makes it softer. The warm vintage brown keeps it retro, while the white chevron makes it feel crisp. This is a fun design when you want polka dots but also want structure. It looks great on almond and squoval nails.
Paint the brown base first. Then map two diagonal dot lines that meet at the center to form the chevron peak. Use consistent dot spacing and keep the chevron narrow enough that it doesn't hit the sidewalls.
Editor's noteDraw a guide line lightly on paper (not on your nail) and match the angle while placing dots.
Watch outDon't make the chevron too wide - it will crowd the nail and lose the clean V shape.
10. Rust Brown With White Dots And Gold Micro-Studs
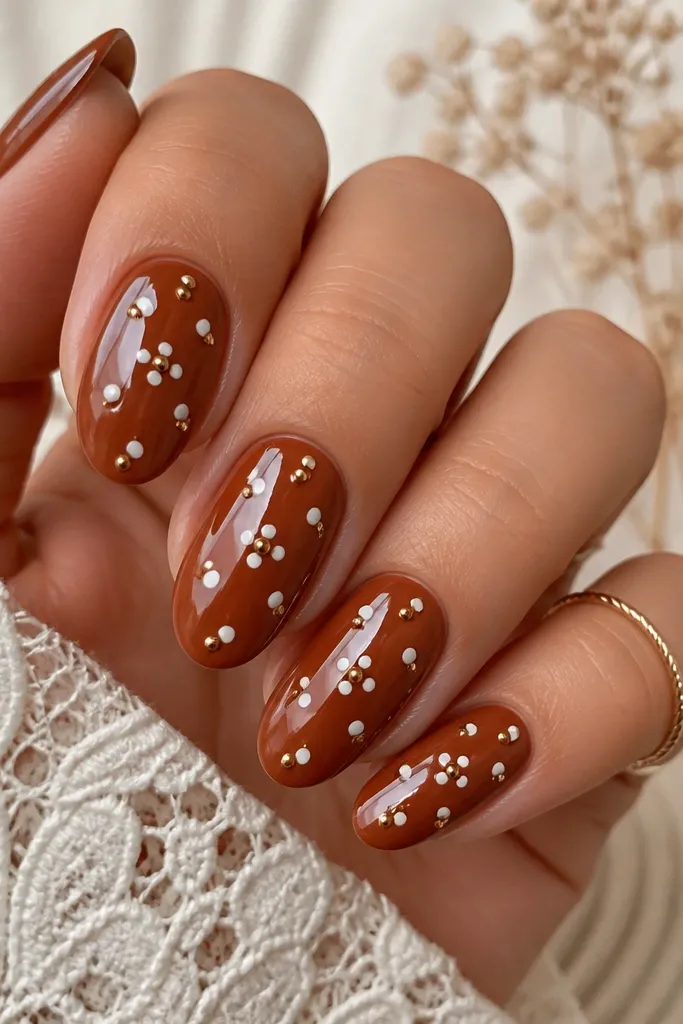
The gold micro-studs add sparkle without turning into full rhinestones. Rust brown has a warm orange undertone, so the white dots look bright and the gold looks like it belongs. This set feels dressed up but still has the playful polka dot theme. I've worn it with gold hoops and it matches instantly.
Use a rust brown gel base. Place white dots in a cluster of 3-4 dots, then add one tiny gold stud next to each dot using gel adhesive. Cure, then cap with top coat carefully around the studs so they don't snag.
Editor's noteKeep the studs slightly smaller than your dot size - big studs make the pattern feel heavy.
Watch outDon't use chunky rhinestones with small dots; the contrast looks unbalanced.
11. Brown Ombre With White Polka Dot Fade
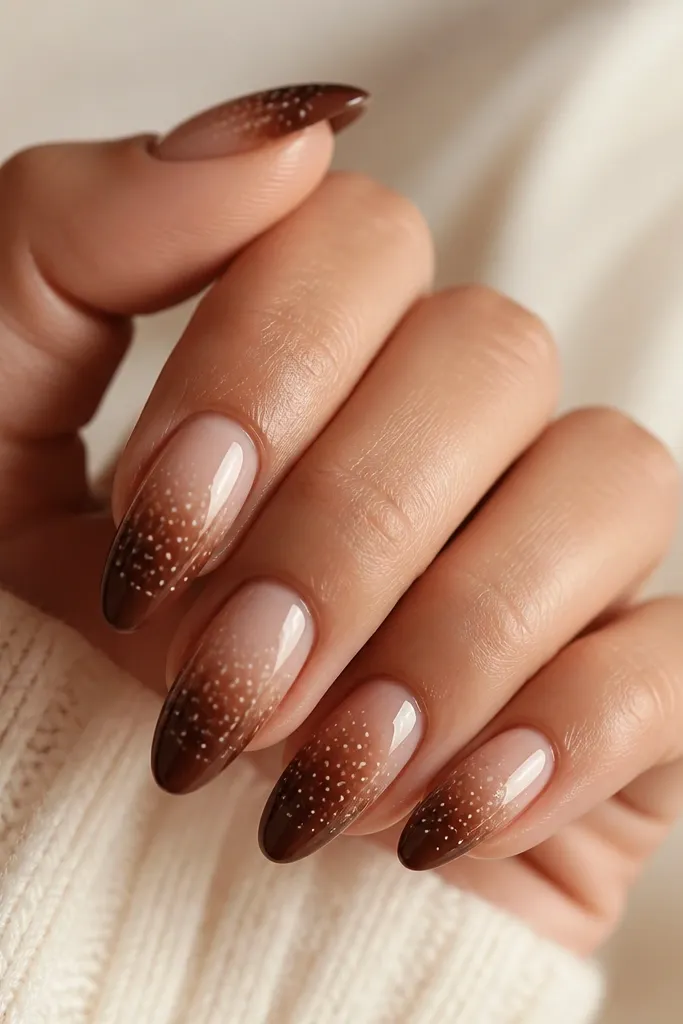
This one blends two aesthetics: ombre and polka dots. The white dots fading toward the tip makes it look like the pattern is dissolving, which feels modern. The brown ombre keeps it soft instead of flat. It's also forgiving if your dot spacing isn't perfect, because the fade hides minor irregularities.
Create an ombre using sponge with two browns: nude-brown at the cuticle and espresso at the tip. Then add dots starting larger near mid-nail, then place smaller dots closer to the tip. Keep dot opacity consistent by using opaque white gel liner.
Editor's noteWipe your dotting tool between nails so the white stays bright and doesn't pick up brown.
Watch outDon't place full-size dots all the way to the tip - it looks like a sticker sheet stuck on.
12. Dark Brown Skittle Nails With One Dotted Accent
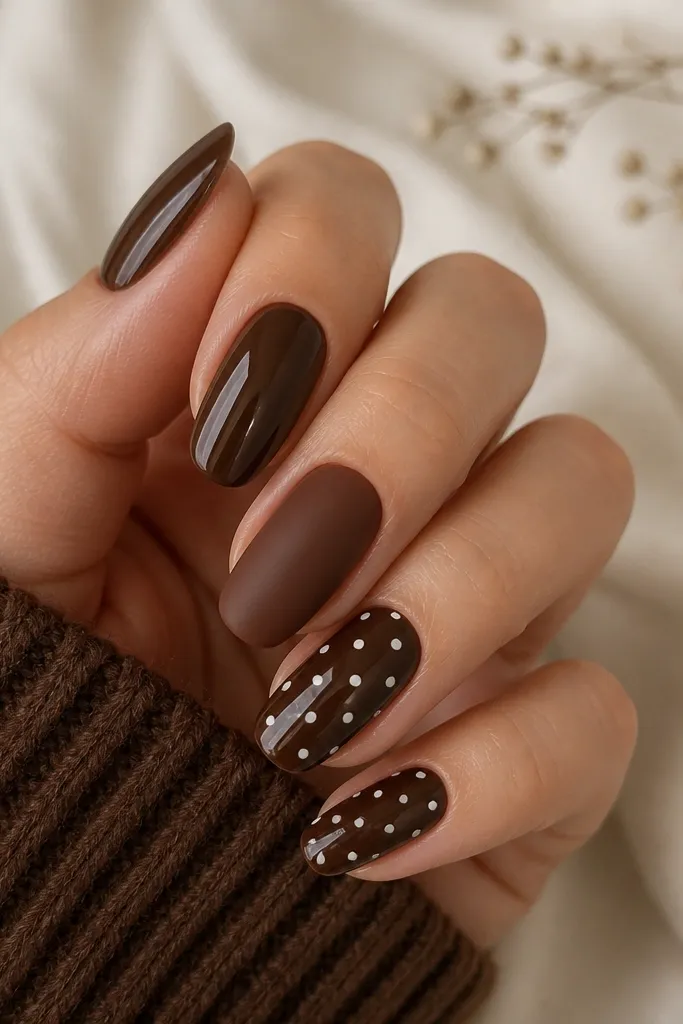
Skittle nails let you keep brown as the theme while giving the polka dot look a spotlight. The accent nails make the white dots feel intentional instead of repetitive. I like this when I'm tired of full dot coverage but still want the aesthetic brown with white polka dot nails vibe. Finish variation also adds depth.
Pick a dark brown shade and use it across all nails, changing only the finish. On the accent nail, paint small white dots in a diagonal line or a corner cluster. Seal with top coat on glossy nails and matte top coat on matte nails, keeping the dot nails glossy so the dots pop.
Editor's noteKeep the accent nail dots to one pattern only - don't add extra stripes or it gets busy.
Watch outDon't mix too many different browns - it turns into random color blocks instead of a coordinated set.
13. Chocolate Brown With White Dot Half-Sheet
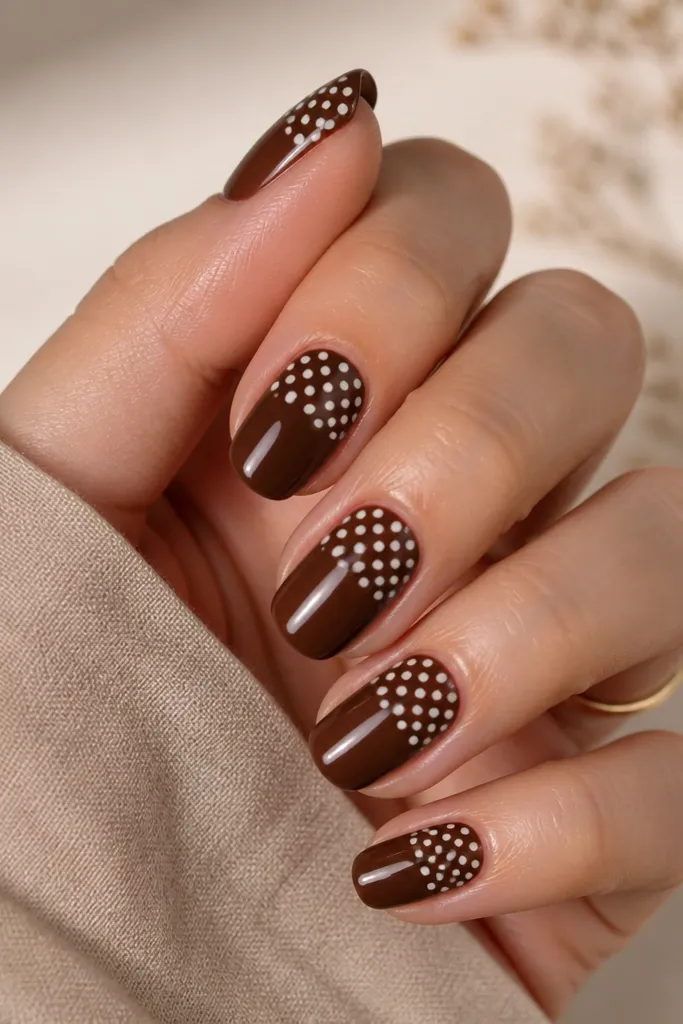
Half-sheet dot coverage looks clean and graphic, like a pattern you'd see on fabric. The solid lower half keeps the nail grounded and makes the white area feel deliberate. This is one of those designs that looks bold even on short nails. It also hides tiny cuticle imperfections because the dots draw the eye upward.
Paint a full chocolate brown base. Place dots starting at the middle of the nail and stopping before the lower third. Use a dotting tool for uniform circles, then cap with top coat so the dot edges don't lift.
Editor's noteUse painter's tape as a straight edge guide to keep the "half" line crisp.
Watch outDon't let the dot area creep too low - the half-sheet line should be clearly defined.
14. Mocha Nude With White Polka Dot Negative Space Ring
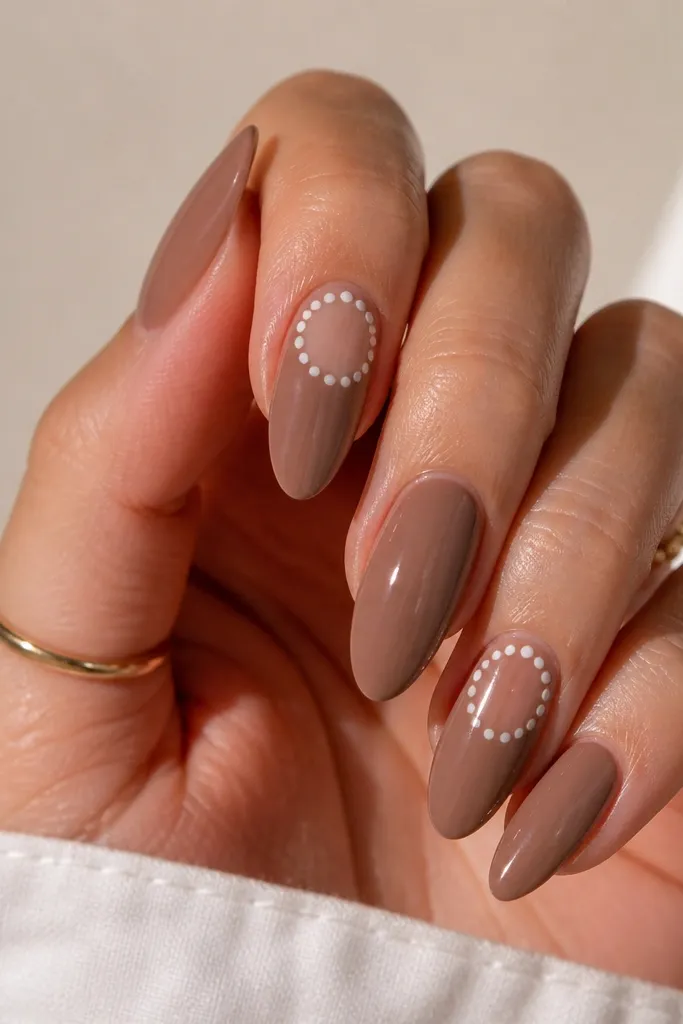
A negative space ring feels chic because it's graphic but still airy. The white dots create a crisp outline without using solid lines. Mocha nude keeps the overall look soft and wearable. This design is also great if you want polka dots but hate full coverage patterns.
Use a mocha nude base and leave a small clear circle area near the center. Dot around it in a neat ring using a small dotting tool head. Then apply top coat over everything, being careful not to flood the clear circle edges.
Editor's noteIf your negative circle gets messy, use a tiny piece of clear tape to mask and peel after the base sets.
Watch outDon't make the ring too thick - thick rings look like a blob instead of a clean outline.
15. Walnut Brown With White Dots And Tiny Heart Accent
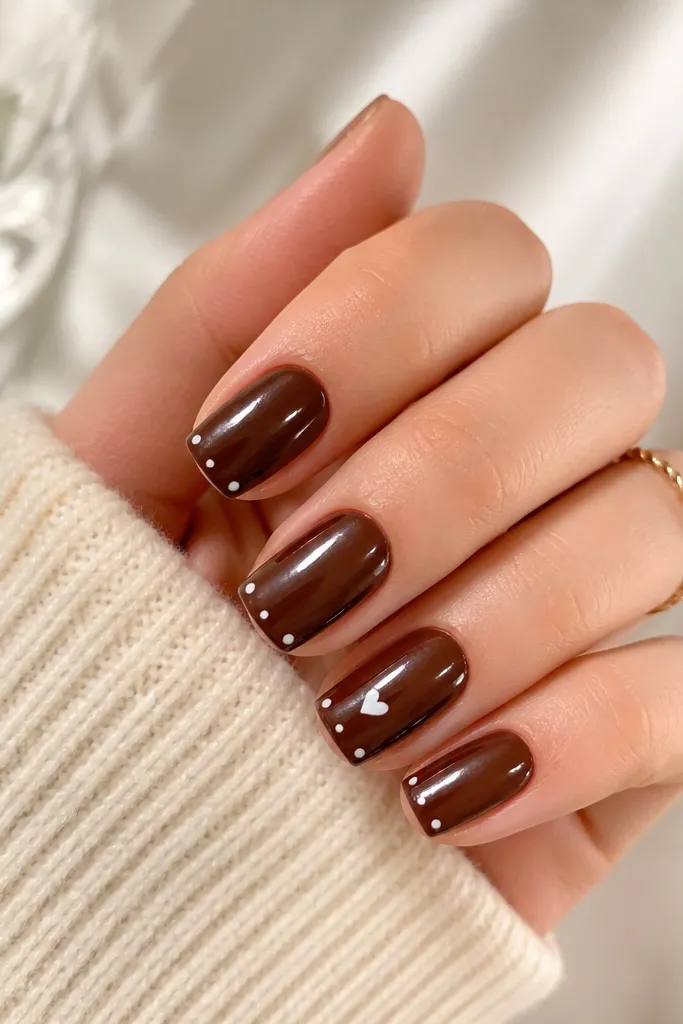
The heart makes the dots feel sweeter without turning the whole set into a Valentine theme. Walnut brown keeps it grounded so the heart doesn't look childish. The dots in the corners create a cute frame effect for the nail tip. This one looks great for date nights and birthdays.
Paint walnut brown base. Add two small white dots at each tip corner on most nails, then on the ring finger, place a tiny heart using a dotting tool pressed into a V shape with a fine brush. Seal with glossy top coat.
Editor's noteUse a toothpick dipped in white polish for the heart point, then drag the sides lightly.
Watch outDon't make hearts bigger than the dots - hearts should be the accent, not the whole pattern.
16. Espresso Brown Stripe Base With Polka Dot Cross
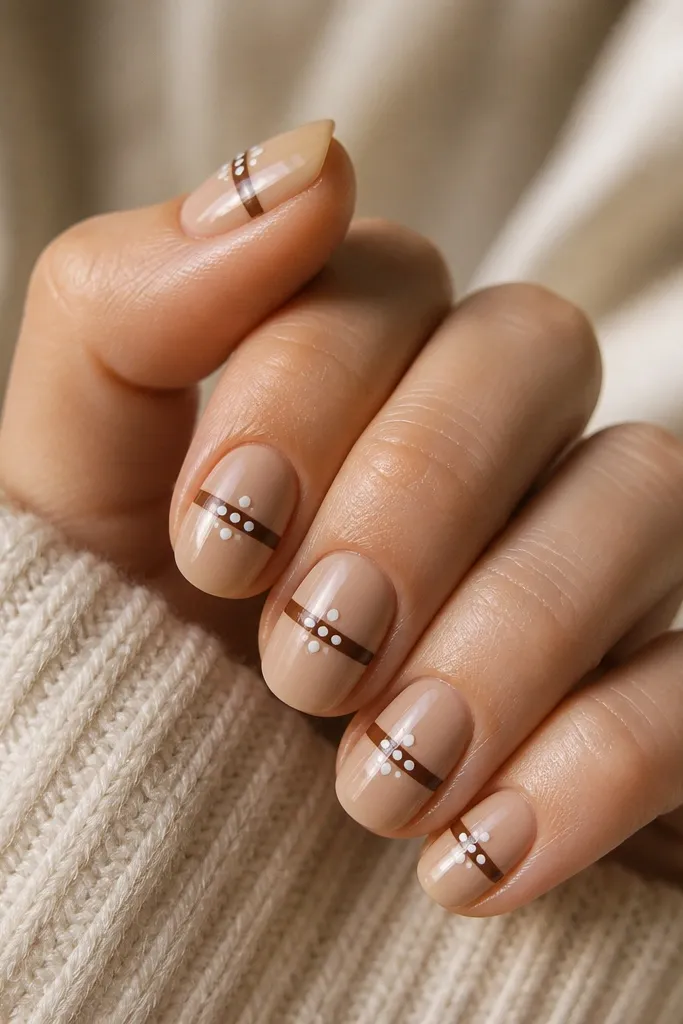
Stripes give structure, and the dot cross adds a graphic punch that still looks playful. Espresso stripes keep it crisp and dark, so the white dots pop. This is a great option when you want more design than a simple dot placement. It also looks good on square nails because the geometry matches the shape.
Start with a nude base. Paint two or three thin espresso stripes across the nail. Then place white dots to form a cross centered on one stripe, using a dotting tool to keep the circles round.
Editor's noteLet stripes fully cure before dotting so the white doesn't smear into the stripe edges.
Watch outDon't overload the stripe thickness; thick stripes make the dots disappear.
17. Caramel Brown With White Polka Dot Tips
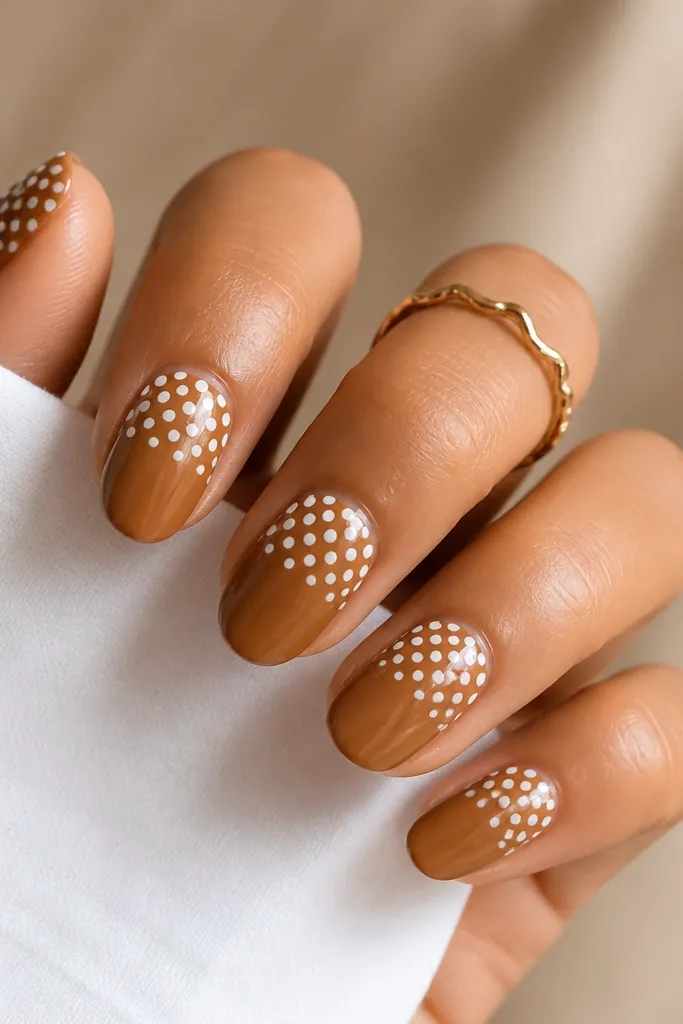
This is the polka dot tip version that looks instantly styled. The dotted top third reads like a French manicure, but softer because it's made of dots. Caramel brown keeps it warm and flattering. This one turns heads because it's bold from the first glance.
Apply caramel brown base. Place a thin line where the tip starts, then fill the top third with medium white dots in neat rows. Keep the dots aligned so the tip edge looks straight. Finish with a thick top coat to smooth and protect the dot area.
Editor's noteIf your dots won't line up, do two rows first, then fill the gaps. It's easier than trying to perfect the whole tip at once.
Watch outDon't make the dots too spaced out on the tip - it looks unfinished.
18. Deep Brown Jelly With Floating White Dots
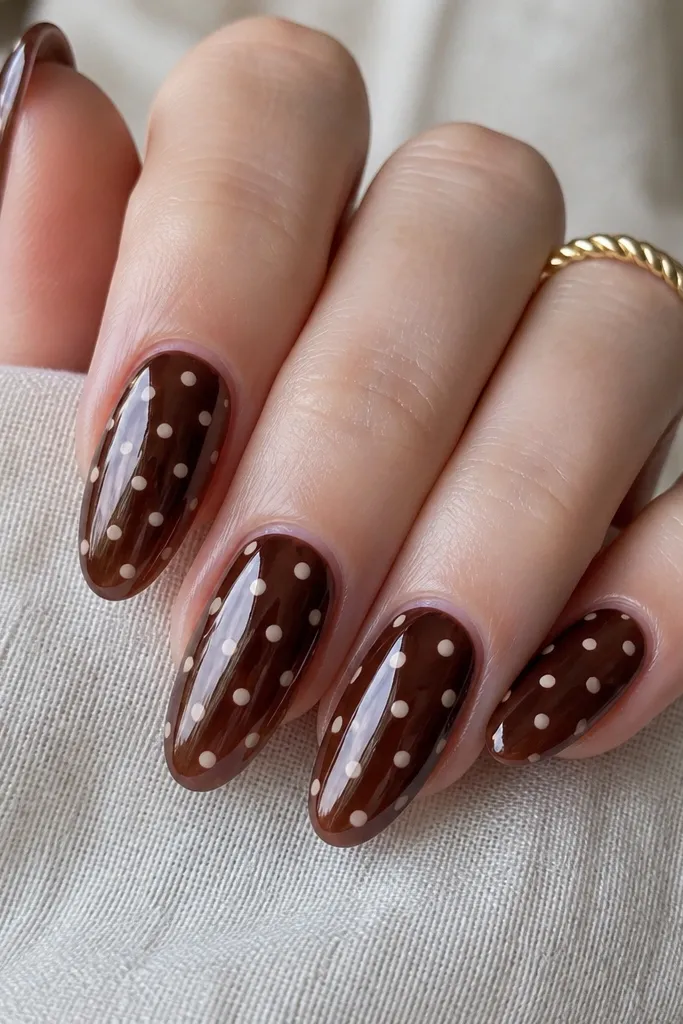
Jelly brown gives you that depth where dots look suspended, not sitting on top. The floating effect is what makes this feel different from regular opaque brown. White dots stay bright because the jelly depth adds dimension instead of turning the white flat. This set looks amazing under flash photos.
Use a deep brown jelly gel as your base. Add white dots after the first jelly layer is tacky, then cap with a full jelly layer so dots sink slightly under the surface. Cure properly between layers so the dots don't smear.
Editor's noteUse a denser white gel for jelly bases - thin white can look milky and uneven.
Watch outDon't rush curing - moving the nail while jelly is wet smears dots and kills the floating look.
19. Mocha Brown With White Polka Dot Cutout Accent
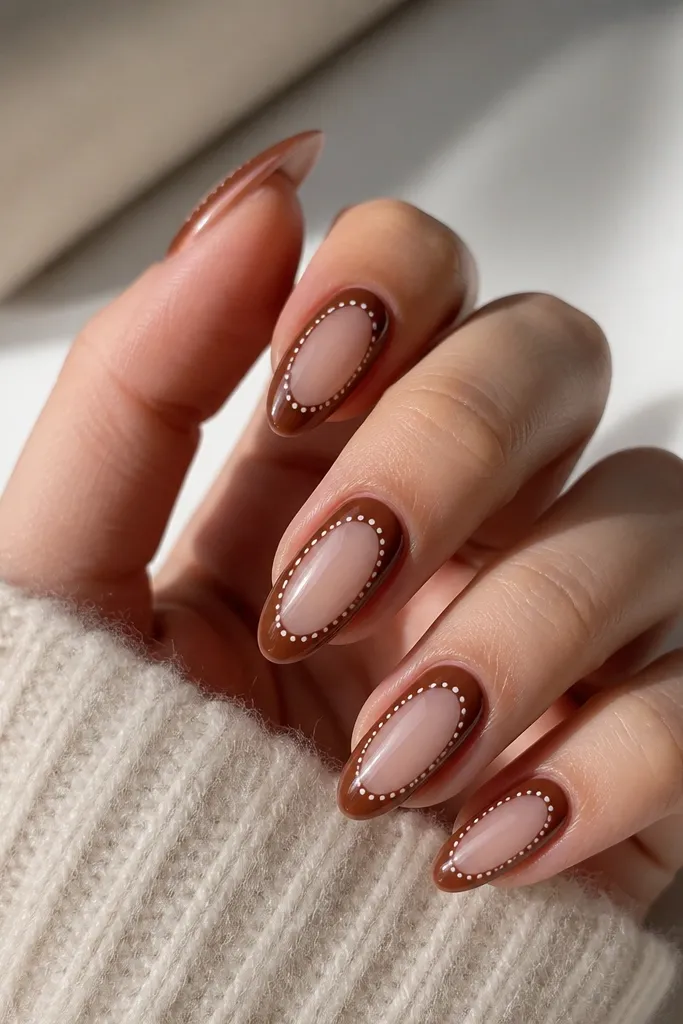
Cutout accents look modern and clean. The white dots around the clear area act like a frame, so the nail feels intentional even though there's negative space. Mocha brown is soft enough that the clear area doesn't look stark. This is a good option if you want polka dots but hate heavy coverage.
Paint mocha brown base, leaving a clear rectangle or oval in the center. Place white dots along the edges of the clear area with a small dotting tool. Cap with top coat carefully so the frame looks smooth and the clear area stays clear.
Editor's noteMake the cutout bigger than you think - tiny cutouts look cramped with dots.
Watch outDon't flood top coat into the cutout area - it can fog the clear spot.
20. Caramel Swirl Brown With White Polka Dot Stops
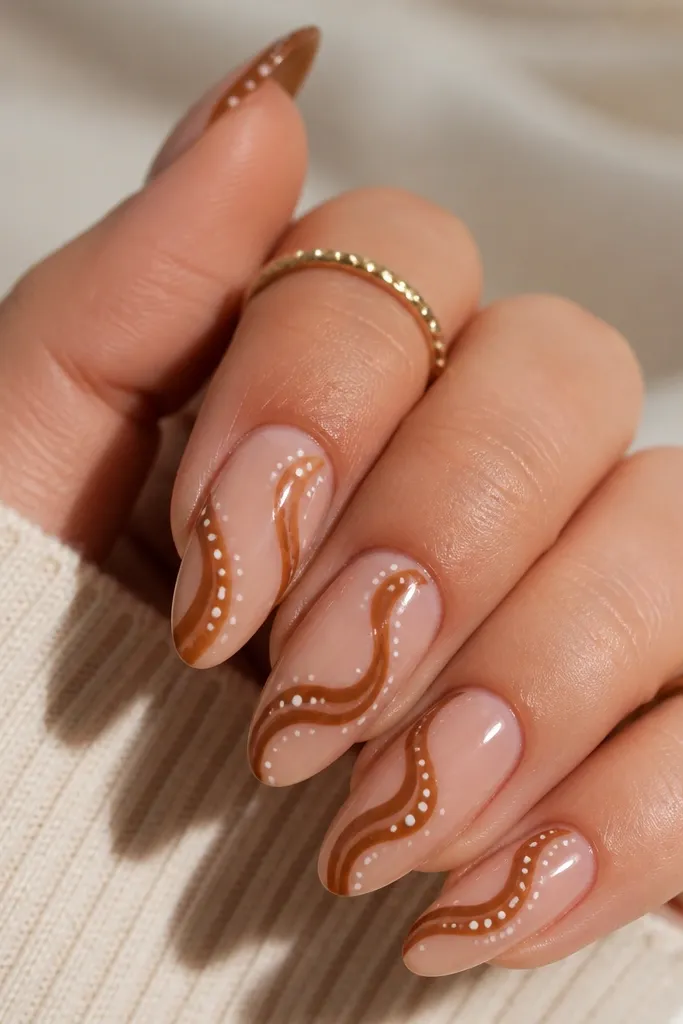
Swirls already create movement, and white dots at curve points make the design feel like a pattern, not random doodles. The caramel-on-caramel color shift is subtle, so the white dots carry the attention. This looks hand-drawn and cute without being cluttered. I like it for medium-length nails because the swirl has space to flow.
Base coat with caramel brown. Add thin darker caramel swirl lines using a striping brush. Press small white dots at 3-4 key curve points on each nail, then seal with top coat.
Editor's noteKeep dot count low - three well-placed dots look cleaner than six scattered ones.
Watch outDon't mix three brown shades at once - it makes the swirls muddy and reduces the contrast.
21. Chocolate Brown With White Polka Dot Marble Tips
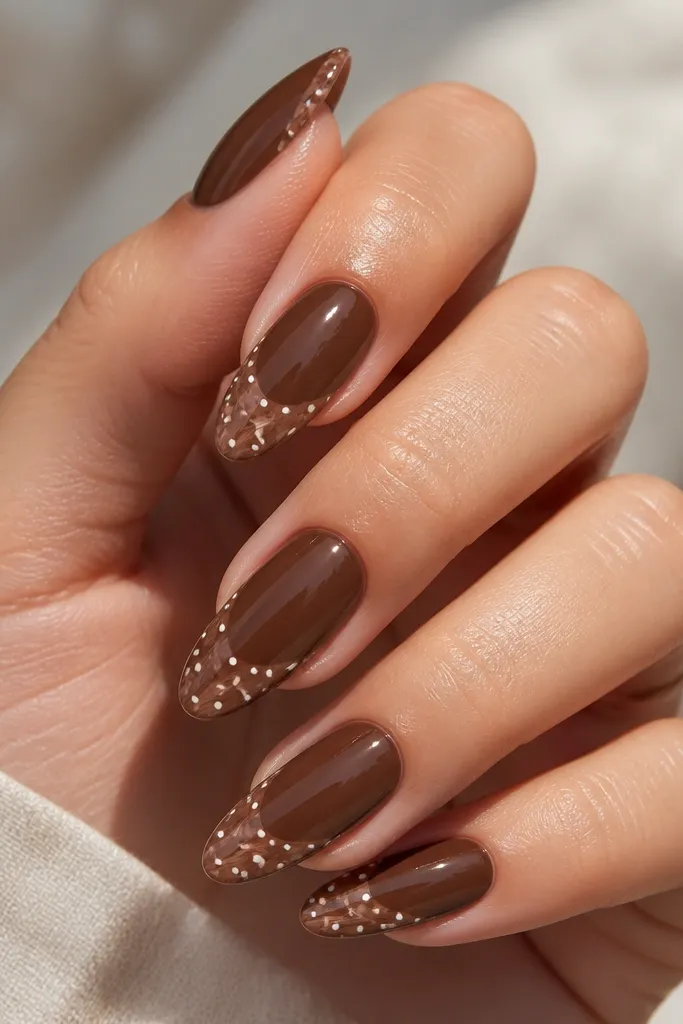
Marble tips make the polka dot theme feel layered. Solid chocolate on the base keeps it calm, while the marbled tip adds texture and depth. The white dots on top of the marble look crisp because the tip has lighter undertones. This design is great when you want something more special than a basic dot tip.
Paint solid chocolate brown on most of the nail. For the tip, sponge a lighter brown over the top third, then drag a thin brush through to marble. Add small white dots over the marbled tip area and cap with top coat.
Editor's noteLet the marbling set for a few minutes before dotting so the white doesn't bleed.
Watch outDon't dot over wet marble - the dots will spread and look like stains.
22. Toffee Brown With White Polka Dot Side Ladder
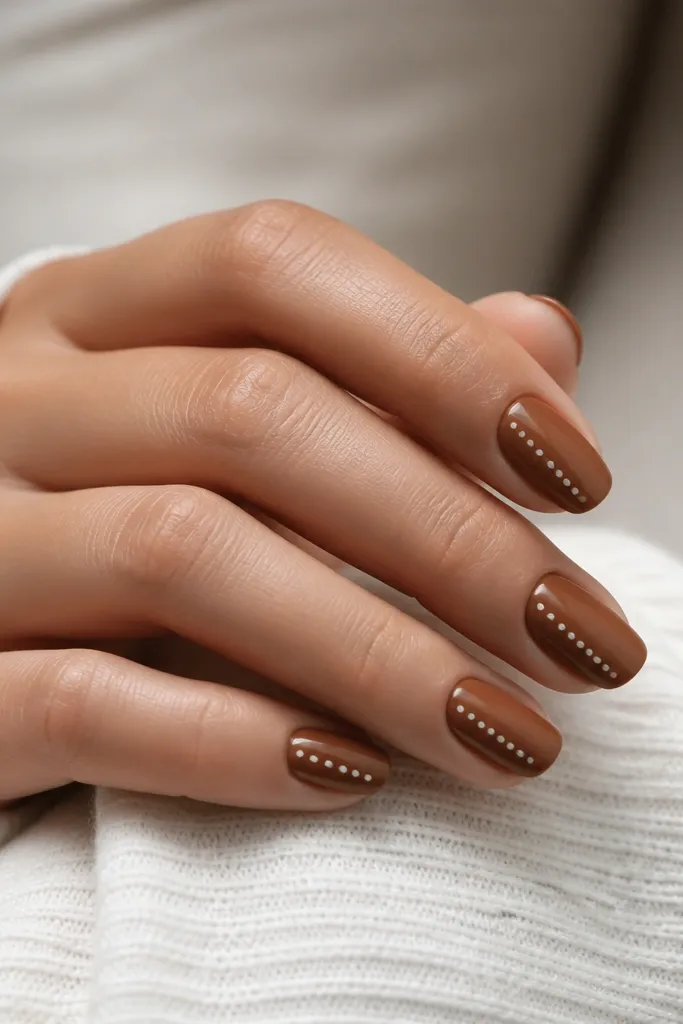
A side ladder is a clean way to add polka dots without covering the nail. It makes the nail look longer because the vertical line pulls the eye. Toffee brown keeps it warm and flattering, and the white dots feel neat instead of chaotic. This one looks especially good on almond nails because the side line follows the natural curve.
Apply toffee brown base. Place a vertical column of small white dots near one sidewall, from about one-third down to just above the tip. Keep spacing even and keep the column straight. Finish with top coat, and lightly cap the sides of the dots so they don't catch on fabric.
Editor's noteIf your hand shakes, rest your pinky on the table - it steadies the dotting tool.
Watch outDon't angle the ladder - tilted columns make the whole set look off.
23. Brown Polka Dot Waterfall On Nude Ombré
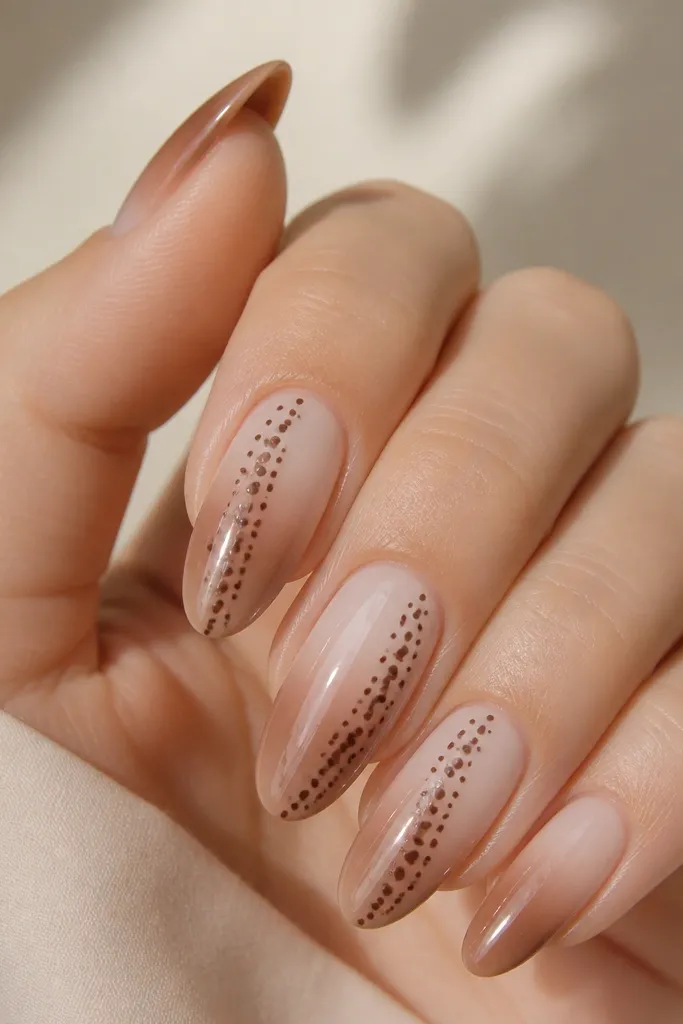
Waterfall dots look like they're sliding down, which makes the design feel airy and fun. The ombré browns keep it soft, and the dots add contrast where the nail needs it. This is a great "aesthetic brown with white polka dot nails" look for spring and summer because it doesn't feel heavy. It also photographs well because the dot sizes create a natural gradient.
Create a nude-to-brown ombré with a warm brown at the tips. Add dots in diagonal rows that start larger near mid-nail and get smaller as you reach the tip. Keep the dots clustered closer to one side to sell the waterfall effect. Seal with glossy top coat.
Editor's noteWork one nail at a time and keep the dot direction consistent across the set.
Watch outDon't make every row the same size - the taper is the whole look.
24. Soft Brown With White Dot Confetti On One Accent Nail
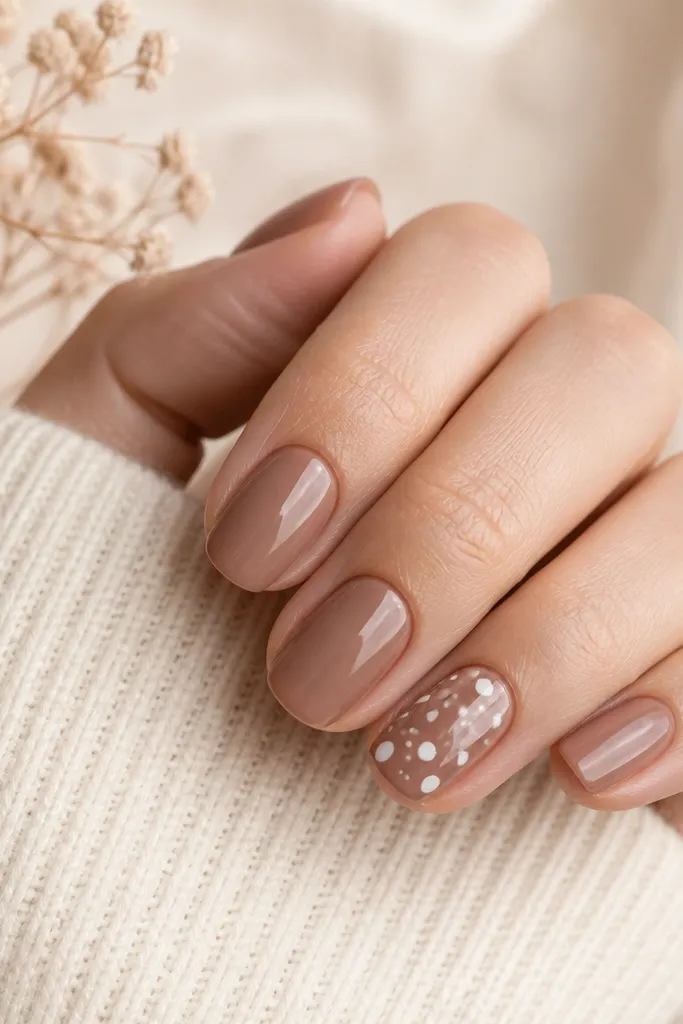
This is a low-effort, high-impact set. Soft brown keeps everything wearable, and the confetti accent nail gives you that playful polka dot hit without committing to full patterns on every finger. The mixed dot sizes make it look like you planned it, not like you ran out of time. It's also ideal if you work in an office and want subtle nails most days.
Paint all nails a soft nude-brown base. On one accent nail, place 10-15 white dots scattered across the nail, using a mix of small and medium dots. Leave some negative space so it doesn't look like a sticker sheet. Top coat everything, then do an extra thin top coat on the accent nail to smooth the dot edges.
Editor's noteKeep confetti dots mostly in the top half of the nail for a lifted look.
Watch outDon't cover the entire nail with confetti dots - dense coverage makes it look cheap.
25. Matte Espresso With White Dot Halo Around Each Nail
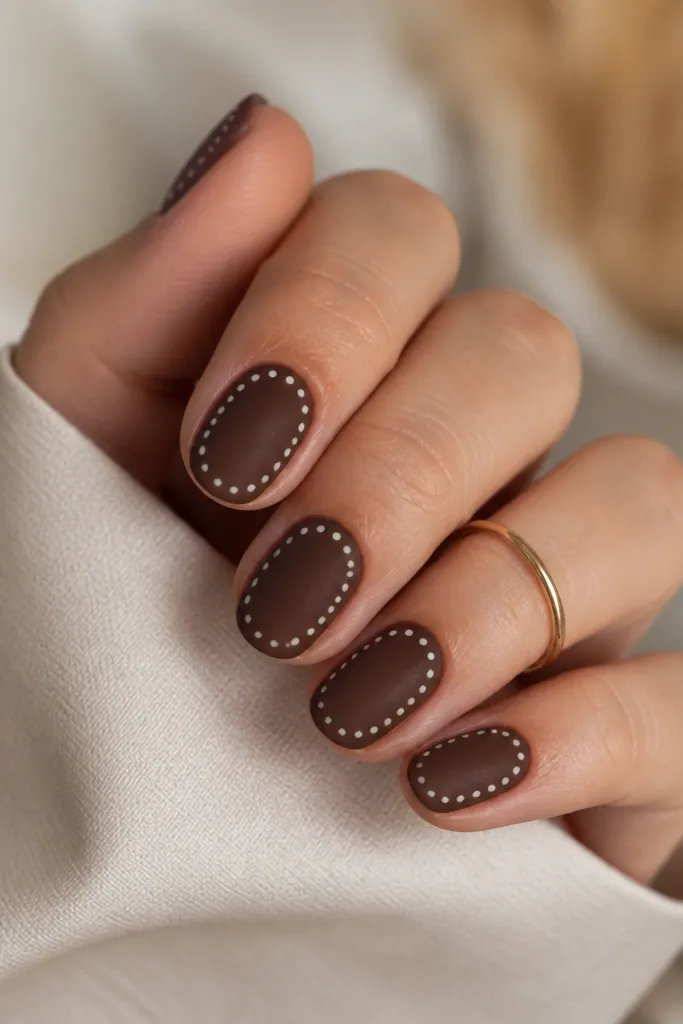
A halo ring frames the nail and makes the dots feel intentional and tidy. Matte espresso reads classy, and the white dots give it that clean outline effect. This is a great option if you want polka dots but hate patterns that cover the whole nail. The halo also helps hide unevenness near the edge because it visually defines the border.
Apply matte top coat to espresso brown. Then dot along a curve around the nail edge, leaving the center untouched. Use small dots so the ring looks like an outline, not a block. Seal with matte top coat again, but only lightly over the dots so they don't smear.
Editor's noteIf the dots blur, wipe your dotting tool with acetone and reload - residue is what causes fuzzy circles.
Watch outDon't use large dots for a halo - they turn the outline into a thick frame.