1. Cocoa Base with Tiny Dot Tips
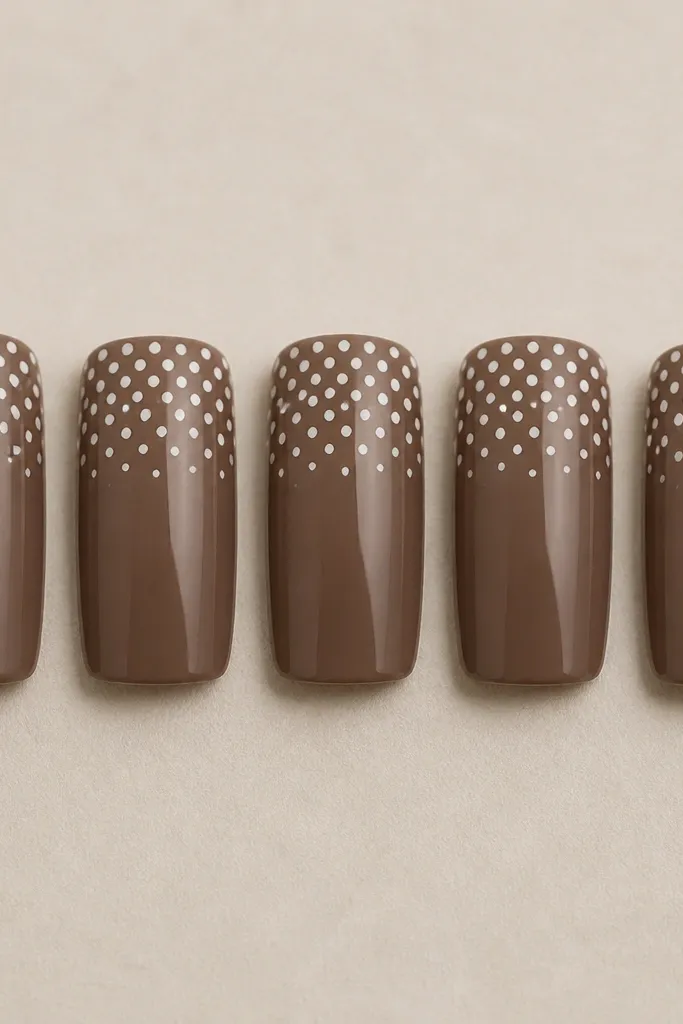
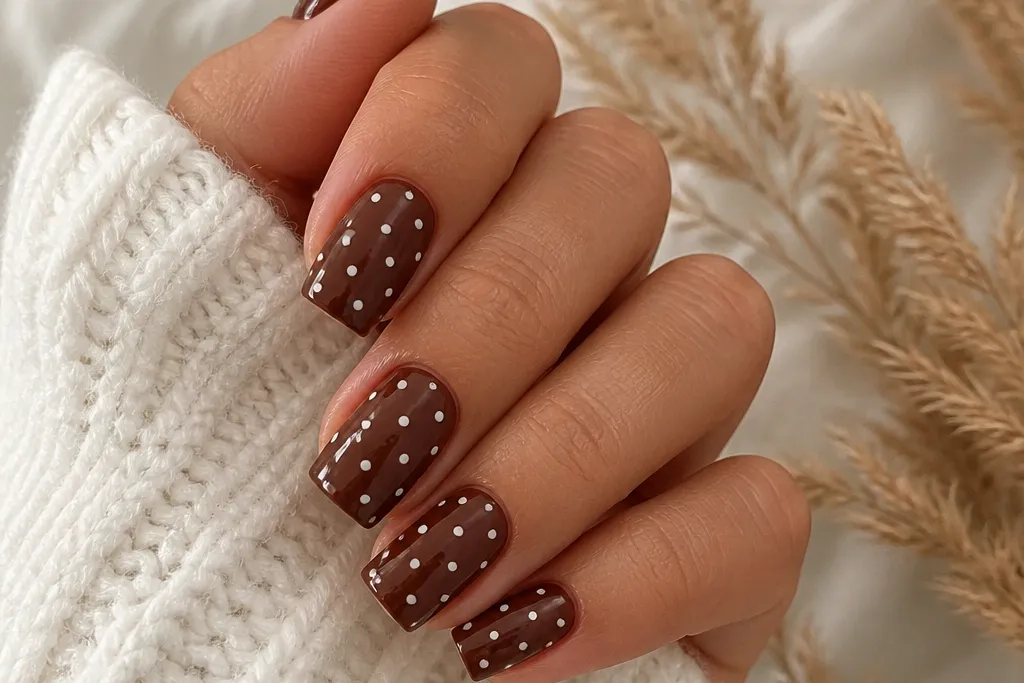
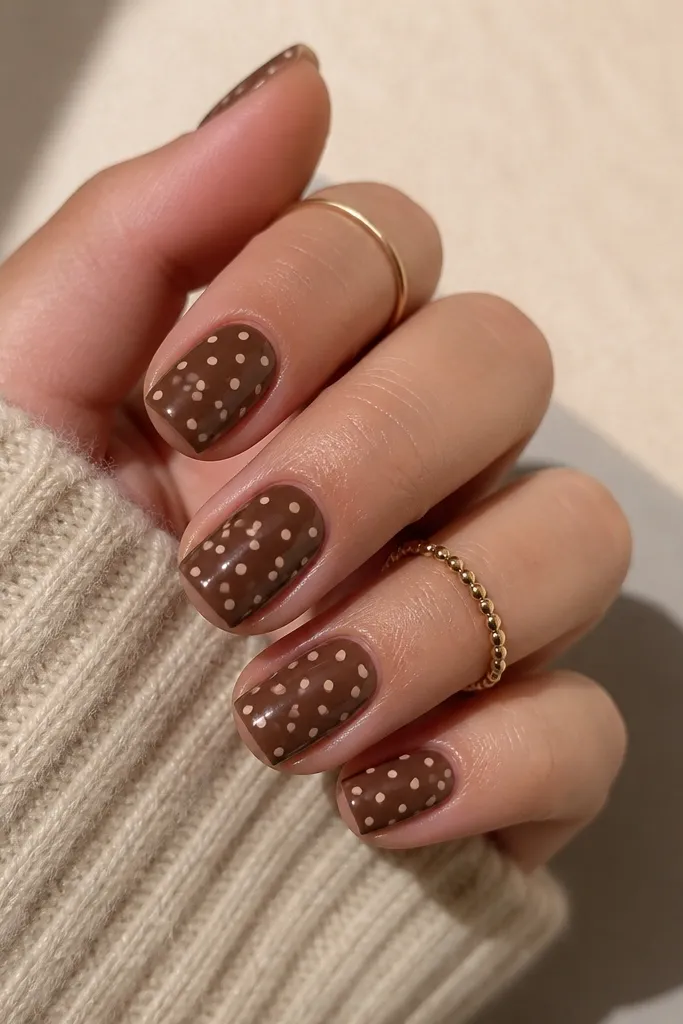
This one makes your nails look neat without covering your whole hand in pattern. The cocoa base reads warm and smooth, while the tiny dots near the tips feel intentional and modern. I like it because it grows out well - the dots stay concentrated where you still see them most.
Paint a solid cocoa brown on all nails. On each nail, place dots only from about 2mm below the tip to the very edge, using a small dotting tool. Keep the dot spacing consistent so the tips look "lined," not messy.
Editor's noteIf you want the dots extra crisp, let the base get tacky for 60-90 seconds before dotting.
Watch outDon't put tiny dots across the entire nail if your squares are short - it turns into visual clutter fast.
2. Milk Chocolate Full Dot Coverage
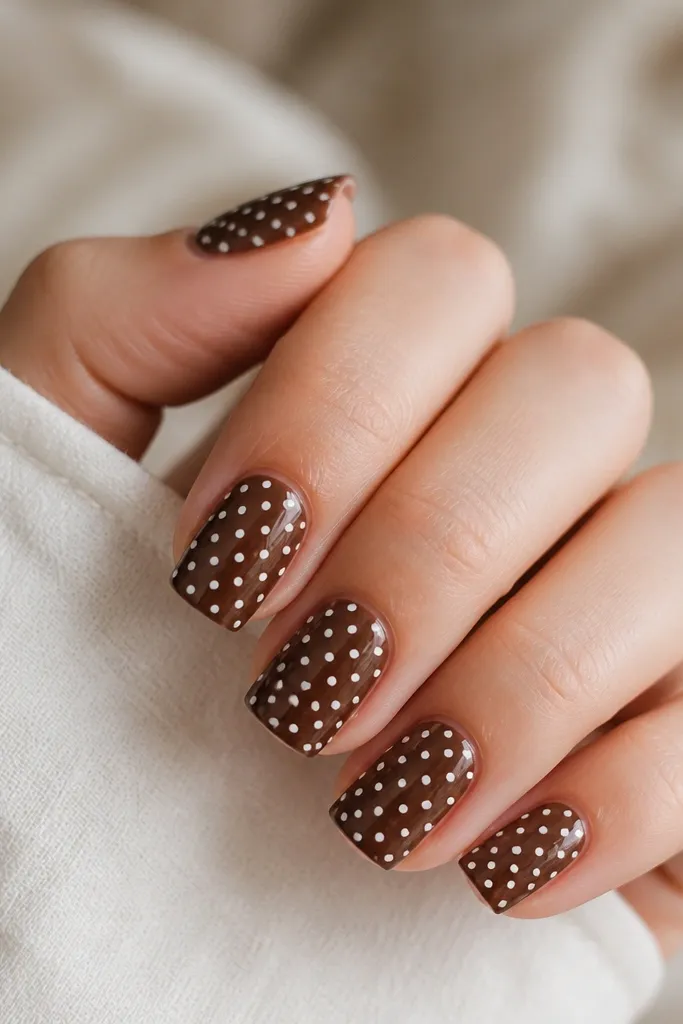
Full coverage dots make brown look fun instead of heavy. The even grid gives a clean, "fabric print" vibe, and the glossy top coat makes the dots pop. This is the design I reach for when I want brown nails that still feel playful.
Use a milk-chocolate brown as the base (not taupe). Place dots in rows from cuticle to tip, leaving a tiny gap between dots so the brown shows. Finish with a high-gloss top coat and cap the free edge.
Editor's noteWork one nail at a time so the tack doesn't dry out before you finish the row.
Watch outSkip uneven dot sizes - random sizing makes the pattern look like a rushed sticker.
3. Caramel Brown Half-Moon Dots
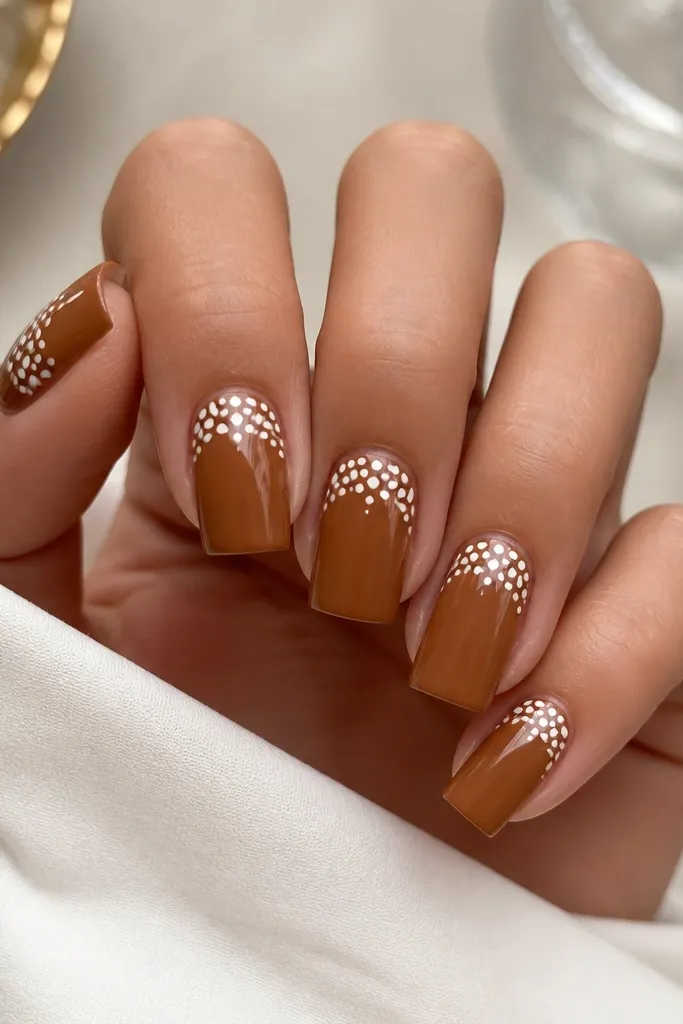
This look uses negative space on purpose. The half-moon dot cluster frames your cuticle area and makes the nail look cleaner and slightly longer. Caramel brown keeps the whole thing warm and wearable.
Paint a caramel brown base. Starting at the cuticle, dot white in a curved band that stops about halfway down the nail. Leave the center empty so you see brown between the dot band.
Editor's noteUse a dotting tool and rotate the nail slightly as you place dots so the curve stays smooth.
Watch outDon't fill the center with extra dots - the negative space is what makes it look styled.
4. Espresso Brown with Gold Dot Accent
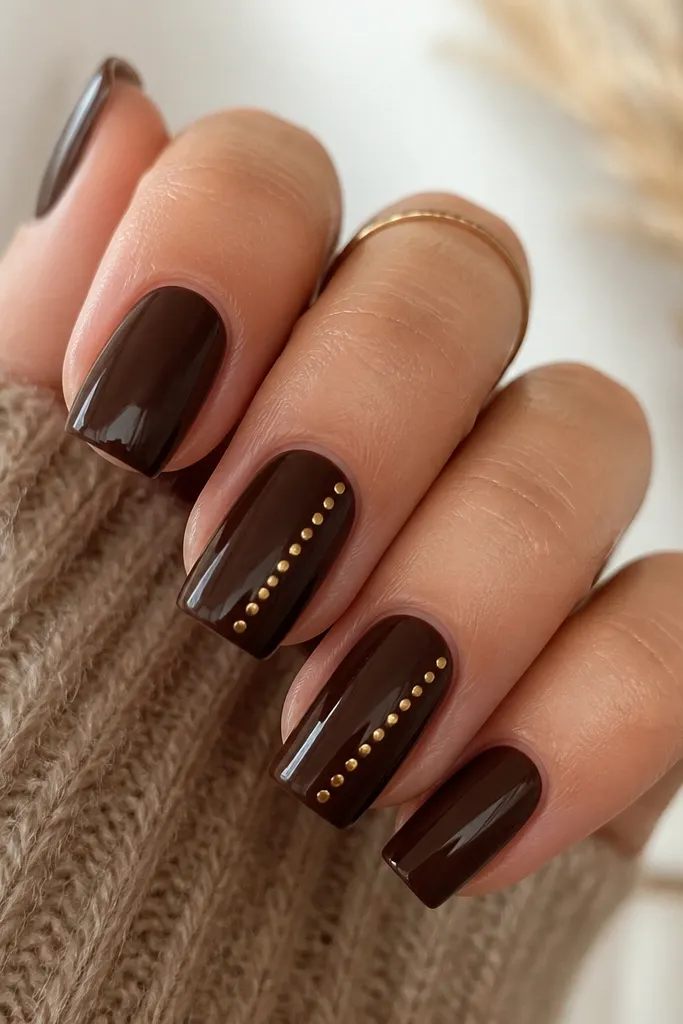
Gold dots on espresso brown look expensive because the contrast is sharp. I love doing it on one or two nails so your hand has a focal point without getting busy. The diagonal line also gives a little movement.
Paint espresso brown on all nails. On the accent nails, place a diagonal row of small gold dots from lower left to upper right. Keep the dots small and spaced so the line stays crisp.
Editor's noteIf your gold polish is thick, use a thinner top coat as a "dot medium" so the dots sit round.
Watch outDon't apply gold dots too close together - they merge into a stripe.
5. Warm Taupe Brown with Cream Dots
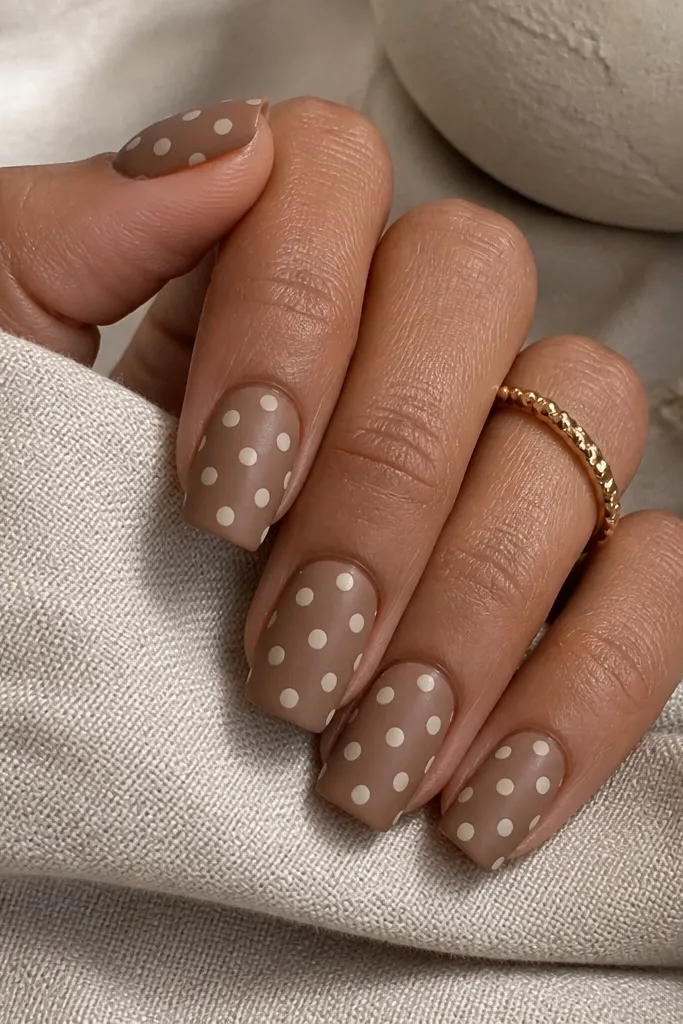
This is the "soft retro" version. Warm taupe gives you a lighter base, and cream dots are gentler than bright white. I like the matte base because it makes the dots feel like printed ceramic, not just painted.
Use a warm taupe brown and let it dry fully. Add cream dots evenly across the nail, then seal with a matte top coat over everything. If you hate matte, use glossy only on the dot area.
Editor's noteLet the matte top coat dry longer than you think - 2 extra minutes prevents tacky drag.
Watch outDon't use icy white dots on taupe - it looks too stark and cheap on this base.
6. Chocolate Brown Reverse Dots (Dots First)
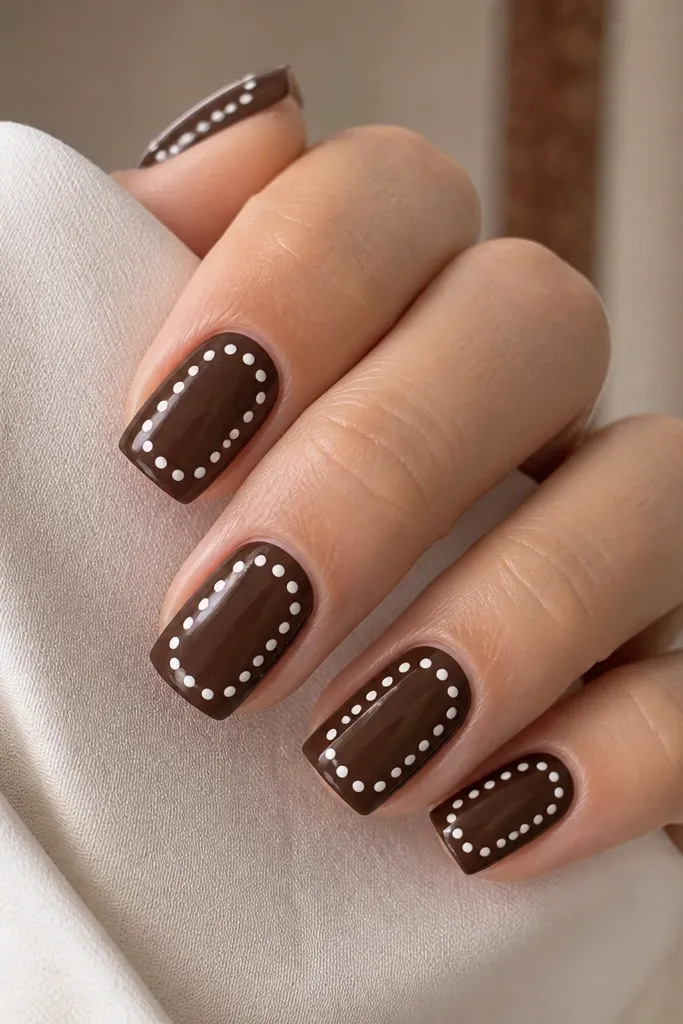
Reverse dotting is how you get ultra-clean edges. You paint the dot color first, let it set, then cover with brown so the dot shape stays crisp. This design reads like a stencil and looks sharp even on short squares.
Dot small white circles on the nail first. Let them cure fully, then paint chocolate brown over the whole nail. When you remove any extra around the dots with a cleanup brush, the dots look "embedded."
Editor's noteUse a flat cleanup brush dipped in acetone to tidy the dot edges right after the brown starts to set.
Watch outDon't rush the brown coat - if the dots haven't cured, the brown will smear them.
7. Mocha Brown with White Dot Border
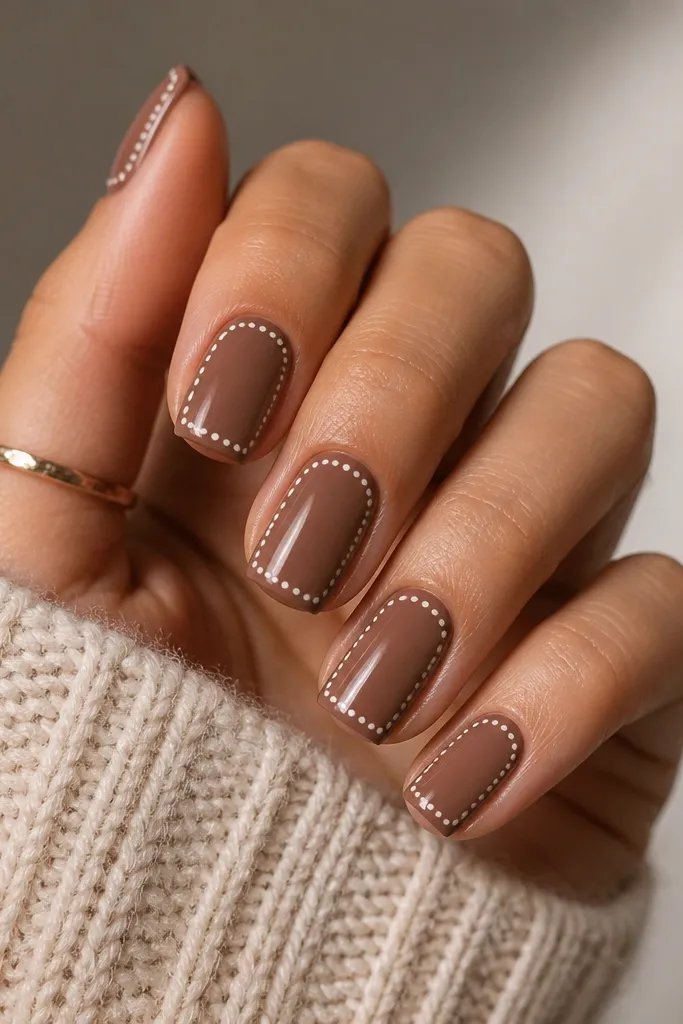
A border makes the nail look designed without covering it in full pattern. The thin white dot frame gives structure and makes your square shape look extra tidy. Mocha is the right shade here because it's dark enough to hold contrast but not too black.
Paint mocha brown. Place tiny white dots along both side edges, then connect them with a line of dots across the tip edge. Leave the center clean and glossy.
Editor's noteDo the sides first, then the tip - it keeps the frame symmetrical.
Watch outDon't make the border thick - a chunky dotted frame looks like cheap nail art tape.
8. Caramel Brown Speckle with Large Dots
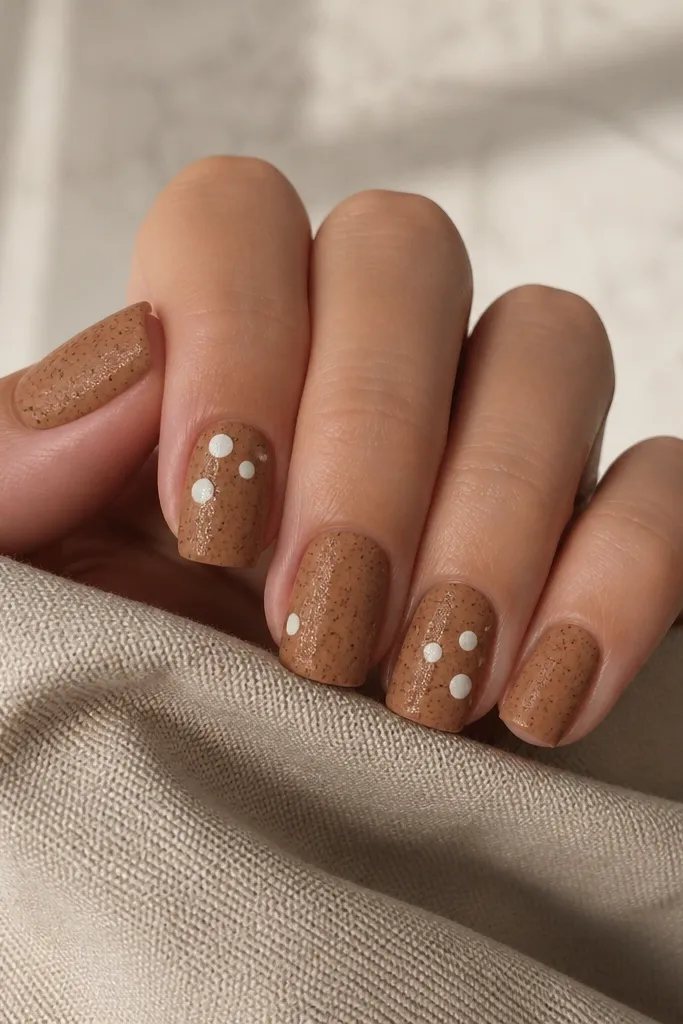
This mix gives you texture and focal points. Tiny speckles make the surface lively, while a couple large dots keep it from looking like random glitter. I like it because it feels playful but still looks put together.
Start with caramel brown. Add small speckles across the nail using a fine dot tool or the tip of a toothpick (lightly pressed). On selected nails, place 3-4 larger dots in a loose cluster near the center.
Editor's noteKeep the large dots spaced so you can see brown between them.
Watch outDon't cover the entire nail with only large dots - it turns into a loud print quickly.
9. Dark Brown Base with Nude Dot Overlay
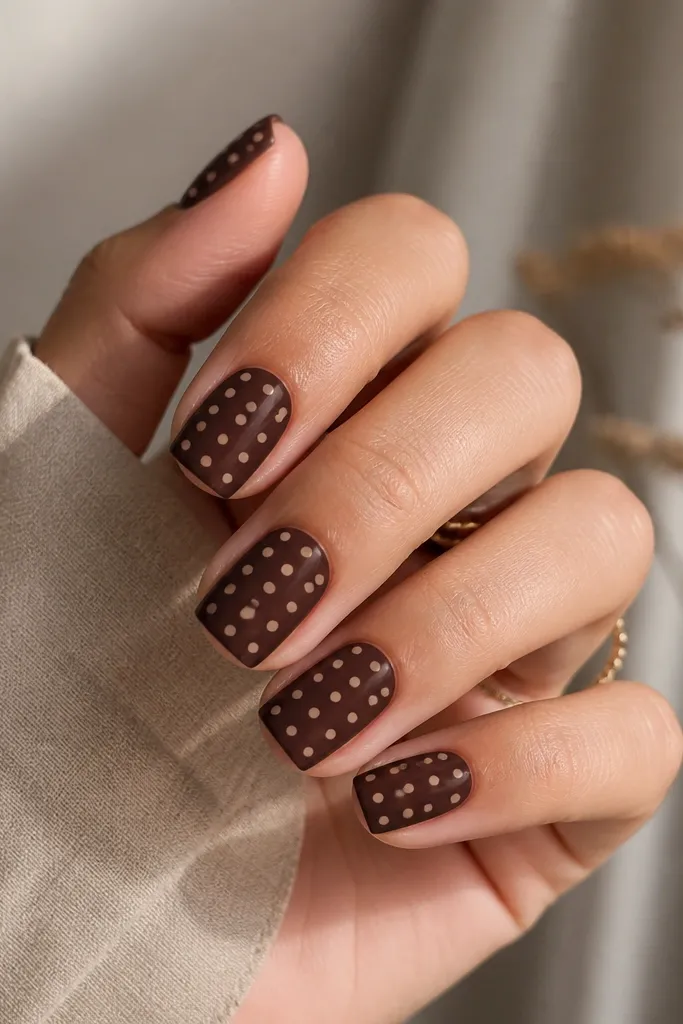
Nude dots look classy because they blend with your skin tone while still reading as pattern. The diagonal rows make the nail feel longer and more flattering. This one is great if you want polka dots but hate high-contrast white.
Use a dark brown base close to espresso. Add nude-beige dots in diagonal rows from lower left to upper right. Keep dot size medium and consistent across the hand.
Editor's notePick a nude dot color that matches your undertone - peachy nude for warm skin, pinky nude for cool skin.
Watch outAvoid gray nude dots - they make the design look dull and uneven.
10. Warm Cinnamon Brown with Red-Brown Dots
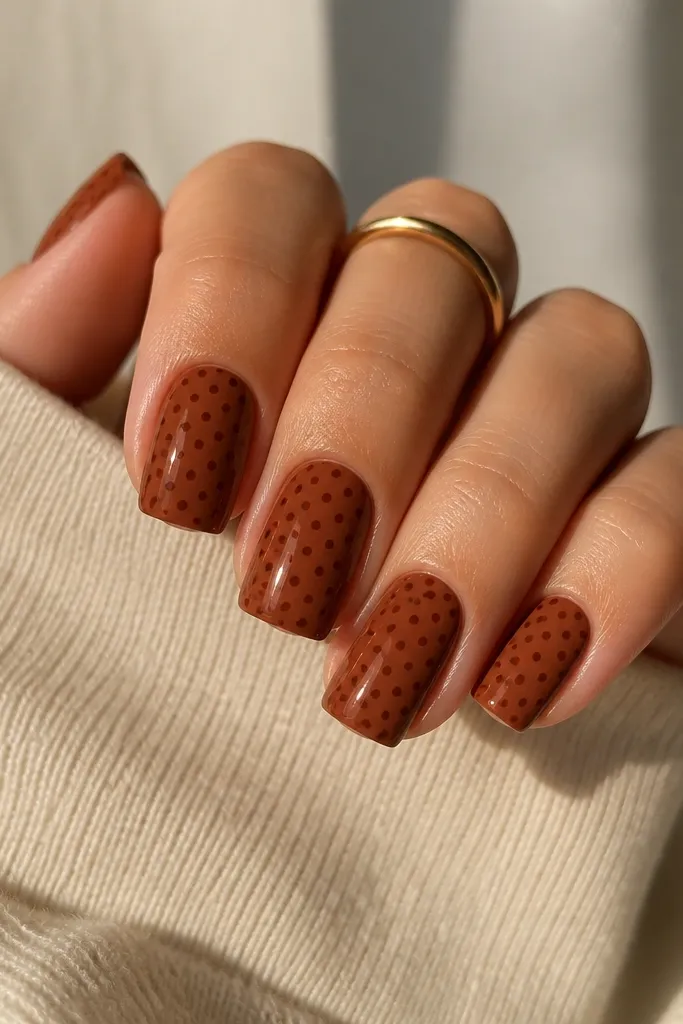
Same-family dots look rich without needing white. Cinnamon plus red-brown dots makes it feel like fall spices - warm, cozy, and not loud. I like this because it works with brown outfits and even denim.
Paint cinnamon brown as the base. Use a dot color that's 1-2 shades darker and slightly more red. Place medium-tiny dots evenly; finish glossy so the dots look crisp.
Editor's noteIf the red-brown looks too dark, thin it with a drop of clear polish so the dots stay rounded.
Watch outDon't use a flat matte base under glossy dots - the contrast looks chalky.
11. Chocolate Brown with White Dot Cuticle Line
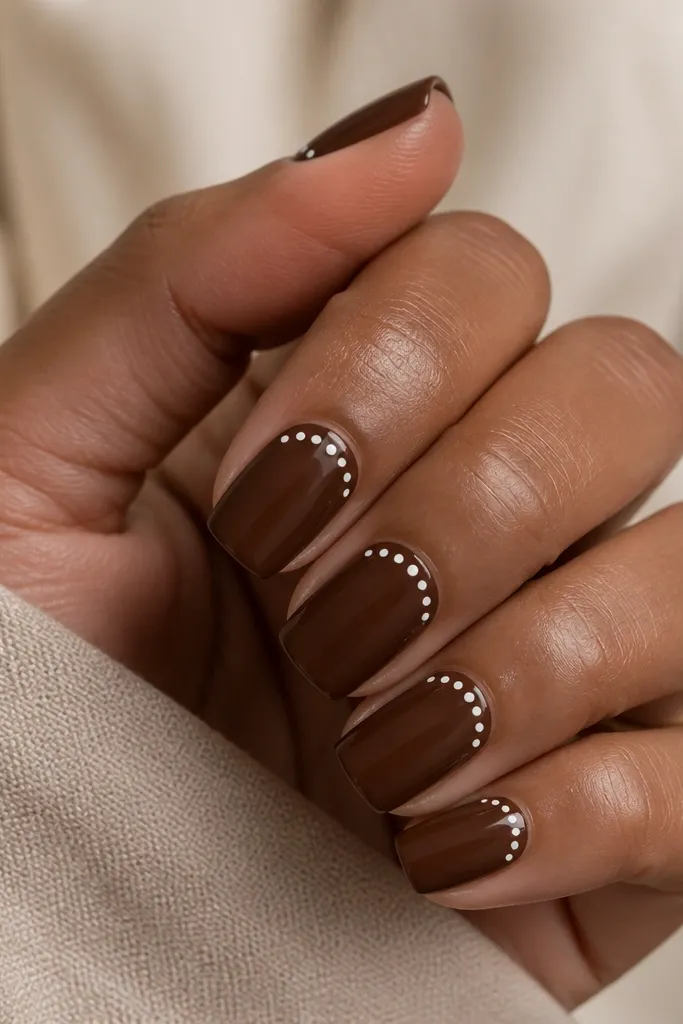
One dot line is the easiest way to do polka dots without committing to full coverage. It frames your cuticle and makes the nail look clean and intentional. Chocolate brown makes the white line pop without feeling harsh.
Paint chocolate brown and let it get tacky. Place a single row of small white dots across the nail just under the cuticle area, leaving a small gap at the sidewalls. Seal with a glossy top coat and cap the edges.
Editor's noteUse a dotting tool with a tiny tip and press gently so the dots stay round, not smeared.
Watch outDon't put the line too high on the cuticle - it can look like a sticker outline.
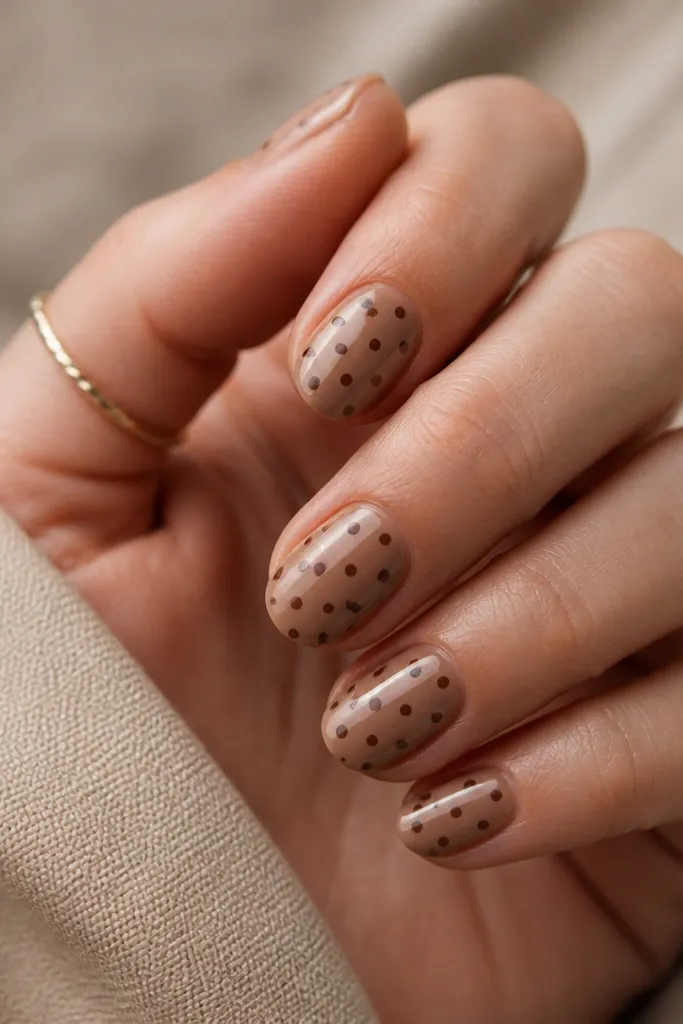
12. Brown Polka Dots on Clear Jelly Base
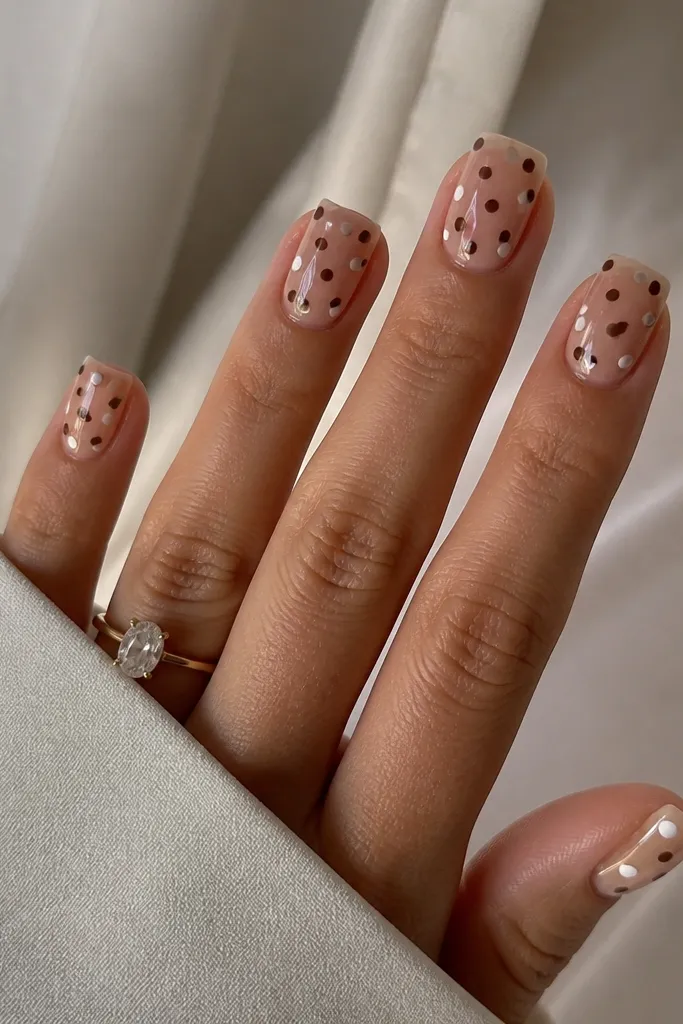
A jelly base makes the dots look suspended, which is why this style looks trendy and expensive. The translucency softens the brown and makes the dots feel lighter. I like doing this when my nails are short because it keeps everything looking airy.
Use a clear jelly base or sheer nude jelly. Add brown dots (slightly darker than the jelly) and optionally sprinkle tiny white dots on one or two nails. Finish with a thick, glossy top coat so it looks like glass.
Editor's noteBuild the jelly base in two thin coats so it stays smooth and doesn't pool at the cuticle.
Watch outSkip thick layers - jelly bases bubble if you overload the brush.
13. Matte Mocha with Glossy Dot Highlights
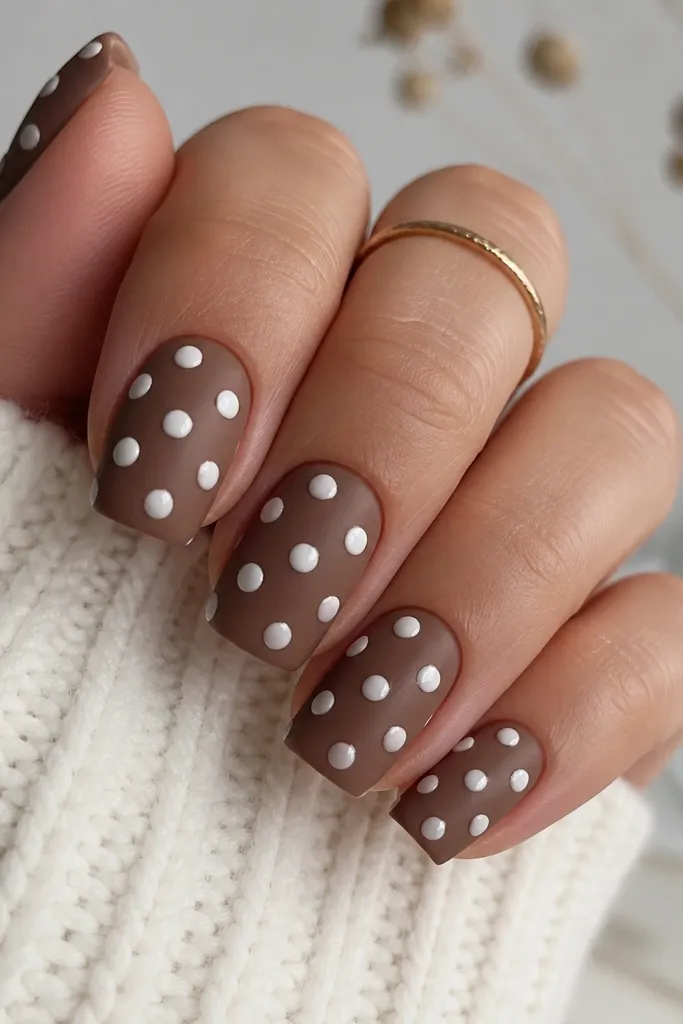
Texture contrast is the secret here. Matte mocha makes the surface look velvety, and glossy dots look raised and dimensional. This design has real depth even without rhinestones.
Paint mocha brown and seal with a matte top coat. Then paint white polka dots on top using a glossy white polish (not matte). Finish with one more thin glossy top coat only over the dots so they stay domed.
Editor's noteLet the matte fully dry before dotting; otherwise glossy dots drag and streak.
Watch outDon't seal matte over glossy dots - it kills the raised look.
14. Chocolate Brown Gradient with White Dots
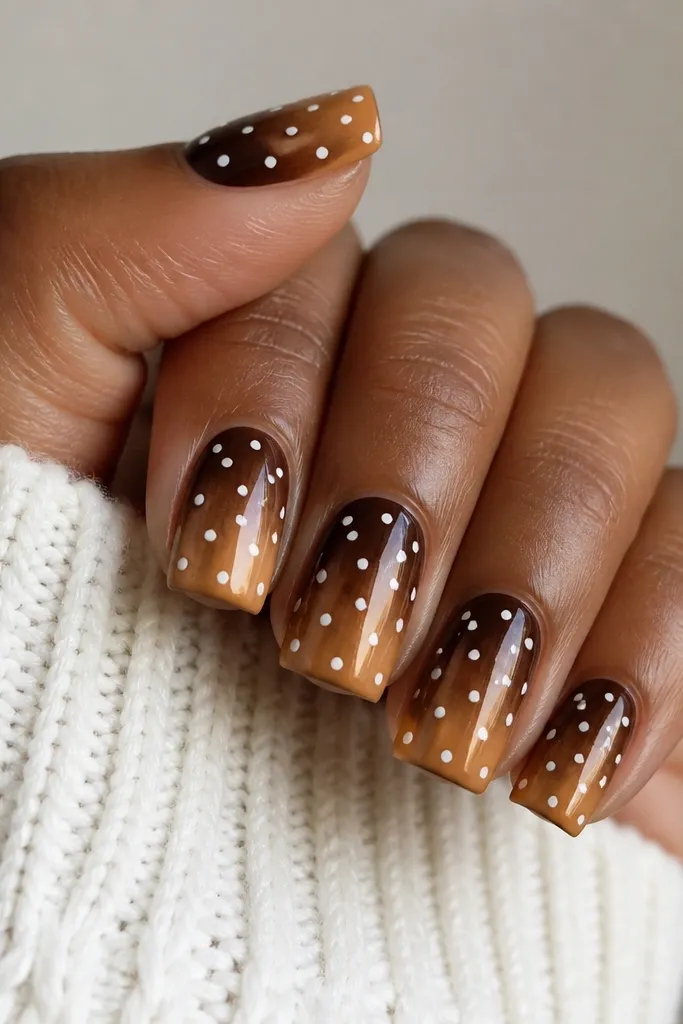
A brown gradient gives the dots more depth and makes them look like they sit on a soft background. The lighter tip area helps the dots read clearly without needing bright white everywhere. I wear this one when I want brown nails that look "art" but still clean.
Create a gradient using a makeup sponge: dark chocolate near the cuticle, then dab lighter caramel toward the tip. Let it dry, then add medium white dots across the whole nail. Seal with glossy top coat so the gradient blends smoothly.
Editor's noteUse a sponge that's barely damp; wet sponge blurs the gradient too much.
Watch outDon't place dots right after sponging - the gradient can smear under the dot tool.
15. Brown Polka Dot French Tip Square Nails
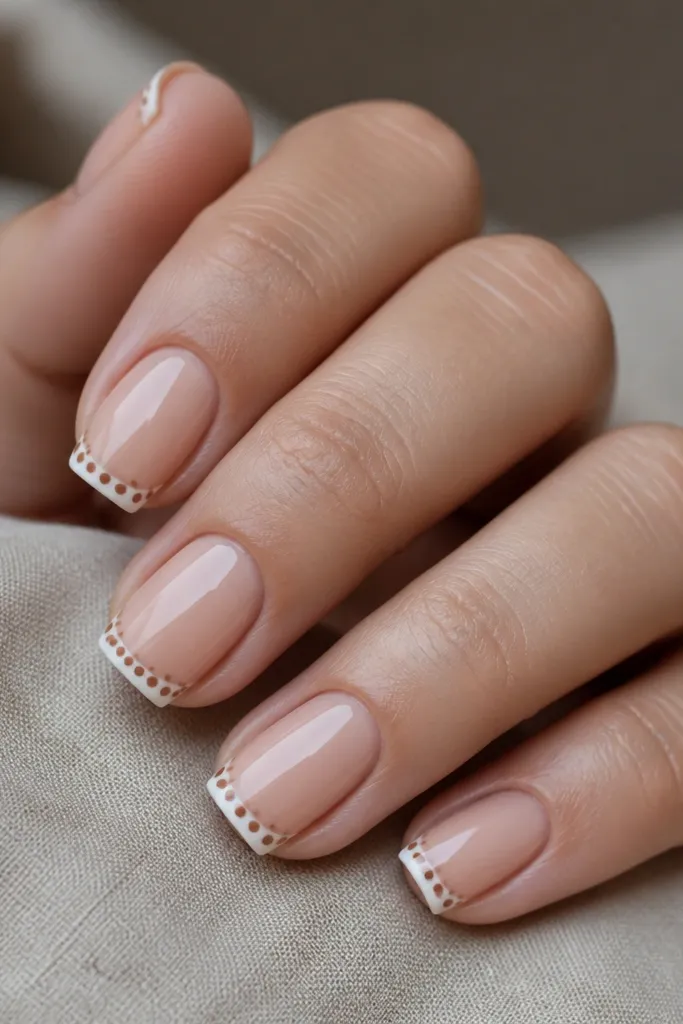
This is the most wearable "polka dot" version if you like French nails. The nude base keeps it classy, and the dotted tip adds interest without looking chaotic. Brown-on-white dots also look crisp and retro.
Paint a nude base. Create a thin white French tip line, then dot brown polka dots only within the French tip area. Keep dots tiny and evenly spaced so the tip stays delicate.
Editor's noteMake the French line thin; wide French tips make the dots feel cramped.
Watch outAvoid smudging the French line while dotting - let the white set first.
16. Espresso Brown with White Dot Diagonal Corners
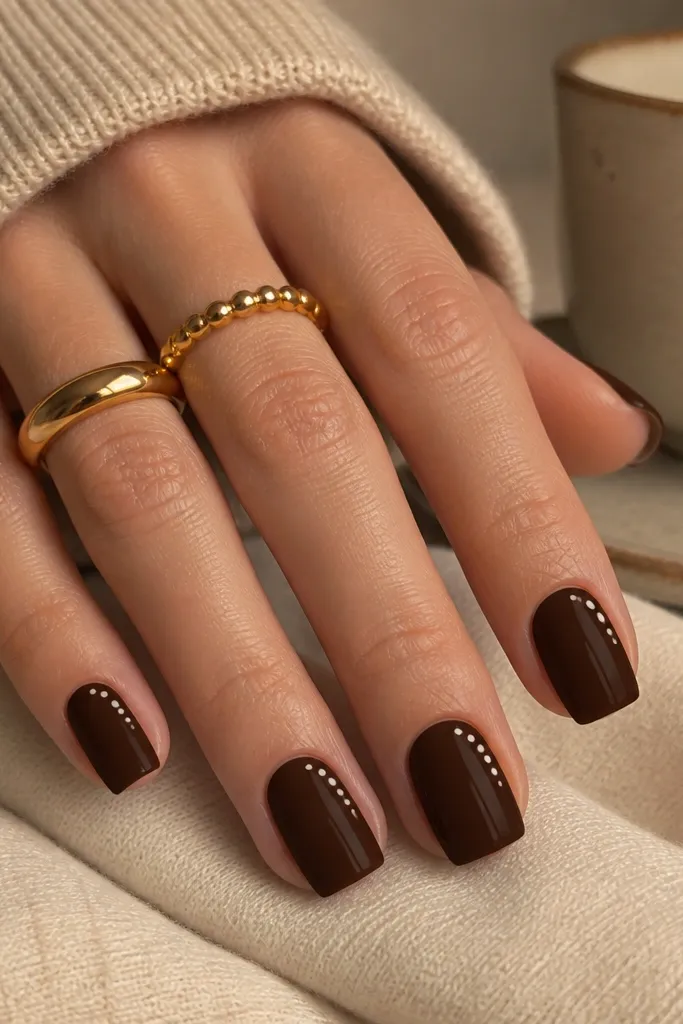
Corner dots look graphic and modern. You get the polka dot look without filling the whole nail, and the negative space keeps the nail from feeling heavy. Espresso brown makes the corners feel crisp instead of messy.
Paint espresso brown base. On each nail, place a small diagonal cluster of dots near one corner (upper right on some nails, lower left on others) and leave the rest solid. Finish glossy.
Editor's noteKeep the cluster to 6-10 dots per nail so it stays intentional.
Watch outDon't spread dots across the whole nail - the corners are the point.
17. Warm Brown with White Dots and Thin Gold Lines
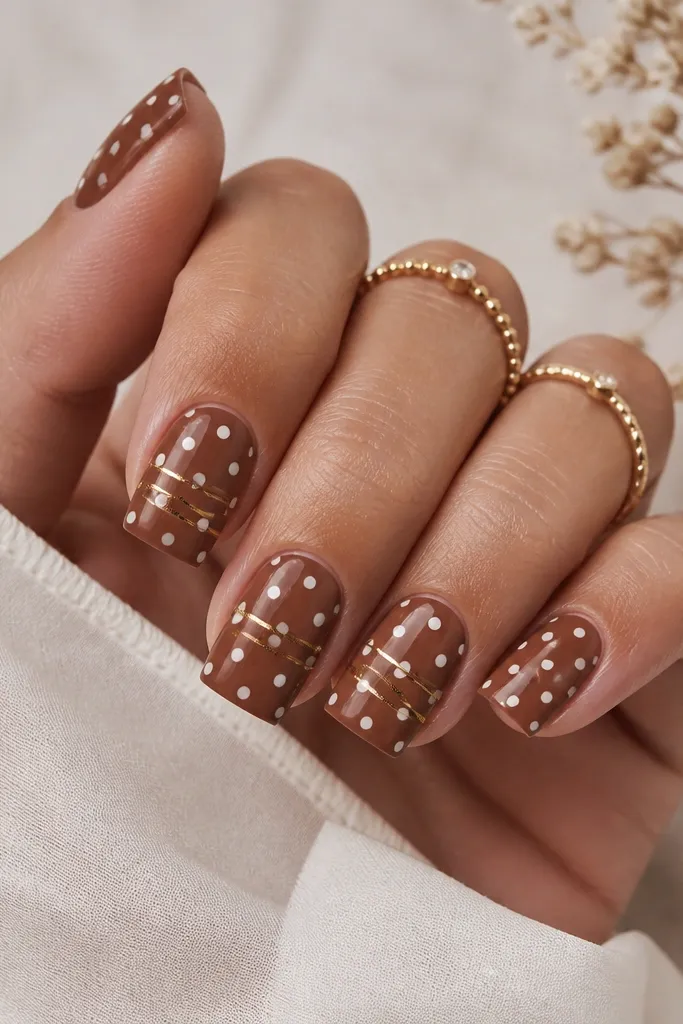
The gold line adds a clean, jewelry-like detail that makes the dots look styled. I like this when I want something for events but I still want the pattern to stay the star. Warm brown keeps it from looking cold or metallic-heavy.
Paint warm brown and add white dots evenly. On accent nails, draw one thin gold line diagonally using striping tape or a fine liner brush, then place dots so they sit next to the line. Top coat everything glossy.
Editor's noteUse striping tape for the gold if you want straight lines without practice.
Watch outSkip thick gold chrome overlays - they dull the dots and make the finish uneven.
18. Brown Polka Dots with Clear Rhinestone-less Center
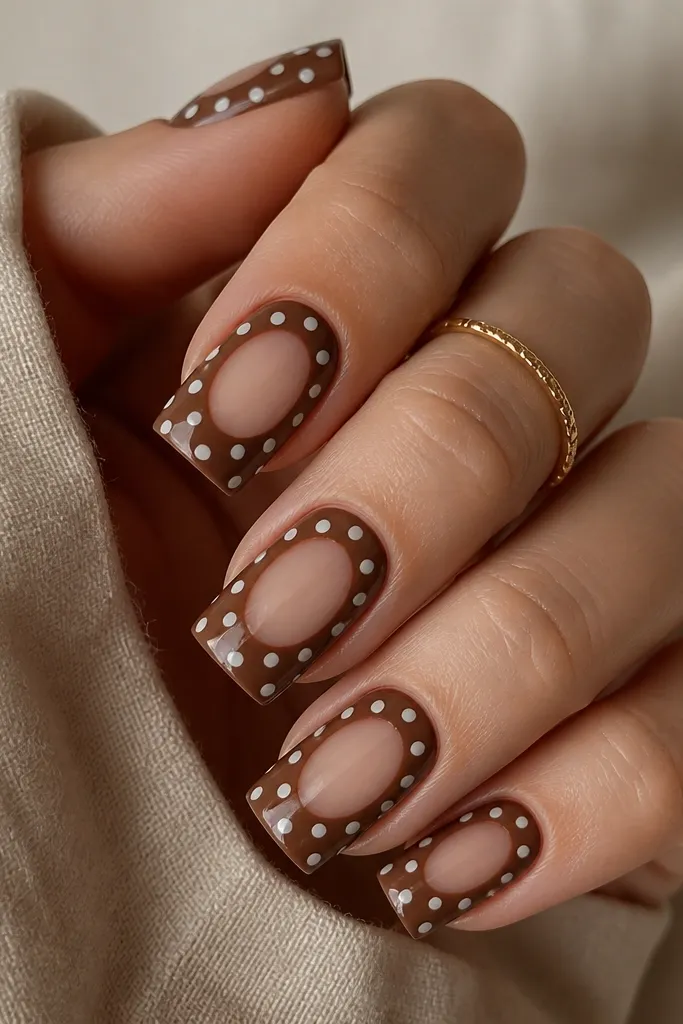
This design tricks the eye into thinking there's a focal jewel, without using rhinestones. The clear oval center makes the dots feel framed and gives your nail a longer, cleaner look. It's also great if you hate bulky embellishments.
Paint a brown base but leave an oval window in the middle unpainted (use tape or liquid latex, then peel). Add white dots around the oval so they form a ring. Seal with glossy top coat and smooth the edges of the window area.
Editor's noteIf you use tape, press the edges down firmly so brown doesn't creep into the clear oval.
Watch outDon't use too many dots inside the oval - keep it empty.
19. Chocolate Brown with Cream Dots and Micro Glitter Edge
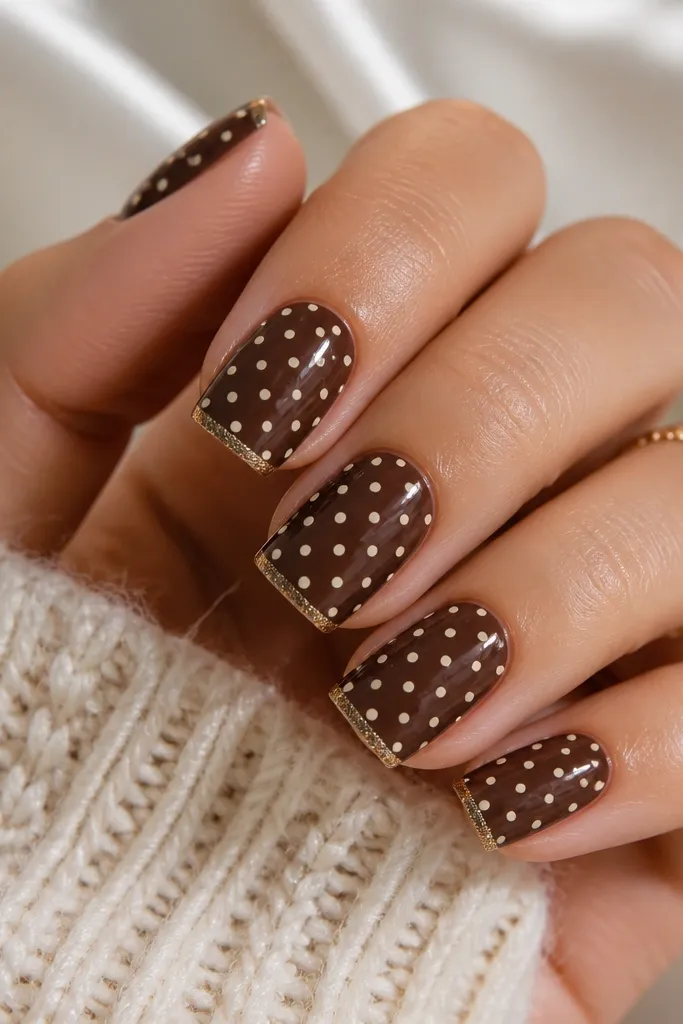
Cream dots keep it soft, and the micro glitter band adds a tiny amount of sparkle right where light hits your hands. This looks great for dinners and dates because the glitter is subtle, not party-overload. The brown base keeps it grounded.
Paint chocolate brown and place cream dots evenly. At the tip edge only, swipe a thin line of micro gold glitter polish or glitter gel. Seal with a glossy top coat so the glitter band stays smooth.
Editor's noteUse a small makeup sponge to press glitter at the tip so you don't flood the nail surface.
Watch outAvoid glitter on the sides - it catches fabric and can chip faster.