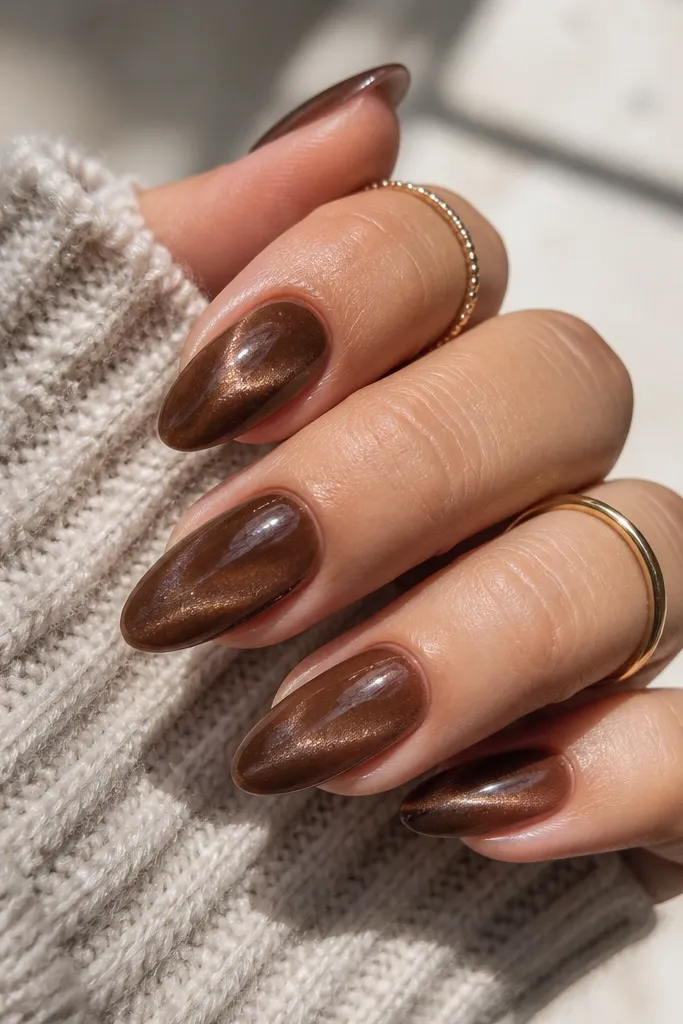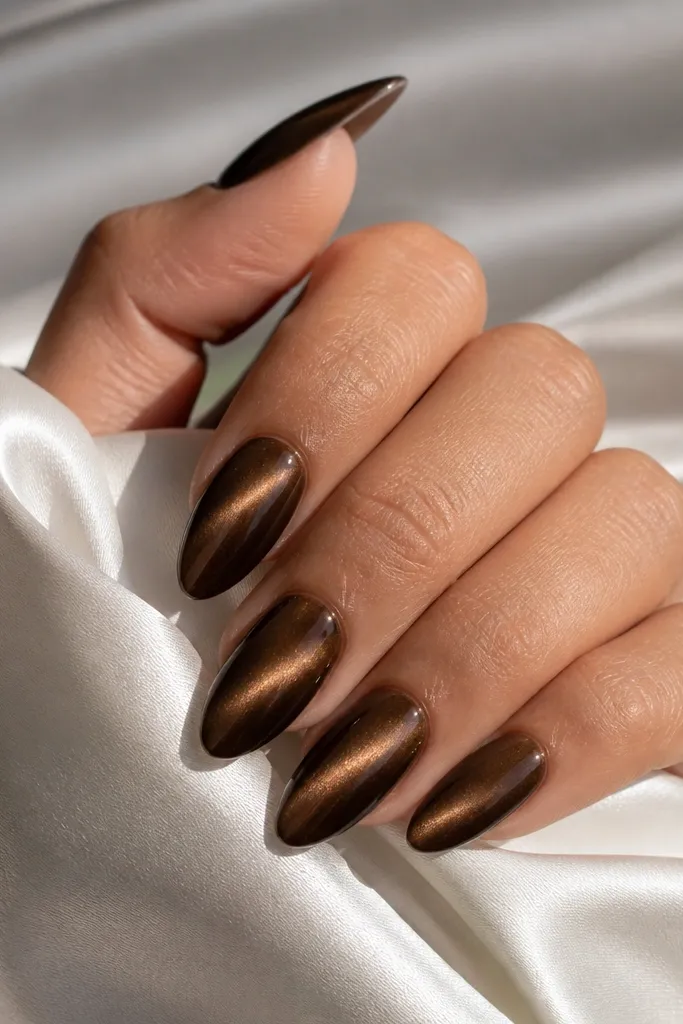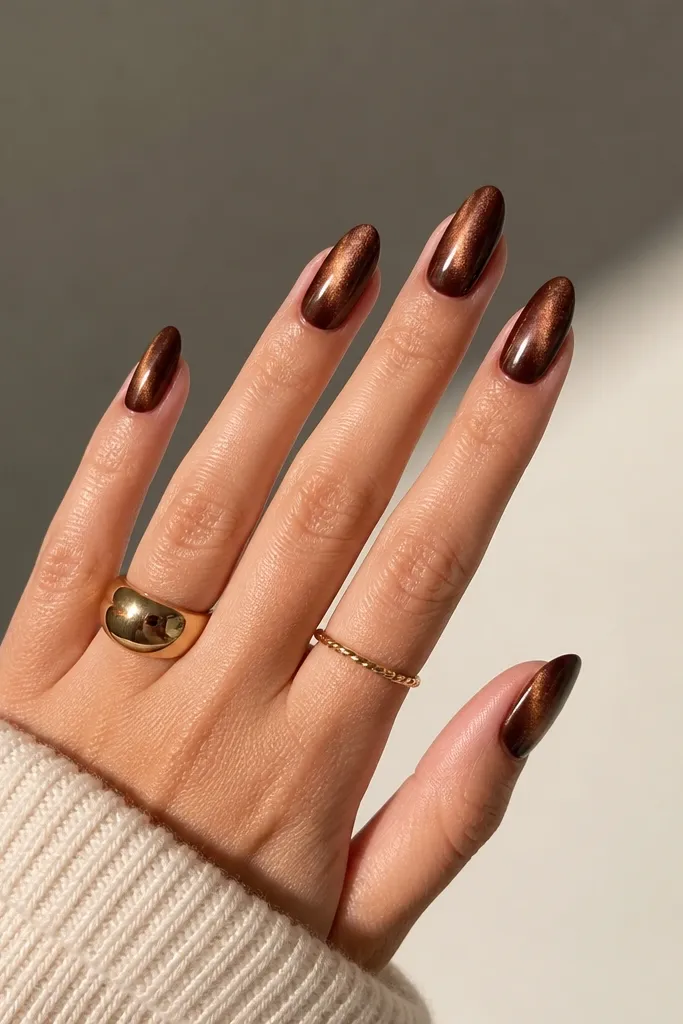
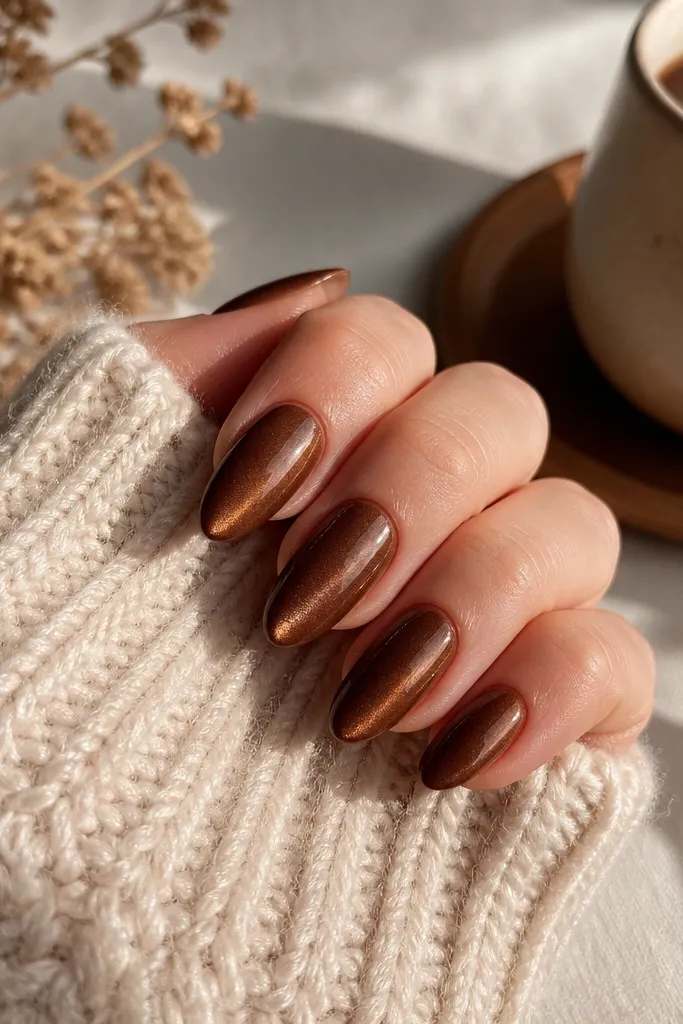
1. Cocoa Chrome Cat Eye With Thin Gold Blade
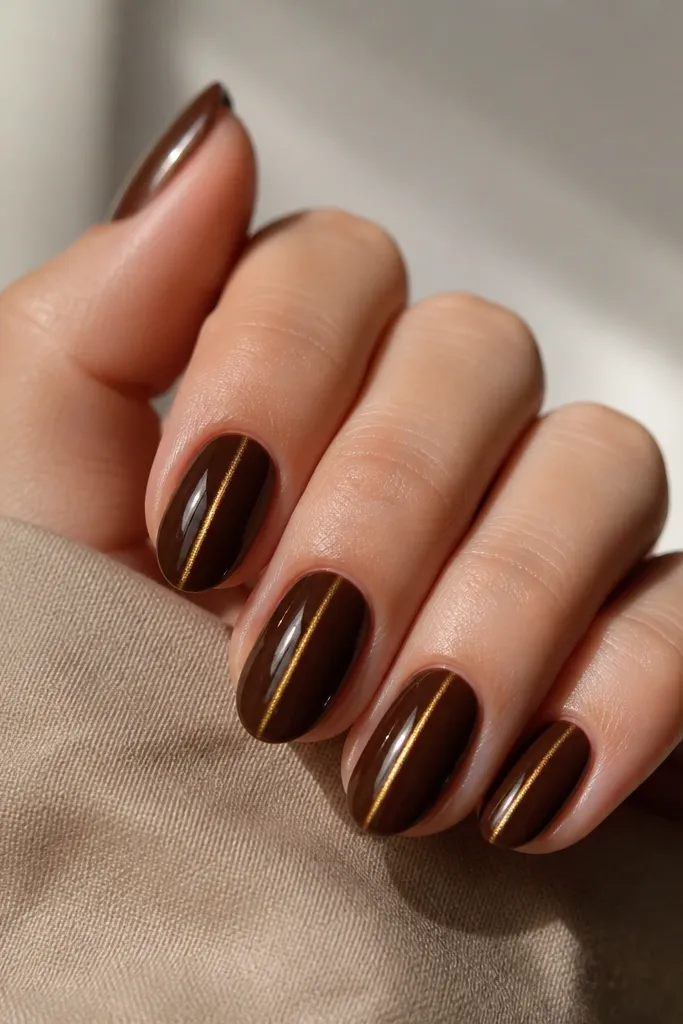
This one gives you the "warm latte" vibe without looking flat. The brown is a true cocoa gel that looks nearly black in shade, then turns warm under light. A gold magnetic pigment pulls into a narrow stripe that reads like a blade, which is what makes it feel cozy instead of flashy. The high-gloss top coat makes the line look glassy, not dusty.
Apply two coats of cocoa brown gel, curing each coat fully. After the second coat, keep it tacky and apply a thin swipe of gold magnetic pigment gel over the nail. Hold a strong magnet directly above the center of the nail for 10 seconds, then cure. Finish with a thick, leveling top coat so the line stays crisp.
Editor's noteIf your stripe looks too wide, use less magnetic pigment - a thin layer pulls tighter.
Watch outDon't magnet after the top coat or after the brown is fully dry - you'll get a cloudy blob.
2. Caramel Sundae Cat Eye With Champagne Glow
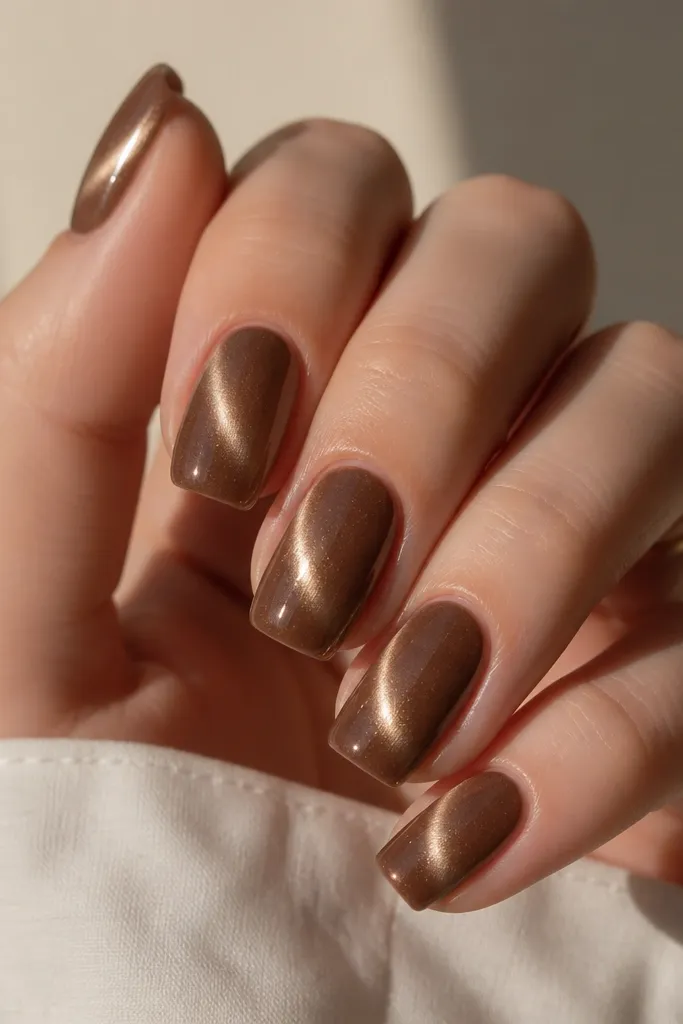
Caramel-brown is friendlier than chocolate because it's warm and forgiving. Champagne magnet pigment makes the eye look like it's lit from within, not painted on top. Because the arc is a touch wider here, it reads cozy even on shorter nails. It also looks great with gold rings and warm-toned makeup.
Use two coats of caramel brown gel, curing each coat. Add champagne cat-eye pigment gel in a thin layer, then place the magnet at a slight angle (about 20-30 degrees) so the eye curves. Magnet for 9 seconds and cure. Seal with glossy top coat, then wipe tacky residue if your top coat requires it.
Editor's noteAngle the magnet toward the cuticle for a curved "smile" eye on squoval nails.
Watch outSkip a thick pigment layer - it turns the eye into a hazy stripe.
3. Mocha Velvet Cat Eye Matte + Gold Micro-Stripe
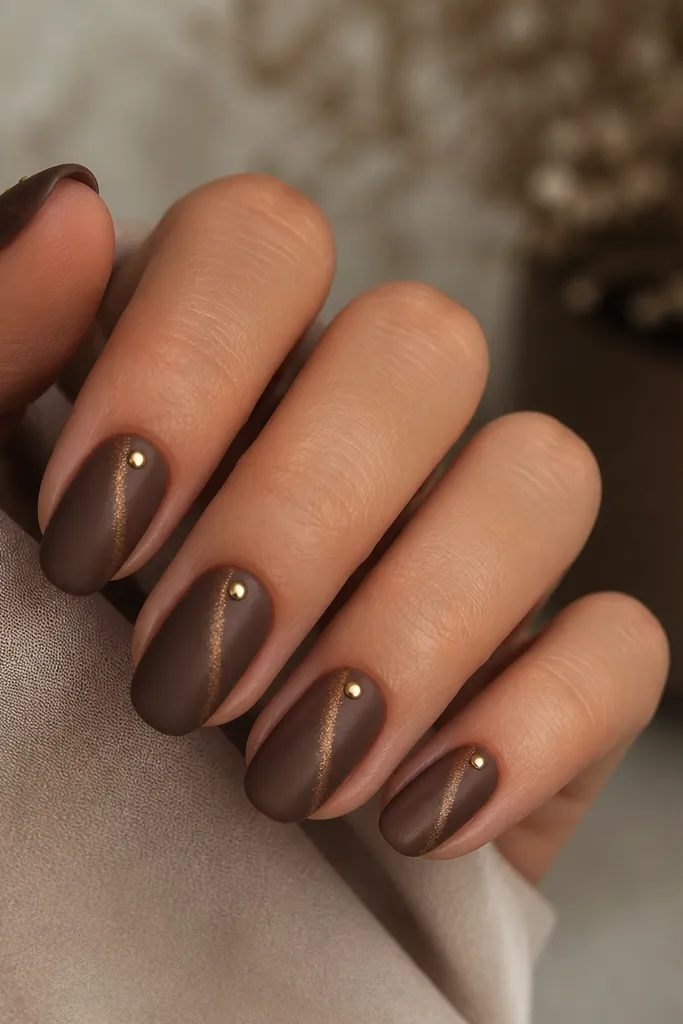
Matte makes cozy brown nails feel softer and more "snuggly," not shiny-for-the-sake-of-shiny. The cat-eye still pulls, but it reads like velvet. Adding a tiny glossy gold dot near the cuticle gives you a focal point when the light hits at an angle. It's a look I wear when I don't want my nails to look too formal.
Paint two coats of mocha brown gel and cure. Apply gold magnetic pigment gel and magnet for 10 seconds while the surface is tacky, then cure. Skip glossy top coat and use matte top coat over everything, then add a 1mm glossy gold dot with gel polish gel at the cuticle line and cure.
Editor's noteKeep the gold dot small - around 1mm - so it doesn't look like a sticker.
Watch outDon't fully matte the pigment line with a rough top coat - use a true matte top coat.
4. Hazelnut Brown Cat Eye With Negative Space Half-Moon
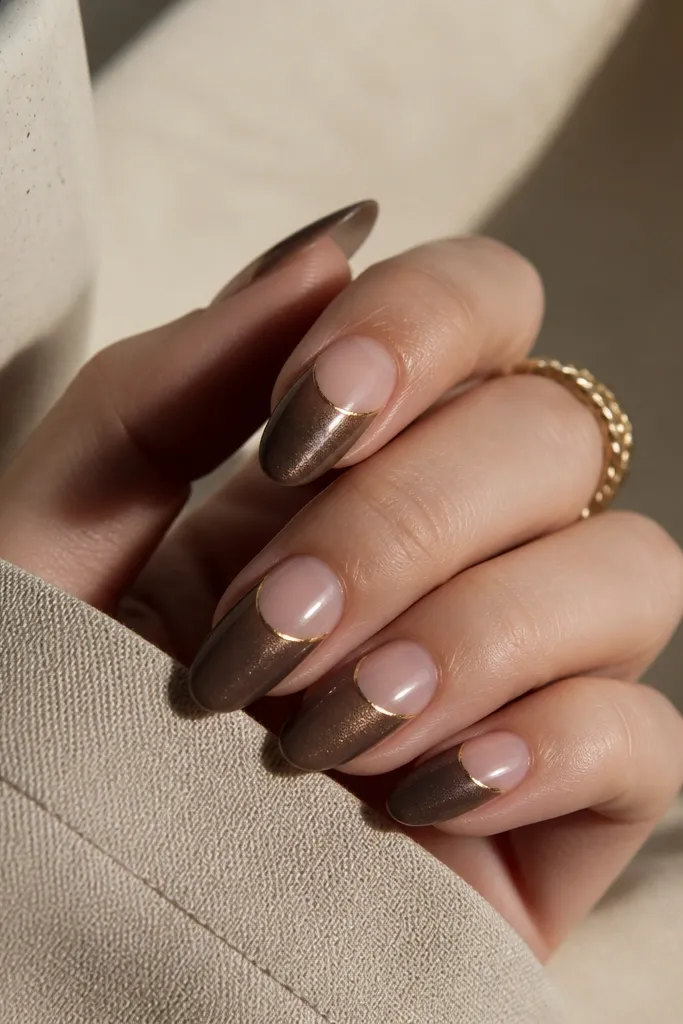
This is cozy because the brown only covers part of the nail, so the gold cat-eye feels intentional instead of heavy. The negative space half-moon makes your nail bed look longer and keeps the design breathable. Hazelnut brown is slightly lighter than chocolate, which helps the gold line show up clean.
Start with a nude base (sheer pink or nude builder gel) and cure. Apply hazelnut brown gel to the lower half only, cure. Add gold magnetic pigment on the brown section and magnet for 8-10 seconds, aiming the eye line upward toward the center. Clean the negative space edges with a small liner brush and finish with glossy top coat.
Editor's noteUse striping tape to mask the half-moon while you paint brown, then remove tape before top coat.
Watch outDon't let brown creep into the negative space - wipe the edges before curing.
5. Espresso Brown Cat Eye With Gold Foil Specks
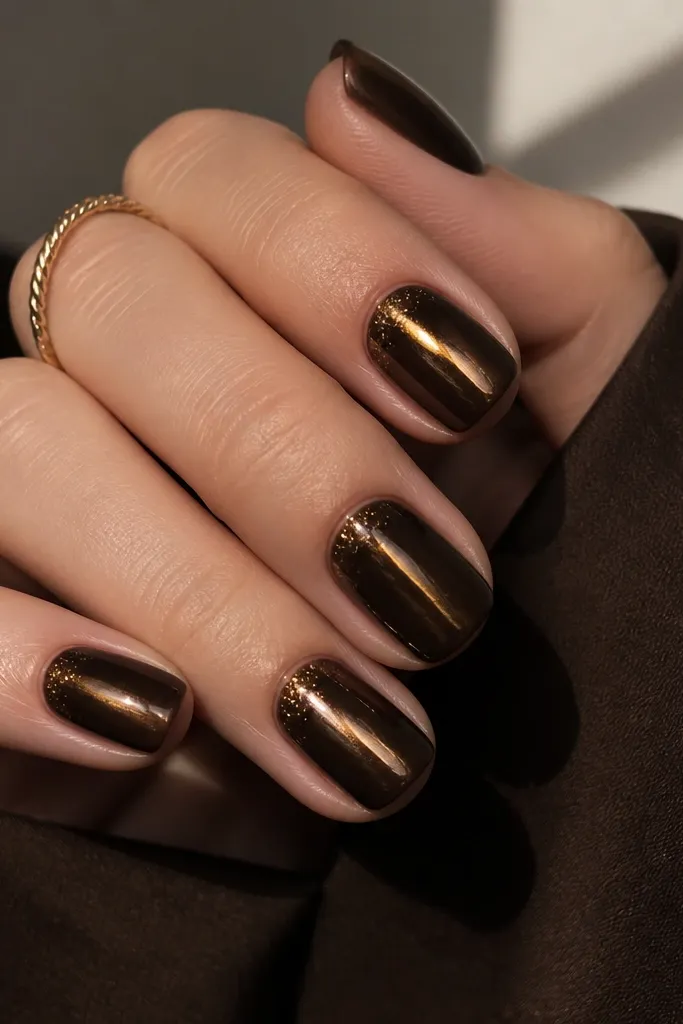
The cat-eye gives structure, and the foil specks add cozy texture. Espresso brown is dark and dramatic, but the gold flecks keep it warm. The foils are irregular, so it looks hand-done rather than uniform like chunky glitter. Under warm light, it looks like candle glow on a coffee table.
Apply two coats of espresso brown gel and cure. Add gold magnetic pigment gel, magnet for 10 seconds, then cure. Use a small amount of gold foil adhesive gel near the cuticle and sprinkle thin foil pieces, then cure. Seal with a glossy top coat that covers the foil without flooding it.
Editor's notePress foil pieces with a silicone tool so they lie flat before top coat.
Watch outDon't use thick foil chunks - they lift and catch on sweaters.
6. Caramel Latte Cat Eye With Diagonal Eye Pull
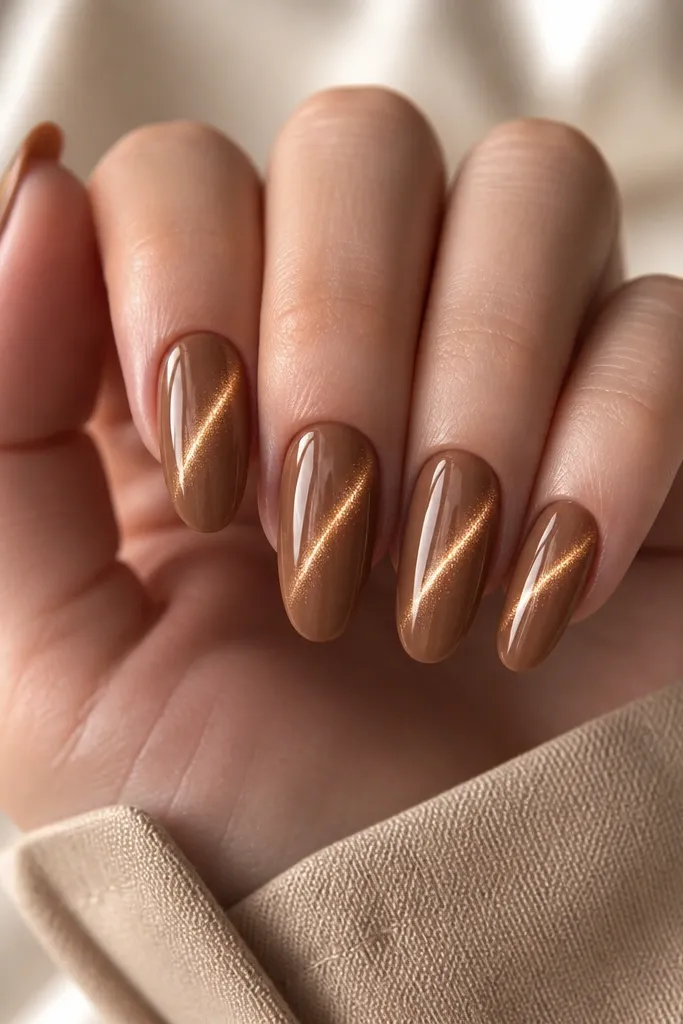
Diagonal cat-eye looks more modern and still cozy because the base is warm. The diagonal pull makes your nail look longer and more sculpted. Caramel latte brown has enough lightness to keep the gold from looking harsh. This is the one I reach for when I want something different from the straight-up eye.
Paint two coats of caramel latte brown gel and cure. Apply gold magnetic pigment gel over the full nail. Magnet with the tip of the magnet shifted so the eye pulls diagonally - magnet for 9-11 seconds. Cure, then top coat with a glossy finish.
Editor's noteMark the diagonal path lightly with a dot of gel at the center before magnet so you stay consistent.
Watch outDon't move the magnet during the pull - diagonal lines blur if you wobble.
7. Warm Cocoa Cat Eye French Tip
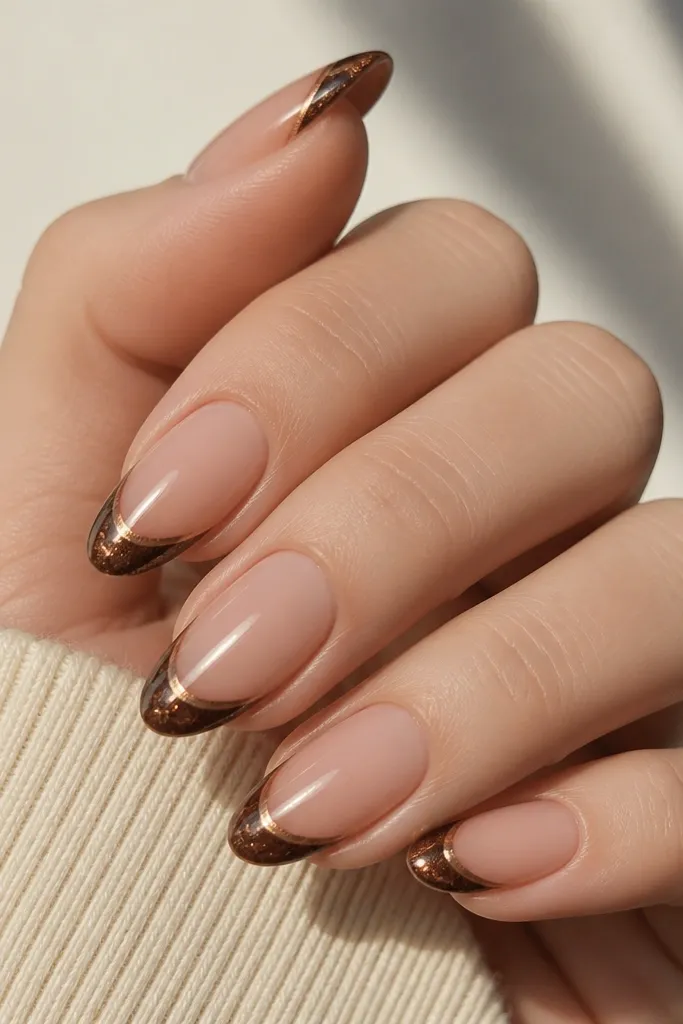
A cat-eye French tip feels cozy because it looks neat and polished, not like full glitter overload. Keeping the base nude lets the gold shimmer be the star. The French tip shape also gives you a natural "frame" for the eye line. Warm cocoa keeps everything flattering for everyday hands.
Start with a sheer nude base and cure. Create a cocoa French tip with a gel brush, curing after you finish each hand. While the French tip is tacky (after curing the cocoa), apply gold magnetic pigment only on the tip area and magnet for 8 seconds. Top coat over the whole nail for a smooth edge.
Editor's noteKeep the tip thickness thin - around 0.5-1mm - so the eye line doesn't look chunky.
Watch outDon't magnet on the nude base - it turns the whole nail into a stripe.
8. Chocolate Brown Cat Eye Ombré Down the Center
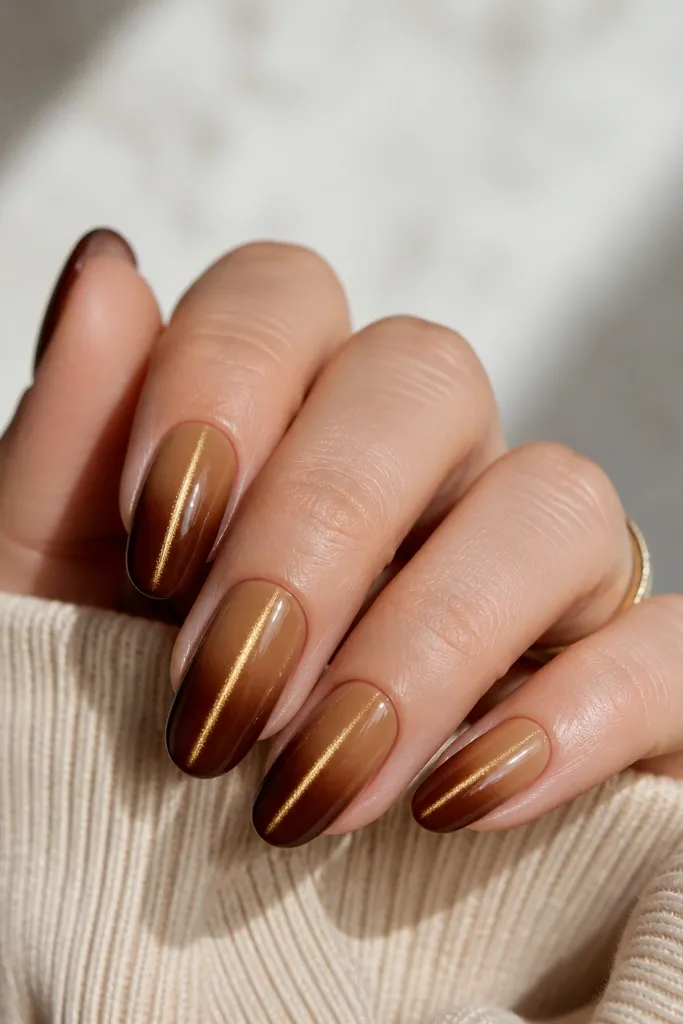
Ombré makes cozy brown nails look expensive because it adds depth even before the magnet. The gold eye line stays readable because it sits on top of the darker center. This design looks great on medium length where the gradient has room to show. It's also forgiving if your magnet pull isn't perfectly centered.
Blend caramel brown at the cuticle and transition into chocolate brown at the tip using a sponge lightly at the center. Cure. Apply gold magnetic pigment gel in the center stripe only, then magnet for 10 seconds. Cure and top coat glossy.
Editor's noteUse a makeup sponge for the blend; tap, don't swipe, or you'll muddy the gradient.
Watch outAvoid over-blending - if the gradient turns flat, the cat-eye line looks like it's floating.
9. Toffee Brown Cat Eye With Gold Micro-Glitter Veil
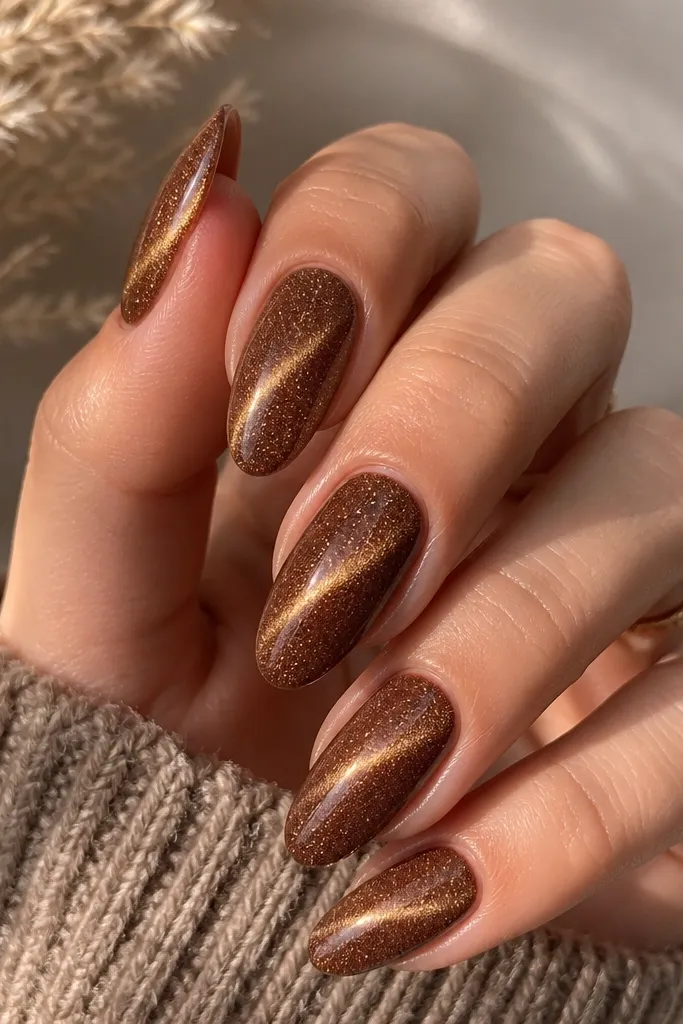
This one is cozy because it reads warm and slightly sparkly without being chunky. The micro-glitter veil adds dimension, while the cat-eye line gives it direction. Toffee brown is lighter than espresso, so the sparkle feels like caramel shimmer. In photos, it looks like your nails are lit from under the surface.
Apply two coats of toffee brown gel and cure. Add gold magnetic pigment gel for the cat-eye line, magnet for 9-10 seconds, then cure. Mix a tiny amount of fine gold micro-glitter into clear gel and brush a thin veil over the nail, cure. Finish with glossy top coat.
Editor's noteKeep the micro-glitter veil thin - one light brush layer is enough.
Watch outDon't pile glitter near the cuticle - it can look dusty and dry.
10. Cocoa Brown Cat Eye With Subtle Starburst Edge
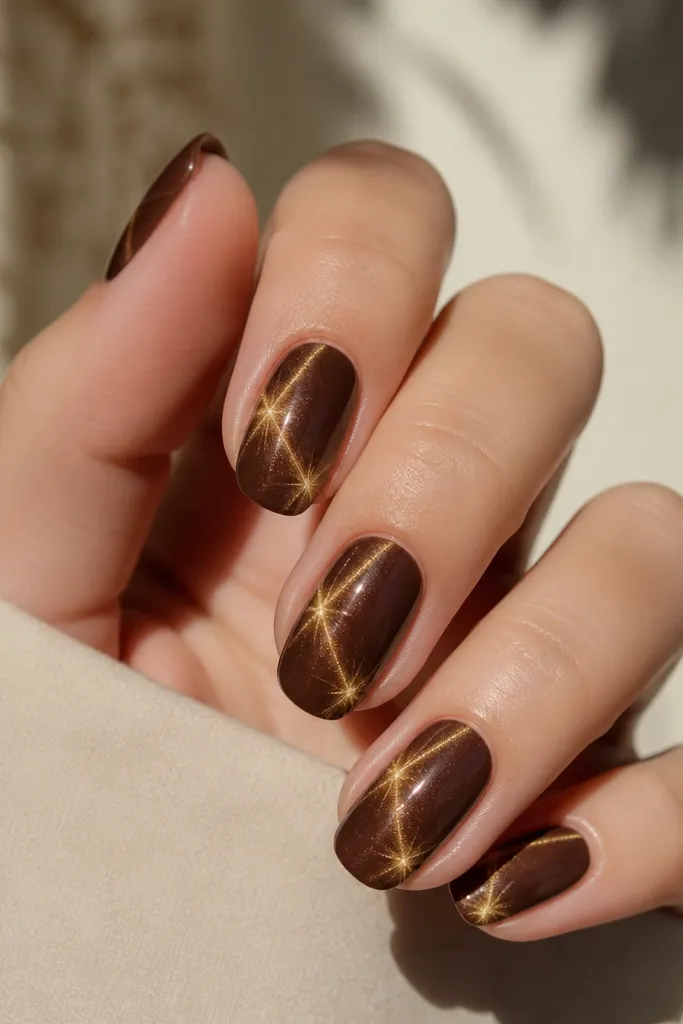
The starburst effect makes the cat eye feel more dimensional, like the shimmer is catching a breeze. You get it by magnetizing at the sides lightly while still keeping the center line. Cocoa brown grounds the look so it stays cozy instead of space-themed. This works especially well on almond nails where edges catch light.
Paint two coats of cocoa brown gel and cure. Apply gold magnetic pigment gel. Magnet the center for 10 seconds, cure. Then, with a fresh magnet position, tap lightly at each side edge for 2-3 seconds and cure again. Seal with glossy top coat.
Editor's noteDo side "taps" fast - you're adding sparkle, not replacing the main eye line.
Watch outDon't hold the magnet at the sides too long - it turns into two thick stripes.
11. Warm Brown Cat Eye With Gold Outline Cuticle Line
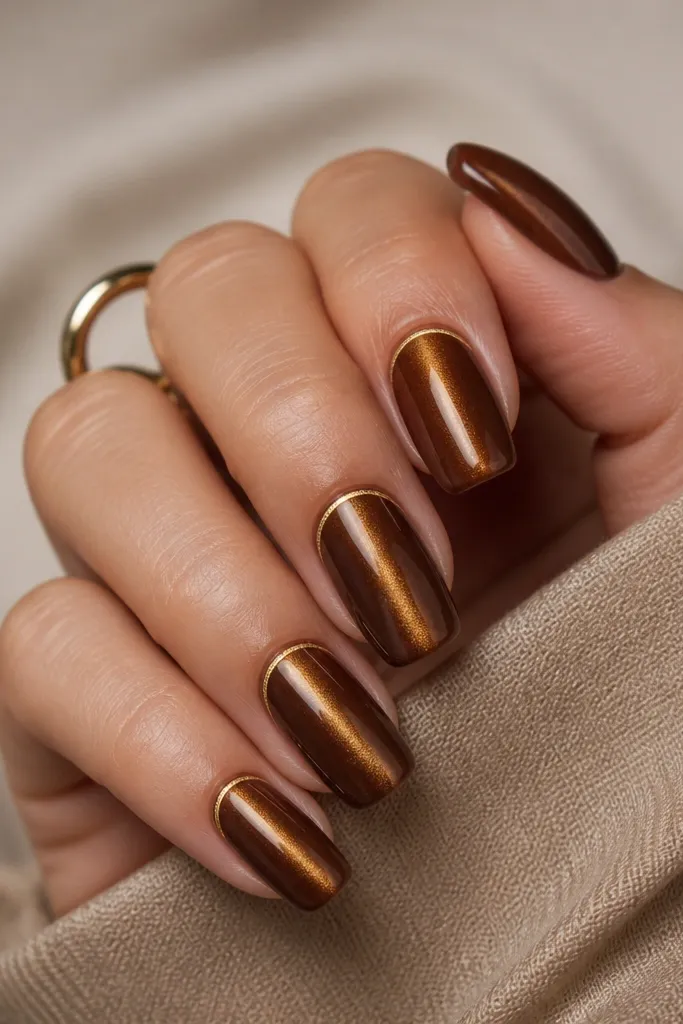
A cuticle outline gives structure and makes the whole set look intentional. The cat-eye line stays the main feature, while the gold crescent adds a cozy glow near the skin. Warm brown keeps the gold from looking too bright. This is one of my favorite "going out" versions that still feels wearable.
Apply two coats of warm cocoa-brown gel and cure. Add gold magnetic pigment and magnet for 9-11 seconds, cure. Use gold striping gel or a metallic gold polish with a fine liner brush to draw a thin arc along the cuticle curve, cure. Finish with glossy top coat.
Editor's noteUse a liner brush with a sharp tip and steady your hand on a table - the crescent line should be one clean stroke.
Watch outDon't thicken the cuticle outline - thick lines look like decals.
12. Spiced Caramel Cat Eye With Brown-To-Gold Fade
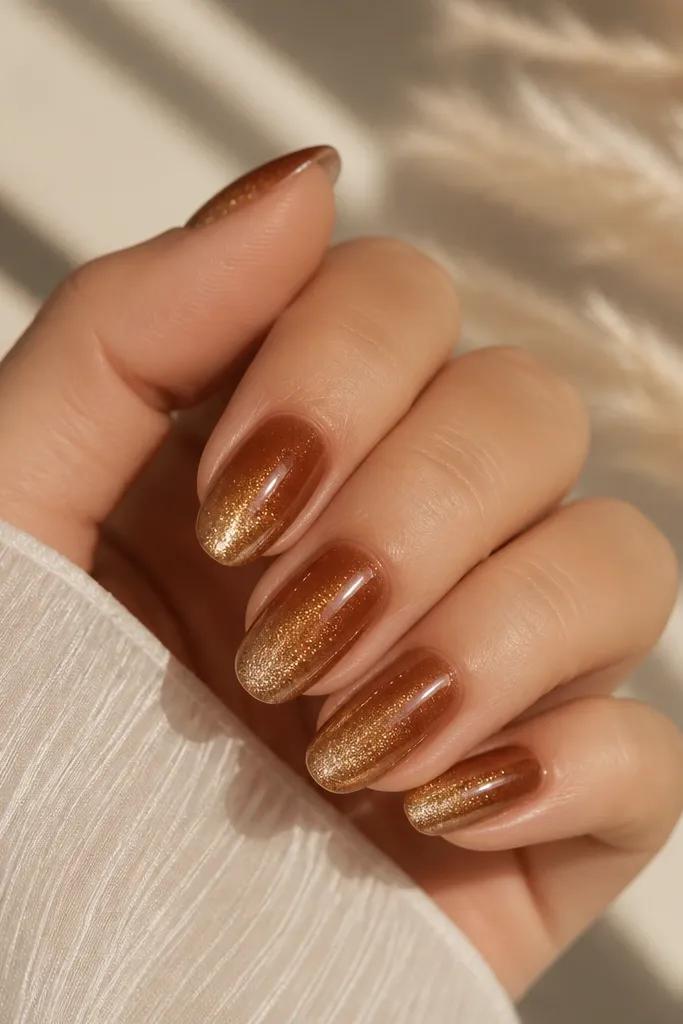
This is cozy because it feels like a warm gradient from "skin tone" to "toasted sugar." The cat-eye line intensifies near the tip, so it looks more dramatic even on short nails. Spiced caramel is slightly orange-brown, which makes gold look richer. It also hides minor imperfections because the shimmer changes density.
Paint two coats of spiced caramel brown and cure. Apply gold magnetic pigment in a gradient: start with a thin layer near the cuticle and add more toward the tip. Magnet for 10 seconds with the magnet centered. Cure and top coat glossy.
Editor's noteLoad more pigment only at the tip by brushing the pigment gel off most of the brush before applying near the cuticle.
Watch outDon't let the gradient reach the cuticle - it will blur the eye line.
13. Smoky Umber Cat Eye With Soft Silver-Dipped Edge
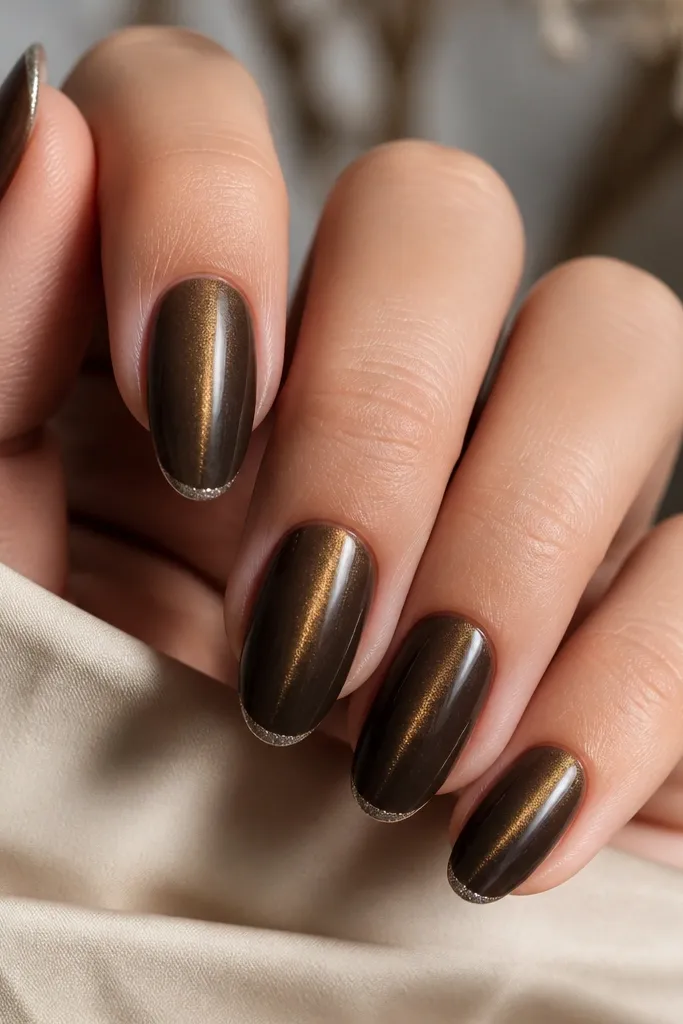
Gold and silver together can look cold if the brown is gray. Here, the smoky umber has warmth, so the silver band feels like candle smoke rather than icy chrome. The cat-eye keeps it cozy; the silver edge adds a crisp finish point. This version works well when you want something different from all-gold shimmer.
Do two coats of smoky umber brown and cure. Apply gold magnetic pigment and magnet for 9-10 seconds, cure. For the silver band, paint a thin line of silver shimmer gel only at the free edge, cure. Top coat glossy over everything to blend the edges.
Editor's noteKeep the silver band under 1mm - a thin stripe looks intentional, not messy.
Watch outAvoid a thick silver layer - it makes the whole nail look top-heavy.
14. Toasted Chestnut Cat Eye With Side-Swept Eye
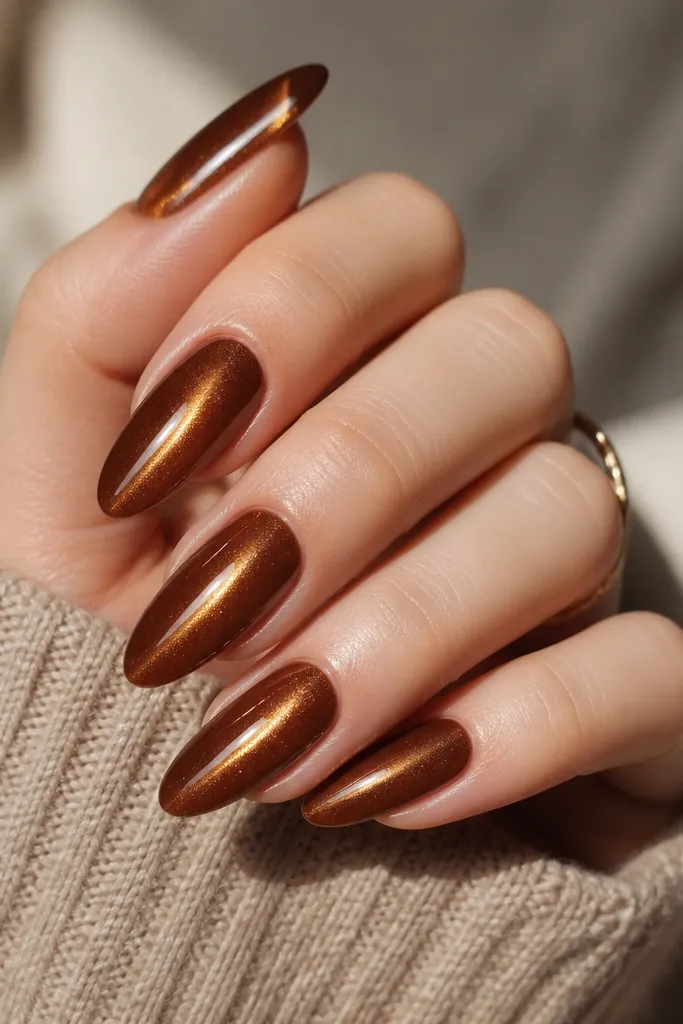
Side-swept cat eye looks more editorial and still cozy because chestnut brown is warm and rich. The off-center eye makes your nails look slimmer and longer. The gold line catches light as you move, which is why it feels alive. I wear this when my outfits are simple and I want the nails to do the talking.
Apply two coats of toasted chestnut brown gel and cure. Put gold magnetic pigment gel over the whole nail but keep it thin. Magnet with the tool offset so the eye pulls slightly off-center; hold for 10 seconds and cure. Finish with glossy top coat.
Editor's noteIf you're nervous about off-center, mark a tiny dot on the nail with a gel liner tool where you want the eye to start.
Watch outDon't center everything out of habit - the whole look depends on the off-center pull.
15. Maple Brown Cat Eye With Tiny Brown Marble Swirls
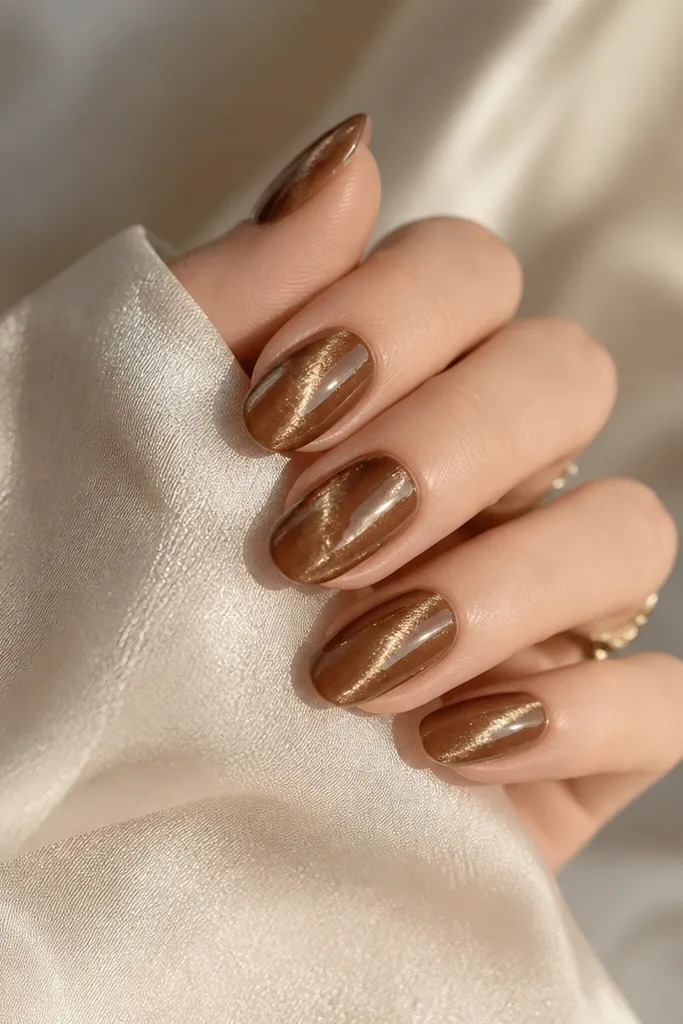
Marble swirls make the set feel cozy and handmade. The trick is keeping the swirls faint so the cat eye still reads clearly. Maple brown is lighter and more golden, which lets the marble show up as depth rather than clutter. The gold line becomes the "main vein" that ties it together.
Paint two coats of maple brown gel and cure. Add gold magnetic pigment and magnet for 9-10 seconds, cure. With a thin liner brush, drag a darker brown gel through a couple of micro-swirl lines around the eye, then lightly fan them out. Cure and seal with glossy top coat.
Editor's noteUse a darker brown gel that's one shade deeper, not black, or the marble looks harsh.
Watch outDon't add too many swirls - three small ones per nail looks right.
16. Deep Walnut Cat Eye With Gold Speckled Tips
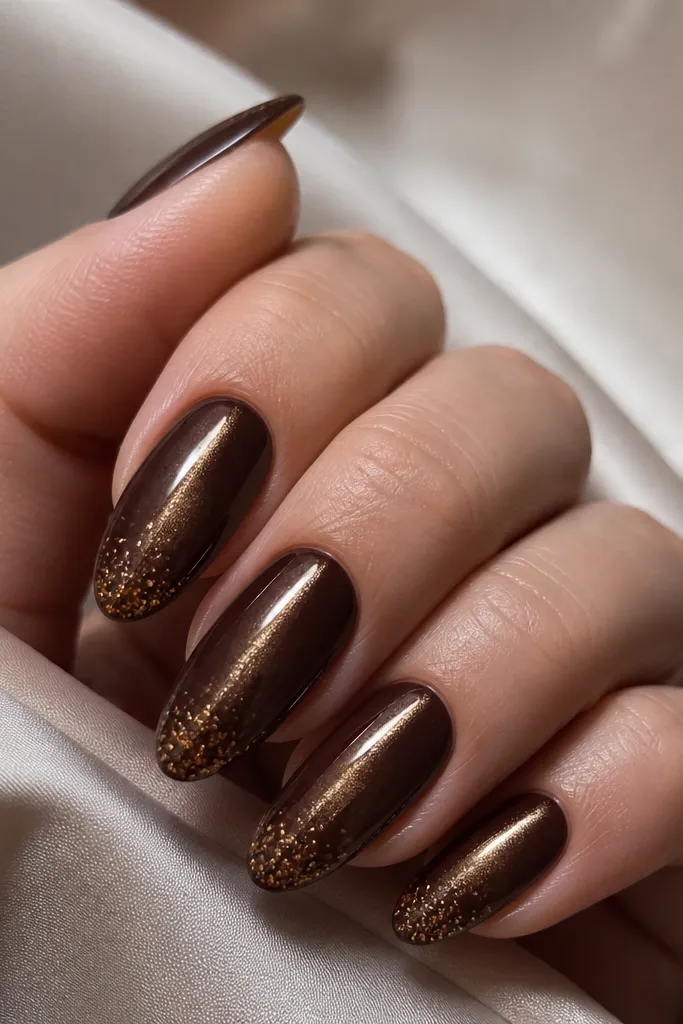
Walnut-brown is the kind of brown that looks good in every season, and the cat eye makes it look intentional. Speckled tips add a playful cozy feel without going full glitter. The gold specks also help the eye line look brighter because your eye travels across the nail. It's a look that feels warm, not childish.
Apply two coats of deep walnut brown and cure. Add gold magnetic pigment gel and magnet for 10 seconds, cure. For speckles, dot tiny bits of gold glitter gel near the tip only, then add clear gel to connect them, cure. Top coat glossy.
Editor's noteLoad a toothpick with glitter gel and tap lightly for controlled specks.
Watch outAvoid speckles across the whole nail - it kills the cat-eye focus.
17. Carob Brown Cat Eye With Pearlized Nude Base
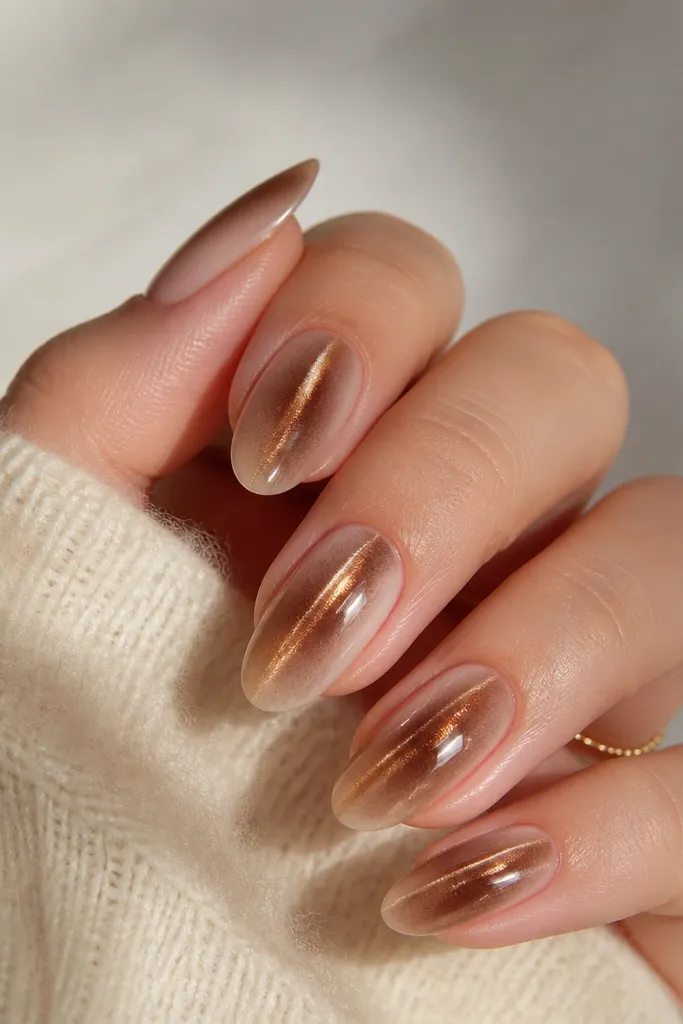
This design is cozy because it looks soft and warm instead of heavy. Pearlized nude on the base makes the gold cat-eye line look brighter and smoother. Carob brown is darker than caramel but not as heavy as espresso, so the eye remains readable. The center placement makes your nails look tidy and sculpted.
Start with a pearlized nude gel and cure. Apply carob brown gel in a center band (about 2/3 of the nail width), cure. Add gold magnetic pigment only on the brown band and magnet for 9 seconds. Top coat glossy across the whole nail so the pearl base and cat eye blend.
Editor's noteUse tape to create the center band width if you're doing this at home and want symmetry.
Watch outDon't cover the sides with brown - the negative space glow is the point.
18. Gingerbread Brown Cat Eye With Gold Bow Accent
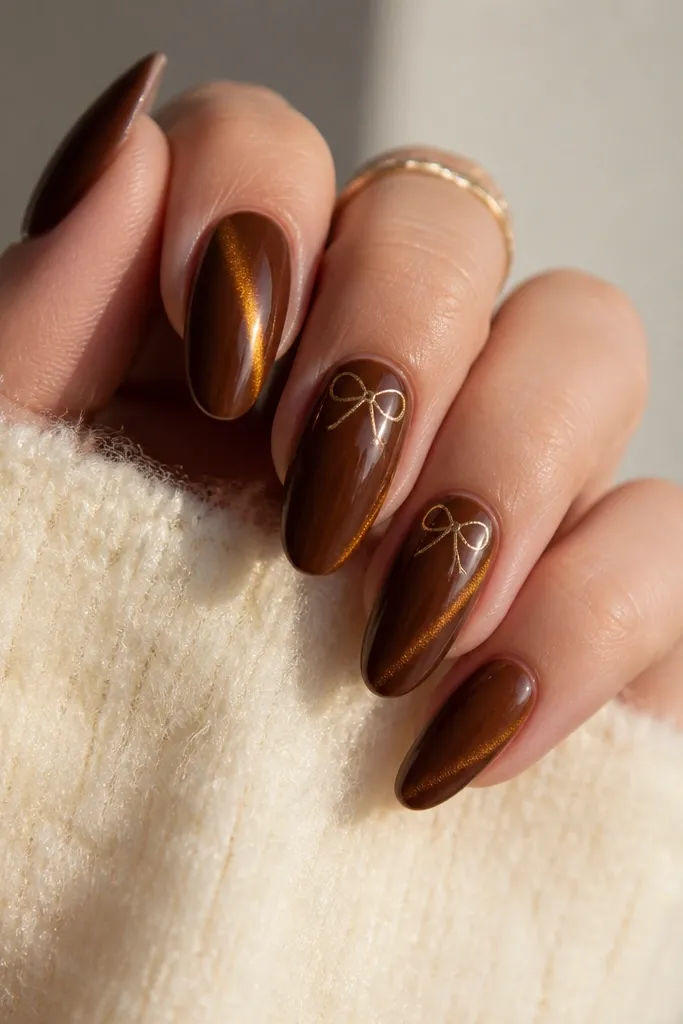
This is cozy-and-cute without looking like a cartoon. Gingerbread brown is warm and slightly orange-brown, which pairs beautifully with metallic gold. The bow accent adds a holiday vibe, but the cat-eye keeps it grown-up. I've done this for December dinners and it always gets compliments.
Paint two coats of gingerbread brown gel and cure. Apply gold magnetic pigment and magnet for 10 seconds, cure. On two nails, use a gel liner brush to draw a small bow shape (about 2mm wide) with metallic gold gel, cure. Top coat glossy, keeping the bow flat with a thin layer.
Editor's noteIf your bow looks messy, outline it first, cure, then fill with gold gel.
Watch outDon't make the bow too big - larger bows look costume-y on short nails.
19. Chocolate Brown Cat Eye With Copper-Gold Dual Pull
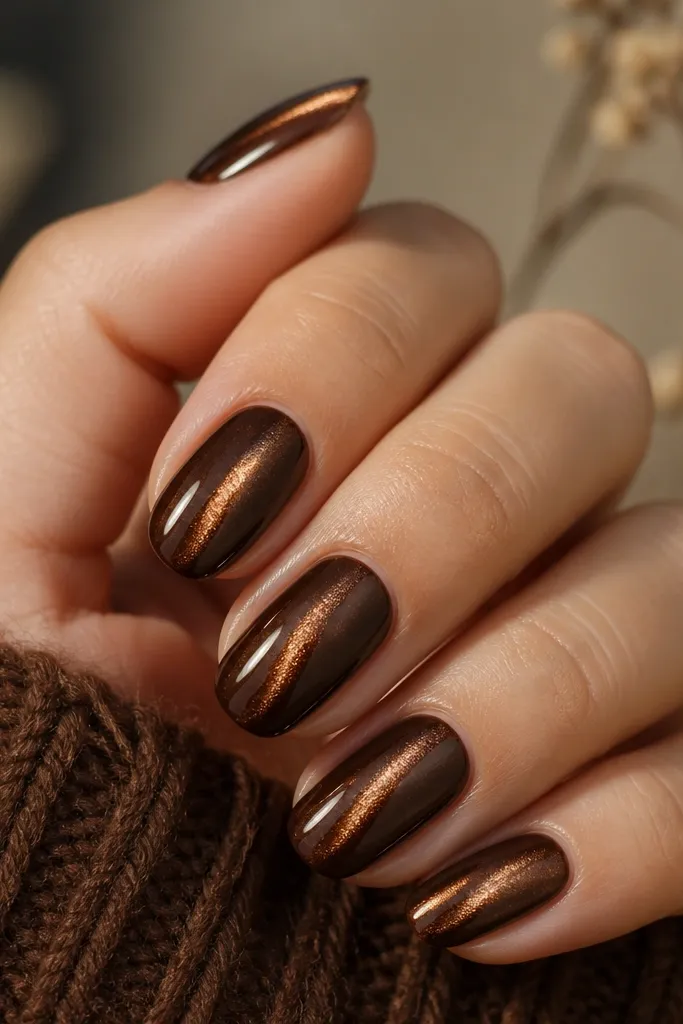
Dual pulls look dimensional and still cozy because the base is deep and warm. The copper side line gives a subtle second highlight, like toasted caramel under warm lighting. Gold stays the main eye, so it doesn't look chaotic. This is the set I make when I want "special" without adding rhinestones.
Paint two coats of chocolate brown gel and cure. Apply gold magnetic pigment gel in the center stripe and magnet for 10 seconds, cure. Next, apply a thin layer of copper magnetic pigment gel just off-center on top of the cured gold line, then magnet again for 6-8 seconds. Cure and seal with glossy top coat.
Editor's noteUse less copper pigment than gold - copper should whisper, not compete.
Watch outDon't cure over uncured pigment layers repeatedly - it can wrinkle the gel.
20. Smoldering Umber Cat Eye With Burnished Gold Halo
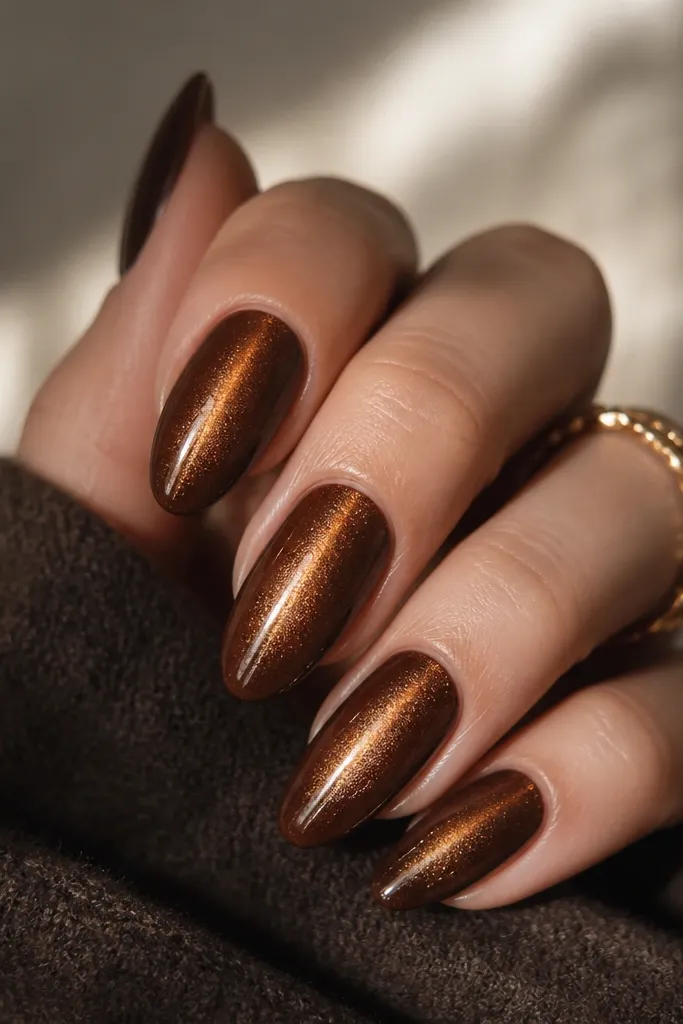
The halo effect makes the cat eye look like it has a glow around it. Umber brown is smokier than caramel, so the gold halo feels like warm light through curtains. It looks especially good on oval nails because the halo follows the nail's natural curve. No rhinestones needed - the shimmer does the work.
Apply two coats of smoldering umber brown gel and cure. Add gold magnetic pigment gel over the nail and magnet for 10 seconds for the center eye. For the halo, lightly drag a small amount of extra gold magnetic pigment around the midline without covering the whole nail, then magnet for 3-4 seconds. Cure and top coat glossy.
Editor's noteUse a small amount of pigment for halo - it should fade, not fill the whole nail.
Watch outDon't magnet the halo for the same length as the center eye or it becomes a second full stripe.