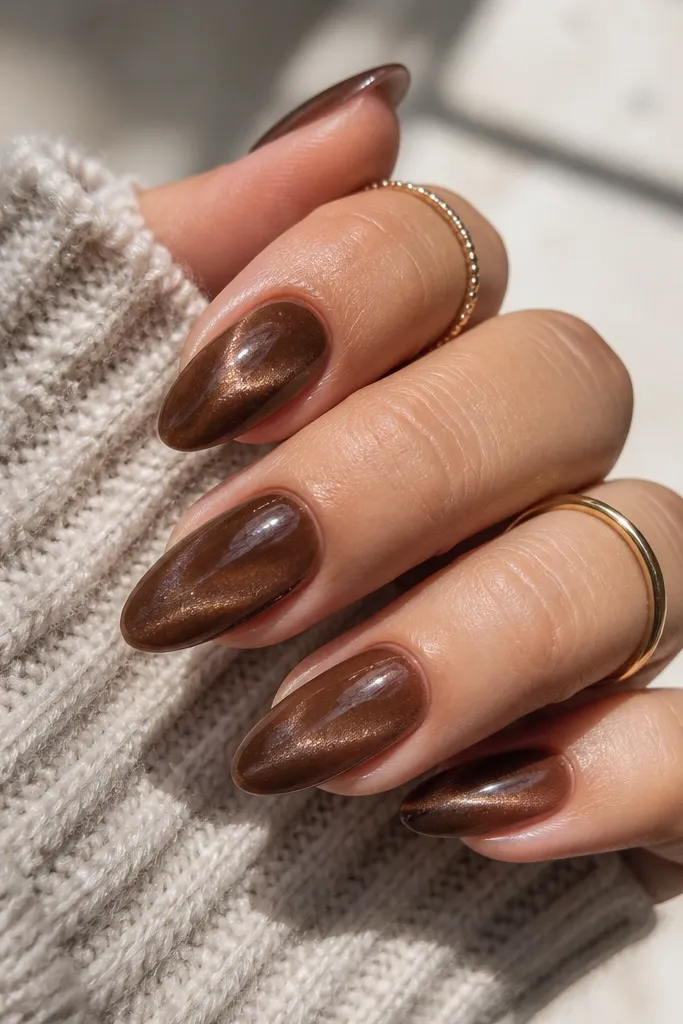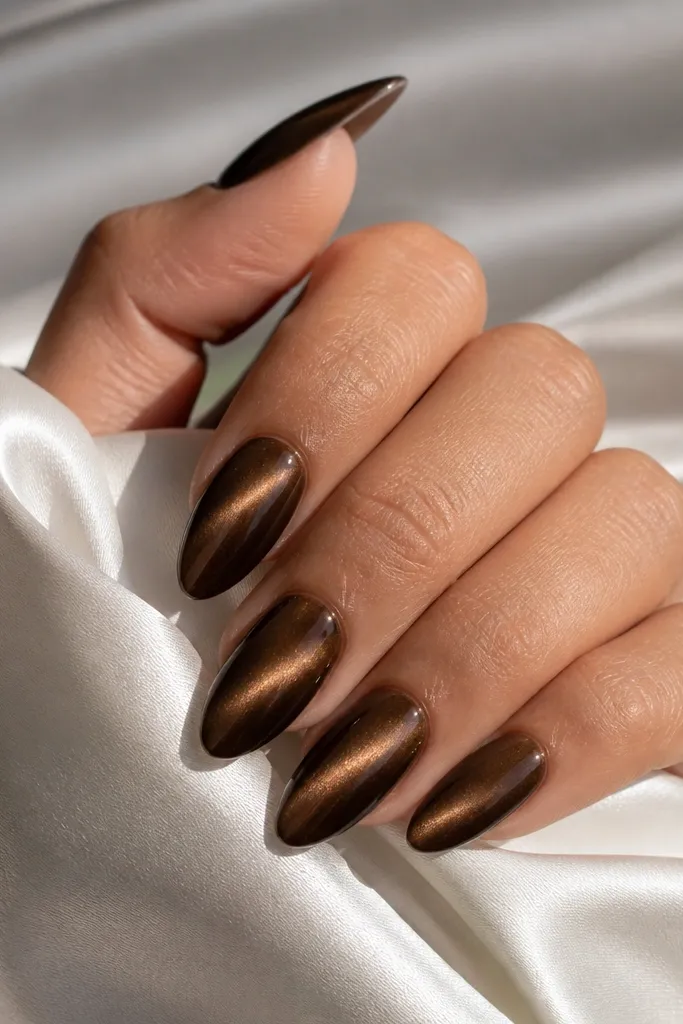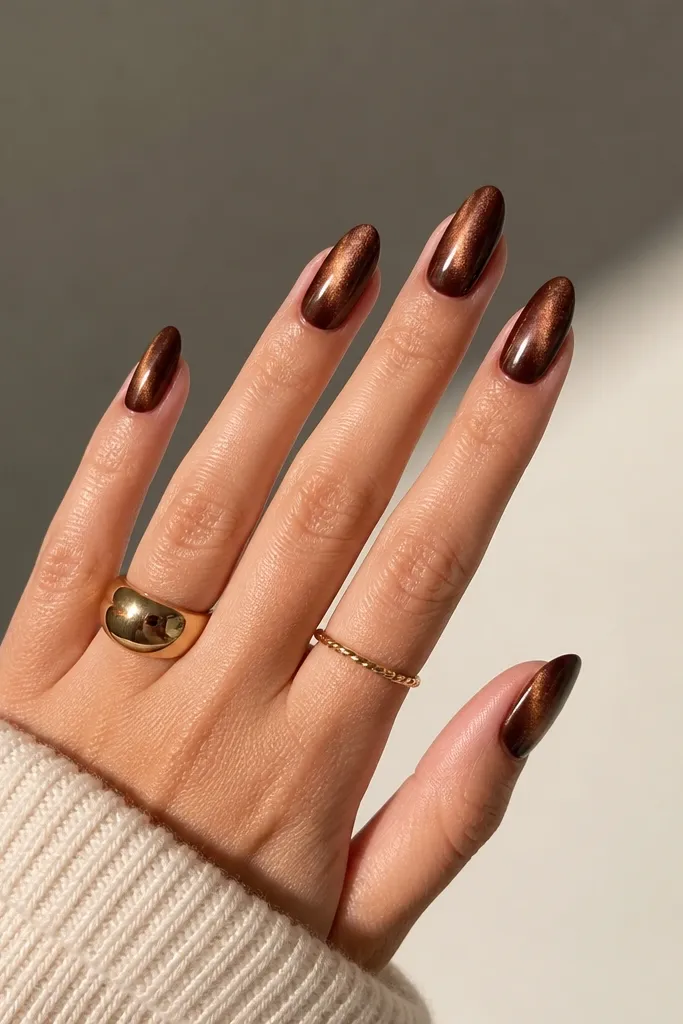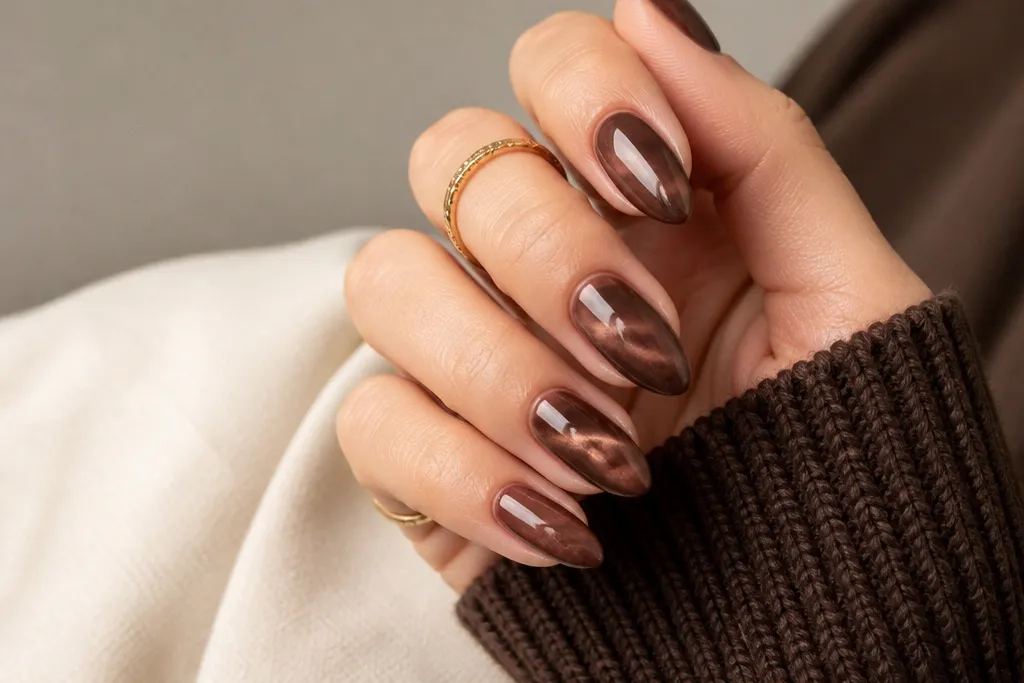
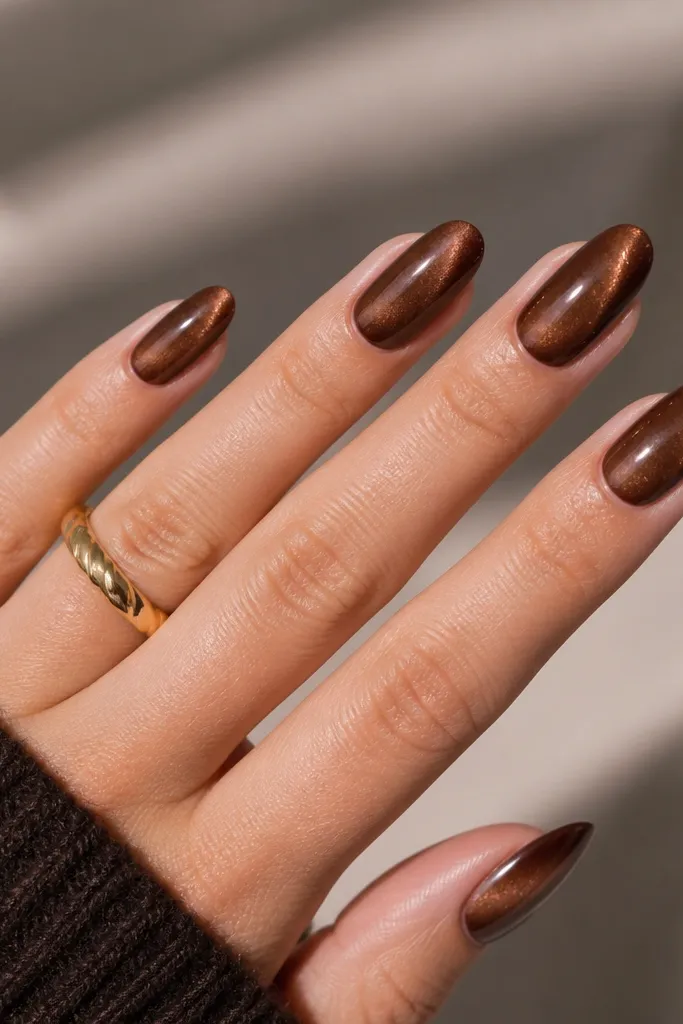
1. Espresso Center-Line Cat Eye
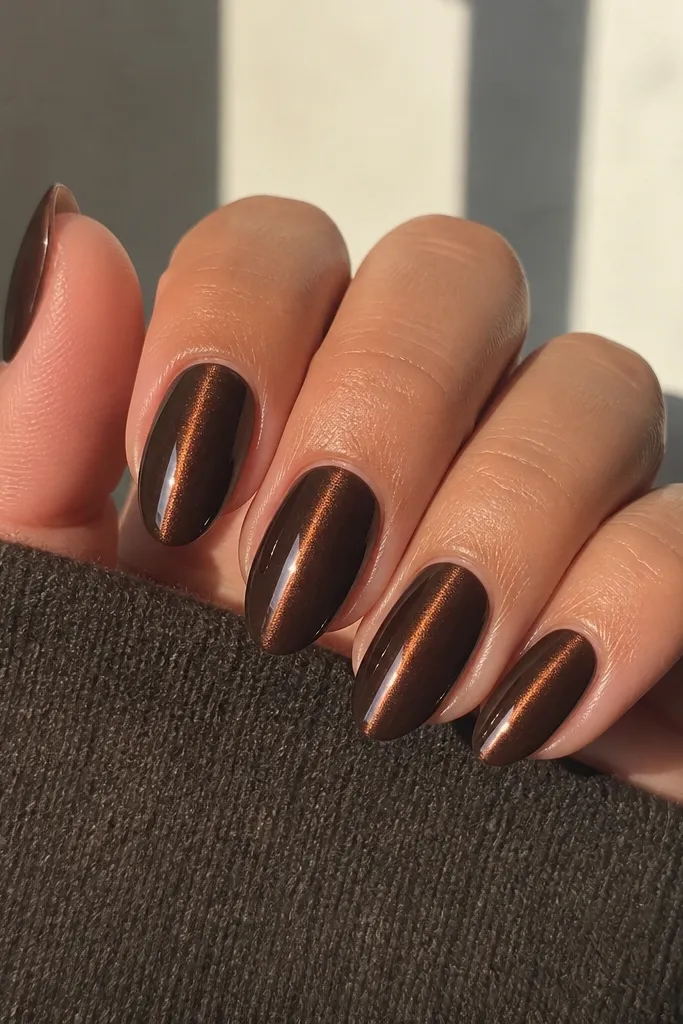
This is the design I reach for when I want "quiet luxury" without thinking. Espresso brown is dark enough to look rich, while the magnetic pigment creates a bright moving stripe that reads like a thin bracelet. Keep the line centered so the effect looks intentional, not accidental. The glossy finish makes the brown look almost wet.
Use an espresso chocolate cat eye gel as your main color. Cure a normal thin layer, then apply the cat eye gel thick enough to self-level but not flood the cuticle. Hold a strip magnet straight above the nail so the streak lands in the middle, then cure. Shape: medium almond or short oval keeps the stripe looking like a clean column.
Editor's noteAfter curing, run a lint-free wipe over the nail edge so the magnet line stays crisp and doesn't get smeared by gel residue.
Watch outDon't use a diluted cat eye gel - it turns the streak into a foggy sheen.
2. Cocoa Chrome Cat Eye (Silver Shift)
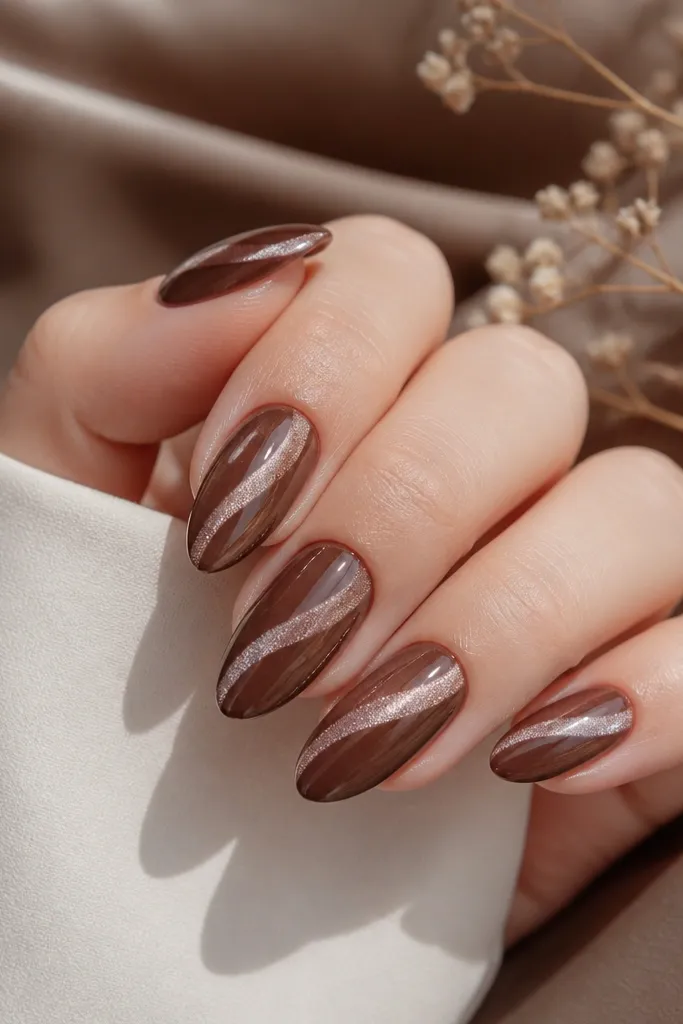
This one looks like you added jewelry even when you didn't. A cocoa base with a silver shift gives a colder, more modern look than warm bronze. The magnetic line stays sharp and bright, and the chrome-like top coat makes it pop in photos. It's my go-to for fall parties because it reads expensive in low light.
Choose a cocoa cat eye gel that leans slightly cool (not red-brown). Magnet-pull for a shorter time so the line stays narrow. Finish with a glossy top coat that dries slick, then wipe tackiness clean. Keep the nail length medium so the reflective shine doesn't look too stark.
Editor's noteIf the stripe looks too wide, bring the magnet closer and cure sooner rather than adding more product.
Watch outAvoid thick top coat layers - they can blur the magnetic line.
3. Dark Caramel Side Sweep Cat Eye
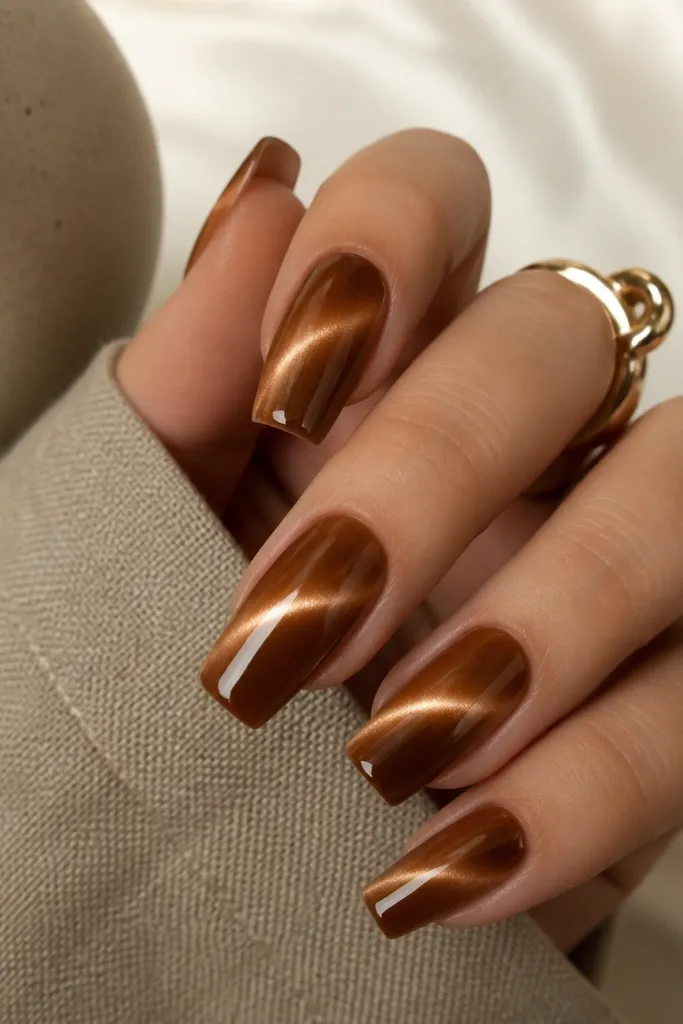
Side sweep is the "I did something" version of cat eye. Dark caramel brown has warmth, and pulling the magnetic line slightly off-center makes your nails look longer. The diagonal angle also catches light when you move your hands, so it looks alive. It's flattering on most nail shapes, especially squares.
Use a warm dark caramel cat eye base. After applying the gel, place the magnet so the streak pulls about 1/3 of the way from the center toward the sidewall. Cure, then top coat glossy. Shape it slightly square with soft corners to keep the diagonal line clean.
Editor's noteMark the nail center with a dot using a liner brush before magnet pulling - it helps you keep the angle consistent across all nails.
Watch outDon't pull the magnet too far off to the side - the streak can drift and look uneven.
4. Mocha Ombré Cat Eye Fade
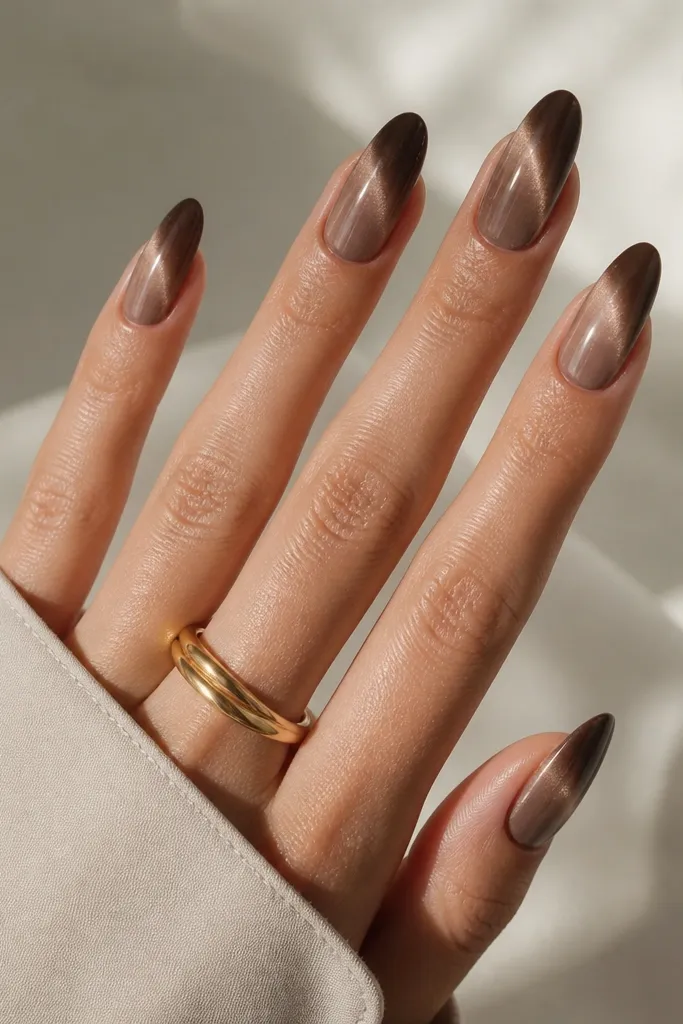
This looks like a manicure and a color blend at the same time. The darker tips ground the look, while the lighter base keeps it wearable for spring and summer. The cat eye line stays visible through the fade, so it doesn't turn into a flat gradient. It's great if you hate full deep brown but still want the luxe effect.
Start with a sheer milk-chocolate base or a lighter nude brown gel. Blend mocha cat eye gel at the tips using a sponge for a smooth transition. Apply magnet pigment over the blended area so the streak runs from near cuticle to tip. Cure in thin layers so the gradient doesn't muddy.
Editor's noteMagnet-pull after the ombré is set but before your final top coat, so the streak sits crisp over the blended surface.
Watch outDon't magnet-pull before the ombré is fully cured - the gradient can smear.
5. Chocolate Half-Moon Cat Eye
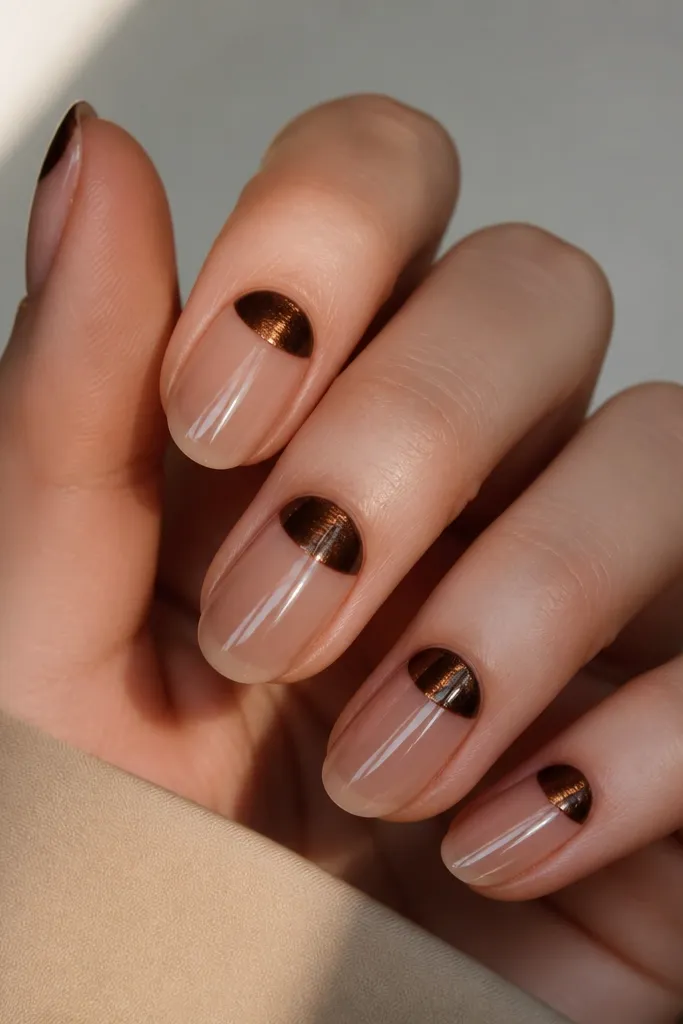
Half-moon cat eye makes the trend office-friendly. You get the magnetic sparkle at the cuticle area, where it looks neat and intentional, while the rest stays clean and simple. The contrast between nude base and chocolate stripe makes the cat eye feel like a design element, not a full-color commitment. It's also forgiving if your cuticles need a little extra care.
Use a sheer nude gel as the base. Leave a clean negative space around the cuticle line or stencil it with a half-moon guide. Paint a thin band of dark chocolate cat eye gel in the half-moon area and magnet-pull so the streak runs upward. Cure and seal with top coat.
Editor's noteUse a striping brush to sharpen the half-moon edge before curing - it makes the negative space look crisp.
Watch outDon't flood gel into the cuticle - it ruins the clean half-moon shape.
6. Caramel Glitter Dust Over Cat Eye
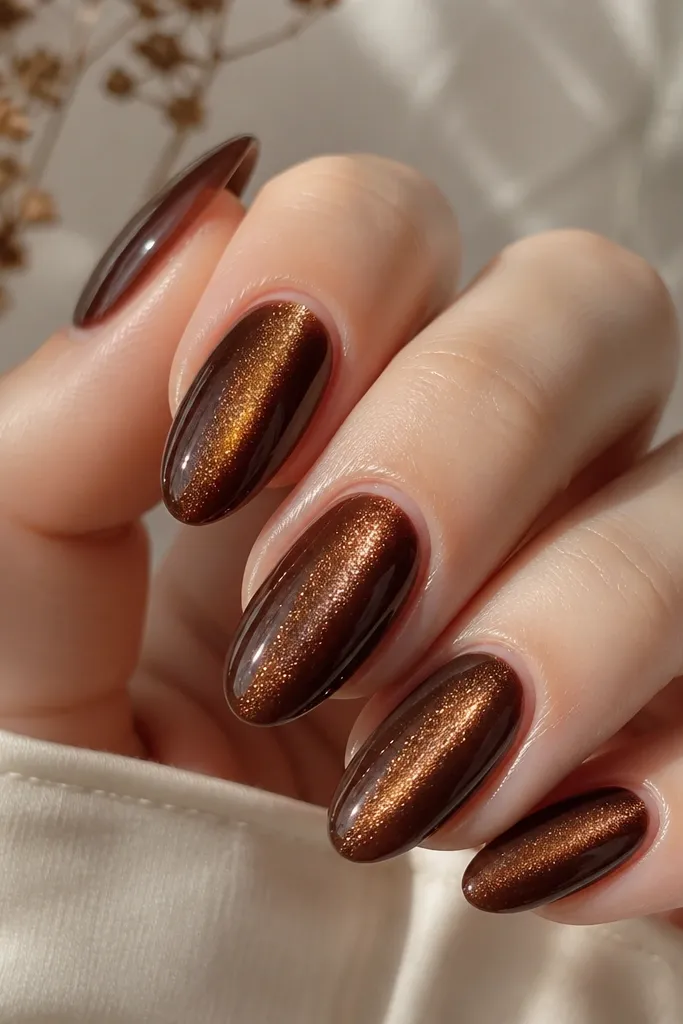
This is the "day-to-night" version that still feels grown-up. Fine caramel-gold glitter sits close to the magnetic line, so the stripe looks brighter and more dimensional. Keep glitter micro-sized so it doesn't turn gritty. The result looks like warm light trapped under glass.
Apply your caramel chocolate cat eye gel, magnet-pull for the center streak, and cure. Then use a tiny amount of fine caramel micro-glitter on and around the stripe area only. Press lightly with a dotting tool so it adheres without piling. Top coat glossy.
Editor's noteIf glitter falls off after curing, add a very thin clear gel layer just along the stripe before glitter.
Watch outAvoid chunky glitter - it kills the smooth cat eye reflection.
7. Cocoa Matte Velvet Cat Eye
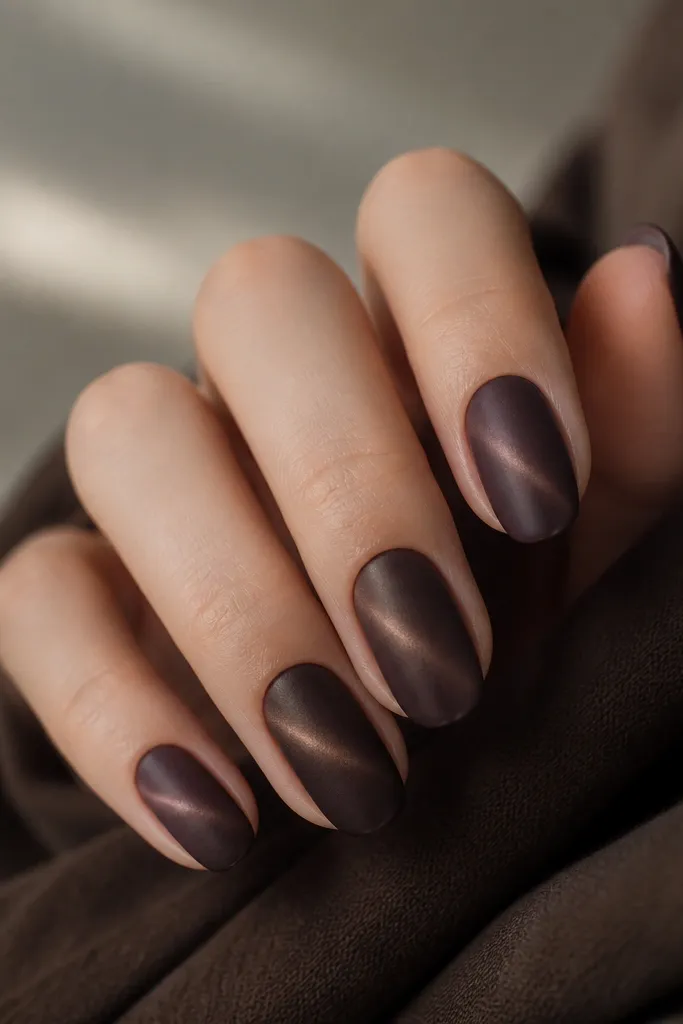
Matte cat eye looks expensive because it changes how the stripe reflects. Instead of a mirror highlight, the line feels like velvet light - soft but still directional. Cocoa brown stays rich even without gloss, and the magnetic pigment still pulls a visible streak. This is my go-to for winter coats because it looks cozy, not shiny.
Do your cat eye gel and magnet pull as usual. Cure, then apply a matte top coat over the whole nail. Be careful to keep the matte layer even; uneven top coat makes patchy streaks. Use short oval or squoval so the matte surface looks smooth.
Editor's noteAfter matte top coat, avoid heavy hand oils for a day - they can cause shine spots on matte.
Watch outDon't use a glossy top coat under matte - it can create a cloudy halo around the stripe.
8. Chocolate Cat Eye with Thin Gold Line
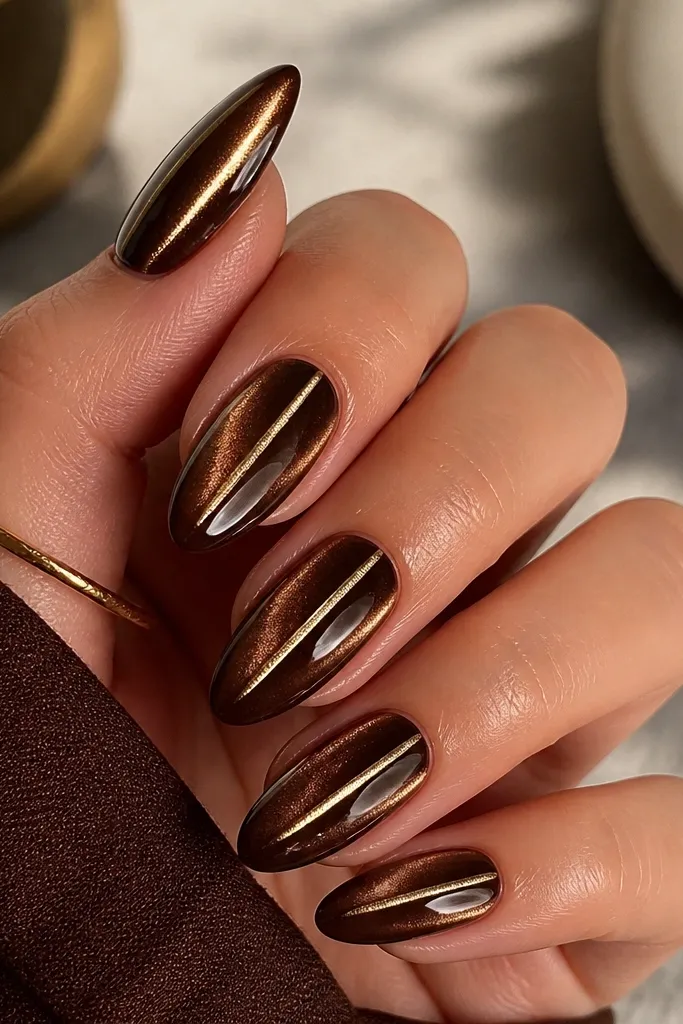
This is the easiest way to make cat eye look designed instead of plain. The thin gold line acts like a frame for the magnetic stripe, so your eye reads structure and symmetry. Use gold chrome because it stays bright against chocolate brown. The combo feels like jewelry without rhinestones.
Paint your espresso or cocoa cat eye base and magnet-pull center streak. Once cured, use a striping brush and gold chrome gel (or gold liner) to draw a line just next to the streak, leaving a small gap. Cure the gold line, then top coat glossy. Keep the gold line very thin - about the width of a single hair.
Editor's noteClean your striping brush with gel cleanser right before lining so the line doesn't feather.
Watch outAvoid thick gold tape lines - they look clunky next to a delicate cat eye streak.
9. Dark Chocolate Cat Eye French Tips
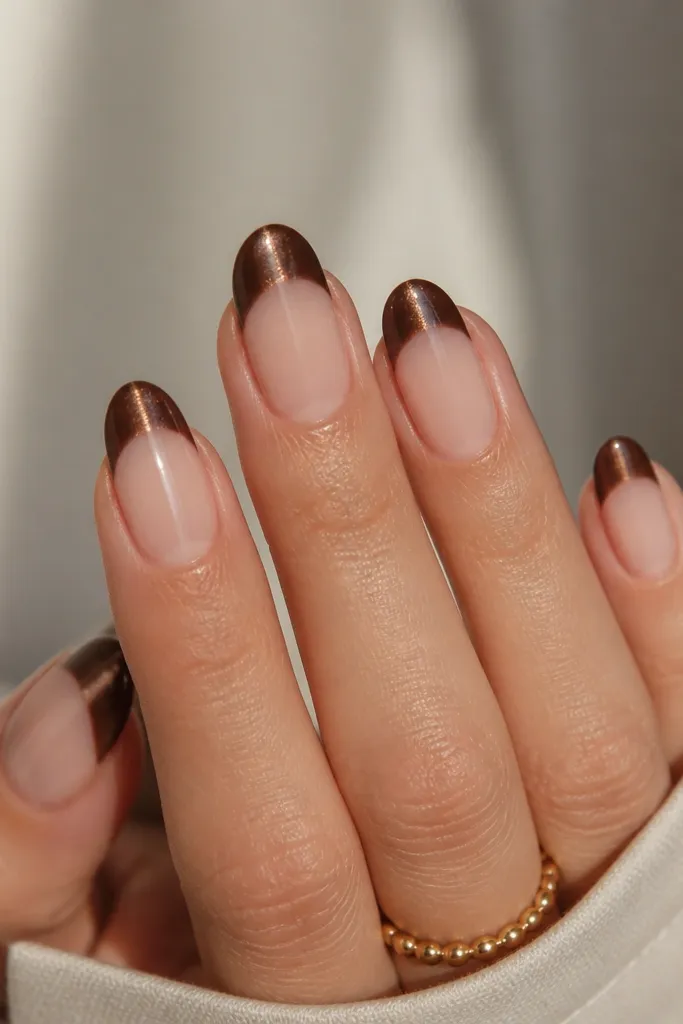
French tips are already clean, and cat eye adds that "special" light. The chocolate tip color looks rich, while the magnetic stripe keeps the tips from looking flat. This is the manicure I wear when I want my nails to look neat but still get compliments in photos. It also hides small tip wear longer than full-color manicures.
Use a nude base gel. Create French tips with a dark chocolate cat eye gel, then magnet-pull so the streak runs down the tip center. Cure, then seal with glossy top coat. Choose short oval or almond for the most natural French curve.
Editor's noteUse a French guide sticker for the first attempt - once you see the curve, freehand gets easier fast.
Watch outDon't magnet-pull too close to the cuticle area - it can distort the French shape.
10. Mocha Cat Eye with Tiny Rhinestone Cap
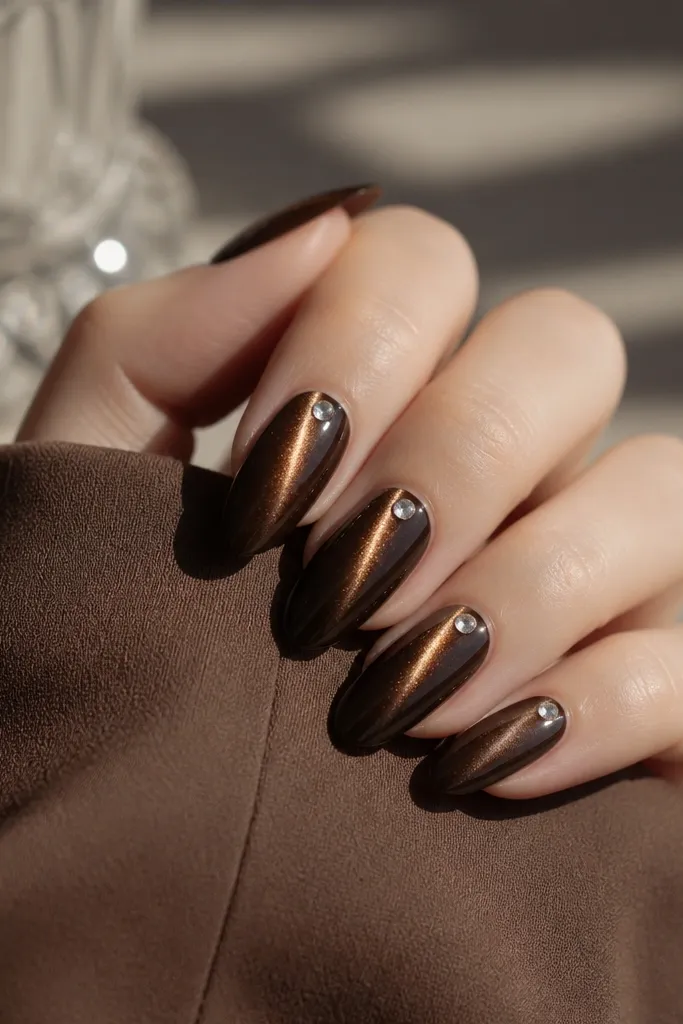
A single micro rhinestone makes the manicure feel dressed up without turning it into a party nail. Put the stone at the center of the cat eye line so the light hits both the magnet stripe and the stone. Mocha brown is forgiving and hides tiny imperfections better than light browns. This looks great for weddings, dinners, and holiday events.
Apply mocha cat eye gel and magnet-pull center streak. Cure, then place one small rhinestone (ss3 or ss4 size) right above the cuticle center, aligned with the stripe. Use clear builder gel or rhinestone glue to set it, then cure. Finish with glossy top coat around the stone.
Editor's noteSeal the rhinestone by lightly dragging top coat over it - it prevents snagging.
Watch outAvoid big stones - they cover the cat eye line and kill the effect.
11. Caramel Swirl Cat Eye Accent on Ring Finger
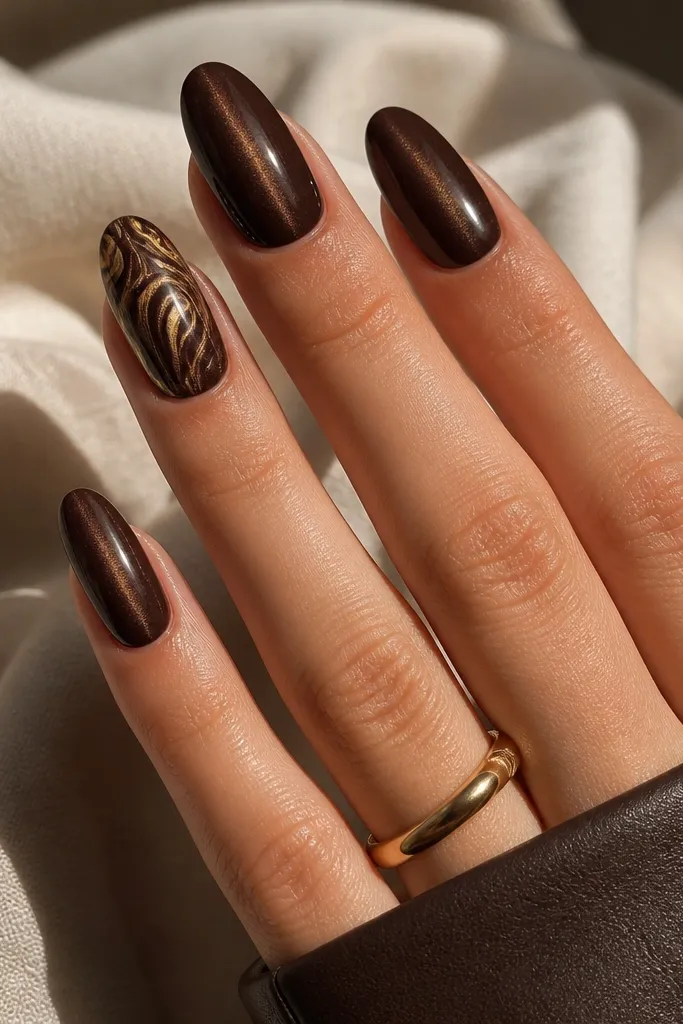
When you add a swirl to just one nail, the set looks intentional instead of busy. The swirl uses gold linework that follows the cat eye direction, so it feels connected rather than random. Espresso cat eye on the other nails keeps the look consistent. This is a great option if you like designs but hate maintaining multiple accent nails.
Paint all nails with espresso cat eye and magnet-pull center streak. On the ring finger, after curing, use a thin gold striping brush to draw a simple S-shaped swirl that hugs the magnetic line. Keep the swirl narrow and stop before the sidewalls. Top coat glossy to lock it in.
Editor's notePractice the swirl on a scrap nail tip - the curve is all about wrist motion, not brush strength.
Watch outDon't add swirls to every nail - the cat eye gets visually crowded.
12. Chocolate Cat Eye Under Clear Rose Nude
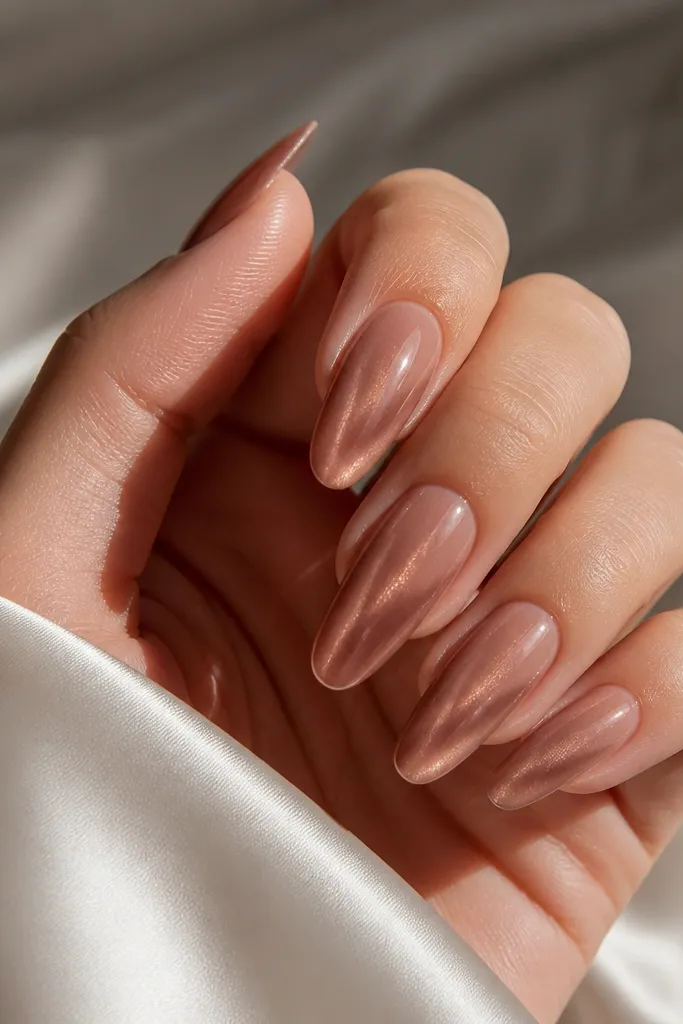
This looks like stained glass. By applying a sheer rose nude over the magnet effect, you soften the brown and make the stripe look like it's glowing from within. It's flattering on hands because it doesn't look too heavy, even with deep pigment underneath. I do this when I want cat eye but my clients say they feel "too dark" in winter.
Start with a chocolate cat eye gel base and magnet-pull center streak, then cure. Add a sheer rose nude gel over the top - thin enough that the stripe still reads. Use magnet pigment sparingly here; the glow comes from layering, not extra pigment. Finish with glossy top coat for maximum glassy depth.
Editor's noteApply the sheer rose nude in two thin coats instead of one thick coat so it stays even over the stripe.
Watch outDon't use a fully opaque nude - it hides the cat eye.
13. Dark Brown Cat Eye with Nude Cuticle Frame
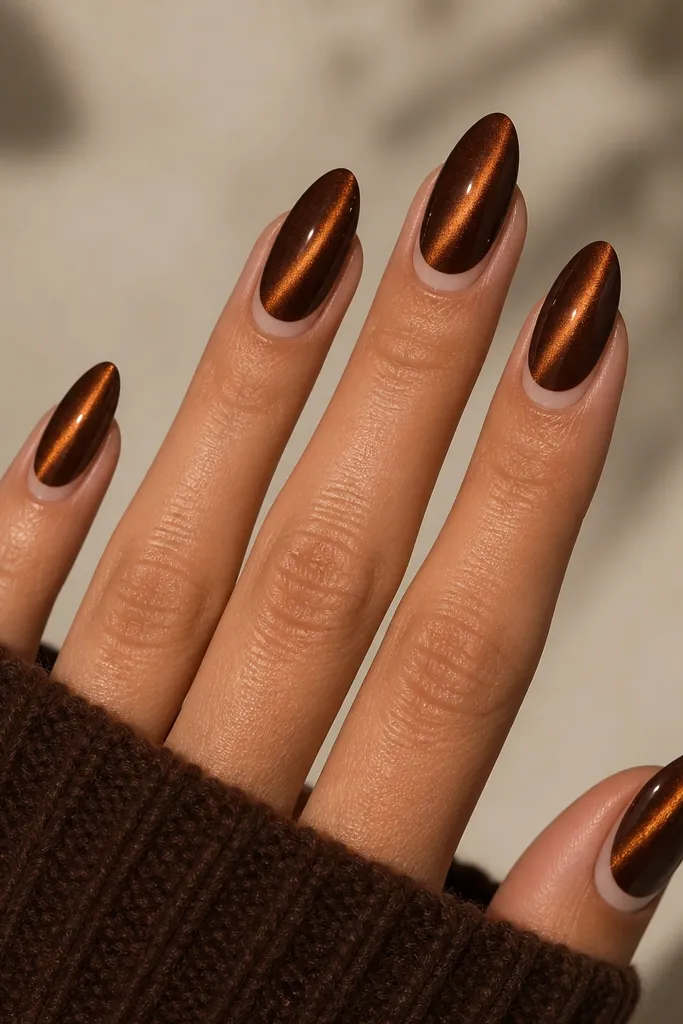
That nude crescent makes the manicure look clean and designed, even though the main color is still chocolate. The cat eye stripe stays the star, and the negative space makes it look sharper. This is the look I do when cuticles are a mess and I want the manicure to look tidy anyway.
Apply cat eye gel as usual, magnet-pull center streak, and cure. Then use a thin liner brush to paint a sheer nude crescent at the cuticle edge - keep it narrow so it frames, not covers. Cure that nude gel and top coat glossy. Use squoval or almond so the crescent shape looks proportional.
Editor's noteIf your crescent is shaky, use a small piece of striping tape as a guide for the first pass.
Watch outAvoid thick negative space - it can look like unfinished gel.
14. Espresso Cat Eye with Micro Dots Along the Stripe
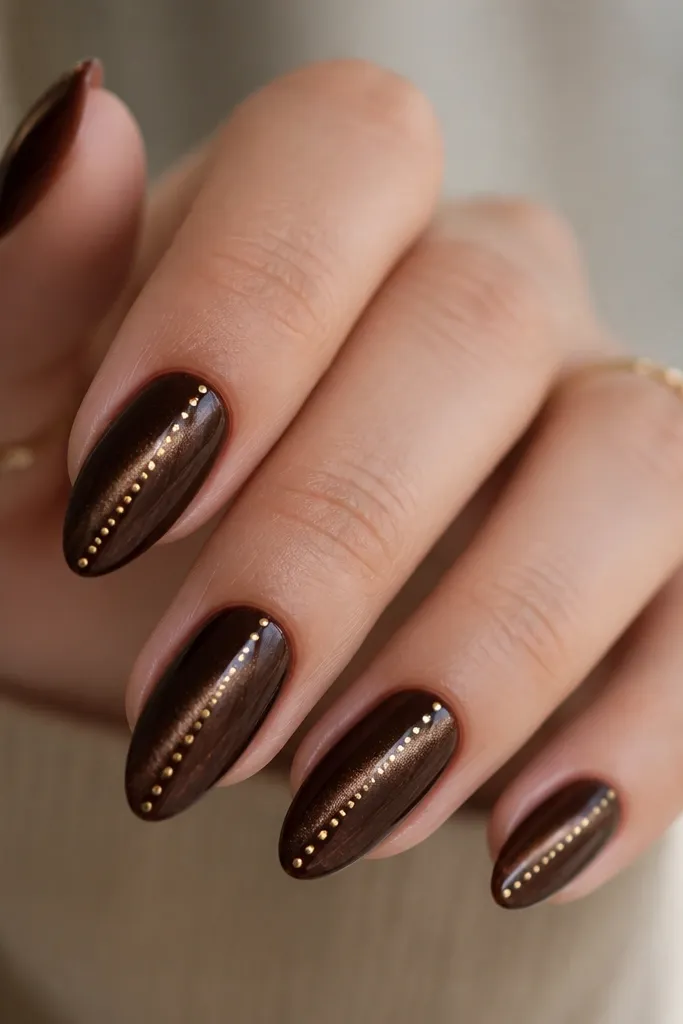
Dots turn the cat eye stripe into a pattern without adding bulk. Micro gold dots reflect light and make the stripe look brighter and more controlled. Espresso brown keeps the dots from looking too flashy. This is a fun "I have plans tonight" set that still feels classy.
Paint espresso cat eye gel and magnet-pull center streak, cure. With a dotting tool, place 4 to 6 tiny gold dots aligned along the stripe direction. Space them evenly and keep them small enough to fit within the stripe width. Top coat glossy to blend everything.
Editor's noteCount your dots before you start - I use 5 per nail so the spacing stays consistent.
Watch outDon't use large dot sizes - they sit on top and look raised.
15. Chocolate Cat Eye with Matte + Gloss Contrast
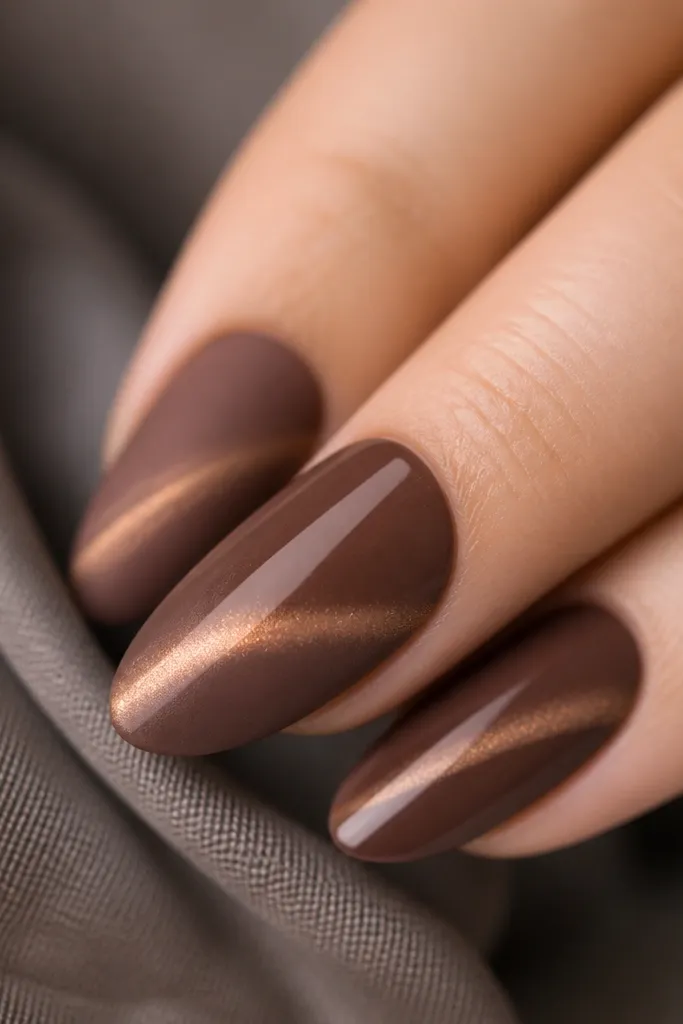
Contrast finishes make cat eye look designed even with one base color. Matte on one side softens the stripe, and gloss on the other side makes it look bright and dimensional. I like splitting the nail vertically because it flatters hands and makes the stripe feel like it has depth. This set looks especially good on medium almond shapes.
Apply cocoa cat eye gel and magnet-pull center streak, cure. Use liquid latex or tape to mask one side, then apply matte top coat on the masked section and glossy top coat on the other. Remove tape carefully and cure again if your system needs it. Finish with a final thin top coat only where needed to smooth edges.
Editor's noteSeal the border where matte meets gloss with a thin clear gel so you don't get a visible ridge.
Watch outAvoid thick masking lines - tape can leave a hard edge.
16. Warm Caramel Cat Eye with Bronze Chrome Tips
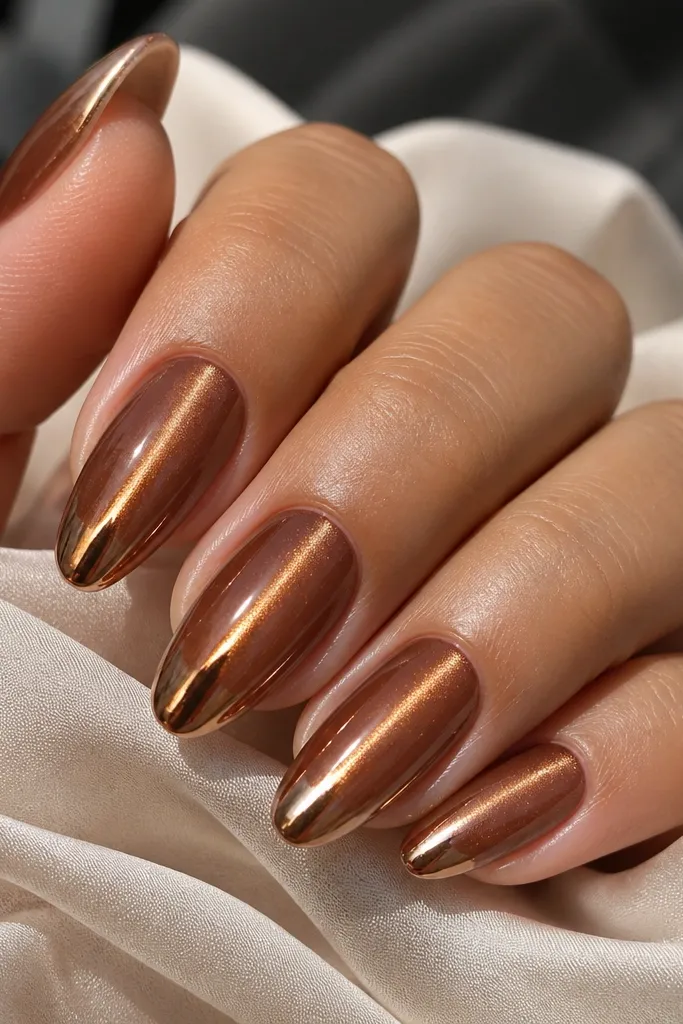
This is where cat eye meets metallic. Warm caramel brown gives a honeyed base, and bronze chrome tips look like melted metal on the edge of the nail. The magnetic stripe stays visible through the base, so you still get movement. It's a great fall-to-holiday look because it works with gold jewelry and warm makeup.
Use a warm caramel cat eye gel as the full base and magnet-pull center streak. After curing, apply bronze chrome powder or chrome gel only on the last third of the nail. Blend slightly upward so the chrome looks like a tip fade. Seal with glossy top coat - chrome usually needs a specific top coat depending on your system.
Editor's noteDo chrome after cat eye curing, not before - chrome dust can contaminate the magnet pigment.
Watch outDon't cover the entire nail with chrome - it hides the cat eye effect.
17. Chocolate Cat Eye with Clear Negative Space Diagonal
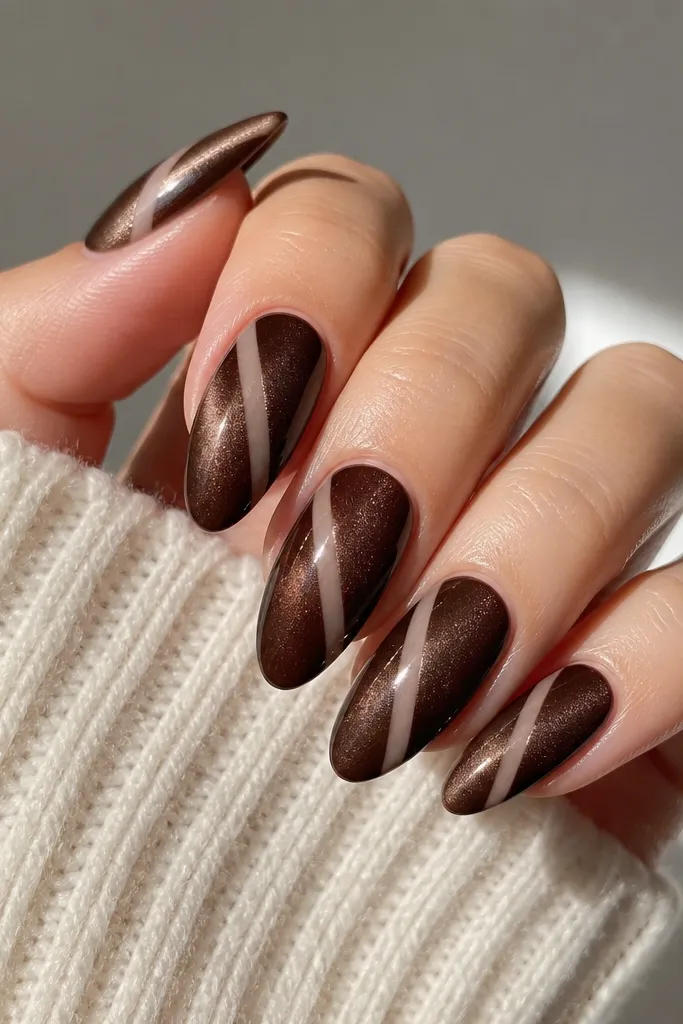
Diagonal negative space makes brown cat eye look modern and a little edgy. The clear strip adds lightness, so the manicure doesn't feel heavy. The cat eye stripe still reads in the brown zones, and the diagonal cut makes it look sharper. This is the set I do when I want something different but still wearable.
Apply cat eye gel over the whole nail first and magnet-pull center streak, then cure. Use striping tape to mask a diagonal clear area and apply a clear gel over that section, then remove tape and cure. Keep the negative-space strip narrow - about 1.5 to 2 mm on medium nails. Top coat glossy on the brown areas and clear area.
Editor's notePress tape down firmly at the sidewalls to prevent brown gel seepage.
Watch outAvoid wide negative space - it can make the nail look thinner.
18. Mocha Cat Eye with Pearlized Taupe Undershine
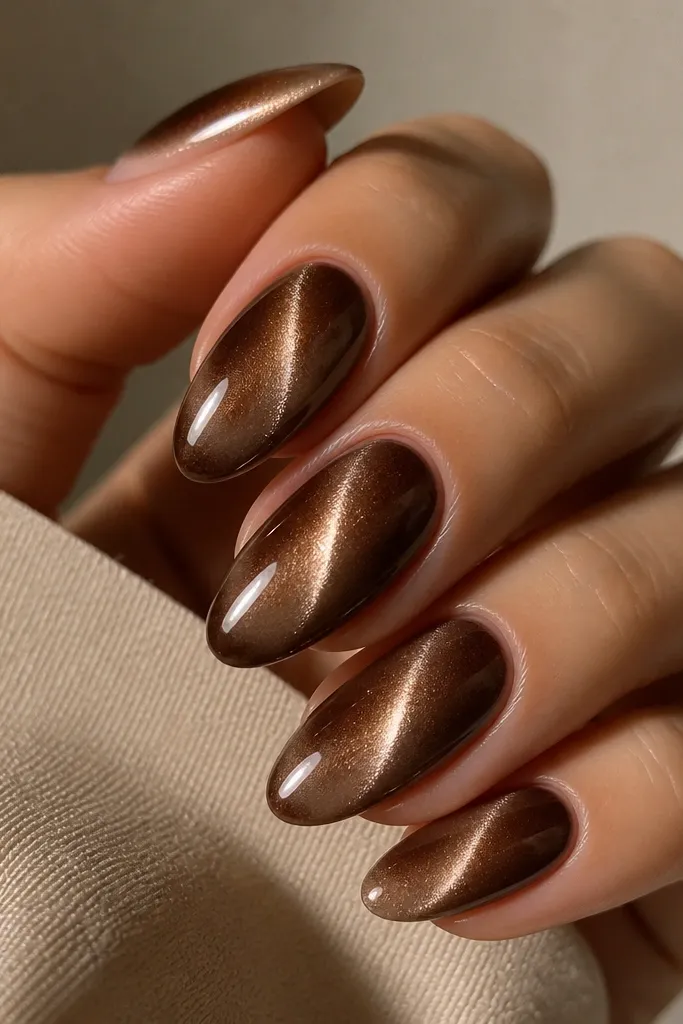
Pearlized undertones make the cat eye look softer and more flattering. Instead of a pure deep brown, you get a taupe glow under the stripe, which looks gorgeous in daylight. It's a "pretty but not childish" option because pearls can read sweet, and the mocha keeps it grounded. The stripe still moves when you tilt your hand.
Start with a pearlized taupe gel as your base layer. Then apply mocha cat eye gel over the top and magnet-pull so the stripe forms. Cure, then keep the top coat glossy to maintain the pearl effect. Use medium almond so the pearl glow has room to show.
Editor's noteThin the pearl base layer - too thick makes it look chalky under the magnet pigment.
Watch outAvoid flat beige bases - they can make the brown stripe look washed out.
19. Chocolate Cat Eye with Skinny Crystal Line
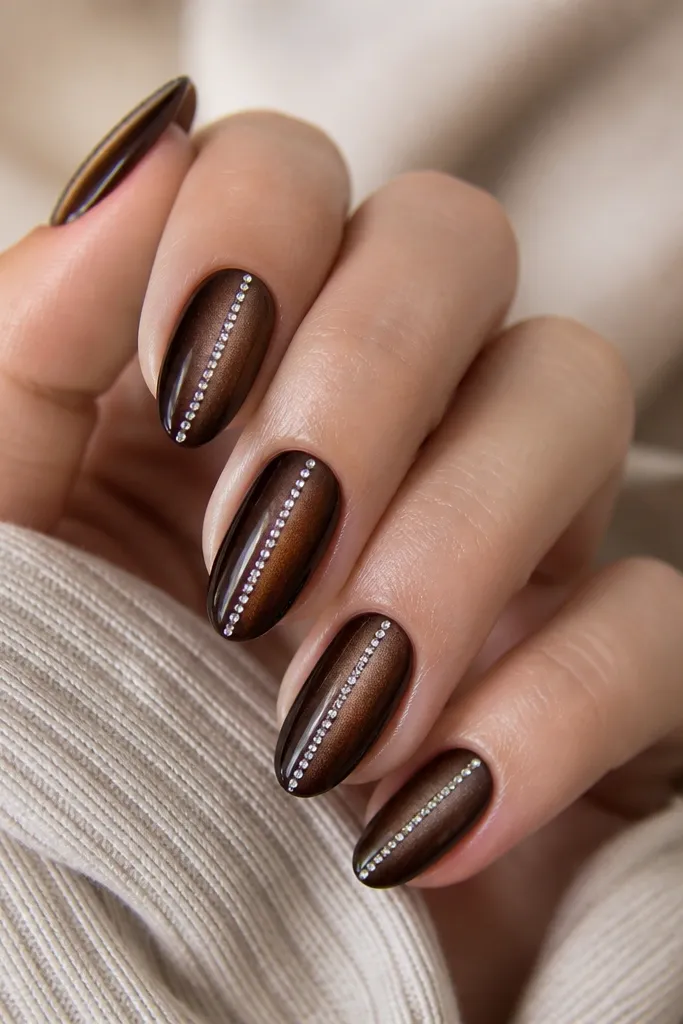
A skinny crystal line gives the manicure a "lined up like a runway" look. When you align the crystals with the cat eye stripe, your nails look structured and bright as you move. Chocolate brown keeps the crystals from looking too bridal. This is a strong choice for events where you want compliments without loud colors.
Do espresso or cocoa cat eye and magnet-pull center streak. Place micro crystals (ss2 to ss3) in a straight line along the stripe with rhinestone glue. Cure, then top coat carefully around the line so crystals stay snag-free. Keep crystals only on two nails if you want it subtle; full set looks great too on short oval.
Editor's noteUse tweezers under bright light so you can line up each crystal with the stripe.
Watch outDon't press crystals too deep - they should sit slightly above the gel surface to sparkle.
20. Dark Chocolate Cat Eye with Burnished Copper Edge
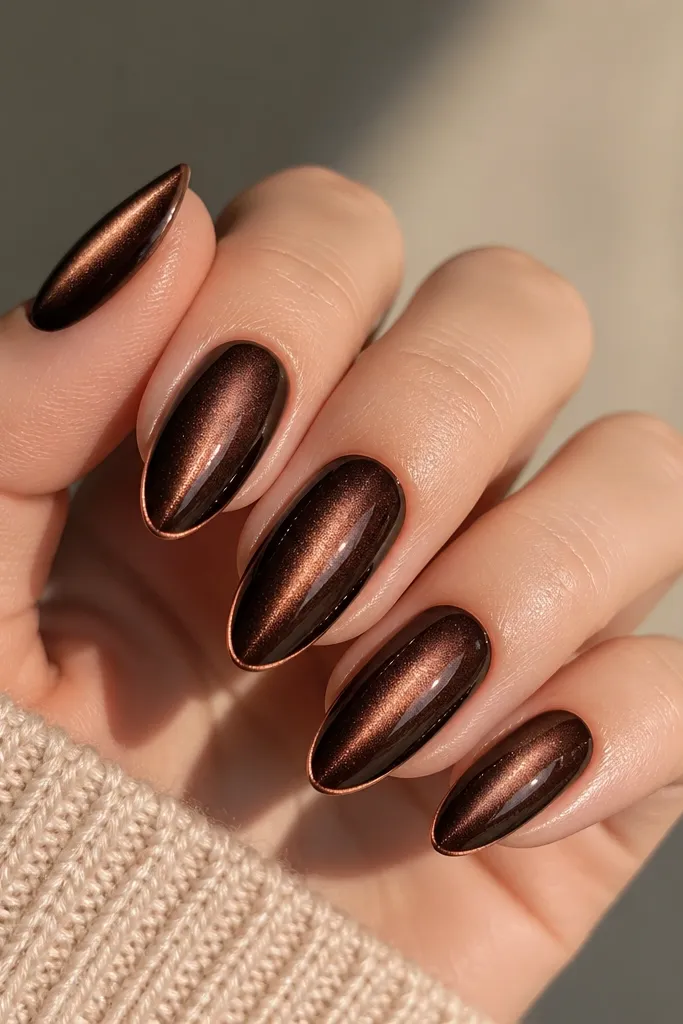
Copper edges look like warm metal plating, and they make brown cat eye feel like a finished piece. The edge detail frames your nail and makes the center stripe look brighter. It's especially flattering if you wear copper or bronze jewelry. The effect is subtle from far away and obvious up close.
Paint dark chocolate cat eye gel and magnet-pull center streak. After curing, use a fine brush to paint copper metallic gel along the free edge and lightly up both sidewalls. Keep it thin - think border, not full coverage. Cure and finish with glossy top coat.
Editor's noteWipe the brush on a lint-free pad before edging so you get a controlled, thin copper line.
Watch outAvoid messy copper into the cuticle - it looks like smudged foil.
21. Chocolate Cat Eye with Velvet Bow Accent
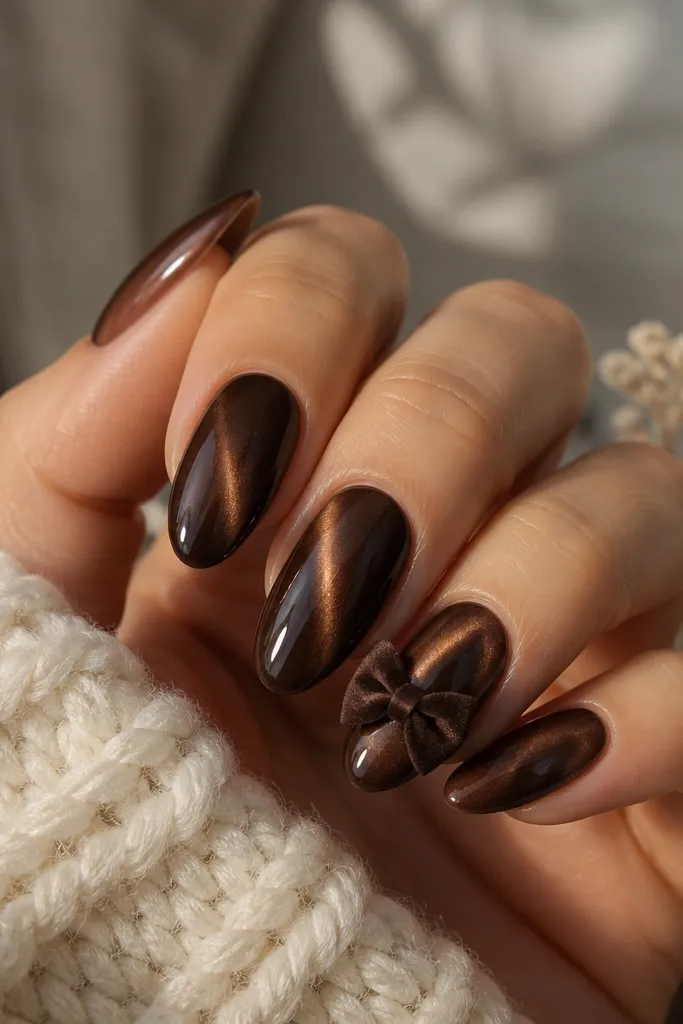
A velvet bow turns cat eye into a little fashion moment. The soft texture contrasts with the glassy shine of the magnetic gel, so it looks tactile even in photos. I like placing it on the ring finger or thumb for balance. Deep chocolate velvet also matches the base so it never looks random.
Do a full set of espresso cat eye with centered stripe and glossy top coat. On one nail, add a small velvet bow accessory (or build one with velvety gel fabric strips) and glue it after base color is cured. Keep the bow small enough to sit within the nail width, not spill over the sidewalls. Seal lightly around the bow with clear gel so it doesn't snag.
Editor's noteUse a flat-backed bow piece so it doesn't lift at the edges.
Watch outAvoid oversized bows - they catch on hair and feel heavy.
22. Milk-Chocolate Cat Eye with Rose Gold Spark
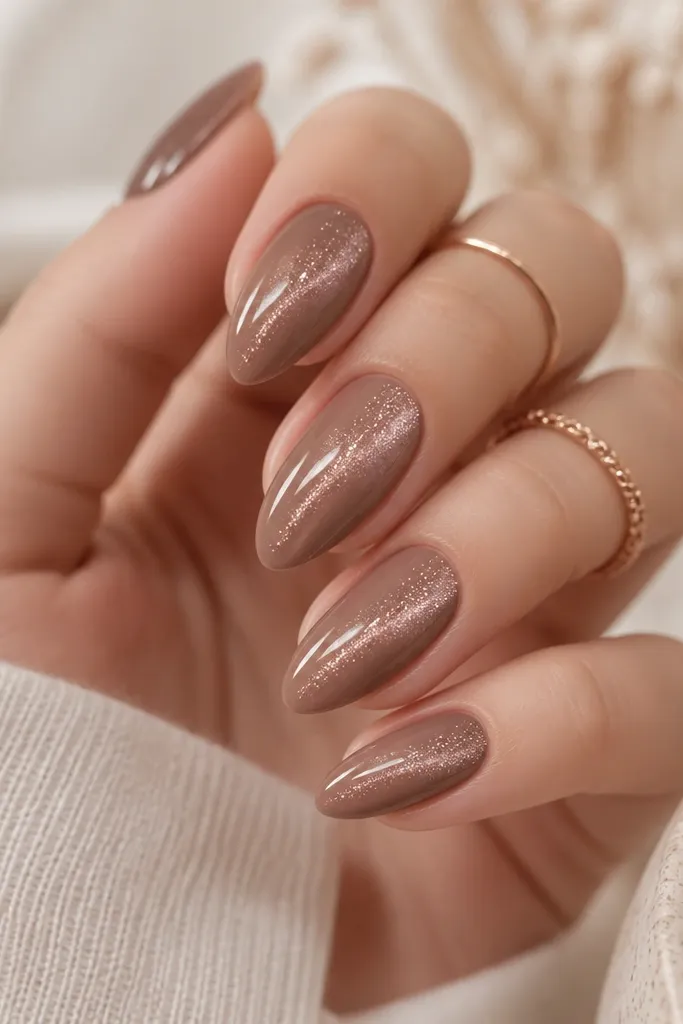
Light brown cat eye is the most wearable "all year" shade for me. Milk-chocolate keeps it gentle, and the rose-gold spark makes it feel romantic without being pink. The magnetic stripe is softer than espresso, but it still moves and catches light. It's perfect for spring events and still looks good in fall because it's warm.
Pick a milk-chocolate cat eye gel. Magnet-pull for a centered stripe, cure, then add rose-gold fine shimmer only within the stripe area. Use a tiny brush to keep the shimmer from spreading. Top coat glossy for that smooth, jewelry-like surface.
Editor's noteIf the shimmer spreads, clean the nail surface with a lint-free wipe before curing the shimmer layer.
Watch outAvoid using a too-light base - it can make the stripe disappear indoors.
23. Espresso Cat Eye with Thin Brown Velvet Line
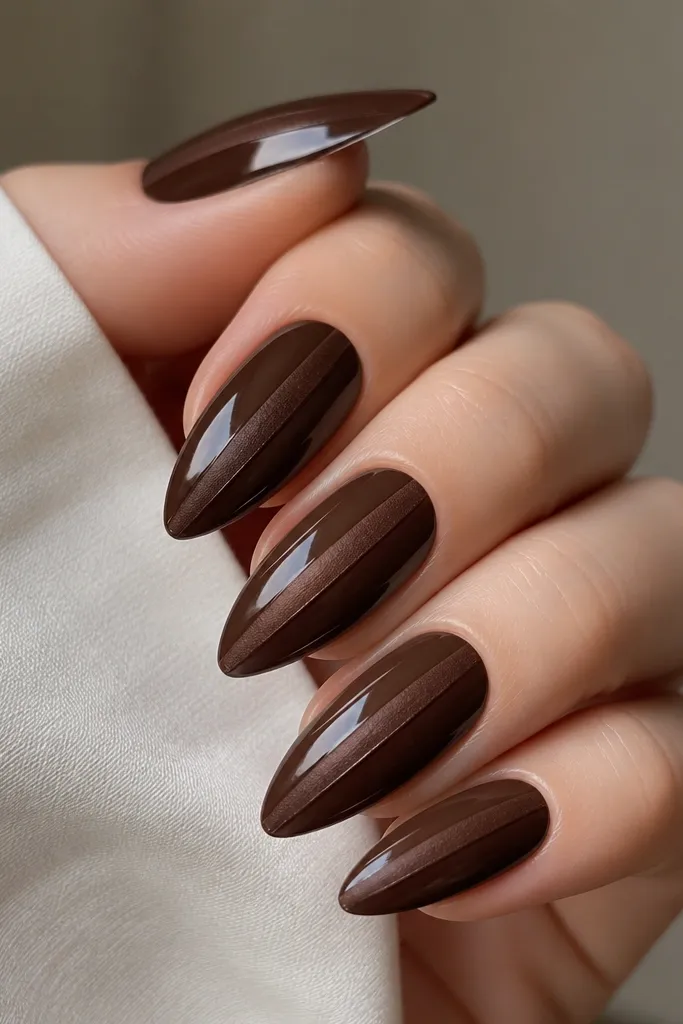
Texture lines look high-end because they create depth without color changes. A thin velvet-matte line over an espresso cat eye base makes the stripe feel layered and intentional. The magnetic line stays glossy, while the velvet line reads soft and plush. This combination looks especially good on short nails because it creates a long vertical effect.
Paint espresso cat eye and magnet-pull center streak, cure, and top coat glossy. Then add a thin strip of velvet matte gel (or velvet effect powder gel) down the center aligned with the stripe. Cure the velvet layer per your product instructions. Finish with a light top coat only around the velvet line edges if your system requires it.
Editor's noteKeep the velvet line thin - about 1 mm - so it looks like a design detail, not a stripe covering the magnet effect.
Watch outDon't put velvet over the entire nail - you lose the cat eye glow.
24. Chocolate Cat Eye with Abstract Crackle Vein
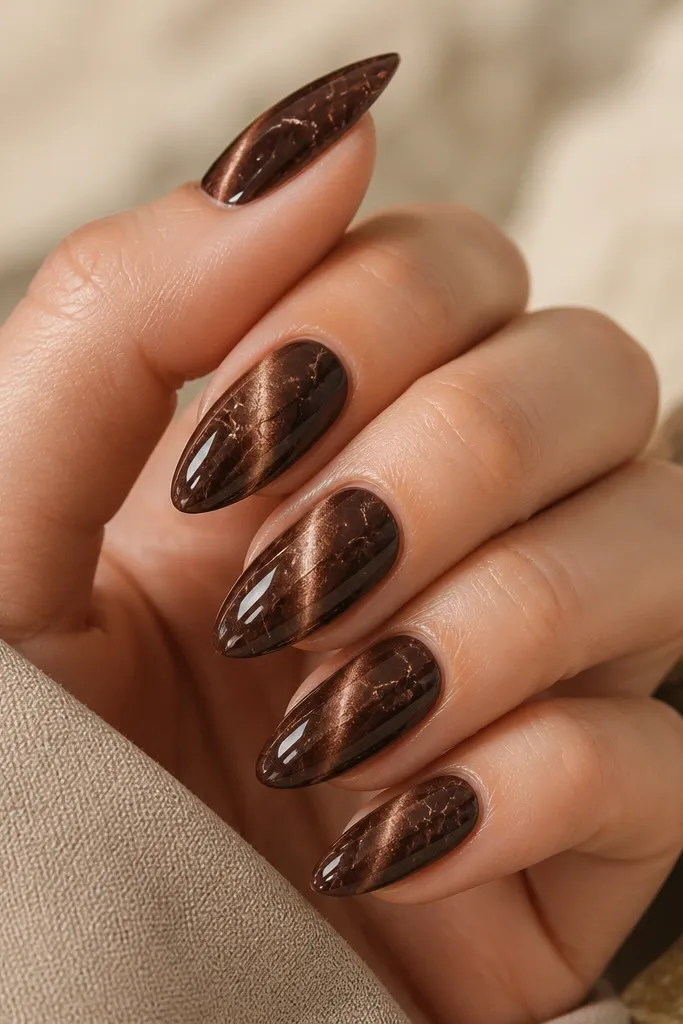
Crackle veins make chocolate cat eye look like stone. The lighter crack lines catch light, while the magnetic stripe gives motion. This is a great option when you want something different from plain cat eye but still stay in the brown family. It feels artsy without using bright colors.
Start with a chocolate cat eye gel base and magnet-pull center streak, cure. Using a thin liner brush, paint abstract crackle lines in a slightly lighter cocoa gel. Let the crackle gel partially set, then add a crackle top coat effect if your system has one. Top coat glossy to lock and smooth the surface.
Editor's noteKeep the crackle lines irregular - the most natural look has uneven spacing, not a perfect web.
Watch outAvoid thick crackle strokes - they look raised and cheap under glossy light.
25. Dark Chocolate Cat Eye with Gold Foil Flecks
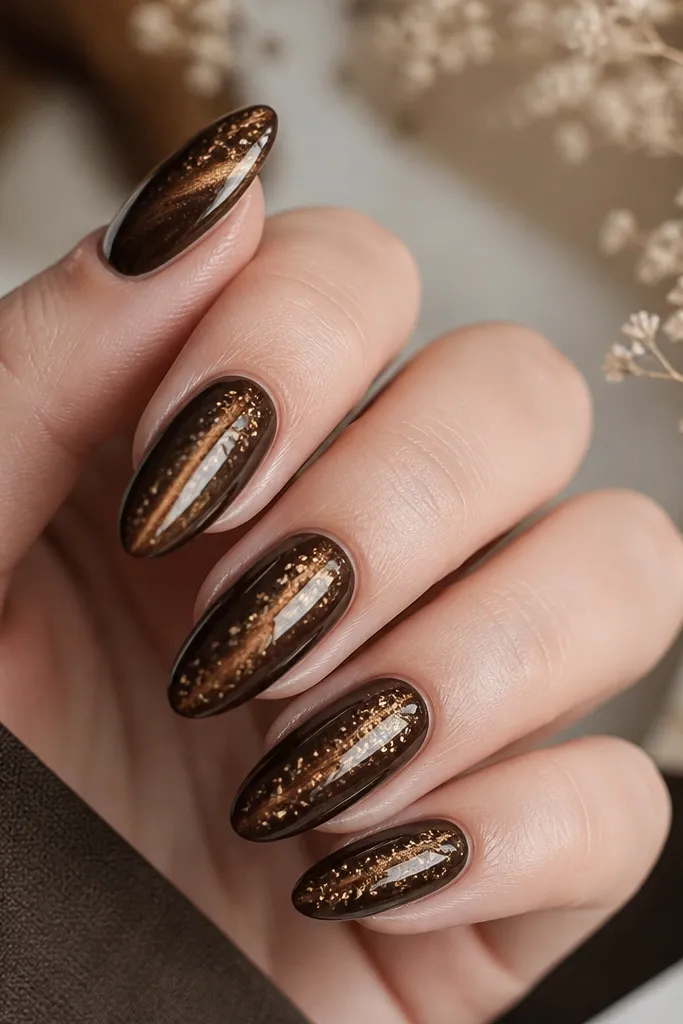
Foil flecks add that "spark from movement" effect. When they cluster near the cat eye stripe, your nails look like they have extra light trapped under the gel. Use dark chocolate so the gold doesn't look brassy or out of place. This set looks incredible in flash photos.
Apply dark chocolate cat eye gel and magnet-pull center streak, cure. Add gold foil flecks using foil gel or tacky clear gel only along the stripe and nearby areas. Press lightly and leave negative space so it doesn't become a full gold layer. Top coat glossy to smooth the foil texture.
Editor's noteUse smaller foil pieces than you think - micro flecks look intentional instead of messy.
Watch outAvoid heavy foil coverage - it makes the cat eye line harder to see.