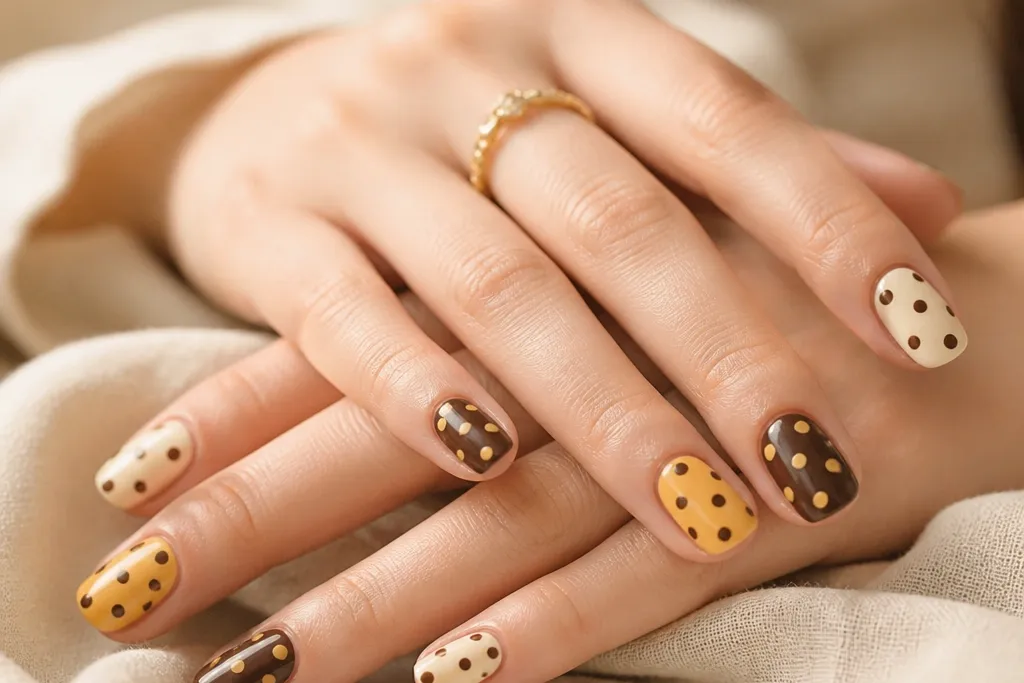
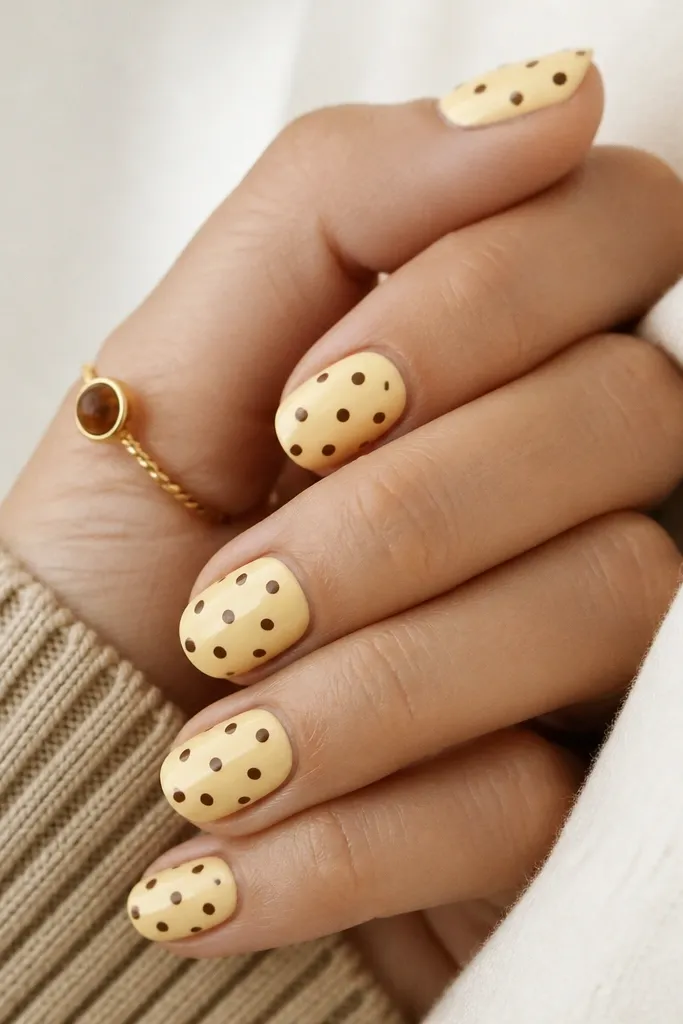
1. Butter Yellow Base With Espresso Confetti Dots
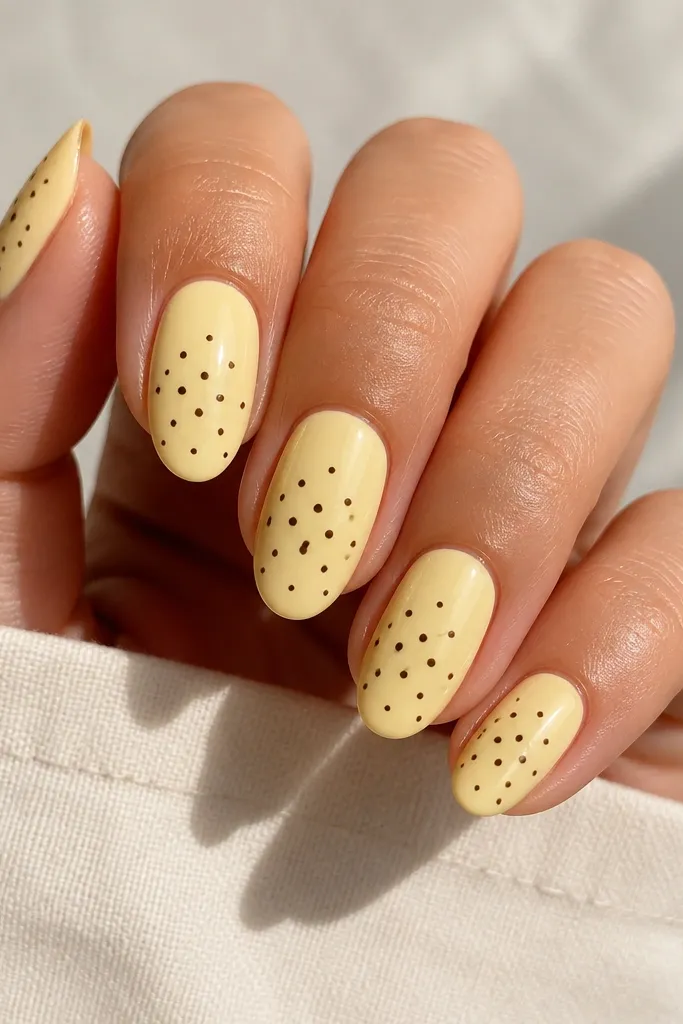
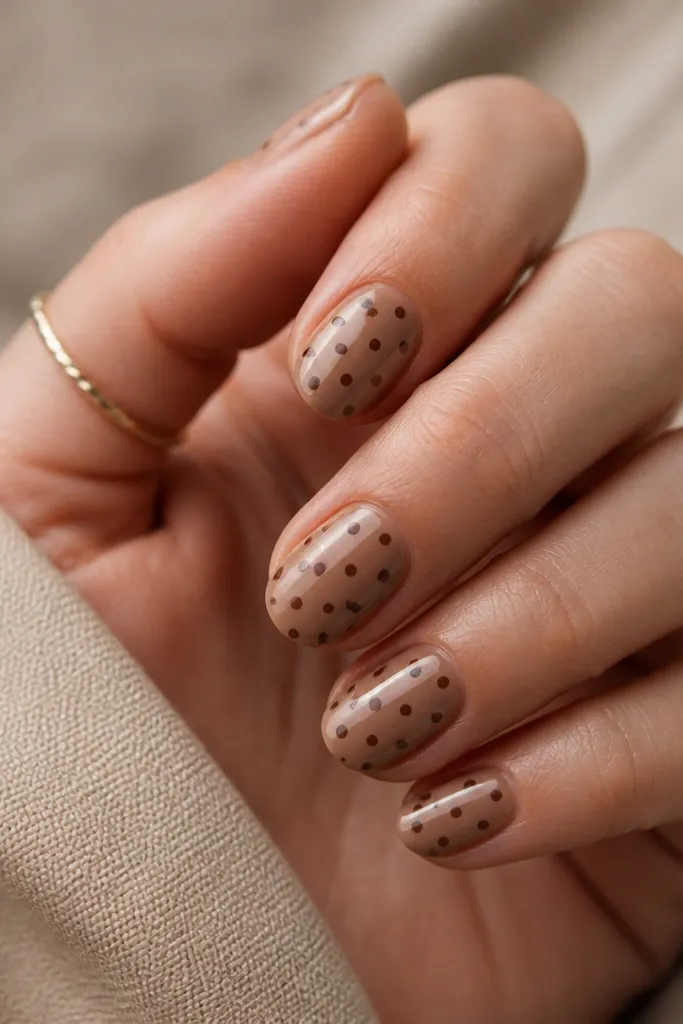
This one is the "always cute" version of the trend. Butter yellow gives a soft glow, and espresso dots look warm and grounded instead of harsh. Because the dots are tiny, the manicure stays neat even as your nails grow out. The confetti placement makes your nails look dressed without feeling heavy.
Use a short almond or squoval shape for the cleanest dot pattern. Paint two thin coats of butter yellow, then use a 1.0-1.2 mm dotting tool to place 10-14 dots per nail. Finish with a glossy top coat that you brush slowly over the dots so they don't smear.
Editor's noteAfter dotting, wait 2 minutes before top coat so the dots have time to set.
Watch outDon't use a grey-brown - it makes the dots look dirty instead of intentional.
2. Lemon Yellow Half-Moon With Brown Dots Tips
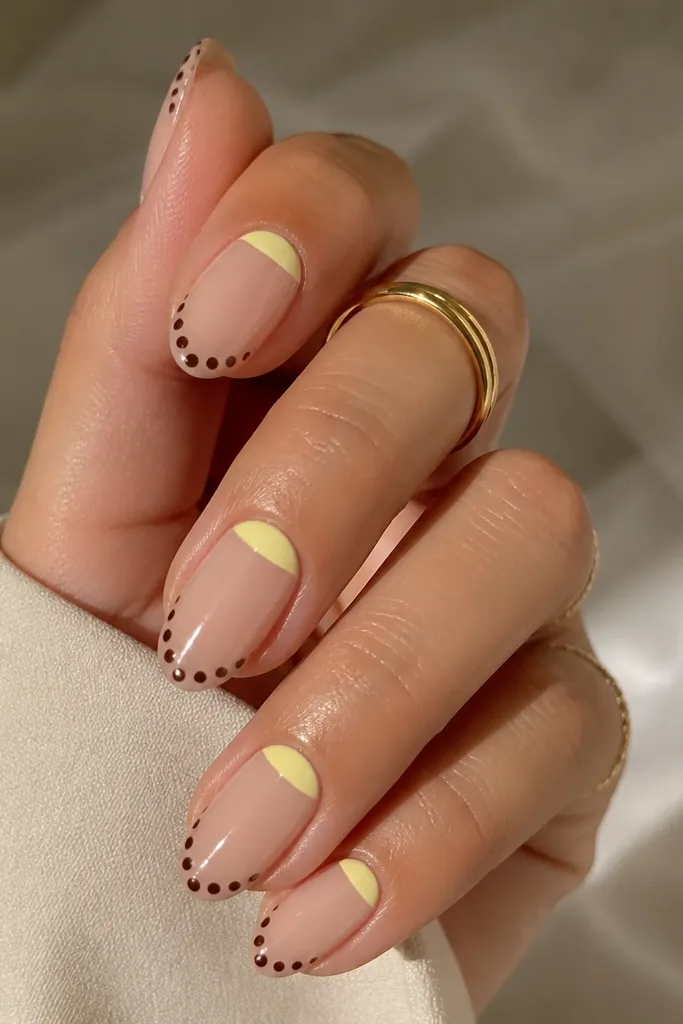
The half-moon keeps the look airy, and lemon at the cuticle makes your nails look brighter right where your eye lands. The dots on the tips act like a playful French twist. This is flattering when your nails are short because the pattern starts high and reads clean. It also hides small growth lines since the base is sheer.
Start with a sheer nude base (or a jelly nude). Paint a lemon half-moon using a small angled brush, staying about 1 mm from the sidewalls. For the dots, use a 2 mm dotting tool along the tip curve, leaving a small gap between each dot for a crisp line.
Editor's noteIf your cuticle area is tricky, use a thin strip of tape to mask the half-moon edge, then remove while the polish is still slightly tacky.
Watch outDon't make the half-moon too thick - it can look like a stripe instead of a clean shape.
3. Mustard Yellow Matte With Chocolate Dot Micro-French
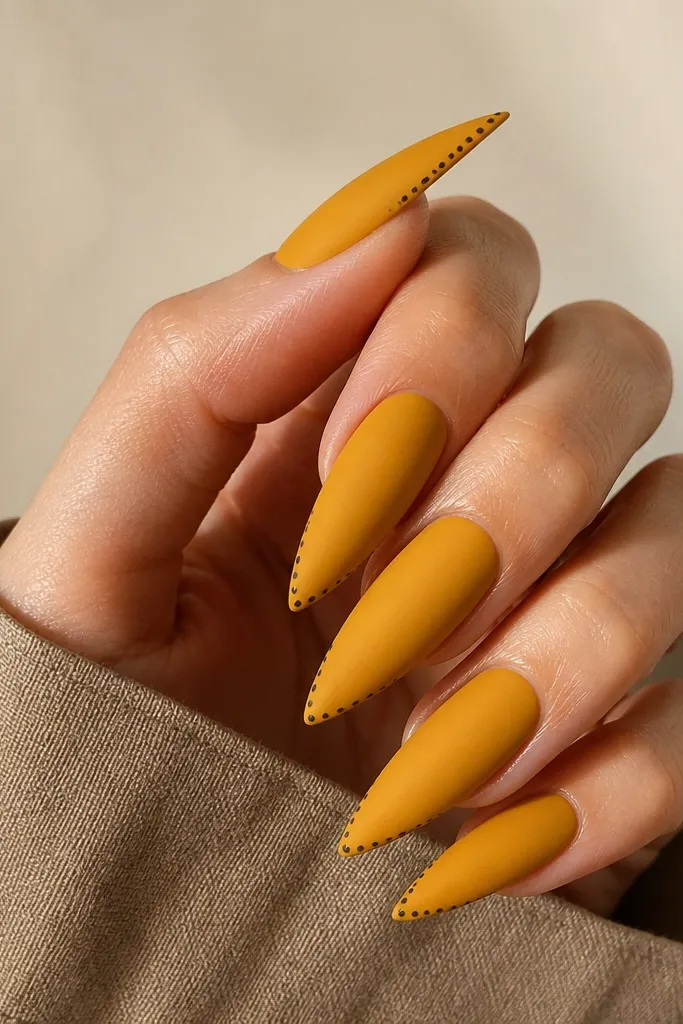
Matte mustard makes the brown dots look richer, almost like they're stamped into fabric. The micro-French placement keeps it classy - you see the dots when you glance at your hands, not all day in your face. It's a good pick for fall outfits because the colors feel warm and grounded. Matte also hides tiny nail texture, which helps this look stay smooth for longer.
Paint two coats of mustard in a creamy formula, then let it dry fully before adding matte top coat. Use a 1.5-1.8 mm dotting tool to place dots along just the top outer curve of the tip, about 3-4 dots total on each nail. Seal with matte top coat only, then avoid washing dishes for a few hours to let it cure.
Editor's noteTo keep dots sharp on matte, blot your dotting tool on a paper towel before each nail.
Watch outDon't use a high-gloss top coat over matte unless you want a different look - it turns the whole thing shiny and less cozy.
4. Yellow Jelly Base With Brown Dots Over Negative Space
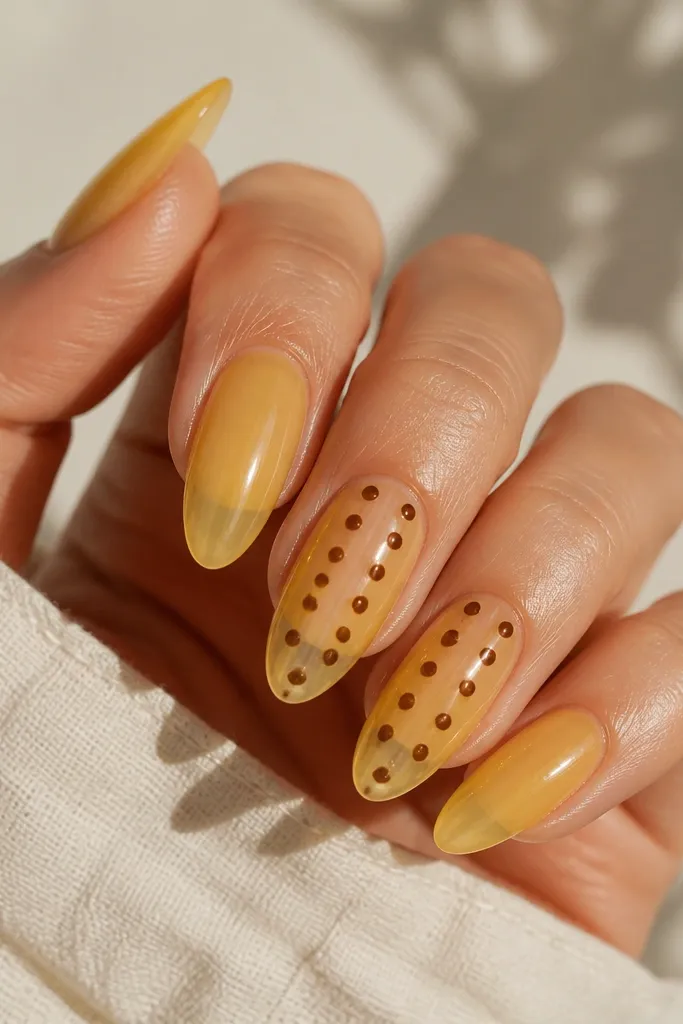
Jelly yellow has that soft, juicy glow, and the negative space stripe keeps it modern. Brown dots placed beside the stripe make the pattern look intentional instead of random. This style looks expensive because the clear area gives the eye a break. It also grows out clean because the dots are anchored around the center.
Use a yellow jelly polish in three thin layers for even translucency. Mask the center stripe with striping tape to protect the negative space, then remove after the jelly layer sets. Dot each side with a 1.2 mm tool - aim for 6-8 dots per side.
Editor's notePress the tape down firmly at the corners so you don't get a fuzzy edge.
Watch outDon't flood the center stripe when you dot - any brown spill kills the clean negative-space look.
5. Sunburst Yellow With Brown Polka Dot Swirl
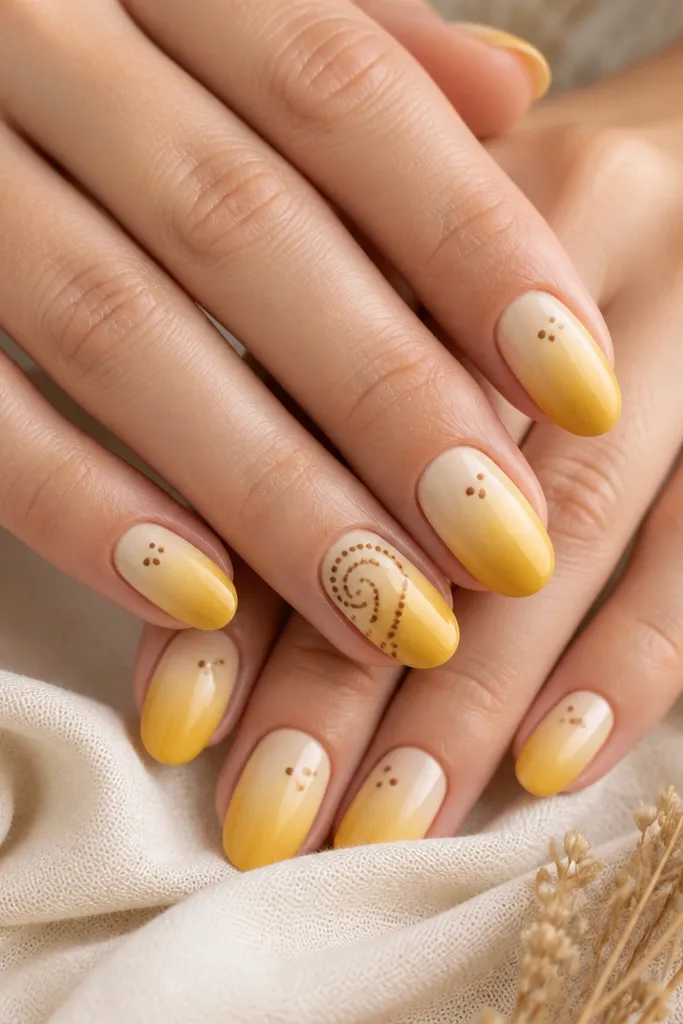
A sunburst gradient makes yellow feel dimensional without adding glitter. The dotted swirl gives movement and makes the polka dot theme feel like a design, not just decoration. Brown keeps it grounded and ties the gradient together. This is a great choice if you get bored with flat polka dots.
Create the sunburst with a makeup sponge: dab pale yellow at the base and blend deeper yellow at the tip. For the swirl, use a dotting tool to place dots along a curved path, then connect the ends with two tiny dots. Keep the rest of the nails minimal: 3-5 dots total.
Editor's noteUse a small fan brush to wipe off gradient dust before dotting so the dots don't pick up pigment.
Watch outDon't overblend the sunburst - if it turns muddy, the dots won't pop.
6. Chocolate Brown Base With Yellow Dot Confetti
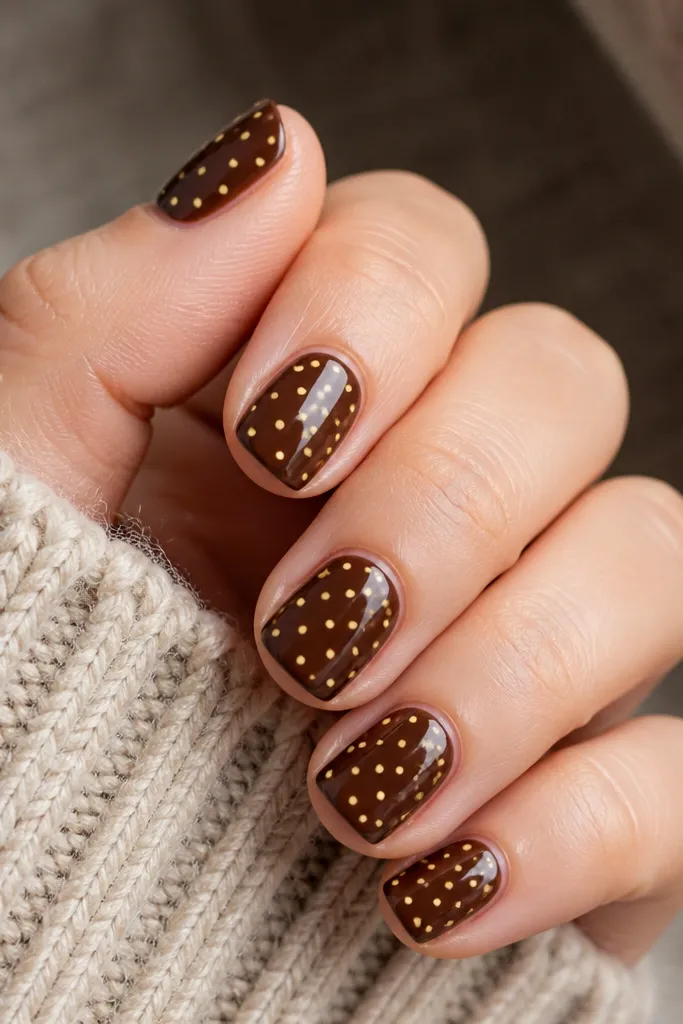
Flipping the colors changes the vibe instantly. Chocolate brown makes the yellow look brighter and more candy-like, and the contrast stays readable even at a quick glance. Tiny confetti dots keep it fun without taking over your entire nail. This is also a smart option if you want yellow but don't want it to look too bold.
Paint chocolate brown in two coats, then use a 1.0 mm dotting tool for the yellow. Place dots unevenly - some nails have more near the center, others have a few by the tip. Seal with a thick glossy top coat to smooth the surface.
Editor's noteIf your dots look streaky, reload the dotting tool with polish, wipe the tip once on a palette, then stamp again.
Watch outDon't use a runny yellow - it bleeds into the brown and makes the dots look like spots.
7. Yellow and Brown Polka Dot French Tips
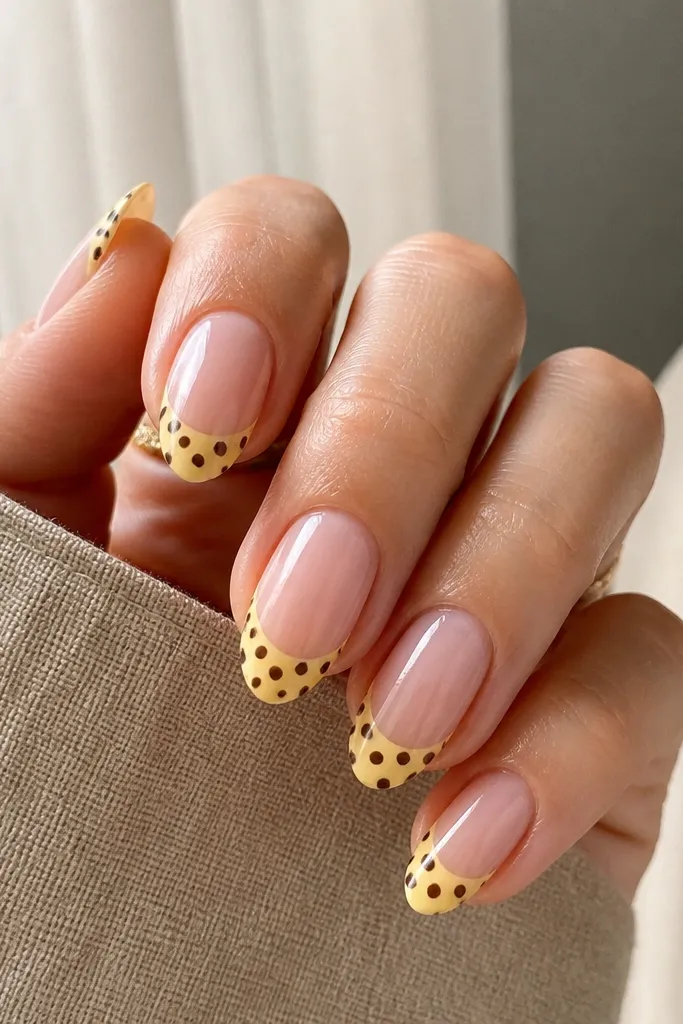
This is the cleanest way to wear the pattern when you want it to feel "done" in photos. The nude base keeps it neat, and the yellow French band gives you the polka dot canvas. Even spacing makes the whole thing look professional. It also works in both gel and regular polish because the dots sit on a smooth band.
Paint nude base, then create a yellow French band about 2 mm wide on a medium almond nail. Let the band dry, then stamp dots with a 1.4-1.6 mm tool. Keep the dots inside the band - don't let them spill onto the nude.
Editor's noteUse a striping brush to sharpen the edge of the yellow band before you dot.
Watch outDon't make the band too wide - wide tips with lots of dots can look like wallpaper.
8. Brown Dot Grid Over Yellow Jelly
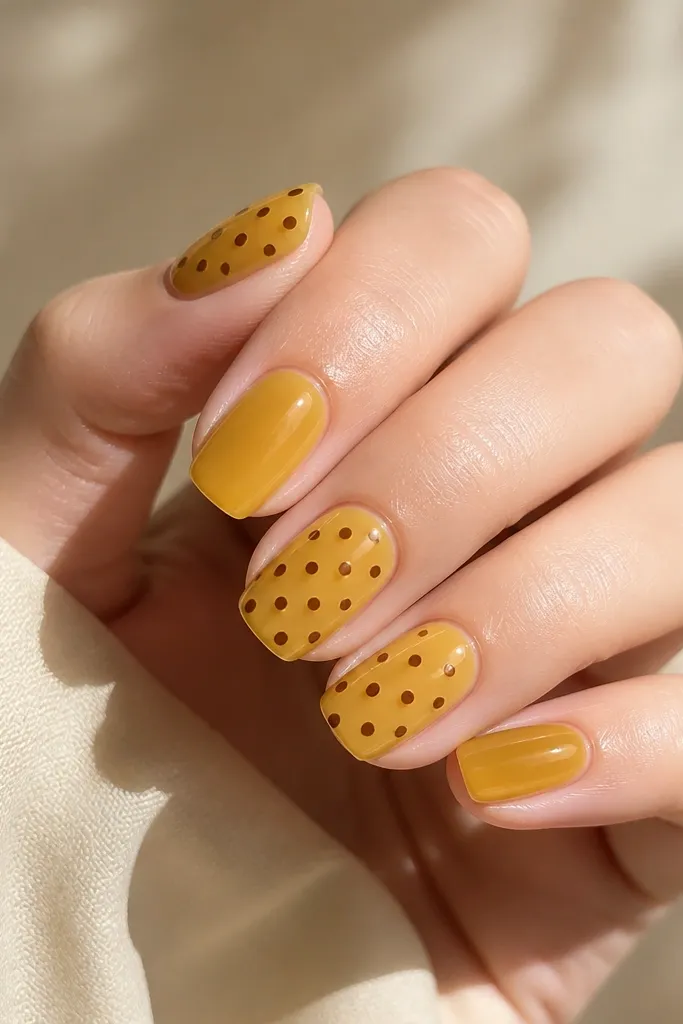
A grid turns polka dots into something graphic and modern. Yellow jelly makes the brown look soft instead of heavy. Because it's a grid, your eyes read it as intentional even when you're moving. This one looks great on longer nails because the grid has room to breathe.
Use a jelly yellow in three thin coats. Place two vertical dot columns using a dotting tool around 1.2 mm. Then add a few horizontal dots to connect the columns, leaving gaps so it stays airy.
Editor's noteMap the grid lightly with tiny guide dots before you commit to full dots.
Watch outDon't fill every square - a full grid turns into a thick stamp that looks flat.
9. Yellow Ombre With Brown Dots at the Fade
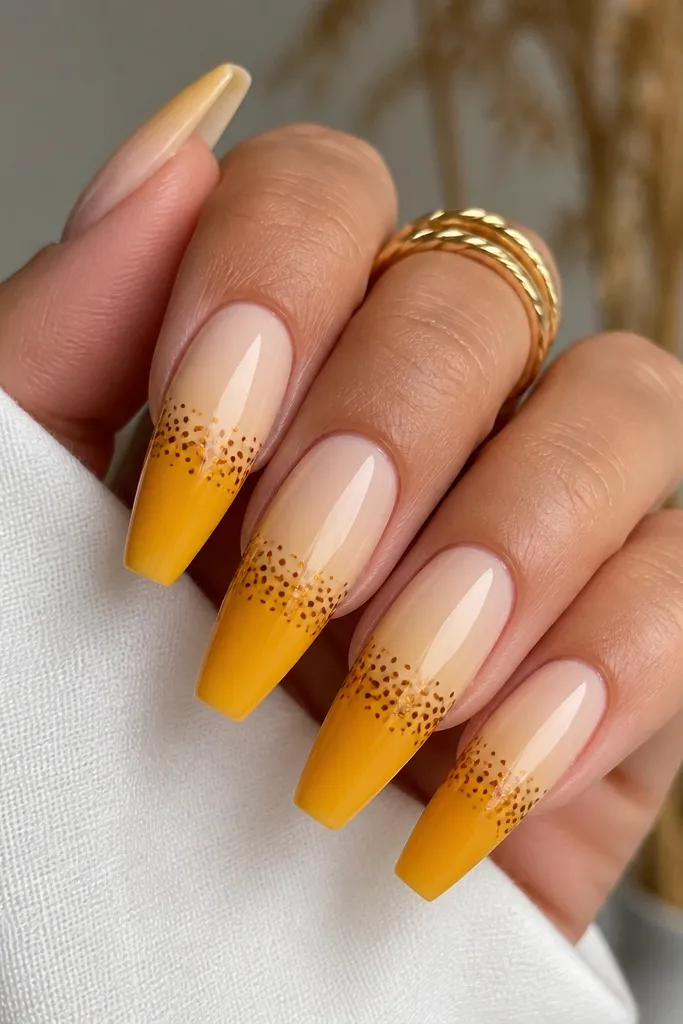
The dotted band at the fade point looks like it's part of the ombre instead of sitting on top. Pale-to-gold gives you dimension, and the brown dots anchor the design. This is a strong choice if you like ombre but want a pattern that feels playful. The placement also hides minor chipping because the dots blur the edge.
Create ombre with a sponge: pale yellow at the cuticle, blend into deeper yellow at the tip. When the ombre is dry, place dots with a 1.5 mm tool in a band across the nail about one-third up from the tip. Keep the band thickness consistent on each nail.
Editor's noteUse a makeup sponge for the ombre, then clean the cuticle edge with a brush dipped in acetone before dots.
Watch outDon't put dots directly over wet ombre - the brown can bleed into the gradient.
10. Tiny Dot Border Around a Yellow Accent Nail
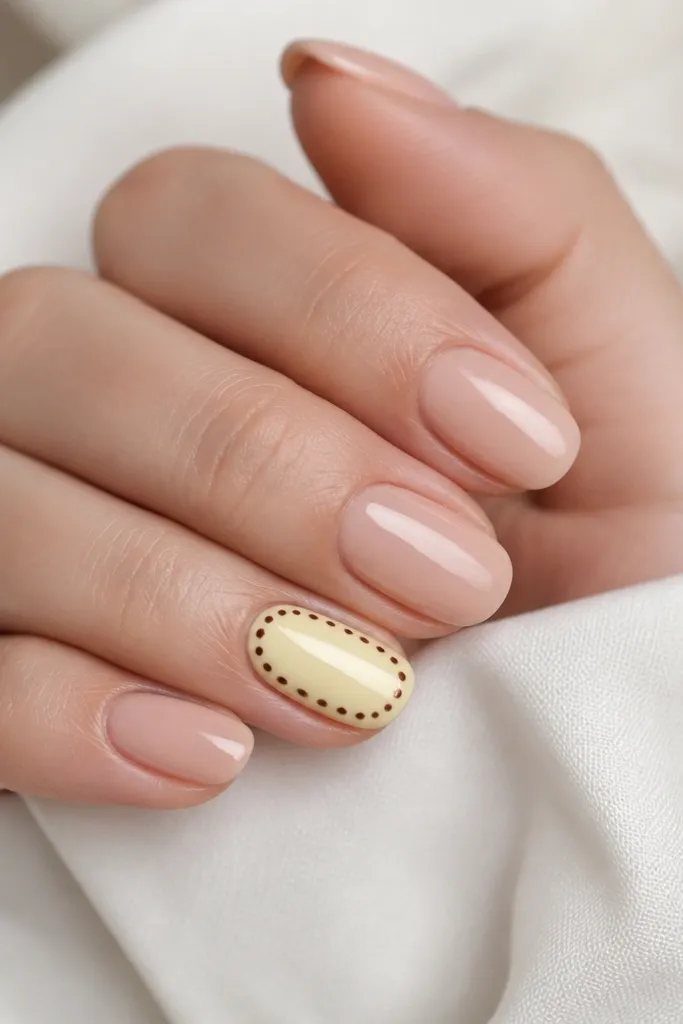
This look uses the dotted border like a frame. The accent nail stays the star, and the other nails keep your hands from looking overloaded. The clear center makes the border look intentional instead of random dots. It's a great option for events because it looks neat even up close.
Paint four nails nude jelly, then butter yellow on the accent nail. For the border, use a 1.0-1.2 mm dotting tool and place dots about 1 mm from the sidewalls and 1 mm from the cuticle. Leave the center completely solid yellow.
Editor's noteIf your border dots wobble, use a dotting tool with a slightly larger metal tip for steadier contact.
Watch outDon't put the border too close to the edge - it chips first at the corners.
11. Brown Polka Dots on a Yellow Skittle Nail Set
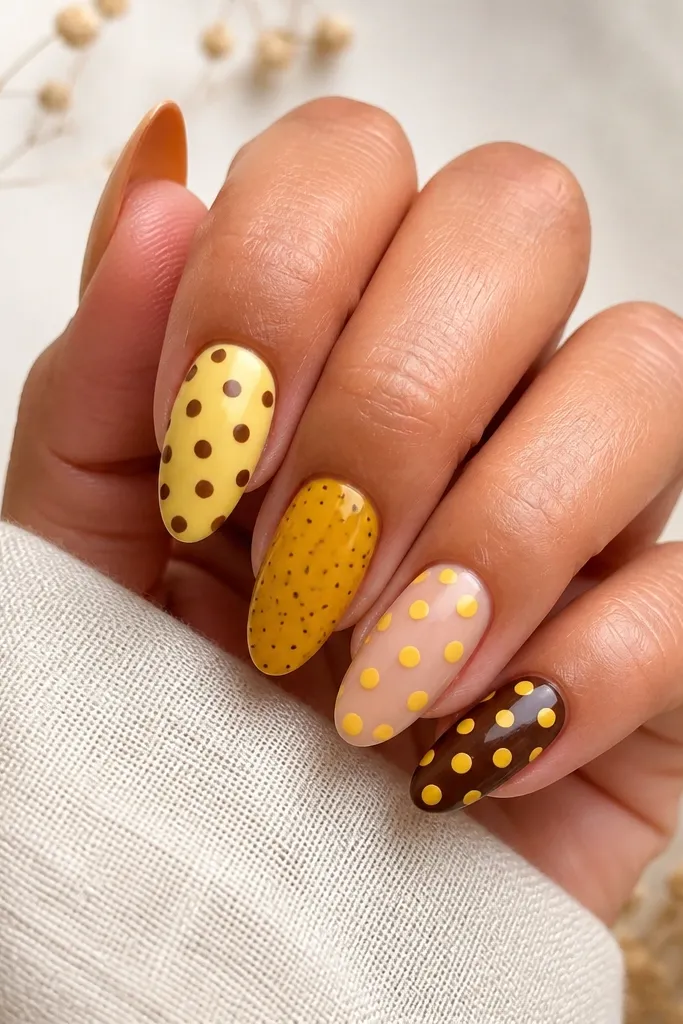
This is my favorite way to wear polka dots when you want variety without losing the theme. Skittle sets keep things fun at different angles - one nail reads bold, another reads delicate. Brown ties the yellow shades together so it doesn't look like random nail art. It also makes your manicure look intentional for weeks because each nail grows differently.
Pick three yellow shades: butter, lemon, and mustard. Use medium dots (2 mm) on two nails and tiny dots (1.0-1.2 mm) on one nail. For the nude and chocolate nails, flip the colors so yellow dots show against darker or clearer backgrounds.
Editor's noteKeep dot spacing consistent within each nail, even if dot size changes across nails.
Watch outDon't mix three dot sizes on the same nail - it looks messy fast.
12. Yellow Dot Fade With Brown Outline Tips
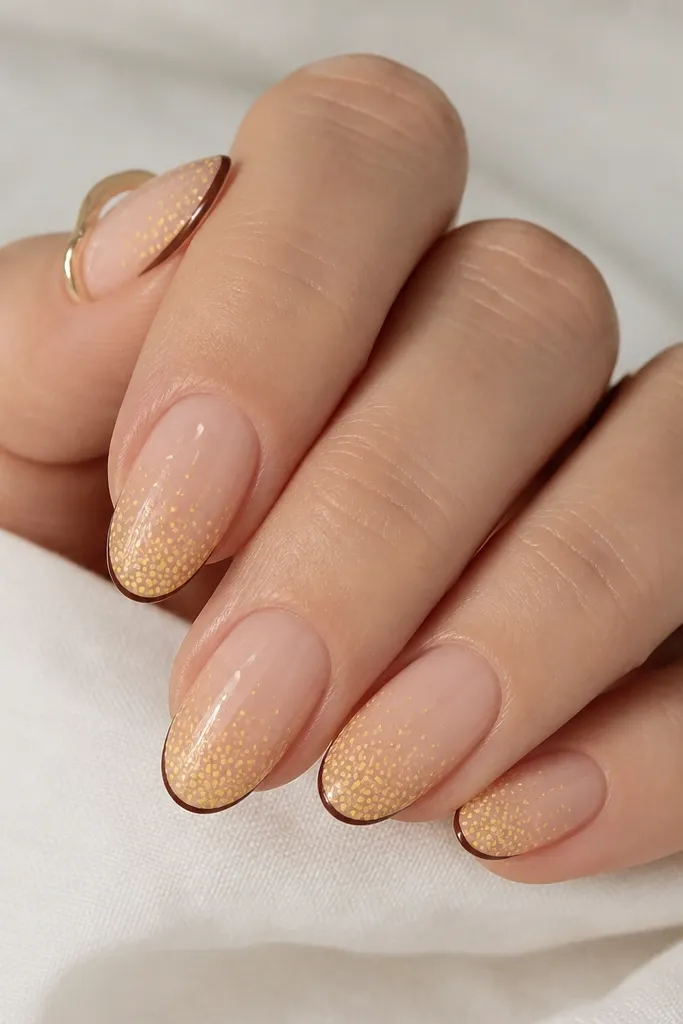
The yellow dot fade gives the look a soft gradient without blending paint. The brown outline makes it crisp and helps the dots look intentional. This design looks especially good on oval nails because the outline follows the shape. It's also great for people who hate solid yellow covering their whole nail.
Paint nude base, then dot yellow along the tip edge starting with 1-2 dots and increasing toward the edge. Use a 1.0 mm tool for tiny dots. Then trace the outside tip curve with espresso-brown using a fine liner brush, not a dot tool.
Editor's noteLet the yellow dots dry fully before outlining so the liner doesn't drag.
Watch outDon't outline too thick - thick lines make it look like a sticker border.
13. Retro Polka Dot Curtain Nails
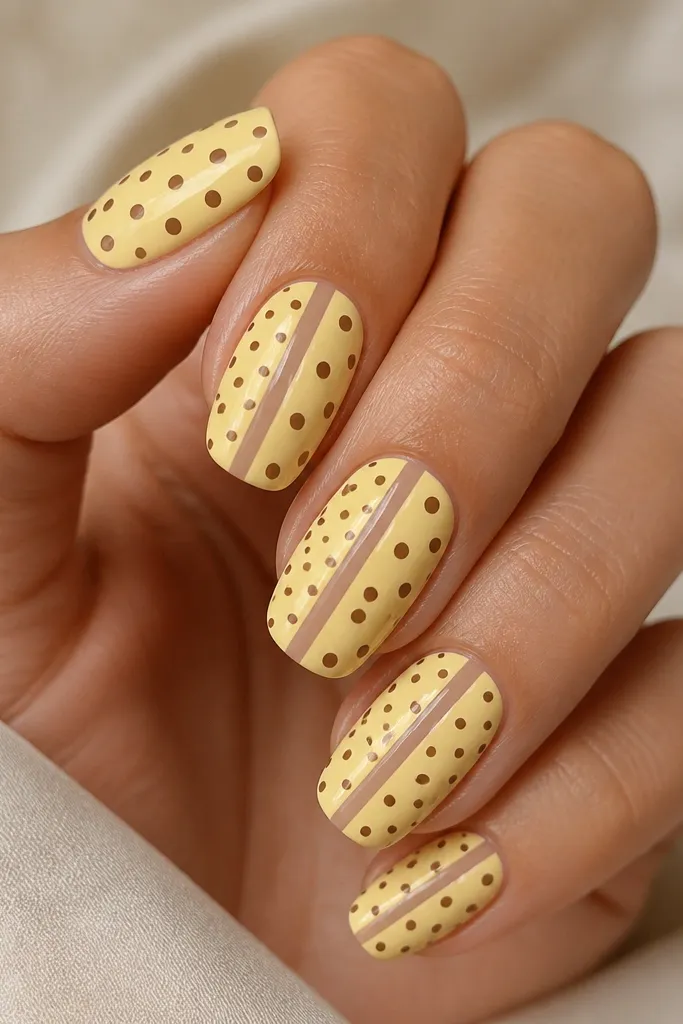
The "curtain" effect is graphic and retro, but still wearable because the nude gap breaks it up. Different dot sizes add depth without making it chaotic. Yellow panels keep the design in the exact color story, and brown dots make it feel like a print. This one looks amazing under sunlight because of the glossy finish and the contrast edges.
Paint the nail with nude base. Mask two side panels with striping tape, then fill left panel with butter yellow and right with lemon yellow. Remove tape, then dot each panel: tiny dots (1.0-1.2 mm) on one side, medium (1.8-2.2 mm) on the other. Seal with a high-gloss top coat.
Editor's notePull the tape off at a slight angle so the edges stay crisp.
Watch outDon't let yellow pool at the tape edge - it bleeds under and ruins the panel separation.
14. Yellow Base With Brown Dots and a Single Gold Dot
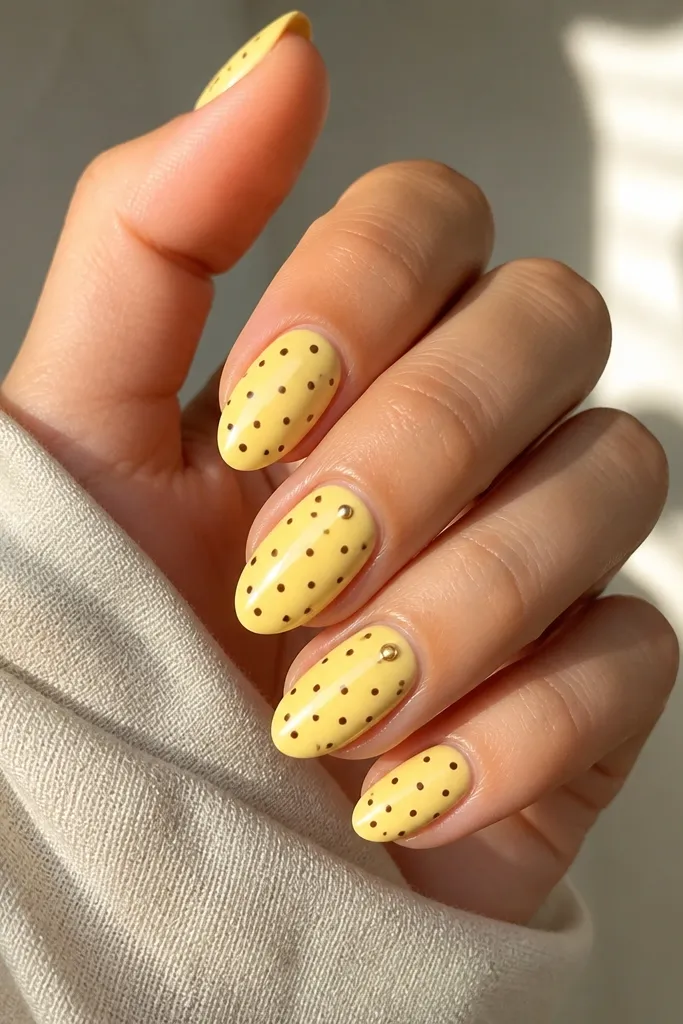
Adding one metallic dot gives a little "jewelry" effect without turning the nails into full-on glam. The brown dots keep it grounded, and the gold picks up warm tones in your skin and accessories. This is subtle but it shows in photos. I like it for workdays because it's playful but not loud.
Base coat with lemon yellow in two thin coats. Use a 1.2-1.4 mm tool for brown dots. On one accent nail, place a single 0.8-1.0 mm gold dot near the cuticle, then keep the rest of the gold off the other nails.
Editor's noteChoose gold polish that's opaque enough to cover in one swipe, not flaky glitter.
Watch outDon't scatter gold all over - it makes the polka dot pattern look cluttered.
15. Brown Dotty Cuticle Line on Butter Yellow
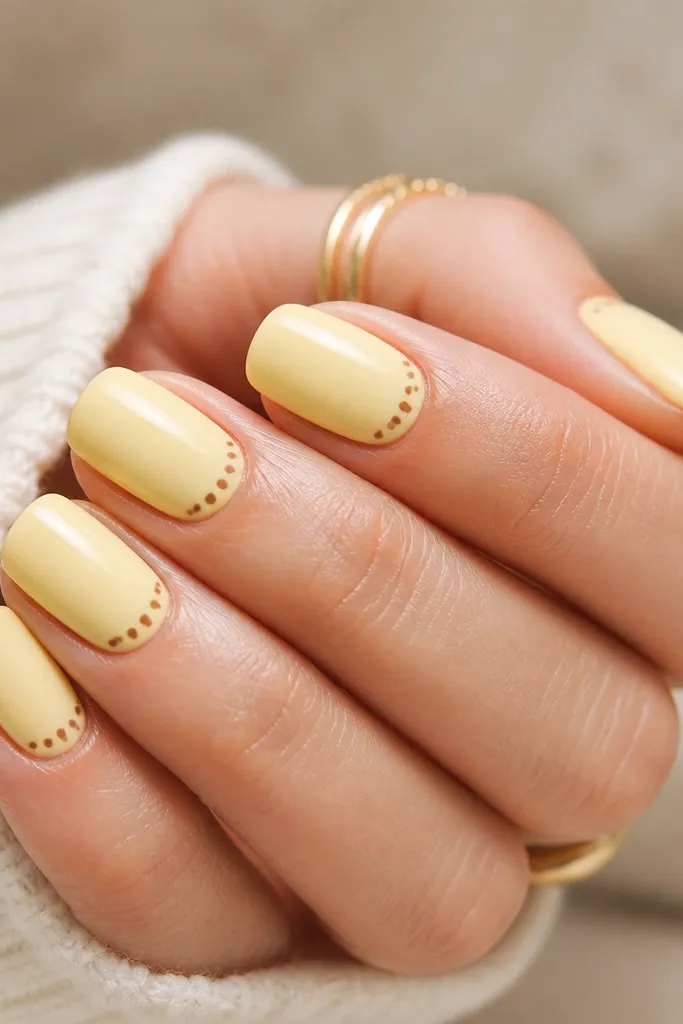
This is a clean, wearable version for when you want the look but you don't want dots everywhere. The cuticle line adds polish and makes your nails look neatly finished even when they're grown out. Butter yellow is soft and flattering, and the brown line frames your nail bed. It's also great for beginners because it's a simple placement.
Paint butter yellow in two coats. Use a dotting tool around 1.0 mm to create dots along the cuticle curve, then connect the curve so it looks like a line of pearls. Leave the center completely blank so the design stays airy.
Editor's noteUse a thin brush to clean the cuticle edge before dotting so the line looks sharp.
Watch outDon't cross dots into the sidewalls - it looks messy when your nail grows.
16. Yellow and Brown Polka Dot Checker Accent
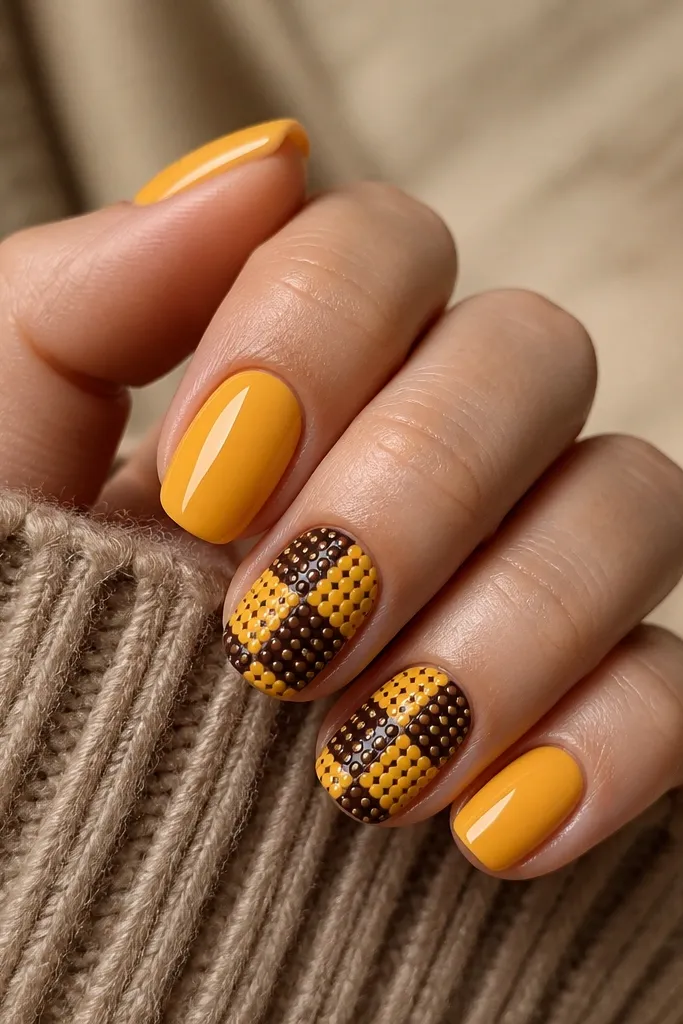
Checker patterns look harder than they are, and you don't need straight lines to get the vibe. The mini checker corner makes the manicure feel designed, not random. Yellow keeps it bright, while brown makes it look like a print. This is perfect for people who want one statement nail but still want the set to feel calm.
Paint nude on all nails. On two accent nails, paint a small lemon corner in the upper-right area. Add brown dots in alternating spots using a 1.2-1.4 mm tool to mimic checker squares, leaving nude visible between dots. Keep other nails minimal: 2-3 dots total.
Editor's noteUse a small piece of tape to block the corner shape so your checker area stays tidy.
Watch outDon't make the checker area too big - large checker dots can look like a stamp.
17. Mustard Yellow With Brown Dot Half-Sleeves
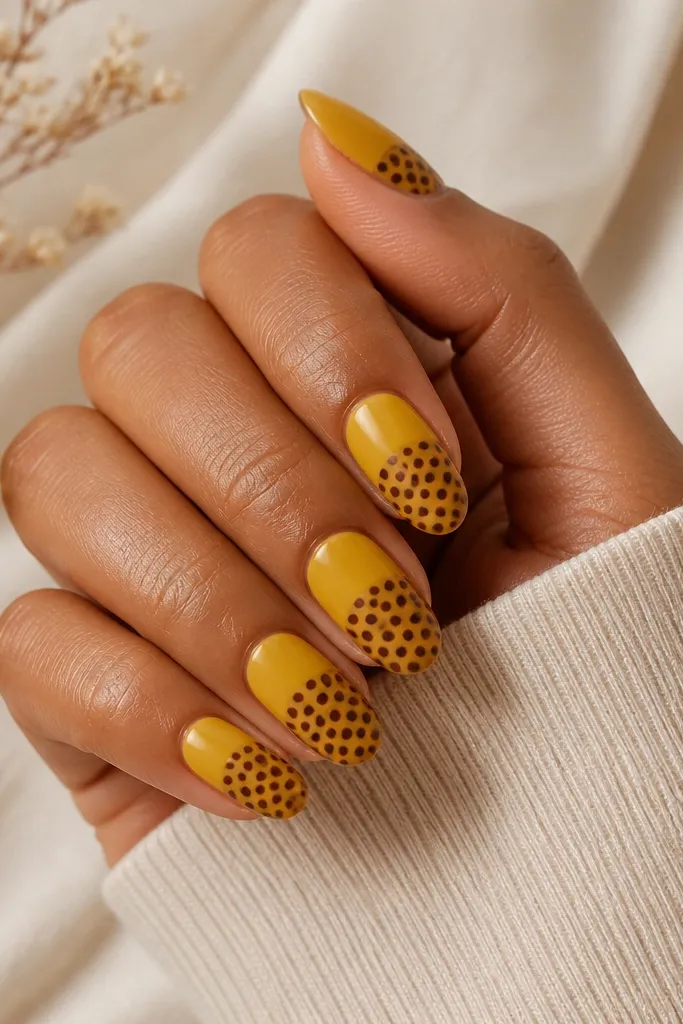
Half-sleeves give you that "pattern placement" look without covering the whole nail. Mustard reads warm and autumn-ready, and the solid top half keeps the design from getting crowded. The evenly spaced dots make it feel tidy and deliberate. This one also hides wear because the solid section looks smooth as it grows out.
Paint mustard yellow as your base. Mark a line across the nail about halfway up using a strip of tape. Dot the lower half with espresso-brown using a 1.5 mm tool, keeping dots off the tape edge so the line stays clean. Seal with glossy top coat.
Editor's noteLet the mustard fully dry before you tape - wet polish lifts and tears.
Watch outDon't blur the half line - a fuzzy boundary makes it look like dots spilled.
18. Yellow Marble Look With Brown Polka Dot Veins
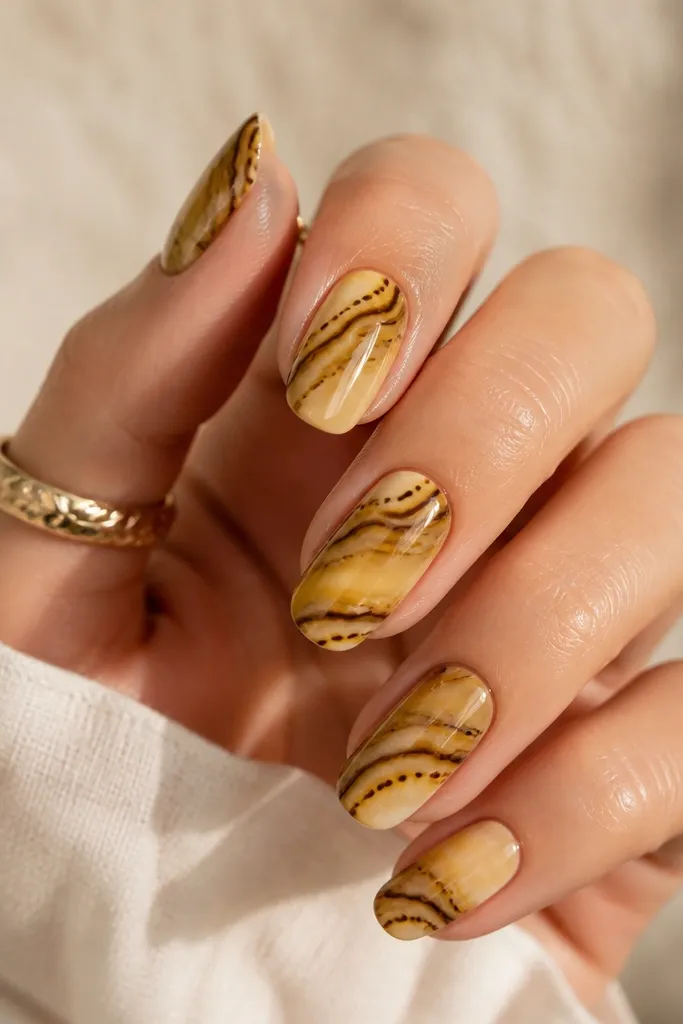
Marble plus polka dots sounds busy, but the dots here act like "ink" tracing the movement. The yellow marble gives organic texture, and brown dots keep the lines crisp. It reads artsy without needing a bunch of colors. This is one of my favorite looks when I want something different from straight polka dots.
Create marble using two yellows (pale cream-yellow and lemon) with a small brush and a few streaks, then blend lightly. Use a liner brush to lightly guide vein paths, then stamp dots along the guide with a 1.0-1.2 mm tool. Keep veins thin - 1 dot wide.
Editor's noteDo the marble first, let it dry, then dot over the dry swirls so the dot edges stay sharp.
Watch outDon't use thick dot lines - wide dotted veins look like stickers.
19. Brown Dots on Yellow Glossy Tips With Nude Base
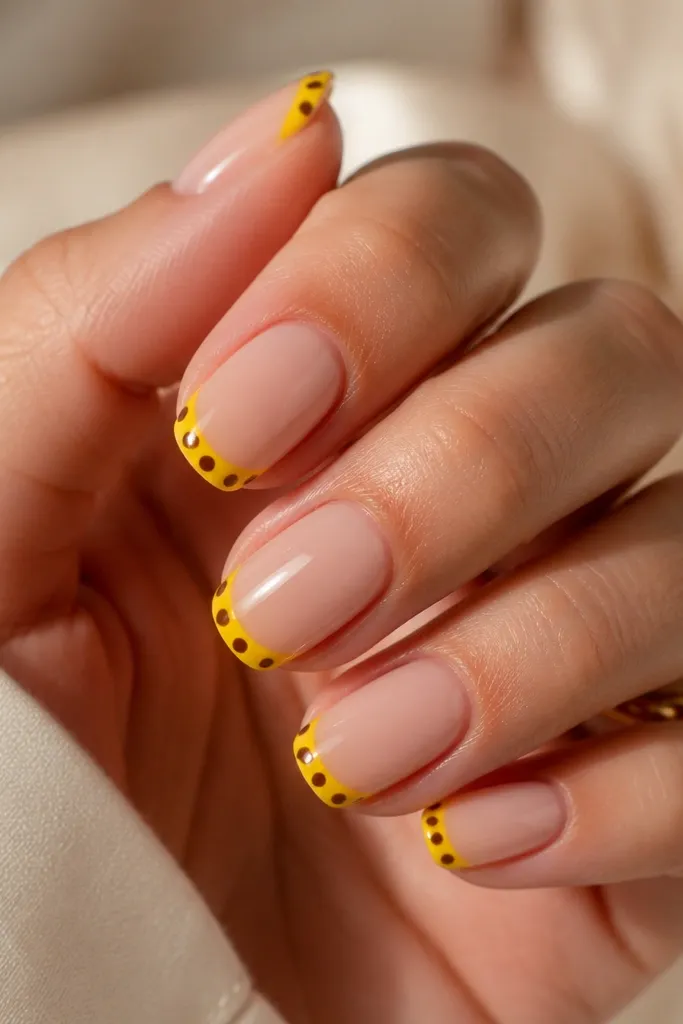
This is like a French tip, but the yellow is the canvas and the dots are the pattern. The nude base keeps it elegant, while the glossy yellow tip makes the dots look crisp. I like this because it looks bright without taking over your whole hand. It also transitions well from day to night.
Paint nude base, then a yellow tip band about 2-3 mm wide. Use a 1.2-1.4 mm dotting tool for brown dots, placing fewer in the middle and more near the sides. Seal with a thick glossy top coat to smooth the tip and lock the dots in.
Editor's noteCap the free edge with top coat before you do anything else so dots don't lift at the tip.
Watch outDon't crowd the center with dots - spacing makes it feel airy.
20. Yellow Polka Dots on Espresso French Base
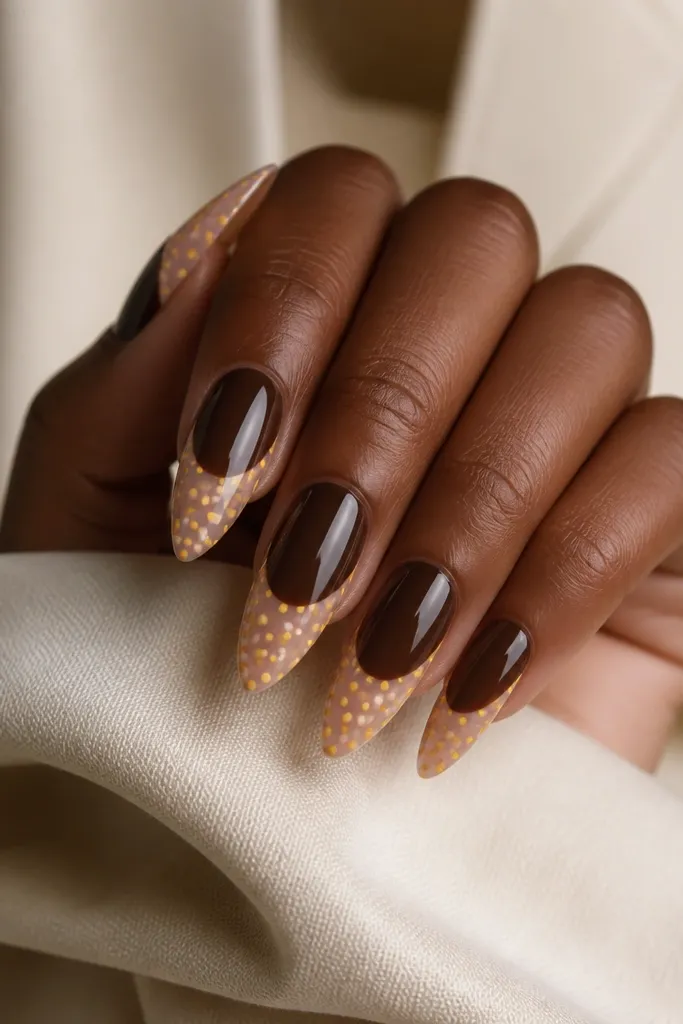
This version feels bold and a little retro because the brown is the main color. The sheer nude tip keeps it from looking too heavy. Tiny yellow dots make the manicure look like a printed fabric pattern. It also looks great against gold rings because brown and yellow warm together.
Paint espresso-brown as the base. Create a sheer nude tip area, leaving a clean edge between brown and nude. Add tiny yellow dots (1.0 mm) across the nude tip, then top coat. Keep the dots mostly within the tip area so they don't smear into the brown.
Editor's noteUse a nail art dotting plate or a silicone palette for consistent dot loading.
Watch outDon't use a translucent yellow for the dots - it turns patchy over nude.
21. Butter Yellow With Brown Polka Dots and Micro Stripe
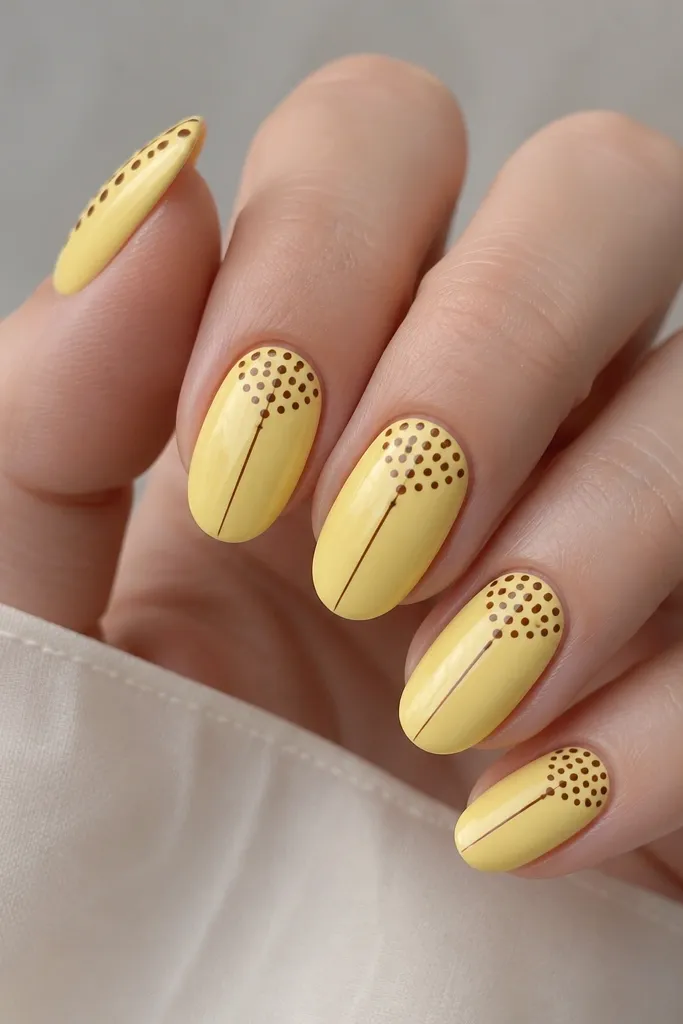
The micro stripe gives the dots a direction, so the design looks structured. Butter yellow stays soft, and the brown stripe makes the whole set look coordinated. I wear this when I want polka dots but I also want my nails to look a little longer and slimmer. The center stripe does that visual trick.
Paint butter yellow in two coats. Use a liner brush to draw a thin vertical stripe (about 0.5 mm) down the center. Then dot near the cuticle on each side of the stripe with a 1.2 mm tool, leaving the lower nail mostly clean. Top coat glossy.
Editor's noteDraw the stripe first, then dot around it so you don't have to squeeze dots too close.
Watch outDon't make the stripe too wide - wide stripes look like a thick band.
22. Yellow Polka Dot Waterfall Accent
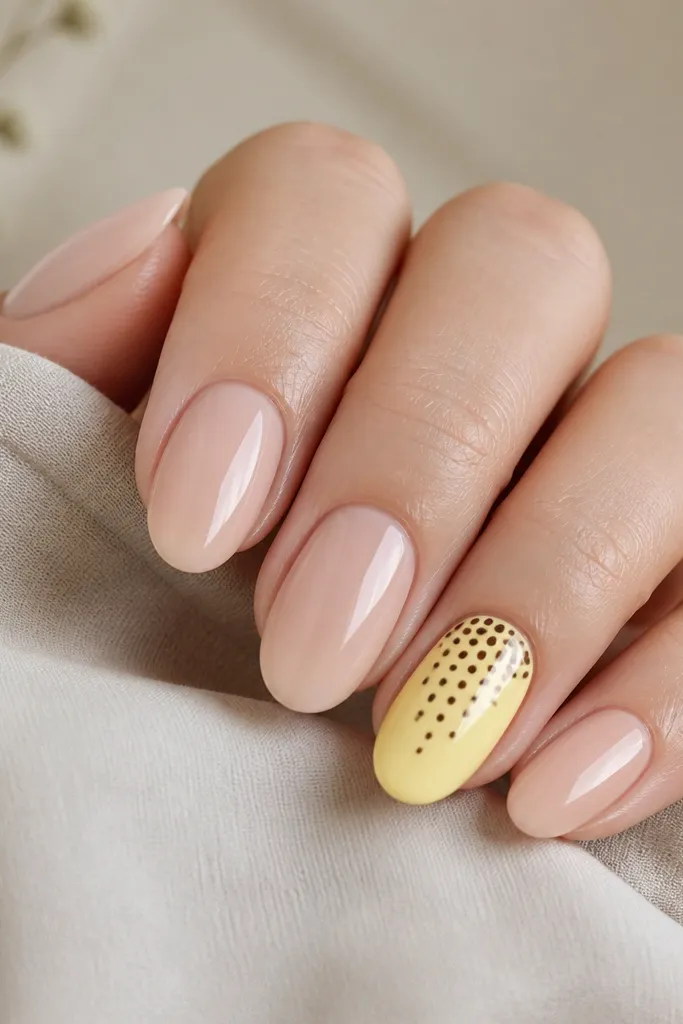
The waterfall pattern makes the polka dots feel like motion instead of decoration. Nude nails keep the hand from looking too busy, and the accent nail does the fun work. Brown dots look like ink droplets against yellow, which reads cute without being childish. This also photographs well because the diagonal cascade catches light differently.
Paint all nails nude jelly. On the accent nail, cover with butter yellow. Then create the diagonal waterfall: place a line of larger brown dots near the cuticle, then step them down diagonally with slightly smaller dots as you reach the tip. Keep the dots spaced so the yellow shows through.
Editor's noteUse a diagonal guide mark lightly with a pencil on the back of a clear stamping block so your hand doesn't drift.
Watch outDon't cover the whole accent nail with dense dots - the waterfall effect disappears.
23. Brown Dots Over Yellow Sheer Base With One Solid Nail
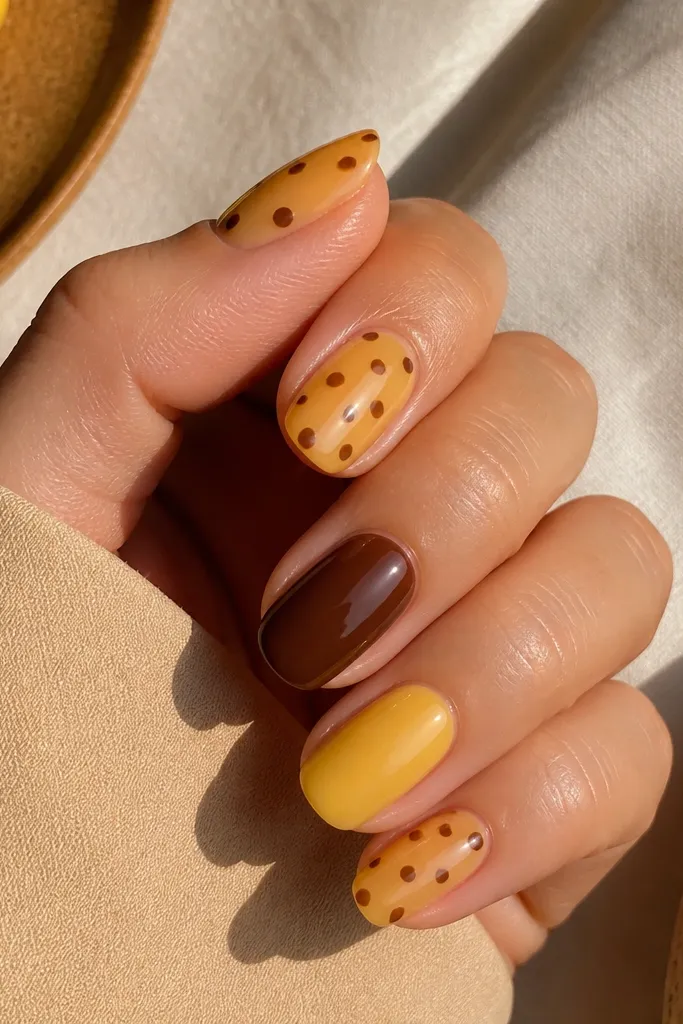
This set uses negative space and color blocking so the dots feel intentional. The fully solid nails act like punctuation, which makes the polka dots look cleaner. Sheer yellow keeps the look light, and brown dots add contrast without heavy coverage. It's a good way to wear the trend if you get tired of full pattern nails.
Paint three nails with a sheer yellow jelly base and add brown dots (1.2 mm) in scattered clusters. Choose one nail solid chocolate brown and one nail solid butter yellow with no dots. Keep dot density consistent across the dotted nails so they match.
Editor's noteIf your sheer yellow looks streaky, add a third thin layer instead of thickening the coat.
Watch outDon't add dots to every nail - the solid nails are what make it look designed.
24. Yellow Polka Dot Cuticle Stars
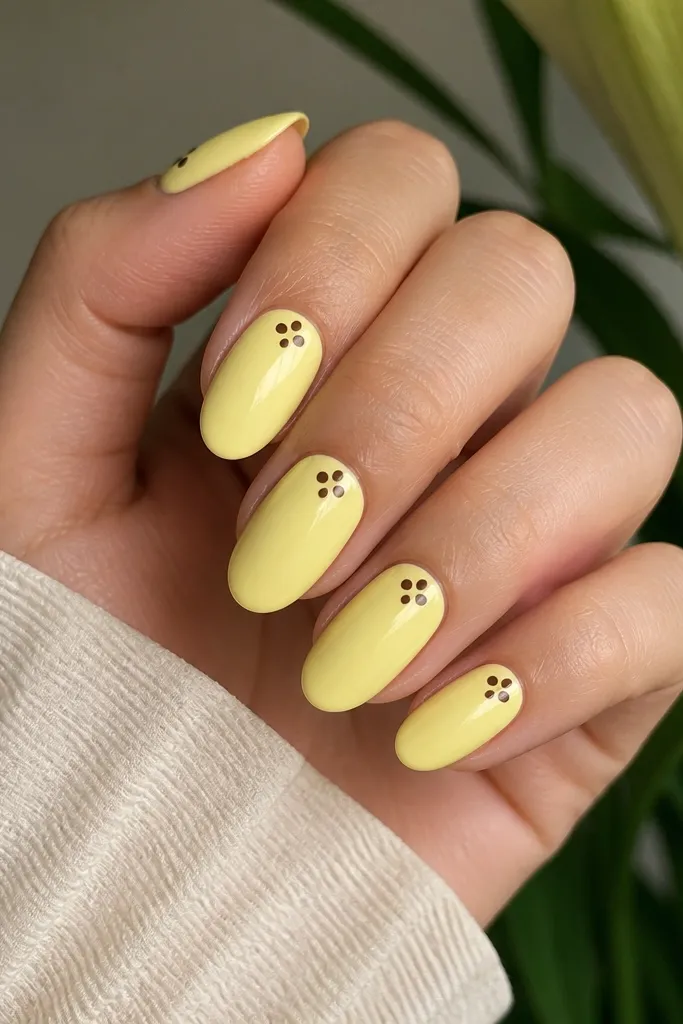
This is a cute spin where the dots don't spread across the whole nail. The star-like cluster at the cuticle makes your nails look decorated even when the rest is plain. Butter yellow keeps it sweet, and espresso brown makes the little cluster readable. It's subtle enough for daily wear but still feels like polka dots.
Paint butter yellow in two coats. Place two dots close together, then add a third dot offset to form a tiny triangle near the cuticle. Keep all clusters centered so they look symmetrical on each finger. Seal with glossy top coat.
Editor's noteUse a dotting tool tip that's slightly smaller than you think - clusters get messy fast.
Watch outDon't put the cluster too high on the cuticle - it can look like it's on skin when you grow out.
25. Yellow and Brown Polka Dot Skim Coat With Brown Tips
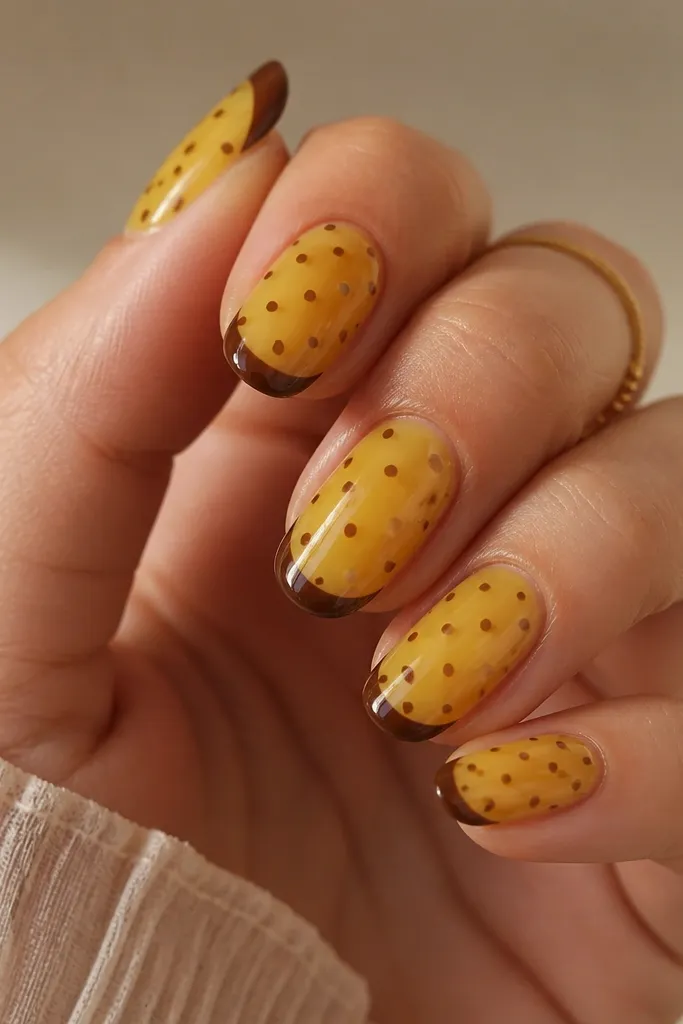
A skim coat of dots feels airy and grown-up. The brown tips add structure, and the sparse dots keep the polka dot look from feeling overwhelming. I like it for short nails because it creates a clean line at the tip while still giving you that playful pattern. The sparse placement also hides tip wear as your nails get longer.
Start with a sheer yellow polish, then add a thin curved brown tip band about 1-1.5 mm. Add brown dots only in the bottom half, using a 1.2 mm tool. Keep dot count low - 6-9 dots per nail - and top coat glossy.
Editor's noteLet the brown tip cure fully before dotting so you don't smear the edge.
Watch outDon't add dots up to the cuticle - it makes short nails look crowded.