1. Vertical stripe with micro dots
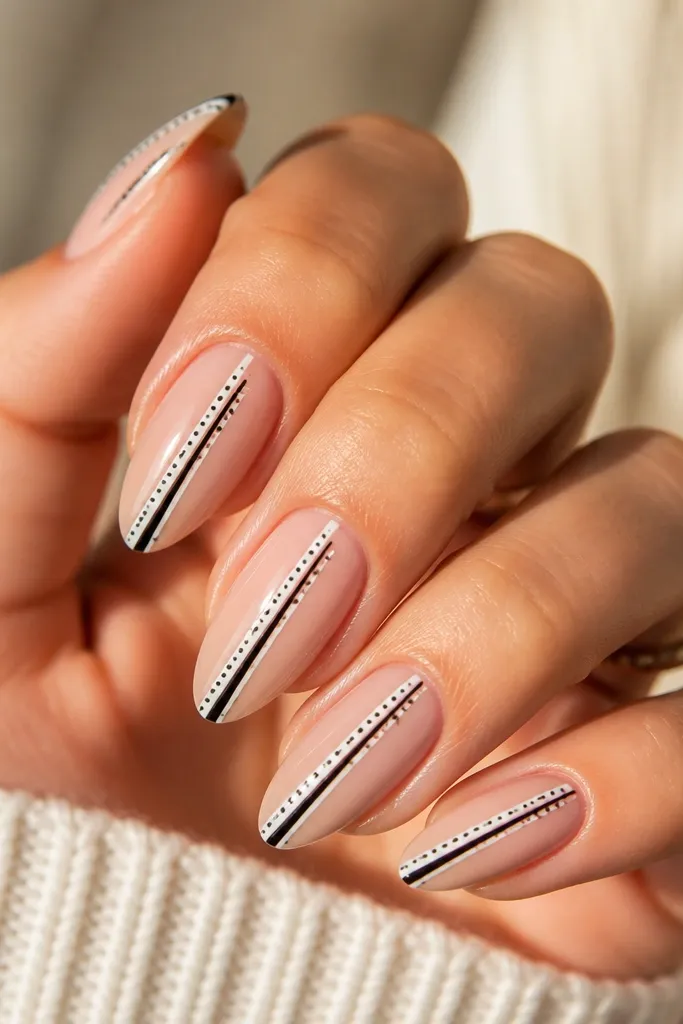
This design works because the thin stripe creates a long visual line, and the dots add interest without taking up width. Keep the stripe narrow - around 1/10 of the nail width - so the nail still looks airy. The nude base also makes the black and white pop without feeling heavy.
Start with a nude base and let it dry fully. Paint the black stripe with a liner brush, then add two small white dots using a dotting tool. Finish with a top coat; keep the dots small so they don't look like bubbles.
Editor's noteIf your stripe looks too wide, wipe the brush on a lint-free pad and go back with a thinner line before the polish sets.
Watch outDon't center a thick black block across the widest part of the nail.
2. Half-moon cuticle frame in white
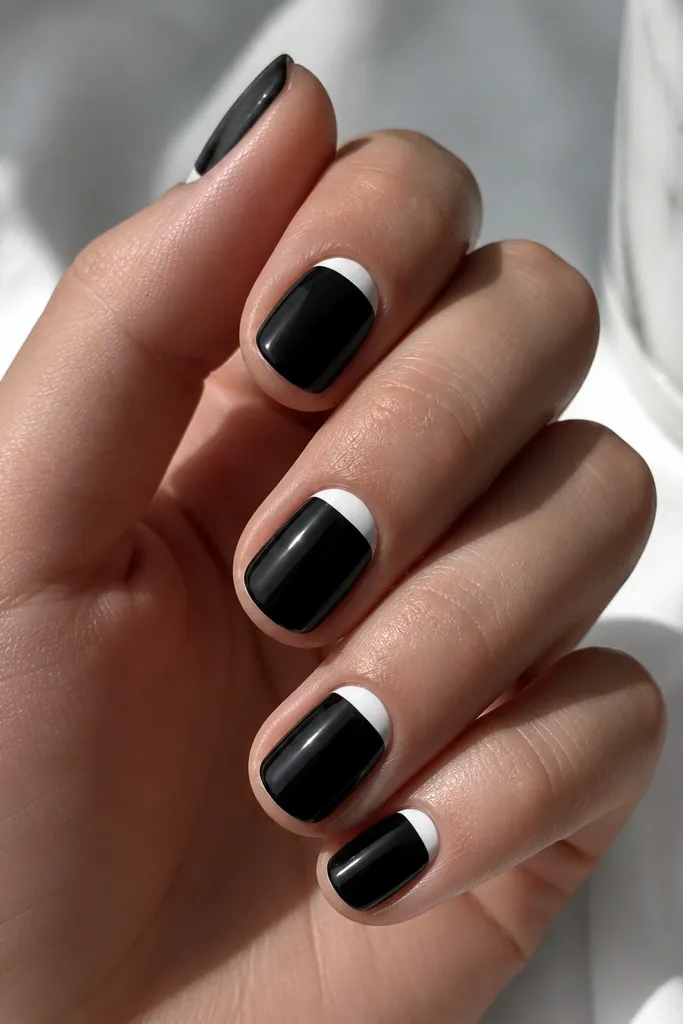
A cuticle half-moon frames the nail bed and pulls attention upward. White at the cuticle makes your nail look more defined, like you're wearing a tiny french manicure, but reversed. The solid black base keeps the look bold without needing length.
Paint the nails black first. Use a small angled brush to place a white half-moon right at the cuticle line, leaving a thin black gap if your curve needs correction. Seal with a glossy top coat for a crisp edge.
Editor's noteUse a piece of tape as a guide for the curve, then remove it while the white is still slightly tacky.
Watch outAvoid painting the half-moon too low; it should sit right on the cuticle edge.
3. Black tip french with thin white inner line
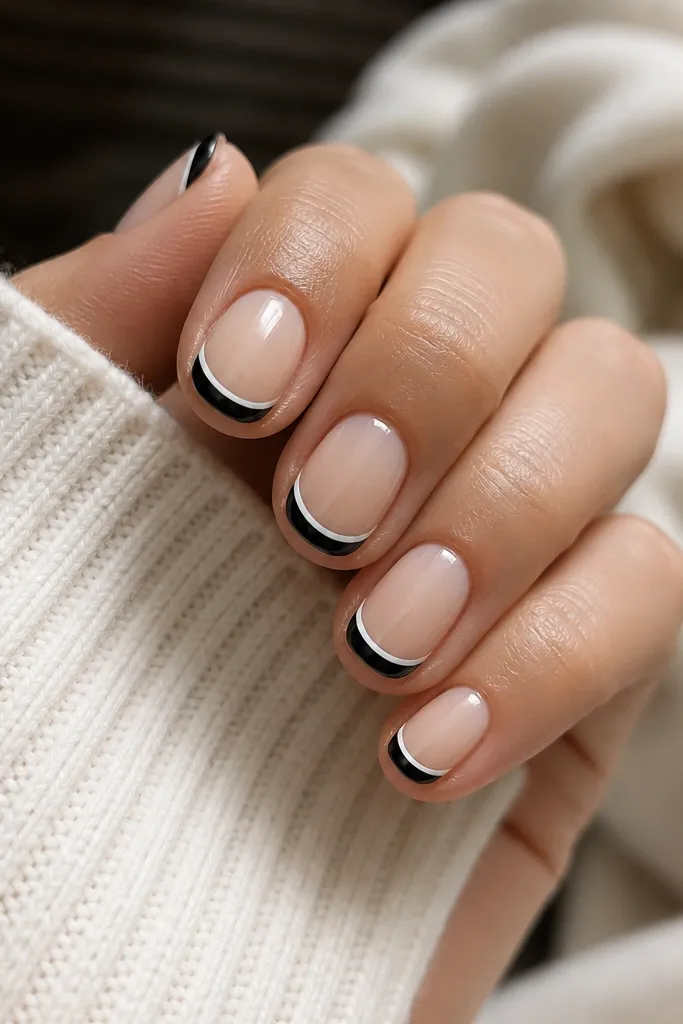
This reads like a classic french but with a graphic twist. The thin white inner line gives the black tip more structure and stops it from looking like a block. On short nails, the double-edge effect makes the tip look intentional and clean.
Mark your smile line with a french guide or a strip of manicure tape. Paint the black tip and cure/dry. Then add the thin white line with a liner brush, keeping it centered inside the black.
Editor's noteMake the black tip slightly shorter than you think - on short nails, extra tip width makes it look cramped.
Watch outDon't skip the inner white line if you want a polished look; plain black tips can look heavy.
4. Checkerboard accent on two nails
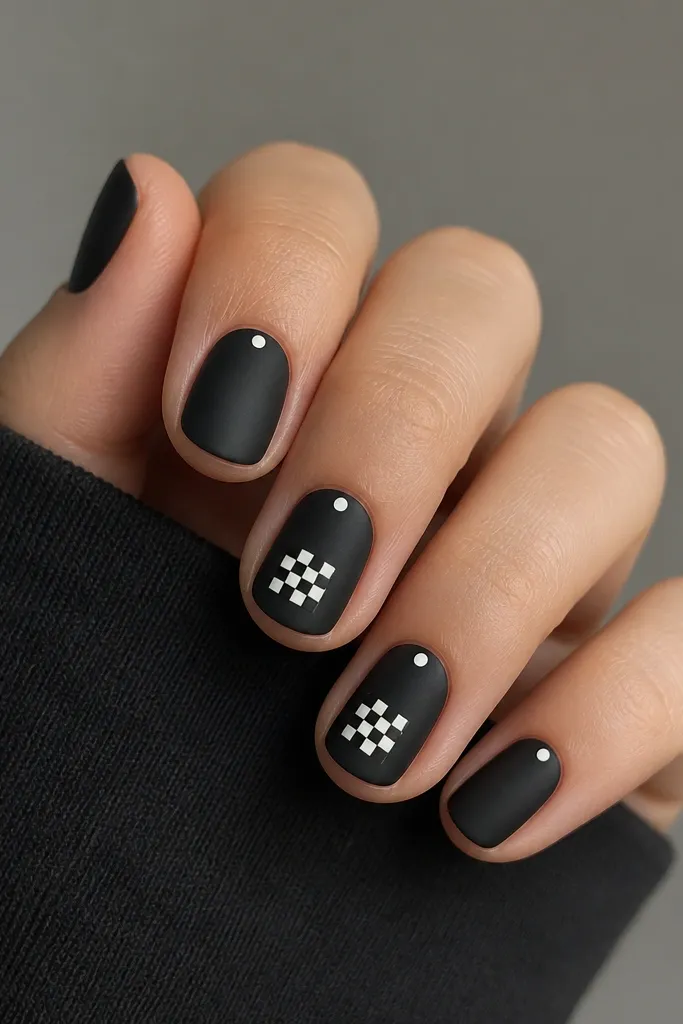
Checkerboard looks playful while still staying graphic. Keeping it to two nails keeps the set wearable and prevents it from shrinking the nail visually. Matte black makes the white squares look sharper and more "printed."
Do matte black on all nails. On two nails, paint a small grid in white and black squares (about 3x3 or 4x4 squares per nail). Finish with a matte top coat on the base and a thin glossy top coat only over the checkerboard squares if you want contrast.
Editor's noteUse nail vinyl squares or cut tiny pieces of tape so your squares stay even.
Watch outDon't cover the whole nail in a big checkerboard - it overwhelms short nail beds.
5. Diagonal split with glossy white triangle
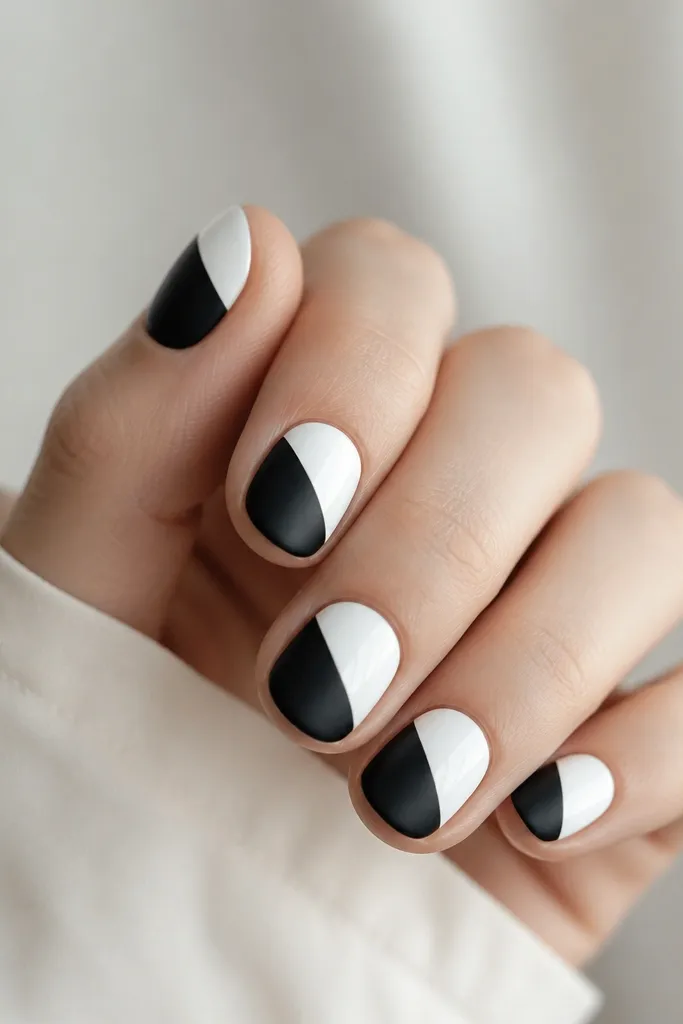
Diagonals create movement and visually lengthen short nails. The glossy white triangle catches light more than matte black, so the design looks crisp even with minimal detail. This one is also forgiving if your lines aren't perfectly symmetrical - the diagonal hides slight wobbles.
Start with matte black on the lower section. Use tape to block the diagonal, then fill the top section with glossy white. Remove tape once the polish is still workable, then clean edges with a small brush dipped in acetone or remover.
Editor's noteAngle the diagonal so it starts near the cuticle on one corner and ends near the tip on the opposite corner.
Watch outDon't round the diagonal edge; soft angles make it look messy.
6. Black and white swirl half-moons
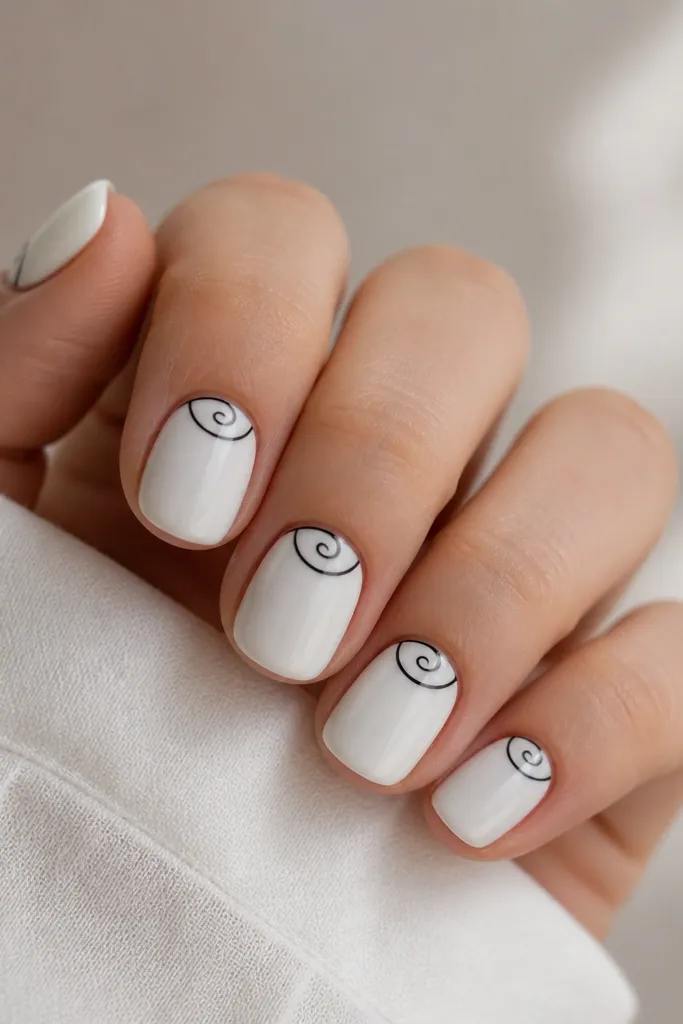
Swirl lines add motion without taking up space. The half-moon near the cuticle anchors the design so it doesn't float away on short nails. A white base keeps everything bright, while black details give the look a graphic edge.
Paint all nails white first. With a liner brush, draw a black half-moon at the cuticle. Then add one thin swirl line inside the half-moon - keep it narrow so it doesn't turn into a blob.
Editor's noteIf you mess up the swirl, wipe just that area with a thin brush and remover, then re-draw while the base is still tacky.
Watch outDon't make the swirl thick; thin lines look intentional on short nails.
7. Micro French in black and white stripes
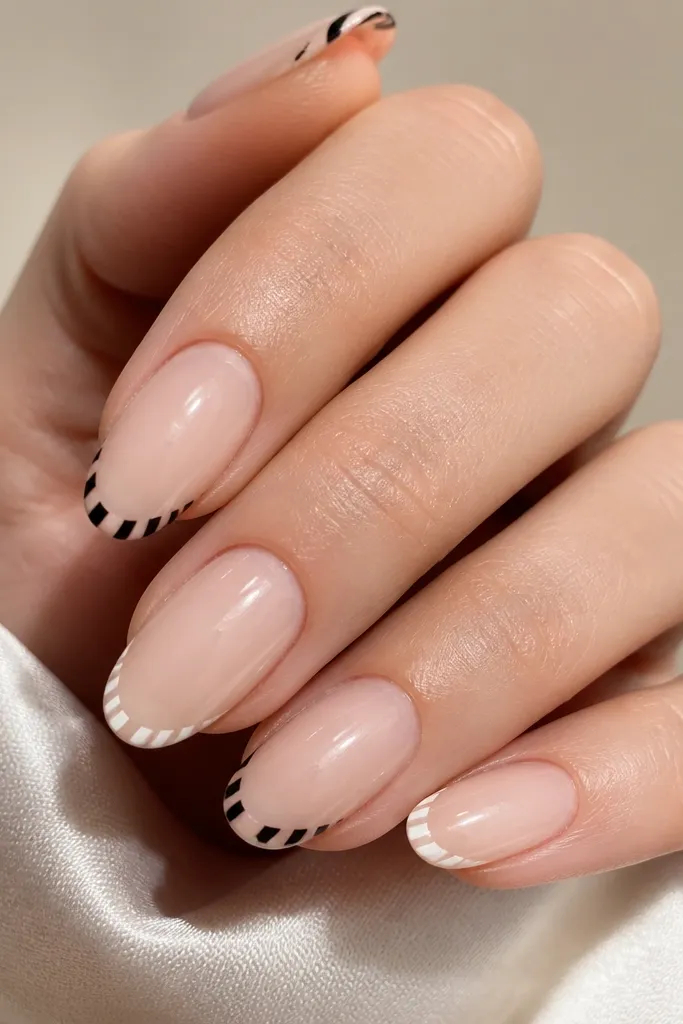
Micro french keeps the pattern small and elegant on short nails. The black line gives contrast, and the white line adds a bright border so the tip looks crisp in close-up. This is perfect when you want something formal but still modern.
Use a nude base and let it fully dry. Paint a very thin black smile line first. Add a second, even thinner white line just inside the black, leaving a tiny gap so both colors stay readable.
Editor's noteUse a strip of nail tape to map the smile line - remove it before the polish sets.
Watch outDon't make the lines too thick; thick micro-french turns into a blunt bar.
8. Solid white nail with black dot cluster
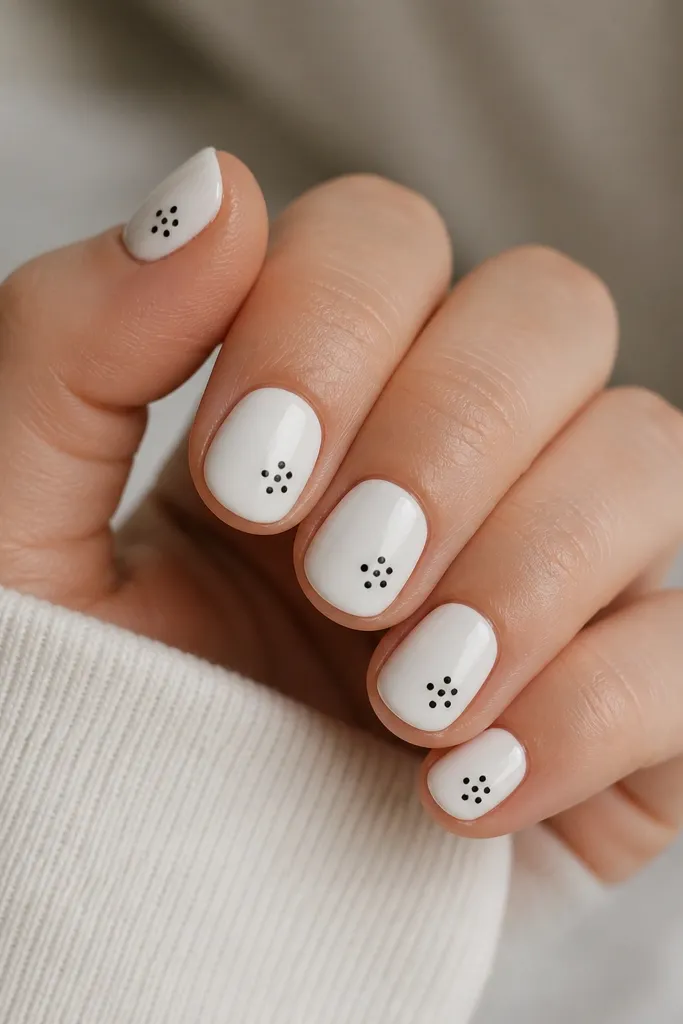
A white base makes the design feel clean and fresh, and the dot cluster gives it a playful, artful center point. Dots are a reliable way to add detail on short nails because you can control the size precisely. Keep the cluster small so it doesn't take over the nail surface.
Paint nails glossy white and cure/dry. Use a dotting tool to place 4-6 black dots in a tight group near the center. Add a top coat that won't smear the edges of the dots.
Editor's notePress the dotting tool lightly - too much pressure makes oval dots.
Watch outDon't spread dots across the entire nail; short nails need one focal cluster.
9. Black base with white negative-space bow
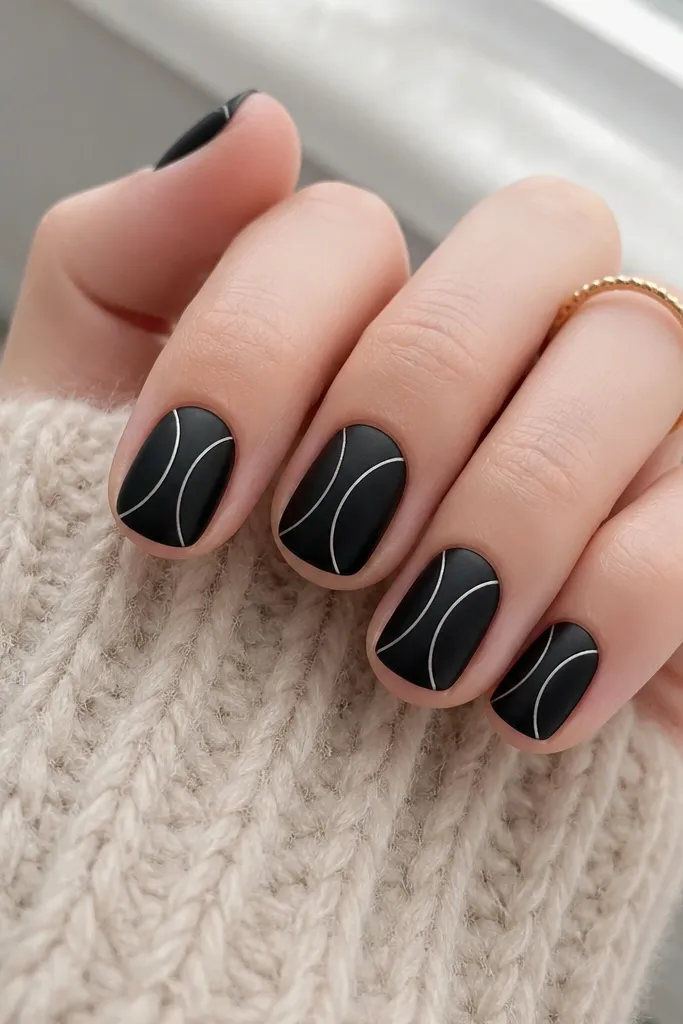
This bow design looks like a graphic illustration because the center stays black. Negative space keeps it light, so it doesn't look bulky on short nails. Matte black makes the white bow lines look crisp and more "printed."
Start with matte black. Use a liner brush to draw two curved loops and a small center line where the bow knot would be. Leave the center area black so you get that clean bow silhouette.
Editor's noteDo the left loop first, then line up the right loop to match height before you add the knot line.
Watch outDon't fill the bow center with white; the negative space is what makes it look sharp.
10. Split nail with black outline border
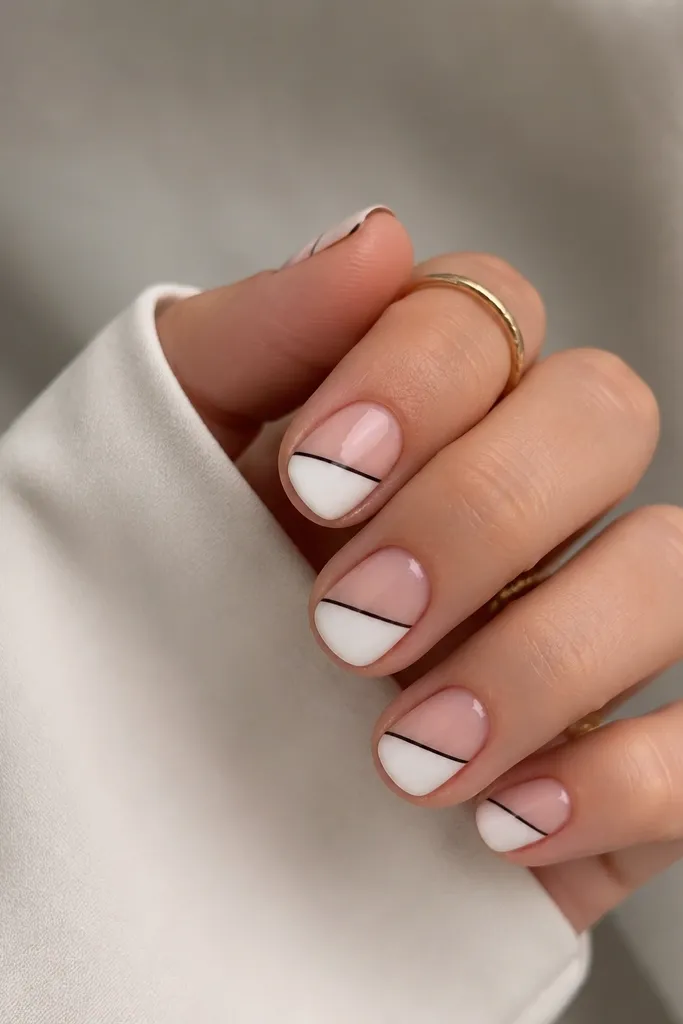
The border makes the shape look designed rather than hand-drawn. White fills the main section so it reads bright, and black outlines keep the edges crisp. On short nails, outlined shapes help the design stay legible even at a quick glance.
Paint a sheer nude layer first. Add a diagonal white fill using tape, then outline the edges in thin black. Remove tape before the white fully sets so the outline doesn't crack.
Editor's noteOutline with a liner brush, not a regular brush - regular polish brushes make thick uneven borders.
Watch outAvoid skipping the outline; a white diagonal without a border can look washed out.
11. White marble lines on black tips
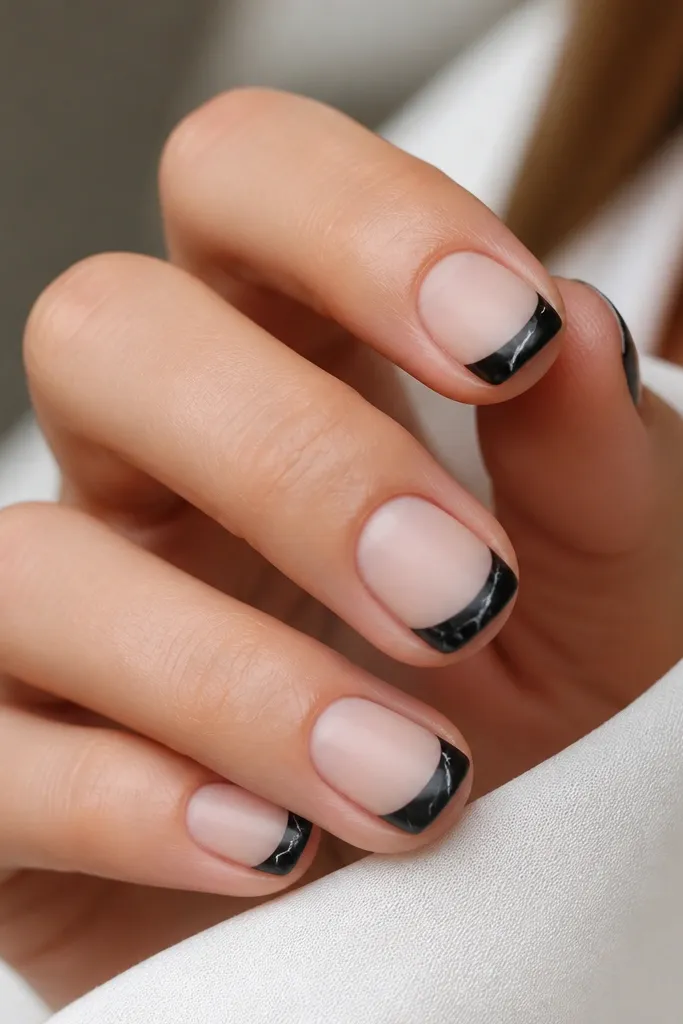
Marble lines stay elegant when you keep them thin and limited to the tip area. Matte black gives the marble a gritty, modern look, and the white veins keep it from feeling flat. This design looks like nail art even when it's only three or four lines per nail.
Paint nude base and seal. Create black tips in a french shape. Add white marble veins with a liner brush: 3-5 thin lines that branch once, then stop before reaching the sidewalls.
Editor's noteWipe your liner brush on a paper towel so the white goes on semi-transparent - that's how veins look real.
Watch outDon't cover the entire tip in thick white swirls; it turns into chalky smudges.
12. Black and white stripe gradient tip
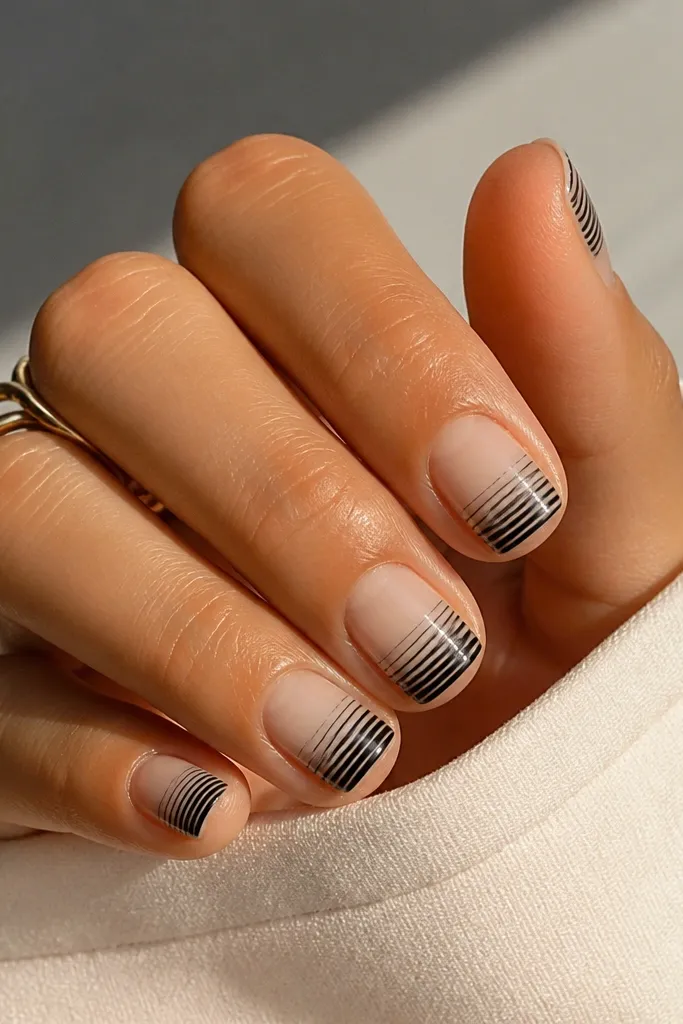
A striped fade looks more dynamic than a flat tip, and it fits short nails because the effect stays at the tip. The white edge catches light, and the black mid-tip grounds it. Keep stripes thin so the fade stays smooth instead of banded.
Paint a white tip first, then add black just above it using a sponge for the fade. While it's slightly tacky, drag a liner brush lightly across to create thin horizontal stripes. Finish with a glossy top coat to blur the transitions.
Editor's noteUse a makeup sponge for the fade, but keep the sponge barely wet - you want a soft gradient, not a speckled mess.
Watch outDon't make the stripes thick; thick stripes on short nails look chunky.
13. Black and white checker half-moon
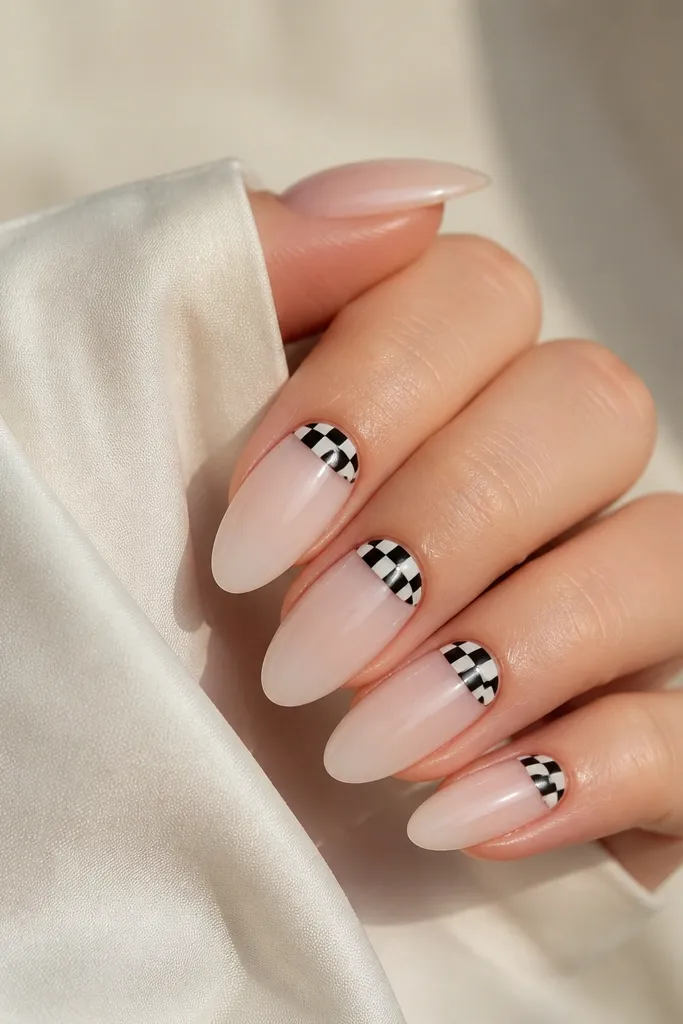
This is the checkerboard trick, but anchored at the cuticle so it elongates the nail. Small squares stay cute and don't overpower short nails. The rest of the nail is clean white, so your hands look tidy even in a busy outfit.
Paint nails white. Add a black half-moon at the cuticle edge. Fill the half-moon with tiny squares using a dotting tool and liner brush, or use pre-cut nail vinyl squares if you have them. Seal with a top coat that levels the surface.
Editor's noteIf your squares look uneven, fix it by outlining the half-moon edge with a thin white line after the checker is dry.
Watch outAvoid big squares; they look too bold on short nail beds.
14. Bold black nail with white side stripe
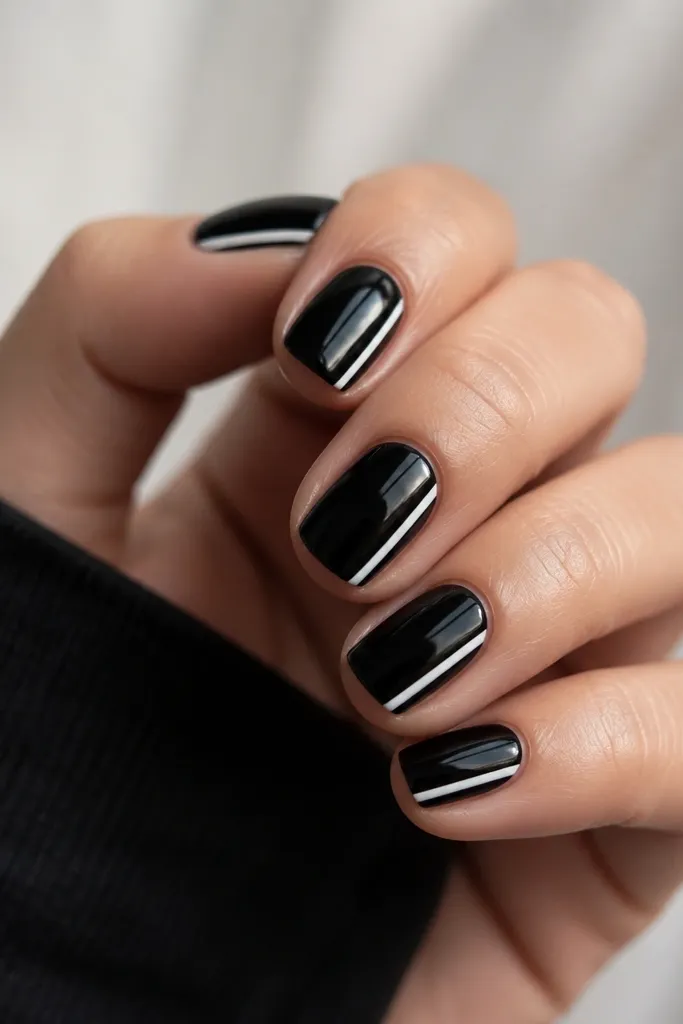
Side stripes add length without covering the nail's whole width. It looks graphic and modern, especially with a glossy black base that reflects light. White on the side also makes your fingers look slimmer because the contrast sits along the edge.
Paint solid black and let it level. Place a white stripe about 1/8 of the nail width on one side, starting just off the cuticle line. Use a liner brush to keep it straight, then top coat glossy.
Editor's noteKeep the stripe a hair away from the sidewall so it doesn't flood onto the skin.
Watch outDon't place the stripe dead-center; center stripes can make short nails look wider.
15. French tip with black outline and white fill
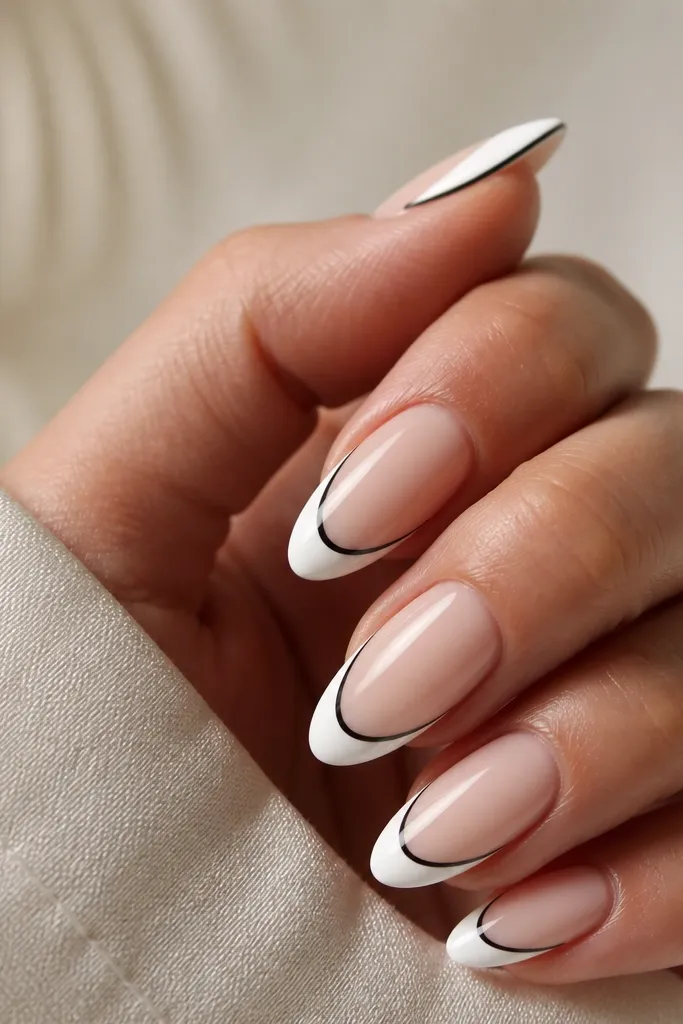
This looks crisp because the black outline defines the french shape. On short nails, a defined smile line keeps the tip from blurring into the nude base. The white fill stays bright and clean, while the outline adds contrast without extra length.
Paint a nude base, then create a white french tip using tape or a guide. Once the white is dry, outline the smile line in thin black with a liner brush. Seal with top coat, and check the side edges for any thick black pooling.
Editor's noteOutline right after the white dries to avoid the black dragging through the polish.
Watch outAvoid thick outlines; they make the french look like a sticker.
16. Black and white yin-yang mini
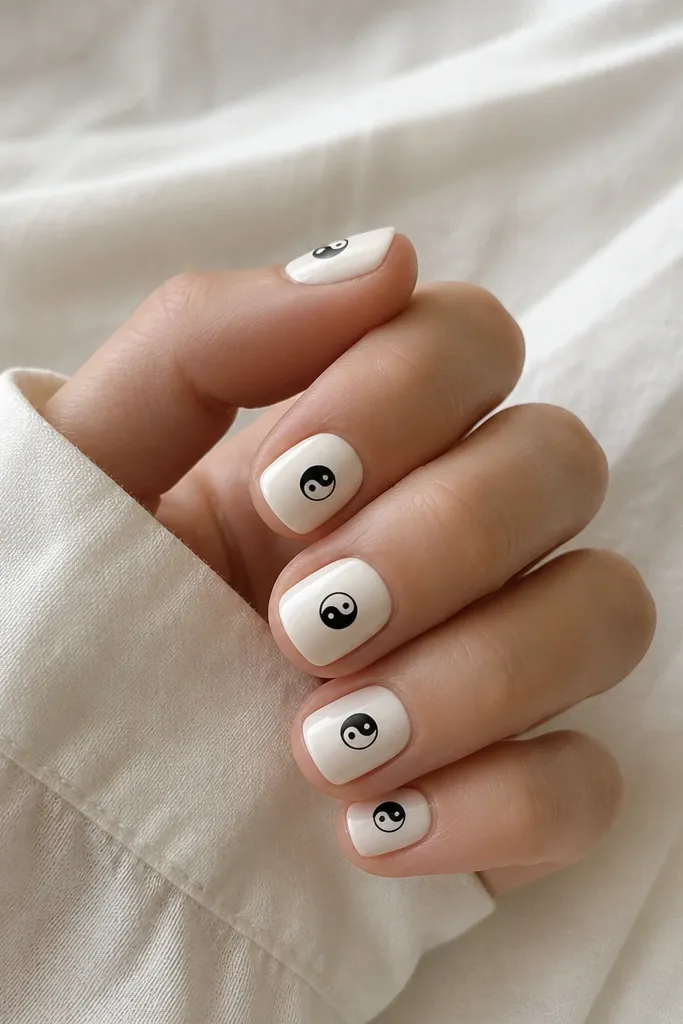
The yin-yang reads like a tiny charm, and the size matters. Keeping it small makes it fit short nails without stealing the whole nail. The two dots also add balance, which is why the design looks intentional instead of random.
Paint the nail white. Use a dotting tool to place two half-circles or a single yin-yang outline, then fill the black half. Add the two tiny dots at the center and cure/dry fully before top coat.
Editor's noteUse a dotting tool tip size matched to your nail - too large and it turns into a blob.
Watch outDon't put yin-yang near the cuticle; keep it centered so the symbol looks like it belongs.
17. Matte white nails with black glossy cross
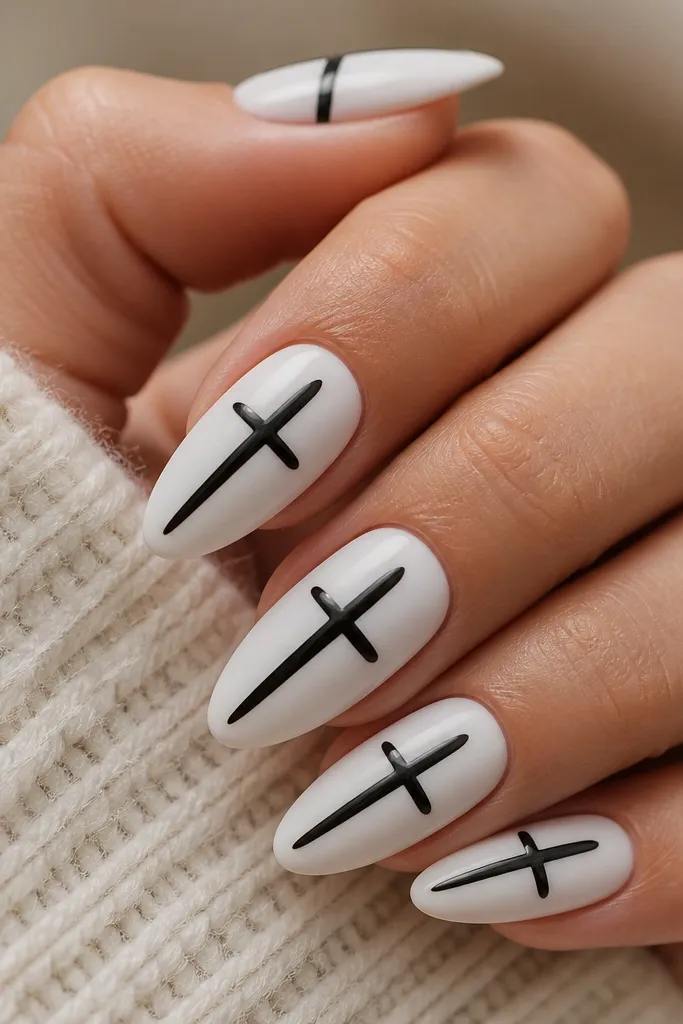
Matte base plus glossy detail looks sharp because the texture contrast is obvious. The cross is simple, but it changes the whole vibe when the lines are thin and even. This one is clean enough for everyday and bold enough for night plans.
Paint matte white and let it fully set. With a liner brush, draw two thin glossy black lines crossing at the center. Keep the cross arms short, about half the nail length, so it doesn't look like a plus sign taking over the nail.
Editor's noteIf your black line looks streaky, do two passes - don't try to fix it in one thick coat.
Watch outAvoid thick lines; matte surfaces make thick polish look rough.
18. Black splatter with white base
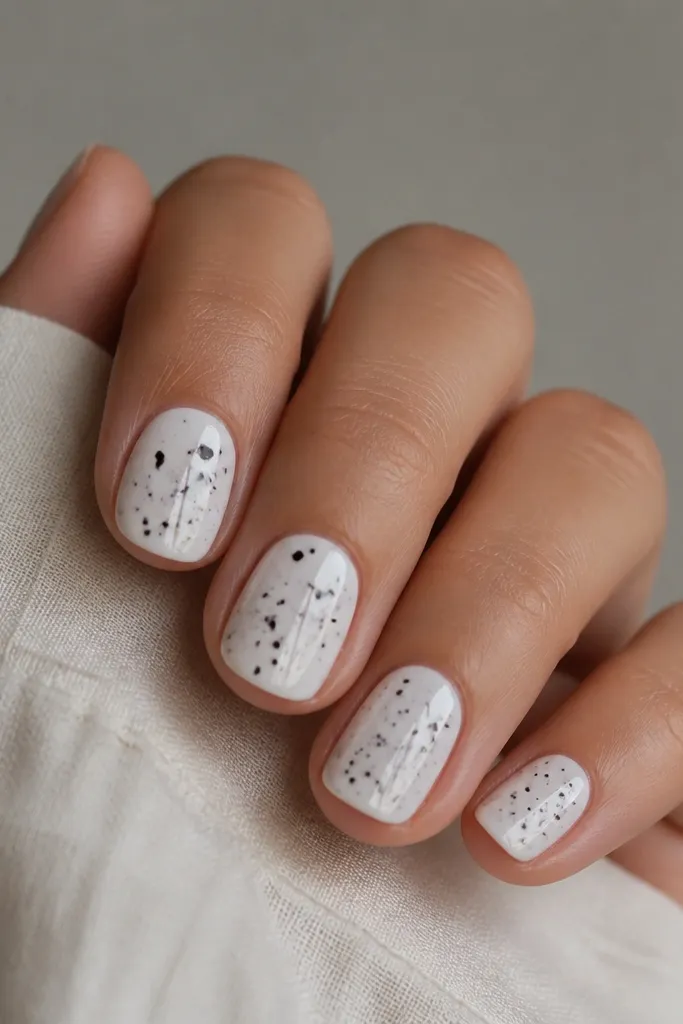
Splatter gives you a textured look without needing fine detail. White base keeps it bright and makes the black splatter stand out. The trick is controlling the density so it looks like art, not mess.
Use glossy white first so the splatter sits on top. Flick black polish from a small brush to create dots and micro streaks. Focus splatter on the center third of the nail, then lightly tap once for a few extra flecks near the tip.
Editor's notePractice on a spare nail tip or paper first so you learn how far to flick.
Watch outDon't cover the whole nail evenly; short nails need a focal area.
19. White nail with black half-foil stripe
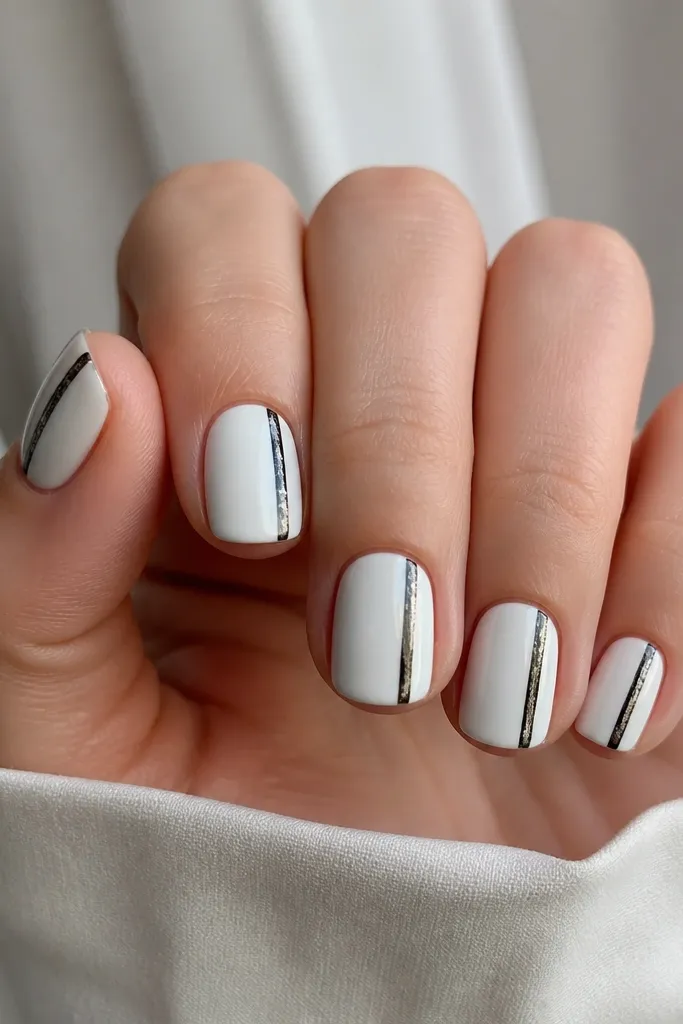
Foil chrome makes black and white look expensive because it reflects in a different way than regular polish. Keeping it as a thin vertical stripe preserves the length illusion on short nails. The white base makes the foil stand out without looking heavy.
Paint glossy white. Apply black foil or chrome gel stripe with a liner brush or strip applicator, keeping the width narrow. Press and seal according to your foil product instructions, then top coat carefully to avoid dulling the shine.
Editor's noteIf the stripe looks streaky, add a second thin foil layer instead of thickening one pass.
Watch outAvoid using a wide chrome stripe on short nails - it makes the nail look blocky.
20. Black and white stripe ladder tips
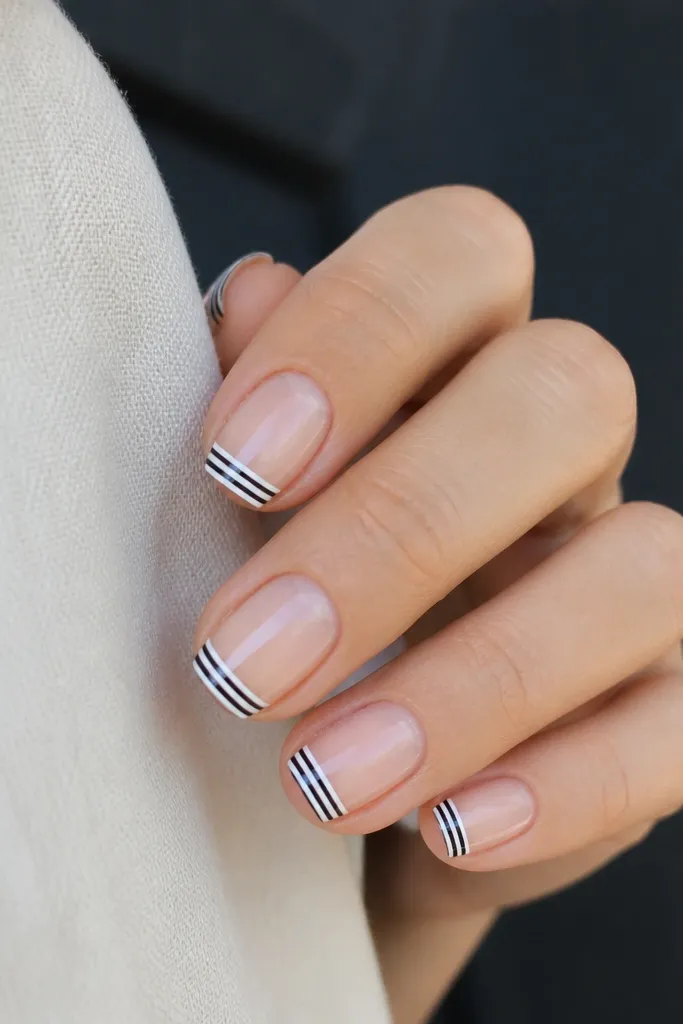
Ladder tips create a structured, almost architectural look. Because the stripes are packed at the tip, your nail reads longer and cleaner. The alternating black and white keeps it from feeling flat, even with short length.
Tape off a french tip area first. Paint alternating stripes inside the tip using a liner brush; aim for equal widths. Let it dry between colors if needed, then remove tape and top coat glossy.
Editor's noteCount stripes as you paint (1-2-3-4) so you don't accidentally uneven spacing across nails.
Watch outDon't freehand the stripes without a guide; uneven spacing shows fast on short nails.
21. Black ombre base with white top edge
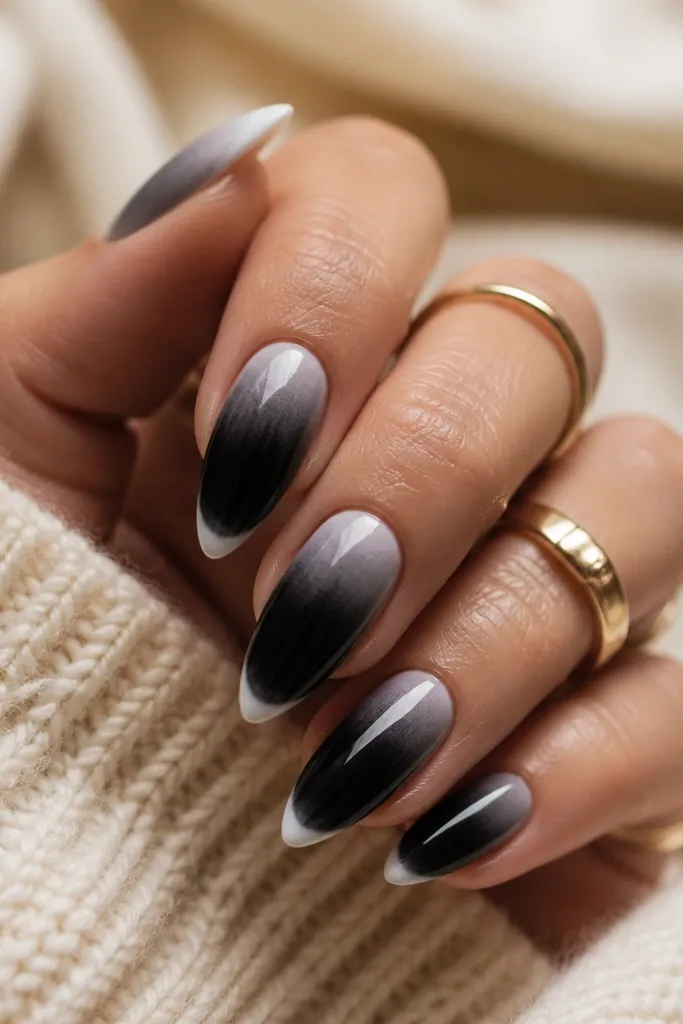
The ombre creates depth, and the white border gives the look a clean finish. The fade keeps the black from looking harsh, which matters on short nails. The micro border line at the tip makes it feel designed instead of accidental.
Start with nude or sheer base. Sponge black starting from the tip upward, blending until it lightens near the cuticle. Then paint a thin white line across the tip edge to lock the design in place.
Editor's noteUse a small sponge cut into a wedge so your ombre stays narrow and doesn't flood the sides.
Watch outAvoid hard edges in the ombre; if it looks like a stripe, blend more before it sets.
22. White base with black tiny heart at cuticle
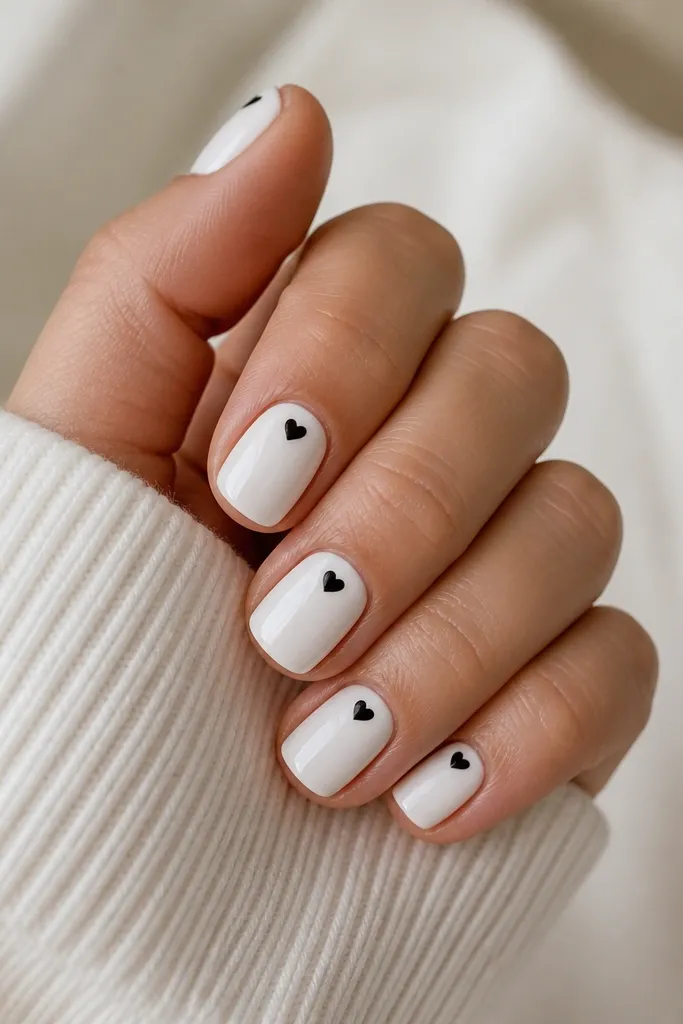
A tiny heart reads sweet without adding length. Putting it near the cuticle keeps the nail looking balanced and stops the design from feeling busy. The glossy white makes the black heart look like a neat sticker.
Paint glossy white. Use a dotting tool to place two small dots for the heart points, then connect them with a liner brush curve and a short bottom stroke. Fill in carefully and seal with a top coat that doesn't flood the heart edges.
Editor's noteIf your heart shape wobbles, outline it first in black, let it dry, then fill.
Watch outDon't make the heart too big; large hearts on short nails look cartoonish.
23. Black and white split with curved tip smile
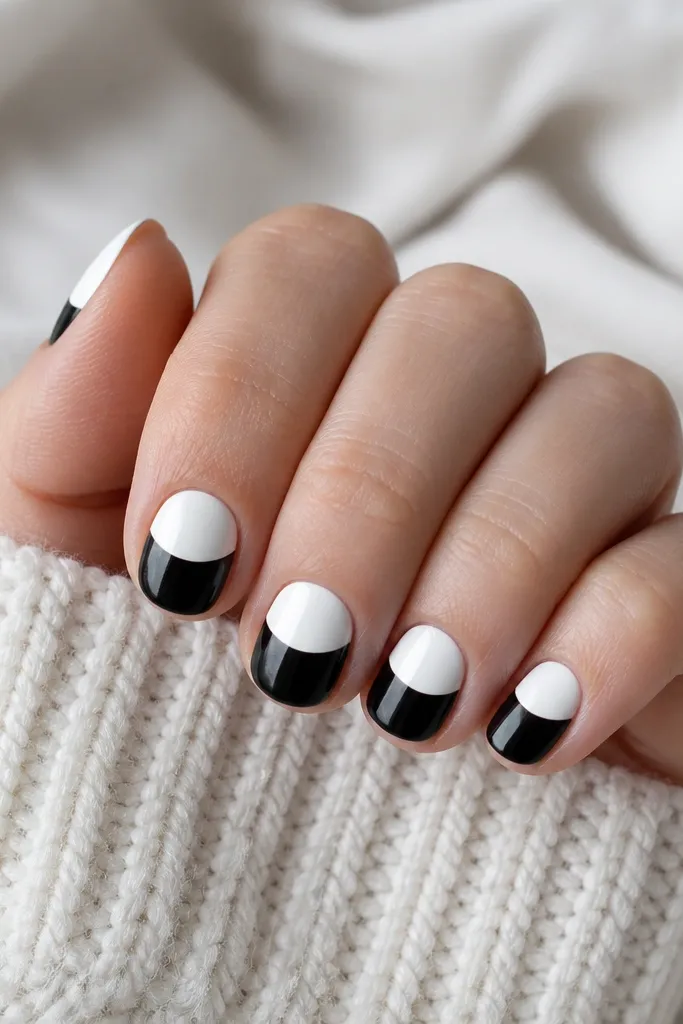
This curved split gives you a french vibe, but with color blocking instead of a border. The curve defines the tip and makes short nails look neat. Black and white split also looks clean in both matte and glossy finishes.
Paint the bottom half black up to a curved guide line. Use tape to block the curve, then fill the top half with white. Remove tape carefully and finish with top coat; glossy makes the split look sharper.
Editor's noteMake the smile curve slightly higher than you think; it balances the nail width on shorter lengths.
Watch outAvoid a straight line split; it can look harsh on small nails.
24. Black micro stripes across white half
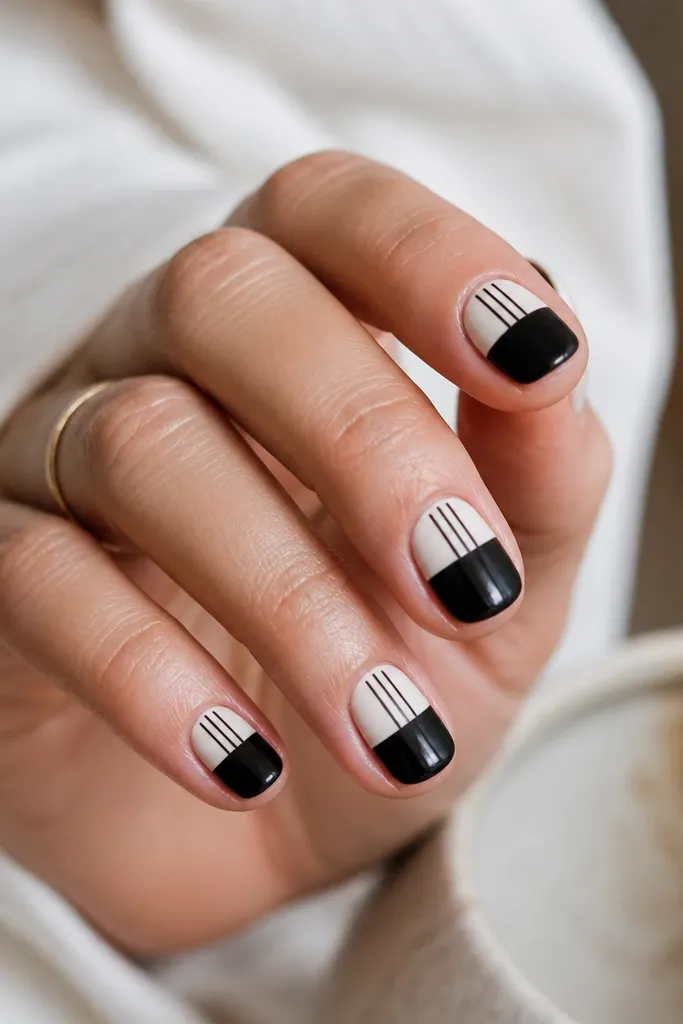
Micro stripes on only one half keep the design from feeling busy. The white half is your canvas, and the black stripes add texture and movement without needing extra art. This works well when you want something graphic but still tidy.
Tape a horizontal split so the top half is white and the bottom half is black. Paint the white half, then add 3-4 thin vertical stripes with a liner brush. Keep stripes evenly spaced, then top coat.
Editor's noteDo one nail at a time so you can place stripes while the white surface is smooth and not too dry.
Watch outDon't add stripes across the black half; it crowds short nails fast.