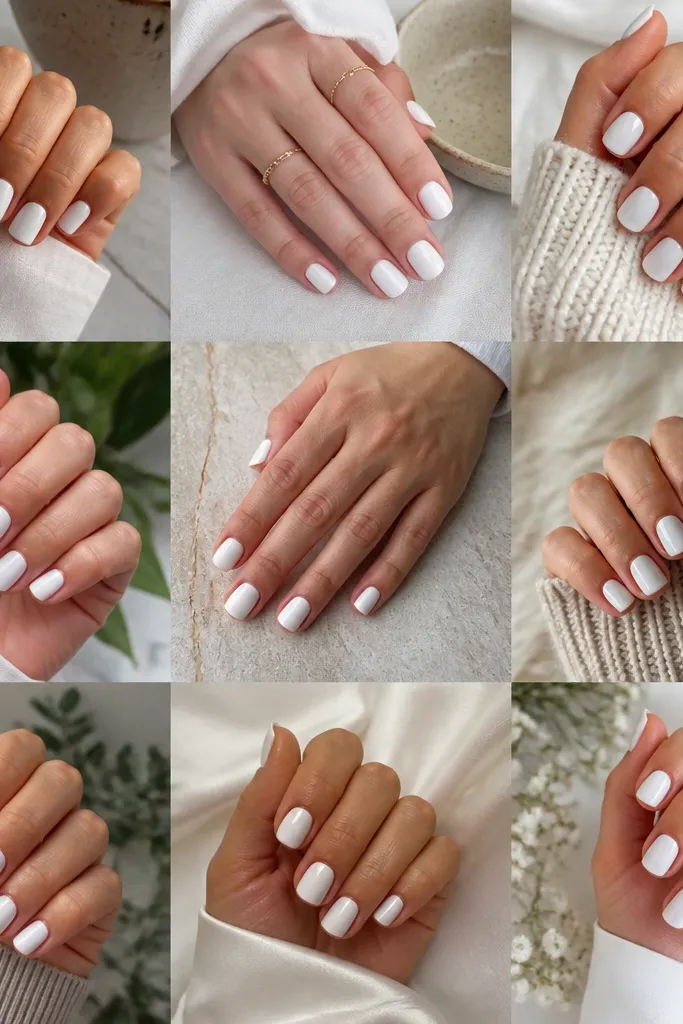
1. Milky Nude French Ombre with Mirror Chrome Tip
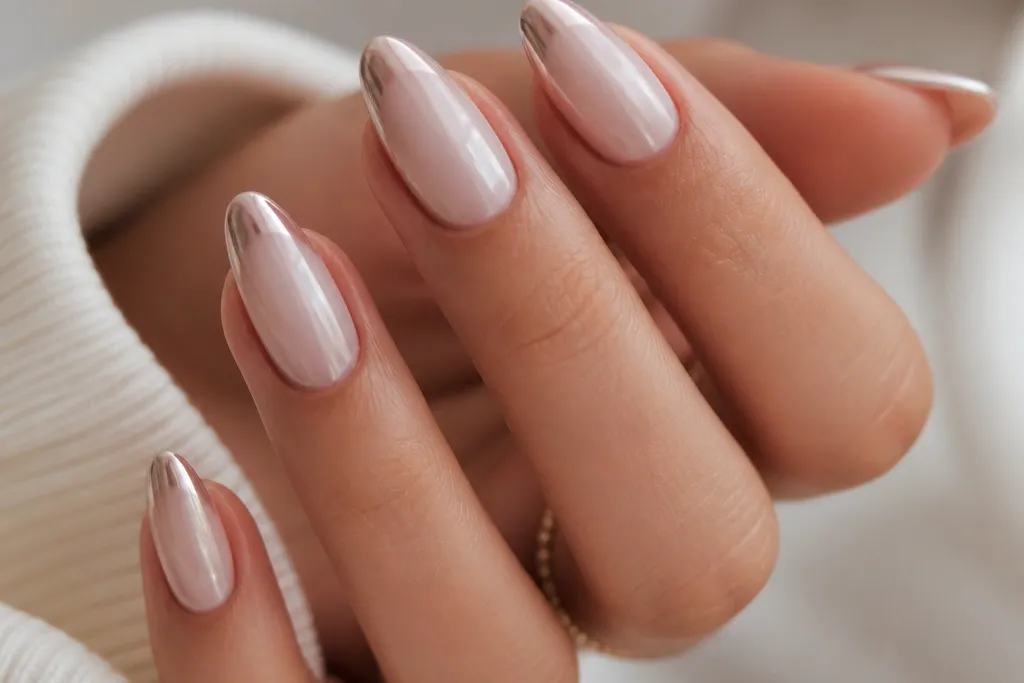
This is the one I reach for when I want low maintenance ombre chrome nails that look fresh even after chores. The milky nude base flatters most skin tones because it sits close to your natural nail color, and the gradient stays light enough that your nail bed still reads healthy. Mirror chrome on just the tip gives maximum shine without covering the whole nail, so any tiny texture doesn't scream. Wear it for workdays, date nights, or photos where you want that "clean French" vibe without harsh white.
Start by applying a milky nude base gel and curing fully. Paint a solid arc band of your tip shade at the free edge, then blend it upward about 2 mm with a tapered ombre brush using gentle pressure. Cure again, then apply chrome gel only over the ombre fade zone and press mirror chrome powder in a thin, even layer. Brush off excess, then seal with a thin topcoat, focusing extra on the tip edge so it doesn't lift.
Editor's noteFor a sharper French look, keep the chrome coverage limited to the top half of the fade, not the whole gradient.
Watch outDon't smear chrome gel across the cuticle area or the grow-out line will look messy fast.
2. Rose Quartz French Ombre with Pearl Chrome Glow
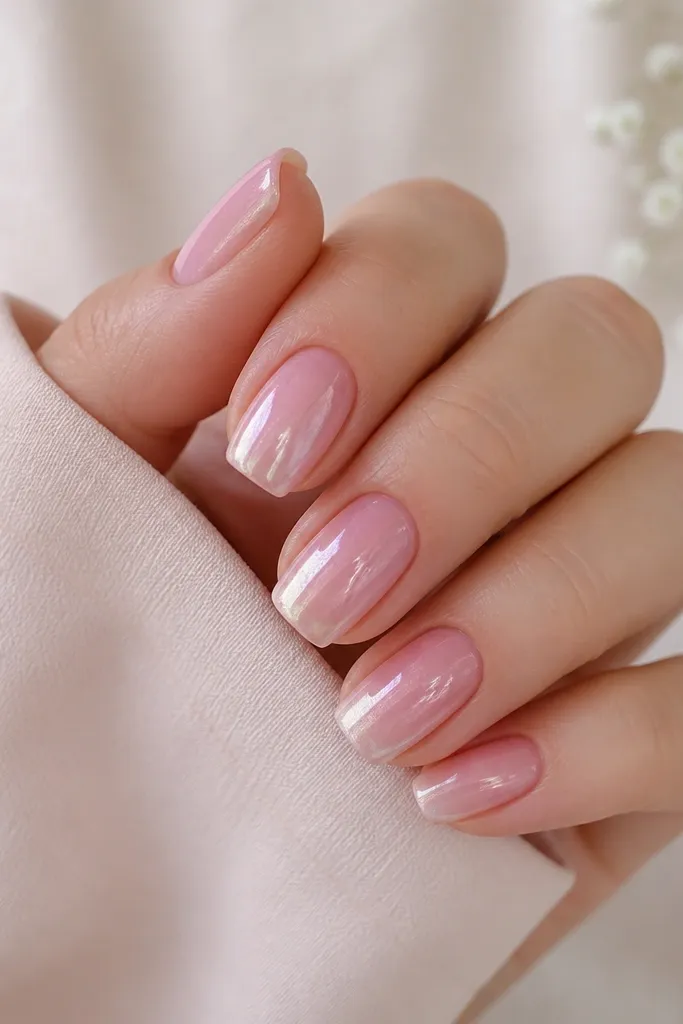
Pearl chrome is forgiving, and this one flatters anyone who hates harsh shine. The rose quartz base looks good on warm and cool undertones because it's balanced - not too orange, not too purple. The ombre stays airy, so your nails don't look heavy, and the pearl chrome makes the nails look smoother even if you have slight ridges. This is also a great pick for short nails because the fade gives length without needing extra width.
Apply a rose-pink base gel and cure. Create a French-ombre tip using two shades: a slightly darker blush at the very edge, then blend upward 1.5-2.5 mm with a clean ombre brush. Cure hard, then use chrome gel over the blended tip area only. Press pearl chrome powder lightly, then seal with a thin topcoat to keep the glow intact.
Editor's noteUse a fluffy makeup brush to dust off excess chrome before topcoat so it doesn't turn gritty.
Watch outSkip mirror chrome on first attempts; it shows uneven blending more than pearl does.
3. Icy White French Ombre with Steel Chrome Edge
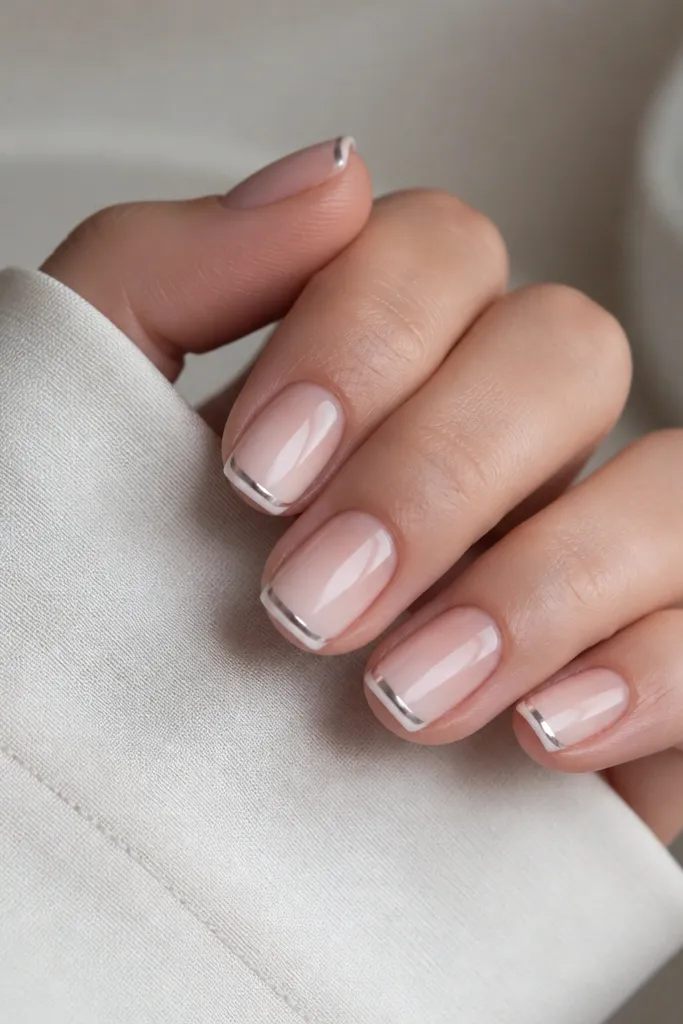
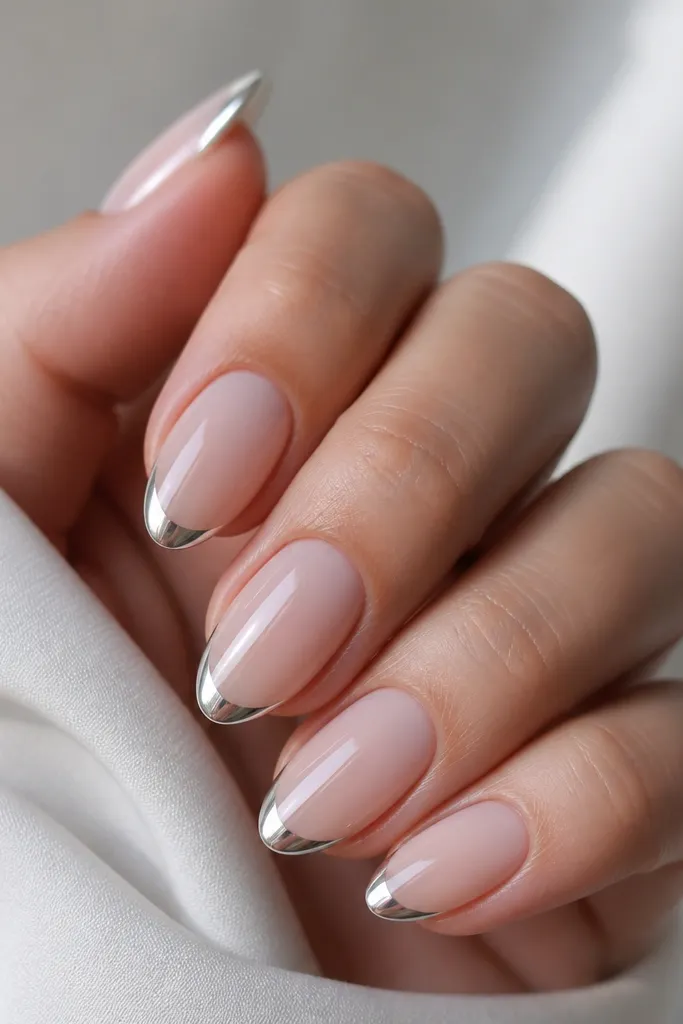
If you want a cool-toned French that still looks soft, this one nails it. The icy white tip shade reads bright without looking stark, and the translucent base keeps it from washing out your skin. The steel chrome edge adds definition - it frames the fade so it looks intentional, even when your nails grow out. This is great for fair skin, cool undertones, and winter photos where everything looks crisp and clean.
Start with a translucent pink base and cure. Paint icy white at the extreme tip as a narrow band, then blend upward slowly until it fades into the base over about 2 mm. Cure, then apply a thin stripe of chrome gel only along the upper edge of the ombre, not the whole gradient. Press steel chrome powder, brush off, and seal with a thin topcoat that stays glossy.
Editor's noteWhen you blend, wipe your brush on a lint-free wipe between strokes so the white doesn't turn chalky.
Watch outDon't bring the icy white too far down; it makes the nail bed look shorter.
4. Champagne Nude French Ombre with Gold Mirror Chrome
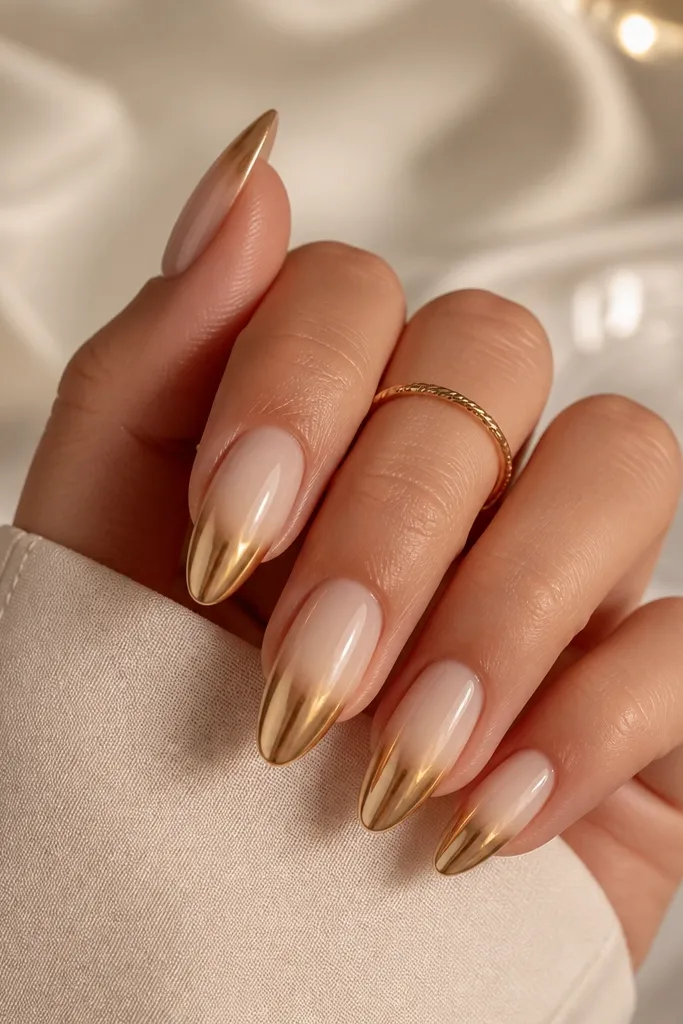
Warm undertones love this because the champagne nude base looks like healthy skin, not makeup. The gold mirror chrome on the tip gives that holiday-bright shine, but keeping it to the French zone keeps it low maintenance. It also looks great with gold jewelry because the undertone matches instantly. I've worn this to brunch, and even when my hands are wet all day, the chrome still looks clean because it isn't spread over the whole nail.
Apply a champagne nude base gel and cure. Paint a creamy tip shade at the edge, then blend upward 2-3 mm so it stays light and smooth. Cure, then apply chrome gel only in the top quarter of the ombre fade. Press gold mirror chrome, remove excess, and seal with a thin glossy topcoat, especially along the sides.
Editor's noteGold chrome looks best when your base is slightly warm; don't pair it with a cool pink base.
Watch outAvoid thick topcoat over gold mirror chrome; it dulls the reflective finish.
5. Milky Lavender French Ombre with Silver Pearl Chrome
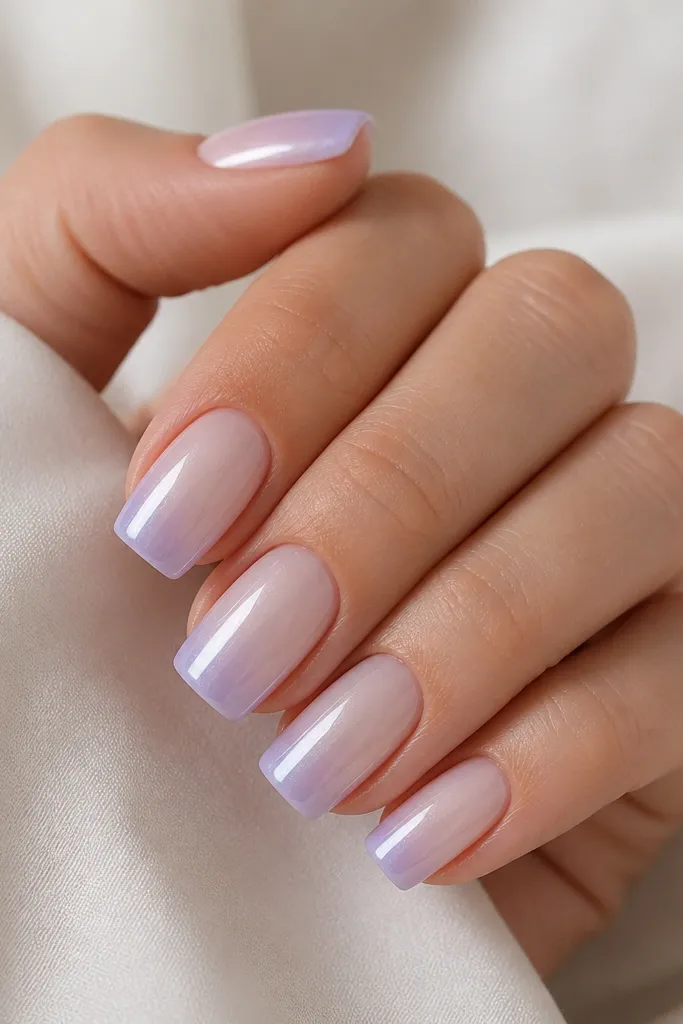
This is my go-to when I want something different from plain nude but still wearable. The milky lavender tip color gives a gentle pop without looking bold, and silver pearl chrome keeps it from turning into a cold, harsh look. It works on both warm and cool undertones because the milky base neutralizes the lavender. It also photographs beautifully because the pearl chrome catches light in a diffuse way instead of mirror reflections.
Start with a milky pale pink base and cure. Paint lavender at the tip as a narrow band, then blend upward about 2 mm. Cure fully, then apply chrome gel over the ombre area and press silver pearl chrome powder. Brush off excess, seal with a thin topcoat, and cap the free edge so it stays smooth.
Editor's noteIf your lavender looks too strong, dilute it by mixing a tiny amount of your base color into the lavender before you paint the tip band.
Watch outDon't skip curing between the ombre and chrome; chrome on under-cured gel looks patchy.
6. Clear Jelly French Ombre with Mirror Chrome Fade
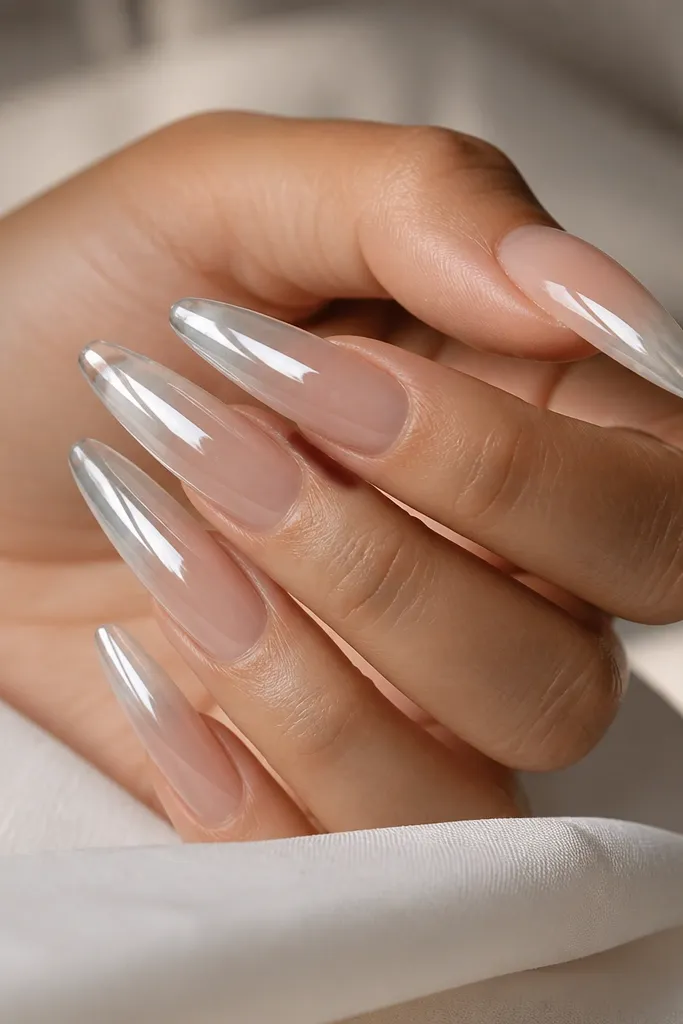
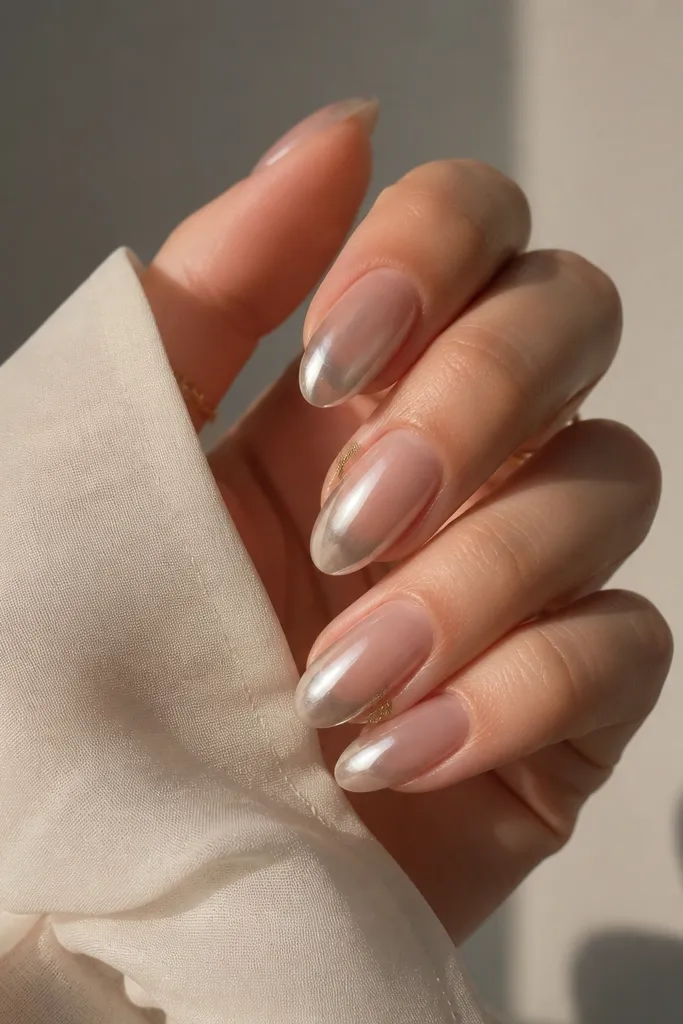
This one looks like "floating chrome" and it grows out the cleanest. The clear jelly base blends with your natural nail, so the boundary between your nail and your design is hard to spot. Mirror chrome over a translucent fade looks icy and expensive, but because the base is clear, it doesn't feel heavy. I use it when I want a manicure that still looks good a week later, even if my nails are shorter.
Apply a clear jelly base gel and cure. Create your French-ombre by painting a translucent white at the tip edge and blending upward with a very light hand, keeping the gradient airy (1.5-2 mm). Cure, then apply chrome gel over the blended tip only and press mirror chrome powder. Seal with a thin topcoat and cap the tip edge so it stays glassy.
Editor's noteUse a light brush and don't load too much product - jelly bases show thick layers fast.
Watch outAvoid applying chrome gel too low on the nail; clear bases show any uneven coverage.
7. Nude-to-Taupe French Ombre with Rose Gold Chrome
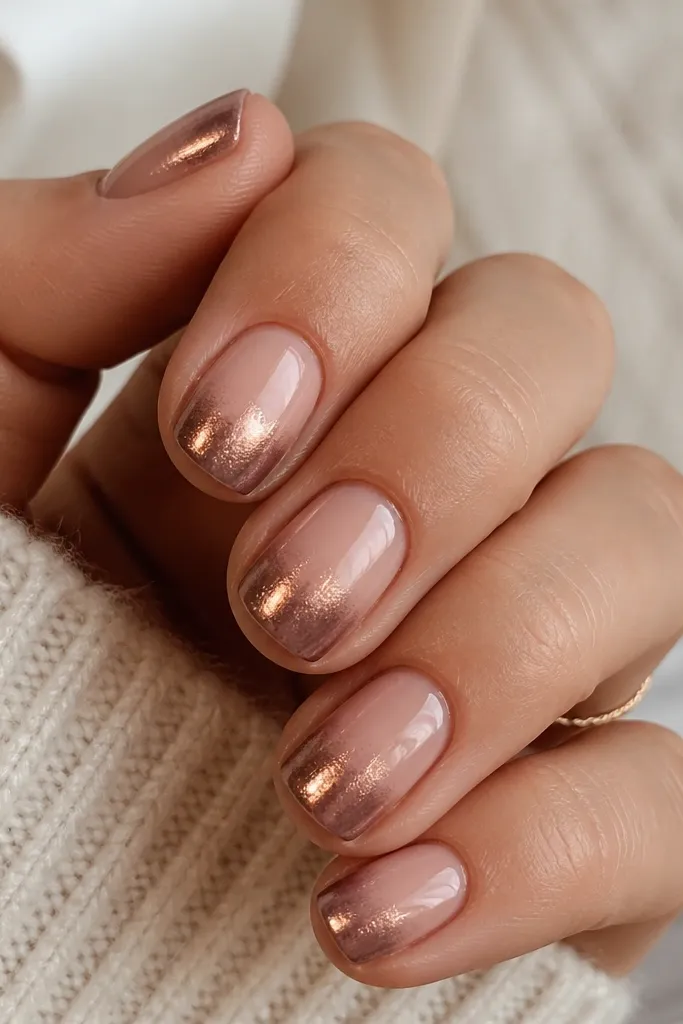
Taupe makes ombre look grown-up, and rose gold chrome keeps it flattering instead of gray. This combo works well if you have medium to deep skin tones because taupe adds depth without looking muddy. The rose gold chrome gives a warm highlight that looks good with both gold and mixed-metal jewelry. It's also low maintenance because the taupe fade hides minor grow-out differences better than bright white.
Apply nude base gel and cure. Paint taupe at the tip as a solid band, then blend upward 2-2.5 mm so it stays smooth. Cure, then apply rose gold chrome gel over the upper half of the ombre fade. Press rose gold mirror chrome, brush off excess, and seal with a thin topcoat, making sure the sides are coated.
Editor's noteIf your taupe looks too cool, add a tiny drop of your nude base to warm it up before you blend.
Watch outDon't let taupe reach the center of the nail - it can make the nail bed look narrower.
8. White French Ombre with Iridescent Chrome Shift
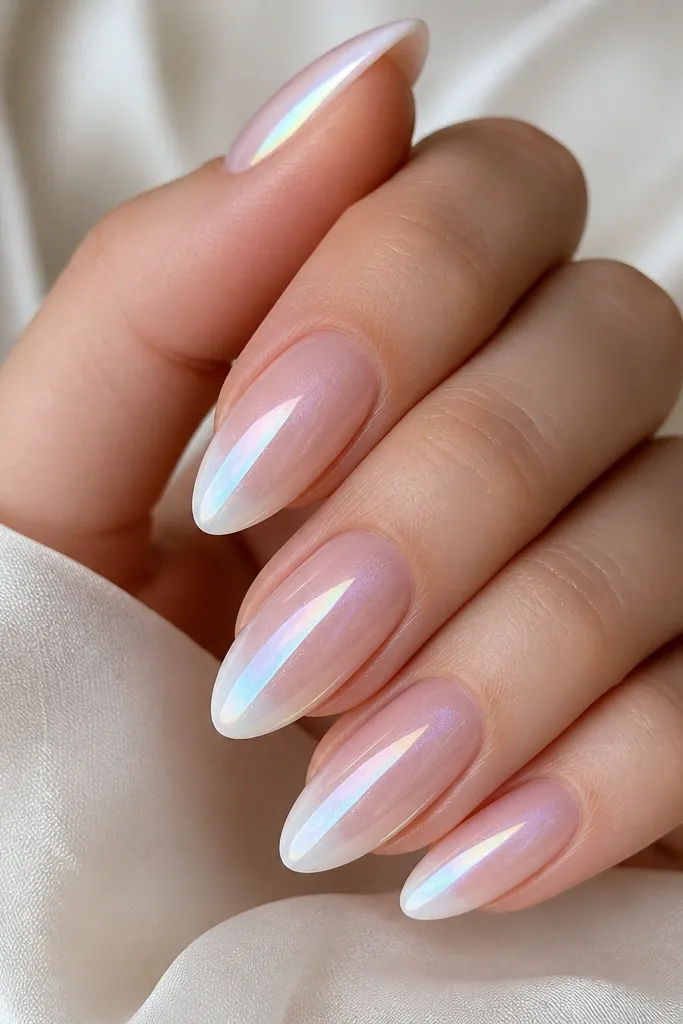
Iridescent chrome is the "I got ready fast" manicure trick because it looks different in every light. The white French ombre gives a crisp foundation, and the iridescent chrome turns it into something special without adding art. This looks great for weddings, parties, and vacation photos because it catches flash and overhead lighting. It's also forgiving on shorter nails because the chrome shift creates visual interest.
Start with a sheer pink base and cure. Paint white at the tip edge as a narrow band, then blend upward 2 mm, keeping the gradient clean. Cure, then apply chrome gel over the fade zone and press iridescent chrome powder. Brush off excess, seal with thin topcoat, and cap the free edge to prevent dull spots.
Editor's noteUse a cool white (not creamy off-white) if you want the iridescence to pop without looking yellow.
Watch outSkip heavy topcoat layers; iridescent chrome dulls quickly under thick sealing.
9. Peach French Ombre with Mirror Chrome Waterline
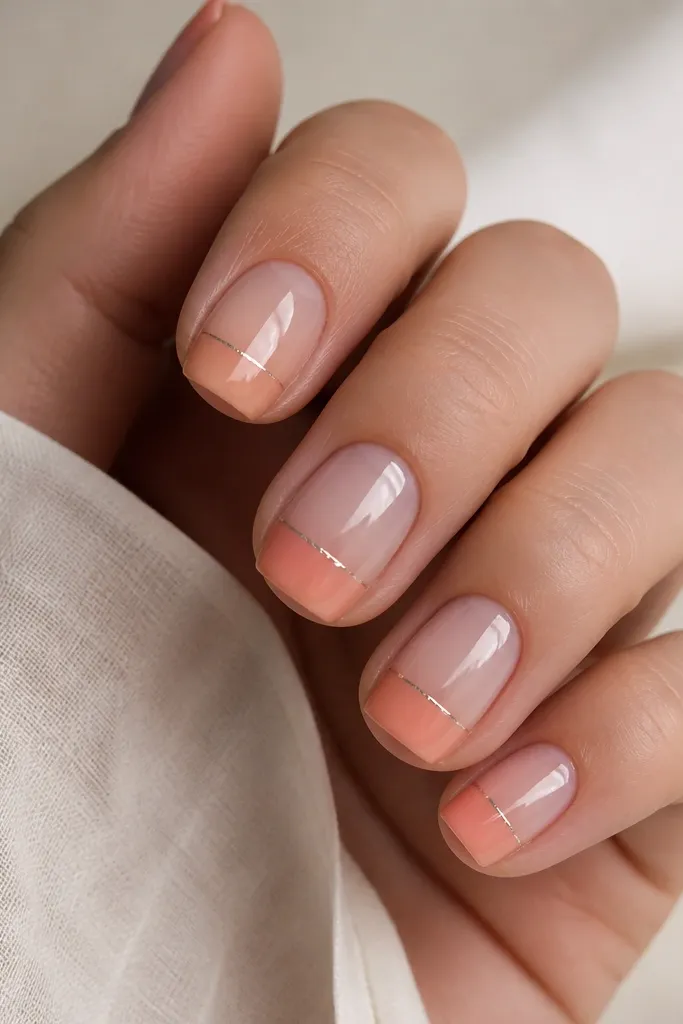
This one is low maintenance because the design has one clear "moment" - a chrome waterline - and the ombre below stays soft. Peach French ombre looks flattering on warm skin tones and also brightens neutral undertones. The chrome line makes the manicure look intentional even if your fade edges aren't perfectly blended. It's a great option when you're learning ombre because you can focus on getting the line straight.
Apply sheer nude base gel and cure. Paint peach at the tip edge, then blend upward about 2-3 mm into milky nude. Cure, then place a thin stripe of chrome gel where you want the waterline, usually around the top third of the ombre fade. Press mirror chrome powder, brush off, and seal with thin topcoat, paying attention to the stripe so it doesn't lift.
Editor's noteUse the nail's natural curve to place the waterline; it should follow the smile line for a clean look.
Watch outDon't make the chrome stripe too thick - thick stripes look chunky and catch on clothing.
10. Blackened French Ombre with Silver Chrome Reverse Fade
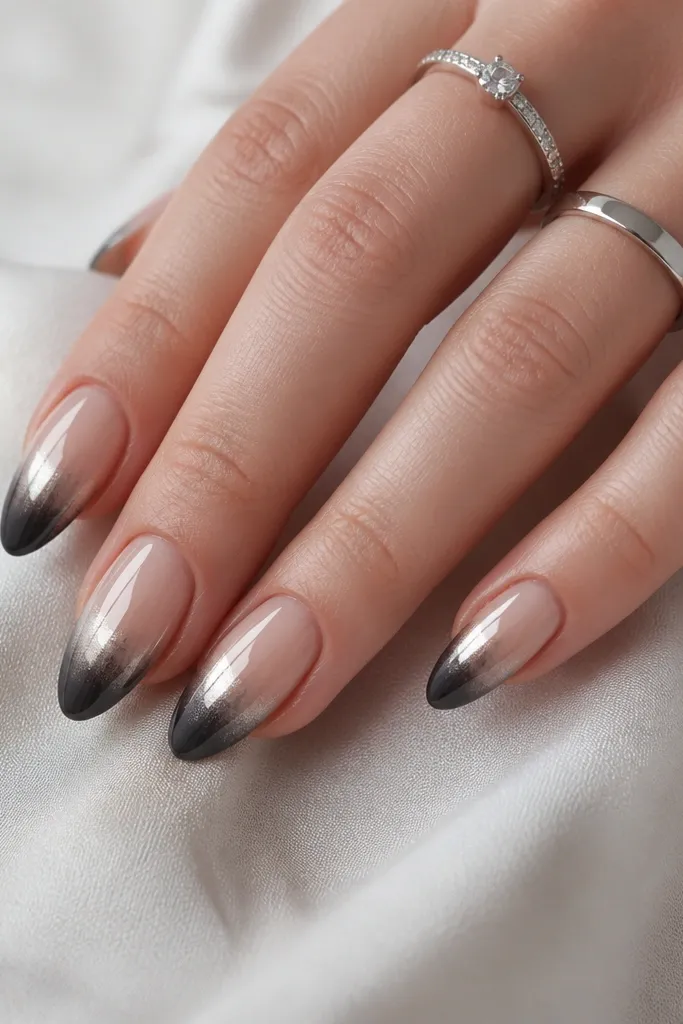
If you want drama that still reads neat, this is the one. The dark French-ombre tip makes your nail shape look sharper, and the reverse chrome placement keeps it looking stylized instead of messy. It flatters deeper skin tones most, but fair skin can wear it too if the base stays sheer nude. This design also hides tiny imperfections because the dark gradient covers small edge mistakes.
Apply sheer nude base gel and cure. Paint charcoal at the tip edge as a solid band, then blend upward 2 mm into smoky gray. Cure, then apply chrome gel only to the upper part of the gradient (not the black edge). Press silver chrome powder, brush off, and seal with a thin topcoat that keeps the shine bright.
Editor's noteFor a cleaner blend, use fewer strokes and let the brush do the work instead of adding more product.
Watch outDon't cover the entire gradient in chrome; it turns into a flat metallic blob on dark shades.
11. Cream French Ombre with Holo Chrome Speckle
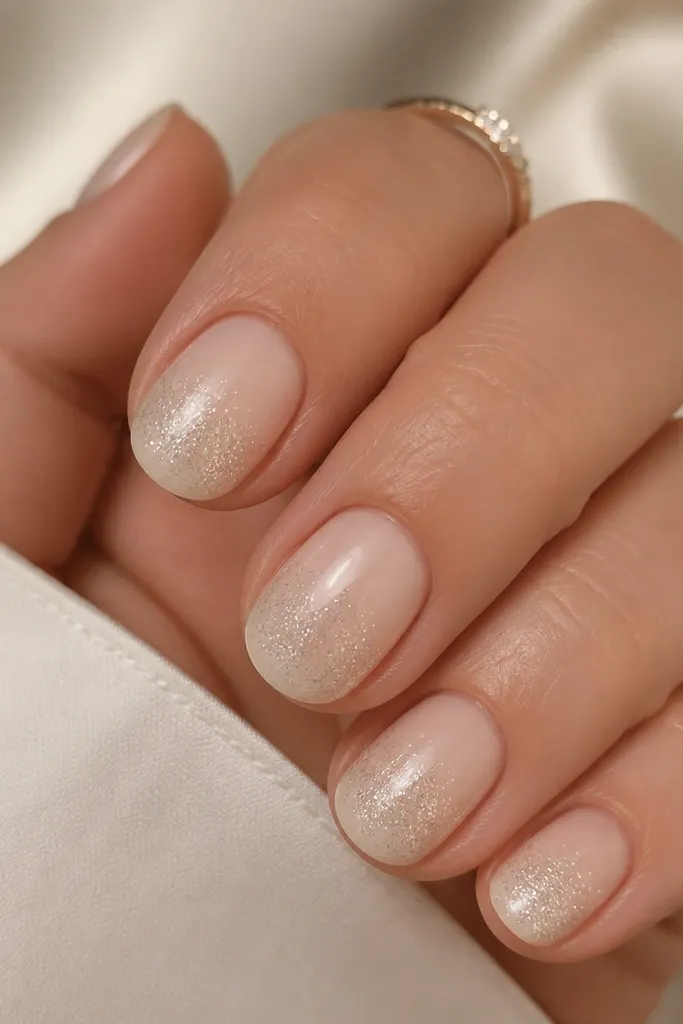
Speckled holo chrome is low maintenance because you don't need full even coverage for it to look good. The cream French ombre keeps the nail soft, and the holographic speckles add that "sparkle in motion" effect when you move your hands. This looks amazing for everyday wear because it doesn't scream for attention but still looks special at arm's length. I like it for people who hate the look of thick chrome layers.
Apply creamy nude base gel and cure. Paint cream at the tip edge, blend upward 1.5-2 mm, then cure. Apply a thin layer of chrome gel only in the top half of the fade, then tap holo chrome powder in small amounts instead of pressing a full layer. Seal with thin topcoat, and keep the brush light so you don't bury the speckles.
Editor's noteUse a light tapping motion with a dense applicator sponge to control speckle size.
Watch outAvoid brushing holo speckles aggressively; it wipes them off and leaves patchy gaps.
12. Blush Pink French Ombre with Rose Chrome Shimmer Top
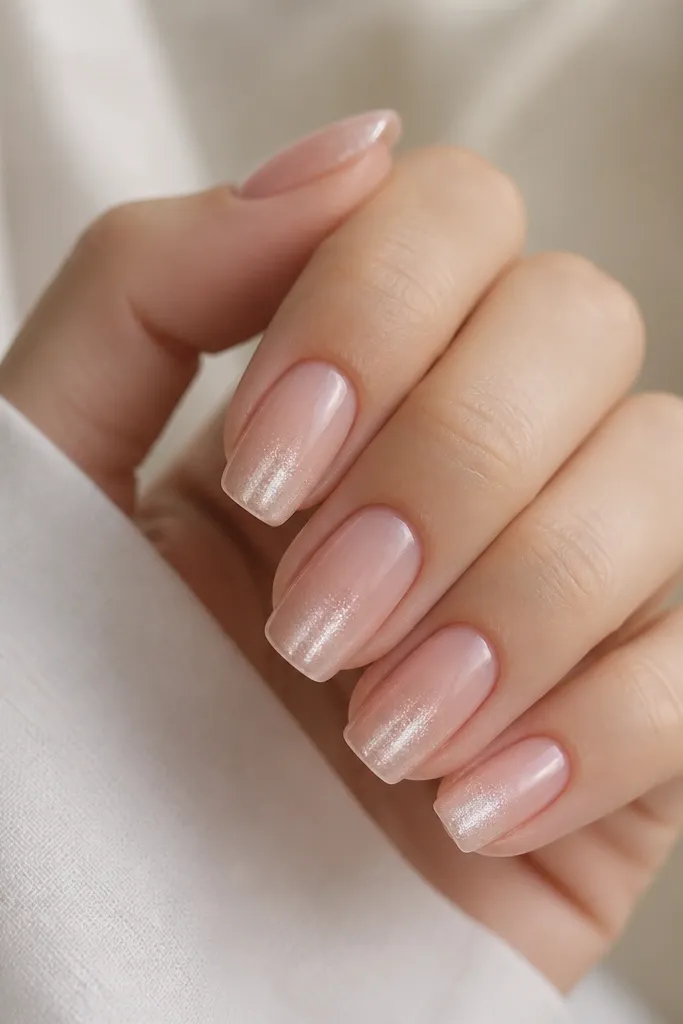
This is the "soft chrome" look that still lasts. Blush pink ombre is flattering and makes nails look tidy even if your cuticles grow slightly. Rose chrome shimmer gives a gentle metallic sheen that doesn't show every brush stroke. If you want chrome but you hate the high-gloss mirror look, this is the best compromise. It also works for everyday outfits because it doesn't overpower your jewelry.
Start with a blush pink base and cure. Paint a slightly deeper blush at the tip edge, blend upward 2-2.5 mm, then cure. Apply rose chrome gel over the full ombre fade zone, then press rose chrome powder lightly so it looks like a veil, not a solid sheet. Seal with thin topcoat and cap the free edge.
Editor's noteIf your chrome looks too strong, press it once, then stop - don't keep adding powder until it's fully opaque.
Watch outDon't over-blend after you've cured; you'll disturb the ombre edge and it'll look muddy.
13. White-to-Silver French Ombre with Chrome Half-Moon Detail
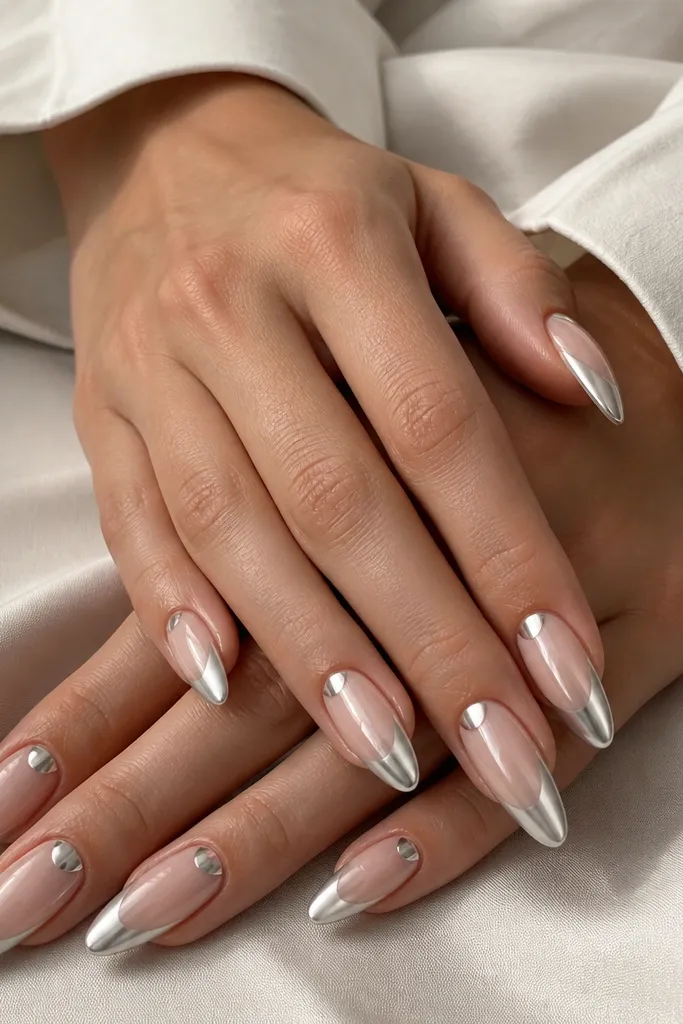
Adding a tiny chrome half-moon near the cuticle makes the manicure look designed, not random. The white-to-silver ombre keeps it fresh, while the half-moon detail draws the eye upward and makes the nail bed look longer. This is especially pretty on shorter nails because it balances the tip shine with a small highlight at the base. I've worn this to events where people stare at your hands, and the detail keeps it from looking plain.
Apply sheer nude base gel and cure. Create the white-to-silver ombre by painting white at the tip and blending upward 2 mm, then cure. Apply chrome gel over the ombre fade and press silver chrome powder for the tip shine. For the half-moon, use a small liner brush to place a tiny arc of chrome gel near the cuticle (leave a hairline gap), press silver chrome, then seal with thin topcoat.
Editor's noteKeep the half-moon small - about 1/5 of the nail width - so it looks crisp, not bulky.
Watch outAvoid placing chrome gel right on the cuticle skin; it lifts fast and looks uneven.
14. Beige French Ombre with Micro Chrome Flakes at the Tip
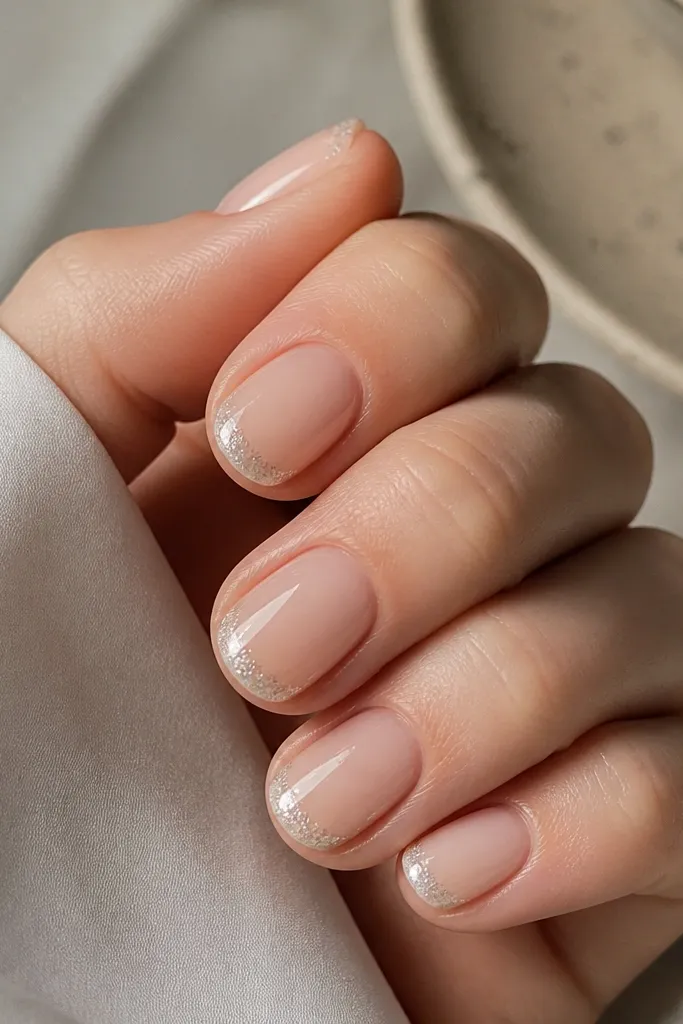
Micro flakes feel more wearable than full chrome because your nails still look like nails, not just metal. This design is great for low maintenance because flakes forgive minor unevenness in your ombre blend. The beige base is clean and flattering across most skin tones, and the tip concentration keeps shine where it matters. It also hides small nicks because flakes sit on top and don't show chips as clearly as a solid chrome coating.
Apply beige nude base gel and cure. Paint a lighter beige at the tip edge, blend upward 1.5-2.5 mm, then cure. Add a small amount of chrome gel only at the very tip edge, then sprinkle micro chrome flakes and press gently so they stick. Seal with a thin topcoat, making sure the tips are fully capped so flakes don't snag.
Editor's noteUse a toothpick to place a few flakes exactly where you want extra sparkle, then let the rest be random.
Watch outDon't seal too thick over flakes; it can bury them and make the shine look flat.
15. Skin-Tone French Ombre with Clear Chrome Jelly Top
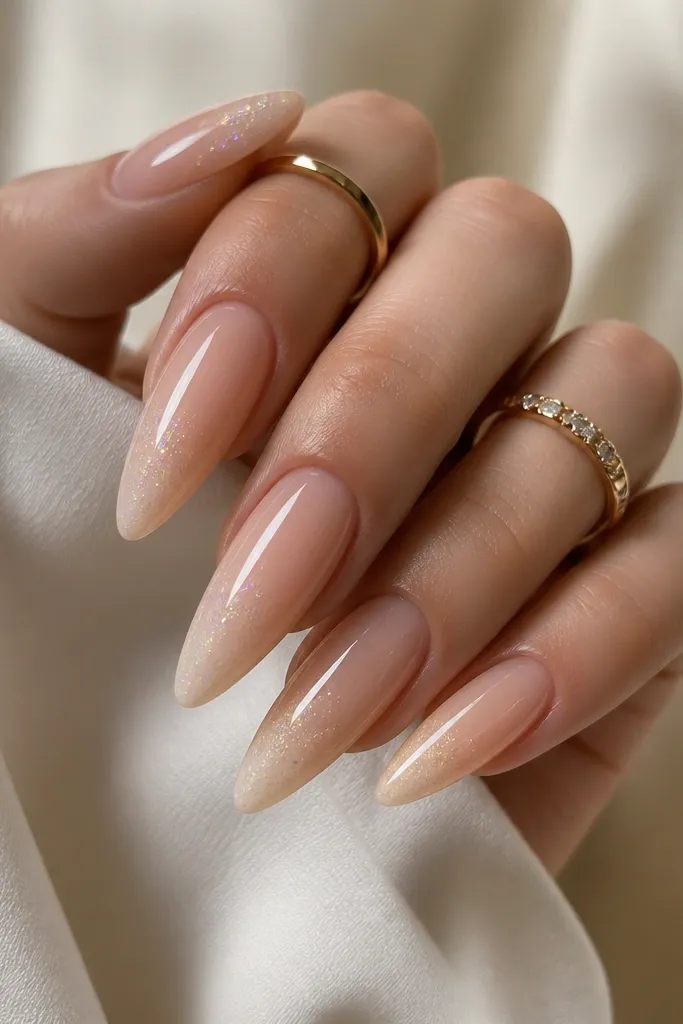
This is the "my nails look naturally perfect" version of ombre chrome. The skin-tone base makes it blend with your nail bed, and the clear jelly top keeps the metallic look subtle. It's low maintenance because the chrome particles don't show patchiness as fast as full chrome powder - you still get shimmer even if coverage shifts slightly. I like it when I want something that feels soft for daily life but still looks special in photos.
Apply a skin-tone nude base gel and cure. Paint the French-ombre tip using a lighter nude close to your base, blending upward 2 mm, then cure. Mix or apply a clear jelly chrome top gel over the ombre zone only, then cure per your gel instructions. If your system needs chrome particles, dust a tiny amount of chrome powder into the tacky jelly before curing. Seal with a thin topcoat and cap the free edge.
Editor's noteChoose a clear jelly chrome top that cures hard; soft gels dent and dull faster.
Watch outAvoid placing this clear chrome jelly over the cuticle area; it can look smoky and get messy at grow-out.