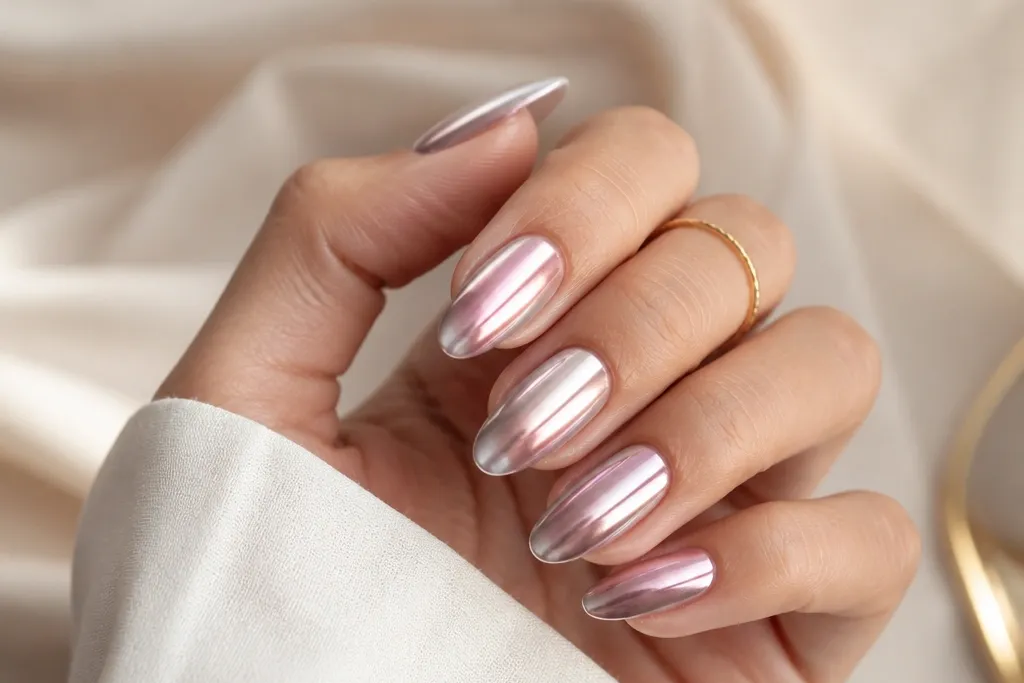
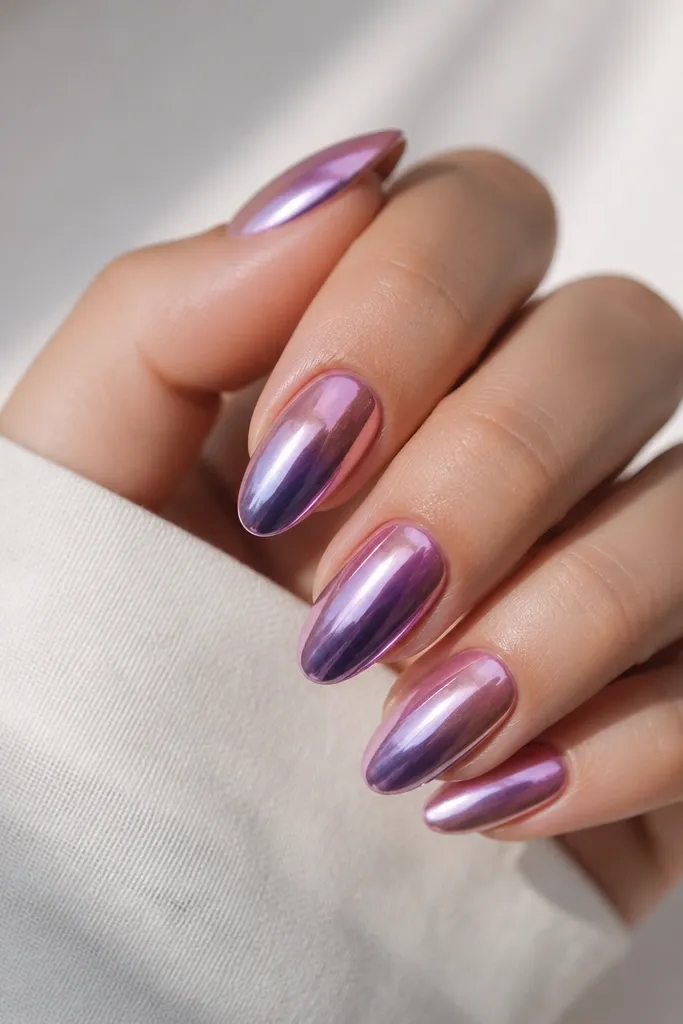
1. Blush-to-rose ombre with pearl chrome
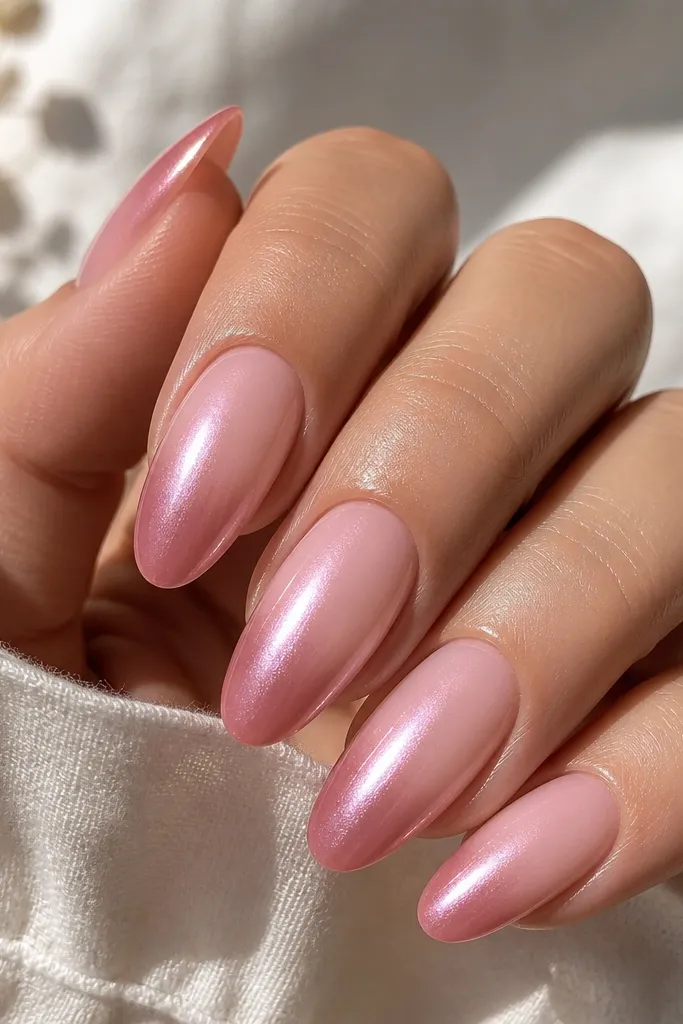
This one is for when you want the chrome to look "pretty" instead of loud. I use a pale blush gel at the cuticle, then blend into a medium rose, keeping the transition near the upper third of the nail. The pearl chrome gives a milky shine that flatters warm undertones and looks amazing on short almond or medium oval nails. It also photographs well because it reflects in a softer halo - you don't get harsh streaks like some mirror finishes. The styling principle is gentle color contrast so the chrome reads as glow, not as a separate layer.
Start by painting a sheer blush gel close to the cuticle, leaving a tiny 0.5mm breathing gap. Sponge on the rose shade so the fade transition sits around the top third to midline, then cure fully. Lightly buff the surface only if you see texture, then wipe with a lint-free pad and isopropyl alcohol. Apply pearl chrome with a small chrome applicator, press lightly, and cure if your system requires it. Finish with a glossy gel topcoat in thin coats, sealing the free edge.
Editor's noteIf your chrome looks patchy, wipe the nail with alcohol and re-apply chrome in a thinner layer instead of adding more product.
Watch outAvoid using a super-opaque rose right at the cuticle because it kills the fade and makes the chrome look like it sits on a stripe.
2. Nude ombre to champagne chrome
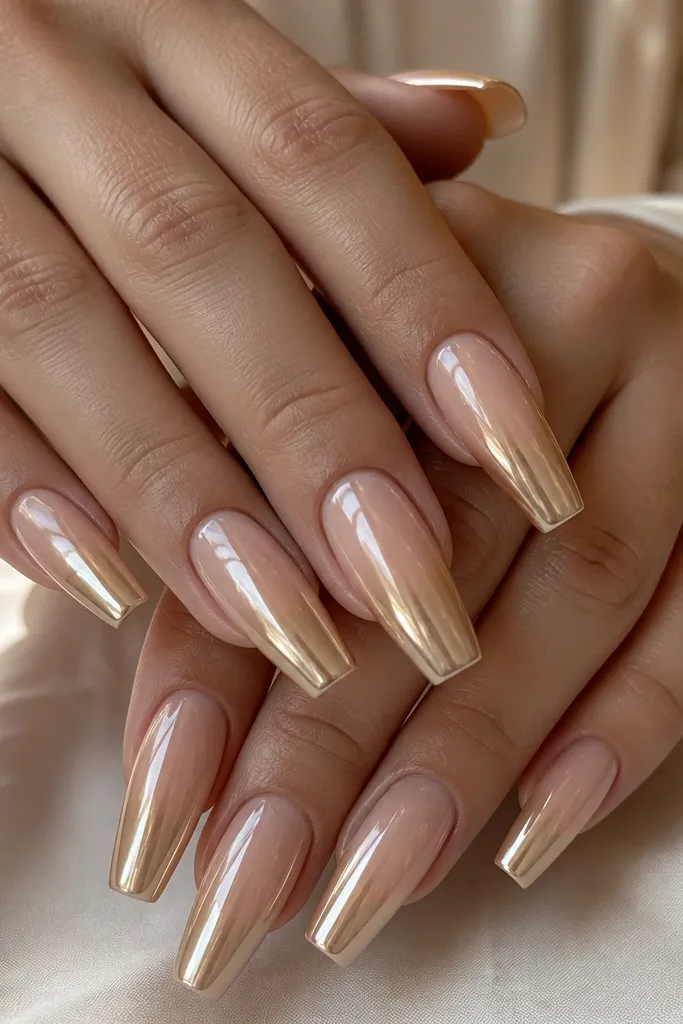
Champagne chrome on a nude ombre looks expensive without looking like you tried too hard. I keep the nude semi-sheer so the fade looks airy, then I deepen the tips with champagne gel that has a warm tone. This set flatters fair to medium skin because the warm chrome picks up skin warmth and makes fingers look longer. Coffin nails work best here because the tip area gives the chrome room to shine. The key is the warm-to-warm gradient - you want harmony, not a sudden color jump.
Apply a nude base coat that matches your skin tone, then cure. Sponge champagne gel onto the lower half of the nail, keeping the blend zone tight so it doesn't reach the cuticle. Cure again, then wipe tack residue if your chrome system needs it. Apply mirror chrome over the cured ombre, focusing on the tips first, then lightly sweep toward the mid-nail. Seal with a high-shine gel topcoat, two thin layers, curing each time.
Editor's noteUse a warm chrome (champagne/rose gold family) if your nude is cool-toned, and a cooler chrome if your nude looks yellow - matching undertones prevents muddy reflections.
Watch outAvoid doing a full-coverage nude (opaque) base because it makes the champagne fade look like it starts late and the gradient reads chopped.
3. Moody mauve ombre with smoky chrome haze
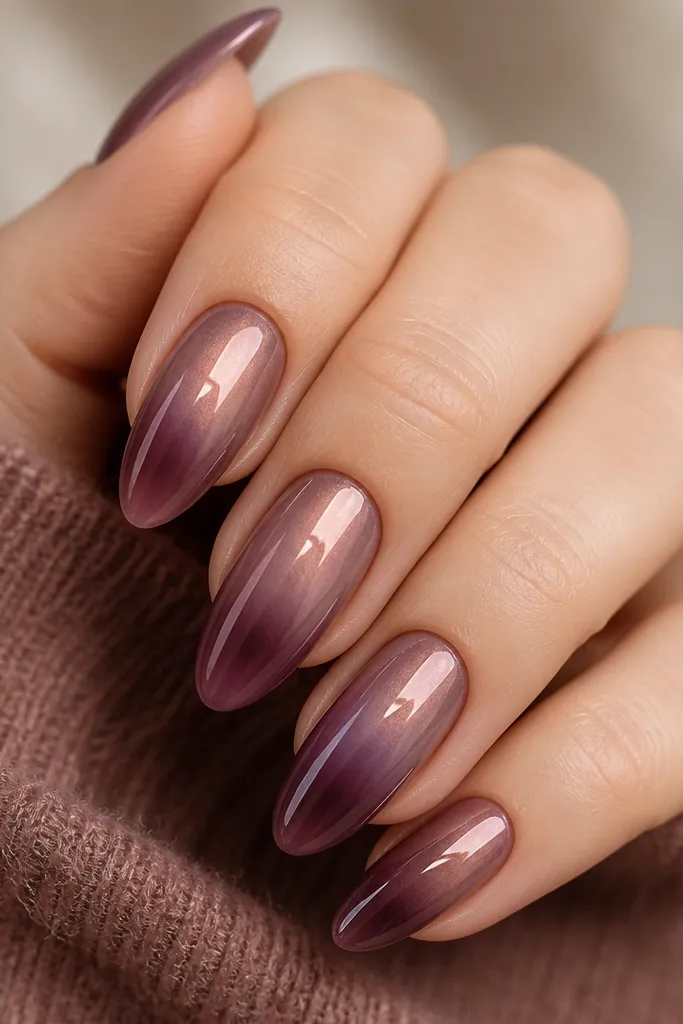
This is the ombre chrome look I reach for when I want "night-out" nails that still feel wearable. The mauve base stays slightly transparent at the cuticle, and the tips go deeper into smoky plum. Instead of full mirror, I use a gray-silver chrome or a smoky chrome powder that reflects in a muted way. It flatters cool undertones and looks killer with black outfits, denim, and silver jewelry. The principle here is lowering contrast - the chrome haze makes the ombre feel smoky and continuous.
Paint mauve gel thinly at the cuticle and cure. Sponge smoky plum into the bottom 40% of the nail, then blend upward only once so the transition stays smooth. After curing, buff lightly to remove any sponge texture, then wipe clean. Apply smoky gray chrome by pressing a small amount onto the tips and dragging a little toward the blend zone. Topcoat with a glossy gel, keeping the first coat thin so the chrome haze doesn't get covered up.
Editor's noteIf the chrome looks too silver, mix a tiny amount of black gel (not topcoat) into the ombre step next time to deepen the base before chrome.
Watch outAvoid over-buffing after you cure the ombre; too much buffing makes the chrome grab unevenly and creates dull patches.
4. Icy pink ombre to holographic chrome tips
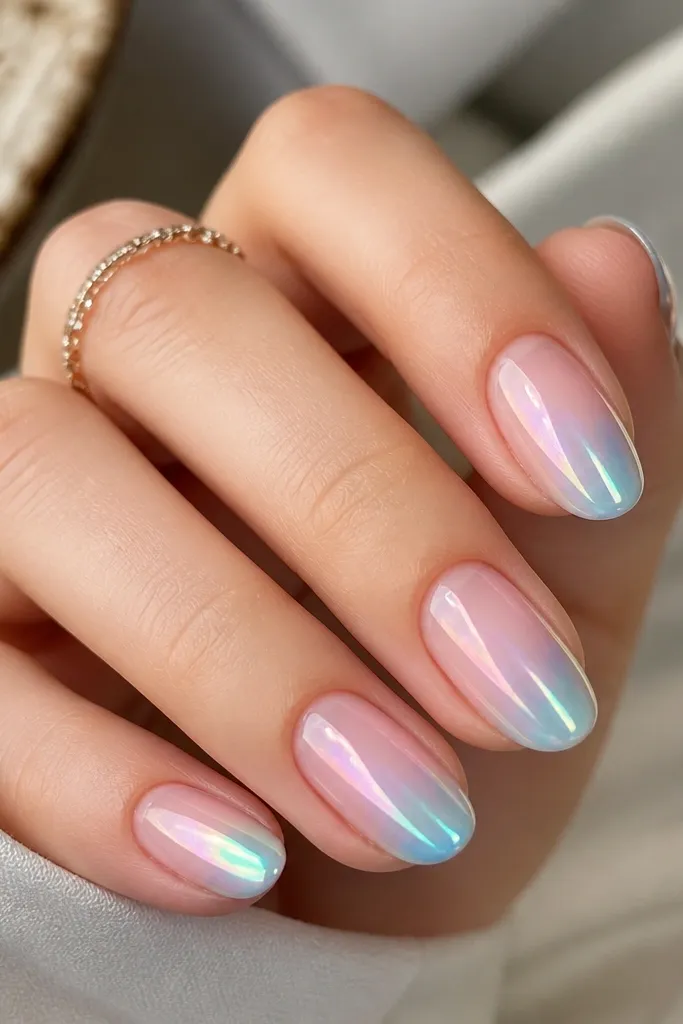
If you like chrome that looks like it's moving, holographic chrome on an icy ombre is the move. Icy pink near the cuticle keeps the nails looking fresh, while the holographic tips add that "party in the light" effect. This set is flattering on all skin tones, especially if your nails are short because the lighter base makes your fingers look clean and bright. The gradient keeps the holographic from looking like a separate sticker - it feels integrated. The styling principle is light-to-loud: pale base, then let the chrome do the heavy lifting.
Start with a sheer icy pink gel base, cure, then sponge a slightly deeper pink into the lower half. Keep the transition in the middle third so the holographic area feels intentional. After curing, apply holographic chrome starting at the tips and working up only to the end of the ombre blend. Press gently - holographic chrome shows streaks if you drag too hard. Seal with glossy topcoat in two thin coats, curing each layer, and wipe the tack residue if needed.
Editor's noteUse a small amount of chrome and build - holographic powders get heavy fast, and that's when the gradient starts to look dirty.
Watch outAvoid putting holographic chrome all the way to the cuticle; it makes the whole nail look flat and kills the ombre effect.
5. Classic white ombre to silver mirror chrome
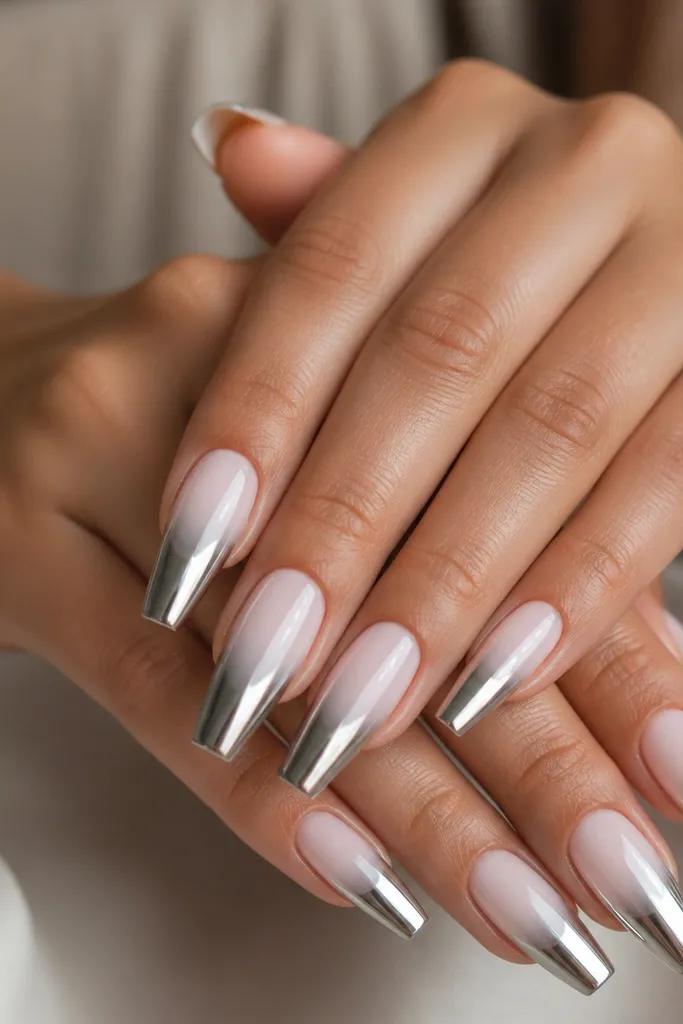
This is the "clean and crisp" chrome set that always looks good in winter photos. I do a sheer white at the cuticle so it looks soft, then I fade into silver mirror on the tips for that sharp reflective finish. It flatters fair skin and also looks great on medium skin because silver brightens the nail bed area. Coffin or almond shapes show off the mirror shine, but the technique works on short ovals too. The principle is high reflectivity on the tips only - so the ombre still reads as ombre.
Apply a sheer milky white gel at the cuticle, cure. Sponge a slightly more opaque white into the top half, then blend down toward the tips until you reach a smooth transition. Cure again, then add silver mirror chrome starting at the tips and pressing outward in short taps. Don't swipe back and forth; it can disturb the blend. Seal with glossy topcoat, and run the brush along the free edge to lock in the mirror.
Editor's noteIf the silver looks grainy, your surface is too matte - buff less next time and keep the color layer glossier before chrome.
Watch outAvoid using a thick white layer; thick color makes the chrome trap air and causes speckled mirror dots.
6. Terracotta ombre to rose gold chrome
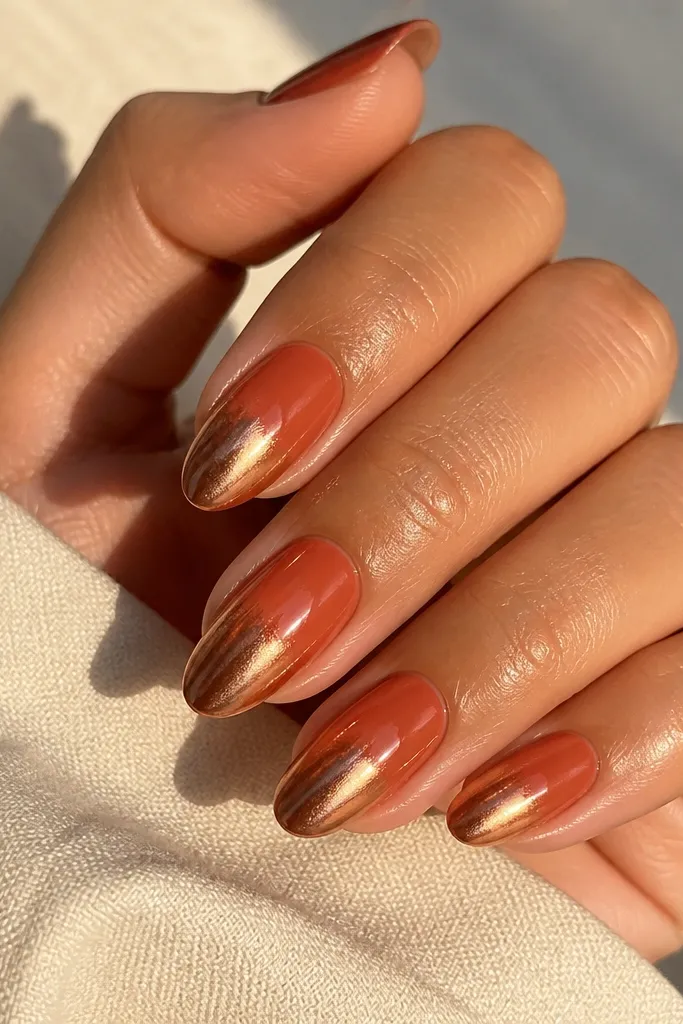
Terracotta plus rose gold chrome is one of those combinations that looks like you planned it, even when you didn't. I keep the cuticle warm and slightly translucent, then fade into a true rose gold chrome zone at the tips. This flatters olive skin and warm undertones because the orange base plays well with natural skin warmth. It also looks great with gold rings and tan leather bags. The styling principle is warm gradient continuity: don't jump from cool pink to rose gold; you want the same warmth family.
Paint a sheer terracotta base, cure. Sponge terracotta deeper into the lower half, then blend upward so the transition ends around the midline. Cure, then apply rose gold chrome by pressing on the tips first. Use a light touch and keep the chrome layer thin so the terracotta fade stays visible underneath. Finish with glossy topcoat, two thin coats, and cure each one fully.
Editor's noteIf your terracotta looks too red, mix in a tiny amount of beige gel next time before you sponge - it keeps the chrome from going overly coppery.
Watch outAvoid overloading chrome at the tips; thick rose gold can look like a block instead of a fade.
7. Olive green ombre to gold chrome edge
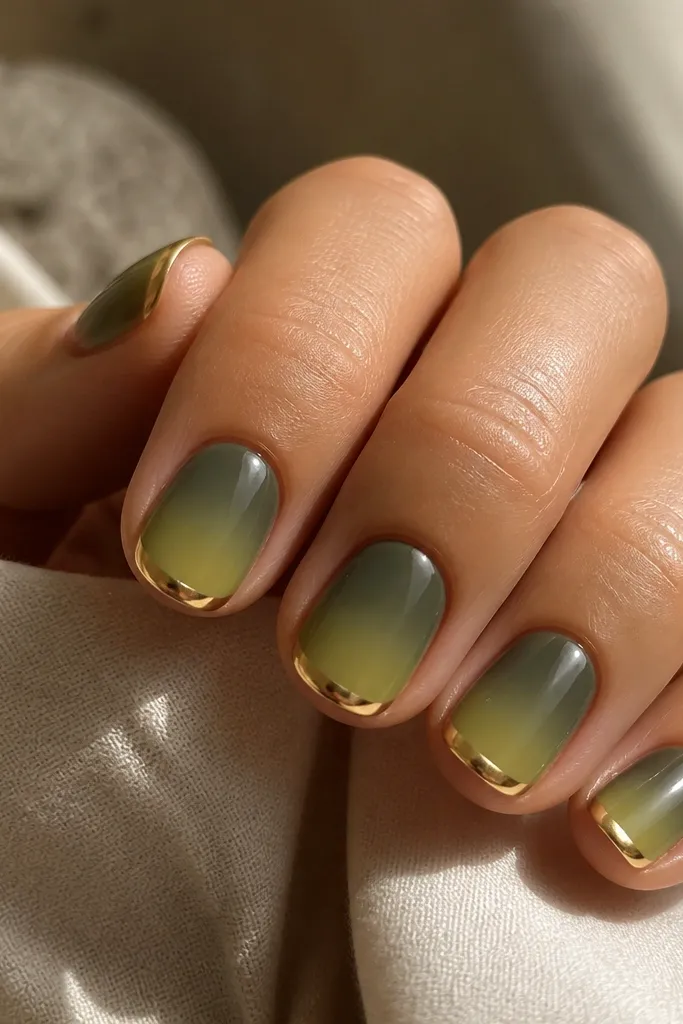
This one is for a subtle chrome look that still turns heads. The olive ombre stays soft and earthy, and gold chrome is used as an edge highlight instead of full coverage. I love this on short rounded nails because the thin chrome edge elongates the nail without making it look heavy. It flatters medium to deep skin tones and also looks striking with earthy outfits. The principle is negative space: keep most of the nail in color and let chrome be the accent.
Start with an olive base gel, cure, then sponge a slightly lighter olive toward the top half and a deeper olive toward the tips. Keep the blend zone in the middle third so it stays smooth. After curing, apply gold chrome only to the last 1.5-2mm of the nail edge using a small chrome tool. Press gently so the edge is crisp but not thick. Seal with a glossy topcoat, but keep the first coat thin to preserve the fine chrome line.
Editor's noteUse a tiny strip of tape as a guide for the chrome edge - it keeps the line straight even if you're shaky.
Watch outAvoid chrome rubbing over the color blend; if you drag chrome through the ombre, you get muddy patches.
8. Black cherry ombre to smoky black chrome
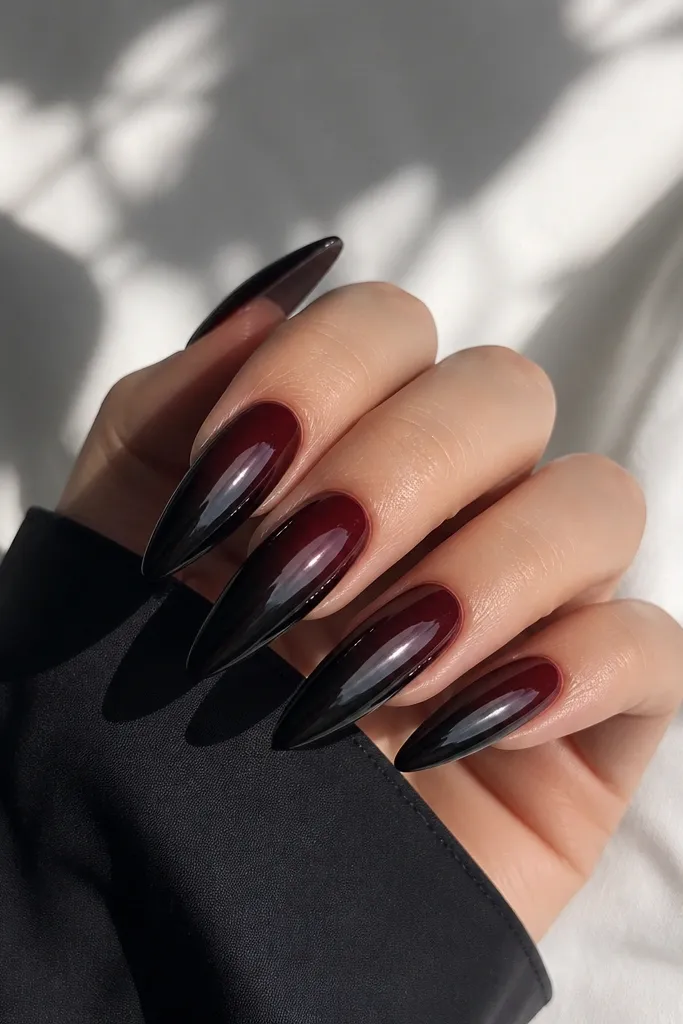
Dark cherry ombre with smoky black chrome makes nails look like polished hardware. I use a deep black cherry at the cuticle and blend into near-black tips so the gradient stays dramatic but not harsh. Smoky black chrome reflects less than silver, so it hides micro-ridges better than mirror chrome. This set flatters long nail beds and looks unreal with matte black outfits and silver studs. The principle is depth layering: the base has color, and the chrome turns it into a low-gloss mirror effect.
Apply black cherry gel thinly at the cuticle, cure. Sponge a deeper black cherry into the lower half, blending up to about the middle third. Cure, then wipe and lightly buff only if you see sponge peaks. Apply smoky black chrome starting at the tips and stopping where the ombre blend ends. Press and tap, then seal with glossy topcoat in two thin layers to keep the mirror effect dark and glassy.
Editor's noteIf your smoky chrome looks flat, add one more thin topcoat layer - too-thin topcoat can make it look dusty.
Watch outAvoid using a super-thick base gel; thick gel makes the ombre sink and chrome highlights the dips.
9. Lilac ombre to iridescent chrome shift
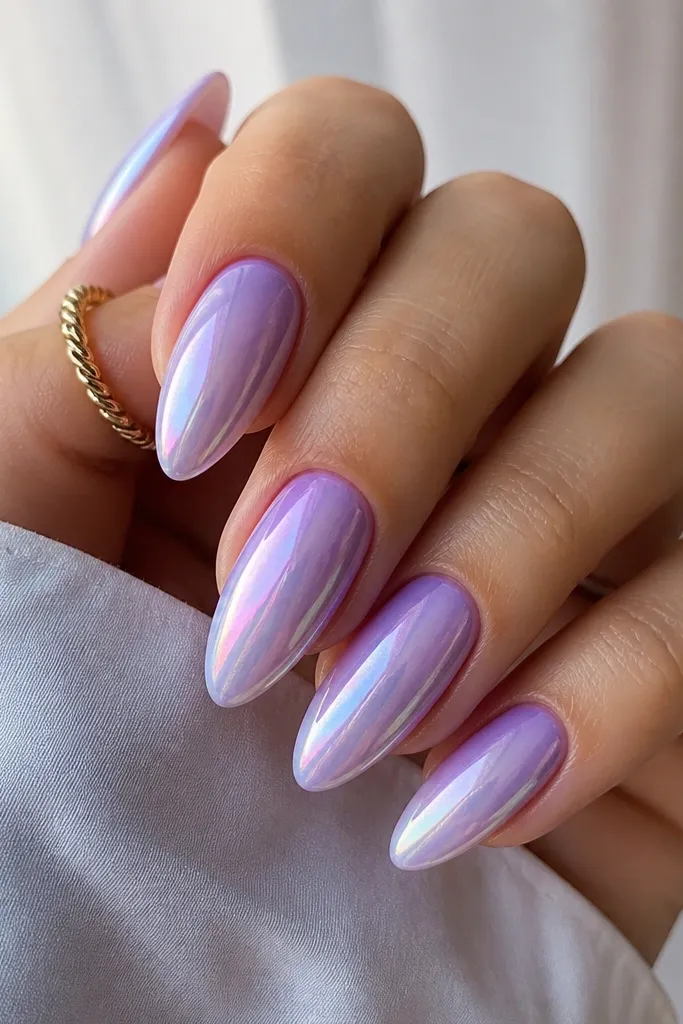
Iridescent chrome makes lilac look more like stained glass. I keep the cuticle lavender and fade into a slightly stronger violet, then apply iridescent chrome only across the tip zone so the color shift reads as a highlight. This flatters cool undertones and makes pale skin look fresh without turning the nails gray. It's also pretty on shorter nails because the iridescence pulls focus. The principle is controlled chrome placement - you're not covering everything, you're framing the ombre.
Paint lavender gel sheer at the cuticle, cure. Sponge violet into the bottom 45% and blend so the transition ends around the midline. Cure again and wipe clean. Apply iridescent chrome with a small applicator, starting at the tips and stopping before the cuticle. Tap off excess, then topcoat with glossy gel in thin layers, curing fully.
Editor's noteAngle your nails toward a lamp after chrome - if you see one dull streak, press that area once more with the chrome tool instead of redoing the whole nail.
Watch outAvoid applying iridescent chrome too close to the cuticle; it makes the whole nail look the same color under different light.
10. Blue ombre to aqua mirror chrome
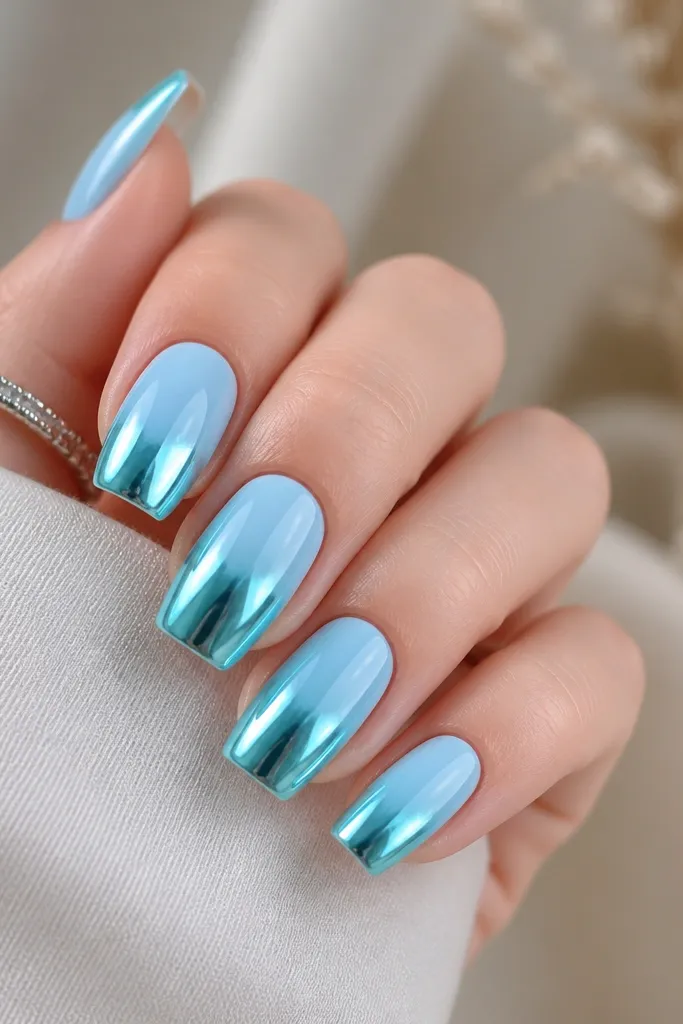
Aqua mirror chrome on a blue ombre looks like fresh pool water. I use a light sky blue near the cuticle, then blend into a stronger aqua at the tips so the chrome reflects that cyan tone. This is flattering on fair and medium skin because it brightens the nail and makes the hand look cleaner. Square nails show the mirror shine well, but almond works too. The principle is matching your ombre color to the chrome tone - you want the reflection to feel like it belongs.
Start with a sheer sky blue base, cure. Sponge aqua gel into the bottom half and blend upward until the transition sits around the middle third. Cure fully, then apply aqua-toned mirror chrome from the tips upward to the end of the blend. Press evenly and avoid dragging - mirror chrome shows streaks. Seal with glossy topcoat, two thin coats, curing each time.
Editor's noteUse a makeup wedge for the sponge so the blend edge stays soft, not splotchy.
Watch outAvoid mixing blue shades with different undertones (purple-blue with green-blue) in the ombre; the fade looks muddy once chrome hits.
11. Peach ombre to rose gold chrome with micro shimmer
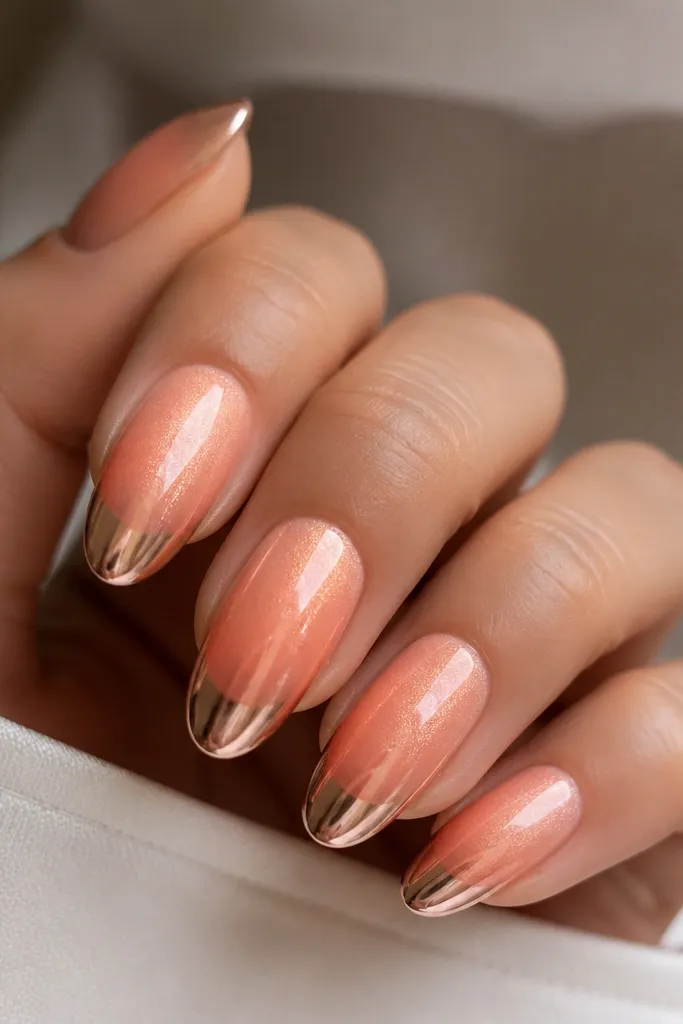
This set gives you warmth and movement without looking glittery in a cheap way. I build a peach ombre with a very fine shimmer gel mixed into the peach, then I fade into rose gold chrome at the tips. The shimmer stays subtle - you notice it when the light hits, not when you stare straight on. It flatters warm undertones and looks gorgeous with cream sweaters and gold jewelry. The principle is tiny sparkle in the color layer, not in the chrome layer - chrome already reflects enough.
Paint peach shimmer gel thinly at the cuticle, cure. Sponge plain peach gel deeper into the lower half, then blend upward so the transition ends around the middle third. Cure, wipe, and lightly buff if needed. Apply rose gold chrome only to the tips, pressing in small sections so it stays smooth. Seal with glossy topcoat, keeping the first coat thin so the chrome doesn't dull.
Editor's noteIf your shimmer looks chunky, switch to a fine-micro shimmer gel; chunky sparkle shows through chrome and looks gritty.
Watch outAvoid using glitter in the chrome area; it makes the mirror look textured and kills the smooth reflection.
12. Cream ombre to pearl silver chrome
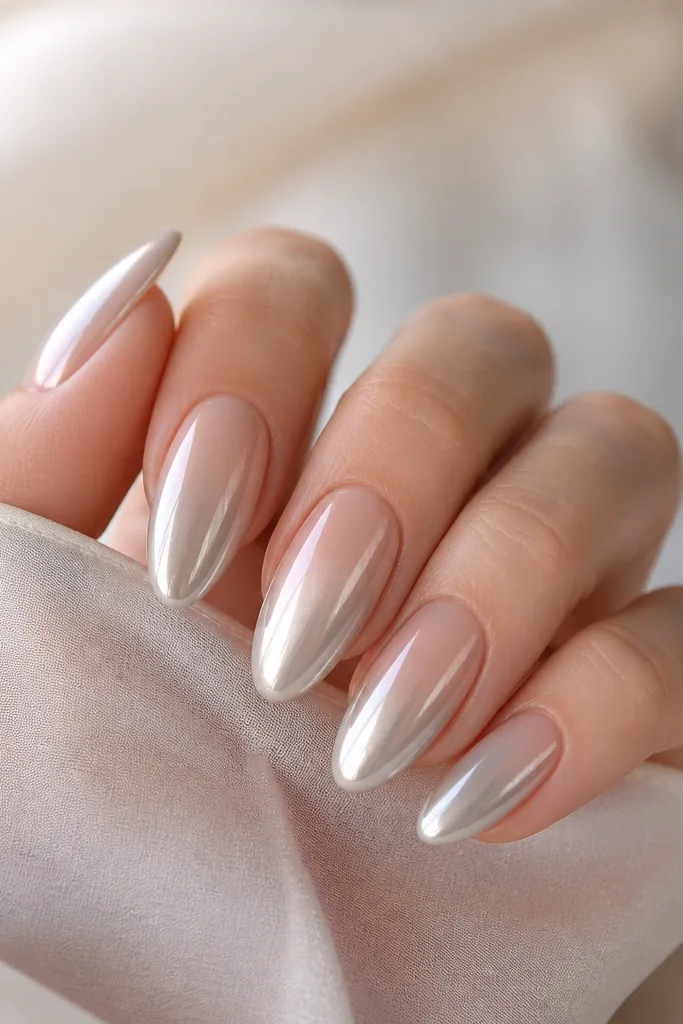
Cream-to-pearl silver is the "bridal but not boring" chrome ombre. The creamy base stays opaque enough to look clean, but the fade is still visible because the tips go into a pearl silver tone rather than a hard white. It flatters every skin tone because silver pearl reads neutral and bright. Almond nails show the smoothness well because the curve makes the gradient look seamless. The principle is softness: pearl chrome keeps the look wearable even if your blend isn't perfectly airbrushed.
Apply a cream nude gel at the cuticle and cure. Sponge a slightly brighter cream into the top half, then blend down so the transition ends around the midline. Cure again and wipe clean. Apply pearl silver chrome to the bottom half, stopping before the last fade line so the ombre still reads. Topcoat with a glossy gel in two thin layers, curing each time.
Editor's noteUse a pearl silver chrome if you're nervous about mirror - it hides tiny application bumps better.
Watch outAvoid curing too long between ombre steps; over-cured gel can get a rubbery surface that makes chrome lift.
13. Chocolate brown ombre to copper chrome
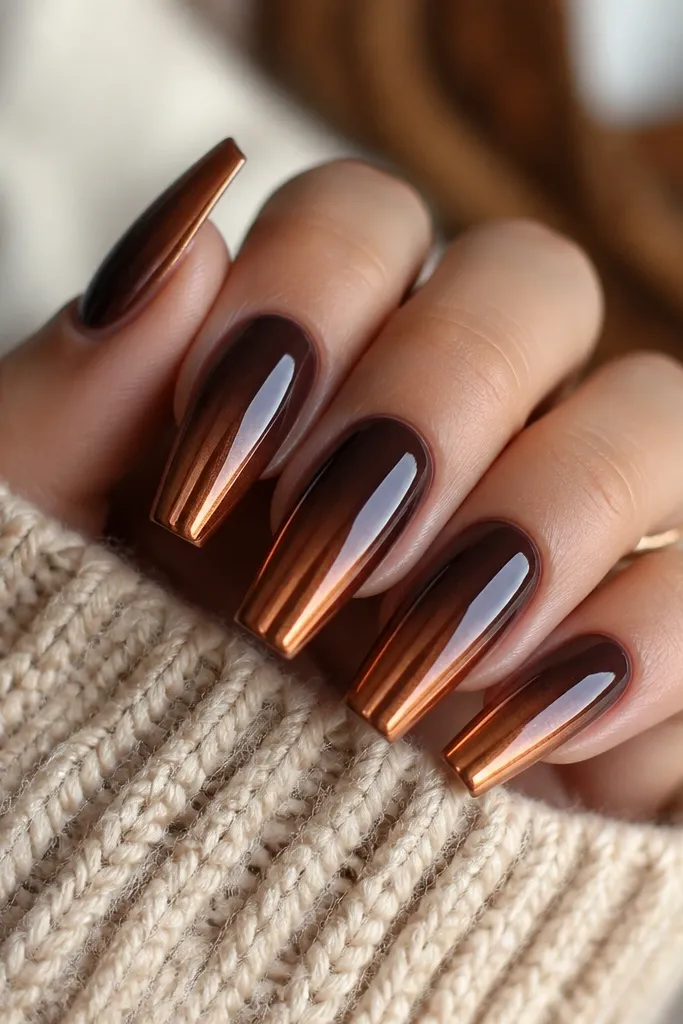
Chocolate brown plus copper chrome looks like caramelized nails. I keep the cuticle in a soft chocolate brown and sponge into a warmer brown before the copper chrome hits. Copper flatters medium to deep skin and also looks stunning with burgundy lipstick and gold accessories. It's a great choice for fall when you want something darker but still shiny. The principle is warm undertone continuity so the copper chrome reflects your base color instead of fighting it.
Paint a sheer chocolate brown at the cuticle, cure. Sponge a warmer caramel-brown shade into the lower half, blending up to about the middle third. Cure, wipe, and buff lightly if needed. Apply copper chrome to the tips, starting at the very edge and pressing inward until it reaches the blend boundary. Seal with a glossy topcoat, two thin coats, and cap the free edge.
Editor's noteIf copper looks too orange, mix a tiny amount of brown into the copper chrome step by choosing a darker copper powder, not by adding gel.
Watch outAvoid using a cool taupe brown under copper chrome; the fade looks gray and the chrome turns dull.
14. Coral ombre to pink chrome with glossy jelly topcoat
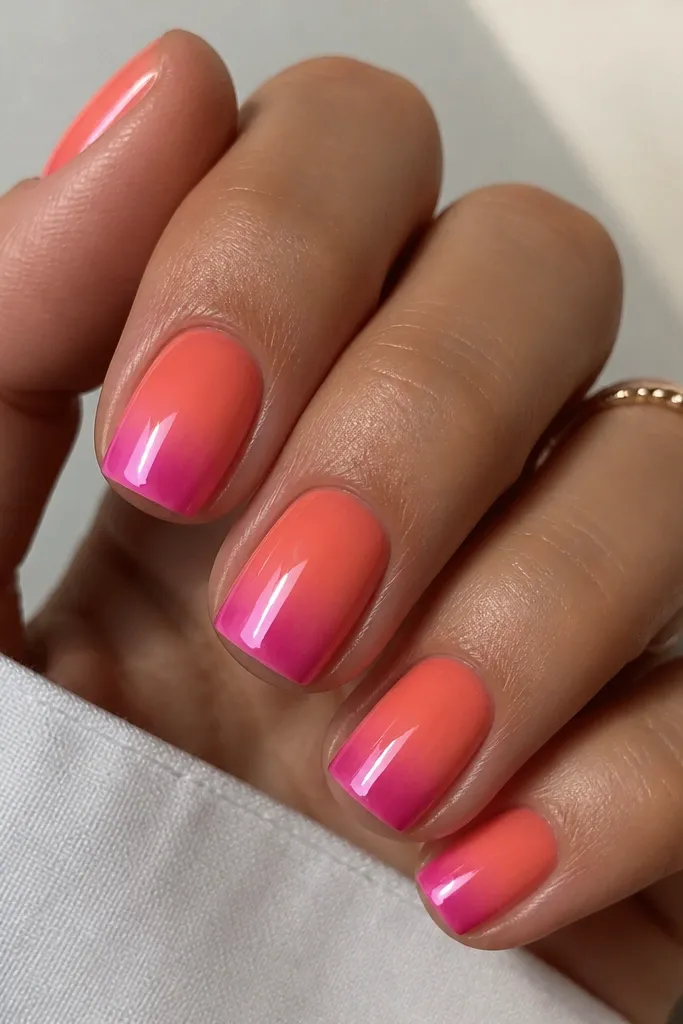
This is the "juicy" ombre chrome set. Coral at the cuticle turns into hot pink at the tips, and the chrome makes it look like the color is glowing from underneath. I do this on squoval or short almond because the jelly topcoat adds depth without needing long length. It flatters warm undertones and makes hands look youthful - especially with a tan or summer skin tone. The principle is glossy thickness: the jelly topcoat makes the gradient look rounded and smooth.
Apply a sheer coral base, cure. Sponge pink gel into the lower half and blend until the transition sits around the middle third. Cure, wipe, and ensure the surface is smooth. Apply mirror pink chrome to the tips only, pressing evenly without dragging. Topcoat with a jelly-style glossy gel in one thicker coat, cure, then finish with a thinner glossy topcoat around the cuticle to keep it smooth.
Editor's noteUse a thicker jelly topcoat only after chrome is sealed; if you do it too soon, chrome can dull or lift at the edges.
Watch outAvoid thin, watery topcoat on this look; it makes the ombre look flat and the chrome less dimensional.
15. Champagne nude ombre to reflective rose hologram chrome
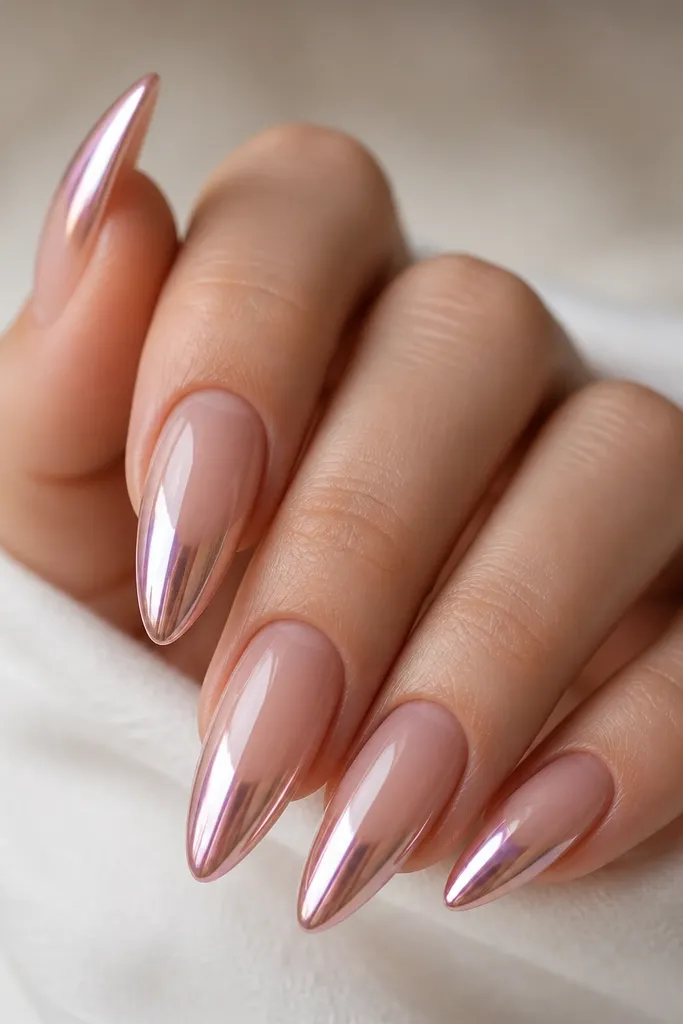
This is the set I do when I want a romantic chrome that still feels modern. The champagne nude base is warm and slightly reflective on its own, which makes the ombre look smooth even before chrome. Then rose hologram chrome gives that multi-angle sparkle without being glittery. It looks amazing on long almond because you get a bigger tip area for the hologram to show color shifts. The principle is warm base + hologram placement so the shine looks intentional, not random.
Paint champagne nude gel thinly at the cuticle, cure. Sponge a slightly deeper champagne into the bottom half, then blend upward so the transition ends around the middle third. Cure fully and wipe. Apply rose hologram chrome to the tips, pressing and tapping in a steady pattern across the nail width. Seal with glossy topcoat, two thin coats, and cure each layer completely to lock in the hologram reflection.
Editor's noteCheck your chrome under two light sources - overhead and window light - to confirm the rose shift shows where you want it.
Watch outAvoid using a very pale cool nude under rose hologram chrome; it makes the ombre look gray and the hologram loses its rosy punch.