1. Icy Pearl Ombre With Starburst Glow Tips
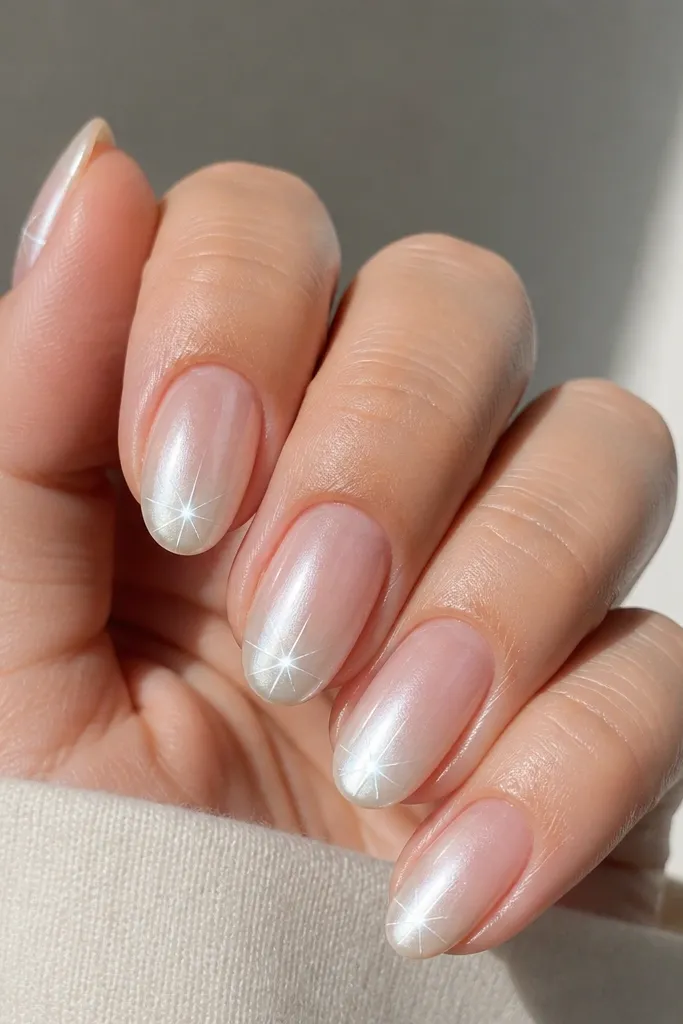
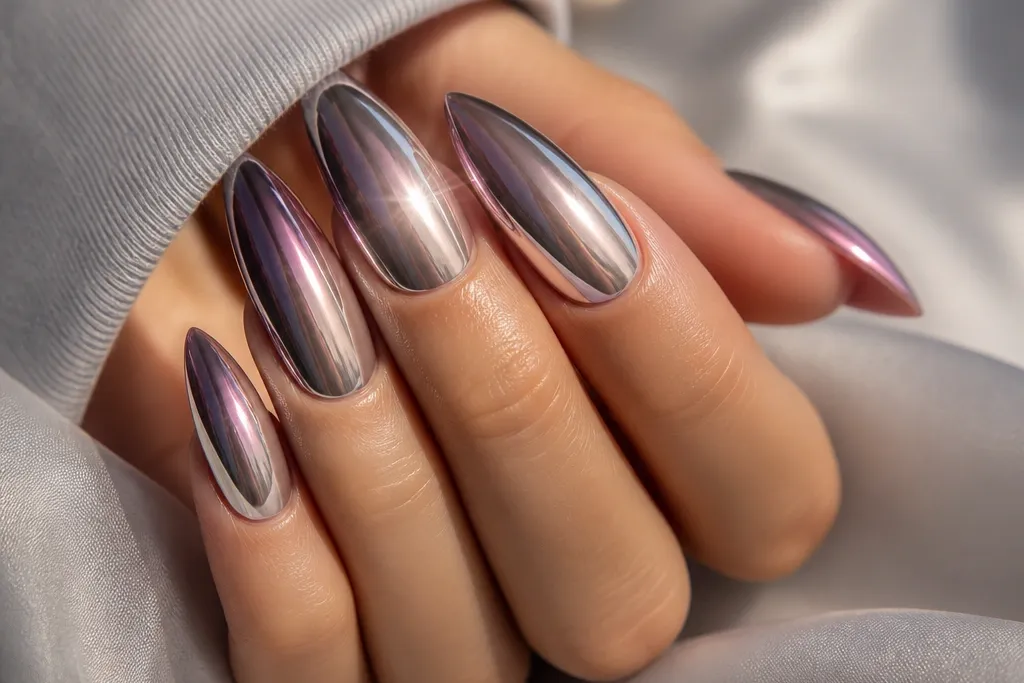
This one is for days when you want "clean expensive" instead of loud. You build a nude base that fades into icy white, then lay pearl-silver chrome so the surface reflects like frosted glass. On top, you add a starburst glow tip using a holographic flare gel placed only in the top third, not across the whole nail. It looks amazing on fair to medium skin because the icy white makes the nail bed look longer, and it also works on deeper skin tones because pearl chrome gives a bright contrast without going neon. In photos, the glow flare catches phone flash and makes the ombre look dimensional.
Start by prepping and buffing the nail until it's smooth, then apply a rubber base coat and cure fully. Sponge on a nude-to-icy white ombre with a fine makeup sponge, keeping the fade soft and centered, then cure. Apply pearl-silver chrome over the entire nail, press gently, and wipe off excess so it stays mirror. With a fine liner brush, place holographic flare gel only along the tip's center stripe and a few short rays, then cure again. Finish with a chrome-friendly top coat in thin layers, curing between coats so the flare stays bright.
Editor's noteUse a liner brush with a short, stiff tip - it keeps the starburst rays sharp instead of blobby.
Watch outSkip applying the glow gel over the whole nail or it will flatten the mirror look and start to look cloudy.
2. Rose Quartz Ombre With Pink Halo Chrome
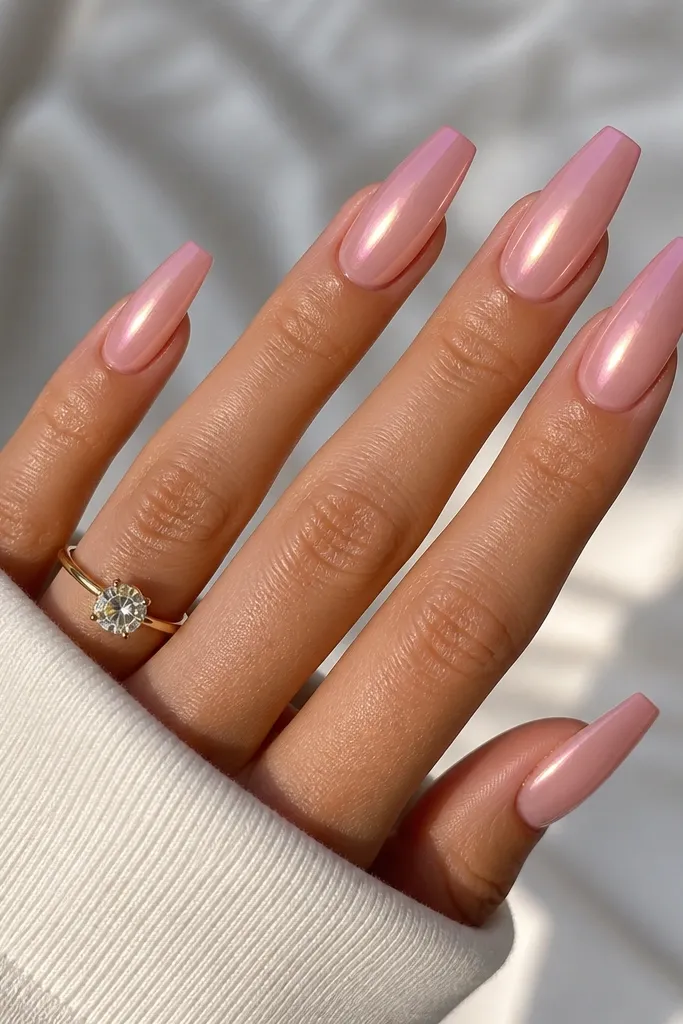
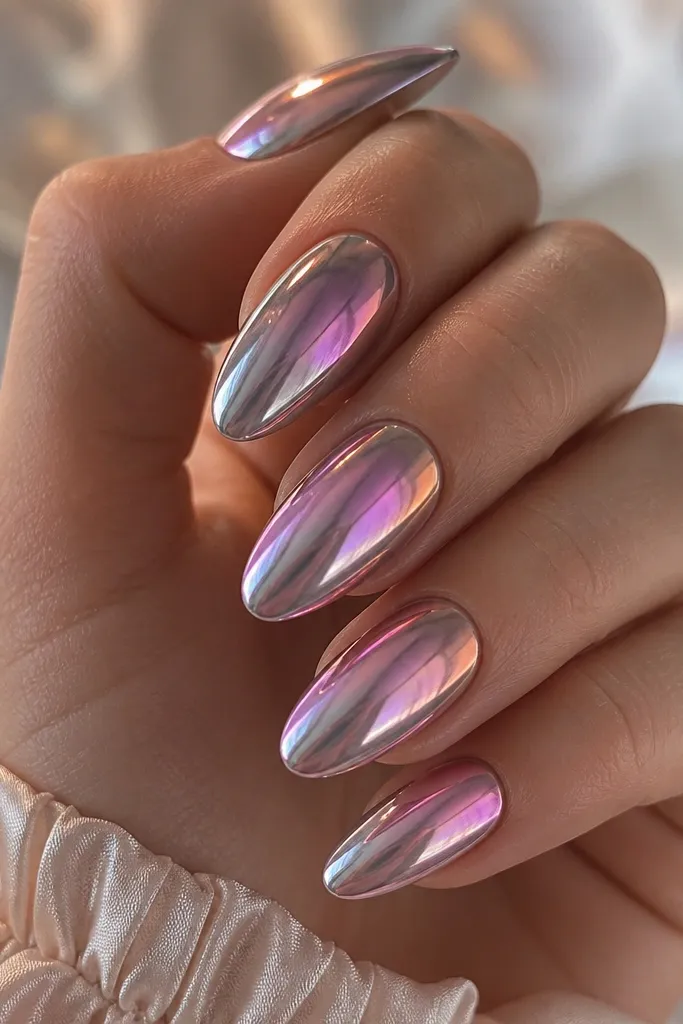
This design is romantic but still wearable. The ombre goes from blush nude at the base to rose pink at the tip, so it flatters hands of all lengths. Pink halo chrome gives that "inner glow" effect because the reflection sits strongest in the center. The light effect is a thin halo ring near the cuticle made with a pink glow gel - it frames your nail bed and makes your fingers look longer. I like this on warm undertones and neutral skin because the rose tones don't fight your complexion.
Apply a sheer pink base gel and cure, then create the ombre using three sponge dabs: one at the cuticle (blush), one mid-nail (dusty rose), and one at the tip (rose pink). Blend the edges with a light touch so the gradient stays smooth, then cure. Rub pink halo chrome mainly on the middle and tip, leaving a slightly softer reflection near the cuticle. Add a thin ring of pink glow gel around the cuticle area, keeping it only 1-2 mm wide, then cure. Seal with a non-yellowing top coat in two thin coats.
Editor's noteIf your halo chrome looks too intense, press it with a chrome applicator for less time so the reflection stays glassy, not mirrored to death.
Watch outDon't put the glow ring too low on the nail plate or it will look like a smear at the cuticle.
3. Midnight Plum Ombre With Purple Light Edges
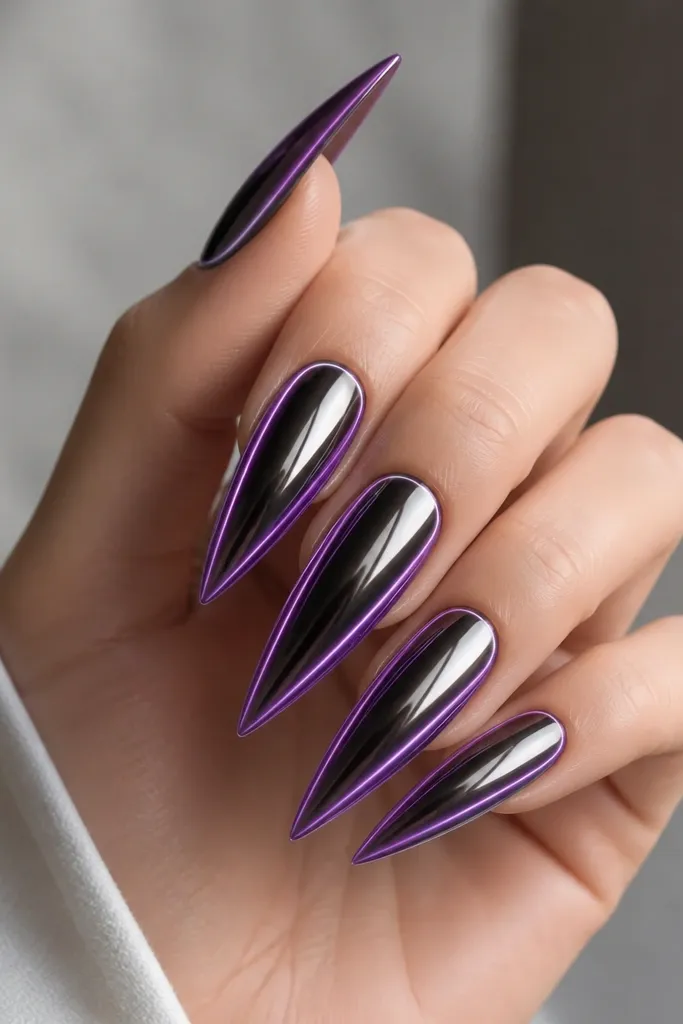
This is the "night out" version that looks sharp, not messy. The ombre starts almost black at the base and transitions to rich plum at the tip, which makes the chrome reflection look deeper. You use purple light gel only on the side edges so the nails look like they have a neon contour line. Mirror chrome is applied across the whole nail so the outline pops against a reflective surface. It flatters deeper skin tones beautifully, and it also looks incredible on fair skin if you keep the plum at the tip - the contrast is dramatic but still clean.
Start with a deep base gel, then sponge on a black-to-plum gradient with the sponge angled so the fade is stronger at the tip. Cure carefully. Apply blackened purple chrome or deep plum chrome across the entire nail, burnish lightly, and wipe off. Using a striping brush, pull purple light gel along the left and right sidewalls from just above the free edge up about 60% of the nail length. Cure, then top coat in thin layers, avoiding flooding the sidewalls so the outline stays crisp.
Editor's noteTo keep the outline even, rest your pinky finger on the table while you paint the sidewall line.
Watch outDon't drag the light gel into the center or you'll lose the contour effect and it will look like a purple haze.
4. Champagne Gold Ombre With Micro-Glitter Light Points
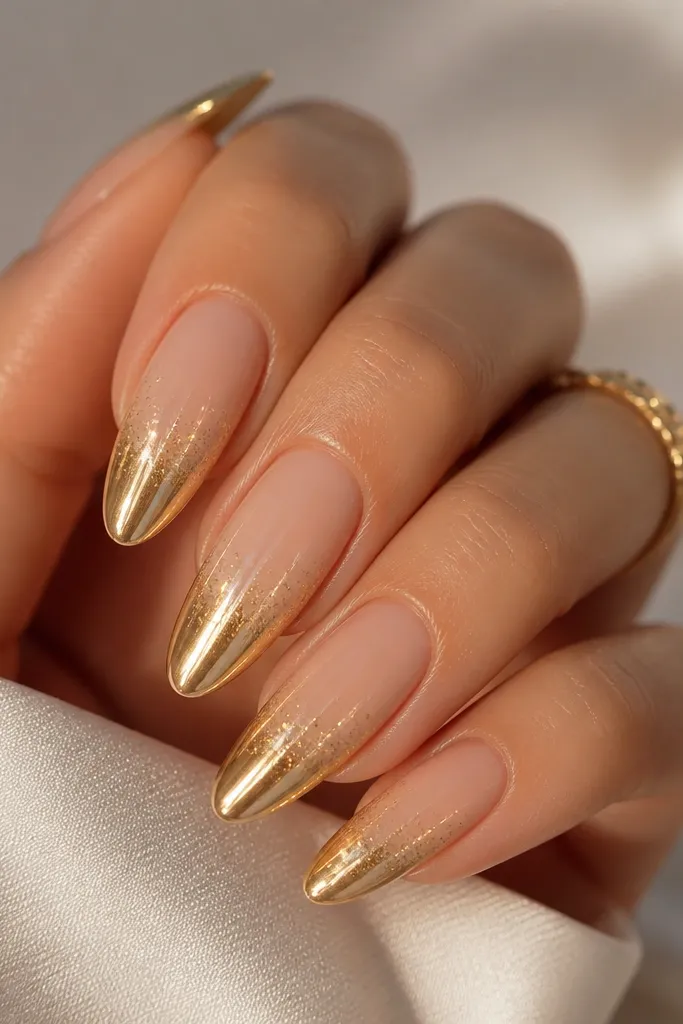
Gold chrome already reads luxe, but the micro light points make it feel like jewelry. The ombre is nude-beige to champagne gold, so it looks flattering on short nails and doesn't wash out. You apply gold mirror chrome first, then add tiny micro-glitter light points in a diagonal pattern near the tip. The light points are small enough to look intentional, and they catch light like suspended sparkle. I love this for warm skin tones, but fair skin looks amazing too because champagne gold warms everything up.
Prep, then apply a nude-beige base gel and cure. Sponge an ombre where the tip becomes dense champagne gold and the base stays sheer, then cure. Coat with gold mirror chrome all over, press, and wipe clean. Tap micro-glitter light gel (or a glitter topper with glow particles) on a diagonal line starting around the middle and ending near the free edge, using a dotting tool. Cure and seal with a thin, glossy top coat.
Editor's noteUse a wax-free lint-free wipe after chrome for extra clarity before you place glitter points.
Watch outDon't use chunky glitter - it lifts the chrome texture and can snag on sleeves.
5. Seafoam Ombre With Holographic Light Waves
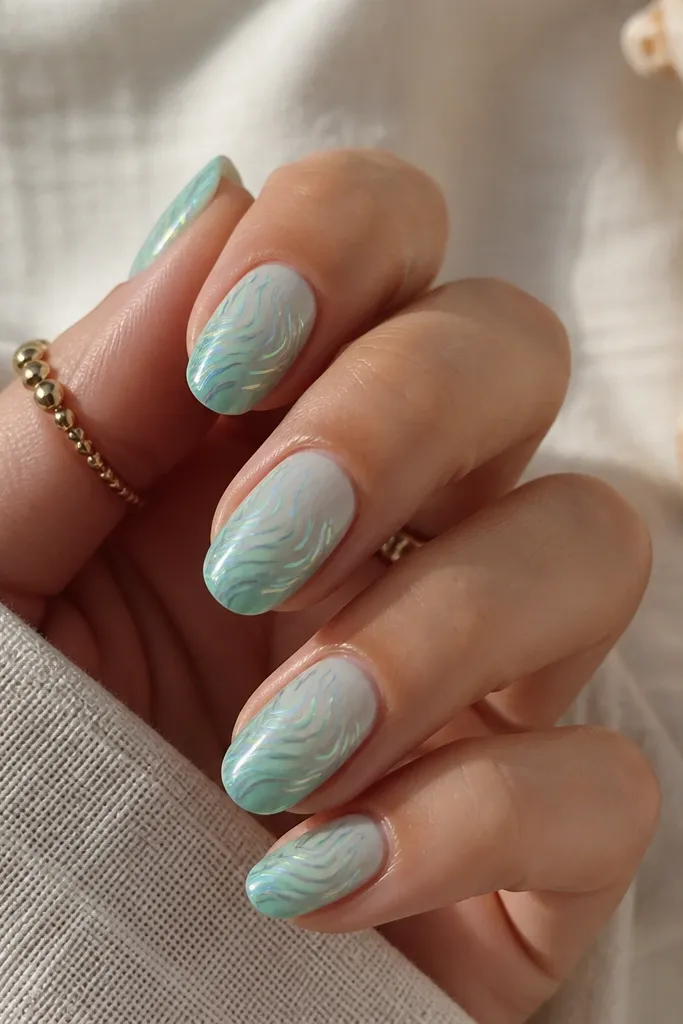
This one looks like ocean glass under a sunny window. The ombre goes from sheer mint to deeper seafoam, and it stays fresh without turning neon. You use a silver-pearl chrome so the holographic waves show movement instead of blending into the color. The light effect is a set of thin wave lines placed horizontally - when you tilt your hand, the lines shift and brighten. This design flatters cool undertones and also looks great on neutral skin because seafoam has enough grey to stay classy.
Start with a sheer mint base gel and cure. Sponge on a mint-to-seafoam ombre, blending the center so it looks like dyed glass, then cure. Apply silver-pearl chrome across the full nail and wipe for a mirror finish. With a holographic gel and a thin brush, paint two or three wave lines across the mid-to-tip area, keeping them spaced about 1-2 mm apart. Cure and top coat with two thin coats to keep the waves smooth.
Editor's notePaint waves in one direction only - starting and stopping mid-wave makes them look like scratches.
Watch outAvoid heavy top coat right over the wave lines; it can dull the holographic flare.
6. Smoky Lavender Ombre With Silver Glow Thread
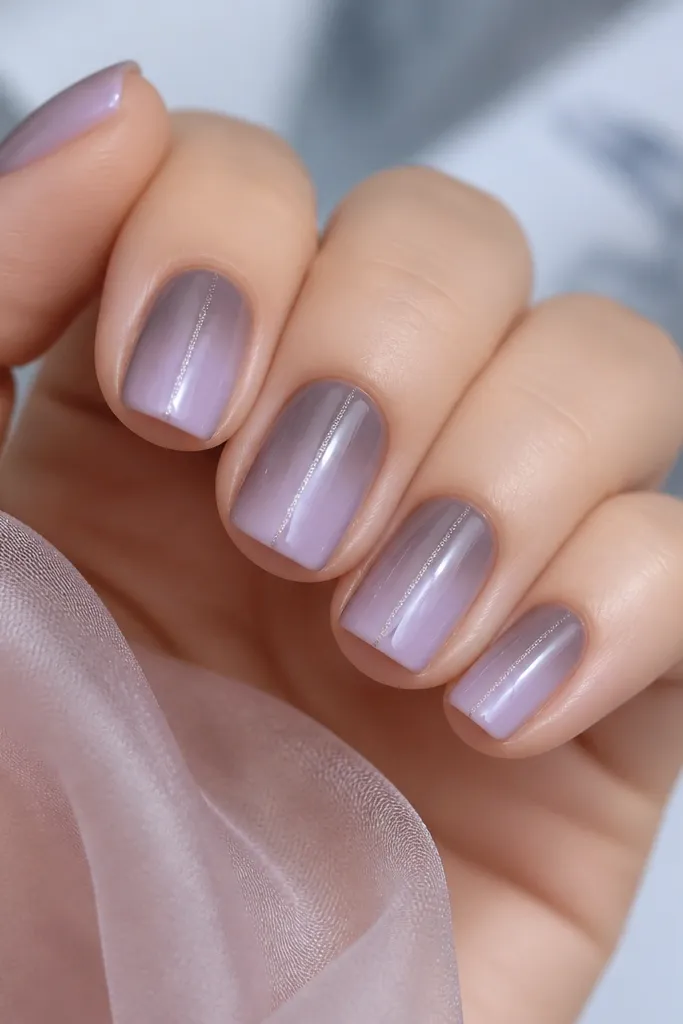
This is the "quiet but special" set that still looks good in daylight. The ombre is smoky lavender to soft lavender, so it has depth without looking muddy. Silver chrome gives you a clean reflection, and the silver glow thread in the center adds a vertical highlight that makes your nails look longer. It's flattering on short nail beds because the center line draws the eye upward. If you wear silver jewelry a lot, this matches perfectly.
Prep and apply a sheer lavender base gel, cure. Create the ombre with sponge: start with smoky grey-lavender near the cuticle, blend into lavender toward the tip, then cure. Apply silver chrome all over, press gently, wipe clean. Use a fine detail brush to draw a thin vertical line of silver glow gel from just above the center cuticle area to the tip, then cure. Finish with a glossy top coat in one thin coat plus a second only if you feel any texture.
Editor's noteSqueeze out excess from the detail brush on a palette - the thread should look like a hairline, not a stripe.
Watch outDon't make the glow thread too wide or it turns into a blob that kills the ombre gradient.
7. Cocoa Brown Ombre With Warm Gold Light Ribbon
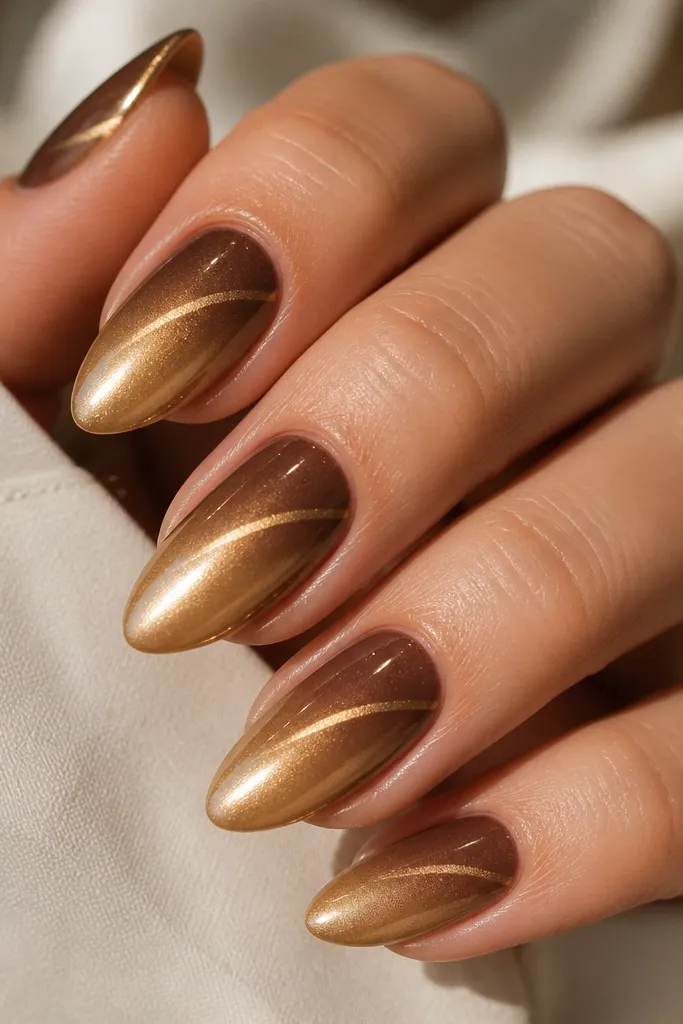
This set looks like coffee and candlelight. Ombre starts cocoa brown at the base and melts into caramel nude at the tip, so it looks rich without looking heavy. Warm gold chrome gives a buttery reflection that flatters olive and warm undertones, and it also looks stunning against cooler skin because the warm gold brings balance. The light effect is a gold glow ribbon placed diagonally under the midline, like a highlight on fabric. When you move your hands, the ribbon brightens and makes the ombre look dimensional.
Apply a cocoa-brown base gel, cure, then sponge on caramel nude at the tip and blend. Cure again. Rub warm gold chrome over the full nail, press, and wipe clean. With a small angled brush, paint a thin diagonal ribbon of warm gold glow gel starting about 2-3 mm away from the cuticle and ending around mid-nail. Cure and seal with a glossy top coat, keeping the ribbon area covered but not flooded.
Editor's noteIf your ribbon disappears, add a second ultra-thin glow layer only on the top edge of the ribbon.
Watch outDon't put the ribbon too close to the tip - it will compete with the ombre highlight.
8. Coral Ombre With Peach Chrome And Light Dot Constellation
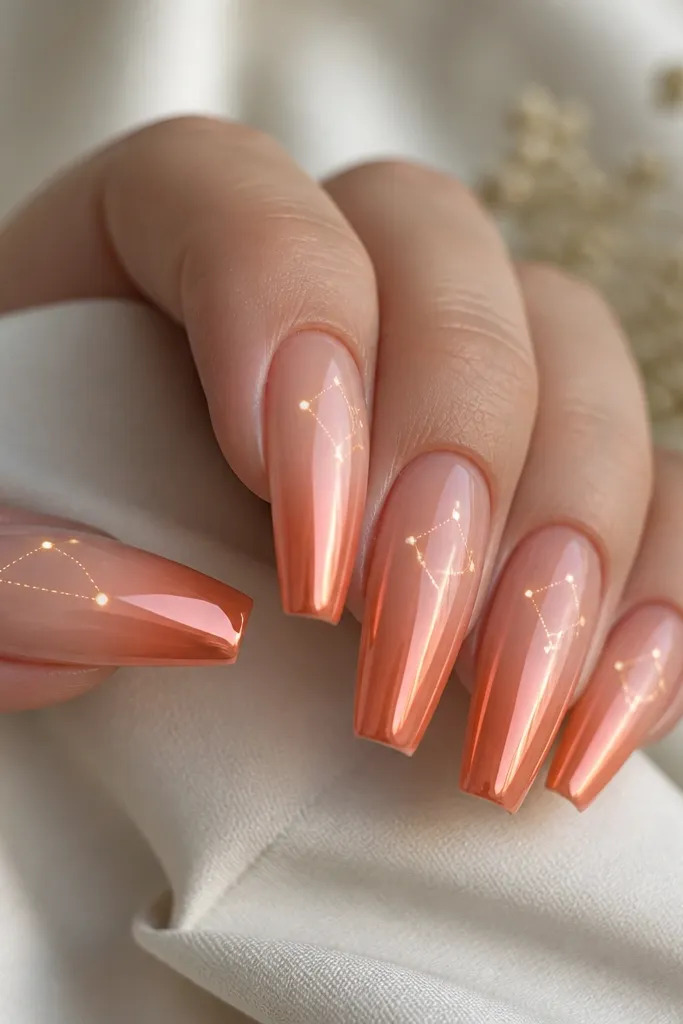
This one is playful but still polished. The ombre is coral nude to coral-orange, which flatters most skin tones because coral sits in a flattering middle ground between pink and orange. Peach chrome keeps the reflection soft and warm, and the constellation of glowing dots gives you that "lights" effect without adding bulk. I like it on hands with shorter fingers because the dots sit high on the nail and draw attention upward. In photos, the dots look like tiny lights blinking over the chrome.
Start with a sheer coral base gel, cure. Sponge on coral ombre from nude cuticle to coral tip, keeping the fade smooth, then cure. Apply peach chrome across the nail, press, and wipe clean. Use a dotting tool to place small dots of peach glow gel in a loose constellation pattern in the upper third, leaving space between dots. Cure and finish with a glossy top coat in one or two thin layers so the dots stay raised enough to catch light.
Editor's noteUse a toothpick to place the smallest dots - it gives better control than a big dotting tool.
Watch outAvoid overdoing the dots; too many makes it look like glitter stuck in gel.
9. Onyx Black Ombre With White Chrome And Cold Light Halo
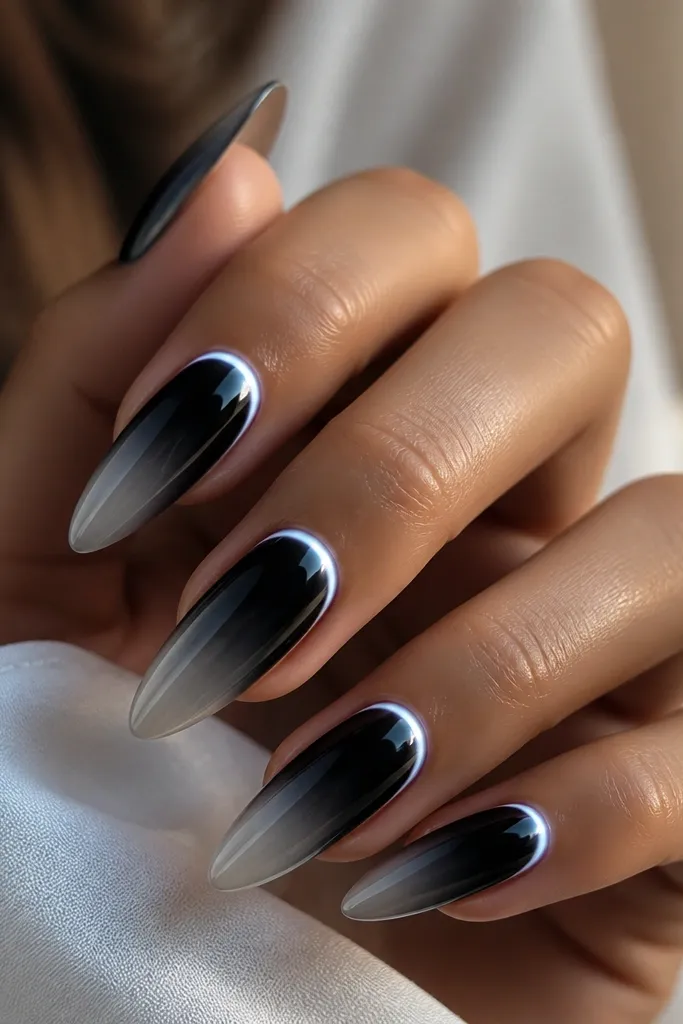
If you like edgy nails that still look clean, this is it. The ombre starts onyx black and fades into smoky grey, then you switch to white chrome for a bright mirror surface. The cold light halo ring at the cuticle gives a frosty frame that makes your nail bed look tidy and longer. I've worn this with black outfits and silver rings and it looks intentional every time. It's especially flattering when your skin has neutral or cool undertones because the white chrome doesn't pull yellow.
Prep and apply a black base gel, cure. Sponge on a black-to-smoky grey ombre, keeping the fade smooth and not streaky, then cure thoroughly. Apply white chrome across the full nail, press, and wipe for a crisp mirror. Paint a thin halo ring of cold white glow gel around the cuticle area, about 1 mm wide, then cure. Top coat with a glossy chrome-friendly top coat, keeping the halo area thin so it stays bright.
Editor's noteUse a gel liner for the halo ring; it keeps the circle even instead of wobbly.
Watch outDon't let the halo gel touch the skin - it will lift and look messy fast.
10. Teal Ombre With Emerald Chrome And Neon Light Spine
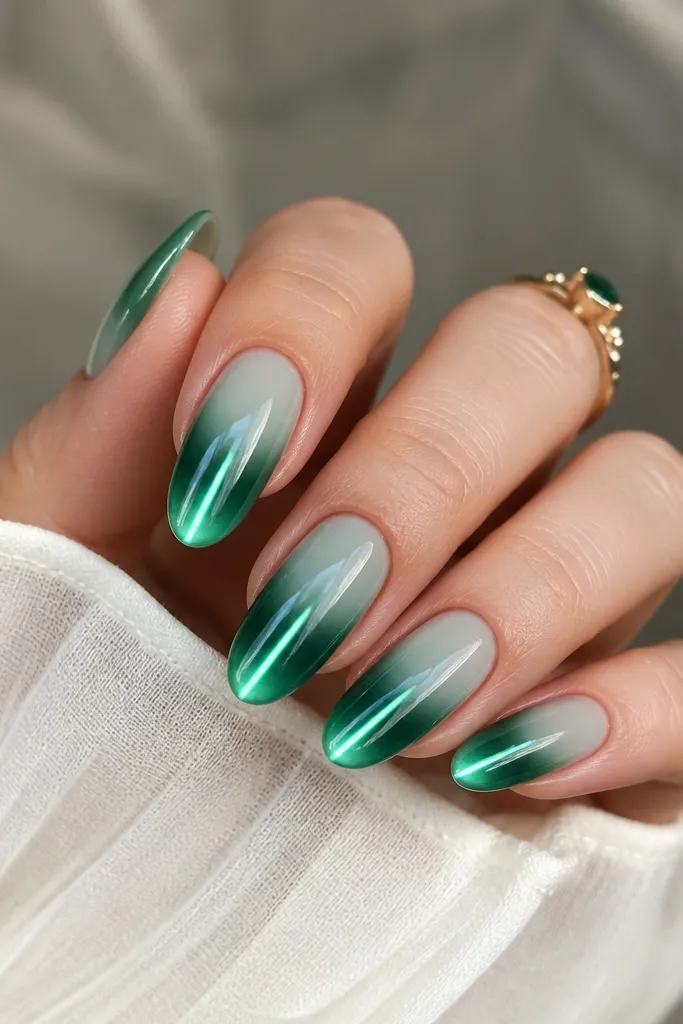
This is the "center spotlight" design. Your ombre is teal to deep teal, so it looks rich and not washed out. Emerald chrome gives you a saturated mirror reflection that looks expensive in daylight. The neon light spine is a thin center line of glow gel - it brightens at the tip and makes the nail look longer and more slender. I recommend this if you like bold color but hate thick decorations. It's also great for summer events and beach nights because teal + neon glow reads like sunlit water.
Apply a sheer teal base gel and cure. Sponge an ombre from teal cuticle to deeper teal tip, blending so there are no hard bands, then cure. Apply emerald chrome across the whole nail and wipe clean. With a fine brush, paint a thin neon light spine down the center, starting slightly below the cuticle and ending near the free edge, then cure. Seal with glossy top coat in thin layers so the spine stays bright and doesn't get muted.
Editor's noteIf your spine looks uneven, use a second pass after curing the first - thin lines look better than one thick line.
Watch outDon't cover the spine completely with thick top coat; it dulls the glow.
11. Lilac Smoke Ombre With Aurora Chrome Flare
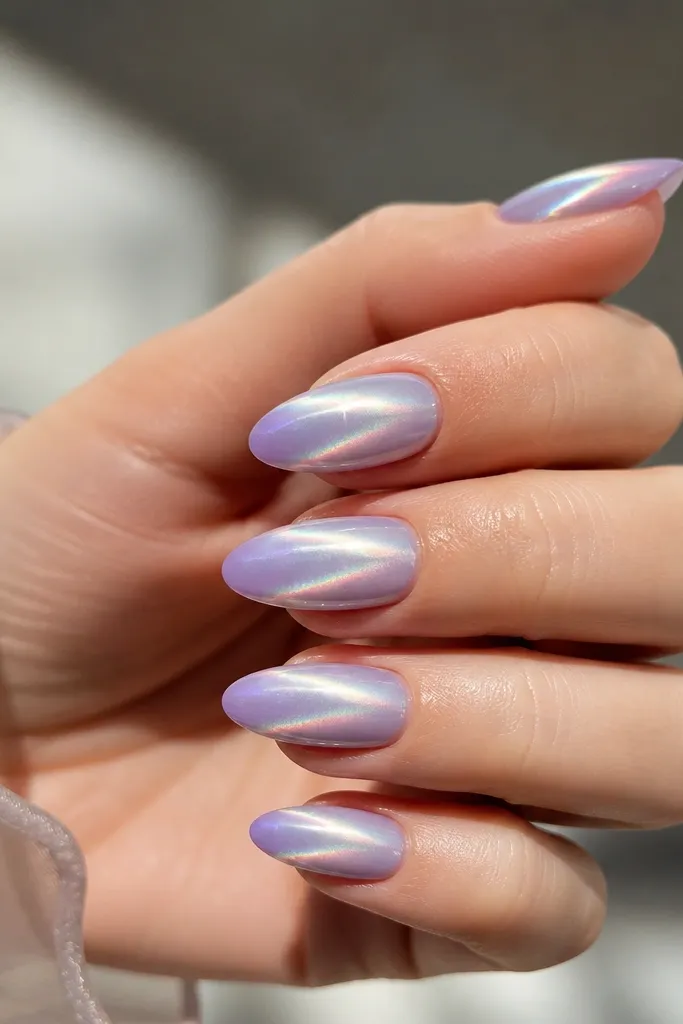
Aurora chrome is the cheat code for "lights" without adding a bunch of extra art. Start with a lilac smoke ombre so the base has depth, then use aurora chrome so you get shifting colors across the nail. Add one flare streak near the tip with a lilac-leaning glow gel - it looks like a spotlight in motion. This set flatters fair to medium skin by keeping things soft and wearable, and it also looks good on deeper skin because the lilac smoke has enough contrast to show. It's a great option for spring and for people who want something different from standard silver chrome.
Prep and apply a sheer grey-lilac base, cure. Sponge on lilac smoke ombre: grey-lilac near the cuticle, then blend into lilac at the tip, then cure. Apply aurora chrome across the entire nail, press, and wipe clean. Place a single flare streak of glow gel near the tip center, angled slightly so it catches light when your hand moves, then cure. Finish with glossy top coat, two thin layers if you need extra smoothness.
Editor's noteAngle the flare streak about 20-30 degrees off straight - that tilt looks better in photos than a perfectly vertical line.
Watch outAvoid adding multiple flares; one clean streak looks intentional, three starts to look like random light scatter.
12. Nude Ombré With Rose Gold Chrome to White Light Edge
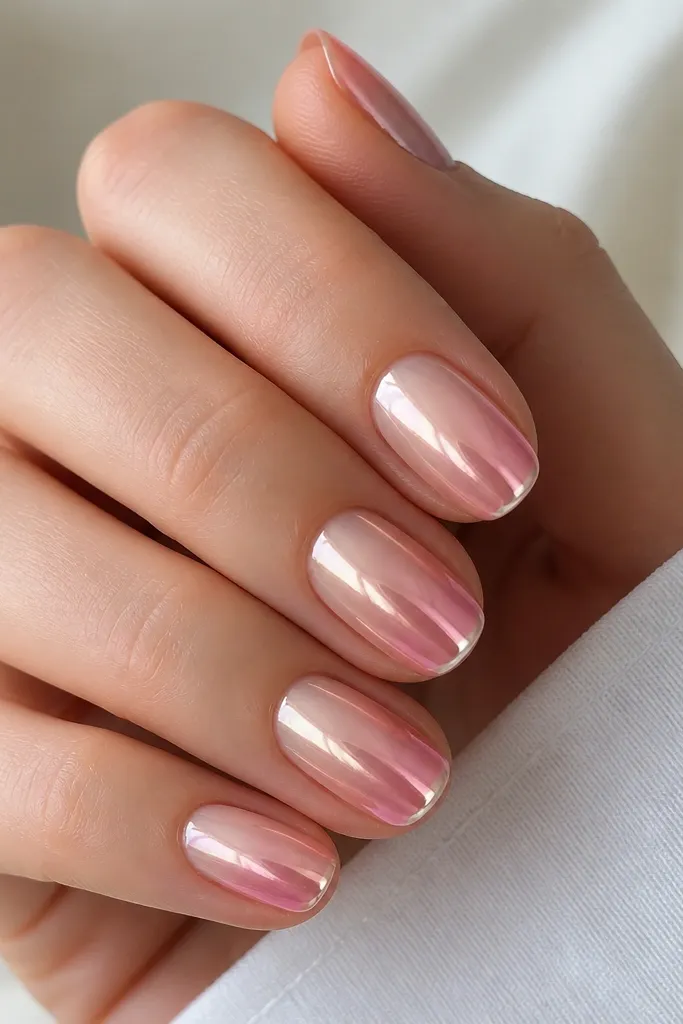
This is the "French but better" version. You keep the ombre subtle - nude to soft pink - so it matches everyday outfits. Rose gold chrome gives warmth and a mirror shine without going too flashy. Then you add a thin white light edge line at the very tip, like the reflection of a ring light. The effect makes the nail look crisp and fresh even if your ombre is gentle. It's flattering on almost everyone because it stays in neutrals and looks clean on short nails.
Start with a nude base gel and cure. Sponge a nude-to-soft-pink ombre, concentrating pigment at the tip, then cure. Apply rose gold chrome over the whole nail and wipe clean for a mirror finish. Using a fine detail brush, draw a thin white glow line exactly along the free edge, then cure. Seal with glossy top coat in one thin coat, then a second only if you feel any ridge.
Editor's notePaint the white light edge in two passes instead of one - you get a sharper line with less bleeding.
Watch outDon't let the white line creep down the sides; keep it tip-only for that clean look.
13. Forest Green Ombre With Silver Chrome And Bright Lime Halo
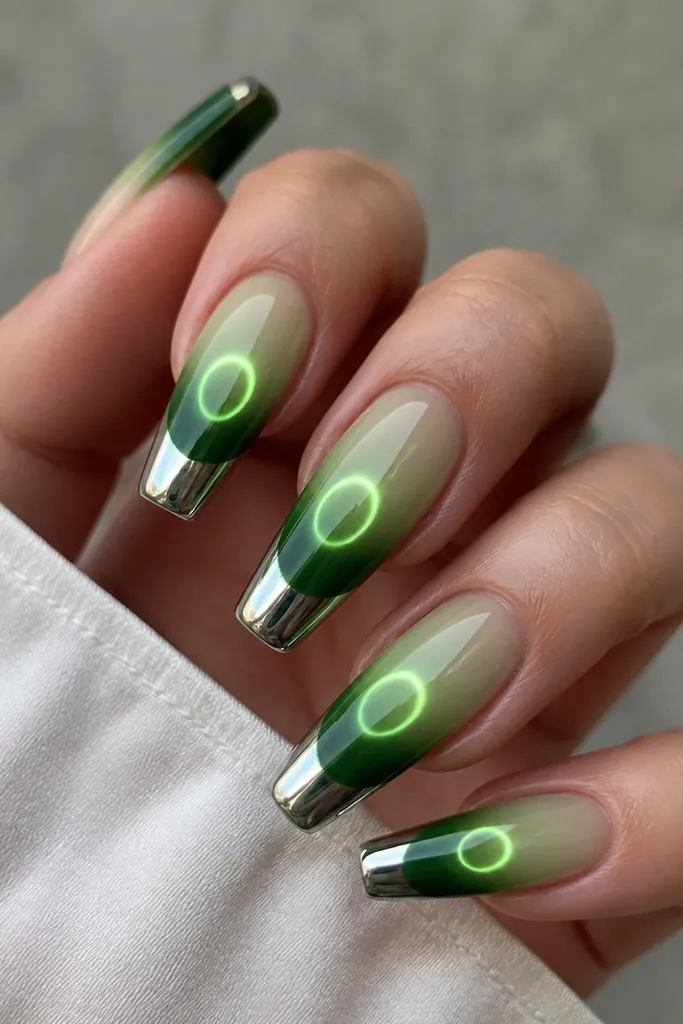
This one is for people who like a surprise pop. The ombre goes from sheer green to deep forest green, which gives you a strong base color. Silver chrome keeps the reflection crisp and stops the green from looking dull. The light effect is a lime halo ring placed around the middle, not the cuticle, so it looks like a glowing spotlight over the nail. It's flattering on most skin tones and especially good if you wear gold and silver jewelry because the lime halo adds energy without clashing.
Prep and apply a sheer green base gel, cure. Sponge the ombre into a deep forest tip, blend well, then cure. Apply silver chrome across the entire nail and wipe clean. With a ring stencil or by freehand using a gel liner brush, place a thin lime glow halo around the mid-nail area, leaving equal space above and below, then cure. Top coat with a glossy chrome-friendly top coat in thin layers so the halo stays bright.
Editor's noteIf freehand rings wobble, use a small strip of clear tape as a guide to keep the halo even.
Watch outSkip placing the halo too close to the cuticle - it can look like a stain instead of a design.
14. Burgundy Ombre With Copper Chrome And Flicker Lights
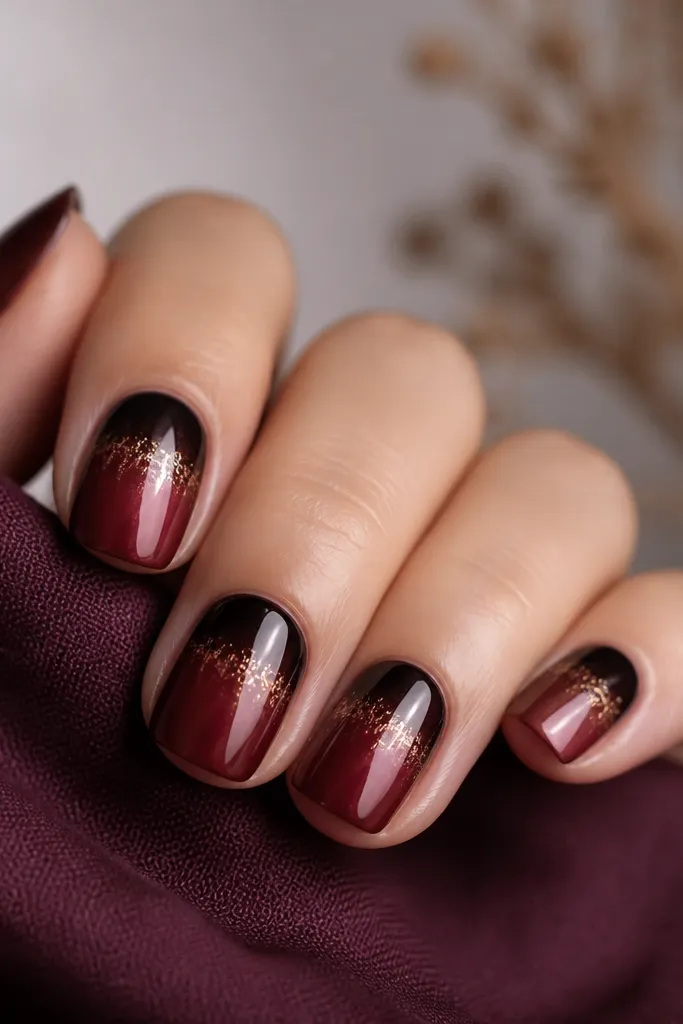
This design looks like candlelight on dark fabric. The ombre is burgundy to wine red, giving a smooth gradient with enough warmth to look rich. Copper chrome reflects with a softer glow than pure gold, so it reads flattering in indoor lighting. The "lights" are tiny flicker strokes - short diagonal lines placed only in the upper third - so you get movement without covering the whole nail. It's great for fall, holiday parties, and anyone who wants dark nails that still photograph bright.
Apply a burgundy base gel, cure. Sponge on burgundy-to-wine red ombre, keeping the fade smooth and concentrated at the tip, then cure. Apply copper chrome across the nail and wipe clean. Use a thin brush to paint 4-6 short flicker strokes with glow gel in the upper third, spacing them so they look like light moving across glass. Cure and seal with a glossy top coat in two thin layers.
Editor's noteKeep the flicker strokes different lengths; matching lengths looks like decorative scratches.
Watch outDon't add glow strokes near the center cuticle line - it can make the nail look crowded.
15. Butter Yellow Ombre With Gold Chrome And Bright White Spark Trail
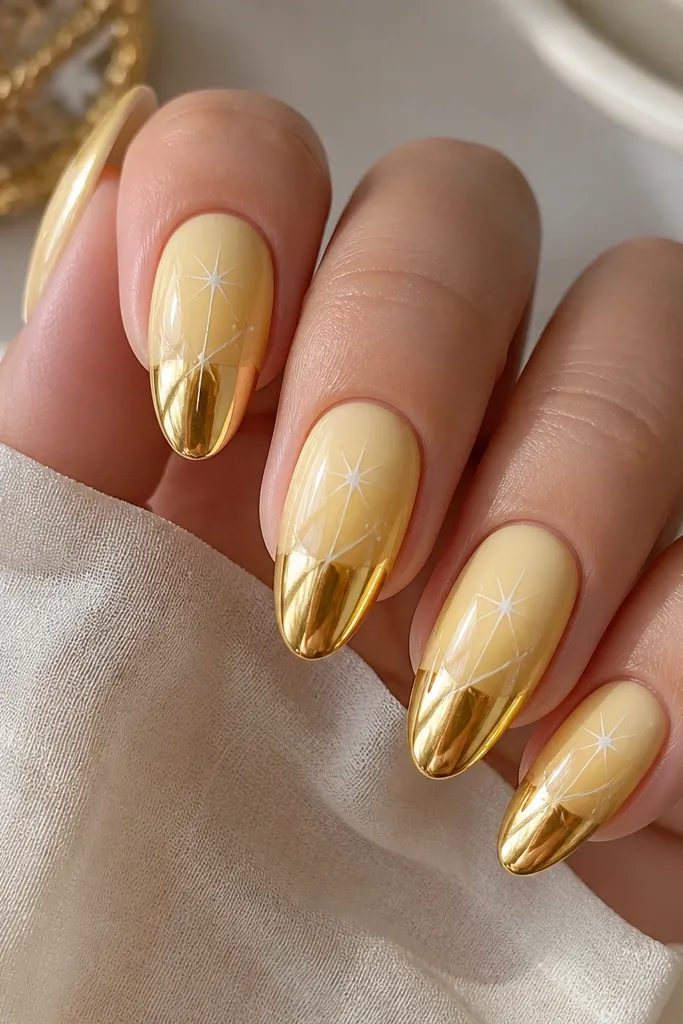
This set is pure sunshine. The ombre starts sheer butter yellow and melts into golden yellow at the tip, which keeps it bright without looking neon. Gold chrome makes the surface reflect like polished jewelry. Then you add a thin white spark trail angled toward the tip - it looks like a streak of light from a camera flash. I like this on fair to medium skin because the yellow doesn't fight undertones, and it's also easy to pair with gold rings and warm-toned outfits. For summer photos, it looks like you're wearing tiny spotlights.
Prep and apply a sheer butter yellow base gel, cure. Sponge the ombre so the tip is denser and the base stays translucent, then cure. Apply gold chrome across the full nail, press, and wipe clean. With a detail brush, draw a diagonal spark trail using a white glow gel, making it thin near the middle and slightly thicker near the tip, then cure. Finish with glossy top coat, two thin layers so the spark stays crisp.
Editor's noteIf the trail looks dull, add a second ultra-thin glow layer only along the top edge of the trail.
Watch outDon't use a thick glitter gel for the trail - it turns textured and catches on hair.
16. Pearl Nude Ombre With Silver Chrome And Moonlight Cuticle Glow
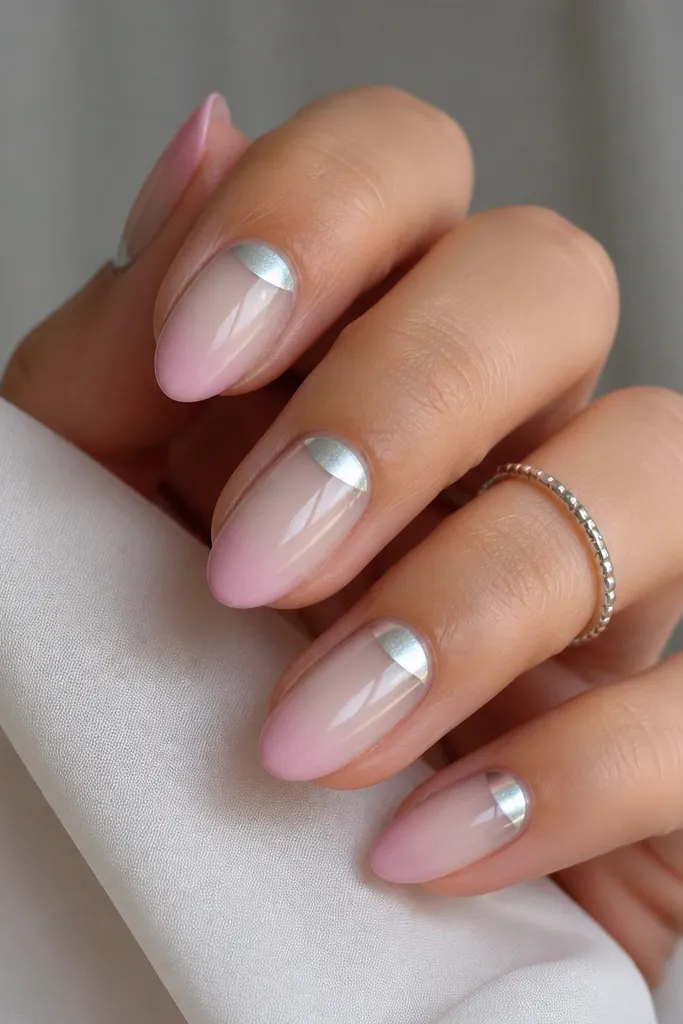
This is the most flattering "date night" chrome set I've worn because it looks clean even when your hands are relaxed. The ombre is pearl nude to pale pink, so it keeps your nails looking natural. Silver chrome gives a crisp mirror that doesn't clash with your skin tone. The light effect is a moonlight crescent glow placed just inside the cuticle area - it brightens the nail bed and makes the cuticle line look intentional. It works on short nails because the glow focuses where the nail starts.
Start with a pearl nude base gel and cure. Create the ombre into pale pink at the tip using a sponge, keeping it subtle and blended, then cure. Apply silver chrome over the entire nail, press, wipe clean. Use a small makeup sponge or crescent brush to add moonlight glow gel in a gentle crescent just above the cuticle line, then cure. Seal with glossy top coat in thin layers, especially around the crescent so it stays smooth.
Editor's noteUse a tiny amount of glow gel - the crescent should look like light, not like paint.
Watch outAvoid getting glow gel on the skin; crescent glow that touches skin lifts fast.
17. Lilac Ombre With Magenta Chrome And Pink Light Spark Borders
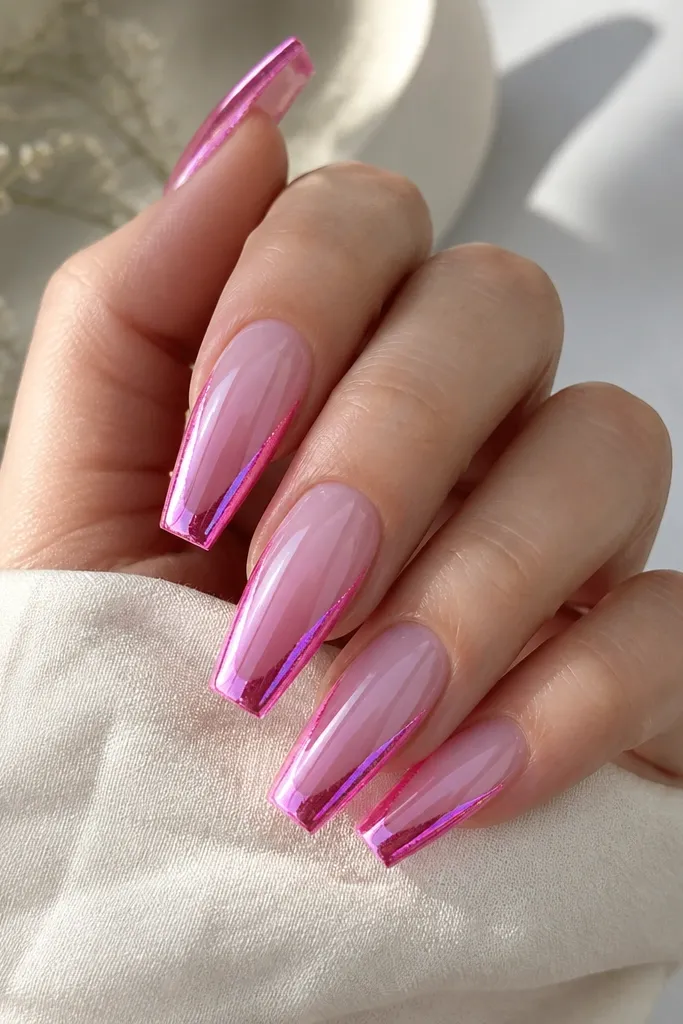
This design has a frame effect. The ombre starts sheer lilac and deepens at the tip so the gradient reads even from a distance. Magenta chrome makes the whole nail pop under indoor lights, and it looks especially good if you wear pink lipstick or blush. The light effect is a spark border: you trace the side edges with pink glow gel and add a small border segment at the tip corners. It makes your nails look shaped and neat, even if your natural nail has slight unevenness. I've gotten compliments because it looks like nail art you'd see in a salon photo.
Prep and apply a sheer lilac base gel, cure. Sponge on lilac ombre into a deeper tip, blend edges, then cure. Apply magenta chrome across the whole nail and wipe clean. Use a striping brush to trace both side edges with pink glow gel from about mid-nail to near the tip, then cure. Add two tiny spark border accents at the tip corners, cure again, and finish with glossy top coat.
Editor's noteFor sharp borders, wipe your brush on a lint-free wipe before you dip back into glow gel.
Watch outDon't thicken the border - wide borders make the nail look bulky and less glossy.
18. Smoke Grey Ombre With Graphite Chrome And Cool White Flash Dots
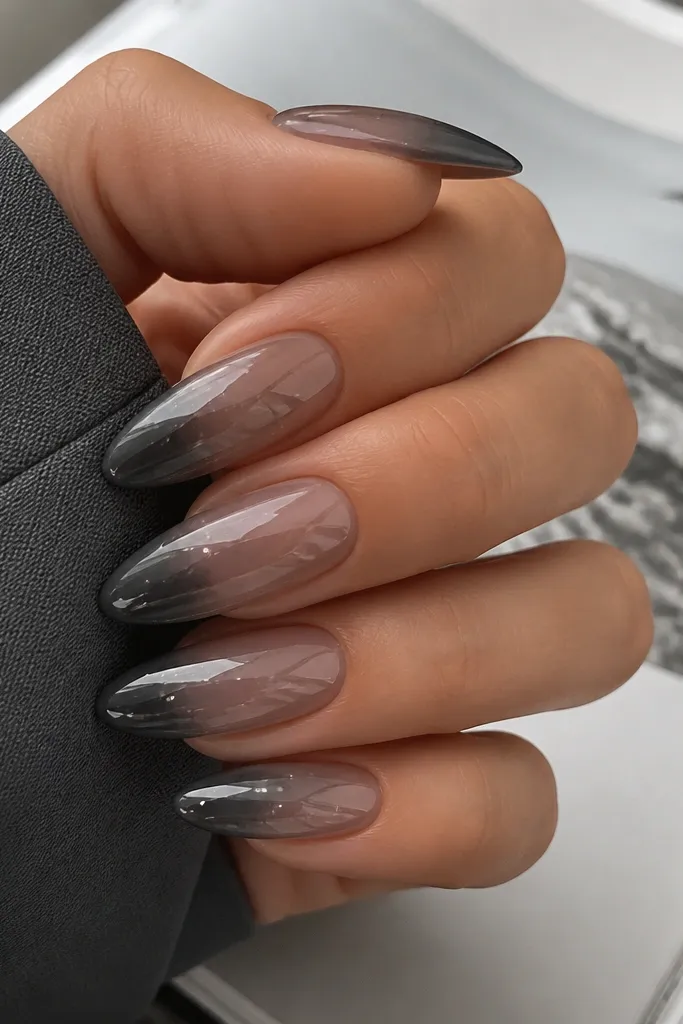
This set looks modern and camera-friendly. The ombre is smoke grey to graphite, so the base has depth even before chrome. Graphite chrome gives a darker mirror reflection that doesn't look flat like regular grey polish. The cool white flash dots are tiny, placed in the center region so they feel like camera highlights on glass. It flatters cool undertones and also looks good on neutral skin because the grey keeps everything balanced. If you wear black, grey, or navy, this is an easy win.
Apply a sheer smoke grey base gel and cure. Sponge an ombre into graphite at the tip, keeping the fade smooth, then cure. Rub graphite chrome across the full nail, press, and wipe clean for a mirror. Use a dotting tool to place 5-7 cool white glow dots near the center of the nail, leaving negative space so it doesn't look like glitter. Cure and seal with glossy top coat in thin layers, making sure the top coat doesn't cover the dots unevenly.
Editor's noteScatter dots with different spacing - a tight cluster looks like a stain.
Watch outAvoid large dots; bigger dots look like chunky glitter once you top coat.
19. Peach Ombre With Rose Gold Chrome And Soft Lantern Lights
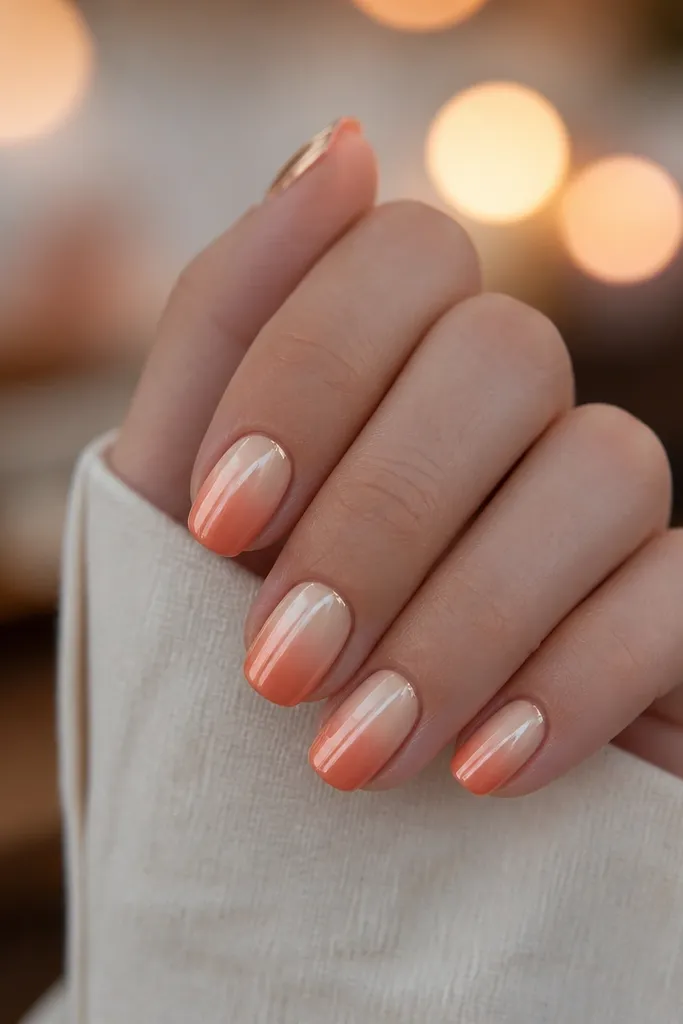
This is the "warm light" look. Peach ombre is forgiving and flattering because it sits close to natural nail color while still showing a gradient. Rose gold chrome adds that warm mirror shine, and the lantern lights are soft circular glow patches placed in the upper third. They brighten your nail bed without feeling like heavy nail gems. I like this for birthdays, brunch, and any time you want compliments that feel sweet rather than intense. It also looks great on hands with slight dryness because the glow draws attention away from texture.
Start with a creamy peach nude base gel and cure. Sponge on peach ombre into a warmer peach tip, then cure until fully set. Apply rose gold chrome all over, press, and wipe clean. Use a small rounded brush to dab soft lantern glow circles in the upper third - keep them translucent at the edges so they look like light, not blobs. Cure and finish with a glossy top coat, two thin coats if needed for full smoothness.
Editor's noteMake the lantern circles slightly different sizes; it looks more natural and less "sticker" like.
Watch outDon't make the glow circles opaque - opaque circles look like paint under chrome.
20. Chocolate Brown Ombre With Black Chrome And Neon White Corner Lights
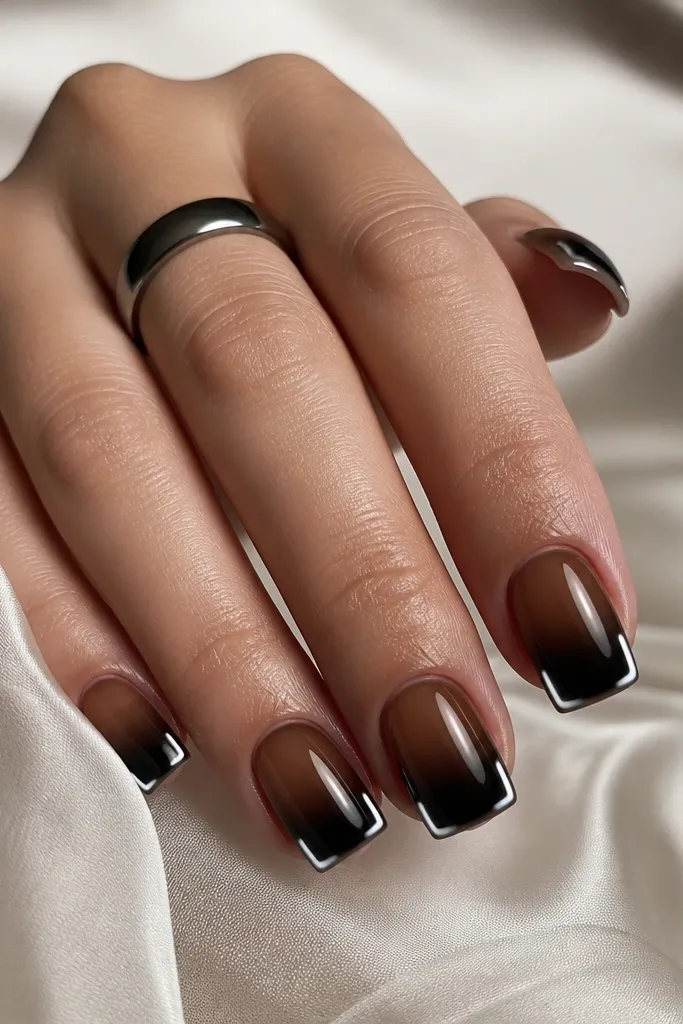
This is dramatic without being cluttered. The ombre is chocolate brown to near-black, so it looks moody and smooth. Black chrome gives a deep mirror that looks almost wet, and it makes white glow corners pop like a camera frame. The neon white corner lights are tiny and placed where the nail edges meet the free edge, so your nails look sharply outlined. It's flattering on medium to deeper skin tones because the contrast is bold, but fair skin can pull it off too if you keep the ombre soft and not too streaky. This set is a guaranteed conversation starter at night.
Prep and apply a chocolate brown base gel, cure. Sponge the ombre toward near-black at the tip, blend until smooth, then cure. Apply black chrome across the nail, press, wipe clean for a true mirror. With a fine brush, paint neon white glow only at the four corner points: two side corners and two near the free edge corners, then cure. Seal with a glossy top coat in thin layers, keeping the corners protected but not thick.
Editor's noteUse a gel liner pen if you have one - it keeps corner points sharp and symmetrical.
Watch outSkip painting glow all along the sidewalls - corner-only looks sleek; full lines look heavy.