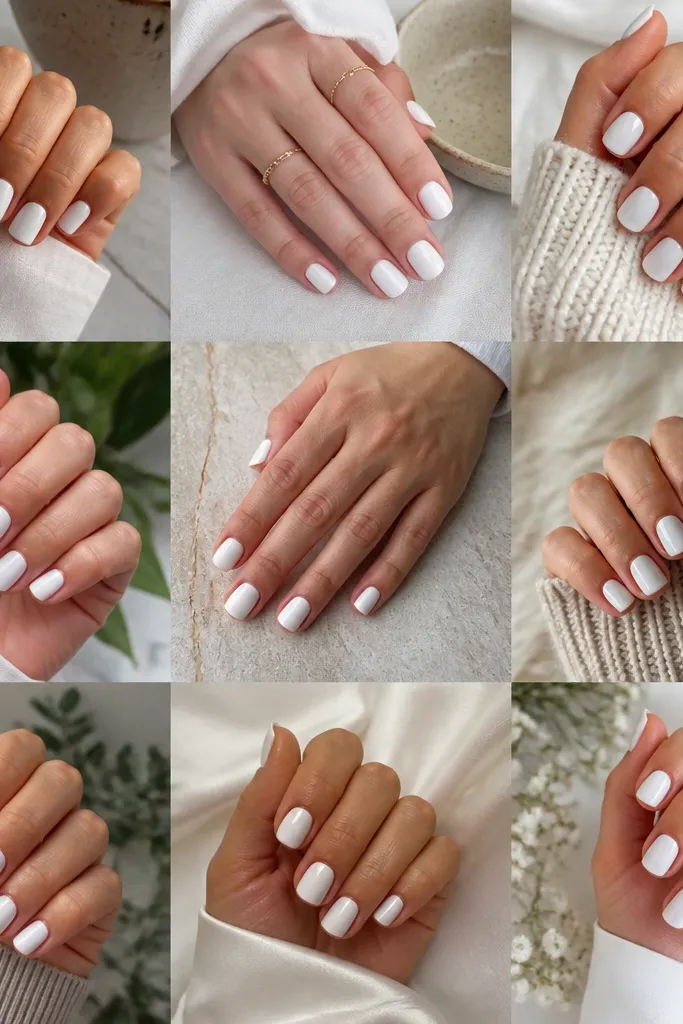
1. Blush Nude to Icy Silver Fade
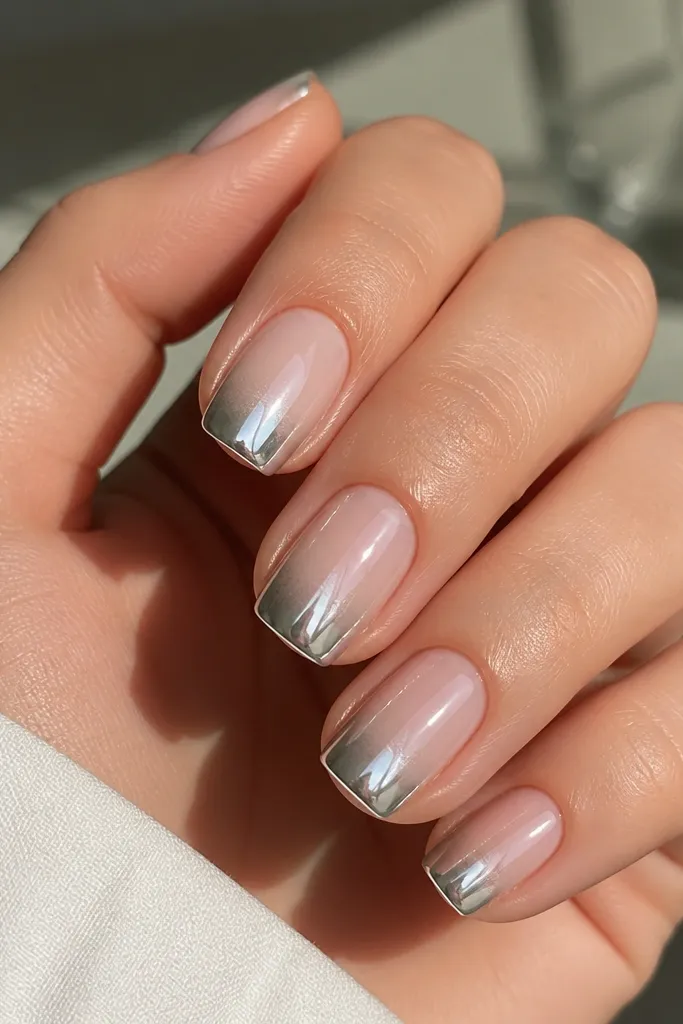
This one is my everyday "quick" set because it flatters almost every skin tone. Start with a sheer blush nude that matches your natural nail bed, then fade into icy silver chrome so the tips catch light without looking harsh. The contrast is gentle, so it doesn't make fingers look longer or shorter - it just gives that clean, polished effect. I wear this for office days and casual dinners because it reads soft, not flashy.
File and shape your nails to a short squoval, then push back cuticles and buff the shine lightly. Paint a sheer blush nude gel and cure it fully. Sponge a second layer of nude slightly darker at the top half, then tap it down the nail so you get a smooth fade. Cure, wipe with a lint-free pad, apply a tacky chrome base only on the top-half gradient, then press or dust icy silver chrome powder and cure again. Finish with a thin top coat over the whole nail to lock it in.
Editor's noteIf your silver looks gray, use a cooler nude base instead of warm beige - the fade will look brighter.
Watch outDon't chrome the entire nail when you want an ombre look - it turns into a flat silver sheet.
2. Peachy Nude to Rose Gold Chrome Tip
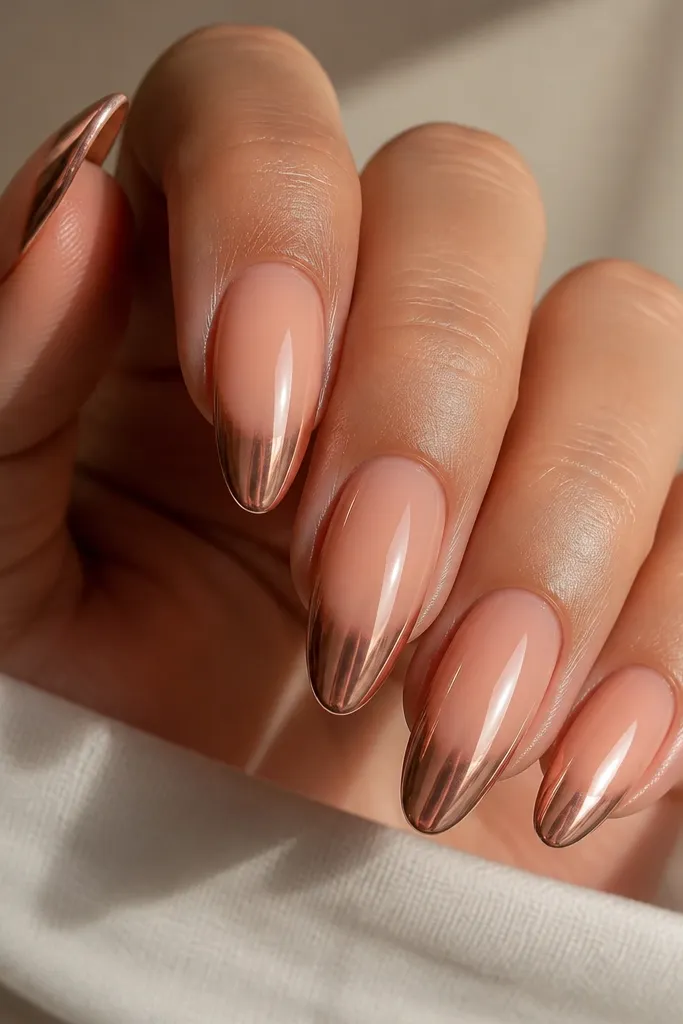
Rose gold chrome is the fastest way to make ombre look intentional on warmer skin tones. The peach-to-rose gradient gives warmth at the end of the nail, where the eye naturally lands. It also looks great on short nails because the chrome tip creates a subtle "lift" without shrinking the nail bed. I love this for spring weddings, birthday dinners, and any time you want compliments without a loud pattern.
Start with a peachy nude gel base on all nails and cure. Sponge a slightly deeper peach (one shade darker) from mid-nail upward, leaving the cuticle area sheer. Cure again. Apply rose gold chrome powder only on the sponged top-half area - dust it on, then tap off excess. Seal with a thin non-wipe top coat, then cap the free edge lightly with the same top coat to prevent tip lifting.
Editor's noteUse a damp makeup sponge edge for the fade - it blends cleaner and reduces harsh lines.
Watch outDon't overbuild the peach layer; thick gel makes the gradient look muddy.
3. Milky White to Mirror Chrome French Fade
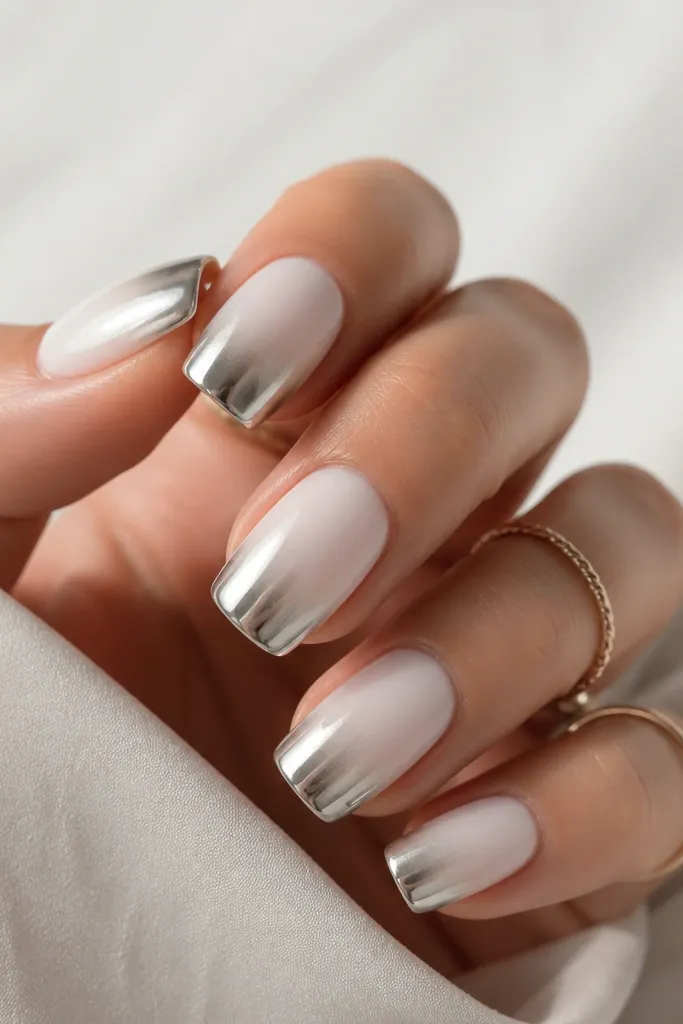
This is the "fresh manicure" look when you want something crisp but still quick. The milky white gives a smooth canvas, and mirror chrome at the tips makes the nails look sharper and more expensive. Because the chrome is concentrated toward the free edge, it hides tiny chips better than full-coverage chrome. It's a great pick for short nails and for anyone who hates when chrome catches on everything.
Apply a milky white gel to about the top two-thirds of the nail, leaving the cuticle area slightly translucent. Cure. With a sponge, dab a small amount more milky white at the tip, then blend upward lightly so the fade is diagonal. Cure again, then apply a tacky chrome layer only over the upper third to near-tip zone. Dust mirror chrome powder, press gently, and cure. Finish with a glossy top coat and wipe the dispersion layer if your system creates one.
Editor's noteIf your chrome looks patchy, wait 10-15 seconds after applying the tacky layer so it becomes tackier before dusting.
Watch outDon't use bright opaque white if your base gel is thick - it can look chalky under chrome.
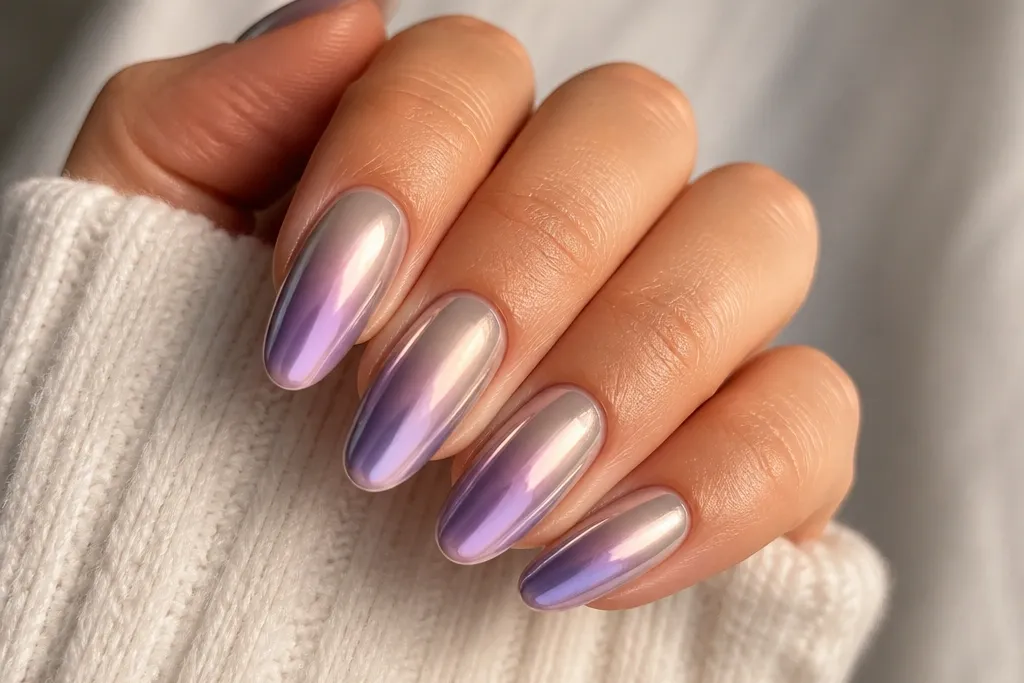
4. Lavender Mist to Platinum Chrome
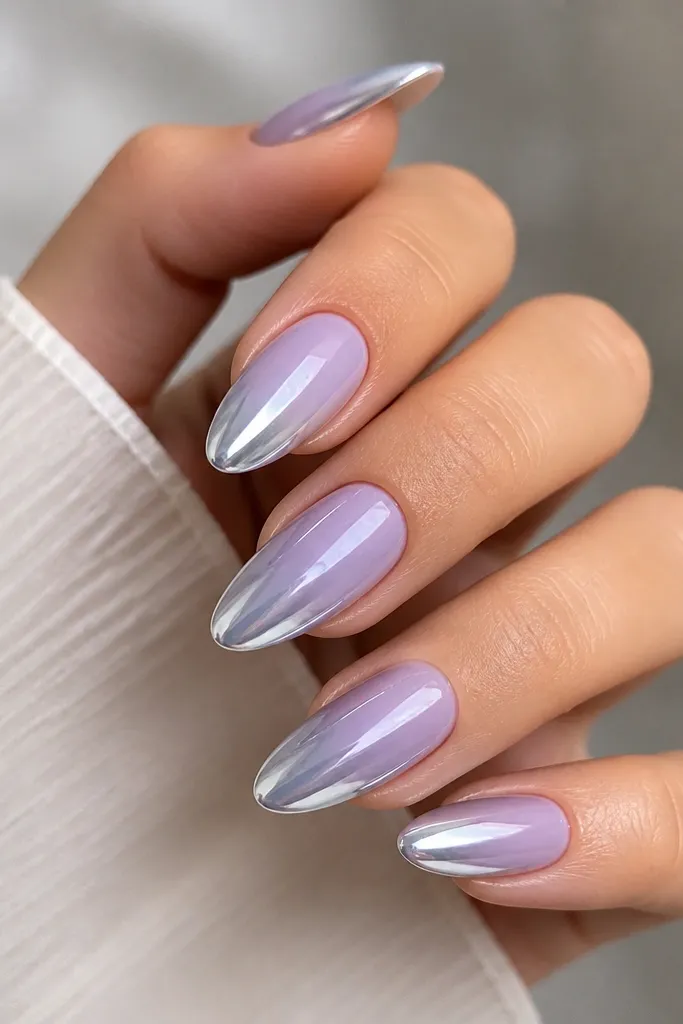
Lavender-to-platinum is the "cool girl" version of ombre chrome. It looks expensive because the lavender stays airy while the platinum gives that cold, glassy shine. This combo is flattering on fair to medium skin because it brightens the nail without going neon. I wear this when I'm doing cooler outfits - gray knits, satin tops, and silver jewelry.
Start with a sheer nude base gel and cure. Sponge lavender gel starting around mid-nail upward, keeping the cuticle area thin and clean. Cure fully. Apply a tacky chrome base only where the lavender is heaviest, then dust platinum chrome powder. Tap off excess and cure. Use a glossy top coat, and cap the free edge so the chrome stays mirror-smooth at the tip.
Editor's noteFor a misty fade, don't press hard with the sponge - let the foam texture do the blending.
Watch outAvoid mixing lavender too thickly at the cuticle - it makes the ombre look like a stain.
5. Mocha Brown to Smoke Chrome Fade
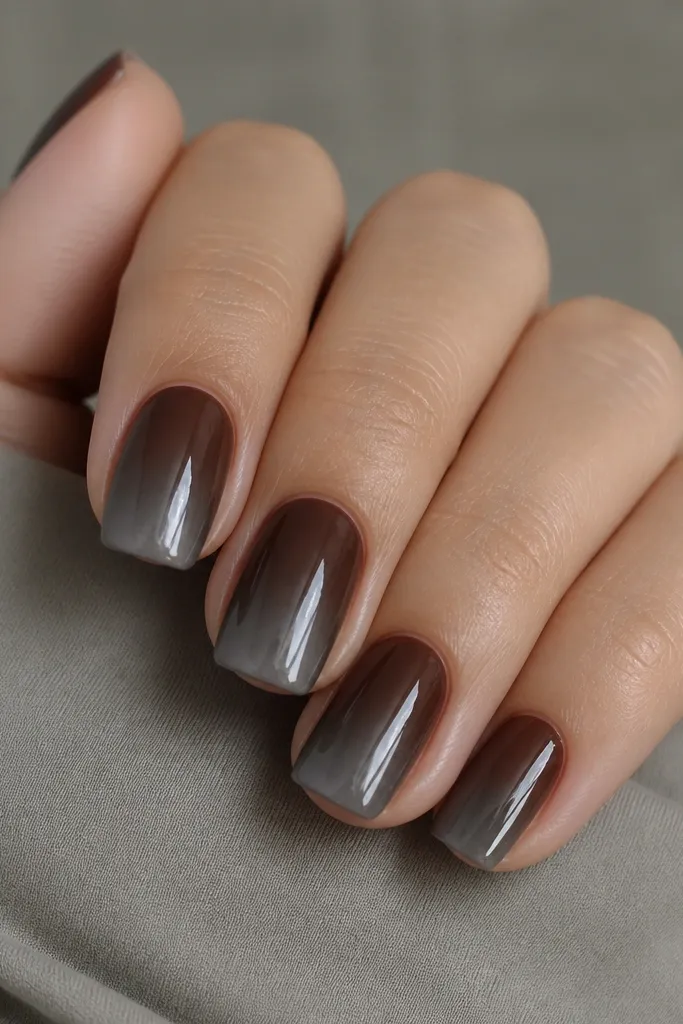
This is my fall and winter standby when you want chrome but don't want "party" nails. The mocha start grounds the look, and smoke gray chrome keeps it modern instead of bright. It also looks good on deeper skin tones because the brown doesn't wash out. I like it for knitwear weeks and holiday dinners because it reads cozy, not loud.
Apply a sheer nude base and cure. Sponge mocha brown gel from the mid-nail up, then blend down slightly so the fade looks like smoke. Cure. Add a tacky chrome layer only on the top-half gradient, then dust smoke gray chrome powder and press lightly. Cure again. Finish with a glossy top coat, then do one extra thin coat over the chrome area if you want max shine.
Editor's noteIf your smoke chrome turns too dark, use a lighter mocha base so the fade stays dimensional.
Watch outDon't put chrome on top of shiny uncured gel - it will look gritty and uneven.
6. Cherry Red to Hot Pink Chrome Tips
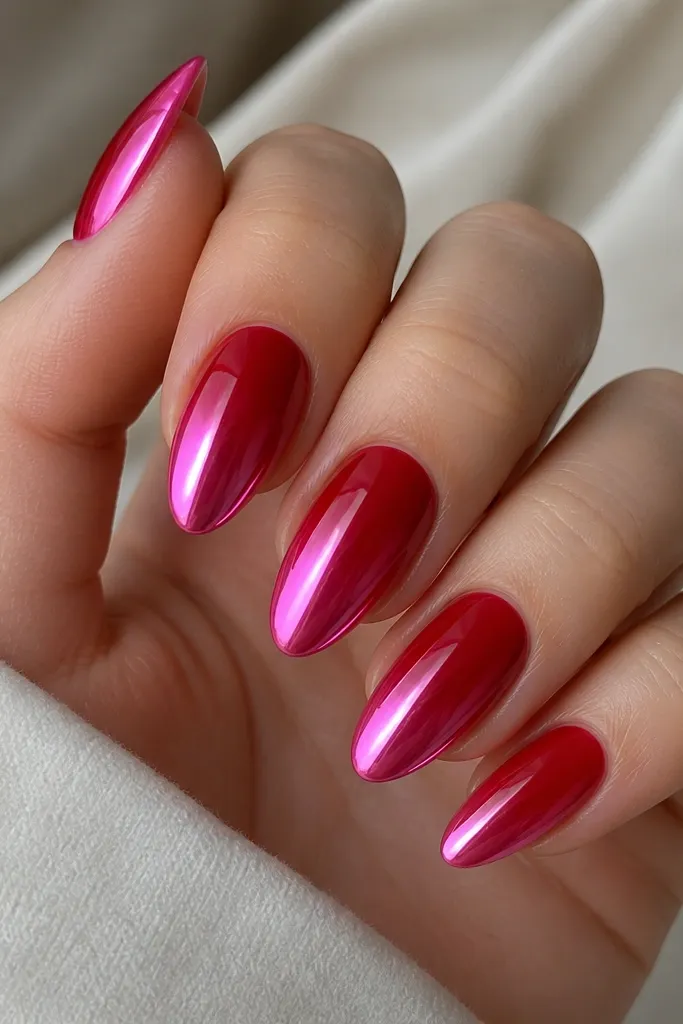
This is the bold set that still looks clean because the chrome sits right on the fade edge. Cherry red as the start color makes the tips look brighter, and hot pink chrome gives that "neon but polished" feel. It's flattering on most skin tones and especially pretty if you wear gold rings - the warmth balances the hot pink. I do this for concerts, nights out, and any time you want your nails to look like jewelry.
Base with a thin sheer nude gel, cure. Sponge cherry red from mid-nail upward, keeping the fade soft so you don't get a hard stripe. Cure. Apply a tacky chrome base only on the top third to near-tip area. Dust hot pink chrome powder, tap off, press gently, and cure. Seal with a glossy top coat, then cap the free edge twice with thin layers so the chrome edge stays crisp.
Editor's noteUse a smaller sponge piece for the fade so the hot pink chrome starts higher on the nail and looks more "lifted."
Watch outAvoid red gel that's too blue - it can make hot pink chrome look bruised.
7. Nude Beige to Champagne Chrome
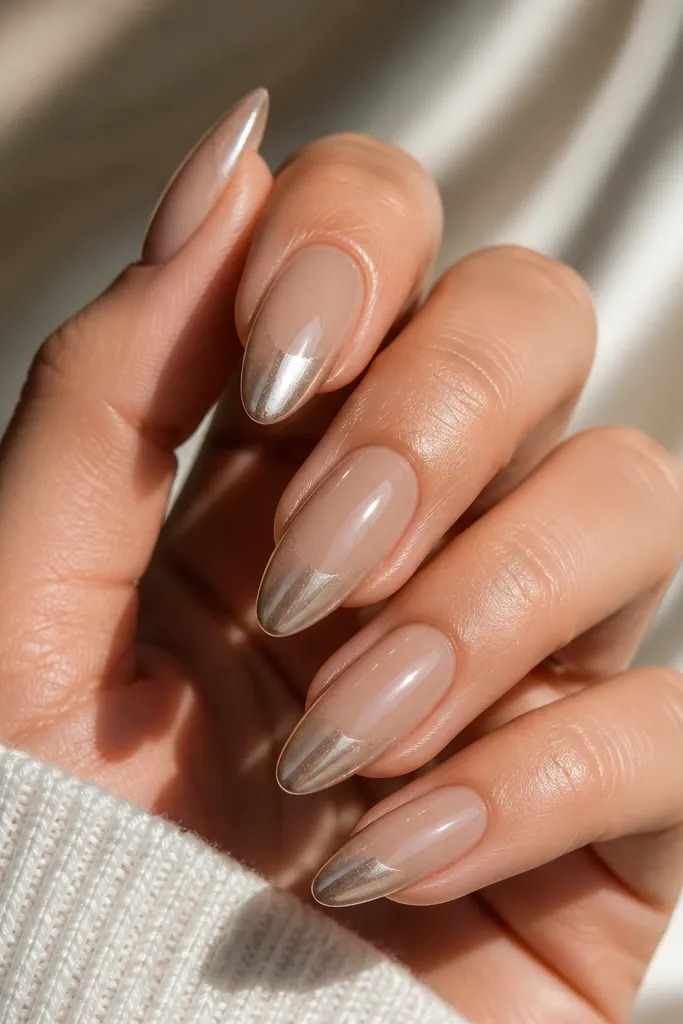
Champagne chrome is the most wearable gold shade when you want quick ombre without looking too "yellow." Nude beige gives a realistic base, and the champagne tip adds glow without screaming. This one looks great on short nails and on nails with a slightly wider nail bed because the warm tip adds definition. I wear it to brunch, work events, and anytime I want a polished neutral that still photographs well.
Apply a nude beige base gel and cure. Sponge a slightly deeper beige (or a nude that's one step darker) from mid-nail to the tip, blending until the transition disappears. Cure. Apply tacky chrome base on the top-half gradient only, dust champagne chrome powder, and press with a firm finger or chrome applicator. Cure, then top coat with a glossy gel. Finish by wiping the nail with a lint-free pad after top coat cure if your system leaves tacky residue.
Editor's noteIf your chrome looks too brassy, switch to a cooler beige base - it keeps champagne from turning orange.
Watch outDon't overbuff before chrome; too much buffing makes gel lift and chrome peel.
8. Icy Blue to Silver Chrome Ocean Fade
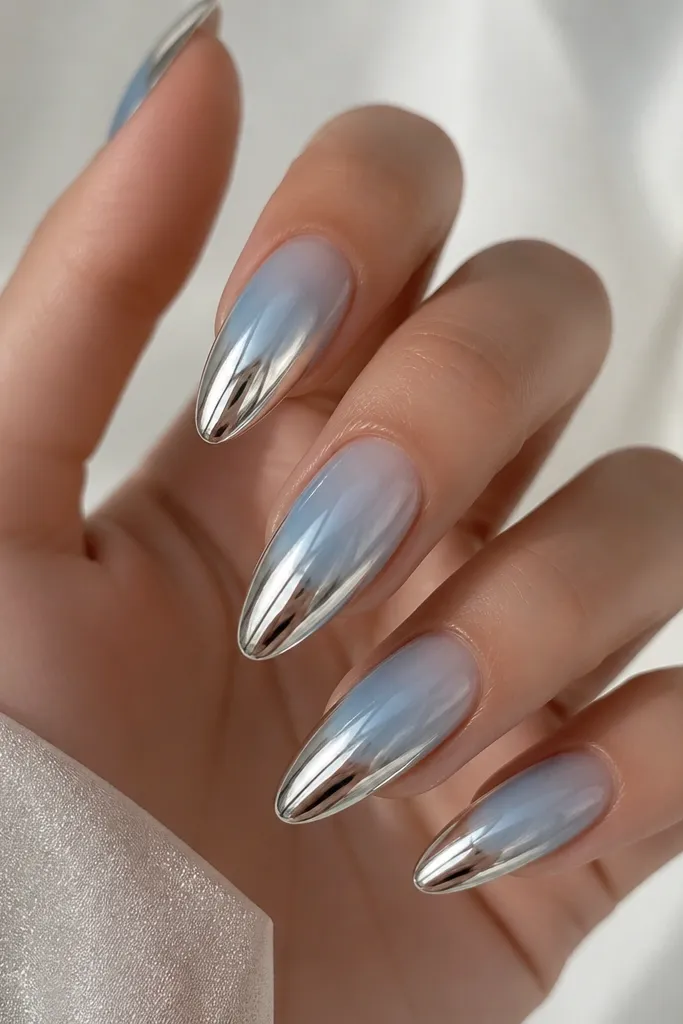
Icy blue to silver chrome looks like frozen water on nails, and it's surprisingly flattering. The translucent blue keeps it airy, while the silver chrome gives a crisp finish that doesn't feel childish. This works well on fair and medium skin tones and looks amazing with silver rings and denim. I do this when I want a "holiday" vibe even if it's just a regular Tuesday.
Start with a sheer milky nude base, cure. Sponge icy blue gel from mid-nail upward, leaving cuticle area translucent. Cure completely. Apply tacky chrome base over the blue fade area, then dust silver chrome powder. Press gently, cure, and seal with glossy top coat. Cap the free edge so the chrome tip doesn't catch and lift.
Editor's noteUse a thin layer of icy blue - thick blue turns opaque and kills the frosty look.
Watch outDon't let the sponge pick up too much blue; heavy gel makes the fade look like a stripe.
9. Olive Sage to Graphite Chrome Edge
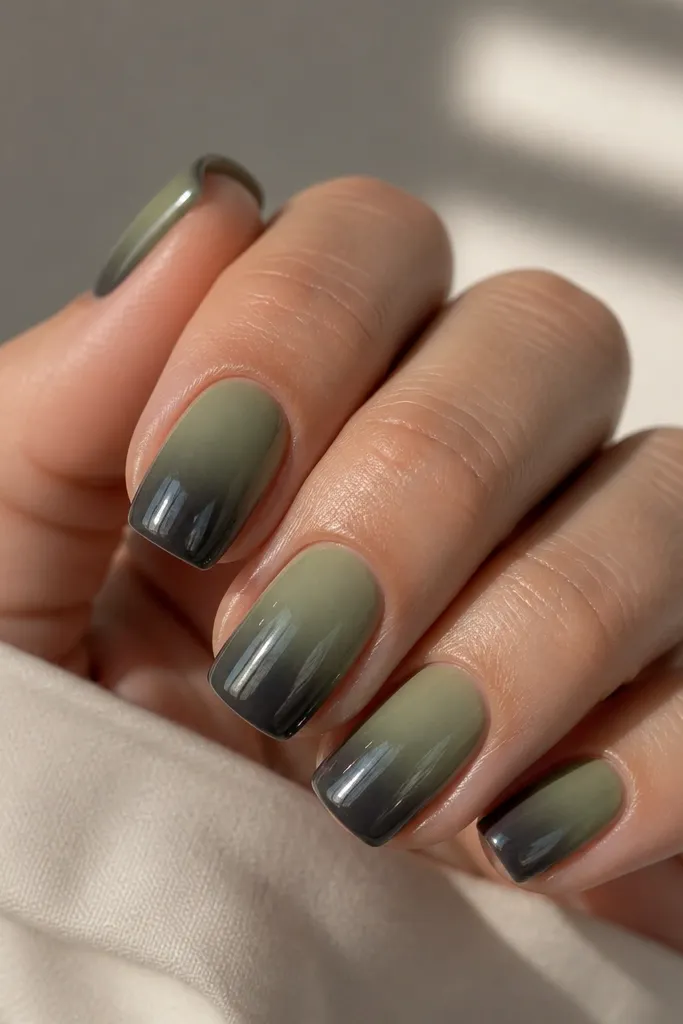
This is the moody set that still feels modern. Olive sage gives an earthy base, and graphite chrome makes it look edgy without needing nail art lines or gems. It's great if you wear earth tones and you want your nails to match your outfits. The darker chrome also hides wear at the tip, so it looks fresh longer.
Apply a sheer nude base, cure. Sponge olive sage gel starting at mid-nail upward, then blend down just a touch so it looks smoky. Cure. Add tacky chrome base only on the top third and near-tip area, then dust graphite chrome powder. Tap off excess, press lightly, and cure. Finish with a glossy top coat over everything, then do an extra thin coat only over the chrome section for a deeper mirror look.
Editor's noteKeep the olive slightly sheer; it makes the graphite chrome look brighter instead of flat.
Watch outAvoid chrome powders labeled "dark" that shed - they can leave a dusty finish under top coat.
10. Clear Jelly Nude to Pearl Chrome Fade
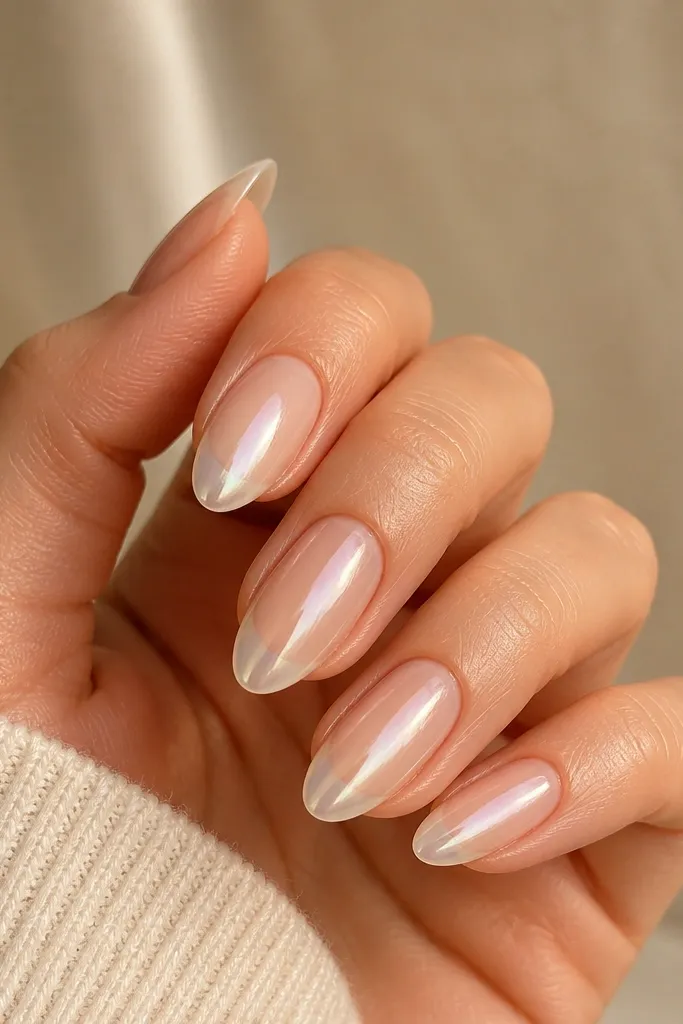
Pearl chrome is softer than mirror chrome, and that makes it forgiving when your ombre blending isn't perfect yet. The clear jelly nude base makes your nail look hydrated and gives a glassy finish even before chrome. This set is flattering on slender nail beds and looks gorgeous for bridal events or baby showers where you want "pretty" more than "loud."
Start with a clear jelly nude gel, cure under your lamp until it's fully set. Sponge a sheer milky white over the top half so the fade has something bright to reflect. Cure again. Apply tacky chrome base only on the top third, then dust pearl chrome powder and press gently. Cure and seal with glossy top coat, keeping the top coat thin so the pearl stays luminous. Cap the tip with one careful swipe to lock it.
Editor's noteUse a pearl chrome powder that leans white, not yellow, so it stays bridal and doesn't turn dirty.
Watch outDon't use a matte top coat - it kills the pearl effect.
11. Coral Blush to Rose Gold Chrome Gradient
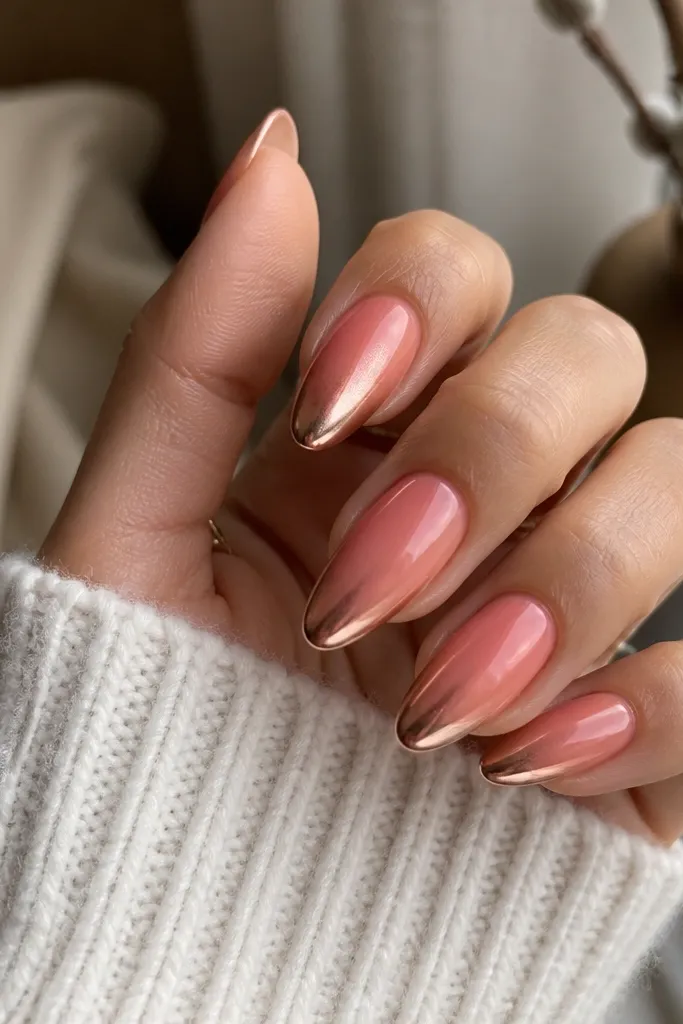
Coral blush makes ombre look alive without needing nail designs. The rose gold chrome tip adds warmth and makes your hands look sun-kissed in photos. This combo works especially well on medium to deep skin tones because coral doesn't get washed out. I love it for vacations, outdoor dinners, and any time you want your nails to look like a fresh manicure, not just a color change.
Apply a sheer nude base gel and cure. Sponge coral blush gel from mid-nail upward, keeping the coral lighter near the cuticle. Cure fully. Add tacky chrome layer only over the coral fade zone, dust rose gold chrome powder, and press lightly. Cure again and top coat glossy. Finish by gently cleaning the sidewalls so the chrome doesn't smear on skin.
Editor's noteIf your coral looks too orange, mix in a touch of pink coral or switch to a coral-rose gel before you sponge.
Watch outAvoid getting chrome on the cuticle edge - it can look messy after wear.
12. Blackened Espresso to Steel Chrome Fade
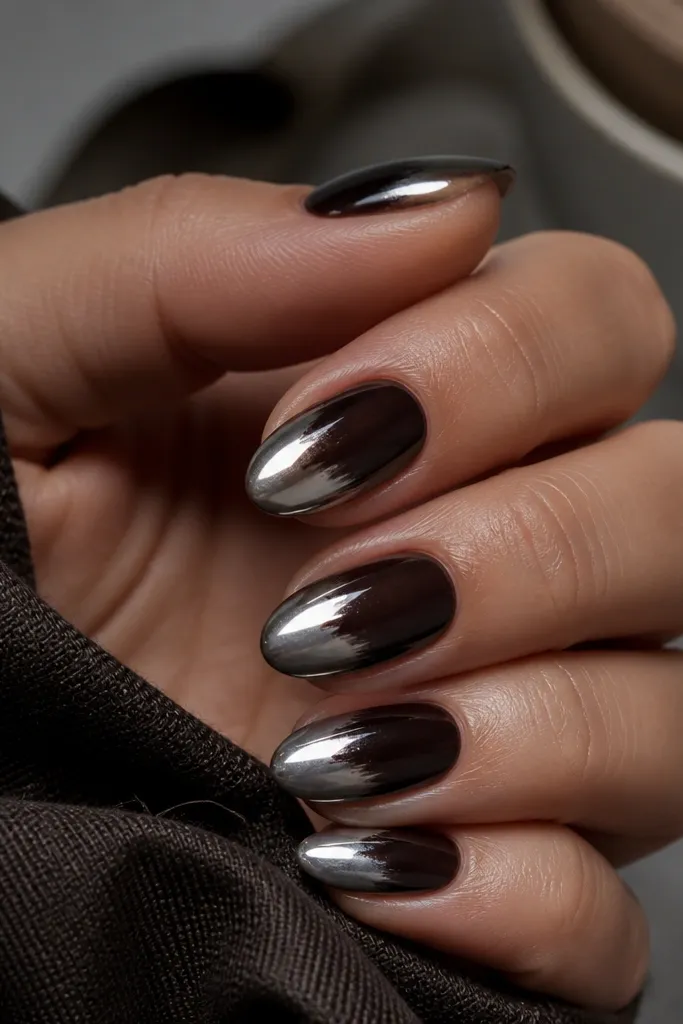
This look is for people who like drama but hate clutter. Espresso-to-steel chrome makes the nails look sharp and clean because the start color is dark and the chrome is crisp. It flatters hands with cooler undertones and also looks amazing with black clothing and silver jewelry. The dark base hides tiny chips, so the manicure looks better for longer between appointments.
Base with a thin espresso brown or near-black gel and cure. Sponge a lighter brown only at the top half if you want more fade depth, then blend down so it transitions smoothly. Cure fully. Apply tacky chrome base on the top third and dust steel chrome powder. Press, cure, and seal with a glossy top coat. Clean around the cuticle edge with an acetone brush after cure so it stays sharp.
Editor's noteUse steel chrome instead of bright silver for a more "expensive" steel look on dark bases.
Watch outDon't skip after-dust cleaning - leftover powder trapped under top coat can create a grainy finish.
13. White to Clear Chrome Reverse Ombre
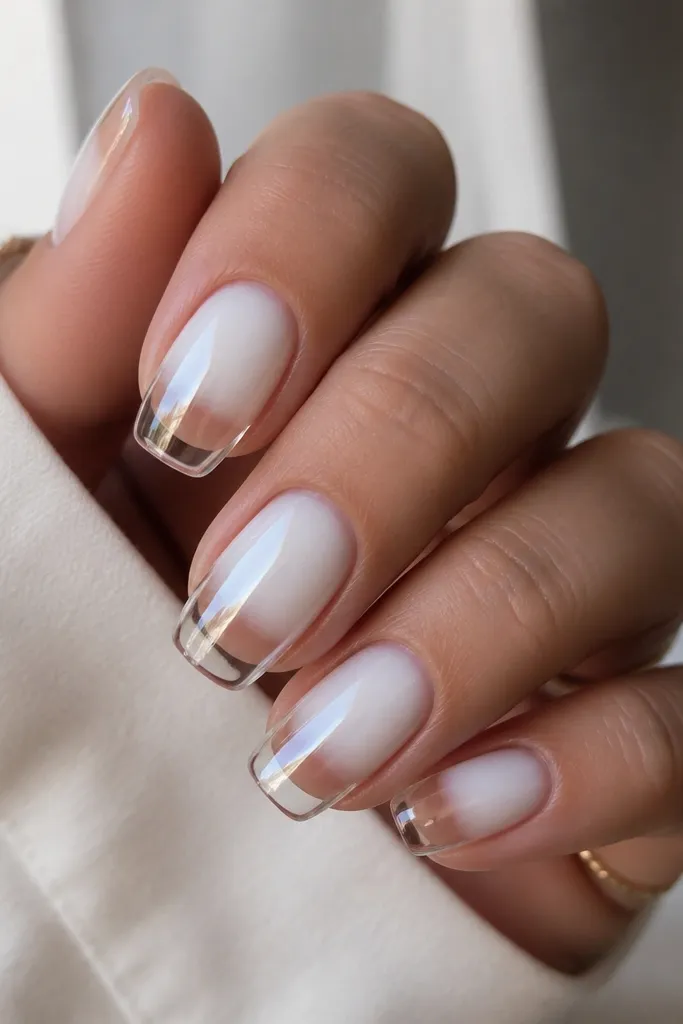
Reverse ombre is the fastest way to get a different look without spending time on nail art. Concentrating white toward the cuticle makes the nail look longer, and clear chrome at the tips keeps it modern and not too heavy. I like this on short nails because the eye reads the bright area upward. It also photographs beautifully because you get reflection patterns without a solid color block.
Apply a sheer nude base gel and cure. Sponge milky white near the cuticle and fade it downward toward mid-nail, leaving the bottom half mostly nude. Cure. Apply tacky chrome base only on the bottom half (near-tip area) and dust clear chrome powder so it stays transparent-looking. Press lightly, cure, then top coat glossy. Cap the free edge and do a careful second pass on the sides so the reverse fade stays clean.
Editor's noteUse a lighter sponge pressure on the mid-nail area - that's where reverse ombre usually turns blotchy.
Watch outAvoid thick white at the cuticle; it can lift and look bulky.
14. Nude Pink to Silver Chrome Half-Moon Fade
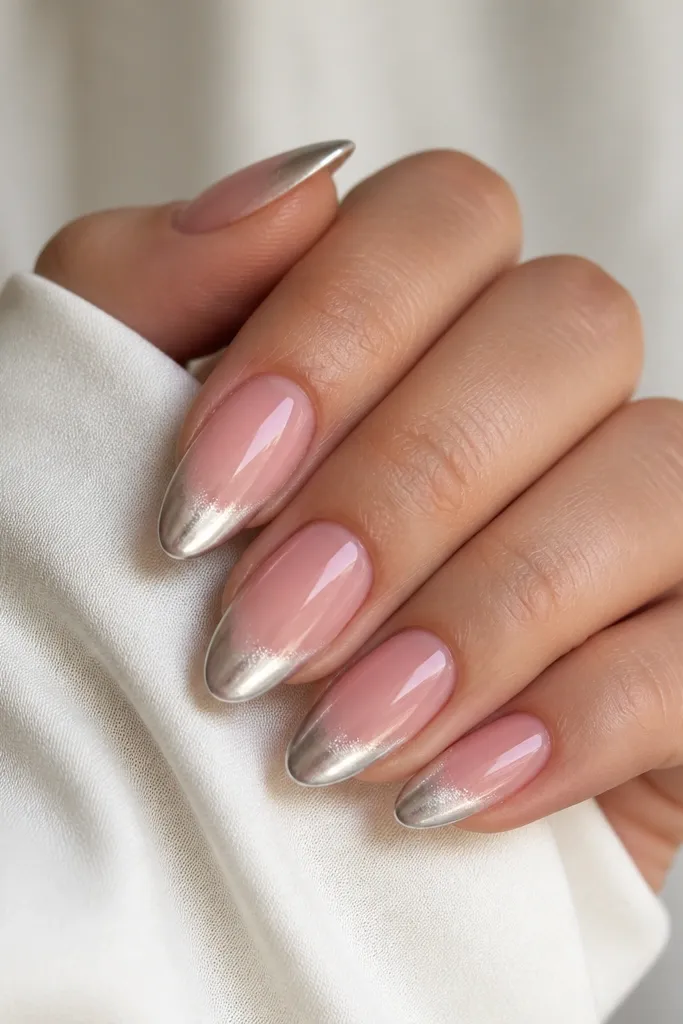
This is a "half-moon fade" look that still counts as ombre chrome because the gradient is what carries it. The nude pink stays natural and wearable, and the silver chrome tips create a clean arc that makes hands look neat. I like it for days when you want something different from straight French ombre but you still want it quick. It's also flattering on nails with a slightly uneven natural nail line because the arc hides it.
Start with a nude pink base gel and cure. Sponge a soft darker pink in a curved shape starting around the upper third, then blend toward the tip. Cure. Apply tacky chrome base in the same curved zone - keep it centered so it forms a half-moon arc. Dust silver chrome powder, press lightly, and cure. Top coat glossy over everything, then cap the tip with a thin layer so the arc stays crisp.
Editor's noteUse a small piece of sponge and practice the arc on one nail first - you'll get the curve right fast.
Watch outDon't let chrome spill around the arc edge onto bare nail; it blurs the half-moon effect.
15. Teal Smoke to Ice Chrome Tips
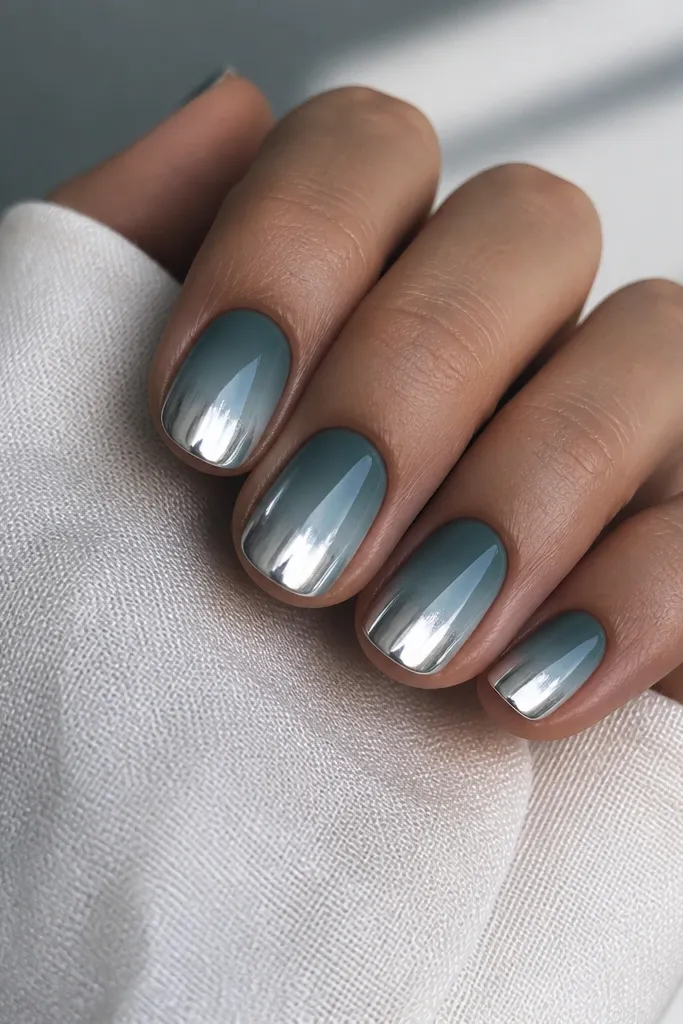
Muted teal turns chrome into something calmer and more grown-up. The ombre looks like a smoky wave, and ice chrome at the tip makes it feel fresh instead of heavy. This set is great if you wear blues, grays, or olive outfits and want your nails to match without feeling matchy. I've done this for beach weekends too - it still looks good when your hands get dry.
Apply a sheer nude base and cure. Sponge teal smoke gel from mid-nail upward, keeping it translucent near the fade edge. Cure. Add tacky chrome base only where teal is strongest, then dust ice chrome powder and press gently. Cure and top coat glossy. Clean up edges with a small brush dipped in acetone so the teal and chrome stay crisp along the sides.
Editor's noteIf teal looks patchy, do two thin sponge layers instead of one heavy layer - you get smoother coverage.
Watch outAvoid using a watery teal that spreads too far - the fade becomes muddy.
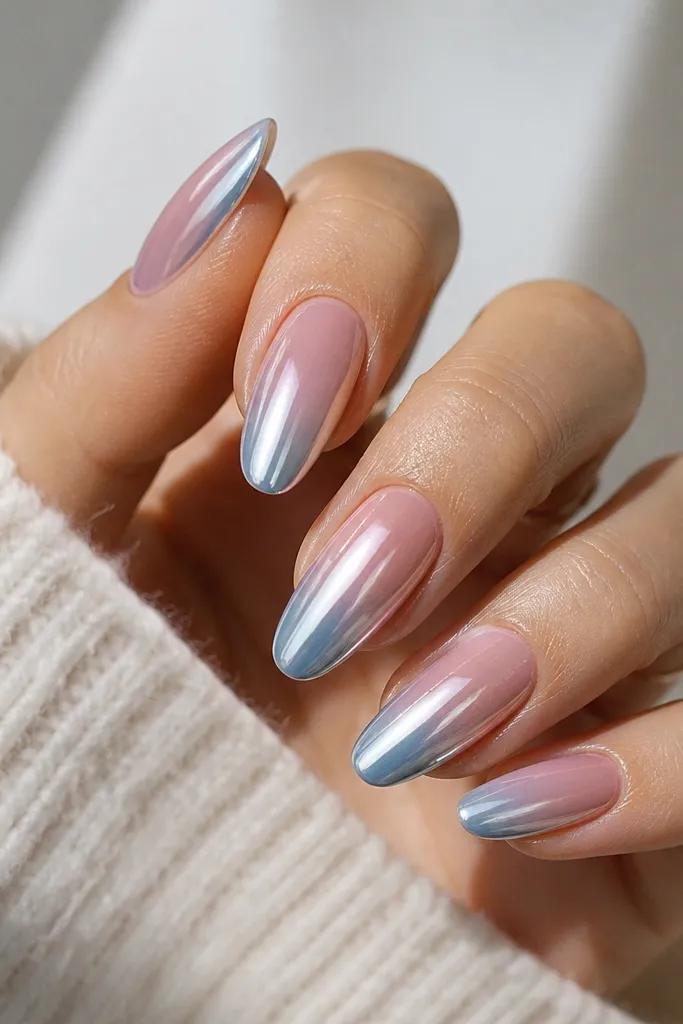
16. Dusty Mauve to Rose Silver Chrome
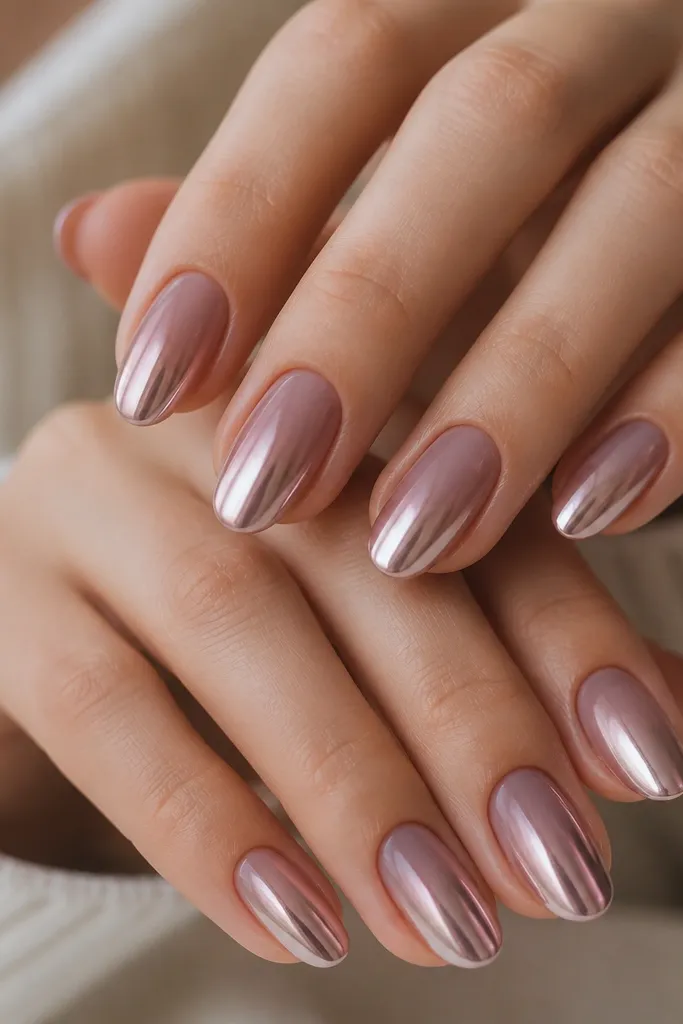
Rose-silver chrome is my favorite for mauve ombre because it looks like satin metal, not harsh silver. Dusty mauve stays flattering on a wide range of skin tones and makes nails look "put together" even when the rest of your outfit is simple. This works well on oval and almond shapes because the fade follows the natural curve of the nail. I wear it when I want something romantic but not fully pink or fully nude.
Base with a sheer nude gel and cure. Sponge dusty mauve gel from mid-nail up, blending so the cuticle stays light. Cure. Apply tacky chrome base on the top third, then dust rose-silver chrome powder and press. Cure and top coat glossy, keeping the top coat thin. Cap the free edge carefully so the rose-silver stays smooth where your nails touch things.
Editor's noteUse a slightly larger sponge surface for mauve; it spreads softly and keeps the fade cloud-like.
Watch outDon't overbuff the mauve layer before chrome - it can make chrome adhere unevenly.
17. Champagne Nude to Mirror Chrome Micro Fade
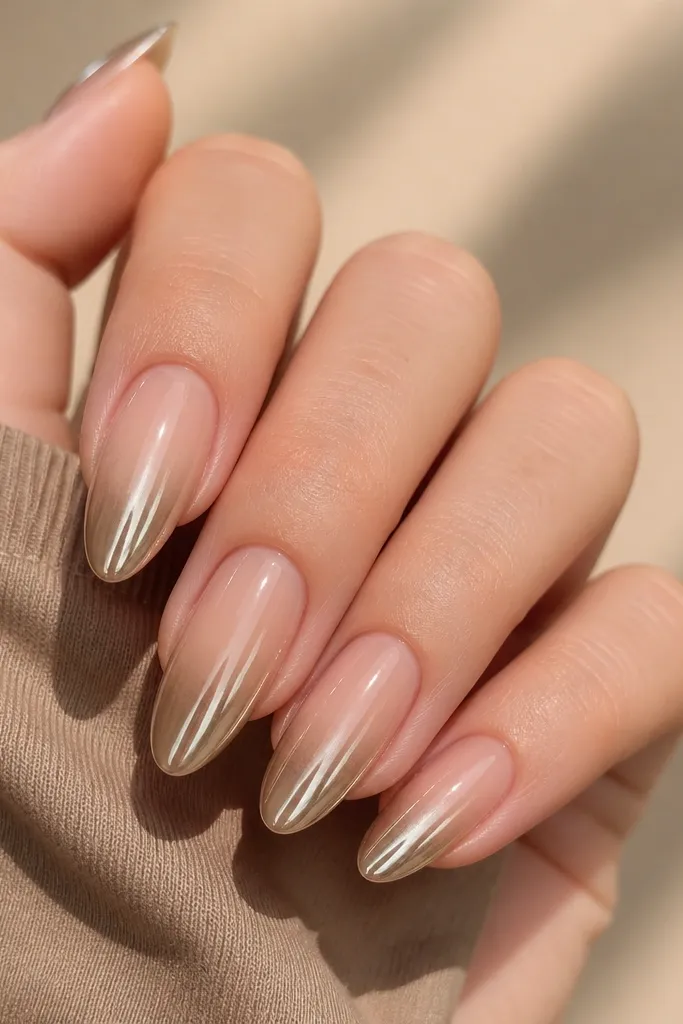
Micro fade ombre chrome is the fastest way to get the chrome look without committing to full tip coverage. The champagne nude makes the nails look clean and healthy, and the mirror chrome band adds shine right where you need it. This is great for short nails because it doesn't overpower the nail bed. I do this when I want something that looks special but still feels workplace-safe.
Apply champagne nude gel and cure. Sponge a tiny bit of deeper nude just at the top of where the free edge begins, then blend down slightly so it's a micro gradient. Cure. Apply tacky chrome base only on that narrow band - keep it straight across for a crisp look. Dust mirror chrome powder, press lightly, and cure. Top coat glossy over the full nail so the transition stays smooth to the touch.
Editor's noteFor a super clean micro fade, use a strip of foil under the nail while you dust chrome so you don't get stray powder on the sides.
Watch outAvoid wide chrome coverage on short nails; it makes the nail look shorter.
18. Gold Nude to Copper Chrome Fade
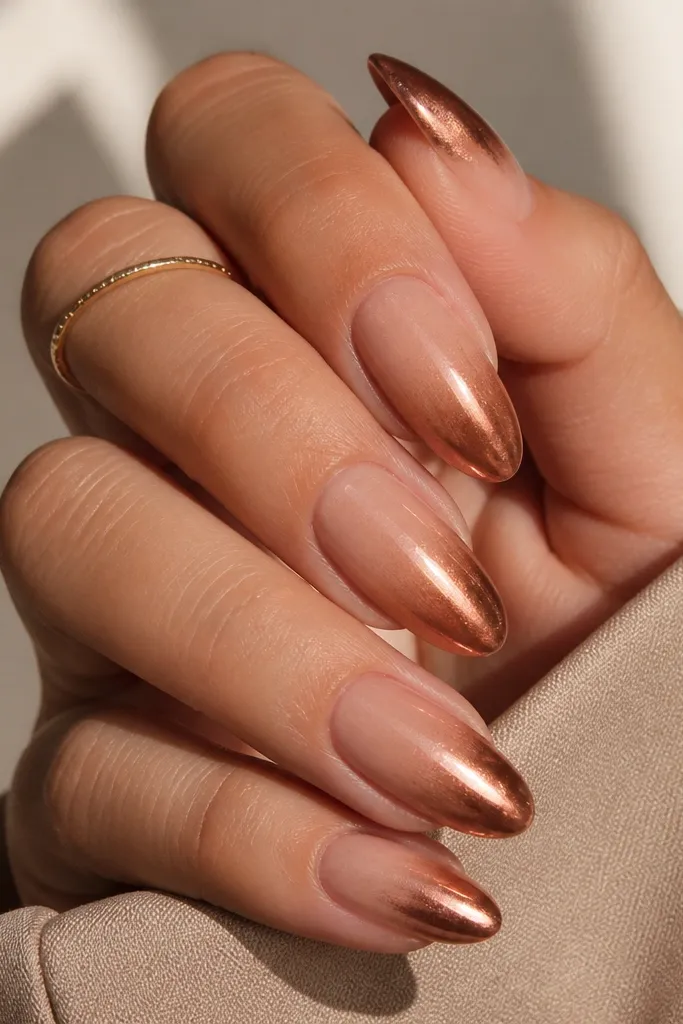
Copper chrome makes ombre feel warmer and more "autumn" without using brown. The gold nude base keeps it flattering and not too orange, while the copper tips give a rich metallic glow. This set looks great with warm undertones and gold jewelry, but it also looks good on cooler undertones because copper warms up the hand. I choose this when I want my nails to look like a polished accessory.
Apply a gold-nude gel base and cure. Sponge a slightly deeper gold from mid-nail upward, blending until the nude looks like it's glowing from within. Cure. Apply tacky chrome base on the top third and dust copper chrome powder. Press, cure, and seal with glossy top coat. Cap the tip and run a tiny bead of top coat right at the free edge so the chrome stays sealed.
Editor's noteIf copper looks too red, reduce the copper coverage area and keep it tighter to the tip for a more wearable look.
Watch outDon't overtop with thick top coat - copper chrome can look dull and less reflective.
19. Black Plum to Steel-Blue Chrome Ombre
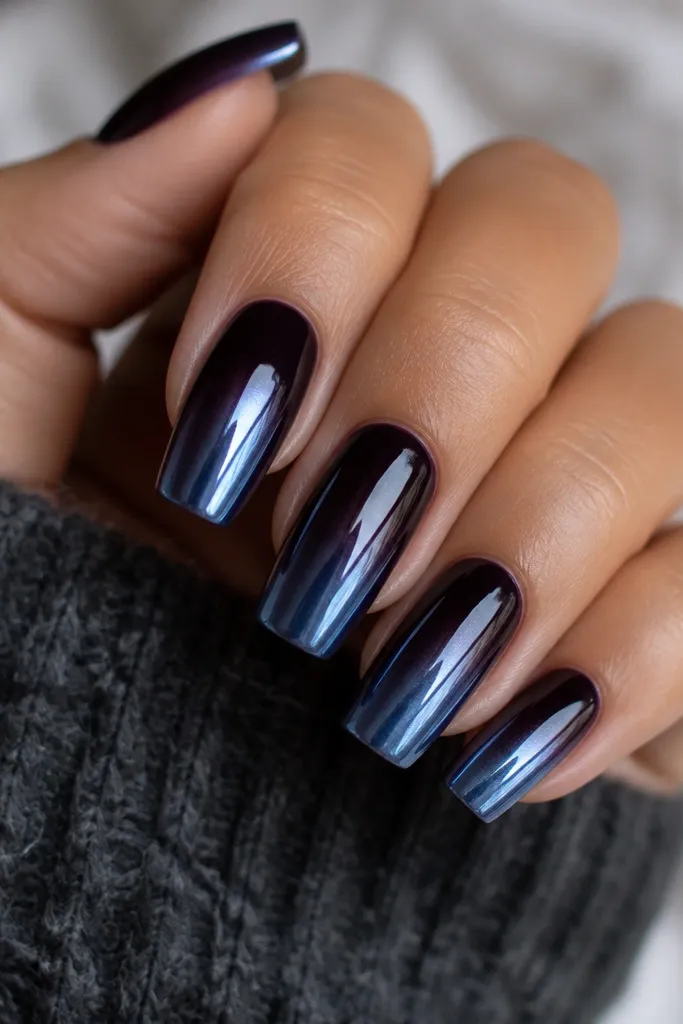
Steel-blue chrome gives you the mirror effect but with a cool tint that looks stunning on deep plum bases. It's dramatic without being neon, and the gradient keeps it from looking like a solid color block. I like this for winter parties and holiday events because it matches cold lighting and looks great in photos. It also hides wear because the start color is dark.
Base with glossy black plum gel and cure. Sponge a slightly lighter plum or keep it sheer, then blend from mid-nail upward so the fade looks smooth. Cure. Apply tacky chrome base only on the top half, then dust steel-blue chrome powder and press. Cure and top coat glossy. Clean around the cuticle and sidewalls after top coat cure so the deep plum stays crisp.
Editor's noteUse a firmer press when applying steel-blue chrome - it helps the blue tint lock in evenly.
Watch outAvoid placing chrome too close to the cuticle; the gradient gets muddy and chips show sooner.