1. Blush Ombre French + Mirror Chrome Tips
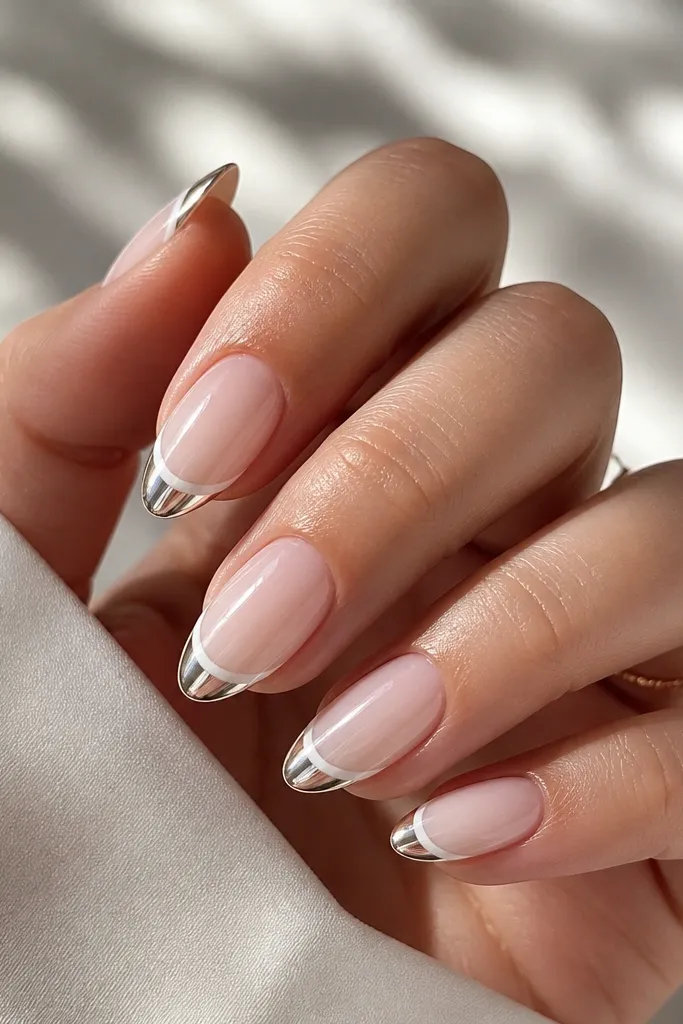
This is the set I reach for when I want "expensive" without looking like I'm trying too hard. The blush ombre has a warm pink that flatters most skin tones, especially if your undertone leans peach or golden. The mirror chrome sits only on the tips, so the shine frames your nail shape instead of covering the whole nail and calling attention to imperfections. It also looks clean with short almond nails because the gradient visually lengthens while the chrome keeps the focus at the free edge.
Start by placing the darkest part of the ombre right at the cuticle line so it looks like your nail is naturally transitioning. Then align the French chrome cap so the line hits your smile curve evenly - use your finger pad as a guide and check from the side, not straight on. Press the center first for 5 seconds, then press the sidewalls and tip edge to lock it down. Finally, add a thin topcoat only over the chrome edge if your set allows it; too much topcoat can dull the mirror finish.
Editor's noteIf you're between sizes, size up slightly for this one. A tiny bit of extra width at the tip makes the chrome French edge look intentional instead of pinched.
Watch outAvoid sets where the ombre is already printed with a thick white stripe in the middle - it reads like a sticker seam.
2. Nude Caramel Ombre + Champagne Chrome Halo
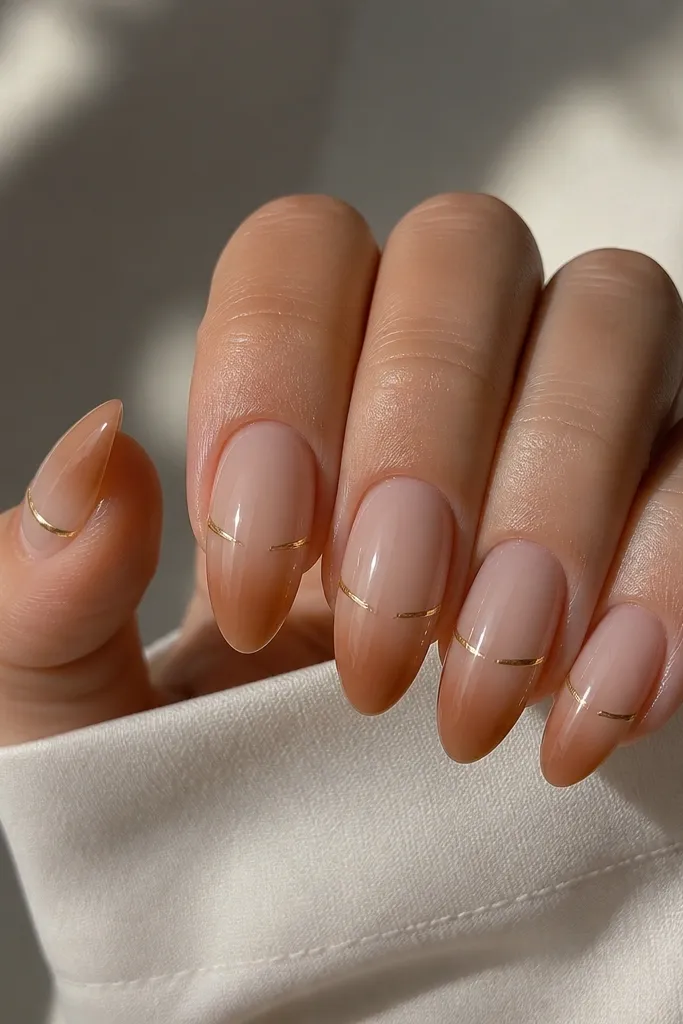
Warm nude and caramel is the combo that looks good on almost everyone because it mimics the way your nails look when they're healthy. The champagne chrome halo is subtle enough for work days, but it still catches light when you move your hands. I like this on medium almonds because the halo sits in the sweet spot - not too close to the cuticle, not too close to the tip. It also photographs beautifully with beige outfits and gold jewelry since the undertone matches.
Choose nails where the halo is a thin band, not a thick arc, because thick halos look like a mistake. Position the ombre so caramel is strongest at the cuticle and fades toward a creamy nude near the tip. Press on the nails starting at the cuticle, then slide the nail slightly downward so the halo band lands around the middle of your nail bed. Seal the edges with a quick pass of topcoat if you're using it, but keep the halo itself lightly coated so it stays reflective.
Editor's notePair it with a sheer peach lip and small gold hoops - the chrome reads warmer and less "cool-toned" in photos.
Watch outSkip designs where the halo is textured or grainy; it catches lint and makes the chrome look dusty.
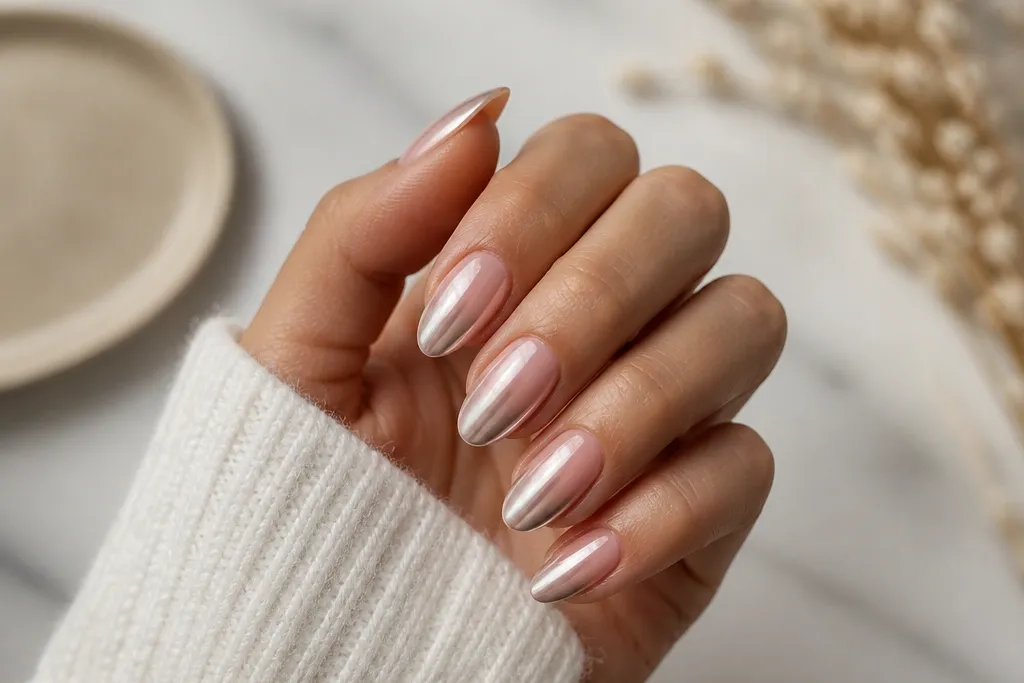
3. Icy Pink Ombre + Pearl Chrome Cloud
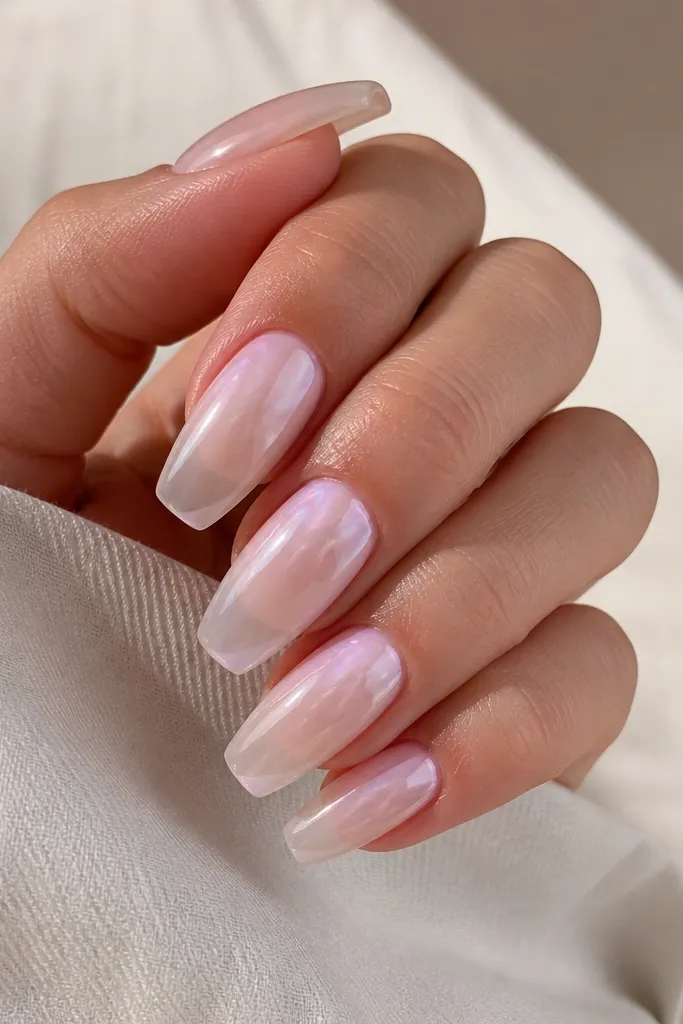
Pearl chrome is my favorite when mirror chrome feels too loud. The icy pink ombre gives you that clean, cool "fresh manicure" look, and the soft cloud chrome makes the nails look like they're lit from within. This works especially well if you have shorter nail beds because the cloud sits higher and draws the eye upward. I've worn this with winter whites and silver rings and it always looks crisp instead of overly festive.
Start with an ombre that fades to almost clear at the tip so the nail still looks light. Place the set so the cloud effect begins slightly above the center of your nail bed; if it starts too low, it can look like a stain. Press down along the cuticle line first, then press the sidewalls, and finally tap the tip to smooth out any air pockets. If your set includes a protective topcoat, use it lightly over the pearl area only; heavy topcoat can mute the pearl sheen.
Editor's noteFor extra smoothness, rub a tiny amount of cuticle oil around the edges after pressing. It helps the adhesive sit flush and reduces lifting at the corners.
Watch outDon't pick a pearl chrome that's too gray - it can make icy pink look washed out.
4. Lavender Ombre + Lilac Chrome Smile Line
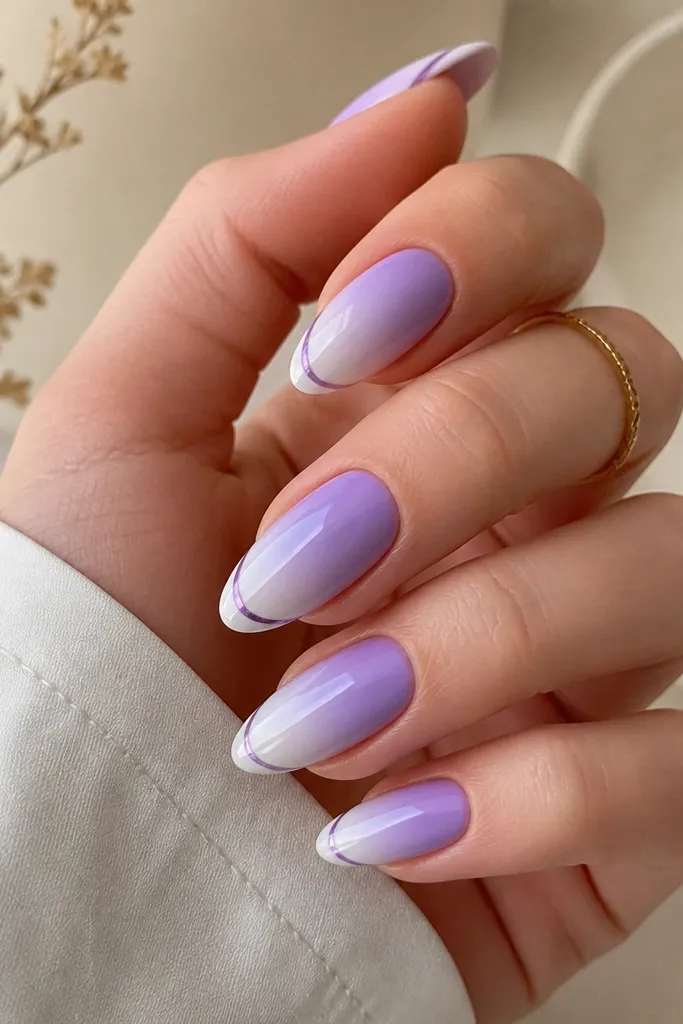
This one is for when you want ombre but still crave a clean, graphic nail moment. The lilac chrome smile line adds structure, so the gradient doesn't have to do all the work. Lavender suits cool undertones and also looks great with neutral outfits because the color reads "soft statement." I like it on medium almonds because the smile line curves naturally and makes your nails look tidy even if your cuticles aren't perfectly smooth.
Choose nails with a smile line that's thin enough to look like a highlight, not a thick border. Align the chrome smile so it sits about 1-2 mm above your natural free edge line. Press starting at the center, then push outward to the sides so the chrome border doesn't warp. If you're trimming, do it before you press - trimming after can crack the chrome edge.
Editor's noteWear a matte base on your hands - no glitter polish on your ring fingers. The chrome smile line gets enough attention on its own.
Watch outAvoid smile lines that look uneven in the package; once pressed, they'll look like a crooked frame.
5. Peach Ombre + Copper Chrome Edge Flick
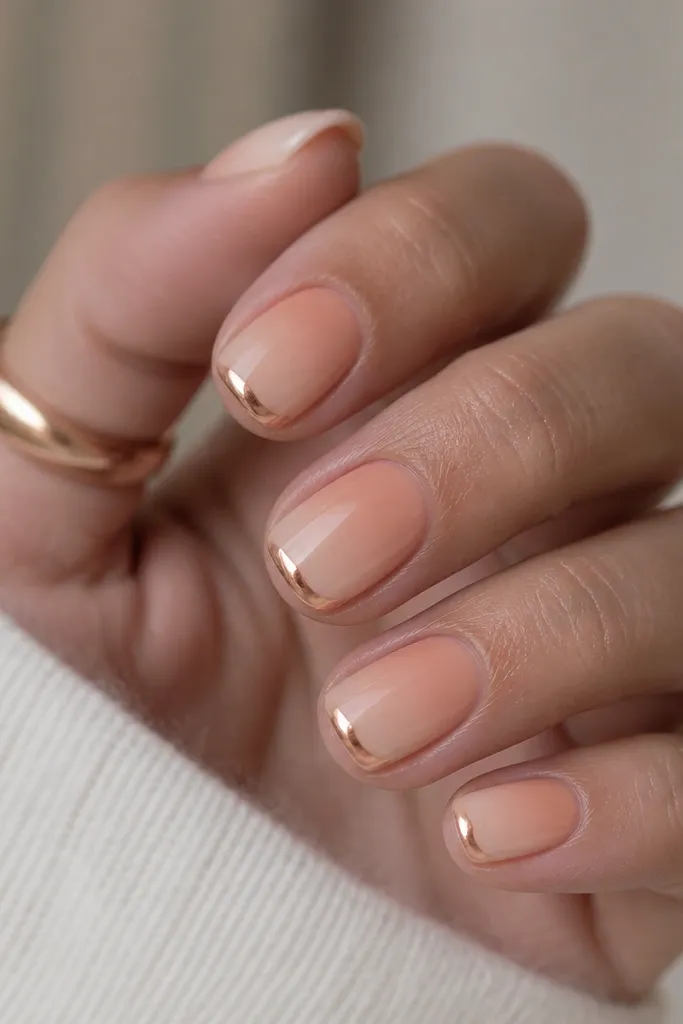
Copper is warmer than gold and it makes peach ombre look extra fresh. The edge flick is a small detail, but it gives movement when you raise your hands, like a tiny "flash" at the corners. This design is flattering on short nails because it doesn't require a long chrome tip to look intentional. I wear it when I want something fun but still renter-friendly for daily errands, since the copper hides minor edge wear better than high-silver chrome.
Start by pressing the nail so the ombre transitions evenly across your nail bed - don't let the peach pool too close to one side. Then align the copper flick with your nail corners; if your nail is more rounded, keep the flick slightly inside the corner so it doesn't lift. Press at the cuticle, then press the corners firmly for 10 seconds each. Finish with a gentle topcoat that covers the edges, not a thick coat over the metal flick.
Editor's noteIf you're getting lifting, add a micro dot of clear adhesive at the very tip edge only, then press for 20 seconds.
Watch outDon't choose copper chrome that looks orange-red in the package - it can read cheap next to peach.
6. Classic White Ombre + Silver Chrome French Micro-Curve
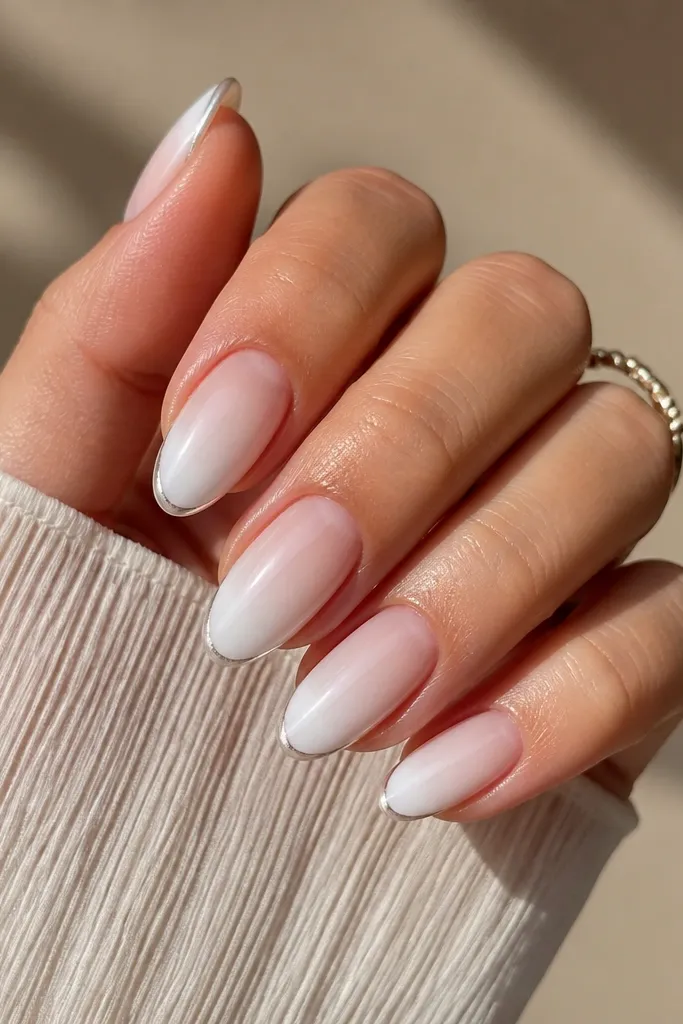
This is the closest thing to a "clean girl" chrome nail that still feels special. The white ombre gives you that bright, polished base, and the silver chrome micro-curve keeps it crisp without looking like a full chrome tip. I like it on medium squares because the micro-curve echoes the shape and makes your nails look sharper. It also pairs well with any outfit color since the base is basically a soft white gradient.
Pick a set where the white ombre is thin and fades to clear, not chalky opaque. Place the nails so the French curve hits your free edge evenly - use a straight edge from the side of your fingertip to check the curve. Press center first, then press each side until the curve edge feels sealed. If you're adding topcoat, keep it light over the chrome line; thick topcoat can turn silver into a dull gray.
Editor's noteUse a white eyeliner-style correction brush to tidy any adhesive squeeze-out along the sidewalls with a tiny bit of isopropyl on a cotton swab.
Watch outAvoid thick white ombre that leaves the nail bed looking opaque; it makes the chrome curve look pasted on.
7. Black Cherry Ombre + Graphite Chrome Thread
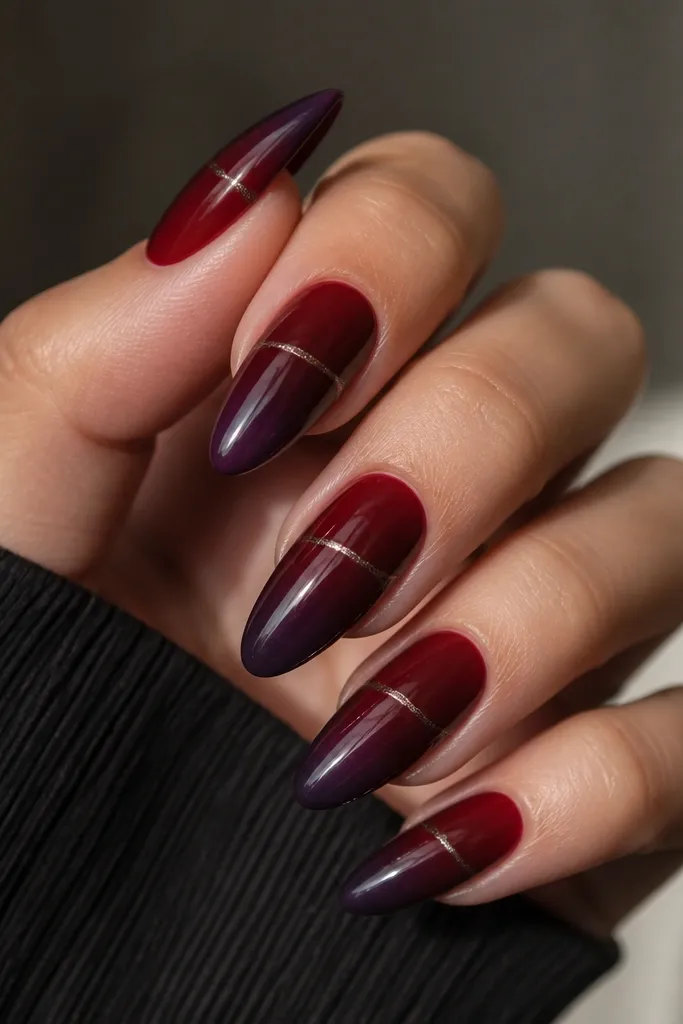
Dark ombre looks richer when it has a thin metallic thread instead of a big chrome block. The black cherry base has that deep wine tone that flatters darker skin tones and also looks striking with fair skin when the contrast is high. Graphite chrome reads more modern than bright silver here, and the diagonal thread gives a slimming effect because your eye follows the line. I've worn this for nights out and it still looks good in indoor lighting without turning gray.
Start by choosing an ombre that fades smoothly - no abrupt color shift from cherry to plum. Position the diagonal thread so it runs from near the cuticle on one side toward the middle of the nail, not across the entire nail length. Press the nail at the cuticle first, then use your thumb to smooth from the center toward the thread edge so it doesn't lift. Finally, seal only the thread edge with a thin topcoat if you're using one; you want the thread to keep its metallic clarity.
Editor's noteIf your nails are short, use shorter length press-ons for this. The thread needs breathing room to look intentional, not cramped.
Watch outSkip sets where the thread is too thick - thick lines look like tape.
8. Teal Sea Glass Ombre + Silver Chrome Wave Tip
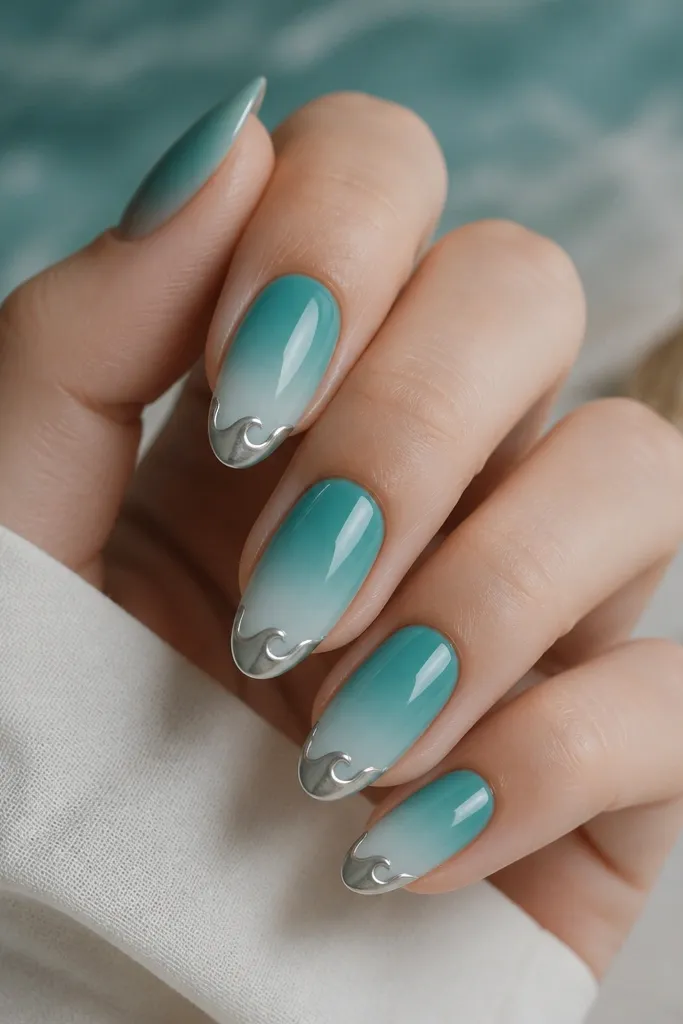
Teal sea glass is one of those colors that makes your hands look cooler and cleaner. The wave tip keeps the design playful without turning into a full novelty nail. Silver chrome on the wave line gives crisp contrast, and the aqua fade makes the nail look longer. This is especially flattering if you wear denim, white tops, or silver jewelry - the whole look reads like summer even when it's not.
Choose nails where the teal is stronger at the cuticle and fades toward a light aqua at the tip. Align the wave tip so the crest sits centered on your nail, not shifted toward the thumb side. Press at the center, then press the wave edges carefully so the thin chrome doesn't lift. If you're adjusting length, do it before pressing because trimming after can crack the wave detail.
Editor's noteSwipe a thin layer of hydrating cuticle oil along the sides after pressing. It keeps the wave edges from catching lint.
Watch outDon't pick an ombre that turns green-brown - it reads muddy next to chrome.
9. Rose Quartz Ombre + Aura Chrome Center
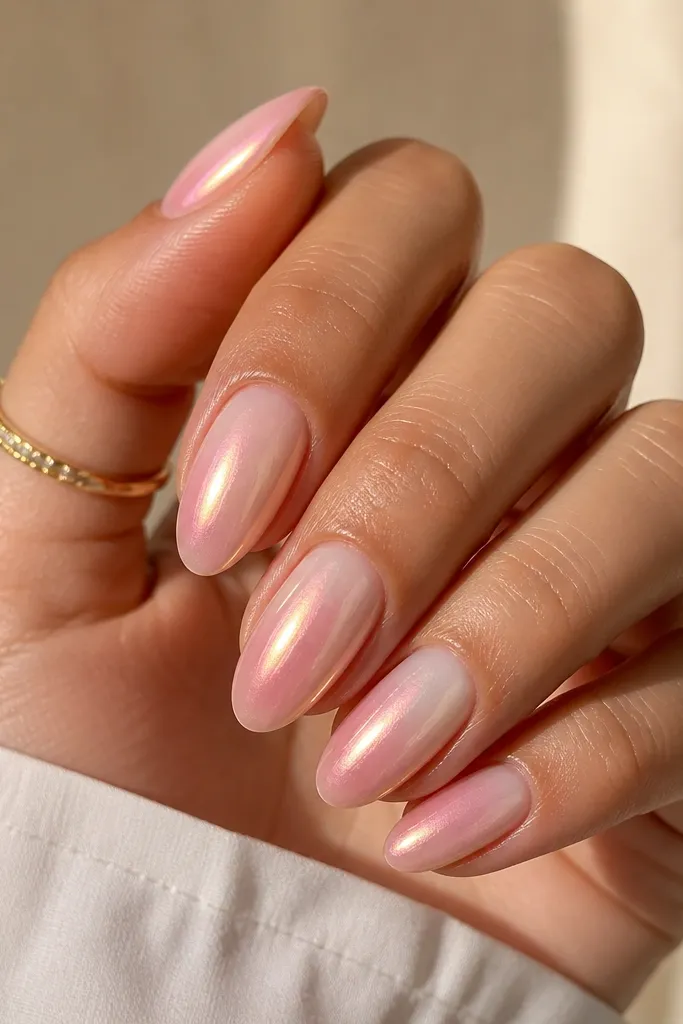
Aura chrome is the one chrome style that still looks good if you're not perfect with placement. The center glow draws attention to the middle of the nail, and the rose quartz ombre makes your skin tone look smoother by contrast. I prefer this on short almond or rounded nails because the glow gives the illusion of extra length. It also looks great with minimal jewelry since the nail does the talking.
Start by pressing nails so the aura center lands around the middle of your nail bed, roughly halfway between cuticle and tip. Then make sure the ombre fades evenly - if one side looks heavier, you can gently re-position before the adhesive fully sets. Press the cuticle line first, then press the center of the nail over the aura glow. Finish by sealing the tip edge so the aura area doesn't lift and cause chrome to snag.
Editor's noteIf you have ridges, buff lightly on your natural nail before applying. Aura chrome shows texture less than mirror chrome, but it still catches edges.
Watch outAvoid aura designs that look like a sticker dot at the center - you want a soft spread, not a hard circle.
10. Red Berry Ombre + Ruby Chrome Cuticle Cap
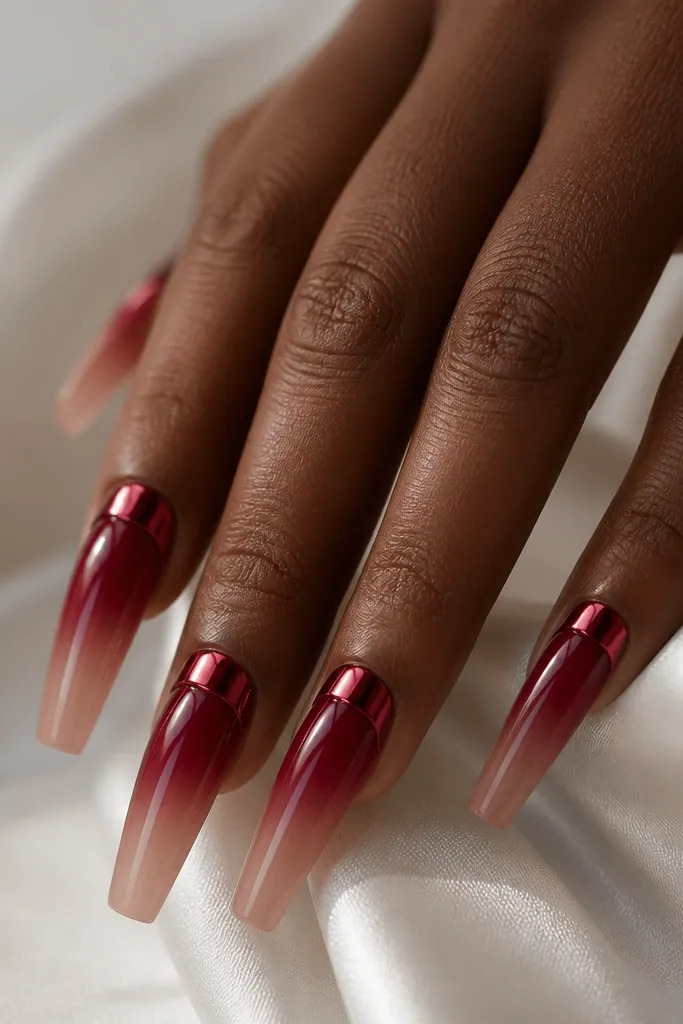
This is dramatic in the best way. The red berry ombre creates depth, and the ruby chrome cap at the cuticle makes your nails look longer because it anchors the eye at the base. Ruby chrome also looks flattering on warm undertones and makes hands look "done" even if you keep your jewelry simple. I've worn this with a dark red lip and it looks coordinated without matching exactly.
Pick a set where the ruby cap is thin and wraps smoothly around the cuticle - a thick cap looks bulky. Place the nail so the cap sits just under your natural cuticle line, leaving a small gap for comfort. Press at the cuticle and hold for 10 seconds, then press the sides to lock the cap edges. If you use a topcoat, keep it light over the cap so the ruby chrome stays glassy and doesn't turn flat.
Editor's noteWhen you remove, peel slowly from the side - don't yank at the cap edge. Ruby chrome can lift in flakes if you tear it.
Watch outSkip cap designs that have a sharp metallic edge - it can snag and lift quickly.
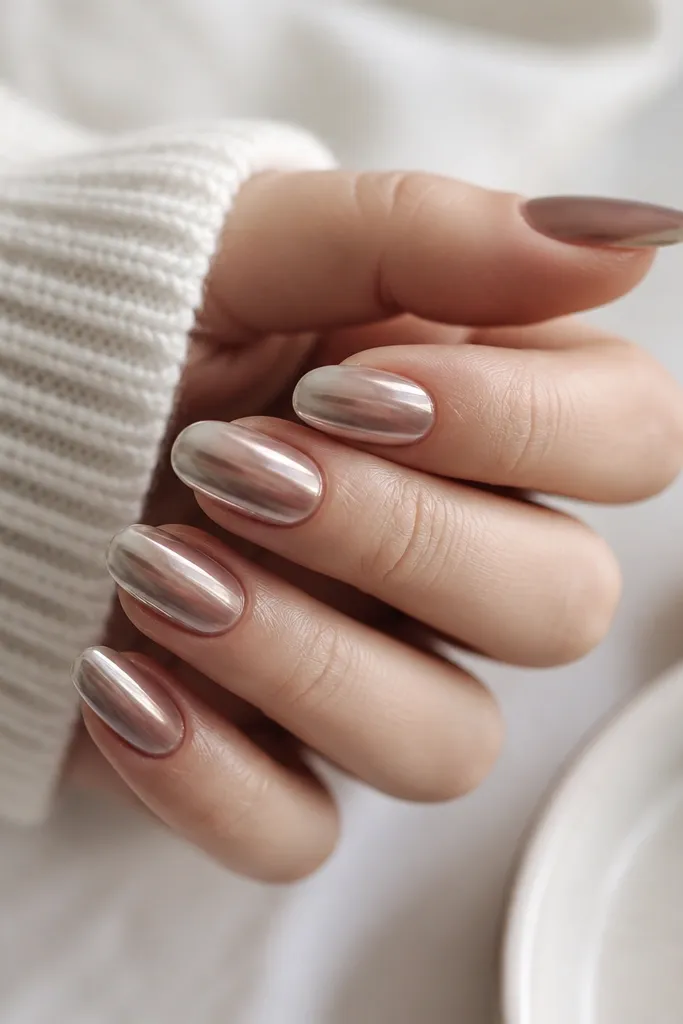
11. Champagne Beige Ombre + Rose Gold Chrome Micro-Foil
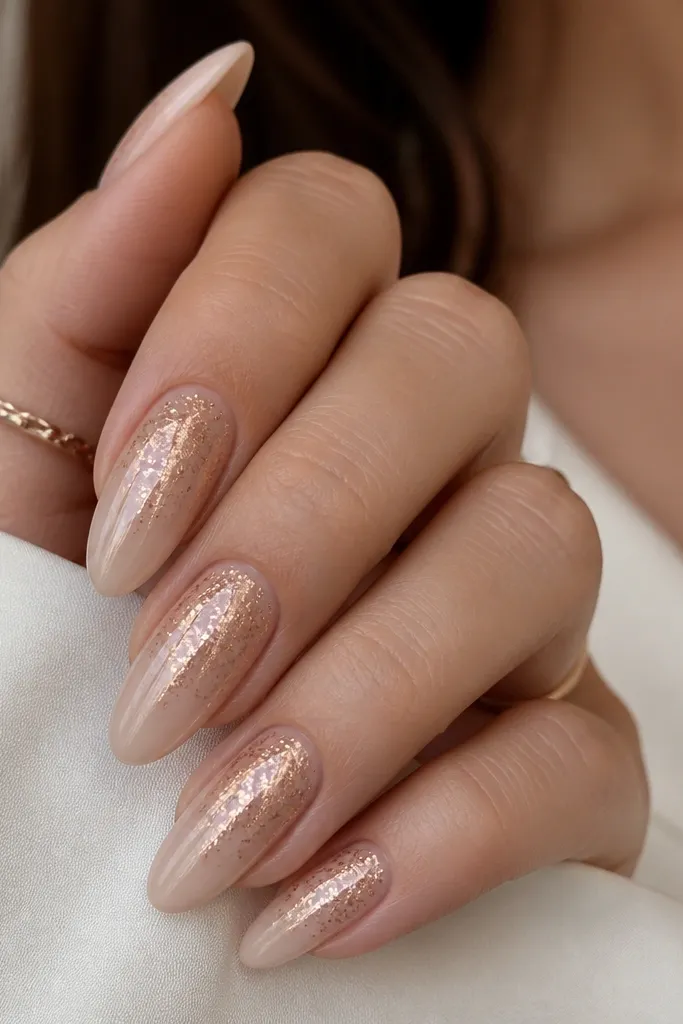
Micro-foil rose gold is how you get chrome without that mirror "spotlight" look. The champagne beige ombre is neutral enough for daily wear, and the fine foil catches light in tiny bursts when you type or reach for your bag. This one flatters hands with shorter nail beds because it keeps the shimmer in the upper half instead of covering the whole nail. I like it for work events, weddings, and any moment where you want polished but not loud.
Start with nails that have a smooth beige-to-nude fade, not a grainy ombre. Press the nails so the micro-foil sits in the upper third, about 2-3 mm below the tip edge. Use firm pressure at the sidewalls since foil textures can lift at corners. If your set includes adhesive tabs, press the tabs onto the nail first, then onto your natural nail - this helps the foil area stay flat.
Editor's noteAdd a small amount of cuticle oil after application and wipe it off the nail surface. Oil on foil can make it look dull.
Watch outAvoid heavy rose gold chunks; they look like glitter stuck under gel.
12. Olive Sage Ombre + Bronze Chrome Speckle Fade
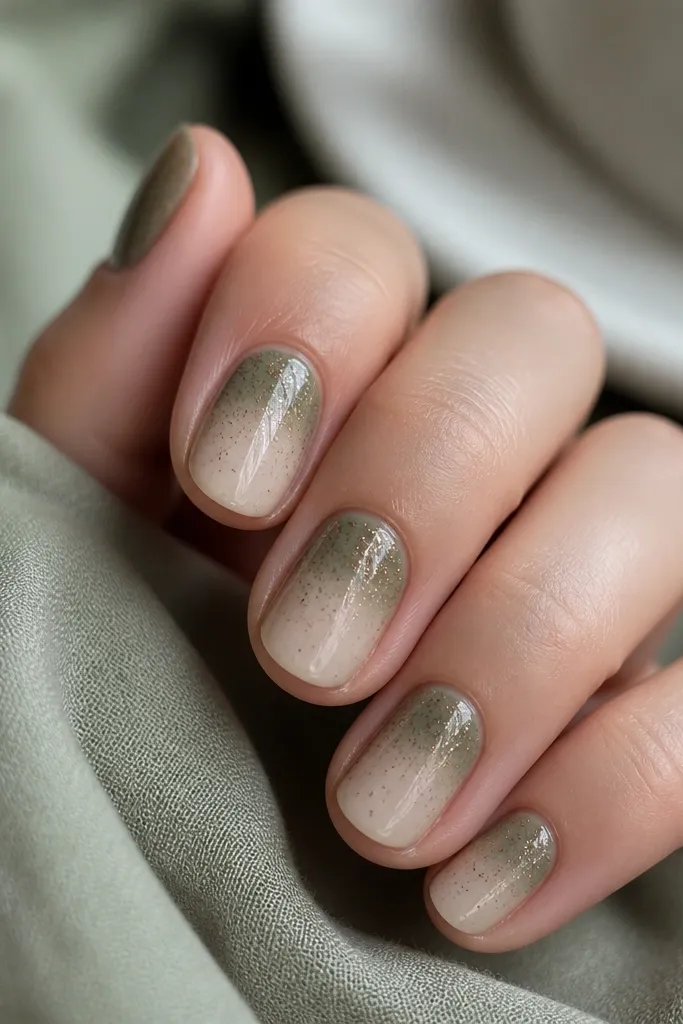
Sage and olive tones can look surprisingly flattering with bronze chrome because the undertones match. The speckle fade gives texture and depth without needing a hard line, which makes it forgiving if you're new to placing press-ons. This looks best on shorter rounded nails because the speckles keep it interesting while the ombre keeps it clean. I wear this with earth-tone sweaters and it looks intentional instead of costume-y.
Choose nails where the speckles fade out before the tip so the free edge looks smooth. Press the nail so the strongest olive color sits at the cuticle and the milky nude shows at the tip. Smooth from cuticle to tip with your thumb, then press the tip edge for 10 seconds to prevent lift. If you're adding topcoat, keep it thin so the speckles don't turn into a flat glitter haze.
Editor's noteIf the speckles catch on fabric, lightly buff the nail surface with a 180-grit file once after curing or setting. Stop as soon as it feels smooth.
Watch outSkip sets where speckles look uniform across the whole nail - it reads like cheap confetti.
13. Royal Blue Ombre + Electric Chrome Tip Cap
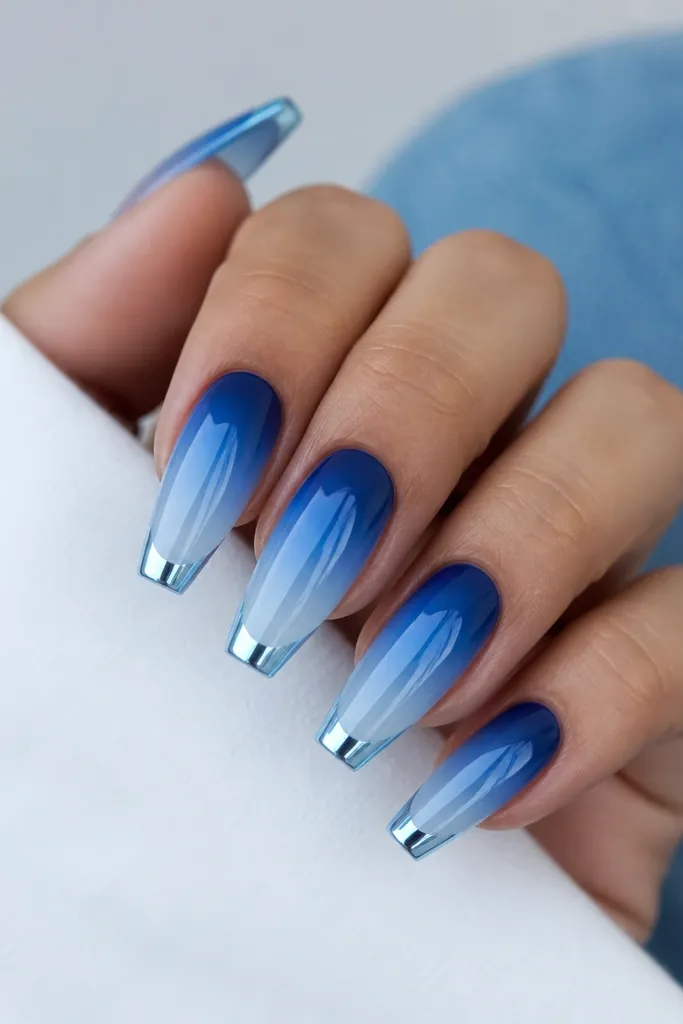
This is the one I pick when I want a "notice me" nail that still looks neat. The royal blue ombre creates a bold base, and the electric chrome cap at the tip keeps the shine concentrated where your hand naturally catches light. It's flattering on cooler undertones and looks extra sharp with silver rings, denim, and crisp white shirts. The tip cap also hides micro chips better than full-coverage chrome because chips happen at the edge anyway.
Start by placing the blue strongest at the cuticle and fading to clear at the tip. Align the electric chrome cap so it forms a thin border at the free edge, not a thick slab - thick caps look heavy on coffin shapes. Press the center, then press around the cap edge with extra pressure so the thin metal doesn't lift. If you need to file, file only the underside or the free edge - avoid sanding across the chrome cap.
Editor's noteUse gloves for dishes for the first 24 hours. Water + heat is what makes removable sets loosen fastest.
Watch outAvoid chrome caps that cover more than the top 1/3 of the tip; they look like sticker residue.
14. Mocha Ombre + Black Chrome Smoke French
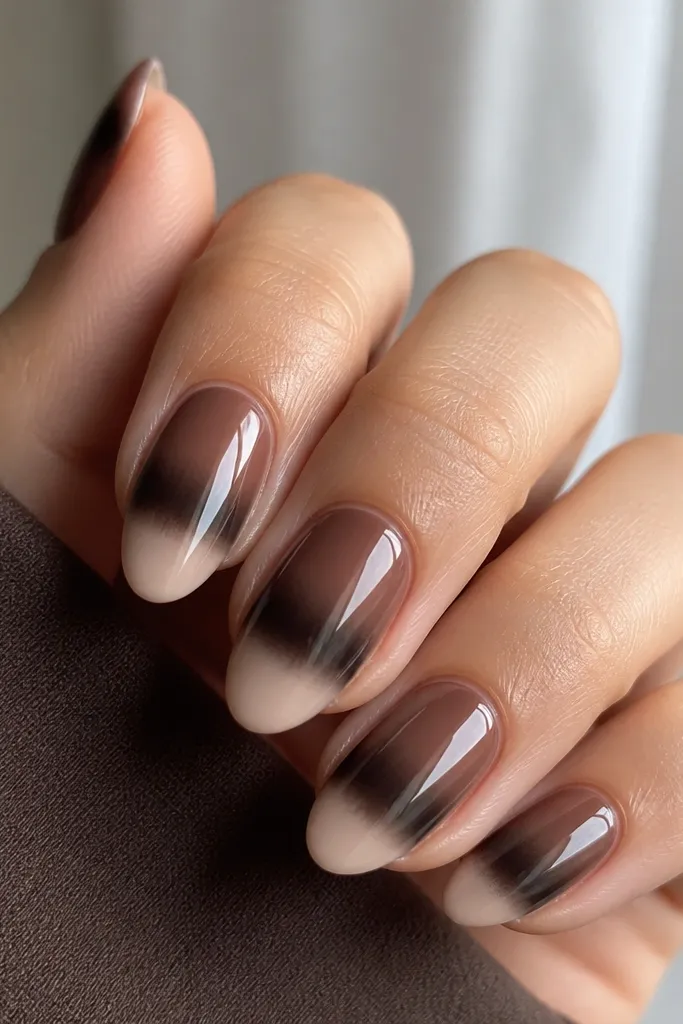
Mocha ombre looks warm and grown-up, and black chrome turns it into a night-ready set without needing extra art. The smoky French band gives movement and hides any tiny placement wobble because the edge is intentionally soft. This design looks great on medium to short almond nails and it flatters hands with warm undertones because the mocha mirrors skin warmth. I've worn it with black outfits and it still looks soft, not harsh.
Pick a set where the French band is smoky and not a hard black stripe. Place the nails so the smoky band sits slightly above your natural free edge line to keep it from looking like a smudge. Press the cuticle first, then press the sides, then press the tip band edge. Add a topcoat only if your set recommends it; otherwise skip topcoat on black chrome to keep the smoke effect crisp.
Editor's noteIf you want it to last longer, buff your natural nail lightly and wipe with alcohol before applying. Adhesion is everything with dark ombre.
Watch outDon't choose smoky chrome that looks patchy in the package; once on, patchiness reads like lifting.
15. Clear Ombré + Rainbow Chrome Micro-Edge
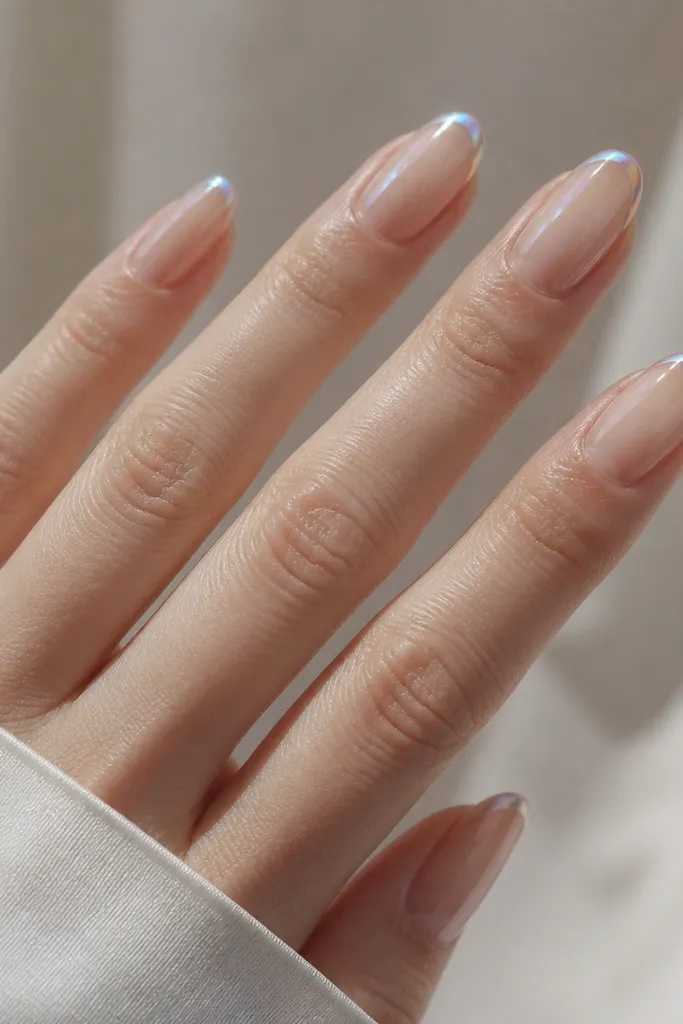
This is the most renter-friendly option if you hate obvious color but still want chrome. The clear ombre makes your nails look hydrated and longer, and the rainbow micro-edge adds that prismatic "shift" when you move. It flatters every skin tone because it doesn't compete with your hand color. I wear it when I'm growing out my nails and want them to look clean during the awkward phase.
Start with the most translucent set you can find so the ombre is subtle. Align the rainbow micro-edge so it sits right at the free edge line - thin and centered. Press the center first, then press the edge line with a flat thumb so it adheres along the thinnest area. If you're adding topcoat, keep it light and avoid building thickness on the edge since it can blur the rainbow shift.
Editor's noteKeep your cuticle line tidy with a damp cotton swab before it sets. Clear ombre shows smudges more than opaque colors.
Watch outAvoid thick rainbow chrome borders; they look like a sticker seam on translucent nails.