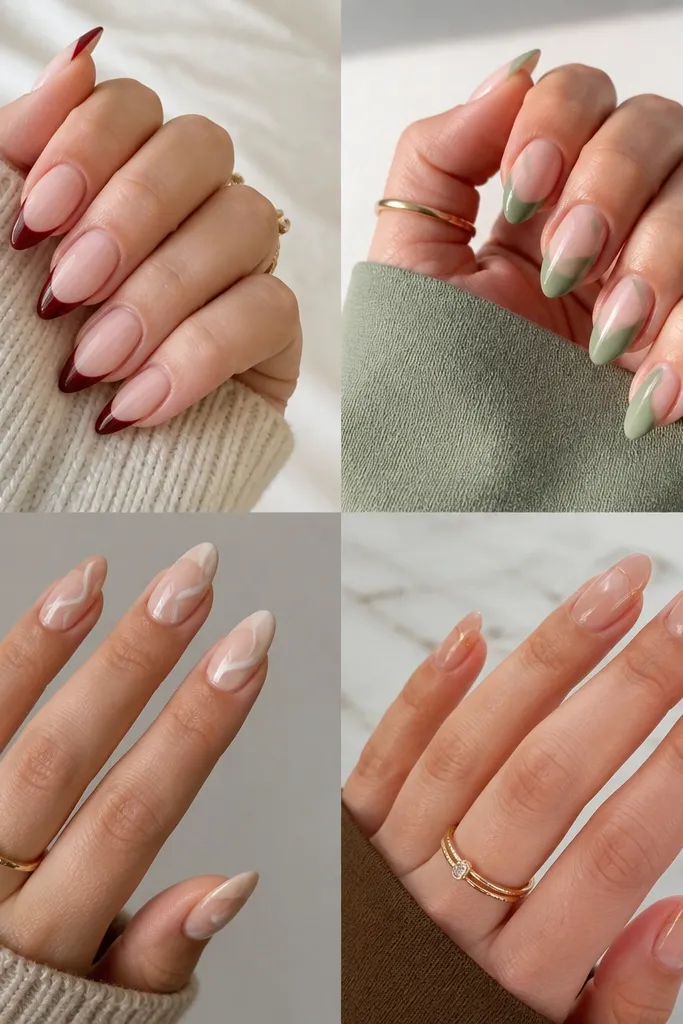
1. Midnight French That Stops Before the Tip
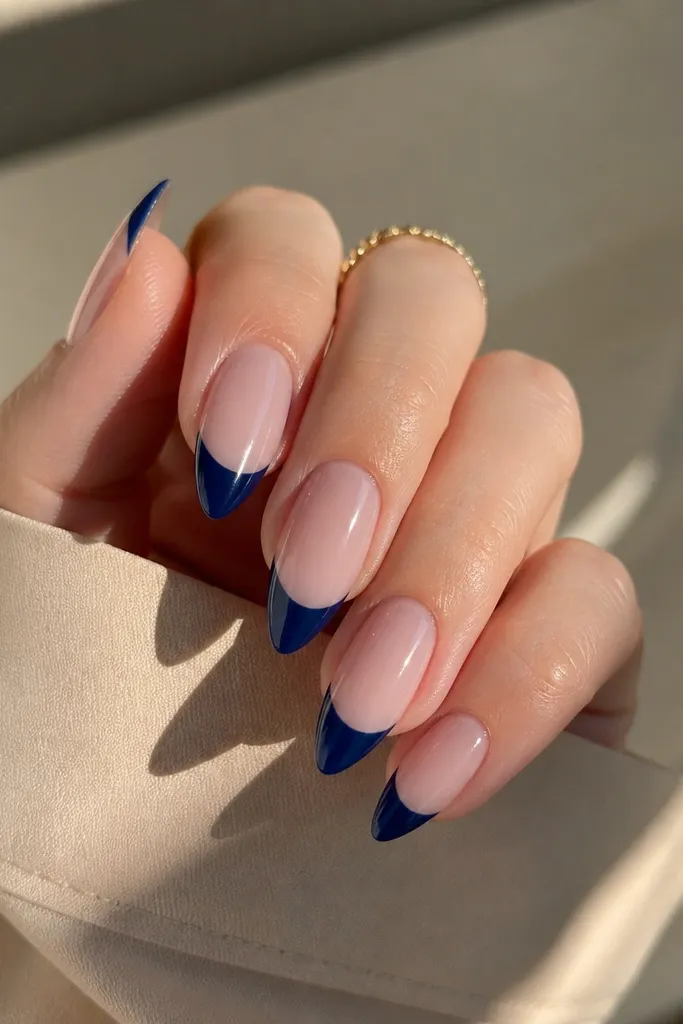
This design turns the French idea into a long-looking illusion. The midnight blue band reads like a crisp frame, and stopping short keeps the point sleek instead of chunky. Use a glossy nude base so the blue looks richer, almost ink-like.
On nails about 5-7 mm long, paint the nude first and cure fully. With a striping brush, draw the blue French line around the sides, then connect across the center so it looks even. Leave a tiny clear gap at the very tip so light hits the point.
Editor's noteFor the cleanest edge, place a striping guide sticker 1 mm back from the tip and cure with it on, then peel.
Watch outDon't run the French color all the way to the point or it looks thick and blunt.
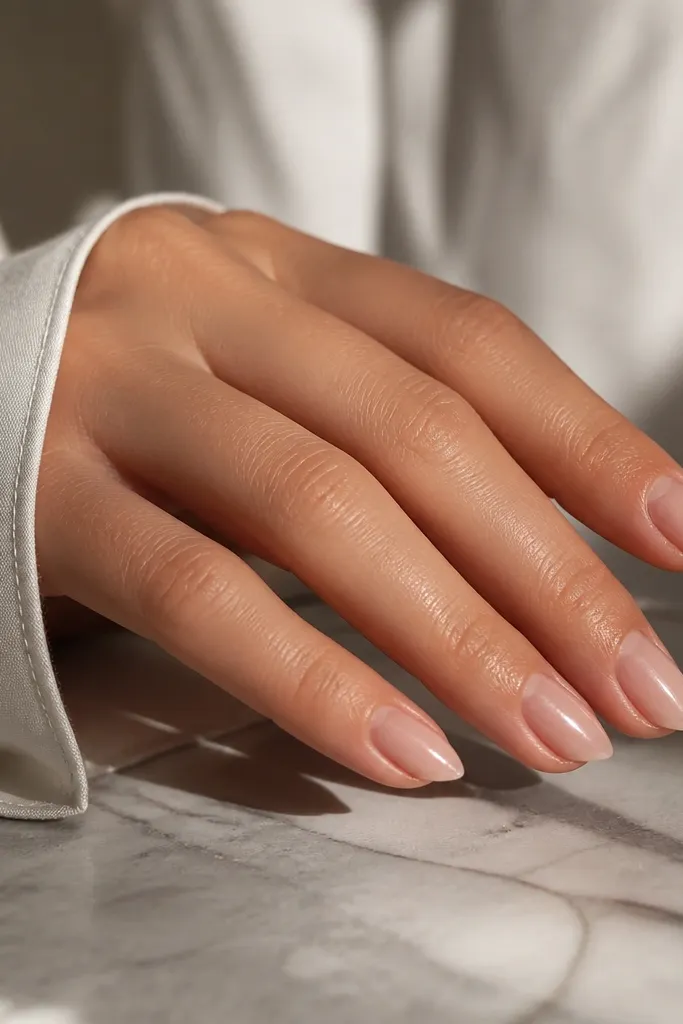
2. Clear Nude Negative Space Half-Moon
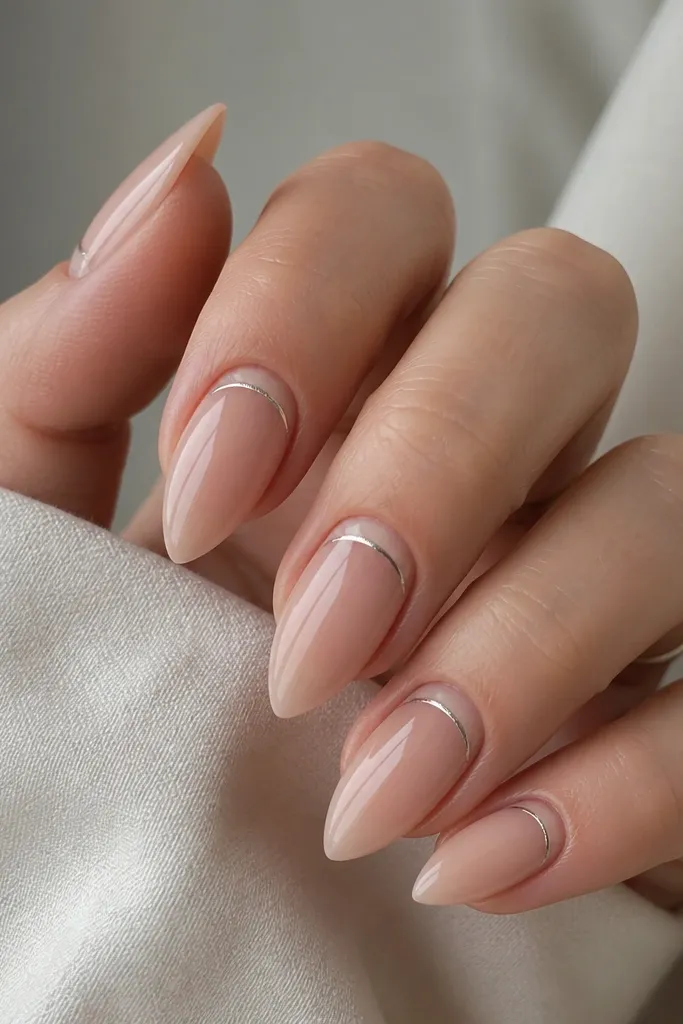
Negative space makes short stiletto feel airy and intentional. The half-moon shape pulls attention upward, and the thin silver outline adds polish without taking up room. The clear nude keeps it wearable even if you're not into full color.
Start with a sheer clear nude gel. Use a half-moon stencil or a small piece of tape to block the cuticle area, then paint a thin silver arc just above the cuticle line. Cure, remove the stencil, and top coat glossy.
Editor's noteIf your cuticles run dry, prep is everything - push back gently, then buff the shine off the nail plate.
Watch outSkip thick silver - it will look like a sticker instead of a line.
3. Rose Chrome Center Stripe
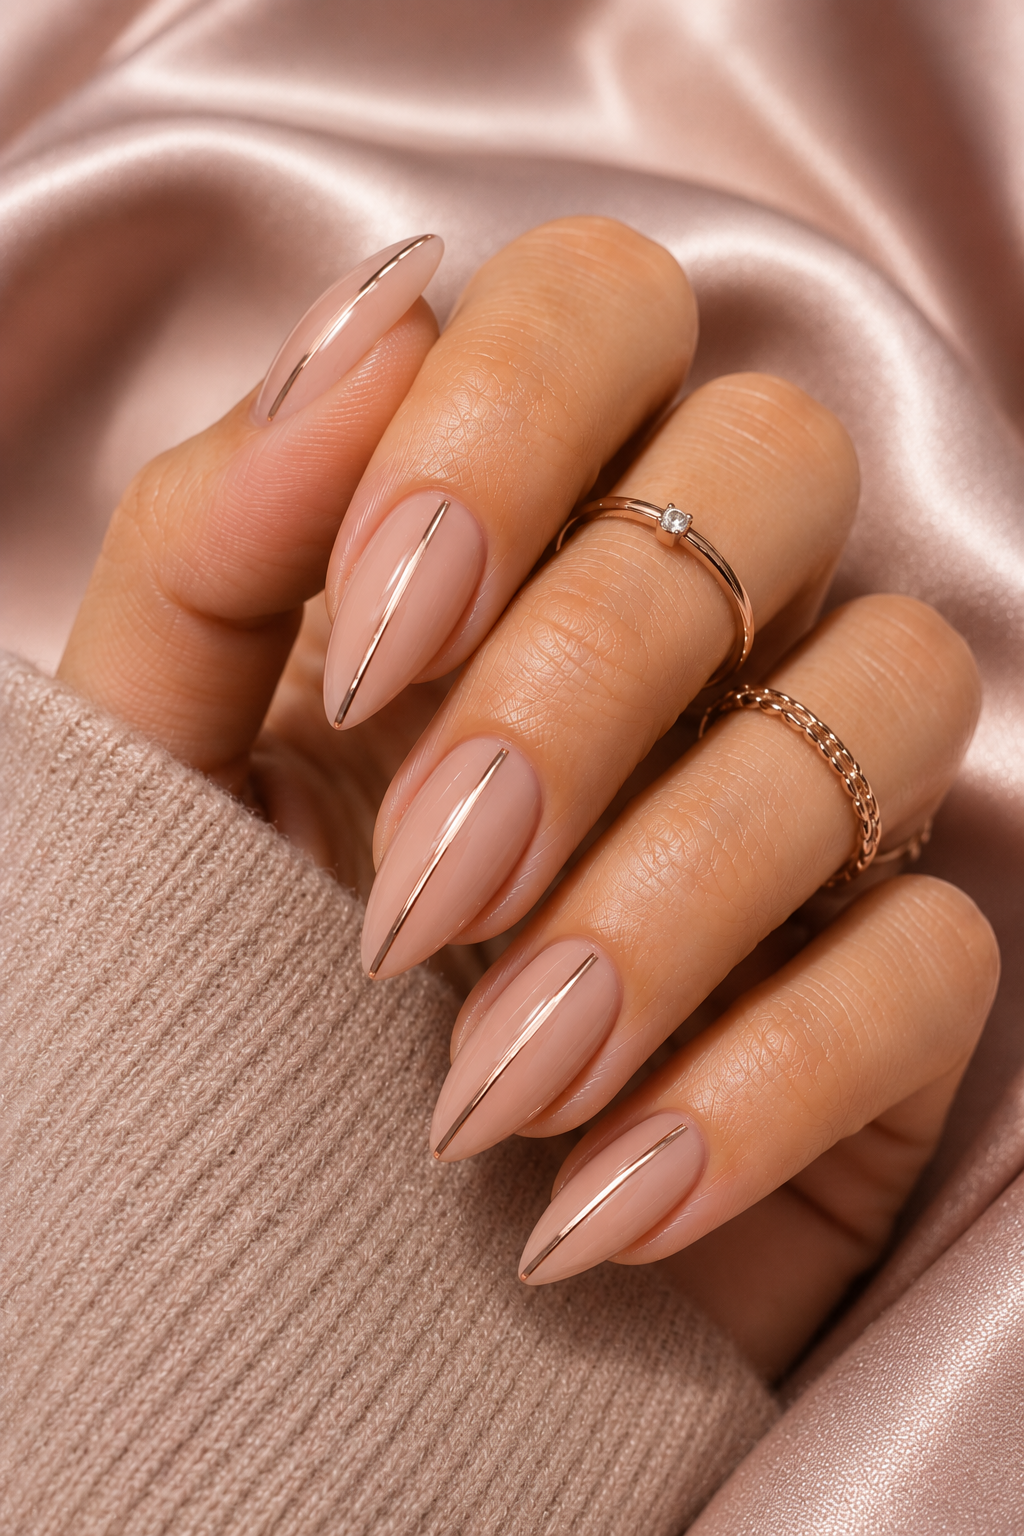
A center stripe is my go-to for making short stiletto look longer. Rose chrome flatters warm skin tones and catches light even with minimal art. Keeping the stripe centered makes the nail read as a vertical shape, not a box.
Use a milky pale pink base gel, cured and glossy. Apply a thin strip of chrome gel in the center, then buff in rose chrome powder and seal with top coat. Leave a small gap near the tip so it doesn't bulk up.
Editor's noteUse a striping brush you trust and mark the center with a tiny dot of gel first.
Watch outDon't smear chrome over the sides - it makes short stiletto look wider.
4. Black Micro-Glitter Ombre Tip
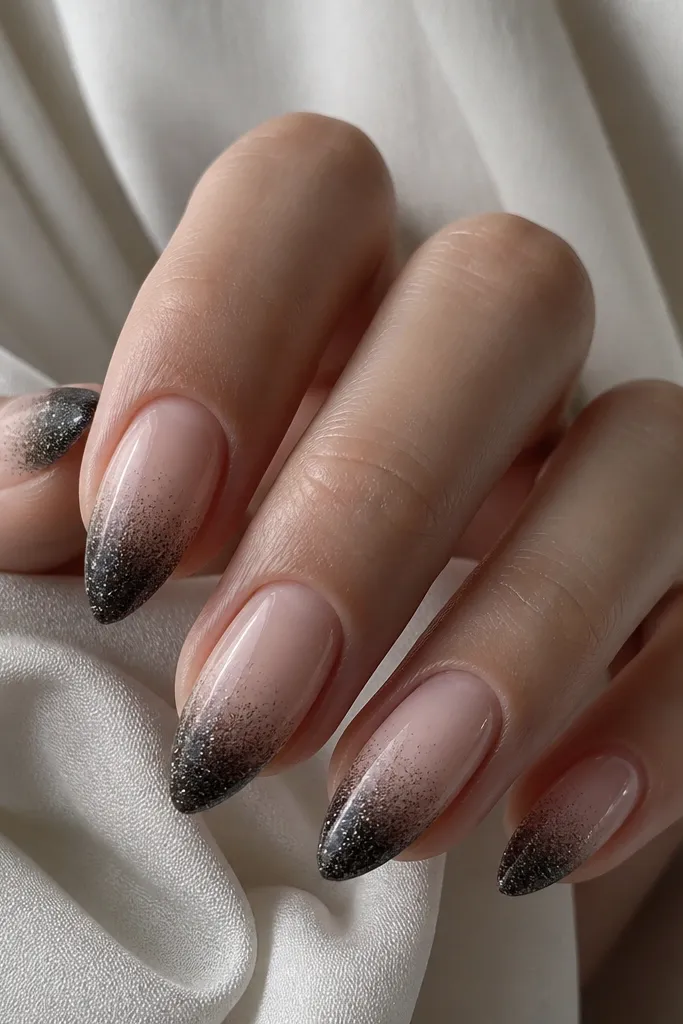
Micro-glitter creates depth without heaviness. The ombre fade makes the tip look dimensional, and the sheer base keeps the design light. Black glitter on nude is dramatic but still clean for everyday.
Start with a sheer nude gel and cure. Sponge black micro-glitter gel at the tip, then blend upward with a dry sponge so the transition looks soft. Seal with a glossy top coat that fills any texture.
Editor's noteIf your glitter looks gritty, add one extra thin top coat layer and cure longer on the tips.
Watch outDon't use chunky glitter - it lifts on short nails fast.
5. White Line Art Cat-Eye Glow
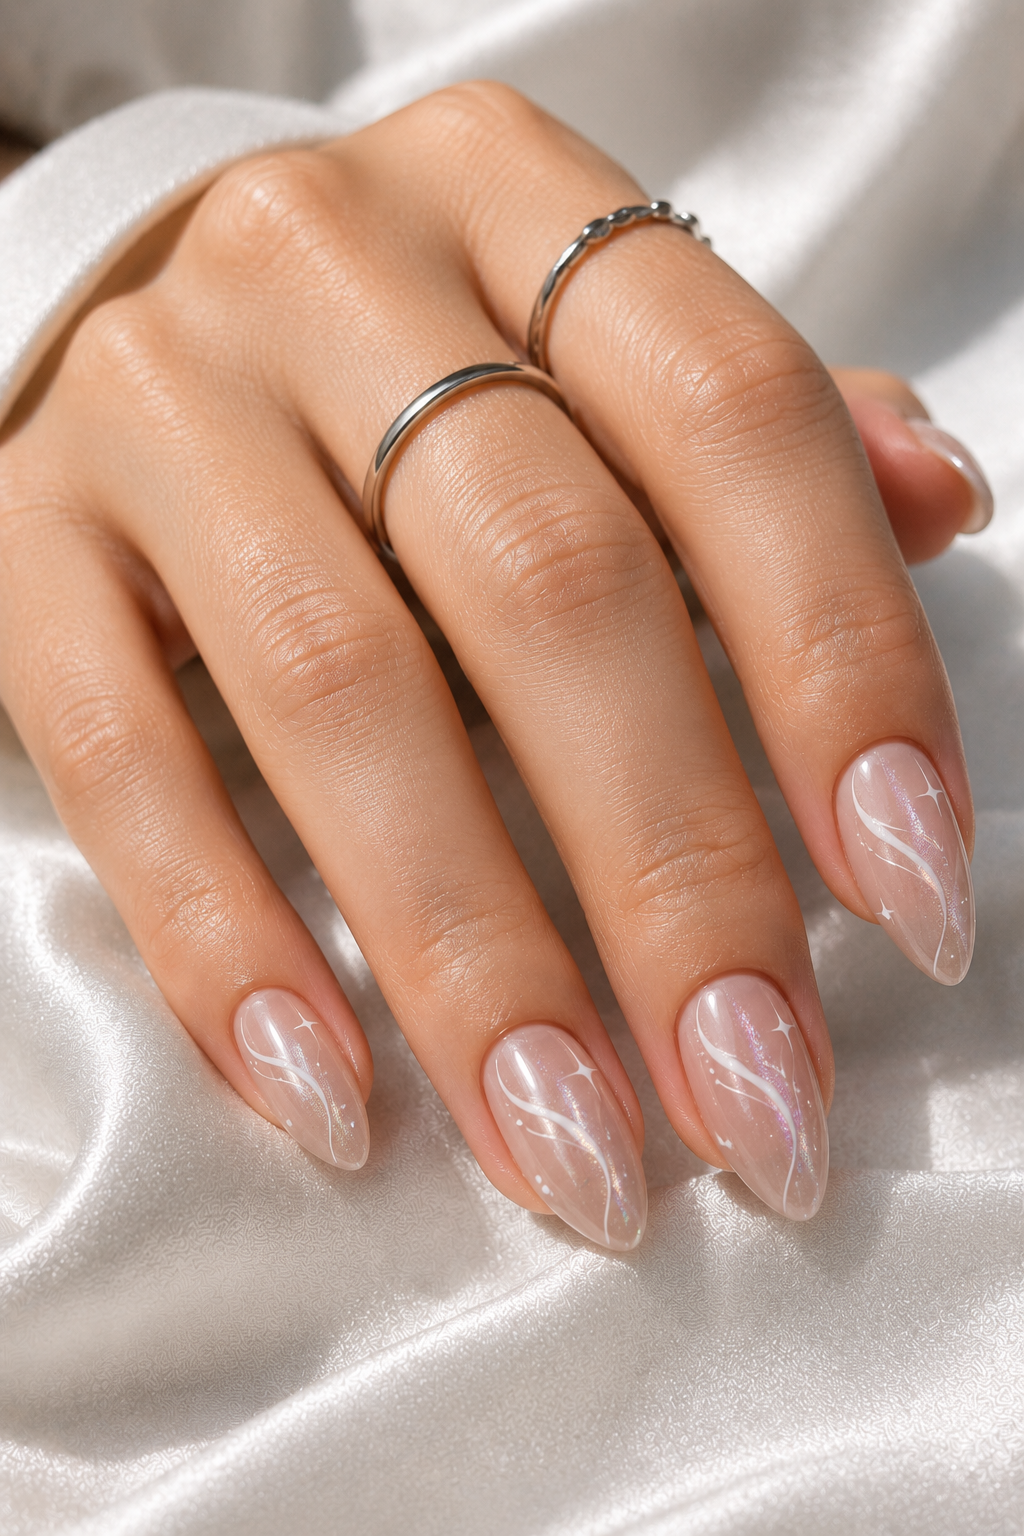
Line art looks best when it's tiny and centered. A cat-eye outline gives a fashion-meets-animal vibe without covering the whole nail, and the gray smoke behind it adds depth. White lines stay crisp on nude, so the design reads even at short length.
Paint nude, cure. With a 00 liner brush, draw a narrow cat-eye curve (like an almond) in white, then tap a small amount of gray gel behind the lines. Cure, then top coat glossy.
Editor's notePractice the curve on a plastic swatch first - line art is all about the smooth arc.
Watch outDon't thicken the lines - chunky white makes short stiletto look messy.
6. Olive Aura With Tiny Gold Specks
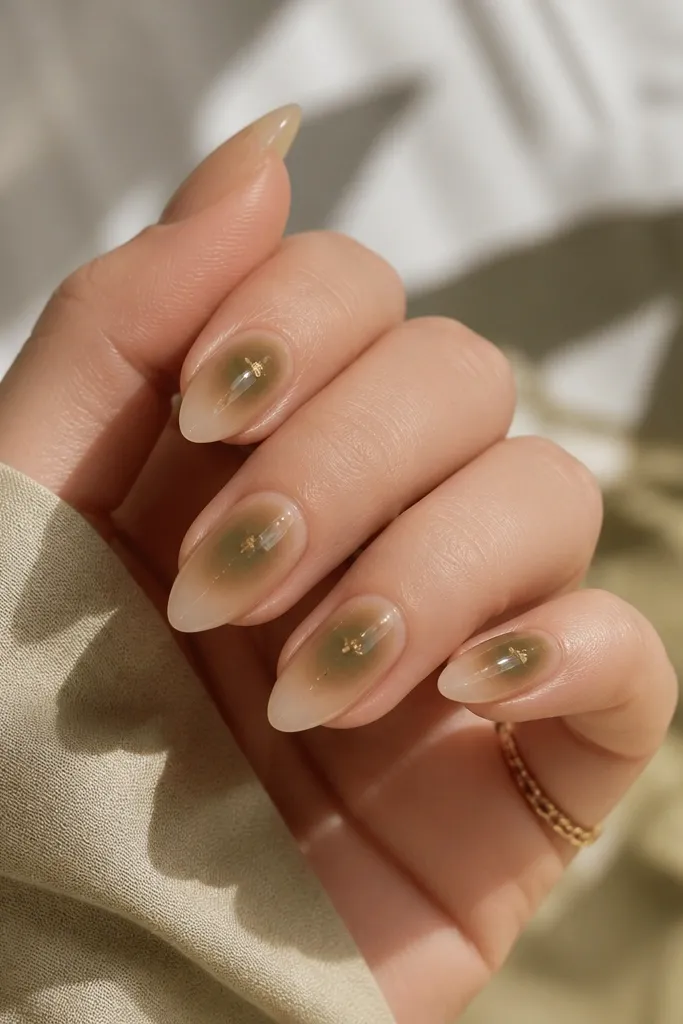
Aura nails are made for short stiletto because the effect is centered and fades naturally. Olive looks grounded and modern, and the gold specks add movement without needing big decals. It's one of those designs that looks different in different light.
Use a sheer nude base and cure. Sponge olive green gel in a small oval at the center, leaving the edges soft. Dot micro gold pigment or gold foil flakes around the bloom, then seal with a glossy top coat.
Editor's noteKeep the aura smaller than you think - if it spreads too far, short nails look crowded.
Watch outSkip heavy pigment - thick aura looks like a stain.
7. Blush Satin Marble Vein
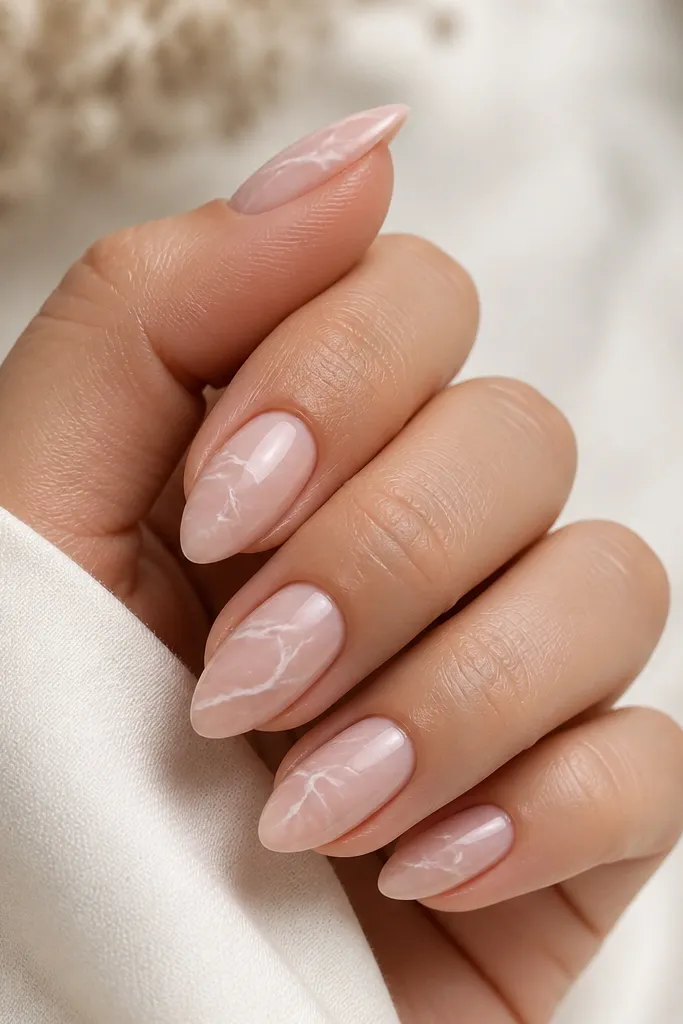
Marble looks high-end when the veins are skinny and the base isn't too glossy. A blush satin finish makes the marble feel soft and slightly dusty, like stone. The diagonal vein direction adds length and keeps the nail from looking flat.
Build a blush gel base and cure, then matte top coat lightly if you want true satin. Add thin white lines with a liner brush, then drag a small amount of pale gray through while it's still workable. Cure and finish with a satin or glossy top depending on your preference.
Editor's noteUse rubbing alcohol on the brush tip between lines so the marble stays hair-thin.
Watch outDon't flood the nail with marble - one or two veins per nail looks best.
8. Copper Foil Corner Accent
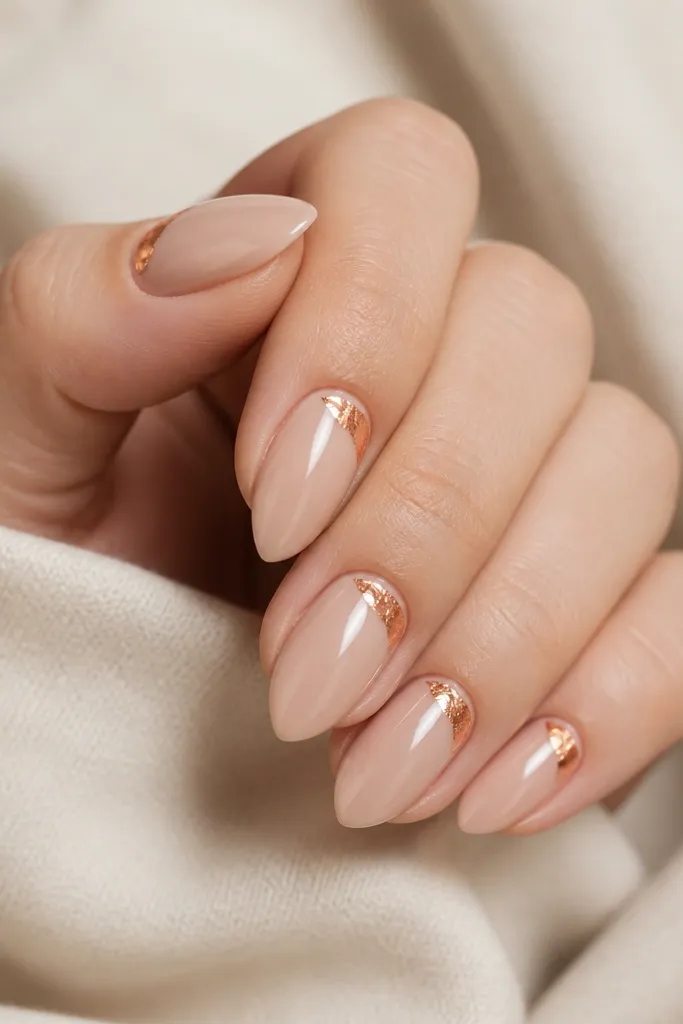
Foil looks expensive when it's used like jewelry, not wallpaper. This corner placement frames the nail and makes the point look sharper. Copper warms the whole manicure and pairs easily with gold jewelry.
After nude base gel and cure, apply foil glue gel only to a small corner area. Press copper foil pieces in, then peel and seal. Keep the foil patch smaller than the width of your nail bed so it doesn't overpower.
Editor's notePress foil with a silicone tool - fingers leave oils and can blur the edges.
Watch outDon't cover the entire nail with foil on short stiletto.
9. Black Lace Strip Over Nude
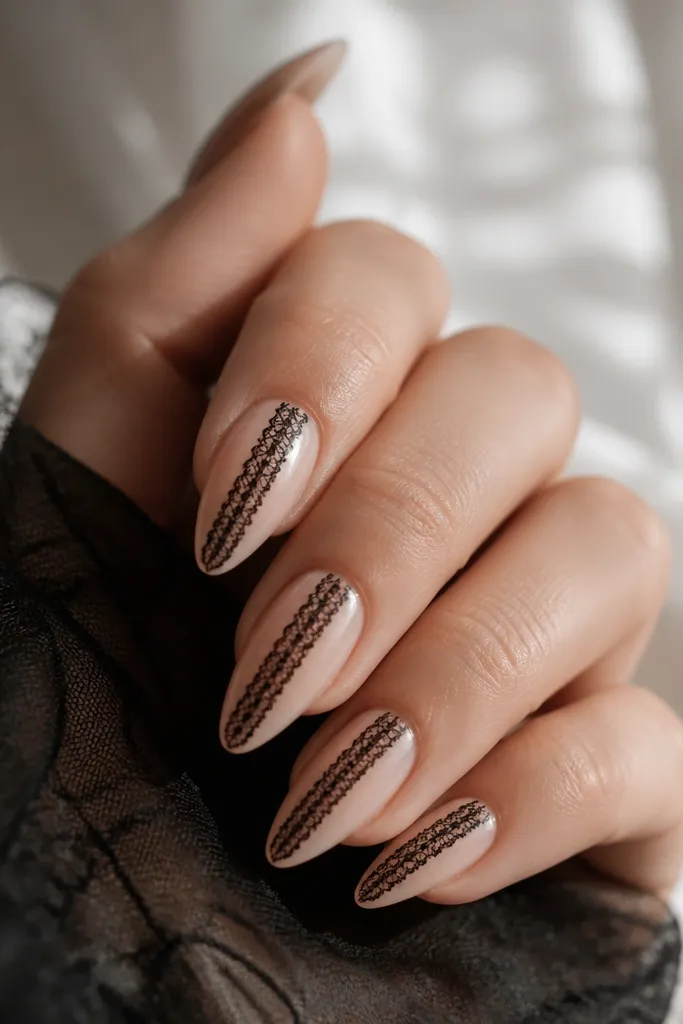
A lace strip is a cheat code for looking detailed without painting lots of tiny shapes. The black vertical strip creates a long line and the negative space between lace cutouts keeps it light. It feels romantic but still sharp.
Choose a black lace nail sticker or thin lace strip decal sized for short stiletto. Apply on top of cured nude, then smooth edges with a thin top coat layer. Seal thoroughly around the sides to prevent lifting.
Editor's noteTrim the sticker right at the sidewalls so it doesn't round out and look bulky.
Watch outDon't leave sticker edges raised - they catch on fabric and pop off.
10. Pastel Rainbow Micro Tips
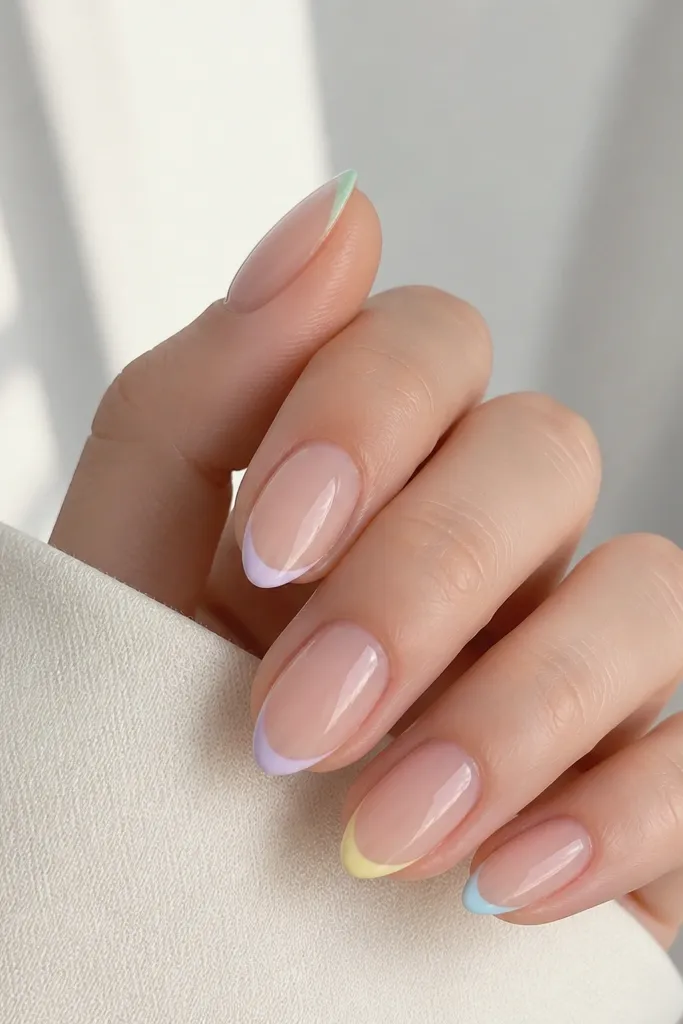
Micro tips look playful without turning the whole nail into a cartoon. Because the lines are tiny, the short stiletto shape stays the star. Pastels also soften the point so it feels cute, not sharp.
Use a sheer nude base and cure. With a dotting tool or fine liner brush, paint a thin curved line at the very tip on each nail. Keep the arc small - about 1 mm from the point - then top coat glossy.
Editor's noteIf your line bleeds, wipe the brush on a lint-free pad before painting.
Watch outSkip thick paint at the tip or it will look like a blob.
11. Matte Nude With Glossy Cuticle V
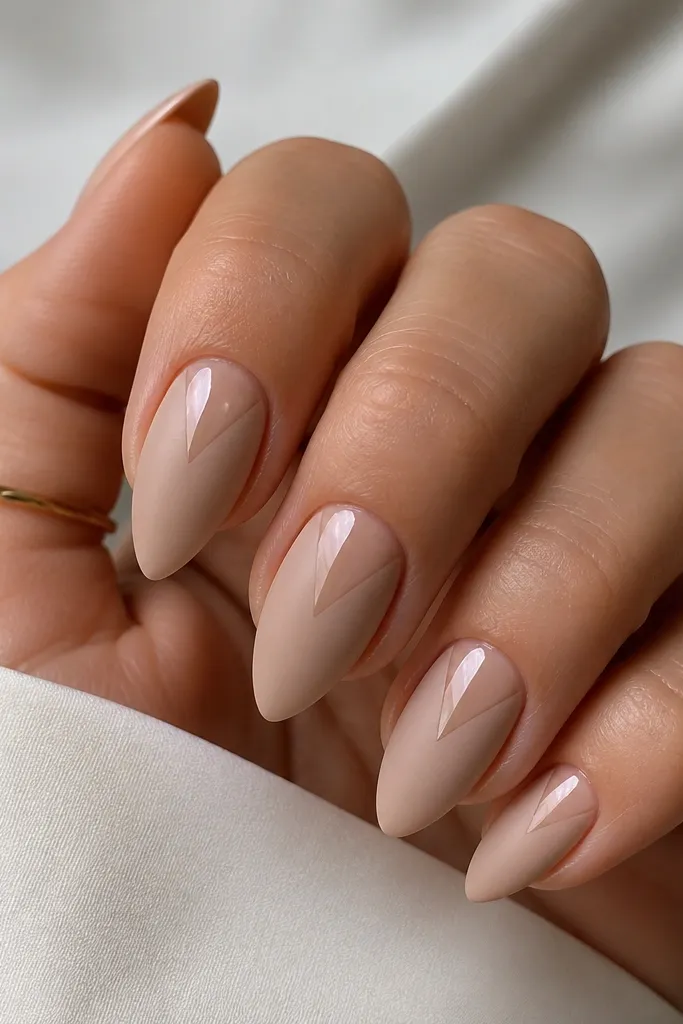
Matte base plus glossy accent makes the manicure look intentional and styled. The V shape pulls the eye downward and makes the nail look longer. It also frames your cuticle nicely without covering the whole nail with shine.
Paint nude gel and cure, then matte top coat. Use a thin brush to draw a small glossy V with clear gel or glossy white gel at the cuticle, then cure. Finish with one more top coat only over the matte areas, keeping the V glossy.
Editor's noteUse two curing steps: cure the V, then cure the rest - it prevents the V from dulling.
Watch outDon't matte the whole nail after you add the V.
12. Teal Jelly Gradient With Clear Edge
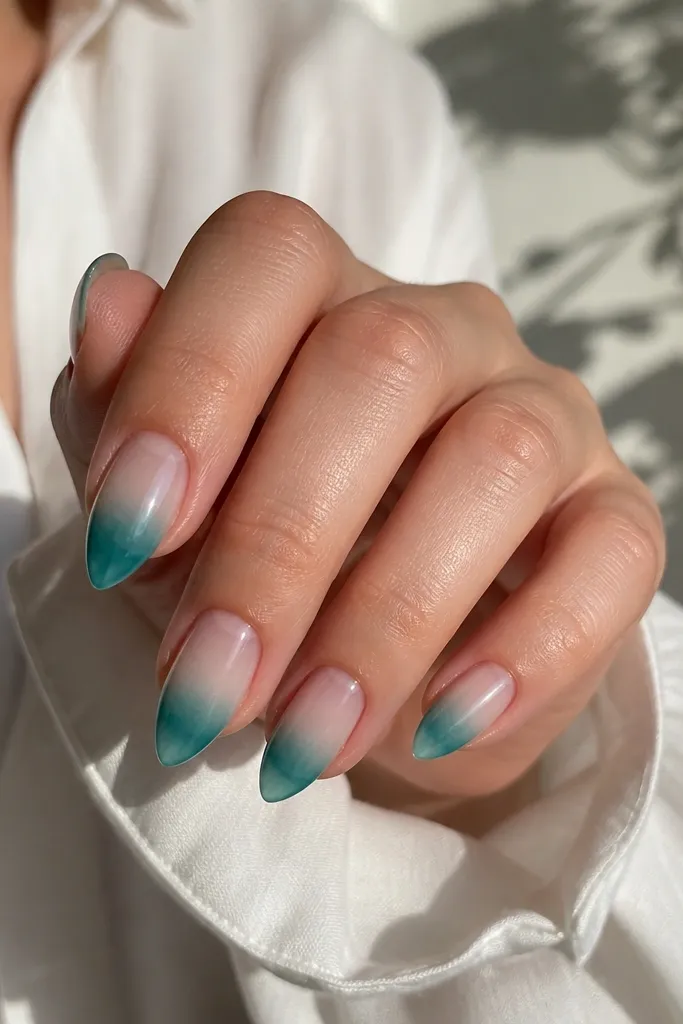
Jelly gradients look smooth even on short nails because they're translucent. Keeping a clear edge makes the stiletto point look crisp and "cut glass" instead of filled. Teal is flattering and reads fresh on both cool and warm undertones.
Use a clear base gel, cure. Sponge or brush teal jelly gel from mid-nail to tip, then wipe the very point with a clean brush so it stays clear. Seal with glossy top coat for a glassy finish.
Editor's noteUse three thin layers of teal jelly instead of one thick layer to avoid shrinkage lines.
Watch outDon't paint all the way to the tip with opaque teal or the point looks blunt.
13. Glitter Halo Around the Cuticle
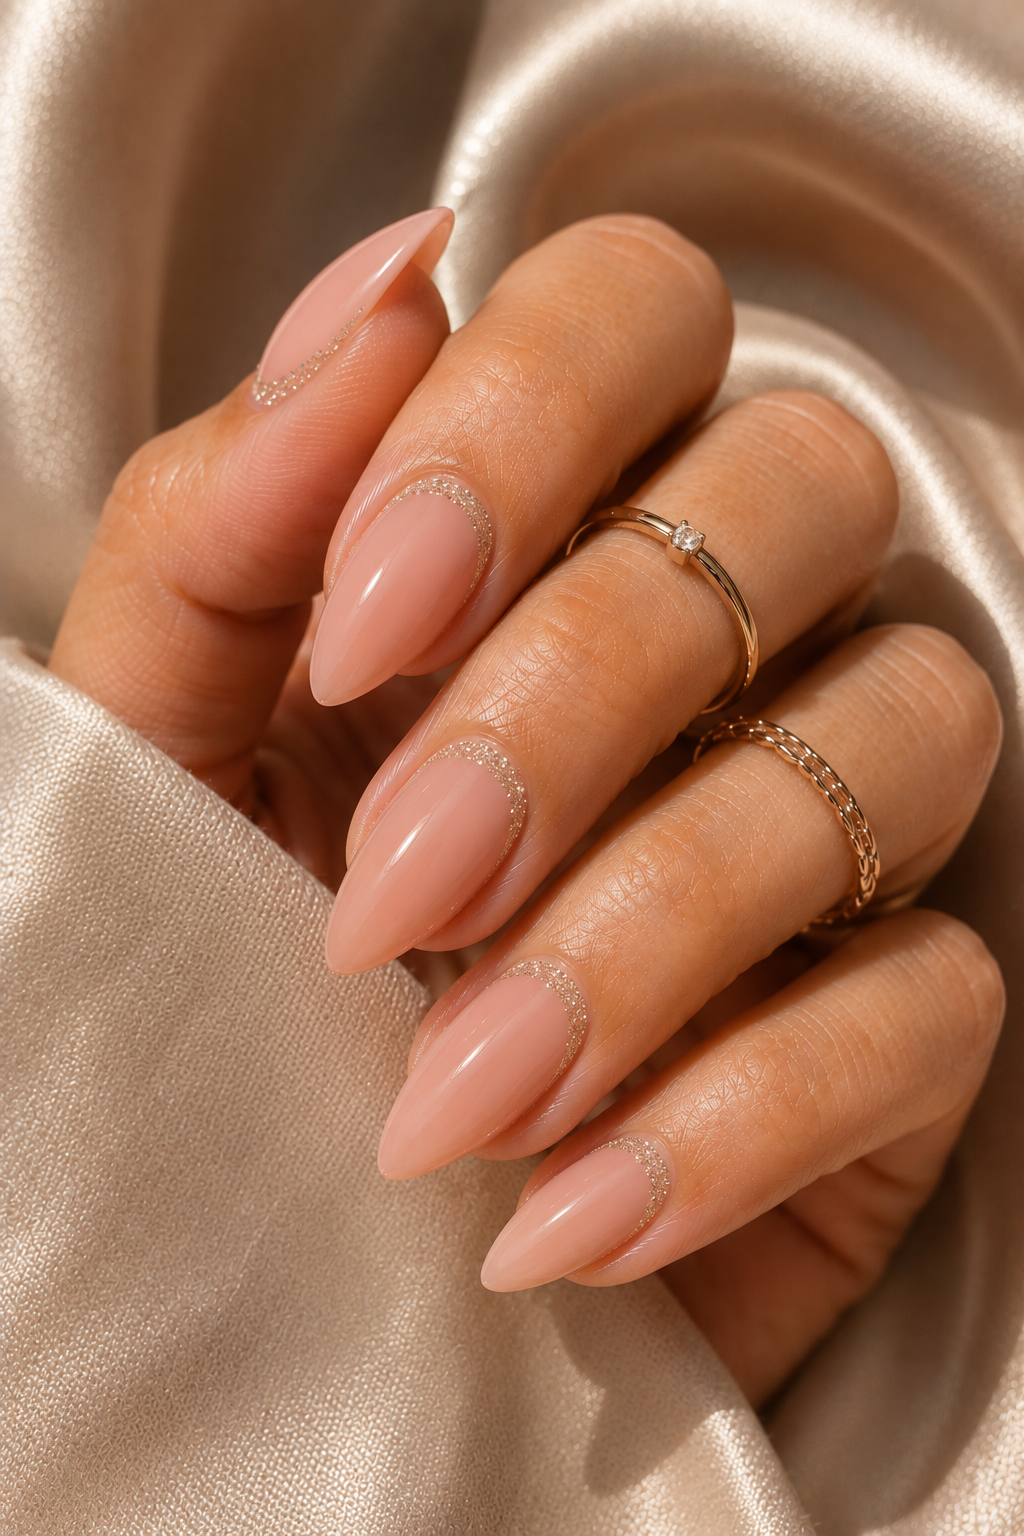
A cuticle halo makes short stiletto feel dressed up instantly. Since the glitter sits near the base, it doesn't take over the length. Silver sparkle on nude looks clean and bright in daylight.
After nude base and cure, apply a thin line of clear gel around the cuticle in a half-ring. Sprinkle fine silver glitter, tap off excess, and cure. Add a thin top coat over the glitter to lock it down.
Editor's noteUse a small makeup sponge to press glitter evenly so it doesn't look patchy.
Watch outDon't let glitter reach your skin - it lifts and gets itchy fast.
14. Tiny Rhinestone Line Along the Sidewall
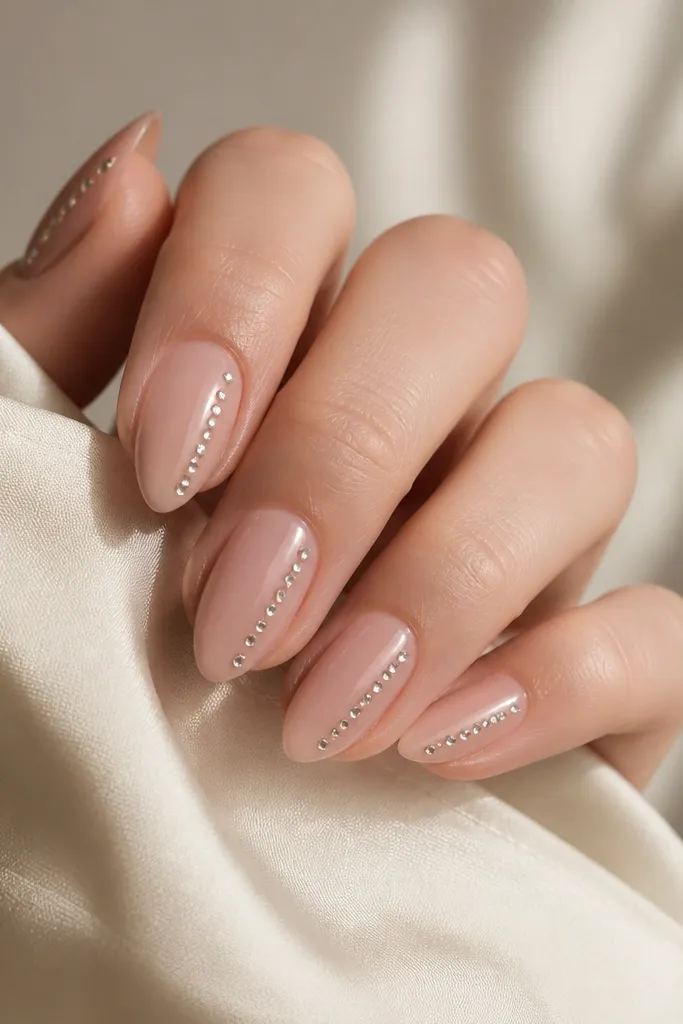
Sidewall rhinestones make the nail look extra narrow and sharp, which is exactly what short stiletto needs. Tiny stones keep it classy and avoid the bulky "bracelet" look. Sheer pink lets the sparkle read clean instead of heavy.
Use a sheer pink or milky nude base gel and cure. Place rhinestones with tweezers using a gel adhesive, starting at the cuticle line and spacing them about the width of one stone apart. Cure, then cover with a thin top coat so the stones feel smooth.
Editor's notePick stones that are all the same size or the line looks uneven fast.
Watch outDon't glue one giant stone as a focal point on short nails.
15. Chocolate Brown Swirl With Gold Thread
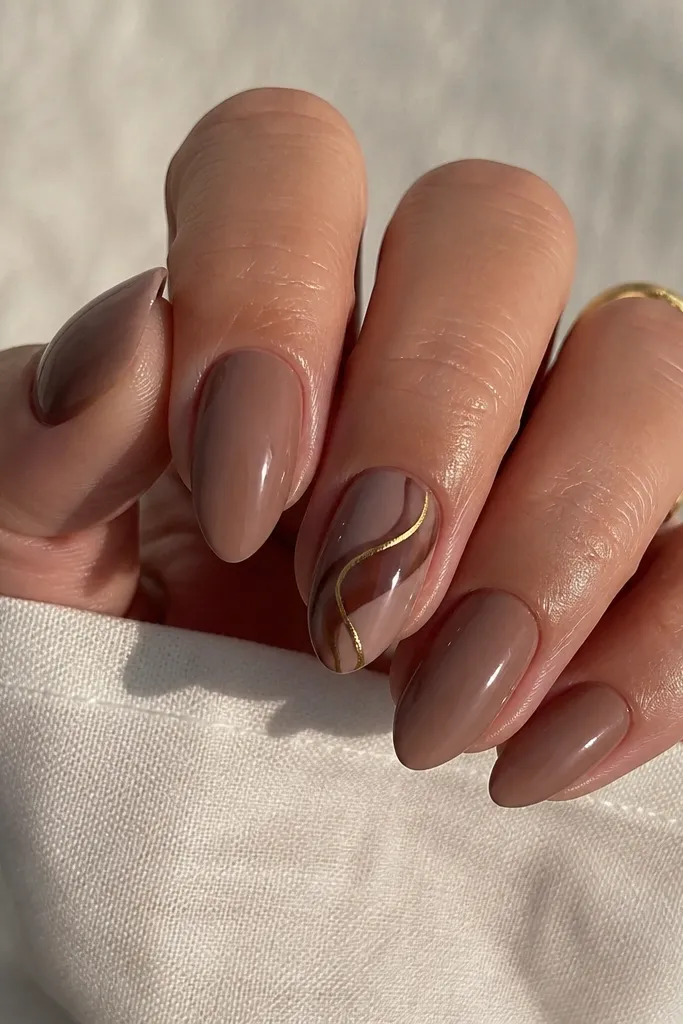
Brown swirls look warm and luxe, especially when you add a single gold "thread" line. Using only one accent nail keeps it chic and prevents clutter on short stiletto. The gold line adds a crisp edge that makes the swirl look intentional.
Paint all nails a glossy nude-brown gel. On the accent nail, draw a smooth swirl using chocolate brown gel, cure. Add a thin gold line that tracks part of the swirl, cure again, then top coat glossy.
Editor's noteKeep the swirl thickness under 1 mm so it stays delicate on short length.
Watch outDon't add swirls on every nail - it starts to look like a sticker sheet.
16. Icy Blue Frost Topcoat Over Nude
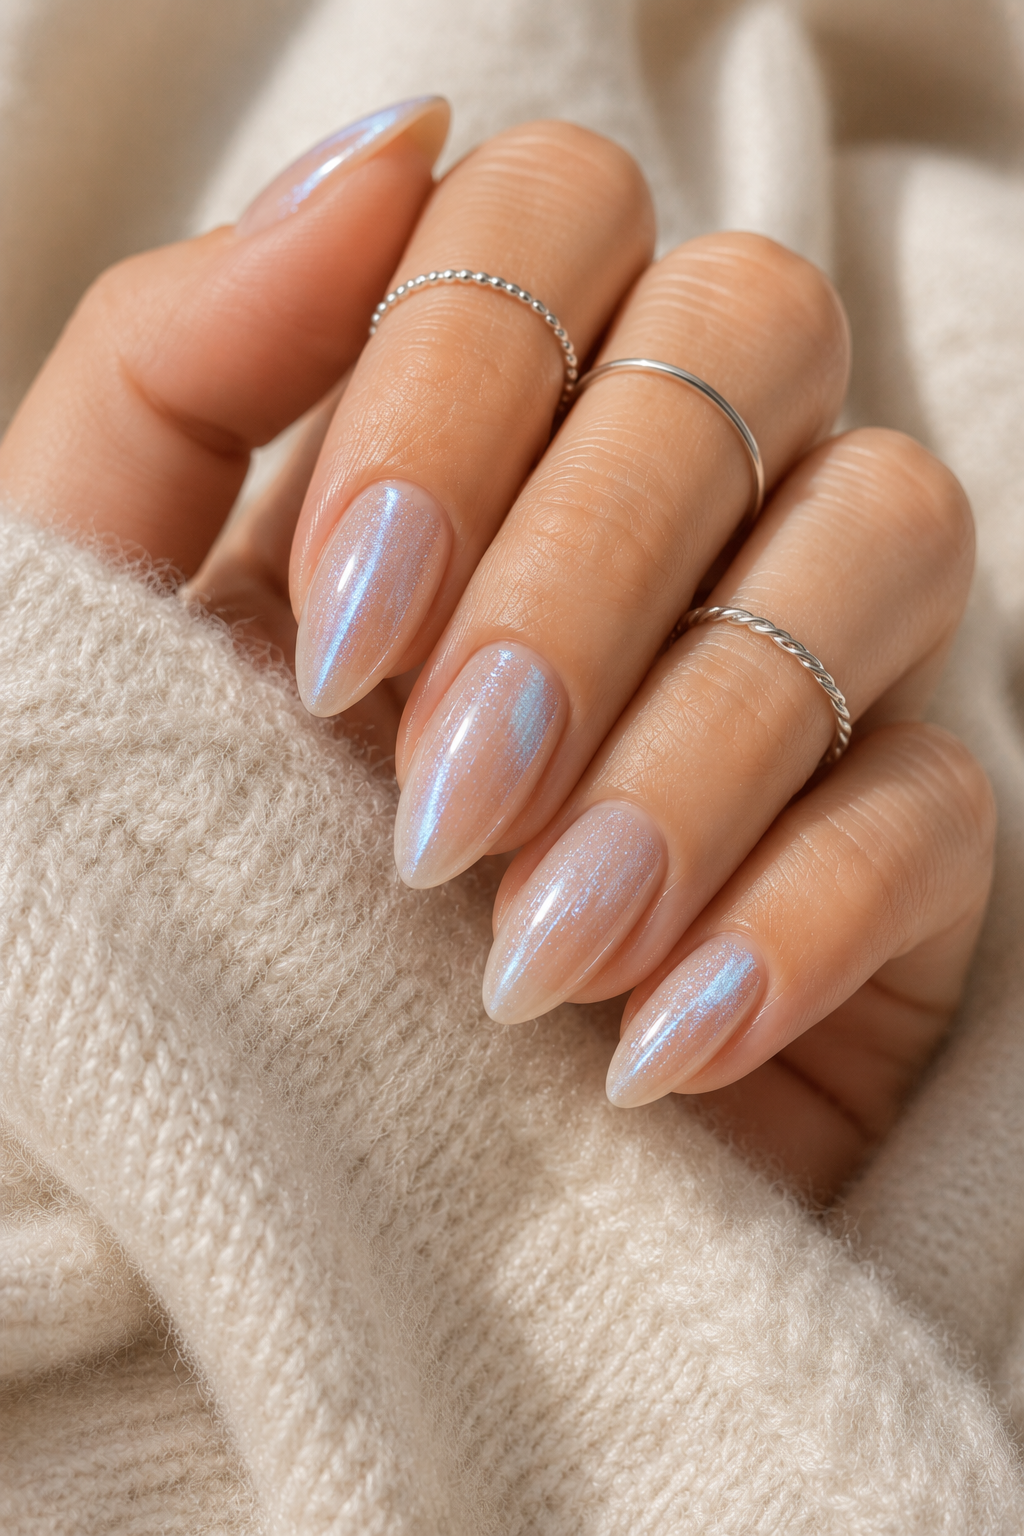
Frost topcoats give you that wintery, editorial look without detailed painting. The tip-dark effect keeps the stiletto point looking dramatic. It also hides small imperfections because the frost texture softens the surface.
Apply nude base and cure. Brush on an icy blue frost gel concentrated at the tip, then feather toward mid-nail. Cure thoroughly and seal with a slightly thicker top coat so the frost doesn't feel rough.
Editor's noteIf the frost feels gritty, buff lightly after cure and then re-seal with a glossy layer.
Watch outSkip thin frost layers - they look patchy on short stiletto.
17. Lavender Satin French With Micro Dot Border
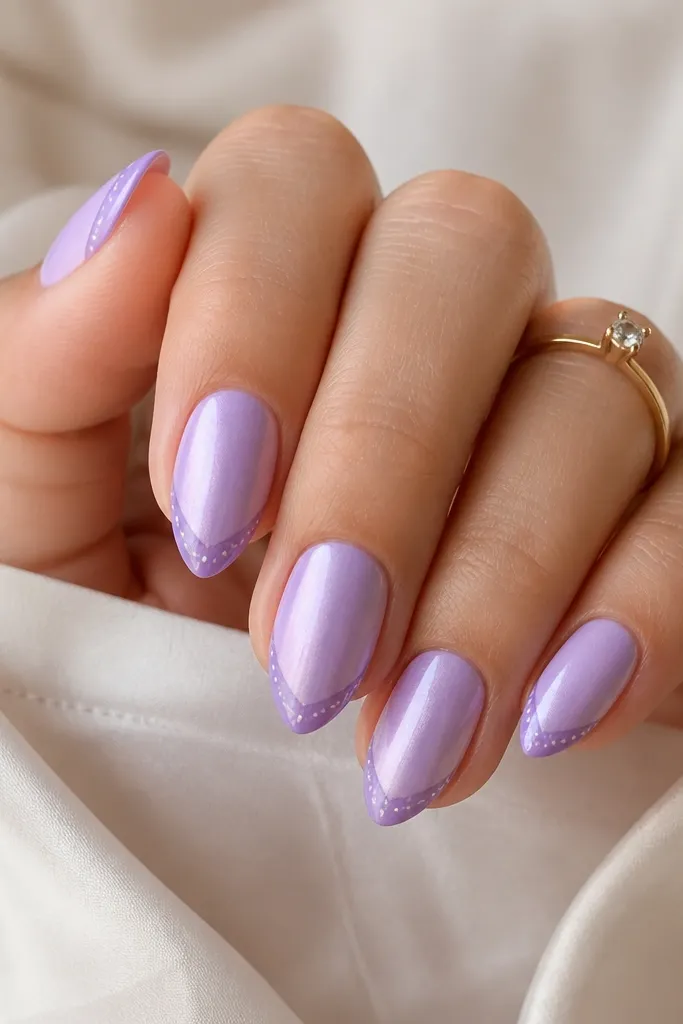
This is a clean, girly take on French that still feels designed. The satin base makes lavender look soft, and the micro dot border adds a neat "beaded" edge. White dots make the whole thing pop without taking over the nail.
Build a lavender satin base using matte top coat over a gel color. Paint a deeper lavender French tip and cure. With a dotting tool, stamp tiny white dots along the French edge, cure, then finish with a glossy top only on the dots and tip edge.
Editor's noteUse a bigger dotting tool for spacing practice, then switch to a smaller one for the final line.
Watch outDon't make the dot border too thick or it turns into a stripe.
18. Metallic Green Chrome With Nude Side Panels
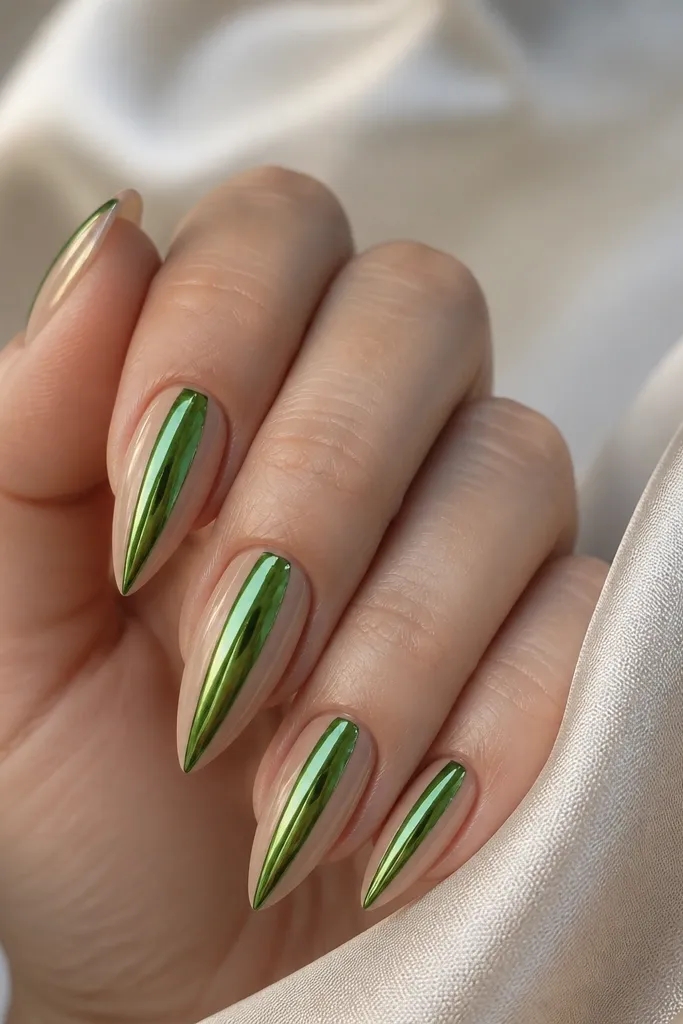
This design uses negative space like a frame and chrome as the focal point. Metallic green reads bold but the nude side panels keep it balanced and wearable. On short stiletto, the center chrome makes the nail look longer and slimmer.
Start with a nude base. Add thin strips of gel to mask the side panels, then apply metallic green chrome gel to the center only. Remove the masks carefully after curing, then seal with top coat.
Editor's noteMask with thin striping tape so the side panel edges stay razor straight.
Watch outDon't let chrome bleed into the nude areas or the panels lose their shape.
19. Pearlized Nude With One Tiny Star at the Tip
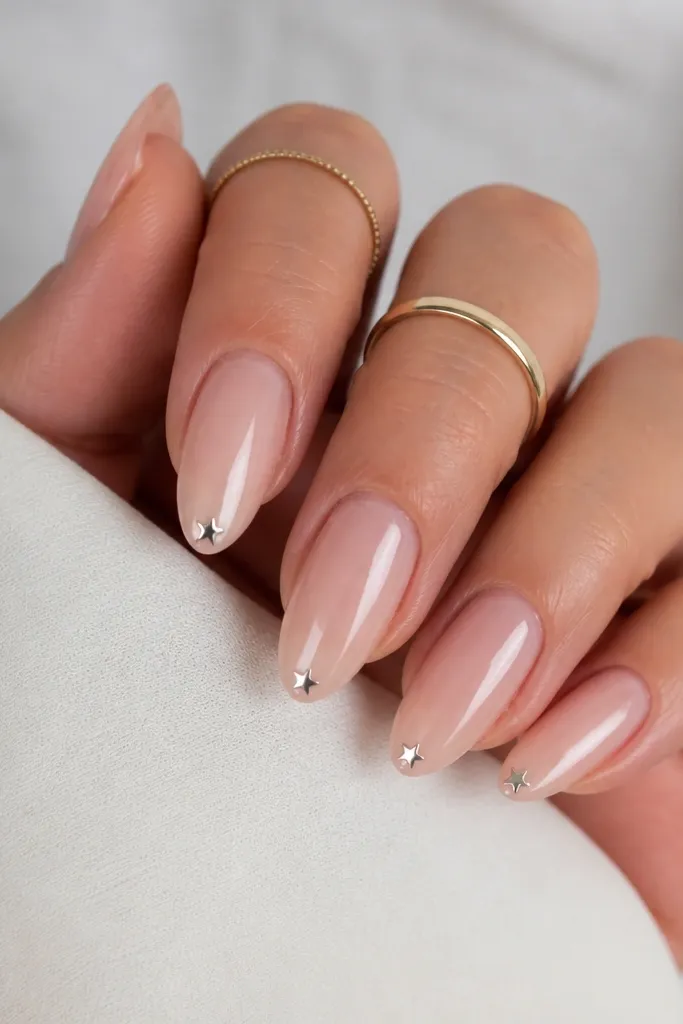
Pearlized nude is already pretty, and the single tiny star adds just enough story. The star at the tip emphasizes the stiletto point without filling the whole nail. It looks great for birthdays or holiday dinners when you want sparkle but not heavy gems.
Use a pearlized nude gel that shifts slightly pink or champagne. Place a tiny star charm or a star decal at the tip center, then cure. Seal with a smooth top coat so the star doesn't catch.
Editor's noteKeep the star smaller than a grain of rice - tiny charms look best on short stiletto.
Watch outDon't stack charms; one small star looks intentional.
20. Black Cherry Gloss With Wine-Cuticle Line
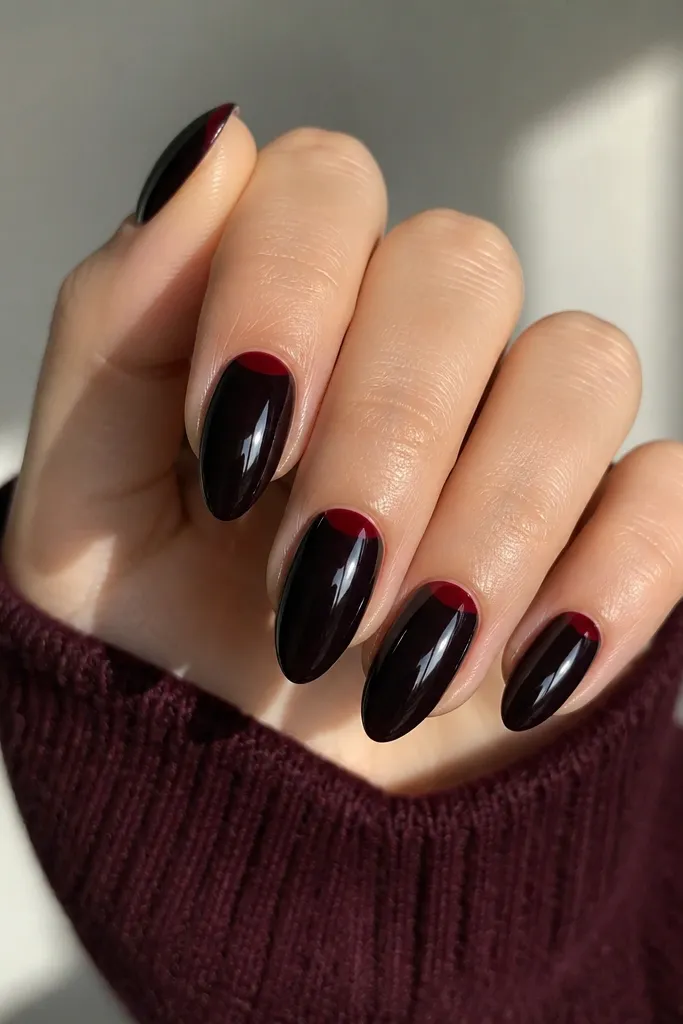
A dark base like black cherry makes the wine line look like jewelry. The thin cuticle curve gives lift and makes the nail look neatly finished. This is one of those designs that photographs insanely well because it has contrast in the shine.
Paint a black cherry gel and cure hard. Use a liner brush to draw a thin wine-red arc right above the cuticle, cure. Top coat glossy, and make sure the line is sealed so it doesn't catch on hair.
Editor's noteWipe the brush on a lint-free pad so the line stays hair-thin.
Watch outDon't make the cuticle line thick - it looks like a border sticker.
21. White Marble Tips With Clear Base
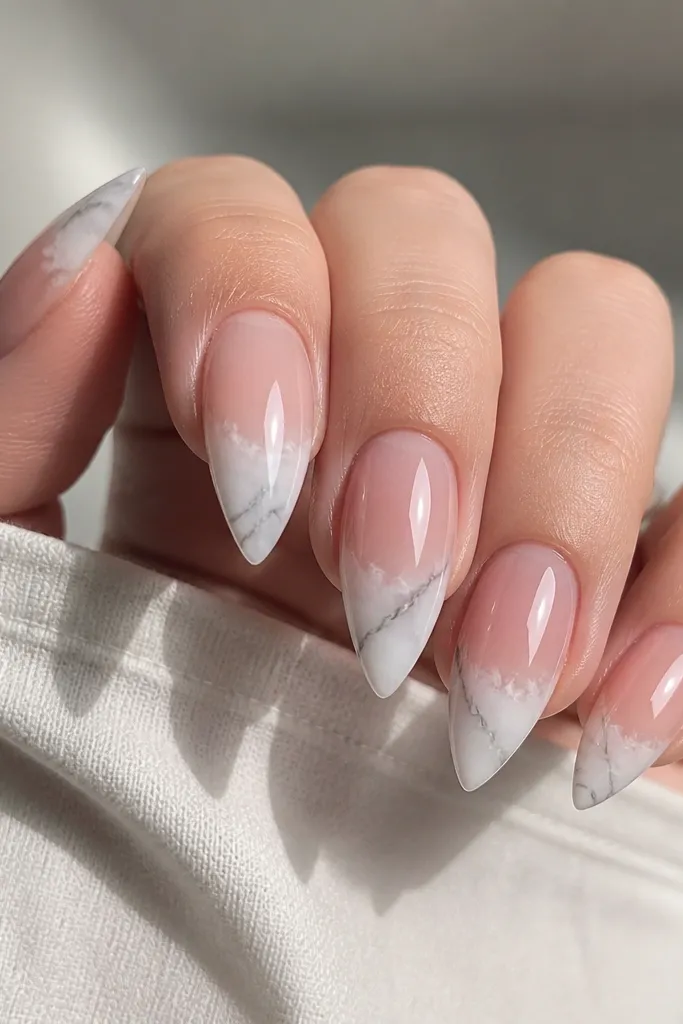
This is marble done the smart way: keep it to the tip so short length stays clean. The clear base makes the marble feel lighter and more modern. The milky white tip also makes stiletto points look extra crisp.
Use a clear nude or builder gel that looks natural and cure. Sponge or brush milky white gel at the tip, then draw thin gray veins inside the white while it's still workable. Seal with glossy top coat to smooth the marble texture.
Editor's noteUse a small fan brush to remove excess marble dust or pigment so the tip stays neat.
Watch outDon't extend the marble past mid-nail or it feels heavy.
22. Beige Nude With Copper Side Glow
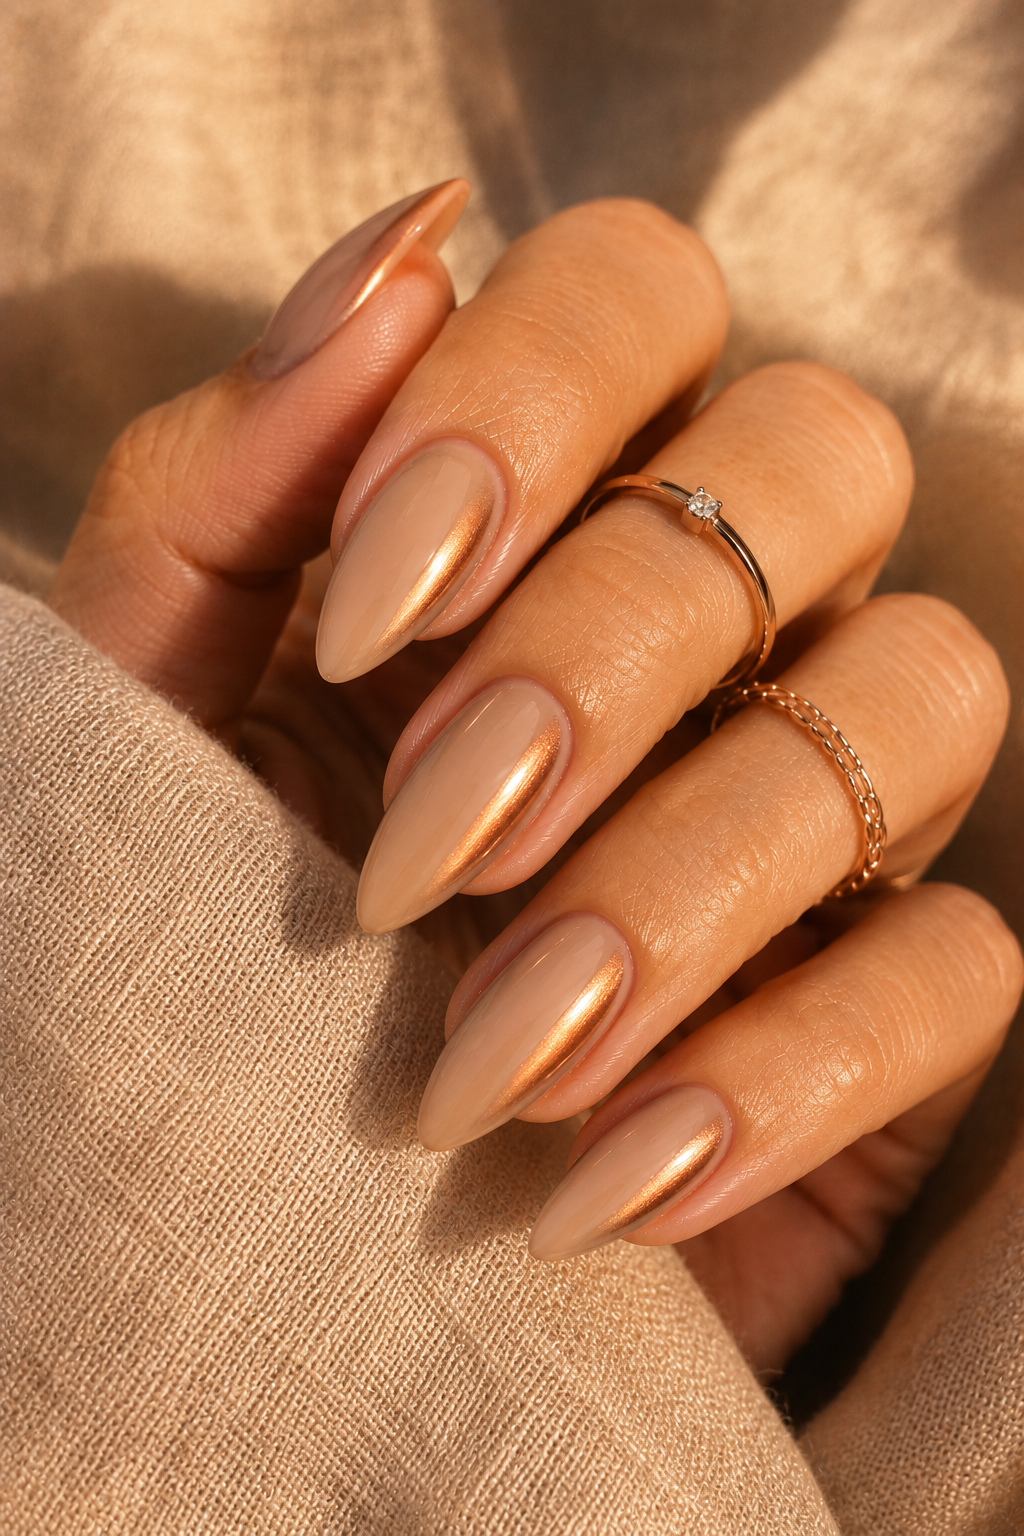
Side glow makes short stiletto look like it has a highlight frame. Copper shimmer flatters neutral skin tones and adds warmth without the loudness of full chrome. Keeping the center nude makes it feel sleek and not busy.
Apply beige nude gel and cure. Add copper shimmer gel only on the sidewalls, then feather it inward with a small brush so the glow fades. Leave the very tip lighter by wiping the center and curing, then top coat glossy.
Editor's noteUse a thin brush for the sidewalls and cure with your hand flat to prevent flooding.
Watch outDon't let shimmer pool at the corners - it looks like spilled pigment.
23. Soft Peach Ombre With Thin Black Edge
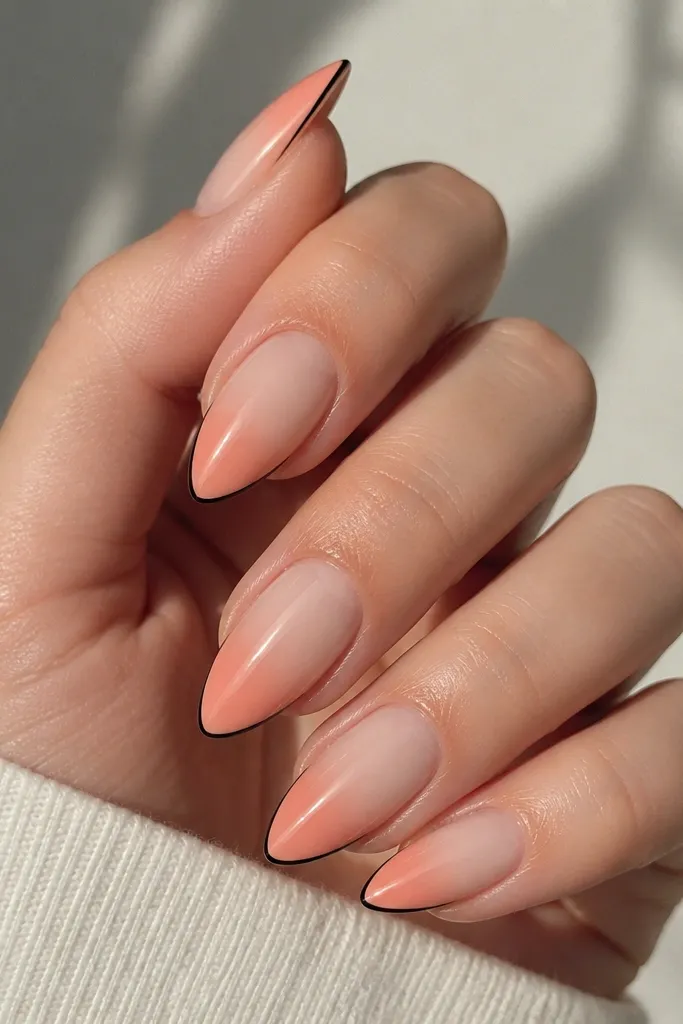
The black edge is the secret - it makes the ombre look intentional and sharp. Peach stays sweet, while the line adds contrast that makes short stiletto look crisp. This one is a favorite when I want something flattering that still looks styled.
Build a nude base, cure. Sponge peach gel from mid-nail to tip, blend upward, cure. Then use a fine liner brush to draw a thin black outline along the outer edge of the peach tip only, cure and top coat glossy.
Editor's noteIf the black line wobbles, erase with a brush dipped in alcohol before curing.
Watch outDon't outline the entire nail - only the tip area looks clean.