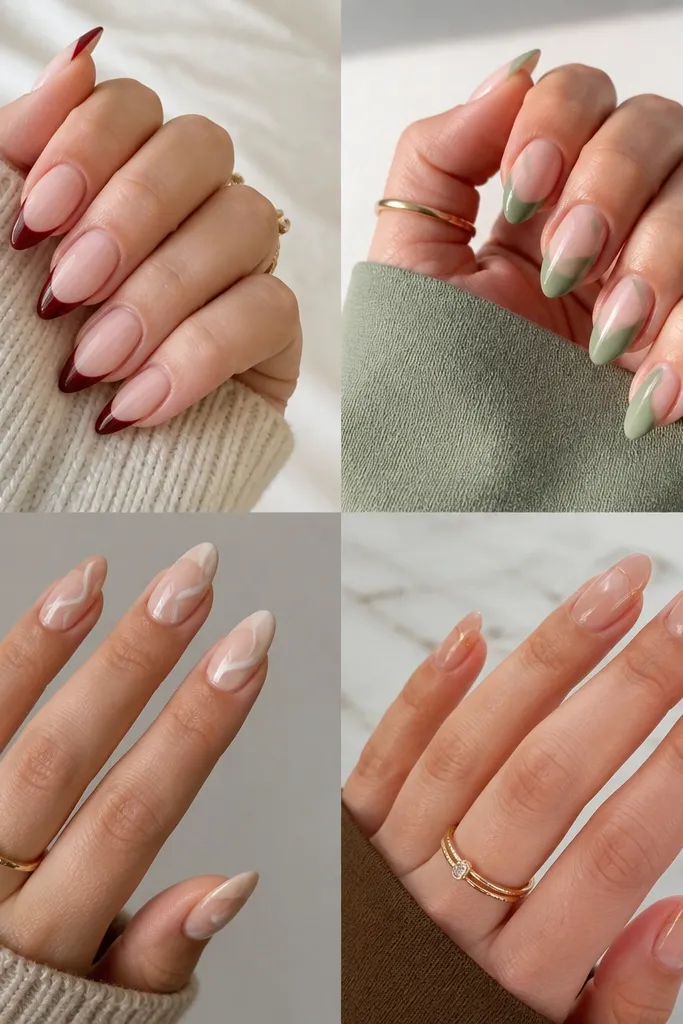
1. Cherry Jelly Red with Clear Tip Glow
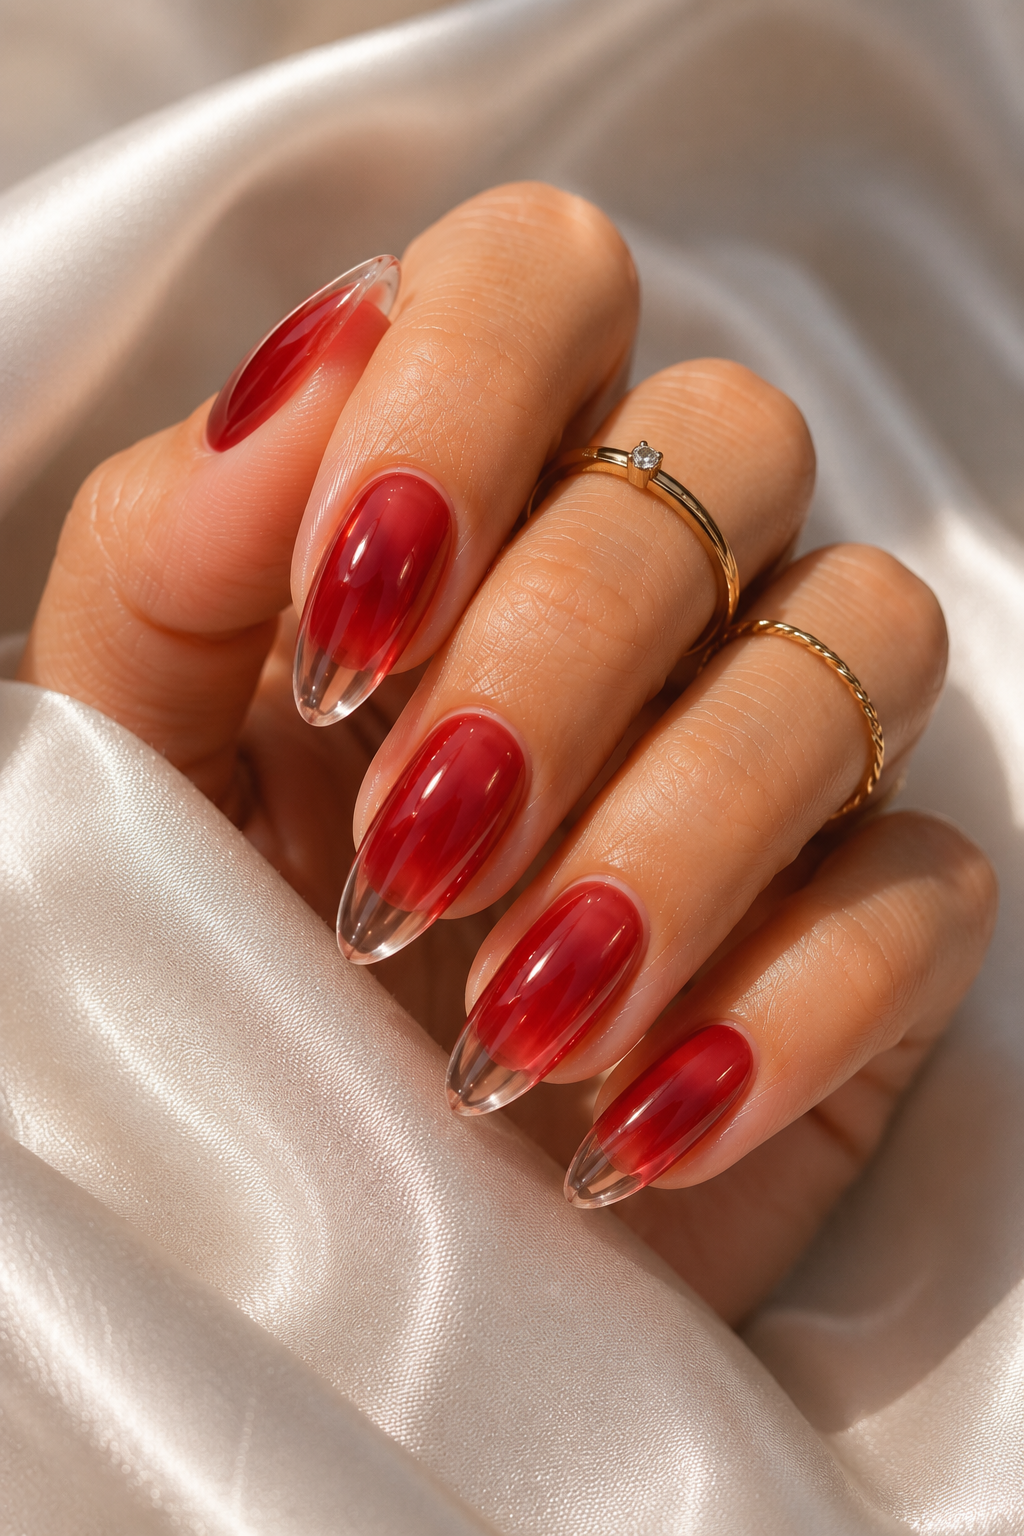
This one looks expensive because the red has depth, not a flat color block. The jelly base lets light pass through, while the denser center layer makes it look like a smooth dome. The clear-tip glow keeps the point looking crisp instead of harsh. It also photographs well because the red catches light without looking neon.
File the nails to a short stiletto with a 2-3 mm free edge and narrow sidewalls. Apply a jelly cherry base on all nails, then add a slightly thicker denser cherry in the center and blend it down the sides. Finish with a high-gloss topcoat and cap the tip so the point stays glassy.
Editor's noteAfter curing, use a fine nail brush dipped in cleanser to clean the cuticle edges - red shows every smudge.
Watch outAvoid applying full-coverage opaque red in one coat, because flat red looks chalky and cheap on short stiletto.
2. Velvet Matte Red with One Glossy Accent Nail
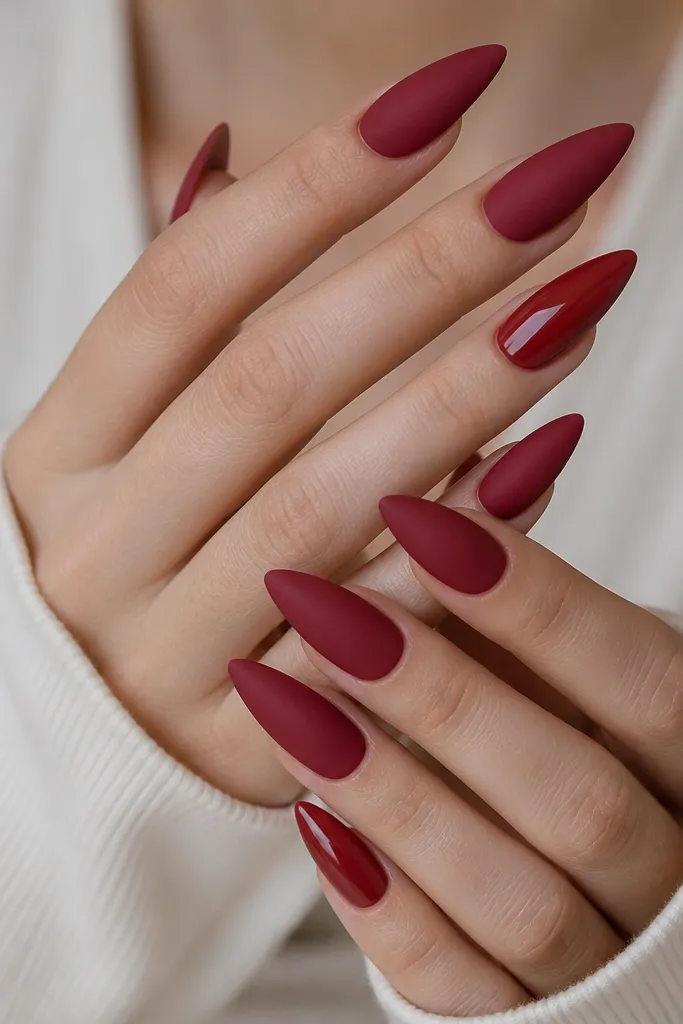
Matte red reads high-end when the surface is even and the shape is sharp. The glossy accent nail adds contrast so the set looks designed, not unfinished. I like deep velvet reds because they hide micro imperfections better than bright cherry. The mix also makes short stiletto points look longer.
Do full color in a deep red gel, cure, then use a velvet matte topcoat on all nails except the ring finger. On the ring finger, use the same red color but seal with a glossy topcoat. Keep the matte topcoat thin so it doesn't dull the point edges.
Editor's noteBuff the nail surface lightly before color so the matte finish looks smooth, not patchy.
Watch outAvoid matte topcoat on every nail if your nails are slightly uneven - matte will show it.
3. Red Chrome Fade from Cuticle to Tip
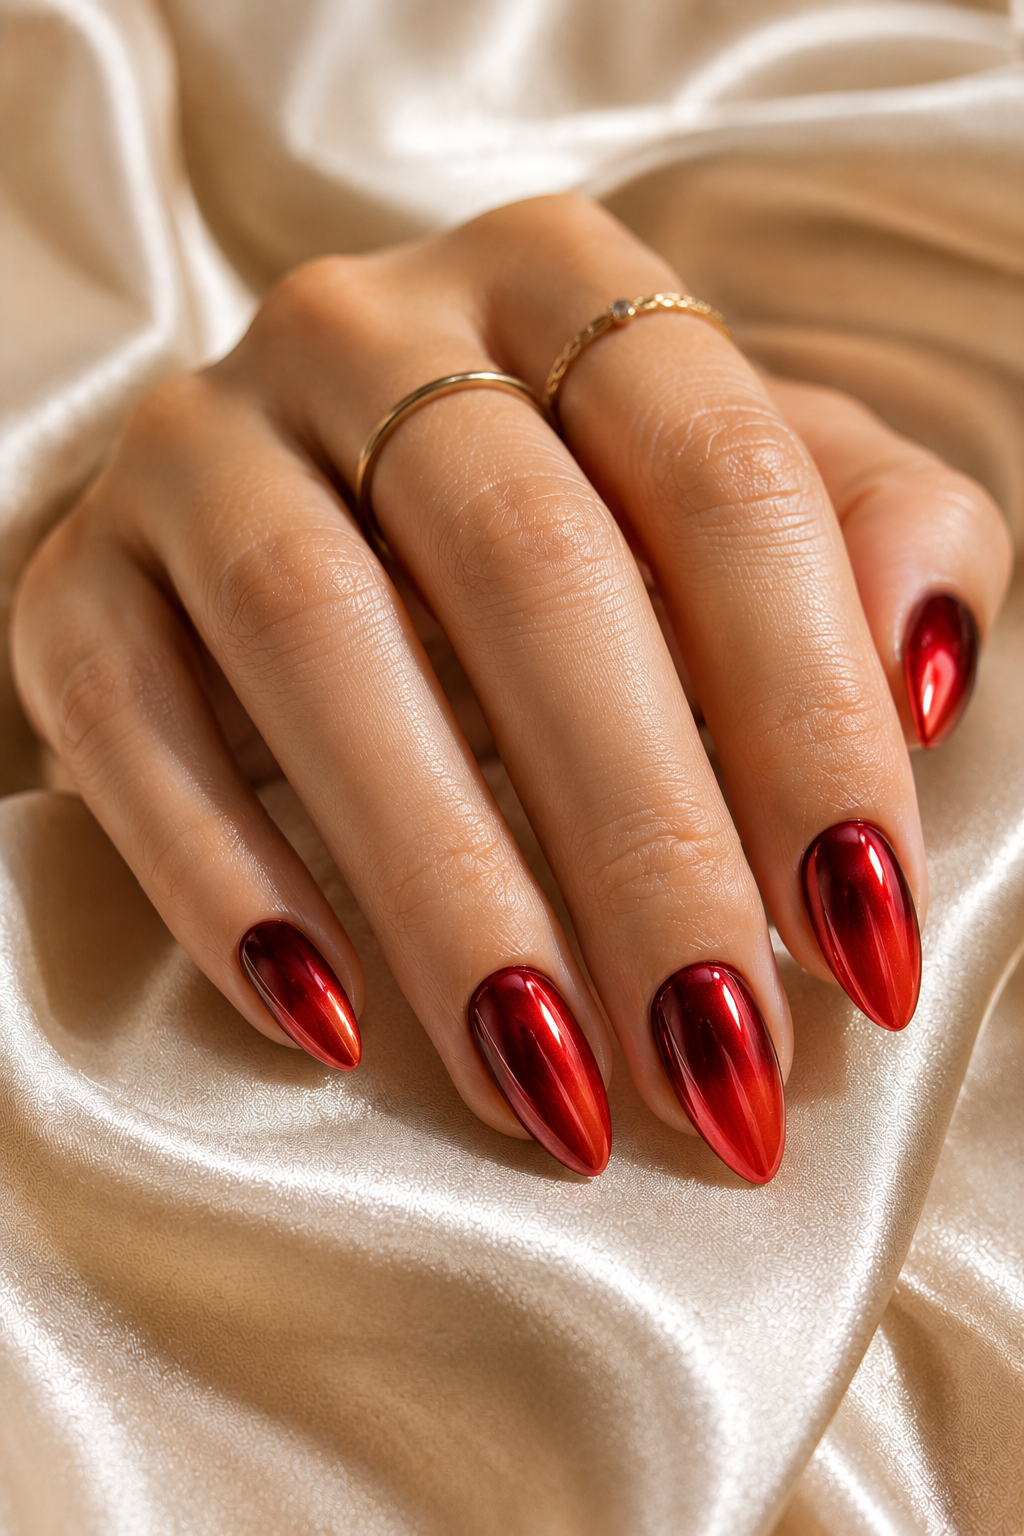
Chrome fade looks expensive because it creates a moving highlight that flat polish can't. The red-to-dark fade adds dimension and makes the stiletto point look sculpted. I've gotten compliments on this because it looks "jewelry" without needing rhinestones. It also stays eye-catching in low light.
Start with a dark red base (not black) so the fade stays red. Apply a sticky layer or chrome base per your product, then sponge red chrome powder lightly at the cuticle and fade outward. Seal with a non-smudging topcoat that won't dull chrome too much.
Editor's noteUse a makeup sponge with almost no pressure - heavy pressure makes chrome look like a solid cap.
Watch outAvoid using silver chrome over red without enough red underlayer, because the fade turns pinkish and cheap.
4. Classic Red French with Thin White Smile
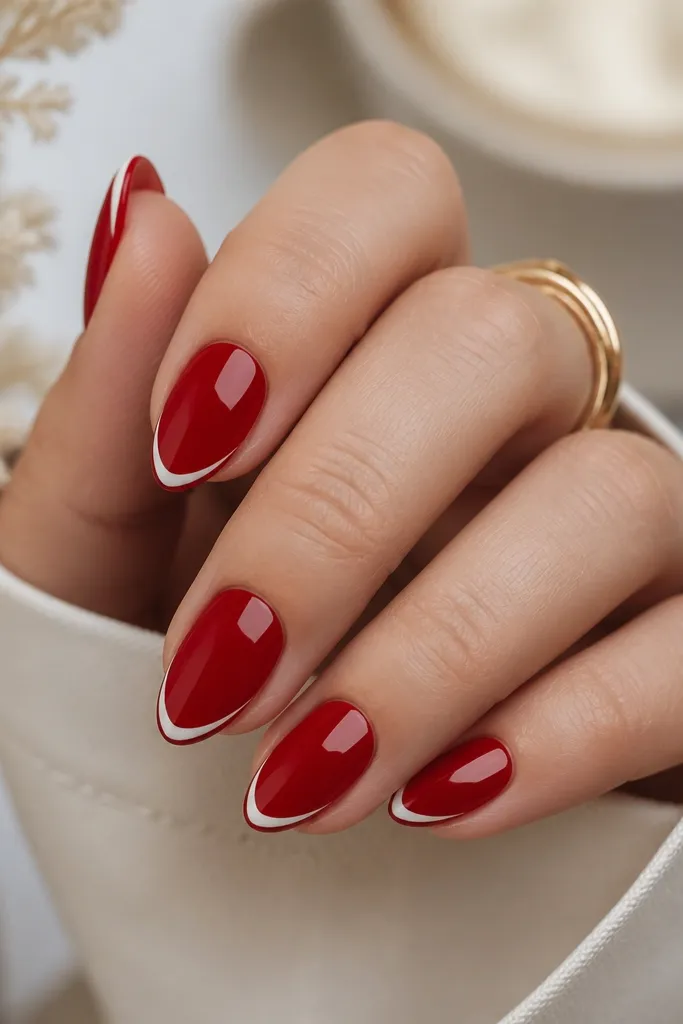
A thin French line makes short stiletto nails look tailored. The white smile gives the red a clean frame, and the glossy topcoat keeps everything looking fresh. This is one of the most "expensive-looking" red sets because it reads like a salon standard. It also works with any outfit color because white anchors the red.
Paint the nail a smooth red base, then use a striping brush to draw a thin white smile at the free edge. Keep the white line about 0.5-1 mm thick so it stays refined. Finish with two coats of gloss and cap the tip.
Editor's noteUse painter's tape as a guide on your finger for the first nail, then freehand the next ones once you see the spacing.
Watch outAvoid thick French lines on short stiletto - they make the tip look blunt and cheap.
5. Red Micro-Foil Confetti on Clear Jelly Base
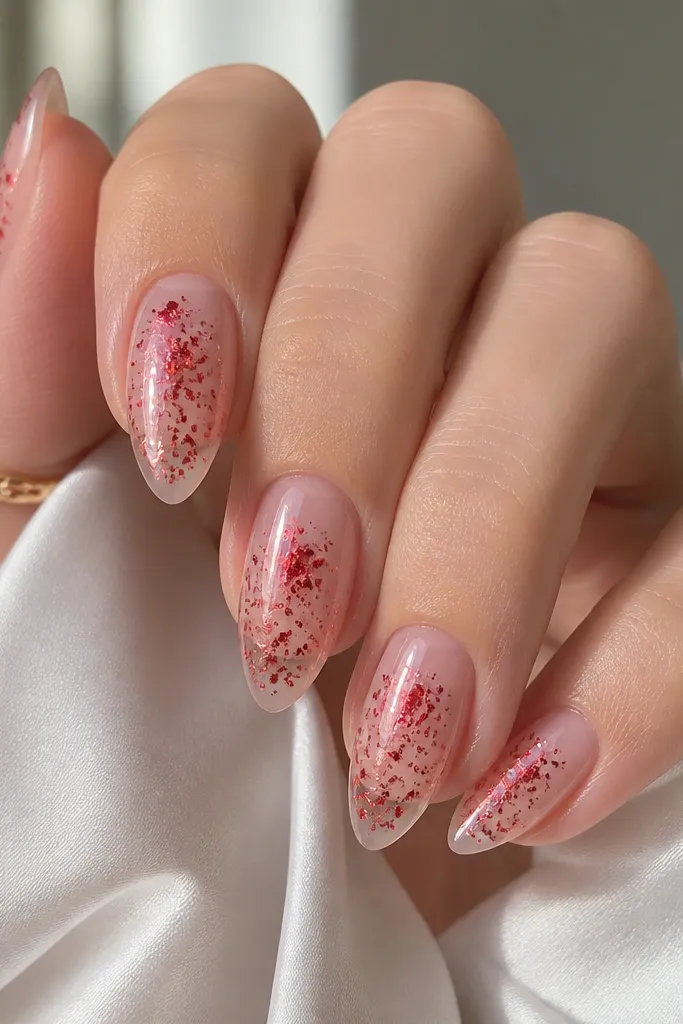
Micro-foil looks expensive because it's light-catching without adding bulk. Putting the foil on a jelly base keeps it looking airy and expensive instead of chunky. The scattered placement makes each nail unique, which reads salon-made. Red foil also pairs well with both warm and cool skin tones.
Apply a clear jelly base, then place tiny red foil flakes with tweezers or a foil applicator. Concentrate flakes in the center and keep the cuticle area clean. Seal with a thick topcoat, and if foil lifts, add a second topcoat layer just over the center.
Editor's notePress each foil flake lightly with a silicone tool before curing so it bonds flat.
Watch outAvoid big foil pieces - they catch on fabric and look messy fast on short stiletto.
6. Red Marble Vein with Black Pinstripe
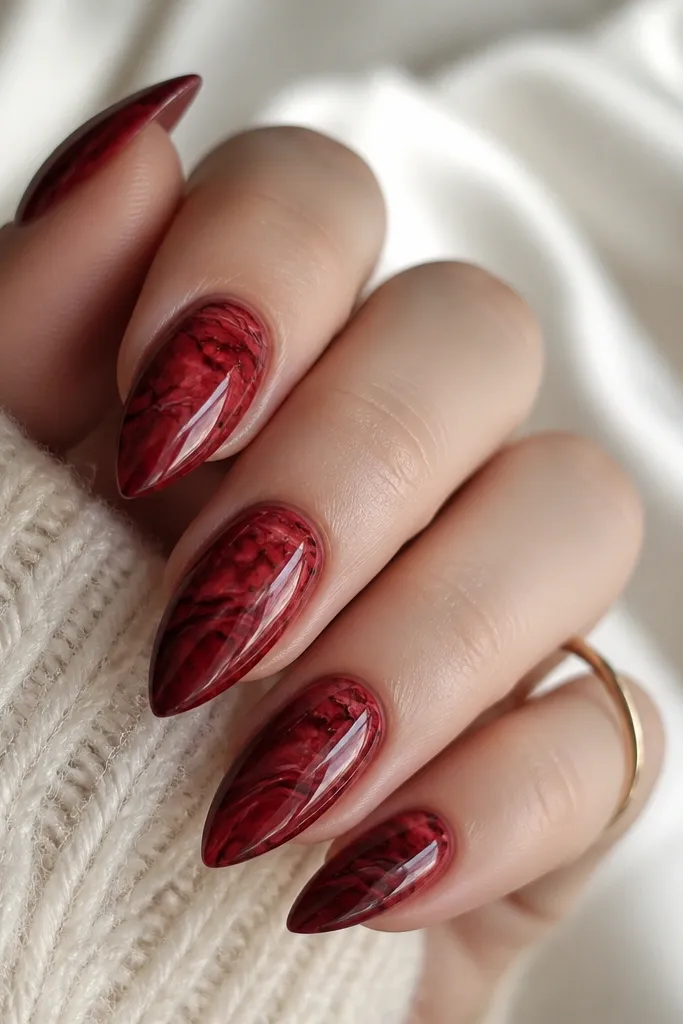
Marble looks luxe when the veins are thin and controlled. The black pinstripe makes the red look sharper and more expensive, like high-end nail art prints. Short stiletto nails are perfect for marble because the shape frames the swirl. It also hides tiny growth lines better than solid red.
Base coat with a deep red gel. Use a marbling tool or thin brush to drag lighter red and burgundy through the wet layer, then add black pinstripes on top once the marble is set. Cure, then topcoat with a slightly thicker gloss so the surface feels smooth.
Editor's noteDo the marble on two nails per hand, not all ten - it keeps it classy.
Watch outAvoid thick black lines - they make the marble look like a coloring page.
7. Lipstick Red with Tiny Gold Foil Dot at the Cuticle
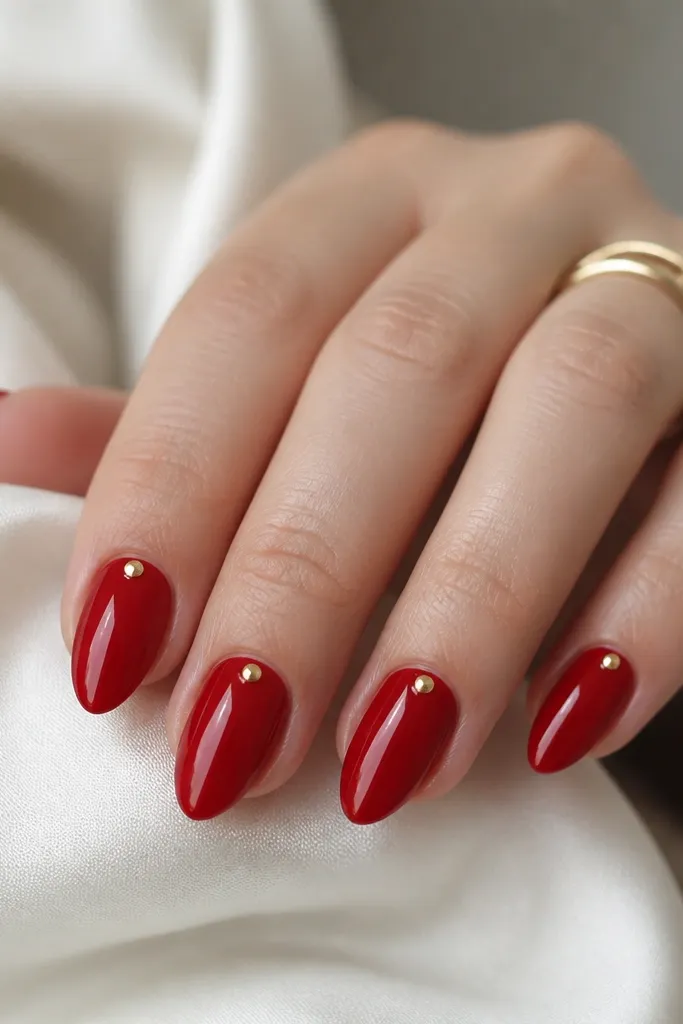
This is my go-to for "expensive-looking" on short stiletto because it adds one precise focal point. The dot at the cuticle makes the nail look longer and more curated. Gold foil sparkles subtly, not like big rhinestones. It also looks great on hands with short nails because it doesn't take over the shape.
Use a fully opaque lipstick red in two thin coats for a smooth finish. Place a tiny gold foil dot with a dotting tool right under the cuticle line. Seal with glossy topcoat, and cap around the dot so it doesn't snag.
Editor's noteKeep the dot the size of a grain of rice, not a blob - small reads luxe.
Watch outAvoid placing multiple dots on every nail - it turns into party glitter fast.
8. Red Ombré Stiletto Tip with Nude Base
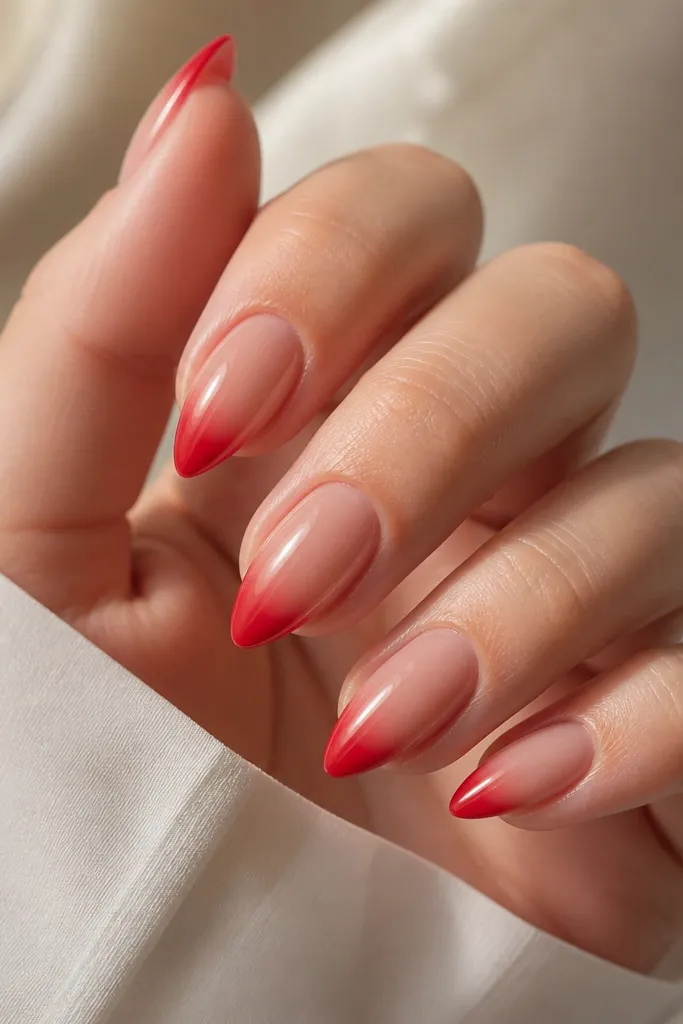
This looks expensive because the nude base makes the red feel intentional, not overpowering. The ombré concentrates pigment at the tip, which makes short stiletto points look sharper and longer. I've worn this with both minimalist outfits and bold lip colors, and it always looks "styled."
Start with a nude pink base that matches your skin tone (or slightly warmer). Sponge red gel at the tip and blend upward with a clean sponge edge. Keep the transition soft, then topcoat glossy and cap the tip.
Editor's noteUse a thin red gel for blending; thick gel creates hard bands that read cheap.
Watch outAvoid ombré that starts too low - if red begins halfway down, the nail looks chubby.
9. Blood Red Gloss with Black Micro-Outline
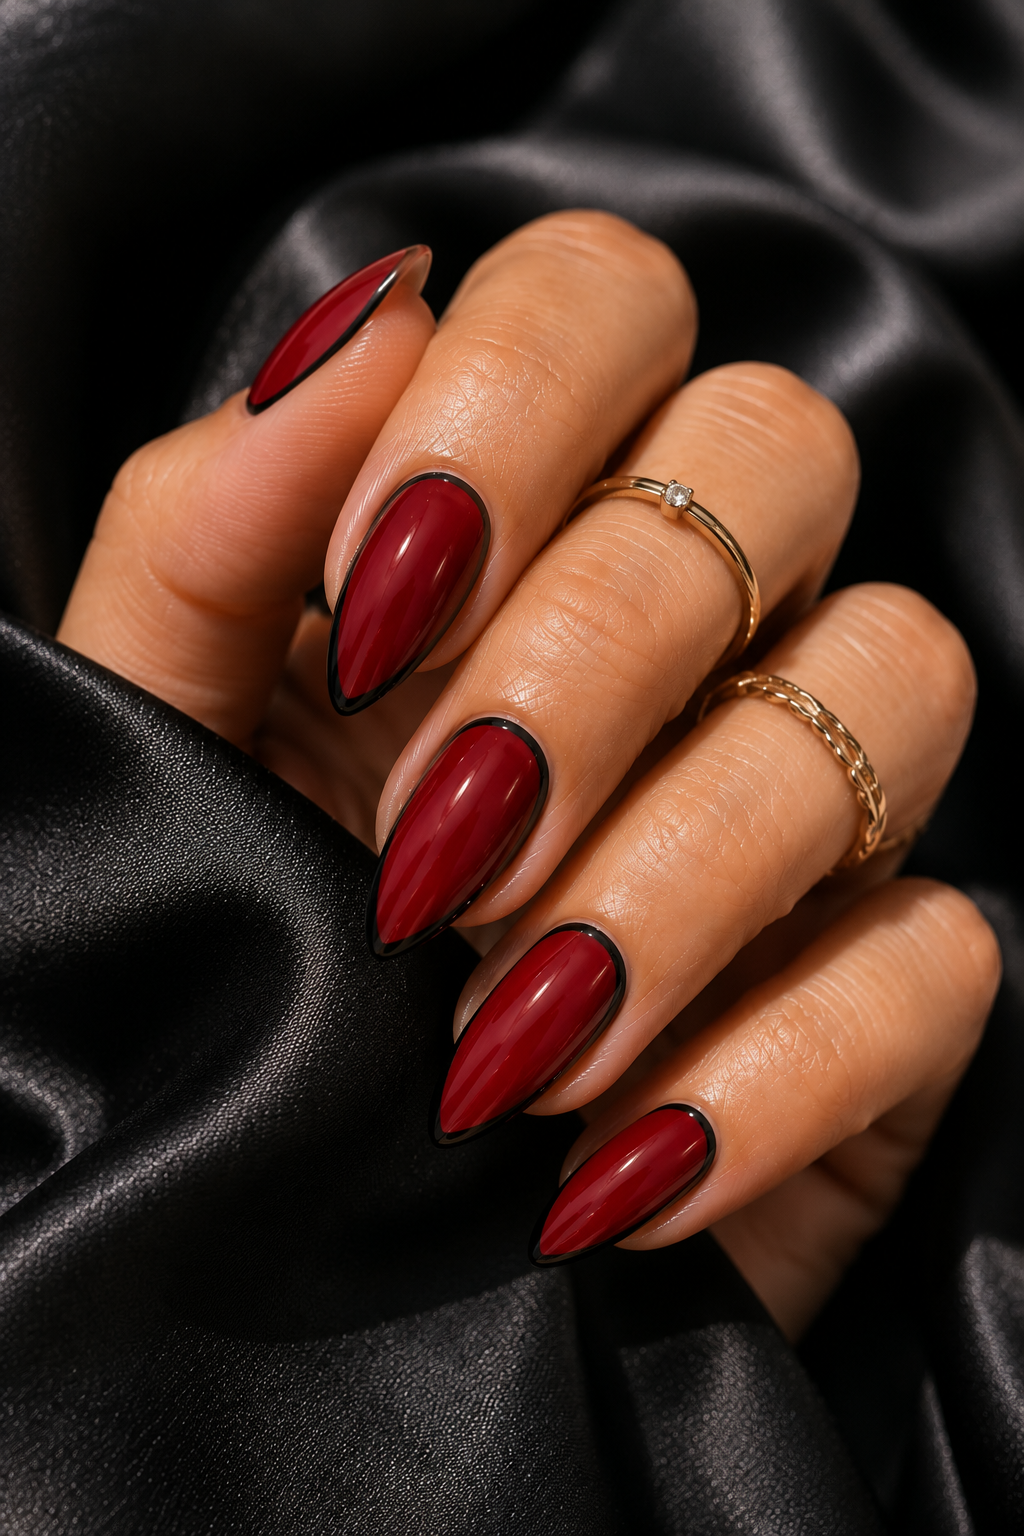
Side outlining makes stiletto shapes look engineered. The black micro line adds contrast and gives the red more structure, which is what makes it feel salon-expensive. Because the line is thin, it stays classy even on short nails. The glossy finish keeps the whole set looking freshly done.
Paint a blood red base in two coats. Use a fine striping brush to draw a single line on each side from mid-length to the tip point, keeping it straight. Cure, then topcoat with gloss and lightly check the sides for pooling.
Editor's noteAngle your brush and keep your hand steady against a table - wobbles ruin the 'expensive' look.
Watch outAvoid thick outlines - they make the nails look like press-on art.
10. Red Satin Glaze with Swirl Highlight
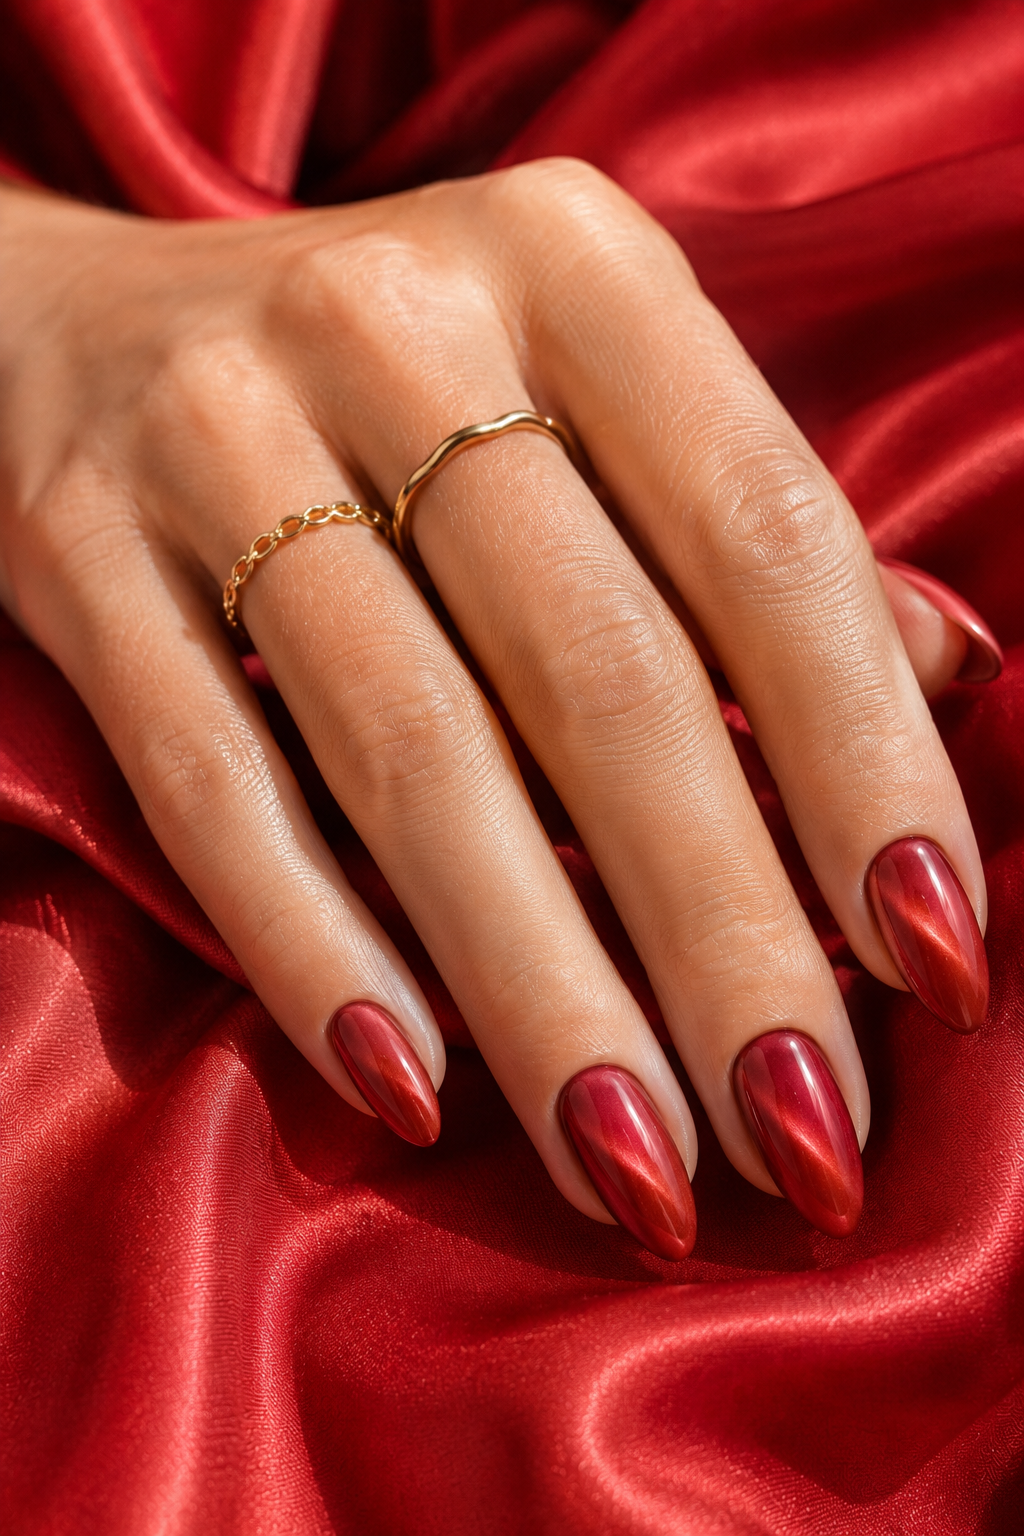
Satin glaze feels expensive because it looks like fabric under light, not flat polish. The swirl highlight adds movement and makes the nail look dimensional even when it's short. I like this for day events because it's striking without looking loud. The effect also photographs beautifully in shade.
Apply red gel in a smooth, even layer. Seal with a satin topcoat, then add a thin translucent highlight swirl using a lighter red or pink-tinted gel. Cure again and keep the highlight narrow, about 1-1.5 mm wide.
Editor's noteIf your satin topcoat looks patchy, apply in two thinner coats instead of one thick coat.
Watch outAvoid heavy swirl shapes - wide swirls look childish on short stiletto.
11. Red Pearl Base with One Crystal-Like Accent Line
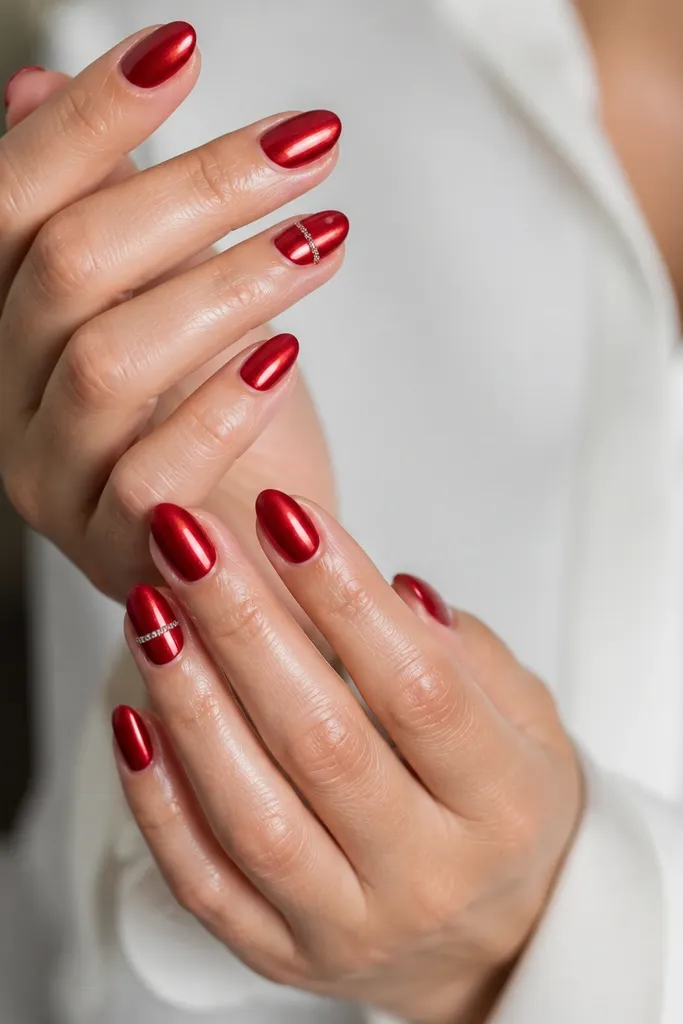
Pearl red reads expensive because the shimmer is fine and smooth. The single crystal-like line gives a jewelry feel without covering the whole nail with stuff. This is a good "turn heads" set that still looks refined at a dinner table. It also works well if you hate heavy rhinestones.
Use a red pearl gel as the base, then add a thin line of clear gel (or crystal gel) across one nail per hand. Place the line straight from near the cuticle to the tip, about 1 mm wide. Cure, then topcoat glossy over everything, keeping the line domed.
Editor's noteUse a dotting tool to place the line ends - crisp ends look more expensive than tapered blobs.
Watch outAvoid putting crystal lines on every nail - it turns into a sticker look.
12. Oxblood Red with Tiny Negative Space Window
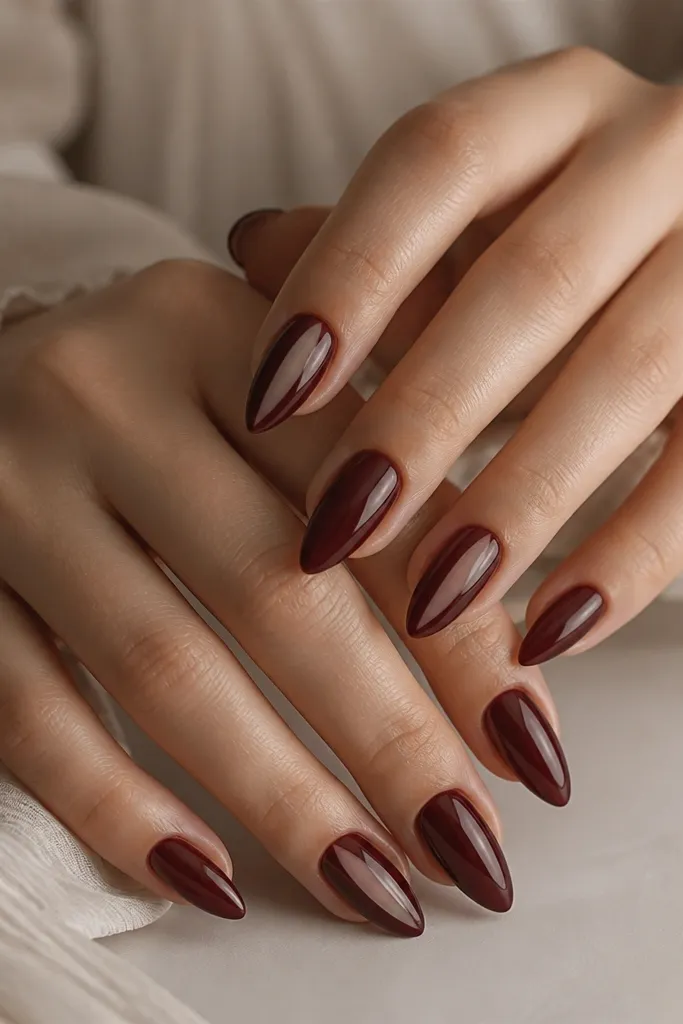
Negative space makes short nails look more modern and expensive because it adds breathing room. The tiny vertical window elongates the nail without adding length. Oxblood is dark enough to look luxe, and the bare window keeps it from becoming heavy. It also looks great with gold jewelry.
Paint oxblood red over most of the nail, leaving a narrow center strip bare on the accent nail. Width should be about 1-2 mm. Seal with glossy topcoat carefully around the window edges.
Editor's noteUse a striping brush dipped in cleanser to clean the window edges before topcoat.
Watch outAvoid wide negative space - big gaps make short stiletto look underdone.
13. Red Velvet Glitter Fade (Only at the Tip)
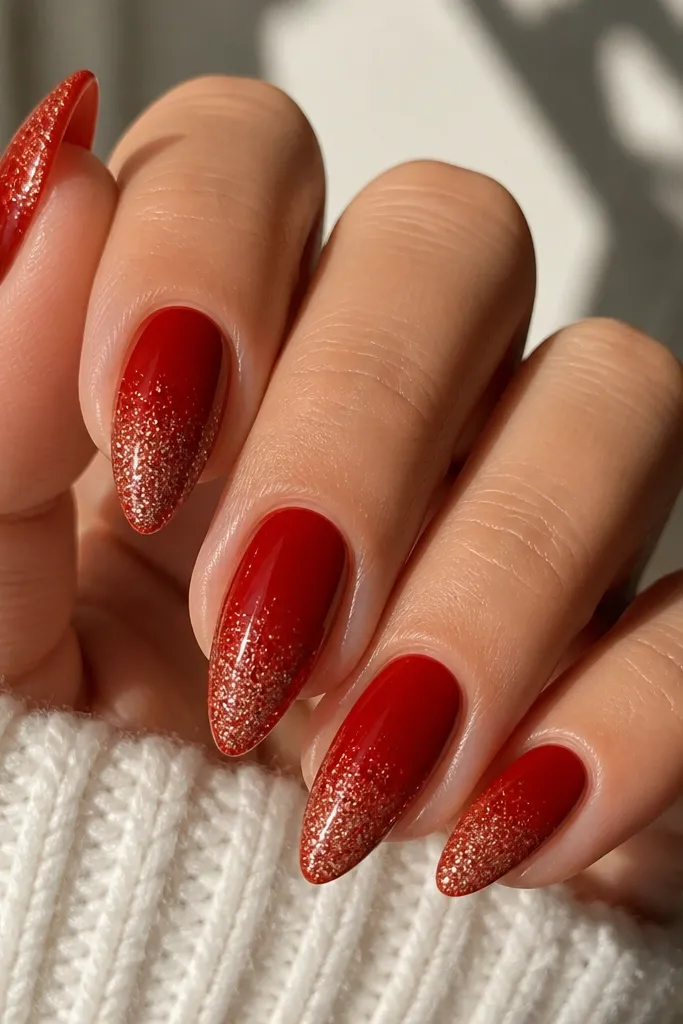
Tip-only glitter looks expensive because it's controlled. The densest glitter at the point makes the stiletto look sharper, and the fade keeps it from looking like a cheap glitter bomb. I've used this for nights out and it still looks clean when the glitter catches light.
Apply solid red base in two coats. Sponge or place fine red glitter only on the last 2-3 mm of the nail, then blend downward lightly. Cure, then topcoat glossy in two thin layers so the surface stays smooth.
Editor's noteUse fine glitter, not chunky - chunky glitter makes short tips feel rough and looks messy fast.
Watch outAvoid glitter that covers the full nail - it kills the expensive, glassy look.
14. Red Gloss with Thin Silver Crescent at the Side
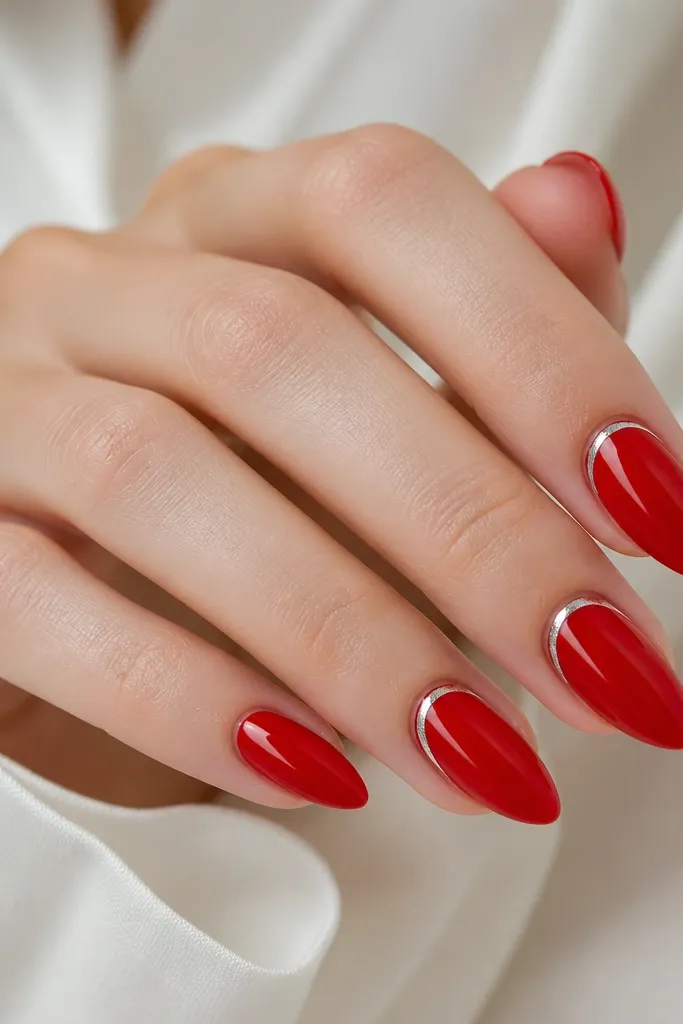
A tiny crescent near the cuticle is a jewelry trick. It frames the nail and makes the red look more dimensional without adding bulk. Silver works especially well with cooler reds and makes white highlights pop. This style looks polished even when your nails are short.
Paint glossy red base and cure fully. With a thin striping brush, draw a half-moon on one side near the cuticle, then fill it with silver gel or chrome. Cure and topcoat glossy to smooth the crescent.
Editor's notePlace the crescent slightly off-center so it looks like a deliberate design, not a template.
Watch outAvoid thick silver shapes - they look like cheap charms on short nails.
15. Cherry Red with Micro Rhinestone Line (One Nail Only)
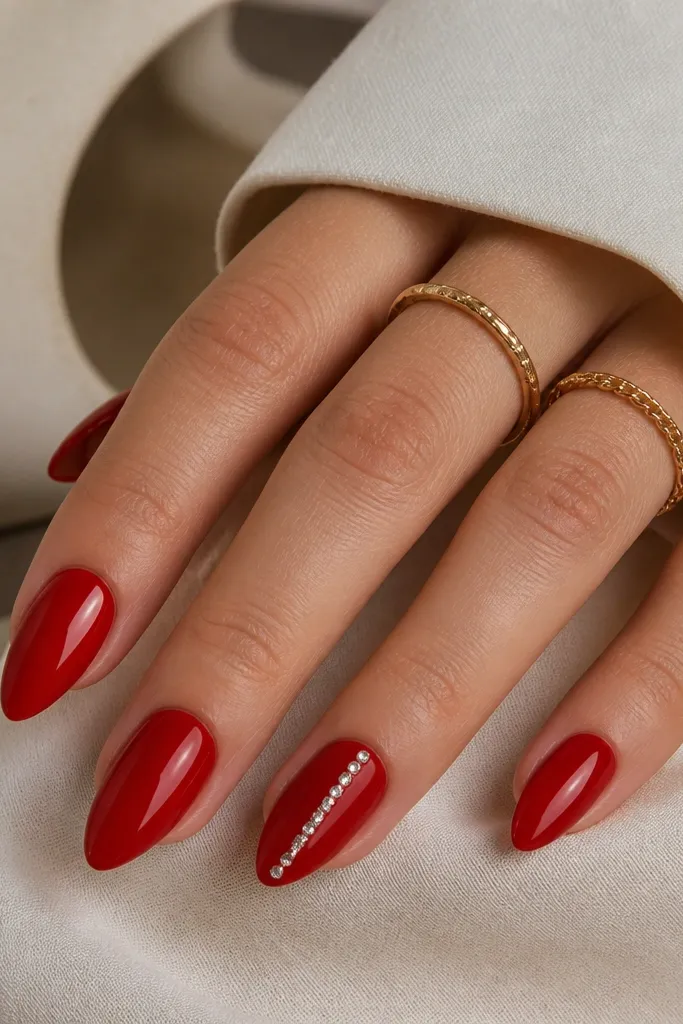
This works because the rhinestone line is minimal. One nail gets the sparkle, and the rest stays clean, so the set looks intentional. Micro rhinestones catch light in tiny flashes that read expensive. On short stiletto, a full rhinestone nail can look heavy, but a single line keeps it sleek.
Apply cherry red to all nails. On the accent nail, place micro rhinestones in a straight line using rhinestone gel, leaving 1-2 mm of space under the cuticle. Cure, then cap with a thin topcoat over the stones so edges don't snag.
Editor's noteUse a toothpick to nudge stones after placement - they settle better than you'd think.
Watch outAvoid big stones on short stiletto - they look bulky and drag the shape down.
16. Red Marble with Gold Vein Accent on Ring Finger
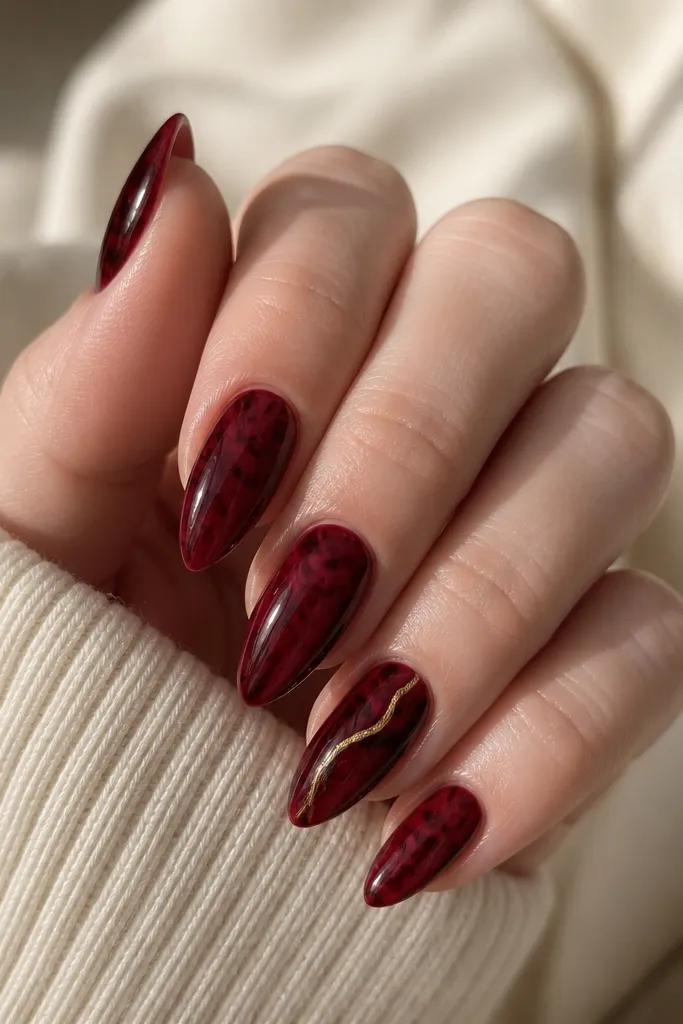
Gold on a red marble vein looks like jewelry resin. The marble gives movement, while the gold line makes the accent feel expensive without adding too much texture. I like using the gold only on one nail because it keeps the look balanced. The glossy dome makes the marble look sealed and premium.
Base with deep red. Marble with lighter red and a touch of burgundy, then add gold foil or gold gel along one main vein on the ring finger only. Cure and topcoat with a thicker layer for a smooth sealed surface.
Editor's noteKeep the gold line thin - 0.5 mm is enough to read luxurious.
Watch outAvoid gold on every nail - it turns the marble into a party theme.
17. Red French Ombré Tip with Nude Center
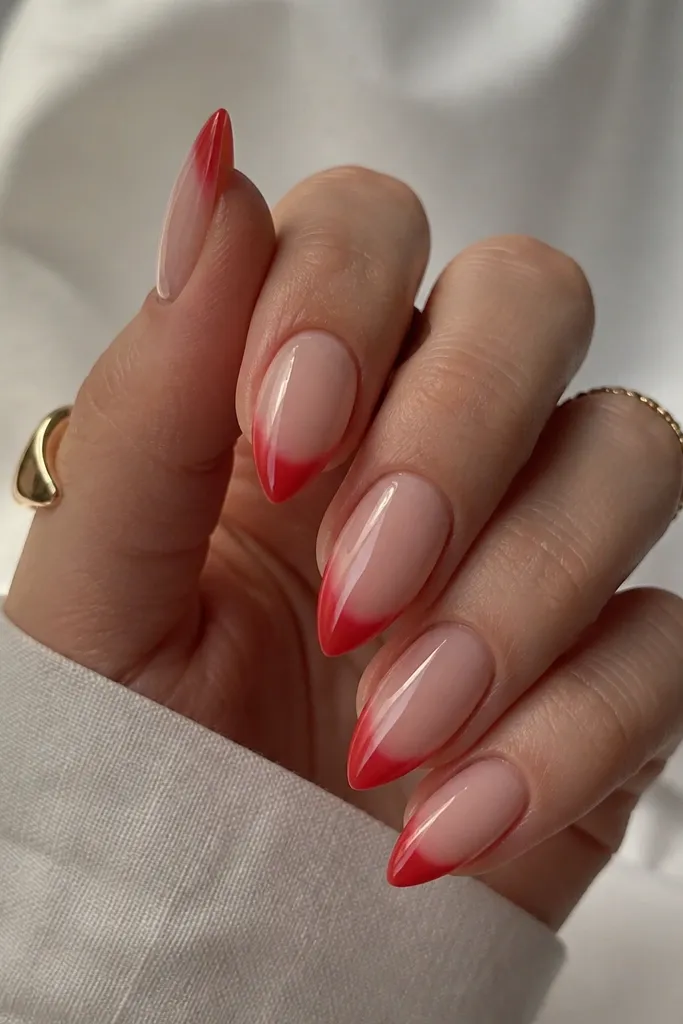
This style looks expensive because it's structured like a French manicure but softened with ombré. The nude center keeps it elegant and elongates the nail. The red band at the tip looks crisp, and the fade makes the transition feel high-end. It's also easy to match with rings because the nude center doesn't fight jewelry shine.
Apply nude base and cure. Sponge red gel starting at the tip and blend up to form a curved French-like band, then make it darkest at the point. Use a thin brush to clean the band edge and topcoat glossy.
Editor's noteClean up the French curve with a flat brush dipped in cleanser before curing the final layer.
Watch outAvoid muddy edges where red bleeds into nude - that's where it starts looking cheap.
18. Red Velvet Rose Outline with Nude Fill
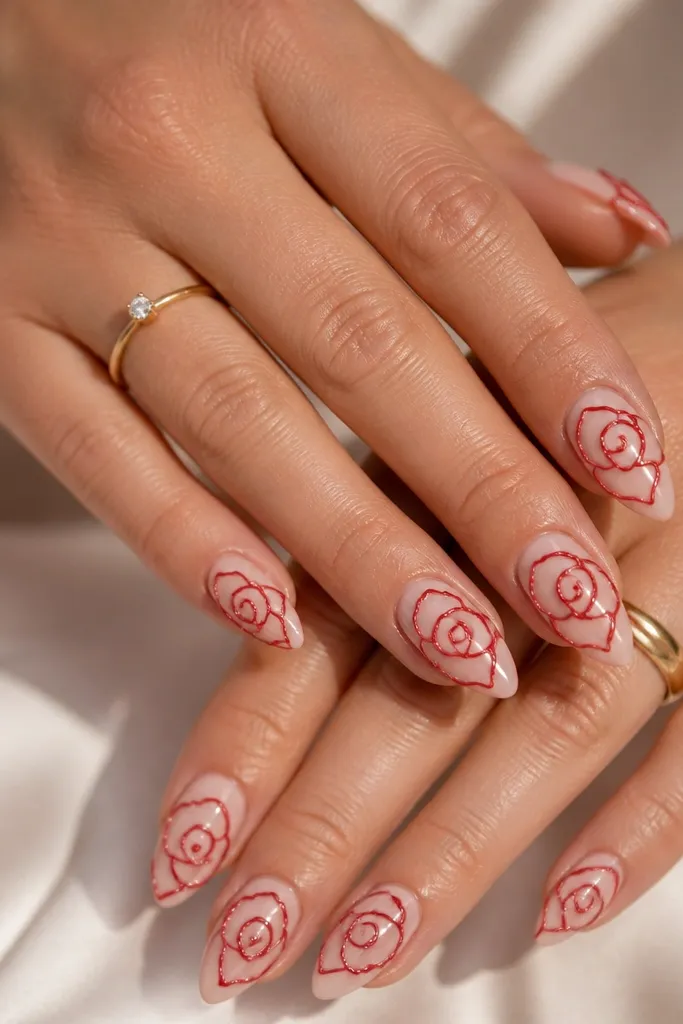
Line art roses look fancy when the lines are smooth and the fill stays clean. Here, the nude base keeps the rose delicate and readable. The red outline gives that "lipstick + romance" vibe that looks expensive on short stiletto because the nail stays bright. It also wears well because there's less bulk than full nail art.
Paint nude base in two thin coats. With a fine liner brush, draw a rose outline using a slightly thick red gel so the line looks crisp. Cure, then topcoat glossy over everything carefully around the line art.
Editor's noteStart with one petal first, then mirror it - your rose symmetry will look way better.
Watch outAvoid filling the rose solid red - it crowds the short nail and looks heavy.
19. Deep Red Lacquer with Clear Negative Cuticle Stripe
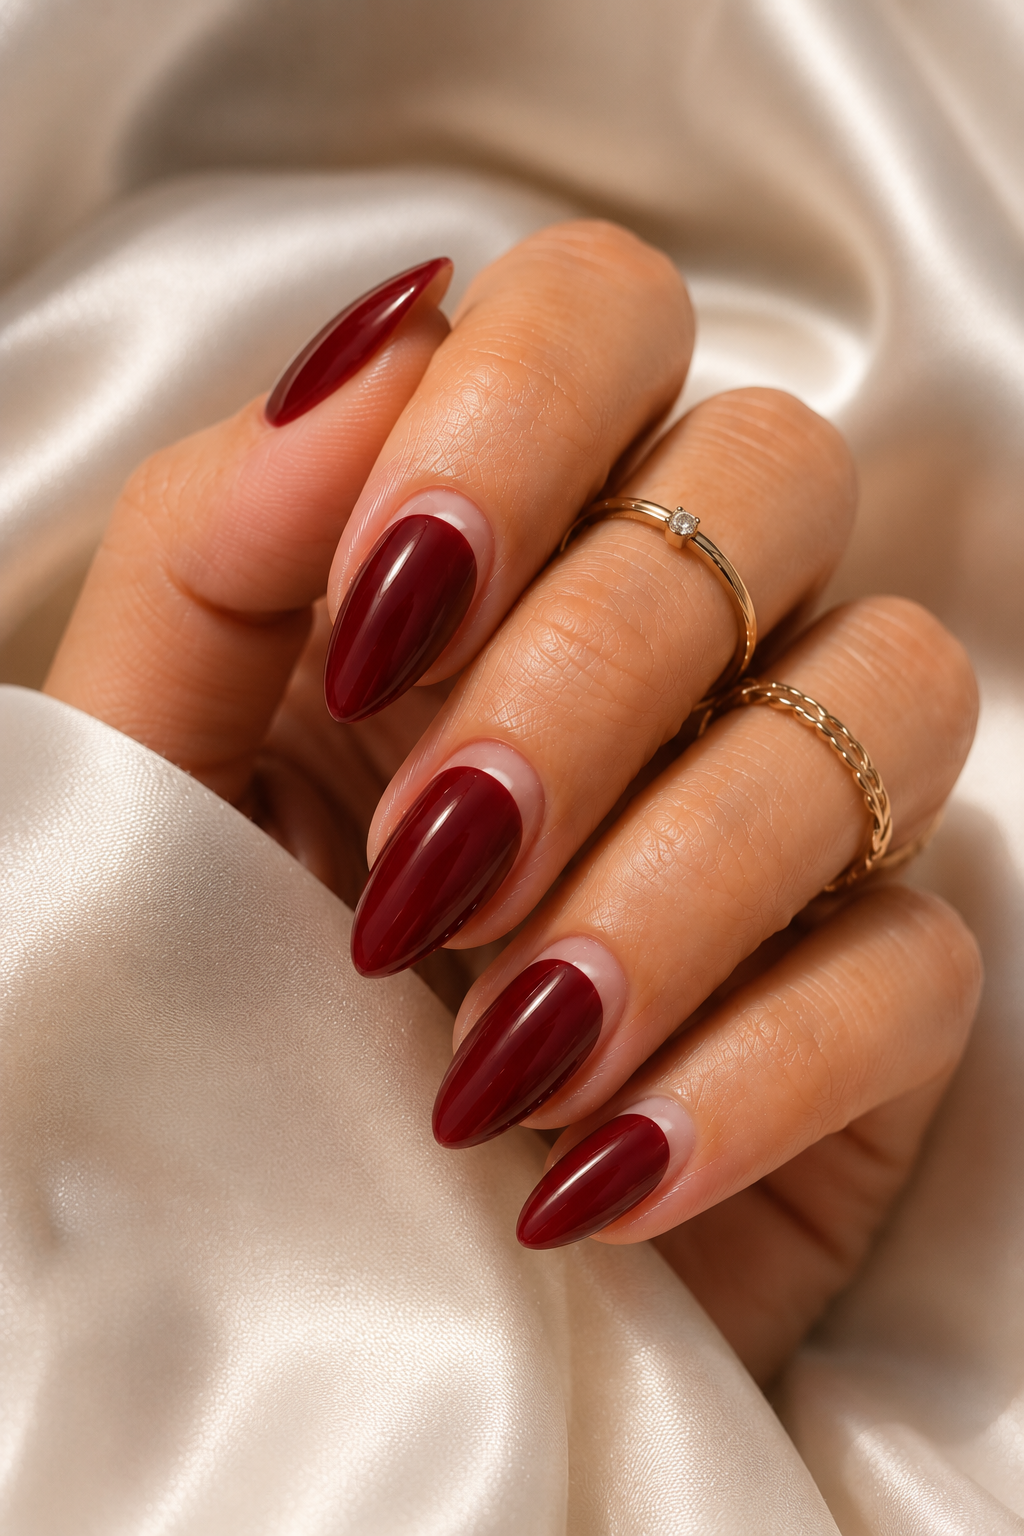
The clear stripe is a strong design choice that makes red look modern. It breaks up a full red block so the nail doesn't look flat. The vertical line also stretches the nail visually, which matters a lot on short stiletto. Glossy lacquer makes the stripe edges look clean and intentional.
Apply deep red but leave a narrow center strip bare - about 1-2 mm wide. Keep the stripe straight by placing the brush down once and pulling slowly. Seal with glossy topcoat and cap the tip so the stripe doesn't chip.
Editor's noteIf you get red on the stripe, clean it while the gel is still wet using a small brush with cleanser.
Watch outAvoid a stripe that curves - curved stripes read messy on short nails.
20. Crimson Red with Black Polka Dot Pinpoint
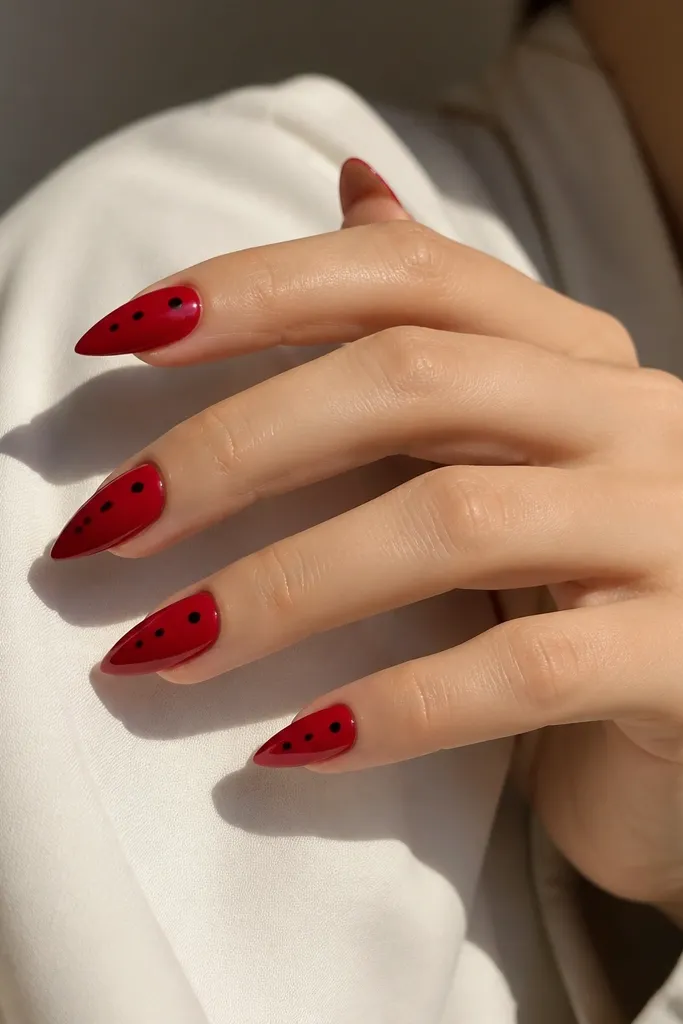
Polka dots can look cheap, but pinpoint dots look graphic and expensive. One or two dots keep it classy and give the nail a "fashion accessory" feel. Crimson red with black is high-contrast and looks sharp in photos. It's also wearable with dark clothing without looking Halloween-ish.
Paint a smooth crimson red base. Use a dotting tool with black gel to place 1-2 tiny dots per nail, spacing them about 3-4 mm apart. Cure, then topcoat glossy in one smooth layer.
Editor's noteWipe your dotting tool between nails so the dots stay the same size.
Watch outAvoid large dots - big polka dots on short stiletto look like press-ons.
21. Red Gloss with Thin Rose Gold Side Bar
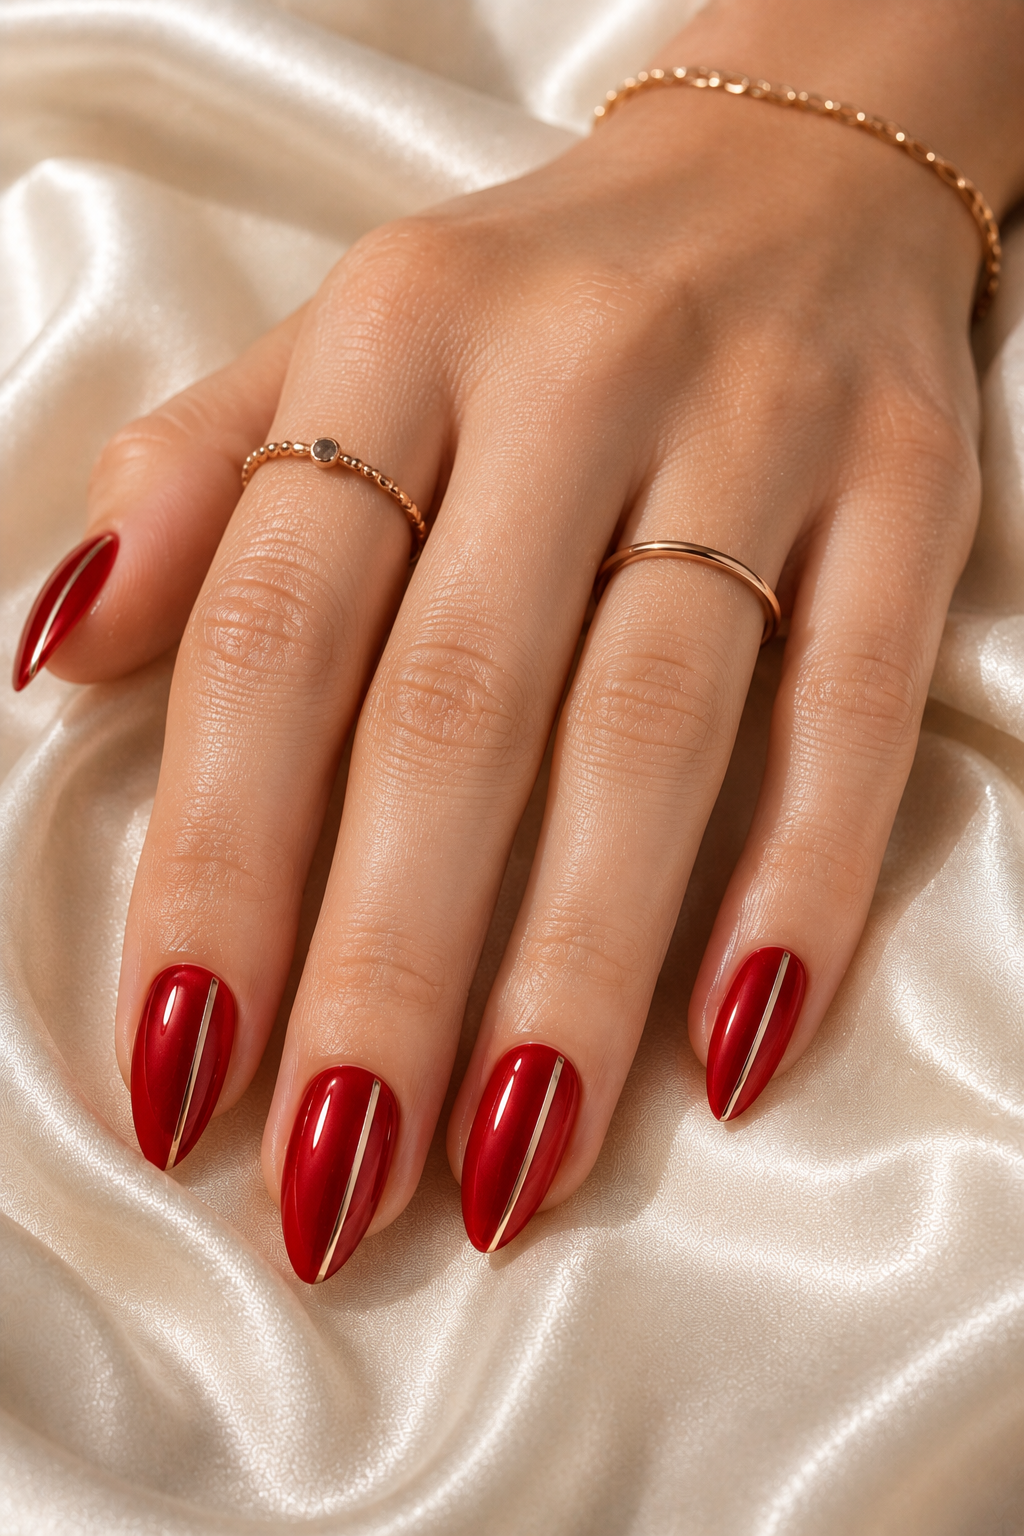
A single side bar makes the stiletto point look sharper. Rose gold warms up red and makes the manicure feel jewelry-level. Because it's only on one nail per hand, it stays chic instead of busy. The reflective bar also hides minor nail plate texture by drawing the eye.
Apply glossy red to all nails. On the accent nail, draw a straight vertical bar with rose gold chrome gel or foil, keeping it narrow (about 0.8-1 mm). Cure and cap with topcoat so the bar feels smooth to the touch.
Editor's notePlace the bar slightly closer to the center than the sidewall - it looks more balanced.
Watch outAvoid bars that touch the cuticle - leave a small gap for a clean finish.
22. Red Jelly with Gold Glaze Drip at the Tip
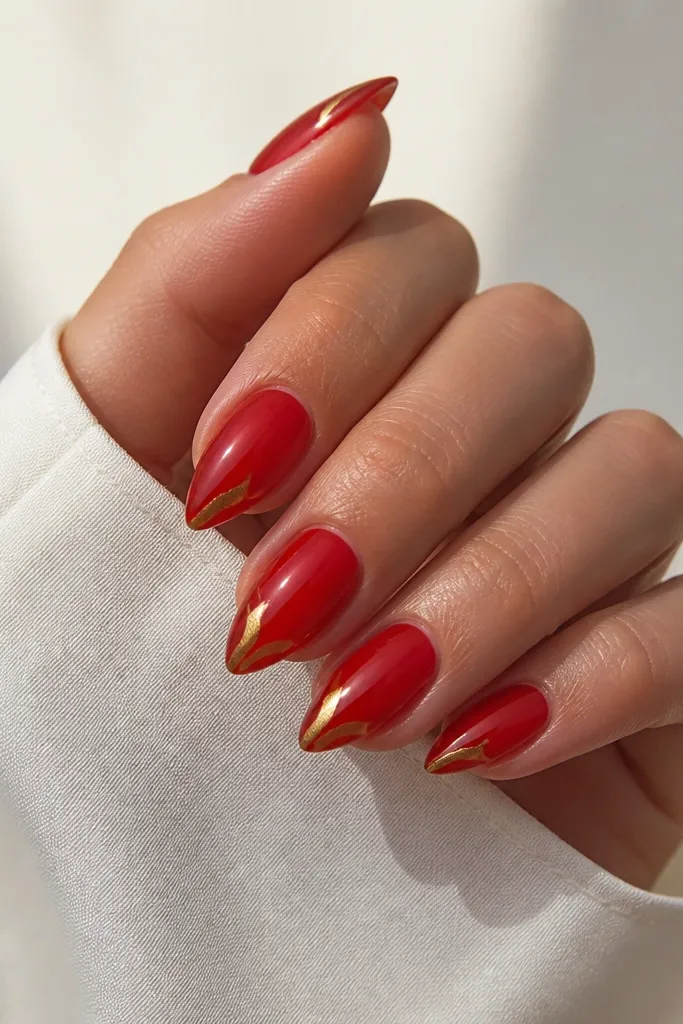
This looks expensive because the drip is small and controlled. Jelly red keeps it delicate, while gold at the tip adds a "designer" focal point. The drip stops short so it reads intentional, not messy. It's a great option if you want drama but still want your nails to feel wearable and clean.
Use a jelly red base in thin layers. Add a tiny gold gel streak on the tip and pull it down 1-2 mm, stopping before it reaches the mid-nail. Cure and topcoat glossy twice for a smooth, sealed drip.
Editor's noteUse a thin brush and let the gold gel self-level for one cure - overworking it makes it look grainy.
Watch outAvoid letting the gold drip run too far - that makes short stiletto look uneven and sloppy.
23. Red and Nude Checker Micro Panel
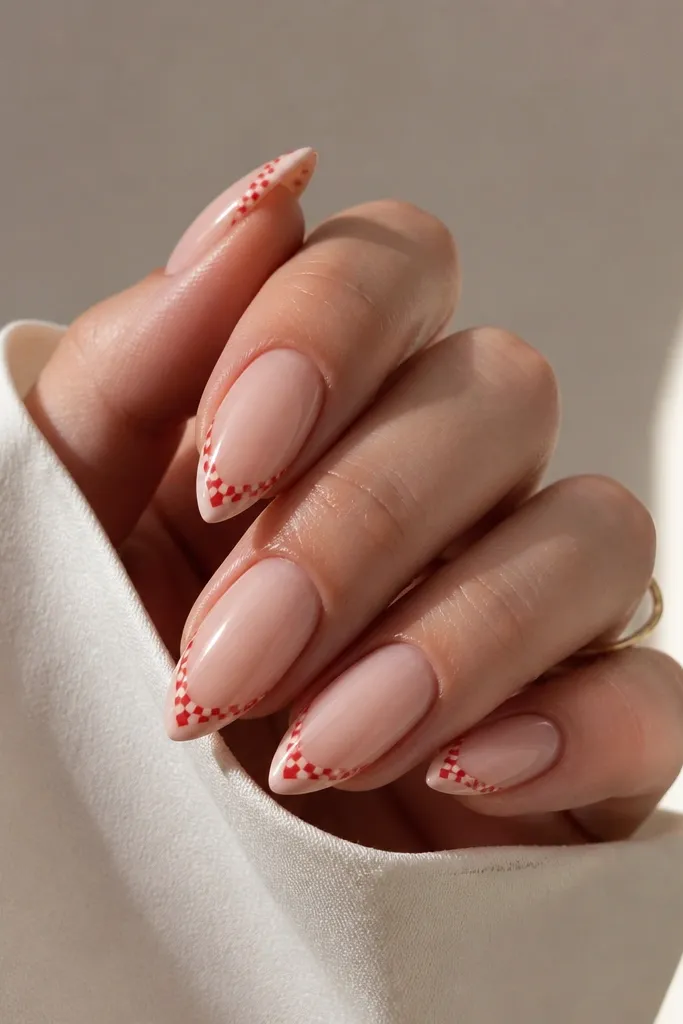
Micro checkers look expensive because the pattern is small and precise. It gives texture without glitter, and it makes short stiletto look like it has a designer pattern panel. Red and nude is a clean combo that flatters most skin tones. The glossy topcoat makes the squares look crisp and sealed.
Paint nude base. Near the tip, use a striping brush to draw tiny squares alternating red and nude, staying within the last 3 mm of the nail. Clean edges with a small brush and cleanser. Topcoat glossy and cap the tip.
Editor's noteMark a guide dot with a dotting tool for the grid spacing on your first nail, then copy it.
Watch outAvoid big checkers - they overwhelm short stiletto and look costume-like.
24. Oxblood Red with One Pearl Dot Cluster
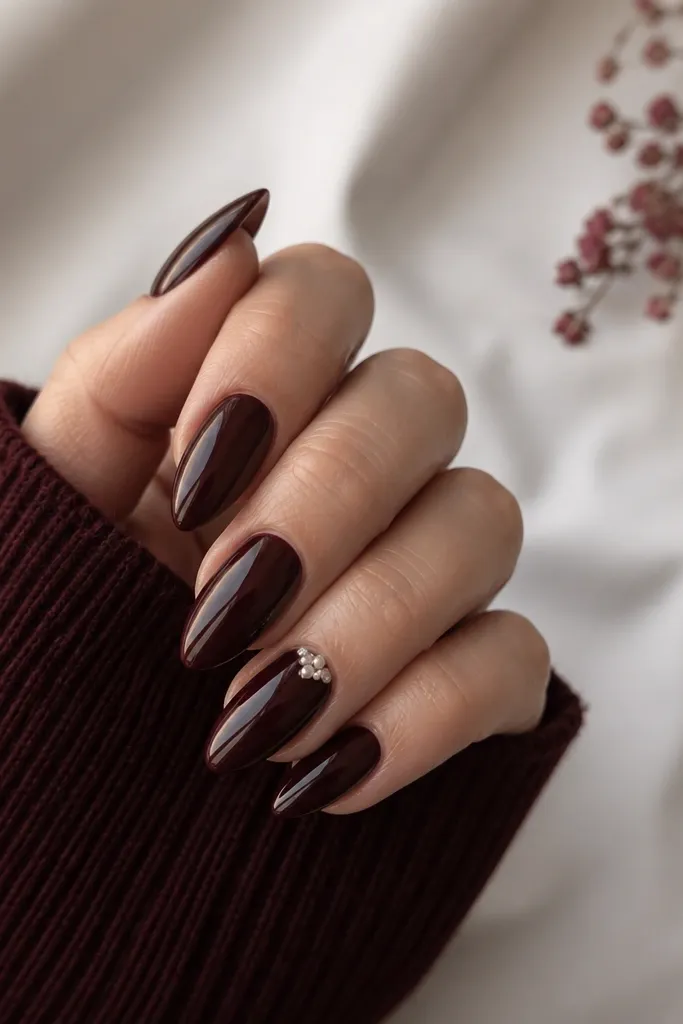
A pearl cluster feels expensive when it's tiny and placed near the cuticle. Oxblood makes the pearls look warm and old-money, not childish. The cluster draws attention to the nail base, which makes short stiletto look longer. Because only one nail has it, the set stays clean and wearable.
Paint oxblood on all nails. On the accent nail, place 3-5 pearl beads in a small cluster using rhinestone gel or bead gel at the cuticle center. Cure, then cap with topcoat to smooth over the beads. Keep the cluster size small - about the width of a pencil eraser head.
Editor's noteAfter curing, check for sharp edges by dragging a cotton swab lightly over the accent nail.
Watch outAvoid spreading pearls across multiple nails - it reads heavy and cheap on short stiletto.
25. Classic Red with Two-Line Gold Stripe at the Tip
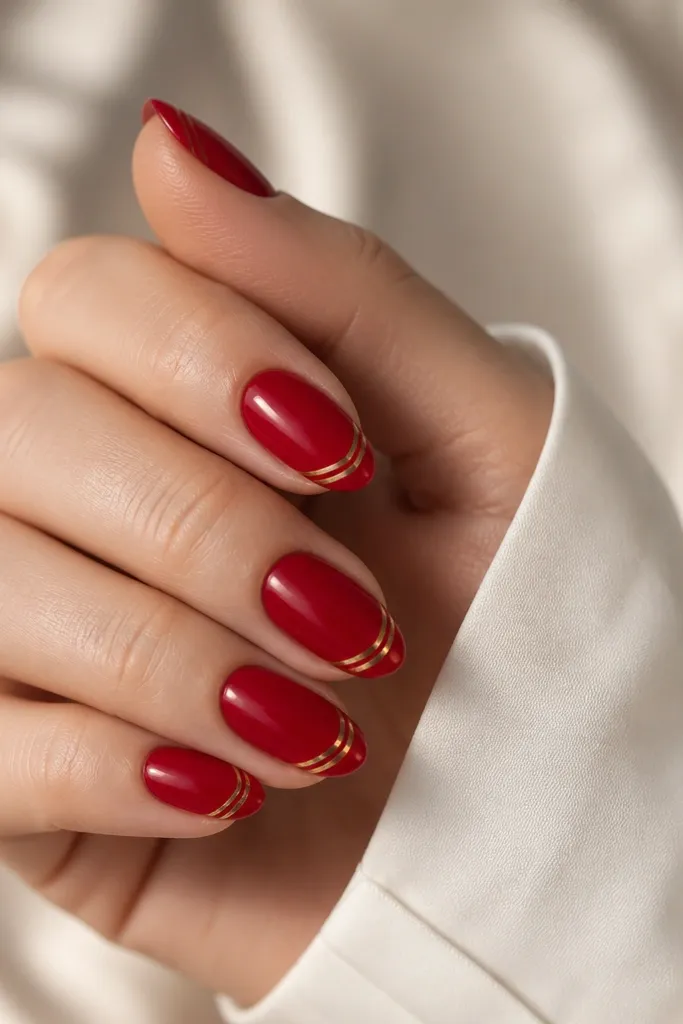
Double gold stripes look expensive because they're symmetrical and crisp. The two-line effect gives a "designer cuff" look at the tip, which makes short stiletto feel intentional. Classic red keeps it timeless, and the gold lines add just enough shine. It's subtle up close and bold from across the room.
Apply classic red in two smooth coats. Use two thin striping brushes or striping tape to place gold gel lines parallel across the last 2 mm of the nail, leaving a tiny gap between lines. Cure and topcoat glossy, making sure the lines are fully sealed.
Editor's noteIf your lines wobble, redo them - touching up after topcoat makes them look thick and messy.
Watch outAvoid one thick gold line - it looks like a cheap sticker on a short tip.