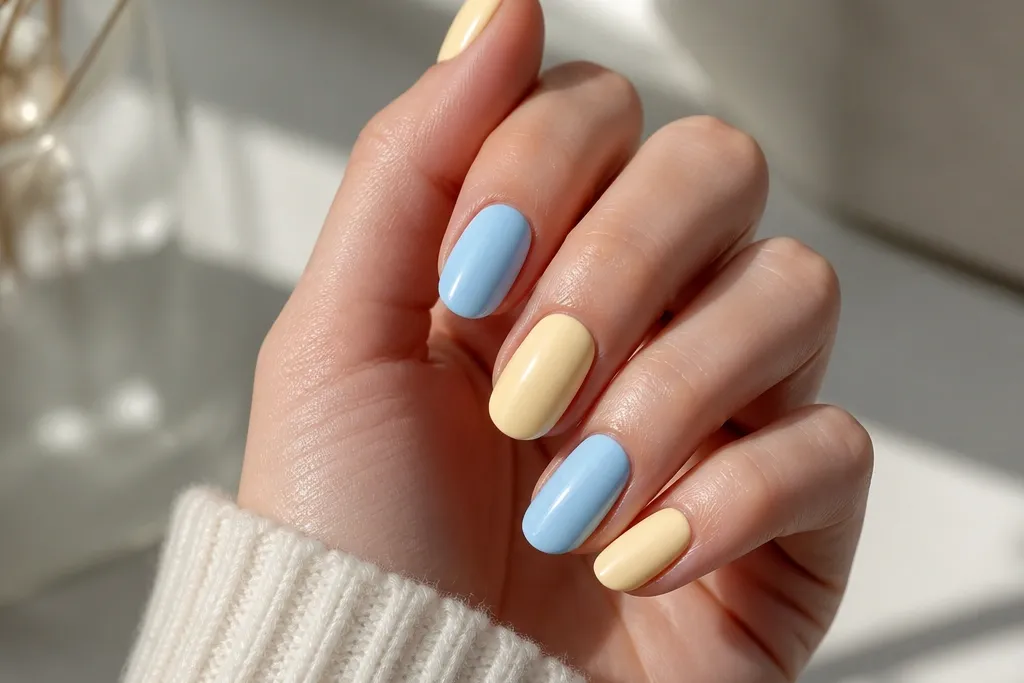
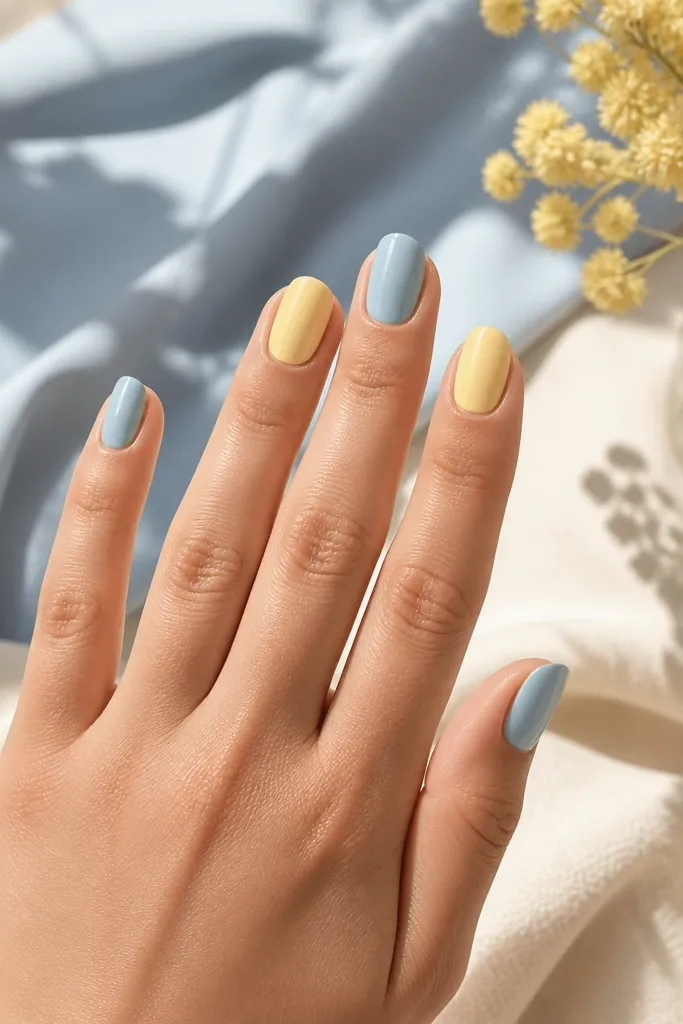
1. Buttercream French Tips with Sky Blue Outline
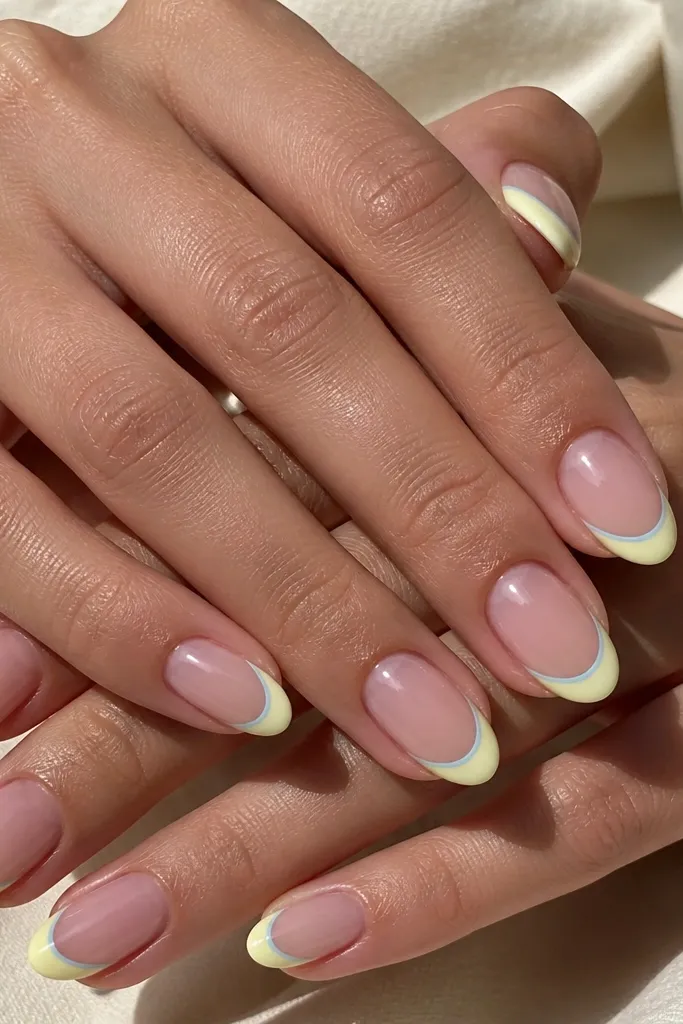
This set reads like a soft spring manicure because the yellow sits in the French zone where it looks bright but not loud. The sky-blue outline makes the yellow look "designed," not accidental, and it keeps the smile line crisp. I like using a sheer nude base so the yellow stays the star.
Paint the base with a sheer nude gel, then cure. Add two coats of buttercream yellow only on the tip area, keeping the edge smooth. With a striping brush, draw a thin sky-blue line just inside the outer tip edge, then top coat.
Editor's noteUse a French guide strip for the first yellow coat, then remove it before you outline so the line stays sharp.
Watch outDon't overfill the tip - if the yellow goes too far toward the center, the outline looks thick and messy.
2. Lemon Base with Cornflower Micro Dots
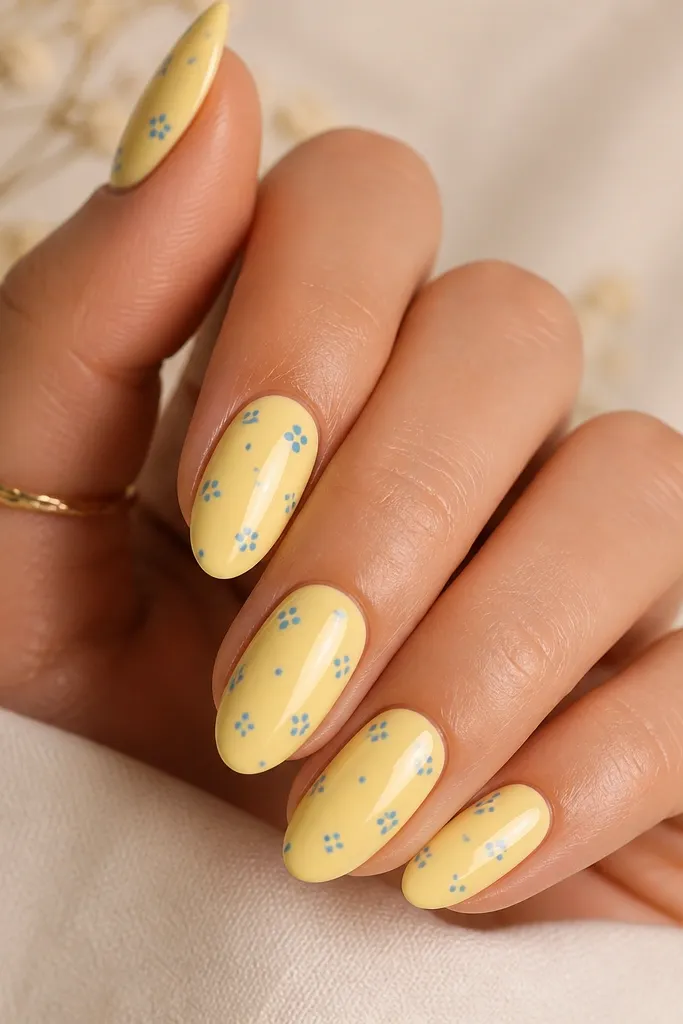
Solid lemon reads bright and clean, and the micro dots add movement without covering the whole nail. Cornflower blue keeps the dots vivid instead of turning muted. The dot size is the whole look: tiny dots look cute; big dots look childish.
Apply a white base coat if your nails stain, then two coats of lemon gel. Use a dotting tool to place 6-10 cornflower dots per accent nail, leaving space between dots so the yellow breathes. Cure and seal with top coat.
Editor's noteTwist your dotting tool slightly as you lift - it makes consistent dot edges.
Watch outSkip dotting on wet gel - it smears and you end up with blue blobs.
3. Half-Moon Split in Buttercream and Powder Blue
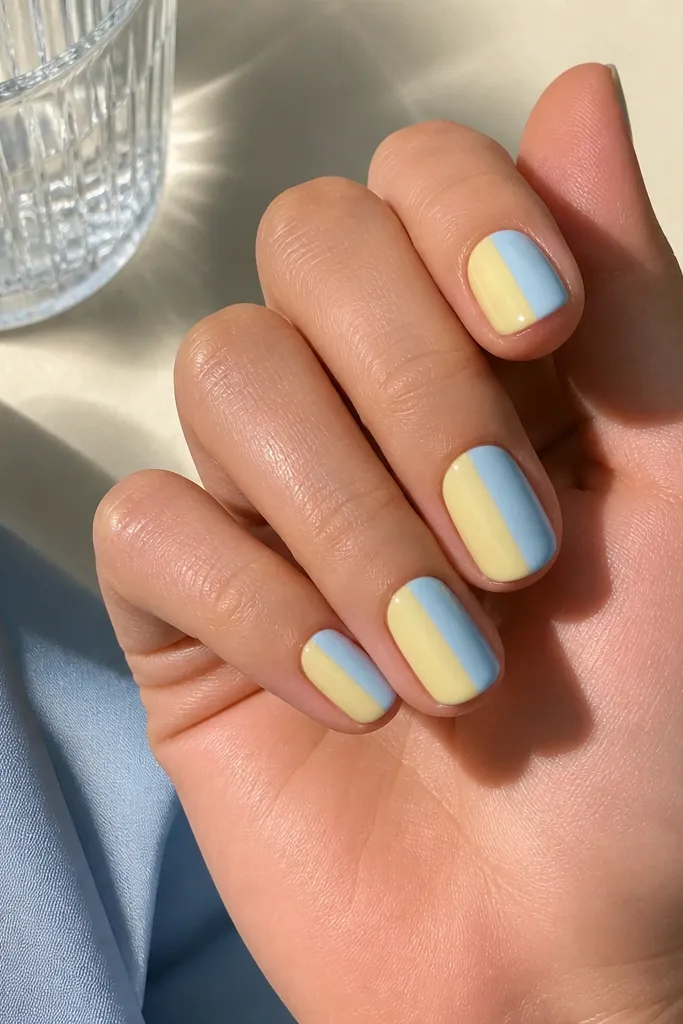
Half-moon splits look intentional because they're geometric and easy to repeat. Buttercream and powder blue balance warm and cool in a way that flatters most skin tones. Keeping the split straight makes the whole set look salon-made.
Start with a nude base underlayer if you want softer edges, then place a small half-moon nail stencil at the cuticle line. Fill one side with buttercream yellow and the other with powder blue. Cure, remove the stencil, then top coat.
Editor's notePress the stencil down for 5 full seconds before curing - tiny gaps create wavy edges.
Watch outDon't use thin, streaky coats on the split line - you'll see the boundary through the gel.
4. Sky Blue Marble with Soft Yellow Veins
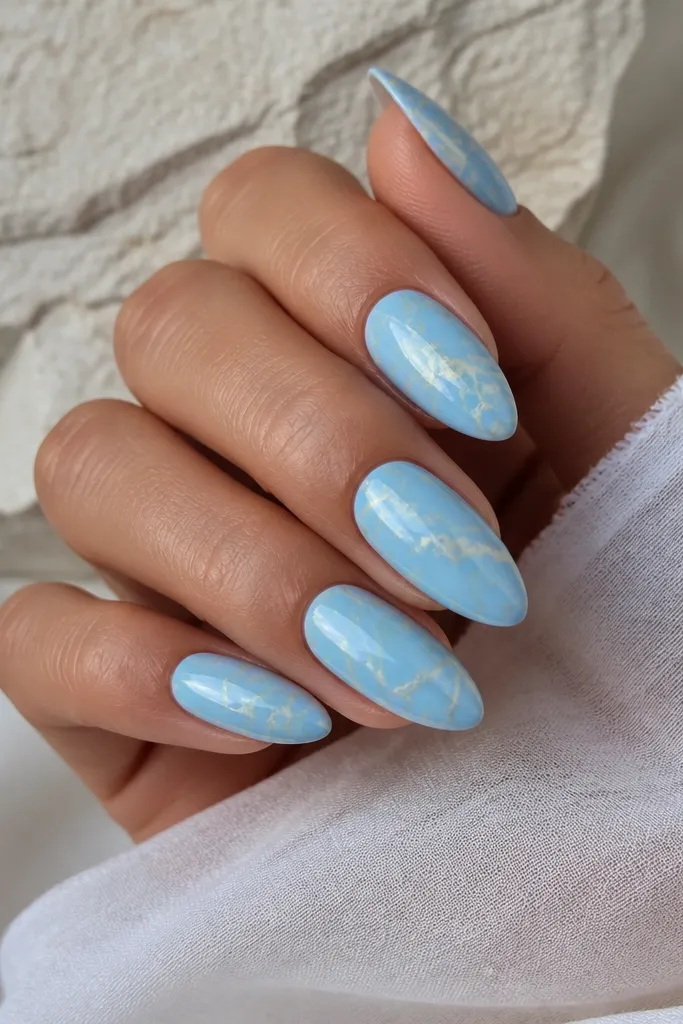
Marble works because it lets both colors show as a pattern instead of separate blocks. Sky blue stays bright as the background, and soft yellow lines add warmth. The trick is thin veins, not thick swirls.
Paint sky blue as a full base with two coats. On a glossy layer (or a tacky layer), drag a thin line of soft yellow using a striping brush or a toothpick. Add a few breaks and taper the ends so it looks like stone veining, then cure and top coat.
Editor's noteDo 2-3 veins per nail, not more - too many lines turns it into scribbles.
Watch outDon't overwork it after curing - the veins get chunky and the marble loses the delicate look.
5. Matte Powder Blue with Yellow Glossy Accent Stripe
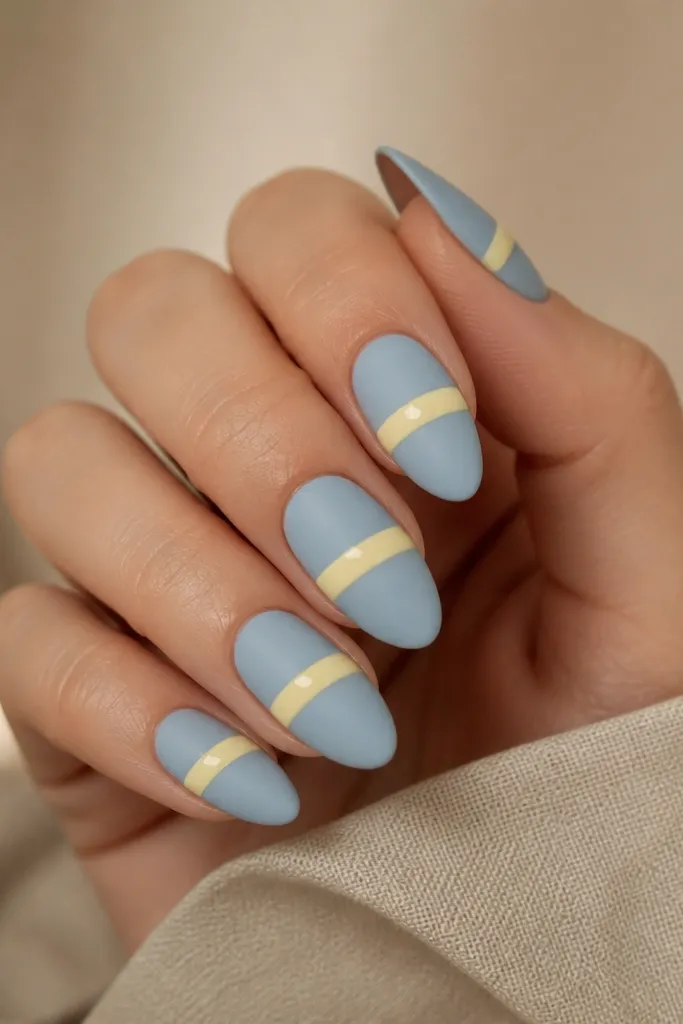
Matte powder blue looks smooth and modern, and the glossy yellow stripe gives you that "light catches it" effect. This combo looks clean even when your stripe isn't perfectly centered. Vertical stripes also make nails look longer.
Use matte top coat on the blue nails after curing. For the accent stripe, paint a vertical glossy strip of buttercream or pale yellow gel, cure it, then seal with glossy top coat only on that stripe area (you can tape off the stripe edges).
Editor's noteLet the matte top coat cure fully before you add the glossy stripe, or the finishes can smear together.
Watch outAvoid dragging the brush through matte - it lifts the finish and leaves dull scuffs.
6. Yellow Ombre Fade into Cornflower Tips
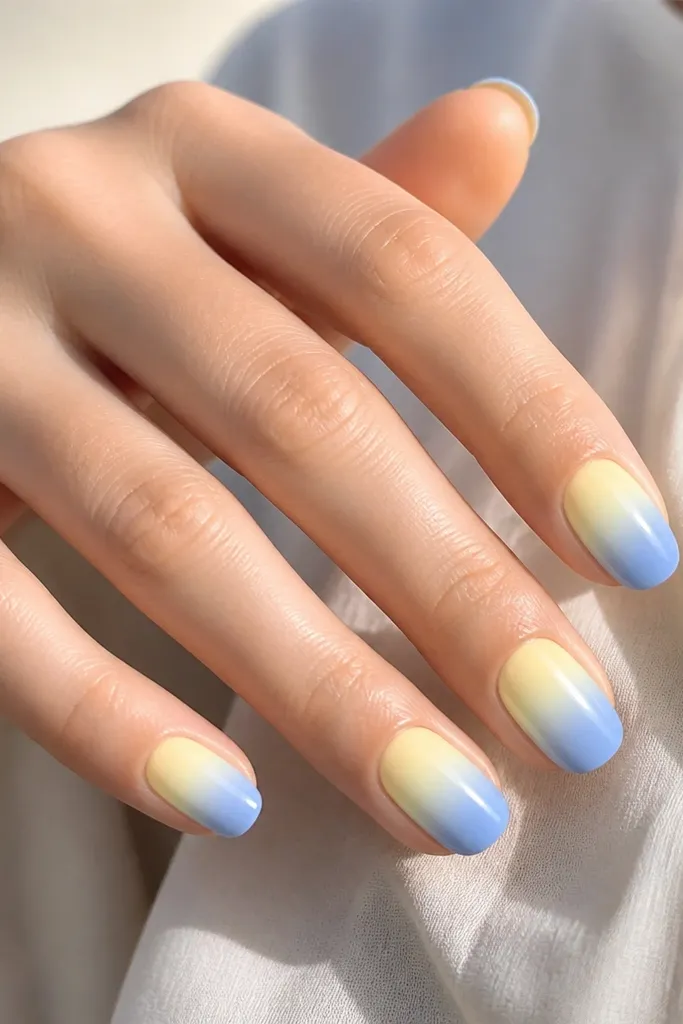
Ombre looks hardest, but it's actually forgiving when you blend the right way. Lemon near the cuticle keeps it bright, and cornflower tips add a cool pop. The smooth gradient is what makes it look expensive.
Apply a sheer base, then sponge on lemon yellow starting from the cuticle and blending outward. Without fully curing, sponge cornflower blue only at the tip edge and feather it into the lemon. Cure, then top coat.
Editor's noteWipe the sponge lightly on a paper towel between nails so the blue doesn't overtake the yellow.
Watch outDon't press too hard with the sponge - it creates patchy texture.
7. Yellow Polka Dot French on One Accent Nail
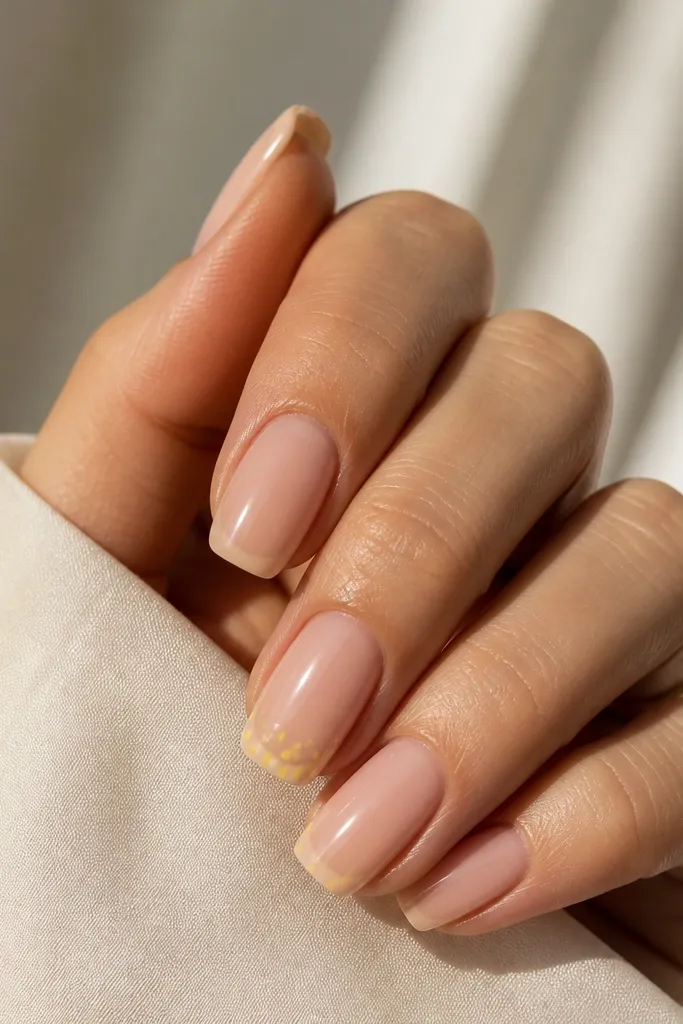
This is a fun way to use both colors without filling every nail. The dotted French tip looks like confetti, and the solid blue keeps the set wearable. I like dot-French on one or two nails because it avoids clutter.
Paint sky blue on all nails, cure, then on the accent nail map a French zone with a striping guide. Add small yellow dots across that zone, then cure. Clean up edges with a thin brush and top coat.
Editor's noteKeep your dot spacing consistent by counting to 3 between each dot placement.
Watch outDon't let yellow dots touch each other - the tip turns into a solid blob.
8. Sunrise Gradient with Thin Blue Horizon Line
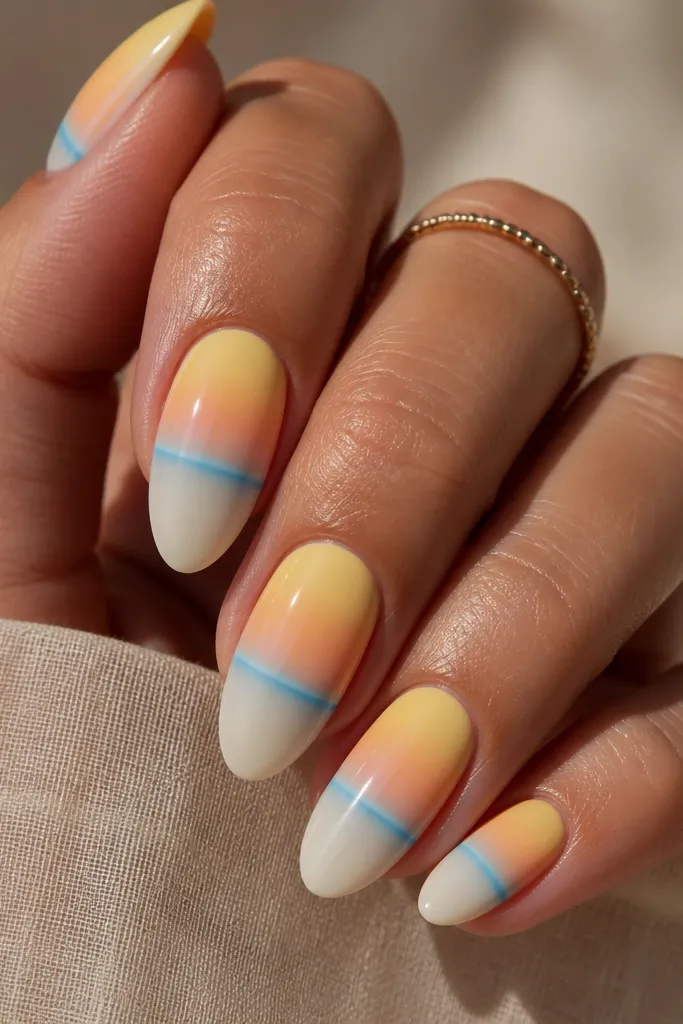
A sunrise gradient feels cheerful, and the thin horizon line makes it graphic. The yellow and blue shift is subtle, so it looks neat in daylight and still fun at night. The line also hides minor blending imperfections.
Sponge lemon yellow at the cuticle, blend into powder blue toward the tip. Cure and add a very thin cobalt line across the center using a nail art liner brush. Top coat to lock everything in.
Editor's noteIf the horizon line looks uneven, redo it - don't try to cover it with top coat.
9. Blue Stained Glass with Yellow Frame
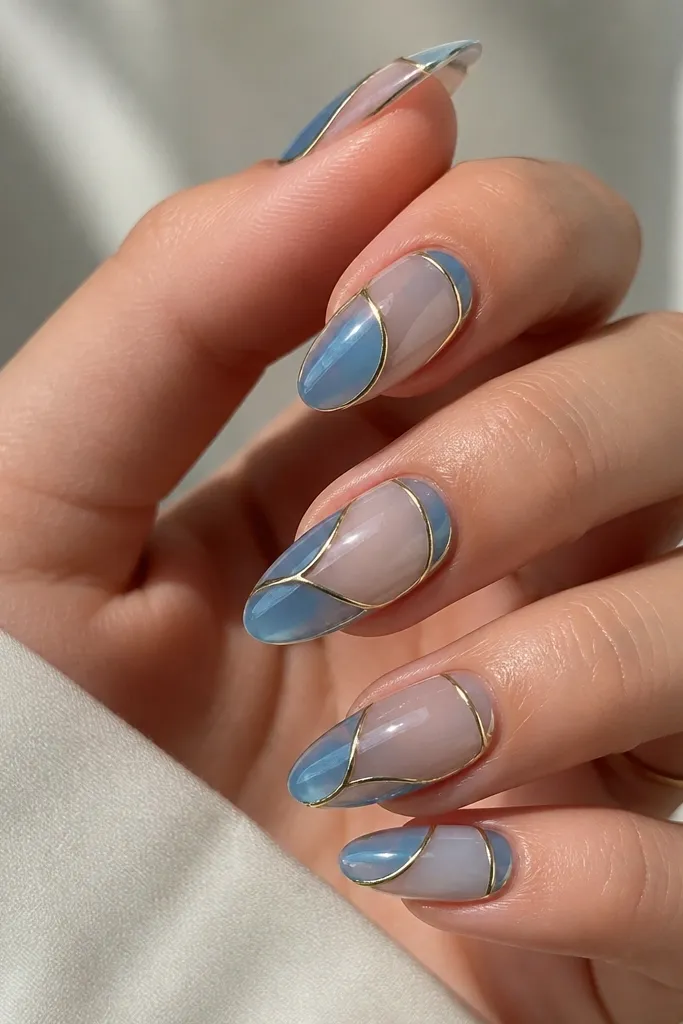
Stained glass is all about the outline. Yellow lines create a "frame" that makes the blue look jewel-like instead of flat. The transparent blue panels keep the look airy, not heavy.
Paint a clear or sheer base, then use yellow gel to draw window outlines with a fine liner brush. Fill each panel with translucent sky-blue gel (thin coats), curing after each panel if needed. Top coat seals the stained-glass shine.
Editor's noteUse a thicker yellow outline than you think - it holds its shape after top coat.
Watch outDon't use fully opaque blue - it kills the stained-glass effect.
10. Yellow Base with Blue Outline Hearts at Tips
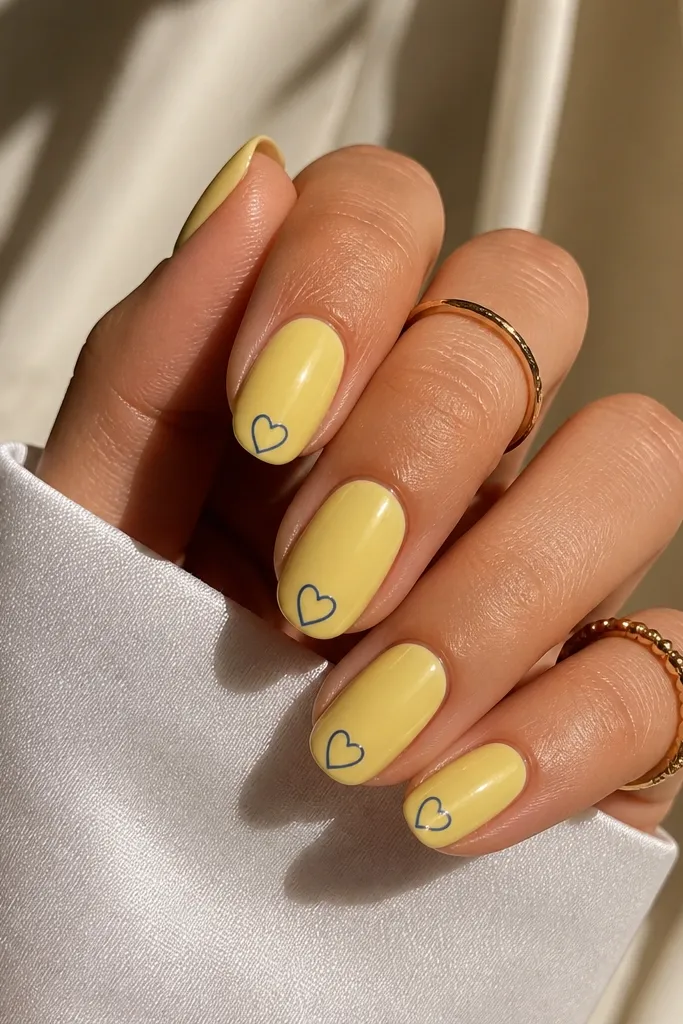
Hearts at the tips look sweet without turning childish when they're outline-only. Buttercream yellow keeps the background soft, and the blue outlines keep the hearts crisp. This design is easy to repeat nail after nail.
Apply buttercream yellow in two coats. For hearts, use a nail art liner brush and draw a V shape, then curve the two sides into a heart. Keep hearts small, about 2-3 mm wide at the top. Cure and top coat.
Editor's notePractice one heart on a scrap nail tip first so your curves match your hand.
Watch outSkip filled hearts - thick blue shapes look heavy and smear.
11. Citrus Yellow and Powder Blue Diagonal Checker
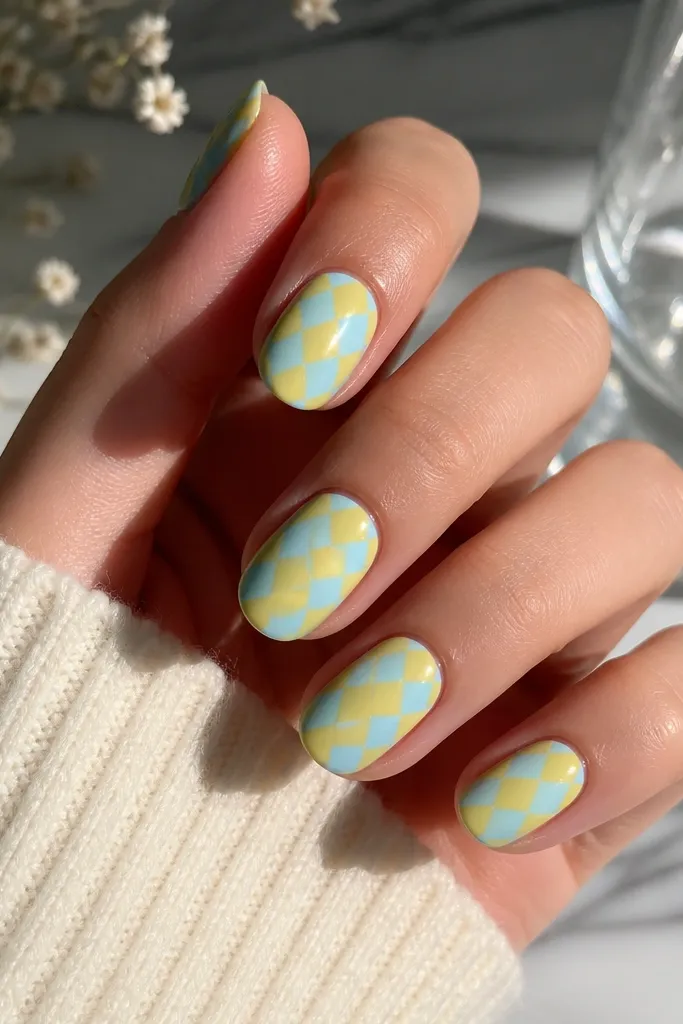
Checker patterns look sharp when the borders are straight and repeatable. Diagonal placement makes the colors feel dynamic while still staying neat. Yellow and powder blue are forgiving in checker layouts because both are light and airy.
Use striping tape to create diagonal "rails" across the nail. Fill alternating sections with citrus yellow and powder blue, cure, then remove tape and clean edges. Seal with top coat and check for any lifted tape lines before curing.
Editor's notePress tape down around the sidewalls with your finger - lifted edges show after top coat.
Watch outDon't eyeball the diagonals - they drift and the checker loses the pattern.
12. Blue Watercolor Wash with Yellow Edge Pop
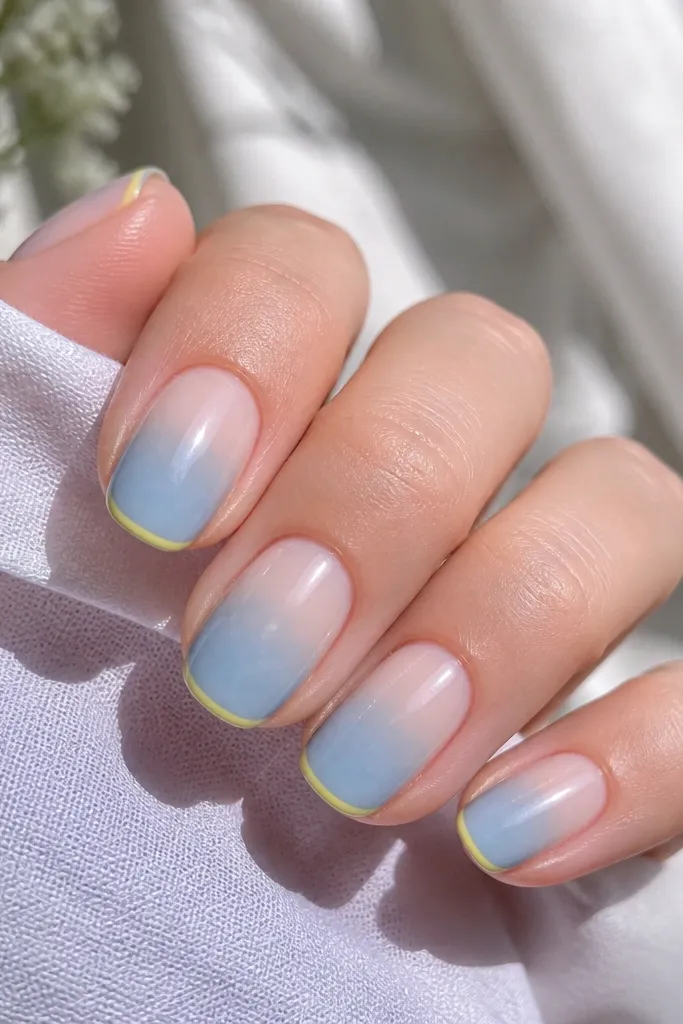
Watercolor wash looks artsy but still clean when the fade is controlled. Powder blue blends well without turning gray, and the thin yellow edge line ties it into a set. This is the look I reach for when I want color but not hard geometry.
Paint a sheer base, then sponge or dab powder blue starting from mid-nail toward the tip. Keep the top half mostly sheer. Cure, then draw a thin yellow line at the very tip edge. Top coat over everything.
Editor's noteUse a small makeup sponge and tap lightly - it gives a soft fade without hard blotches.
Watch outDon't drag a brush through the blue wash - it creates streaks.
13. Yellow Stripe Nail with Blue Half-Side Accent
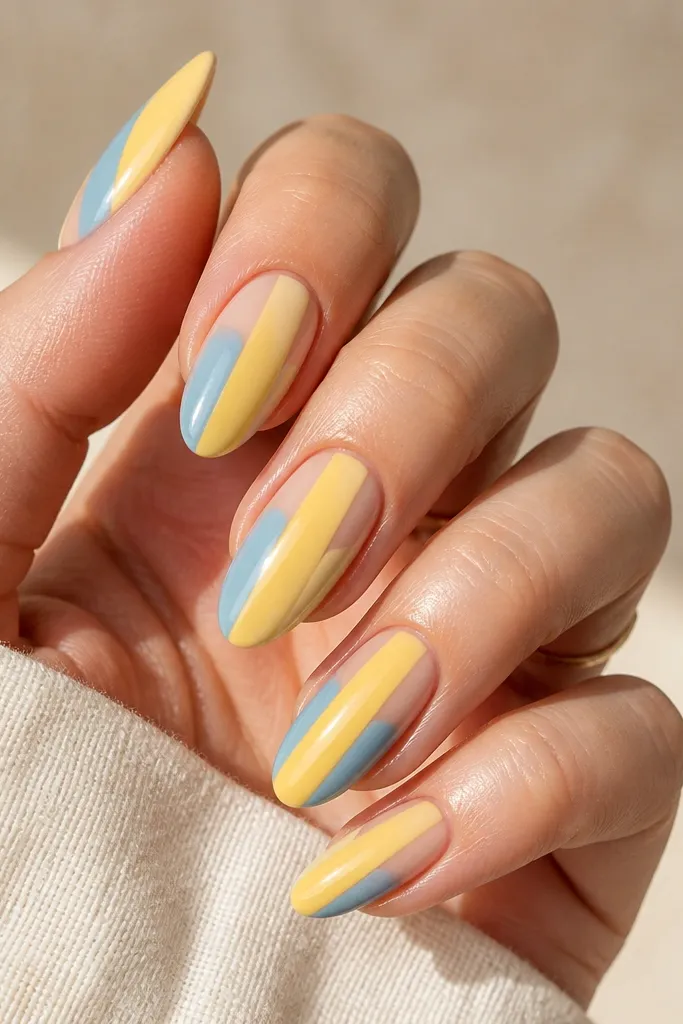
This set mixes simple blocks with one bold stripe, so it looks styled even with minimal art. The thick yellow stripe is the focal point, while the blue half-side panel adds contrast near the cuticle. It's also flattering because stripes pull the eye upward.
Paint most nails light blue and cure. For the accent nail, add a sheer nude base, then paint a thick vertical yellow stripe centered. On one side of the cuticle, paint a small half-panel of blue, keeping it under the yellow stripe edge. Top coat.
Editor's noteIf your stripe is thick, use a wider striping brush so the edges stay even.
Watch outDon't put the blue panel too close to the free edge - it makes the nail look top-heavy.
14. Yellow and Blue Foil Flakes on Clear Base
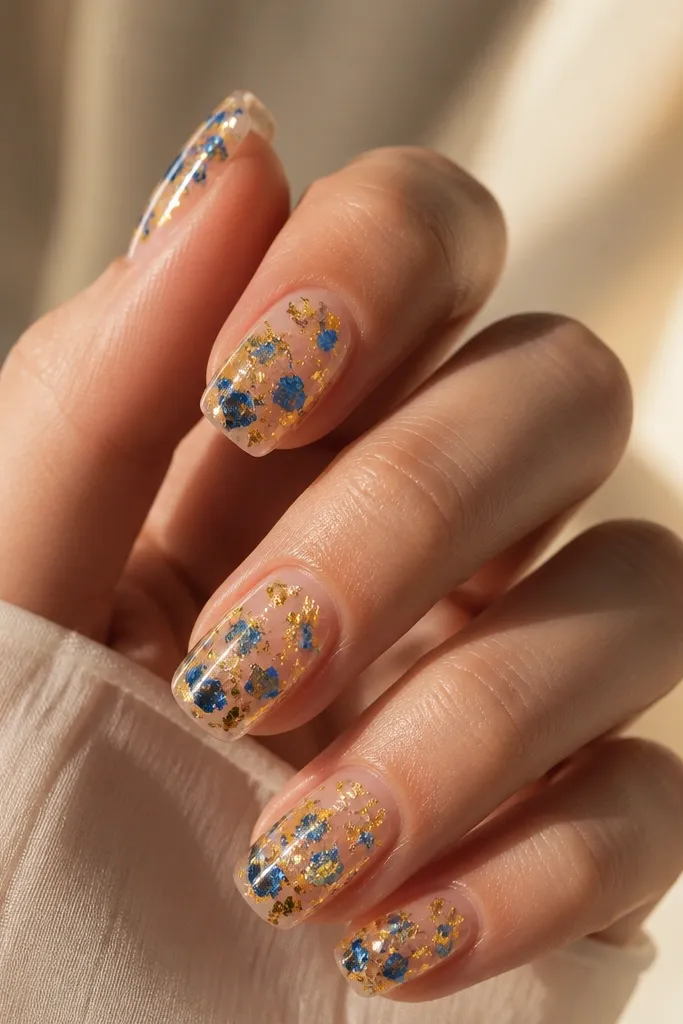
Foil flakes make the colors look expensive because the light moves across the nail. Clear base keeps it modern and lets the yellow and blue feel airy instead of heavy. I like this when I'm wearing simple outfits and want the nails to do the talking.
Use a clear gel base, then apply thin layers of foil adhesive gel in small patches. Press yellow foil flakes in one cluster and blue flakes in another cluster, leaving negative space. Cure, then top coat generously enough to smooth the foil texture.
Editor's noteTop coat in two thinner layers - thick one can trap bubbles over foil.
Watch outDon't cover foil before it's cured - you'll smear it and lose the sparkle.
15. Soft Yellow Swoosh with Blue Outline Tips
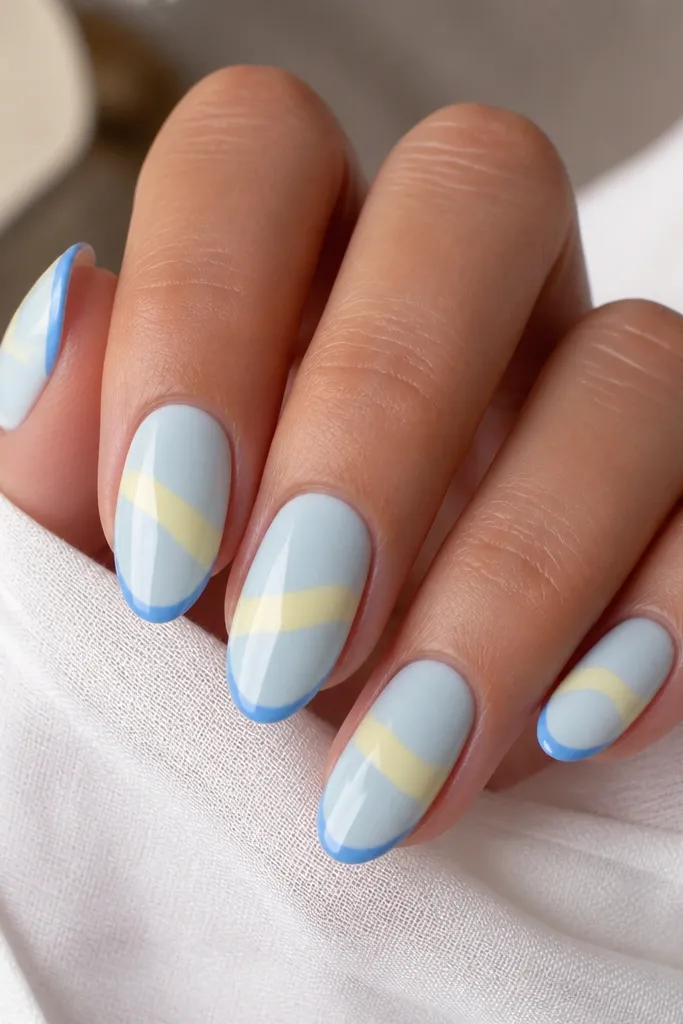
The swoosh makes the set feel fluid, while the blue outline keeps it structured. This works well because the base is already blue, so the yellow shows as motion rather than a full block. The thin outline is what makes it look polished instead of random.
Paint nails light blue, cure. Add a diagonal yellow swoosh across the center using a striping brush, then cure. Outline the tip edge with thin blue gel to form a crisp border. Top coat once dry.
Editor's noteMake the swoosh slightly wider near the center - it reads better than a thin line.
Watch outSkip thick yellow swooshes - they sink into the base and look uneven after top coat.
16. Blue Butterfly Wings with Yellow Body
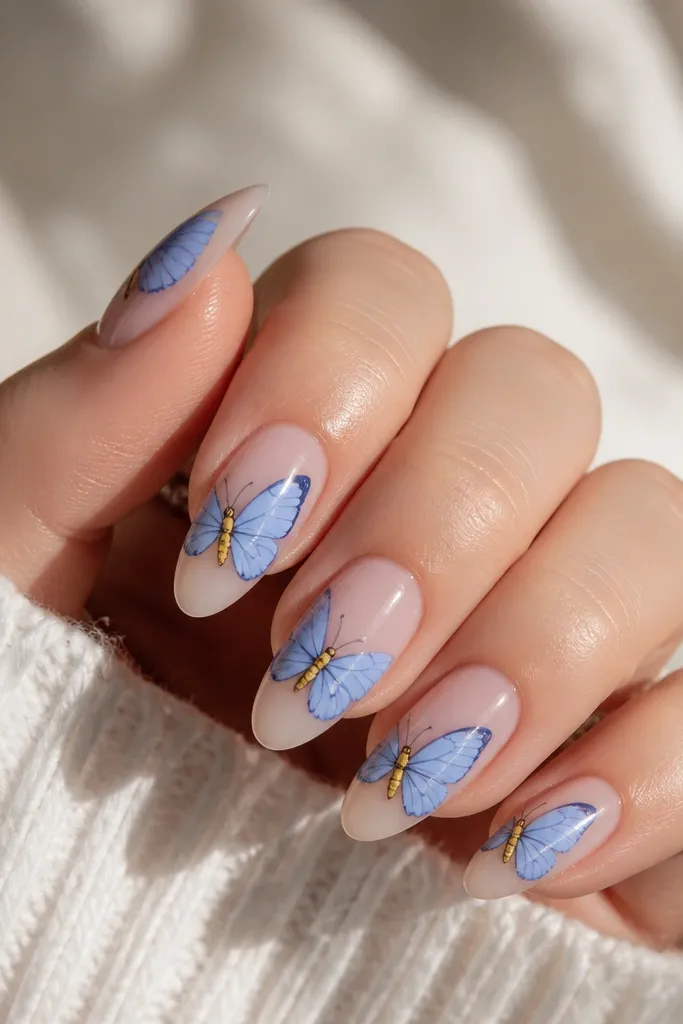
Butterfly wing art looks delicate when the wings are separated and outlined. Yellow body lines make the wings feel grounded, so the blue doesn't float. I like doing this on short nails because it stays cute and readable.
Start with a sheer base. Draw a thin vertical yellow line in the middle, then add two wing shapes on each side using blue gel. Outline the wings lightly so edges stay crisp. Cure and top coat.
Editor's noteUse a toothpick for the body line if your brush keeps spreading.
Watch outDon't fill the whole wing solid - negative space makes it look like wings, not blobs.
17. Yellow and Blue Marble Confetti Mix
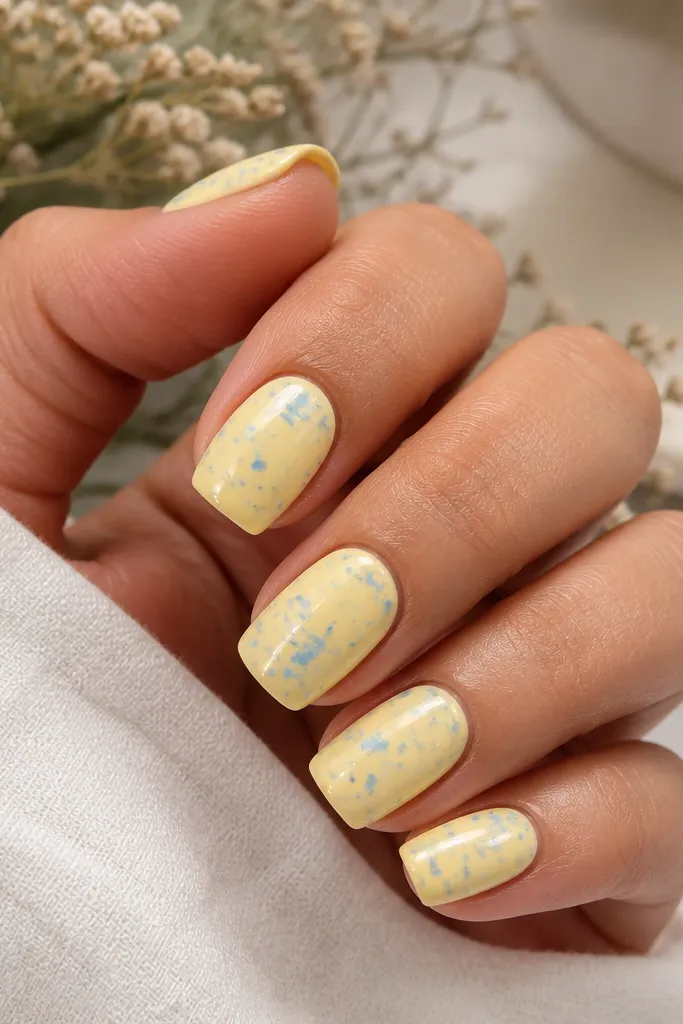
This is for when you want both colors without committing to full patterns. The confetti pieces look like tiny marble fragments, and the yellow base keeps it bright. It also hides small application bumps because the texture is part of the design.
Paint nails pale yellow, cure. On a tacky top layer, dab tiny bits of translucent blue gel using a sponge or the corner of a makeup wedge. Lightly drag each dab with a toothpick once so edges soften. Cure and seal with top coat.
Editor's noteKeep the blue pieces clustered toward the center - it looks more intentional.
Watch outAvoid huge chunks of blue - they overpower the yellow and look uneven.
18. Blue Gradient with Yellow Side Accent Line
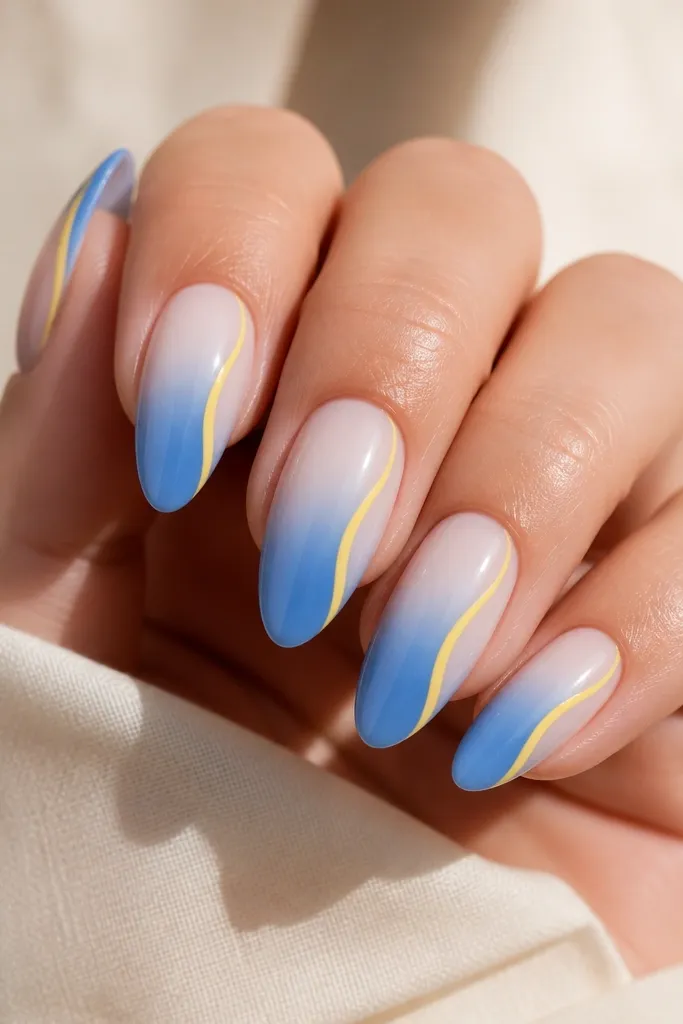
A tip-to-cuticle gradient is clean and wearable, and the side accent line adds a modern detail. Yellow along the sidewall makes the nail look longer because your eye follows the line. This is one of my favorites for everyday outfits.
Make a gradient by sponge-placing powder blue at the tip and blending upward into clear. Cure. Draw a thin yellow line along one sidewall starting about halfway down, then cure again. Finish with top coat.
Editor's noteIf your sidewall line gets wavy, fix it before curing by wiping the brush and re-straightening once.
Watch outDon't paint yellow all the way to the cuticle - it can look messy and grow out fast.
19. Yellow Glitter Fade into Blue at the Tips
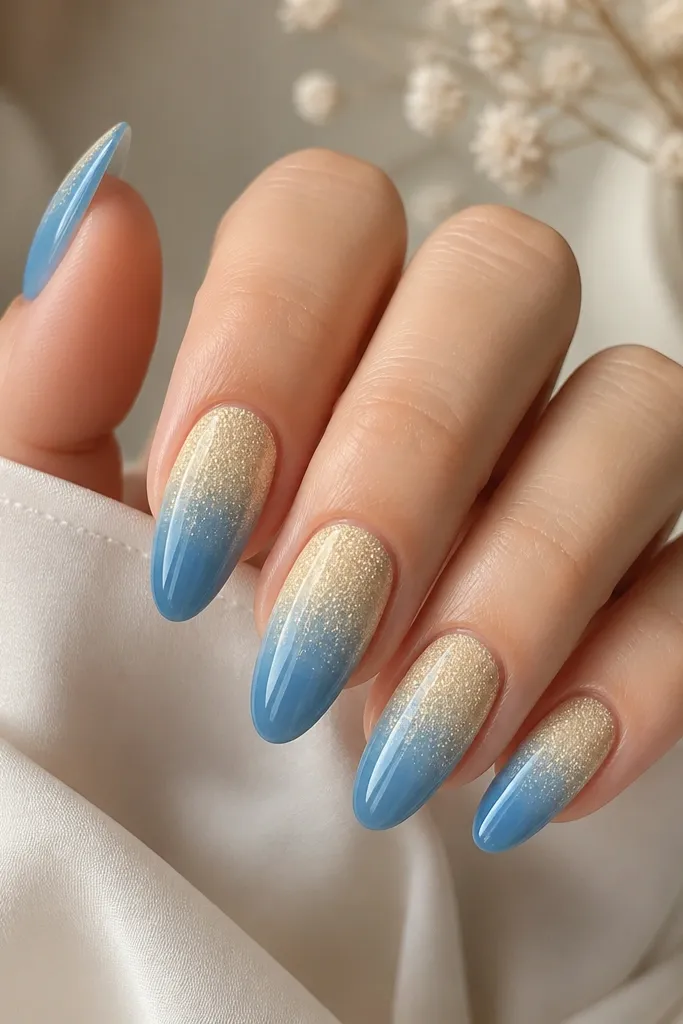
Glitter fades look best when the glitter is concentrated near the cuticle and thins out as it meets the second color. Yellow glitter stays soft and bright, and the blue tips add contrast that makes the glitter look intentional. This set also hides texture because glitter naturally adds dimension.
Apply a sheer nude base. Sponge or dab pale yellow glitter gel starting near the cuticle, then blend downward lightly. Paint blue gel at the tip third and feather the boundary with a thin brush. Cure and top coat with extra attention to the edges.
Editor's noteUse a sticky lint-free wipe to remove dust before top coat or glitter will look dull.
Watch outSkip a thick glitter layer - it can feel gritty and catch on fabric.
20. Blue Floral Outline on Yellow Negative Space
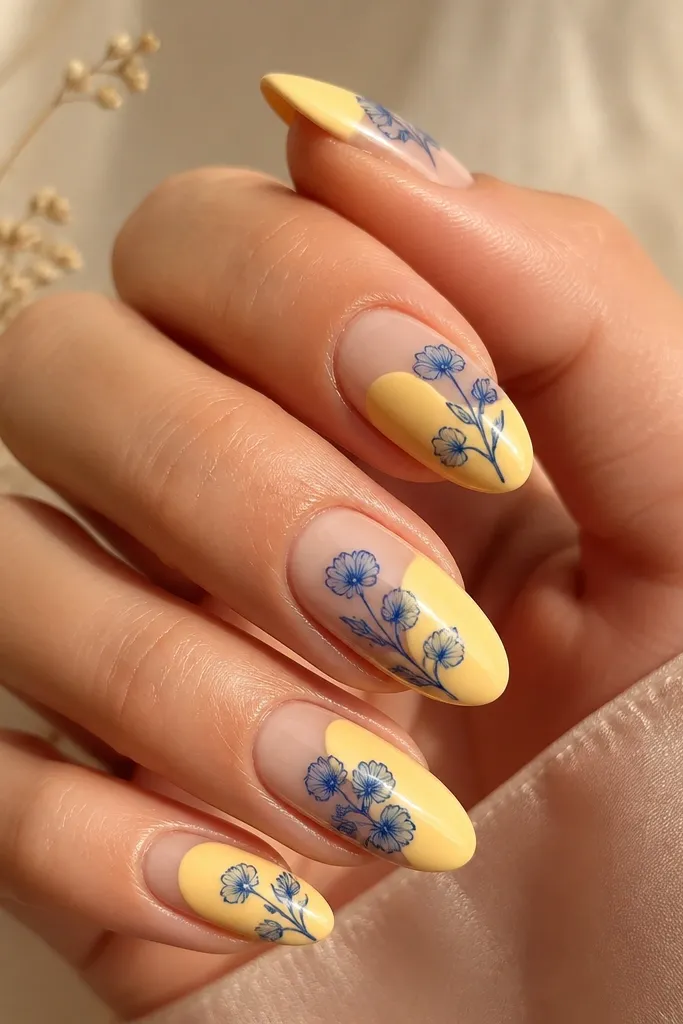
Line-art florals keep the design airy, and the yellow base makes the blue outlines pop. This is one of the cleanest ways to do "pretty" without covering the whole nail. It also looks good on short nails because the flowers sit near the cuticle where you see them most.
Paint a pale yellow base in two coats for full opacity. Use a fine liner brush to draw 2-3 simple petals per flower and a tiny center dot. Place each flower cluster consistently near the cuticle. Cure and top coat.
Editor's noteStart with one flower size and repeat it exactly - consistency makes it look high-end.
Watch outDon't use a thick brush for line art - wide lines look like sticker edges.