1. Butter Yellow French Tips with Extra-Thin Line
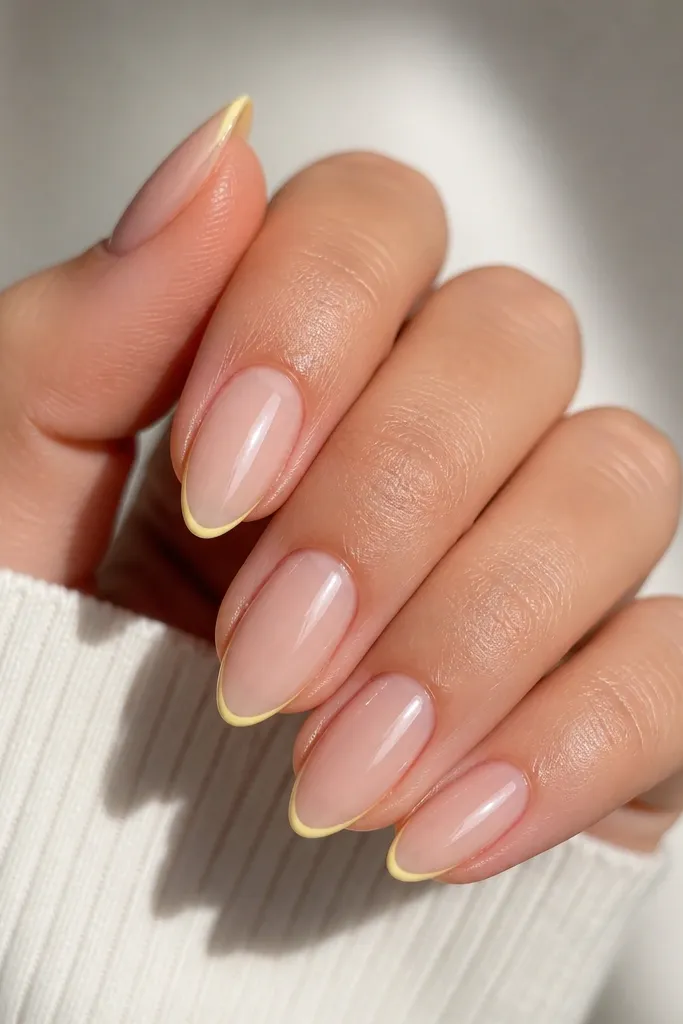
This look turns heads because the yellow is only where light hits - the smile line - so it stays crisp instead of looking heavy. The nude base keeps your nails looking longer, and the thin French line makes the yellow look intentional. I like butter yellow here because it reads creamy, not neon.
Use a sheer nude base like a milky pink-beige, then paint a thin French arc with a fine brush (around 1 mm wide at the center). Keep the arc higher on the sides so it matches your nail shape. Finish with a thick glossy top coat so the yellow looks smooth, not powdery.
Editor's noteIf your line wobbles, place a small strip of nail tape at the side angle first, then remove it right after painting.
Watch outAvoid making the yellow tip too wide - thick French on light yellow turns flat and cheap-looking.
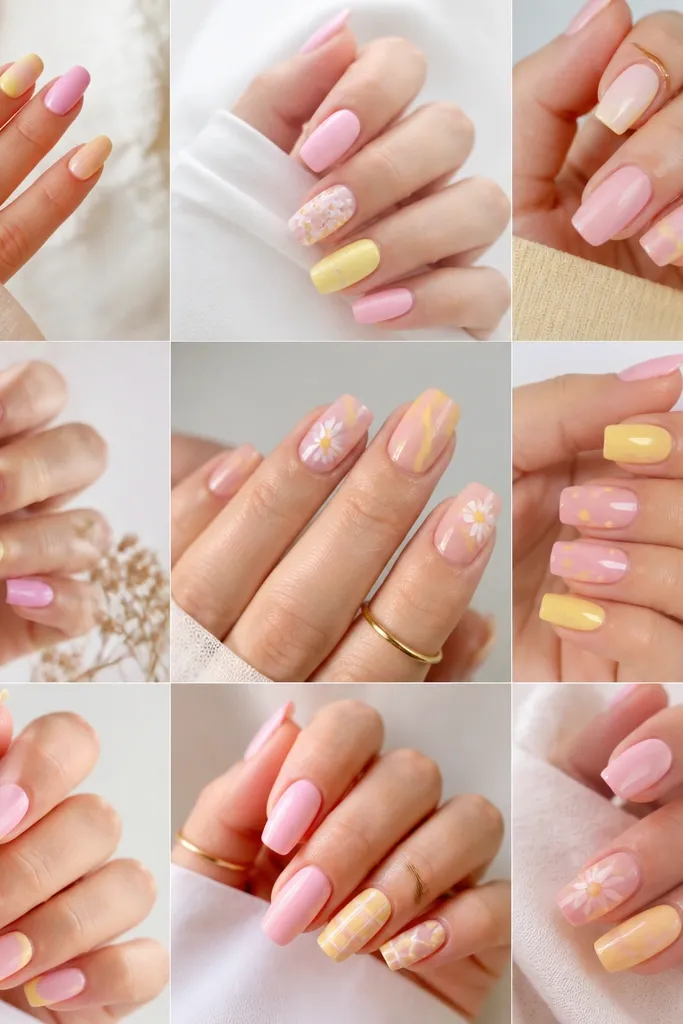
2. Lemon Cream Scattered Confetti Dots
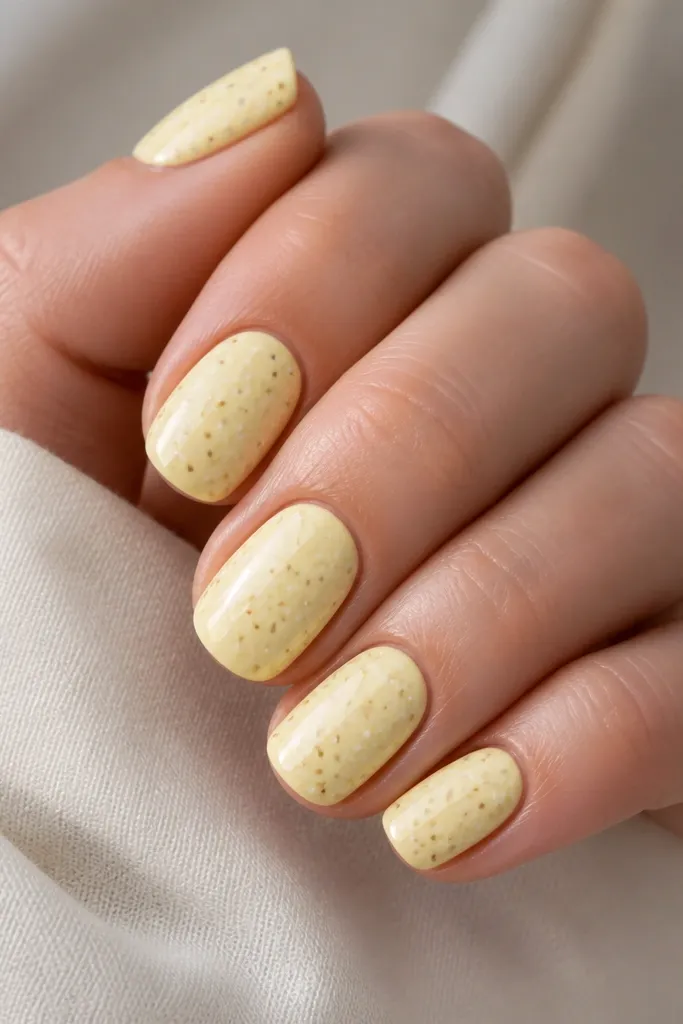
Scattered dots make light yellow feel playful without needing bright colors. The tiny white dots add contrast so the yellow pops in photos, and pale gold dots make it look like sunlight. This design works even if your nails are short because the dots don't require long nail space.
Start with a solid lemon cream base. Tap small dots using a dotting tool: one size for white (about the size of a pin head) and a slightly smaller one for pale gold. Leave gaps - full coverage looks busy and messy.
Editor's noteDo the dots on the second-to-last coat stage if you're using gel: it helps them sit smooth before top coat.
Watch outDon't cluster the dots at the cuticle - it makes the nail look dirty.
3. Half-Moon Yellow with Clear Center
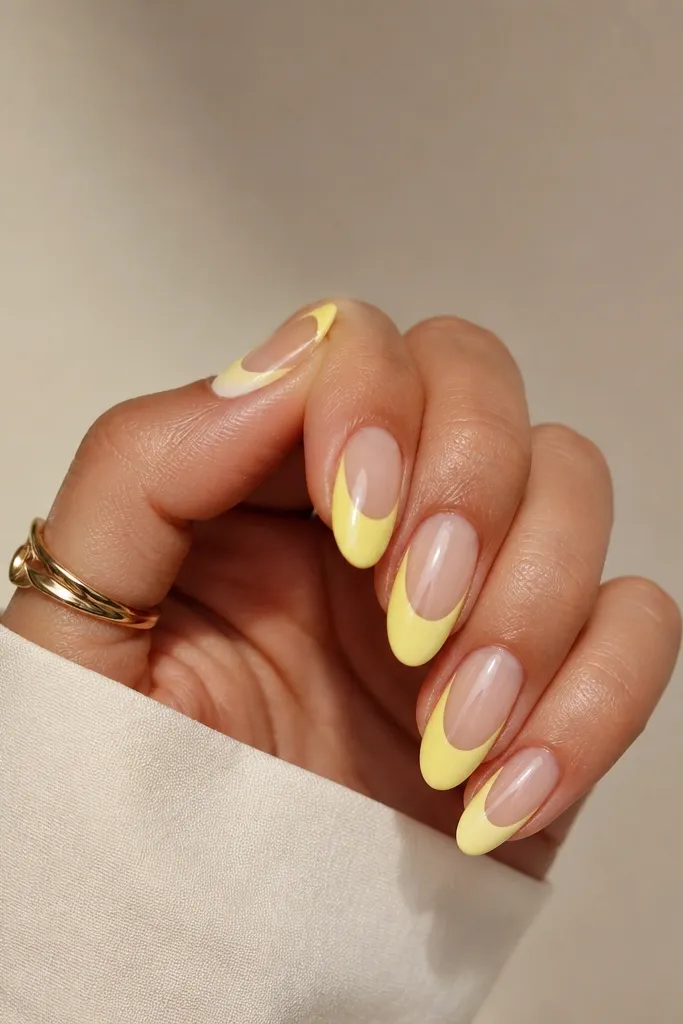
The half-moon trick makes light yellow look high-end because it's framed and limited. The clear center keeps it airy, so the yellow reads fresh instead of loud. I like this when I want something that looks neat in office lighting but still turns heads in daylight.
Apply a sheer nude or clear base, then paint the half-moon shape with a small angled brush. Keep the half-moon about 2-3 mm tall on each side of the nail. Seal with two passes of top coat to lock the edges.
Editor's noteUse a nail stencil for the first try, then freehand once you see the spacing.
Watch outAvoid sloppy cuticle edges - a thick blob makes the whole nail look uneven.
4. Marigold Mist Gradient from Clear to Yellow
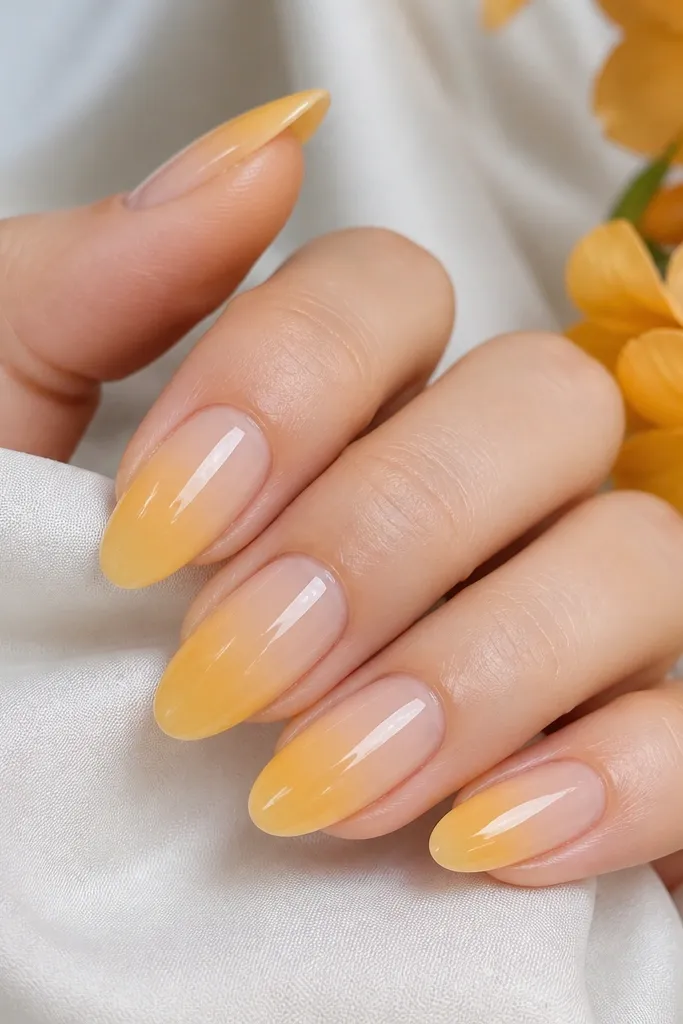
A clear-to-yellow fade looks like light is moving across your nails. It turns heads because it's subtle up close but bright when you move. Marigold mist (a warm pastel) keeps the gradient from looking like pale school glue.
Start with a clear or sheer base. Sponge marigold yellow from mid-nail to tip using a makeup sponge, then blend the top of the sponge area with a second light layer. Cure between layers so the gradient doesn't smear.
Editor's notePractice on a paper towel first - you want the sponge barely loaded so the fade stays smooth.
Watch outDon't make the gradient reach the cuticle - it can look patchy and grow out fast.
5. Yellow Topcoat Over Nude with Gold Leaf Flicks
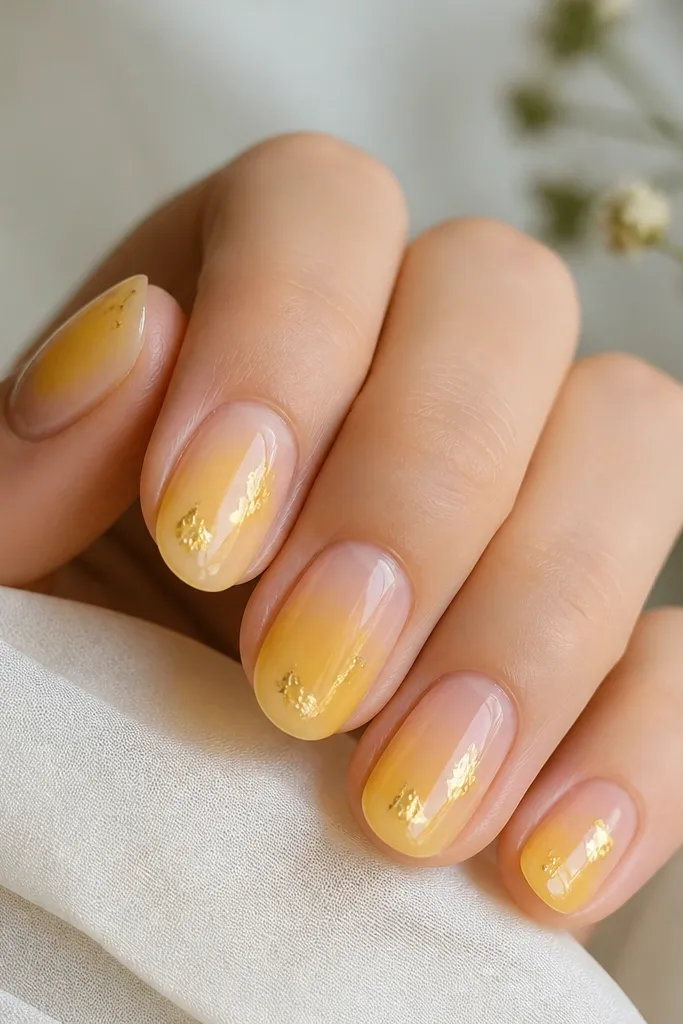
This is my go-to when I want light yellow that looks expensive. The semi-sheer yellow wash gives depth without covering everything, and the gold leaf adds sparkle that doesn't scream "glitter." It's especially flattering with short almond nails because the glow makes them look smoother.
Paint a nude base, then apply a semi-sheer buttery yellow topcoat or thin gel color. While it's tacky (or right after the second color layer before full cure), place tiny gold leaf bits and press lightly. Seal with a glossy top coat.
Editor's noteIf gold leaf keeps sticking to your brush, place it with the tip of a toothpick.
Watch outSkip chunky glitter - it roughens the surface and makes the yellow look cheap.
6. Pastel Lemon Swirl Accent on Ring Finger
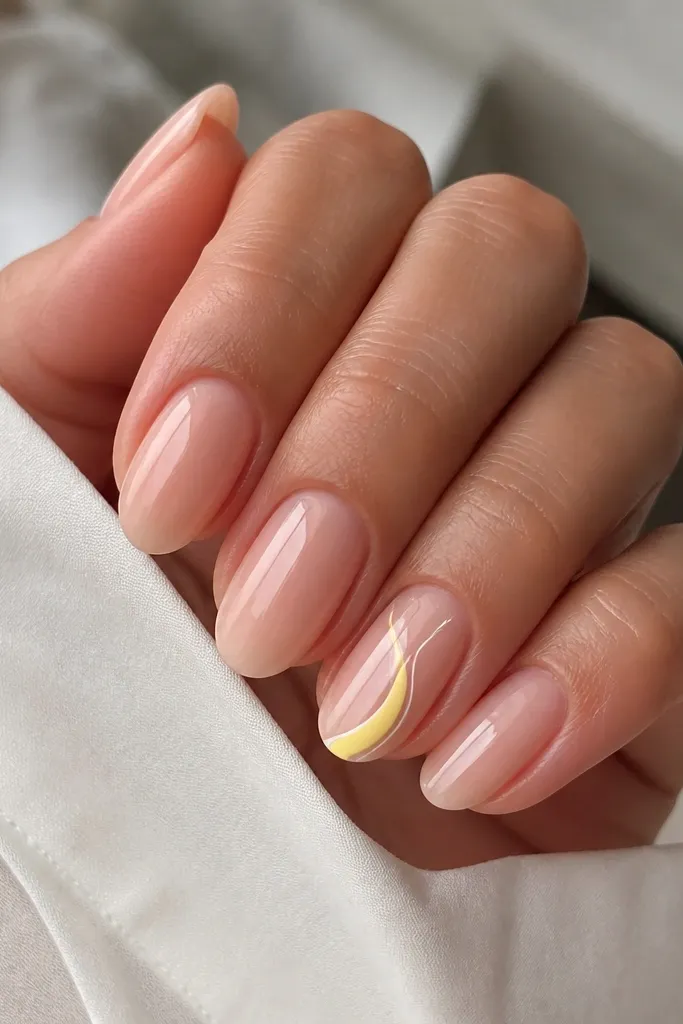
A single swirl turns heads because it's clean, not busy. The pastel lemon line reads soft and fresh against nude, and the thin white outline makes it crisp instead of blending. I do this when I want something fun for brunch or a weekend event without fully committing to yellow on every nail.
Paint all nails nude and glossy. On the ring finger, use a thin liner brush to draw a loose S-curve swirl, then add a second pass of pastel lemon over it, and trace select edges with white for contrast. Keep the swirl centered so it looks intentional.
Editor's noteUse a nail guide sticker under the ring finger so your curve stays symmetrical.
Watch outAvoid putting swirls on every nail - it turns into a busy pattern fast.
7. Light Yellow Marble with Milky White Veins
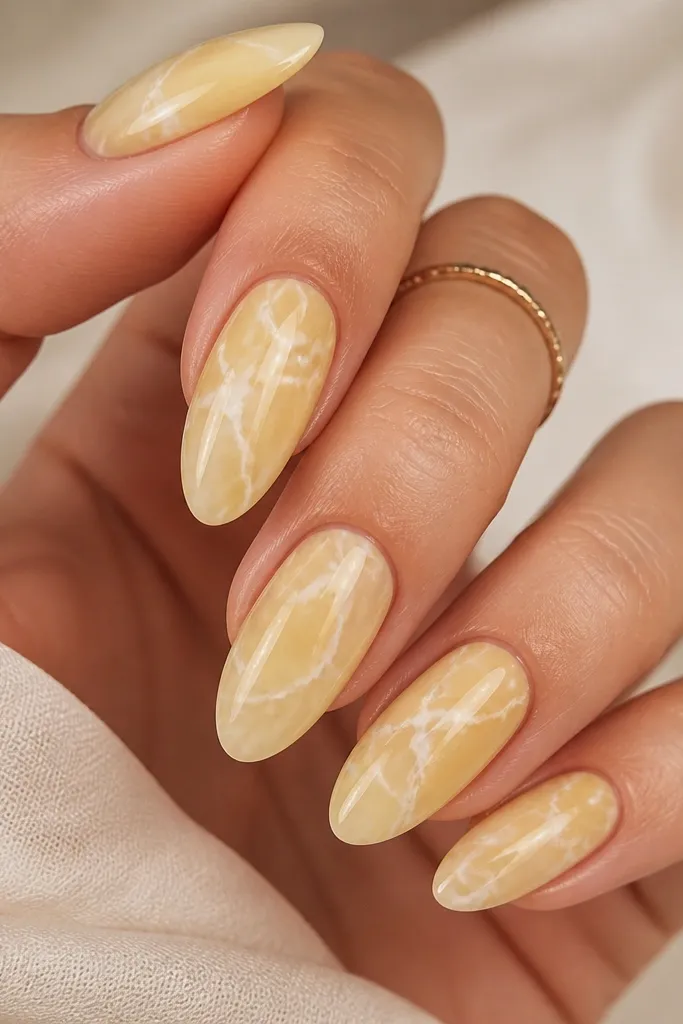
Marble makes light yellow look dimensional in a way solid color can't. The milky white veins give contrast and keep it from looking flat or chalky. When you catch the light, it looks like glossy candy glass.
Start with a smooth pale yellow base in two thin coats. Add milky white gel in thin streaks using a striping brush, then lightly drag through with a clean brush tip to soften the lines. Swirl just enough to create veining, then top coat heavily.
Editor's noteAfter curing, wipe with gel cleanser and check under a lamp - you can add one more micro-vein if it looks too plain.
Watch outDon't over-mix the marble - too much dragging turns it into muddy yellow.
8. Sunbeam Diagonal Half-and-Half
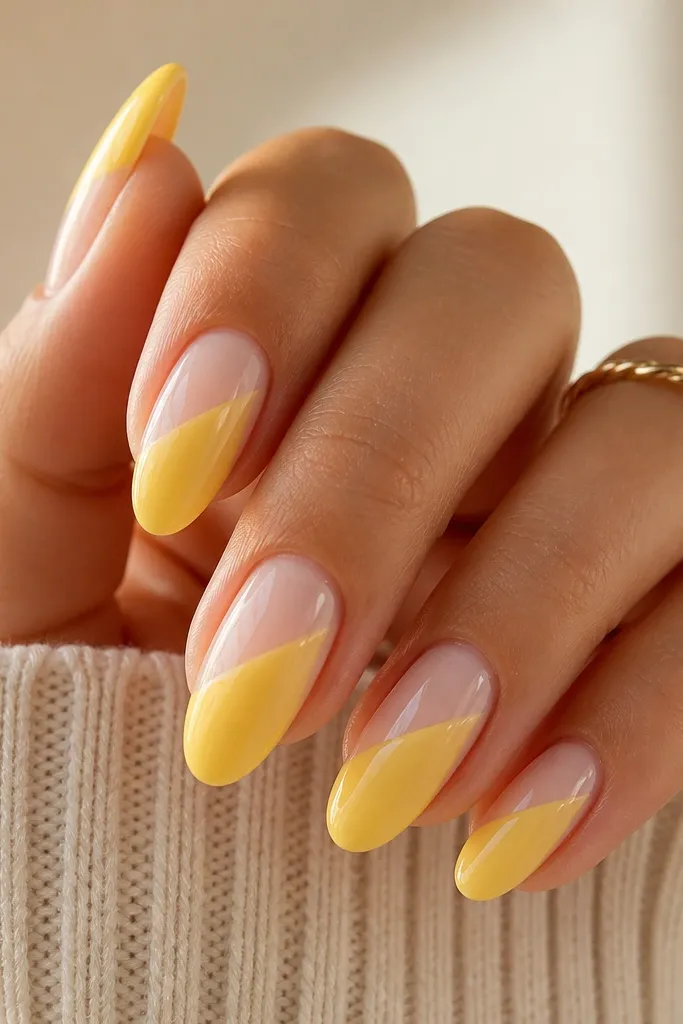
Diagonal color blocks feel modern and turn heads because they look graphic. Light yellow on one side gives a bright pop without covering the whole nail. The sharp division is what makes it look salon-done.
Paint a nude base first. Use striping tape to create a diagonal line from lower left to upper right (or mirror it). Fill one side with light yellow, cure, then remove tape carefully. Apply top coat to seal the edges.
Editor's notePress the tape down with a silicone cuticle pusher so yellow doesn't creep under it.
Watch outAvoid rounded tape edges - they blur the line.
9. Pastel Yellow with White Micro-Stars
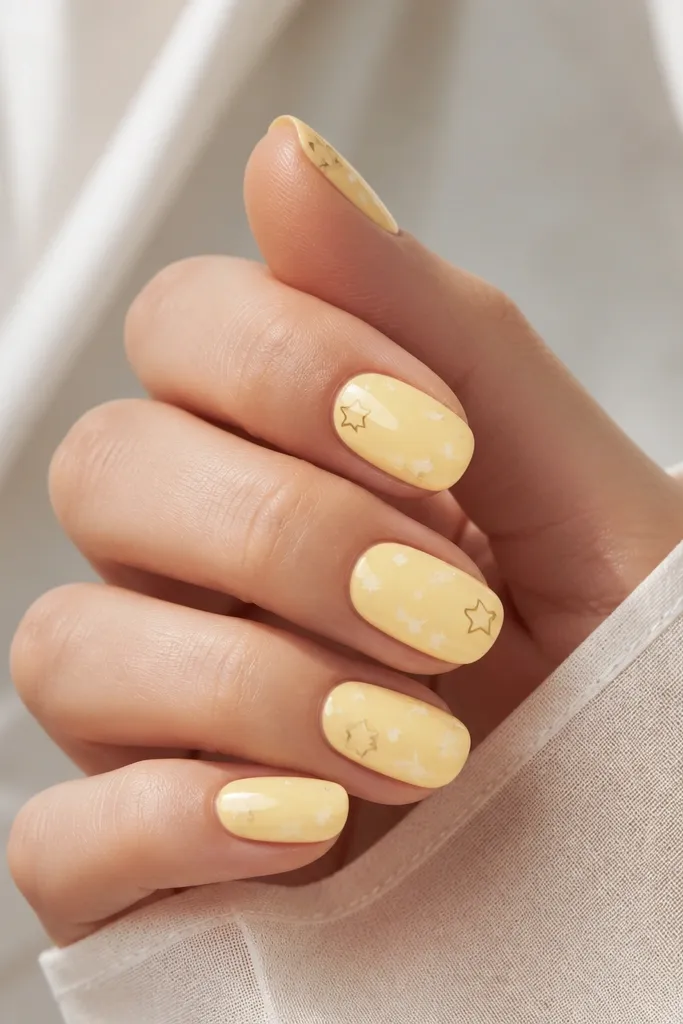
Micro-stars make light yellow feel playful but still neat. The white shapes pop like highlights, and tiny gold outlines keep it from looking like a kid's sticker. This design reads "cute" without turning into chunky nail art.
Use a smooth pastel yellow base. Add tiny star stamps or hand-draw stars with a dot-to-star technique: make five small dots and connect lightly. Place most stars in the upper half and a couple near the tips for balance.
Editor's noteIf you can't draw stars consistently, use a star stencil sticker and then paint over it.
Watch outDon't use large stars - they cover the yellow and make it look crowded.
10. One-Coat Light Yellow Jelly with No Base Coverage
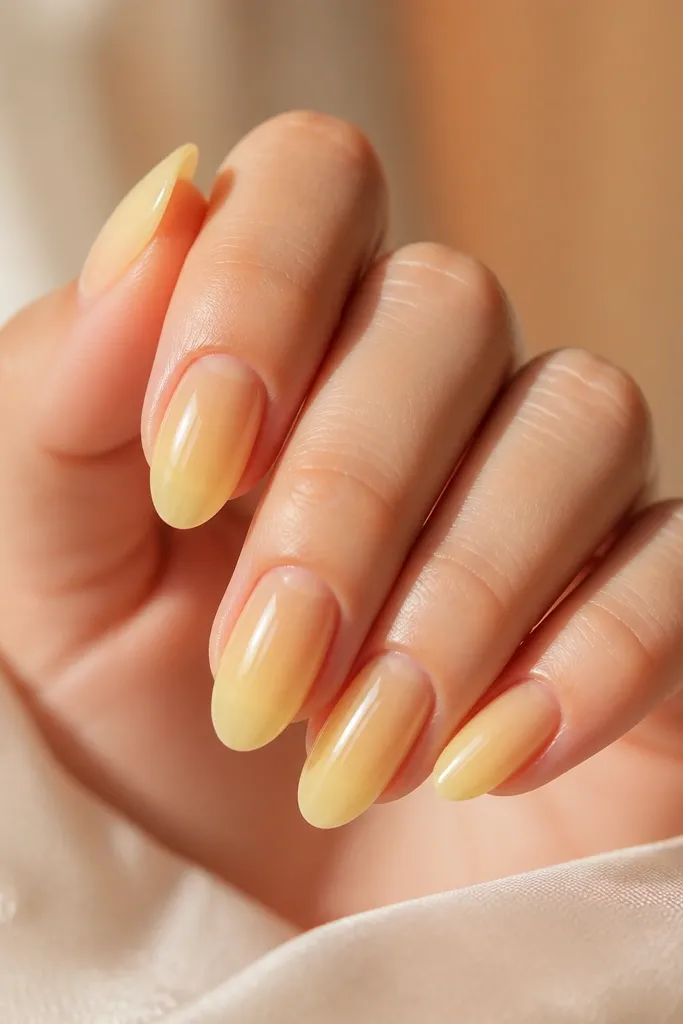
A jelly finish is the easiest way to make light yellow look glossy and head-turning without complicated art. The transparency lets your nail tone show through, which makes the yellow look airy and clean. This works great if your nails are already even and you want a "my nails but prettier" vibe.
Start with a clean, smooth nail surface and a thin base coat. Apply one coat of light yellow jelly and cure. Add a second jelly coat only where you want more saturation, usually the center and tips.
Editor's noteIf your jelly looks streaky, stir it gently and wipe the brush on the neck before applying.
Watch outSkip thick layers - thick jelly shrinks and shows ridges.
11. Yellow Outline Nails with Clear Negative Space
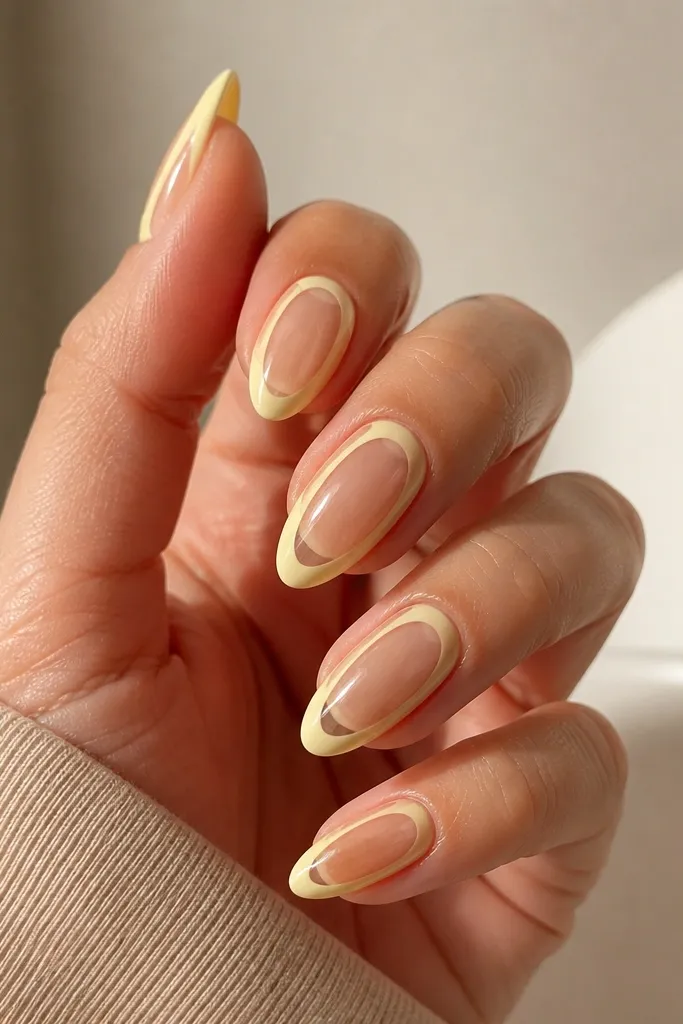
Negative space makes light yellow look crisp and expensive. The thin outline is what turns heads because it frames your nail like a graphic design print. This one looks especially good on short almond or squoval nails.
Leave the nail clear or use a super sheer nude base. Paint a thin yellow line along the sidewalls and tip edge, then add a small inner outline near the tip. Keep lines consistent thickness - about the width of a fine gel brush hair.
Editor's noteUse a striping brush with a point, not a wide liner, or your lines will look fat.
Watch outAvoid filling the whole nail with yellow - the outline loses its effect.
12. Light Yellow Aura Nails around the Cuticle
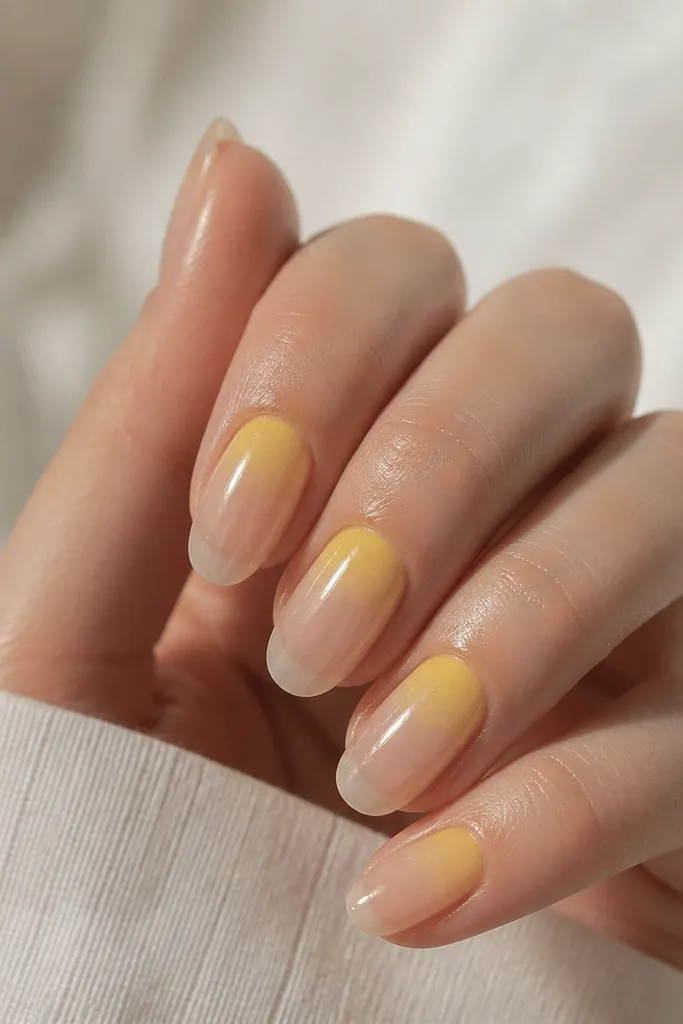
Aura nails turn heads because they look like a soft filter over your hands. The yellow sits where skin meets nail, so it brightens your whole hand without needing full coverage. I like this with warm pastel yellow because it flatters every skin tone I've tried it on.
Use a sheer base. Sponge light yellow in a small circle around the cuticle, then blend the edge with a second sponge lightly loaded with base color. Leave a clean gap so the aura doesn't creep into the sidewalls.
Editor's noteKeep the aura small - a 2-3 mm radius looks intentional; bigger looks messy.
Watch outDon't over-sponge - too much product makes the cuticle area look dirty.
13. Glossy Yellow Chrome with Mirror Tip
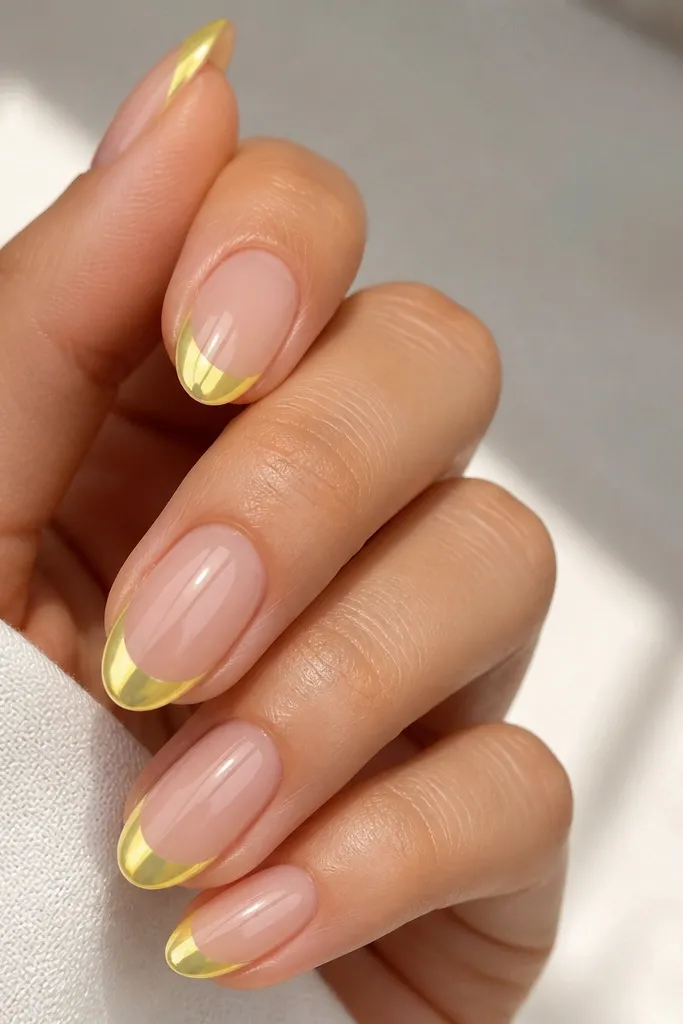
Chrome makes light yellow turn heads instantly because it reflects like jewelry. Keeping it only on the tip makes it look sharp, not costume-y. The mirror shine also hides tiny imperfections in the base nail.
Paint nude base, then apply a chrome-ready tack layer on the tips only. Rub yellow chrome powder in short strokes, then buff gently. Seal with a chrome-friendly top coat so the shine stays reflective.
Editor's noteBuff with a soft foam pad, not a nail file - you want clean reflectivity.
Watch outAvoid regular top coat over chrome without compatibility - it kills the mirror effect.
14. Half-Tip Butter Yellow with Clear Center
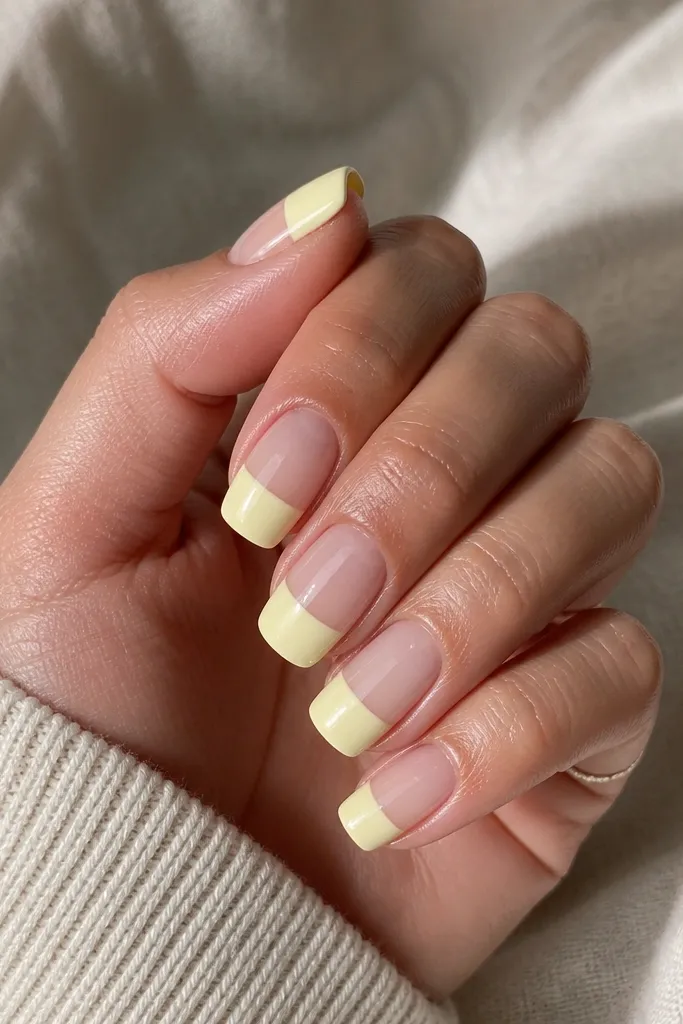
This is a modern take on a French without the curve. The straight band makes the design look graphic and clean, and the clear center keeps it airy. Butter yellow works best because it looks smooth and creamy against the transparent base.
Apply a sheer base. Use tape to mask a straight line across the nail at about 60-70% down from the tip end, then fill the masked area with butter yellow. Cure, remove tape, and top coat twice for a perfect seal.
Editor's noteUse a strip of tape, not a bigger mask - smaller tape gives you a sharper band.
Watch outAvoid uneven band placement - one nail higher makes the set look sloppy.
15. Light Yellow Floral Sticker with White Liner Frame
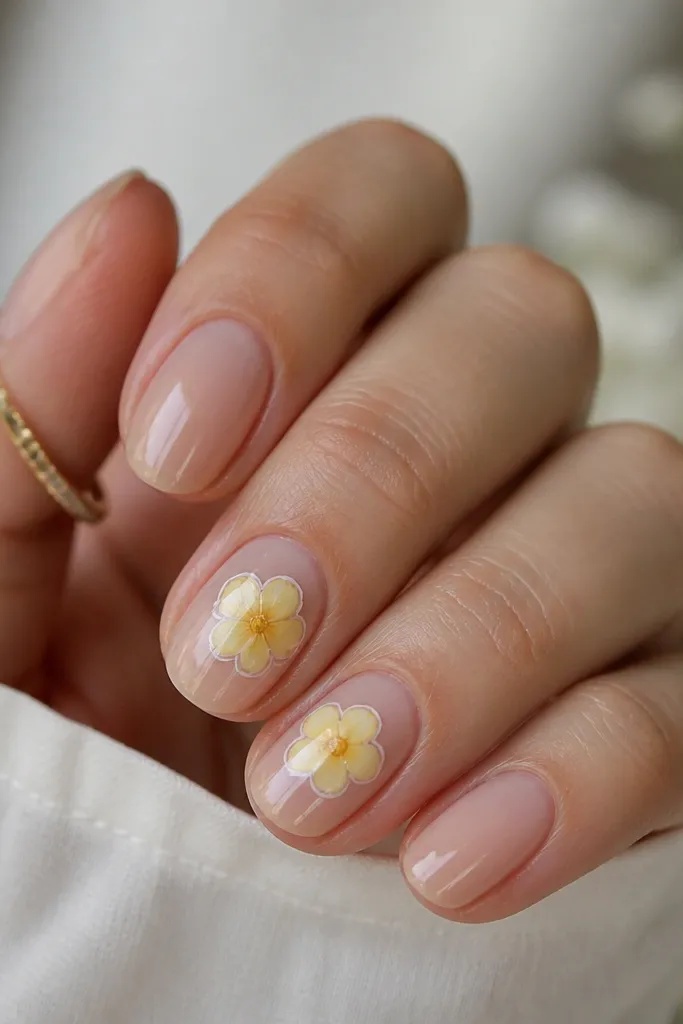
Floral stickers look best when you give them a frame. The white liner makes the sticker blend into the nail instead of sitting on top like a sticker. Light yellow flowers also match gold rings and look fresh with spring outfits.
Apply nude base and cure. Place the floral decal where you want it, then paint a thin white border around it with a liner brush. Seal with top coat in thin layers so the decal edges don't lift.
Editor's notePress the decal down with a rubber-tipped tool so bubbles don't show.
Watch outAvoid thick top coat in one pass - it creates bumps over decal edges.
16. Pastel Yellow Ombré with White Fade at the Tips
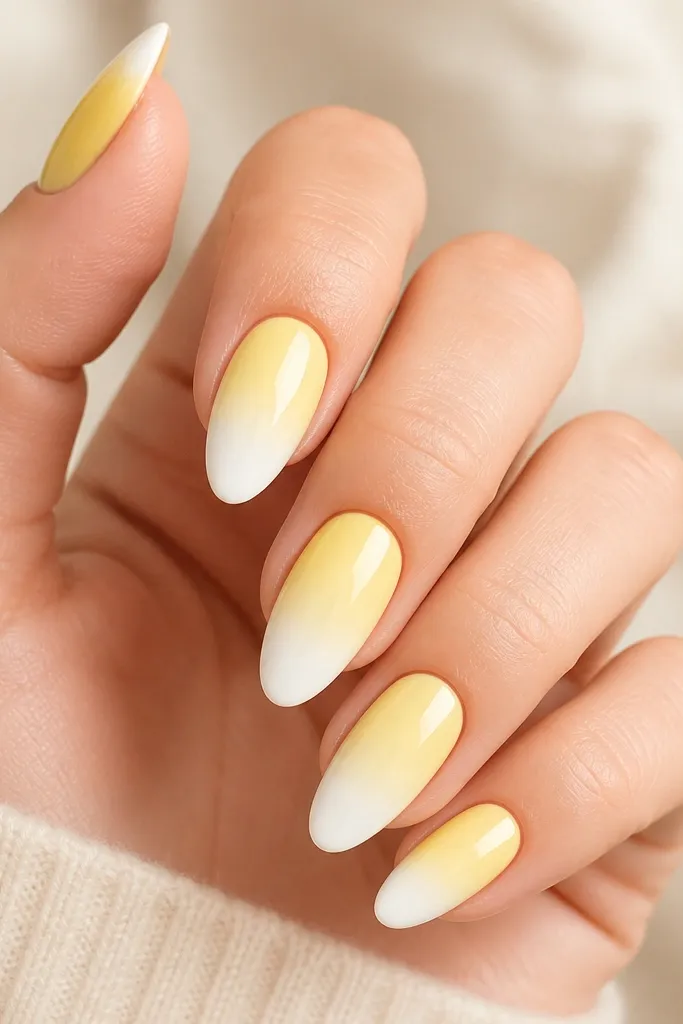
This is bright without being harsh. The white tip softens the yellow so it doesn't overpower your hand, and the ombré makes nails look longer. It's a great option when you want light yellow nails that turn heads but you still like a gentle look.
Use a sheer base, then sponge pastel yellow starting around mid-nail. For the final fade, sponge white only at the tip edge and blend upward with light pressure. Cure after each layer and finish with a glossy top coat.
Editor's noteBlend with a clean sponge edge - it prevents harsh stripes.
Watch outDon't use pure white too close to the cuticle - it makes the yellow look like it's fading unevenly.
17. Yellow and Nude Checkerboard Accent
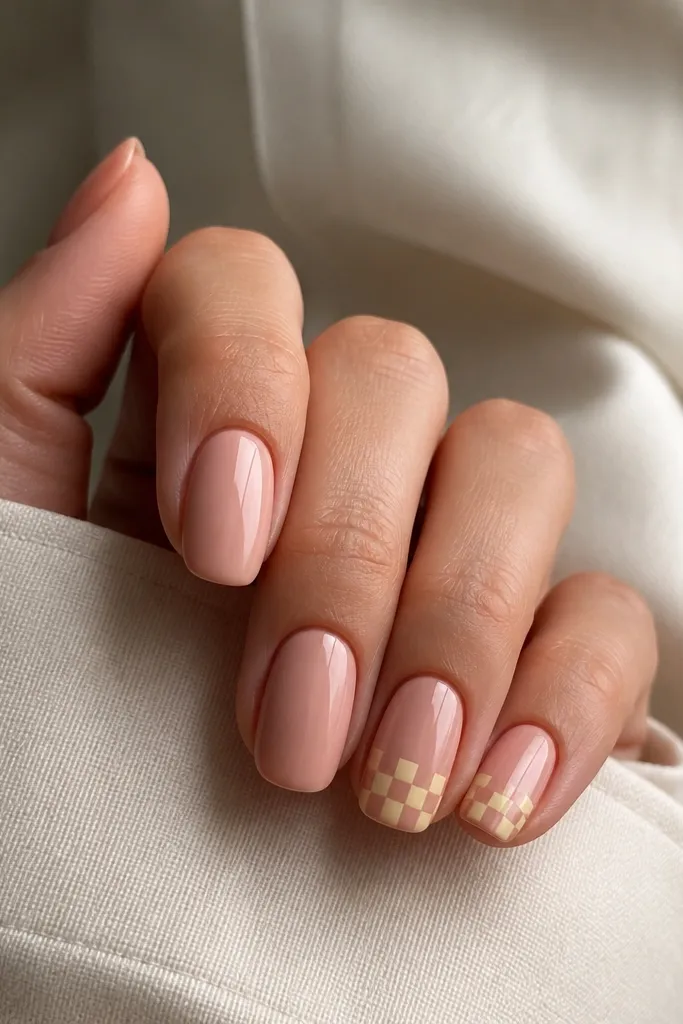
Checkerboard looks fun because it's controlled, not random. Keeping it small and near the tips makes it look designed, and light yellow squares add that pop. I like this when I want something that feels playful but still works with work outfits.
Paint nude base on all nails. On the accent nails, place tape to create tiny grid sections near the tip, fill alternating squares with light yellow, and remove tape carefully. Use a fine brush to clean edges before top coat.
Editor's noteMake your squares consistent by counting nail-width marks - I do 3 to 4 squares across.
Watch outAvoid big checkerboards - they crowd the nail and look messy on short lengths.
18. Light Yellow Gloss with Tiny Rhinestone Corner
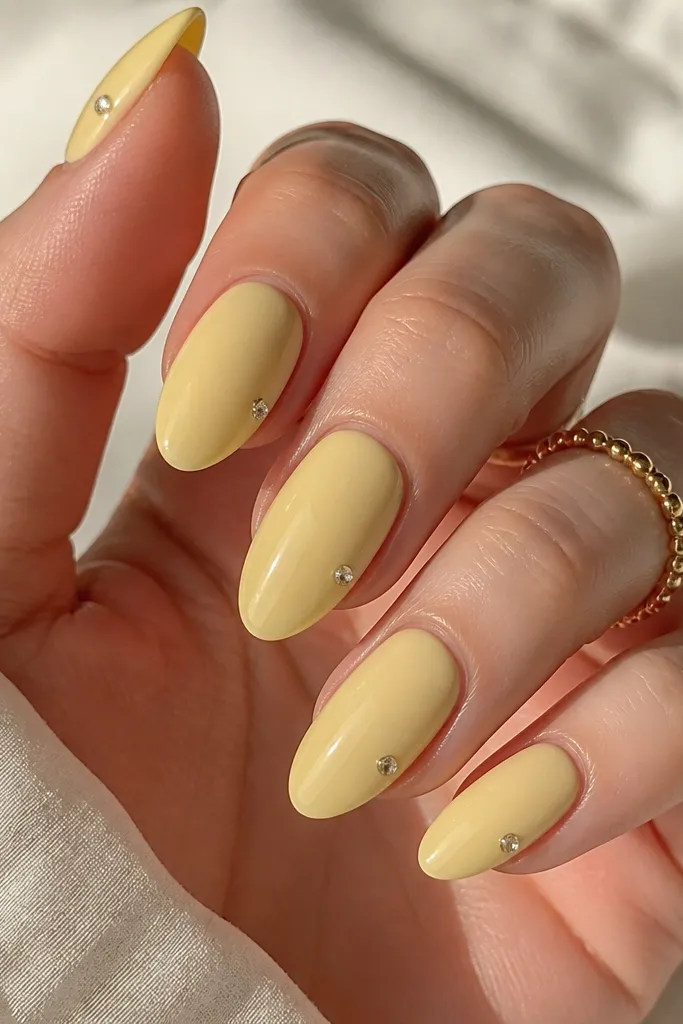
One rhinestone is enough to turn heads because it catches sunlight instantly. Placing it at the outer corner gives a flattering diagonal sparkle instead of a centered "spot." The jelly gloss makes the yellow look smooth and candy-like.
Apply solid light yellow jelly in two thin coats. Cure fully, then add a small rhinestone with gel adhesive at the outer tip corner (about 1-2 mm from the sidewall). Cure again and seal with a thin top coat around the stone.
Editor's noteIf the stone rocks, add a micro-dot of adhesive under it and cure again.
Watch outAvoid placing stones too close to the cuticle - it lifts faster.
19. Yellow Foil Flakes with Clear Negative Half-Nail
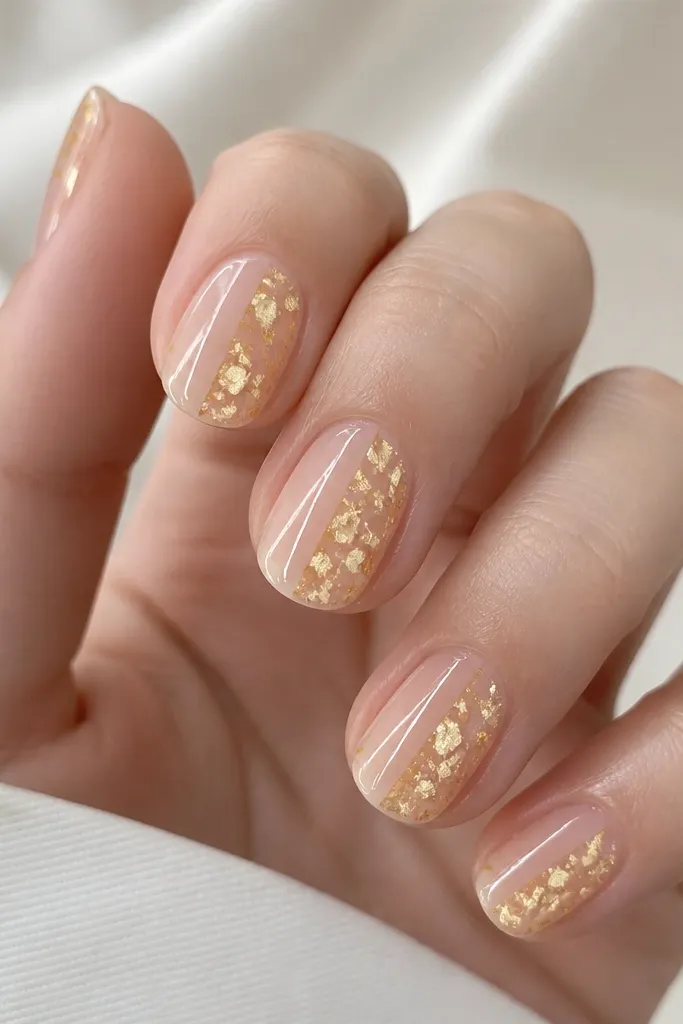
Foil flakes look like sunlight caught in your nail. The clear half keeps the design from feeling heavy, and the vertical split makes fingers look longer. Light yellow foil is softer than gold foil, so it looks fresh, not overly warm.
Apply a sheer base or keep one side clear. Use tape to create a vertical line, then apply a tack layer on the yellow side and press light yellow foil flakes in small pieces. Seal carefully with top coat so flakes don't snag.
Editor's notePress foil with a small foam applicator so it picks up evenly.
Watch outDon't rub hard over foil - it smears and dulls the shine.
20. Minimal Yellow Dot Trail on Nude
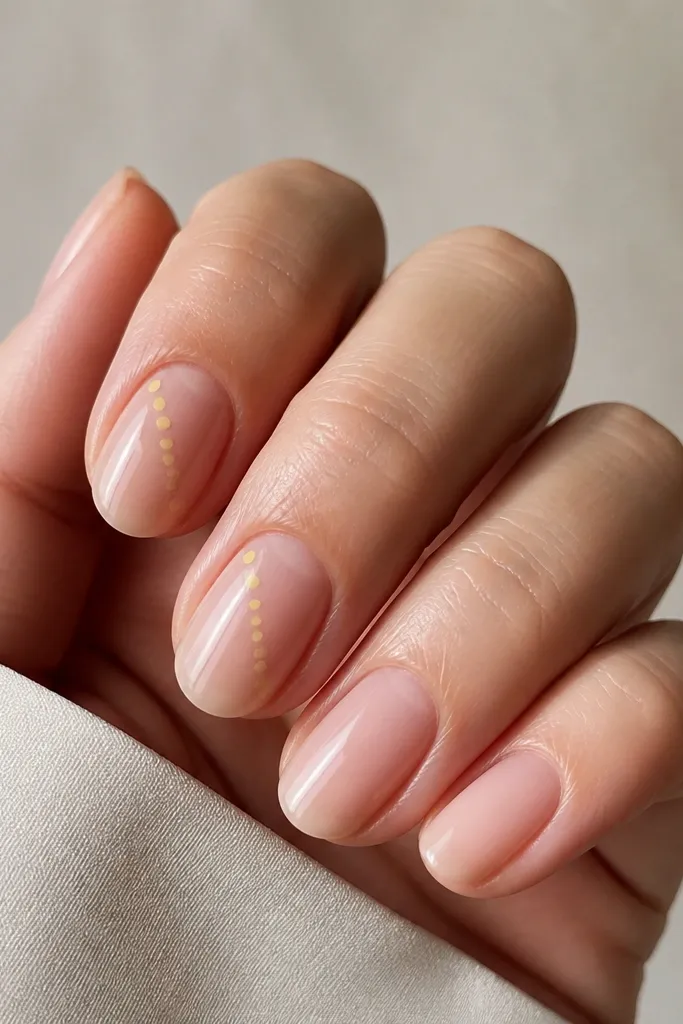
This is subtle, but it turns heads because the dots look like a moving highlight. Light yellow against nude reads clean and modern, especially when the dots are evenly spaced. It's my favorite design for people who want yellow but hate full-color nails.
Paint nude base and cure. Use a dotting tool to place 3-5 dots in a diagonal line, leaving space between each dot. Add a tiny micro-dot in the last spot for a "trail" effect, then top coat over everything.
Editor's noteUse the same dot size for the first three dots, then shrink the last one slightly.
Watch outAvoid random dot placement - uneven spacing makes it look accidental.
21. Light Yellow Candy Stripes with Thin White Lines
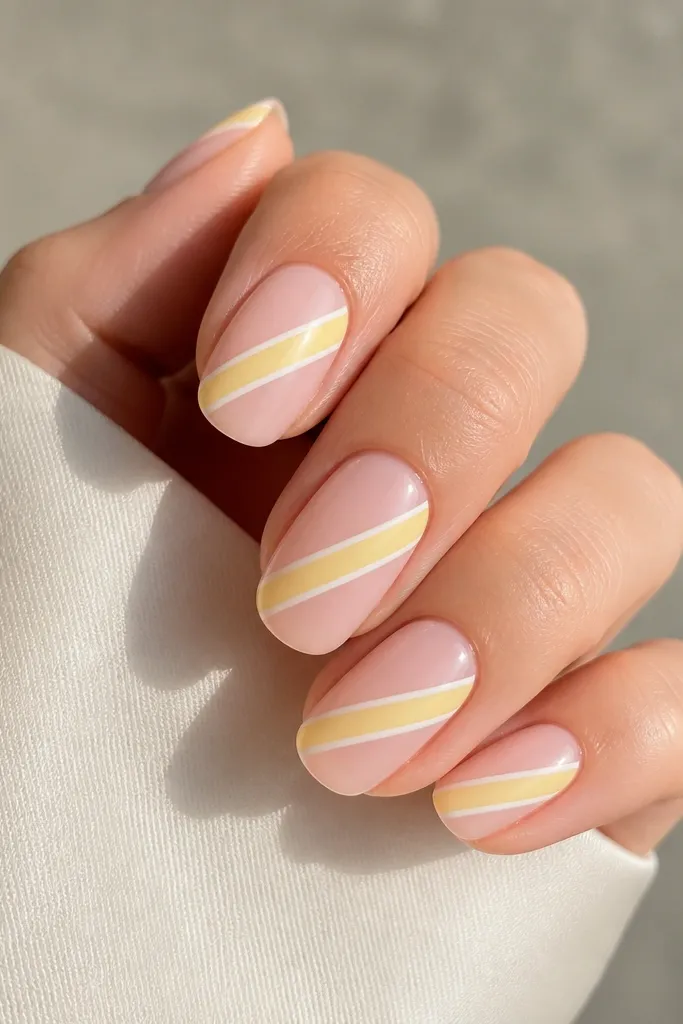
Candy stripes look like a sweet wrapper, and the white separators keep them from blending into a single band. Light yellow stripes brighten your hand without needing glitter. This design stands out because the lines are narrow and crisp.
Start with a nude base. Use striping tape to create two diagonal bands, paint light yellow, cure, then remove tape. Add thin white lines with a liner brush between the yellow bands, then top coat twice for smooth edges.
Editor's noteIf tape pulls at the base, wait until the tack layer is fully cured before removing.
Watch outAvoid thick stripes - wide bands make the nail look bulky.
22. Yellow Chrome Half-Moon with Clear Base
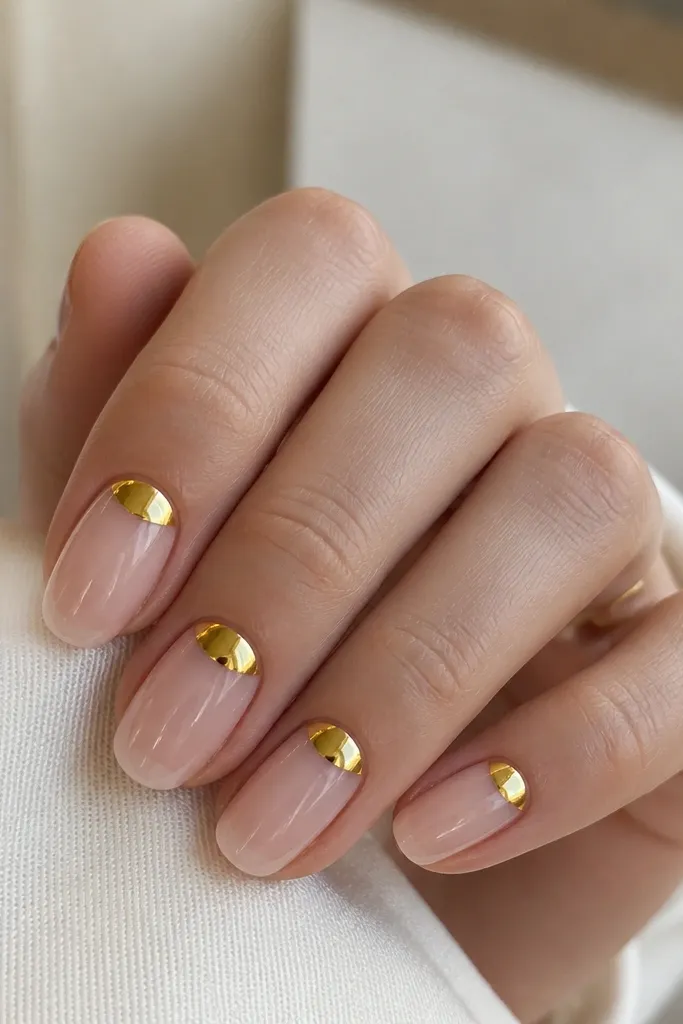
This is the fastest way to make light yellow look like jewelry. The half-moon placement catches light every time your hands move, and the clear base keeps it airy. Yellow chrome is sharper than matte pastel, so it reads "turn heads" even in low light.
Use a clear base and cure. Apply chrome tack layer only in the half-moon area, then rub yellow chrome powder on. Brush off excess and seal with a chrome-safe top coat. Keep the half-moon height around 2 mm so it stays delicate.
Editor's noteWarm chrome powder between your fingers for 5 seconds to improve coverage.
Watch outAvoid covering the whole nail in chrome - it gets heavy and looks costume-y fast.
23. Pastel Yellow Marble Accent with One Solid Nail
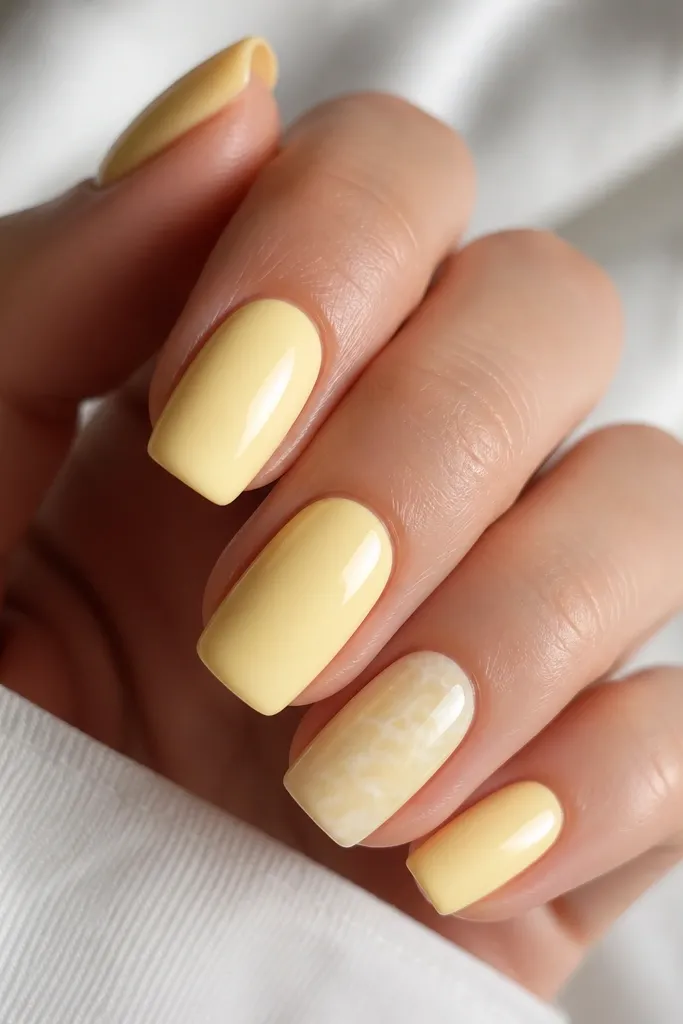
Mixing one marble accent with solid yellow makes the set look styled, not random. The marble adds depth and gives your eyes a focal point. Solid light yellow on the rest keeps the overall look bright and photo-friendly.
Paint four nails with pastel yellow in two thin coats. On one accent nail, do a marble using pastel yellow plus milky white streaks, then lightly blur the veins with a clean brush tip. Finish with glossy top coat on all nails.
Editor's noteMatch the marble veins to the nail's natural curve - it makes the accent look intentional.
Watch outAvoid marble on every nail - it overwhelms the light yellow and looks messy.
24. Light Yellow Polka Fade from Tip to Cuticle
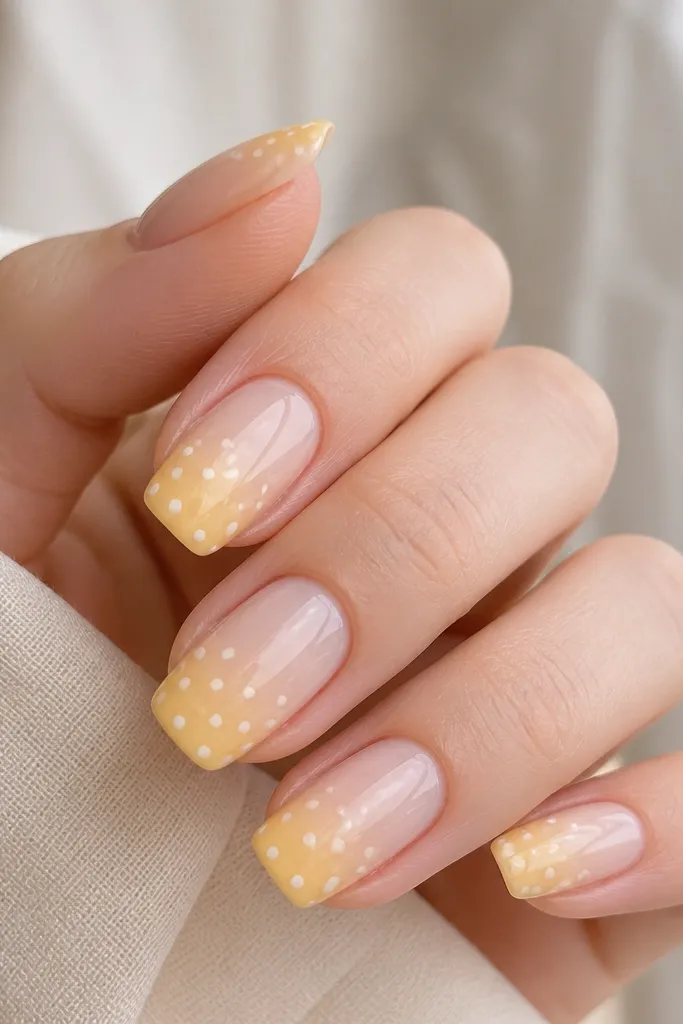
Polka fade looks like a pattern that's dissolving into light. It turns heads because the dots create texture and the fade keeps it clean. White dots give crisp contrast, and the tip-heavy placement keeps the nail from looking crowded.
Apply a sheer base, then sponge light yellow starting at mid-nail and building toward the tips. While it's tacky (or after the last cured layer if using decals), place white dots only on the yellow zone, denser near the tips and sparse toward mid-nail. Seal with glossy top coat carefully to avoid smearing dots.
Editor's noteUse a dotting tool with a consistent tip size so the dots look uniform at a glance.
Watch outDon't put dots all the way to the cuticle - it makes the nail look busy and less flattering.