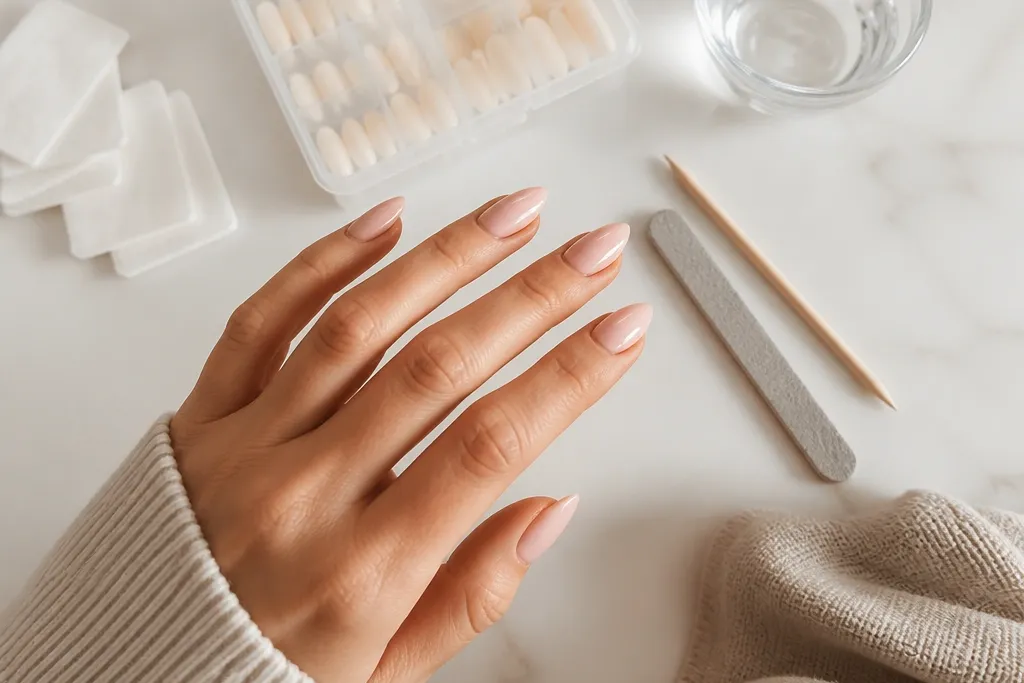
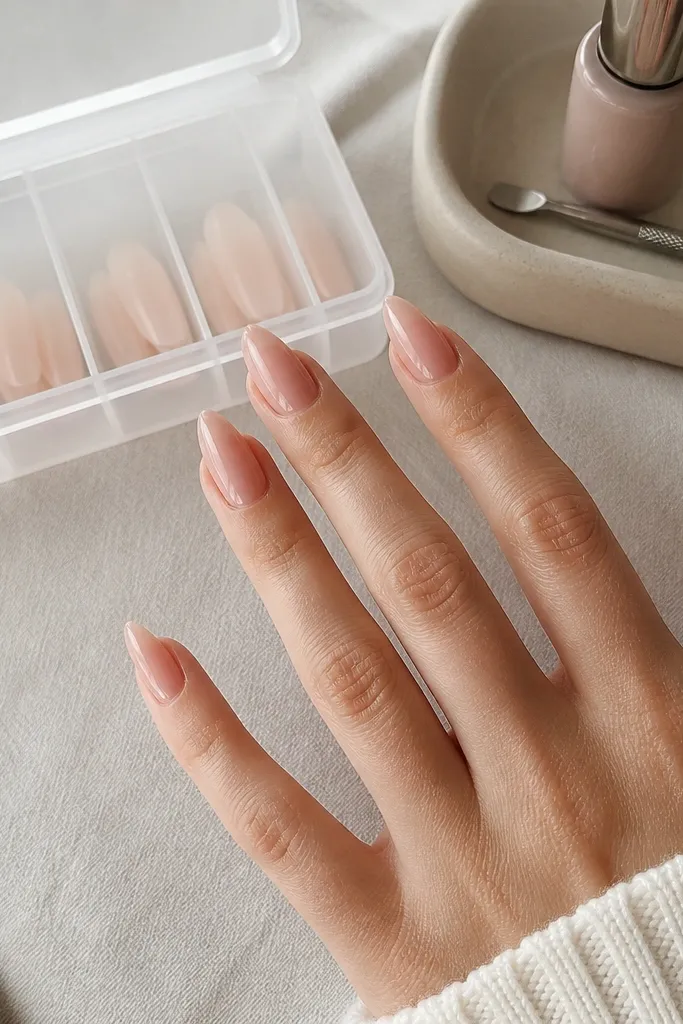
1. Milk-bath nude with black micro french and a clear storage case label
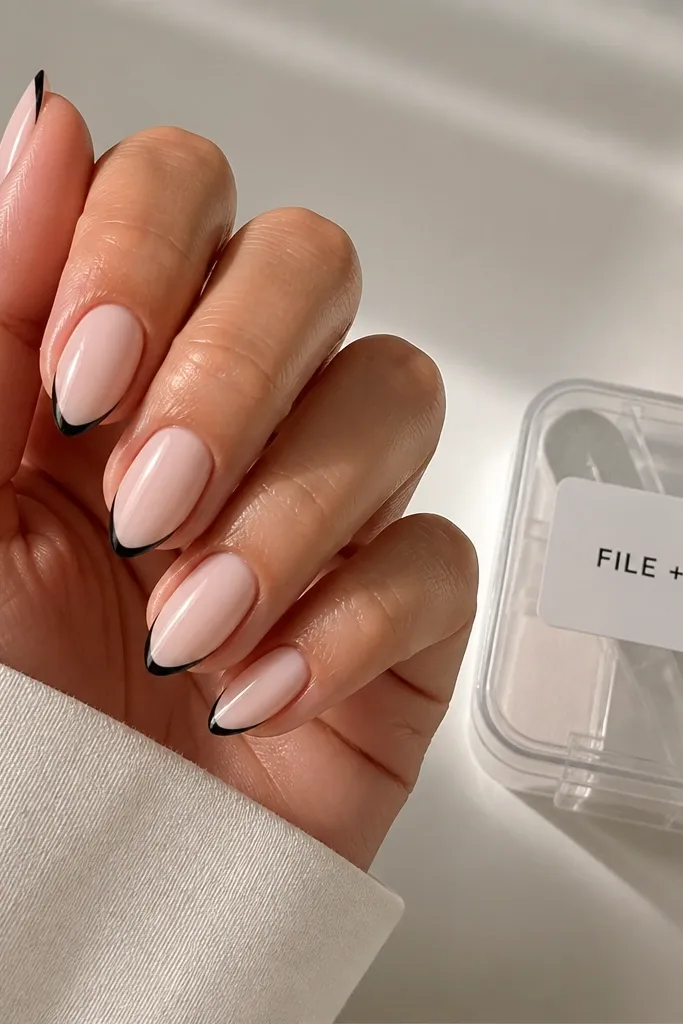
Start with a milk-bath nude that's semi-translucent, not fully opaque. Then add a black micro French that hugs the edge - thin enough that it doesn't widen the nail. The contrast reads sharp on short stiletto because the line defines the shape without taking over the whole nail. For storage-friendly day-to-day, the glossy seal helps the nail slide past fabric and case edges without roughening.
Use a nude builder gel or soak-off gel in a milky base, then cap the tip lightly with a clear layer. Paint the micro French with a striping brush (around 0.5-0.7 mm tip width) and keep the line centered. Seal with a no-wipe top coat and cure until hard, then gently buff the side walls smooth.
Editor's noteLabel your nail tools with a tiny sticker strip so you never touch your gel surface while searching for the file.
Watch outDon't make the French line thick - it turns short stiletto into a stubby rectangle.
2. Chocolate swirl gradient with a pocket-sized file compartment
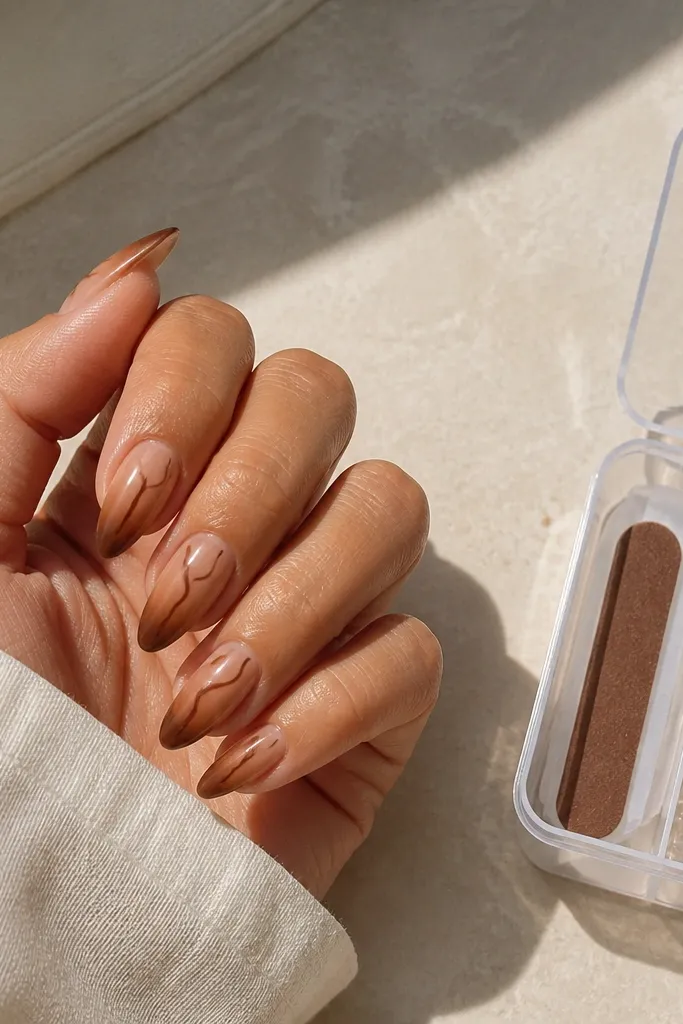
This design looks like a latte cup - warm, cozy, and clean. The gradient gives depth without heavy glitter, and the thin swirls add movement. Short stiletto loves gradients because the fade naturally guides the eye toward the tip. It also stays storage-friendly because there's nothing bulky to snag.
Create a gradient from medium cocoa at the cuticle to caramel nude at the tip using a sponge and then lightly blend. Add 2-3 thin swirl lines per nail using a striping brush and a darker brown gel. Finish with a glossy top coat and make sure the swirls are fully covered by the top coat for a smooth feel.
Editor's noteKeep your file in a flat slot so it doesn't press against your nail art when you close the case.
Watch outDon't leave swirl gel raised - it will catch on your storage lid.
3. Glazed peach chrome with storage-ready cuticle oil pen
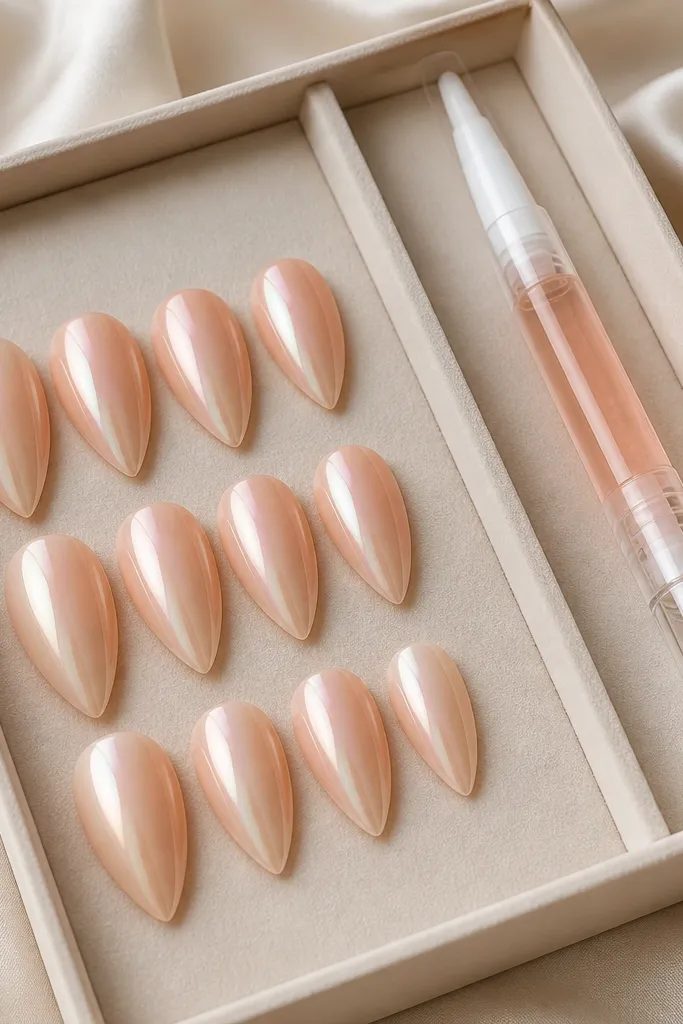
Peach chrome on a short stiletto reads glossy and fresh without needing heavy art. The "glazed" effect is smooth and reflective, which helps the nail look polished even after daily friction. Chrome also hides tiny surface imperfections better than matte. Pair it with a cuticle oil pen kept in storage so you can rehydrate without carrying a greasy bottle.
Apply a peach gel base, cure, then buff lightly to remove bubbles. Use a peach-toned chrome powder (or chrome gel) and wipe off per the brand method, then seal with a high-shine top coat. Store the oil pen in its own compartment so cap residue doesn't get on your nails.
Editor's noteReapply oil to the cuticles only, then wipe the oil pen tip before closing the storage case.
Watch outDon't skip top coat - chrome left unsealed scratches fast against zippers and bag hardware.
4. Black velvet matte with one glossy crystal line
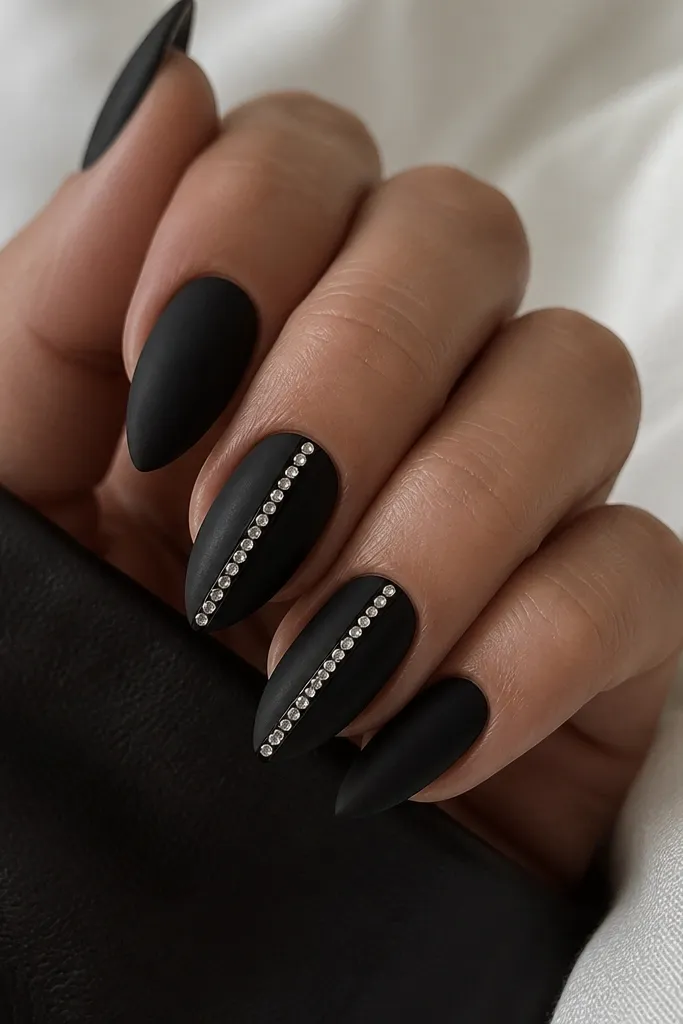
Matte black makes short stiletto look sleek and intentional. The trick is the one glossy crystal line - it catches light and gives you a focal point without covering the whole nail. Keeping crystals only on a center line keeps it storage-friendly because the surface stays flatter than full rhinestone coverage. It also photographs well because the matte absorbs glare.
Build a black base and cure. Apply matte top coat to all nails, then on accent nails add a center strip of glossy gel and place 5-7 micro crystals per nail. Cure again and seal the crystals with a thin glossy layer so they don't snag.
Editor's noteUse a wax pencil or crystal picker to place stones, then press lightly with a silicone tool.
Watch outDon't put matte top coat over crystals - it dulls the shine and makes the line look patchy.
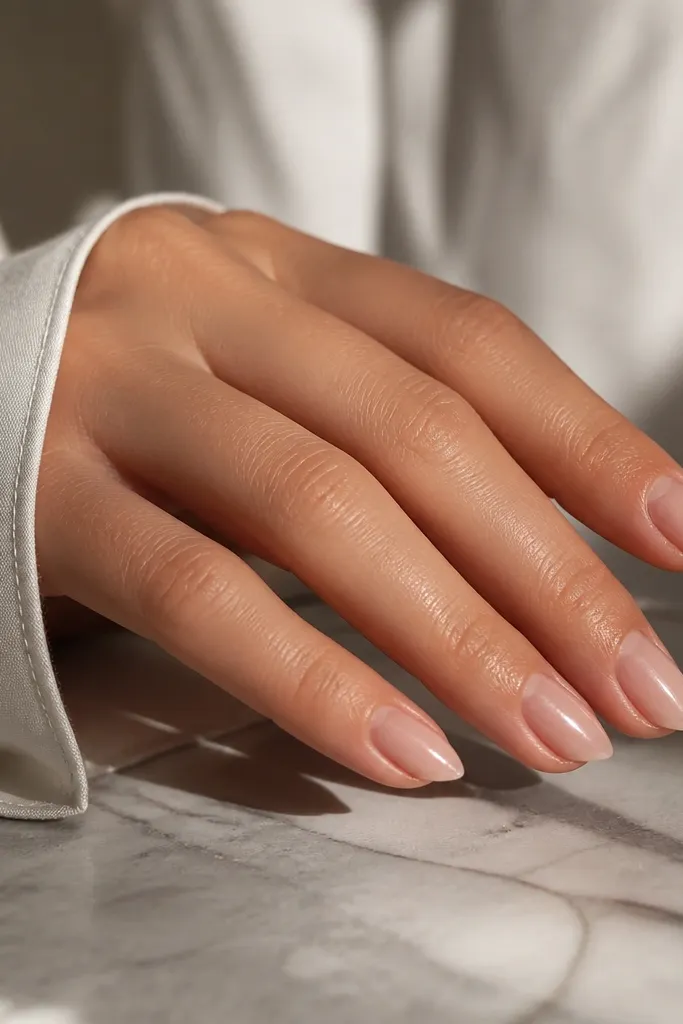
5. Clear nude base with tiny silver foil flakes at the tip
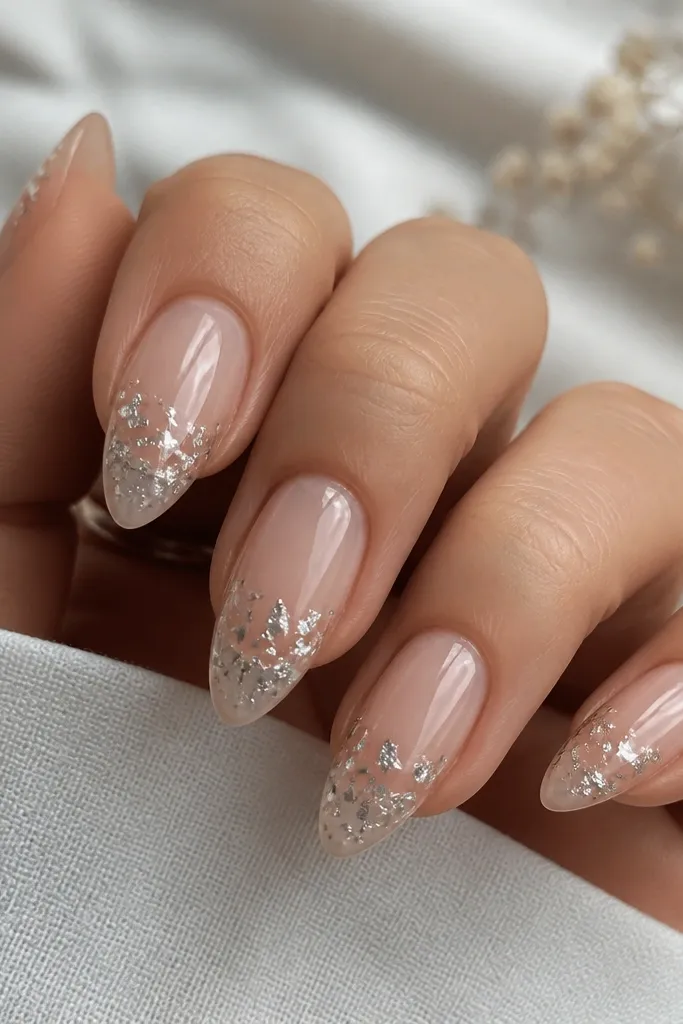
This is the "clean but interesting" look. The clear nude base makes your nails look longer and neat, and the foil placement near the tip gives sparkle without bulk. Foil flakes are thin, so they're storage-friendly as long as you seal them smoothly. On short stiletto, tip-focused shimmer keeps the nail shape crisp.
Use a clear nude builder for a translucent effect, then place foil flakes with gel tack in the last 2-3 mm of the nail. Press gently so flakes lie flat. Cap with clear gel and top coat, paying attention to the free edge so it doesn't lift.
Editor's noteTap foil in place with a soft brush - don't smear it across the whole nail.
Watch outDon't overload flakes - too many layers create a ridge that catches on your case lid.
6. Rose quartz marble with a storage-labeled "touch-up" tray
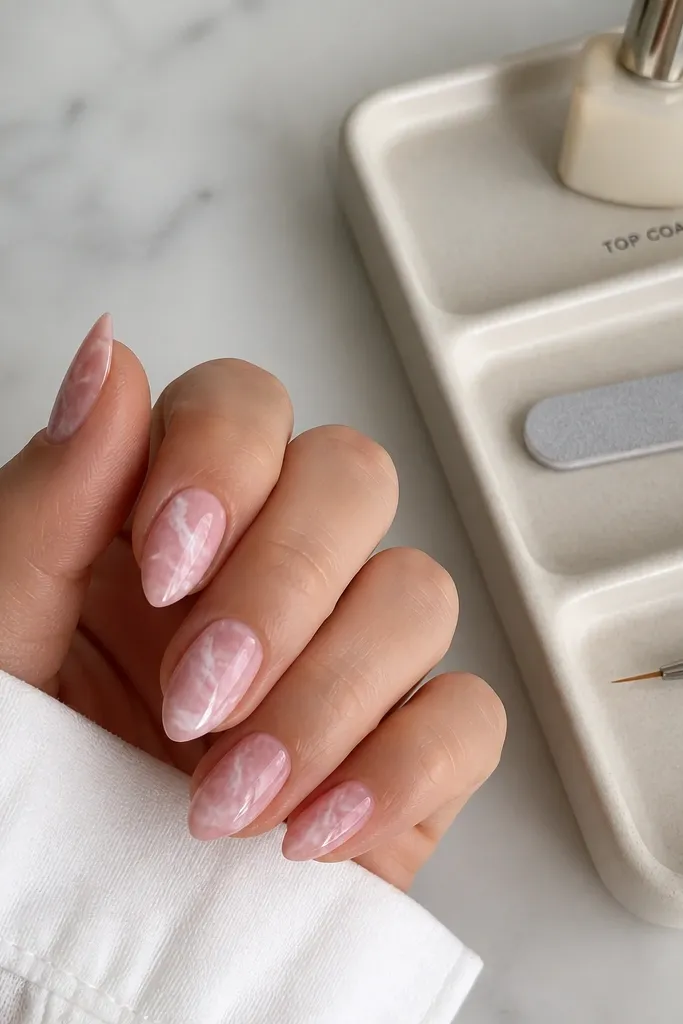
Rose quartz marble looks soft and expensive on short stiletto because the colors blend into the nail instead of sitting on top. Veins placed diagonally make the nail feel longer. It's storage-friendly because marble can be done mostly with thin lines and layered gel, not thick 3D. Keep your touch-up tools in a tray so you can fix chips fast without opening a messy kit.
Start with a milky pink base. Add thin white lines, then drag slightly with a marbling tool or a clean toothpick tip to create natural veining. Add a second thin pink glaze for depth, cure, then top coat with a glossy finish.
Editor's noteIf a vein looks too bold, glaze over it with a thin milky pink to soften.
Watch outDon't make thick, raised marble lines - they snag when you pull tools out of storage.
7. Deep burgundy glossy with a single gold foil accent stripe
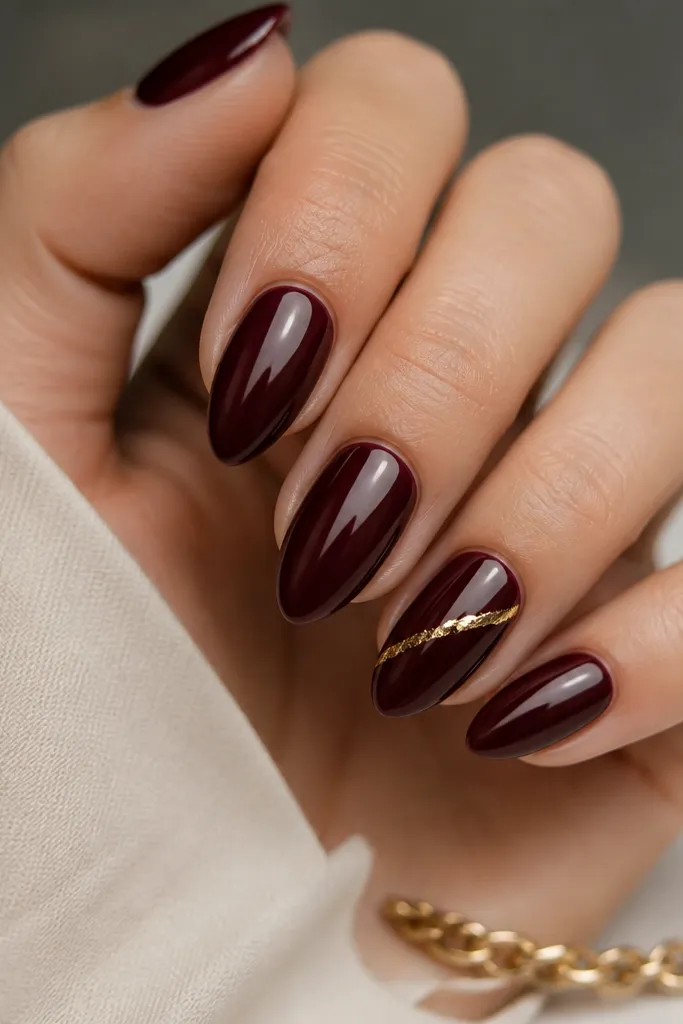
Burgundy looks rich even on short stiletto because the gloss makes the nail look smooth and bright. A single gold foil stripe adds a designer touch without clutter. Foil stripe placement across the center elongates the look. With storage, this style holds up well because you're not relying on heavy rhinestones.
Apply burgundy gel in two thin coats for even color. For the accent, place a strip of tacky gel, then press gold foil so it adheres in a clean band. Seal with top coat and cap the edges so the foil doesn't lift.
Editor's noteUse a lint-free wipe and alcohol to clean the foil area before sealing.
Watch outDon't cover foil with matte top coat - it kills the gold and makes the stripe look gray.
8. White sheer base with tiny black dot "constellation" near the cuticle
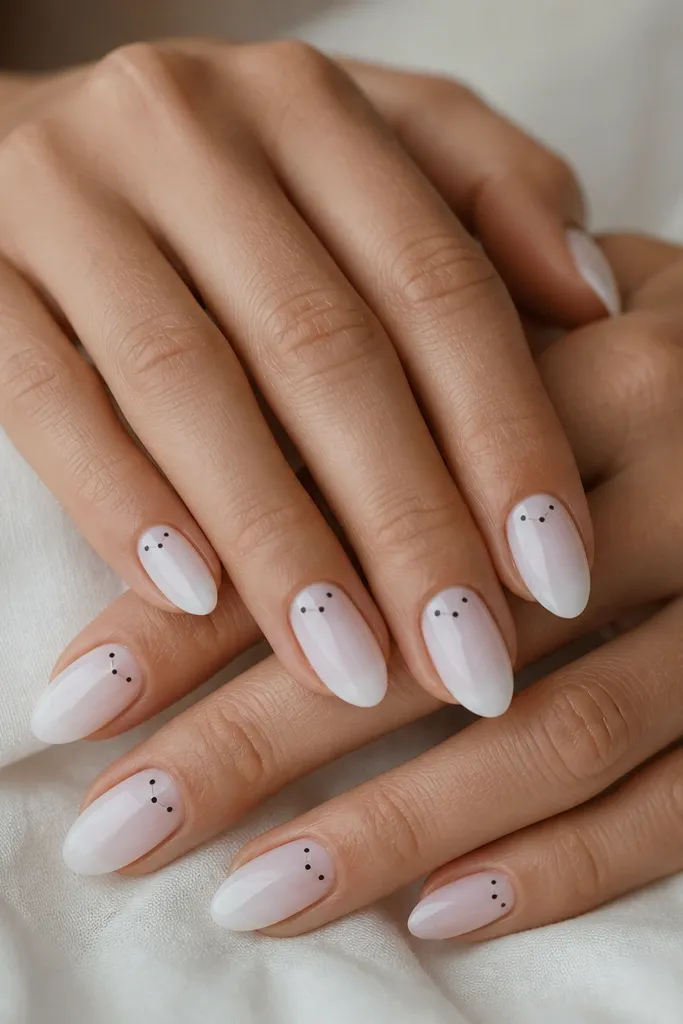
Dots near the cuticle feel fresh and intentional. On short stiletto, the constellation placement keeps attention up top and makes the nail look neat and clean. Use small dots only - big dots look cartoonish at this length. The glossy sheer base also helps with storage friction because the surface stays smooth.
Paint a sheer white builder gel, cure, then use a fine dotting tool to place 3-6 tiny black dots per nail near the cuticle. Keep a little space between each dot so it doesn't look like a stain. Seal with a glossy top coat and cap the free edge.
Editor's noteIf dots smear, clean your dotting tool with alcohol and dry it before every nail.
Watch outDon't pack dots all the way to the tip - it makes short stiletto look crowded.
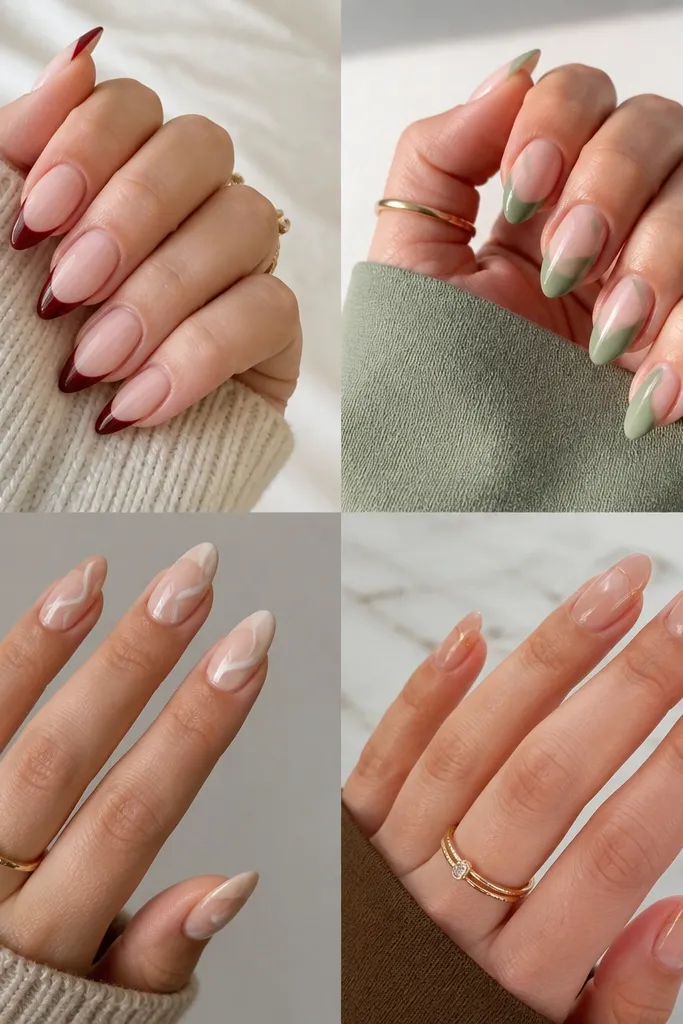
9. Sage green micro French with a clear organizer for nail art pens
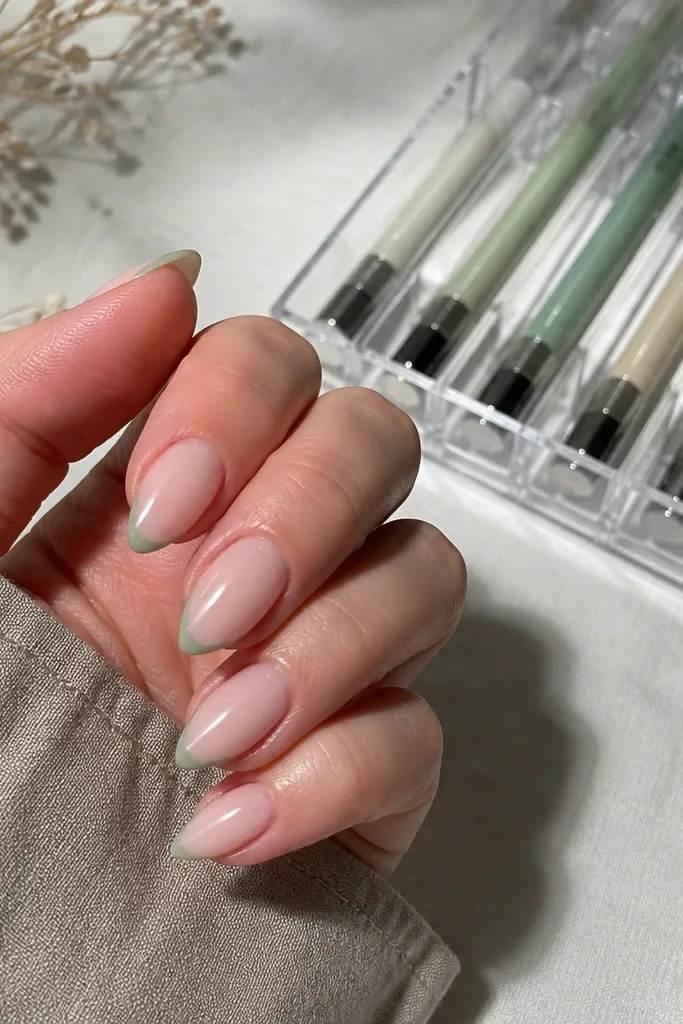
Sage micro French is calm, modern, and it reads clean even when your hands are doing real life. The thin line keeps the short stiletto shape sharp. Pair it with a storage organizer for liner pens so you don't dig around and accidentally smear gel. This combo also looks great in natural light - the sage hue softens your skin tone.
Use a nude base that matches your natural nail undertone. Paint micro French with sage gel using a striping brush, keeping the line under 1 mm. Cure, then apply one smooth top coat layer and check for any bumps along the sidewalls.
Editor's noteStore your liner pens tip-down in a separate slot so gel doesn't dry in the cap.
Watch outDon't make the French line uneven - it's the first thing you notice on short nails.
10. Caramel nude with brown ombré fade and matte top on one accent nail
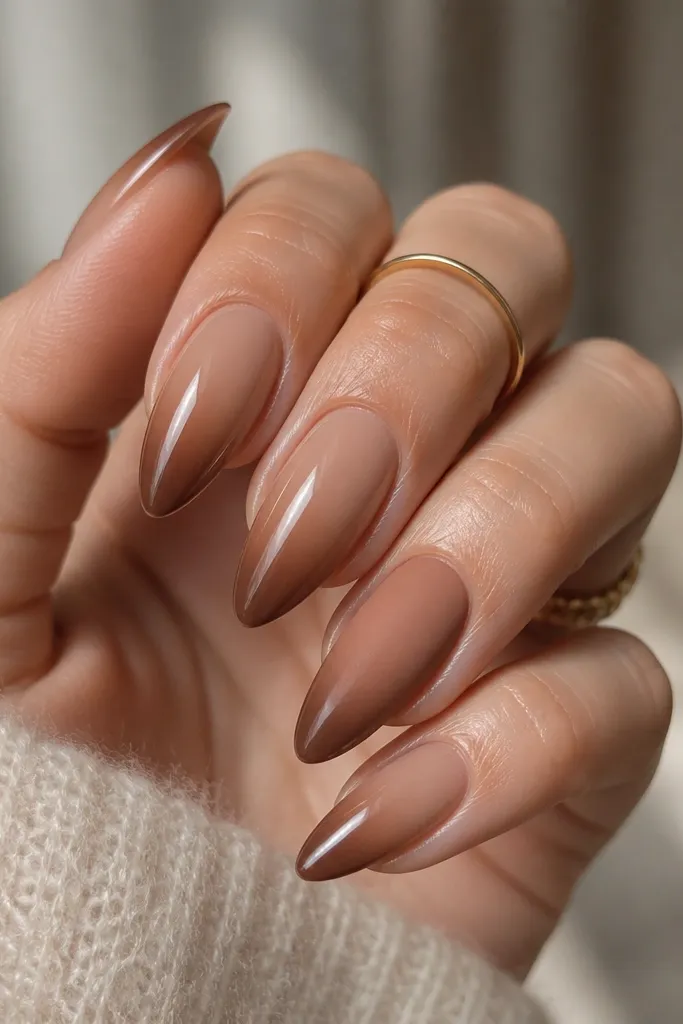
This design gives warmth and depth without needing art tools beyond sponge and brush. The ombré fade keeps the nail looking longer, while the matte accent adds texture contrast. Storage-friendly note: matte surfaces show scuffs faster, so keep the matte accent on a finger that hits fewer surfaces when you grab your case.
Blend brown gel into the tip with a sponge, then soften the transition with a clean brush. For the matte accent, use matte top coat only on that nail after sealing. Keep the fade placement consistent - stop the darkest brown 1-2 mm before the tip so it doesn't look harsh.
Editor's noteSeal the ombré with a thin glossy coat under matte (on the accent) if you want it smoother.
Watch outDon't skip blending - sponge edges look messy on a short stiletto point.
11. Silver drip tips with a nude base and a mini top coat bottle
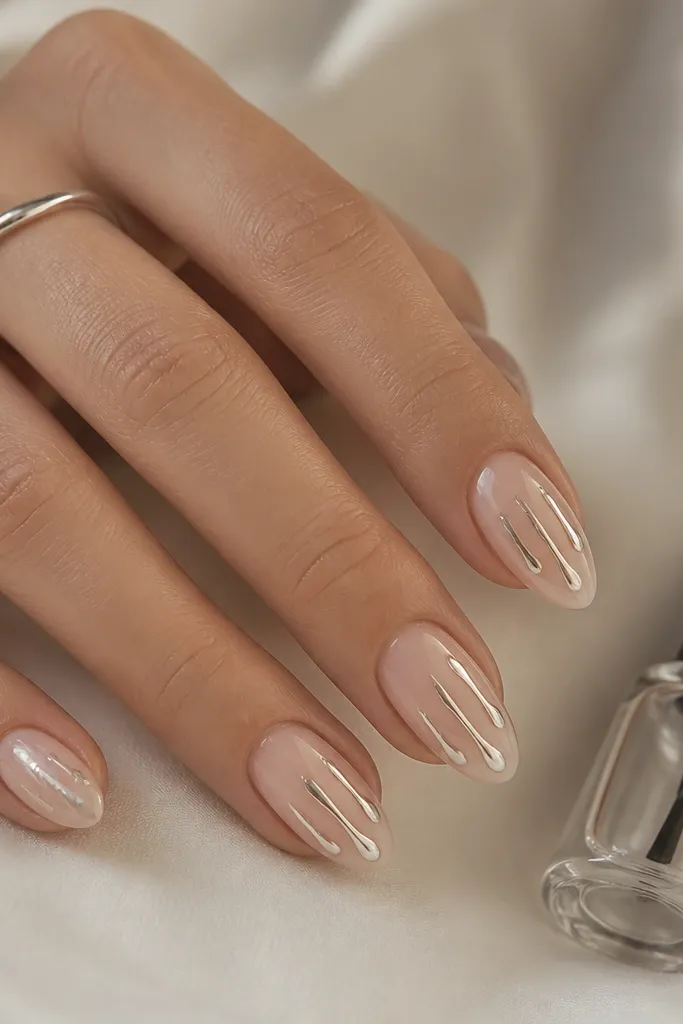
Drip tips look fun, but they can get bulky. Keep the drips thin and short so they sit on the surface without building a ridge. Silver on nude reads like icy jewelry, and it stands out in photos. Storage-friendly setup: keep a mini top coat in your case so you can re-seal any tiny edge lifting.
Apply nude base and cure. Place small amounts of silver gel at the lower half and drag slightly downward with the brush tip to create drips that are 1-2 mm long. Cure, then top coat over the drips to smooth them.
Editor's noteIf a drip looks too thick, drag it with a clean brush before curing.
Watch outDon't place drips right at the tip edge - they chip first.
12. Black and nude checkerboard on two nails, solid on the rest
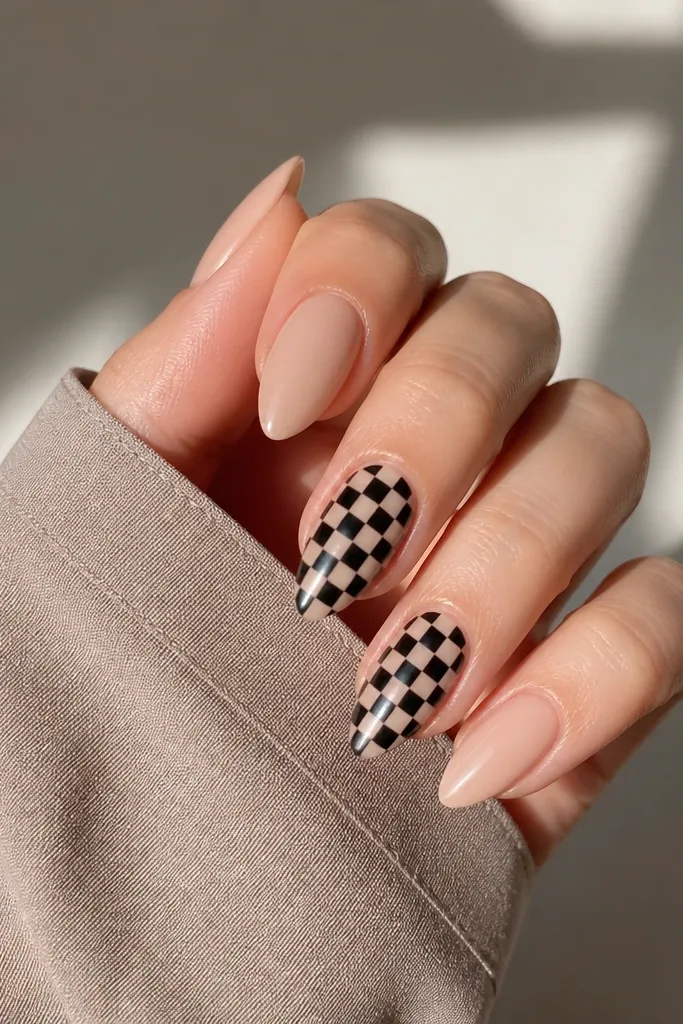
Checkerboard looks graphic and clean when the squares are small. I like it on just two nails because it keeps the set from feeling busy. On short stiletto, the pattern stays believable if you keep the squares consistent and the background glossy. Storage-friendly because the pattern is flat; you're not adding stones.
Paint nude base on all nails. On two accent nails, use a striping brush and black gel to draw a grid and fill squares with a thin coat. Keep the checkerboard confined to the middle third of the nail so the cuticle area stays smooth. Seal with a glossy top coat.
Editor's noteUse painter's tape as a guide for the first straight row, then paint the rest by eye.
Watch outDon't freestyle big squares - they look messy at this length.
13. Lavender shimmer ombré with a storage pocket for lint-free wipes
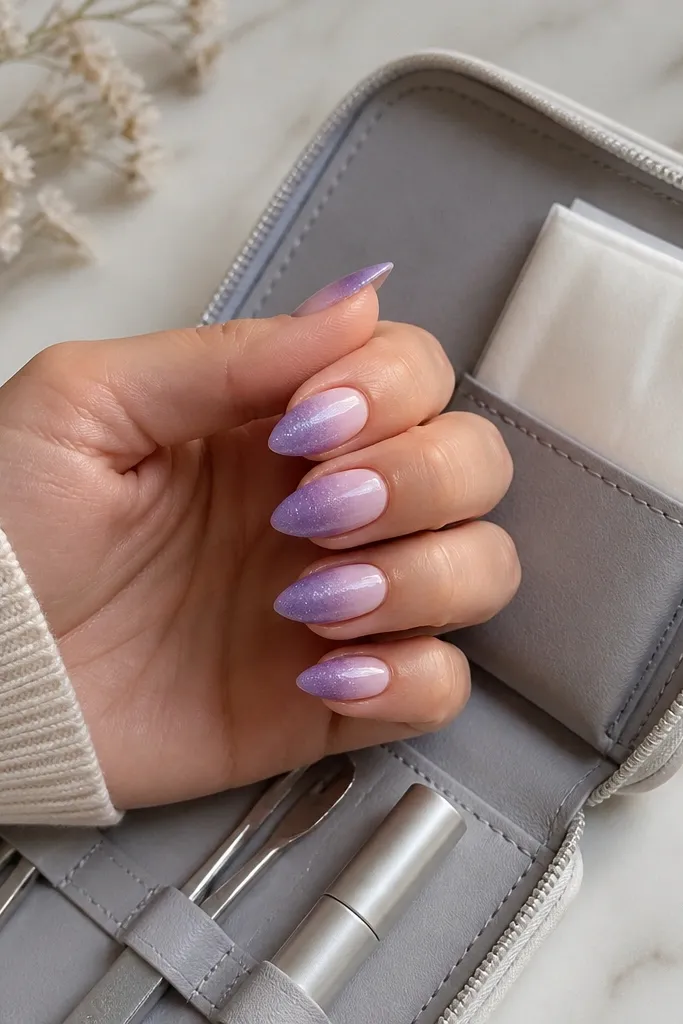
Lavender shimmer ombré is soft enough for everyday and still looks "done" in indoor lighting. The gradient placement keeps the nail flattering, and the shimmer catches movement. I pair this with lint-free wipes in storage because glitter builds residue fast and you'll want clean edges for touch-ups. The result stays smooth when you keep the cuticle line tidy.
Use a pale lavender base, cure. Sponge on a deeper lavender shimmer at the tip, blending upward. Add a thin clear layer to smooth transitions, cure, then top coat. Store wipes in a separate pocket so you don't contaminate your other tools.
Editor's noteWipe the sidewalls with a lint-free wipe before top coat so shimmer doesn't smear.
Watch outDon't rub glitter into the skin - it shows as a rough edge after curing.
14. Nude chrome with a thin black outline around the tip
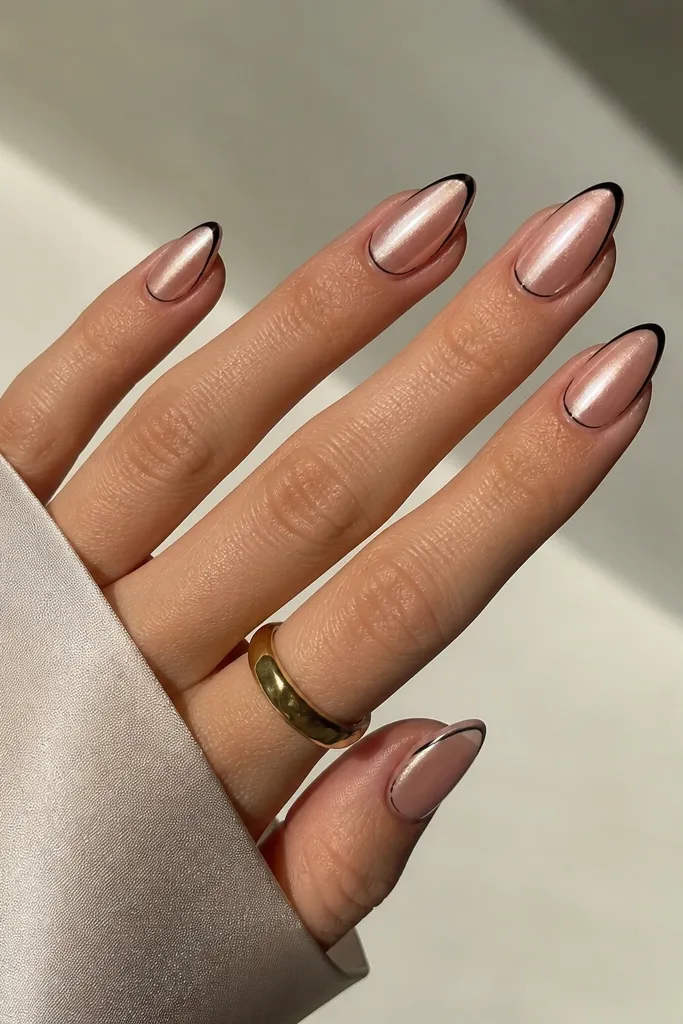
This is my go-to when I want "sharp" without heavy art. Chrome makes the nude look expensive, and the black outline defines the stiletto point. Keeping the outline thin keeps the nail looking proportional. Storage-friendly because the design is basically linework - flat and easy to seal.
Apply nude gel base, cure, then use nude chrome powder and seal with top coat. With a fine brush and black gel, draw a thin line around the free edge, staying inside the tip border. Cure and seal again, making sure the outline is fully capped.
Editor's notePractice the outline on one nail first - the brush angle is everything for crisp lines.
Watch outDon't thicken the outline - it makes short stiletto look like it has a border sticker.
15. Turquoise aura nails with a small gel brush holder in the kit
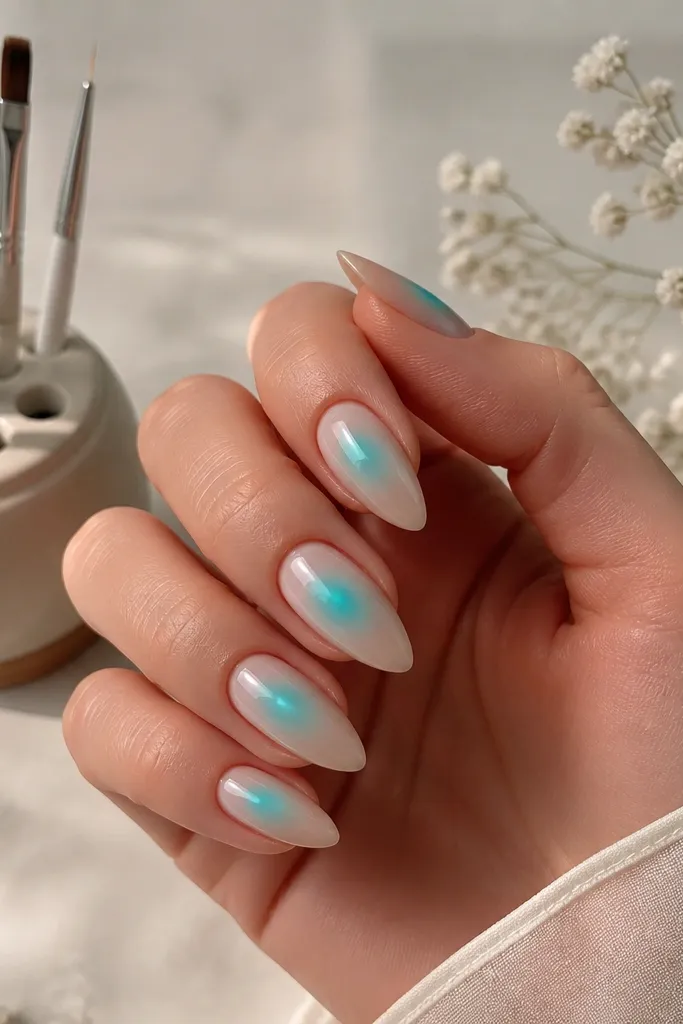
Aura nails work great on short stiletto because the glow sits where your eye naturally reads the nail. Turquoise aura feels bright without needing neon tips. The halo effect makes the nail look airy, and the design stays flatter than 3D decorations. For storage-friendly prep, keep your aura brush separate so dried gel doesn't ruin the blend.
Paint a nude base and cure. Sponge turquoise gel in the center, then soften the edges with a clean brush and a tiny touch of white gel. Add a thin clear layer to blend, cure, and top coat. Use a dedicated small brush holder so your blending brush stays clean.
Editor's noteKeep the aura slightly higher than center - it lifts the nail visually on short stiletto.
Watch outDon't make the aura too wide - it swallows the tip at this length.
16. Clear jelly base with tiny pink hearts on the side of the nail
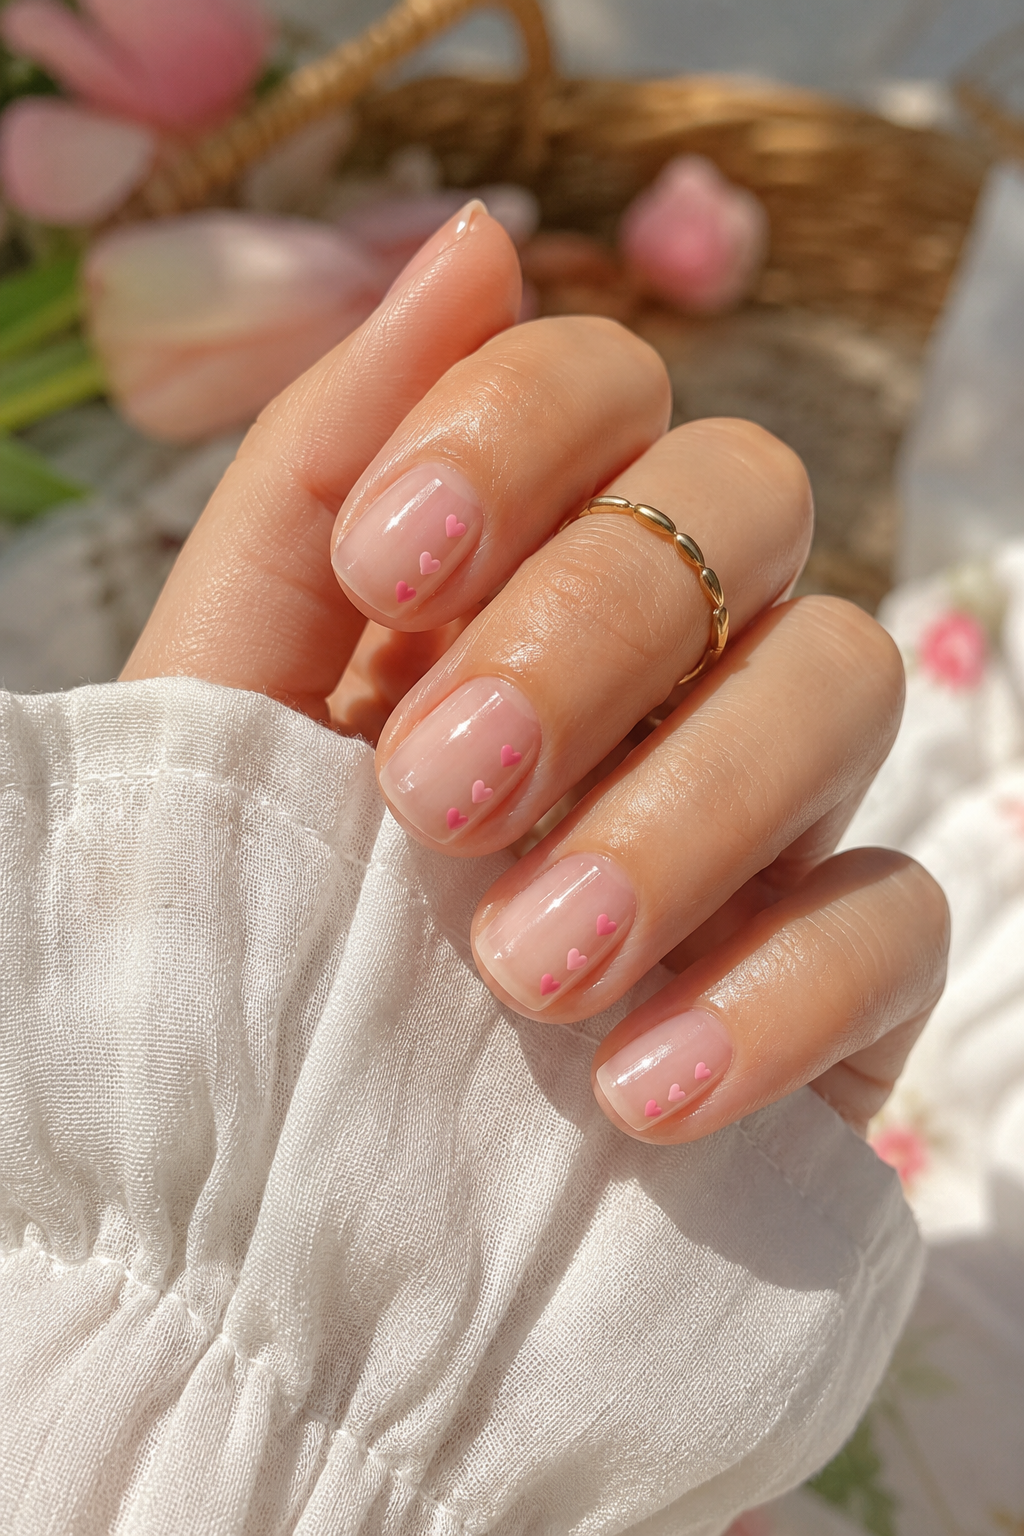
Side-wall hearts are cute without looking childish. The clear jelly base gives a fresh, glossy look that's easy to maintain. Hearts on the side keep the center clean, and that matters when you store your nails in a case - you want fewer raised spots. This style also looks good on hands because the hearts catch light only when you move.
Build a clear jelly nude and cure. Use a dotting tool to place heart outlines, then fill with thin pink gel. Keep hearts small and only on one side, with 2-3 hearts per nail. Seal with top coat, especially along the side where your case may rub.
Editor's noteUse a thin liner to draw heart points after placing dots - cleaner edges than freehand.
Watch outDon't stack hearts on top of each other - they create a bump you'll feel.
17. Matte nude with a single thin gold stripe down the center
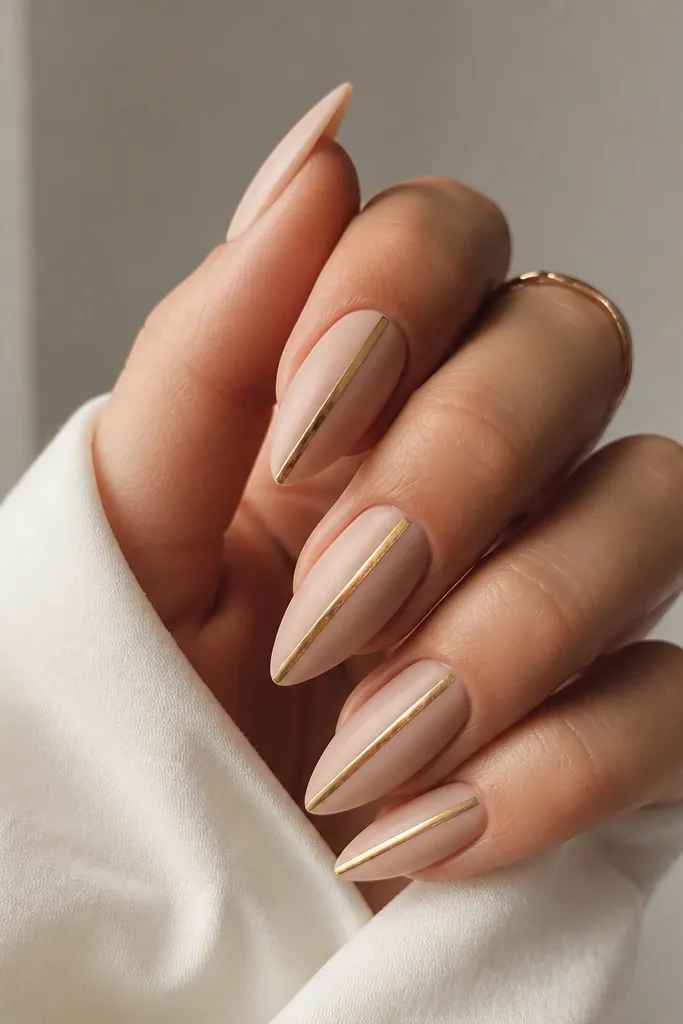
Matte nude makes everything look calm and expensive, and the gold stripe adds a clean focal point. The stripe down the center lengthens short stiletto visually. Because it's just one line, it stays flat and storage-friendly. I like this when I'm traveling because it looks good even when you're rough on your hands.
Apply nude base, cure, then matte top coat. Then paint a thin gold line with gold gel or metallic liner and cure. Seal with a glossy micro-top-coat only over the stripe area so the line stays bright without turning the whole nail glossy.
Editor's noteLet matte top coat fully set before drawing the gold line - it prevents bleeding.
Watch outDon't use thick gold paint - it looks chunky on short stiletto.
18. Black marble with white veins and a "tools separated" storage method
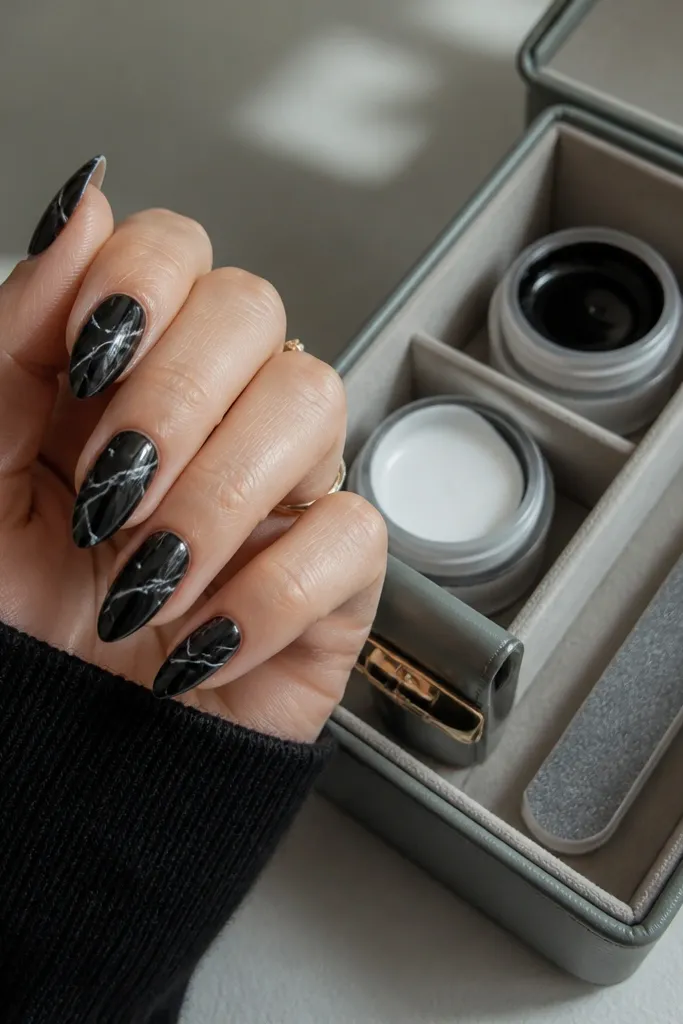
Black marble reads dramatic, and white veins keep it modern. The diagonal vein direction adds length on short stiletto. This design stays storage-friendly when you keep veins thin and fully sealed. I also treat the storage method like part of the manicure: separate compartments stop liner gel from mixing with dust on tools.
Paint black base and cure. Add thin white lines, then drag lightly with a marbling tool for natural flow. Use a second tiny layer of white to strengthen a few vein ends, cure, then top coat twice if needed for full sealing. Store gel liner and top coat in separate slots so you don't cross-contaminate.
Editor's noteUse a toothpick to pull micro veins - it gives thinner lines than a brush at this size.
Watch outDon't overwork the marble - too many strokes make it look smoky and muddy.
19. Satin pink base with a tiny rhinestone cluster at the tip edge
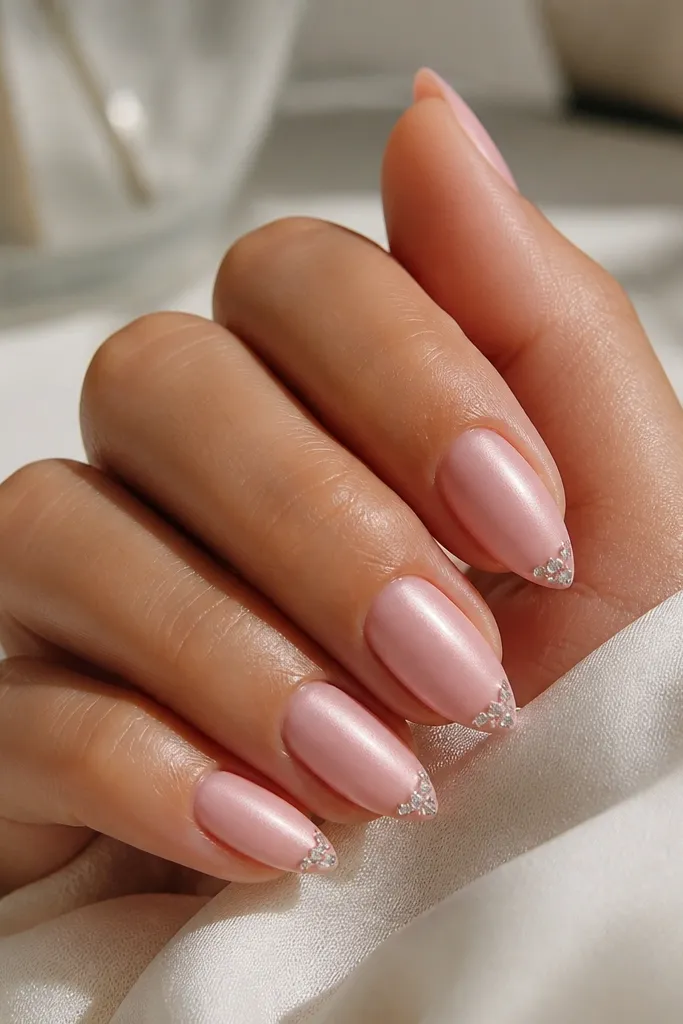
A satin pink base keeps the nails soft-looking, and the rhinestone cluster at the tip adds a "special" moment without covering the whole nail. On short stiletto, keeping crystals only at the tip edge makes the nail look intentional rather than heavy. Storage-friendly because small clusters can be sealed smooth - you just need a careful top coat cap.
Apply satin pink gel base and cure. Place 3-5 micro rhinestones in the center of the tip edge using gel tack. Cure, then cover with a thin clear top coat layer that fully smooths around the stones. Cap the free edge so it doesn't catch when you open the storage case.
Editor's noteUse a silicone tool to press stones into the gel so they set flush.
Watch outDon't put rhinestones on the side walls - they pop off first in storage friction.
20. Nude gradient with gold leaf stuck in a "V" near the tip
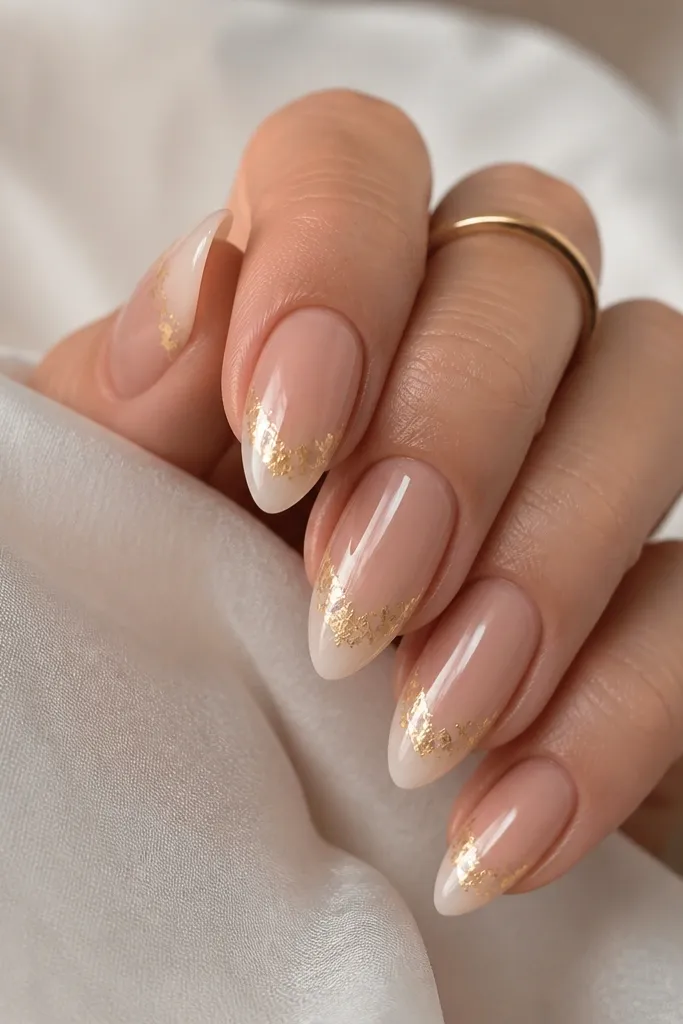
The V placement is flattering because it follows the stiletto point. Gold leaf adds texture and sparkle without needing glitter. This design stays storage-friendly because gold leaf is thin, and the V shape is easy to cap smoothly. It also looks great when your nails catch light while you're opening your storage case.
Blend nude gel from cuticle to tip with a sponge or brush, cure. Add gel tack to form a V shape and press gold leaf pieces into it. Arrange so the V is centered and stops 1-2 mm before the tip edge. Seal with a clear gel cap and then glossy top coat.
Editor's notePress gold leaf with a flat silicone stamp - it flattens pieces fast.
Watch outDon't make the V too wide - it makes short stiletto look less sharp.
21. Coral pop color blocking with a narrow white border
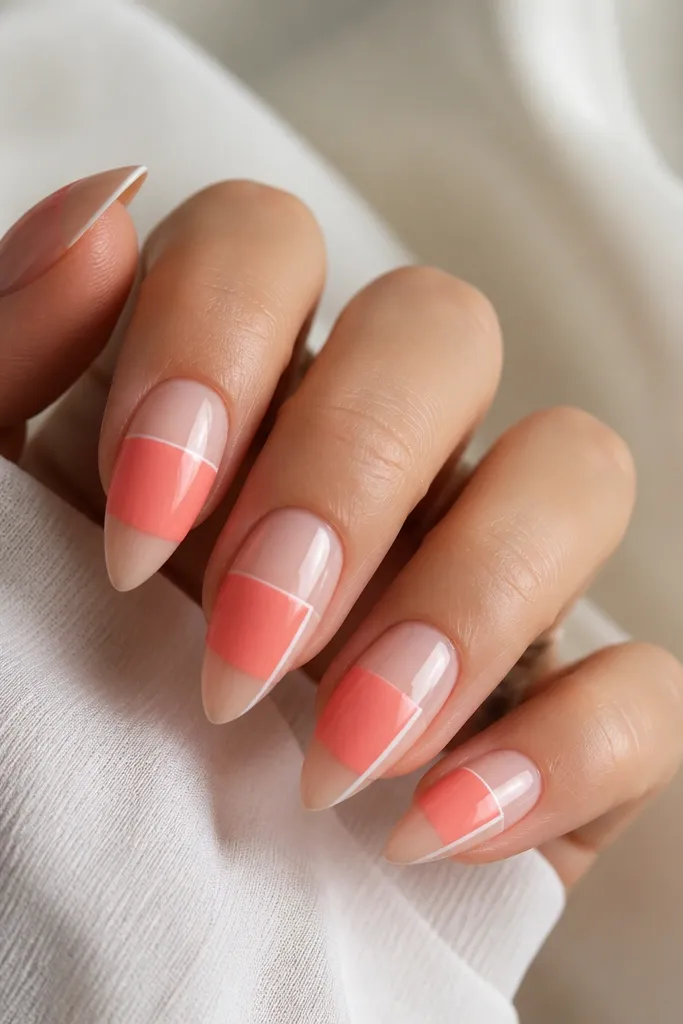
Color blocking looks modern and confident at short length when the shapes are clean. The coral block adds punch, and the narrow white border keeps it crisp instead of blending muddy. It's storage-friendly because the design is flat and sealable. If you keep your storage kit organized, you can touch up the border fast without repainting the whole nail.
Paint nude base and cure. Use white gel to draw a thin border rectangle across the mid-nail, then fill the center with coral gel. Keep the coral block about one-third of nail length. Cure and cap with top coat to make the edges smooth.
Editor's noteUse a nail art tape strip for the border line, then remove while gel is still slightly tacky.
Watch outDon't skip the border - coral bleeding over nude looks cheap on close-up.
22. Icy nude with silver flakes only on one accent nail
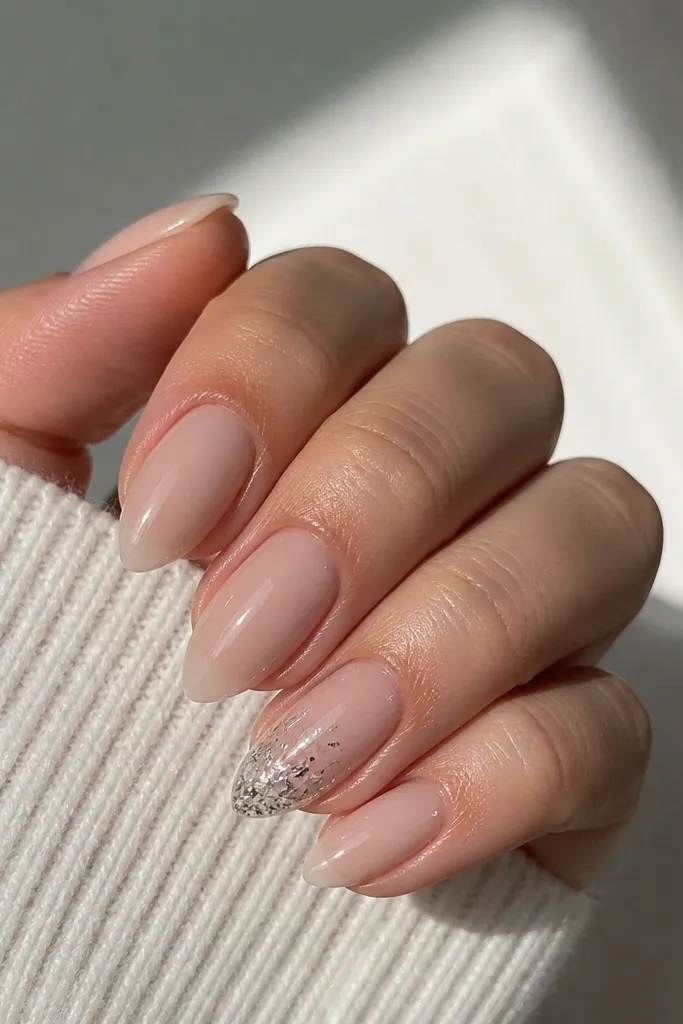
This is the easiest way to make short stiletto look styled without doing art on every nail. The plain icy nude keeps the manicure clean, and the flake accent adds sparkle where your eye goes. Storage-friendly because only one nail has texture, and you can seal it extra well. It also helps your manicure look fresh longer since fewer details chip.
Use an icy nude gel that has a subtle pearly tone. On the accent nail, apply gel tack near the last 3 mm and press silver flakes in a loose scatter. Cap with clear gel and top coat the accent thoroughly. Keep the rest of the nails just glossy top coat.
Editor's noteIf flakes lift, add a tiny dab of clear gel under the edge before topping.
Watch outDon't add flakes to every nail - it looks cluttered at short stiletto length.
23. Forest green matte with a tiny nude half-moon at the cuticle
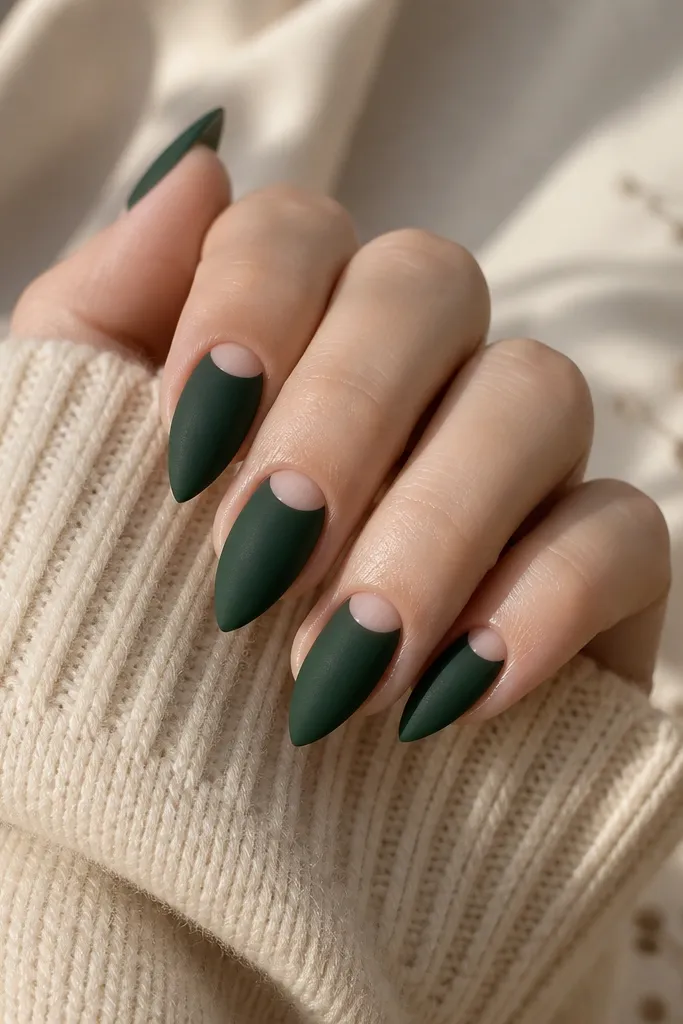
Forest green matte looks rich in low light, and the nude half-moon gives a graphic, clean finish. Keeping the half-moon small keeps the design from looking like a French gone wrong. This is storage-friendly because matte hides small surface lines, and you're not using stones. The half-moon also makes cuticle regrowth less obvious.
Apply forest green gel and cure, then matte top coat. Paint a small nude half-moon using a fine brush at the cuticle - keep it about 1-2 mm tall. Seal lightly with matte top coat around the half-moon so it stays crisp.
Editor's noteUse a cuticle guide card or a straight edge to keep the half-moon curve even.
Watch outDon't make the half-moon too big - it shrinks the nail visually.
24. Nude base with thin teal lightning lines and a separate gel liner compartment
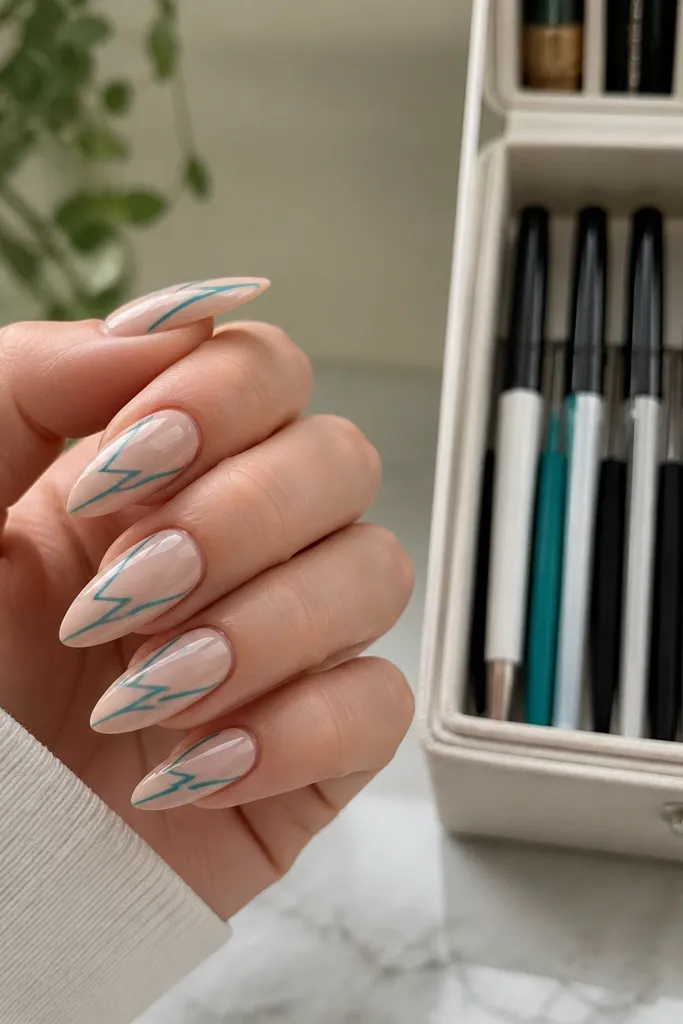
Lightning lines give movement and a little edge without heavy decoration. Teal on nude looks bright but not neon. The lines are thin, so the manicure stays smooth when you open a case and reach for tools. This is also easy to maintain because if one line chips, you can touch up with liner gel quickly.
Paint nude base and cure. Use teal gel liner and a fine brush to draw a jagged bolt shape across the center diagonally. Keep each bolt narrow - about the thickness of a hairline. Cure and cap with top coat, making sure the line edges are fully covered.
Editor's noteKeep gel liner in a separate compartment so you don't pick up dust and clog the brush tip.
Watch outDon't over-thicken the lightning - it turns from graphic to bulky.
25. Champagne nude with micro pearl dots along the side ridge
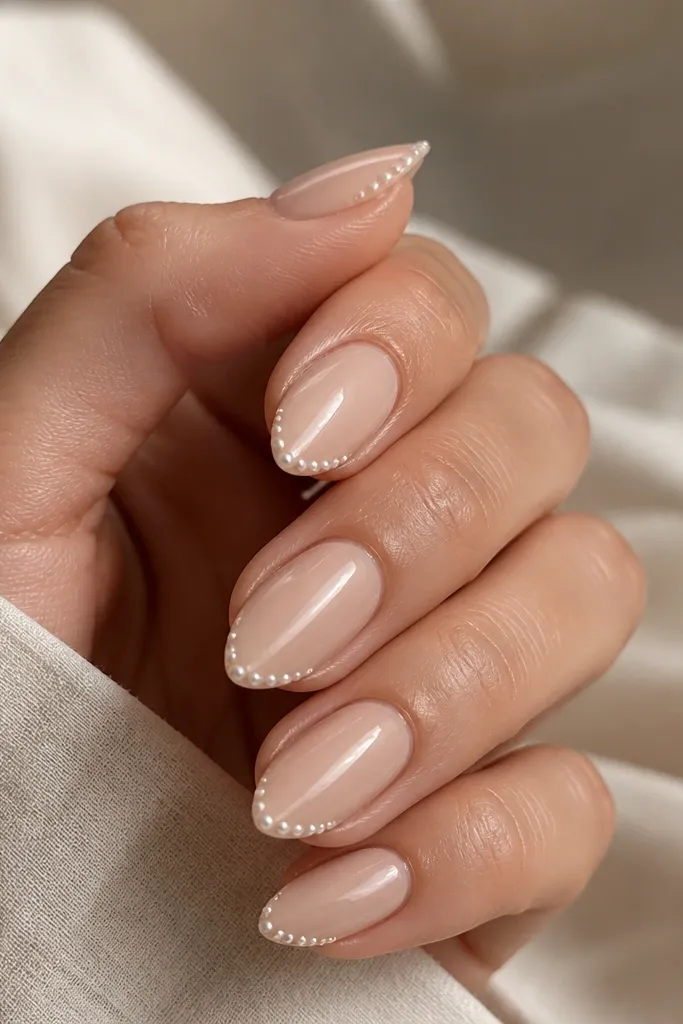
Micro pearl dots add a soft luxury feel without needing big rhinestones. Side placement gives a flattering contour, especially on short stiletto where the side walls shape the look. This is storage-friendly if the pearls are small and sealed - you want them to sit flush. The champagne nude base keeps the pearls from looking stark.
Use champagne nude gel and cure. Place tiny micro pearls with gel tack along one side near the last third of the nail. Keep the pearls in a line and stop before the very tip to avoid snagging. Seal with a thin clear gel layer and glossy top coat.
Editor's notePress pearls with a silicone tool for a flush set before curing.
Watch outDon't use large pearls - they rock and pop off in daily storage friction.
26. Classic red glossy with a tiny gold clasp detail at the tip
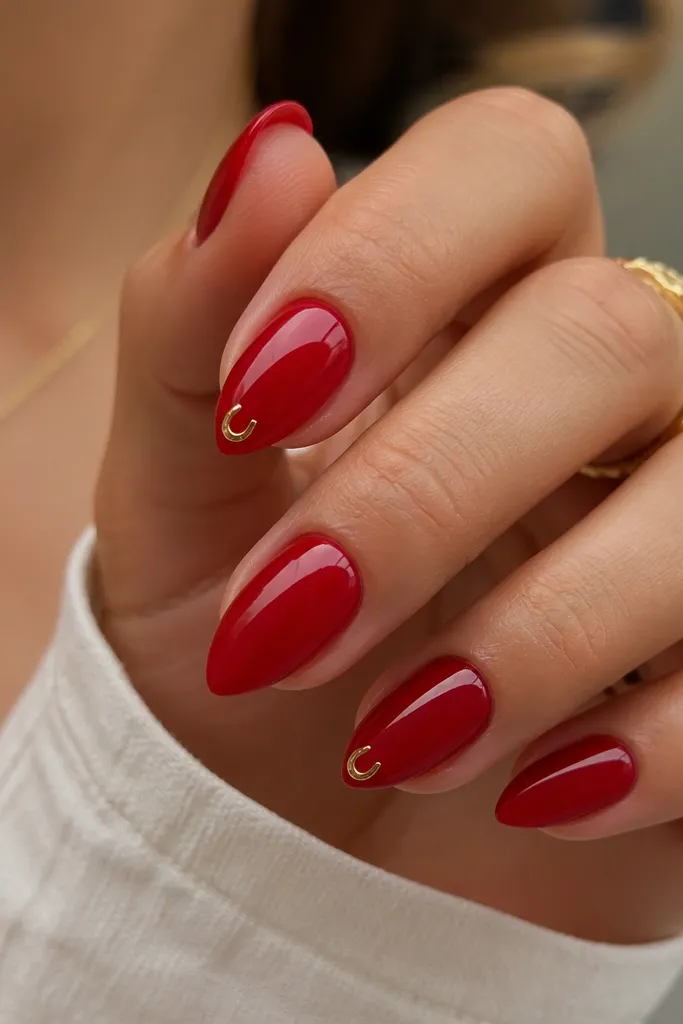
Classic red always looks sharp on short stiletto because the gloss makes it look freshly painted. The tiny gold clasp detail gives a "bag hardware" vibe that pairs perfectly with a storage kit. Keeping it at the tip center keeps the look clean and prevents the detail from scraping when you close your case. It's bold without being busy.
Apply red gel in two thin coats and cure fully. For the clasp detail, use metallic gold gel or a gold foil paper punched into a small U shape, then outline it with gold gel for crisp edges. Cure and cap with top coat, smoothing the clasp so it doesn't feel raised.
Editor's noteIf the gold feels bumpy, add one more thin top coat layer and cure longer.
Watch outDon't put the clasp too close to the edge - it chips first.
27. Nude pink chrome with a thin black "cat-eye" line
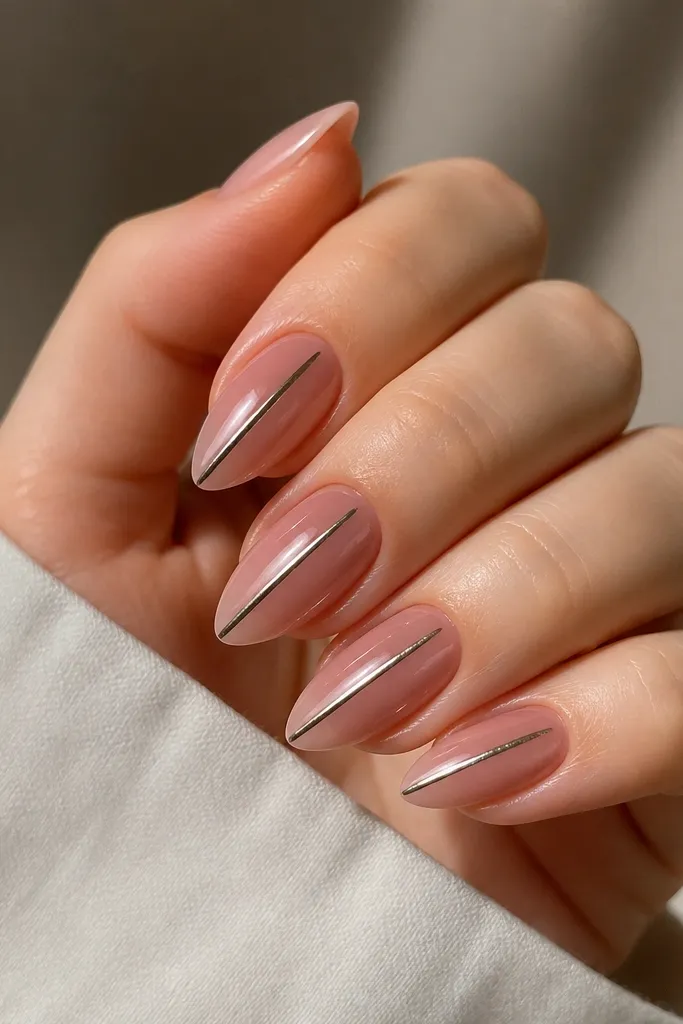
Cat-eye lines are dramatic even when the nail is short. The nude-pink chrome gives a soft glow, and the black line makes it look like intentional eyeliner. Because the line is thin, it stays storage-friendly and doesn't create a snag point. This design also hides minor regrowth because the base is already reflective.
Apply nude-pink chrome powder and seal. Then draw a thin vertical cat-eye line with black gel using a fine brush. If you're using a magnetic cat-eye product, create the line on the nail first, cure, then add a thin black outline for crispness. Top coat and cap the line edges.
Editor's noteUse a steady wrist and pull the line in one motion - multiple passes thicken the center.
Watch outDon't smear the line over chrome - it dulls the shine in that area.
28. Soft white base with tiny gold foil dots at the center
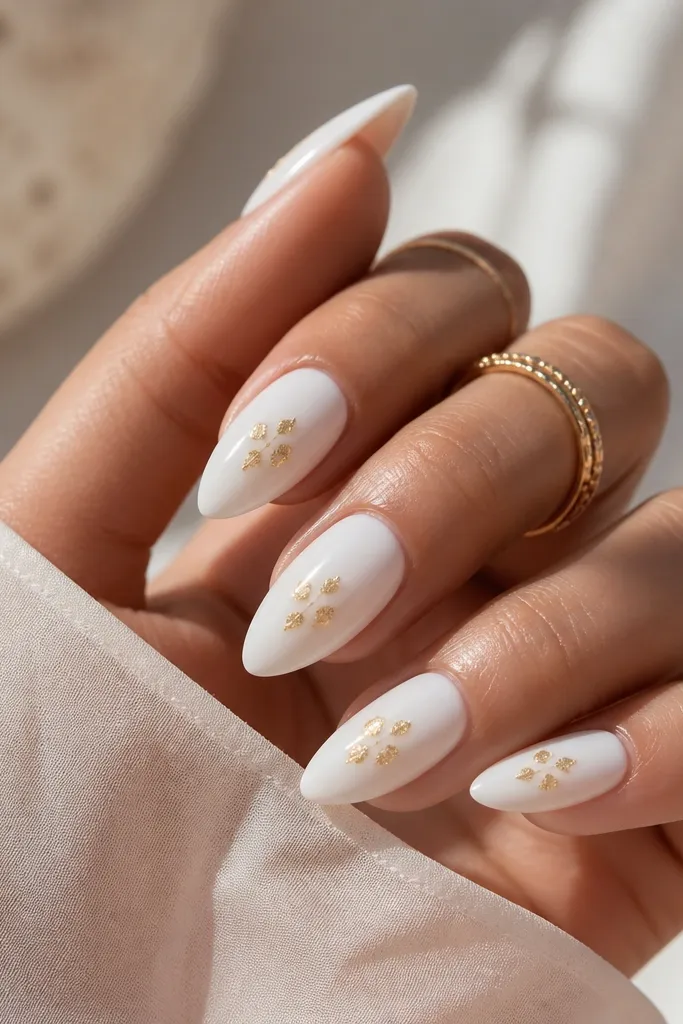
Soft white makes short stiletto look clean and fresh, and gold foil dots add a delicate shimmer. Placing dots in the center keeps the nail balanced and prevents the design from looking like it's shrinking at the tip. Foil dots are thin, so the manicure stays smooth and storage-friendly. This is a great set for people who hate heavy glitter but want sparkle.
Paint soft white builder gel, cure. Dab small dots of tack gel in the center, then press micro gold foil pieces into each dot spot. Seal with top coat and cap the edges so the foil doesn't lift. Keep dot count low so it looks intentional.
Editor's noteIf a dot looks too big, scrape it gently with a clean brush tip before curing.
Watch outDon't spread foil dots all the way to the free edge - it creates a rough texture.
29. Mocha nude with a thin dark brown diagonal stripe
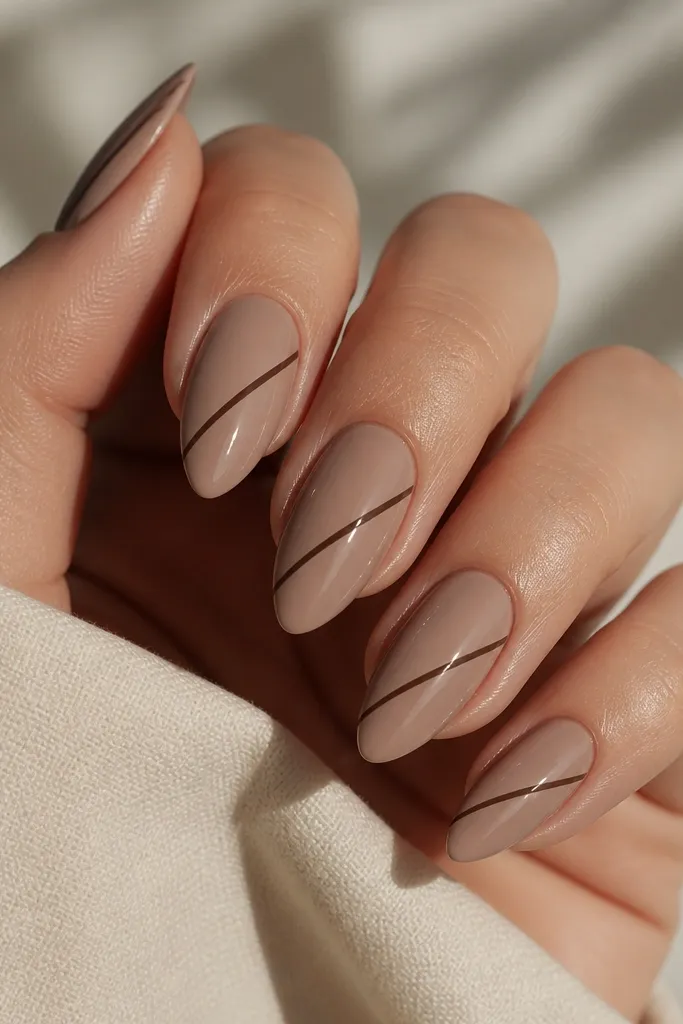
This is minimal, but it looks expensive because the stripe is crisp and the base color is warm. Short stiletto loves diagonal lines since they guide the eye along the nail's length. Using a dark brown stripe instead of black keeps it soft and less harsh. Storage-friendly because it's just one line - flat and easy to seal.
Apply mocha nude gel and cure. Use a fine striping brush and dark brown gel to draw one diagonal stripe per nail across the center. Keep stripe thickness under 1 mm. Cure and top coat twice if you're worried about sidewall snagging.
Editor's noteAngle the stripe so it lands near the tip point - it makes the stiletto look sharper.
Watch outDon't make the stripe wavy - uneven lines read as rushed.
30. Muted navy satin with white micro stars and a star-sponge tool
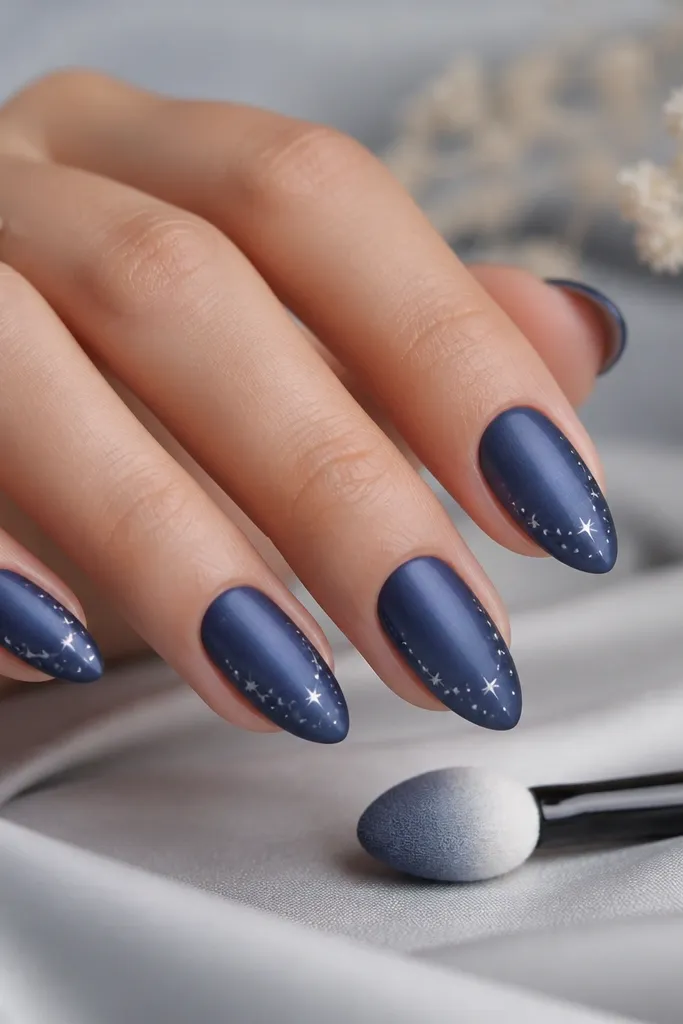
Muted navy satin is moody without being heavy, and white micro stars add a playful winter vibe. The satin finish hides minor wear, which helps storage-friendly use. Stars near the tip look cute and keep the design from covering the whole nail surface. If you store your nail art supplies, this set is forgiving because the stars can be touched up easily.
Apply muted navy gel and cure, then satin top coat. Place a few micro stars using a star stamp or a tiny dotting tool with a star-shaped tip. Keep them sparse: 3 stars per nail max. Seal with a thin top coat layer so the stars feel smooth.
Editor's noteUse a makeup sponge to soften any glitter residue around the stars before sealing.
Watch outDon't pack stars close together - it looks like a sticker sheet.