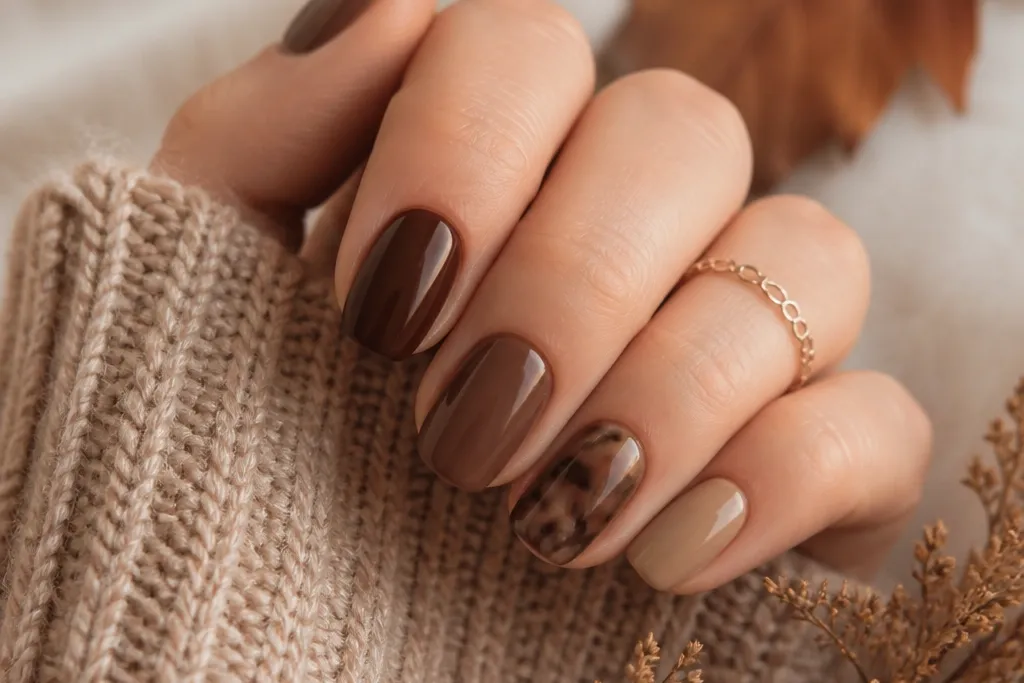
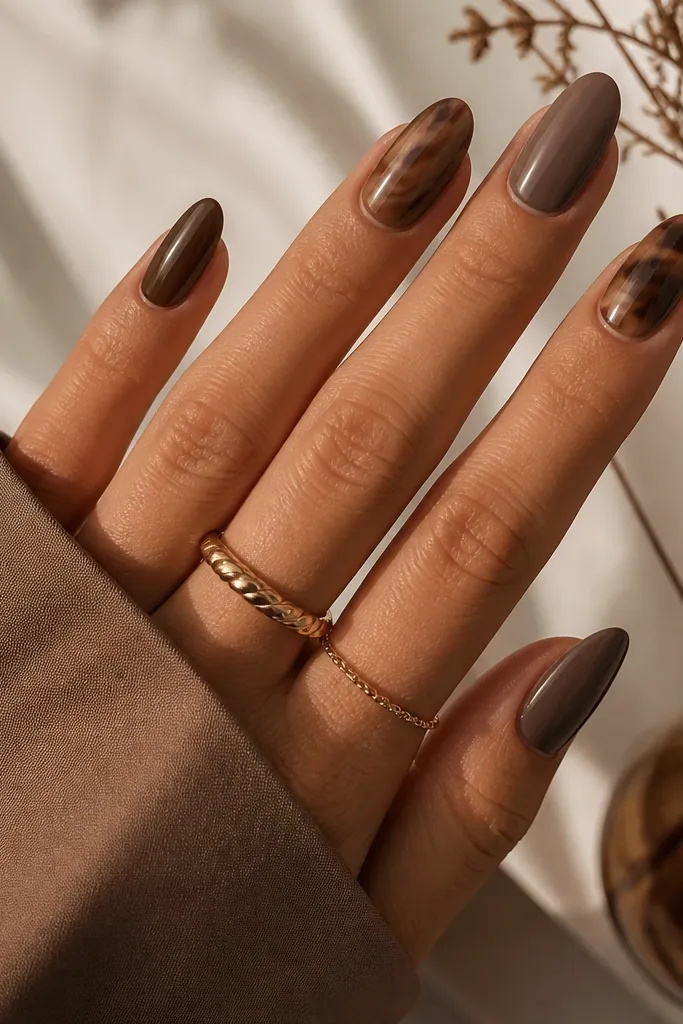
1. Milk-chocolate French with nude micro-line
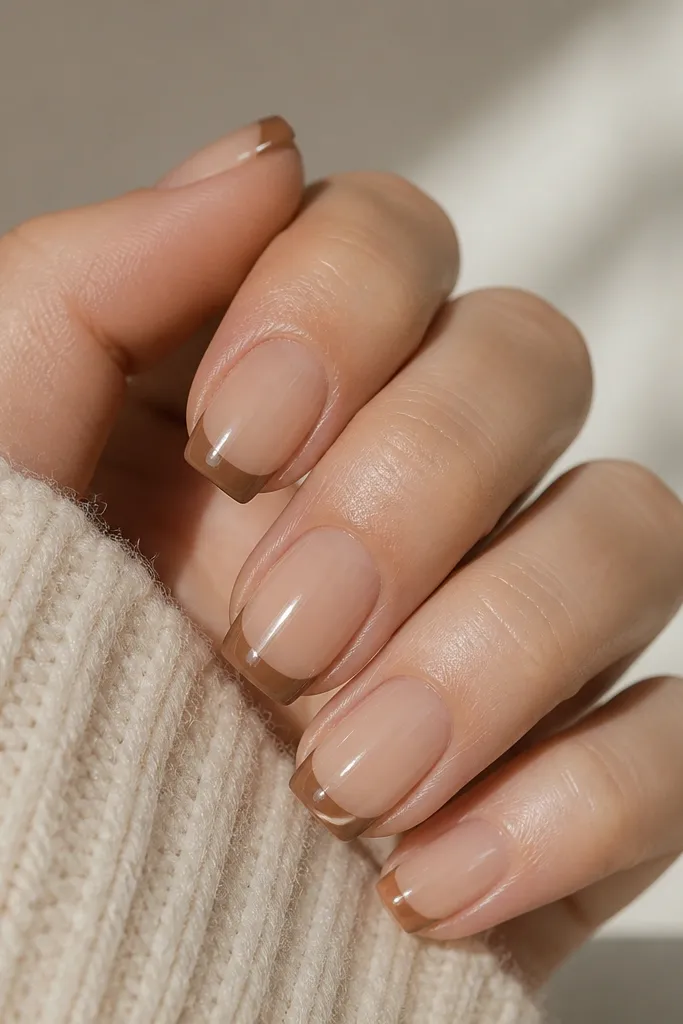
This works because the French tip is warm but not dark enough to swallow the nail. The nude micro-line gives you crisp separation, so the brown looks intentional instead of painted over. I like glossy topcoat here because the chocolate tone catches light without turning gray.
Keep the tip width to about 1.5-2 mm on short nails. Use a creamy nude base (not pink) and paint the French freehand or with a guide strip. Finish with a high-gloss topcoat and cure fully at the end.
Editor's noteAfter you paint the tip, run a thin brush dipped in nude polish along the border to sharpen it.
Watch outDon't make the French too wide on short nails - it shrinks the nail and makes the brown look heavy.
2. Espresso half-moons with clear cuticle gap
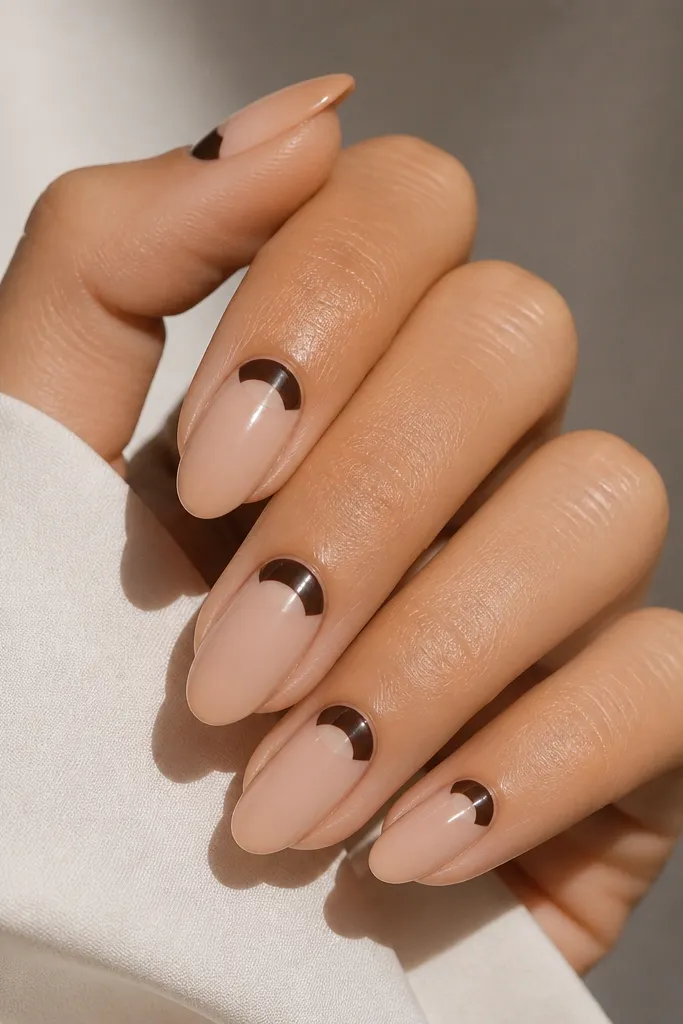
The negative space is the secret. The clear cuticle gap keeps espresso from looking dense and gives your nails a lifted, airy look. The half-moon placement also flatters almond shapes because it follows the nail's curve.
Start with a thin nude base gel. Use a half-moon stencil or a small curved brush to paint the espresso shape, leaving a 1 mm clear gap at the cuticle. Seal with glossy topcoat.
Editor's noteIf your half-moons get messy, clean the line with a brush soaked in gel cleanser before curing.
Watch outSkip covering the cuticle area fully - a heavy cuticle brown makes the nails look grown-out and uneven.
3. Caramel ombré fade into nude
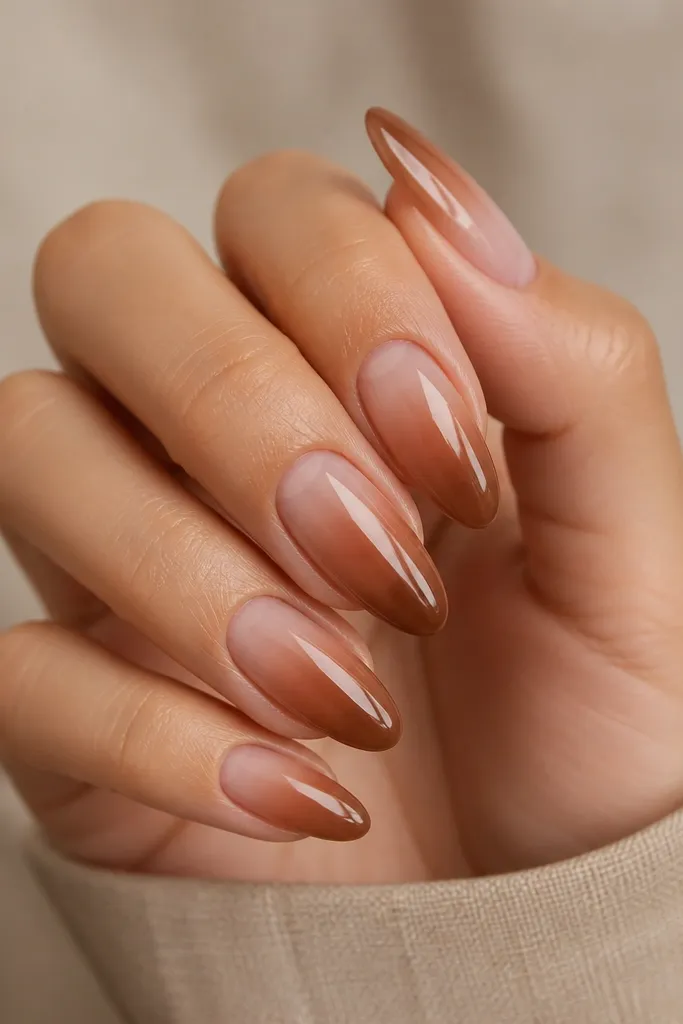
Caramel ombré looks dreamy because it has warmth without the harshness of espresso. The fade makes the nail look longer, and the milky nude base keeps it from turning orange. Glossy topcoat makes the gradient look glassy instead of chalky.
Use a sponge to blend caramel gel only on the last third of the nail. Keep the fade line subtle, about 2-3 mm upward from the tip. Cure in thin layers so the gradient stays smooth.
Editor's noteWipe the sponge on a paper towel once between nails so you don't over-load pigment.
Watch outDon't blend all the way to the cuticle - that's when ombré turns muddy and shortens the look.
4. Brown latte marble with white vein accents
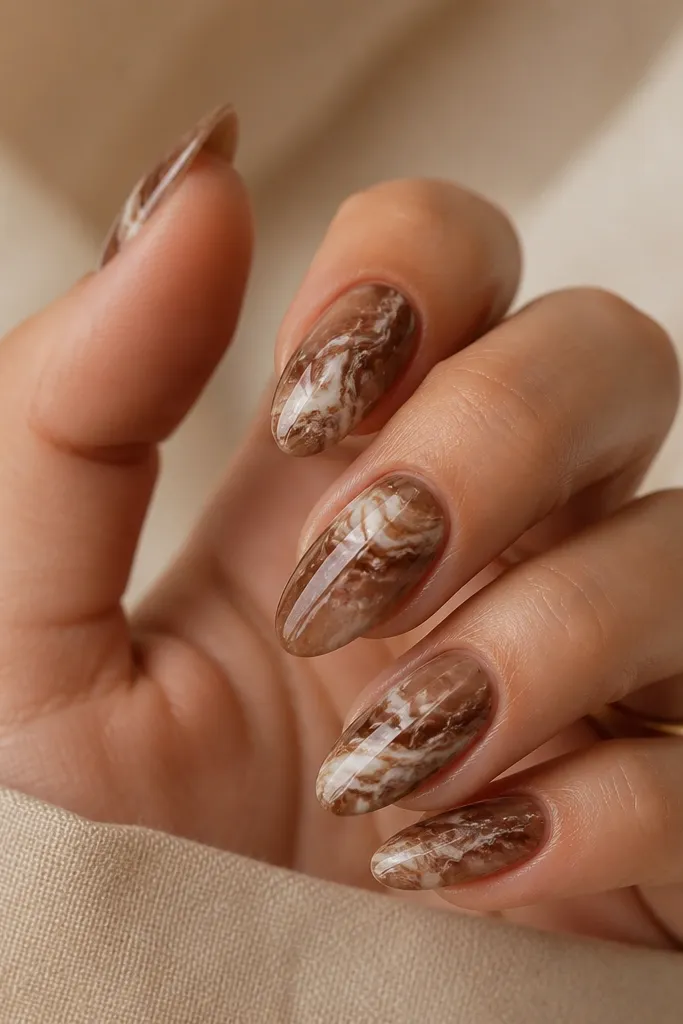
Marble works because it adds movement inside the brown instead of using one flat color. White veins give contrast so the set reads autumn even without glitter. I like latte marble because it's warm and forgiving - mistakes blend into the pattern.
Use a milky latte base, then swirl darker brown gel with a thin dotting tool. Add white gel veins with a striping brush and keep them thin. Seal with glossy topcoat to lock the pattern.
Editor's noteDo two thin veining passes; one heavy pass makes lines look thick and cartoonish.
Watch outDon't overdo the white - too much white makes it look like winter marble, not autumn.
5. Burnt umber matte with copper flecks
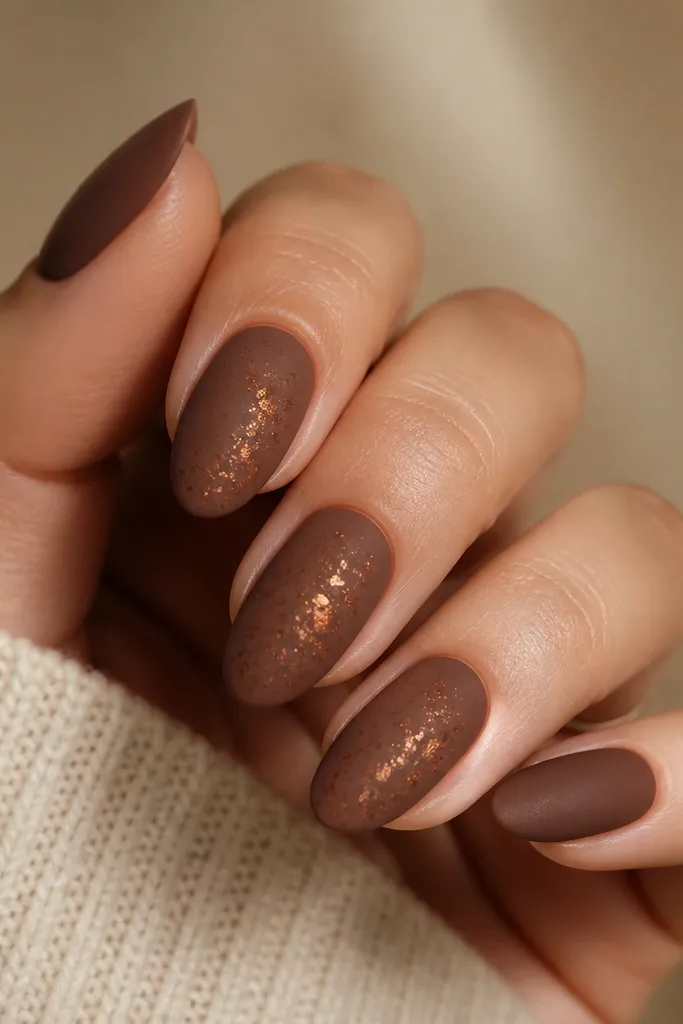
Matte burnt umber looks like dried leaves. The copper flecks add controlled sparkle without turning the set into full glitter. This combo looks best on shorter shapes because the texture reads cozy and intentional.
Paint the base in burnt umber and cure. Apply matte topcoat to the whole set, then press copper foil flecks lightly on top. If you want less mess, use a gel tack layer only where you place the flecks.
Editor's noteUse a soft makeup sponge to tap flecks in - it gives you scattered placement instead of clumps.
Watch outDon't use chunky glitter on matte - it catches and looks uneven.
6. Chocolate swirl nails with thin gold outline
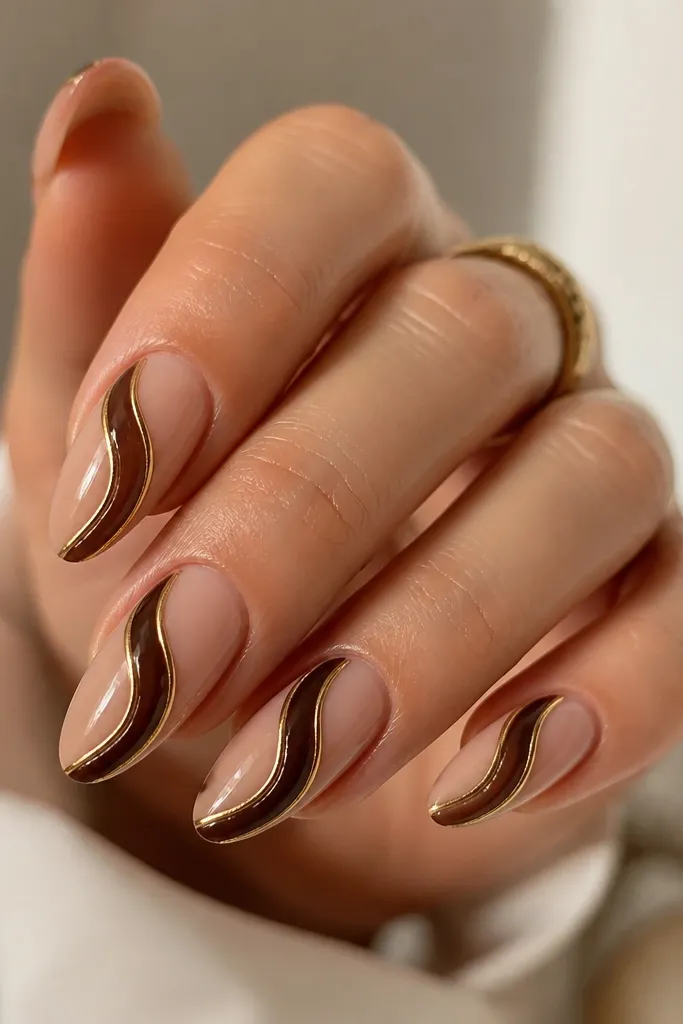
Swirls look fancy when the lines are crisp. The gold outline makes the chocolate look like it's drawn on, not painted over. This one feels autumn without leaning into heavy browns everywhere.
Use a nude base and paint swirls with a striping brush in chocolate gel. Outline with gold chrome gel or gold striping polish. Cure carefully so the gold line stays smooth.
Editor's noteLet the chocolate line cure fully before outlining so the gold doesn't smear.
Watch outDon't thicken the swirl lines - thick lines make it look like a sticker.
7. Caramel glazed donut topcoat
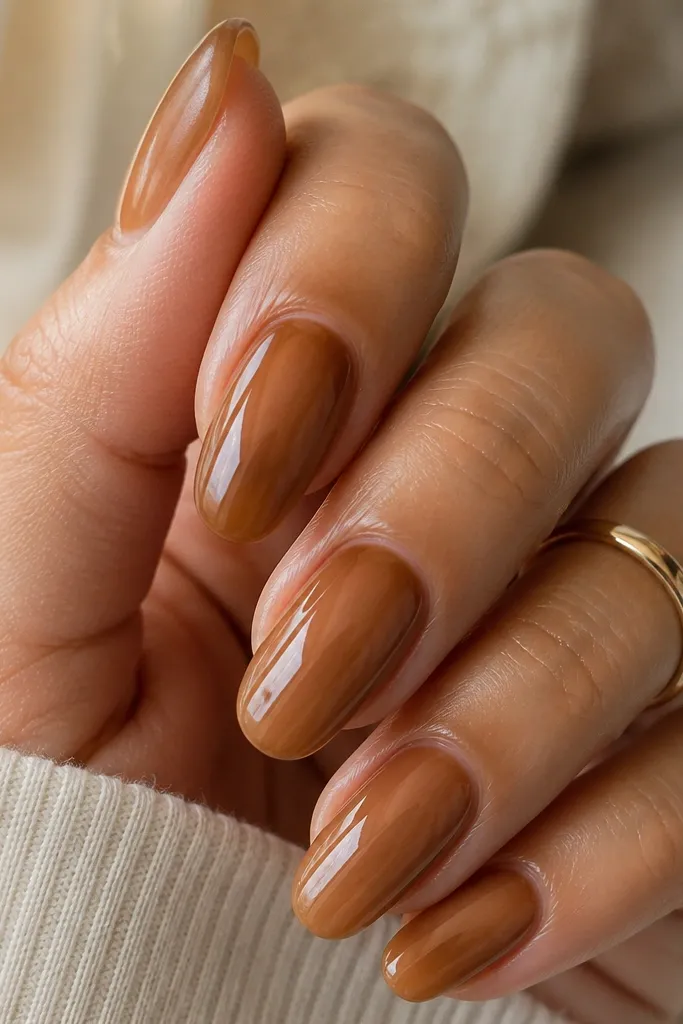
This look is all about the topcoat effect. A caramel base plus a thicker "glaze" topcoat makes the nail look like it has depth - it's the same reason glazed donuts look so tempting. It's also low effort because the design is mostly finish quality.
Apply caramel gel in two thin layers for even coverage. Then use a slightly thicker gel topcoat (or a high-viscosity topcoat) and cap the free edge. Cure longer than usual if your UV lamp runs weak.
Editor's noteAfter curing, wipe with cleanser and buff only lightly - too much buffing kills the glassy look.
Watch outDon't use a watery topcoat - it won't build that glazed reflection.
8. Espresso micro-French with nude negative space
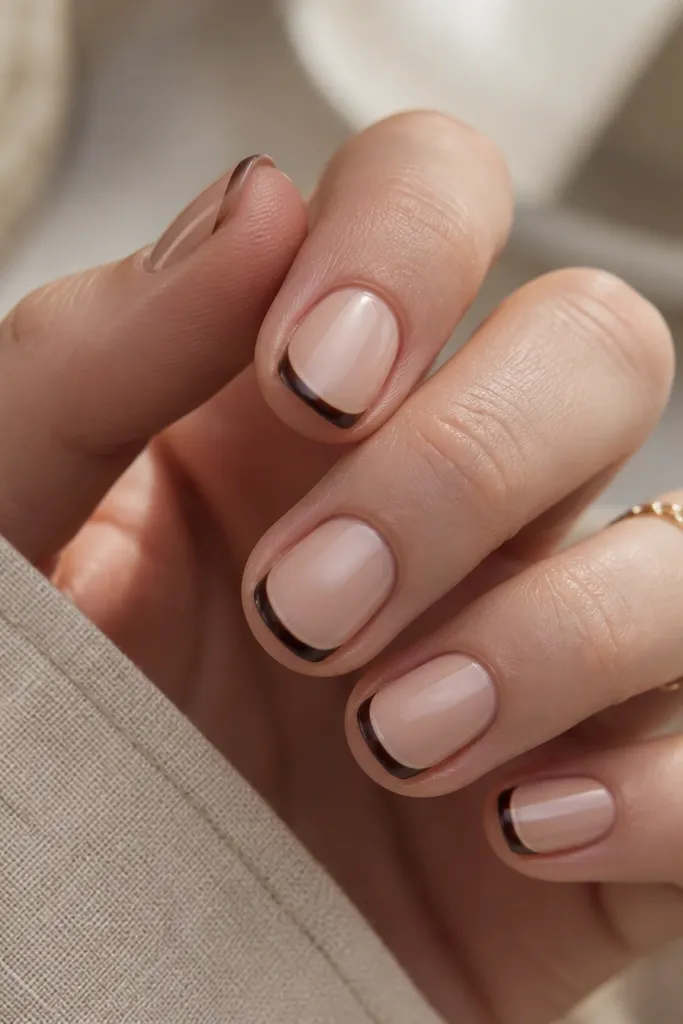
Micro-French keeps brown wearable and clean. The tiny espresso line looks sharp on short nails, and the nude gap stops it from looking like a stripe. This is the set I reach for when I want brown but still need a "work safe" vibe.
Paint nude base, then set your guide with a thin strip. Keep the tip line under 1.5 mm. Add one coat of glossy topcoat to smooth the line.
Editor's noteUse a nail guide strip and remove it while the polish is still slightly tacky for a crisper edge.
Watch outDon't freehand a thick line on short nails - it looks uneven fast.
9. Warm taupe base with terracotta dots
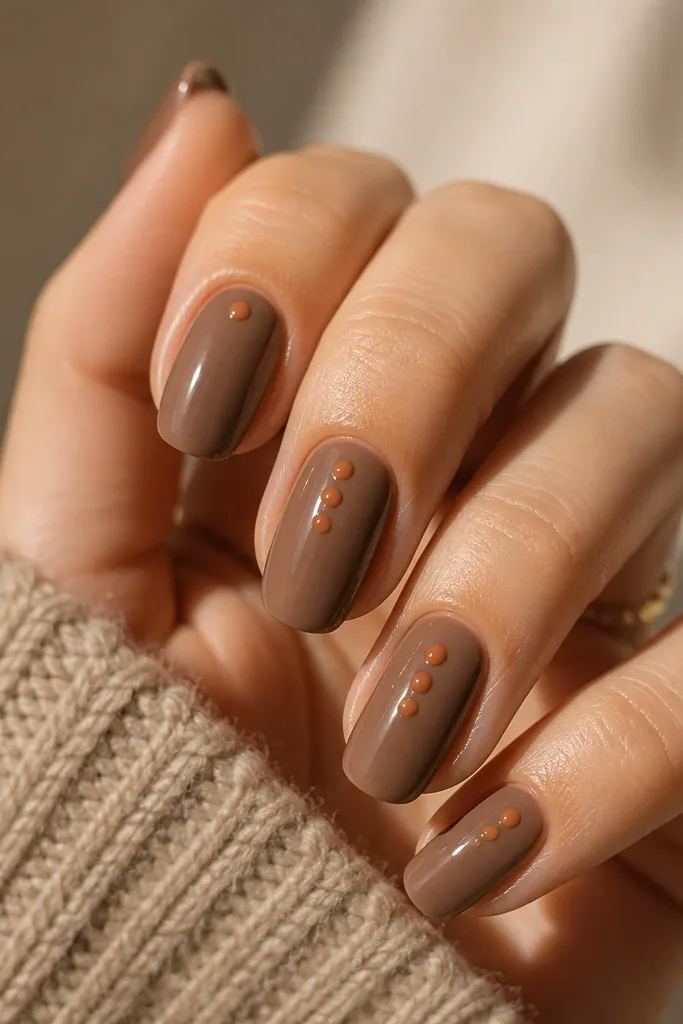
Taupe makes brown feel softer, and terracotta dots bring that autumn clay tone. The dot clusters add texture without clutter. It also looks good on both short almond and longer almond because the dots create rhythm.
Use a warm taupe as the base color. Add terracotta dots with a dotting tool - start with 3 dots per nail, then add smaller dots between. Keep dot sizes under 1 mm for a neat look.
Editor's notePress the dot tool lightly; too much pressure creates uneven circles.
Watch outSkip huge dots - they make the set look childish instead of chic.
10. Chocolate swirl half-tip overlay
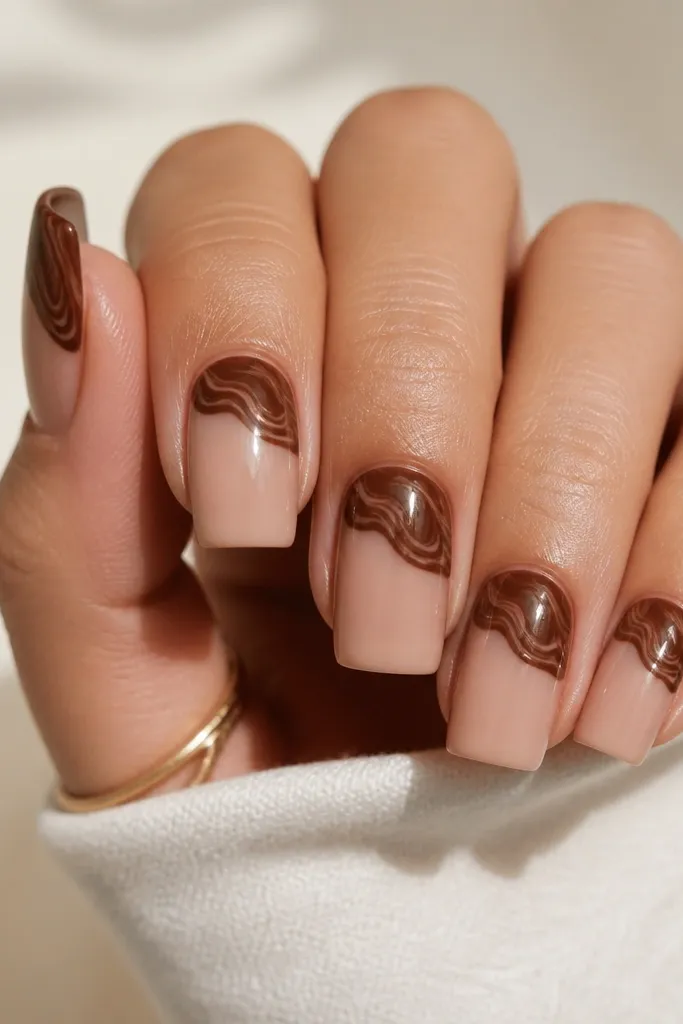
This design feels autumn because it puts the brown only where light hits first. The swirl overlay gives movement, but the negative space keeps it wearable. I like it on square shapes because the straight sides make the swirls look intentional.
Paint nude base. Mask the lower half with a small strip of tape so the brown only covers the top half near the tip. Freehand swirls inside the brown area and remove the tape while gel is still workable.
Editor's noteUse a smaller brush than you think you need - swirls look cleaner when the line is thin.
Watch outDon't cover the whole nail - full coverage swirls can turn busy fast.
11. Sienna ombré with soft brown sparkle
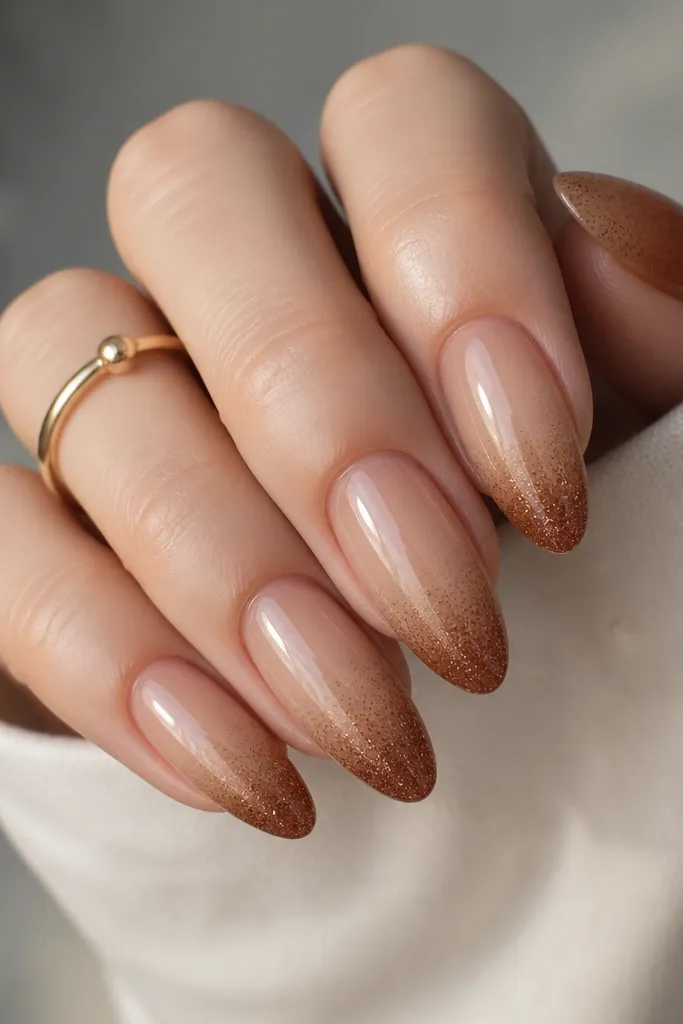
A sienna ombré keeps the set warm and slightly orange in a flattering way. The sparkle stays subtle because it's fine and blended, so it reads like autumn sun, not holiday glitter. This one looks great for fall events and photos.
Blend sienna gel on the last third. Mix a tiny amount of fine brown shimmer into the top layer at the tip, then blend again with a sponge. Cure in thin steps so sparkle doesn't clump.
Editor's noteIf sparkle clumps, use a clean sponge to lightly feather the top edge after the first cure.
Watch outDon't use silver glitter - it makes the brown look cold.
12. Walnut tortoise shell accent nails
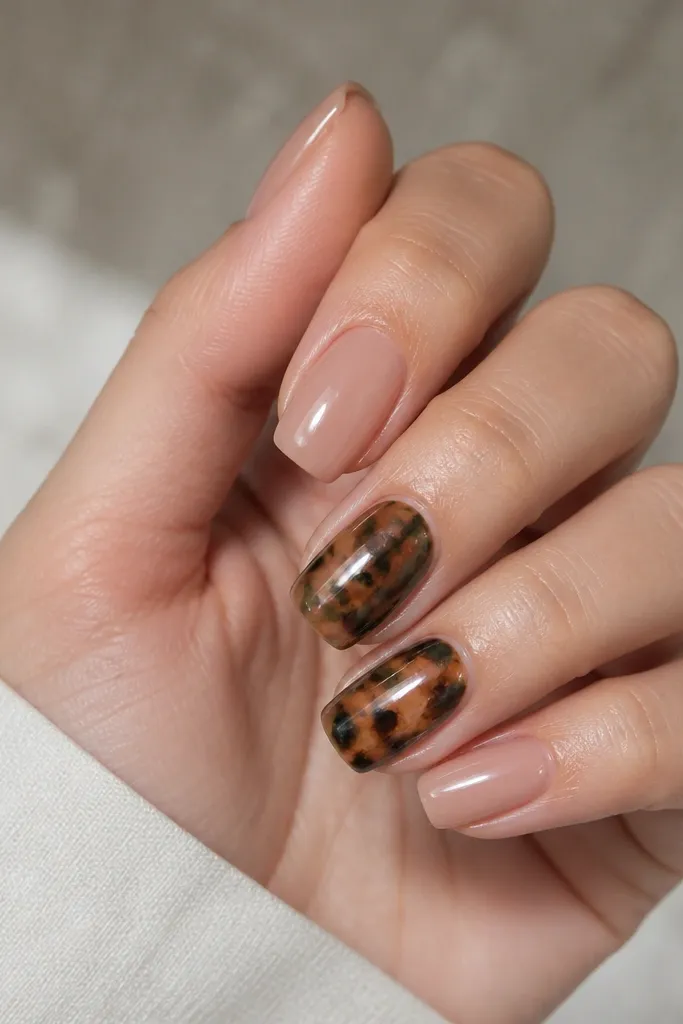
Tortoise shell looks expensive because it has multiple browns and tiny tonal shifts. Keeping it to accent nails stops the set from looking too busy. The olive hint makes it feel like fall without turning the pattern green-gray.
Paint nude base on all nails. For tortoise, layer small irregular shapes: dark walnut, then honey brown, then a micro olive line. Add a glossy topcoat to smooth and unify the pattern.
Editor's noteDo tortoise on one nail at a time so the shapes stay crisp before you seal.
Watch outDon't make tortoise shapes too perfect - real shell patterns are uneven.
13. Caramel nude base with espresso vertical stripe
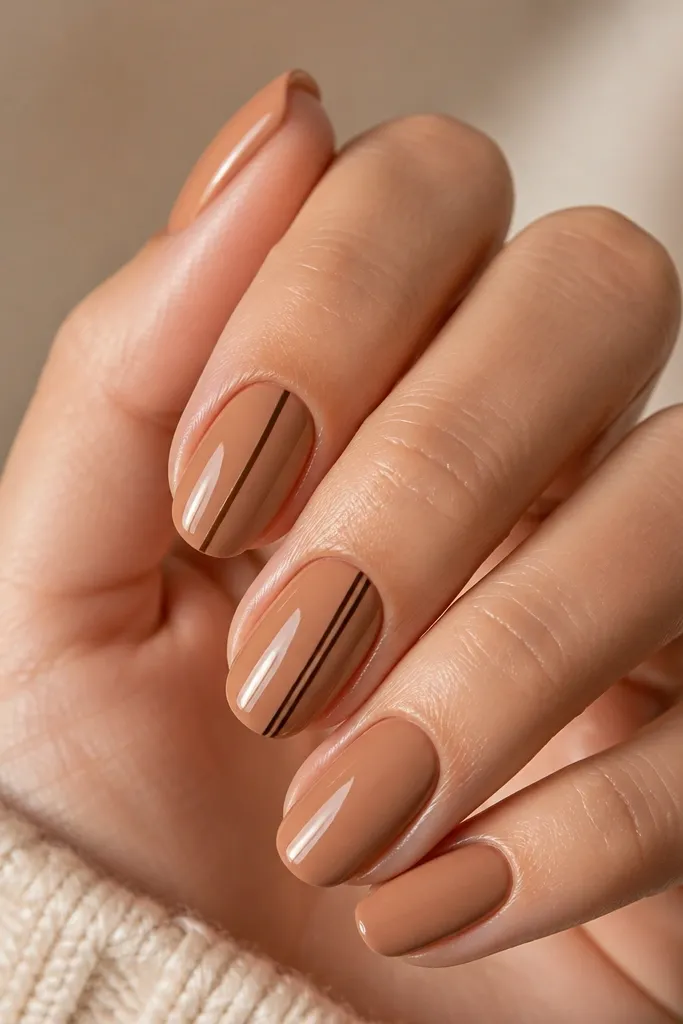
Vertical stripes make nails look longer, and espresso gives clear contrast against caramel nude. It's simple, but it reads styled because the stripe is straight and centered. This is my go-to when I want brown that doesn't feel like "painted brown."
Use a caramel nude base that matches your undertone. Apply one thin espresso stripe using a striping brush and a steady hand. Keep the stripe width around 0.5-0.8 mm.
Editor's noteUse a striping brush with a fine point and pull the line in one confident stroke.
Watch outDon't go thicker than 1 mm - thick stripes look like tape.
14. Chestnut swirl French tips
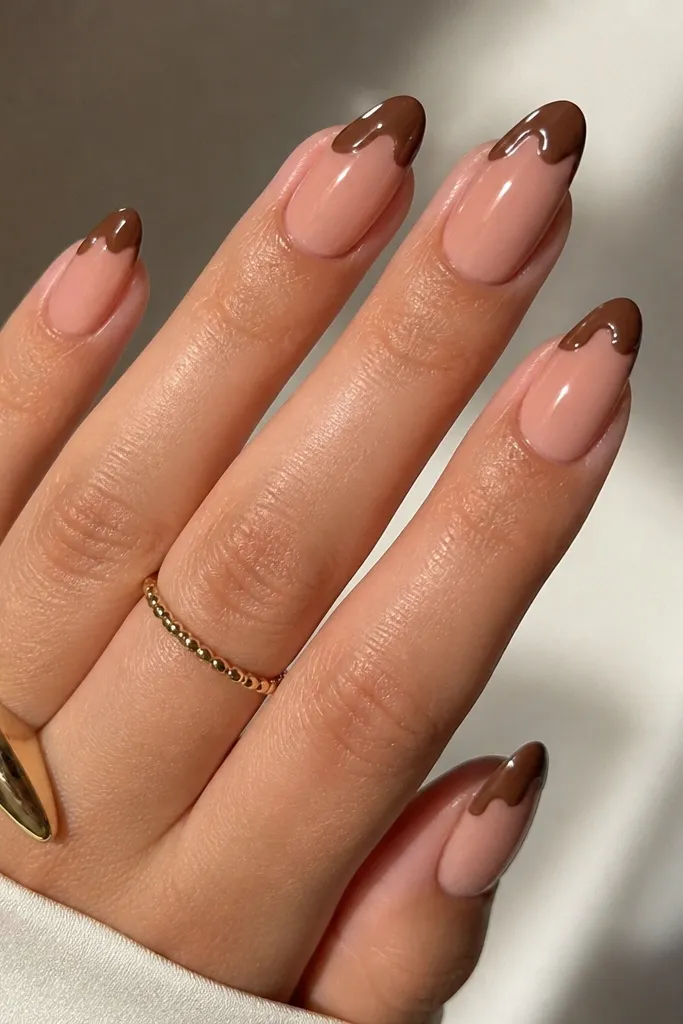
A French tip with a swirl edge looks like a hand-drawn detail instead of a sticker. Chestnut is warm and clear, so it doesn't blur. The swirl tip gives you that autumn "cozy craft" feeling while staying neat.
Paint nude base, then create the tip area with a guide strip. Fill the tip with chestnut and add a swirl edge using a thin liner brush. Remove the guide strip after curing the tip color layer, then seal with glossy topcoat.
Editor's notePractice the swirl on a paper towel first - you want a smooth curve, not a wobble.
Watch outDon't make the swirl edge too tall - it can look like a nail extension line.
15. Mocha base with tiny leaf stamping
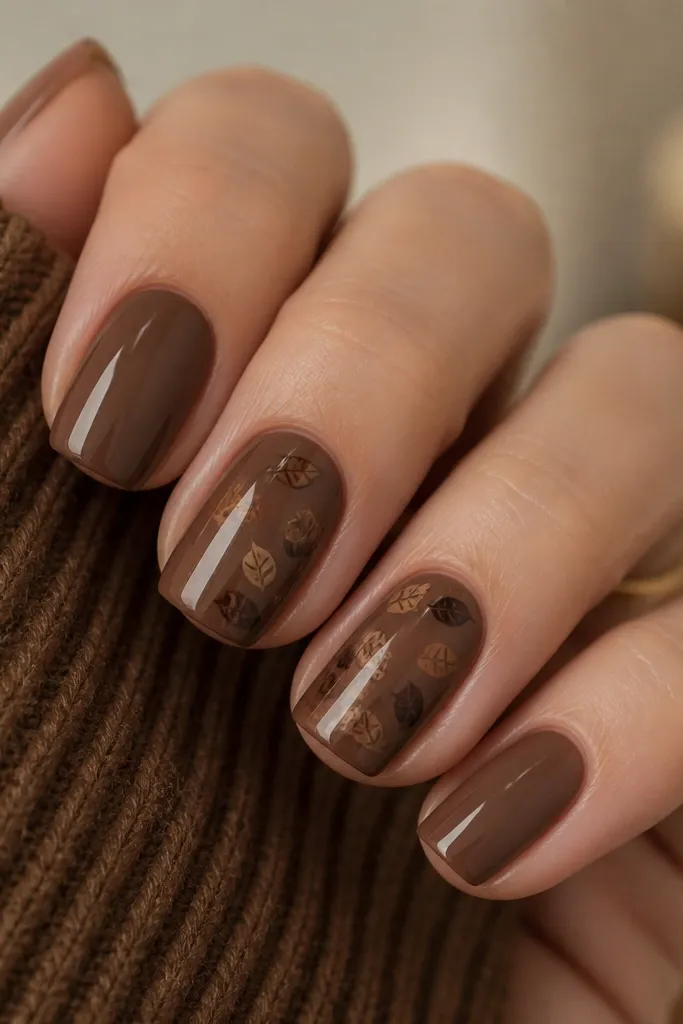
Leaf stamping works because it's repeatable and consistent, unlike hand-painted leaves that wobble. The lighter caramel leaf sits on the mocha base and looks like pressed fall foliage. Keep the stamps small so it looks modern, not like a costume.
Paint mocha base and cure fully. Use a leaf stamping plate with fine details, then scrape and stamp onto the nail. Seal with glossy topcoat to smooth and protect the stamped design.
Editor's noteWipe the stamping plate clean between nails so the leaf pattern stays sharp.
Watch outDon't use thick stamping paste - it fills in the leaf lines and looks muddy.
16. Satin brown with pearl cuticle dots
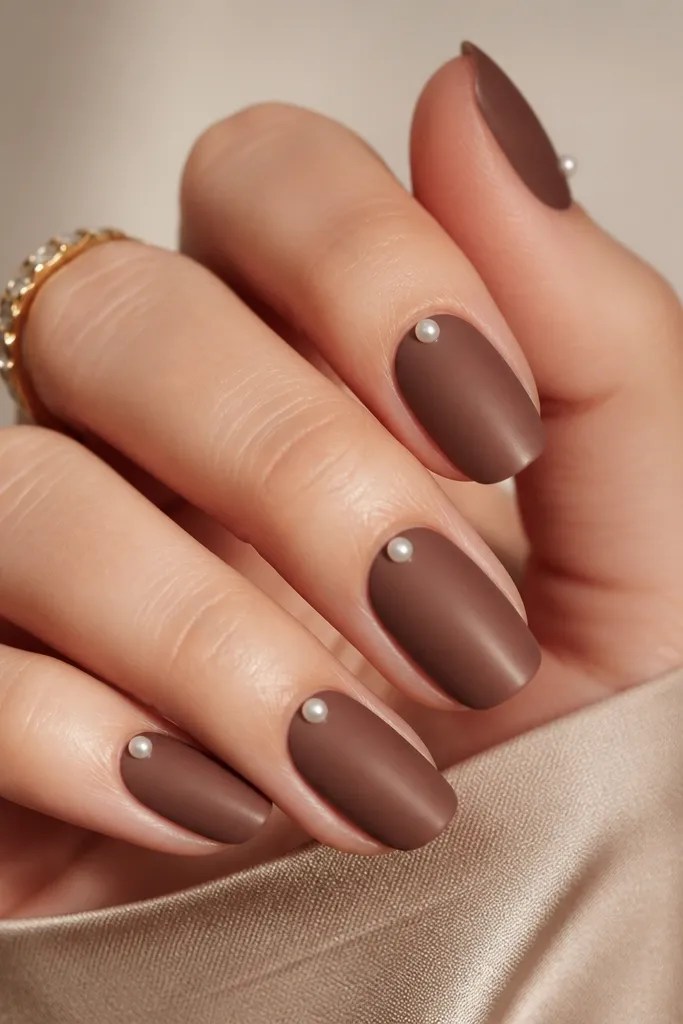
Satin brown already has a soft glow, so it looks fancy without glitter. The single pearl dot at the cuticle makes it look styled and gives a focal point. This works especially well when you want brown but you don't want dark and heavy.
Apply a medium brown with a satin finish (not deep espresso). Add one pearl dot using gel and place it exactly at the center cuticle. Finish with a satin-matte topcoat so the pearl stays the only true shine.
Editor's noteUse tweezers and place the pearl while the gel is tacky, then cure immediately.
Watch outAvoid multiple pearls per nail - it turns into a random bead look.
17. Espresso negative space swirl
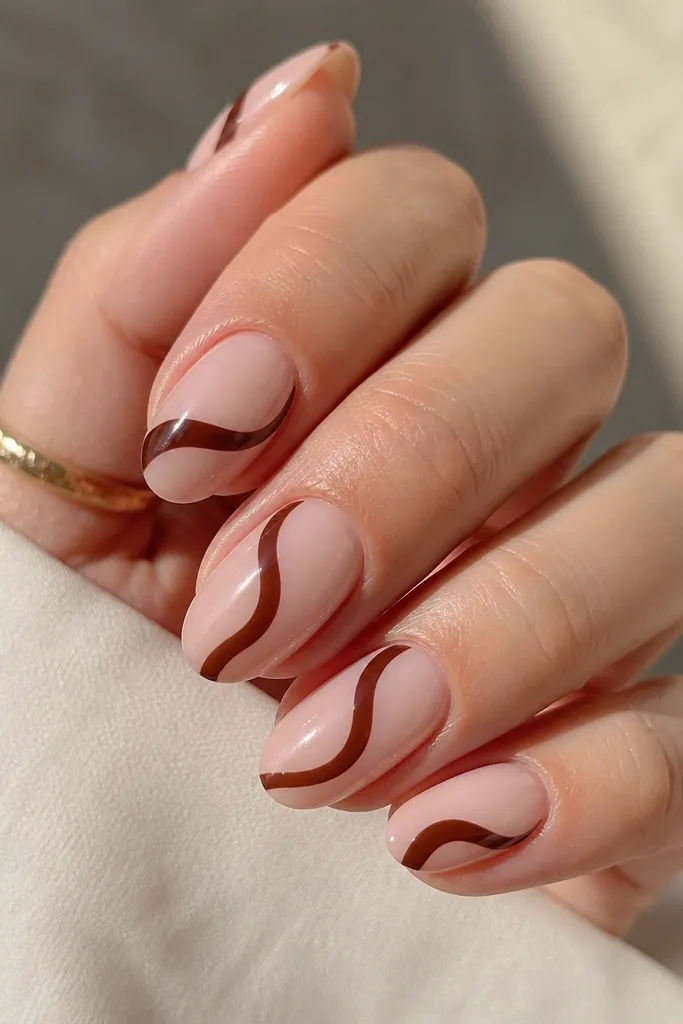
Negative space swirls keep the set light even with espresso. The nude center makes the swirl look like a design drawn on glass. I like this because it looks good with grown-out nails and doesn't get crowded.
Paint nude base. Use a striping brush to draw an espresso swirl line, then stop - don't fill the swirl interior. Cure and seal with glossy topcoat.
Editor's noteKeep the swirl line thickness consistent by reloading your brush only once per nail.
Watch outDon't let the swirl cross the sidewalls too far - it makes nails look narrower.
18. Caramel glaze with micro gold flakes
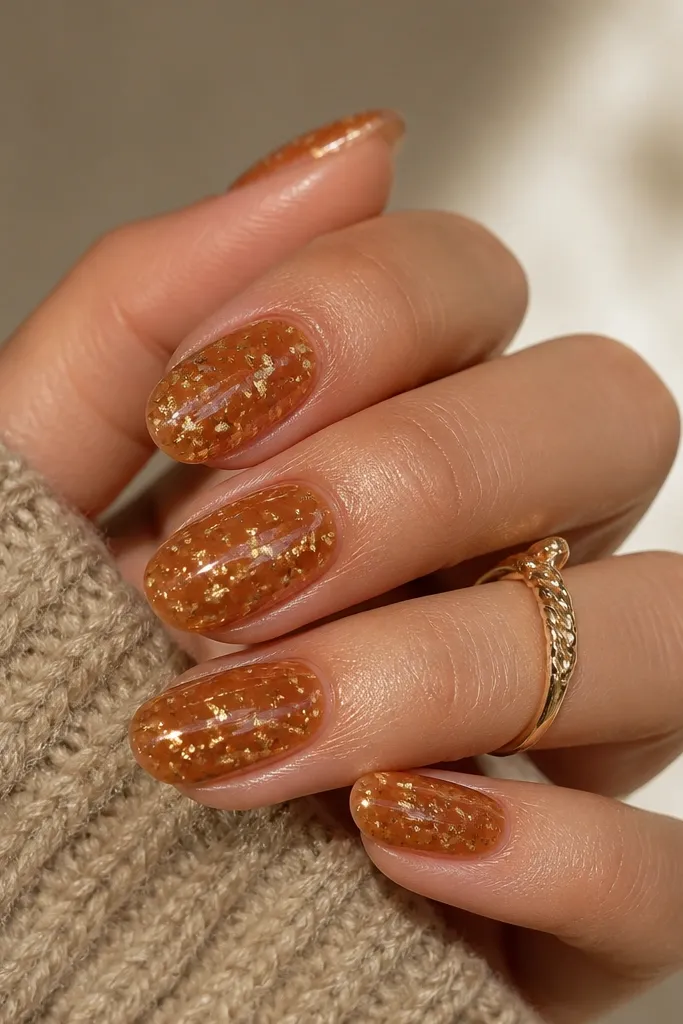
Gold flakes turn caramel into a "late fall" party set without needing a full glitter coat. The scattering keeps it airy, and the glossy base makes the flakes look like they're suspended. This is a great transition set from everyday to date night.
Paint caramel gel in two layers. Add a gel tack layer only where you want flakes, then sprinkle micro gold flakes and press lightly. Cure and seal with one more glossy topcoat.
Editor's noteUse a small piece of tape as a clean-up tool to lift stray flakes from the skin.
Watch outSkip overloading flakes - too many flakes look gritty on brown.
19. Chocolate checker accent on nude brown base
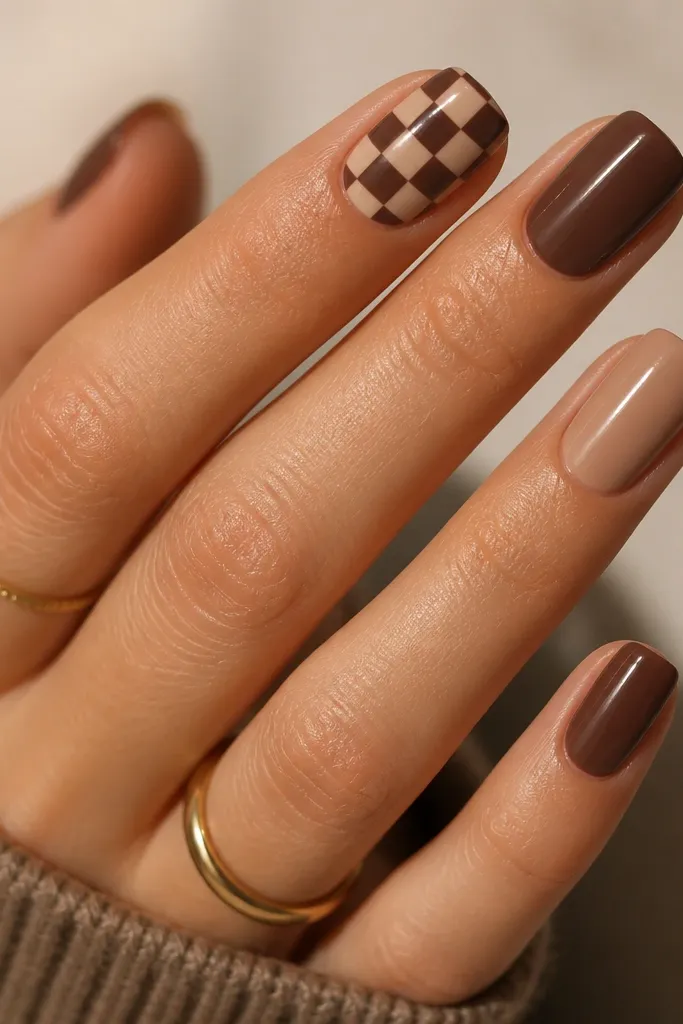
A tiny checker pattern adds graphic interest and makes brown look intentional. Keeping it near the tip keeps the design from taking over the whole nail. The lighter taupe squares stop the checker from looking one-note.
Start with a nude-brown base. For the checker, use a fine liner brush and paint small squares in a grid, or use stamping if you have a checker plate. Keep the checker area to about 30-40% of the nail length.
Editor's noteLet each square color cure briefly if you're layering by hand to avoid bleeding.
Watch outDon't make the checker too large - big checks can look like school art.
20. Umber crackle with clear topcoat shine
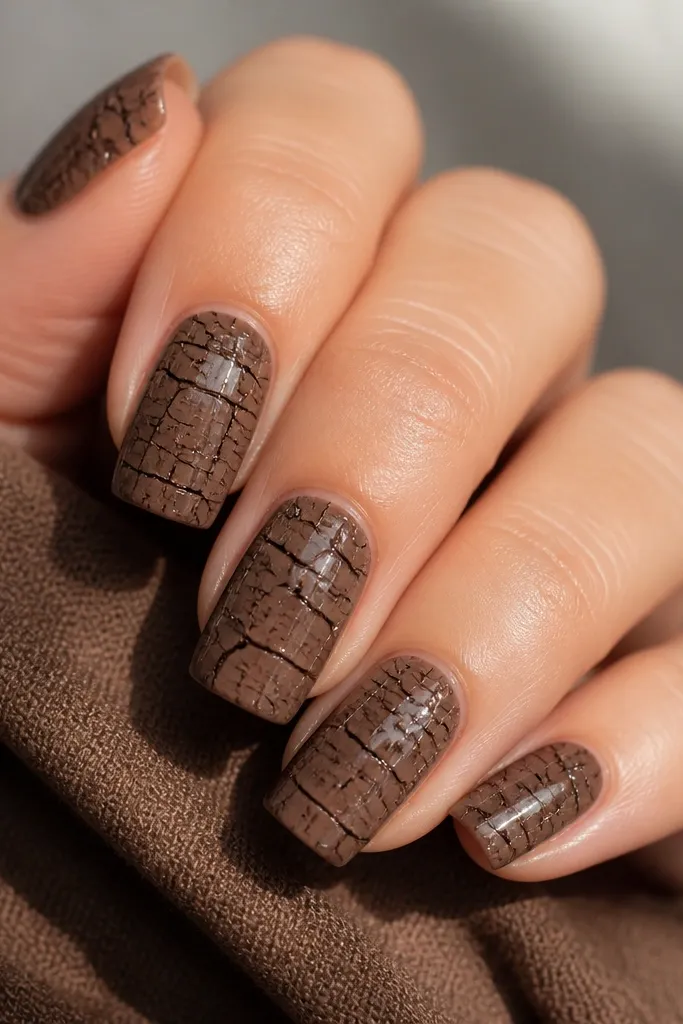
Crackle effects look autumn because they mimic dry leaf textures. Umber crackle reads more natural than black crackle, and the glossy topcoat keeps it from looking dusty. This is a fun set when you want brown but still want something that feels different than marble or ombré.
Apply umber base gel and cure. Use crackle gel in a thin layer so the crack lines show without pooling. Seal with a glossy clear topcoat to smooth the surface and protect the design.
Editor's noteUse a thicker application than you think, but only on one coat - too thin gives faint cracks.
Watch outDon't skip topcoat - unsealed crackle can snag and chip faster.
21. Mocha latte swirl dots on nude
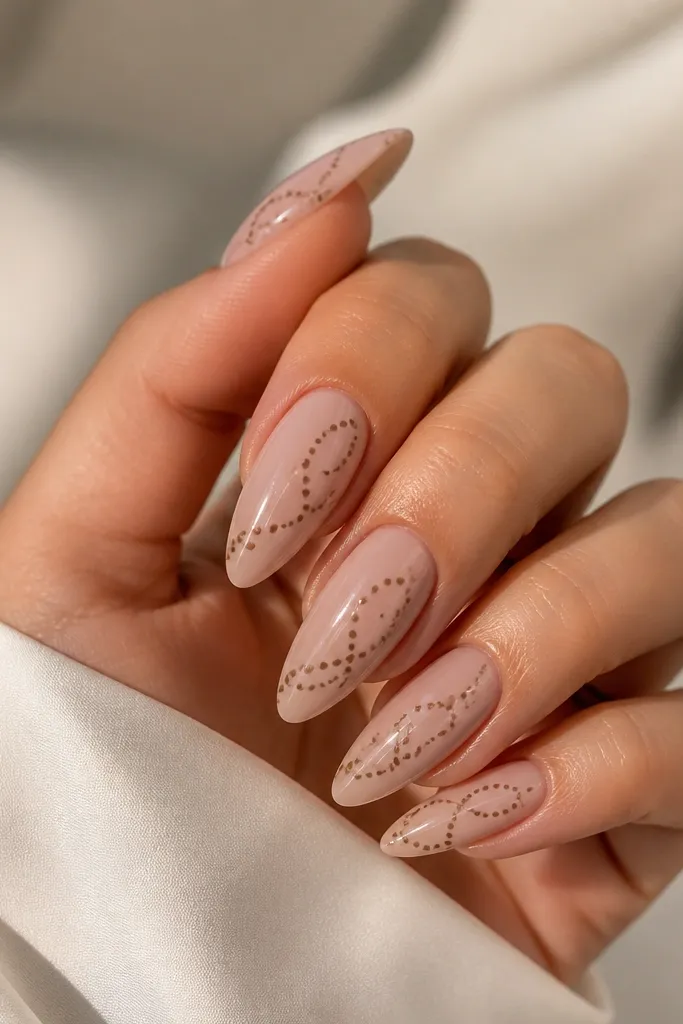
Dotted swirls look soft and hand-made, not harsh. The mocha dots give you texture without glitter, and the nude base keeps the set airy. This design is flattering on long almond because the swirl can curve with the nail length.
Paint nude base first. Use a dotting tool to place dots in a spiral path, then connect the dots visually with a second pass if needed. Keep the swirl starting about 3-4 mm from the cuticle and ending near the tip.
Editor's noteUse a slightly darker mocha for the outer dots and a lighter mocha for the inner dots for depth.
Watch outAvoid placing dots too close together - it turns into a blob.
22. Chestnut French with tiny gold studs
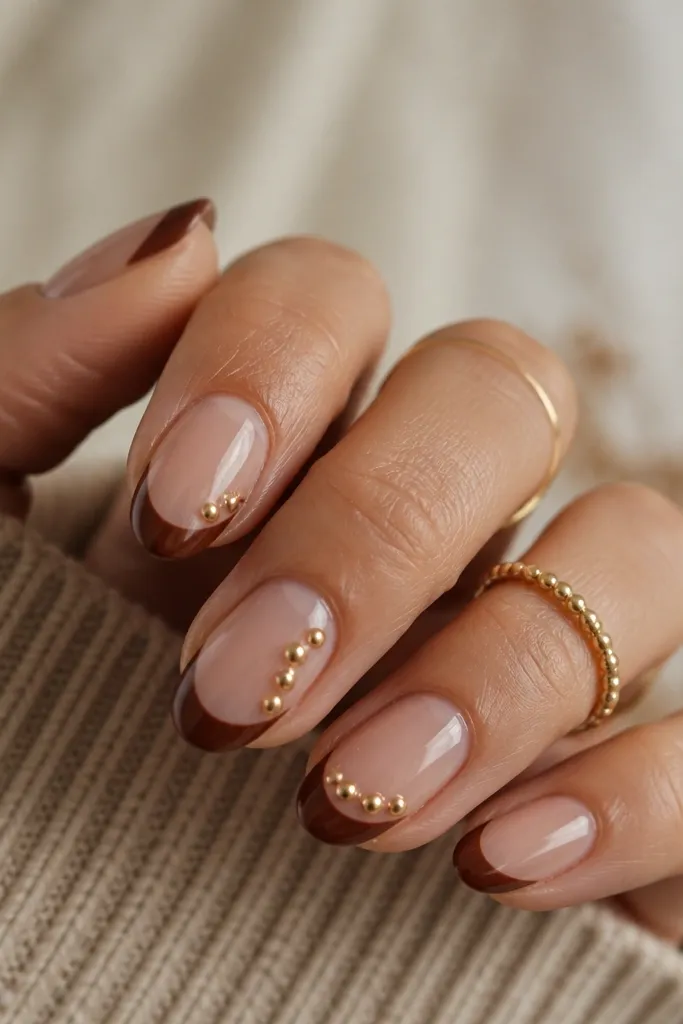
Studs at the tip look like warm jewelry. Chestnut French gives the autumn brown base, and the gold studs add focus without making the nail heavy. This is a great "one step above basic" set for fall dinners.
Paint nude base, then apply chestnut to the tip using a guide. Place 1-2 micro gold studs on the cured tip area using a tiny amount of gel and cure. Cap the edges with a thin topcoat so studs don't catch.
Editor's noteUse a dot of gel to anchor each stud, then wipe the brush clean so you don't flood around it.
Watch outDon't place studs in the center of a wide tip - they look like a random bump.
23. Espresso velvet matte with soft gradient sides
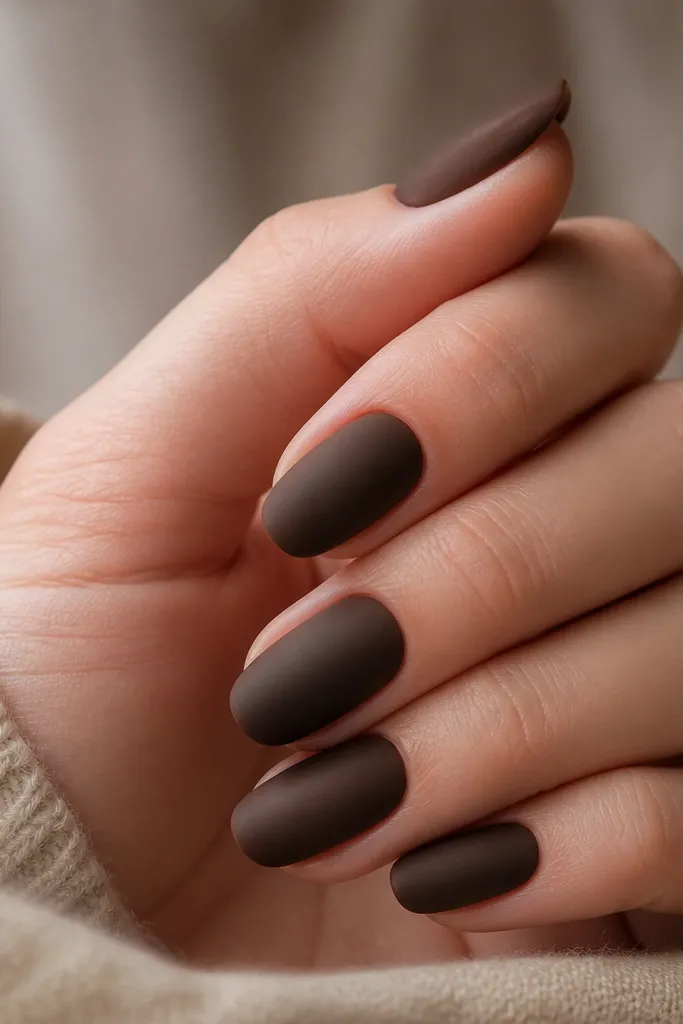
Velvet matte makes espresso look plush instead of flat. The lighter side gradients keep the nail from looking like one dark block and give a slimming effect along the sides. This one feels very fall because it looks like fabric.
Use a matte velvet powder over espresso gel if you have it, or use a matte topcoat for a smoother look. For the side gradients, blend lighter brown gel along the lateral edges only, then cure. Finish with a matte topcoat to lock it all.
Editor's noteFor the cleanest sides, use a flat brush and keep gradient only within 1-2 mm from the edge.
Watch outSkip heavy gradient blobs on the center - it destroys the velvet effect.
24. Caramel and cream half-split nails
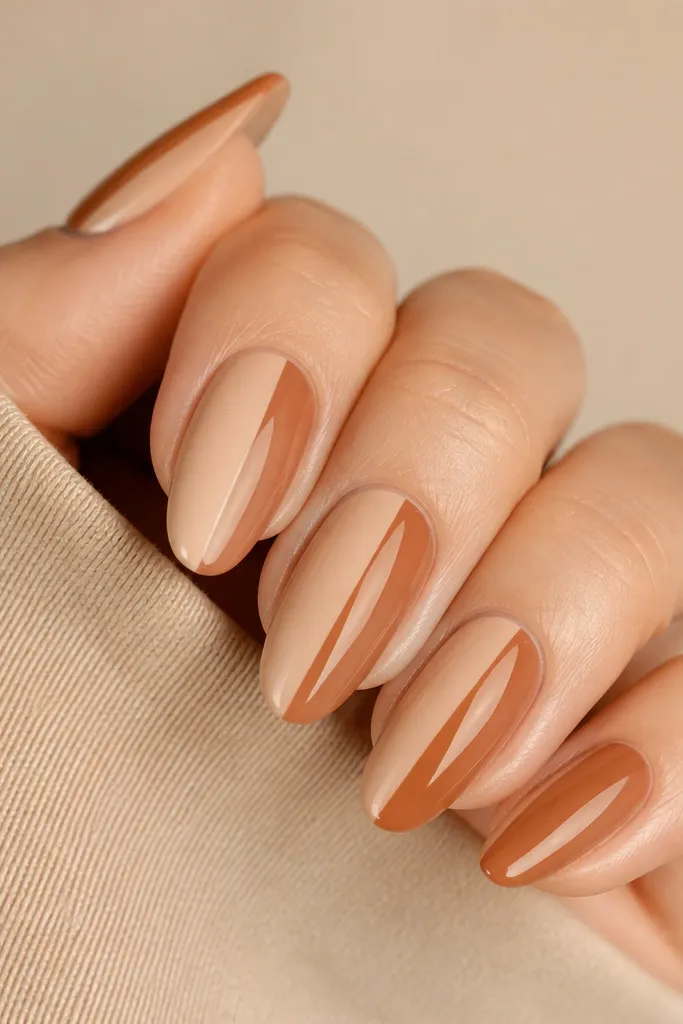
Half-split nails look modern and graphic, and brown stays wearable when it's only half the nail. The off-white nude keeps it warm, not stark. Crisp separation makes it feel intentional even if your lines aren't perfect - the split is the design.
Paint a creamy nude base first, cure, then mask half with tape or a nail form strip. Paint caramel brown on the exposed side, remove the tape while gel is still tacky, then cure. Seal with glossy topcoat.
Editor's noteUse thin tape and press it down gently so you don't get ridges.
Watch outDon't blur the split line - it turns into a muddy two-tone.
25. Dark cocoa ombré with bronze tip shimmer
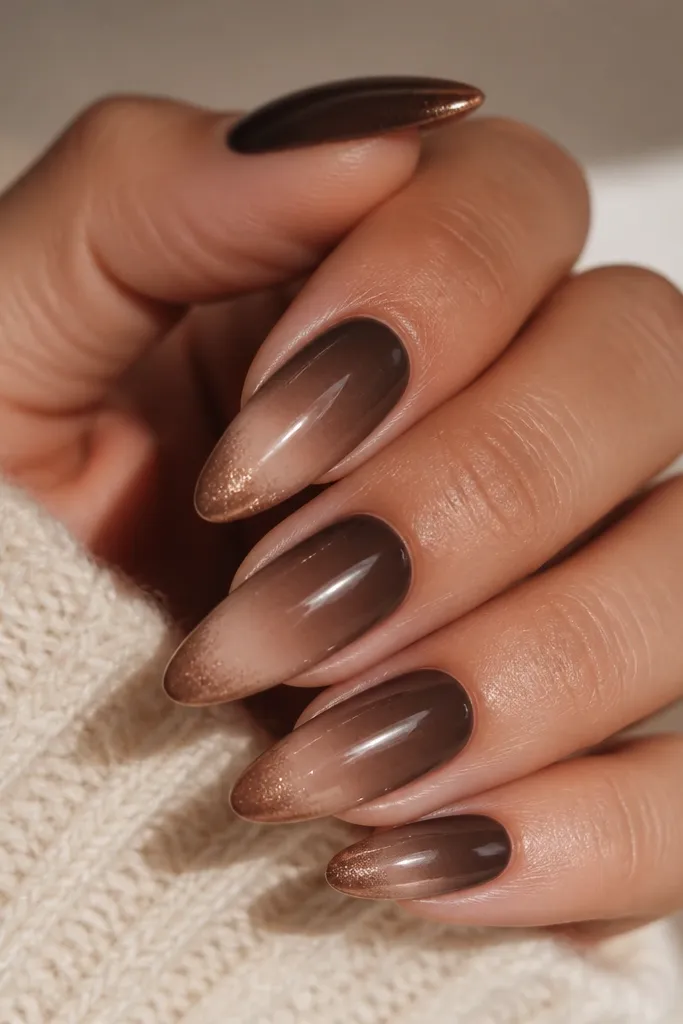
This is the "night fall" brown look. The cocoa ombré gives depth, and the bronze tip shimmer adds warmth that reads gold in sunlight. The fade keeps it from looking like a glitter stripe.
Blend dark cocoa gel on the last third down into nude. Add bronze shimmer only at the extreme tip and blend it upward 1-2 mm. Cure in layers so the shimmer stays fine and smooth.
Editor's noteAfter the final cure, apply one glossy topcoat thick enough to level texture over shimmer.
Watch outDon't let bronze shimmer reach the middle - it makes the set look like a holiday nail.