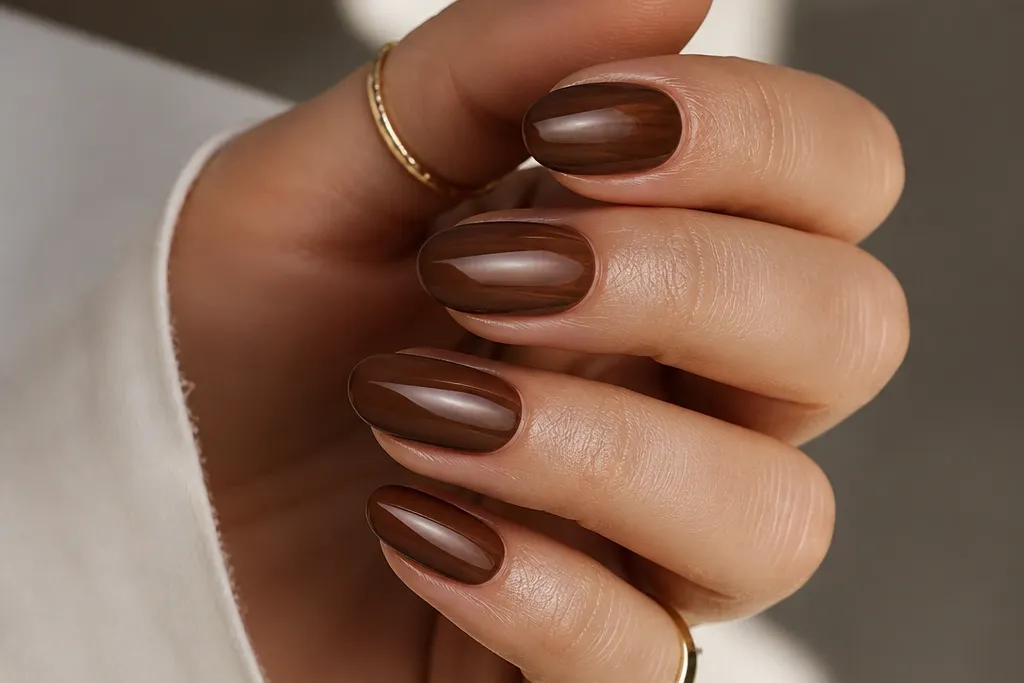
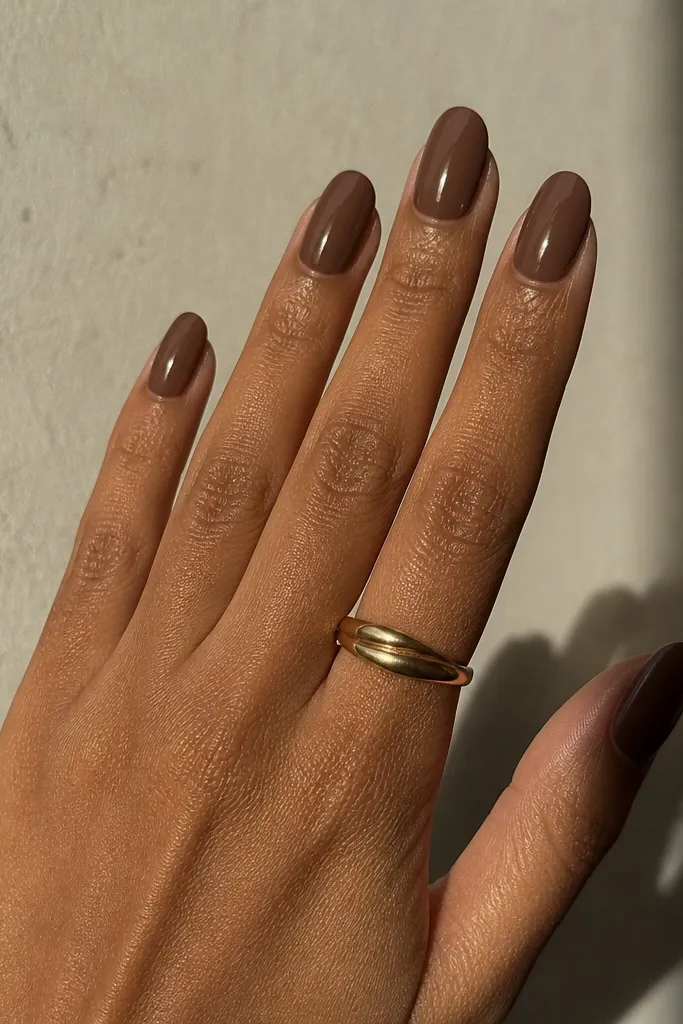
1. Milk-Chocolate Glass Tips
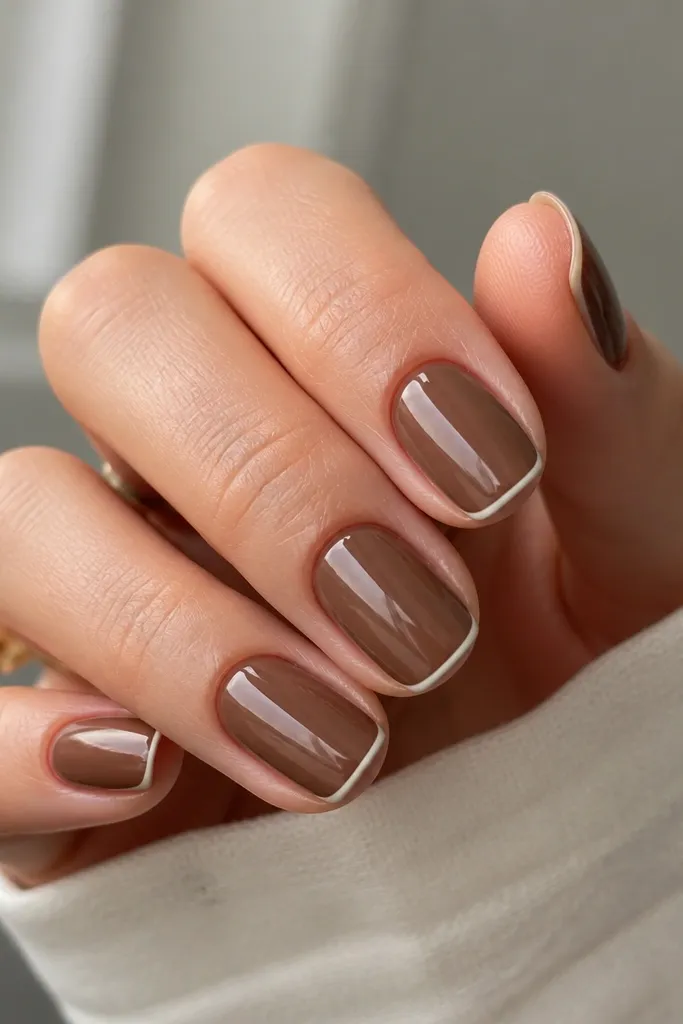
This design uses a warm milk-chocolate brown as the base and adds a super-thin cream "frame" at the free edge. The thin light line makes the brown look cleaner and brighter, like it has depth. A high-gloss topcoat is the whole point - it turns flat brown into a smooth, reflective surface.
Keep nails short squoval (about 2-3 mm past the fingertip) so the tip line stays delicate. Use opaque brown polish or gel in two thin coats, then paint a 0.5-1 mm cream border right along the tip. Finish with one layer of glassy gel topcoat, curing fully so you get that mirror shine.
Editor's noteUse a fine detail brush and tape off a straight guide line for the cream border. If it smudges, clean the line with a flat brush dipped in acetone before topcoat.
Watch outAvoid thick tip lines - they make brown look like a cheap manicure sticker.
2. Espresso Half-Moon Negative Space
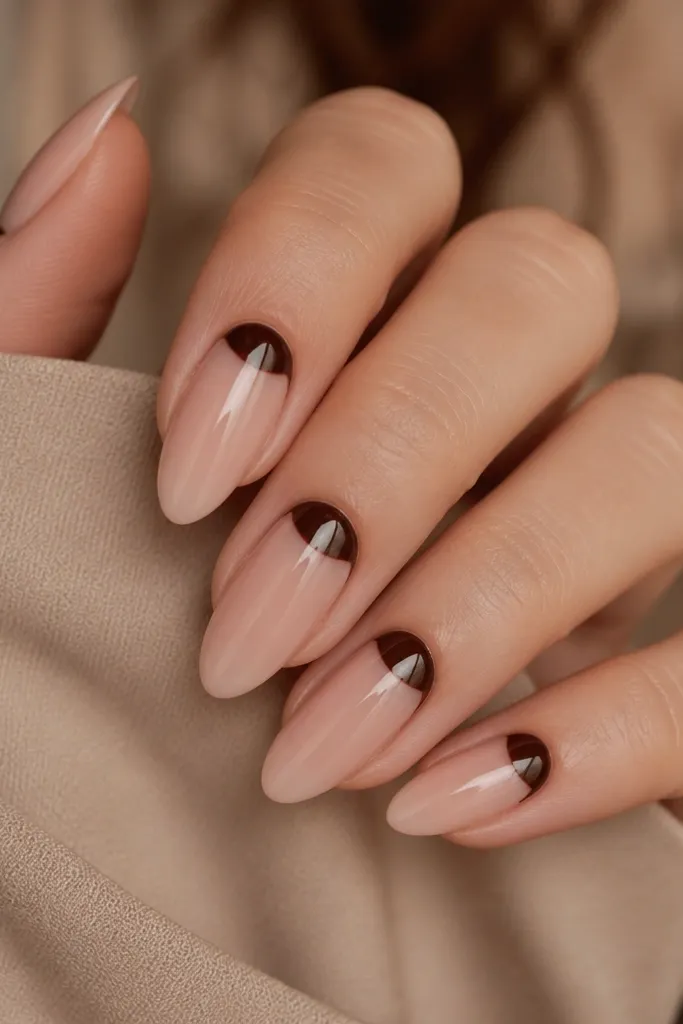
The negative space keeps the brown from taking over, and the half-moon placement makes it look intentional. Espresso brown at the cuticle reads sleek because it's concentrated where your eye expects detail. A glossy topcoat over the nude base makes the bare area look smooth, not dry.
Start with a sheer nude base (pink-beige, not gray). Paint the half-moon in espresso brown gel, using a small liner brush and a steady hand. Cure, then topcoat everything with a thick-gloss layer so the negative space looks sealed.
Editor's noteIf your half-moon gets messy, use a cuticle remover cotton swab right after curing to tidy the edges.
Watch outSkip chunky cuticle coverage - sloppy half-moons look like the polish bled under the brush.
3. Caramel Ombre Fade
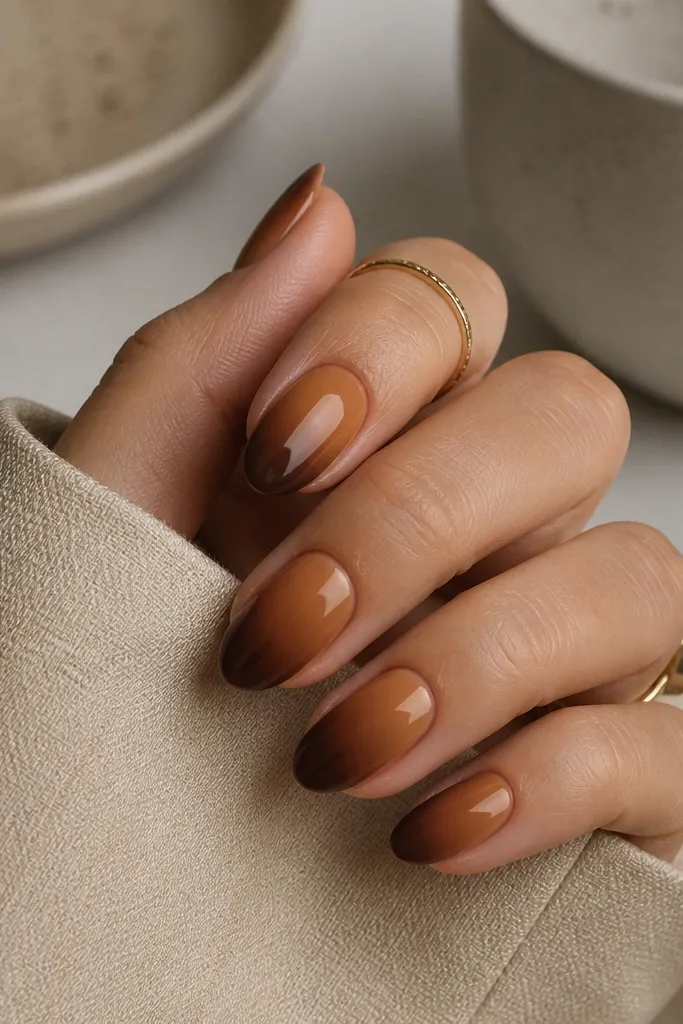
Ombre makes brown look expensive because it creates dimension without adding extra art. Caramel at the cuticle gives brightness, while the darker tip anchors the look. The blend has to be soft - that's what makes it look salon-done.
Use a 3-color gradient: sheer nude base, caramel (warm tan-brown), and chocolate brown. Apply caramel where the fade starts (about 1/3 of the nail), then sponge in chocolate at the tip. Blend with a makeup sponge in light taps, then topcoat with a glossy gel.
Editor's noteWipe the sponge lightly on a paper towel between nails so you don't get heavy dots in the middle.
Watch outDon't use a sponge straight from the bottle - it creates gritty bands.
4. Mocha Marble Swirl
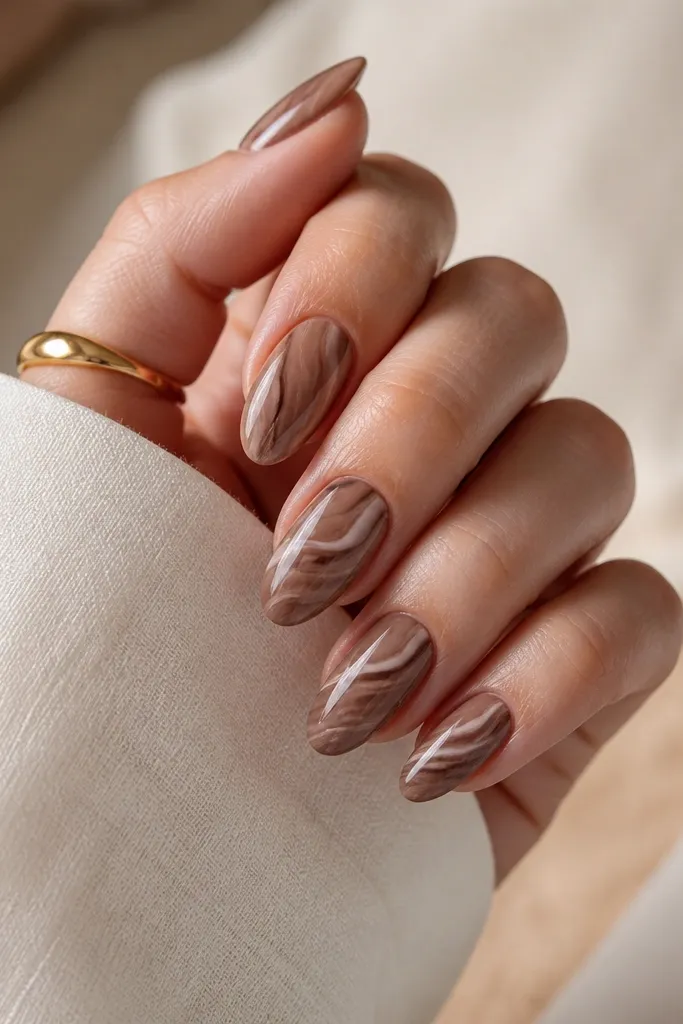
Marble works with brown because you can keep it warm: cream lines over mocha look like stone, not "mud." The trick is thin movement lines, not thick scribbles. Glossy topcoat makes the marbling look like it's trapped under glass.
Paint a solid mocha base (two coats). On a damp layer or with a marbling tool, drag thin cream and light tan lines through the brown, then swirl once per nail. Finish with a glossy topcoat that levels the surface so the lines look smooth.
Editor's noteUse a toothpick for the final swirl line - it's thinner than most dotting tools.
Watch outAvoid big blobs of cream - they make brown marble look like dried paint.
5. Cocoa Dot Cuticle Stars
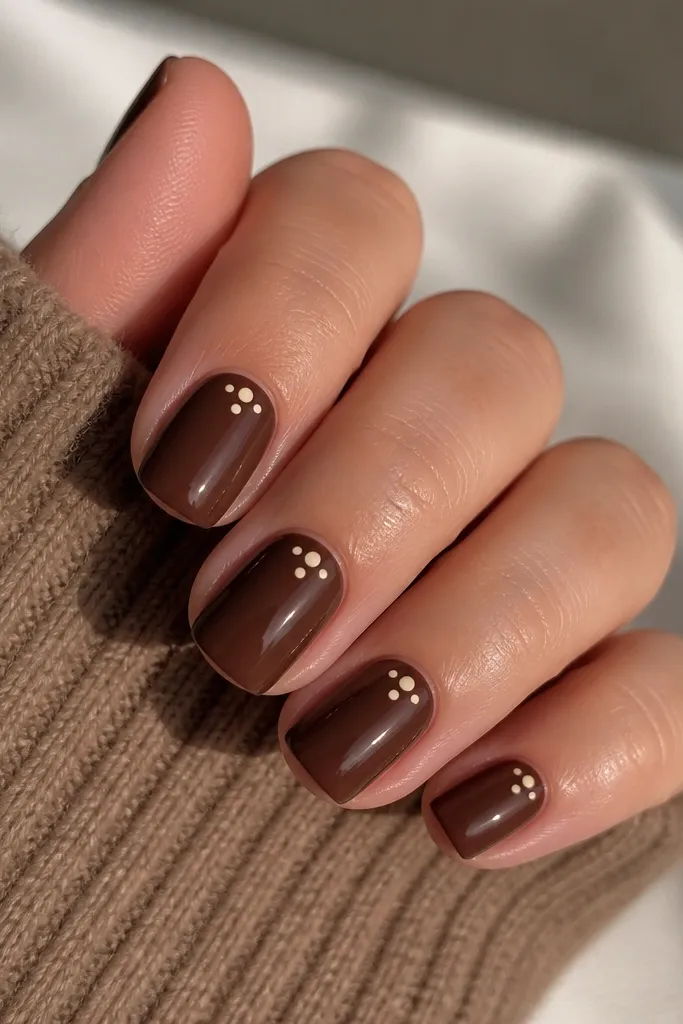
Tiny dots near the cuticle look cute without needing long nails. Cocoa brown is the hero color, and cream dots add contrast that makes the manicure look crisp. This pattern reads clean because the dots are small and spaced evenly.
Use an even cocoa brown base. Place three cream dots in a triangle near the cuticle, leaving a small gap from the skin line. Topcoat over the dots so they look smooth and slightly raised.
Editor's noteDot in two stages: place the first dot, cure, then add the other two to prevent smearing.
Watch outDon't make the dots too large - big dots look like accidental fingerprints.
6. Gold Foil Edge Frame
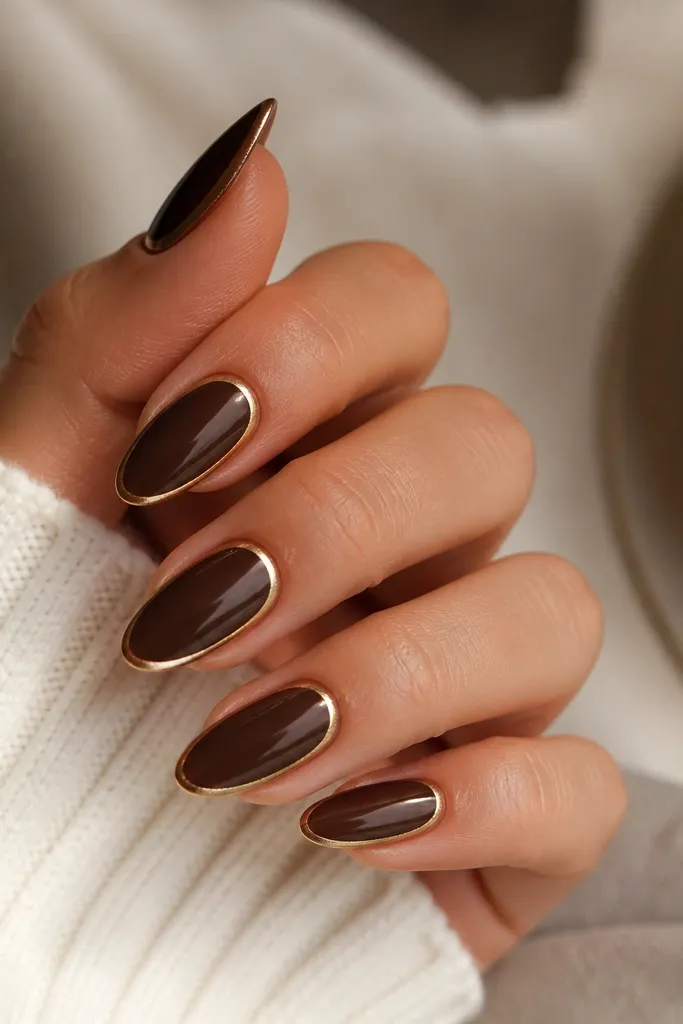
Gold foil on brown looks instantly polished because it adds a warm highlight that matches the undertone. The frame effect is subtle and reads "expensive" because it's placed only where light hits the nail. Keep the foil narrow so it doesn't overpower the brown.
Paint espresso brown as your base. Tear thin pieces of gold foil and press them along both side edges with a tacky gel layer. Leave the center clean. Seal with a glossy topcoat that fully covers the foil edges.
Editor's notePress foil with a silicone tool - it grips without lifting the base color.
Watch outAvoid covering the whole nail with foil - that's where it starts looking costume-y.
7. Chestnut Micro-French
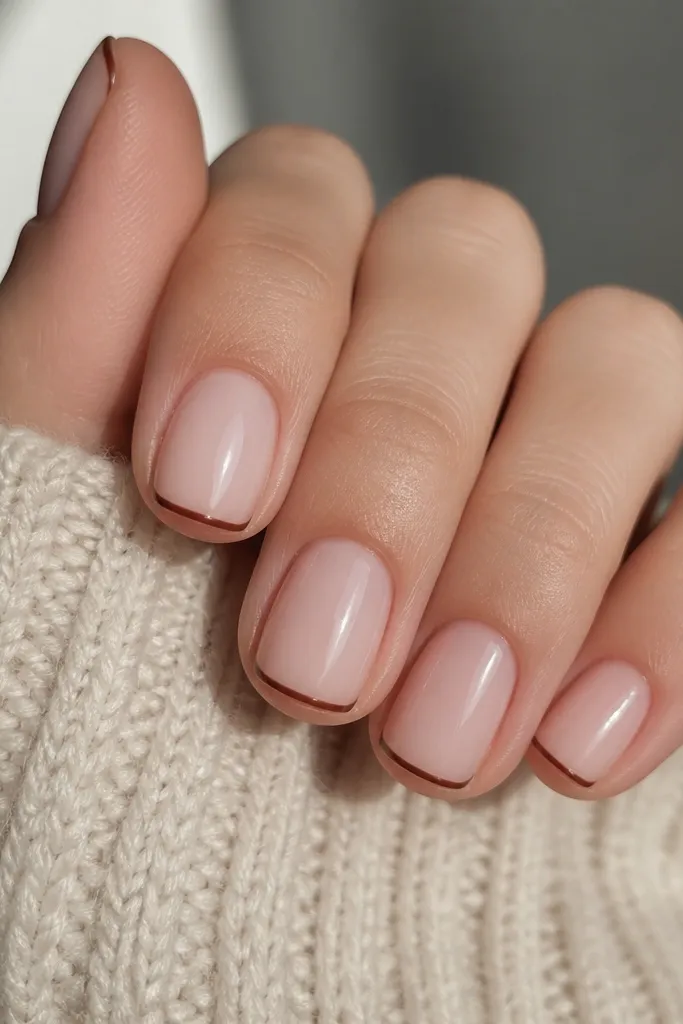
Micro-French is the easiest way to make brown look high-end. The brown is only at the tip, so the rest of the nail stays clean and bright. It also hides uneven cuticles because the nude base matches your skin tone.
Start with a nude pink-beige base. Use a nail striping brush and paint a thin chestnut line at the tip, about 1 mm tall. Cap the edges with topcoat so the line doesn't catch on sleeves.
Editor's noteUse nail tape for the first pass, remove it immediately, then refine the line with the brush.
Watch outSkip a thick French - it makes the manicure look like a cheap stencil.
8. Toffee Aura Glow
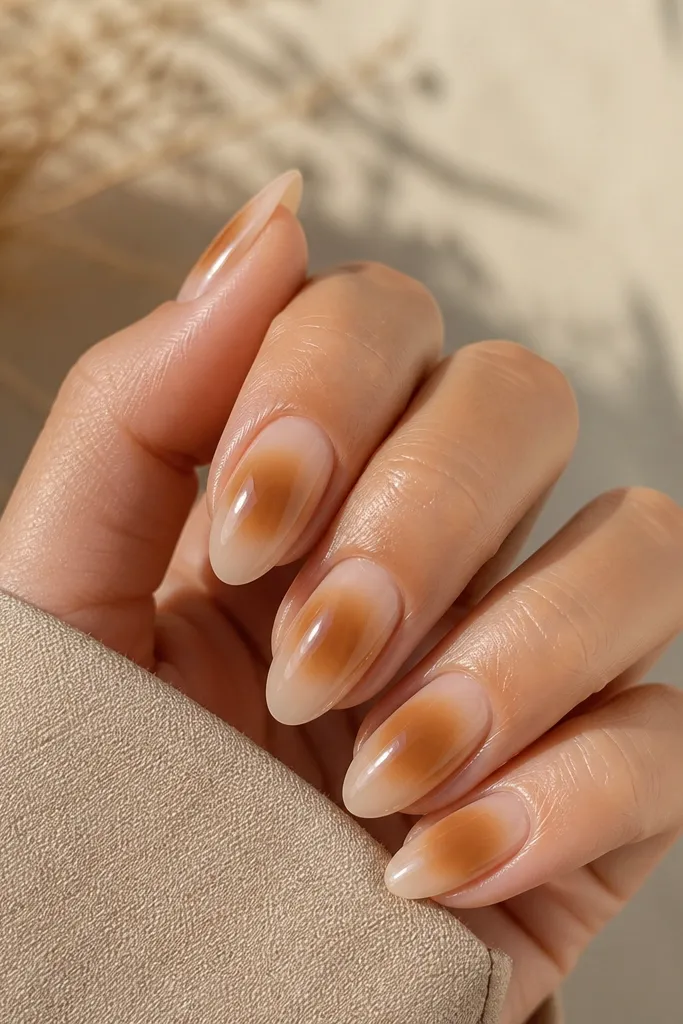
Aura nails make brown look airy and expensive because the color is concentrated in the middle and fades smoothly. Toffee is warm and forgiving - it doesn't turn gray on camera like some browns do. A glossy topcoat keeps the aura looking hydrated, not dry.
Paint a sheer nude base. Sponge toffee-brown in a circle around where the center of the nail sits, then blend outward with a lighter caramel shade. Clean up the sides with a brush and acetone before topcoat. Cure and finish with glossy gel topcoat.
Editor's noteHold the sponge flat and tap lightly - pressure creates harsh rings.
Watch outDon't overbuild the aura in one spot - it turns blotchy fast.
9. Chocolate Chip Accent Nail
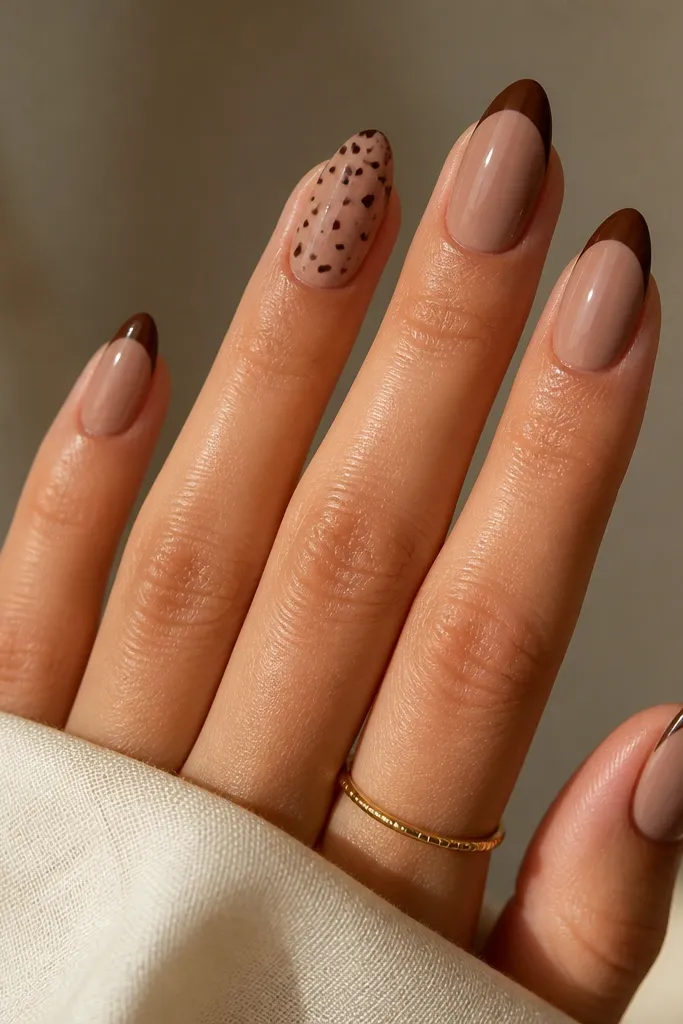
Accent nails make brown designs feel intentional and wearable. The "chocolate chip" flecks add texture without needing full nail art. When the rest of the nails stay nude, brown looks rich instead of heavy.
Paint nude on all nails. On one nail per hand, paint a chocolate brown base, then add tiny cream specks using a dotting tool or broken toothpick tip. Keep the flecks random but small. Seal with topcoat so the texture looks smooth.
Editor's noteUse two sizes of flecks - one tiny and one slightly larger - for a more natural chip look.
Watch outAvoid painting all nails with flecks - it becomes busy and cheap-looking.
10. Espresso Skittle Tips
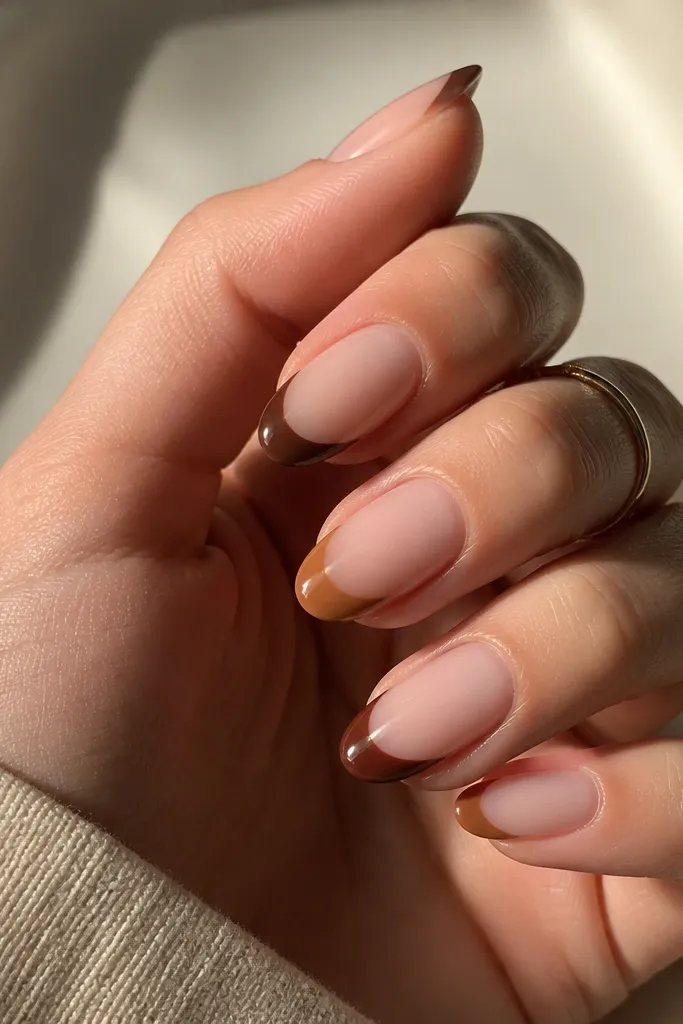
Skittle tips with brown tones look expensive because they create a planned color story. You get variety without turning the whole manicure chaotic. The nude base keeps it clean, and the soft blend makes the transitions look salon-made.
Choose three browns: espresso, caramel, and warm cocoa. Paint nude base, then sponge each brown tone only at the tip area (about 1/3 of the nail). Blend the bottom edge lightly so you don't get a hard line. Topcoat glossy.
Editor's notePick the same tip height on every nail so the manicure looks designed, not accidental.
Watch outDon't use too many brown tones - four or more makes it look like you grabbed leftover polishes.
11. Hazelnut Velvet Matte
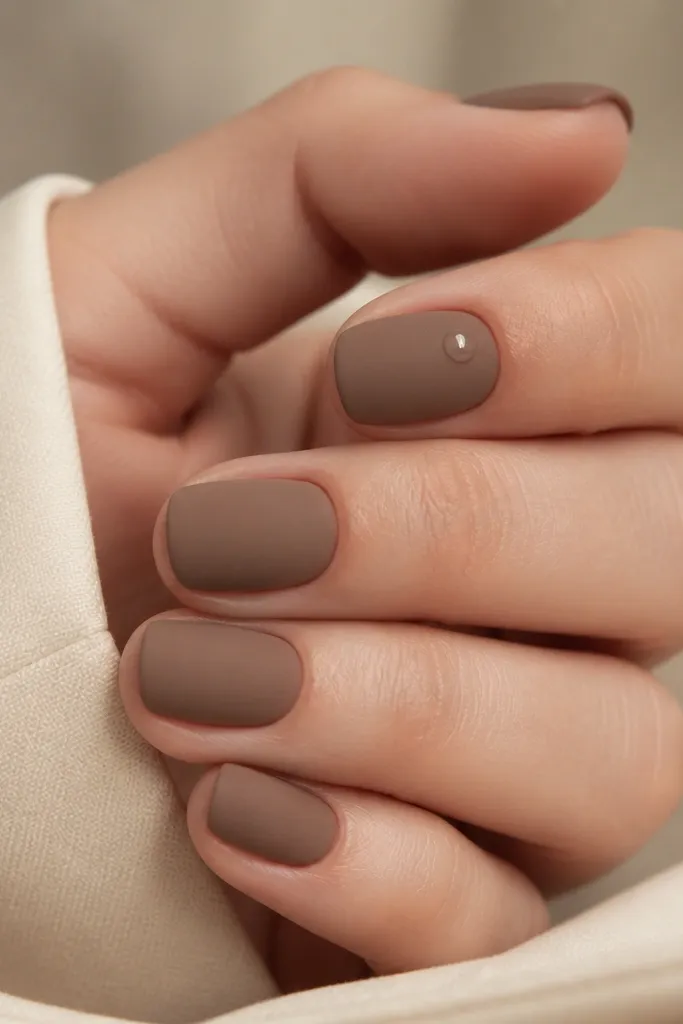
Matte is where brown nails look expensive fast because it hides minor imperfections in the base coat. Hazelnut brown reads warm and cozy on matte, and the tiny glossy dot gives a focal point. The contrast between matte and one glossy detail is the whole trick.
Use a rich hazelnut brown as your base. Apply matte topcoat over everything except the one dot nail area you want glossy. For the dot, paint a single tiny glossy gel dot and cure, then matte topcoat around it.
Editor's noteScuff the surface lightly with a matte-friendly buffer before matte topcoat if your gel is too glossy.
Watch outDon't put matte topcoat over uneven color - it can make patches stand out.
12. Brown Chrome Halo
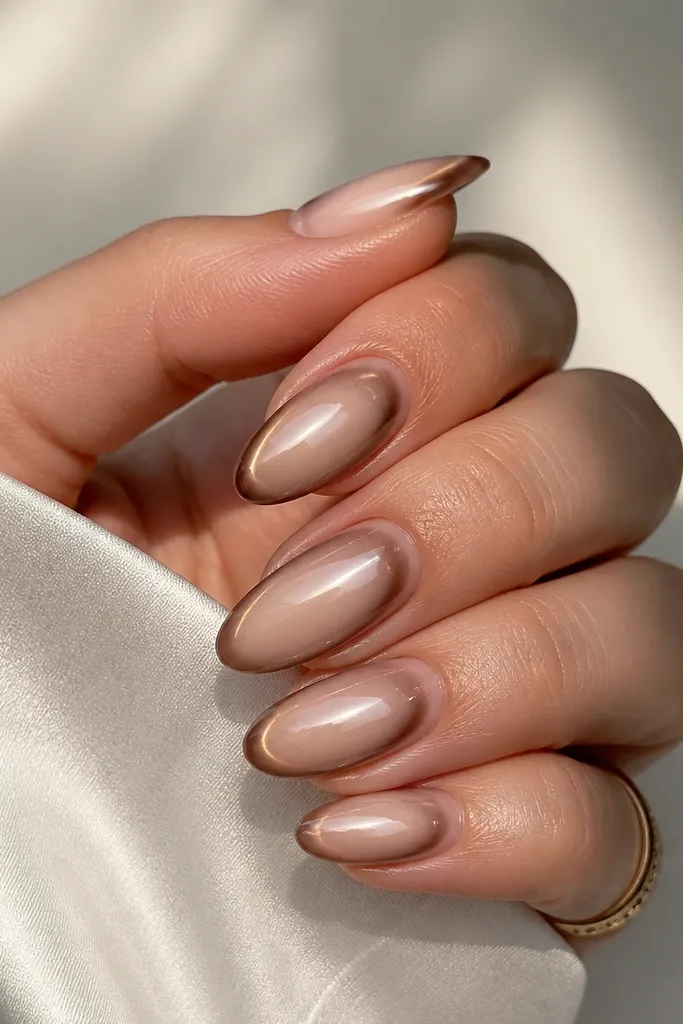
Chrome halo lines look pricey because they catch light in a controlled circle. Brown chrome is smoother than glitter and doesn't look harsh. The nude base makes the halo look like jewelry instead of decoration.
Start with a nude base. Apply a thin gel ring where you want the halo, then dust brown chrome powder over it and brush off excess. Seal with a glossy topcoat - chrome needs sealing so it doesn't dull.
Editor's noteUse a stencil circle or a small nail dot sticker for the ring placement.
Watch outDon't over-press chrome powder - it can smear and look streaky.
13. Caramel Lace Negative Lines
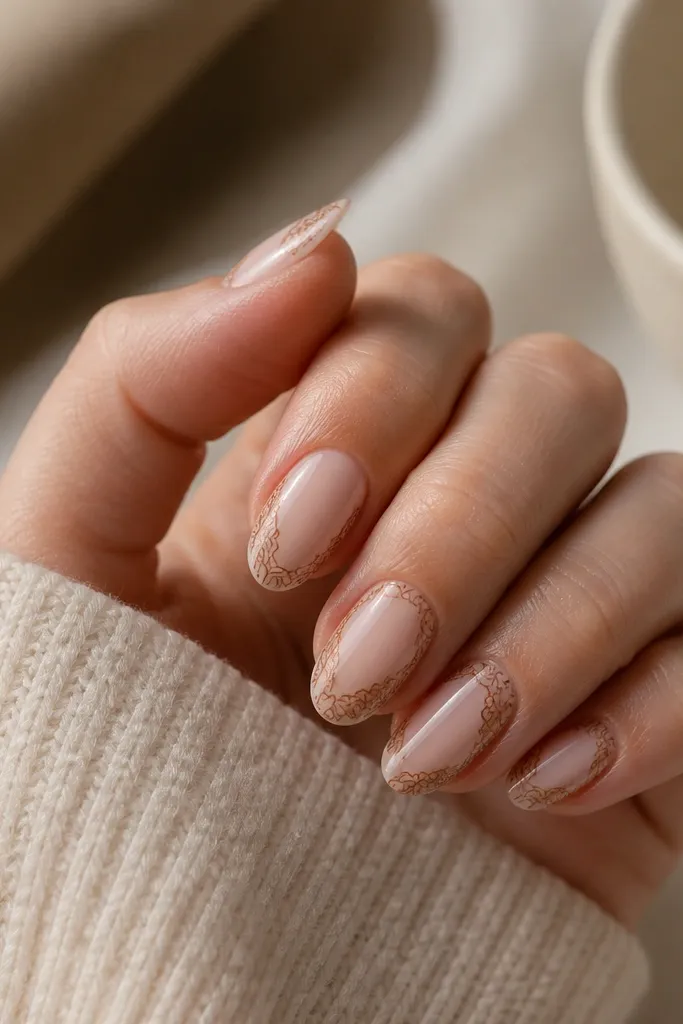
Lace linework looks fancy on brown because the color is warm and the pattern is airy. The trick is leaving lots of nude space so the lines don't crowd. A glossy topcoat keeps the lines crisp and prevents them from looking like flat decals.
Paint nude base. Use a fine liner brush to draw two curved side lines and add small cross strokes like a loose lace grid. Keep the pattern on the sides and upper half so it looks delicate. Topcoat glossy and cap the line edges.
Editor's noteDo the linework in one nail at a time so gel doesn't dry before you place the lines.
Watch outSkip thick marker-like lines - they read cheap and overpower the nail.
14. Chocolate Ombré Glitter Fade
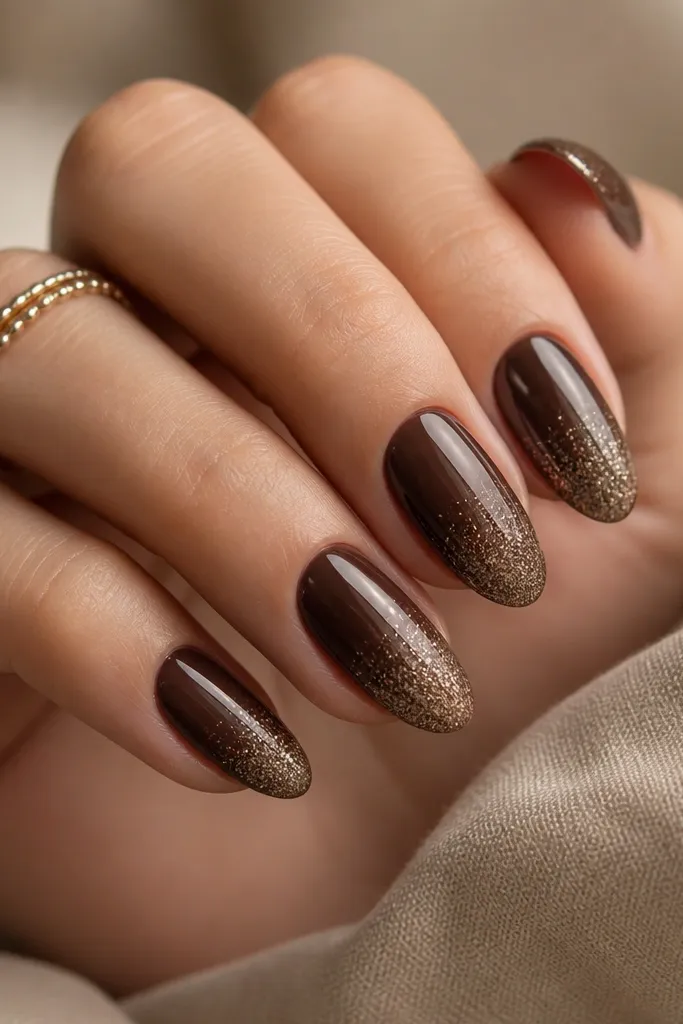
Glitter fade makes brown look glam without full glitter coverage. The key is concentration at the tip and a soft gradient down the nail. A warm chocolate glitter (not silver) keeps it cohesive and keeps the brown looking intentional.
Paint a chocolate brown base. Sponge or brush warm brown glitter gel starting at the tip area and fade downward. Keep the glitter edge soft by using fewer passes as you move toward the middle. Seal with glossy topcoat so it doesn't feel gritty.
Editor's noteIf it feels rough, add a second clear gel layer and cure longer for a smooth surface.
Watch outAvoid chunky glitter piles - they catch on fabric and look messy.
15. Warm Brown Skintone Base
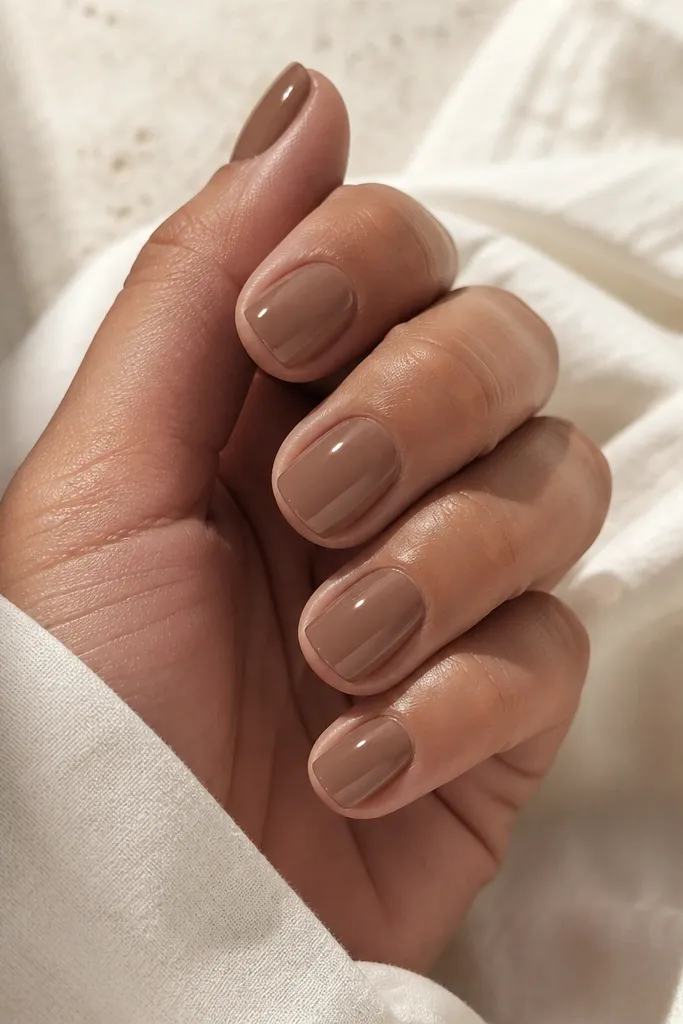
This one is simple but it's the "expensive" trick: a warm brown nude base that matches your skin's undertone. It looks like a custom shade, not a generic brown polish. Glossy topcoat is required because it turns that nude-brown into a smooth, expensive finish.
Choose a brown nude that looks slightly warmer than your natural nail bed. Apply two thin coats, making sure you cap the free edge. Finish with a glossy topcoat that levels the surface. This works for short nails and grows out clean.
Editor's noteTest the shade on your fingertip first - the right brown nude disappears into your skin instead of sitting on top.
Watch outDon't use gray-brown nudes - they look tired and make hands look older.
16. Caramel Dot French Corners
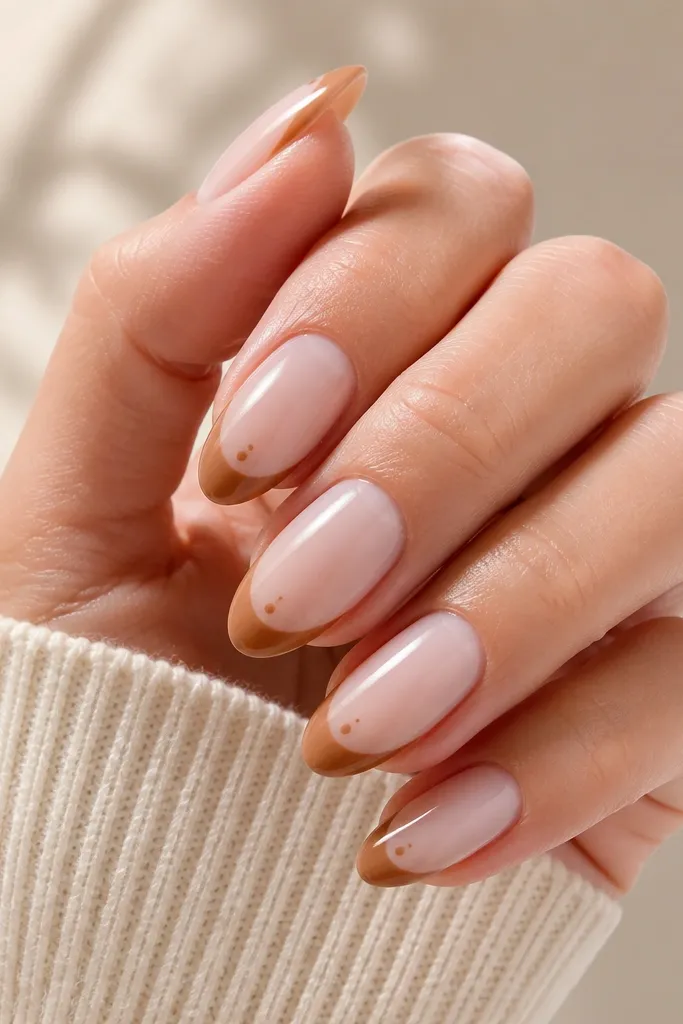
This design adds a tiny detail that makes a basic French look designed. The dot corners catch light and make the tip look sharper, especially on almond. Caramel-brown is warm enough to look flattering and not harsh.
Paint nude base. Add a thin caramel French line at the tip. Place one tiny dot on each side corner where the line ends. Topcoat glossy so dots look smooth and sealed.
Editor's noteUse a dotting tool with a small tip; big dots make the corners look like mistakes.
Watch outAvoid thick French lines - the dots won't save it.
17. Espresso Side Stripe
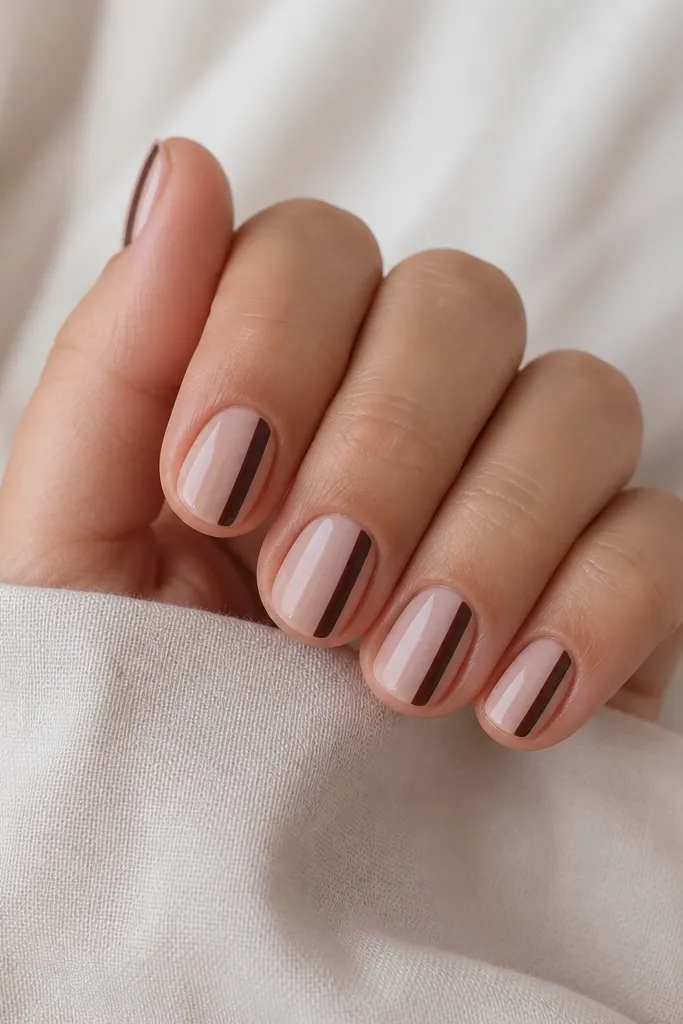
A single side stripe makes brown look sleek and modern. Because it's one line, the manicure stays clean and doesn't feel busy. Espresso brown against nude reads sharp, and the glossy topcoat makes the stripe look crisp.
Use a nude base with a pink-beige tone. Paint a vertical stripe along one sidewall only, about 1/6 of the nail width. Keep the stripe straight from cuticle to tip. Seal with glossy topcoat and cap the stripe edge.
Editor's noteRest your hand on a table and use the side of the brush to keep the stripe width consistent.
Watch outSkip a stripe that crosses the tip too thick - it looks like a cheap nail sticker.
18. Mocha Latte Marble Half-Moon
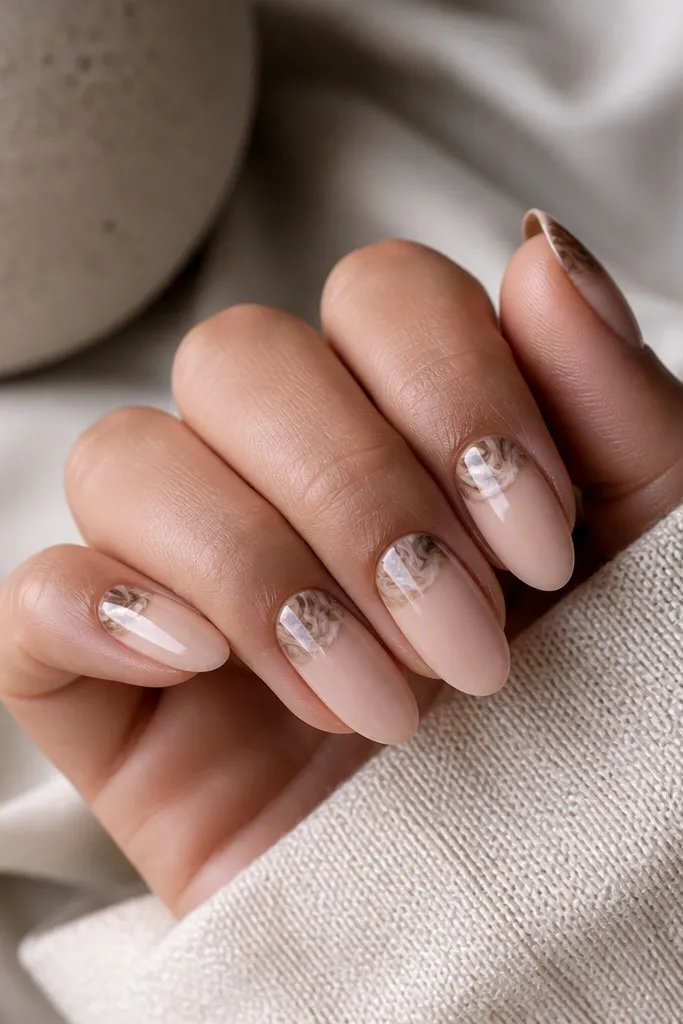
This is marble at a smaller scale, so it looks luxe without taking over the whole nail. The half-moon area frames your cuticle and makes the nail look fuller. Mocha and cream lines keep it warm and wearable.
Start with a nude base. Paint a mocha half-moon near the cuticle, then drag cream and light tan lines through it once or twice. Blend just at the edges so it looks like stone. Topcoat glossy and cure fully.
Editor's noteDo the marble lines with a very thin brush - you want hairline strokes, not thick swirls.
Watch outDon't flood the half-moon with too many lines - it turns muddy.
19. Chocolate Brown Jelly One-Coat
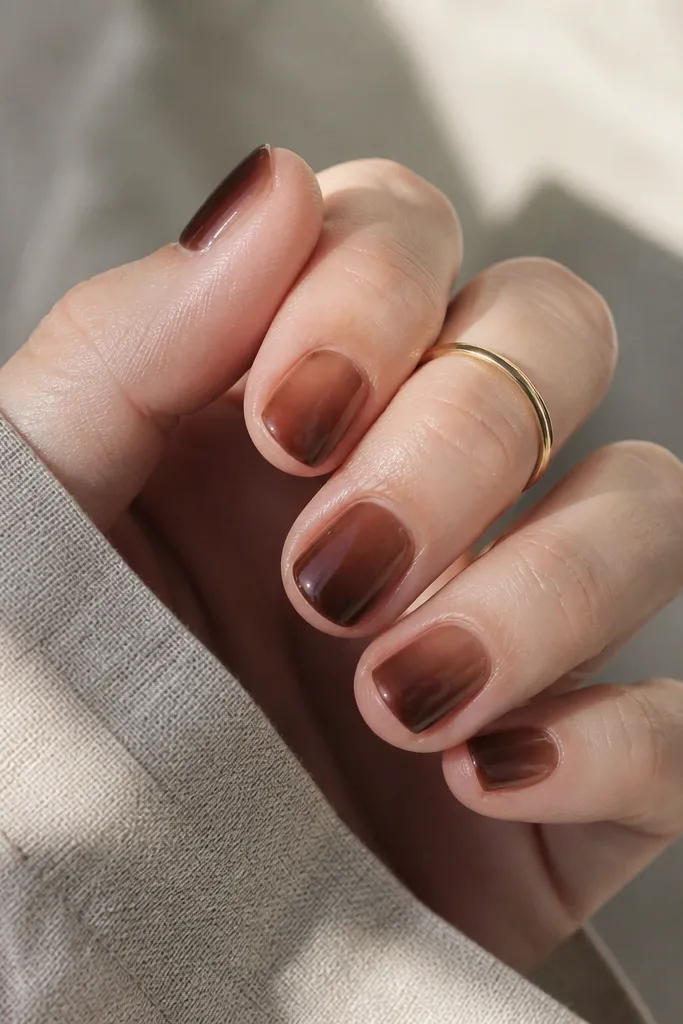
Jelly brown looks pricey because it has that "light passing through" effect. If you use a true jelly formula, it looks smooth even with short nails. A slightly darker tint at the tip makes it dimensional without nail art.
Use a jelly brown polish or jelly gel in two layers for even color. Paint a full coat, then add a thinner second coat focused on the tip for a subtle gradient. Finish with high-gloss topcoat to lock in the jelly shine.
Editor's noteLet each layer self-level for 30-60 seconds before curing or drying so you avoid streaks.
Watch outAvoid opaque brown over jelly - it kills the glow and makes it look flat.
20. Caramel Check Accent
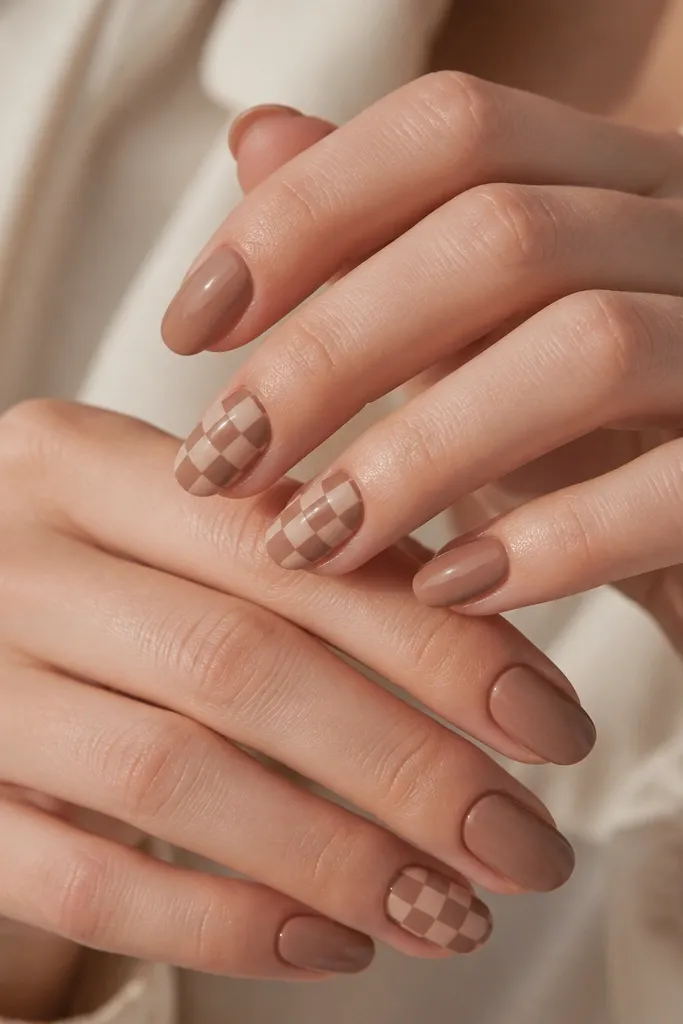
A small check pattern looks cute and intentional when it's limited to one or two nails. Caramel checks add structure, and the nude background keeps it from feeling heavy. The solid nude-brown nails make the check accent feel like a planned set.
Paint all nails with warm brown nude and gloss. On accent nails, draw thin caramel lines to form a grid, then fill alternating squares with a slightly darker cocoa. Keep squares small - about 1-2 mm. Topcoat glossy to seal the edges.
Editor's noteUse nail tape as a guide for the grid first, then peel and refine with the brush.
Watch outDon't make the check squares too big - large checks can look childish fast.