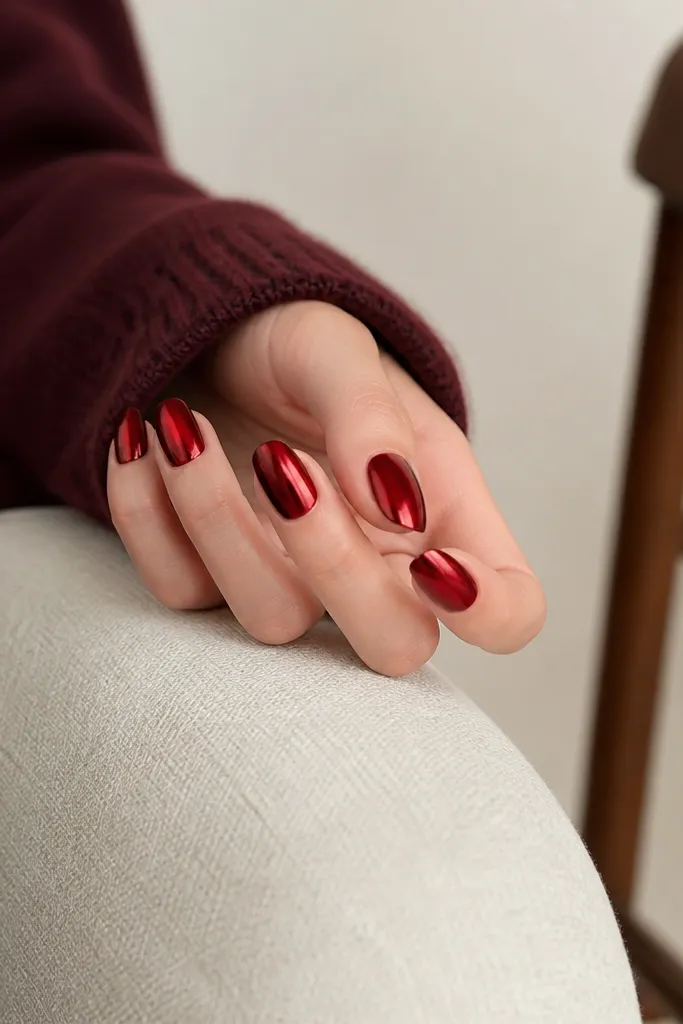
1. Oxblood mirror center stripe
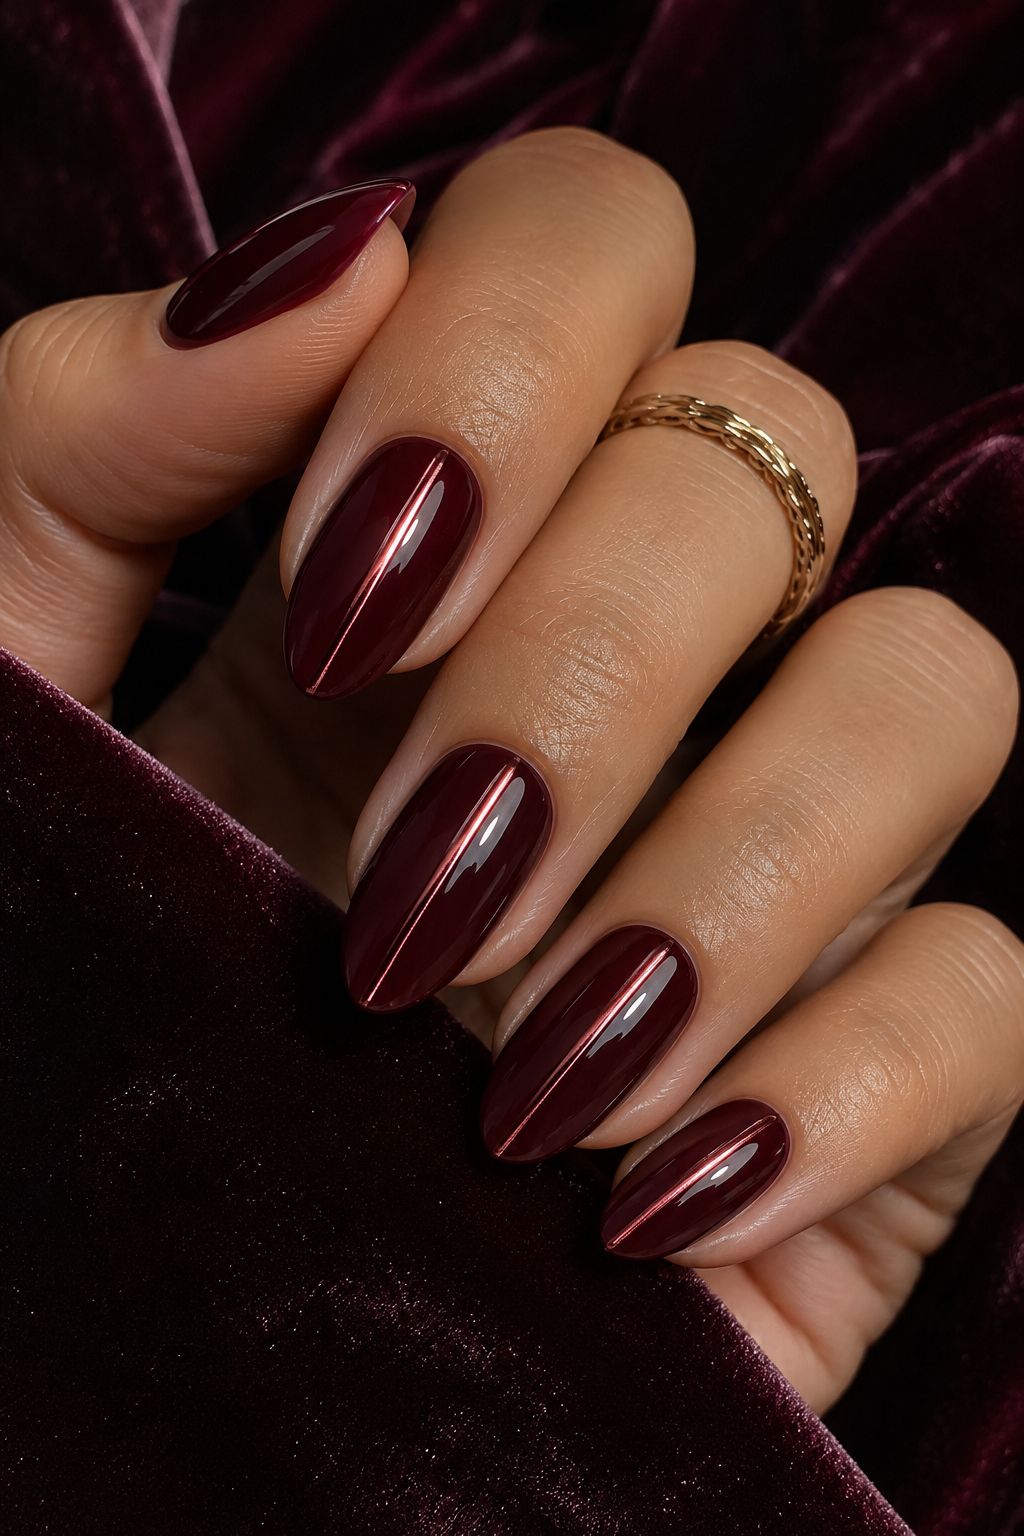
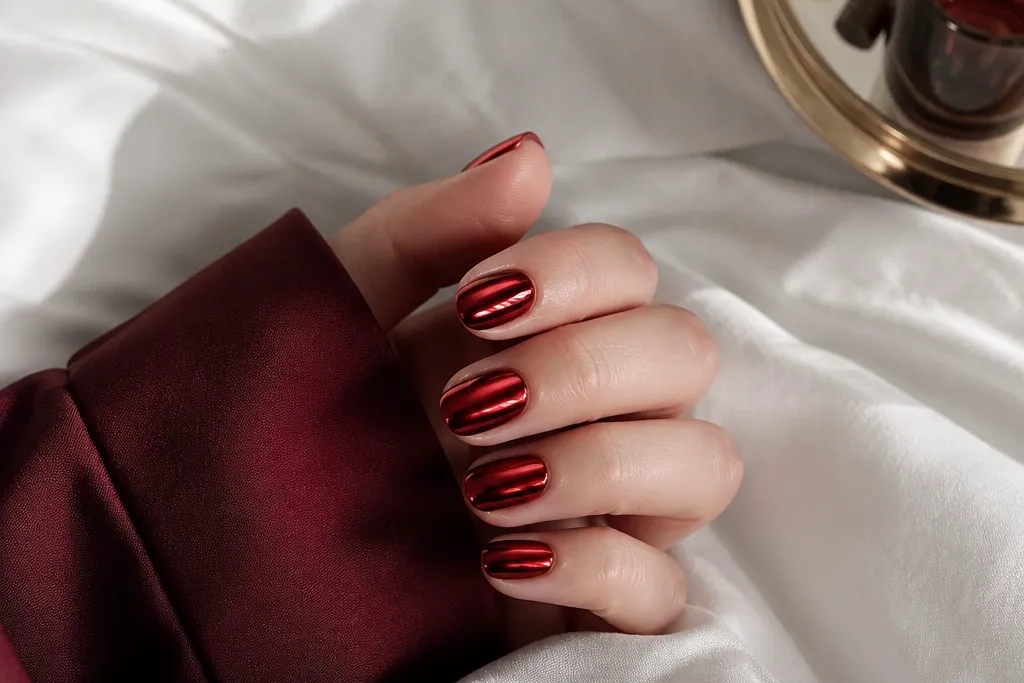
This design makes short nails feel longer because the brightest reflection runs straight down the middle. The sides stay solid oxblood, so you keep contrast instead of turning the whole nail into a single flat red mirror. I use a cool-toned silver chrome for a crisp stripe against warm oxblood. It looks clean in daylight and still reads glossy under indoor lights.
Paint two thin coats of oxblood gel, cure fully between coats. Rub or press chrome only on the center strip, then lightly brush the edges with a dry soft brush so the shine fades out. Top coat in one thin layer, cure, then add a second thin layer only if the stripe needs extra smoothness.
Editor's noteUse a striping brush to mark a 1.5-2 mm center guide before chrome so you don't over-apply.
Watch outDon't chrome the whole nail - it makes short nails look shorter and wider.
2. Wine chrome half-moon
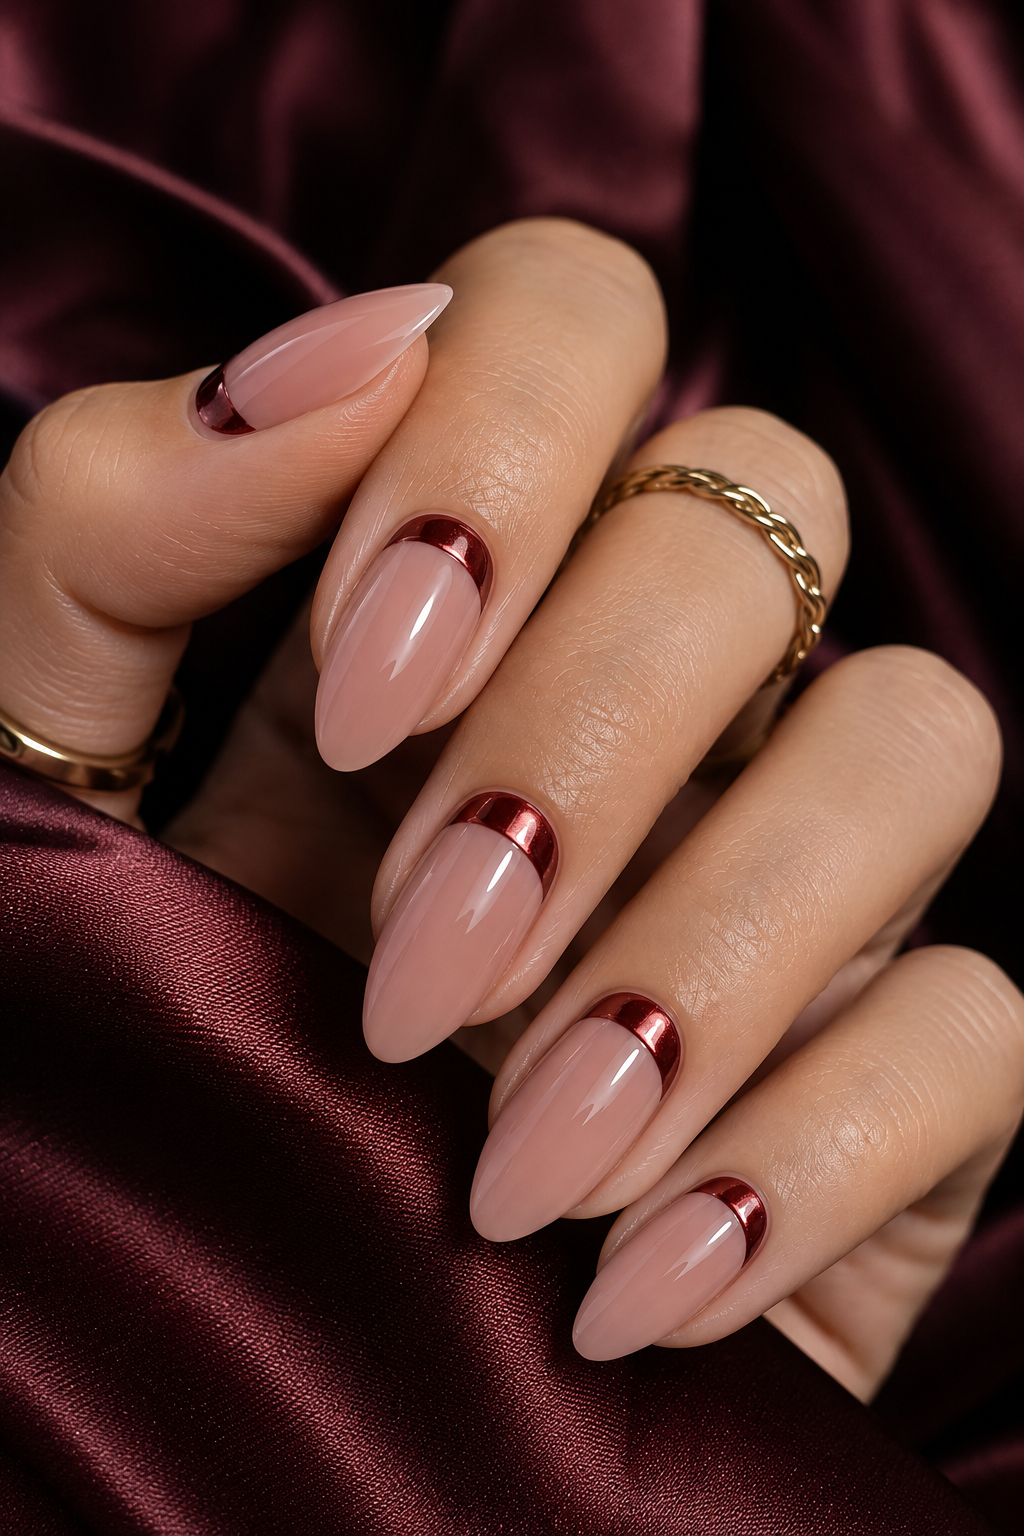
Half-moon chrome at the cuticle lifts the eye upward without taking space at the tip. The rest of the nail stays a deep wine red, so the shine looks intentional and not like a full chrome blob. I like this for small space because the cuticle crescent gives a built-in frame. The chrome reads bright but controlled.
Apply a deep wine gel base in two coats. Using a small sponge or a crescent stencil, apply chrome only within a cuticle arc about 60-70% of the nail width. Seal with top coat, keeping it thin near the cuticle so the crescent stays crisp.
Editor's noteStart the crescent slightly off-center toward the nail's natural center ridge - it looks more symmetrical in real life.
Watch outSkip thick top coat over the cuticle - it can blur the half-moon edges.
3. Deep red French tips with chrome outline
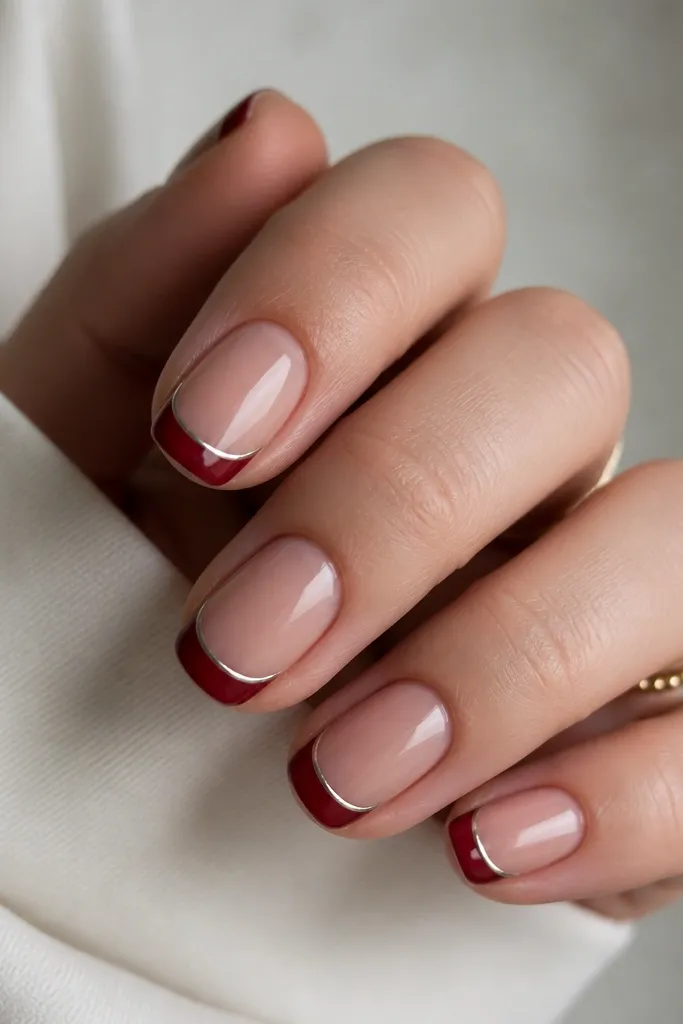
This is a French look that works on short nails because the chrome outline adds definition without needing long tips. The deep red tip gives the main color hit, and the chrome border makes the tip edge look sharper. I use a slightly darker red than you think so it stays punchy. Under moving light, the chrome line flashes like jewelry.
Start with a sheer nude base. Paint French tips in deep red, keeping the tip width narrow (about 2 mm on small nails). After curing, add chrome only along the outer edge of the red tip using a striping brush or thin chrome foil strip. Top coat over the whole nail carefully.
Editor's noteMake the French smile line flatter than you would for long nails so it doesn't shrink the nail visually.
Watch outDon't make the French tip too wide - it eats your small space.
4. Micro dot chrome confetti
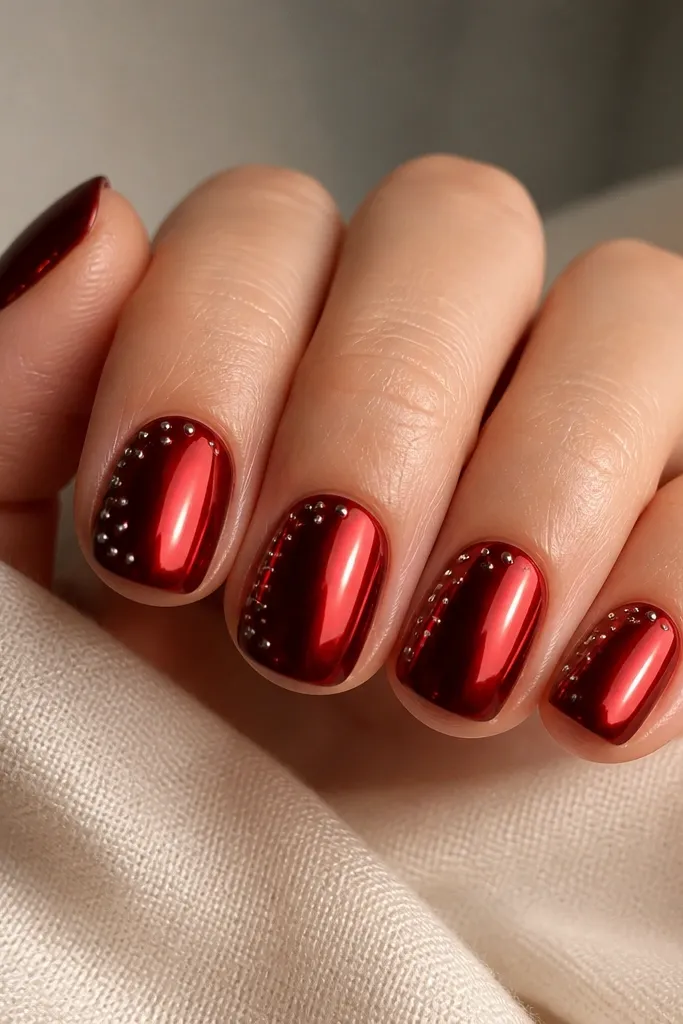
Micro dots add movement without adding length. Because the dots are chrome, they catch light in tiny flashes, and the deep red mirror keeps the overall look cohesive. I like dot sizes around 0.3-0.5 mm so they read as confetti, not blobs. This works when you want something fun but still clean.
Apply deep red base, cure, then chrome coat the full nail for a mirror base. With a dotting tool and a tiny amount of chrome mix (or chrome gel), place 5-8 micro dots on each nail, mostly toward the cuticle. Seal with a thin top coat so dots don't spread.
Editor's noteIf your dots blur, wait one extra cure cycle before top coat and keep the top coat strokes gentle.
Watch outDon't place dots all the way to the tip edges - it can look messy on short nails.
5. Oxblood glossy base with red-silver chrome fade
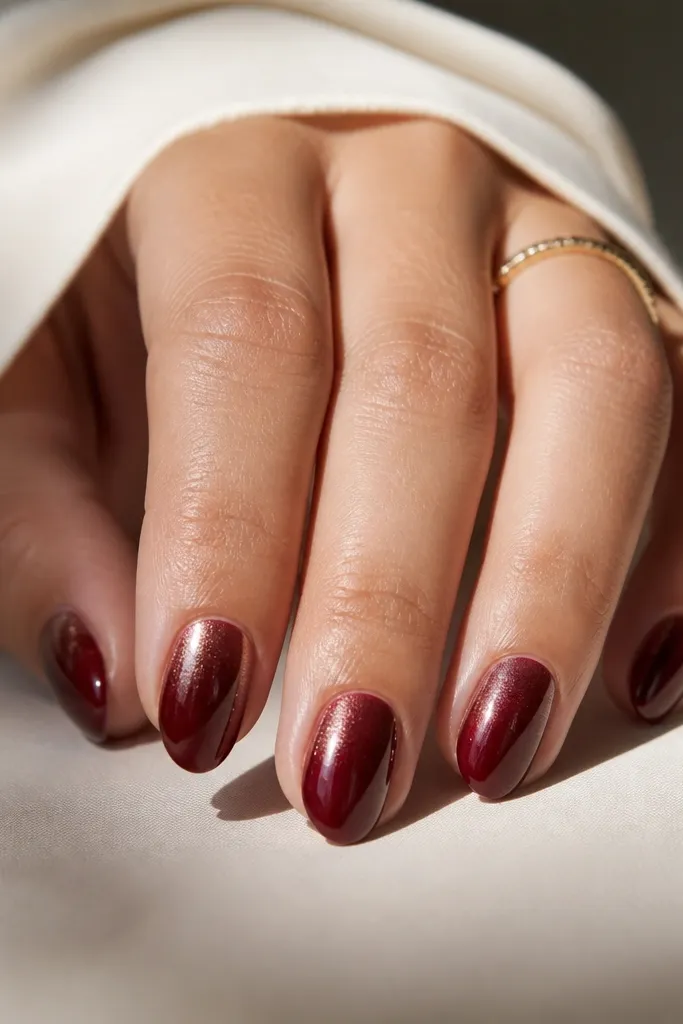
A fade keeps chrome from dominating the whole nail. The mid-nail reflection makes your nails look taller, while the solid red bottom anchors the design. I use a red-silver chrome so it doesn't turn icy against warm oxblood. The fade looks smooth when the transition is feathered, not stamped.
Paint oxblood gel in two coats, cure. Sponge chrome at the cuticle area and blend upward with a makeup sponge in light taps, not swipes. Stop the chrome fade around halfway down the nail. Top coat in two thin layers if you need extra gloss.
Editor's noteDo one test nail first to find how quickly your chrome lifts before you commit to all fingers.
Watch outDon't over-blend - heavy rubbing can turn the transition patchy.
6. Crisscross chrome on deep red grid
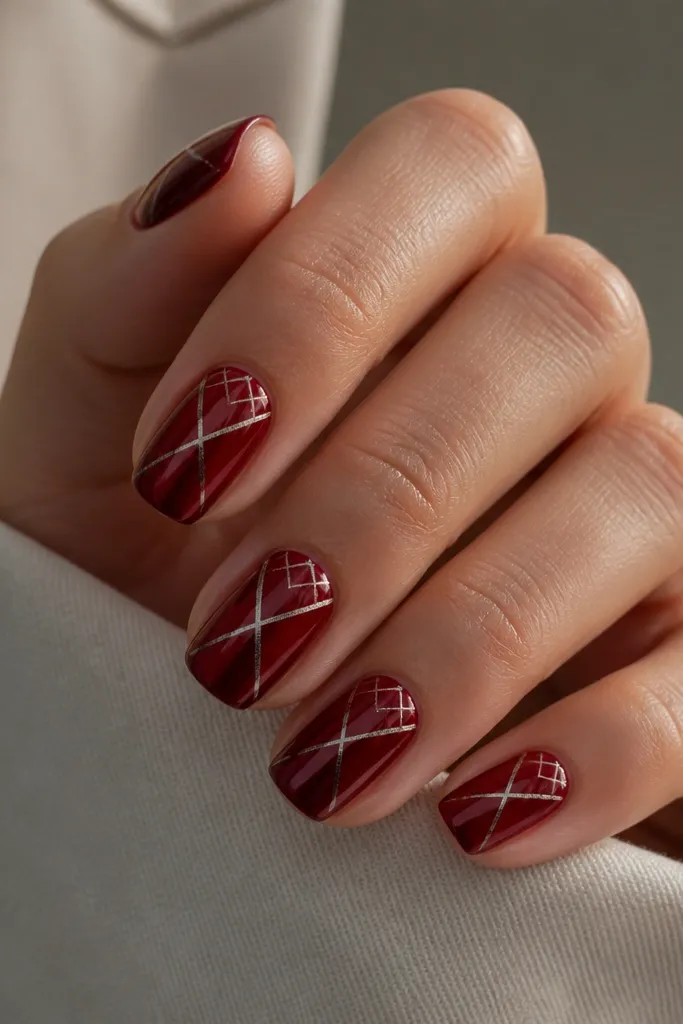
Lines give structure, and small nails need structure. The X pattern pulls the eye to the center and makes the nail feel shaped even when it's short. I like chrome lines because they don't look flat like white nail art. Keep the grid subtle so the base stays the star.
Apply deep red base in two coats, cure. Use a thin liner brush to draw two diagonal lines crossing at the center, leaving a small gap between lines and sidewalls. Add one extra short chrome line near the cuticle to suggest a grid without filling the whole nail. Seal with top coat, keeping it smooth over the lines.
Editor's noteUse a liner brush dipped lightly into chrome gel so the line stays crisp and doesn't flood the nail.
Watch outAvoid thick lines - on small nails they look like tape.
7. Chrome cuticle ring with matte red body
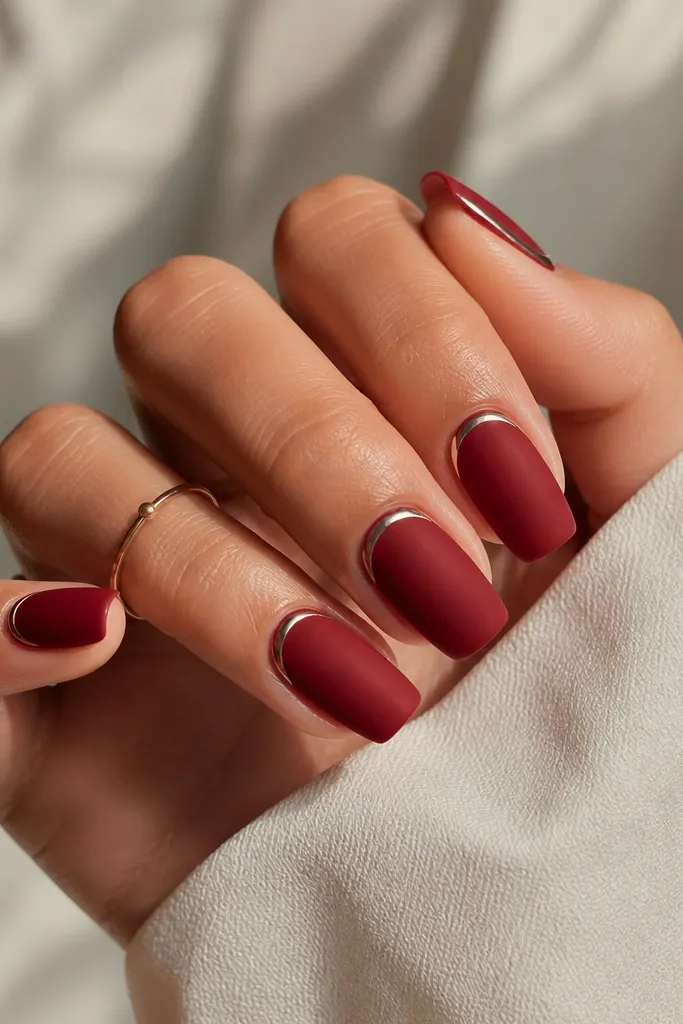
Mixing matte and mirror makes small nails look styled without needing length. The matte deep red hides minor bumps, and the chrome ring adds a clean jewelry moment at the cuticle. I use a narrow ring so the nail stays balanced. This is one of my go-to looks when my nails are slightly uneven.
Paint deep red gel and cure. Apply a matte top coat over the entire nail, then leave a small cuticle border un-top-coated while you add chrome ring. Add chrome gel only in that border, cure, then finish with a tiny top coat around the ring so it stays glossy and doesn't smear.
Editor's noteWipe the cuticle area with a lint-free wipe before chrome so the ring sticks without lifting.
Watch outDon't matte the cuticle after adding chrome - it dulls the mirror ring.
8. Deep red chrome jelly overlay with silver sparks
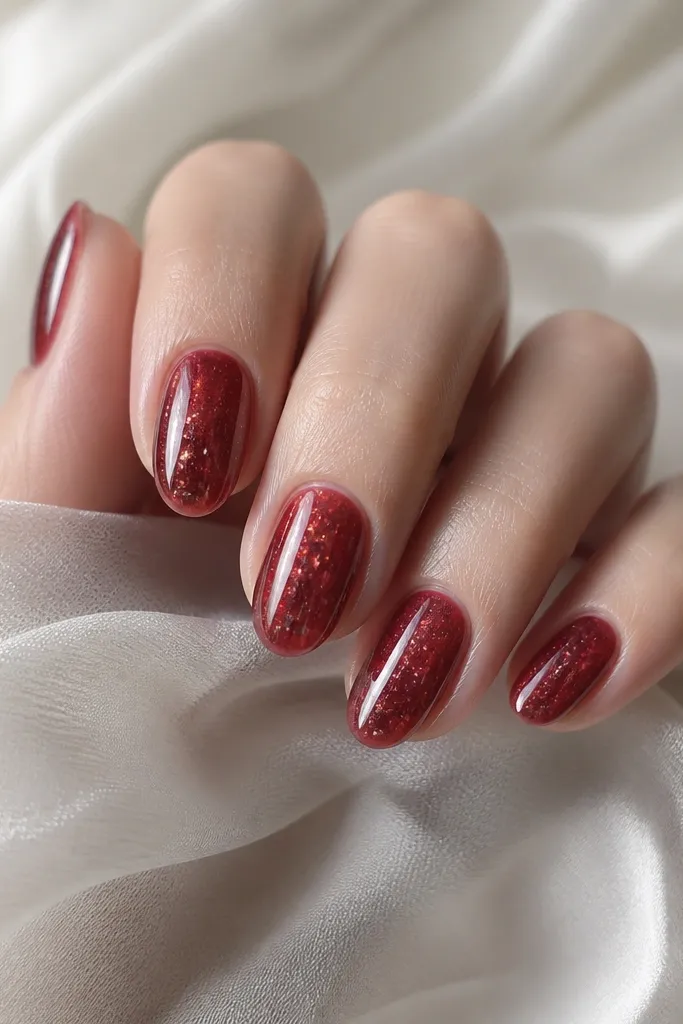
This looks like stained glass on short nails. The jelly overlay lets light pass through, so even with chrome, it doesn't look heavy. Silver specks add a starfield effect without needing big decals. I like it when you want deep red but still want the nail to look airy.
Build a deep red jelly gel layer (two thin coats), cure. Apply a light chrome dusting or rub-on chrome only on the top half, then tap the remaining area with a speckle tool using silver chrome powder mixed with a drop of clear gel. Seal with a glossy top coat.
Editor's noteKeep the jelly layer slightly thinner than you would for full opacity so the chrome stays luminous.
Watch outDon't pack chrome thick over jelly - it turns grainy.
9. Velvet deep red with chrome edge swipe
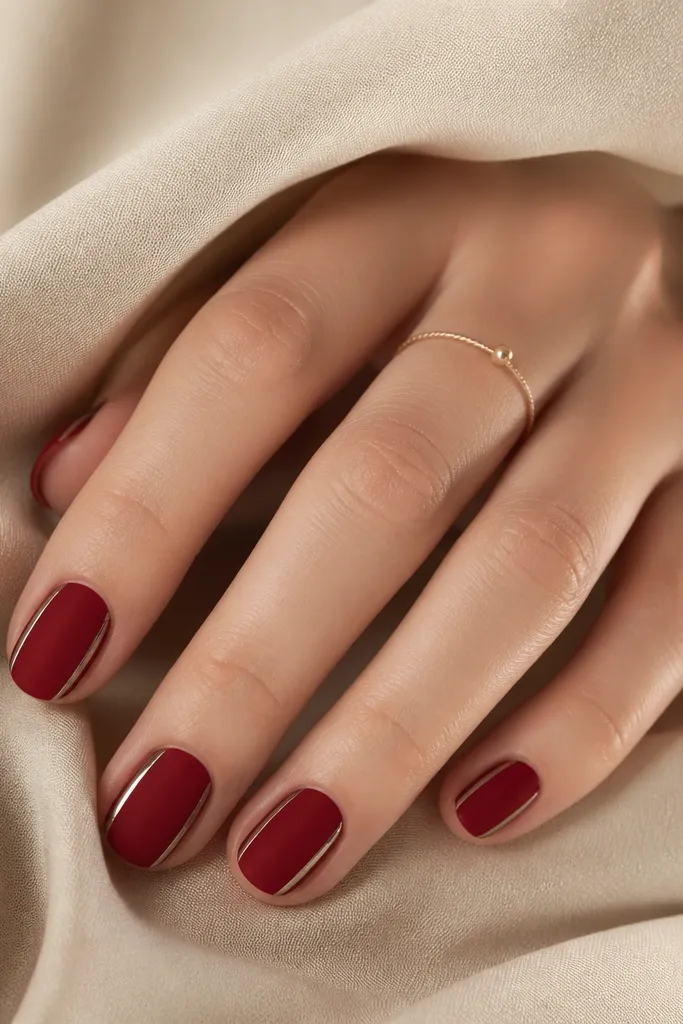
The side swipe makes your nail look narrower and longer at the same time. Velvet finish hides fingerprints and small texture issues, while the chrome edges add that polished snap. I use a cool silver chrome so the edge line stays crisp against deep red. This is the look I reach for when I want drama but not full mirror.
Apply deep red gel and cure. Add a velvet matte top coat (or velvet powder over gel) for that soft texture. With liner brush, place chrome along both sidewalls starting around mid-nail, stopping 1 mm before the tip. Top coat only over the chrome swipes, not the whole velvet surface.
Editor's noteUse tape to protect the center if you're shaky with side lines.
Watch outDon't chrome the tip edge fully - it can widen short nails.
10. Half-moon chrome with deep red ombre tips
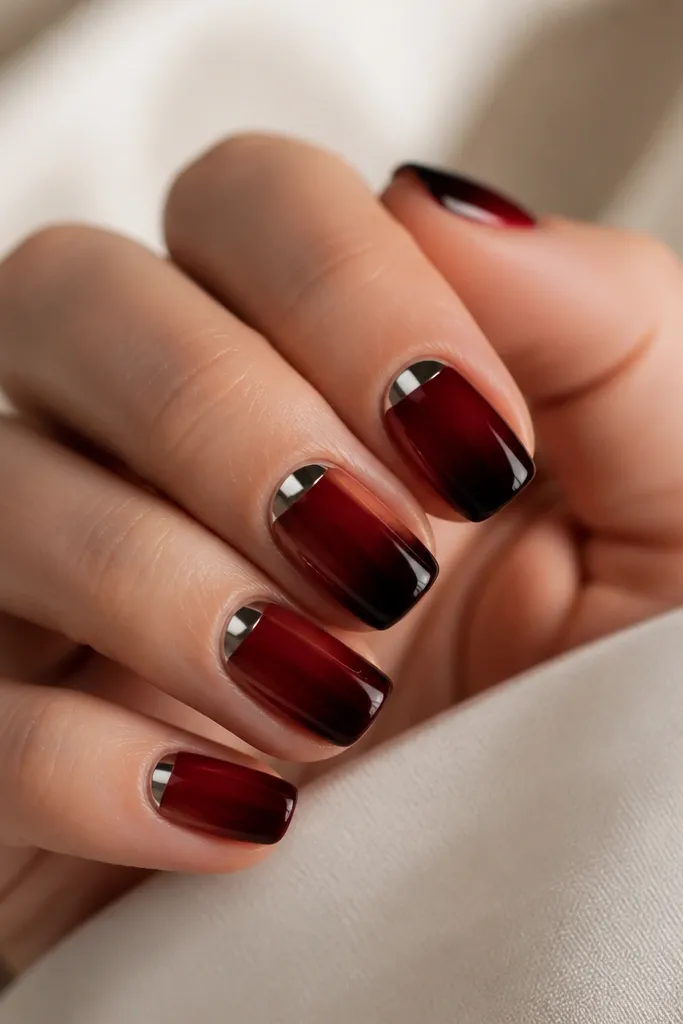
The half-moon keeps the shine near the base, and the ombre toward the tip adds depth. Short nails benefit from gradients because they create a vertical flow. I use a darker oxblood at the tip and blend upward into a slightly brighter wine in the mid-nail. The chrome half-moon gives a high-end finish without needing full chrome coverage.
Base with a bright wine-red gel, cure. Create a cuticle half-moon in chrome, then blend a slightly darker oxblood from mid-nail to tip using a small sponge. Smooth the ombre by dragging a brush lightly through the blend area. Seal with glossy top coat.
Editor's noteBlend with a damp (not wet) sponge for a cleaner ombre edge.
Watch outAvoid harsh lines - the ombre should disappear in the middle.
11. Deep red chrome checkered accent
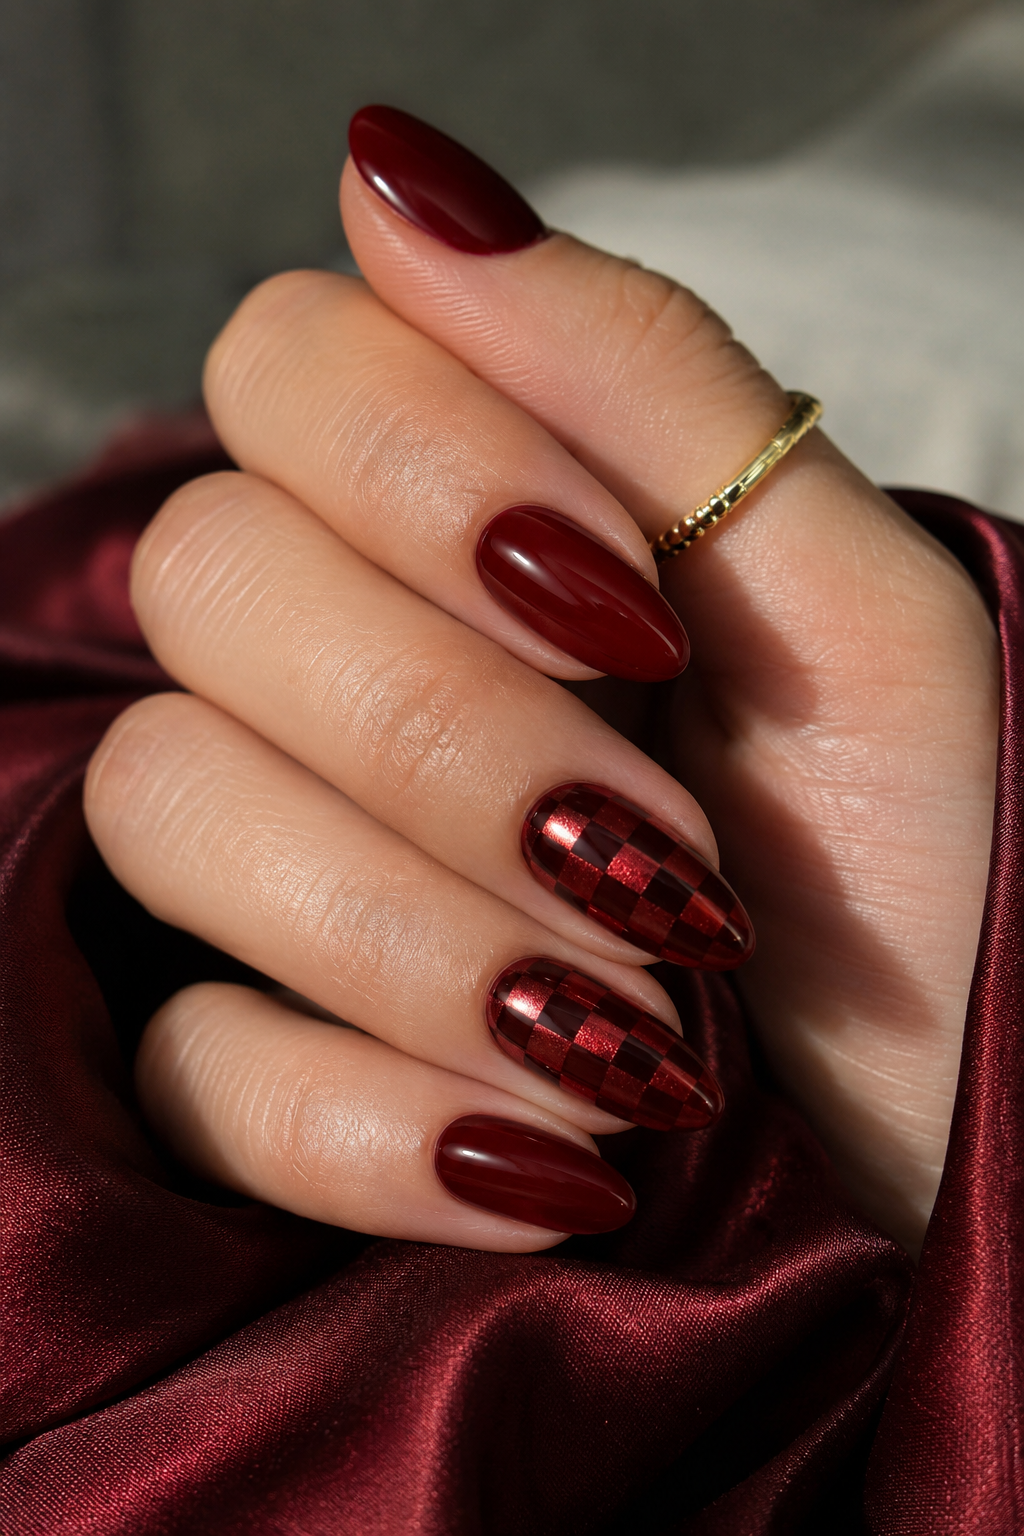
Checkers look playful but still structured when the pattern is tiny. I keep it to one or two nails so the design doesn't overwhelm small space. The chrome check block catches light sharply, while the rest of the nails stay clean and glossy. This gives you a manicure that looks intentional in photos.
Paint all nails deep red and cure. For the accent nail, add a small chrome square at the center of the nail about 3 mm wide, then draw two mini lines across it with chrome gel to create the check effect. Keep the square away from sidewalls so it doesn't look crowded. Top coat over everything, with extra care around the accent lines.
Editor's noteIf your lines smear, cure each line separately before continuing.
Watch outDon't extend checkers to the tip - it makes short nails look busy.
12. Chrome diagonal lightning on oxblood
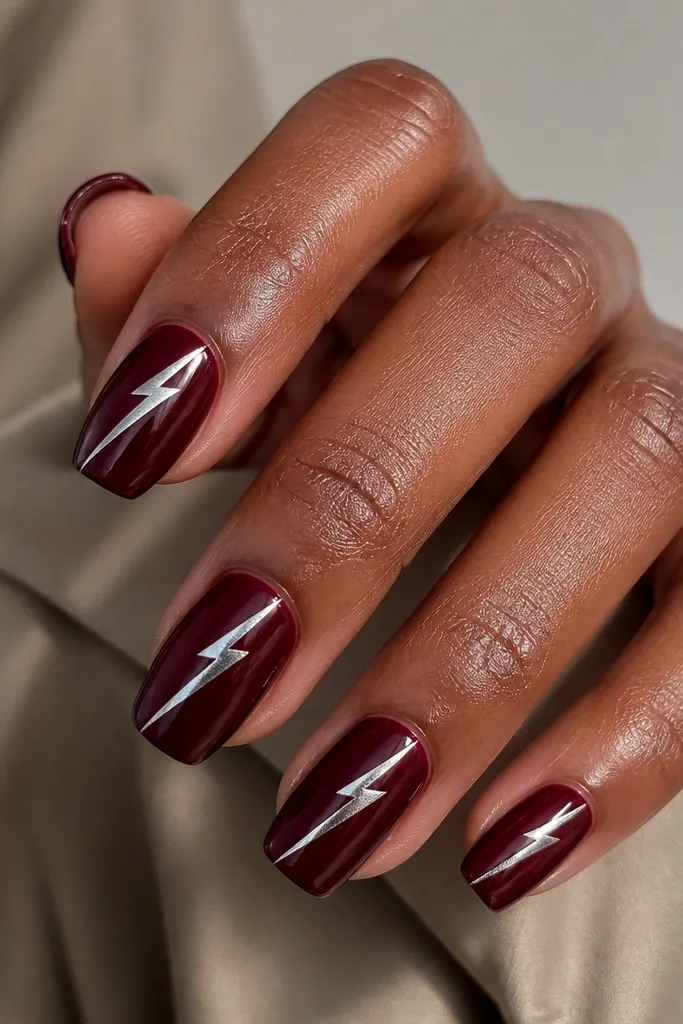
A lightning bolt is bold, but the diagonal placement keeps it from shortening the nail visually. Chrome makes the bolt look like it's cut from foil. I use a narrow bolt width so it stays classy on short nails. This is a fun look that still looks neat because the base stays solid oxblood.
Apply oxblood in two coats, cure. Draw a lightning bolt using a striping brush and chrome gel or thin chrome foil transfer, starting near the cuticle and ending about 1 mm before the tip. Fill the bolt edges crisply so it doesn't look jagged. Seal with glossy top coat.
Editor's noteOutline the bolt first with chrome gel, cure, then fill inside for cleaner edges.
Watch outSkip a thick bolt - it can look like a marker scribble.
13. Red chrome halo around a matte center
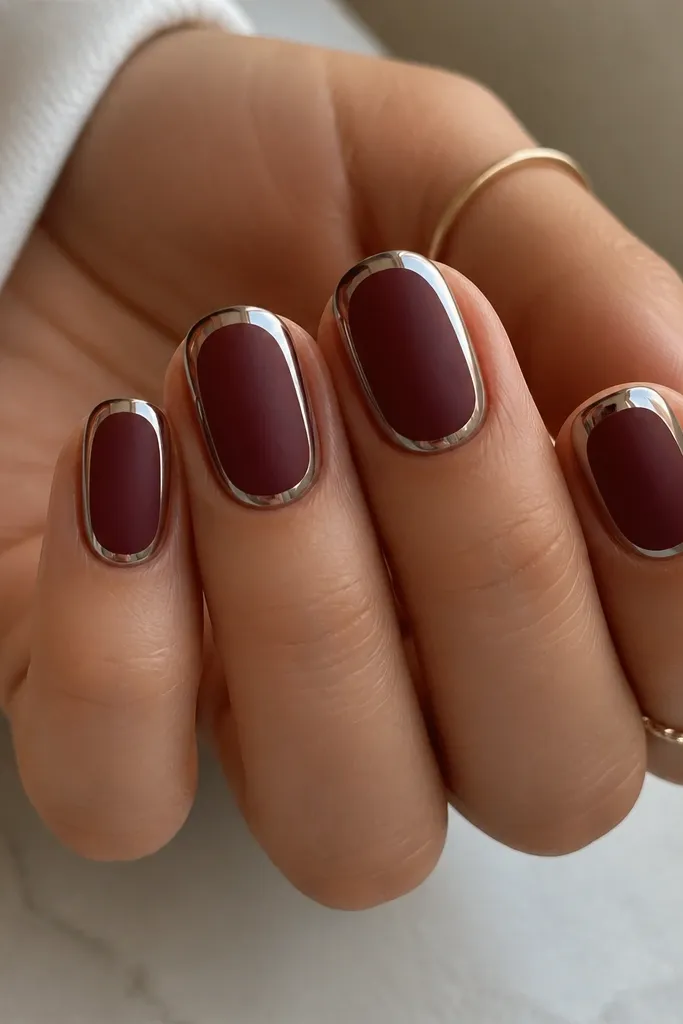
This design tricks the eye by creating a framed center. The matte center reads soft and hides tiny imperfections, while the chrome halo gives a finished border. It's a great option when you want something different from full mirror but still want deep red shine. The halo keeps the nail looking shaped even when it's short.
Paint deep red base, cure. Apply matte top coat to the entire nail. Then add chrome only on a ring area around the center panel - leave a 1.5-2 mm matte rectangle in the middle. Finish with top coat over the chrome ring only.
Editor's noteUse a strip of clear tape to block the matte center while you rub on chrome.
Watch outDon't let chrome touch the sidewalls too aggressively - it can look messy.
14. Oxblood chrome aura glow
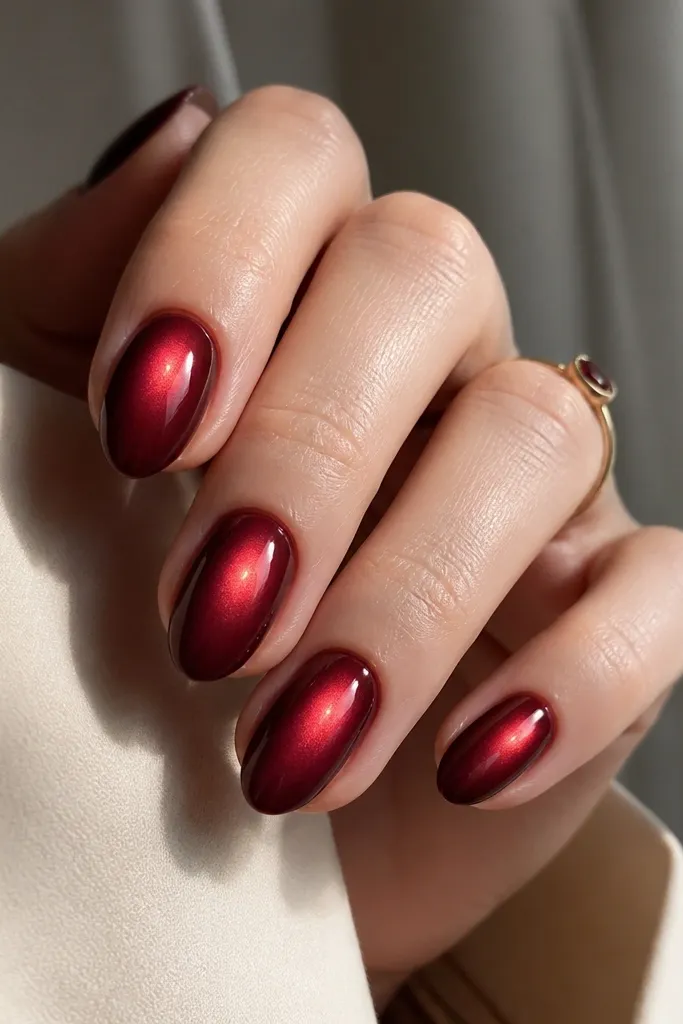
Aura glow looks expensive because it's smooth and reflective, not harsh. On small nails, the soft center glow creates depth without needing extra length. I use chrome powder mixed with a clear gel for a controlled glow. The fade keeps it from turning into a full mirror that hides the nail shape.
Apply oxblood base and cure. Tap chrome powder mixed with a tiny clear gel in the center, then blend outward with a sponge so the edges fade. Keep the aura about 60% of the nail width so it stays centered. Seal with glossy top coat in thin layers.
Editor's noteBuild the aura in two light layers instead of one heavy layer for a smoother glow.
Watch outAvoid a hard circle - it should blur at the edges.
15. Deep red chrome micro stripes on one side
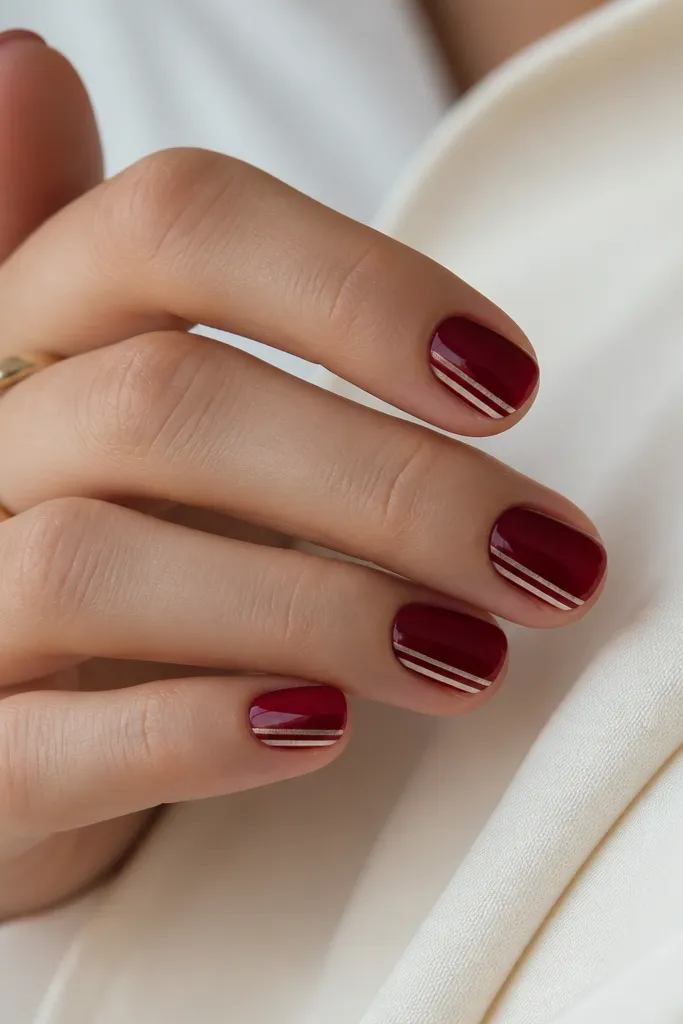
Side micro stripes elongate the nail because they create a vertical line. The rest of the nail stays deep red, so you don't get that chunky chrome look. I like three stripes because it's enough detail to look designed but not so many that it clutters. This is a clean way to wear chrome when you want it subtle.
Paint deep red base and cure. Using a striping brush, place three vertical chrome lines along one side, each about 0.5 mm wide with 0.5-1 mm spacing. Stop the lines 1 mm before the tip. Top coat carefully, then cure fully.
Editor's noteKeep the stripes parallel to your natural nail curve so they look aligned.
Watch outDon't cross stripes over the center - it can make the nail look wider.
16. Chrome cap tip on deep red
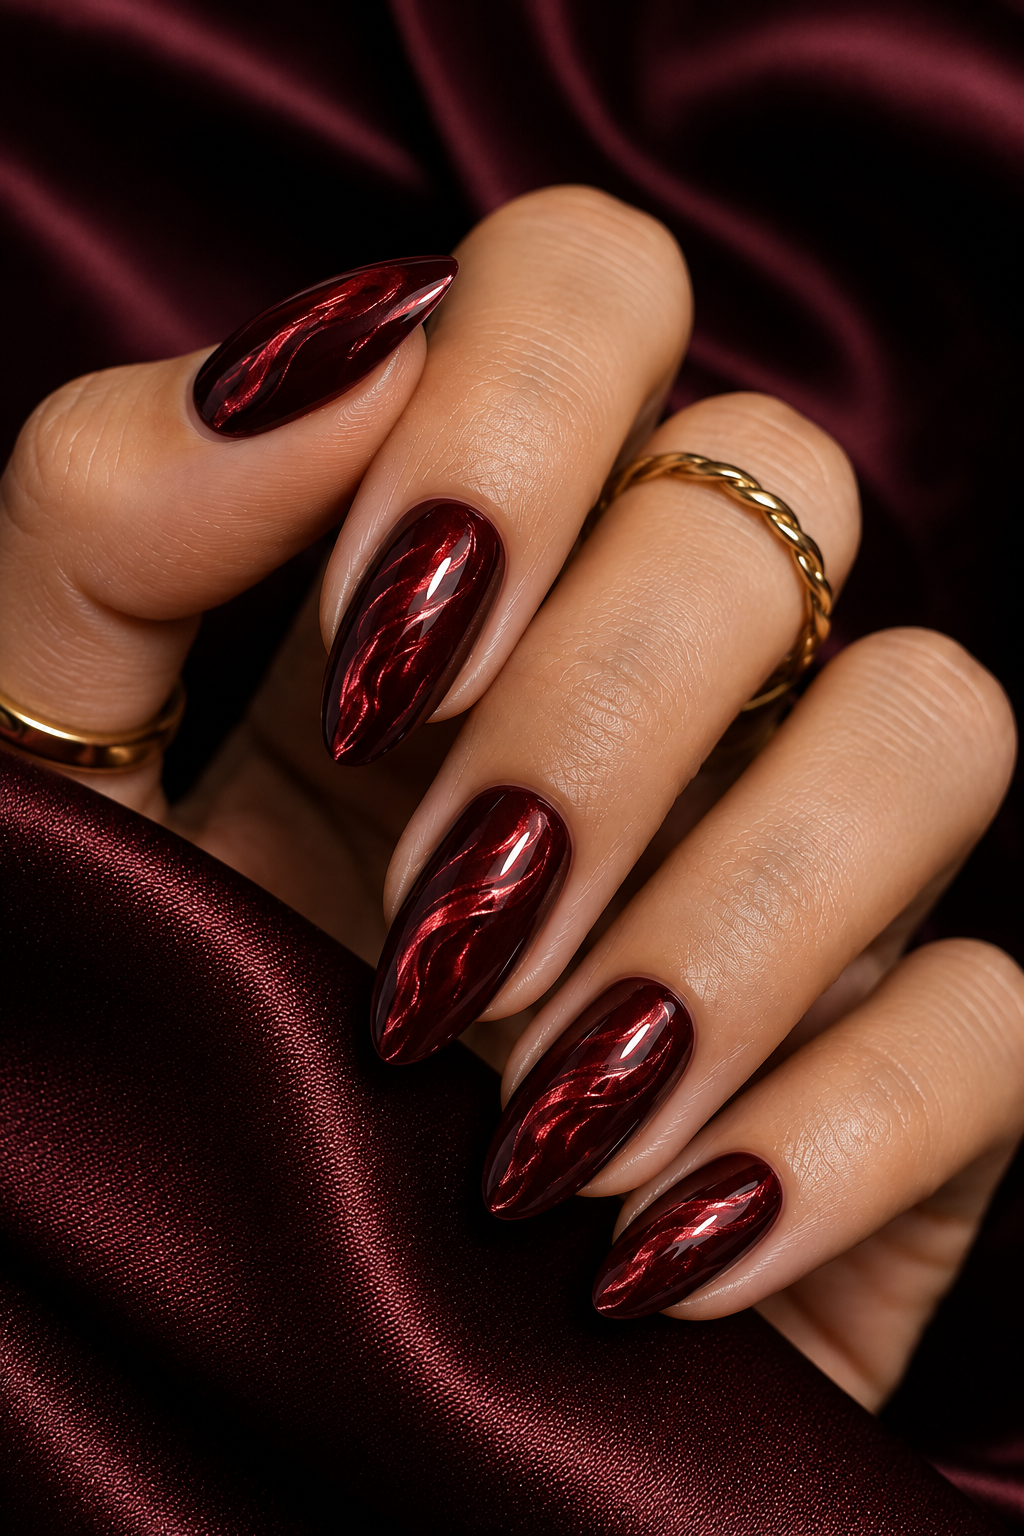
A chrome cap reads like a polished manicure even when nails are short. It adds shine right where the eye naturally looks, without flooding the whole nail. I keep the cap thin so it doesn't thicken the tip visually. The deep red base stays rich while the chrome edge flashes when you move your hands.
Apply deep red in two coats, cure. Paint a chrome cap along the outer tip edge, about 1-2 mm wide, and keep it centered. Use chrome gel for control if you're not using foil. Seal with top coat, and avoid dragging the brush hard across the cap.
Editor's noteIf your chrome cap lifts, lightly buff the tip surface before chrome application.
Watch outSkip a thick cap - it makes short tips look blunt.
17. Deep red chrome marbled swipe
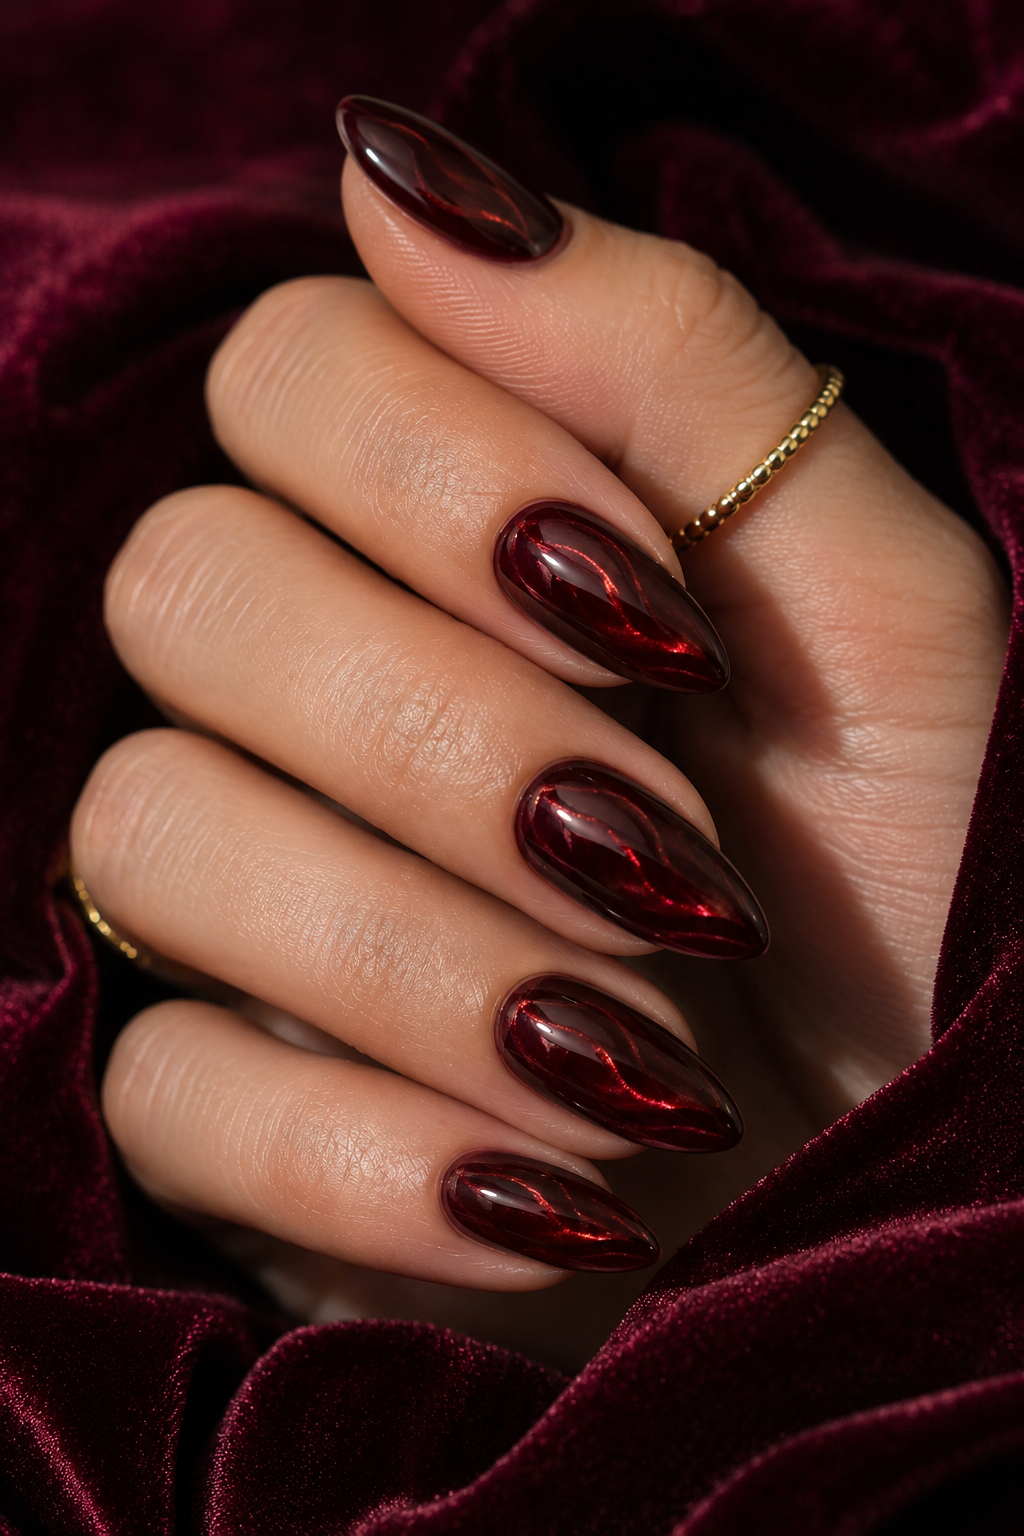
Marble swipes look fluid, but on short nails you need one main movement, not a whole nail pattern. The chrome swipe gives that marble highlight effect without needing white veining. I like a single diagonal swipe because it makes the nail look longer. The marbling is subtle - you still read deep red first.
Base with deep red, cure. Add a diagonal chrome swipe across one side using a small sponge with chrome powder mixed into a drop of clear gel, then drag a tiny brush through it to create wisps. Keep the swipe narrow (about 2-3 mm). Top coat to lock it smooth.
Editor's notePractice the swipe on one nail with extra base - marble is about pressure control.
Watch outDon't cover the entire nail - full marble turns muddy on dark reds.
18. Chrome bow tie accent
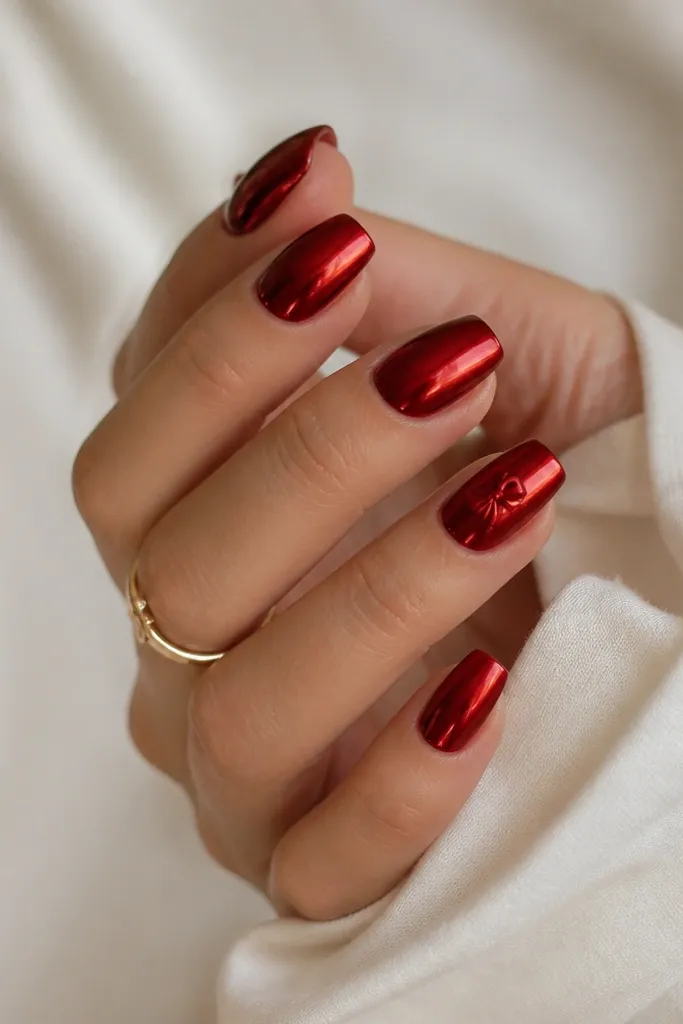
A bow tie is cute but it works best when it's small and placed near the cuticle. On short nails, that placement keeps the design from crowding the tip. The bow tie is mirror chrome so it stands out sharply against deep red. I do it on one or two nails only so the manicure stays wearable.
Chrome all nails lightly with deep red-toned chrome, cure, then top coat thinly. For the accent nail, draw two small angled loops with chrome gel, cure, then connect them with a tiny center knot. Keep the bow width around 3 mm. Seal carefully so the bow edges stay crisp.
Editor's noteUse gel liner and cure after each loop to keep the bow symmetrical.
Watch outDon't make the bow too large - it swallows the nail shape.
19. Deep red chrome negative space arch
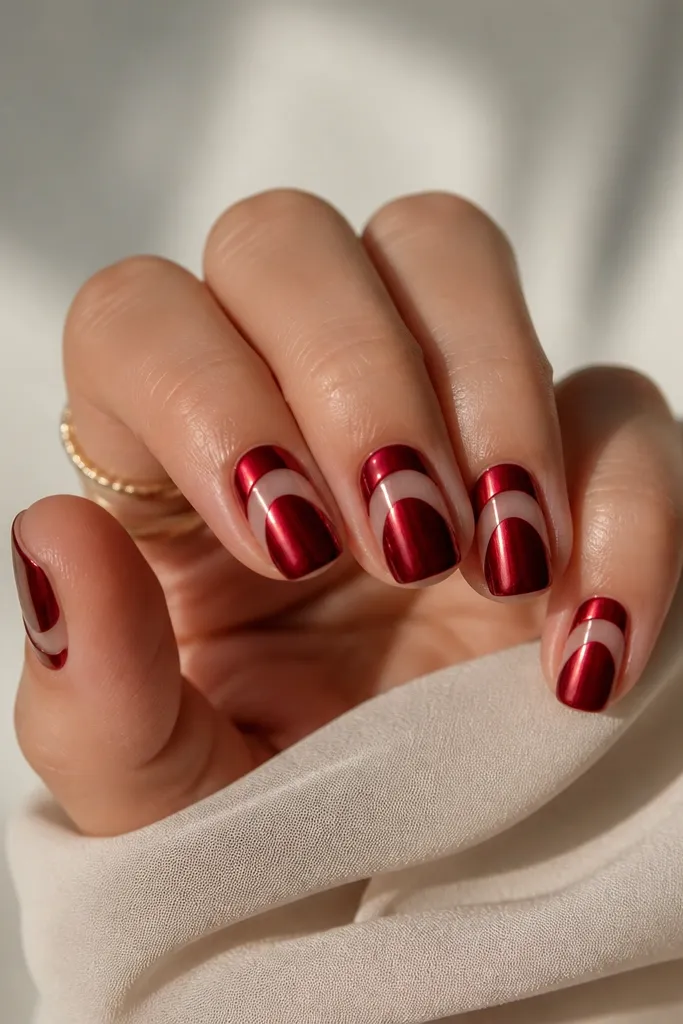
Negative space makes the nail look longer because the eye sees a clear opening. I use a sheer base arch so the nail still looks clean, not like a mistake. The chrome stays around the arch, creating a frame effect. This is one of the most flattering looks for tiny nail beds.
Prep nails and apply a sheer nude base layer. Cure. Paint deep red chrome around a center arch area you leave untouched (mask with small curved tape or a cut guide made from tape). Rub chrome into the deep red area and top coat. Remove the mask after curing so the arch stays clean.
Editor's noteMake the arch slightly higher than you think so it doesn't shorten the nail visually.
Watch outDon't leave the negative space too wide - it will look like missing polish.
20. Oxblood chrome with tiny rose gold corners
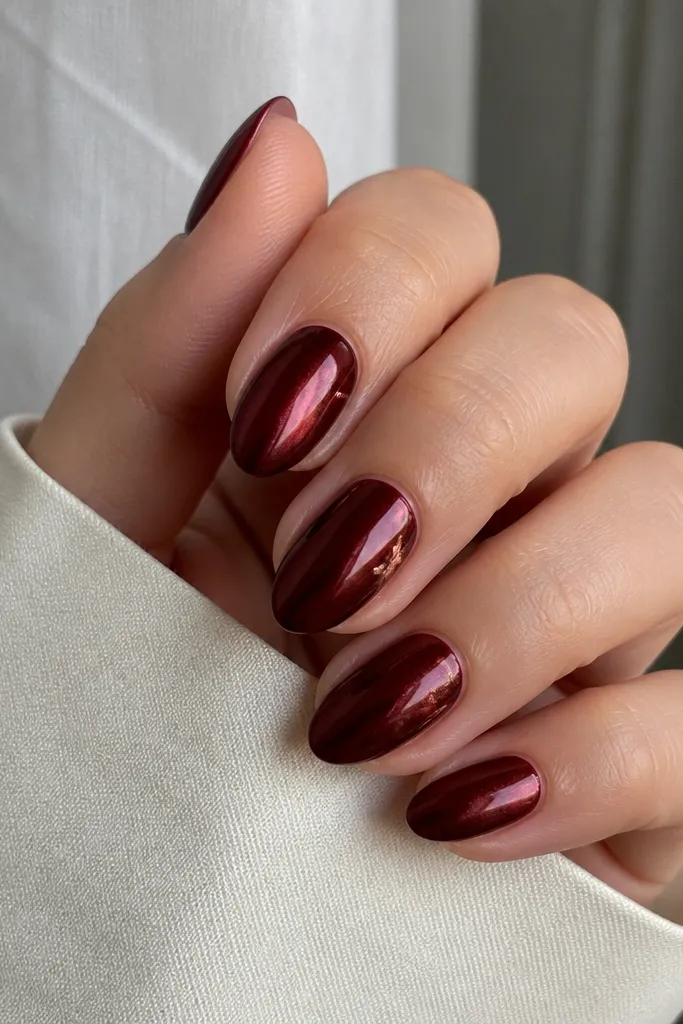
Corner accents add a luxe detail without adding bulk. Rose gold corners warm up deep red and make chrome look intentional. I keep the corners tiny so they don't look like random glitter. The main nail stays deep red mirror while the corners flash like jewelry settings.
Apply deep oxblood base and chrome it fully. On accent nails, place two tiny rose gold corner triangles on each side at mid-nail using a small dot of gel and a micro brush. Cure and then add one thin top coat layer. Keep the triangles under 1 mm tall.
Editor's noteIf you're using foil, cut the foil into micro corner pieces and press for 5-8 seconds each.
Watch outAvoid large glittery corners - they look cheap on short nails.
21. Chrome top only over deep red base
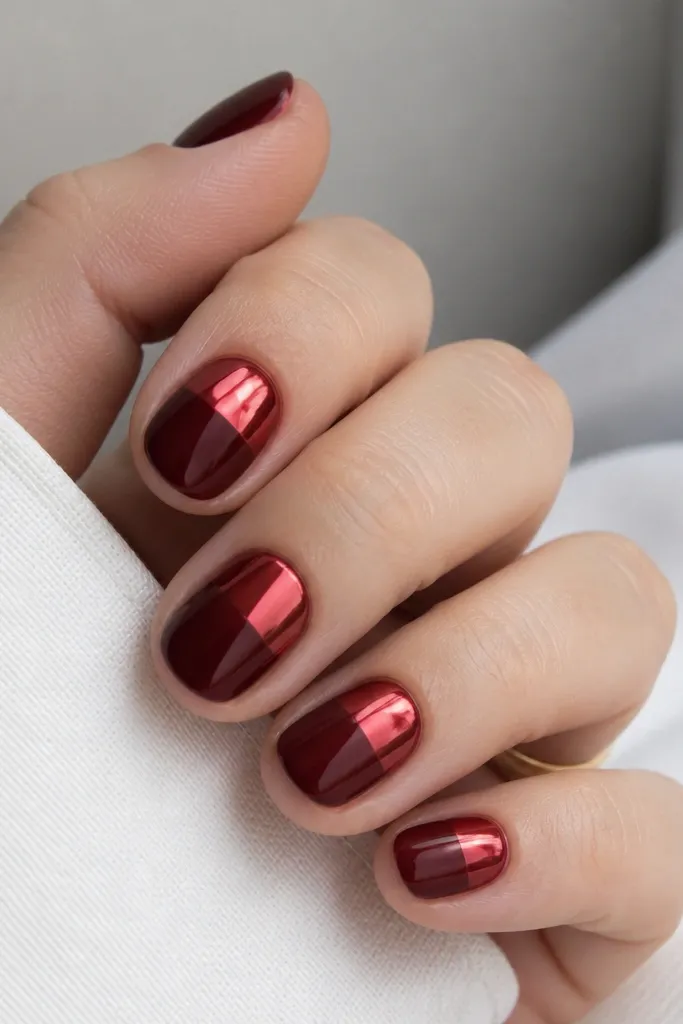
A two-level chrome look gives a graphic effect that still flatters short nails. The clear starting line creates a visual horizon, and the shiny top half reflects light. I like it when I want chrome without committing to full mirror coverage. Keep the line soft enough to look designed, not harsh.
Paint deep red base, cure. Apply chrome to the top half using a small sponge and stop cleanly around mid-nail. Feather the edge slightly with a dry sponge so it blends. Seal with glossy top coat, using thin strokes to avoid smearing the transition.
Editor's noteIf you want the line sharper, apply top coat first, cure, then chrome on top of that tacky surface.
Watch outDon't make the chrome start too high - it cuts the nail in half.
22. Deep red chrome checker gradient
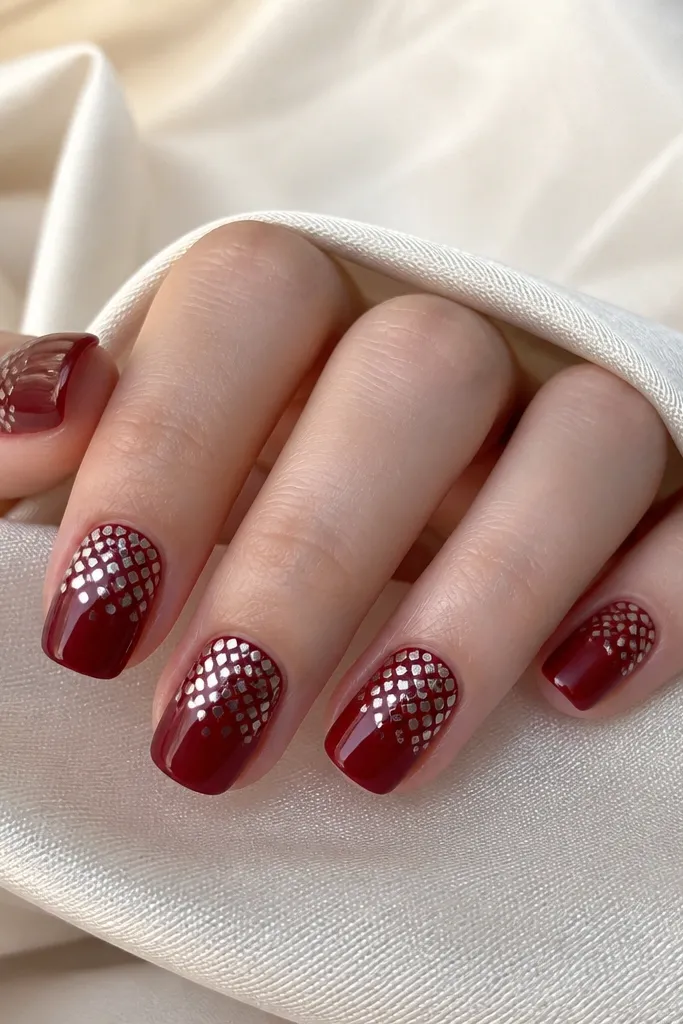
A fading checker adds texture without turning into a full pattern that overwhelms small space. The dense cuticle checker creates a focal point near the base, and the sparse tip keeps the nail clean. I use chrome gel to paint the tiny squares so they stay crisp. It looks playful in motion and still feels polished.
Base deep red, cure. At the cuticle, place a 3x2 grid of tiny chrome squares (about 0.8-1 mm each). As you move toward the tip, reduce the number of squares per row and leave more red showing. Seal with a thin glossy top coat so the squares don't blur.
Editor's noteUse a nail art practice mat and mark tiny square spacing with a dot grid under the mat.
Watch outDon't make the squares too big - they overpower short nails.
23. Chrome swirl ribbon on deep red
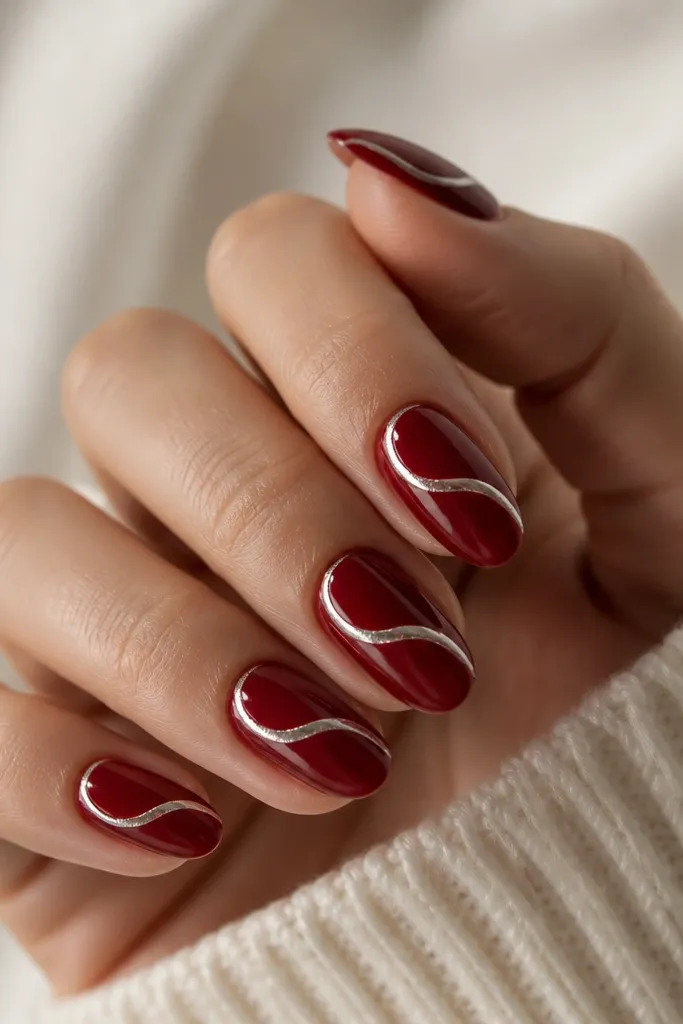
A ribbon swirl looks like movement, and it makes the nail feel longer because it follows a curve. The deep red base stays consistent while the chrome ribbon adds a highlight path. I use a thin ribbon width around 1 mm so it stays refined. This is my pick when you want something "done" but not busy.
Apply deep red base and cure. Use chrome gel to draw a ribbon that starts near the cuticle on one side, curves into the center, then ends around 1 mm before the tip. Add a second thin line beside the ribbon only if you want extra definition. Top coat gently.
Editor's noteCure your ribbon in two steps so it doesn't spread - first outline, cure, then fill.
Watch outAvoid chunky ribbon thickness - it looks heavy on short nails.
24. Deep red chrome halo around a clear center
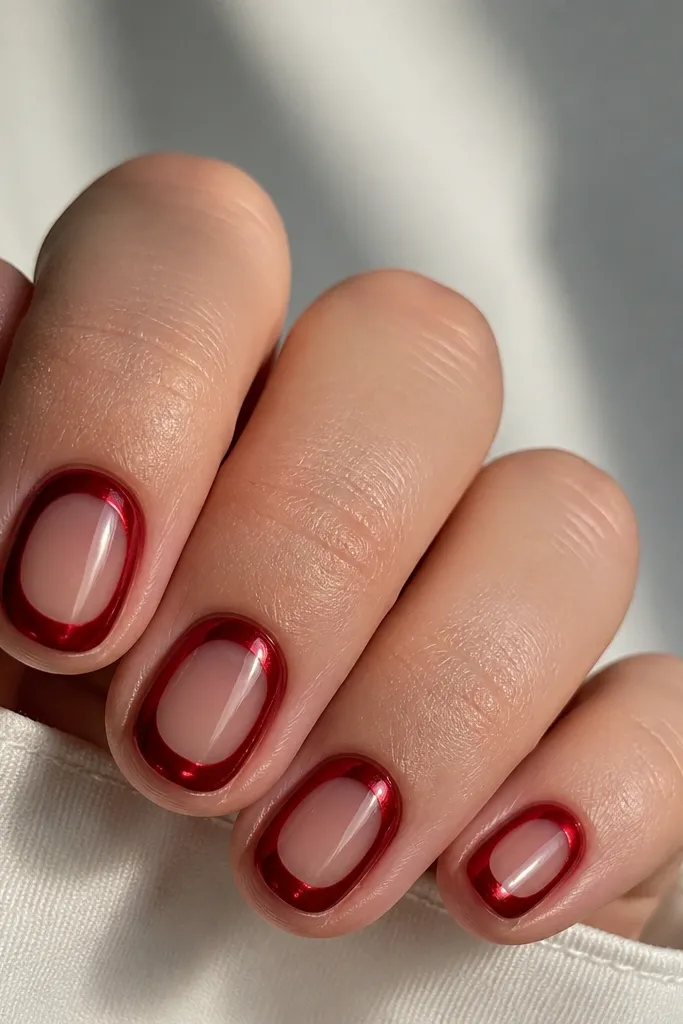
A clear center window keeps the manicure light and makes small nails look airy. The halo chrome frames the center and gives a mirror glow without filling every corner. I like using clear gel window because it looks intentional and clean. It also hides small cuticle imperfections because the window is central.
Use a sheer base first, cure. Mask a center oval area with small tape or a cut guide so you keep it clear. Apply deep red chrome around the masked oval and blend the edges slightly. Remove the mask after curing and seal with top coat.
Editor's noteKeep the window oval narrow (about 40-50% of nail width) so the nail still looks full.
Watch outDon't make the window too wide - it makes nails look thin.
25. Chrome micro French with deep red smile
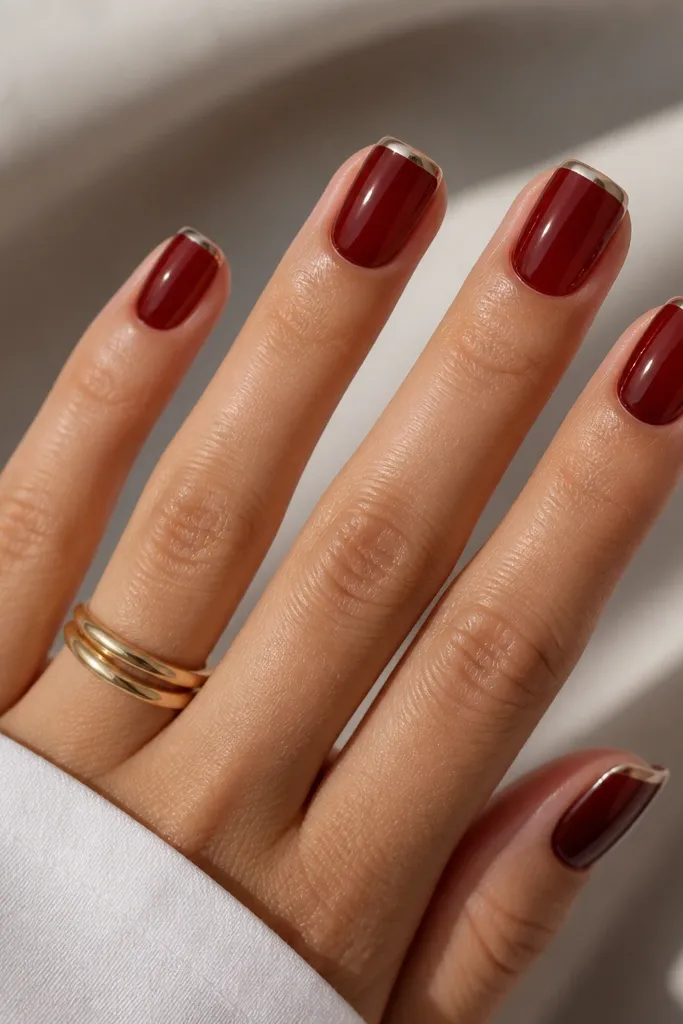
Micro French is perfect for small nails because it adds detail at the tip without requiring length. The chrome outline makes the smile line look crisp, and the slightly lighter red at the smile adds dimension. I do this when I want deep red to look layered instead of flat. It photographs clean because the outline catches light.
Base with a deep oxblood tone, cure. Add a lighter wine-red smile line about 1 mm above the tip edge, cure. Outline the micro French with chrome gel on the outer edge only, then seal with glossy top coat in thin layers.
Editor's noteUse a fine striping brush and keep chrome only on the outer edge - inner chrome smears faster on short nails.
Watch outAvoid thick smile lines - they look like marker.
26. Deep red chrome gradient from side to side
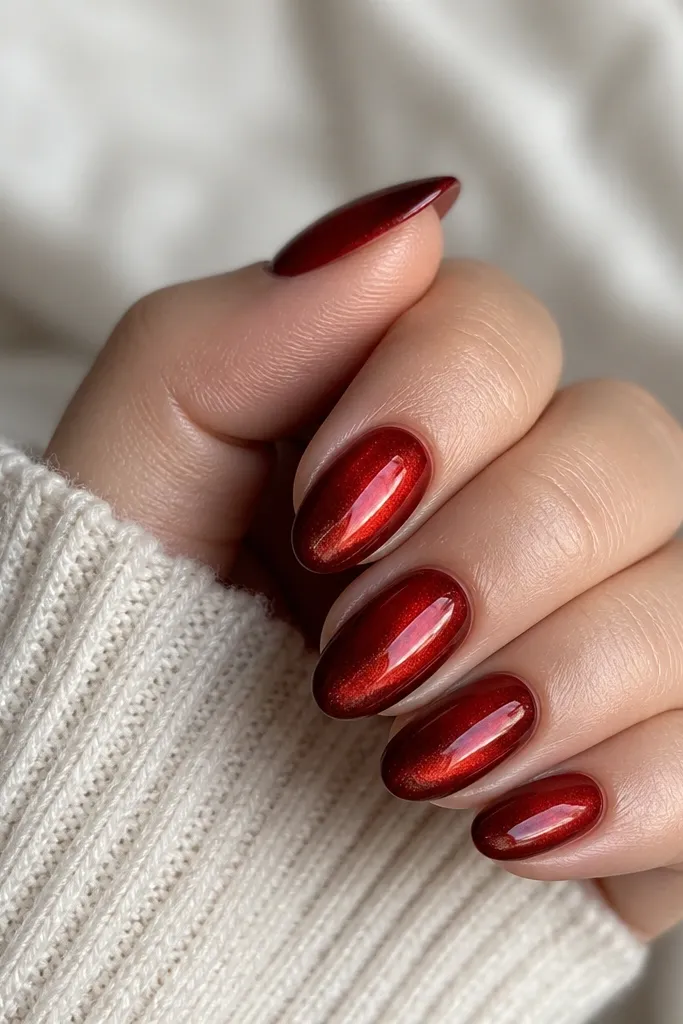
Side-to-side gradients make the nail look curved and dimensional. Even when you're short, this gives a "3D" effect because the reflection changes across the nail. I use a sponge to control density so it fades naturally. It's a dramatic look that still feels neat because it follows the nail's natural shape.
Paint deep red base, cure. Sponge chrome on the left side of the nail, then lightly tap and blend toward the center until it fades. Keep the fade about 1-2 mm wide at the transition. Seal with glossy top coat, using minimal brush pressure to avoid disturbing the gradient.
Editor's noteStart with less chrome than you think, then build - it's easier to add than fix.
Watch outDon't blend too much - full blending turns into a patchy red haze.
27. Oxblood chrome with tiny silver crescent tips
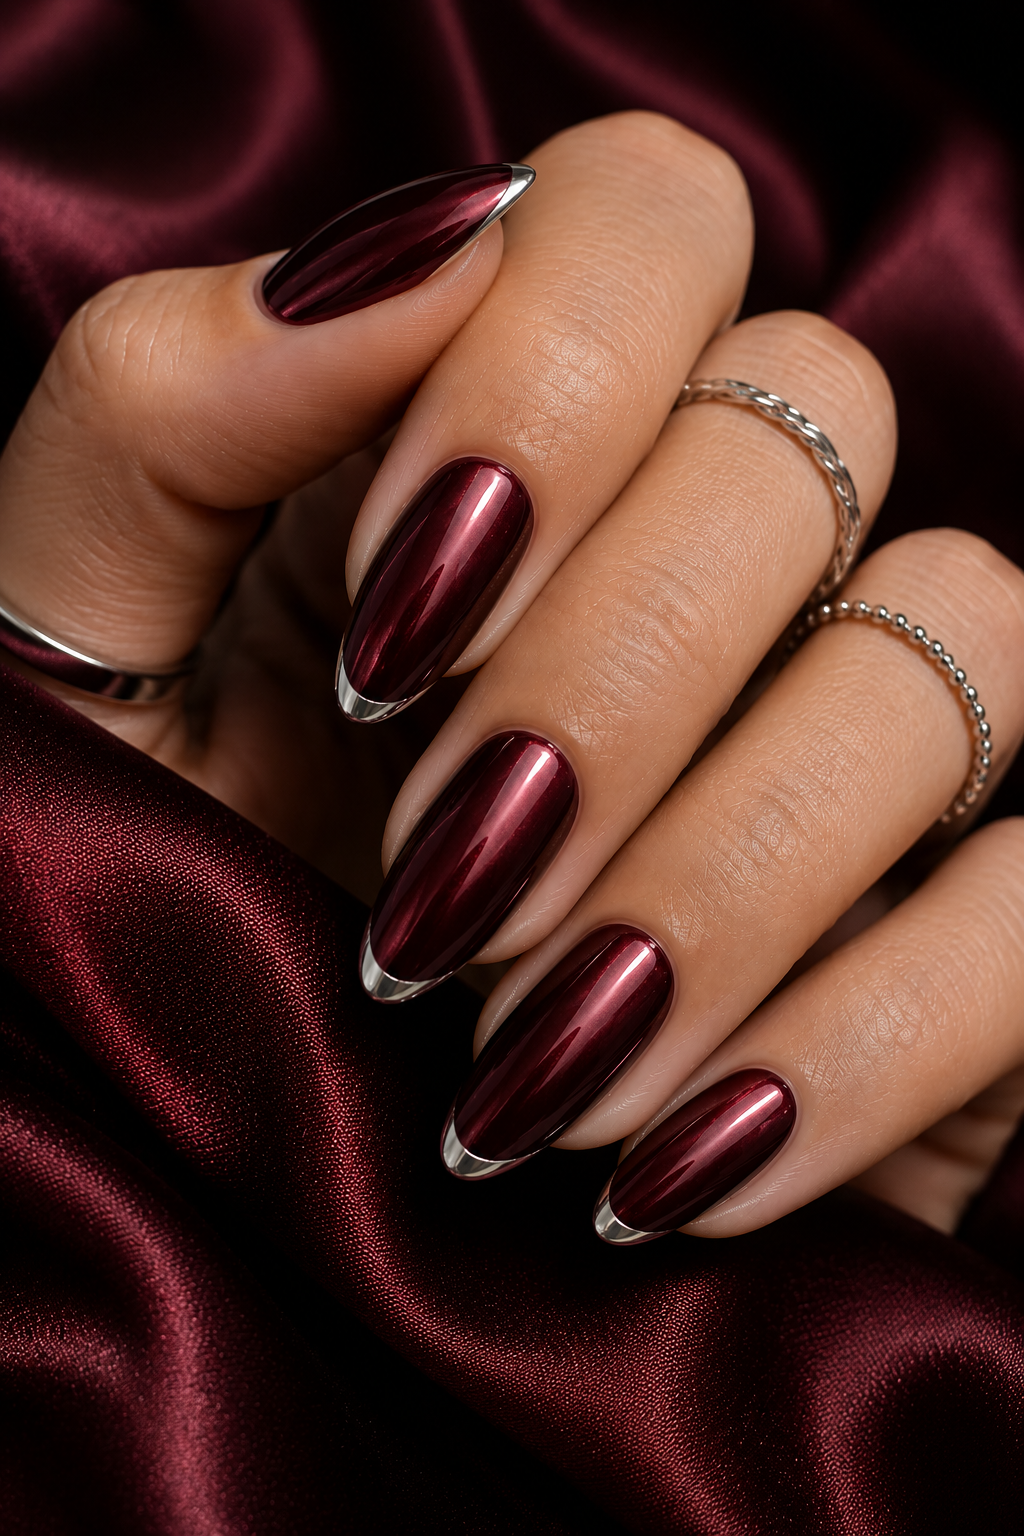
Tiny crescent tips look like jewelry without taking up space. The main nail stays mirror, and the little moon detail gives a second focal point. I use silver chrome because it contrasts cleanly with oxblood. This is a cute option for someone who wants chrome but also wants control over the look.
Chrome the whole nail in deep oxblood-toned chrome, cure. With a small dotting tool or striping brush, place a tiny silver crescent at the center of the tip, about 0.5-1 mm tall. Cure and top coat lightly so the crescent stays sharp.
Editor's noteIf your crescent looks uneven, use a small piece of tape to block one side while you paint the other.
Watch outAvoid placing crescents too close to the sidewalls - it looks crowded.
28. Deep red chrome crackle with black micro lines
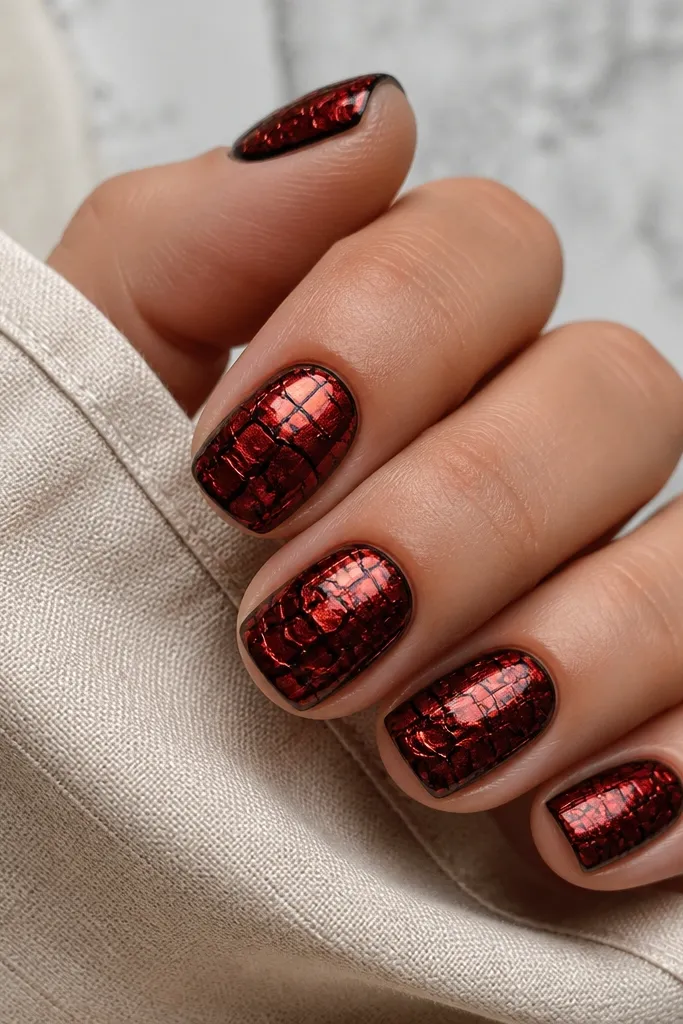
Crackle looks high-end on dark reds because the contrast makes the pattern read clearly. Chrome makes the crackle pop even more because the "broken" areas reflect light. I use very thin black lines so it stays elegant, not like messy marker. This look works well when you want a bit of edge without studs or gems.
Base with deep red gel, cure, then chrome lightly across the nail. Add crackle lines using a fine liner brush with black gel paint. Keep lines narrow and clustered around the center and upper half. Seal with a glossy top coat, thin enough to keep the crackle lines crisp.
Editor's noteDraw crackle lines first, cure, then chrome over only lightly if you want the cracks to stay defined.
Watch outDon't use thick black lines - they kill the chrome shine.
29. Chrome ombre half-matte deep red
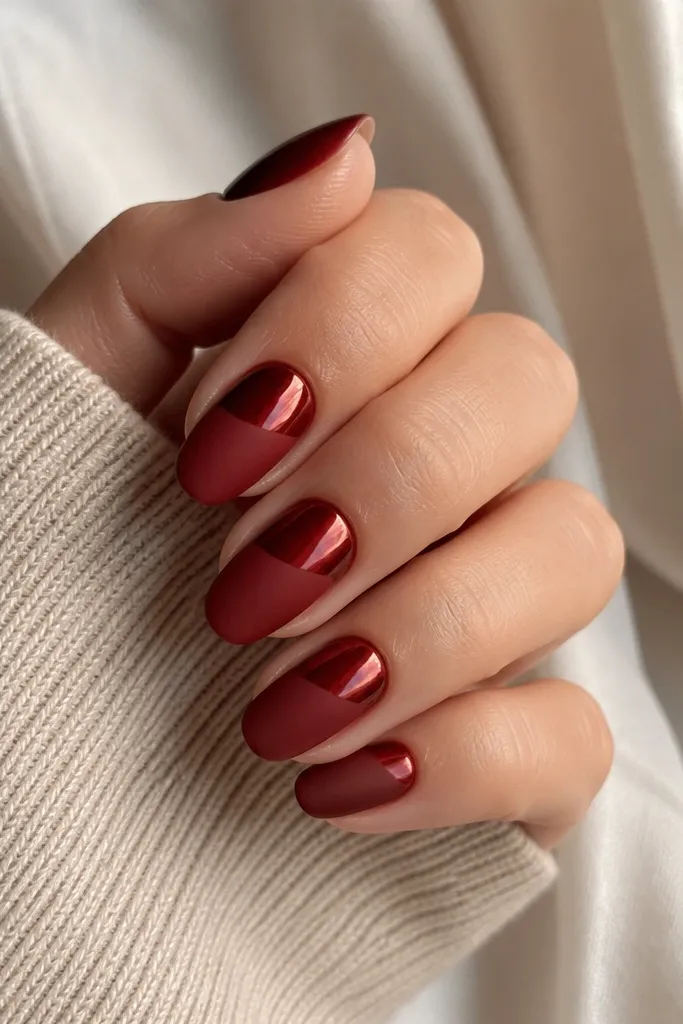
Horizontal split designs look intentional and graphic, and they work on small nails when the split is around the midline. Matte bottom hides small ridges, while chrome top gives shine right away. I use a soft blend at the border so it doesn't look like tape. This one gets compliments because it looks styled even with minimal art.
Paint deep red base, cure. Chrome the top half using sponge application, cure, then apply matte top coat to the bottom half only. For a soft blend, lightly feather the border with a sponge before matte application. Seal the chrome top with glossy top coat, not the matte part.
Editor's noteUse a small brush to paint matte along the bottom edge without flooding upward into the chrome.
Watch outDon't make the split too high - it shortens the visible chrome area.
30. Deep red chrome diagonal French overlay
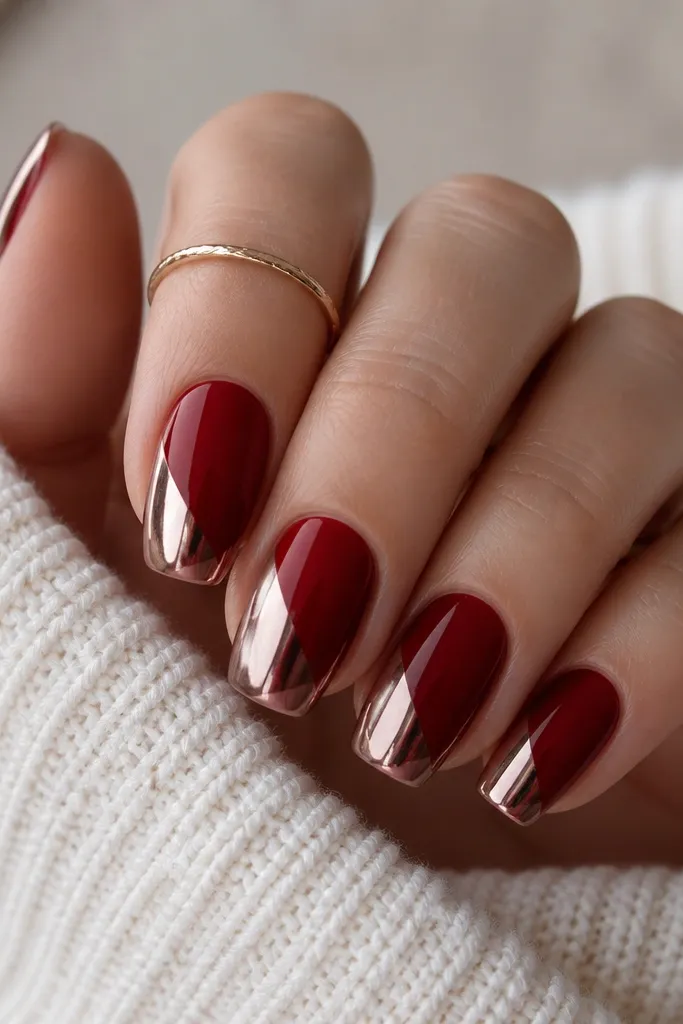
Diagonal overlays create the illusion of extra length because they pull the eye up and across. It's a modern take on French that still reads clean on short nails. I keep the diagonal overlay narrow enough to show deep red underneath. Chrome gives the "cut" line feel when the angle is crisp.
Base in deep red, cure. Mark a diagonal line from lower side near the cuticle to upper side near the tip. Apply chrome only on one side of that diagonal, stopping 1 mm before the tip edge. Top coat thinly and cure fully.
Editor's noteAngle the diagonal so the highest point lands closer to the center than the sidewall.
Watch outAvoid a random angle - a sloppy diagonal makes short nails look uneven.