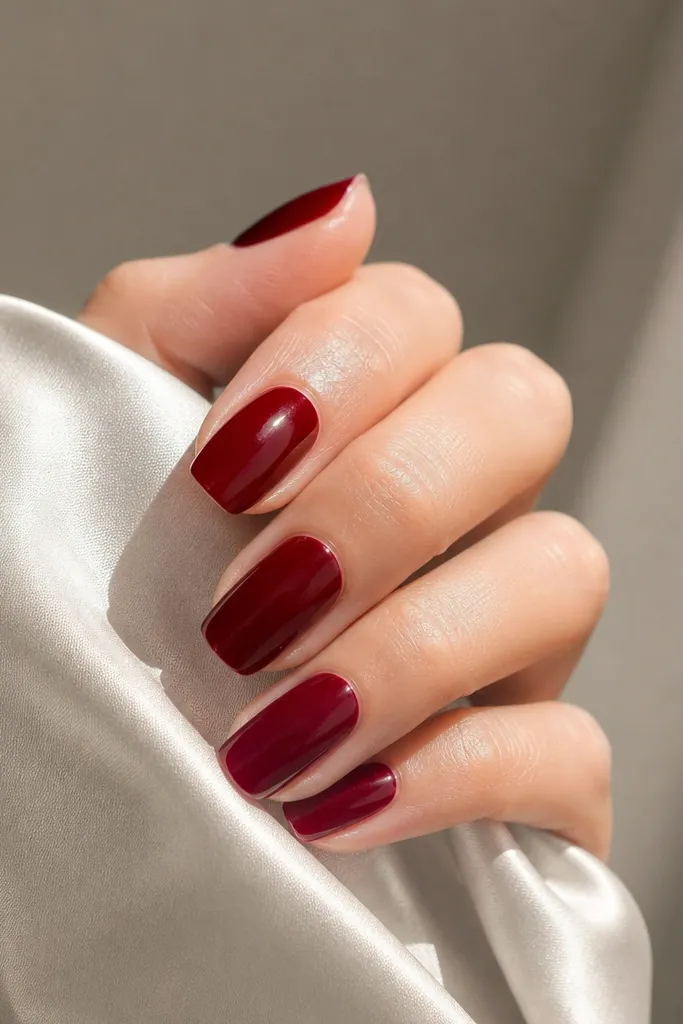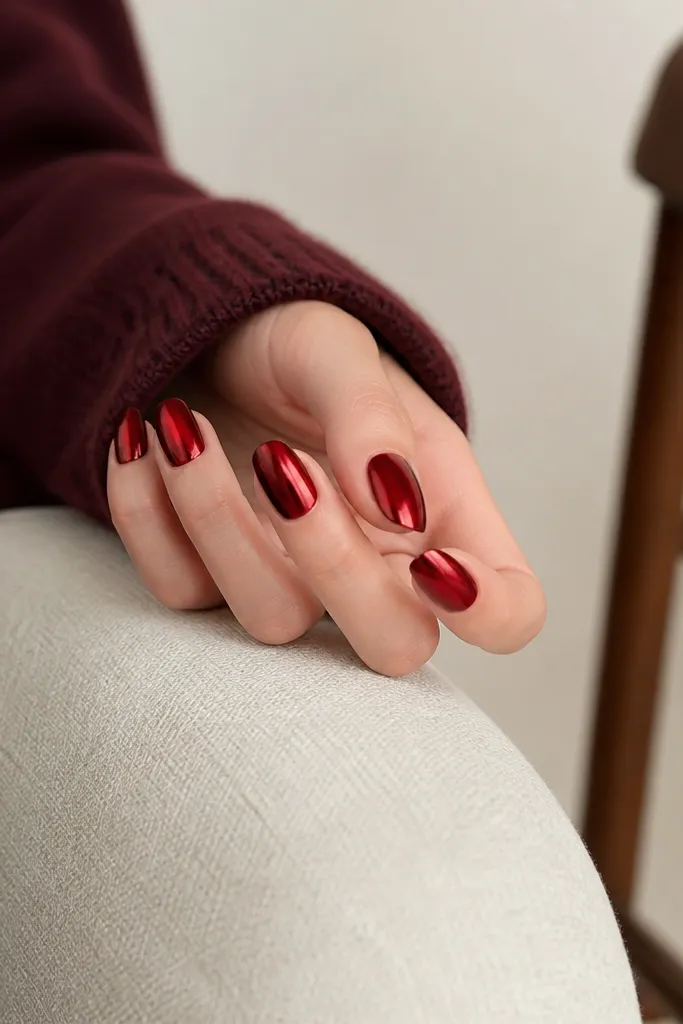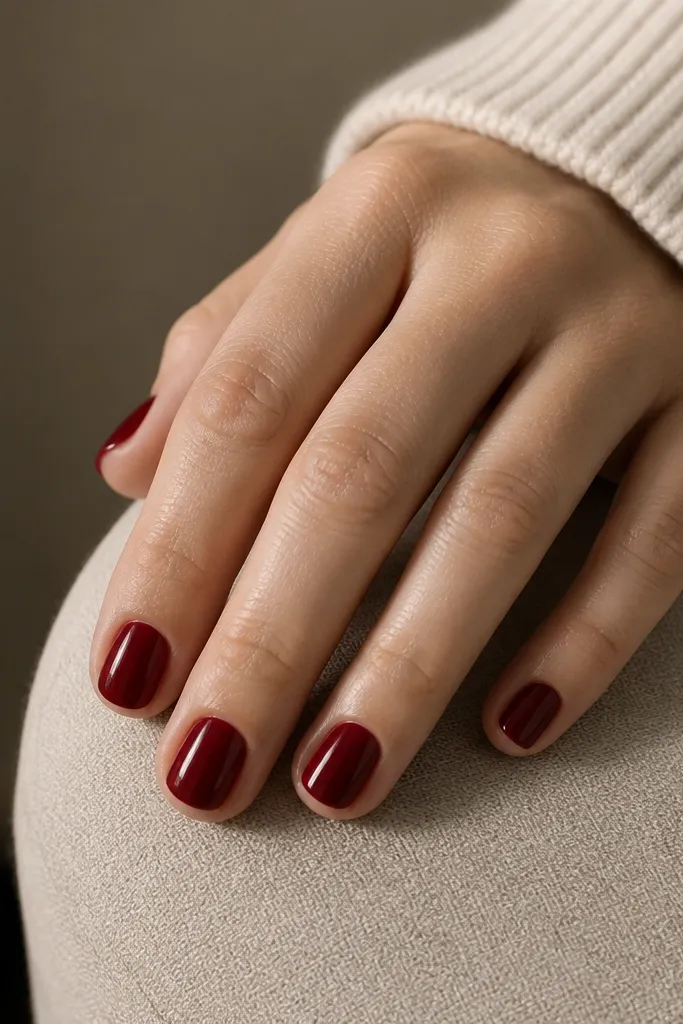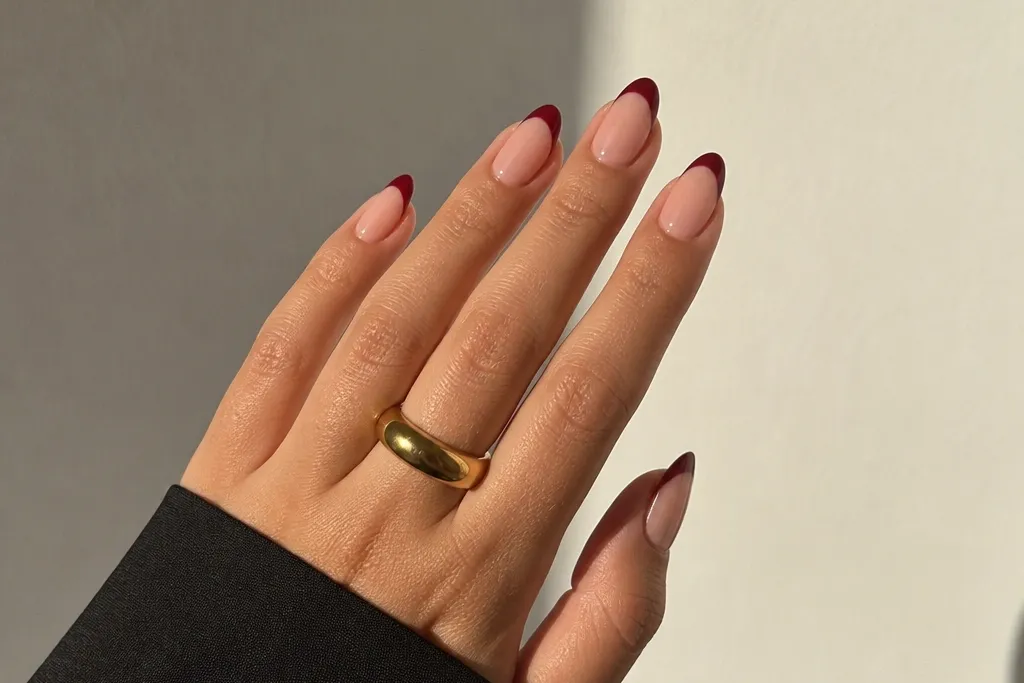
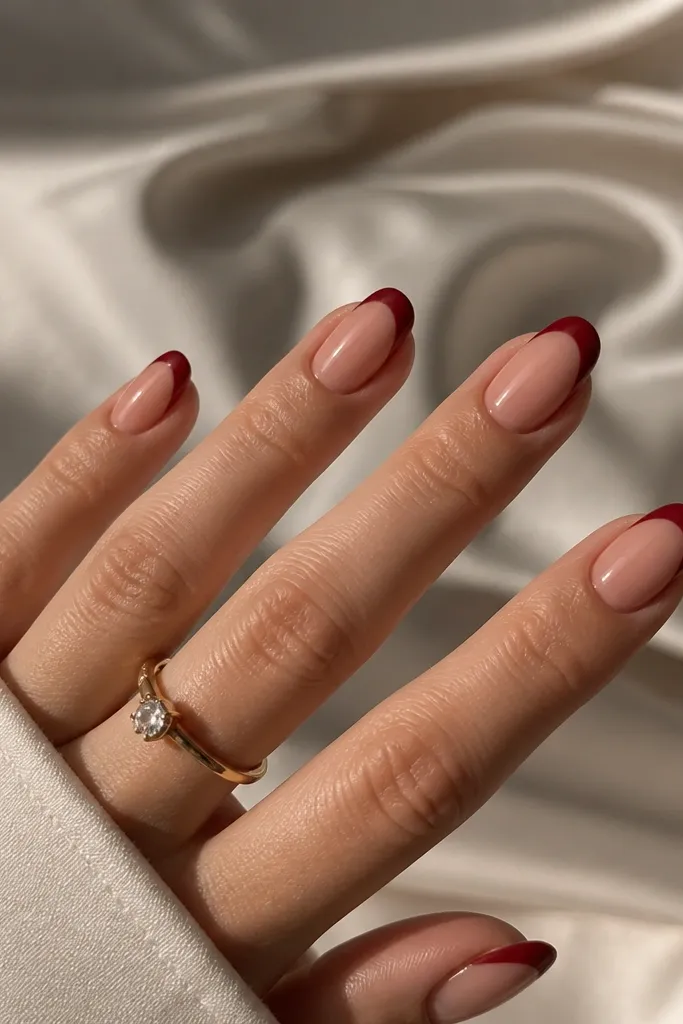
1. Burgundy Gloss French with Milky Pink Smile
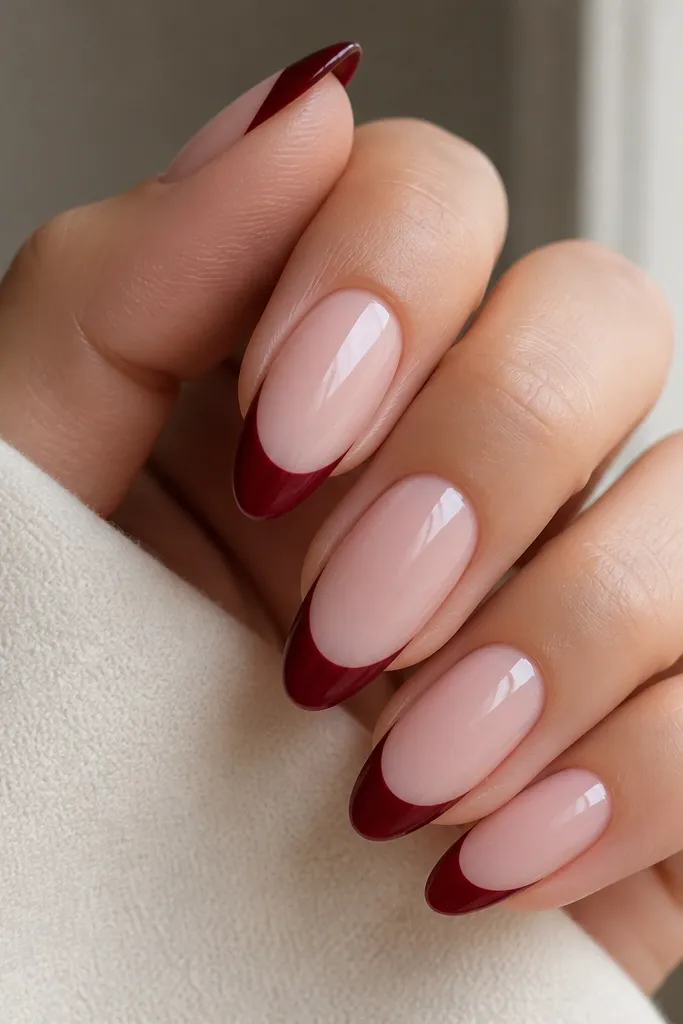
This set is clean and high-contrast. The milky pink base makes the burgundy look deeper and less harsh, and the glossy top coat keeps the tip edge reflective. The smile line is the star: it's slightly arched, not flat, so the nails look longer. I love this when you want "date night nails" that still look work-appropriate.
Start by shaping to almond or squoval with a soft point, then apply milky pink gel or polish as a full base. Paint the french tips in a single smooth sweep, keeping the red thickness around the same width across the nail. Cure fully if you're using gel, then seal with a glossy top coat over the tip edge for a glassy finish.
Editor's noteUse a dotting tool to place the center of the tip line first, then pull the red toward each side so the curve stays even.
Watch outDon't make the red too thick - chunky tips look like nail polish smudges instead of a french line.
2. Cherry Red French with Nude-Beige Base (Warm Glow)
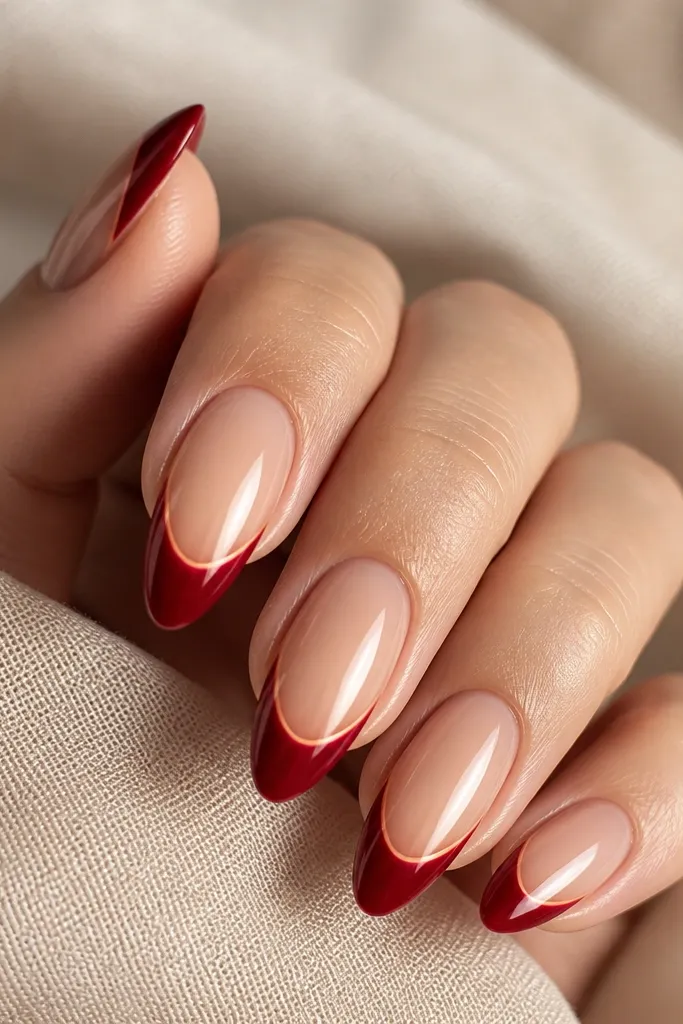
Cherry red has a cleaner, brighter punch than burgundy, and the nude-beige base warms it up. The result is a "soft glow" look that photographs well without needing any gems. The french tip stays sharp, but the overall set feels gentle because the base isn't pale-white. This one turns heads in daylight because cherry reads true red.
File squoval so the corners are slightly rounded, not sharp. Apply two thin coats of nude-beige until it's even and opaque. For the tips, keep the smile line thin and paint the red from the center outwards to avoid over-spreading near the corners.
Editor's noteIf your cherry red looks streaky, do two thin tip coats instead of one thick coat.
Watch outAvoid a grey-toned nude base - it makes deep red look muddy.
3. Deep Red Micro French on Short Squoval
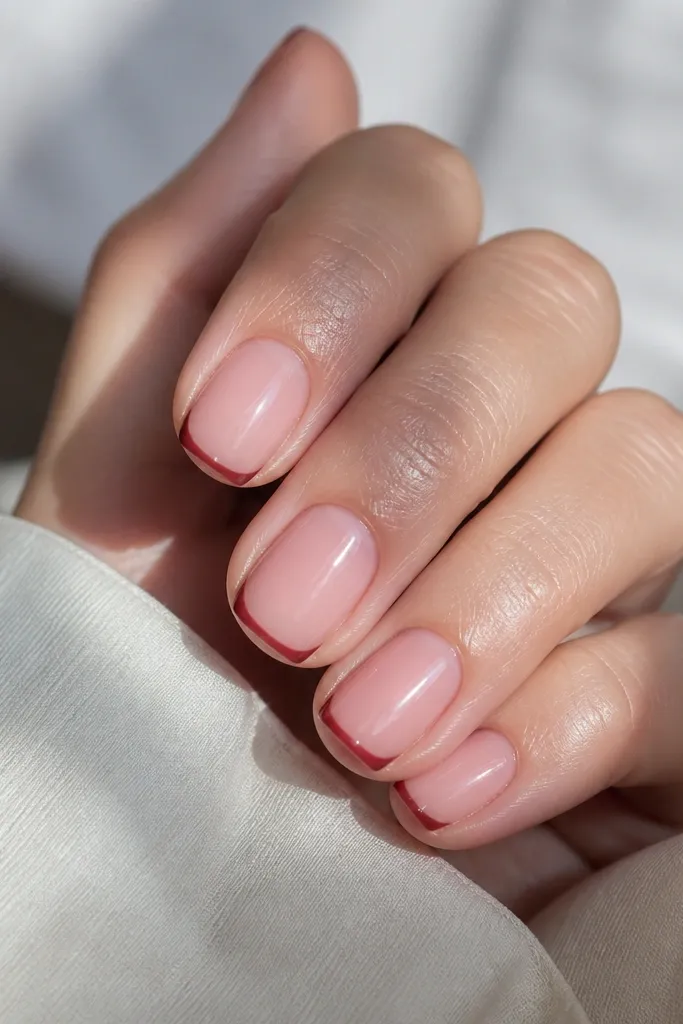
Micro french is the easiest way to get the deep red french tip nails aesthetic without feeling like your nails are too "done." The thin red line gives the illusion of length and keeps the look tidy. A sheer pink base helps the red stay refined instead of overpowering. I've used this when I needed something pretty for work and travel.
Keep the free edge minimal, about 1-2 mm. Use a sheer pink gel base, then draw a thin deep red line right at the tip edge using a nail art striping brush. Add a second coat only if the line looks uneven, then top coat for shine.
Editor's noteAngle the brush so the tip line is tight at the center and slightly wider near the corners for a natural curve.
Watch outDon't drag the red across the whole nail - micro french should sit at the edge.
4. Velvet Matte Deep Red Tips with Sheer Base
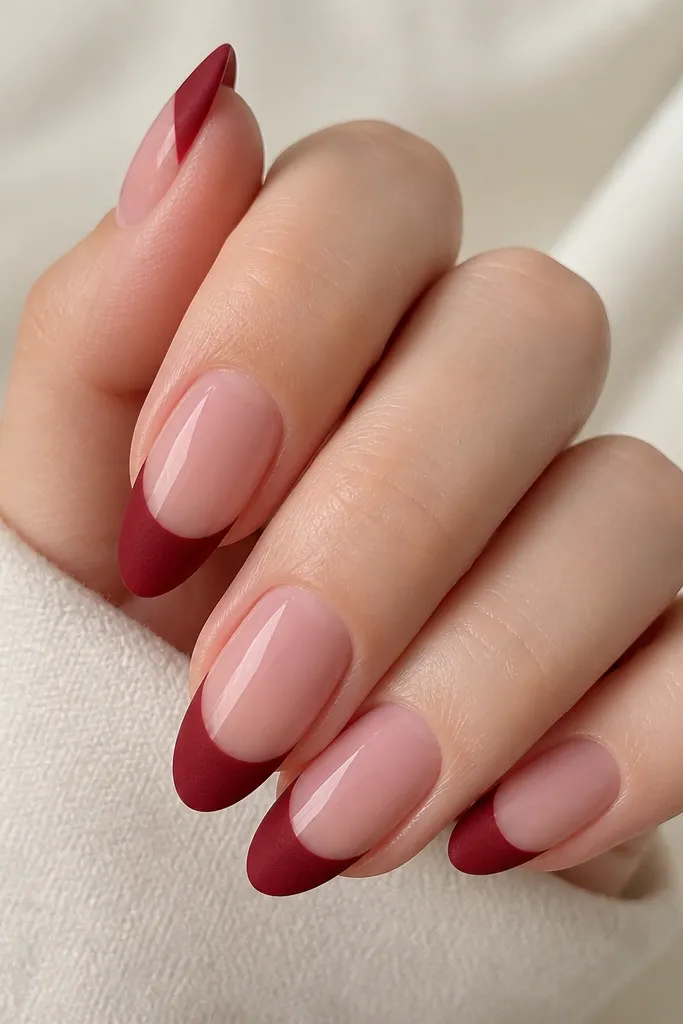
Matte deep red tips look expensive because the color absorbs light instead of reflecting it. The sheer base keeps it airy, so the matte red doesn't feel heavy. I love pairing matte with clean french edges because it keeps the look modern and not "random matte dots." This is perfect for nights out and photos.
Apply a sheer pink base and cure. Paint the french tips deep red, then use a matte top coat only on the tips (or a full matte top coat if you want uniform). Keep matte off the cuticle area because it can look dry if you smear it.
Editor's noteSeal the tip edge with matte top coat last, then wait 3-5 minutes before touching anything so it doesn't streak.
Watch outSkip the matte top coat too soon after curing - it can smear the red.
5. Deep Red French with Gold Foil Half-Moon Accent
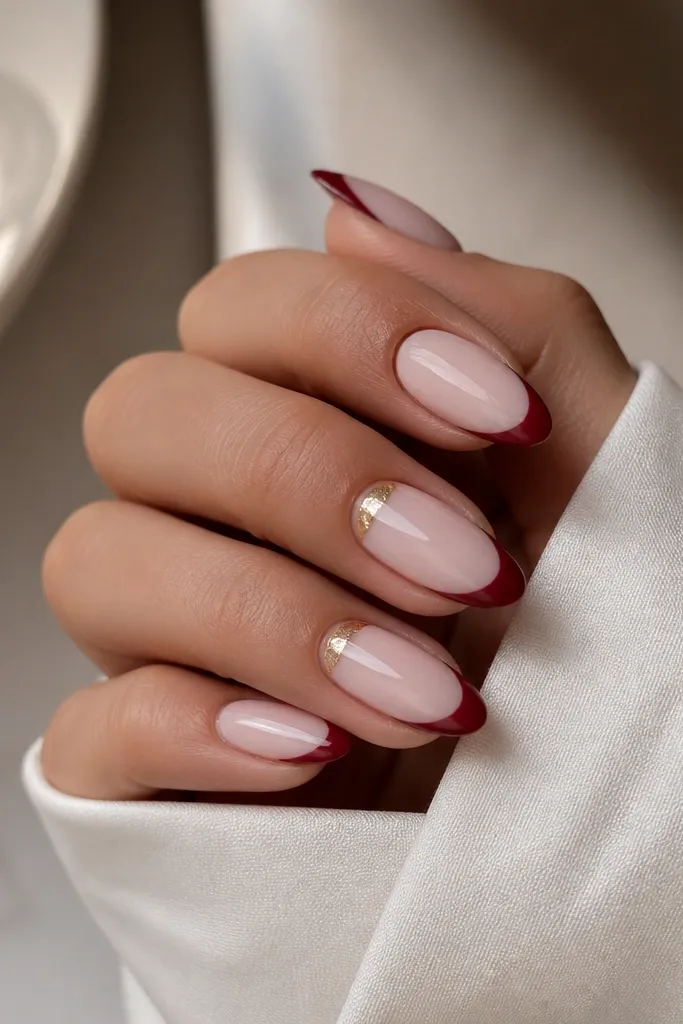
Gold foil at the cuticle makes the deep red look even richer. The half-moon shape frames the nail bed and adds shine where the eye naturally starts. I like doing it on two accent nails so it doesn't look like a full set of random foil pieces. This one reads festive without turning into full bling.
Do your milky pink base and deep red french tips first. Add gold foil flakes using a tacky gel layer near the cuticle, then press gently with a small silicone tool. Keep the foil under the cuticle line - don't flood it into the sidewalls.
Editor's noteTap off extra foil with a dry brush so only crisp pieces stay visible.
Watch outDon't cover the entire cuticle - the half-moon should be small and intentional.
6. Ombre French Fade from Wine Red to Clear
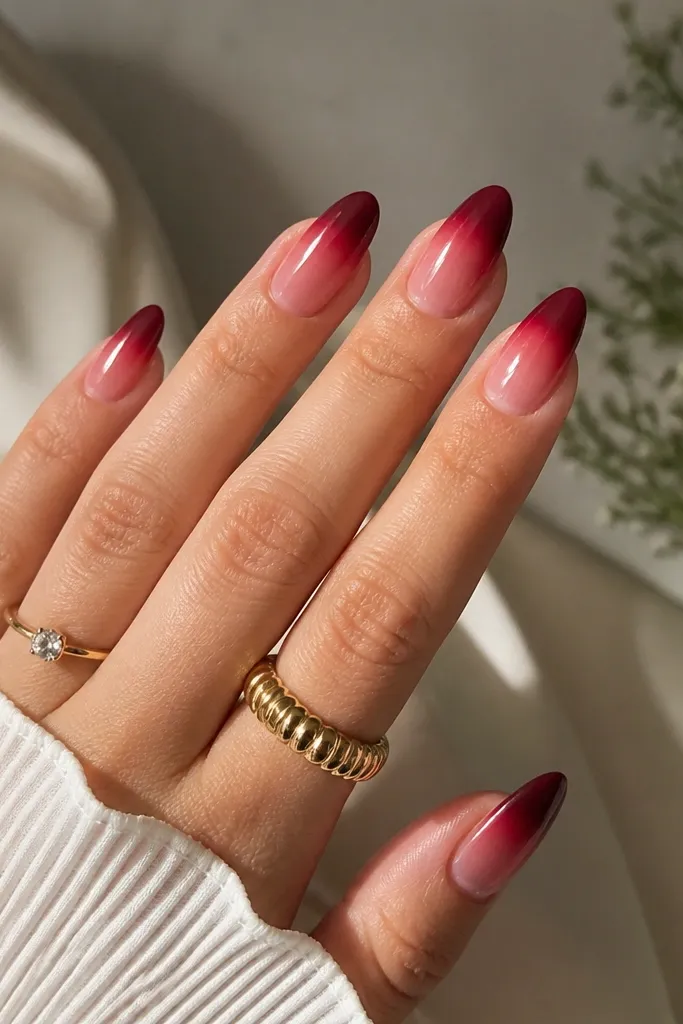
This is french that looks softer and more custom. The fade from deep red into a translucent section avoids the hard line that can look "sticker-like" when your brush wobbles. I use a sponge gradient for a smooth transition, then keep the darkest red only at the very tip edge. It gives that salon-airbrush look at home.
Use a sheer pink base. Paint a thin band of deep wine red at the tip edge, then sponge a lighter red or diluted red upward to blend. Finish with a glossy top coat so the gradient stays smooth and glossy, not chalky.
Editor's notePractice the fade on a nail swatch - gradient control improves fast once you see the blend.
Watch outDon't over-blend into the base - the red should stay strongest at the edge.
7. Deep Red French with Tiny Black Cat-Eye Dot Tips
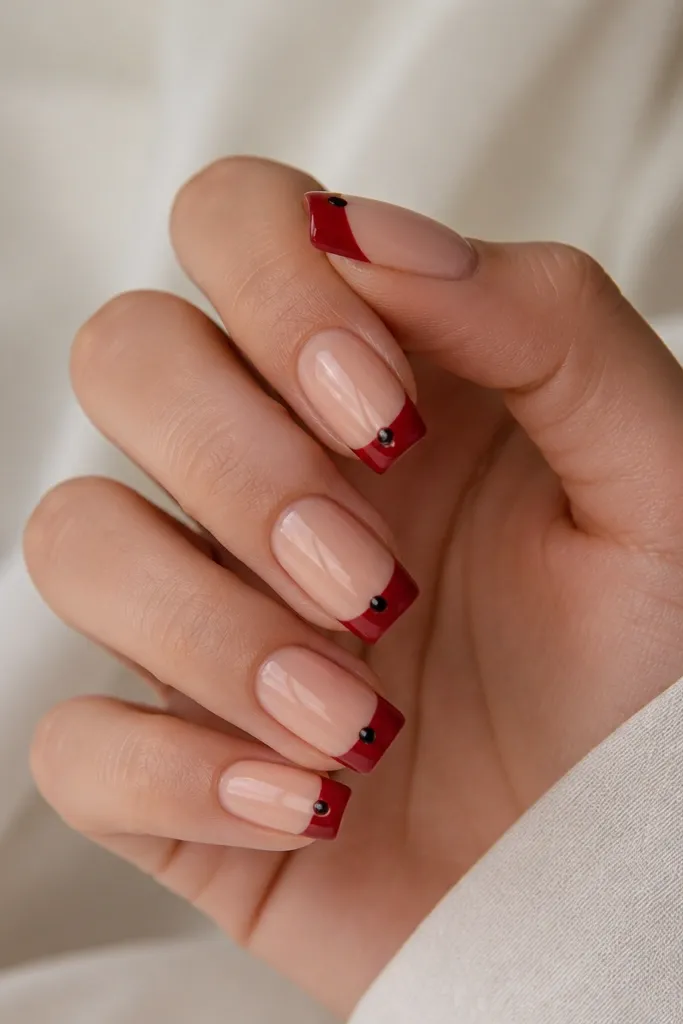
A micro cat-eye dot gives the deep red french tip nails aesthetic a little edge. The black magnet pigment pulls focus and makes the red look more dimensional. It's subtle enough for daily wear, but it catches light when you move your hands. I've gotten compliments from people who thought it was a tiny jewel at first glance.
Apply nude base and deep red french tips. Cure. Then use a dotting tool to place a small amount of black cat-eye gel right at the center of each tip, and magnet it to create a tiny streak effect. Seal with glossy top coat.
Editor's noteMake the dot size match your nail width - around 0.8-1.2 mm for short nails.
Watch outDon't magnet too long - it can pull the pigment sideways and ruin the center dot.
8. Glitter Underlayer Deep Red French (Hidden Sparkle)
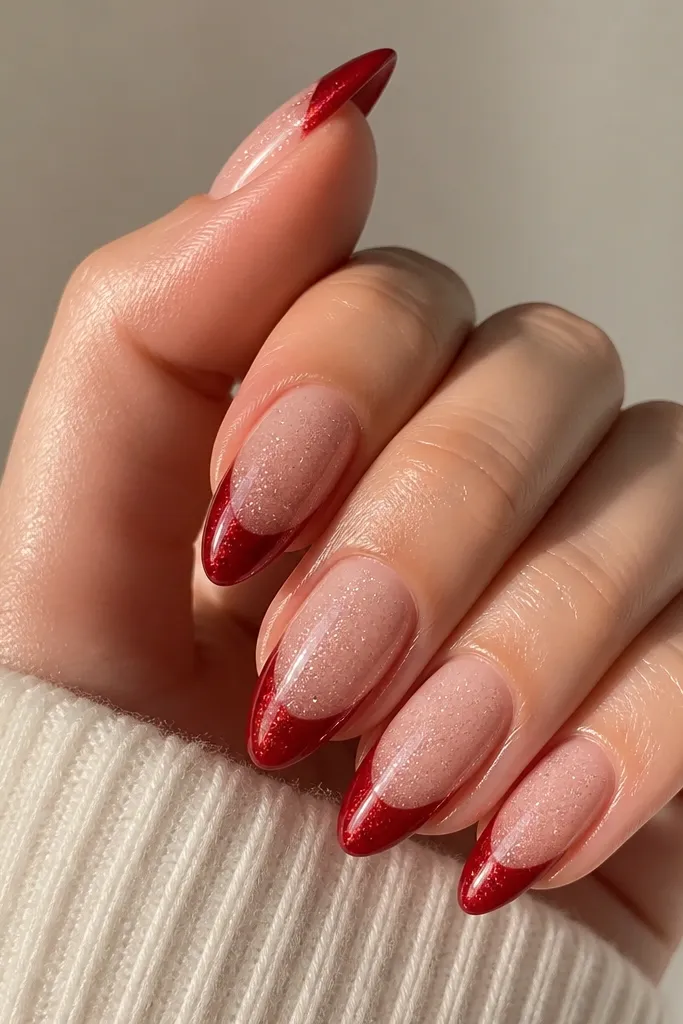
This look is sneaky in the best way. The glitter sits under the deep red, so you don't get chunky sparkle on top - you get a lit-from-within effect. I use fine red micro-glitter or a holographic dust, then cap it with a deep red gel so the tip still looks smooth. In motion, it looks like shimmer in the paint, not glitter on your nail.
Start with a sheer pink base. Paint a thin layer of deep red at the tip, then dab fine glitter gel into the tip area while it's tacky. Cap with another thin deep red layer and cure until fully smooth, then top coat.
Editor's noteCap the glitter with a slightly thicker top layer at the tip edge so it doesn't feel gritty.
Watch outAvoid chunky glitter - it makes the tip texture rough and ruins the french line.
9. Deep Red French with Rhinestone Corner Cluster
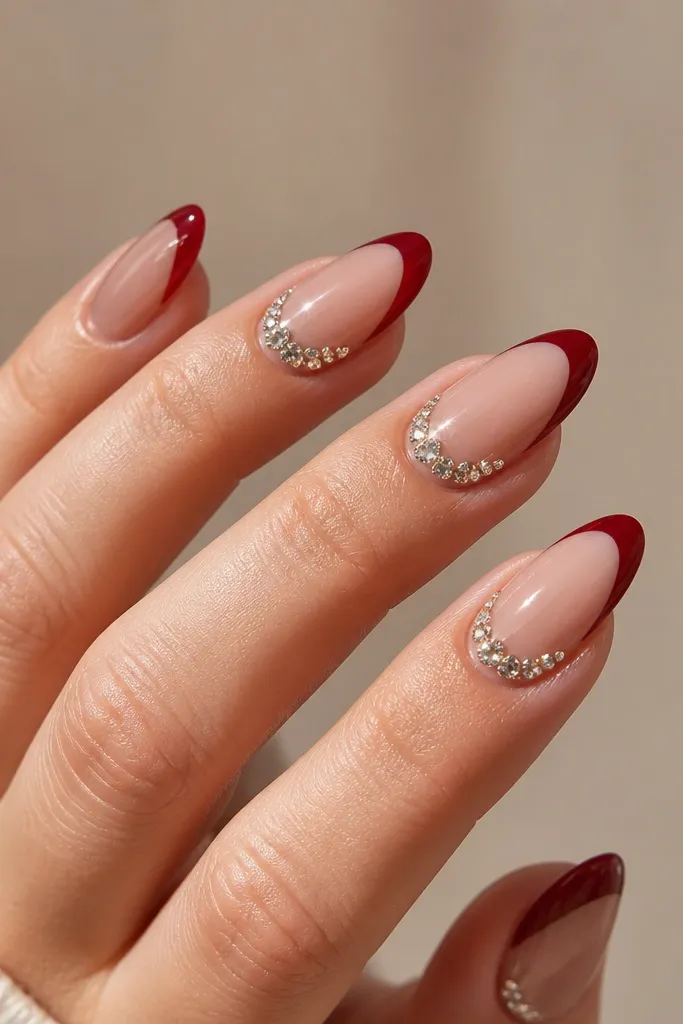
Corner rhinestones make the tip line feel intentional and "designed," not random. I like using 3-4 small stones in a tight cluster so it looks like one accent. Clear stones keep it classy with deep red, and the outer corner placement elongates the nail visually. This is my go-to for weddings, holiday parties, and events where you want your hands to show.
Apply nude base, then paint deep red french tips. Place a dot of gel at the outer corner area and set small rhinestones with tweezers. Cure, then add a thin layer of top coat around the stones so edges don't catch on fabric.
Editor's noteUse gel glue for stones, not regular polish - stones loosen fast on glossy regular lacquer.
Watch outDon't put rhinestones too close to the center - it breaks the french symmetry.
10. Wine Red French with Thin White Double Stripe
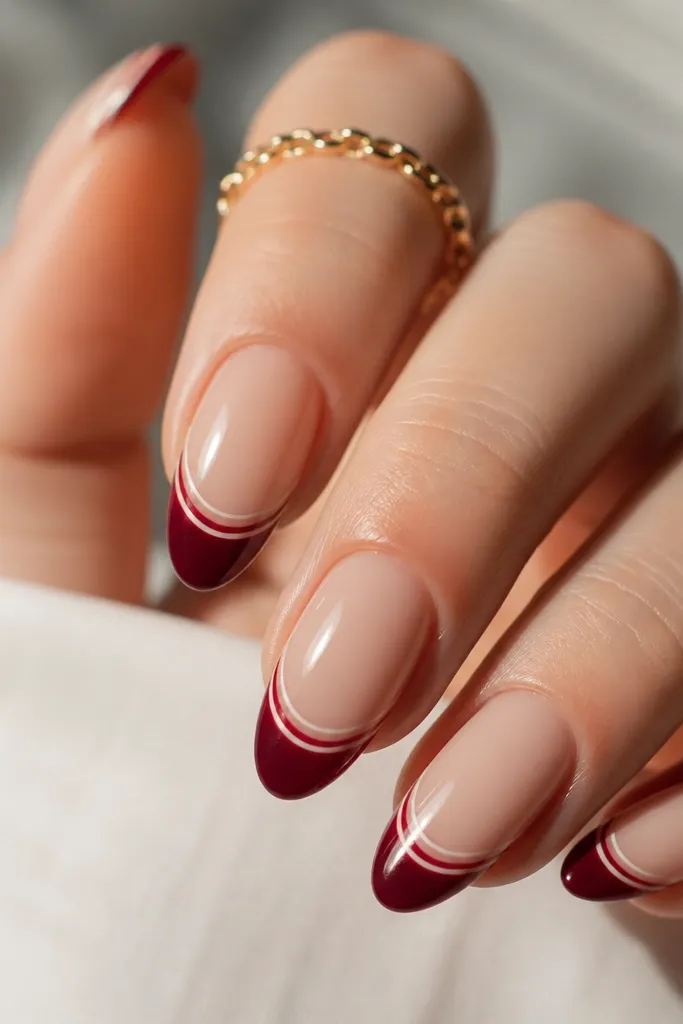
The double white stripe makes deep red look crisp and editorial. It also hides tiny brush imperfections because the white lines act like borders. This is the kind of set that looks great on camera because the stripes create clean separation. I do this when I want french tips to look more "fashion" than "simple."
Start with milky pink base and deep wine red french tips. Cure. Then use a liner brush to add a thin white line inside the red near the smile line and another along the outer edge of the tip. Seal with glossy top coat.
Editor's noteLet the white stripe cure fully before top coat so it doesn't smear.
Watch outDon't make the white lines too thick - thick white turns it into a cartoon outline.
11. Deep Red French with Negative Space Cuticle Arc
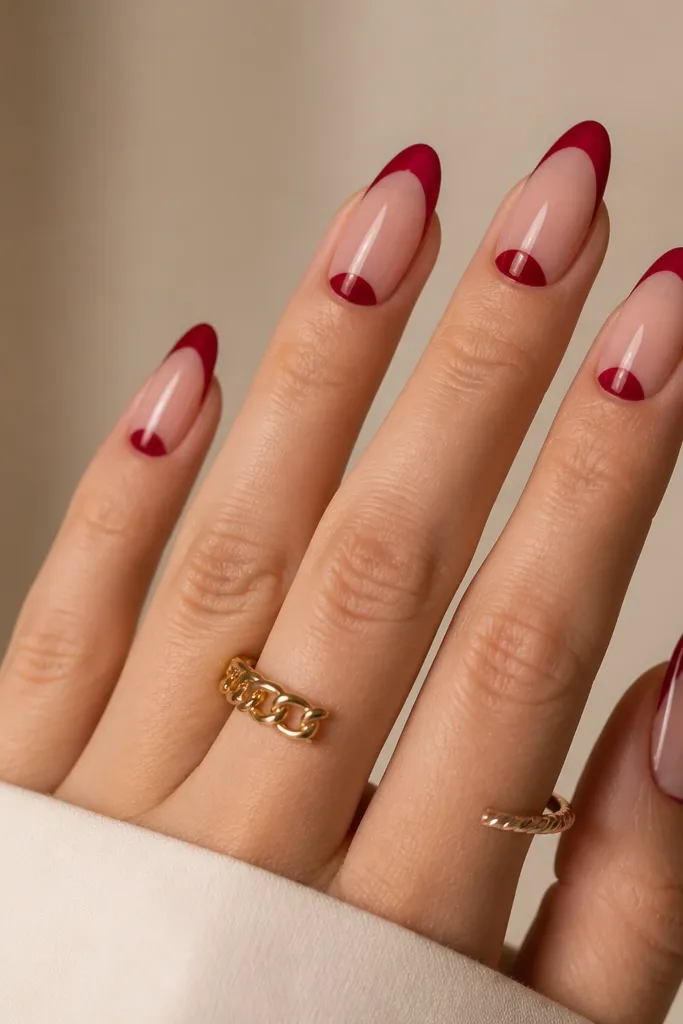
Negative space makes deep red french tips feel modern and lighter. The cuticle arc draws the eye upward and makes nails look neat even with a bold tip color. This is a great option if you don't like heavy base coverage or if your cuticle area grows out quickly. It also helps the french line stay sharp because you're not painting the whole nail.
Use a sheer nude base so the nail still looks clean. When painting, leave a small crescent of negative space right under the cuticle - about 1 mm wide. Paint deep red tips around it, then top coat carefully so the arc stays clear.
Editor's noteUse a thin brush to clean the arc edges with a wipe soaked in gel cleanser.
Watch outDon't leave the negative space too wide - it can look like a gap instead of intentional design.
12. Deep Red French with Burgundy Micro Dots Along Smile
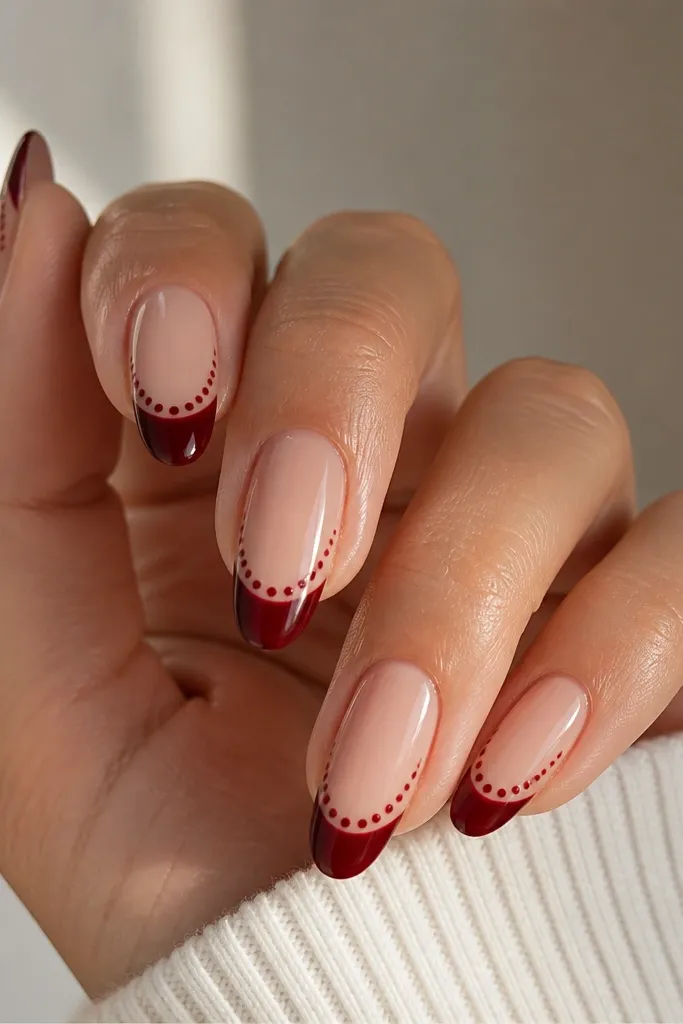
Micro dots along the smile line make the french tip feel handcrafted. Using a lighter burgundy instead of pure white keeps it subtle and keeps the look within the deep red family. Dots also make the line look smoother because they hide tiny uneven spots. This is a pretty choice for birthdays and date nights when you want something cute but not loud.
Paint your base and deep red tips first. With a dotting tool, place 3-5 micro dots along the inside of the smile line on each nail, keeping them evenly spaced. Cure, then top coat glossy.
Editor's noteWipe the dotting tool often - gel gathers and makes bigger dots than you want.
Watch outDon't place dots across the full tip - keep them only along the smile.
13. Deep Red French with Black Lace Stamping Tips
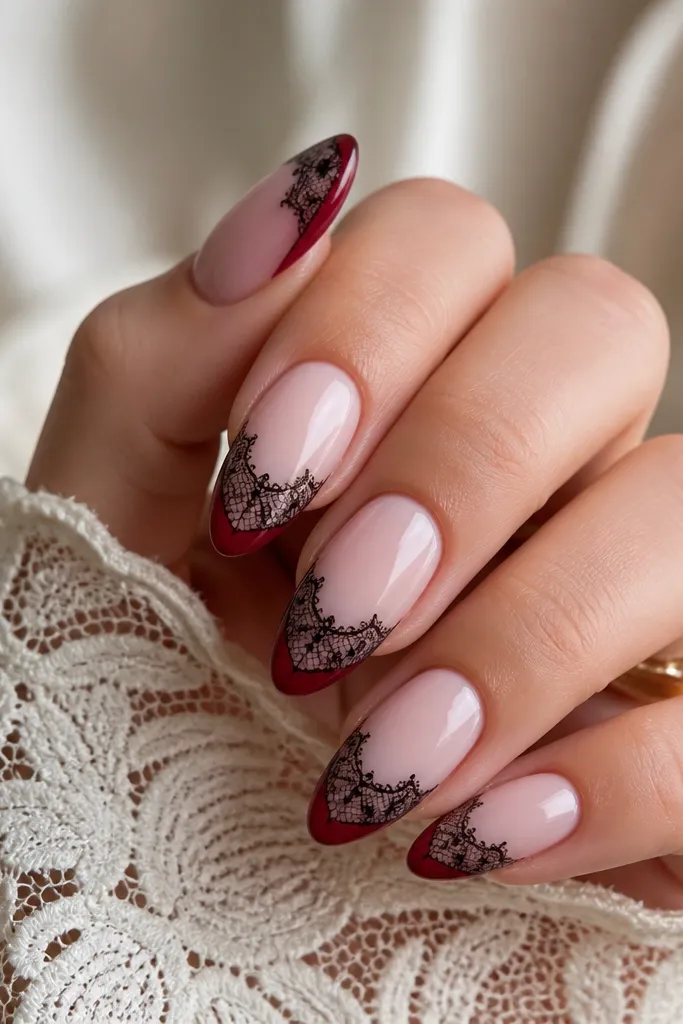
Black lace over deep red gives a gothic-romantic vibe without needing heavy gems. The key is keeping lace only on the top portion of the tip so the red still reads as the main color. Lace stamping creates crisp lines that hand-drawn art usually can't match. This looks stunning for fall outfits and evening events.
Base coat and apply milky pink. Paint deep red french tips, cure, then stamp black lace using a nail stamping plate with fine lace patterns. Use a stamper with medium pressure, and keep the stamp only on the french area. Seal with glossy top coat.
Editor's noteClean the stamping plate between nails - deep red polish dries fast and blocks crisp transfer.
Watch outSkip thick stamping polish - it smears the lace lines.
14. Deep Red French with Pearlized Top Coat Only on Tips
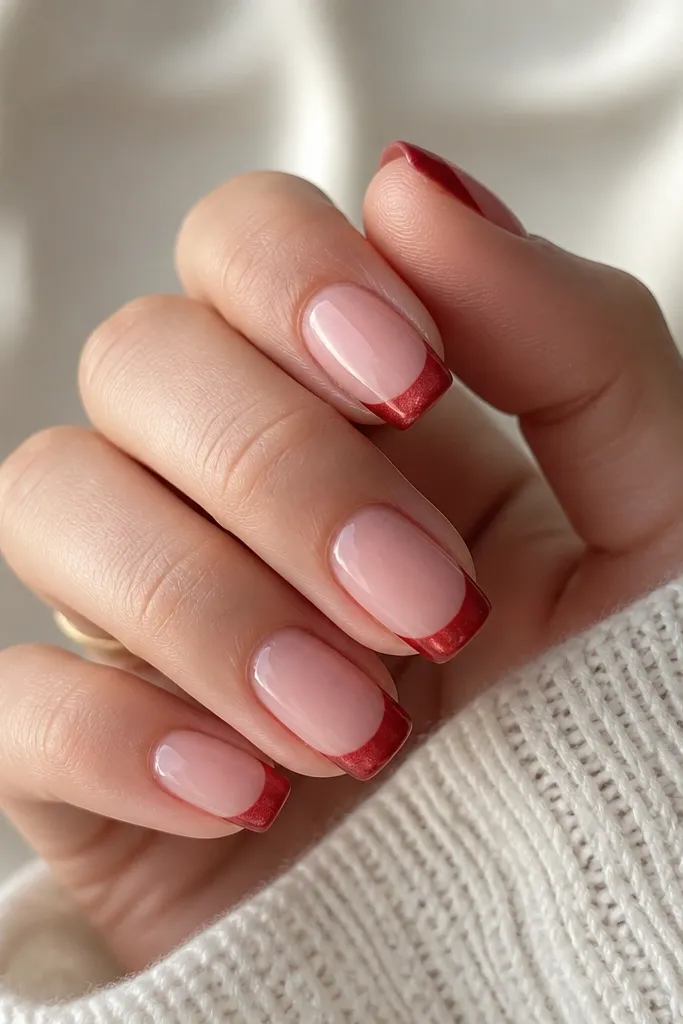
A pearlized top coat changes deep red from flat to softly glowing. The nude base stays glossy, while the tips get a refined, pearly finish that looks expensive in indoor lighting. This is a nice middle ground if you don't like full matte but still want texture. It also makes the tip line look smoother because the pearl finish blurs micro streaks.
Apply nude base and deep red tips, then cure. Brush pearlized top coat only on the tips so the base stays normal glossy. Cure again and wipe residue if needed to keep the pearl from looking patchy.
Editor's noteUse two thin pearl coats instead of one thick coat to avoid milky pooling.
Watch outDon't pearl-coat the base - it can look cloudy against skin.
15. Deep Red French with Rose Gold Line Art at the Smile
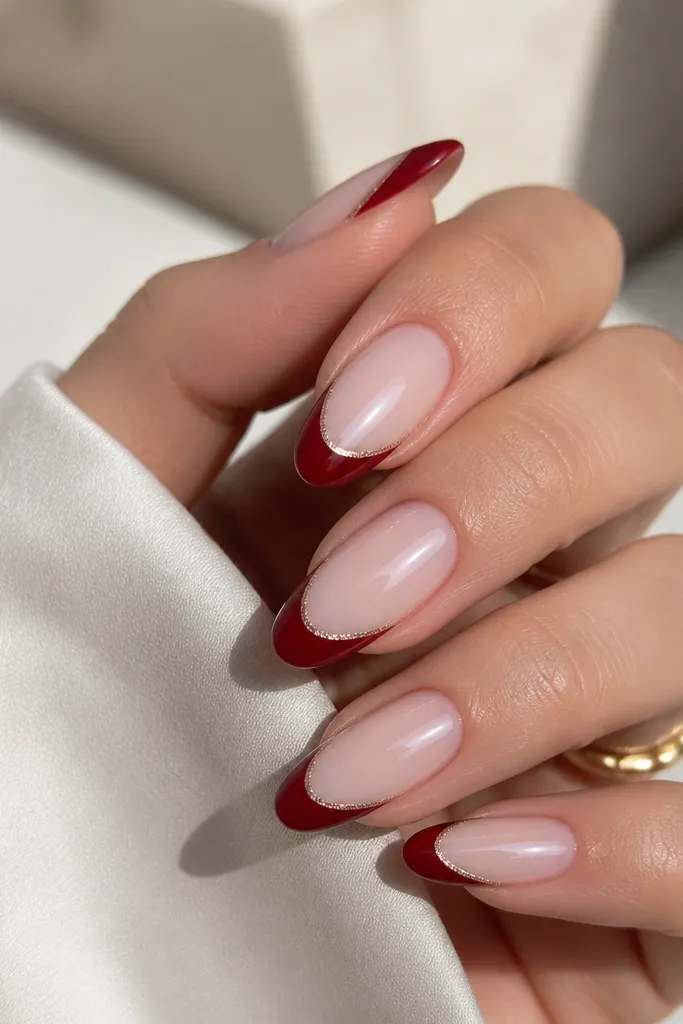
Rose gold line art makes deep red look warmer and more jewelry-like. Tracing the smile curve adds a "frame" effect that makes your french tips look extra clean. I like doing this with a striping gel because it stays smooth and doesn't crumble like loose metallic powder. This is a great option for someone who wants glam without stones.
Do your standard milky pink base and deep red tips. After curing, use rose gold striping gel or metallic liner to draw a single line following the smile curve. Keep the line about half the thickness of the red tip. Top coat over the line to lock it in.
Editor's noteLet the metallic line settle for 10 seconds before curing so it levels out.
Watch outDon't draw multiple lines - one clean trace looks intentional; extra lines look messy.
16. Deep Red French with Micro Chrome Overcoat (Mirror Tips)
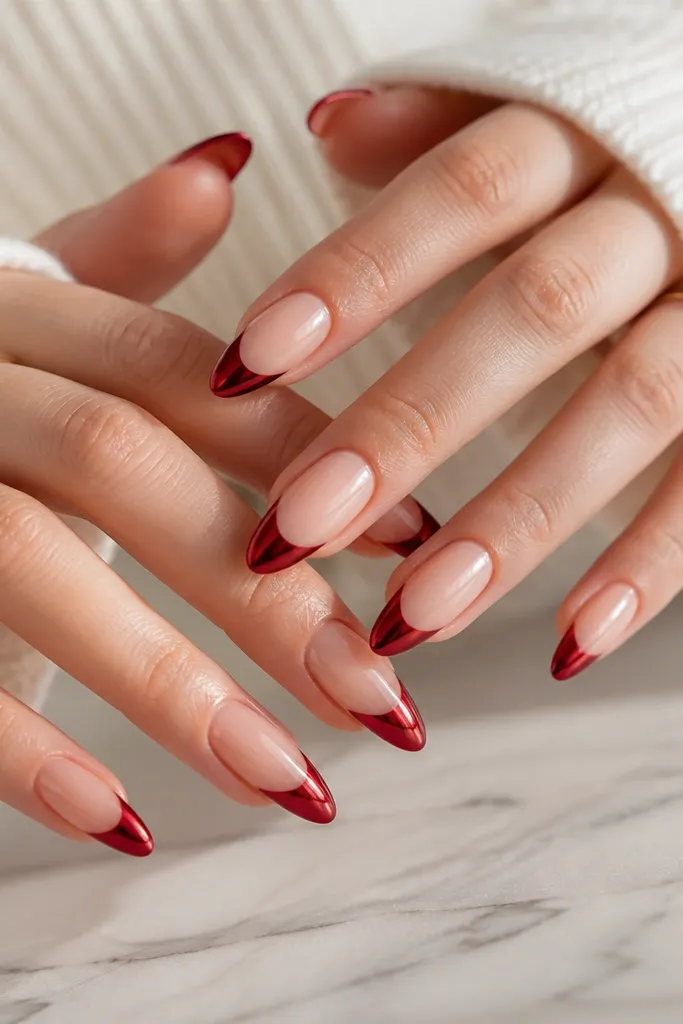
Chrome over deep red makes the tips look like lacquered jewelry. The micro chrome is fine enough that the red still shows through, so you don't end up with plain silver tips. This look turns heads because the surface reflects light in a smooth sheet. It also makes nail lines look crisp because the chrome evens out tiny imperfections.
Apply sheer nude base. Paint deep red tips and cure. Apply chrome gel or a chrome powder method over the tips only, then buff lightly if your chrome system requires it. Seal with a top coat that won't dull the chrome (some systems need a specific no-wipe top).
Editor's noteDo chrome in a cooler room if possible - heat can change how the powder adheres.
Watch outDon't use a regular thick glossy top coat over chrome - it can kill the mirror effect.
17. Deep Red French with White Marble Veins on Accent Nails
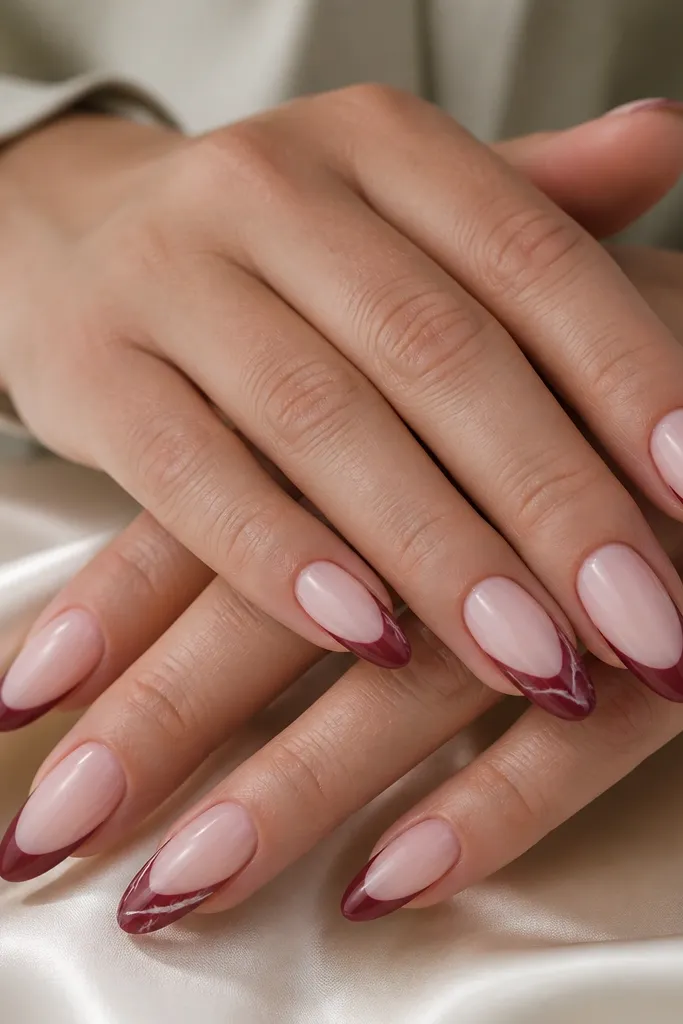
Marble veins make the deep red french tip nails aesthetic feel custom without needing art on every nail. The white veining looks like it's trapped under glass because the red stays glossy. I keep it on two nails so the set looks cohesive instead of chaotic. This one reads luxe and pairs well with gold jewelry.
Paint deep red tips on all nails first. On two accent nails, use a thin brush to pull white gel into the red in a vein pattern, then lightly drag with the brush tip to create natural movement. Cure and seal with glossy top coat for the glassy marble look.
Editor's noteKeep veins thin and uneven - uniform lines make it look like stickers.
Watch outDon't flood the marble with white - too much white turns deep red into pinkish patches.
18. Deep Red French with Smudged Wine Fade (Brush-Stroke Style)
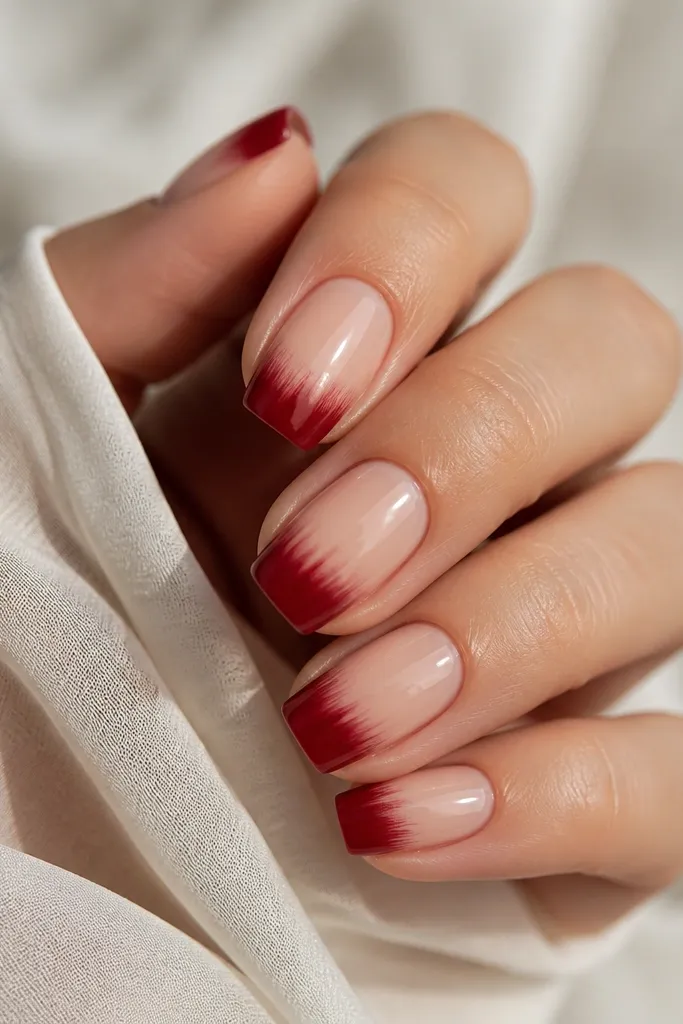
This is for when you want french tips that look artistic instead of perfectly painted. The smudged wine fade creates a salon airbrush vibe, and the nude base keeps it wearable. I like it on squoval because the wider sidewalls let the fade look smooth. It's also forgiving if your line isn't perfectly symmetrical.
Use nude base. Paint deep red tips, then while the gel is slightly tacky, lightly blur the inner edge of the tip with a clean flat brush or sponge. Keep the outer edge crisp so it still reads as french. Cure and top coat glossy.
Editor's noteUse a damp brush edge for blur control, not water - gel systems hate big water drops.
Watch outDon't blur the entire tip - keep the outer edge defined.
19. Deep Red French with Black Matte Base and Gloss Tips
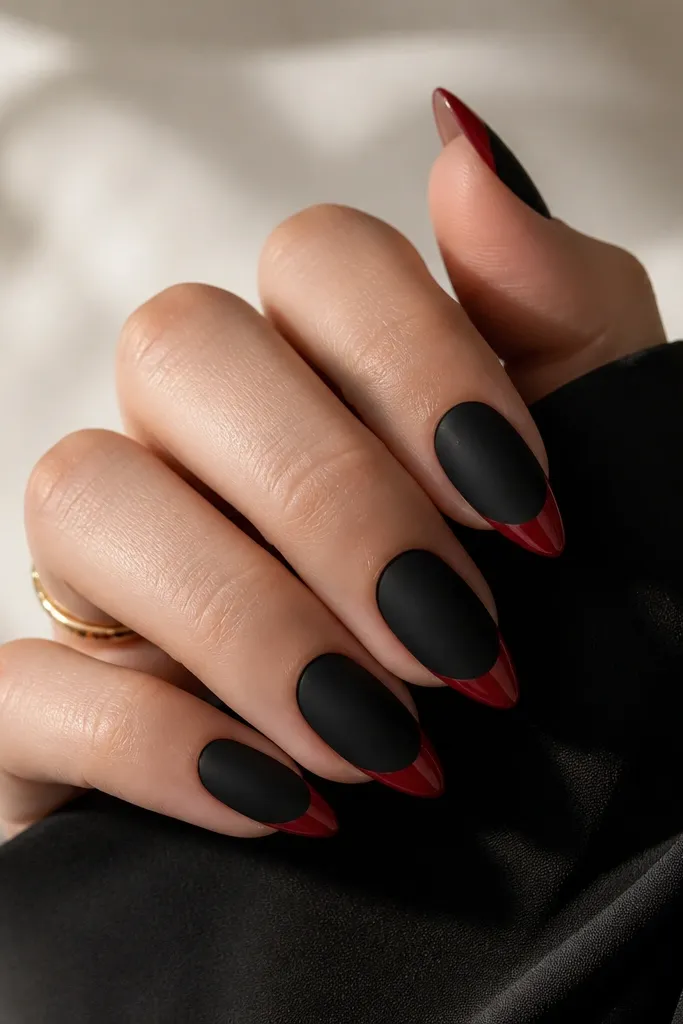
Black matte under deep red glossy tips makes the red pop like paint on a gallery wall. It also makes the french line look extra sharp because the contrast is strong. This set looks bold and dramatic without needing extra decoration. I do it when outfits are simple and I want my nails to carry the look.
Apply black matte base first and cure. Then paint deep red french tips over the matte carefully, keeping the red line smooth. Seal with a glossy top coat only on the tips so the base stays matte and the contrast stays crisp.
Editor's noteIf the red floods into matte, clean the edge with a small brush dipped in cleanser before curing.
Watch outDon't use glossy top coat over the whole nail - you lose the matte contrast.
20. Deep Red French with Red-to-Clear Stained Glass Accent
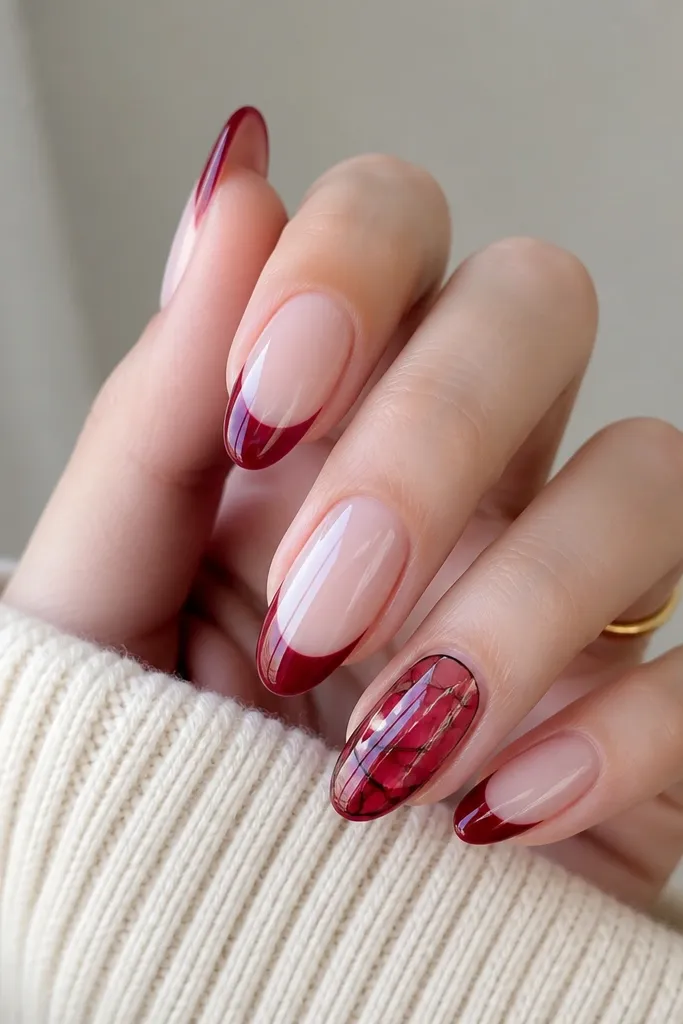
Stained-glass outlines add a graphic feel while keeping the deep red color front and center. The red-to-clear window makes the nail look like it has depth and layers. I like doing the panel on one nail per hand so it reads intentional, not busy. This is a fun option for holiday parties and photos because the lines catch light.
Paint deep red french tips on all nails. On one accent nail, leave a clear window in the french area, then outline the window with a thin deep red gel line and fill the surrounding panel with a translucent red. Cure and top coat glossy over the whole nail.
Editor's noteOutline first, cure, then fill - it keeps the window edges clean.
Watch outDon't skip a full cure between outline and fill if your gel system requires it.
21. Deep Red French with Tiny Studs at the Sidewalls
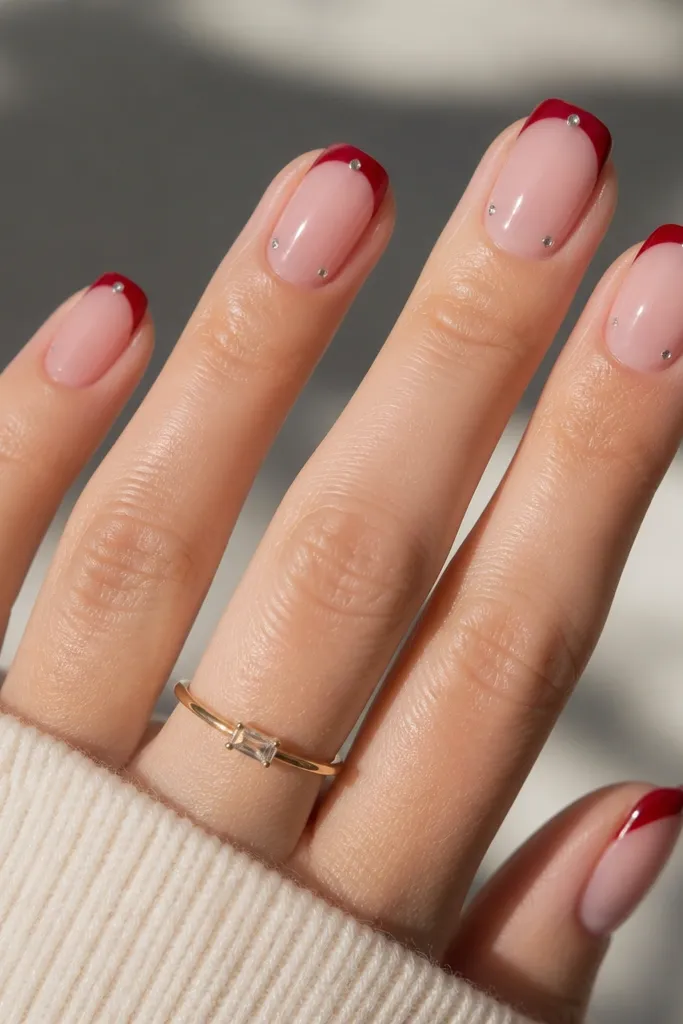
Sidewall studs make the tip look like it has hardware, not decoration. The studs catch light when you move your fingers, and the base stays clean so the set feels sleek. I use micro studs because big ones overpower deep red and look heavy. This one is great when you want sparkle but hate full rhinestone clusters.
Apply sheer pink base and deep red french tips. Place two micro studs on each tip near the sidewalls, leaving the center clean. Cure, then top coat carefully around each stud to prevent lifting.
Editor's noteUse a toothpick to apply a tiny gel dot at each stud spot so gel doesn't spread onto your red line.
Watch outDon't place studs too close to the free edge - they snag and pop off.
22. Deep Red French with Chocolate Brown Shadow Under Tip
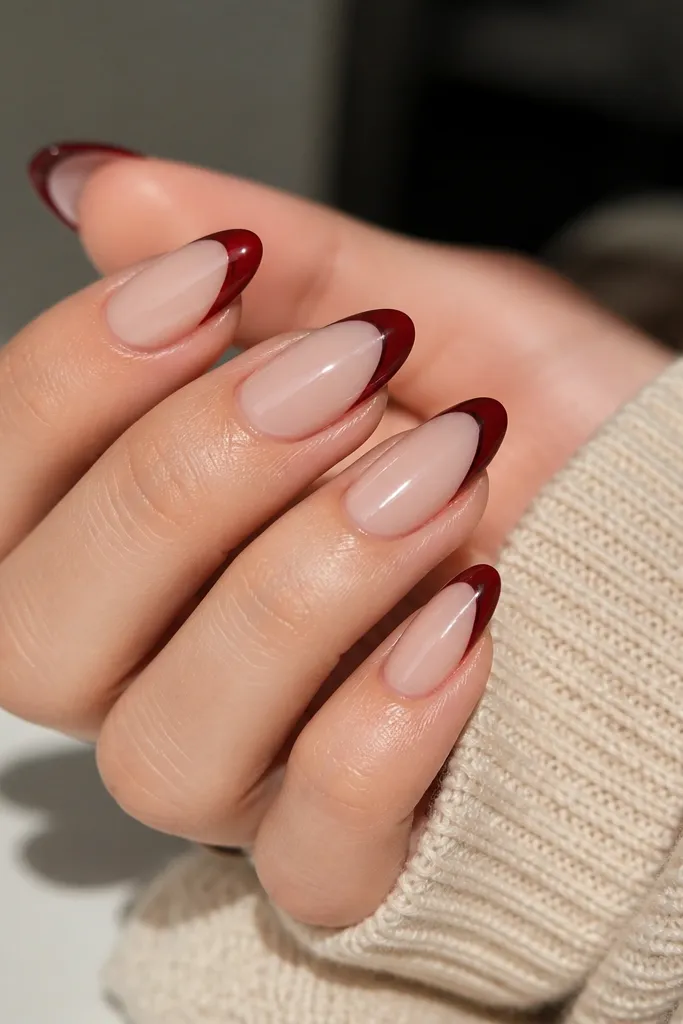
A chocolate shadow under deep red makes the tip look dimensional and more expensive. The brown doesn't read as another color - it just deepens the red and gives a soft "painted" edge. I love this effect when I want deep red to look more like wine instead of flat polish. It also helps hide slight unevenness in your smile line.
Apply milky nude base. Paint deep red tips and cure. Then add a very thin layer of chocolate brown gel directly under the smile line, blending it slightly upward with a brush. Cure and seal with glossy top coat.
Editor's noteKeep the brown line hair-thin - if you can see it clearly, it's too much.
Watch outDon't blend the brown into the red too far - it turns the tip muddy.
23. Deep Red French with Solid Red Tip and Clear Negative Stripe
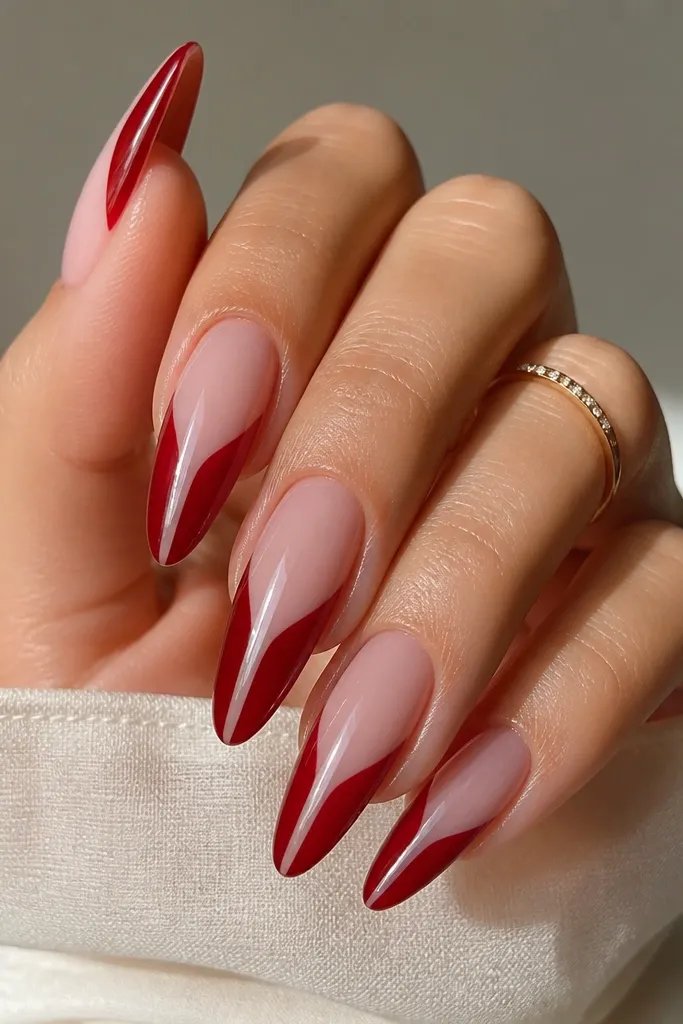
This design looks sharp because it breaks the french tip into sections. The clear negative stripe makes the red feel lighter and gives a "glass" effect. It's also great for people who want something graphic without relying on studs or glitter. This one gets compliments because it looks like nail art, not just polish.
Use nude base and apply a solid deep red french tip. Place a thin strip of tape down the center while the red is tacky, then remove it after curing so you keep the clear stripe. Alternatively, paint the stripe area with a peel-off base layer before painting red, then remove after cure. Top coat glossy.
Editor's noteUse thin striping tape - wide tape makes the stripe look like a mistake.
Watch outDon't rush tape removal - pull slowly to avoid lifting the red edge.
24. Deep Red French with Silver Micro-Line Border
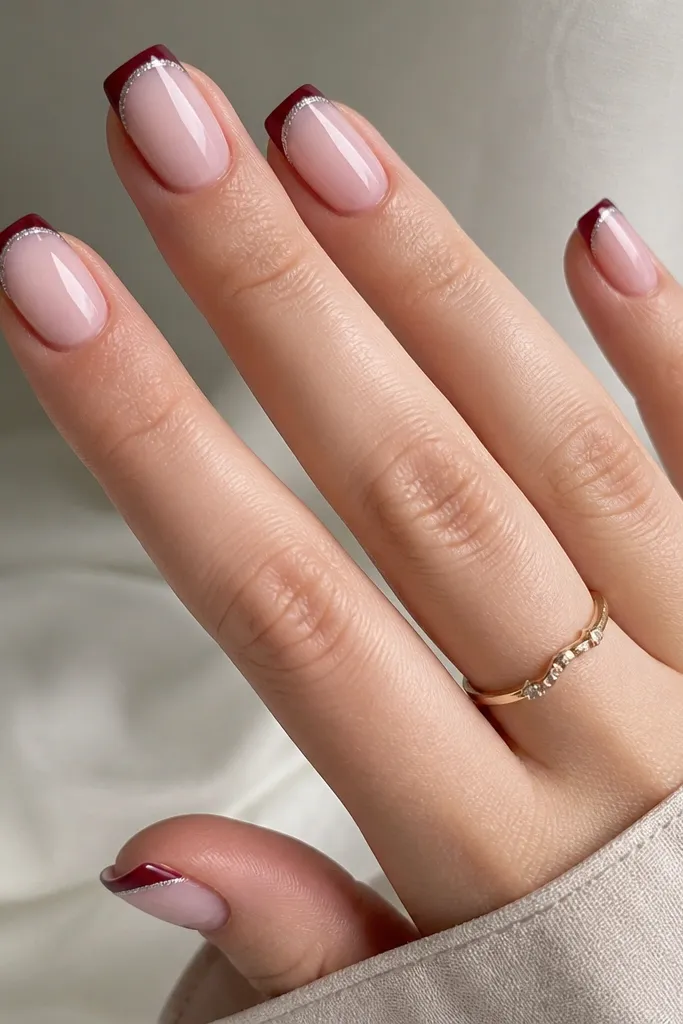
A silver micro-line border makes deep red look crisp and expensive without adding bulk. It's the same idea as a frame around a painting - the red has a neat boundary. I like silver more than gold here because it keeps the set clean and not too warm. This looks great with rings and watches.
Apply milky pink base and deep red tips, cure. Use a silver striping gel or chrome pencil to draw a single thin line along the outer edge of the tip. Keep the line even across each nail and seal with glossy top coat.
Editor's noteDo the border after curing - it's easier to correct small mistakes without smearing the red.
Watch outAvoid thick silver borders - they overpower the french tip and look heavy.
25. Deep Red French with Gold Leaf Specks Inside the Tip
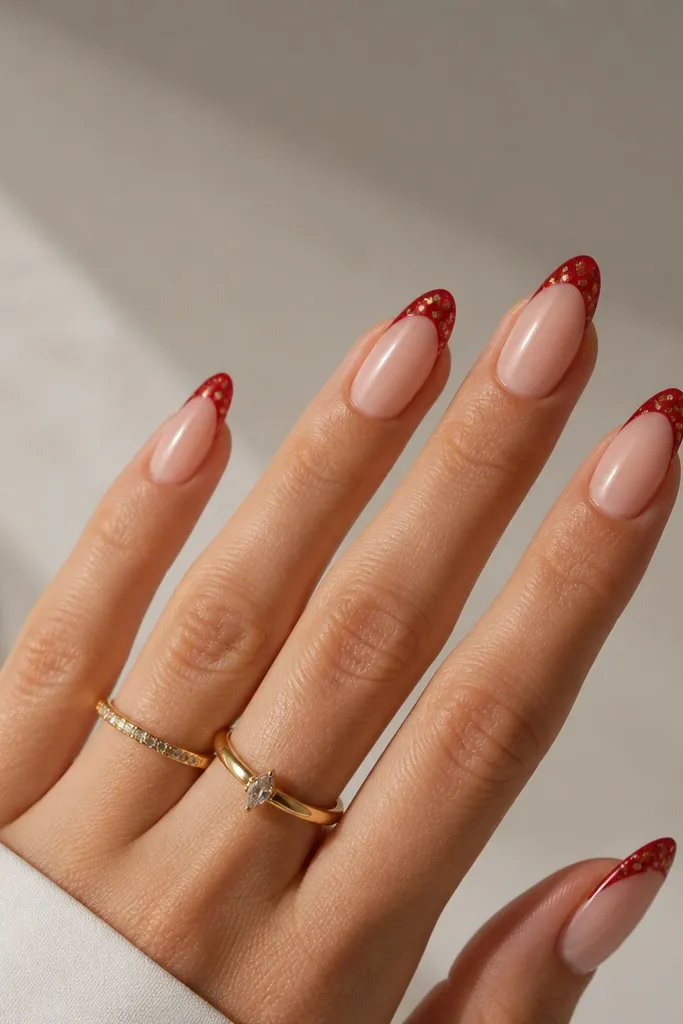
Gold leaf specks inside the tip create a soft, scattered glow. Unlike foil sheets, leaf breaks into irregular flakes that mimic natural light reflections. I keep the specks sparse so the tip still looks smooth and french-like. This is a gorgeous option for holiday outfits where you want something artsy but wearable.
Apply nude base and deep red french tips. While the red is tacky, press tiny pieces of gold leaf into the tip area using tweezers or a leaf applicator. Cure, then top coat twice to fully smooth over leaf texture so it doesn't snag.
Editor's notePut leaf mostly in the center of the tip - it looks more natural than dense edges.
Watch outDon't rub gold leaf hard - it smears and stains the red.