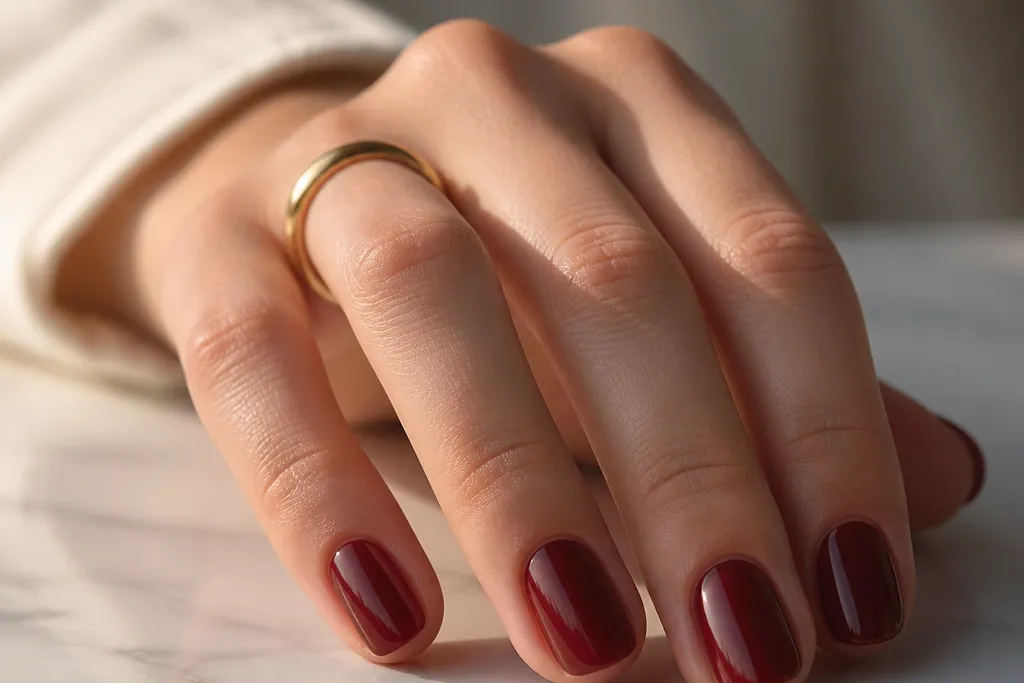
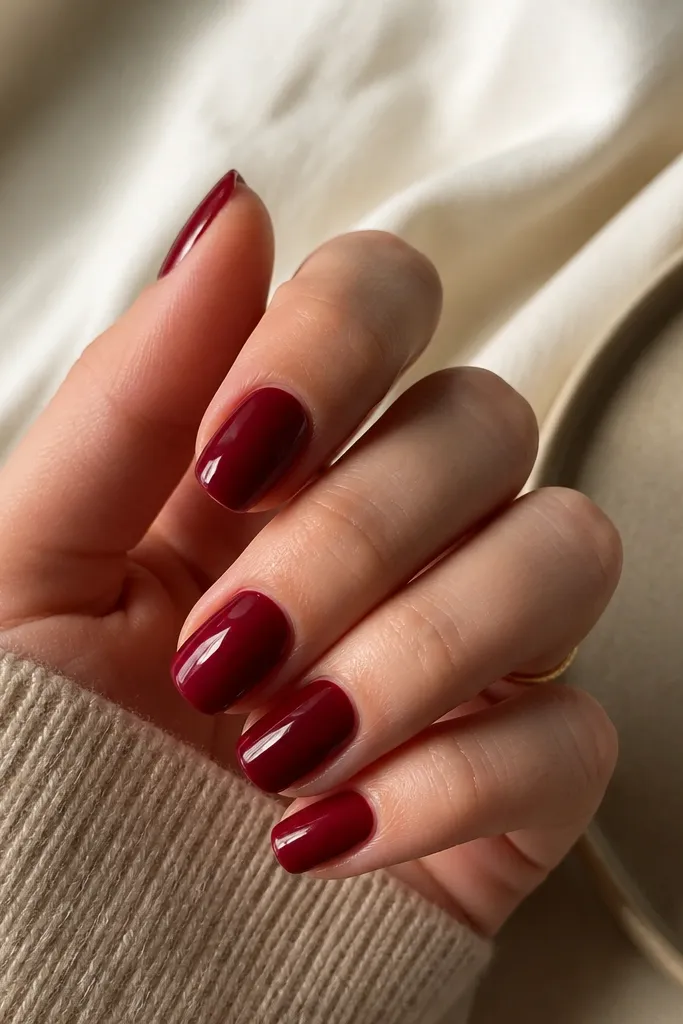
1. Glossy Wine Base with One Gold Foil Accent
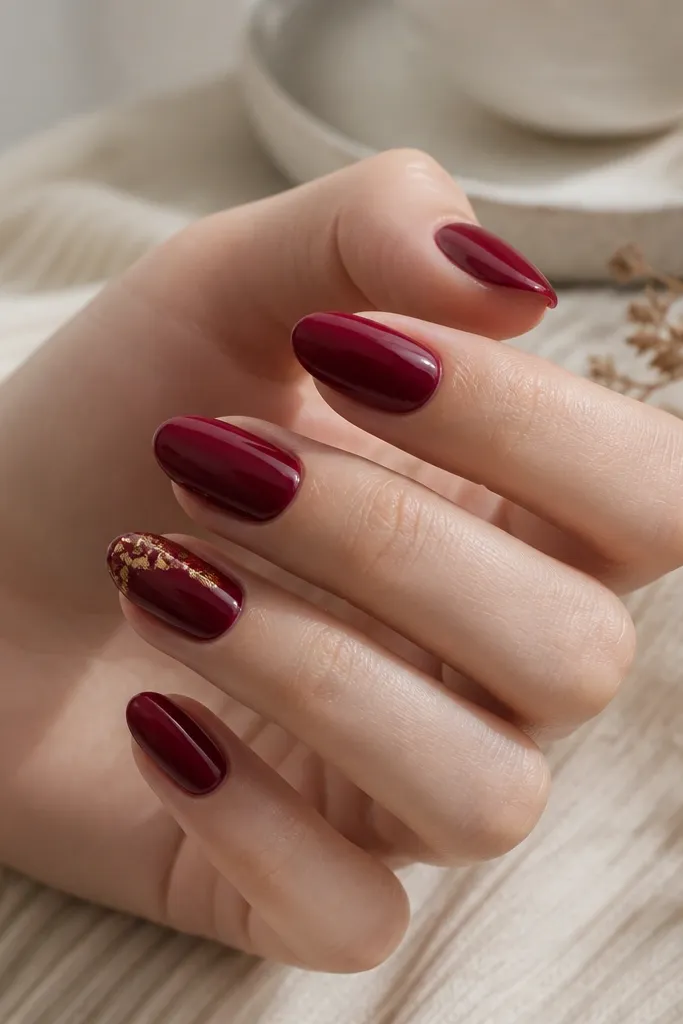
This works because deep red looks luxurious on its own, and gold foil adds sparkle without needing a drawing. The foil near the cuticle makes your nail bed look longer and more lifted. Keep the gold pieces uneven and tiny so it looks like real foil, not glitter chunks.
Use a wine-red gel or lacquer as the base on all nails. On the ring finger (or index), press micro gold foil fragments just above the cuticle line, then seal with two coats of glossy top coat. Keep the gold area under 1/3 of the nail so it stays clean.
Editor's notePress foil with a small silicone tool or the back of tweezers - it helps the pieces grip instead of sliding.
Watch outDon't pile foil all the way to the tip; it makes the nail look chunky and messy.
2. Deep Red Half-Moon with Nude Cuticle Fade
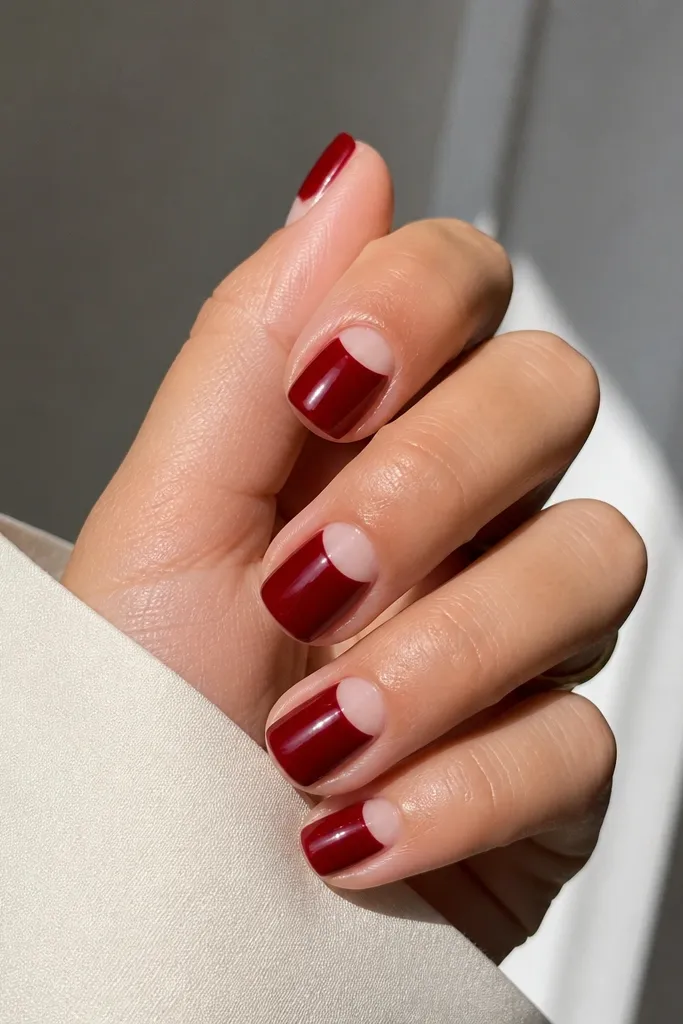
A half-moon is clean geometry, and deep red makes the negative space look sharp. The nude fade at the cuticle makes your nails look neat even if your cuticle area isn't perfect. It also makes deep red feel lighter and less heavy.
Apply nude sheer or builder gel in a thin layer at the cuticle, then use a half-moon stencil or a small brush to define the curve. Paint the rest of the nail deep red and seal with glossy top coat. Keep the half-moon width about 1.5-2 mm from the nail's center.
Editor's noteUse a nail art striping brush to clean the half-moon edge before top coat.
Watch outSkipping a glossy top coat makes the negative-space edge look dull and uneven.
3. One Thin White Stripe on the Ring Finger
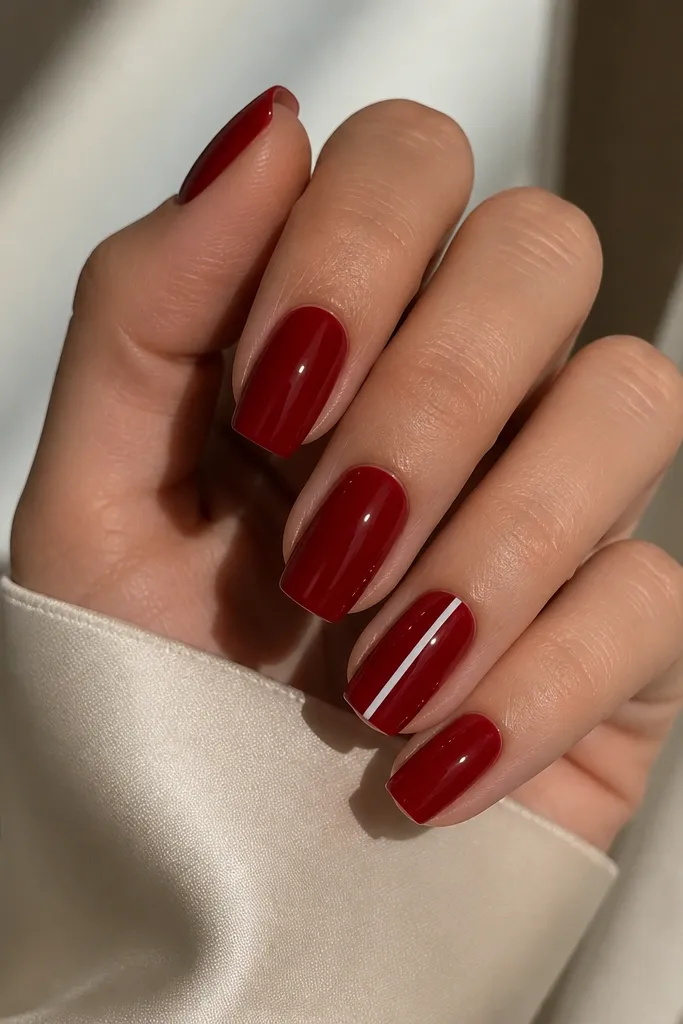
A single vertical stripe elongates the nail instantly. White is high contrast against deep red, so it looks crisp even with minimal skill. Keeping it to one nail per hand keeps it from looking like a random accent.
Paint all nails deep red and let dry fully. Place a striping tape down the center for a perfectly straight line, or use a striping brush. Width should be about 0.5 mm, then remove tape while still tacky.
Editor's noteFor lacquer, use tape only on the last 10 minutes when the polish is slightly tacky so the edges don't lift.
Watch outDon't make the stripe thick; thick stripes turn into a blocky look on short nails.
4. Matte Deep Red with Micro Gold Specks
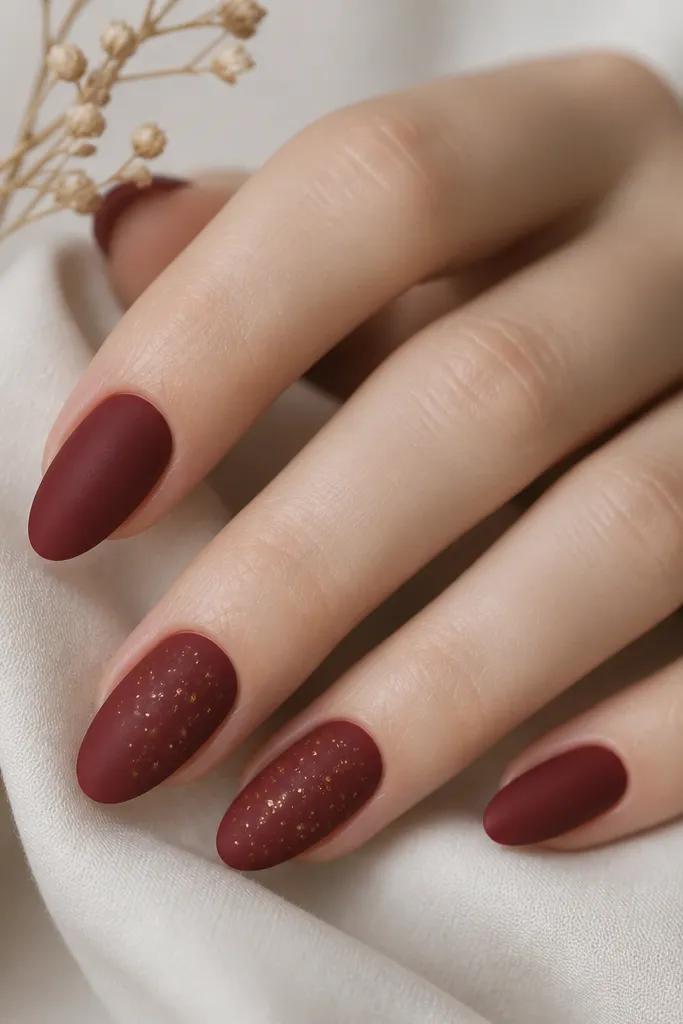
Matte turns deep red into a velvet color that looks expensive fast. Micro gold specks add dimension without needing a pattern. The specks look like fine dust, which hides tiny placement differences.
Apply deep red base and cure or dry completely. Use a matte top coat over all nails, then on one or two nails dab gold leaf glue or a dot of clear gel and press gold micro flakes lightly. Seal again with matte top coat, but keep it thin.
Editor's noteUse a makeup sponge to pick up micro flakes; it gives you that scattered, natural look.
Watch outDon't use glossy top coat over matte designs; it ruins the velvet effect.
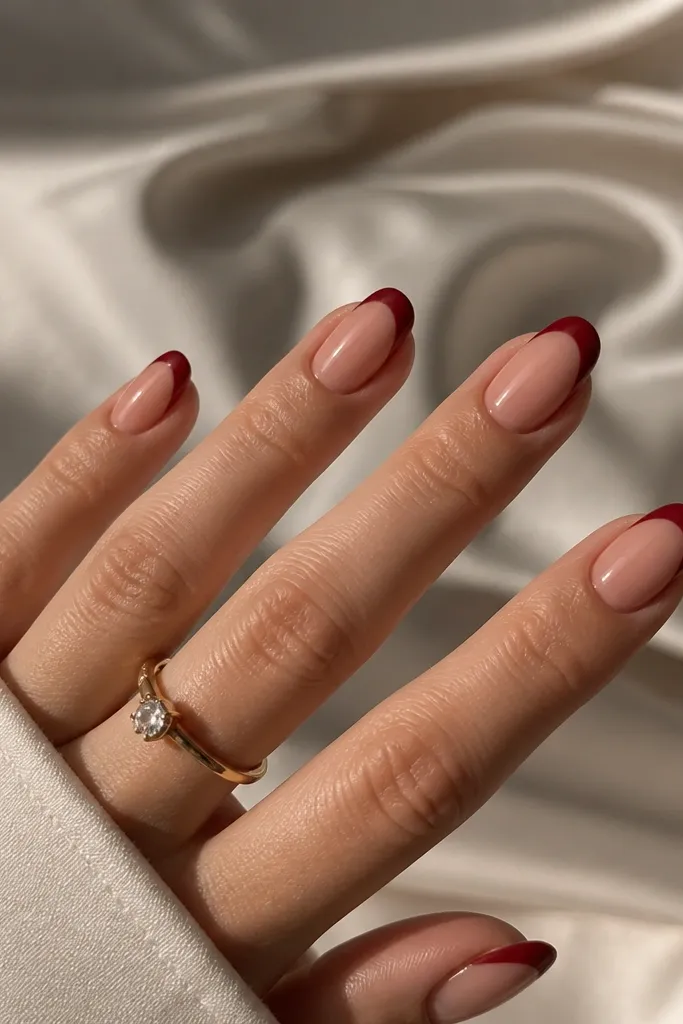
5. Deep Red Tips with a Clean Reverse French
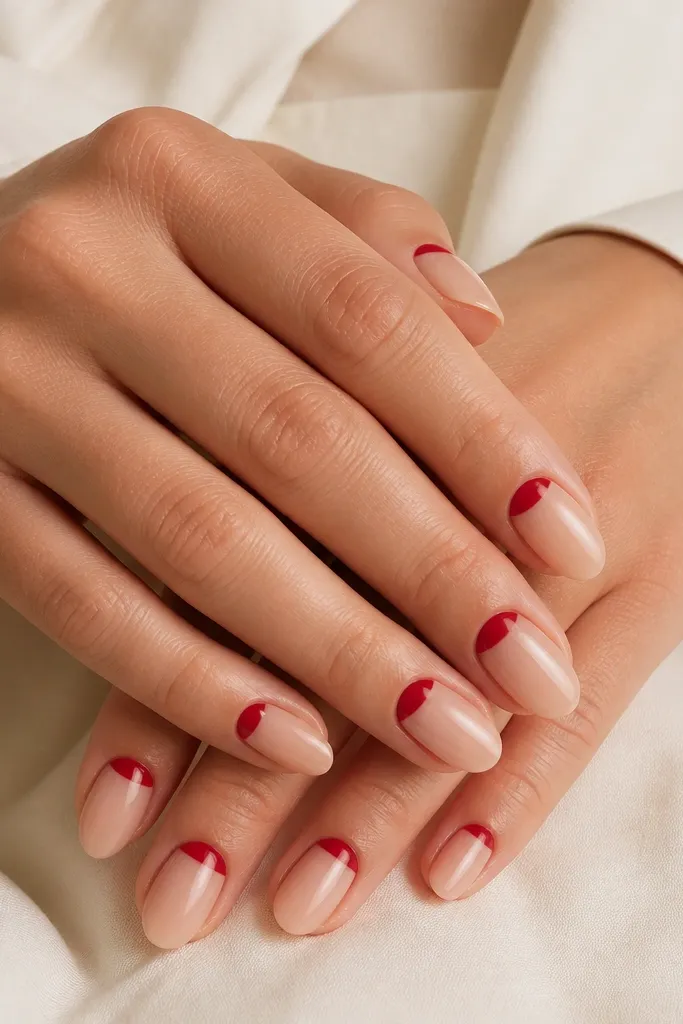
Reverse French looks modern and it's easier than a full French tip because the curve is smaller. Nude base makes deep red pop, and the cuticle-area placement makes the design feel intentional. It's also forgiving if your free edge is slightly uneven.
Start with a nude sheer or milky base. Use a French tip guide or a half-moon stencil near the cuticle, then paint deep red for the lower third. Keep the band width about 2-3 mm, then finish with glossy top coat.
Editor's noteIf your line leaks, clean the stencil edge with a cotton swab dipped in acetone before the polish sets.
Watch outDon't paint too close to the cuticle; leaving a tiny gap keeps it crisp instead of messy.
6. Deep Red Ombré with Burgundy-to-Black Fade
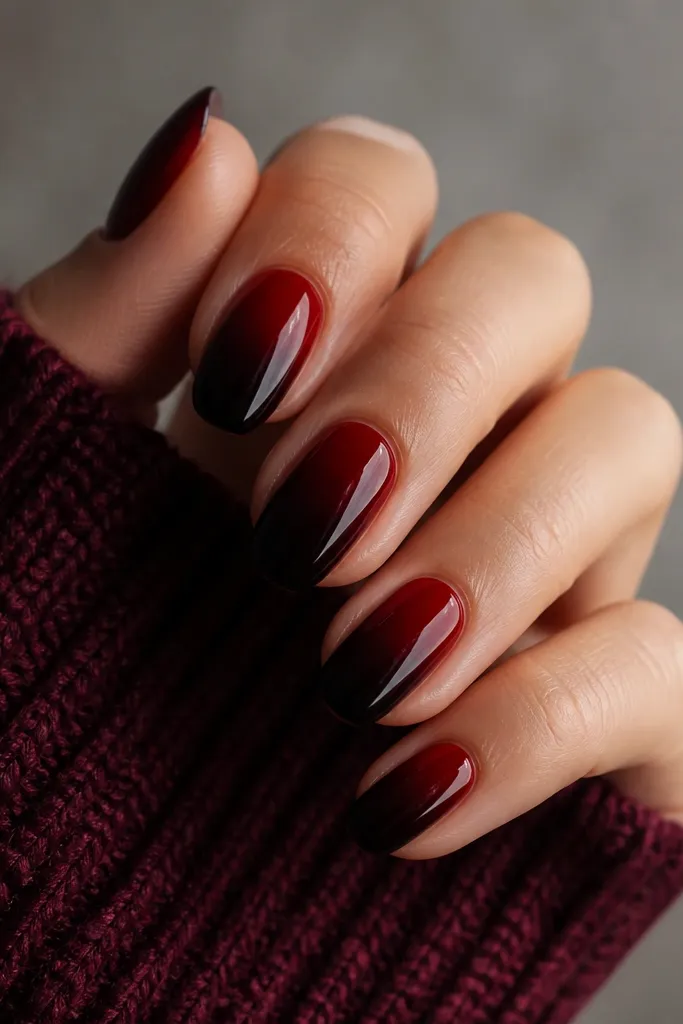
An ombré uses the same family of colors, so it forgives uneven blending. The darker tips make your hands look slimmer and the deep red looks richer. This is also one of the easiest advanced-looking effects because you don't need lines or shapes.
Use deep red polish at the base, then sponge a darker burgundy and a tiny bit of near-black only on the tip area. Blend on a makeup sponge by dabbing, not dragging. Seal with glossy top coat to smooth out texture.
Editor's notePractice on a paper towel first; you want the sponge to be lightly loaded so the gradient stays soft.
Watch outDon't go all the way to black at the tip; it can overpower and make the nails look harsh.
7. Gold Outline Half-Moon on One Accent Nail
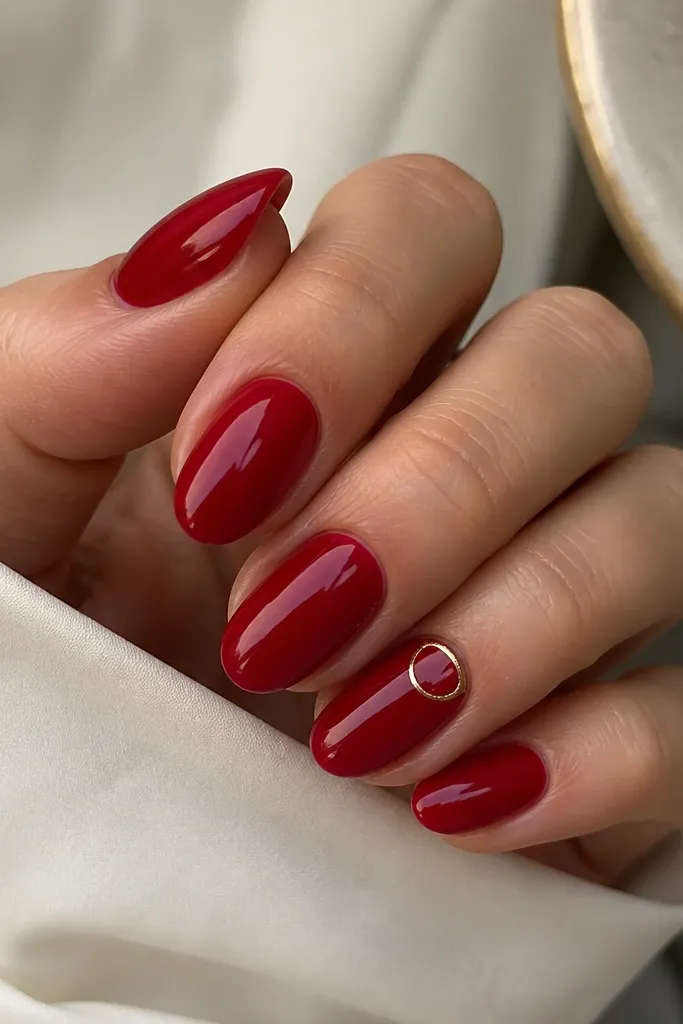
This design looks like nail jewelry. The thin gold outline adds detail without filling the space, so it stays clean. Deep red under the line makes the gold look brighter.
Paint all nails deep red and cure/dry fully. On the accent nail, apply a half-moon stencil and use gold striping gel or gold nail art pen to trace the curve. Remove stencil carefully, then top coat.
Editor's noteUse a nail art pen with a stiff tip; it gives you a steadier line than a loose brush.
Watch outDon't thicken the gold outline; chunky lines look like stickers.
8. Clear Jelly Overlay with Red Micro Glitter
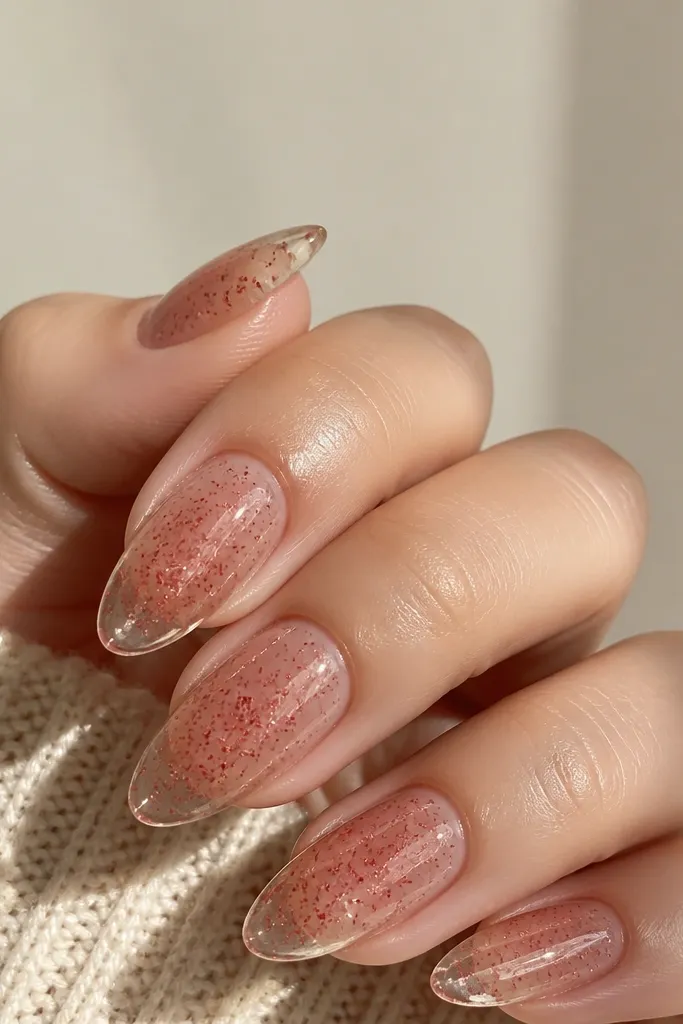
Clear jelly makes deep red look like it's glowing from within. Micro glitter stays delicate, so it doesn't turn into a gritty layer. This is a beginner-friendly way to get sparkle without complex placement.
Use deep red as a base, then apply a sheer clear jelly gel or clear top coat mixed with red micro glitter. Focus the glitter slightly toward the tip so it looks dimensional. Cure and then seal with a full glossy top coat.
Editor's noteMix the glitter in the gel on a palette until it looks like wet sand - too much glitter makes texture obvious.
Watch outDon't use large glitter pieces; they snag on sleeves and look messy quickly.
9. Deep Red Checkerboard on Two Nails
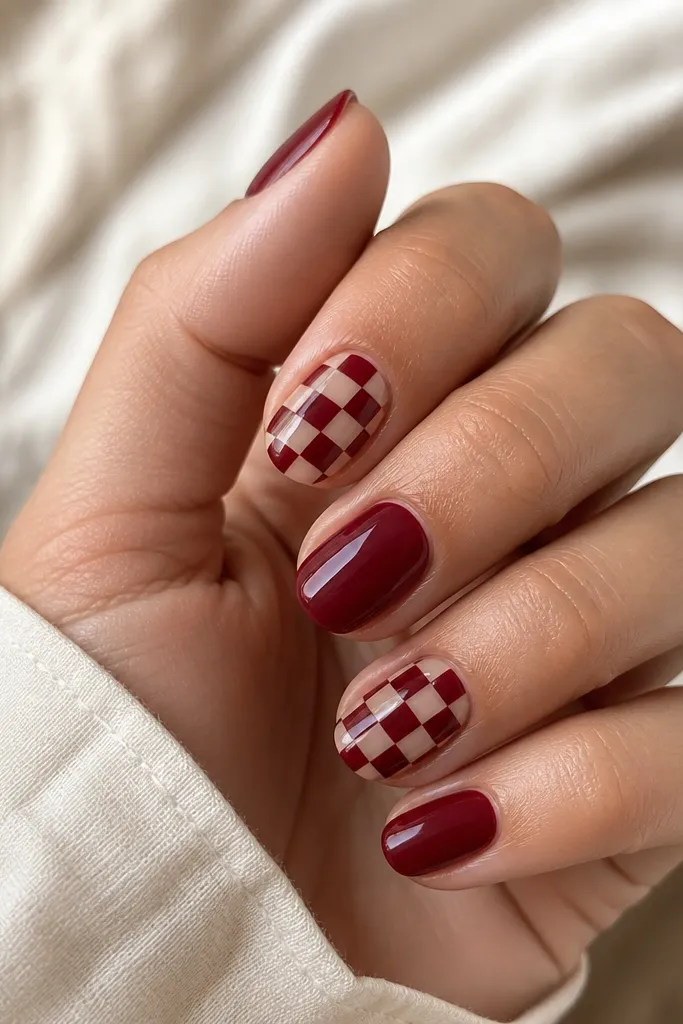
Checkerboard looks harder than it is because you're repeating small squares. The contrast between nude and deep red keeps it readable. Doing it on only two nails keeps the set cohesive and beginner-proof.
Paint base deep red, then place striping tape to create 2 mm squares. Paint the exposed squares nude, cure/dry, and remove tape while the polish is still slightly tacky. Repeat for the second nail with the same grid so it looks intentional.
Editor's noteStick tape down, press hard with a cuticle pusher, then paint - that's how you get sharp edges.
Watch outDon't make squares uneven widths; the pattern will look accidental.
10. Red Marble Lines with Clear Gel Veins
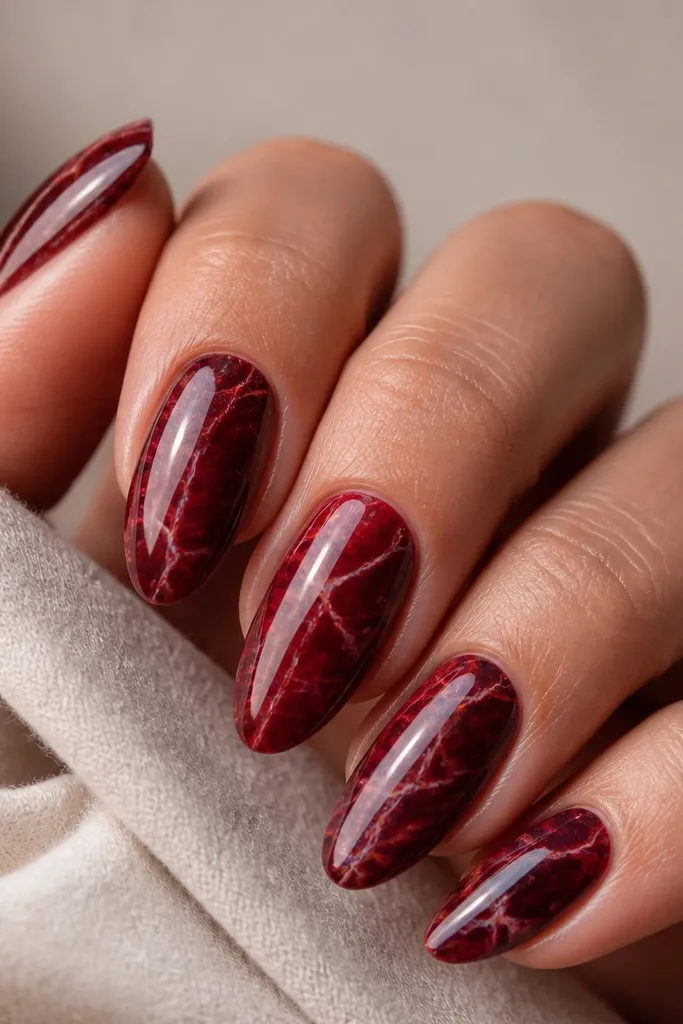
Marble looks artsy, but this version uses thin gel lines instead of full painting. Clear gel veins create a glassy look that catches light over deep red. It's forgiving because marble always has variation.
After base coat and deep red base, use a thin striping brush to draw squiggly lines with a slightly lighter red gel or diluted red gel. Add clear top gel along some lines for a raised vein effect. Cure and seal with glossy top coat.
Editor's noteLess is more: 4-6 lines per nail looks like marble; 20 lines looks chaotic.
Watch outDon't flood the lines; raised marble should stay thin so it doesn't feel rough.
11. Deep Red with Tiny Black Dots like Confetti
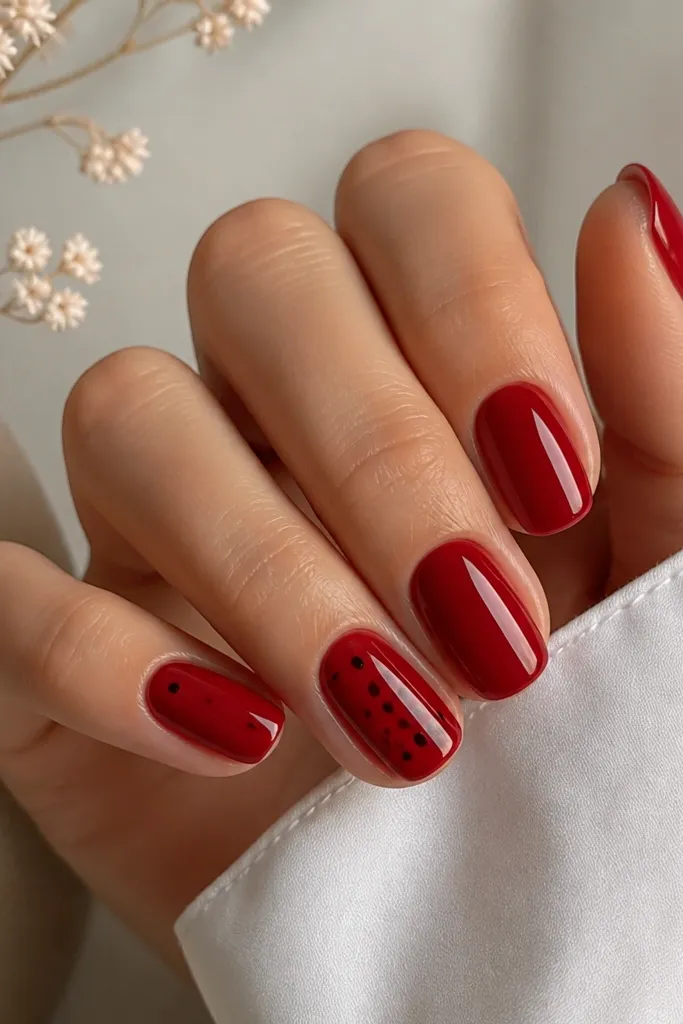
Small dots add interest without creating big shapes that require steady hand control. Black dots make deep red look darker and moodier, like a night-out manicure. The negative space between dots keeps it classy.
Paint all nails deep red. On the accent nail, use a dotting tool or toothpick to place 6-10 tiny black dots. Keep dot size around 0.5-0.8 mm. Finish with glossy top coat to lock them in.
Editor's noteDip the dotting tool lightly; too much polish turns dots into blobs.
Watch outDon't place dots in a perfect line; random spacing looks more natural.
12. Micro French Tip with Deep Red and Nude Base
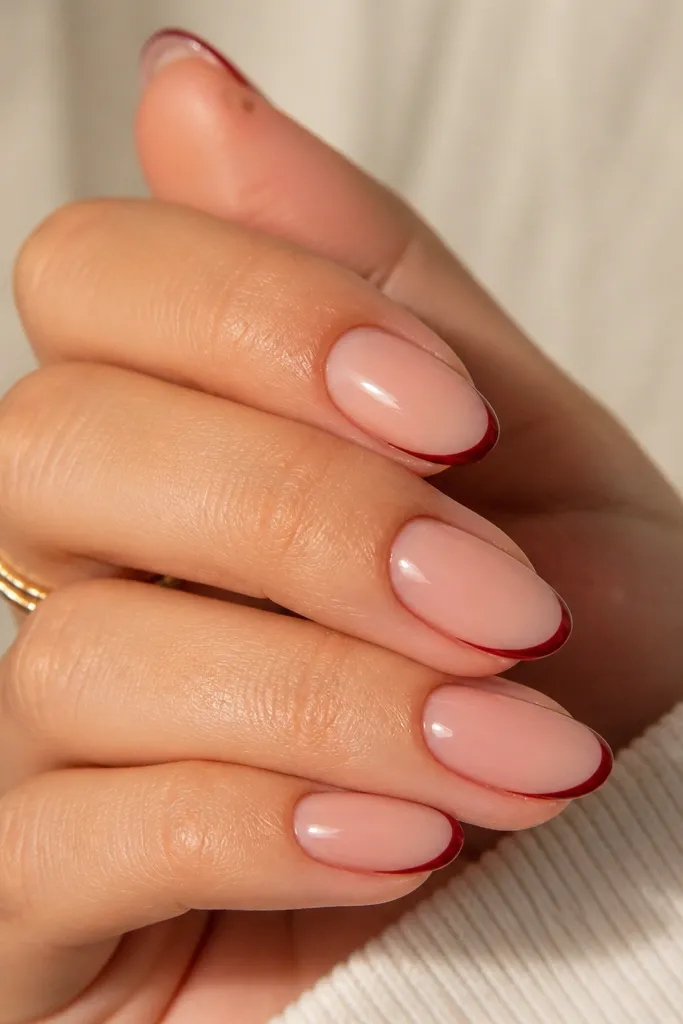
Micro French looks neat even when you're new because the tip line is narrow. Deep red on nude reads modern and flattering. The thin line also reduces the chance of smudging onto the nail bed.
Start with a nude base. Use French tip guides or a striping tape to mark a line about 1-2 mm from the tip edge. Paint deep red in that strip, then remove guides while tacky and top coat.
Editor's noteUse a small brush to cap the free edge with top coat so the line doesn't chip.
Watch outDon't make the tip too wide on short nails; it squashes the nail visually.
13. Deep Red Skittle Nails with Burgundy, Maroon, and Wine
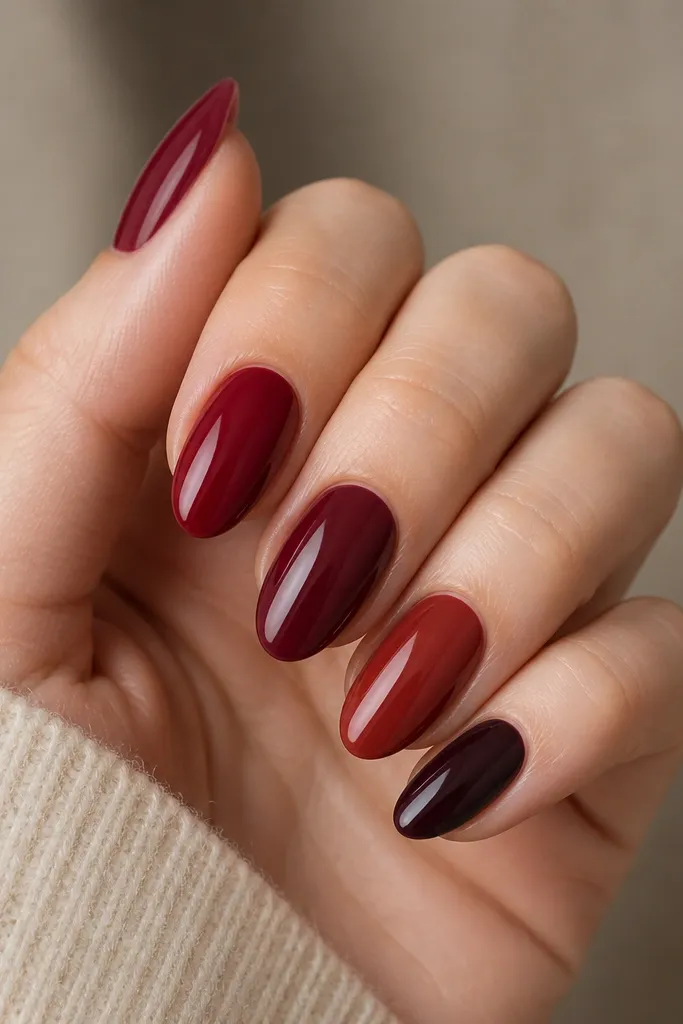
This is the easiest "design" because you're still using deep red but changing tone. Skittle nails look intentional and modern without any art skills. Different shades also hide minor brush strokes and uneven coats.
Pick 5 deep reds in the same family: wine, burgundy, maroon, brick, and dark plum. Paint one shade per nail with two thin coats each. Seal with the same glossy top coat on every nail so the finish matches.
Editor's noteIf you only have two reds, do a 3-2 mix: three nails one shade, two nails another shade.
Watch outDon't mix reds with completely different undertones like orange-red and blue-red; it looks mismatched.
14. Deep Red Diagonal Stripe with Silver Tape
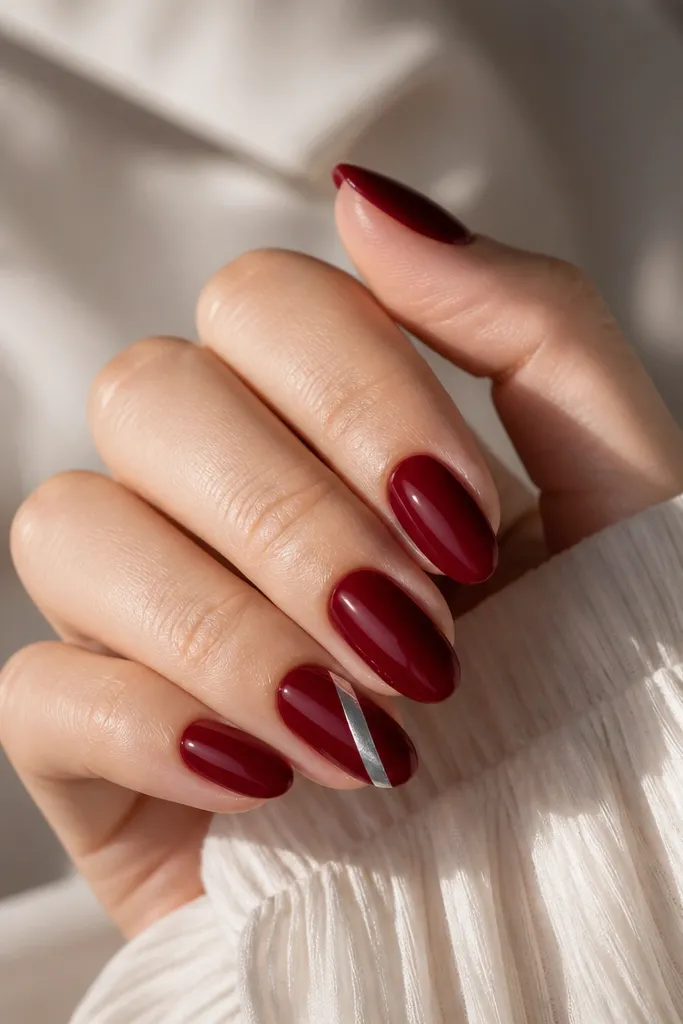
Diagonal stripes make nails look longer because the line pulls the eye. Silver tape gives a clean metallic edge that's hard to fake with nail polish. Keeping it on one nail keeps the set polished.
Paint all nails deep red. On the accent nail, place striping tape diagonally, leaving about a 1 mm gap width. Paint over the tape area with silver gel or peel-off metallic tape, then remove tape and top coat.
Editor's notePress the tape down with a firm fingertip for 5 seconds before painting.
Watch outDon't use thick ribbon-like tape; it bleeds and makes the stripe look heavy.
15. Ombre Reverse French with Dark Red Cuticle Band
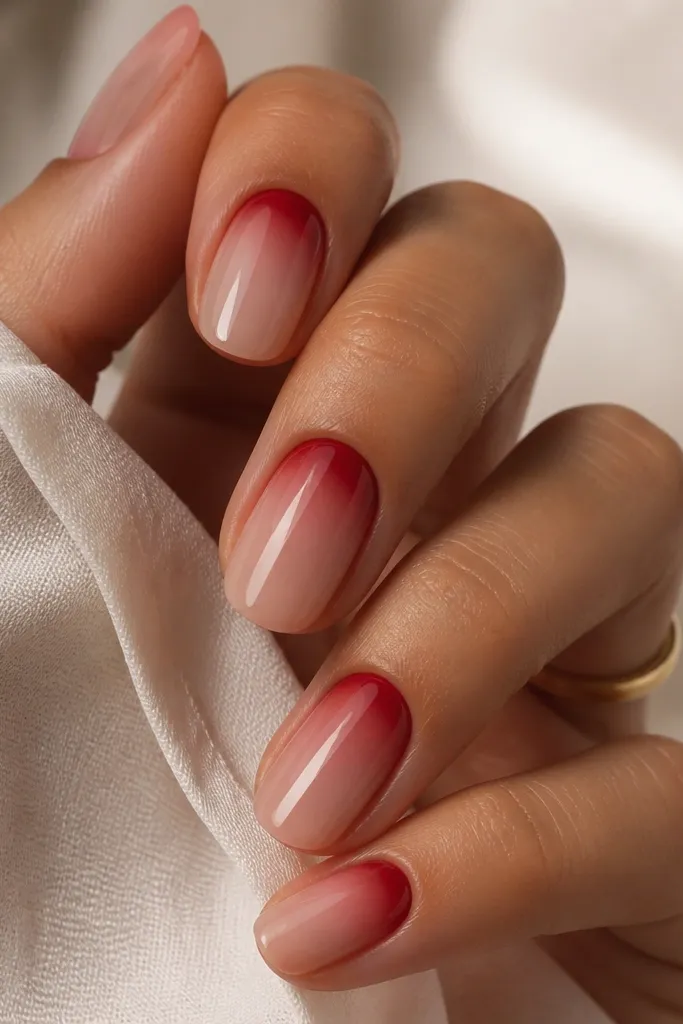
This is a softer version of reverse French. The fade from cuticle to center looks smooth and keeps deep red from feeling too bold. It also works on short nails because the design stays near the nail bed.
Apply nude base. Sponge deep red at the cuticle area, then blend lightly toward the center with a clean sponge so it turns into a soft gradient. Use a half-moon makeup sponge and keep the darkest part within 2-3 mm of the cuticle line. Finish with glossy top coat.
Editor's noteWork in tiny layers - one heavy sponge pass looks patchy.
Watch outDon't start with a completely wet base; it smears the fade.
16. Deep Red with One Crystal Bead at the Cuticle
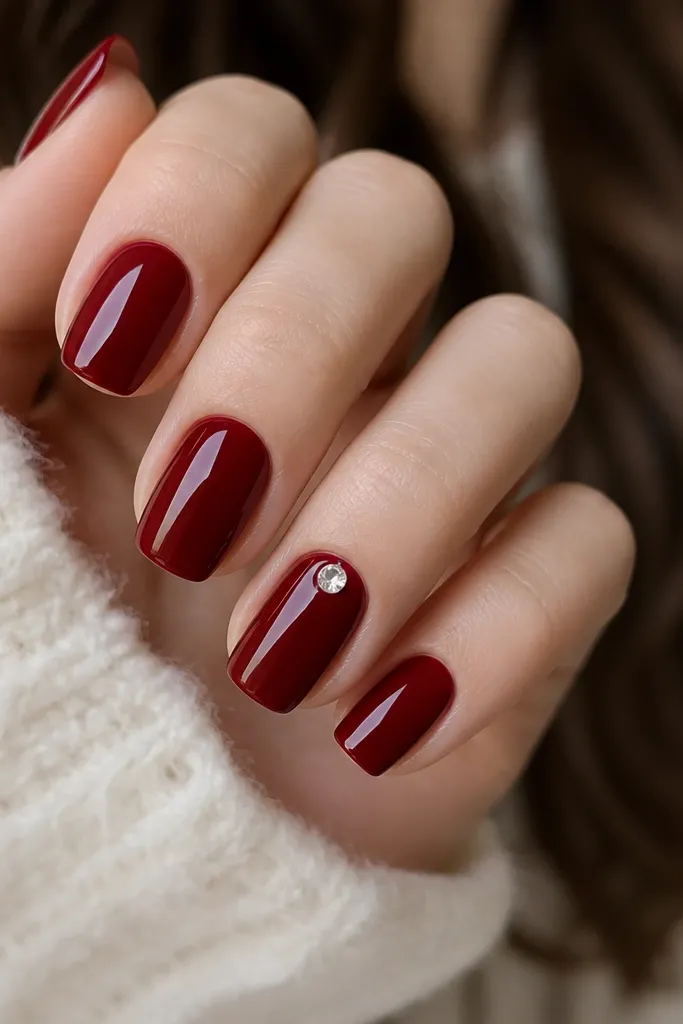
One crystal looks like a tiny chandelier. It gives you that high-end detail without painting. Deep red makes the stone pop even if the crystal is small.
Paint all nails deep red. On the accent nail, dab a tiny dot of clear gel near the cuticle and place one rhinestone with tweezers. Cure fully, then cap the rhinestone with a thin gel layer and seal with top coat.
Editor's notePlace the stone slightly off-center toward the sidewall for a more natural look.
Watch outDon't put crystals on every nail; it looks heavy and catches on hair.
17. Deep Red Half-and-Half Split with Clear Line
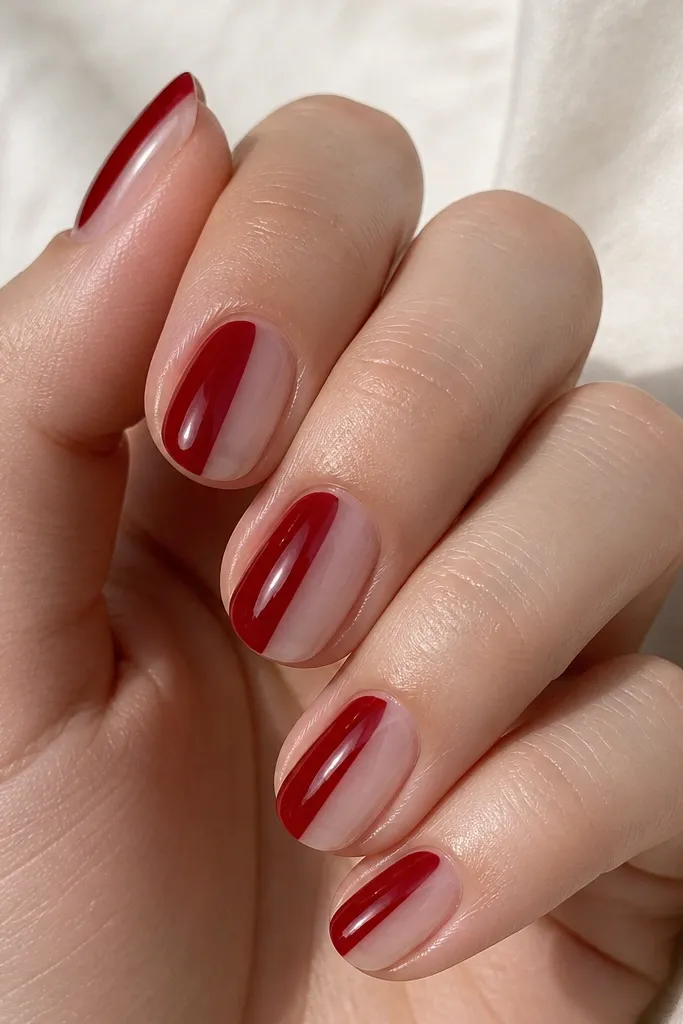
A clean split shows off the color in a graphic way. The clear jelly side keeps it from looking too dark. You get a salon look using tape and clear gel, not freehand.
Paint the full nail deep red first. Place a vertical striping tape down the center, then apply clear jelly or a sheer nude on the un-taped side. Remove tape carefully and seal with glossy top coat so the boundary stays crisp.
Editor's noteIf your clear side looks streaky, add a second thin jelly layer and cure again.
Watch outDon't rush tape removal; remove while still tacky to prevent tearing.
18. Deep Red with Faux Leather Crackle in Wine
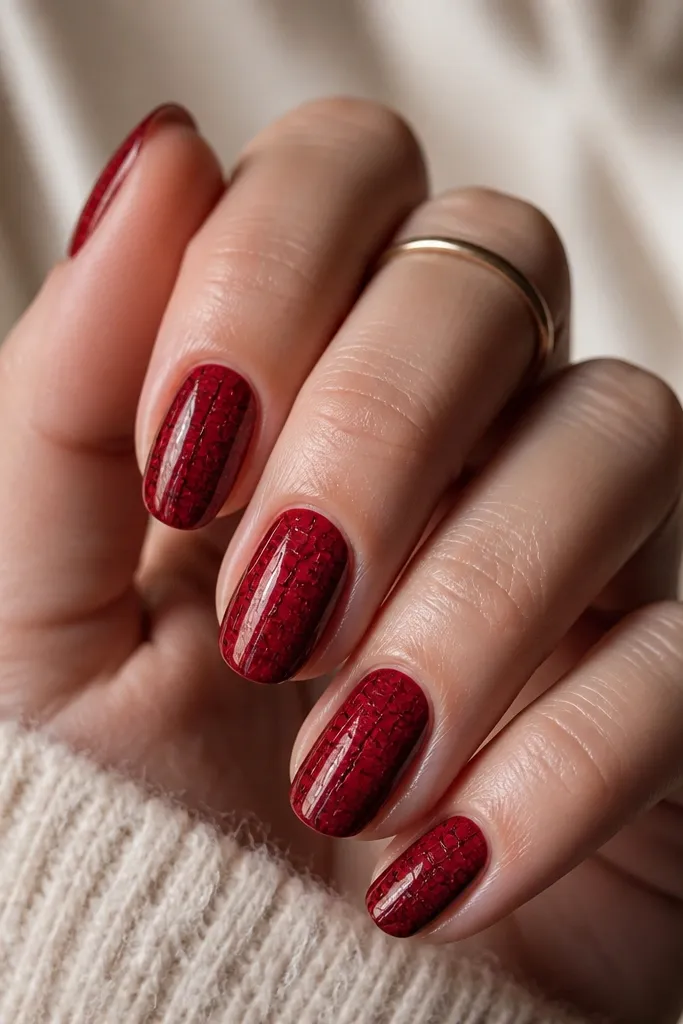
Crackle polish looks like leather once it's set - it's textured but still wearable. The crack lines add visual depth so the manicure doesn't look flat. Deep red crackle is moody and flattering on both short and medium nails.
Start with a dark wine-red base. Apply a crackle top coat in the same family so the lines show subtle dimension instead of harsh contrast. Finish with glossy top coat to lock the pattern and smooth the feel.
Editor's noteUse a thicker coat on crackle - thin coats can create patchy spots instead of full coverage.
Watch outDon't shake crackle polish hard; it can create big bubbles.
19. Deep Red Watercolor Bloom with Rose Tint
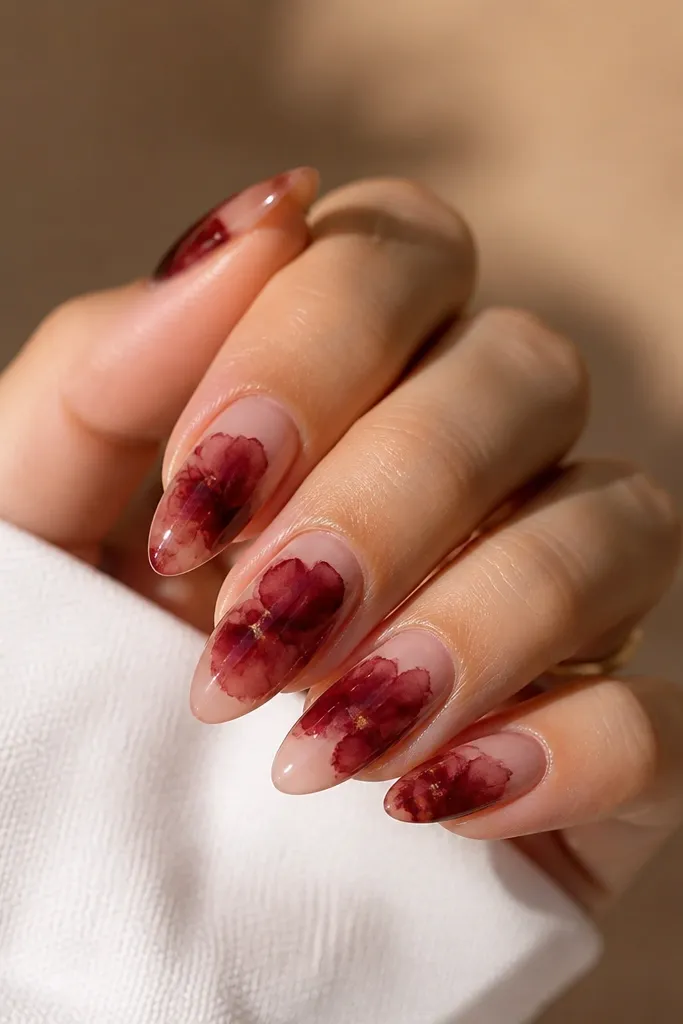
Watercolor blooms look like nail art but you're really just feathering color. The rose tint inside the deep red gives a soft, romantic effect. This is forgiving because watercolor edges are never perfectly sharp.
Base coat deep red. On the accent nail, dab a drop of diluted rose polish or rose gel into the center and drag it outward with a thin brush using very light pressure. Add one more tiny rose dot for a layered look. Seal with glossy top coat to blend and smooth.
Editor's noteUse a clean brush lightly dampened with cleanser to soften edges - stop before it turns muddy.
Watch outDon't overwork the bloom; too much brushing turns it into flat pink smears.
20. Deep Red and Black Micro Lines in a Grid
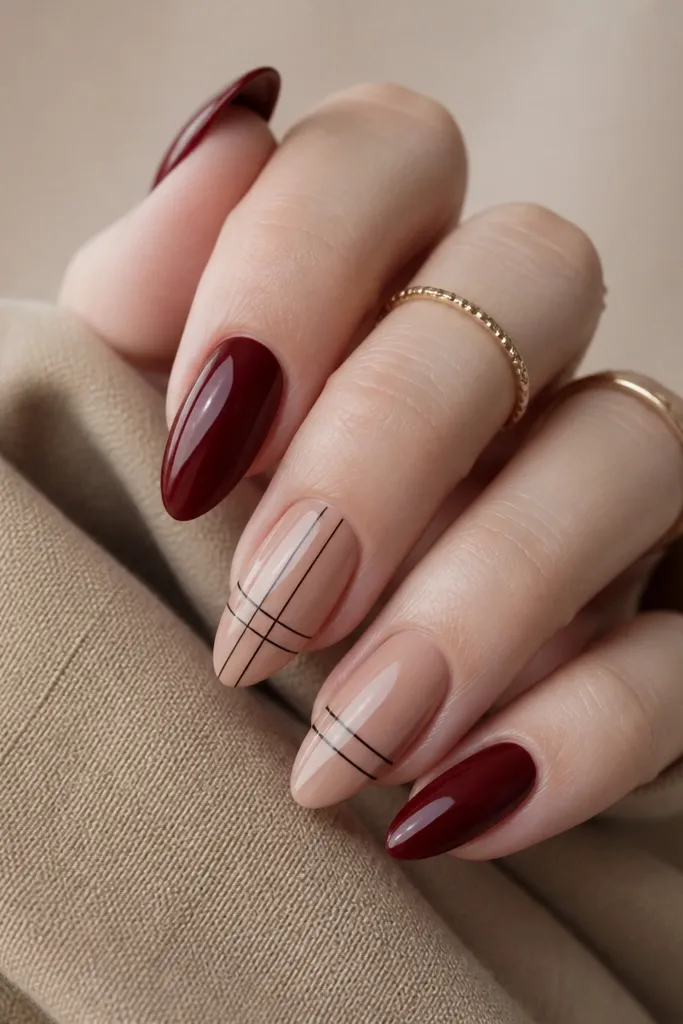
Micro lines give structure without looking like full nail art. Black lines on deep red look crisp and modern. Keeping the grid partial makes it beginner-friendly and less likely to look messy.
Paint deep red on all nails. On one accent nail, use striping tape to mark two or three vertical points, then paint thin black lines between them with a liner brush. Remove tape and top coat. Keep lines about 1-2 mm long and spaced.
Editor's noteIf your liner brush is too thick, wipe one side on the bottle edge before you paint.
Watch outDon't draw full checker grids; full grids need steadier spacing than most beginners have.
21. Deep Red Glitter Fade from Tip to Halfway
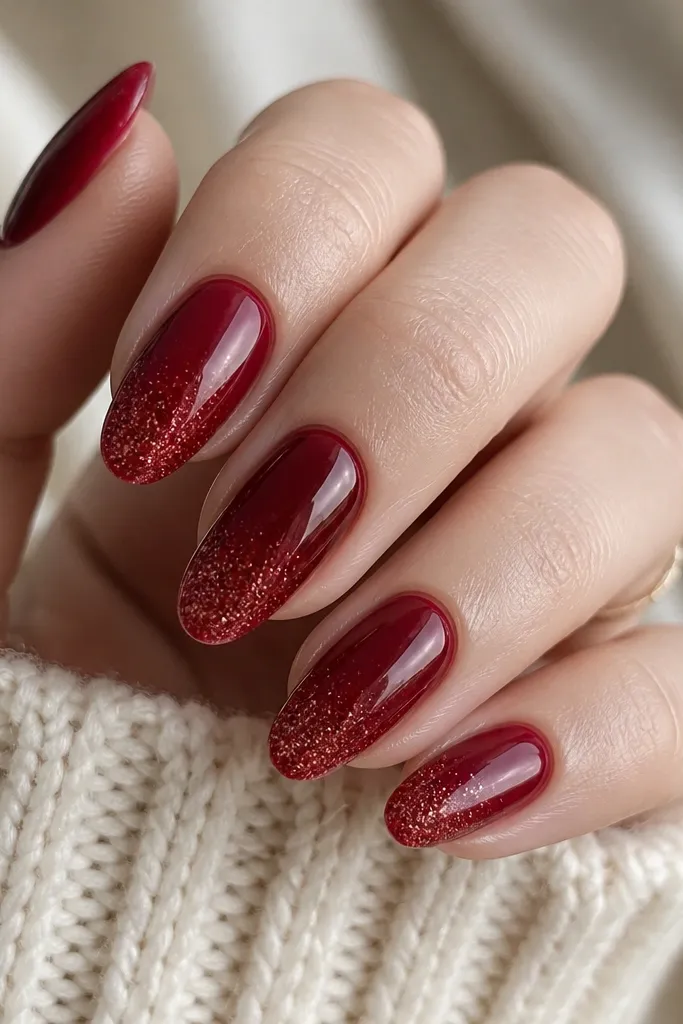
A glitter fade looks like a gradient even if you don't have an ombré brush. Glitter at the tip is also practical because it hides small chips. The key is blending where the glitter starts so it looks like a soft transition.
Base deep red. Sponge or dab glitter gel from the tip up to about halfway, then use a clean sponge to feather the boundary. Cure and seal with glossy top coat. Use fine glitter, not chunky pieces.
Editor's noteSeal the glitter edge by dragging top coat lightly over the feathered area.
Watch outDon't let glitter sit only in one thick band; it looks like a stripe instead of a fade.
22. Deep Red Bloom French with Tiny Nude Petal Edges
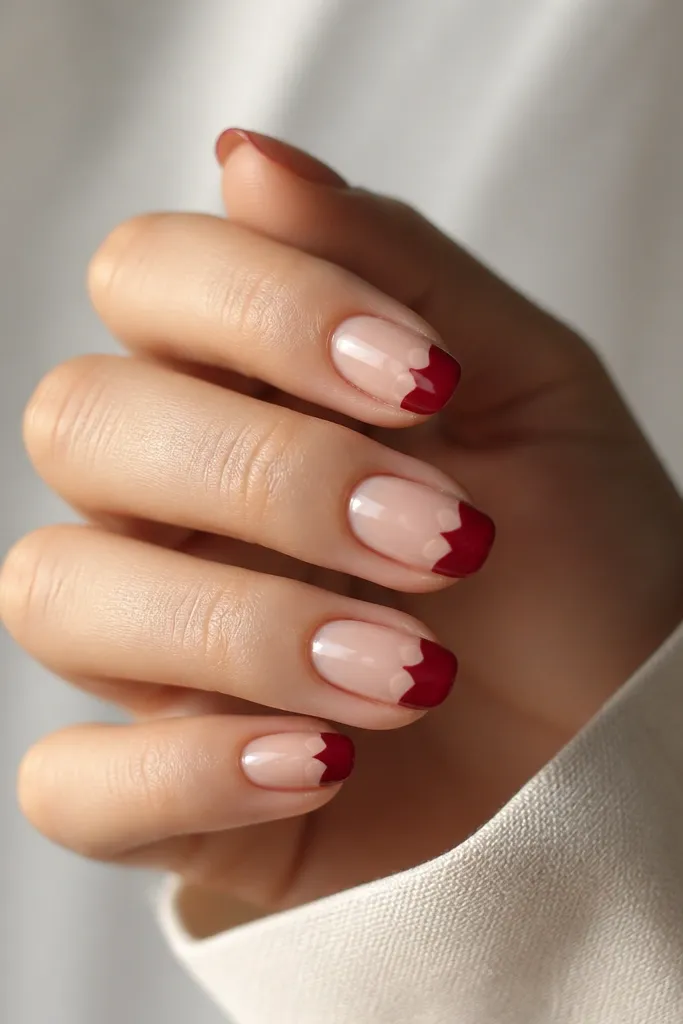
This "bloom French" softens the French tip and makes deep red look less harsh. The tiny nude petal arcs add a delicate outline that looks harder than it is. It's a great beginner design because you're working with a guide shape, not freehand art.
Start with nude base. Use a French tip guide to place the deep red tip, then use a small dotting tool to tap tiny nude semi-circles along the inner edge of the tip. Keep the petal arcs small, about 1 mm each. Top coat glossy.
Editor's noteUse the same dot size for every petal so the design looks intentional.
Watch outDon't make the bloom tip too wide; wide tips shorten the nail and hide the petal detail.
23. Deep Red Negative Space Triangle at the Tip
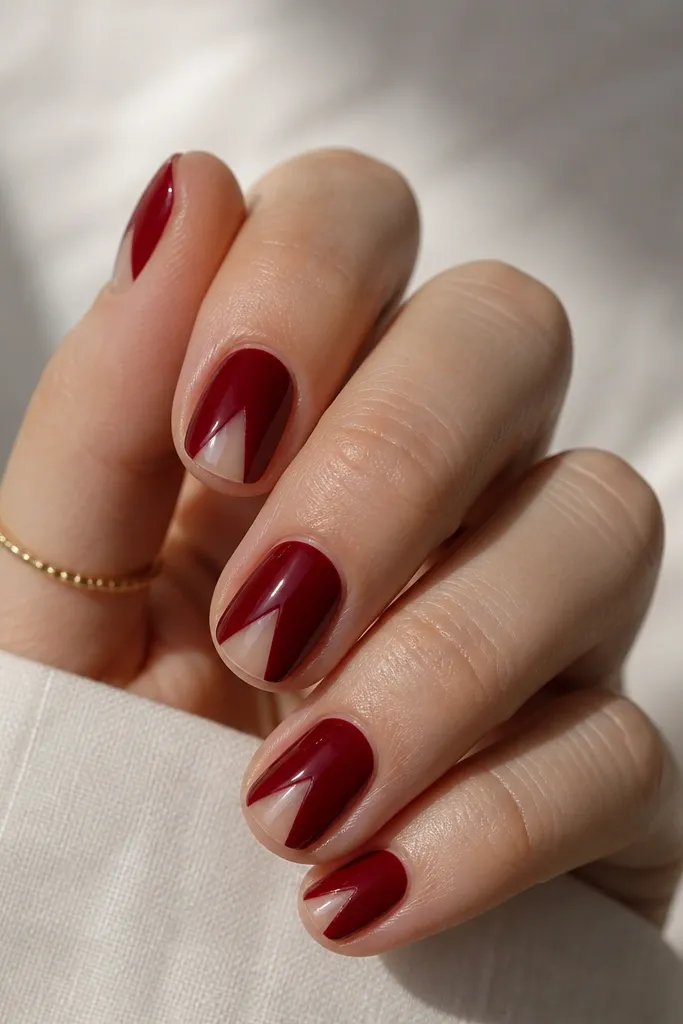
Negative space triangles make deep red look graphic and modern. The triangle also draws attention to the center of the nail, which is flattering on short lengths. This is easier than it looks because the triangle is just tape geometry.
Apply deep red base. Place striping tape to form a triangle at the tip, then paint over the whole nail with deep red if needed and finally remove tape to reveal the clear triangle. For a cleaner look, use a clear gel base under the triangle area before painting deep red. Seal with glossy top coat.
Editor's notePress tape edges firmly, then run a thin brush with top coat along the revealed triangle border.
Watch outDon't use a triangle that's too big; large negative space can look unfinished.
24. Deep Red Ombre with Nude Center Glow
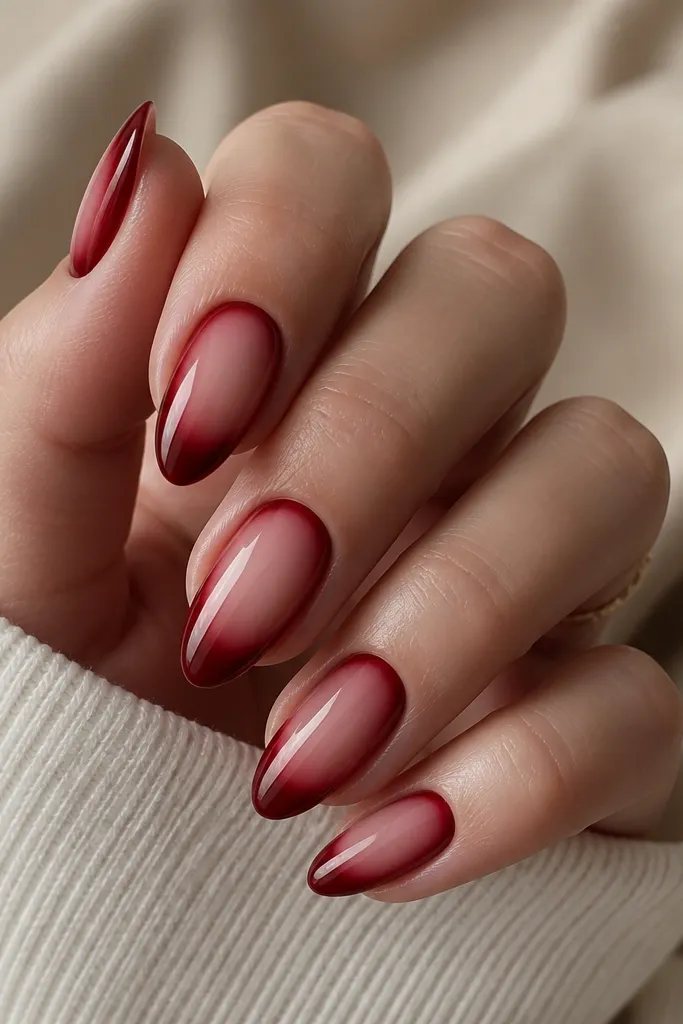
This creates a "glow" effect because the nude center looks like light hitting the nail. Deep red frames the nude band and makes the contrast look intentional. It's also forgiving because you're blending edges, not drawing lines.
Base with nude sheer. Sponge deep red on the sides first, then feather toward the center until the nude band stays visible. Keep the nude center around 2-3 mm wide depending on nail width. Seal with glossy top coat to even out the blend.
Editor's noteUse a flat eyeshadow brush for more control than a round sponge.
Watch outDon't blend until the nude disappears; you need the center glow to read.
25. Deep Red Striped Cuticle Line with Clear Top Cap
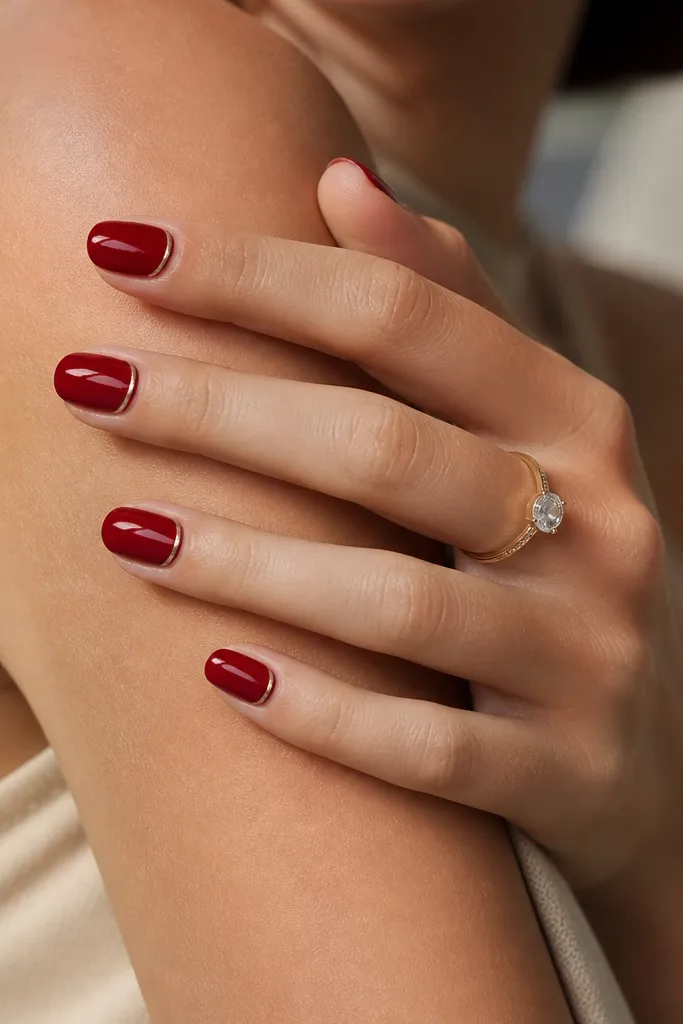
A cuticle line is jewelry-level detail that doesn't require painting a full design. Silver on deep red looks crisp and bright, especially under indoor lighting. Because it follows your natural cuticle curve, it hides small asymmetry.
Paint deep red first. Use a small striping brush or thin silver striping tape to trace a line right along the cuticle curve, leaving a hairline gap from the skin. Seal with clear top coat so the line feels smooth and doesn't catch.
Editor's noteIf the line looks uneven, fix it with a cotton swab dipped in acetone before top coat cures.
Watch outDon't put the line too close to the skin; it will lift and peel fast.