1. Chocolate Cream Short Squoval
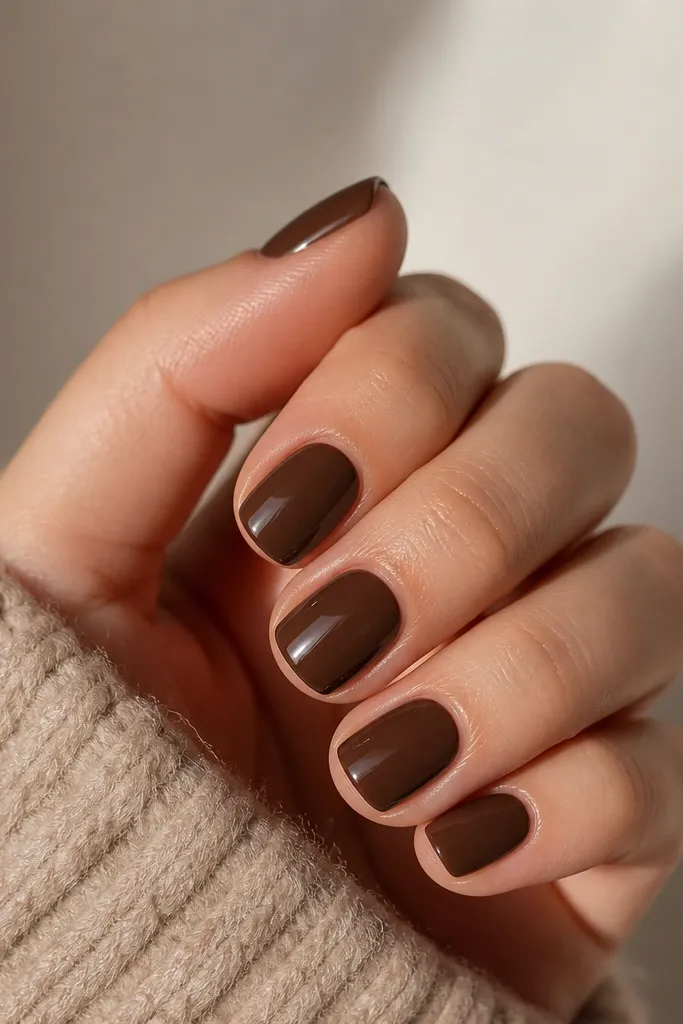
This is the "always works" brown. The chocolate cream finish looks smooth and expensive because it doesn't rely on glitter or micro-sparkles. On brown skin, it gives a grounded, polished look that doesn't fight your undertone. I like it most when the nails are short because the color stays crisp and doesn't look heavy.
Ask for a squoval shape with tips that are about 1-2 mm past the fingertip. File the sidewalls straight and slightly rounded at the corners so the shape doesn't flare. Apply two thin coats of a chocolate cream polish, then seal with a thick glossy topcoat.
Editor's noteIf your first coat looks streaky, wait 60 seconds and add a second thin coat instead of going thicker.
Watch outAvoid taupe-brown creams with a gray cast - they can look dusty on your skin.
2. Caramel French Tips on Nude Base
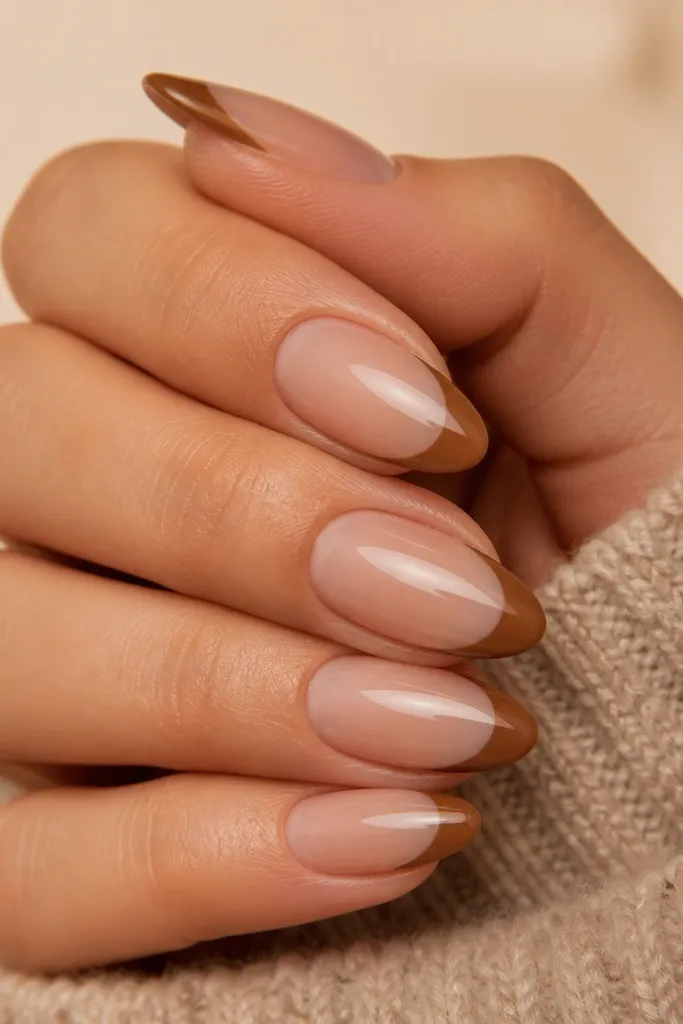
French tips make brown nails look sharp because the line defines the nail bed. The trick is using a caramel tip that's warm and slightly lighter than your base, not a dark brown that swallows the tip. The nude base should match your skin tone family so the tips read intentional. This set looks great in daylight and doesn't need extra art to feel finished.
Keep nails short squoval or short almond. Use a nude base that is one shade lighter than your skin's nail area, then paint French tips in caramel. Keep the tip width about 1/8 of the nail length - too wide makes it look like a sticker.
Editor's noteUse a striping brush and place the tip along your smile line first, then fill in. Clean edges matter more than perfect symmetry.
Watch outSkip thick French lines - they chip faster and look bulky.
3. Toffee Marble Swirls
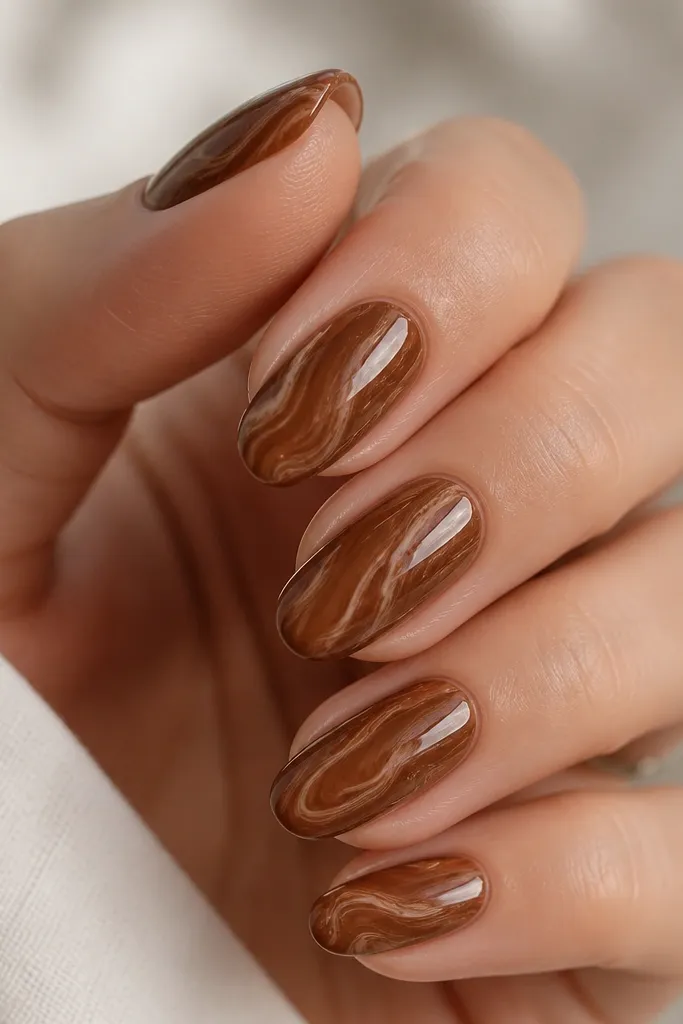
Marble looks expensive on brown skin because it creates movement inside a warm palette. I use a toffee base so the lighter swirls don't look like chalk. The lighter caramel veins reflect light and make your nails look fuller. Keep the pattern airy - too many lines turns it into a messy smear.
Start with a toffee brown cream base in two coats. With a thin detail brush or sponge, paint 3-5 thin swirls per nail using a lighter caramel. Drag a tiny bit of the base color into the swirls for a softer marble effect, then topcoat glossy.
Editor's noteDo one nail at a time so the base stays slightly tacky for better blending.
Watch outDon't use cool-toned grays in the marble - it can make the whole set look dull.
4. Copper Foil Half-Moons
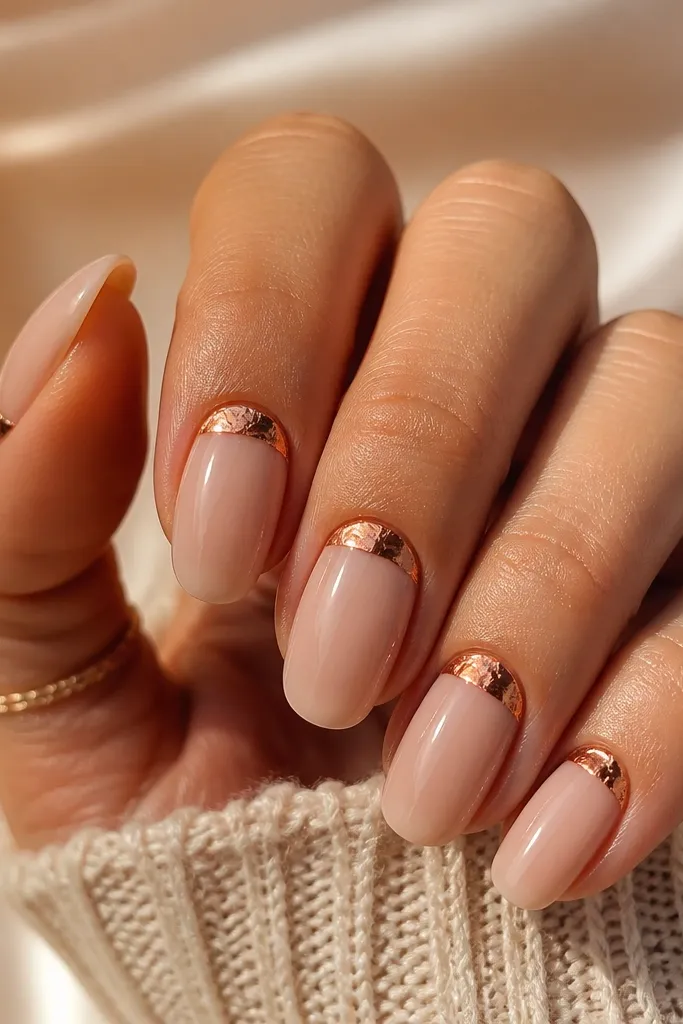
Half-moons are my go-to when I want brown skin nails ideas that look glam but still wearable. The copper foil catches warm light and makes the cuticle area look lifted. A sheer nude base keeps it clean and gives the foil room to stand out. This is a great option when you don't want full glitter coverage.
Use a sheer nude jelly base (not opaque). Apply a small crescent of copper foil at the cuticle - about 1/3 of the nail width. Press the foil down gently and seal with a glossy topcoat so it doesn't lift.
Editor's noteIf foil is patchy, press it with a silicone tool for 10-15 seconds, then seal immediately.
Watch outAvoid placing foil too low into the nail - it can look like grime.
5. Mocha Velvet Matte + Glossy Accent
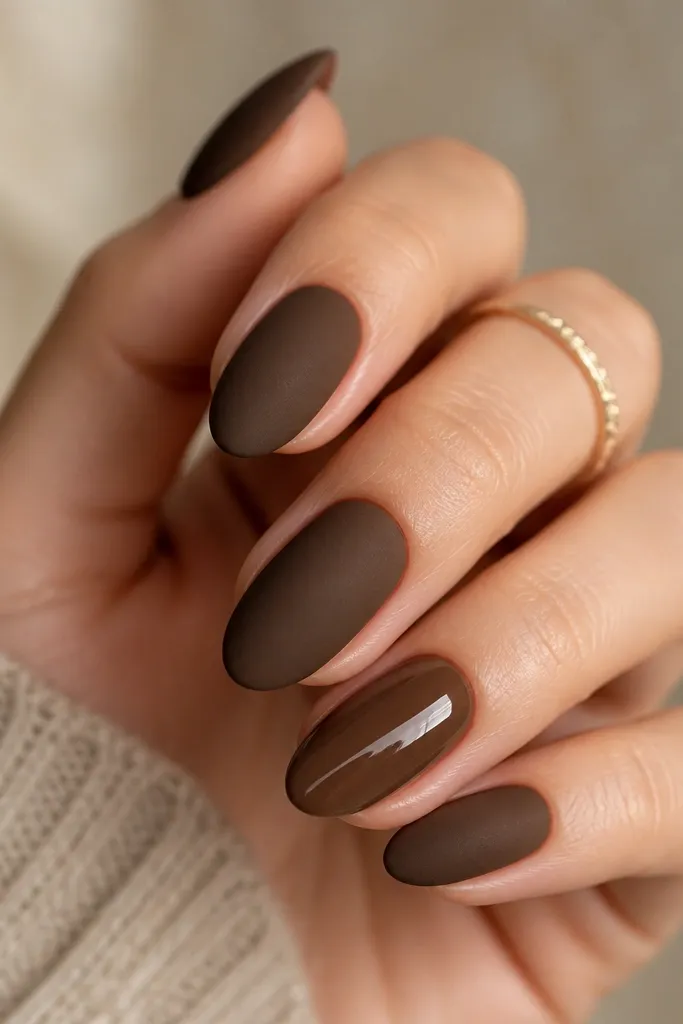
Matte mocha looks smooth and grown-up, and it flatters brown skin because it doesn't reflect light in a harsh way. The glossy dot adds a focal point and keeps the set from looking flat. I love this combo for fall events because the contrast reads intentional. It also hides minor ridges better than full gloss.
Paint two coats of mocha cream. Finish with a matte topcoat on all nails. On your ring fingers, add one glossy dot using a gel topcoat or chrome gel, then cap with regular gloss.
Editor's noteFor velvety matte, wipe the tacky layer off properly if your topcoat needs it - uneven tack shows up fast.
Watch outSkip matte over glittery chunky polishes - texture looks rough instead of luxe.
6. Terracotta Brown Ombré
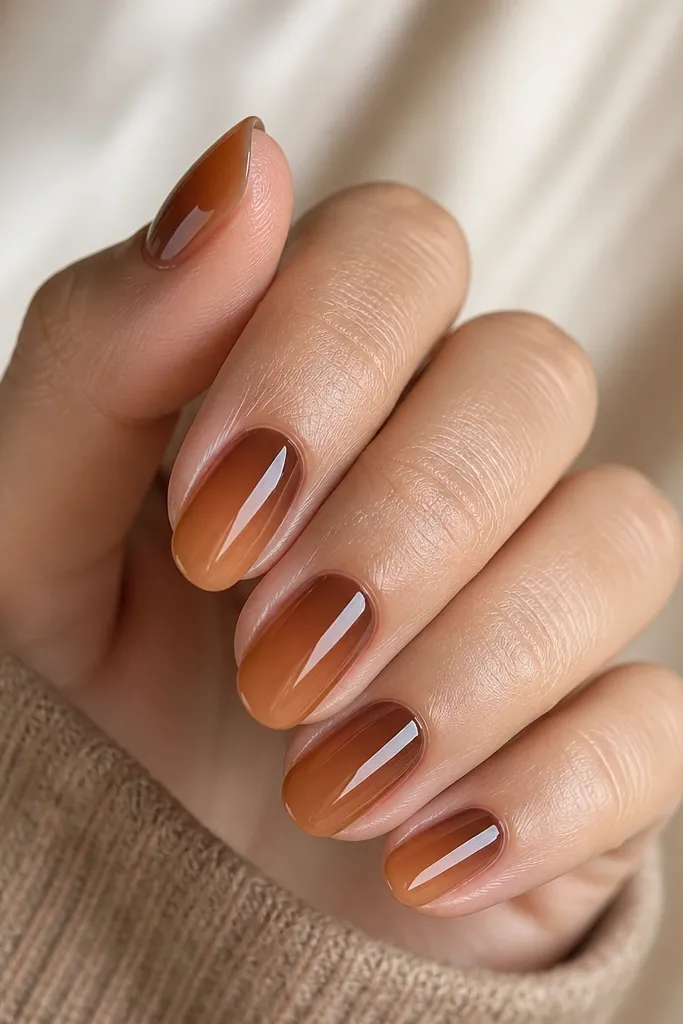
Ombré is one of the cleanest ways to make brown nails look lighter without using a pale nude that washes you out. Terracotta brings warmth and a little orange glow, while the lighter caramel tip brightens the nail surface. The gradient also makes the nail look longer. Keep it smooth, not stripey.
Start with a terracotta-brown base at the cuticle. Use a makeup sponge to blend caramel near the tips, pressing lightly and reloading pigment as needed. Let it dry fully between layers, then seal with two glossy topcoats.
Editor's noteCut sponge pieces small so you can control the fade - big sponges create harsh bands.
Watch outDon't skip sealing - ombré edges lift if the topcoat is thin.
7. Nude Brown Micro-Glitter Fade
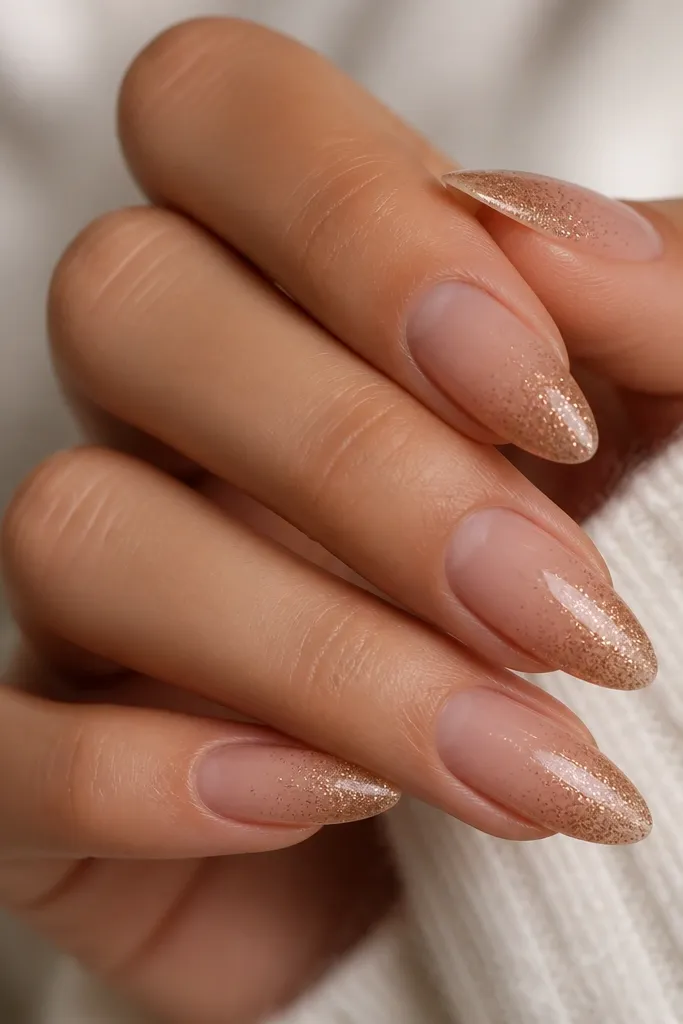
This is subtle sparkle that doesn't look like craft glitter. The nude brown base keeps it flattering, and the micro glitter near the tips adds dimension where light hits. It's a perfect middle ground for workdays and date nights. The fade also makes your nails look neat instead of overloaded.
Use a sheer nude jelly base. Tap micro glitter only on the last third of the nail, then drag a clean brush through the border to fade it upward. Finish with glossy topcoat to smooth the surface.
Editor's noteIf you can feel glitter texture after topcoat, add a second thicker topcoat and cap the free edge.
Watch outAvoid chunky glitter - it catches on hair and chips at the edges.
8. Deep Espresso with Gold Line French
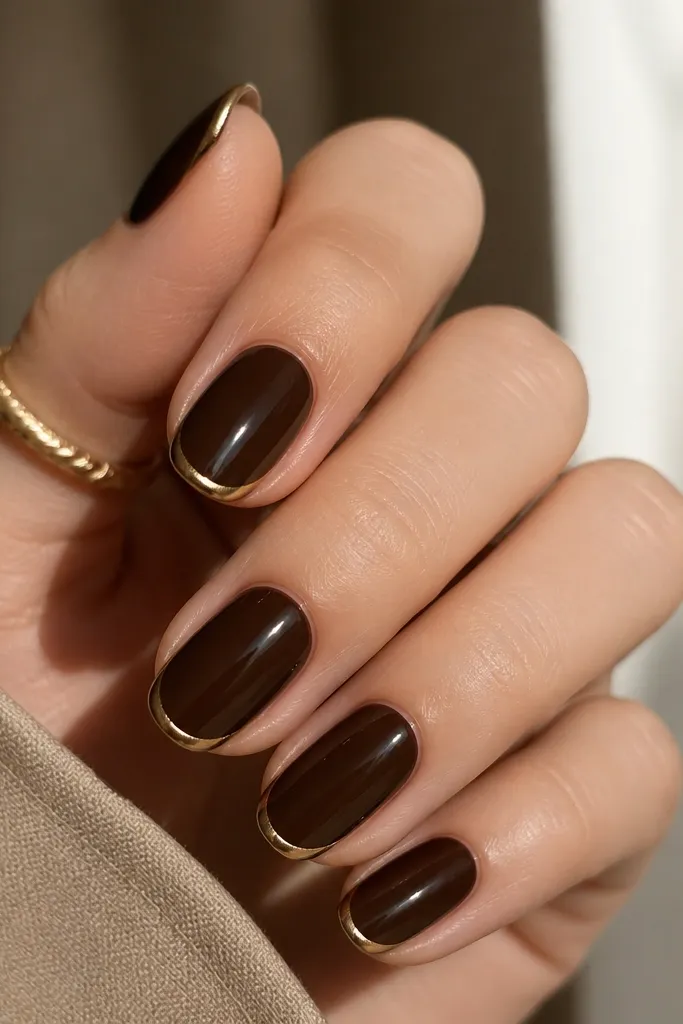
A thin gold line turns a basic brown into a "done" manicure. The espresso base is dark enough to look luxe, and the gold stripe adds brightness without adding bulk. I've worn this to weddings and it photographs really well because the gold reads crisp in flash. Keep everything minimal - one line only.
Choose a deep espresso cream and paint two coats. Once dry, use striping tape or a fine liner brush to draw a gold line along the top edge of the French tip area. Topcoat glossy and cap the corners.
Editor's noteUse tape for the line - it keeps your curve consistent across all nails.
Watch outDon't use thick gold foil paste - it can look uneven and drag when dry.
9. Caramel Latte Dots on Sheer Base
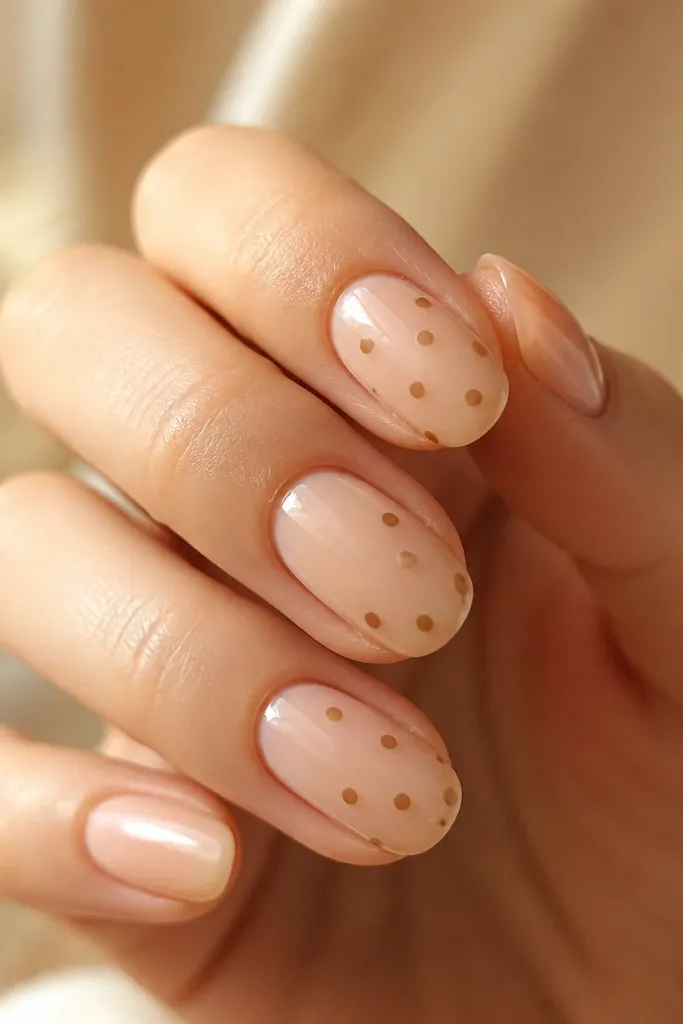
Dot nail art looks playful, but on brown skin it can look classy when the dots are tiny and warm. Caramel dots on a sheer base keep the nail light and airy. I like spacing them so they don't form a heavy cluster near the cuticle. This set gives a "clean cute" vibe without needing a lot of time.
Use a sheer nude base in two coats. With a dotting tool (or the back of a bobby pin), place 6-10 tiny caramel dots per nail. Leave breathing room between dots, then seal with a glossy topcoat.
Editor's noteIf dots smear, let the base cure longer. A slightly tacky surface makes dot placement easier.
Watch outAvoid large dots - they can look like fingerprints when the nail moves.
10. Smoky Brown Aura Glow
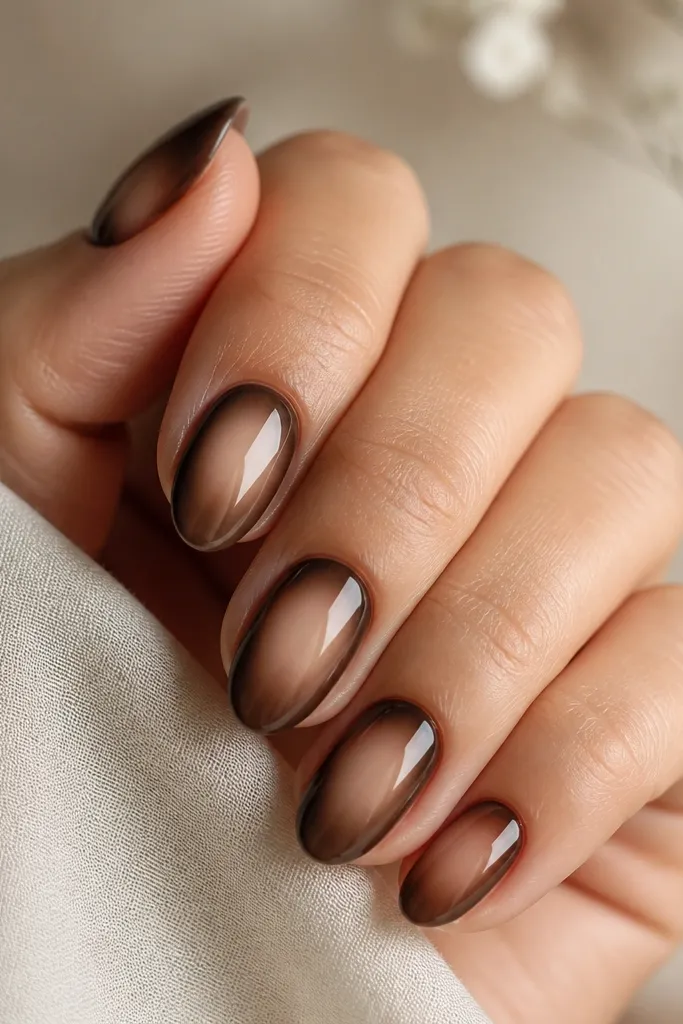
Aura designs look flattering on brown skin because they create a halo effect that visually lifts the nail. The center glow is key: it should be lighter than the surrounding smoky brown. I like using a bronzy-brown gradient so it doesn't look like plain smoke. This manicure looks good even when it grows out because the halo sits in the middle.
Paint a medium smoky brown base. Then sponge a lighter caramel or warm beige in the center in a circular shape. Blend the edges with a second lighter layer and topcoat glossy.
Editor's noteUse a small makeup sponge and press, don't swipe. Swiping drags pigment into streaks.
Watch outSkip cool gray smoke - it can pull ashy on brown skin.
11. Mahogany Glossy with Tiny Rhinestone at Sidewall
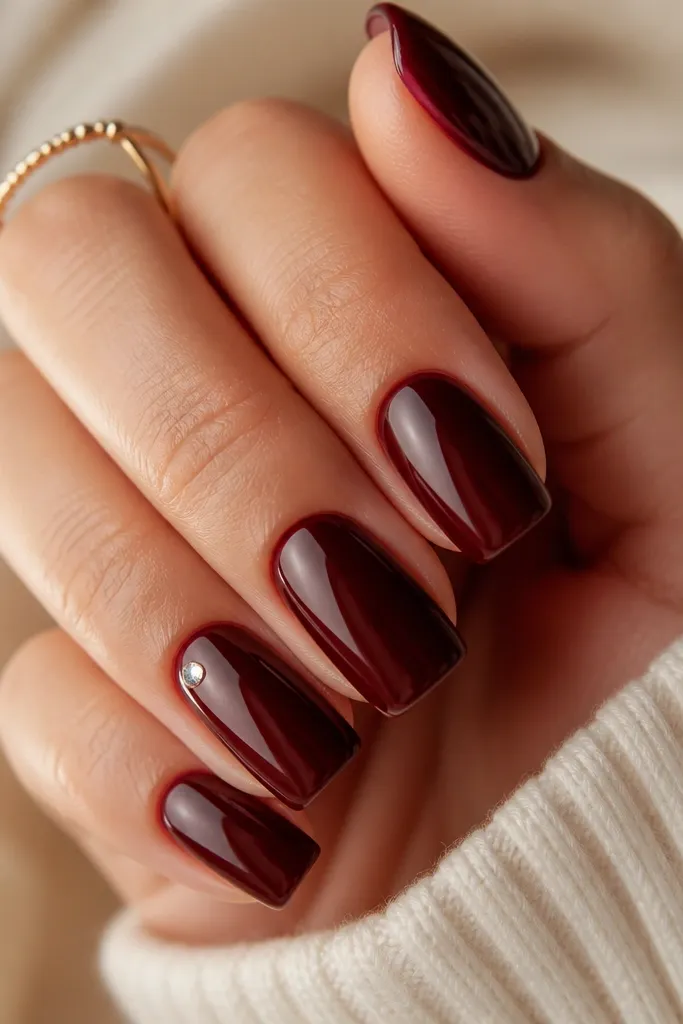
Mahogany reads rich and flattering because it has red-brown warmth. A single rhinestone placement on the sidewall catches light when you move your hands. I like sidewall stones because they don't snag like stones centered on top. This gives a "jewelry" look without overdoing it.
Use a deep mahogany cream or gel polish in two coats. Place one tiny rhinestone using nail glue near the sidewall about 2-3 mm from the cuticle. Seal with a gel topcoat and cure fully so the stone stays locked.
Editor's noteChoose one stone size only - mixing sizes makes it look messy fast.
Watch outAvoid placing rhinestones too close to the free edge - they pop off sooner.
12. Chocolate Chip Brown with Matte Topcoat
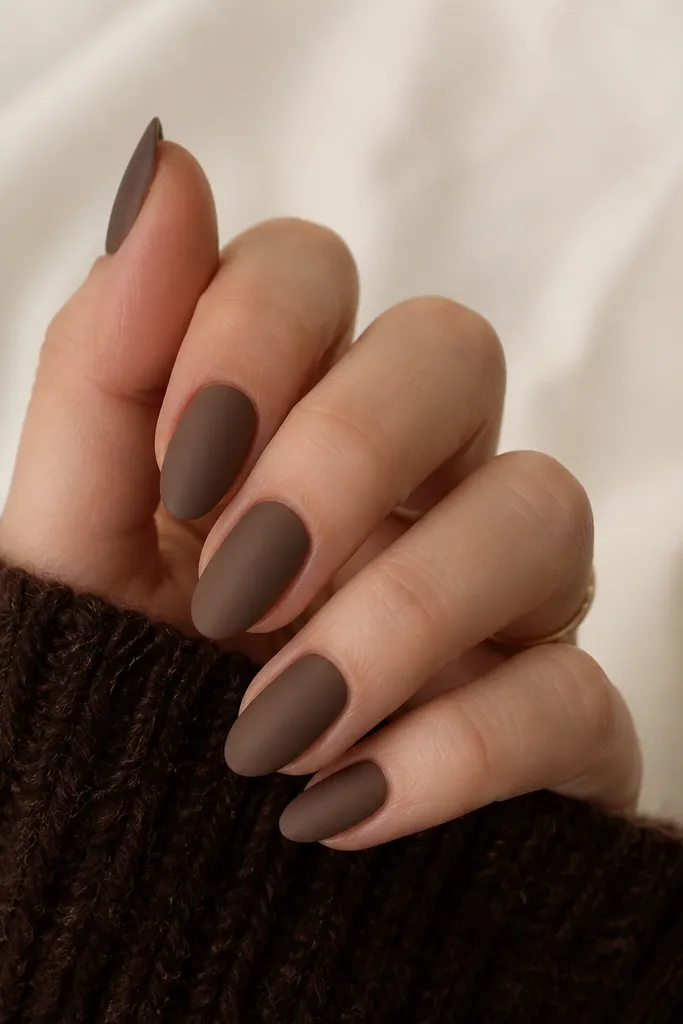
This one gives a textured look without using chunky glitter. The speckles are just enough to mimic cocoa powder or chocolate chips, so the set looks intentional. Matte keeps it soft and hides tiny imperfections in the nail surface. It's a cozy option when you want brown nails ideas that feel different from plain cream.
Paint a dark chocolate base in two coats. Add micro speckles using a sponge loaded with a slightly lighter cocoa shade - press lightly so it stays random. Finish with matte topcoat and seal edges well.
Editor's notePractice the speckle on one fake nail first. Light pressure is the difference between cute and messy.
Watch outSkip glossy if you want the speckle to look like cocoa - gloss turns it into glitter.
13. Brown Skin Friendly Nude Line Art French
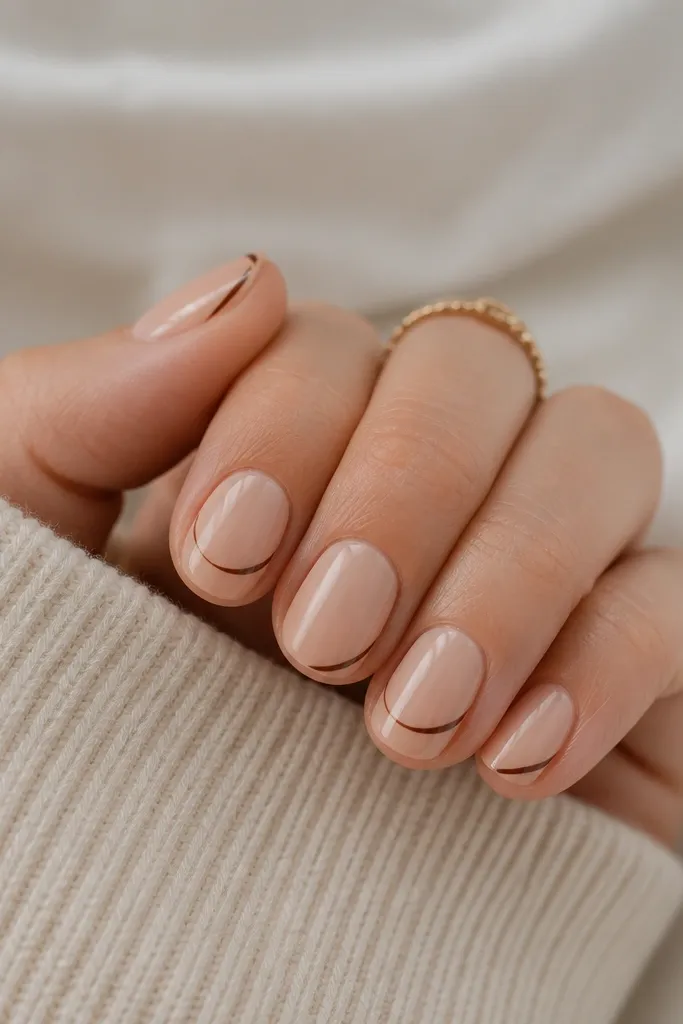
Line art makes brown nails look modern because it adds shape without heavy color blocks. The nude base keeps your tone looking even, and the thin line detail gives structure. I like using a warm brown outline instead of black because black can look too harsh. This is a great set for people who want art but hate thick nail decals.
Use a sheer nude that matches your natural nail tone family. Paint a thin warm brown outline along the tip edge and add one curved line inside the tip area. Keep lines thin and consistent, then add glossy topcoat to smooth.
Editor's noteDraw one nail first to set your line thickness, then repeat on the rest.
Watch outAvoid sticker decals - they lift and look cloudy on brown polishes.
14. Caramel Chrome Half-Set
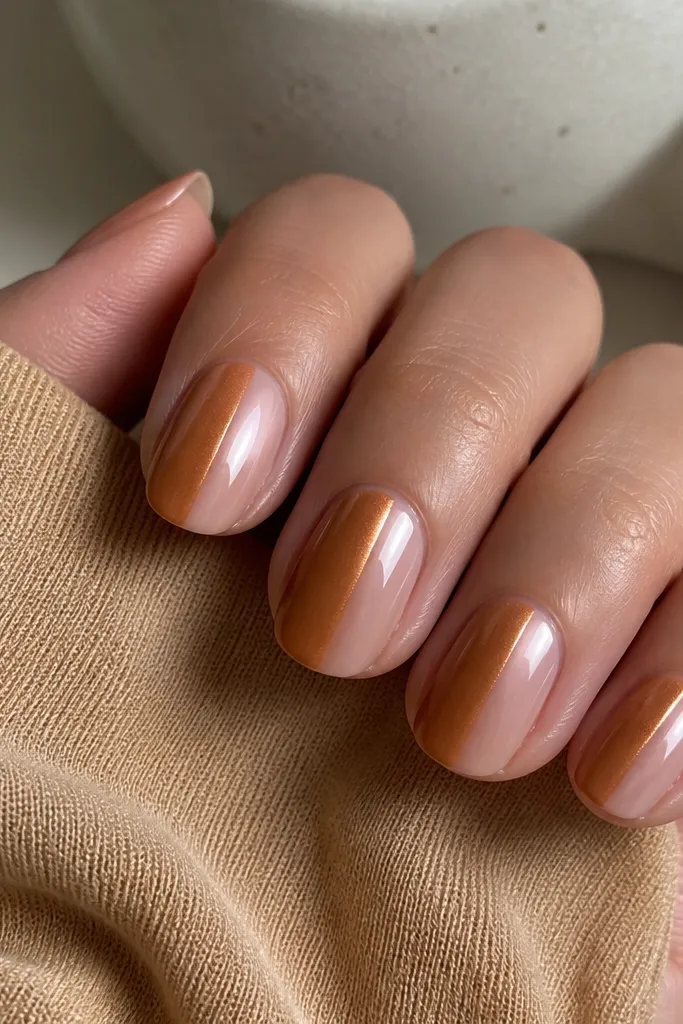
Chrome on a caramel half-set looks futuristic but still wearable because the nude side balances it. The mirror shine makes the warm tone look brighter against brown skin. This is one of the fastest ways to get a "new manicure" look without complex art. It also grows out clean because the chrome area is only half.
Use a nude jelly base and cure fully. Apply caramel chrome powder or chrome gel on the left half, using tape to keep a crisp vertical line. Remove tape before final cure, then topcoat carefully - some chrome needs a specific topcoat to keep the shine.
Editor's noteUse thin tape and press the edges down. Any gap creates blurry lines.
Watch outSkip thick topcoat immediately - it can dull chrome.
15. Satin Taupe-Brown with Pearly Center
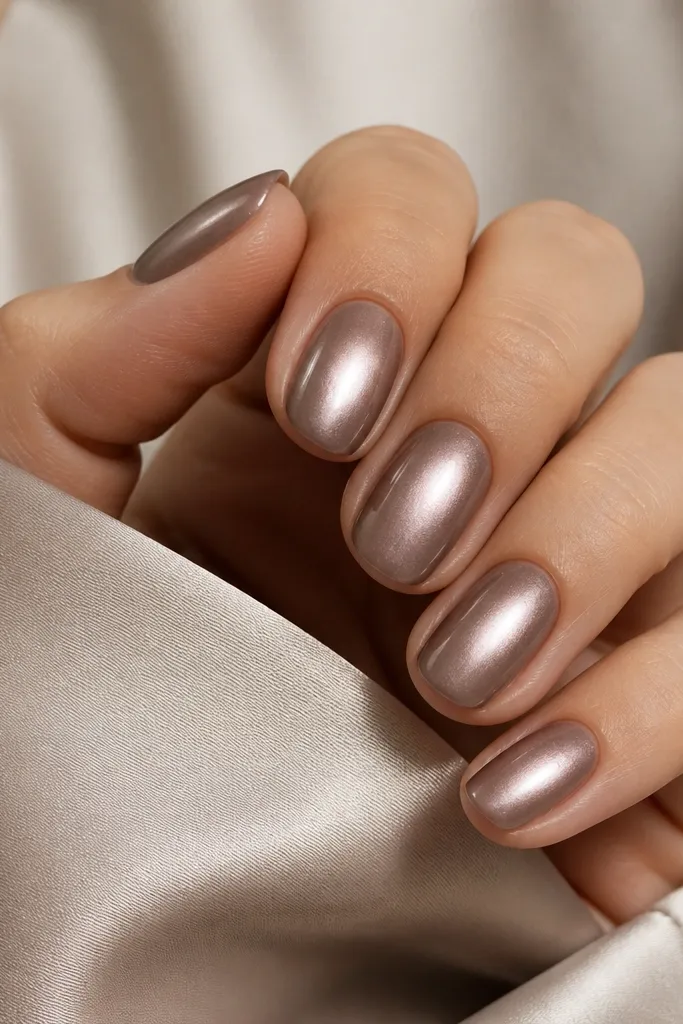
This is the only taupe-brown I like for brown skin, and it has to be satin, not dusty. The pearly center creates a highlight zone that makes the nail look smoother and more dimensional. I've had this look complimented in office lighting because the shimmer stays subtle. It's classy when you want something neutral but not plain.
Paint a satin taupe-brown base with a pearlized finish. Add a pearly oval in the center using a pearly topcoat or shimmer gel, then blend edges lightly. Finish with a satin-matte topcoat on most nails, but keep the center glossy if you want extra pop.
Editor's noteKeep the pearly oval narrow - about the middle third of the nail width.
Watch outAvoid flat matte taupe if you want it to look flattering - it can read gray.
16. Spiced Berry Brown Ombré Tips
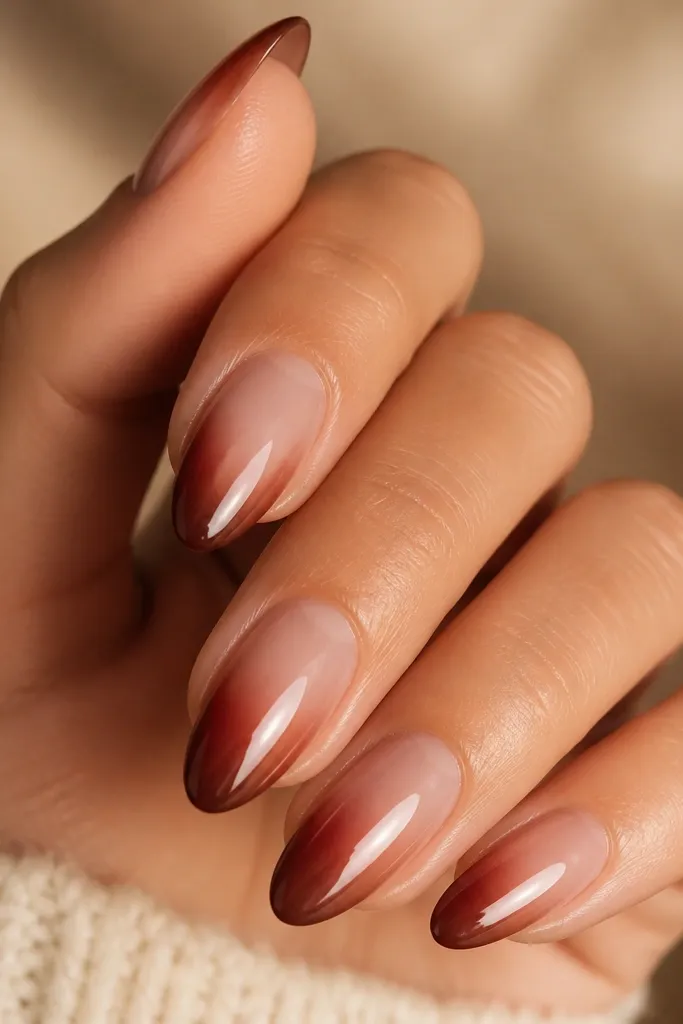
Pairing brown with a berry tint makes your nails look richer because the berry adds depth instead of turning the set into a single note. The ombré tips create a lengthening effect and look great in photos. I use spiced berry because it leans warm - more cranberry than purple. Brown skin nails ideas love this combo when you want something festive without going full red.
Start with a warm brown base. Sponge or brush berry polish onto the tips and blend upward about 1/3 of the nail. Use a glossy topcoat to lock in the gradient and smooth the blend.
Editor's noteBlend on a dry surface, then add one extra topcoat layer to erase any sponge texture.
Watch outDon't pick a blue-leaning berry - it can make the brown look muddy.
17. Dark Brown Jelly with Floating Gold Flecks
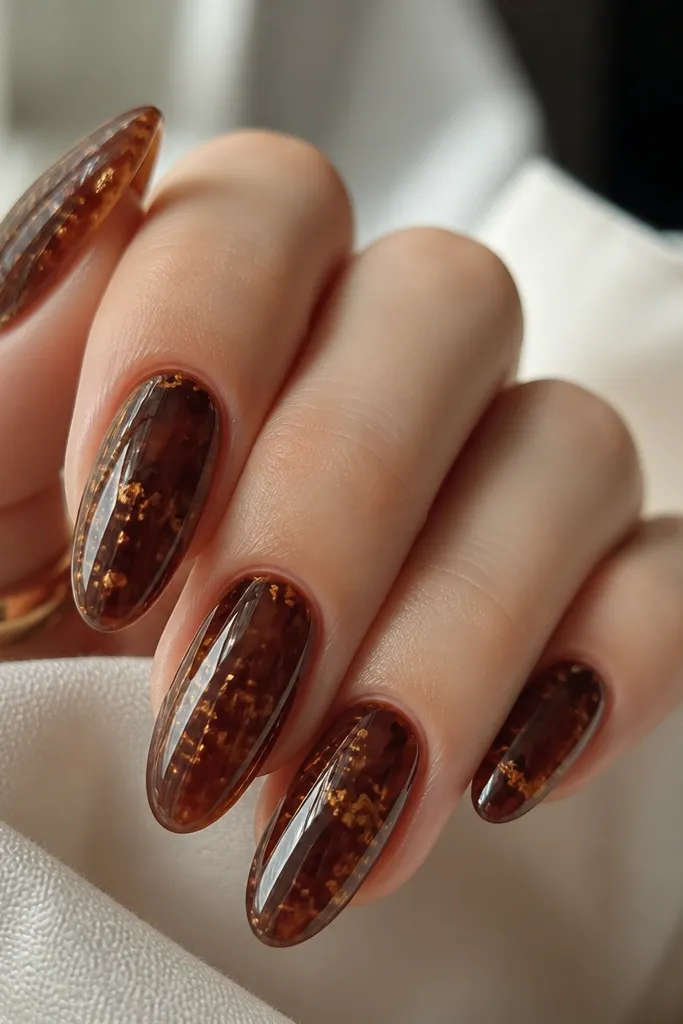
Jelly polish makes brown shades look juicy and dimensional. Gold flecks inside the jelly give that floating effect - like warm light trapped under glass. This set looks especially good when you wear gold jewelry because the tones match. It's also forgiving when nails grow out since the jelly stays glossy.
Use a dark brown jelly gel polish base and cure. Add gold flecks lightly, then cap with a clear jelly top layer so the flecks look suspended. Keep flecks sparse on the first coat; add more only where you want sparkle.
Editor's noteCap the free edge with clear gel or topcoat so flecks don't snag and lift.
Watch outAvoid applying flecks directly over matte - it kills the glass look.
18. Warm Brown Micro French with Nude Strip
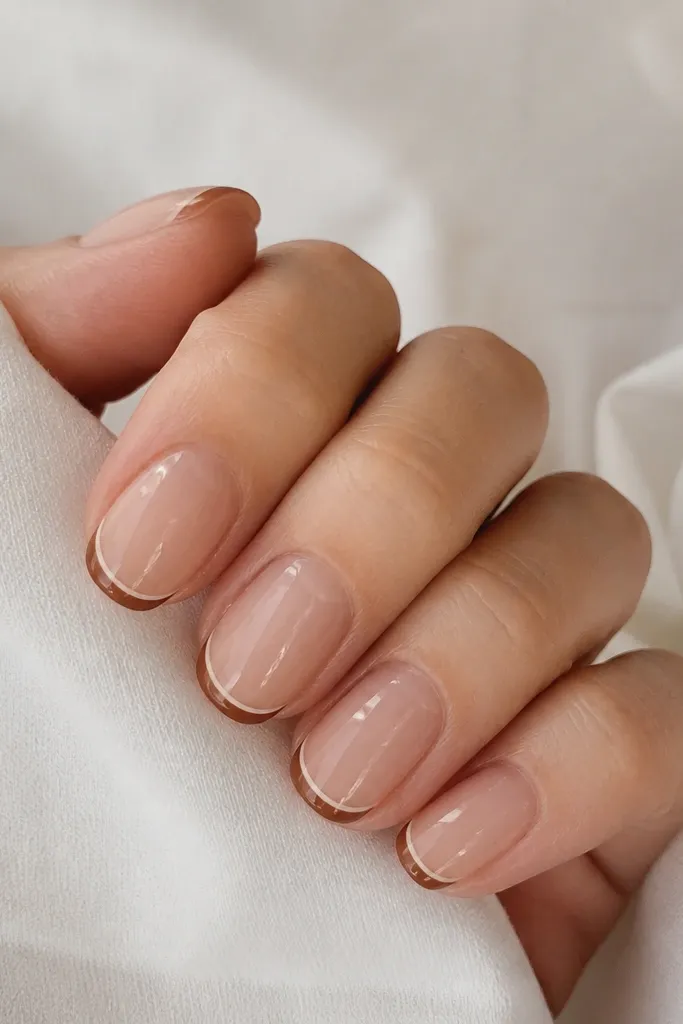
Micro French looks clean and modern, and the tiny nude strip makes it look even more precise. This design flatters brown skin because it keeps the nail light at the base while still adding color at the tip. I like it for short nails because the thin line doesn't overpower your nail bed. It also looks good in a minimalist setting without looking plain.
Use a sheer nude base. Paint a very thin warm brown line at the tip - keep it under 1 mm thick. Leave a small gap so the nude strip shows between base and tip, then topcoat glossy.
Editor's noteUse a liner brush and rest your hand on a table. Stability makes the line straight.
Watch outSkip thick French when nails are short - it looks like a heavy border.
19. Brown Skin Nails Ideas in 3D Caramel Bow Accent
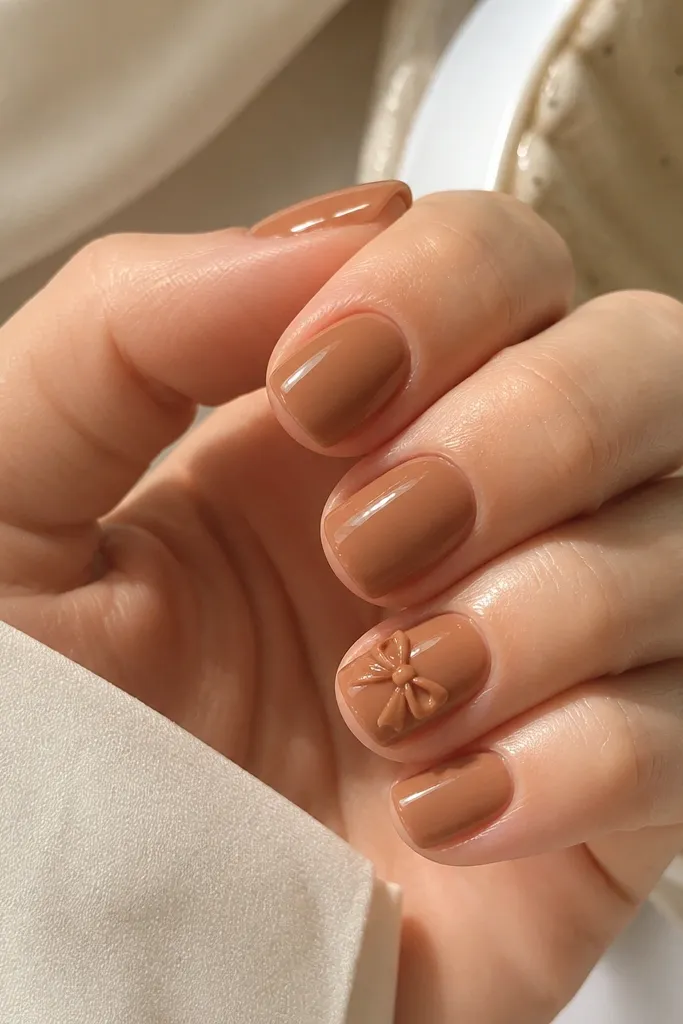
A tiny 3D bow turns basic brown into something playful without needing full coverage gems. Caramel nude base keeps the bow warm and cohesive. I've worn this to brunch and birthdays and people always notice the detail, but it doesn't feel costume-like because the bow is small. Keep the bow color close to the base so it looks like it belongs.
Paint caramel nude on all nails. On accent nails, build a small bow shape using gel striping tape or pre-made 3D nail bow pieces. Secure with clear gel, then cap with glossy topcoat so the edges feel smooth.
Editor's noteMake the bow about the width of your thumbnail nail bed, not bigger. Small scale reads cute, big scale reads cartoonish.
Watch outAvoid thick un-capped 3D pieces - they snag and catch on hair.
20. Espresso + Rose Gold Stamping
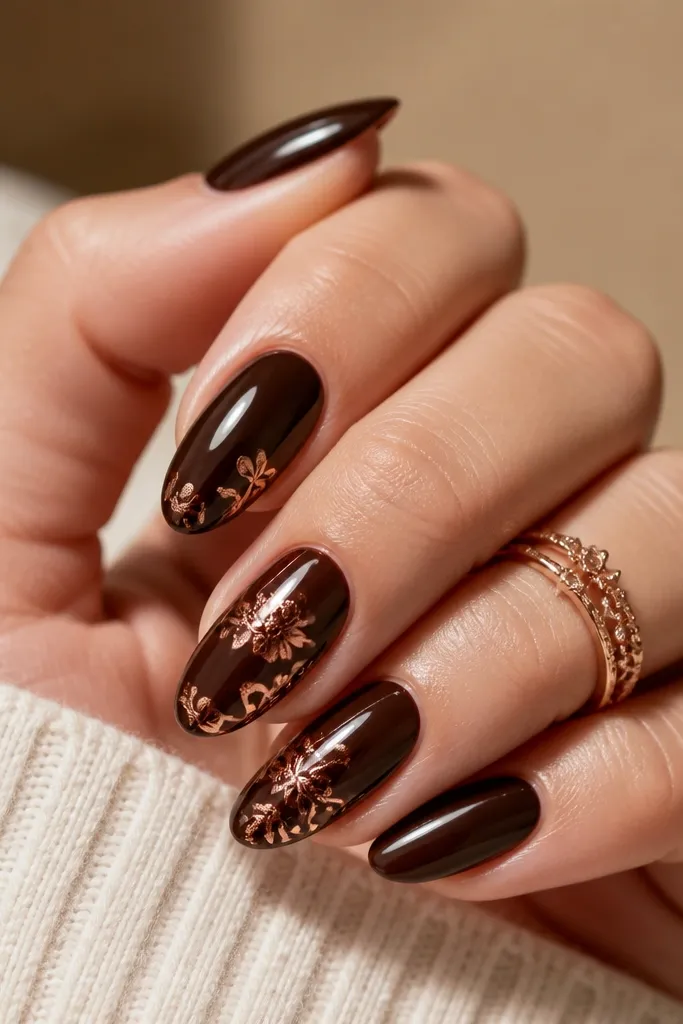
Stamping is one of the fastest ways to get detailed nail art without freehand skills. Espresso brown is the perfect backdrop because it makes rose gold look bright instead of dull. The filigree pattern adds texture and makes your nails look like jewelry. I use this when I want brown nails ideas that still feel special for events.
Paint espresso brown in two coats. Apply rose gold stamping polish to the stamp plate, scrape clean, and press onto the nail. Wipe excess, then topcoat glossy to seal the design.
Editor's notePress the stamp firmly for 2-3 seconds and keep your angle straight to avoid blurry lines.
Watch outDon't stamp over tacky base layers - it smears and the pattern looks cloudy.