1. Velvet-matte wine base with one glossy cuticle swoop
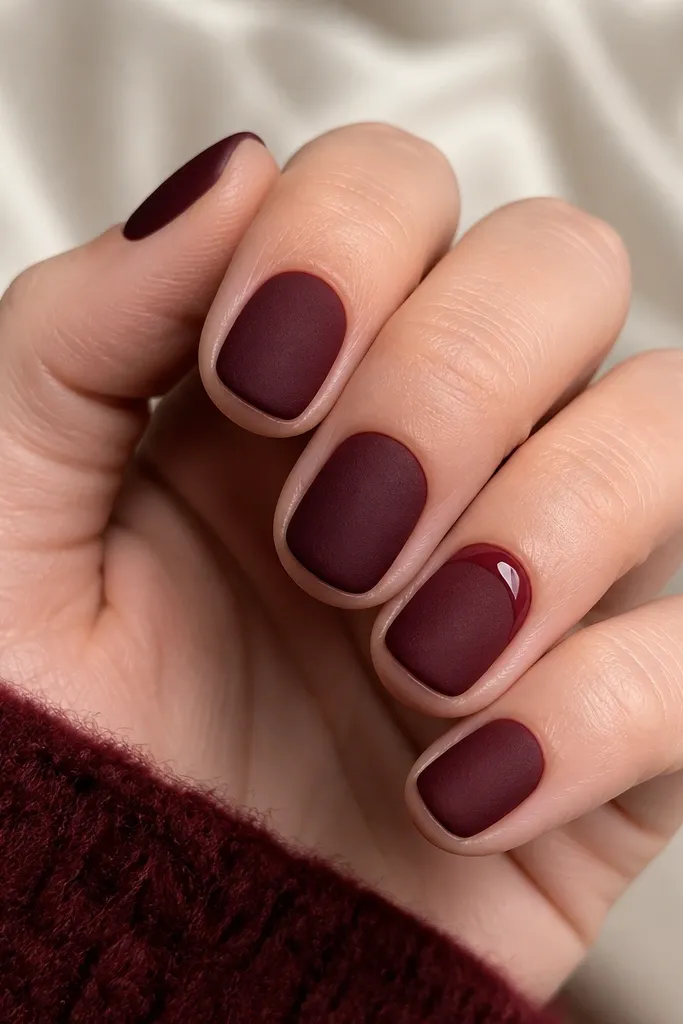
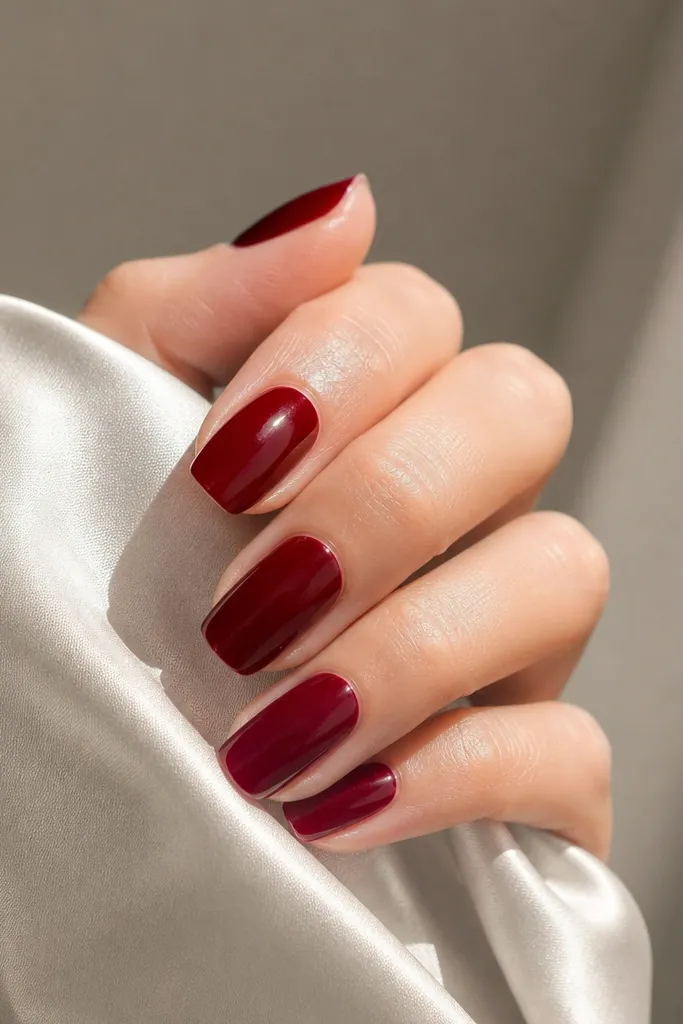
This design feels cozy because the velvet-matte finish kills shine across the nail, like soft fabric. The glossy cuticle swoop brings back a controlled reflection - it looks warm, not flashy. I use a slightly lighter wine for the swoop so it reads as highlight instead of another dark blob.
Start with velvet-matte top coat over a deep burgundy gel base. On one accent nail, apply a thin line of glossy wine gel at the cuticle and drag it into a smooth crescent - the curve should be about 1/3 the nail width. Seal with glossy top only on the swoop area, then matte top on the rest.
Editor's noteUse a striping brush with bristles that are firm enough to hold a straight curve - you want a crisp crescent edge.
Watch outDon't cover the whole nail with glossy on a matte base; it turns into a shiny red instead of cozy burgundy.
2. Micro-glitter "embers" gradient from the tip
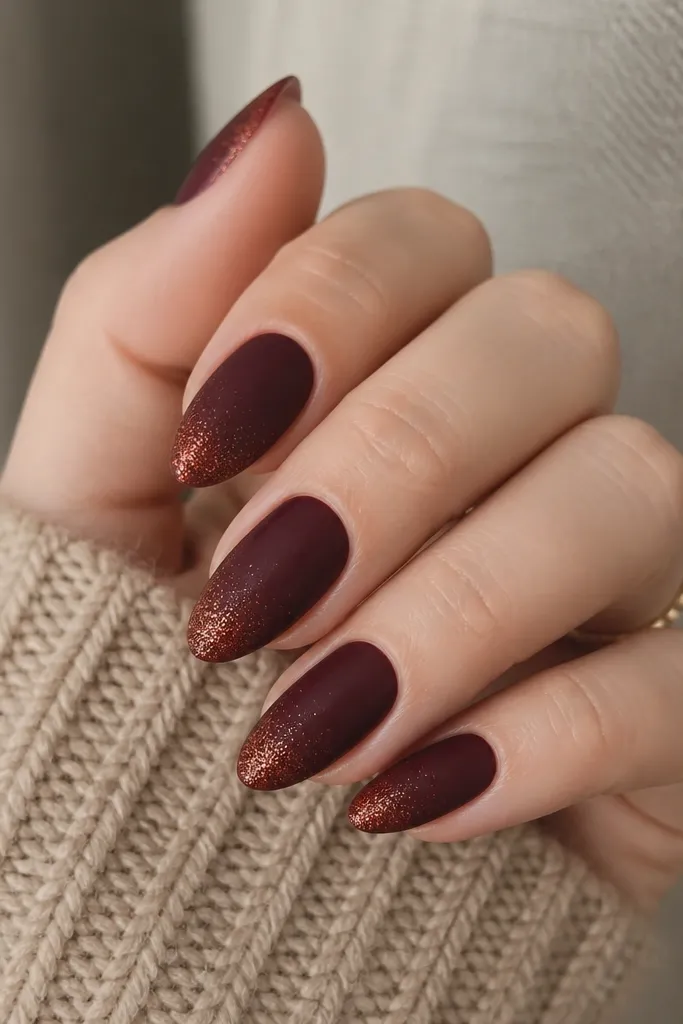
Micro-glitter at the tip mimics candlelight on dark fabric. The ember effect works because copper glints against burgundy - it reads warm and autumny. Keeping the glitter only on the outer third stops it from looking like full-on party nails.
Use a deep burgundy base with a satin finish (not fully glossy). Sponge very lightly with micro-glitter gel so it starts around 2mm from the tip and fades inward. Top with a satin top coat to blend the texture so the glitter doesn't snag.
Editor's noteDust off glitter before curing and tap off excess with a clean brush so the gradient stays soft.
Watch outSkipping the fade - if glitter starts too close to the cuticle, it looks heavy and less cozy.
3. Classic deep burgundy French with a thin black-wine line
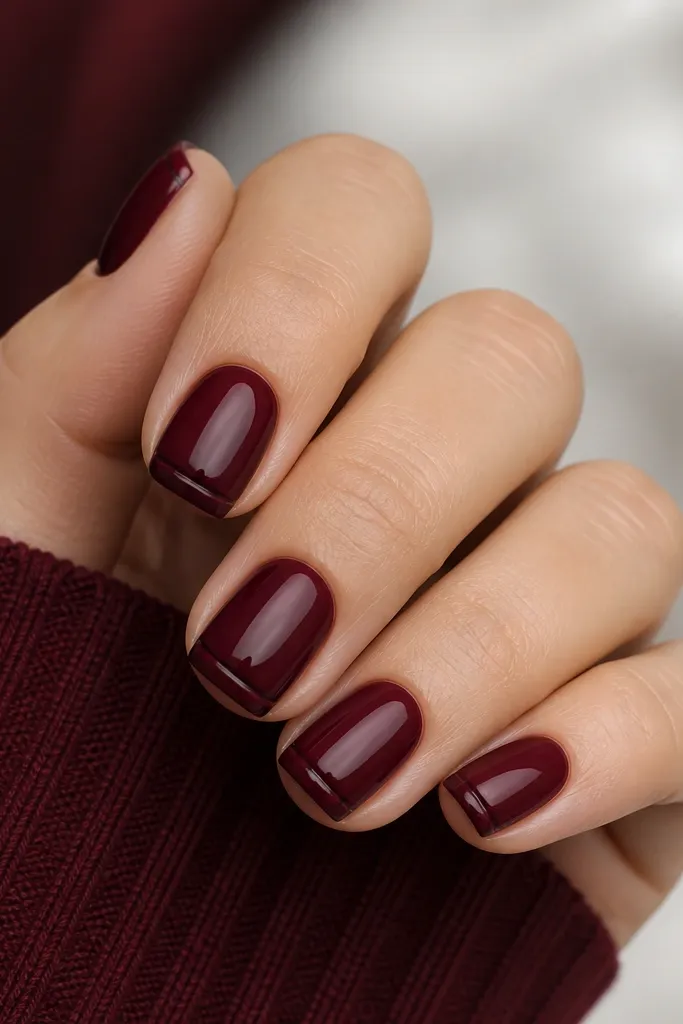
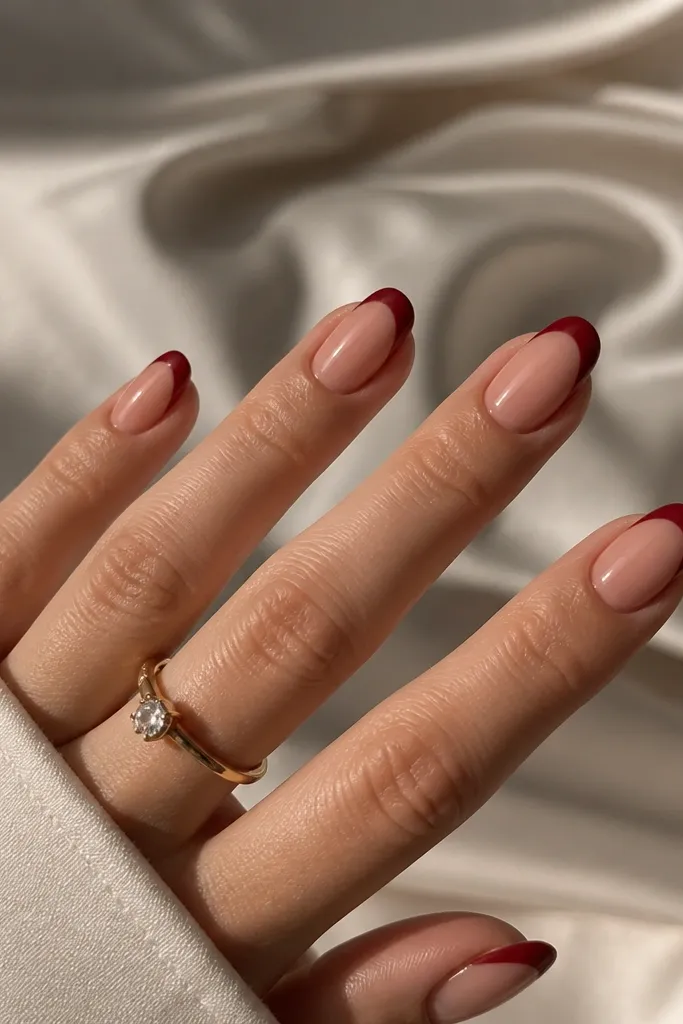
A French tip looks clean with cozy outfits because it's structured. The thin black-wine outline adds definition and makes the burgundy look deeper. This is one I wear when I need my nails to look polished for work but still feel warm.
Paint the nail base deep burgundy. Use striping tape to mark the French line, then apply burgundy to the tip and cure. With a fine liner brush, draw a hairline border in black-wine gel right along the French edge, then seal with glossy top.
Editor's noteMake the line slightly thicker at the center of the smile and taper at the corners for a more flattering shape.
Watch outDon't make the outline too wide; thick borders look dated and messy.
4. Oxblood half-moon with matte rest and glossy dots
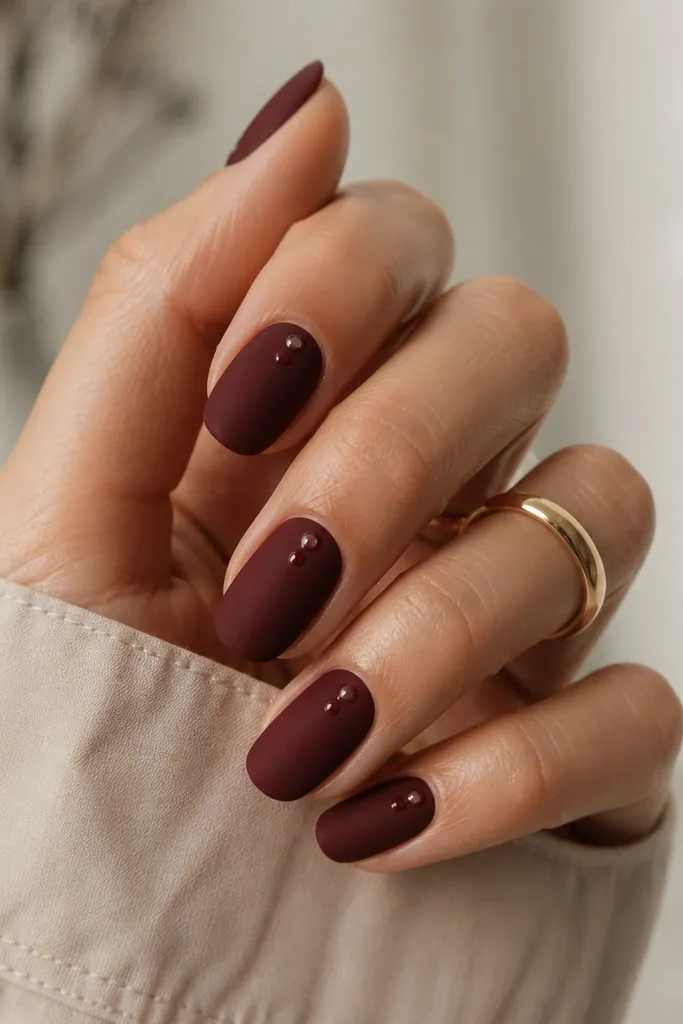
Half-moons read cozy because they're small and intentional - they look like a design detail, not a loud pattern. Glossy dots add light without taking over the nail. Oxblood (a slightly cooler burgundy) makes the half-moon look crisp and expensive.
Start with matte top coat over oxblood gel. For the half-moon, use a cuticle brush to paint a glossy half-moon shape leaving a clean gap around the cuticle line. Add two tiny dots in glossy wine gel, centered. Cure and finish with matte top everywhere except the half-moon and dots.
Editor's noteKeep the half-moon height under 1mm so it doesn't shrink your nail visually.
Watch outAvoid pushing the glossy half-moon too close to the cuticle - it can flood the skin and look sloppy.
5. Negative-space diagonal ribbon in burgundy gloss
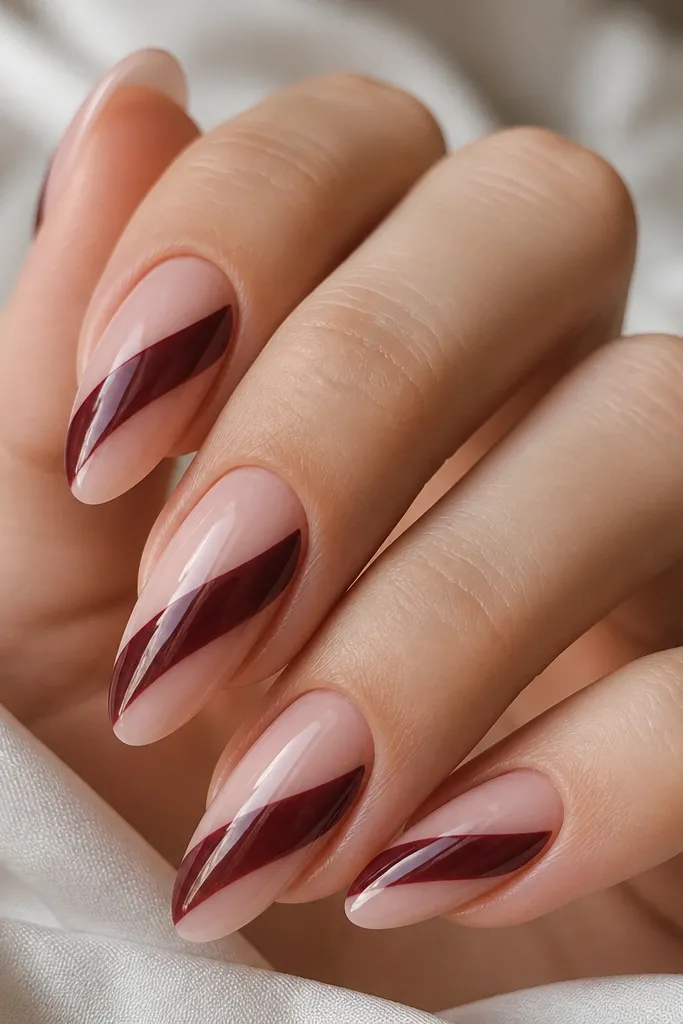
Negative space makes deep red burgundy feel lighter and more "cozy" with casual outfits. The glossy ribbon adds contrast against the sheer nude, so the burgundy looks like lacquered fabric. I like this one for days when you want dark nails but not full coverage.
Use a sheer nude base with a rubberized gel layer for strength. Place striping tape diagonally at the angle you like, then fill the ribbon with glossy deep burgundy gel. Pull tape while gel is still tacky for clean edges, cure, then remove any fuzzy bits with a cleanup brush.
Editor's noteAngle the ribbon so it narrows slightly toward the tip - it flatters your nail bed.
Watch outDon't cover the entire nail with burgundy - the negative space is the whole point.
6. Burgundy marble with soft, smoky swirls
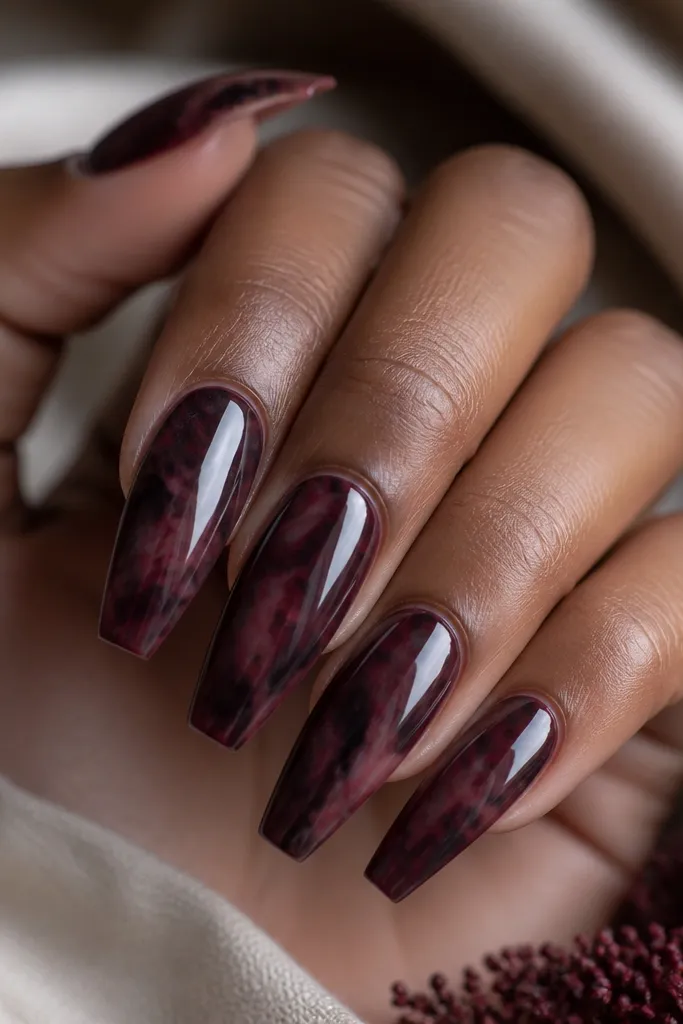
This marble is cozy because it looks like smoke and shadow, not like candy stone. I skip bright whites and keep the movement in dark tones. The result is moody but still wearable with winter knits.
Paint a solid deep burgundy base. Add thin drops of slightly darker black-wine and a muted wine, then drag with a thin nail art tool to create soft feathering. Use a matte or satin top coat so the marble looks like it's under fabric.
Editor's noteUse a small amount of product for marble swirls - thick blobs look like paint, not stone.
Watch outAvoid high-contrast white marble; it reads colder and less cozy.
7. Wine chrome "swoosh" over matte burgundy
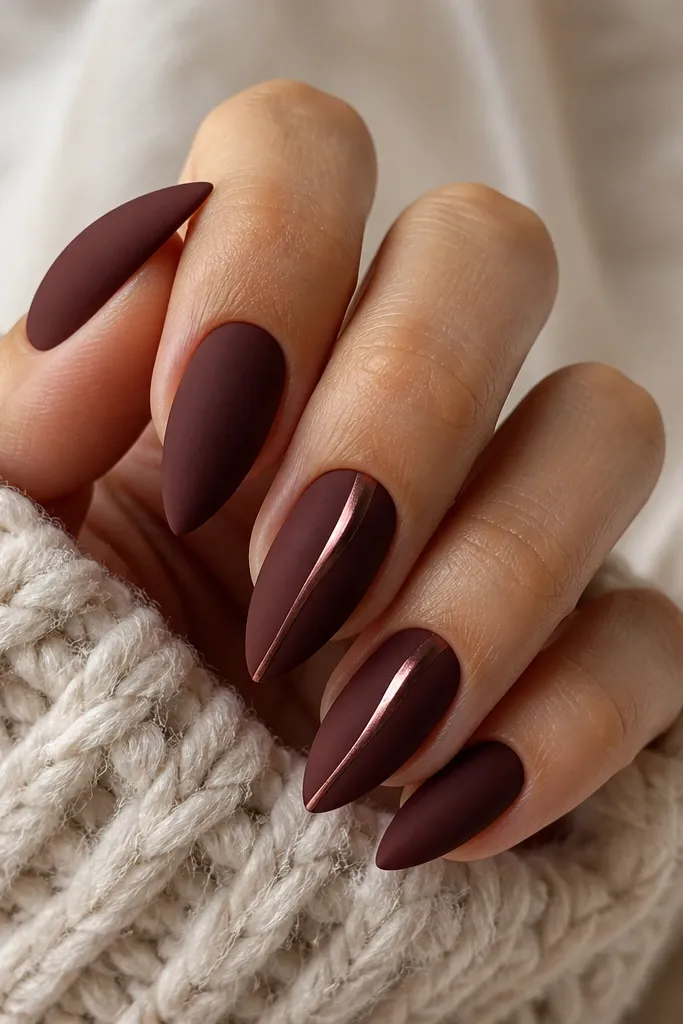
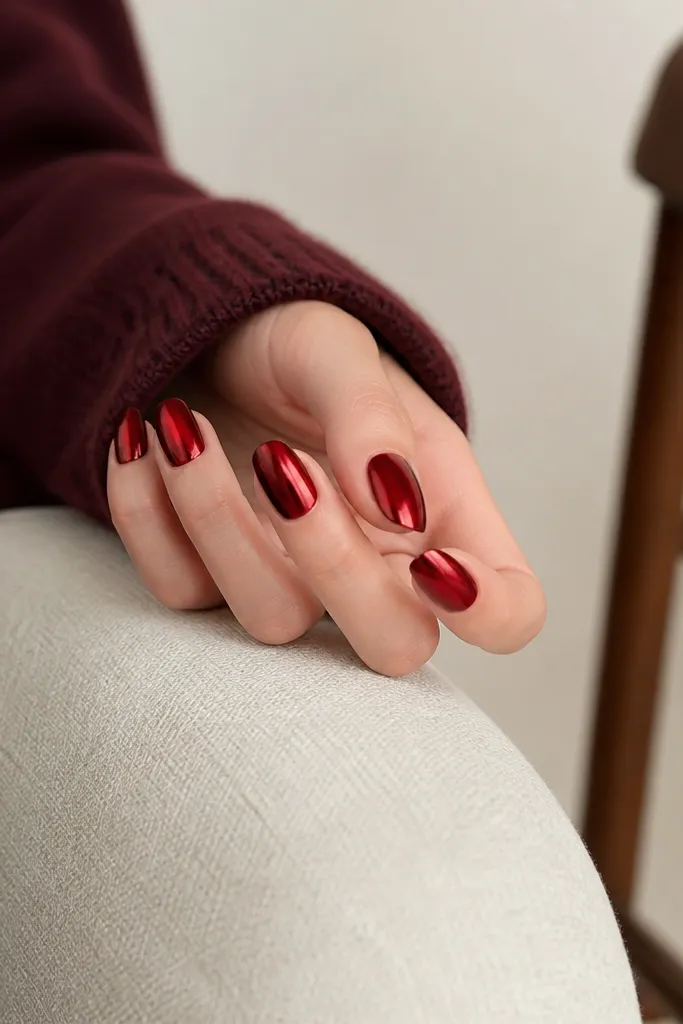
Chrome looks cozy when it's thin and directional. A vertical swoosh makes the nail look longer without adding extra patterns. The rose-gold tone matches burgundy and keeps it warm instead of silver-cold.
Apply matte burgundy top coat after your color coats cure. For the chrome, buff a small strip of wine chrome powder gel onto a vertical line, then cure. Blend the edge with a clean sponge so the swoosh has a soft fade, then top coat matte everywhere else.
Editor's noteKeep the chrome line width under 1mm - thin chrome looks intentional, thick chrome looks loud.
Watch outDon't chrome the entire nail; it turns into a mirror effect that fights cozy vibes.
8. Deep red velvet French tips
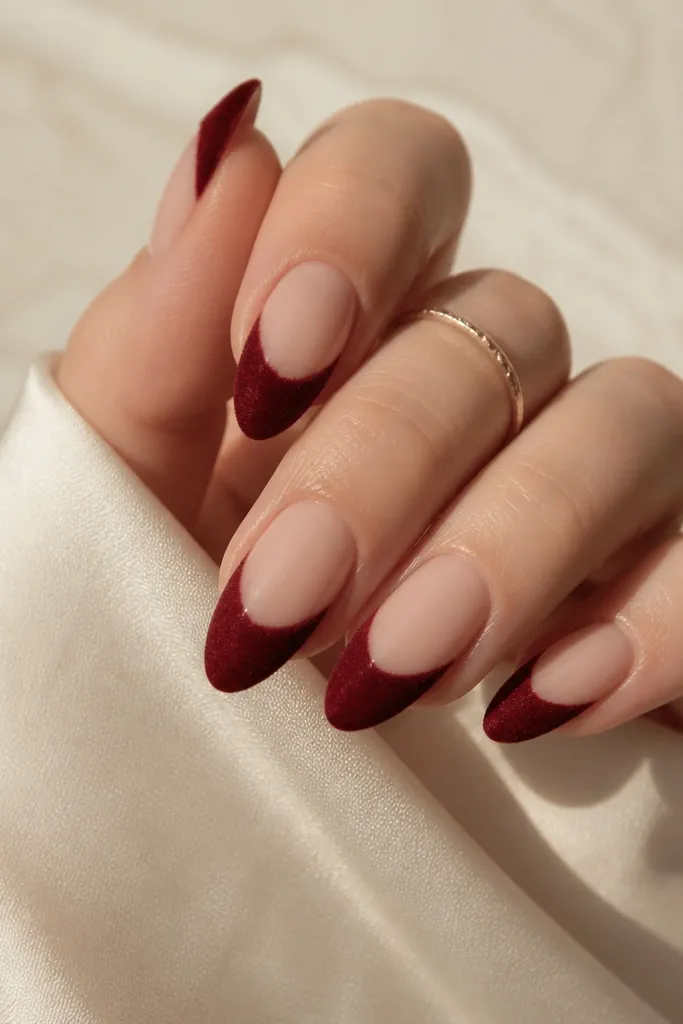
This is one of my go-to cozy sets because it looks like two textures on purpose. Glossy base reflects light off coats and scarves, while the velvet tips look soft and warm. It also hides small tip imperfections because matte smooths the visual.
Start glossy deep burgundy on the full nail. Mask the smile line with a curved striping guide and paint the tips with the same burgundy, then top those tips with a velvet-matte top coat only. Cure again and keep the transition crisp.
Editor's noteUse a guide striping tape to get the smile line even across all nails.
Watch outDon't make the velvet tip too wide - if it covers half the nail, it looks like a cap.
9. Oxblood + gold leaf flecks on one accent nail
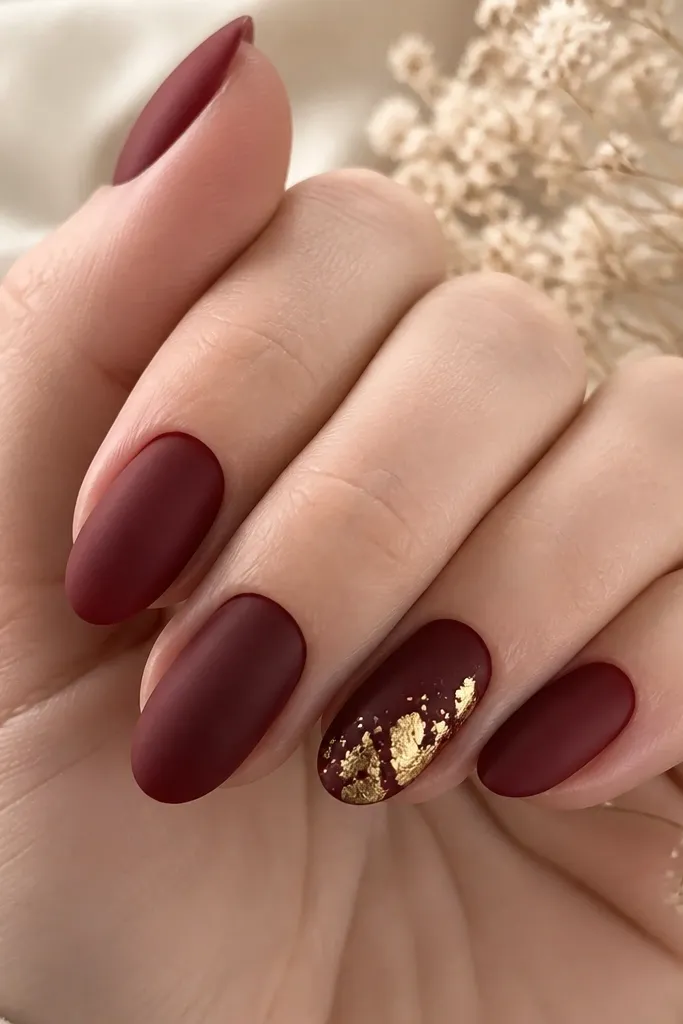
Gold leaf flecks feel cozy when the rest of the set is matte. It gives you that "candlelit detail" look without turning the whole manicure into glitter. I keep the gold irregular so it doesn't look like printed foil.
Do a matte oxblood base on all nails. On the accent, apply a thin tack layer (or leaf adhesive) and press small pieces of gold leaf into the lower half, leaving gaps. Seal with a matte top coat for the base, but use a glossy top over the leaf if you want stronger sparkle.
Editor's notePress leaf with a silicone tool instead of your fingers so you don't smear the adhesive.
Watch outAvoid stacking too many flecks - heavy foil makes it look like a craft project.
10. Cozy cable knit pattern in burgundy-on-burgundy
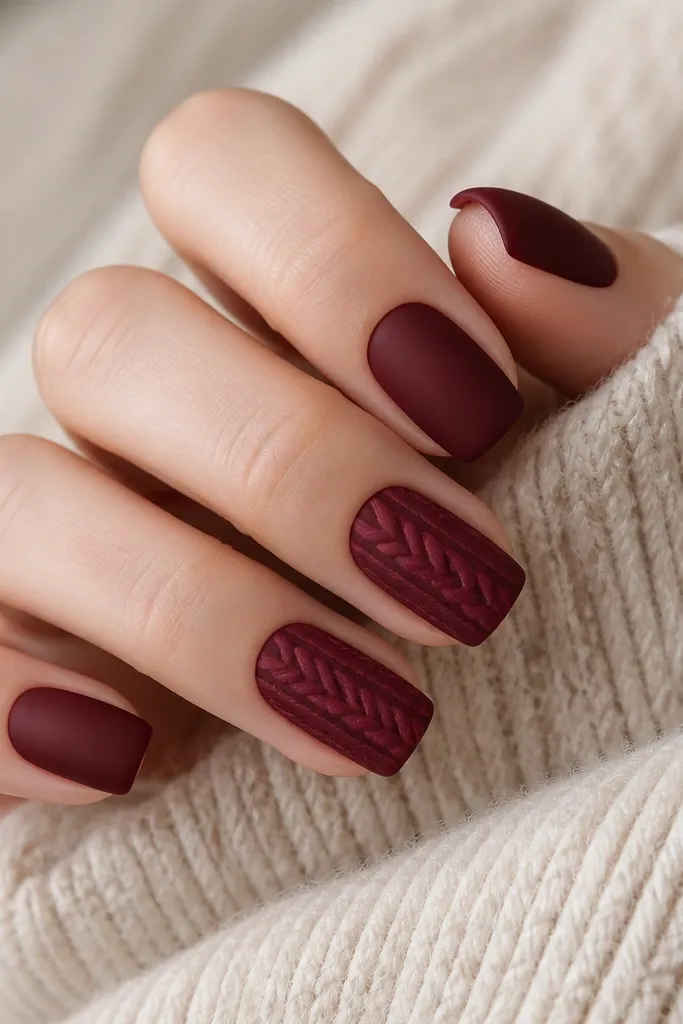
Cable knit art looks cozy because it mimics texture you already wear. Using a slightly lighter burgundy keeps it tonal, so it doesn't look like random lines. The pattern is bold but still subtle because it stays in the same family.
Paint the base deep burgundy and matte top it. Mix or choose a shade 1-2 steps lighter for the knit lines. Use a dotting tool to place mini intersections, then connect with a thin striping brush. Keep the cable section centered and about 60% of the nail length.
Editor's noteAdd a tiny layer of gel on the knit lines only if you want a raised look - just one thin coat so it doesn't bulk.
Watch outDon't spread the knit pattern across every nail; it gets busy fast.
11. Glossy deep burgundy with tiny black dot constellation
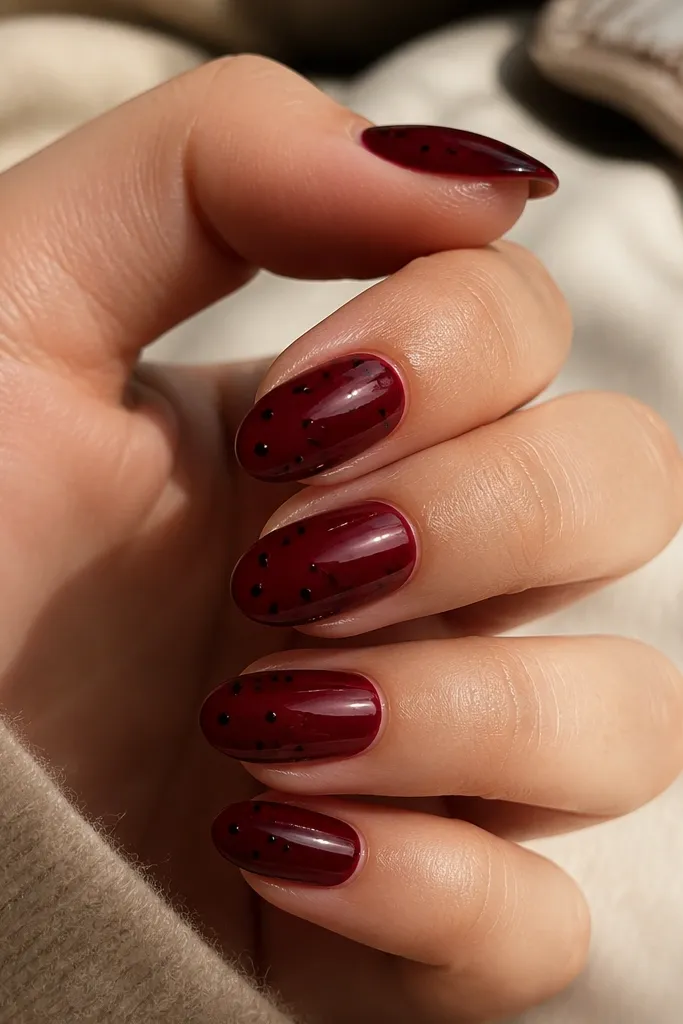
Tiny dots feel cozy because they're subtle and look like specks on dark fabric. The black dots keep the burgundy from reading too warm or too flat. This design is also forgiving - if one dot is off by a hair, it still looks intentional.
Apply a glossy deep burgundy base. With a dotting tool, place small black dots near the tip or along one side, leaving negative space between them. Vary dot size (one big, two medium, the rest tiny) so it doesn't look like stickers.
Editor's noteUse a nail map: mark dot positions lightly with a gel pen before you place pigment.
Watch outAvoid making dots the same size - uniform dots look like a stamp.
12. Berry jam jelly nails with a smoky top coat
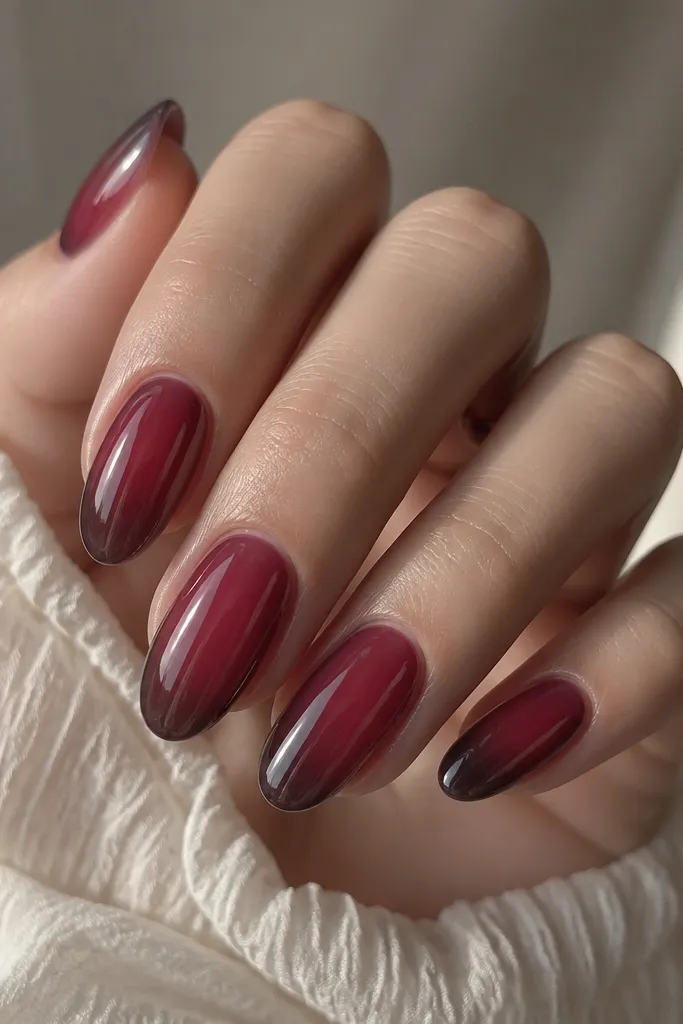
Jelly burgundy looks cozy because it's juicy and warm, like berry preserves. The smoky edges make it look dimensional and less flat than a solid red. This is the set I wear when I want deep color but with a softer, lighter feel.
Build a jelly layer: apply 2-3 thin coats of translucent berry burgundy, curing each time. After the last coat, add a very thin smoky haze at the sides and tip using a sponge and a smoky gray-burgundy gel. Finish with a slightly diffused top coat or satin top to keep the haze soft.
Editor's noteKeep jelly coats thin so your nail line doesn't disappear - you want that see-through center glow.
Watch outDon't overbuild opacity; opaque burgundy jelly stops looking cozy and starts looking heavy.
13. Deep burgundy plaid with thin negative-space lines
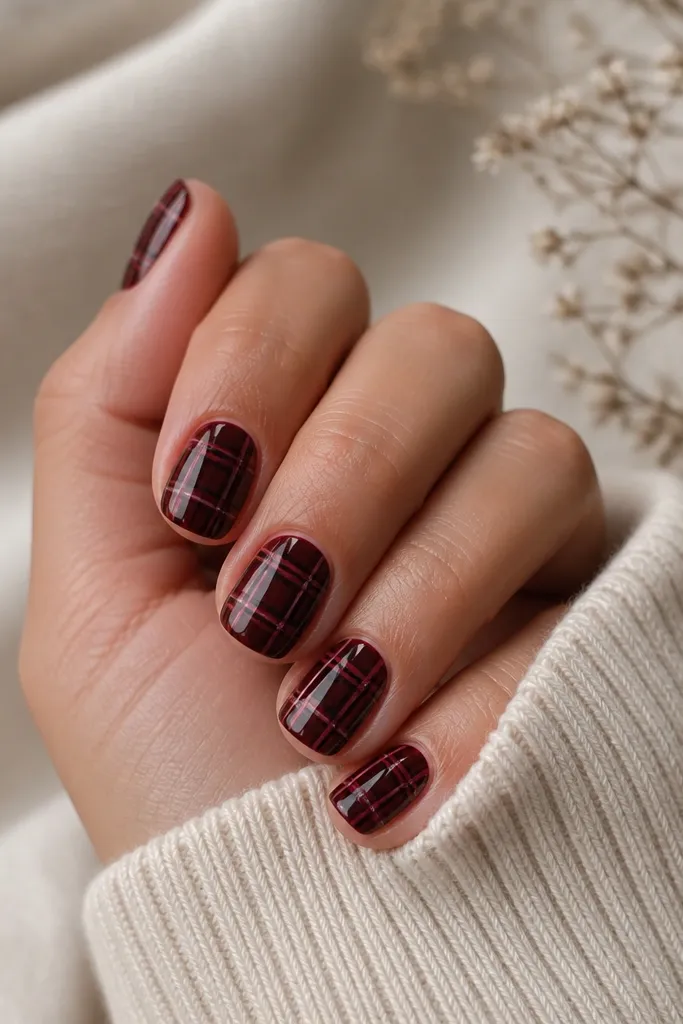
Plaid nails look cozy on sweaters because they mimic the pattern language of flannel. Negative-space lines keep plaid from turning into a thick, muddy block. I keep the plaid in burgundy-on-burgundy tones so it stays wearable and not like holiday wrapping paper.
Start with deep burgundy base. Add thin lines with striping tape: one set vertical, one set horizontal, leaving small gaps. Fill two intersections with a slightly lighter burgundy, then outline the grid with a darker wine for contrast. Seal with glossy top for crisp lines.
Editor's noteMeasure your grid with tape strips - eyeballing plaid makes it drift on shorter nails.
Watch outAvoid filling every section solid; fully filled plaid looks bulky and cheap.
14. Burgundy ombre to nude with glossy shine
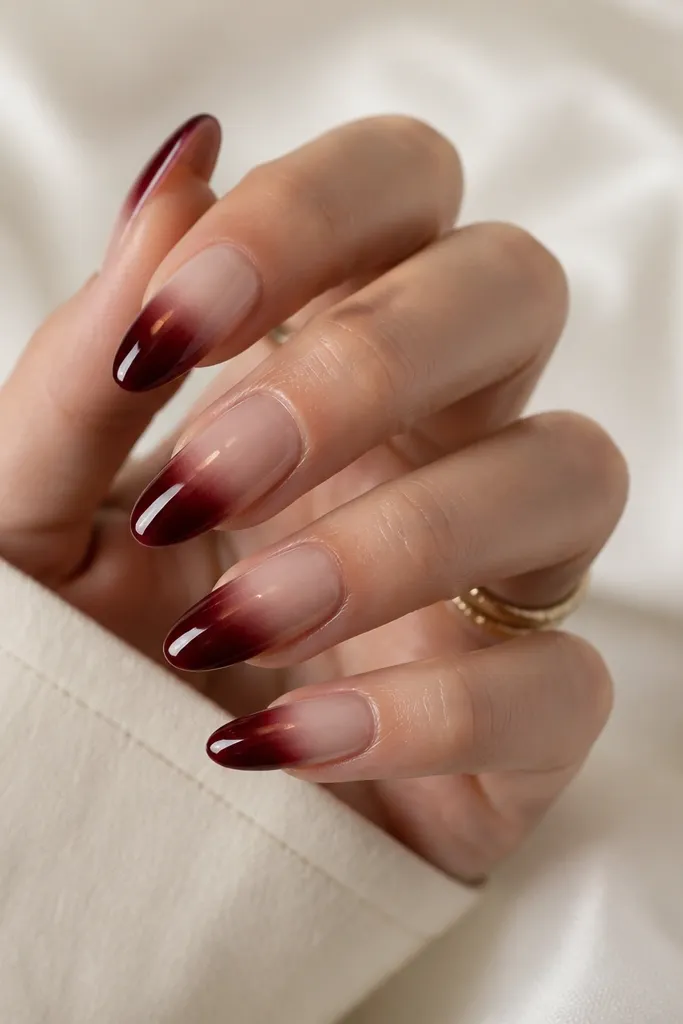
This one feels cozy because the nude base makes the deep burgundy breathe. Ombré also hides growth at the cuticle, which matters when you're wearing darker polish for weeks. Gloss keeps it looking fresh even as the edges grow out.
Use a sheer nude or milky nude base. Sponge deep burgundy gel from the tip upward in a gradient, blending until there's no hard line. Cure, then add a glossy top coat for a smooth, glassy finish.
Editor's noteBlend for 10-15 seconds per nail with a clean sponge for a smoother ombre edge.
Watch outDon't create a hard band at the midpoint; that band looks like a sticker.
15. Matte burgundy with glossy swirl tips (one-stroke look)
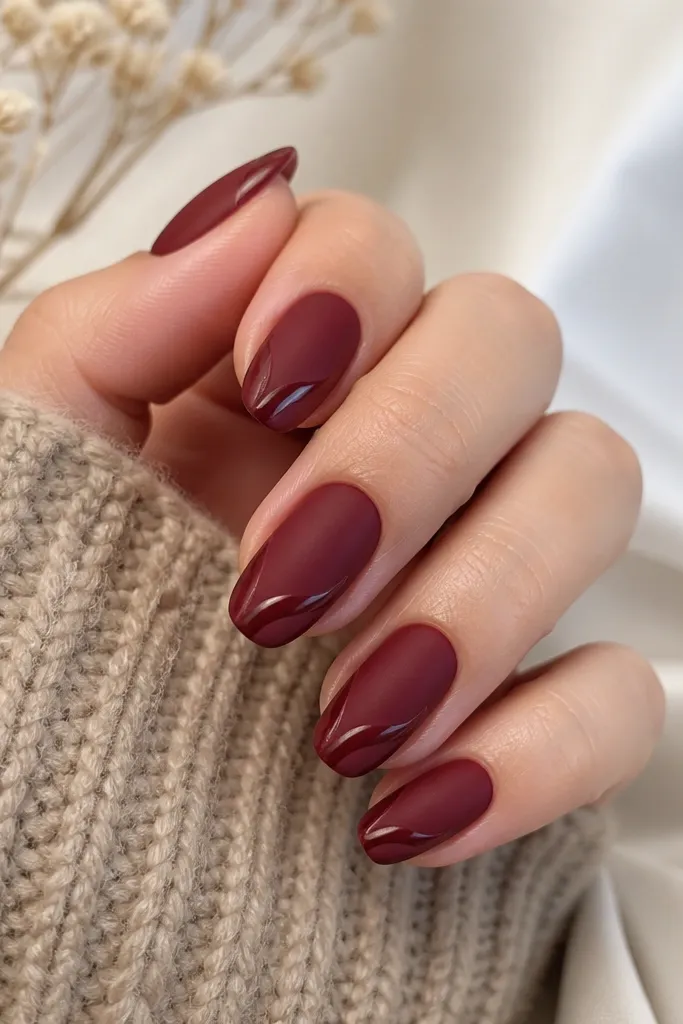
Swirl tips look cozy because they're fluid and soft - they read like hand-drawn ink on fabric. Keeping the swirl only on the tip keeps it delicate. Glossy gel over matte catches light in a way that feels warm, especially in indoor lighting.
Matte top coat your burgundy base. With a fine brush, pull a single continuous swirl from one corner of the tip to the other, staying within 2mm of the edge. Cure and then add a glossy top only over the swirl line.
Editor's notePractice the swirl on a scrap nail stick so your curve matches your nail width.
Watch outAvoid thick swirl lines; wide swirls look heavy and messy on short-to-medium nails.
16. Deep red burgundy glazed donut nails
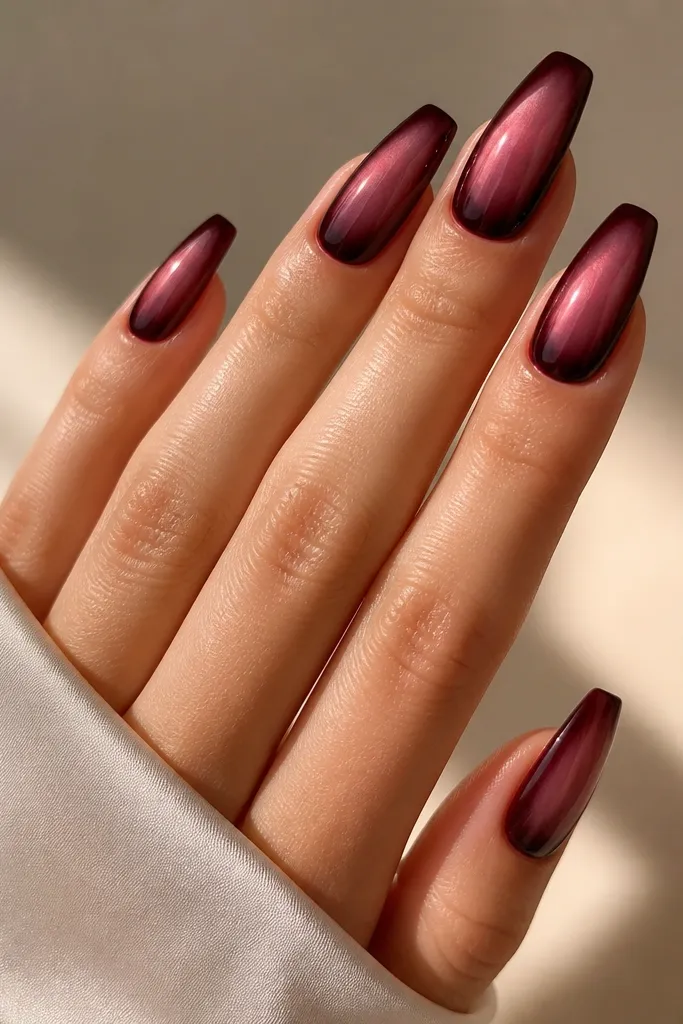
Glazed donut nails look cozy because they have that "soft highlight" effect instead of sharp glitter. The milky ring makes the burgundy look richer and more dimensional. It's a great option when you want something different but still classy for day-to-day.
Apply deep burgundy gel as the base. Add a thin milky pink gel ring across the middle of the nail, leaving space between the ring and the cuticle. Cure, then buff the surface lightly and apply a super glossy top coat for that rounded glaze shine.
Editor's noteKeep the ring centered and thin - like a donut hole outline, not a thick halo.
Watch outDon't make the ring too close to the cuticle; it can shorten your nail visually.
17. Micro-studs in burgundy gradients on two accent nails
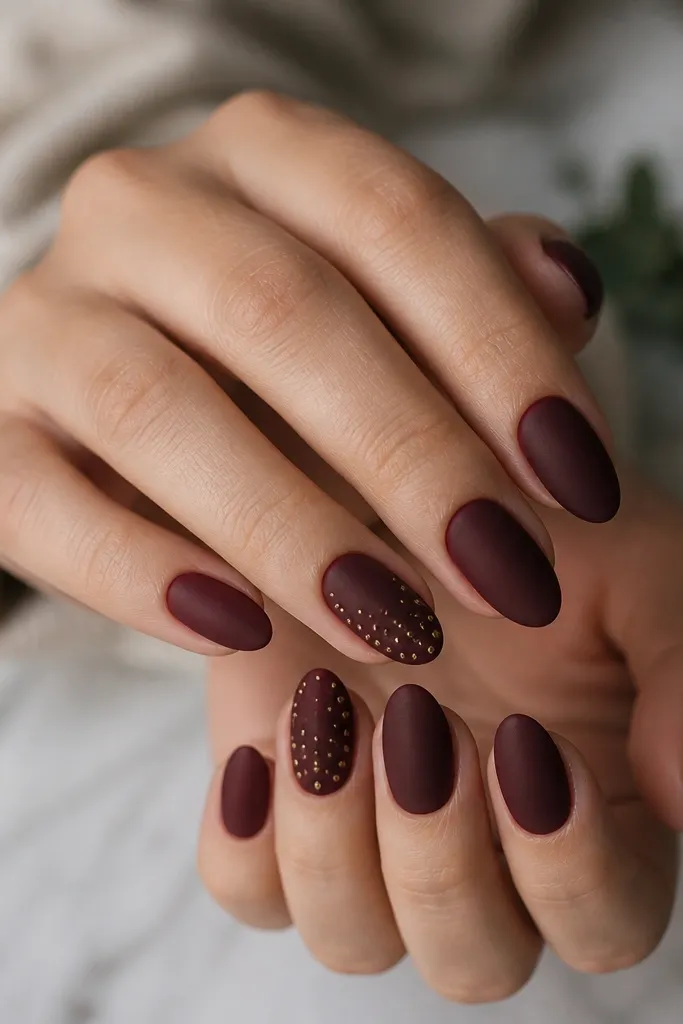
Studs feel cozy when they're tiny and spaced, not chunky rhinestones. The diagonal gradient gives movement and keeps the set from looking flat. I like warm-toned studs (champagne-gold) with burgundy because it reads like winter jewelry.
Matte top coat the base on all nails. On two accents, place micro-studs using a dot of clear gel or stud glue, starting near the tip and moving diagonally toward the center with decreasing number. Seal carefully with a thin clear top coat so the studs don't snag.
Editor's noteUse tweezers with straight tips and place studs one at a time so the row stays crisp.
Watch outAvoid sealing too thick over studs; it smears the edges and makes them look cloudy.
18. Burgundy cuticle frame with glossy inner border
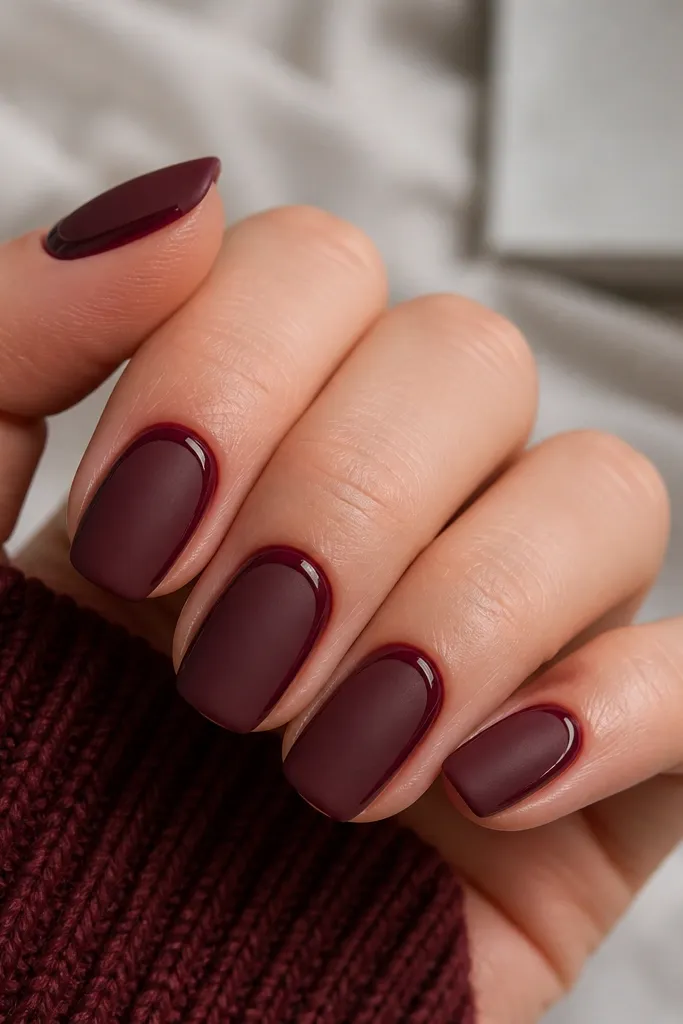
A cuticle frame makes your nail look dressed up without covering the whole plate. The glossy inner border adds a clean highlight that gives definition. It's a cozy look because it stays close to the cuticle, where your hand already shows movement and warmth.
Start with matte deep burgundy. Paint a glossy rounded-rectangle frame around the cuticle using a fine liner brush, keeping the frame width around 1.5mm. Add an inner line just 0.5mm inside the frame, then cure and top everything matte except the frame and inner line.
Editor's noteKeep the frame open at the center by a hair so it looks like a highlight, not a sticker.
Watch outAvoid dragging the liner too far down the nail; the frame should stay in the top third.
19. Deep burgundy floral sprig in negative space
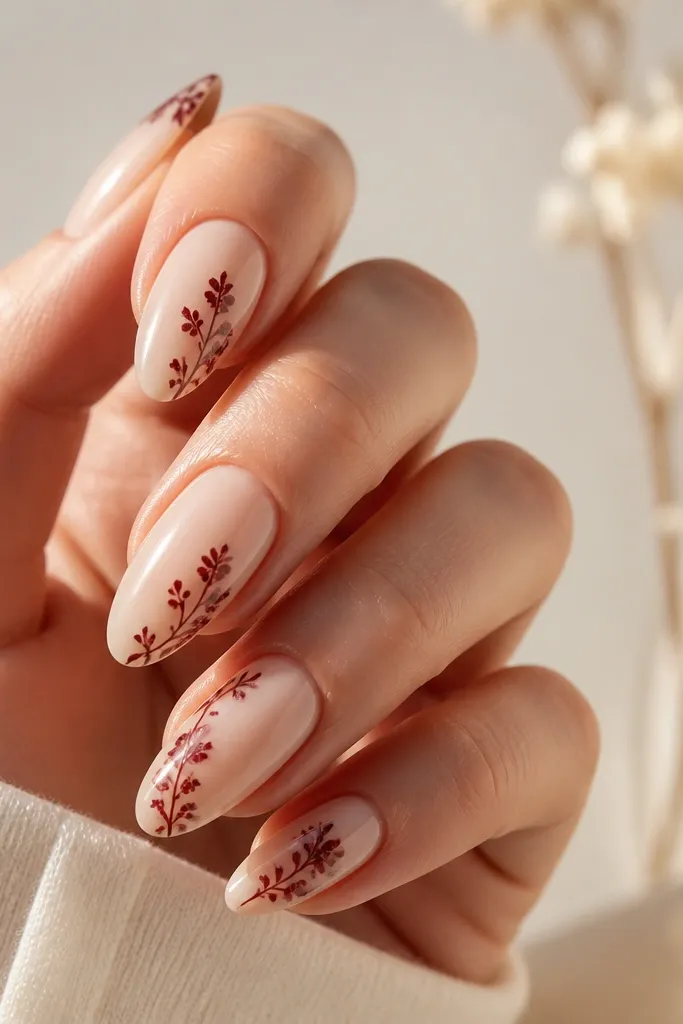
Floral sprigs look cozy because they're delicate and airy, even in dark color. Negative space keeps the design light, so it doesn't feel heavy with winter outfits. I use tiny petals and a thin stem for a "pressed flower" vibe.
Apply a sheer nude base and cure. With a fine brush, paint a thin stem along one side of the nail, then add 3-5 tiny petal shapes near the middle and near the tip. Leave the center of the nail clear so the burgundy sprig reads intentional. Finish with glossy top for a clean, pressed look.
Editor's noteUse a small dotting tool to place petal centers first, then paint the petal outlines around them.
Watch outAvoid large, fully filled flowers; big florals in deep burgundy can look like a mural.
20. Burgundy "cocoa dust" matte with glossy center line
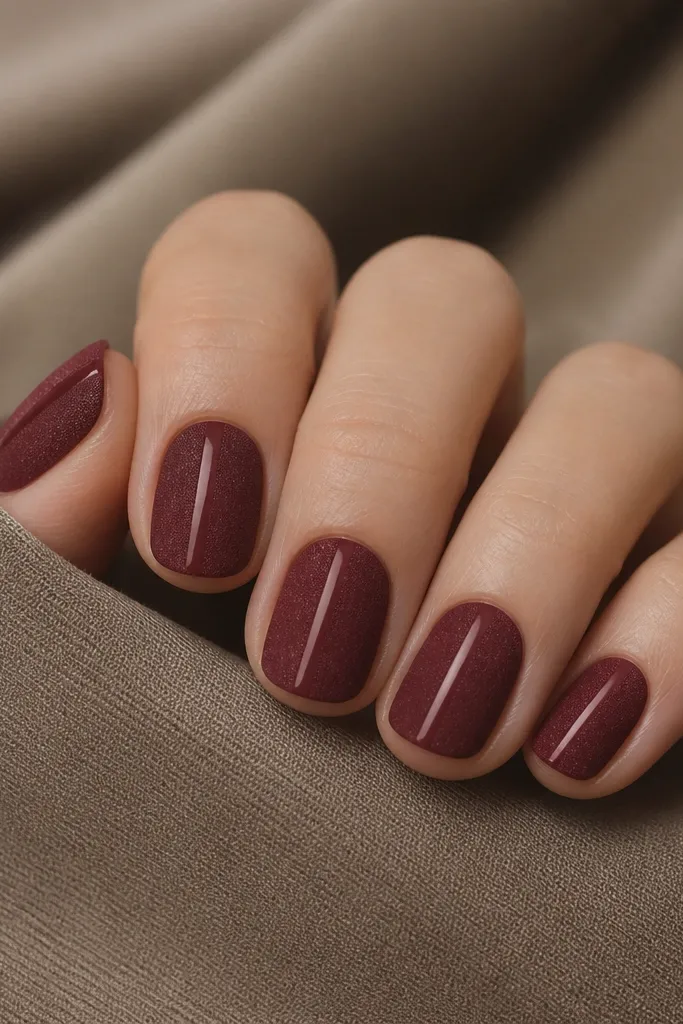
Cocoa dust texture makes deep red burgundy feel like sweater fabric. The glossy center line adds a clean vertical highlight that flatters the nail and makes your hands look longer. This is a simple set that still looks designed.
Use deep burgundy gel, then top with a matte top coat that dries velvety. For the center line, apply a thin strip of glossy burgundy or wine chrome down the middle, cure, then seal with matte around it. Keep the line width around 0.8-1mm.
Editor's noteIf your matte top looks too flat, dust a tiny amount of cocoa-toned velour powder just on the nail surface before curing.
Watch outAvoid thick center lines; they overpower the velvety finish.