1. Merlot glass nails with one gold kiss
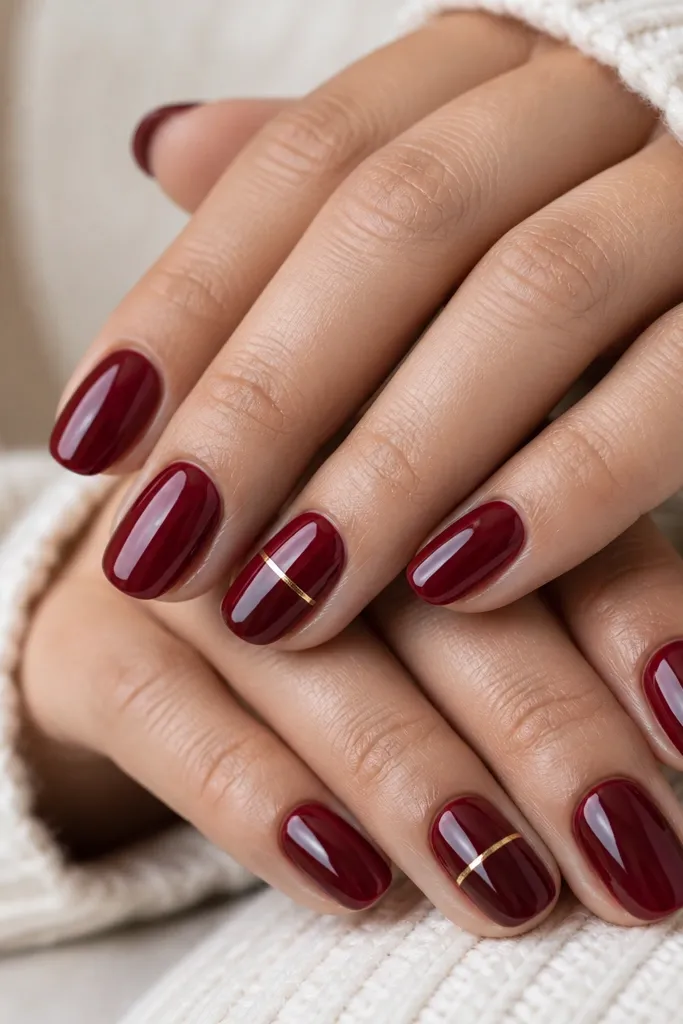
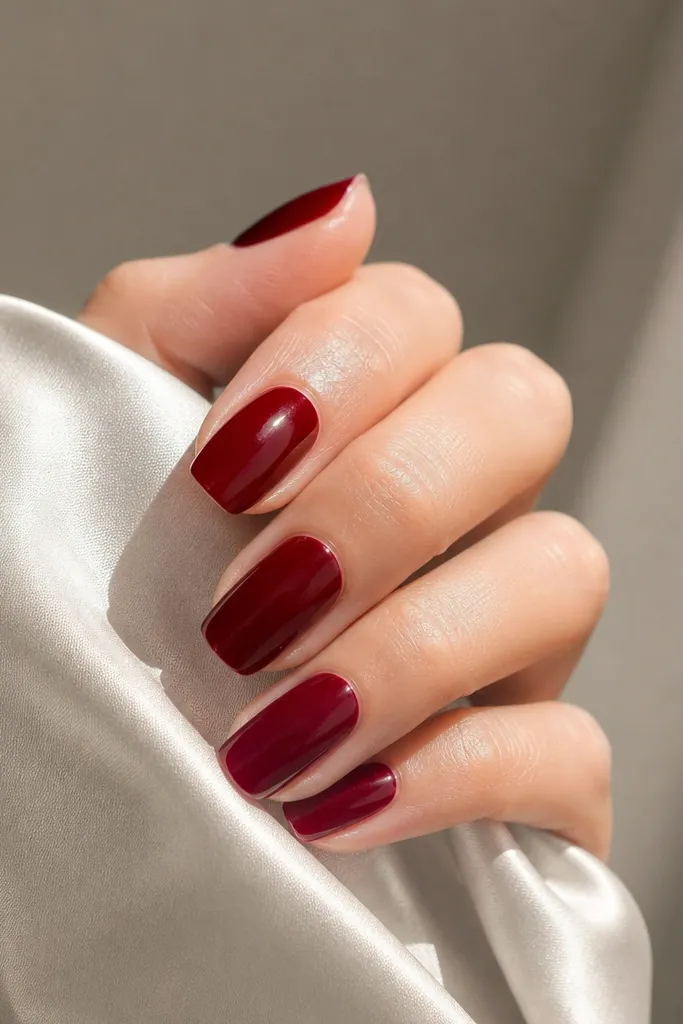
This is the most wearable way to make deep red christmas nails all year feel festive. The base is a clean, warm merlot with a glassy top coat so it reads rich, not dull. The gold line acts like a holiday ornament without needing glitter or full coverage. It looks sharp on photos because the line stays crisp against the red.
Use a medium almond or short coffin shape. Paint all nails merlot gel, then add a single 1 mm gold foil strip on the ring finger and pinky - keep it centered. If your gold polish is thick, paint a thin gold stripe with a striping brush instead of dragging foil.
Editor's noteCap the gold line by brushing a thin layer of top coat over it and sealing the sides so it doesn't catch on fabric.
Watch outDon't make the gold stripe wider than 1.5 mm or it starts looking like a random accent tape.
2. Oxblood matte with glossy red ribbon center
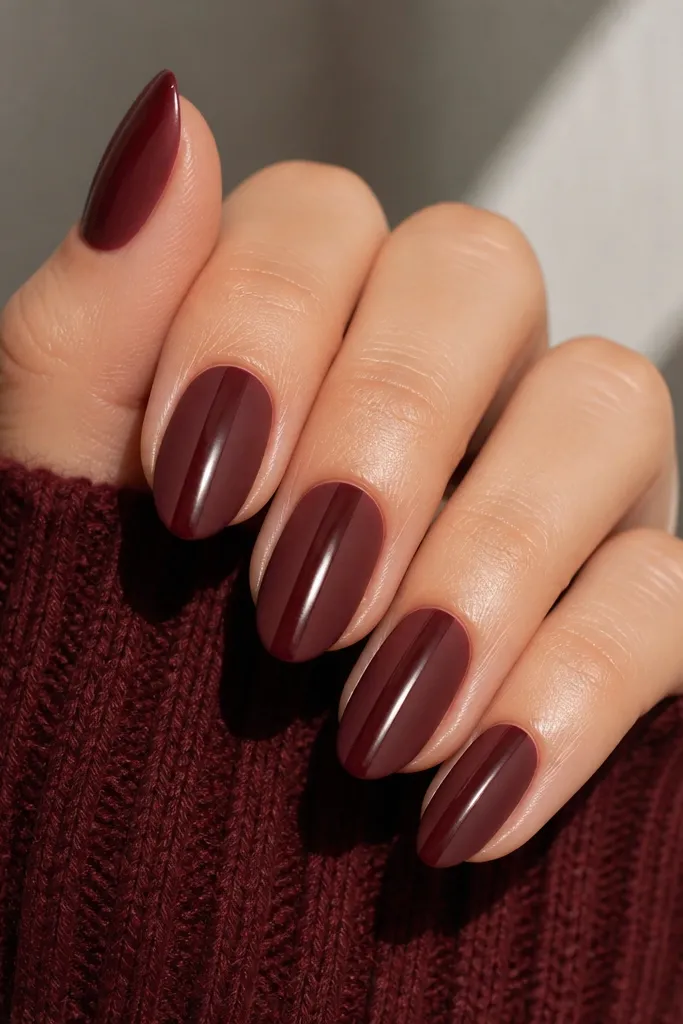
Matte oxblood feels cozy and wintery even when the design is minimal. The glossy vertical ribbon breaks up the flat matte so the nails don't look heavy. It also flatters every skin tone because the contrast makes the red look intentional. This one is my go-to for weeks when I want "festive" but not sparkly.
Do full matte top coat on all nails except the center strip. After curing, paint a thin glossy strip down the middle using gel polish and cure again, then finish with a glossy top coat only over that strip. This works best on short almond so the ribbon doesn't look too long.
Editor's noteUse a striping brush and press lightly so you get a straight line without flooding the cuticle.
Watch outAvoid skipping the second cure after the glossy strip - uncured gel smears the matte finish.
3. Deep cherry with micro-sparkle halo tips
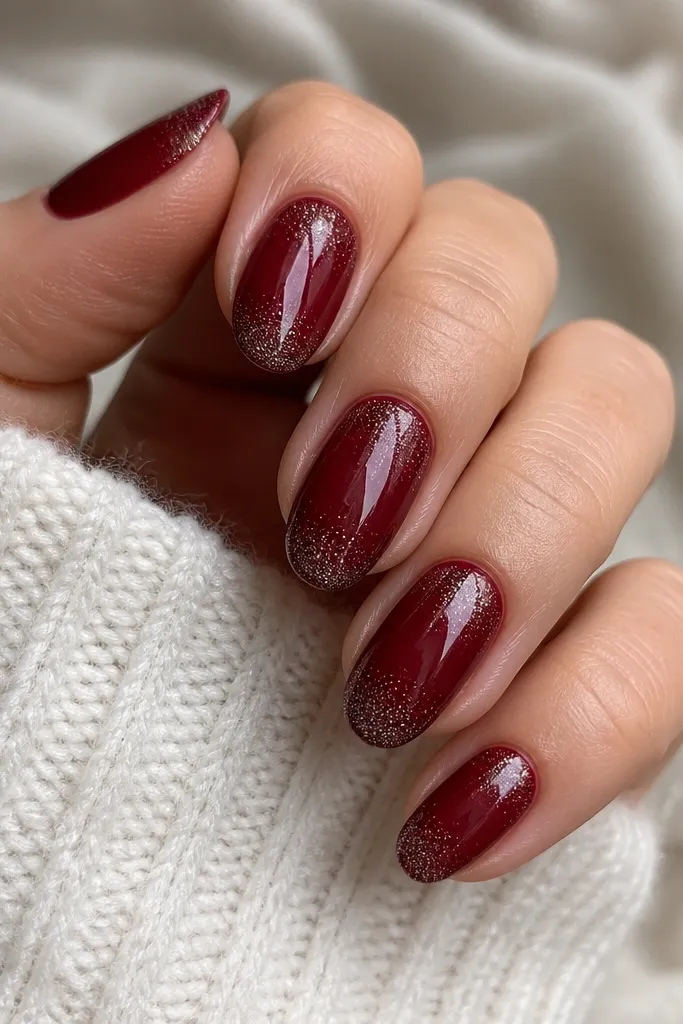
Micro-sparkle halo tips give "holiday lights" without the chunkiness of glitter. The base stays solid deep red, so the nails look clean and wearable. The sparkle is concentrated near the free edge, which reads festive while still growing out nicely. Silver micro-shimmer also looks brighter in indoor lighting than gold.
Paint a deep cherry base. Add a sheer glitter gel to the top 2-3 mm of the nail, then use a dry brush to feather the edge so it fades. Cure, then seal with a thick glossy top coat to smooth any texture.
Editor's noteFeather with a nearly dry brush - if you see glitter halfway down the nail, you've gone too far.
Watch outDon't use chunky glitter on tips; it catches on sleeves and chips first.
4. Berry red French with a thin gold smile
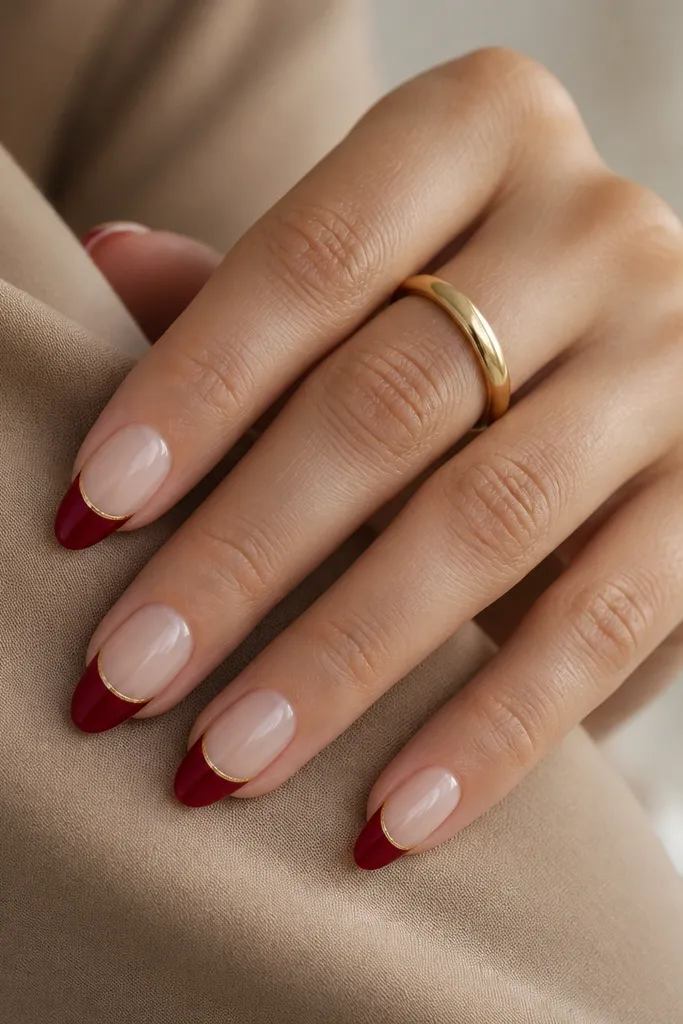
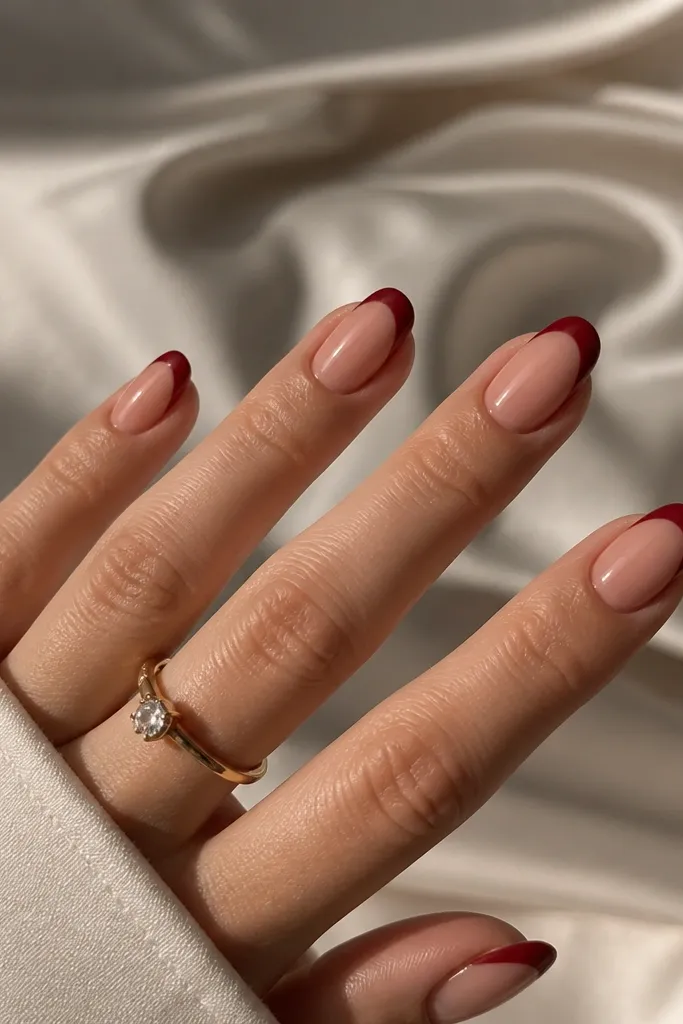
This design feels Christmas-y because of the red tip, but it stays year-round because it's basically a French manicure. The thin gold line makes it look polished, like jewelry. I like berry red here because it's warm and flattering even when the rest of the nail is nude. It grows out well since the nude base hides regrowth.
Use a nude base or sheer pink gel. Paint a neat French tip in berry red, about 2 mm wide on short nails and 3 mm on medium almond. Add a 0.5-1 mm gold line at the border and cure flat so it doesn't thicken.
Editor's noteMark the tip width with a guide dot using a dotting tool so both hands match.
Watch outDon't make the gold line too close to the cuticle - it looks messy in regrowth.
5. Deep red swirl ornaments on two accent nails
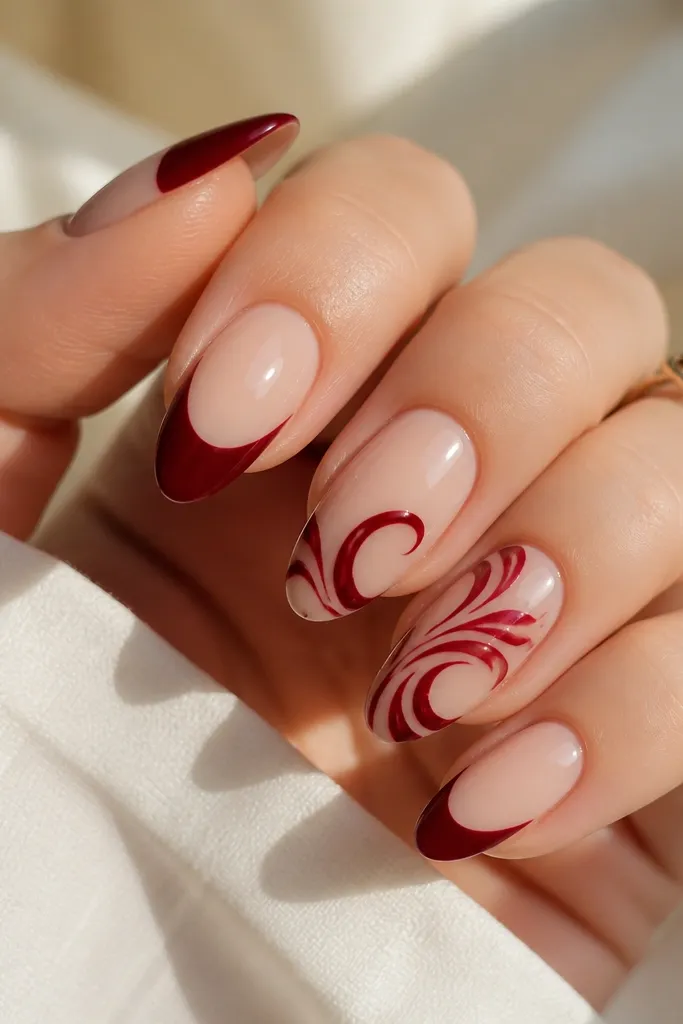
Swirl ornaments look like delicate holiday decor, but keeping it to two nails keeps it wearable. White lines on deep red read crisp, not icy, and the small gold dots give that twinkle without glitter. This is the design I wear when I want holiday vibes but I don't want to explain my nails at work.
Paint all nails deep red. On two nails per hand, add a thin white gel swirl using a liner brush. Finish with 2-3 tiny gold dots placed where the swirl turns, then top coat everything glossy.
Editor's noteIf your white gel looks streaky, thin it slightly with gel medium so the line stays smooth.
Watch outAvoid covering the whole accent nail with swirls; negative space is what keeps it elegant.
6. Oxblood half-moon with tiny star studs
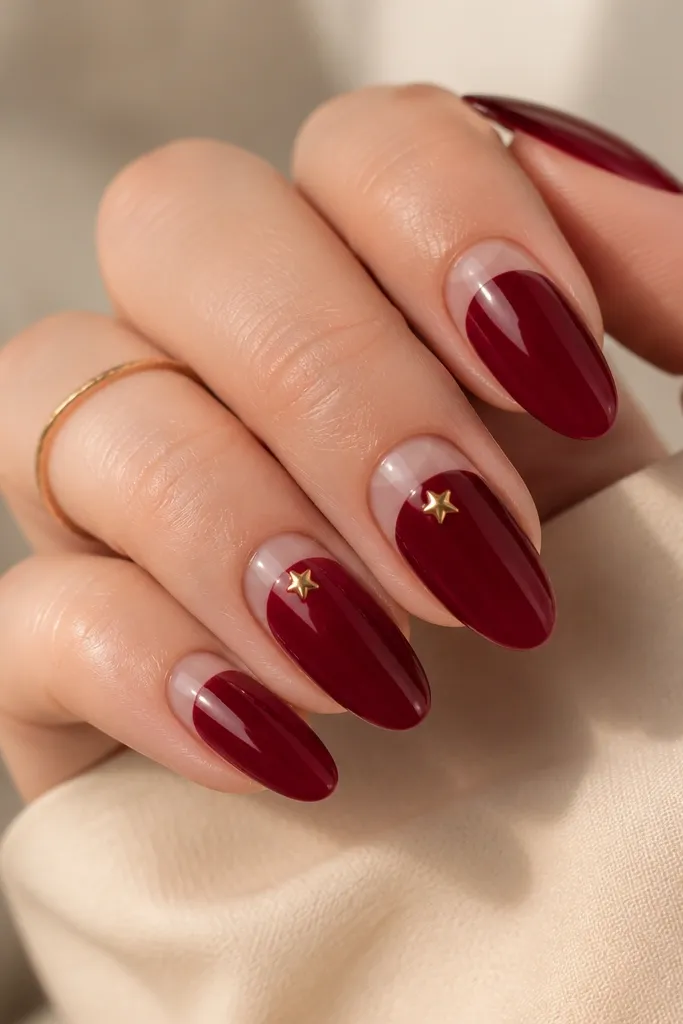
The half-moon cutout makes deep red feel modern and clean. Tiny star studs give a holiday wink without turning into full rhinestone chaos. The nude base also helps the red look less heavy, especially on shorter nails. I've worn this for holiday events and then kept it for everyday because it doesn't look like a themed set.
Use a nude base or bare nail area with a half-moon guide sticker. Paint oxblood over the rest of the nail, cure, remove the guide, then place two small silver stars centered on the half-moon. Seal with top coat around the studs so they don't snag.
Editor's notePress studs on with a silicone tool and cure again so they lock in.
Watch outSkip big studs - large stones make the half-moon look like costume jewelry.
7. Velvet effect deep red with gold micro-line edges
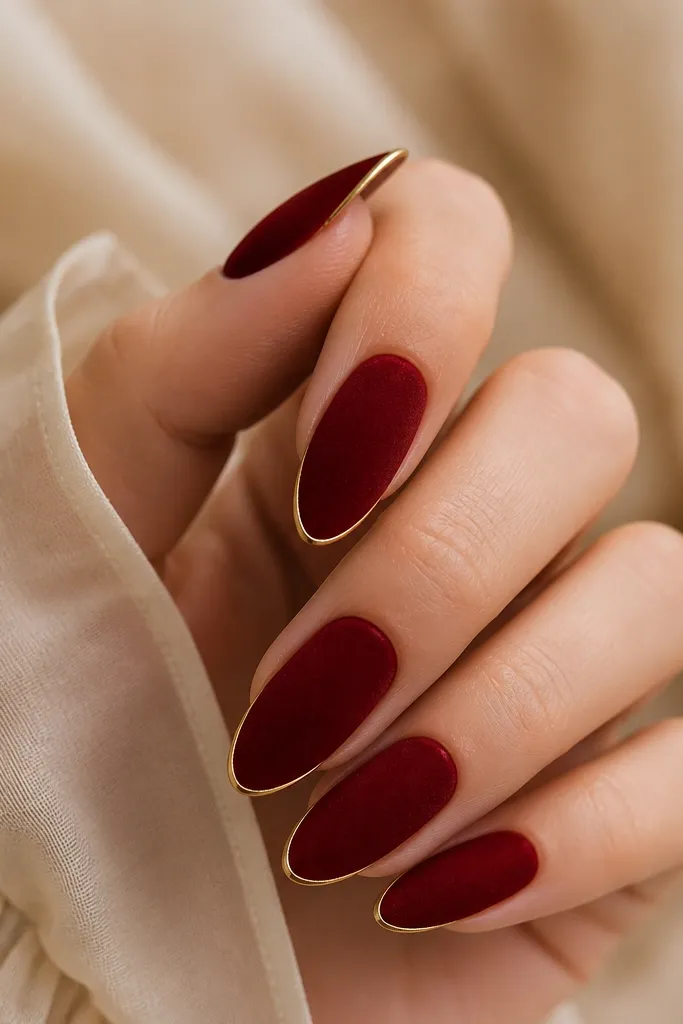
Velvet effect makes deep red feel soft and wintery, like crushed velvet curtains. The gold micro-line edges add a subtle frame so the nails look finished even when you don't have time for full art. This one reads festive because of the texture, not because of big designs. It's also forgiving as it grows out since there's no pattern that needs alignment.
Apply velvet powder or velvet-finish gel over deep red, then cure and avoid wiping the surface too hard. Use a striping brush to paint a 0.5 mm gold line along each side near the tip - keep it symmetrical. Finish with a top coat that won't kill the velvet (some velvet systems need a specific top).
Editor's noteDo the gold lines after velvet - the powder makes it grip and reduces smudging.
Watch outDon't use a glossy top coat over velvet unless your product instructions say it's safe.
8. Classic deep red glitter fade on the ring finger
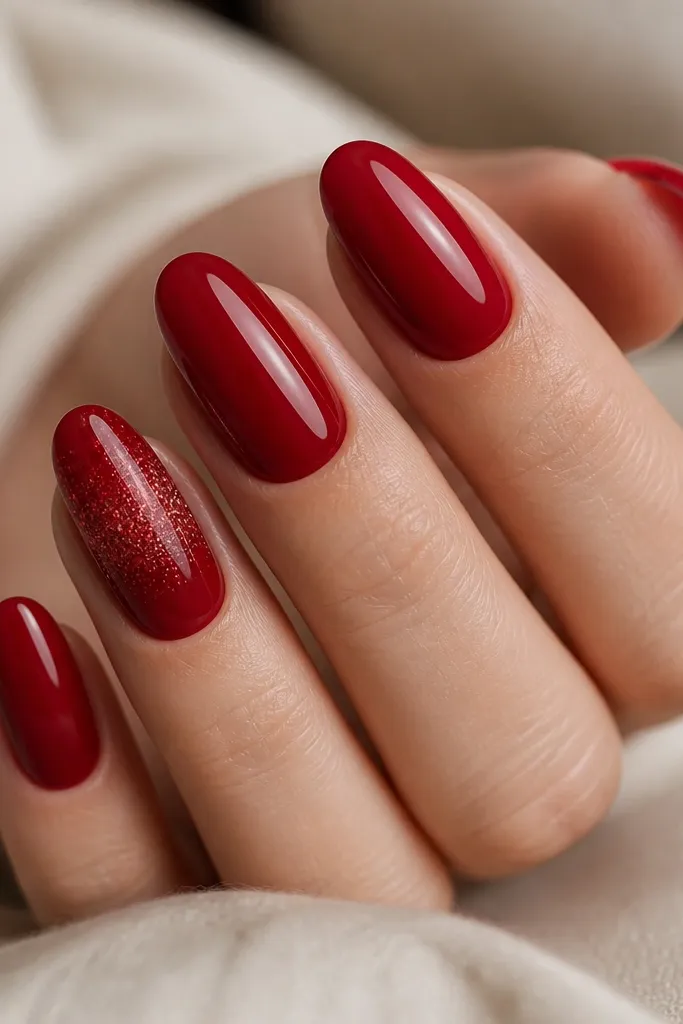
This design is a cheat code for "Christmas but all year." Red glitter fade matches the base color, so it doesn't scream holiday. The fade looks smooth and expensive compared to speckled glitter. It also grows out better because the glitter starts at the tip, where chips are less noticeable.
Paint all nails deep red glossy. On the ring finger, apply a sheer red glitter gel at the tip and feather upward with a sponge brush. Cure, then top coat over the glitter to flatten texture. Repeat on both hands for balance.
Editor's noteFeather with a makeup sponge dab - it gives that smooth gradient faster than a brush.
Watch outAvoid overloading glitter too far down the nail; it can look like a stain.
9. Deep red plaid on two nails with tiny gold dots
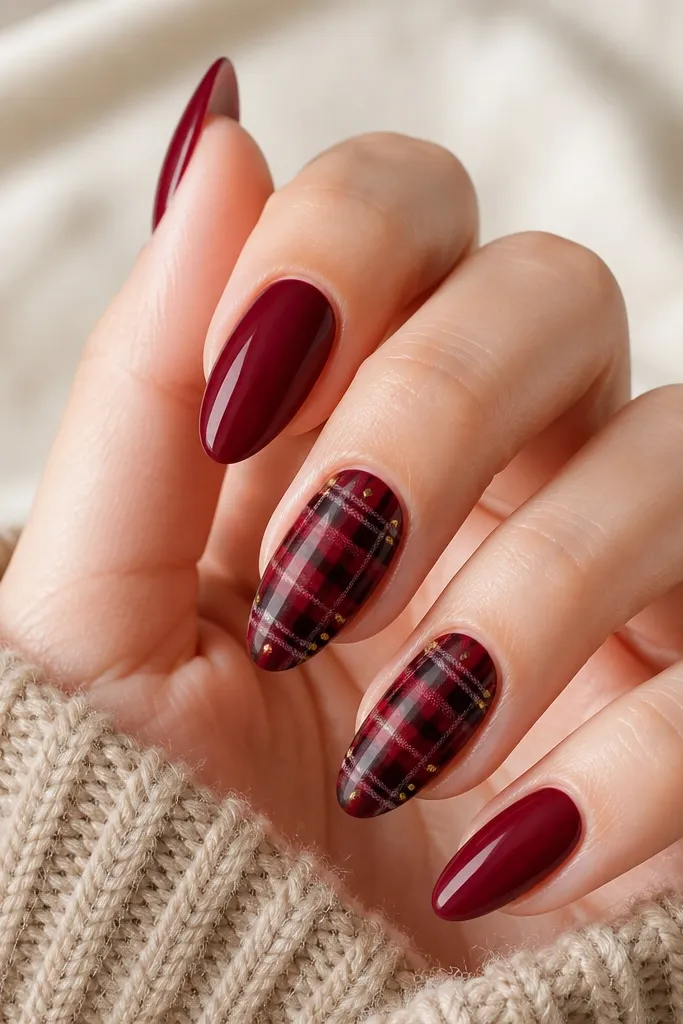
Plaid reads winter immediately, but keeping it on two nails keeps it wearable. The key is thin lines: thick plaid looks like craft paint. Black lines make the deep red look richer, while pale gold dots add that "holiday ornament" sparkle. It's festive without needing snowflakes.
Paint all nails deep red glossy. On two nails per hand, draw a horizontal pale gold line, then add black lines crossing at even spacing using a liner brush. Add two or three pale gold dots at intersections, then top coat glossy.
Editor's noteLet each line cure briefly before the next so you don't smear through the pattern.
Watch outDon't use silver for plaid lines - it can look icy and make the red look less warm.
10. Deep red chrome tips with mirror center
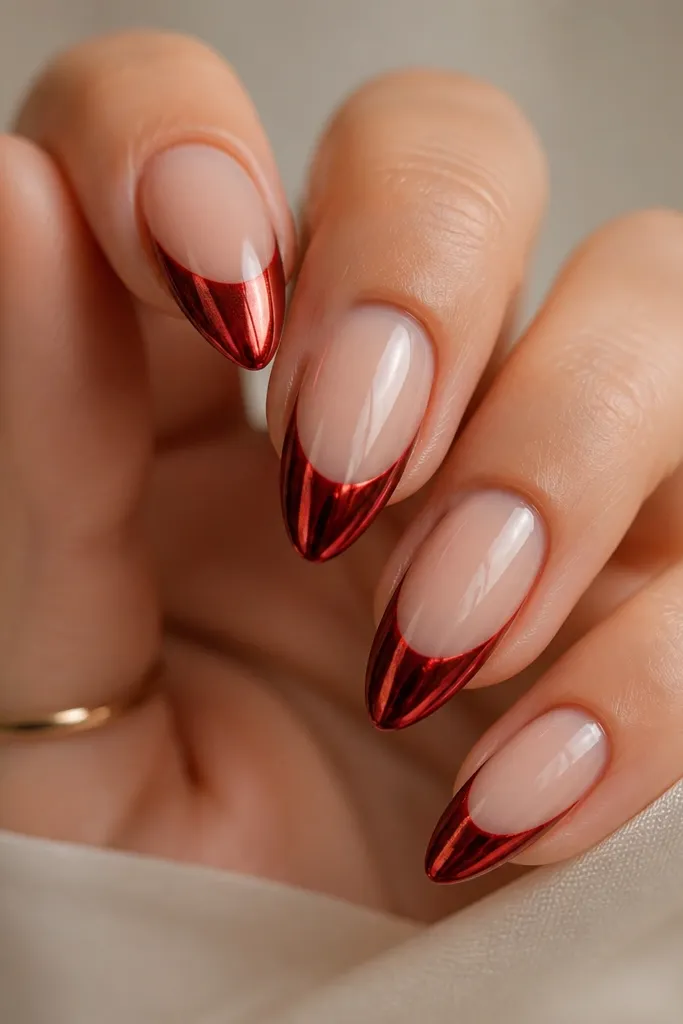
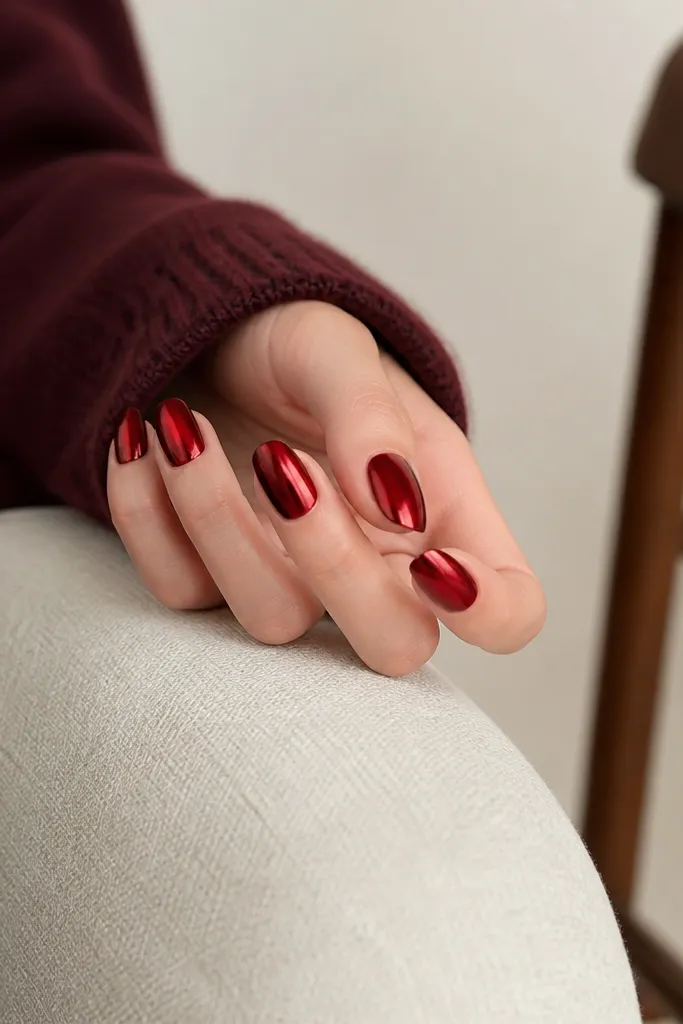
Chrome turns deep red into something party-ready instantly. The trick here is placement: a center chrome band plus a thin tip outline keeps it from looking like a full chrome accident. The chrome reflects light, so it looks festive in motion even with minimal design. It also photographs beautifully because the reflections are sharp.
Paint deep red base and cure. Apply chrome powder or chrome gel to a 2-3 mm band across the center (not the tip), then rub off excess and seal. Add a thin chrome line at the free edge, cure, then top coat carefully (some chromes need a matte-free top).
Editor's noteUse a lint-free wipe and keep chrome off the cuticle for a clean mirror edge.
Watch outAvoid thick chrome layers - they look dull and can peel.
11. Snowflake stamp on deep red with clear negative space
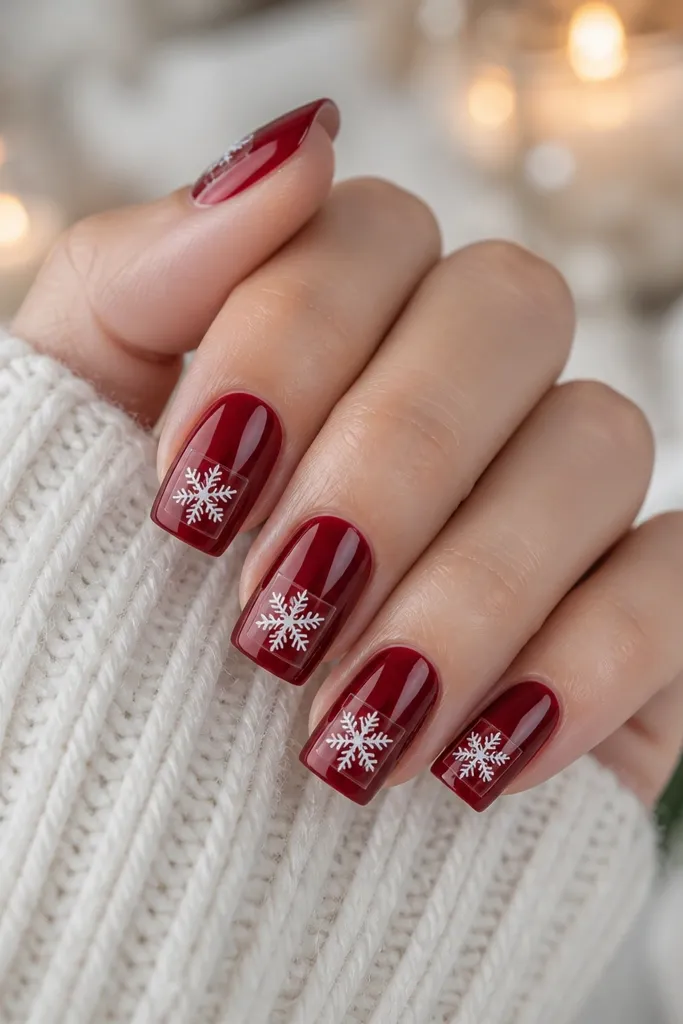
This is the cleanest way I've found to do snowflakes without making your whole set look seasonal. The negative space panel keeps the art crisp and gives the snowflake a frame. White stamping contrasts hard with deep red, so it reads like winter glass. It still feels "Christmas" because the snowflake is the cue, not because of extra glitter.
Paint deep red base. Apply a clear gel patch near the tip (or use a small clear nail sticker) and cure. Stamp snowflakes in white gel polish, then place inside the clear patch and seal with top coat.
Editor's noteUse a stamping plate with smaller snowflakes; big ones fill the nail and look cartoonish.
Watch outSkip thick stamp gel - it smears and makes the snowflake look fuzzy.
12. Deep red ombre with smoky gray shadow at the base
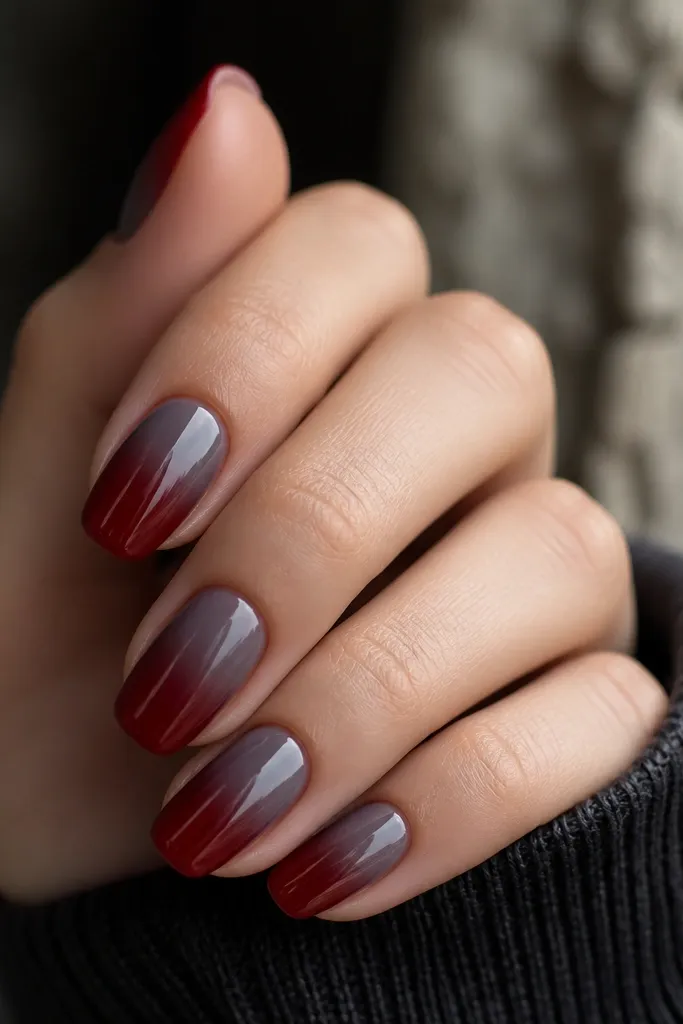
This one makes deep red feel like night, not just holiday. The smoky gray at the base softens the red and adds depth, so it looks cool and not too sweet. Ombré is also forgiving as nails grow out because the gradient hides the regrowth line. It's a great choice if you want deep red christmas nails all year but you hate obvious seasonal icons.
Start with a deep red gel at the tip. Use a sponge to blend down into a gray gel at the cuticle, keeping the center transition smooth. Cure, then add a glossy top coat to unify the finish.
Editor's noteBlend in small dabs - wiping back and forth makes the ombre streaky.
Watch outDon't bring gray too high on short nails; it can make the whole nail look dirty.
13. Deep red aura nails with thin silver ring
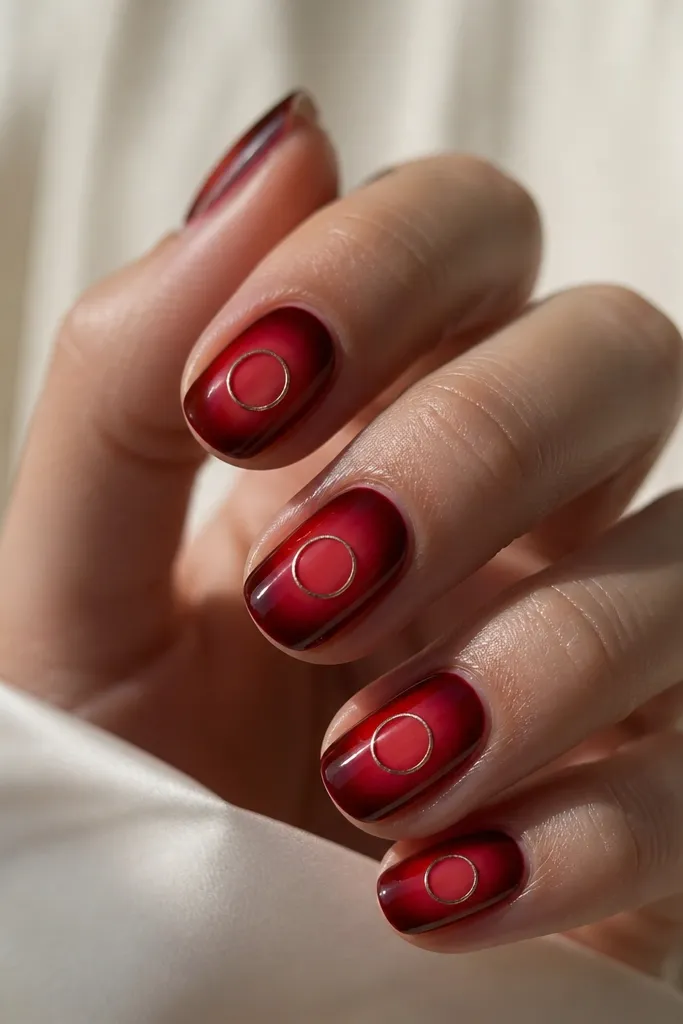
Aura nails give that candlelight glow feeling, which works year-round even when the base is Christmas-red. The lighter red halo keeps it warm instead of harsh. A thin silver ring adds a "holiday light" effect without glitter. This looks best on medium almond where the aura can sit centered.
Paint deep red base. With a sponge, dab a slightly lighter red (or burgundy mixed with a clear gel) in the center and feather outward. Add a thin silver circle around it using a nail art pen, then top coat glossy.
Editor's noteKeep the silver ring hair-thin so it stays chic, not like a sticker.
Watch outAvoid thick aura blobs; they look like a stain rather than a glow.
14. Burgundy glossy with micro heart tips
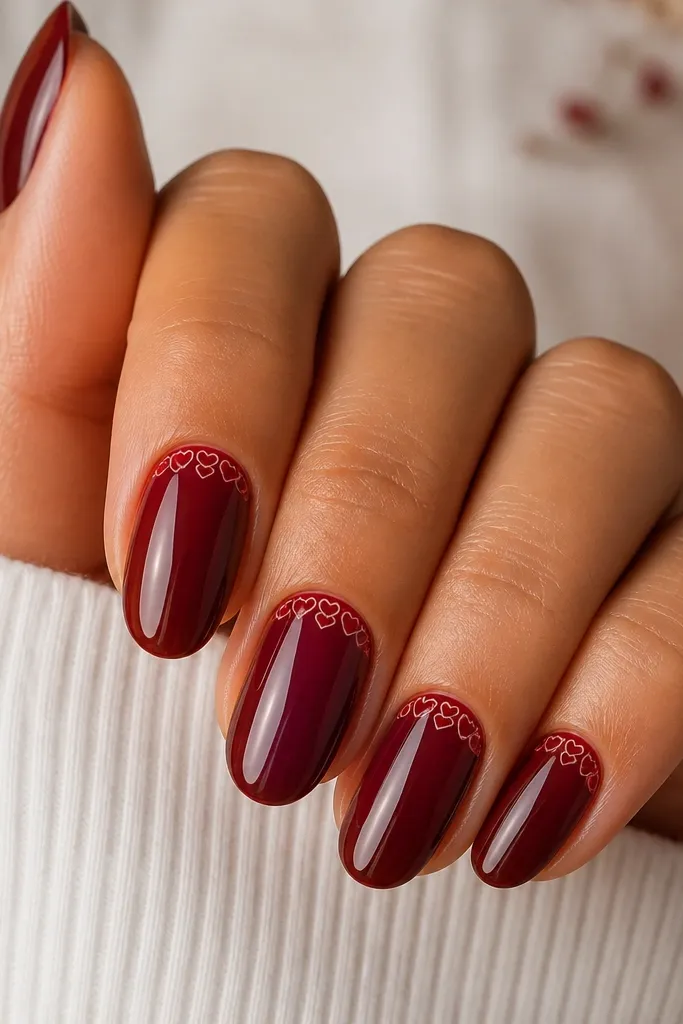
Hearts feel sweet, but micro hearts on deep red read more "romantic winter" than "Valentine." The white outline makes the hearts crisp and prevents them from blending into the background. This design is festive in December and still cute later when you're not thinking about snow. It also looks great on short nails where bigger art can feel crowded.
Use a burgundy glossy base. Add a thin white line at the tip as a guide, then dot tiny heart shapes in red gel on top. If you're stamping, use a small heart plate and position hearts in a line across the tip. Seal with top coat.
Editor's noteUse a dotting tool with a consistent tip size so heart shapes match across nails.
Watch outDon't do hearts all the way down the nail - it gets busy fast.
15. Deep red swirl French tips with white corner dots
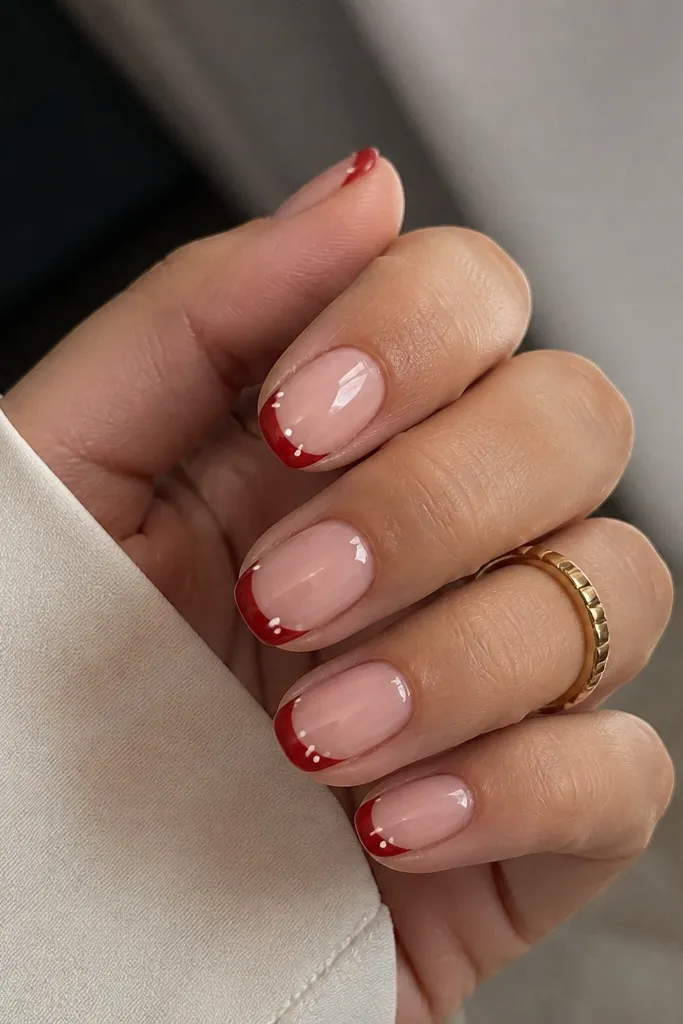
This is a French manicure that looks handmade because the tip edge has a swirl curve. The white corner dots act like tiny snow nuggets, but they're small enough to look clean in summer too. Deep red stays the star; the nude base keeps it light. It's also forgiving because the tip edge can be slightly uneven and still look intentional.
Paint nude base, then create deep red swirl tips using a French stencil if you're new. Add two micro white dots near each side of the tip edge on the ring finger and index finger for variety, then top coat.
Editor's noteIf your swirl tip looks wobbly, make the line slightly thicker - it reads as design, not error.
Watch outAvoid a super thin red tip on nude base; it chips and looks patchy.
16. Oxblood and rose gold half-split nails
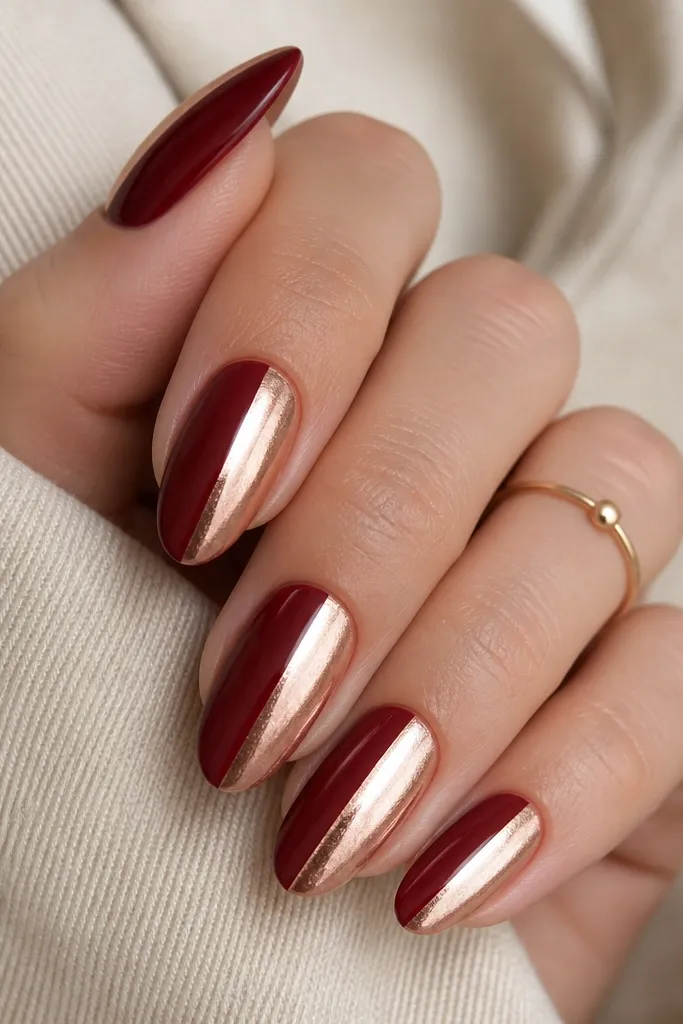
Half-split nails look modern and they make deep red feel like jewelry instead of holiday paint. Rose gold foil warms the whole set and keeps it from looking too harsh. The straight split line is what makes it look expensive. This design is also easy to repeat once you nail the straight center line.
Paint half the nail oxblood, cure. Apply rose gold foil gel to the other half, then place foil and press until it transfers. Use a striping brush to clean the center line if needed. Seal with a glossy top coat, and keep the split consistent across all nails.
Editor's noteUse striping tape as a guide for the center line - peel it off while gel is still slightly tacky.
Watch outDon't blend the two colors together; the sharp split is the point.
17. Deep red velvet snow cap on tips
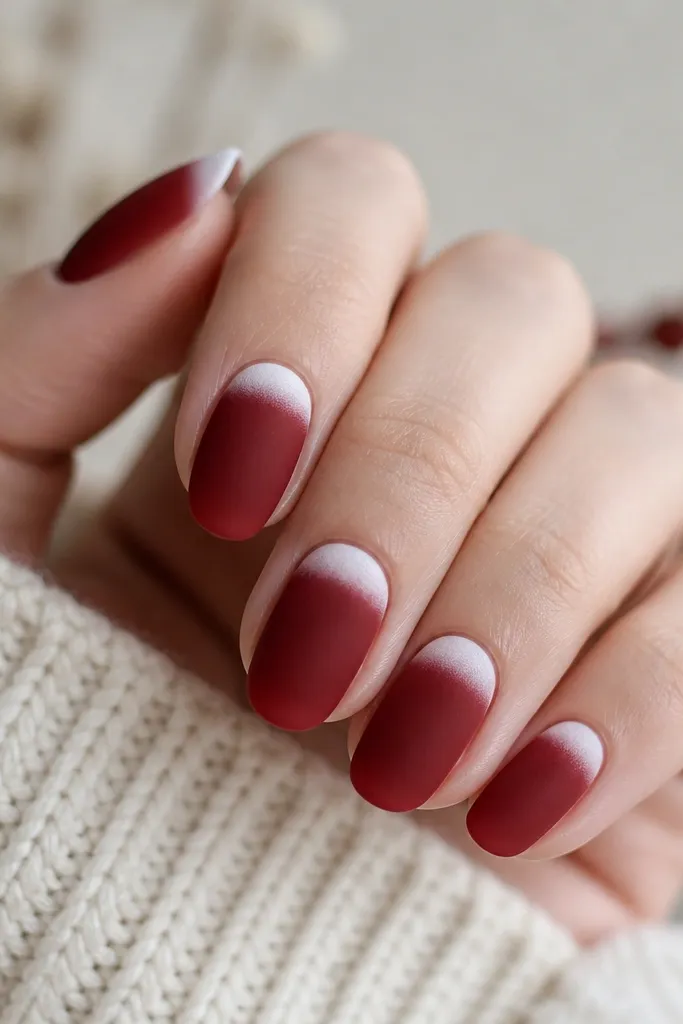
Snow cap tips feel wintery but the design stays subtle because it's limited to the free edge. The velvet finish makes the red look richer, and the pale white fade looks like cold air rather than chunky snow. This gives you that Christmas feeling without glitter everywhere. It's also a nice option if you like matte nails year-round.
Start with deep red velvet powder or velvet gel. Add icy white gel to the tip in a curved "cap," then blend the edge with a clean brush so it fades. Cure and seal with a velvet-safe top coat.
Editor's noteUse a silicone tool to lift the snow cap edge - it helps create a smooth fade.
Watch outAvoid pure bright white with no fade; it looks like nail polish accident.
18. Burgundy micro French with negative space at cuticle
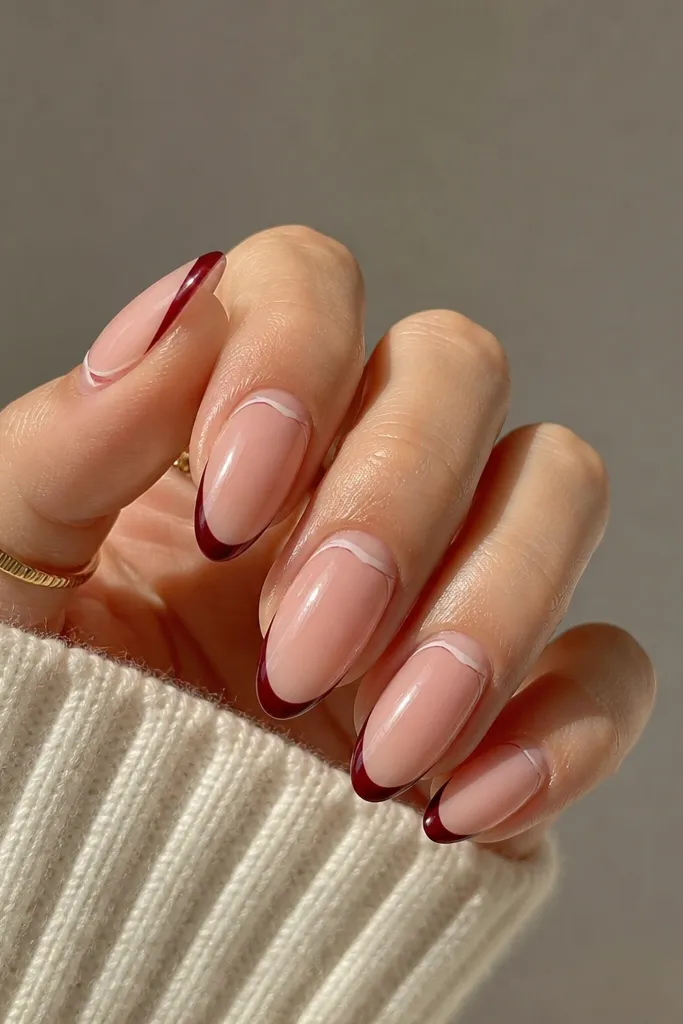
Micro French is the cleanest way to wear deep red christmas nails all year without heavy art. The burgundy line is thin, so it reads classy instead of festive-overloaded. The cuticle negative space adds a modern "breathing room" and makes the red look intentional. This design is great if you want holiday color but your job requires subtle nails.
Apply nude base. Use a French stencil to paint a thin burgundy line at the tip, about 1 mm. Then use a half-moon stencil near the cuticle to keep a small nude crescent, cure, remove stencil, and top coat.
Editor's noteWiden the micro French slightly on thumb nails only so they match in visual weight.
Watch outDon't make the tip line too thick; thick micro French turns into a sloppy full tip.
19. Deep red with gold snowflake outline only
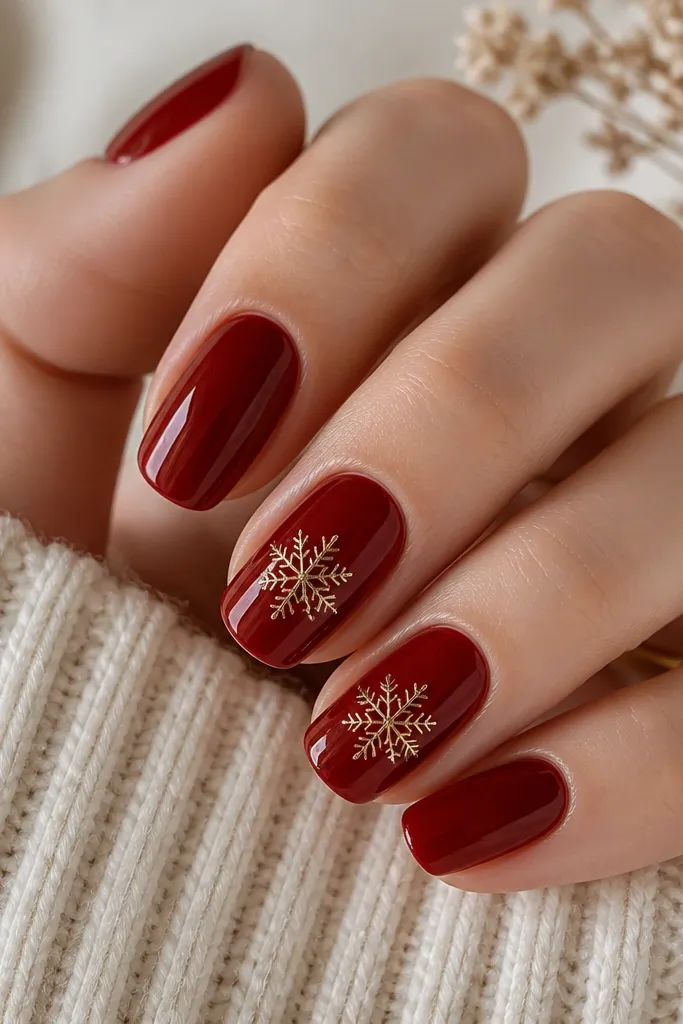
Outlines read lighter than filled icons, which is why this stays year-round. Gold snowflake outlines look like delicate ornaments, not like winter nail decals. Since there's no glitter, it still feels grown-up. This is a great choice if you love the holiday theme but hate when nails look too busy.
Paint all nails deep red glossy. On two nails per hand, use gold foil pen or gold liner gel to draw a small snowflake outline. Keep it under 3 mm tall and center it. Cure and seal with a glossy top coat.
Editor's noteIf your snowflake lines break, go back with a second pass after the first cure - it fixes gaps cleanly.
Watch outSkip oversized snowflakes; they overwhelm the nail bed.
20. Deep red checker accent with thin black lines
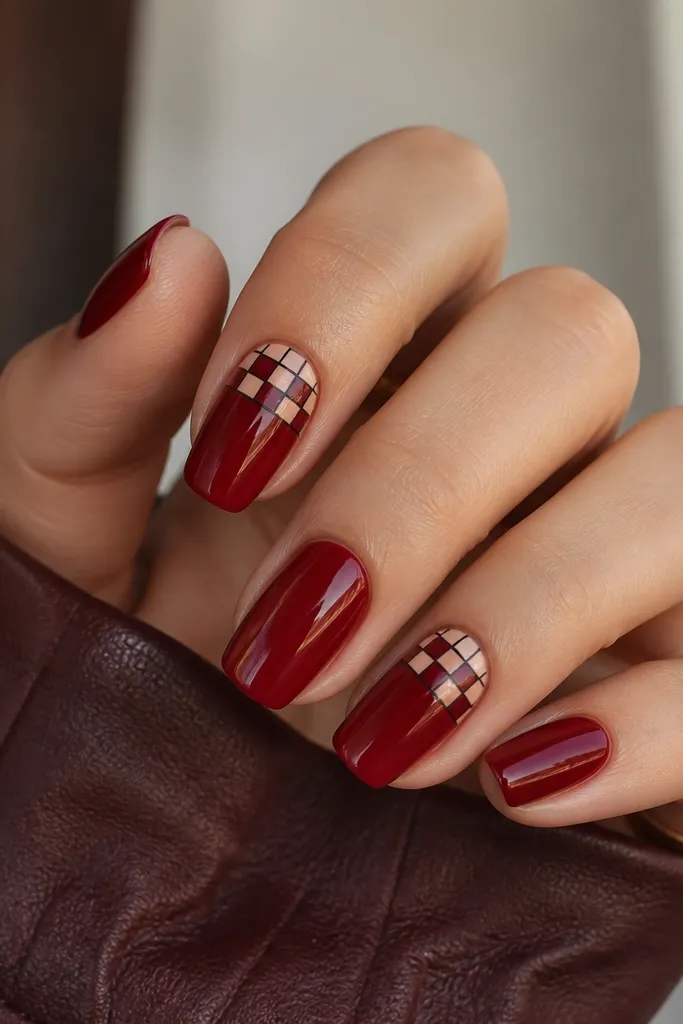
Checker accents look festive because they hint at holiday patterns, but they stay graphic and wearable. The black lines sharpen the design and keep it from blending. Using only a small checker panel near the tip keeps it from taking over. It's also a fun change if you're bored with snowflakes.
Paint all nails deep red. On two accent nails per hand, create a small checker panel starting about 2 mm from the tip. Alternate between deep red squares and a nude square, separated by thin black gel lines. Seal glossy top coat so lines don't look raised.
Editor's noteUse a nail art ruler strip (or cut thin tape) to keep square sizes consistent.
Watch outAvoid thick black borders - they look like permanent marker.
21. Oxblood with red gemstone dots on ring finger
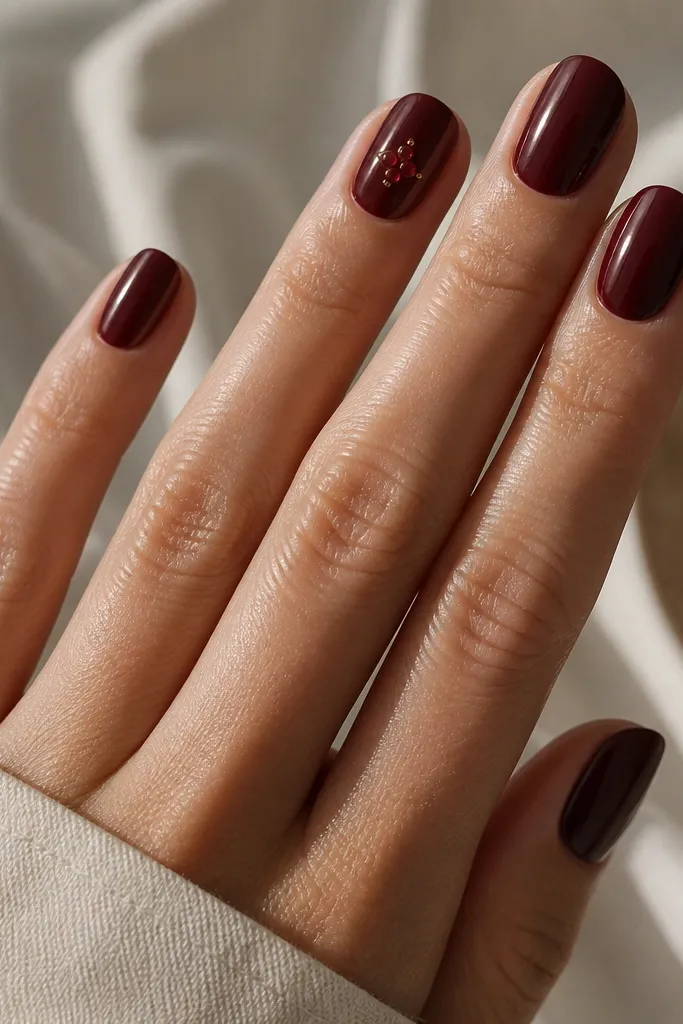
Gemstone dots are the easiest way to make deep red feel festive without going full rhinestone. The stones are the same family as the base color, so it looks cohesive. A small gold dot scatter adds sparkle without taking over. This design looks best when the stones are tiny and the spacing is clean.
Paint all nails oxblood glossy. On ring fingers, place three small red gems in a triangle and add two tiny gold dots around them. Seal with top coat around each gem, then do a final thin top coat over the surface to smooth.
Editor's noteChoose stones with flat backs so they sit flush and don't catch on coats.
Watch outDon't pack gems too close together; it turns into a blob.
22. Deep cherry with ribbon bow on one thumb
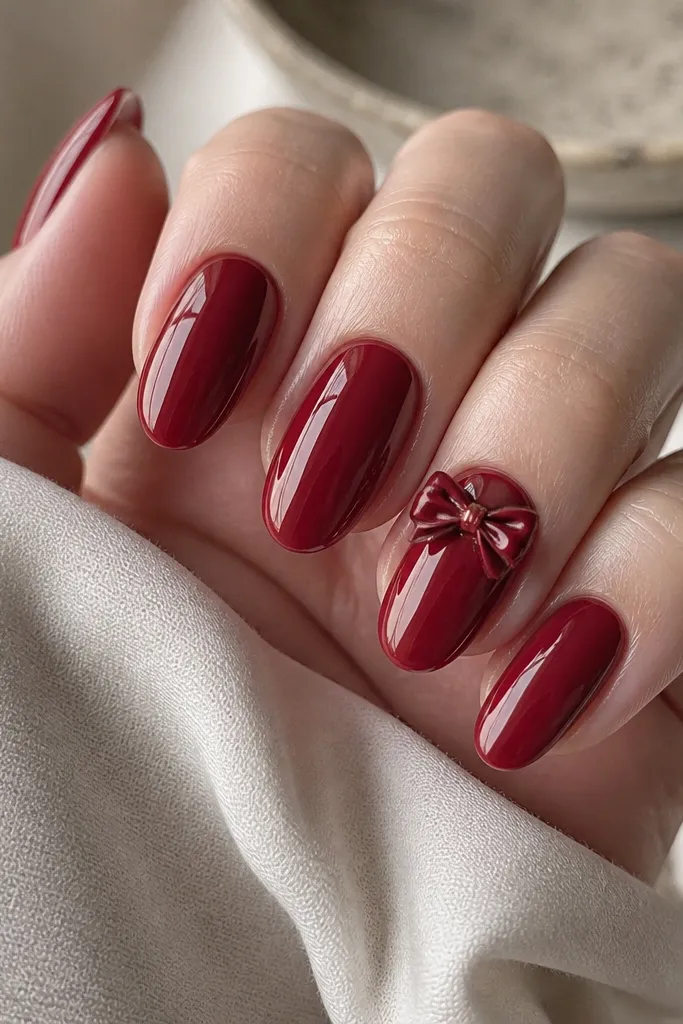
A single 3D ribbon bow makes the nails feel like a gift without covering every nail in decorations. Deep cherry keeps it warm, and the tiny gold knot reads like a wrapped bow. Because it's only on one nail, the rest stays simple and wearable. This is the design I reach for when I want a "special" look that still grows out okay.
Use a nail art bow charm or build a bow with gel and a thin striping brush. Place it on the thumb near the cuticle, centered and slightly angled. Add a small gold dot at the center to mimic the knot. Cure and top coat carefully around the charm.
Editor's noteAdd a second top coat layer after curing to lock down edges of the bow.
Watch outAvoid putting the bow on the middle of the nail; it looks heavy and can lift sooner.
23. Deep red gradient with silver line halfway down
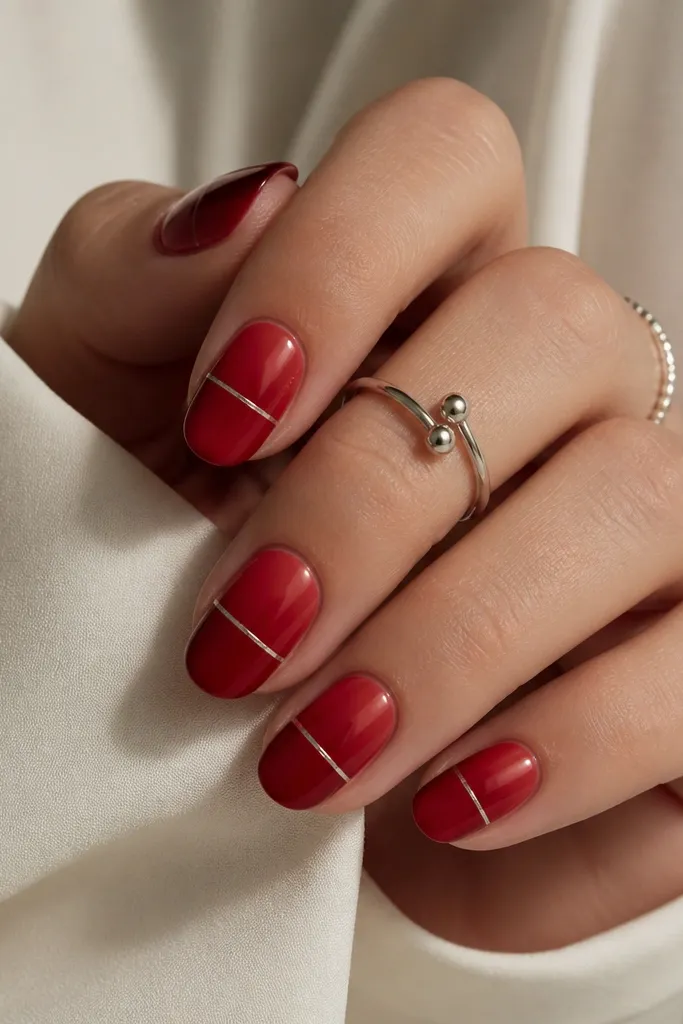
A silver line gives a "belt buckle" look, and it makes deep red feel structured. The gradient makes it look smooth and expensive rather than flat. This is festive because of the metallic line, but it doesn't scream holiday. It also looks great on almond shapes where the line can sit cleanly.
Paint a deep red gradient using sponge blending or airbrush style blending. After the gradient cures, draw a thin silver stripe across the middle using a striping brush. Cure and finish with glossy top coat.
Editor's noteUse a nail art pen for the silver line so it stays even across nails.
Watch outDon't place the stripe too high; it can make nails look shorter.
24. Burgundy velvet with tiny gold snow dots
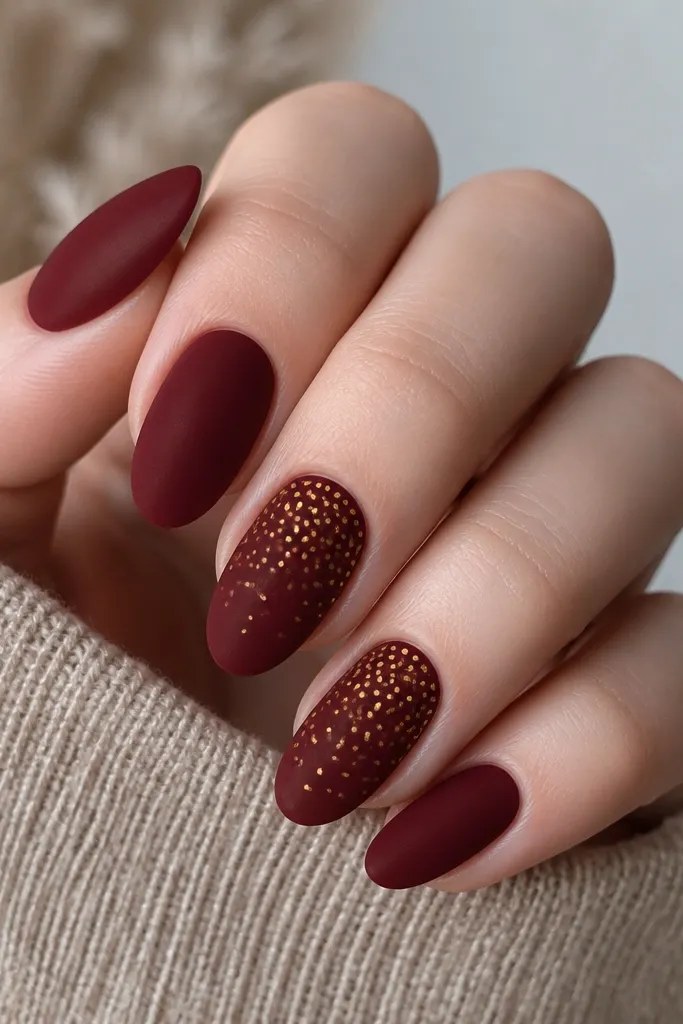
The velvet finish makes the deep burgundy look soft and winter-ready even when you don't draw a single snowflake. Tiny gold dots mimic twinkle lights more than glitter. Keep the dot placement higher on the nail so it looks like snow floating down, not like random confetti. This design is also easy to maintain because it doesn't require perfect lines.
Apply velvet finish over burgundy gel. On accent nails, place 6-10 tiny gold dots with a dotting tool near the top half. Cure and top coat with a velvet-safe finish or leave matte if your system requires it.
Editor's noteSpace the dots unevenly - a perfect grid looks fake.
Watch outAvoid big gold circles; they look like cheap nail stickers.
25. Deep red cuticle crescent with pearl shimmer
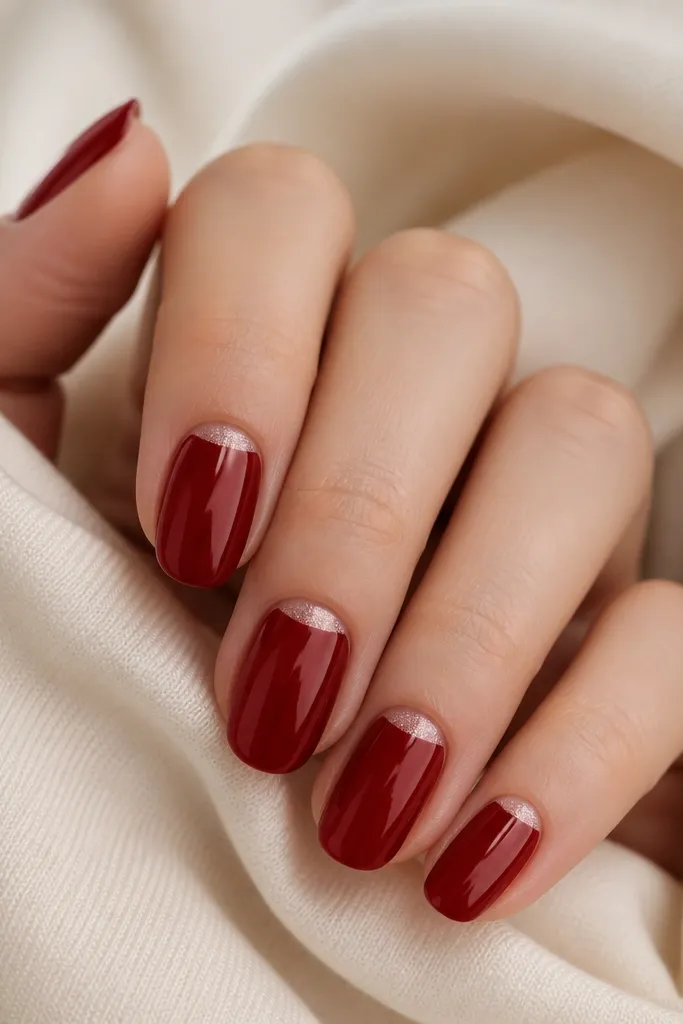
This is a clean holiday-adjacent design because the pearl shimmer reads like ornament light. The deep red base keeps it dramatic, while the cuticle crescent keeps it minimal and flattering. It's also one of the easiest ways to make deep red look "done" without adding art to every nail. I've worn it to dinners where I wanted my nails to look polished, not loud.
Paint deep red glossy base. Use a cuticle crescent stencil to apply a pearly shimmer gel at the base, thin layer only. Cure, remove stencil, then top coat glossy over everything.
Editor's noteKeep the crescent thin - about 1 mm tall - so it looks like light, not glitter residue.
Watch outDon't let shimmer flood onto the nail bed; it turns patchy after growth.