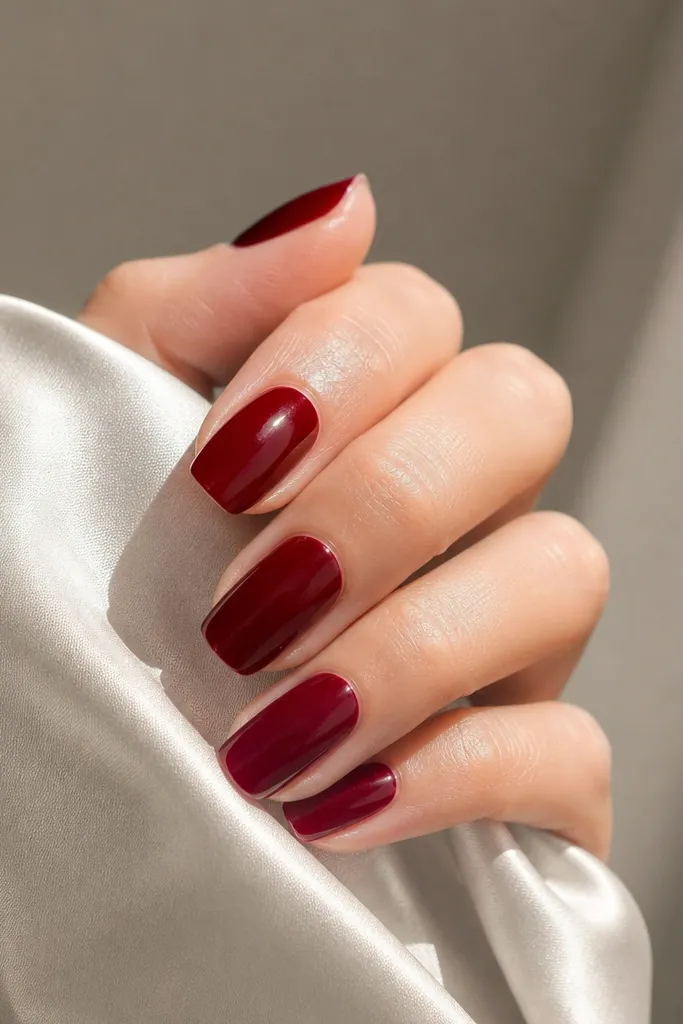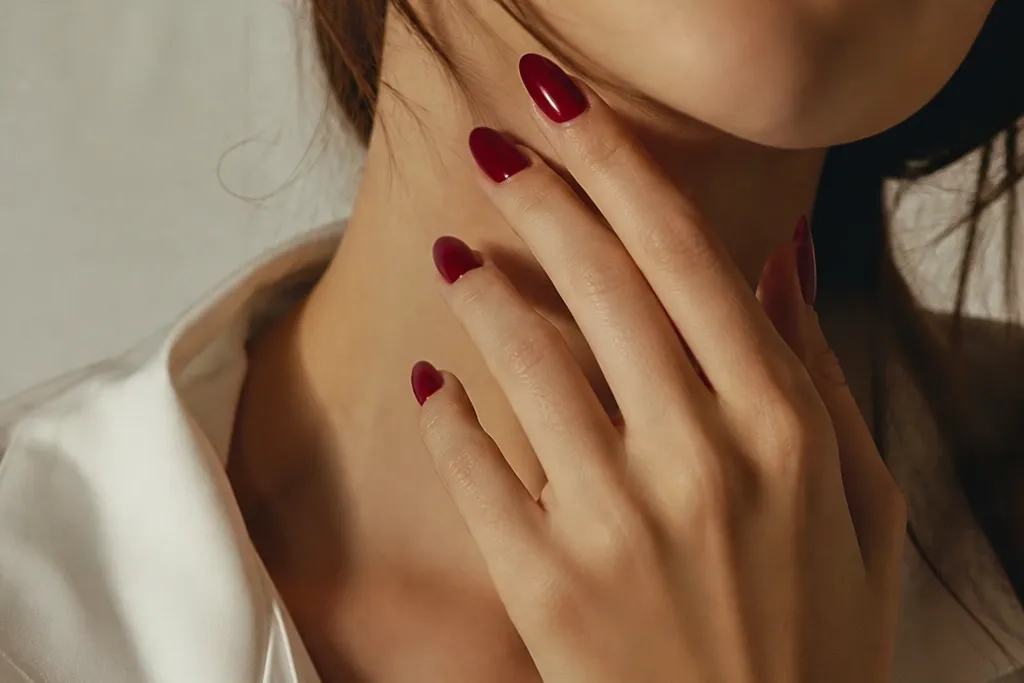
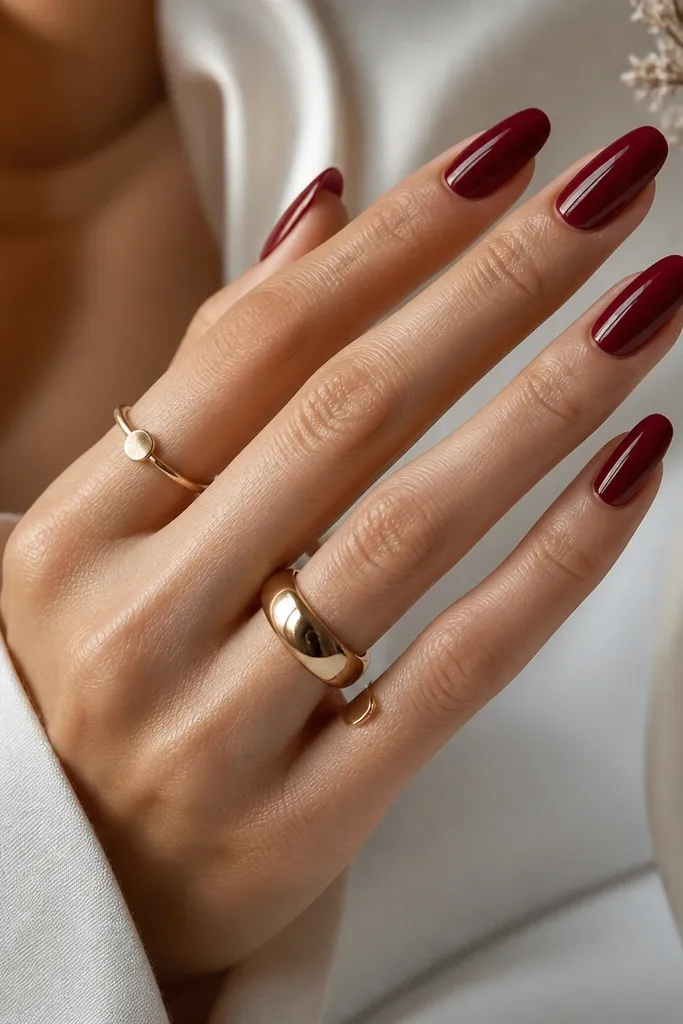
1. Jet-Gloss Cherry Gel Short Square
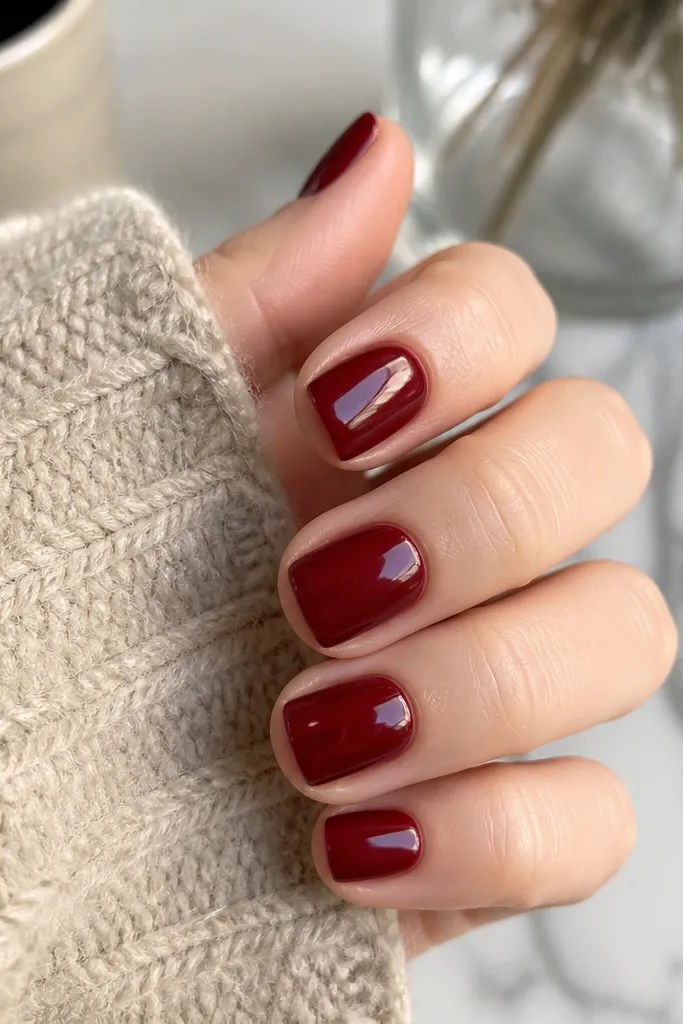
A dense cherry-red gel reads expensive because it stays red in every lighting setup. Short square with crisp corners makes the shade look intentional, not accidental. The ultra-gloss top coat gives that "new set" shine that holds up through daily wear. This look is clean enough for work and still feels special for dinner photos.
File to a true short square - free edge about 1.5-2 mm. Apply two thin coats of gel color, cure fully each time. Finish with a high-shine gel top coat and cap the free edge for less chipping.
Editor's noteAfter curing the top coat, wipe with a lint-free pad and gel cleanser, then inspect under a lamp; any dull spots mean you missed a thin patch.
Watch outSkip thick color coats - they pool at the center and make deep red look uneven.
2. Blue-Red Deep Coffin with Stiletto Tip Gloss
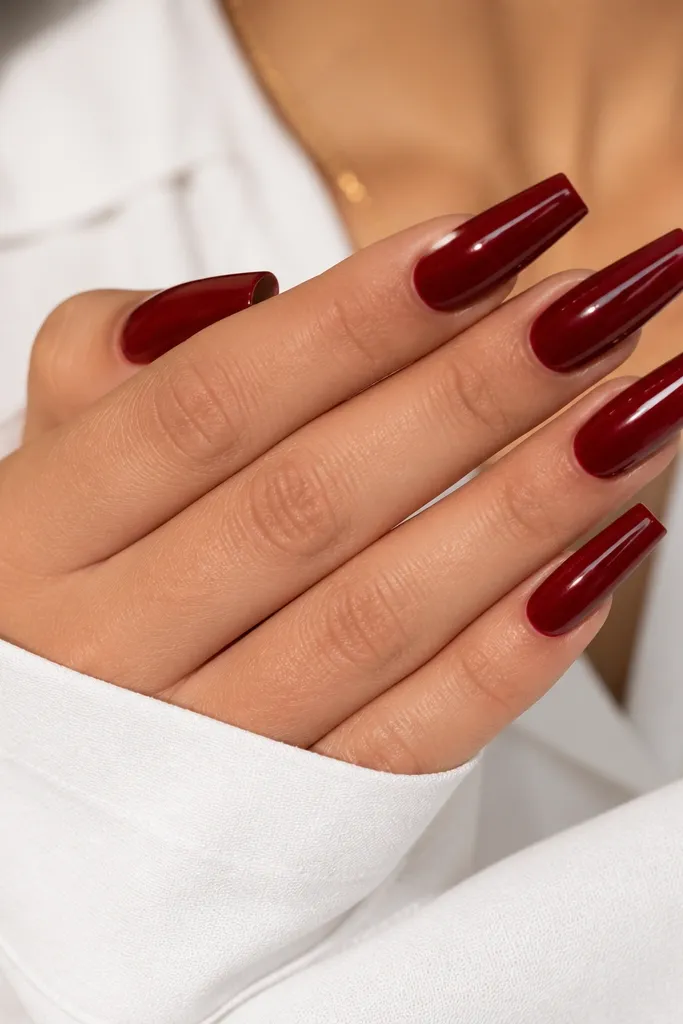
Blue-red deep shades look luxe because they don't warm up into brown as they sit on the nail. Coffin length gives the color space to look sleek, especially with a clean, tapered tip. A glassy top coat makes the reflection sharp, which reads "high-end salon.". The overall effect is dramatic without needing art.
Target a coffin shape with a tip width of about 1 mm at the widest point. Use two coats of blue-red gel, then top coat with a thick, self-leveling shine. Keep the sidewalls smooth so the nail shape stays crisp.
Editor's noteIf you're prone to chips, add a micro-thin layer of top coat on the tip every other day for the first week.
Watch outDon't round the coffin tip - rounded ends make deep red look softer and less chic.
3. Squoval Wine Velvet Matte
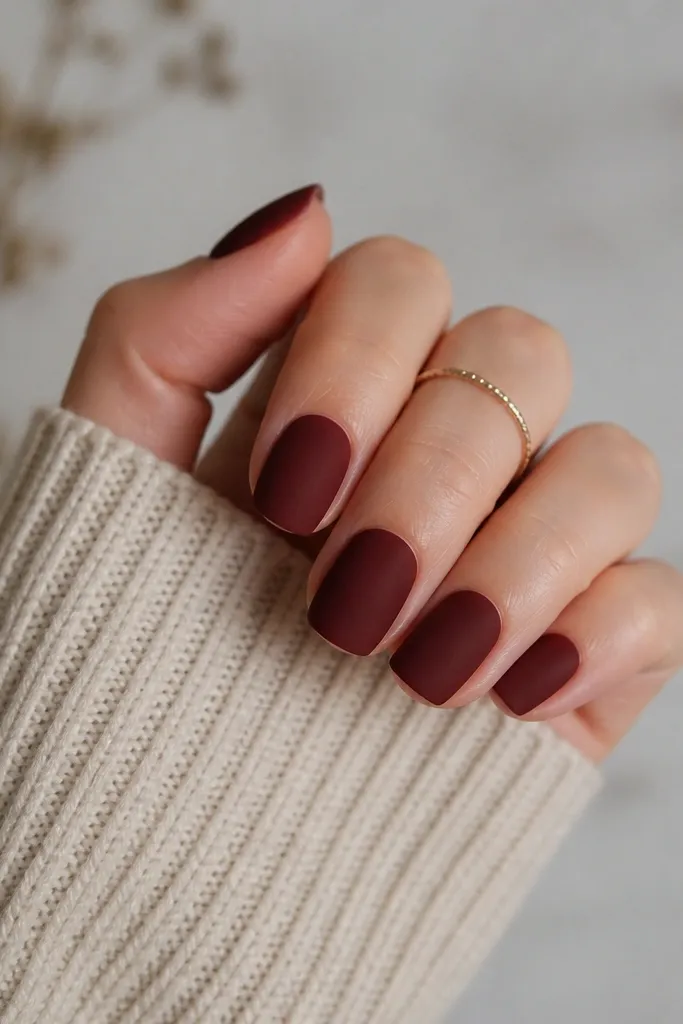
Velvet matte makes deep red feel expensive because the color reads richer when it's not reflective. Squoval shape keeps it flattering and wearable, even if you like a darker shade. This combo also hides minor ridges better than glossy finishes. It looks especially good in fall coats and dark handbags.
File squoval with a gentle curve at the corners - free edge about 2-3 mm. Apply color in two thin layers, cure, then use a velvet matte top coat. Avoid overworking the matte top coat; it dries fast and can streak.
Editor's noteAfter the matte top coat cures, wipe once with a matte-safe cleanser so you remove dust without changing the texture.
Watch outSkip glossy top coat over velvet - it turns the finish patchy and kills the luxe texture.
4. Deep Red Micro-French with 1mm Side Lines
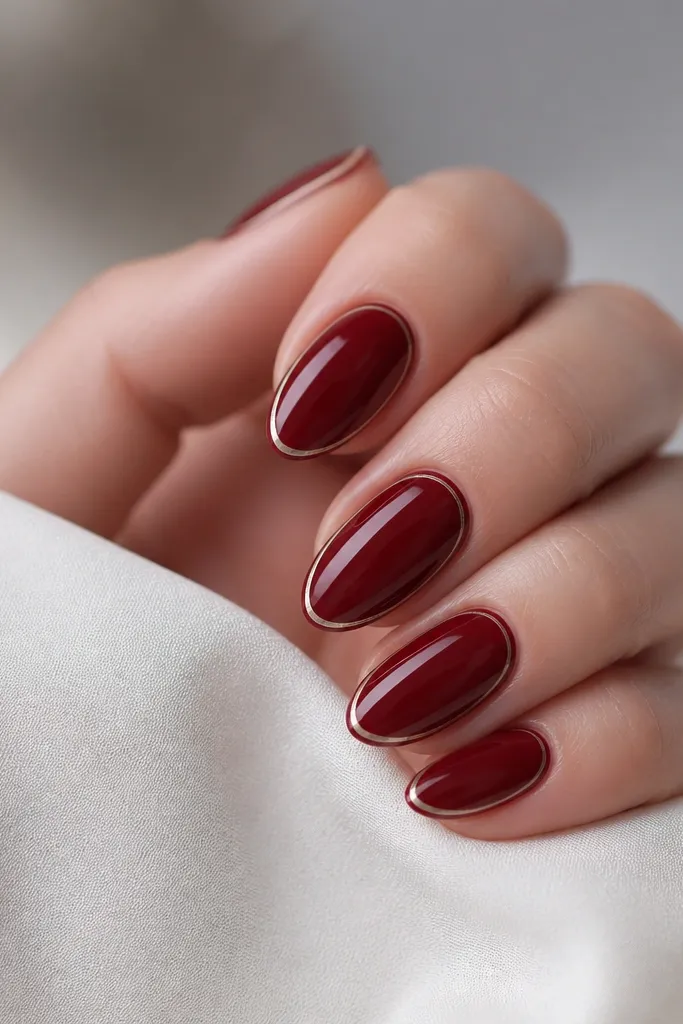
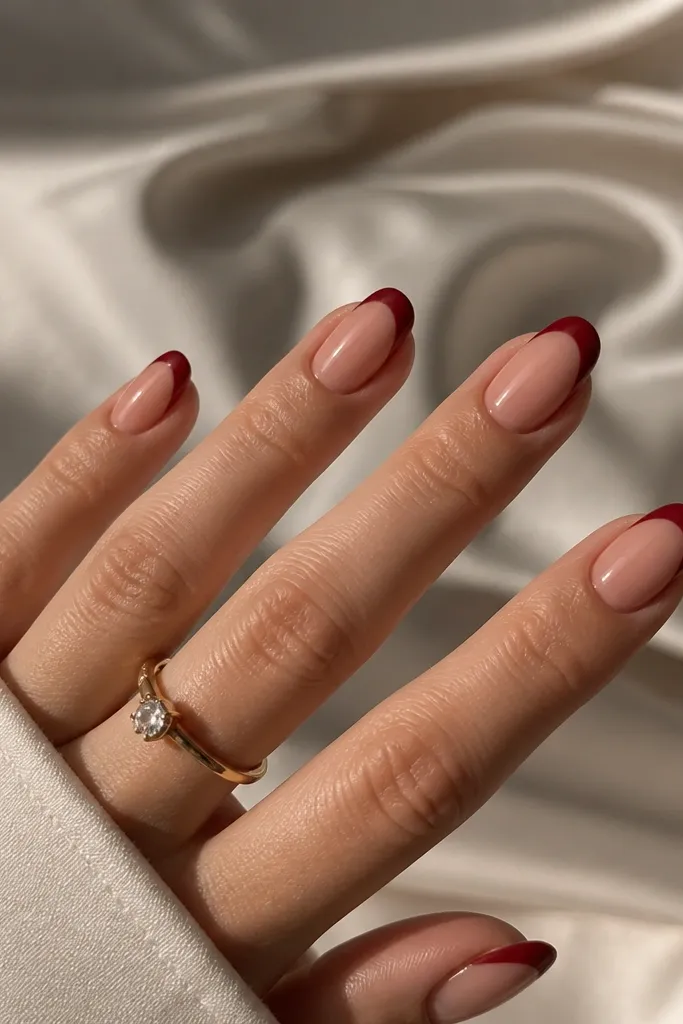
Micro-French looks high-end because it frames the nail instead of covering it. The 1mm side lines create structure and make the deep red look sharper. Use a slightly darker shade for the line or the same shade with a high-gloss top coat to create contrast. The result feels tailored, like a clean dress.
Start with a solid deep red base in two coats. With a striping brush, paint a super-thin French at the tip and add side lines that stop 1-2 mm before the free edge. Seal everything with glossy top coat.
Editor's noteUse nail guides (tape or a French guide strip) for the first one; once you nail the spacing, you'll fly through the rest.
Watch outDon't make the French line wide - wide tips look like stickers instead of salon work.
5. Cherry Red Cuticle Gradient Fade
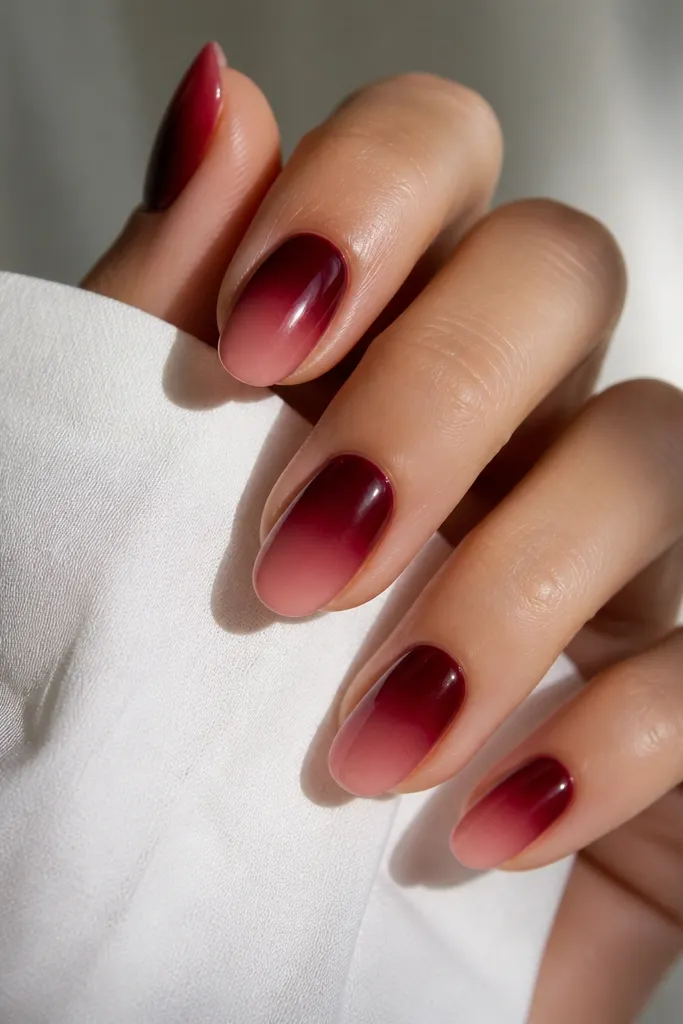
A cuticle fade looks luxe because it mimics natural nail color transitions. Deep red at the cuticle makes the whole set look richer, while the lighter mid-to-tip keeps it from feeling heavy. I like this on medium almond because it shows the fade shape nicely. Under flash, the gradient gives a soft glow.
Use three shades: deep cherry, a mid deep red, and a lighter cherry. Sponge near the cuticle with the darkest shade, then blend outward with the mid tone and finish with the lighter shade at the tip. Keep the fade within the nail - don't drag onto the skin.
Editor's noteIf you get fuzz at the edges, wipe the skin with a thin brush dipped in acetone before top coat.
Watch outAvoid a sponge that's too dry - it creates speckled dots instead of a smooth fade.
6. Deep Red Gloss with Gold Leaf at One Corner
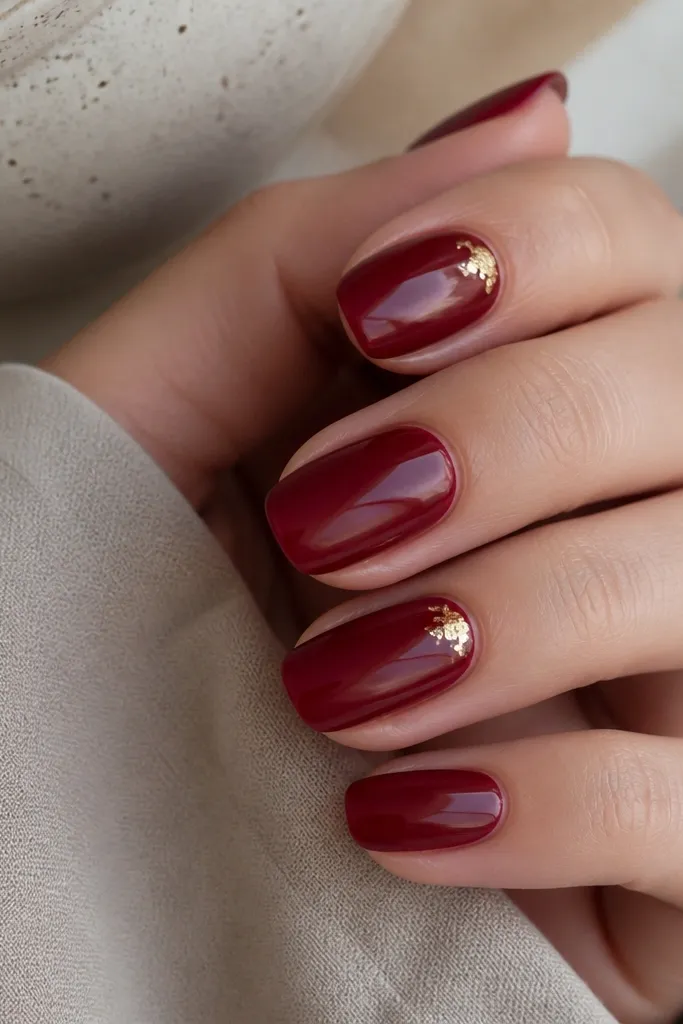
Gold leaf makes deep red look expensive because it adds irregular sparkle without looking like chunky glitter. One-corner placement keeps it modern and intentional. Glossy gel under the leaf gives a rich base so the gold reads bright, not dull. This is the manicure I get asked about at events.
Paint all nails deep red. On accent nails, apply a small amount of gel tack near the outer cuticle corner and press gold leaf pieces in place. Seal with two top coats so the leaf doesn't catch on fabric.
Editor's noteUse a small makeup sponge to press leaf down - it conforms better than a flat brush.
Watch outSkip full-nail gold leaf - it turns the look from luxe to messy fast.
7. Red Glass Nails with Clear Jelly Tip
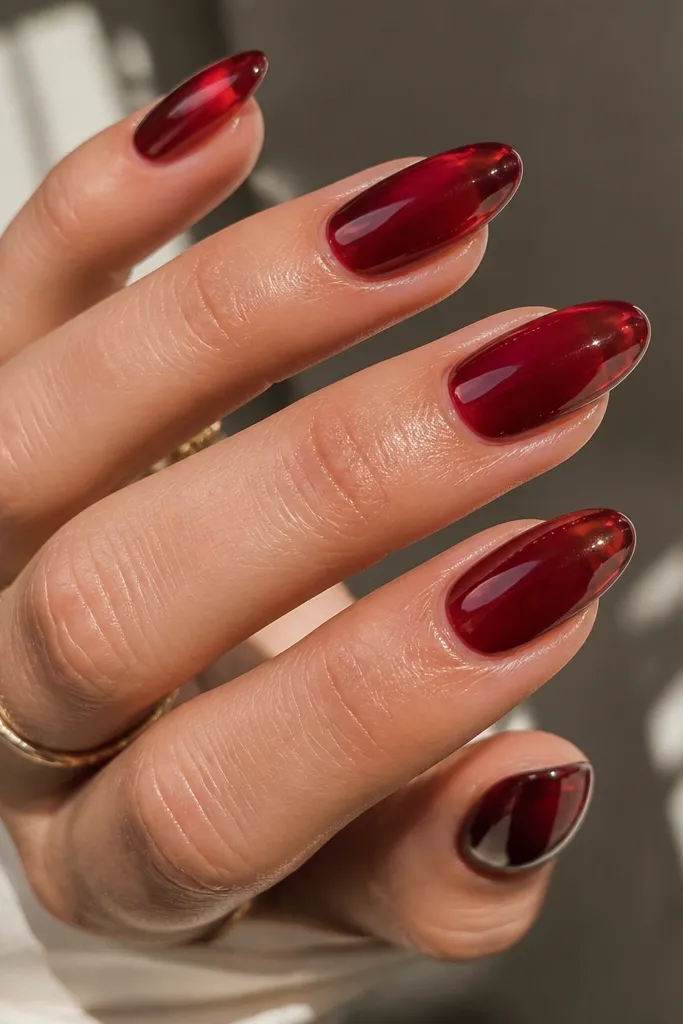
Clear jelly tips make deep red look lighter and more high-end because they create a "glass" effect and reduce heaviness. The clear portion also makes the nail look longer and smoother on camera. This style looks especially good with glossy top coat because the surface reflects like a candy shell. It's elegant even if you don't add gems.
Build with a red jelly overlay on the nail bed area. Leave the very tip area more translucent by using clear jelly or a sheer red jelly near the free edge. Cure well, then top coat for a smooth, rounded reflection.
Editor's noteKeep the clear tip area consistent across nails so the glass lines match.
Watch outDon't leave the jelly too thick at the tip - it can look bulky and snag.
8. Velvet Matte with One High-Gloss Red Stripe
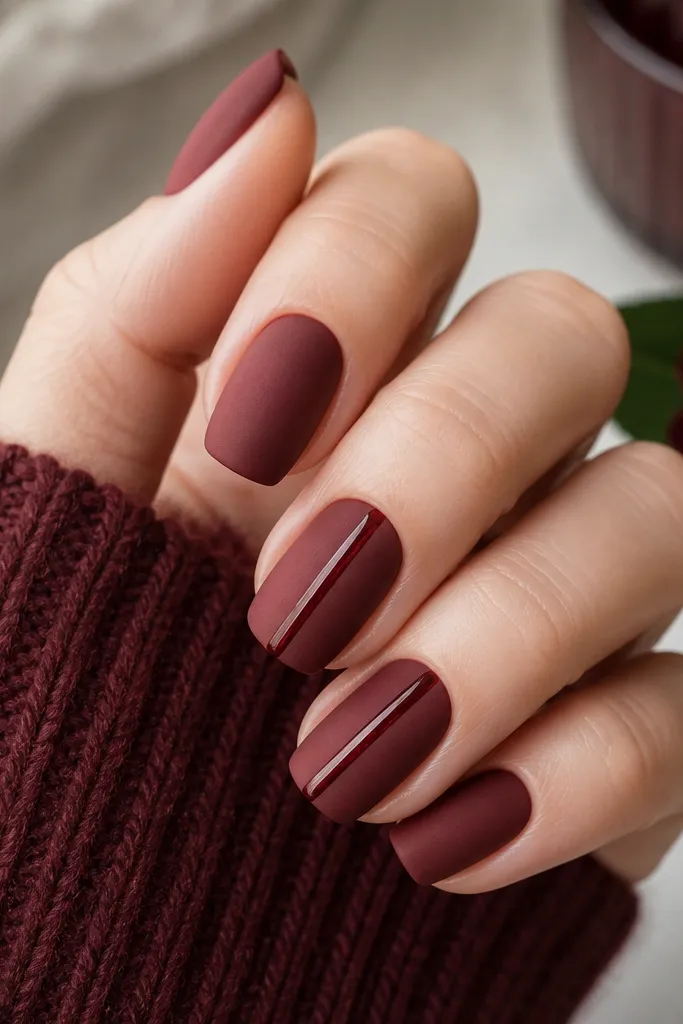
Mixing matte and glossy in one narrow stripe looks designer because it adds highlight where your eye expects it. The matte velvet makes the deep red feel soft and expensive. The glossy stripe adds a clean line that elongates the nail. It's minimal, but it still looks styled.
Do the full set in velvet matte top coat. On accent nails, wipe off any dust, then paint a vertical stripe with glossy gel in a slightly deeper shade. Cure the stripe and top coat only where needed so you keep the matte around it.
Editor's noteUse a liner brush that's 1-2 mm wide at the ferrule; wider brushes make thick stripes that look amateur.
Watch outAvoid random glossy spots - the design needs one intentional highlight line.
9. Rhinestone Halo on Deep Red Almond
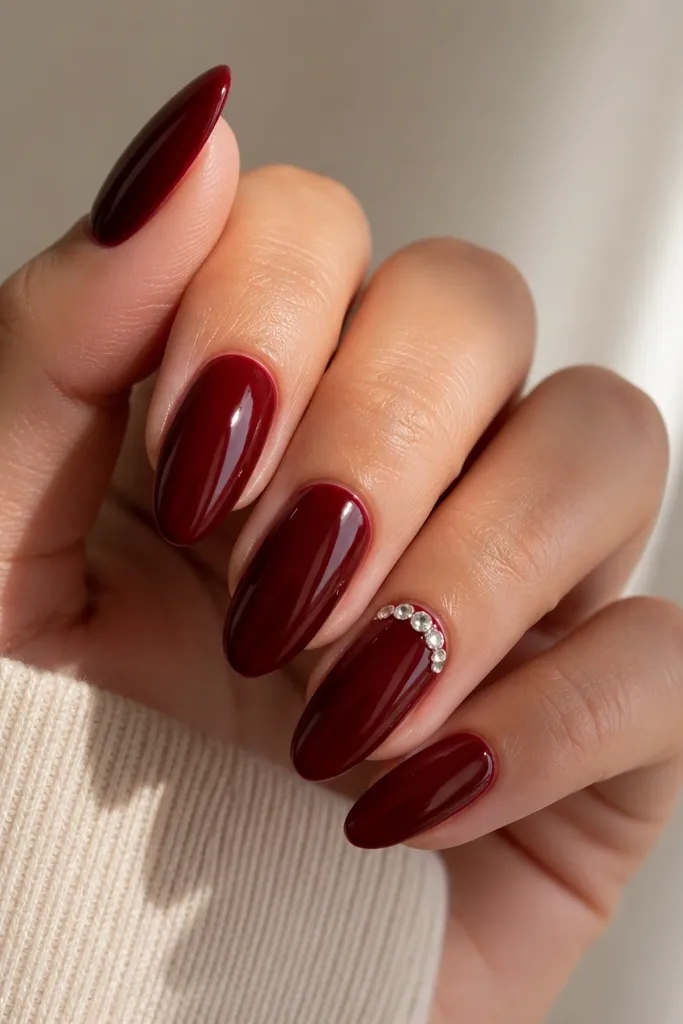
A tiny halo reads luxe because it frames the cuticle and makes the deep red look even deeper. Keep the stones small and spaced - think 1.0-1.5 mm stones, not chunky gems. The rest of the nails stay clean so the accent has room to shine. This set works for weddings, holiday parties, and nights out.
Paint all nails deep red with a glossy top coat. On accent nails, apply a thin line of gel near the cuticle, place stones in a half-moon pattern, then cure. Seal with top coat carefully around stones so they don't lift.
Editor's noteUse tweezers with a pointed tip and place stones one-by-one; rushing makes the halo uneven.
Watch outDon't cover stones with thick gel - it can dull sparkle and create a bump.
10. Deep Red Half-Moon with Negative Space
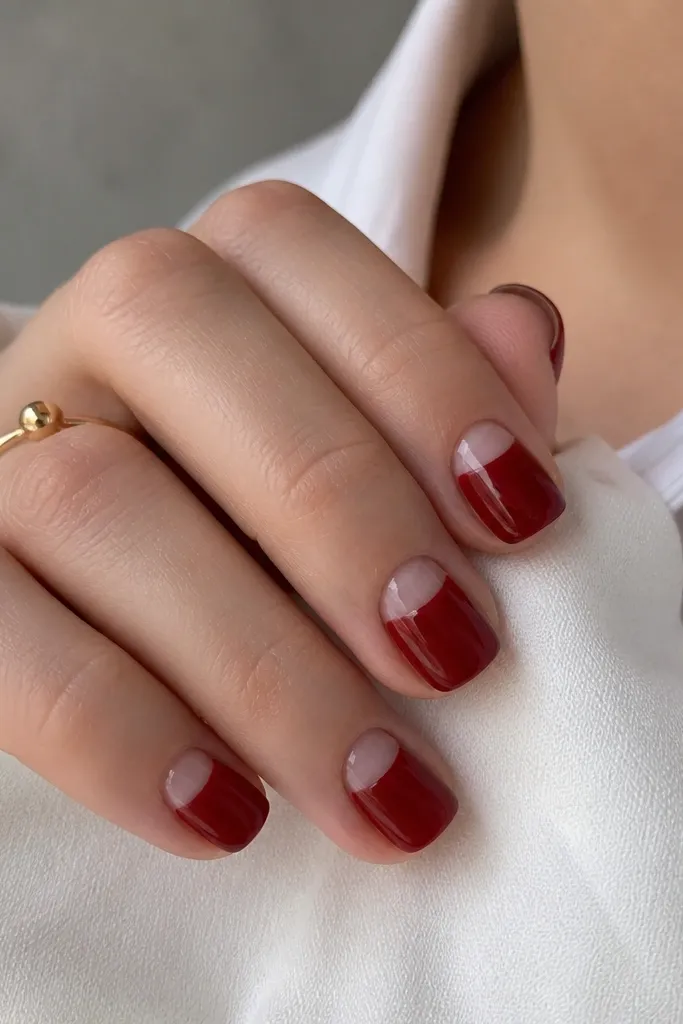
Negative space half-moons look high-end because they reference classic nail art without filling everything in. Deep red on the lower half gives bold contrast and makes fingers look longer. The clear cuticle area also keeps the set from feeling heavy. It's a clean look that still feels "done."
Use a sheer nude base only if you want a tint, or go fully clear for maximum contrast. Apply deep red from mid-nail down, leaving a crisp half-moon at the cuticle. Clean edges with a thin brush and acetone, then seal with glossy top coat.
Editor's noteUse a small dotting tool to map the half-moon curve before painting red.
Watch outSkip messy cuticle edges - sloppy half-moons are what make this look cheap.
11. Deep Red Chrome Tips on Short Almond
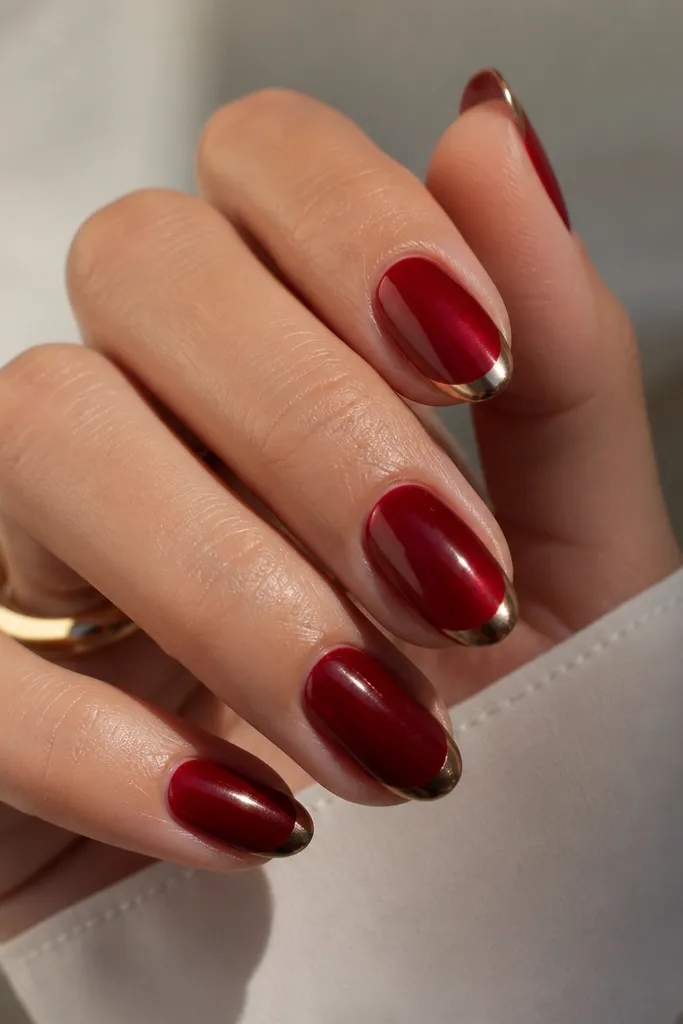
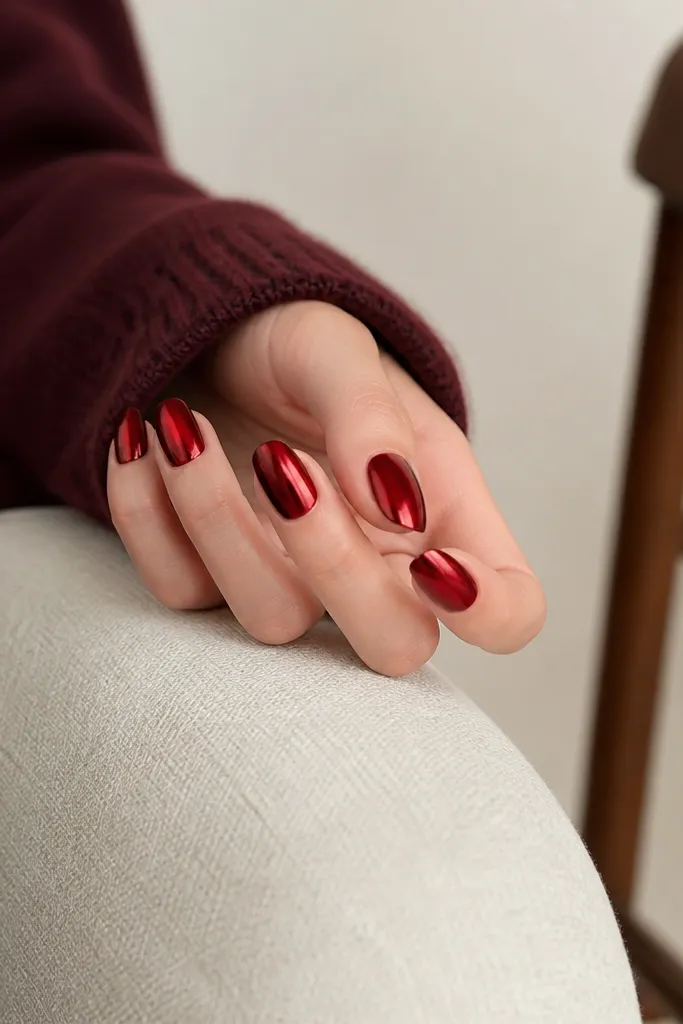
Chrome tips look luxe because they add a reflective edge that makes the nail look sharper. Keep chrome only at the free edge so it doesn't overpower the red. The contrast between glossy red and metallic tip reads expensive in daylight and flash. This is my go-to when I want glam without full art.
Paint the nails deep red. Apply a thin layer of chrome base or gel sticky layer only to the tip band, then apply chrome powder or transfer foil with a sponge. Blend the chrome edge by lightly buffing the transition spot once the chrome is sealed.
Editor's noteSeal chrome with a gel top coat that isn't too thick; thick sealing can dull the mirror effect.
Watch outDon't chrome the whole nail - it turns deep red into a different color story.
12. Oxblood Deep Red with Thin Black French
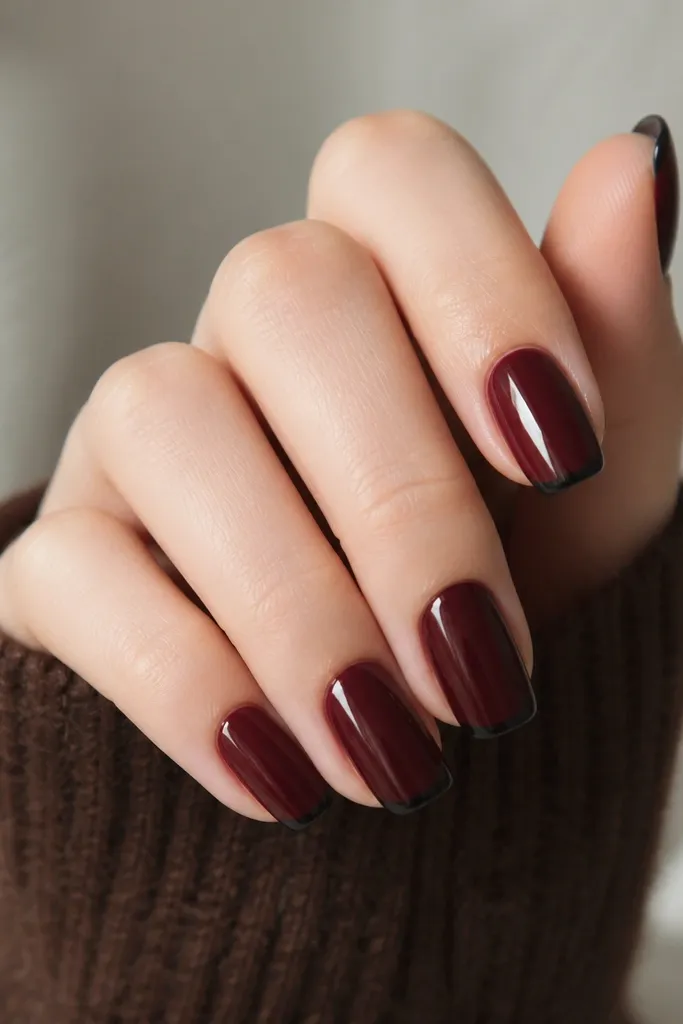
Black French lines make oxblood feel sharp and expensive because they add contrast without adding clutter. The thin line keeps it clean, and the glossy finish makes the deep red look like polished wine. This combo looks incredible with leather jackets and dark knitwear. It's also a good alternative if you want something darker than classic red.
Use an oxblood shade (slightly brown-black undertone) for the base. Paint a thin black French line at the tip with striping gel and a steady hand. Seal with glossy top coat and cap the free edge.
Editor's noteIf your French line wobbles, don't repaint - clean the edge with a flat brush dipped in acetone until the line snaps into place.
Watch outSkip thick black outlines - they make the manicure look heavy and dated.
13. Deep Red Marble with Clear Veins
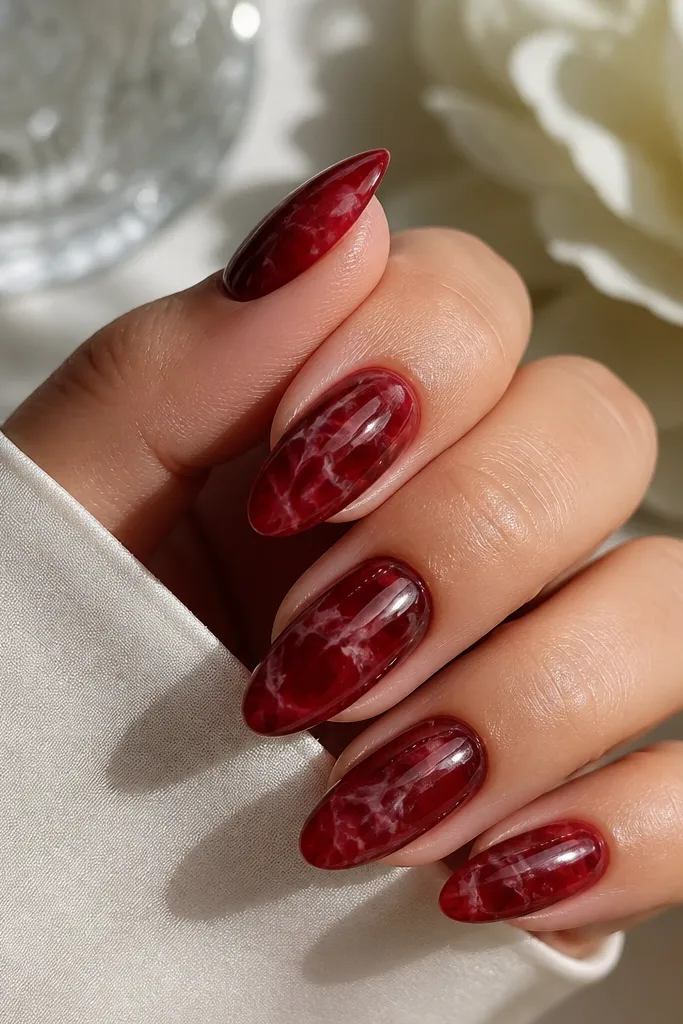
Marble works when the veins look like they're sitting under glass. Using clear gel veins keeps the look modern and prevents it from turning into flat streaks. Deep red marble looks luxe because the color stays strong while the veining adds motion. It reads expensive in photos because the veins catch light.
Paint a deep red base and cure. Add thin lines of lighter red gel and a few clear gel streaks, then drag lightly with a fine brush to form veins. Cure, then top coat with a high-gloss layer to smooth the surface.
Editor's noteUse fewer veins than you think - marble looks better with negative space than with full coverage lines.
Watch outDon't overblend - muddy marbling is the fastest way to lose the luxe stone look.
14. Deep Red Ombre from Cuticle to Tip
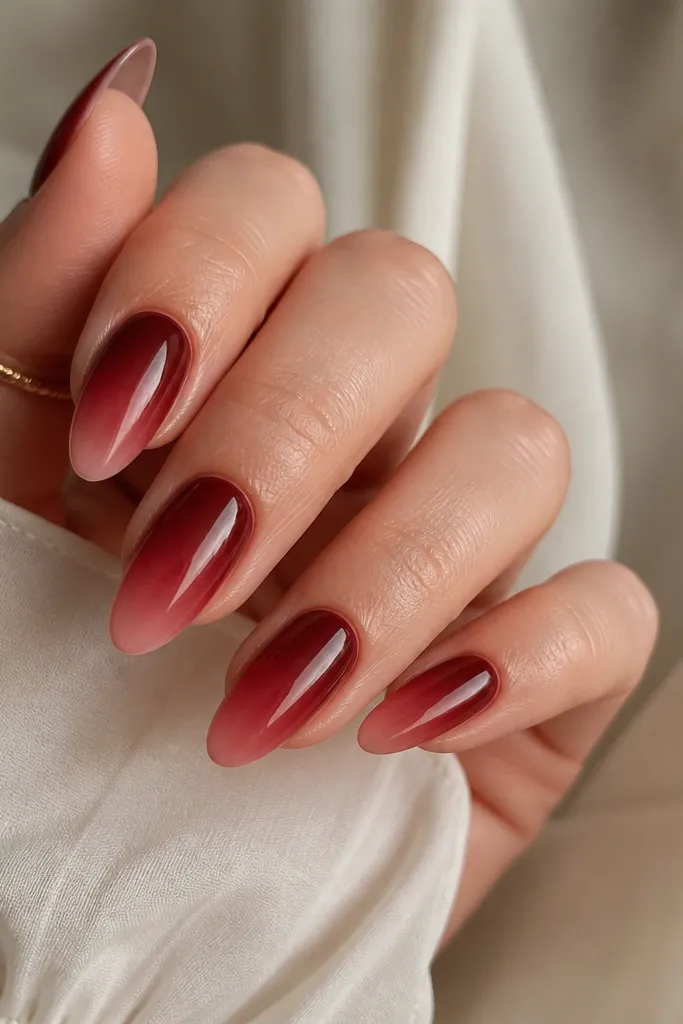
A full ombre looks salon-level when the gradient is smooth and the undertone stays consistent. Starting darker at the cuticle makes the nail look more dimensional and flattering. The lighter end keeps it from looking too heavy. This is especially pretty on medium almond because the curve helps the gradient flow.
Use a sponge or ombre brush with two shades: deep red and a slightly lighter cherry red. Keep the darkest color centered near the cuticle and blend outward in thin layers. Seal with glossy top coat for a glassy finish.
Editor's noteBlend in layers - sponge twice lightly instead of once heavy to avoid blotches.
Watch outSkip a straight line gradient - it looks like you painted over a strip.
15. Deep Red French Fade with Sheer Nude Base
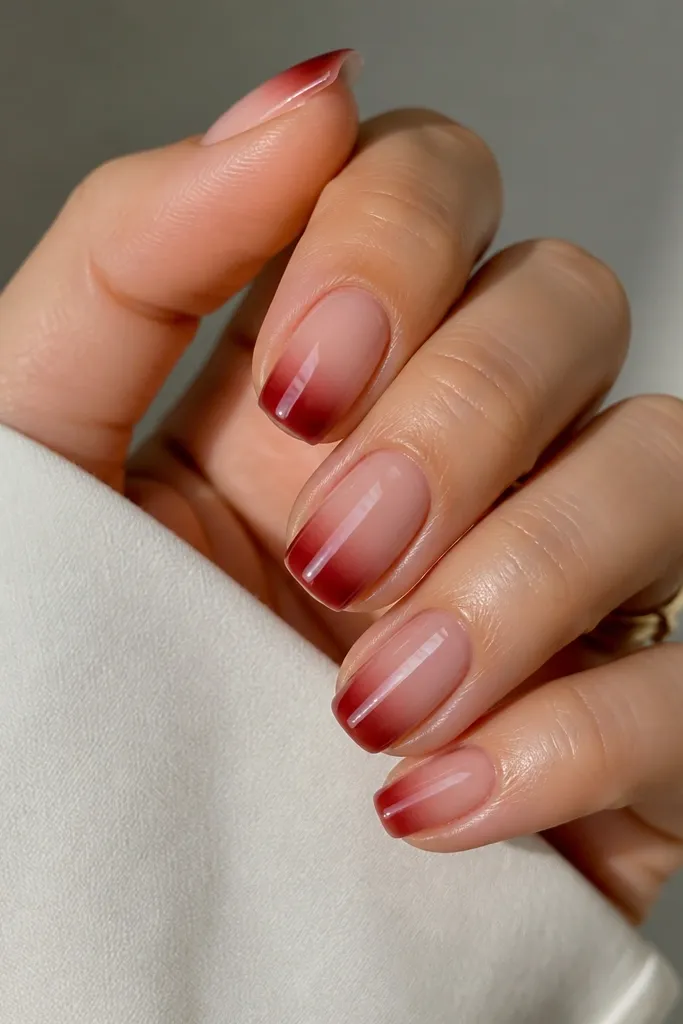
French fade is luxe because it looks soft and tailored. The sheer nude base keeps your fingers looking fresh, and the deep red tip gives the drama. This combination also hides small growth lines better than a full opaque red. Under flash, the fade looks like a gradient filter.
Use a sheer nude gel as the base. Sponge or paint a deep red tip area and blend upward 1/3 of the nail for a smooth fade. Cure and then top coat glossy to lock the transition.
Editor's noteChoose a nude that matches your skin undertone; a too-pink nude makes the deep red look muddy.
Watch outDon't use a thick nude base - it makes the fade look like a sticker.
16. Deep Red Gloss with Tiny Gold Dot Cluster
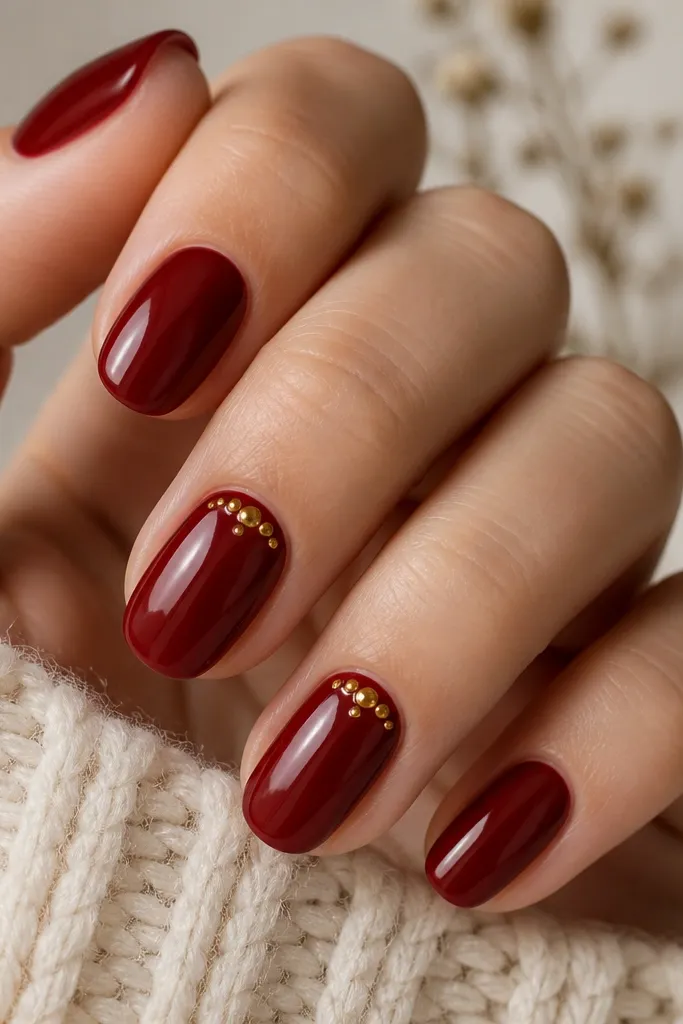
Tiny dot clusters look expensive because they add sparkle without taking over the nail. The gold dots give a soft, controlled shine that pairs perfectly with deep red. I like the placement near the cuticle because it visually lengthens the nail and draws attention to the shape. This is a great option if rhinestones feel too much.
Paint all nails deep red glossy. On accent nails, use a dotting tool to place 5-7 tiny gold dots in a small triangle near the cuticle. Cure and seal with one extra top coat pass to keep dots smooth.
Editor's noteMix gold gel with a drop of clear gel if your dots look too thick.
Watch outSkip big dots - they look like random confetti instead of a planned cluster.
17. Deep Red Gloss with Pearlized Cuticle Ring
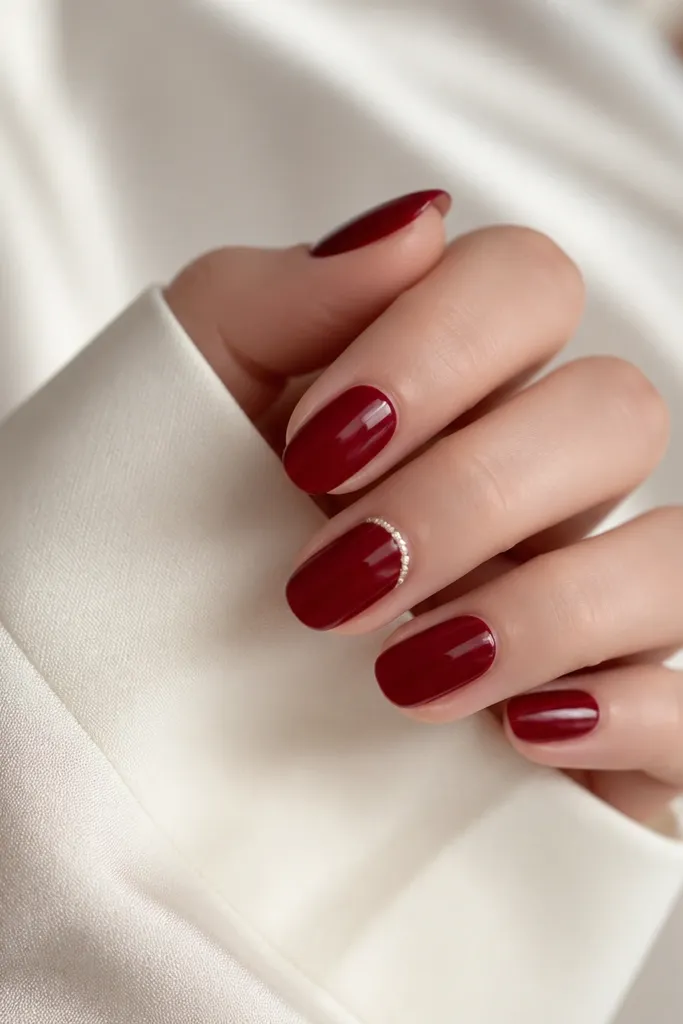
A pearlized cuticle ring looks luxe because it frames the nail like jewelry. The pearl effect softens deep red so it doesn't feel too harsh. It also makes your cuticle area look neat, which is half the "expensive" look. This one is subtle, but it pops in photos.
Choose a pearlized white-pink gel (not chalky). Paint deep red on all nails. On accent nails, draw a thin curved line around the cuticle, leaving tiny gaps so it looks like a ring, then cure and top coat.
Editor's noteUse a thin striping brush and steady your hand on the table - it keeps the ring even on both sides.
Watch outDon't make the ring too thick - thick pearl lines look like a sticker border.
18. Deep Red Glitter Only at the Tip
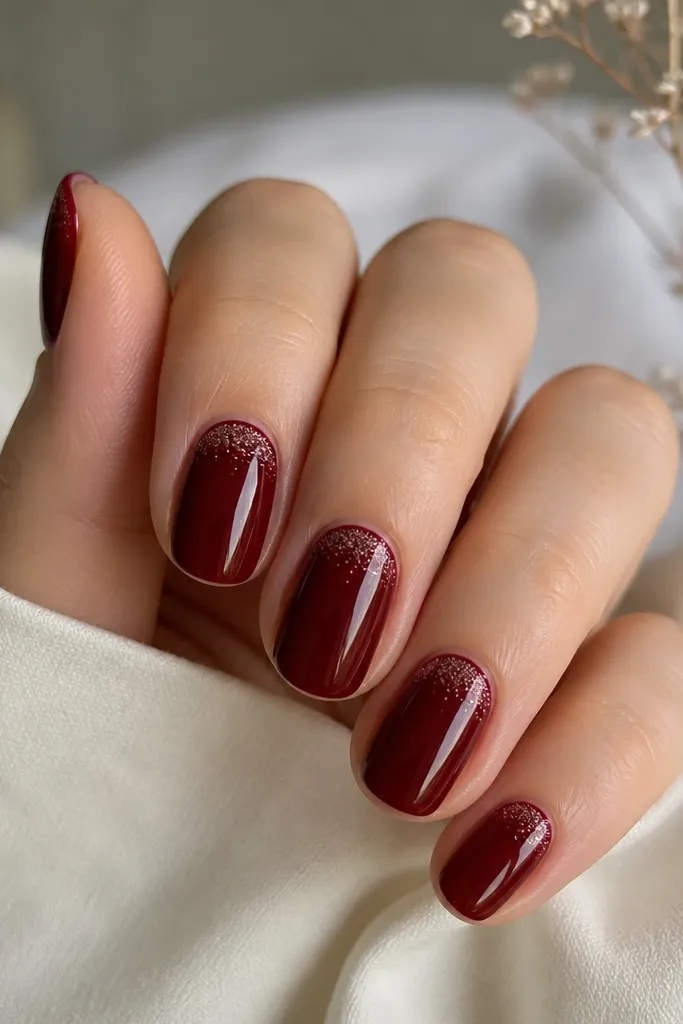
Tip-only glitter looks high-end because it stays controlled. The deep red base already has depth, so you don't need full glitter coverage. A fine glitter dust at the tip gives a soft twinkle that looks expensive under warm indoor lighting. It's also easier to wear because it doesn't snag as much as full glitter.
Paint nails deep red glossy and cure. Apply a thin gel layer at the tip band, then use a fine glitter powder and press it in. Tap off excess, cure, and seal with glossy top coat to smooth the edge.
Editor's noteIf glitter looks sparse, do a second thin gel layer instead of adding more glitter at once.
Watch outSkip chunky glitter - it catches on fabric and ruins the luxe finish.
19. Deep Red Satin Finish with No Shine
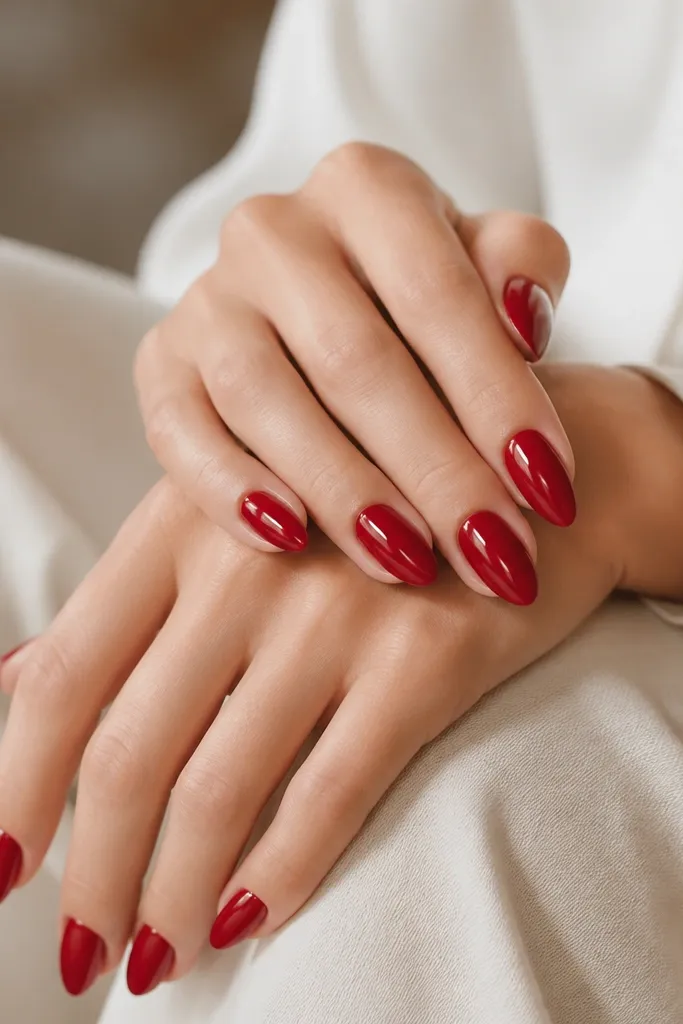
Satin finish looks costly because it sits between glossy and matte. Deep red under satin reads rich and smooth, and it doesn't scream for attention like high shine does. This is perfect if you want "luxe" but you hate mirror glare in daylight. It also looks great on longer almond shapes because the satin sheen follows the curve.
Use deep red gel color in two coats. Top with a satin-matte top coat (not velvet matte) and cure. Don't buff aggressively after - you want the soft sheen to stay intact.
Editor's noteAfter curing, wipe gently with gel cleanser so you keep the satin texture even.
Watch outAvoid regular matte top coat - it makes deep red look flat and chalky.
20. Deep Red Negative Space Diagonal Cut
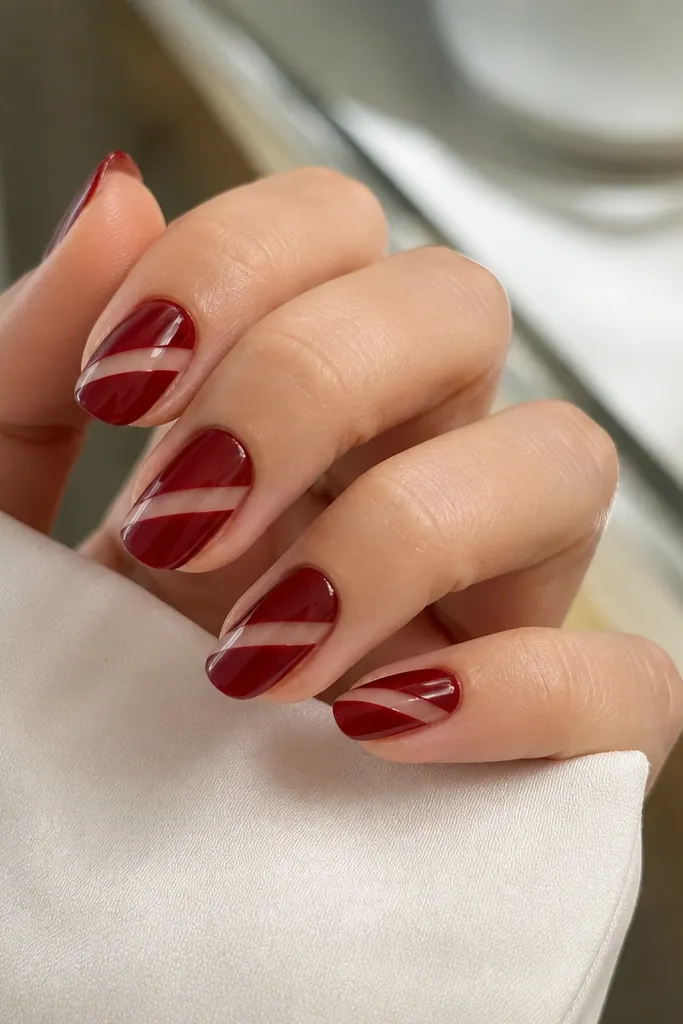
Diagonal negative space makes deep red feel modern and expensive because it adds graphic structure. It also breaks up the color so your nails look longer. The key is clean edges around the clear panel; crisp lines are what separate luxe from DIY chaos. This design works great for parties and photo days.
Paint deep red as the base, then place a thin strip of tape or a nail stencil diagonally across the nail where you want clear space. Remove the stencil after curing the base color. Seal with glossy top coat and check that the diagonal edge is sharp.
Editor's noteUse thin tape meant for nail art; wide tape leaves bulky borders and ruins the line.
Watch outDon't drag polish over the clear panel edge - it blurs the design.
21. Deep Red Ombré Glaze with Micro Glimmer
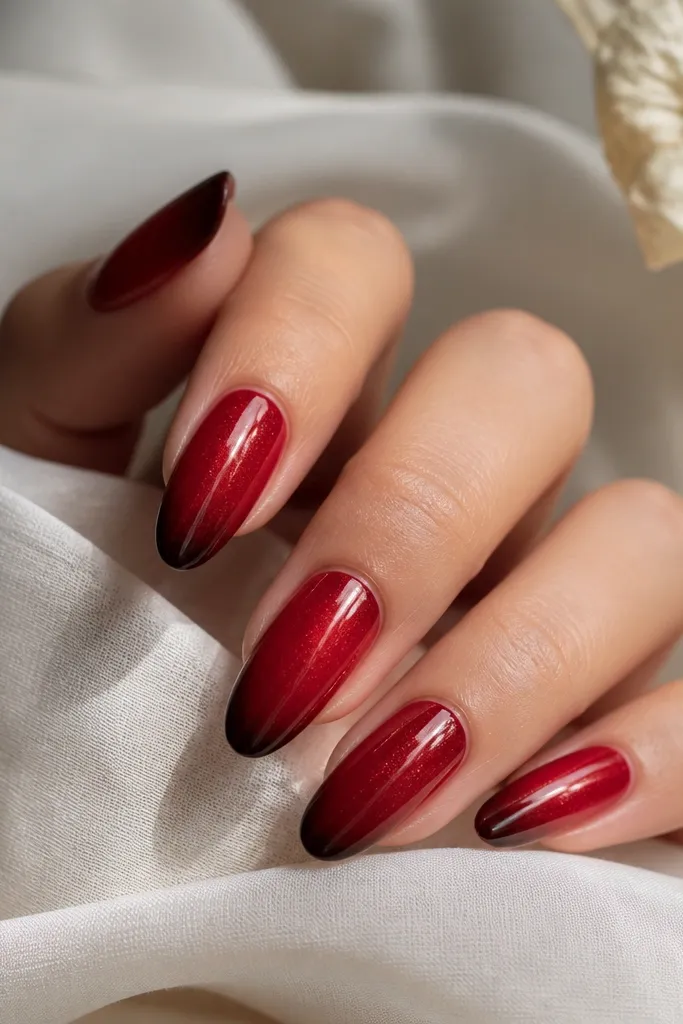
Micro glimmer over an ombré glaze looks luxe because it adds a soft light-scatter effect instead of obvious sparkles. The glimmer catches at angles, so the nails look different as you move. Deep red stays the star, and the micro shimmer just makes it feel expensive. This is perfect for dates or events where you want shine but not glittery chaos.
Create a deep-to-lighter red ombré first, then apply a sheer red glaze layer with fine shimmer only around the mid area down to the tip. Keep the shimmer light so you don't lose the fade. Seal with a high-gloss top coat.
Editor's noteTest the glimmer density on one finger first; micro shimmer can go from subtle to too much fast.
Watch outSkip heavy glitter layers - they look gritty on deep red.
22. Deep Red Gloss with Asymmetrical Foil Flake
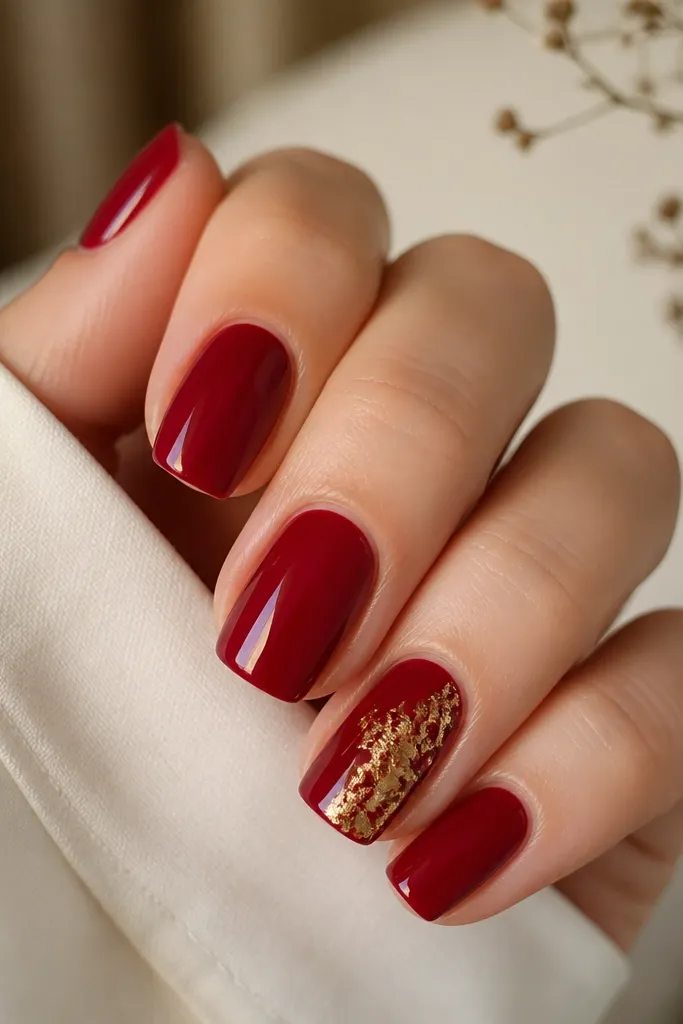
Asymmetrical foil flake looks high-end because it's irregular in a controlled way. Centered foil can look like a craft project; side placement looks fashion-forward. Deep red under gold foil makes the foil look warmer and more expensive. The glossy surface helps the foil sit flat and reflect cleanly.
Paint all nails deep red glossy. On the accent nail, apply tack gel on one side near the middle and press gold foil flakes in small pieces. Seal with two top coats, focusing on the edges so foil doesn't lift.
Editor's noteUse a soft brush to press foil edges down after curing the first top coat layer.
Watch outDon't leave foil edges unsealed - they snag and lift within a week.
23. Deep Red Pearl-Edge French on Short Round
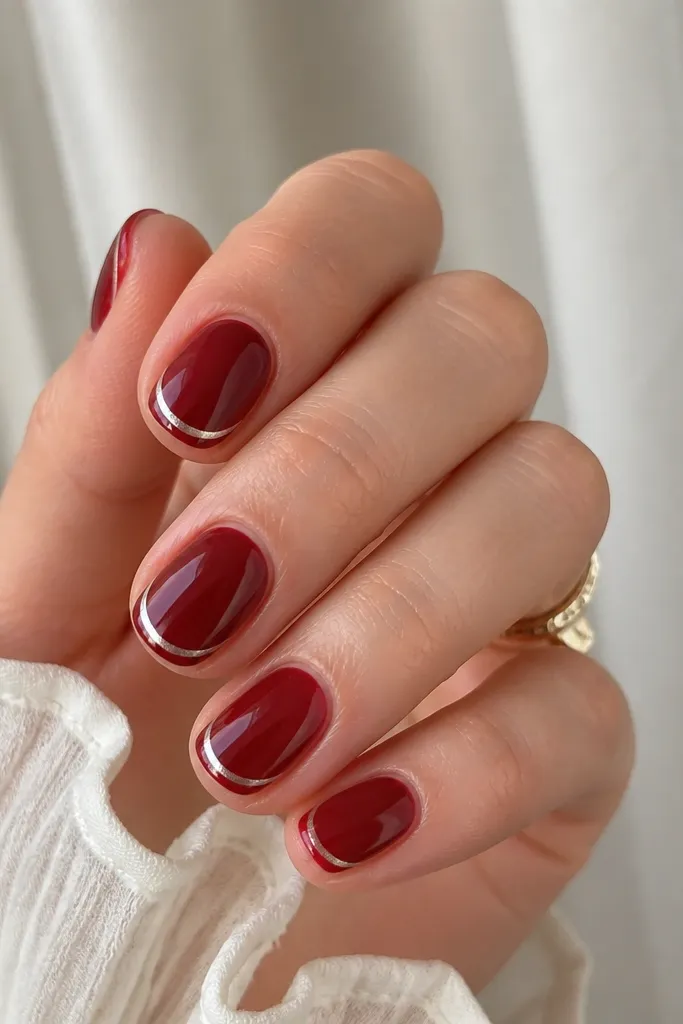
A pearl-edge French looks luxe because it makes the tip border look like jewelry. Short round nails keep it gentle and practical, while the pearl line gives that polished, salon vibe. Deep red stays bold, and the pearl line adds a soft highlight instead of harsh contrast. This is a great daily set if you hate sharp corners.
File short round with a smooth curve - no sharp corners. Paint two coats of deep red gel and cure. For the pearl edge, draw a thin line just at the free edge using pearl gel, then top coat glossy to blend it in.
Editor's noteKeep the pearl line thinner than you think - 0.5-0.8 mm is the luxe sweet spot.
Watch outSkip thick pearl borders - they look like costume nail stickers.
24. Deep Red Glassy Build with Razor-Clean Sidewalls
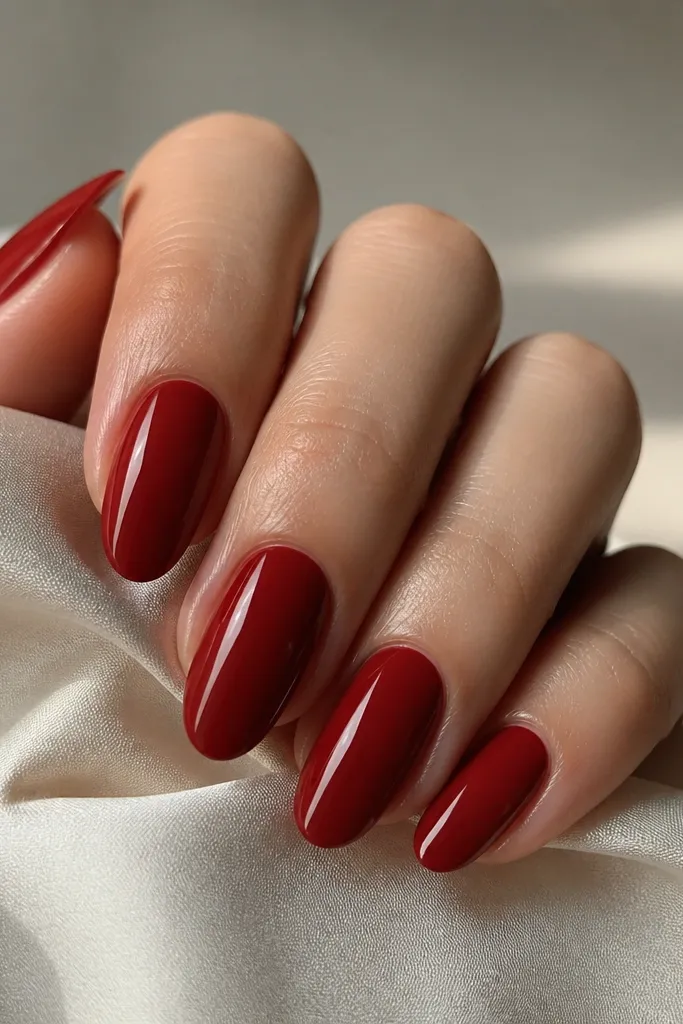
This is the "expensive" look that comes from technique, not extra art. When sidewalls are razor-clean and the surface is glassy, deep red reads like a custom press-on from a luxury brand. The straight center reflection is what you're aiming for. This set looks great even with plain color because the prep is doing the work.
Build with gel in thin layers and wipe the sidewalls as you go. File sidewalls to be smooth and straight, then buff only lightly. Top coat with a high-gloss gel and cap the free edge for a sealed, glassy surface.
Editor's noteUse a nail brush to clean dust from the sidewalls before top coat; grit shows as tiny bumps in deep red.
Watch outDon't skip sidewall cleanup - messy edges are what make plain deep red look cheap.