1. Milk-chocolate half-moons
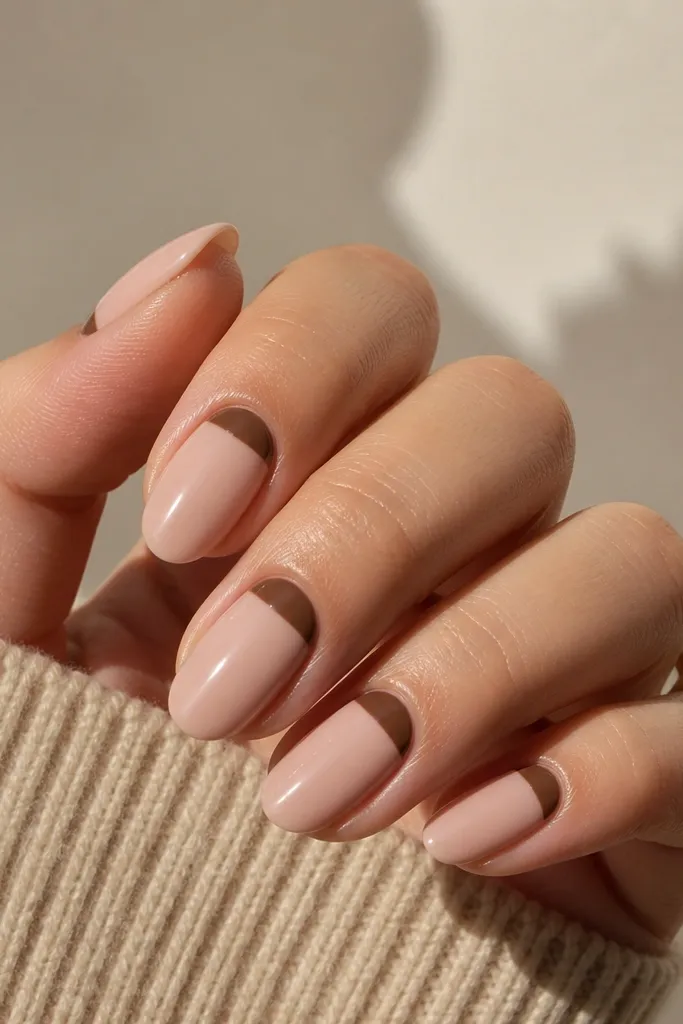
This look makes short nails look longer because the nude half-moon draws the eye upward. The brown is warm and creamy, not dusty, so it stays flattering next to skin. Keep the half-moon crisp and small - it should feel like a detail, not a chunk. The glossy finish makes the brown look smooth and "done."
Use a warm milk-chocolate polish as your base. For the half-moon, use a small detail brush or half-moon nail stickers, then paint the nude (think creamy beige) into the cuticle curve. Finish with a high-gloss top coat so the edges look glassy.
Editor's noteIf your half-moon edge gets messy, clean it with a flat brush dipped in acetone before top coat.
Watch outAvoid a huge half-moon that reaches too far down the nail - it makes short nails look chopped.
2. Espresso micro-French tips
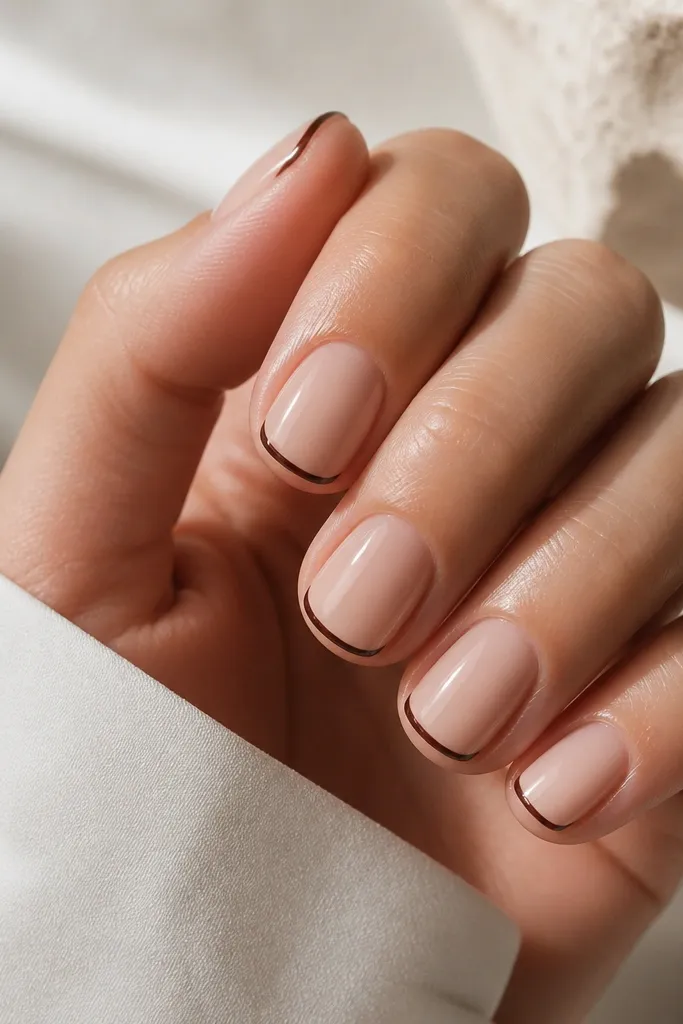
Micro French on short nails is my go-to because it adds structure without crowding. Espresso brown has enough depth to look polished, but the thin tip keeps it light. The sheer nude base is important - it lets the tip line "lift" the nail shape. This one looks good even if you do it with steady hands only once.
Start with a sheer nude (or pinky nude) base coat. Use a striping brush to paint a 0.8-1 mm espresso tip line, keeping it centered. Add a second thin layer if needed for full coverage, then seal with glossy top coat.
Editor's noteHold your hand under a bright light and paint the tip line in one stroke, then touch up the ends.
Watch outSkip thick French tips on short nails; they make your nail bed look smaller.
3. Cinnamon swirl on nude-brown
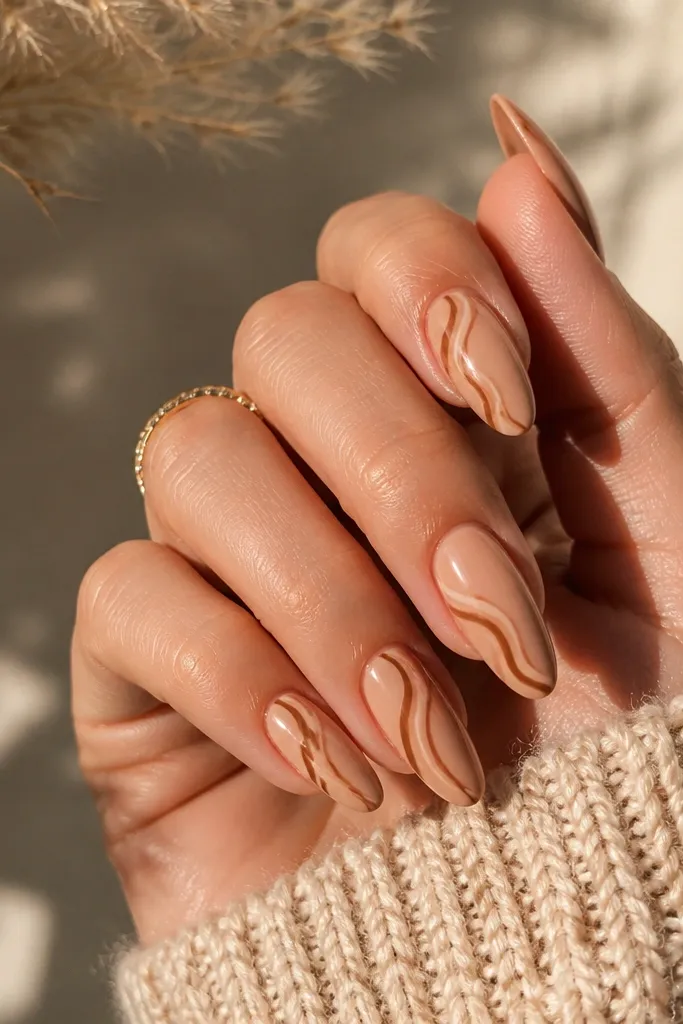
A swirl adds movement while staying delicate on short nails. The nude-brown base keeps it wearable, and the cinnamon swirl adds warmth. The creamy white highlight makes the swirl look dimensional instead of flat. You get the "nail art" vibe without needing long nails.
Paint all nails a nude-brown (light milk tea color). On one or two nails, use a dotting tool to place a small swirl starting near the center, then drag the cinnamon brown with a thin brush. Add a thin creamy white line over the swirl for contrast.
Editor's noteDo the swirl only on the nail surface - don't let it creep into the sidewalls or it will look crowded.
Watch outAvoid covering the entire nail with swirls; short nails need breathing room.
4. Glossy cocoa with one bronze stripe
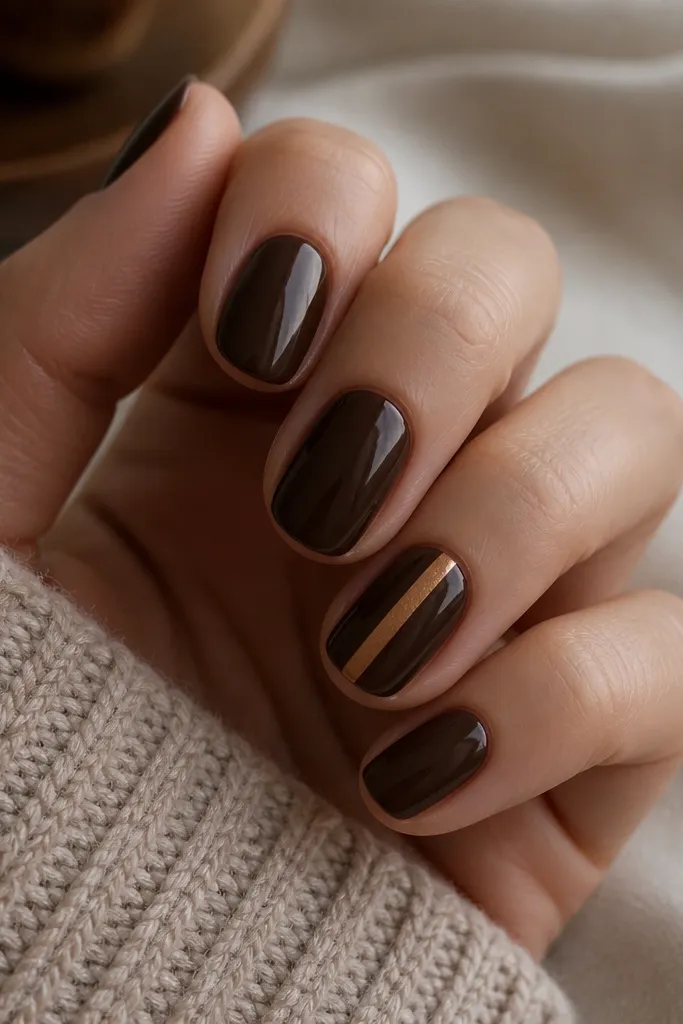
That one vertical stripe makes short nails look taller. Deep cocoa is dramatic without being black, and bronze catches light like jewelry. Because the stripe is centered, it frames the nail bed instead of distracting. Glossy top coat keeps the brown looking smooth and expensive.
Use deep cocoa polish on all nails. For the stripe, use a striping tape guide or a fine liner brush with bronze metallic. Keep the stripe thin - about the width of a regular gel brush hair. Seal with a thick top coat to smooth over the metallic.
Editor's notePress the tape down lightly for a straight line, then remove immediately after painting for sharp edges.
Watch outDon't use a chunky glitter stripe; it makes short nails feel visually heavy.
5. Caramel glossy ombré edge
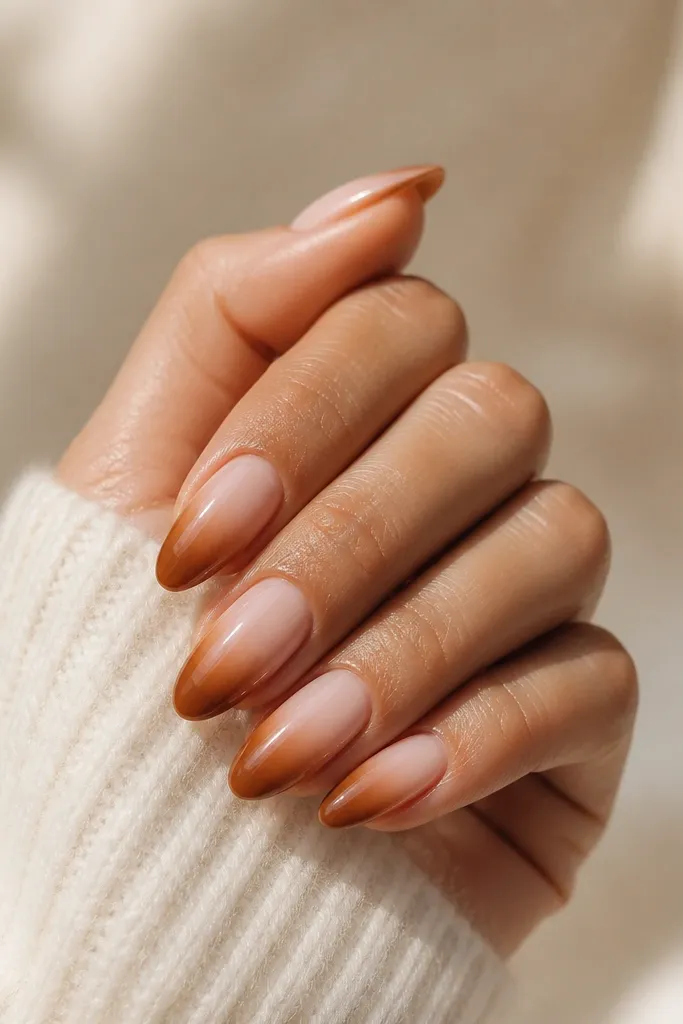
Side ombré is flattering on short nails because it preserves the lighter center and adds dimension. Caramel brown is warm and friendly, so your hands look healthy rather than harsh. The fade hides minor nail shape unevenness. Glossy finish makes the gradient look smooth instead of patchy.
Start with a sheer nude. Sponge caramel brown onto a makeup sponge, then tap near the outer edges and blend toward the tip, leaving the center lighter. Clean up edges with a brush dipped in acetone, then top coat.
Editor's noteUse a light hand with the sponge - build opacity in 2 thin layers, not one heavy layer.
Watch outAvoid a harsh line at the fade point; it's what makes ombré look DIY.
6. Matte mocha with tiny dot constellation
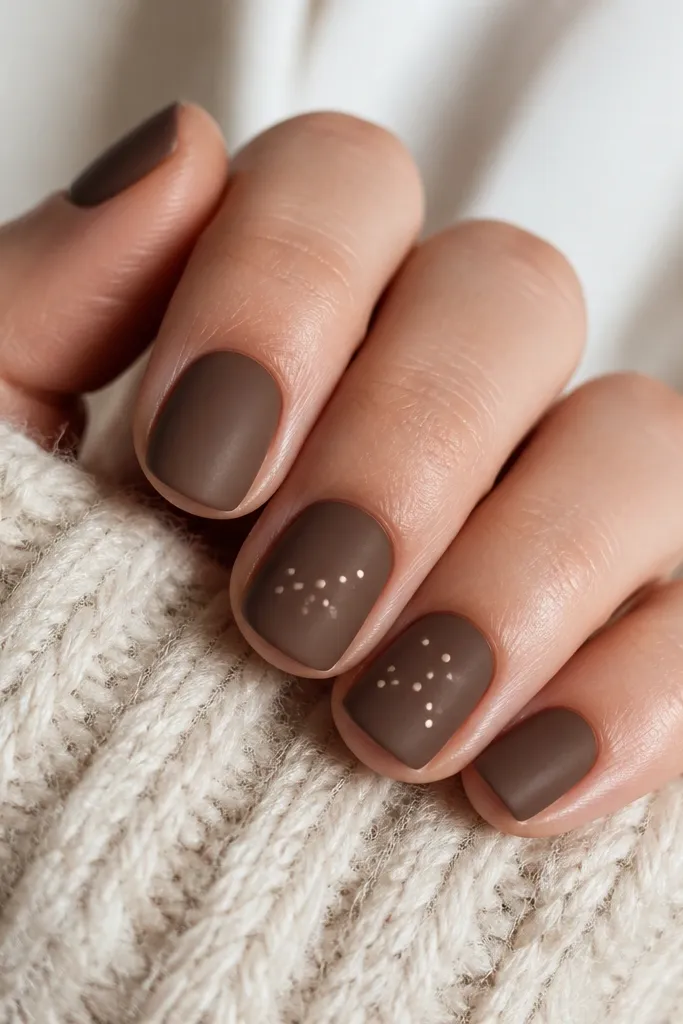
Matte mocha looks cozy and modern, and tiny dots add interest without taking over. Cream dots brighten the design and make short nails feel playful. This combo looks especially good if your brown polish is smooth - matte magnifies texture. I like using a matte top coat over a well-leveled base.
Paint all nails with a mocha brown (slightly medium tone). Let it dry fully, then apply matte top coat. For dots, use a dotting tool with cream polish and place 3-5 dots in a small cluster on one or two accent nails.
Editor's noteSeal the dots with a thin layer of top coat only after they're completely dry - matte can smudge if you rush.
Watch outSkip matte on nails with ridges unless you smooth the base - otherwise it looks rough.
7. Chocolate chrome tips
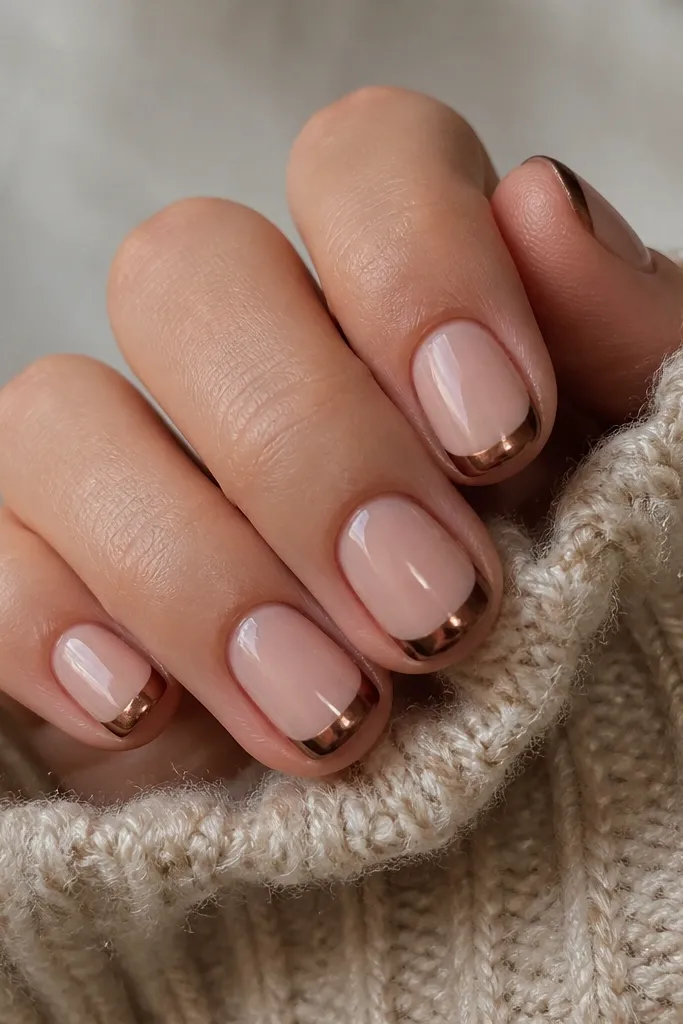
Chrome tips make short nails look like you spent way more time than you did. The brown-chocolate chrome reads rich, and the shift to copper gives warmth without needing extra patterns. Because it's only on the tip, it stays neat even on very short length. The reflective finish makes the nail shape look crisp.
Use a nude base, then apply a gel top coat or chrome-ready base at the tips. Buff the brown chrome powder onto the tacky surface, then tap off excess. Seal with a glossy top coat to lock it in and keep the shine even.
Editor's noteIf your chrome powder looks patchy, add a thin second layer of tack only on the tip area.
Watch outDon't put chrome over a thick, streaky brown base - the streaks show through.
8. Caramel check accent
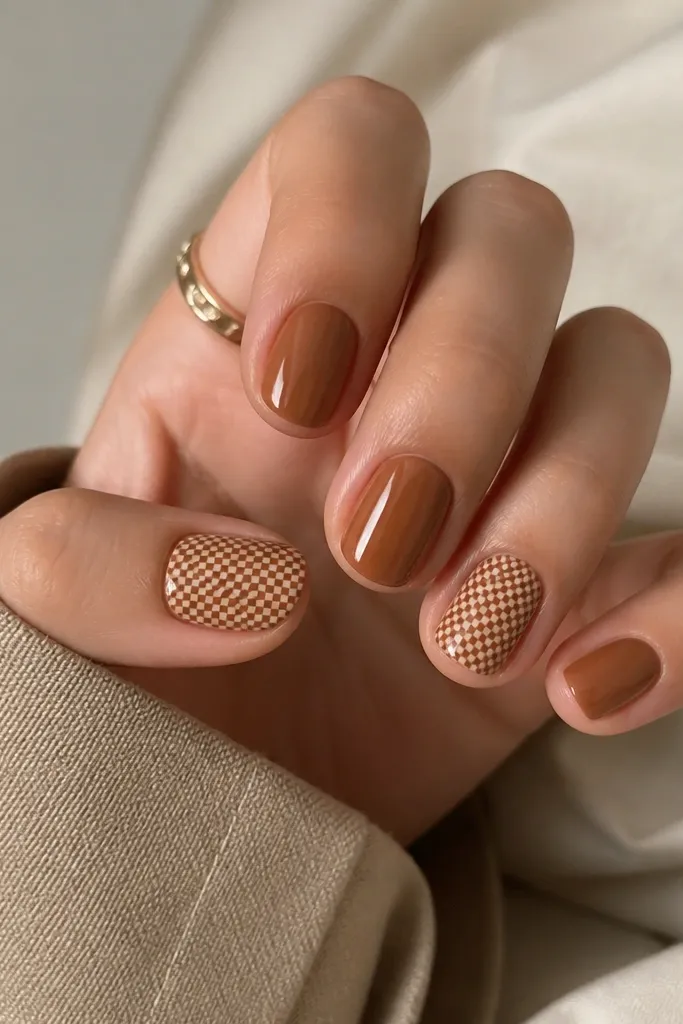
A mini check pattern looks cute on short nails because the squares are small and controlled. Lighter beige + caramel gives contrast without turning the design into "fall themed" clutter. It reads trendy because the pattern is only on select nails. Glossy top coat keeps the check lines sharp.
Paint all nails caramel brown. On accent nails, use a thin striping brush to draw two vertical lines, then two horizontal lines to form a small grid. Fill alternating squares with beige, leaving caramel as the other squares. Finish with top coat.
Editor's noteUse a nail art tape strip as a guide for straight lines, then remove it right away.
Watch outAvoid large checks - they swallow the small nail real estate.
9. Nude brown glazed donut
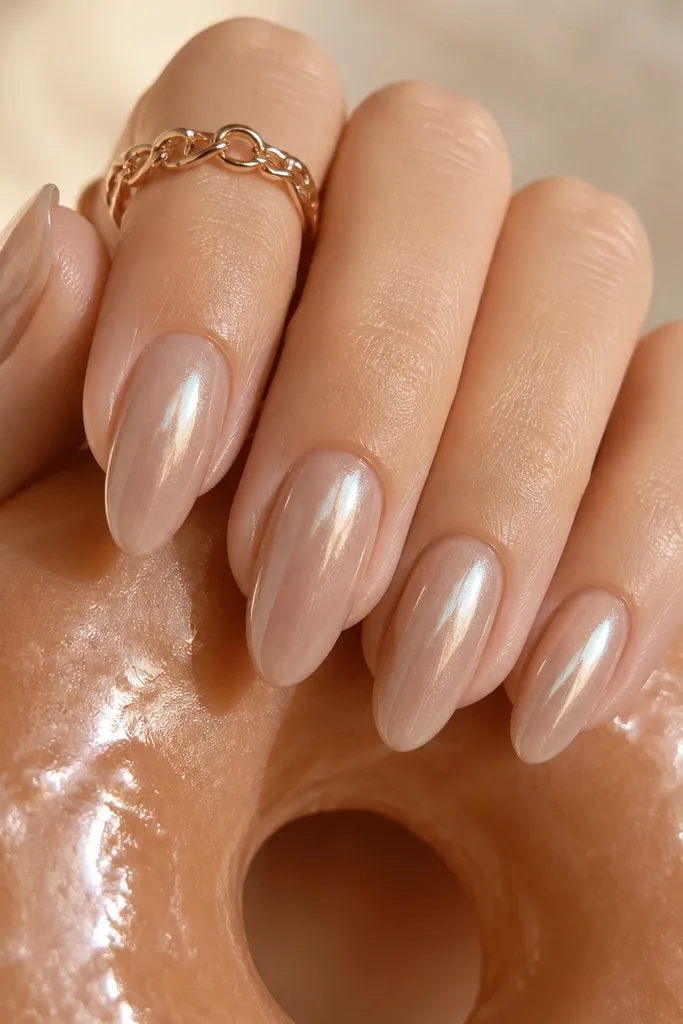
This is the "glazed" look that always photographs well. The nude-brown base keeps it soft, and the pearly glaze makes it look smooth and hydrated. The arc near the cuticle gives a subtle framing effect that suits short nails. It's glossy enough to hide minor brush strokes.
Use a nude-brown cream polish or a nude gel base. Add a sheer pearl gel on top and cure. Then paint a thin lighter-brown arc with a liner brush along the cuticle curve, and seal with a glossy top coat.
Editor's noteKeep the arc line thin - around 0.5 mm - so it stays "glaze," not a thick band.
Watch outDon't add glitter everywhere; it turns the glazed look grainy on short nails.
10. Satin brown with cuticle ribbon
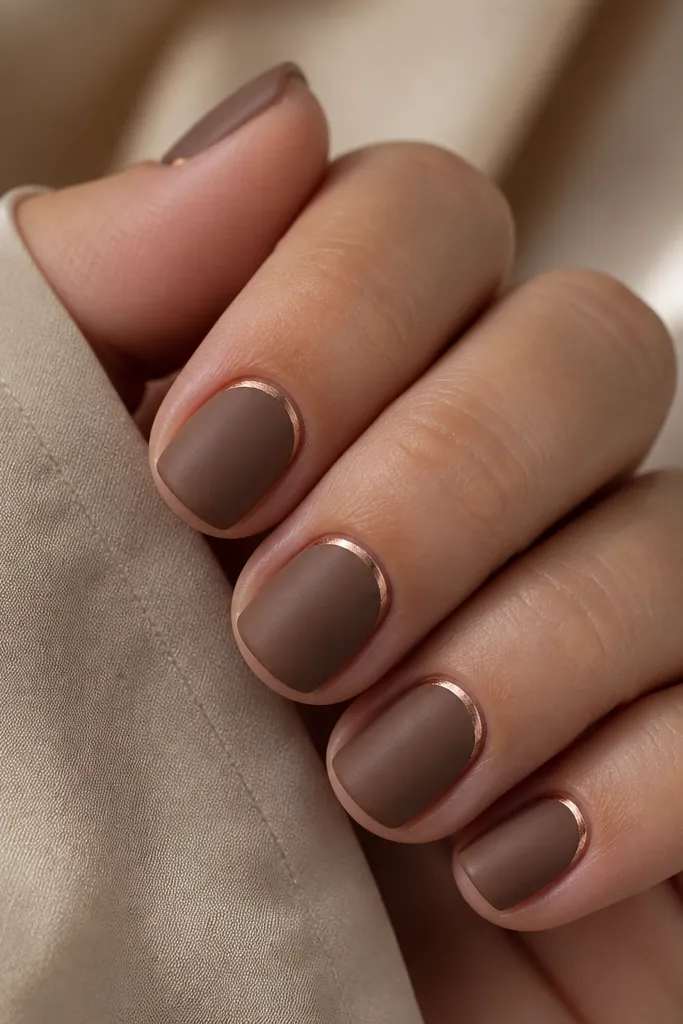
The cuticle ribbon is the quickest way to make short nails feel dressed up. Satin brown makes the metallic pop without looking loud. I like rose-gold because it flatters most skin tones and doesn't turn the design orange. The ribbon also visually lengthens the nail by drawing the eye along the cuticle curve.
Apply satin-matte brown (or matte top coat if you don't have satin). Use a small strip of rose-gold foil or metallic tape and place it along the cuticle curve, then trim the ends with a small scissors or file. Seal carefully so the foil doesn't lift.
Editor's notePress the foil down with a cotton swab wrapped in tape for extra grip before sealing.
Watch outDon't cover the ribbon with heavy matte top coat - it dulls the foil and looks patchy.
11. Mocha marble swipe
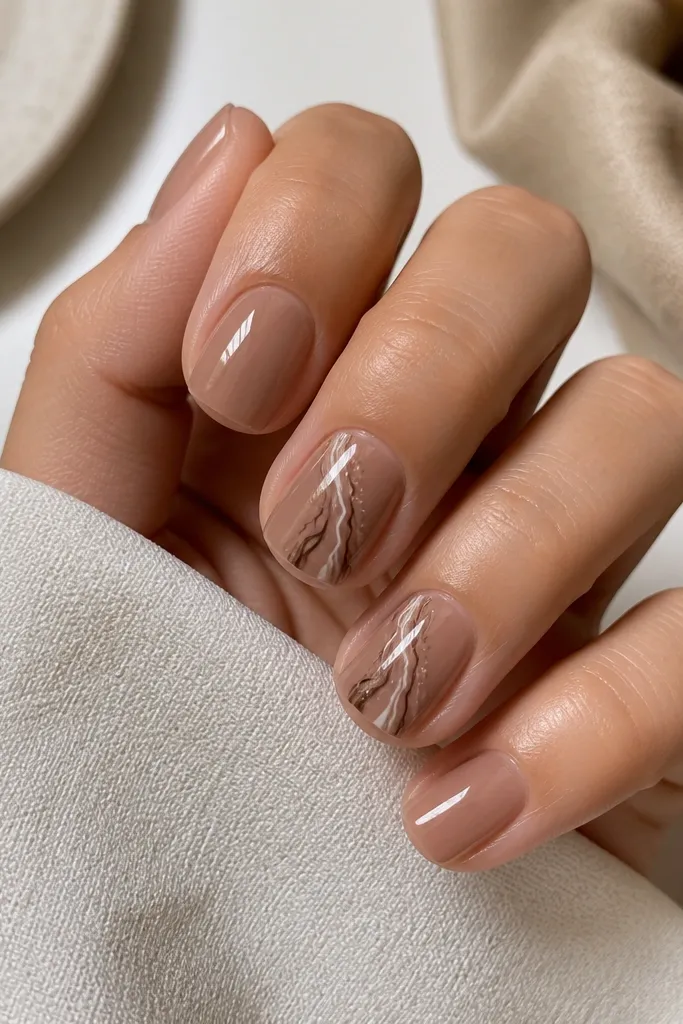
Marble swipe works on short nails because the pattern is linear, not spread across the whole nail. The translucent base makes the lines look like they're floating. Espresso + cream gives contrast that looks clean instead of muddy. Glossy top coat makes the marble look like gel art, even if you're using simple tools.
Paint a sheer nude brown base. On accent nails, drag a few thin lines with a detail brush using espresso brown, then add tiny creamy white flecks. Swirl with a toothpick lightly to soften edges. Seal with glossy top coat to lock the design.
Editor's noteKeep the marble lines mostly in the center; side-heavy marble can look cramped on short nails.
Watch outAvoid thick marbling - it looks like paint blobs on short nails.
12. Walnut swirl French
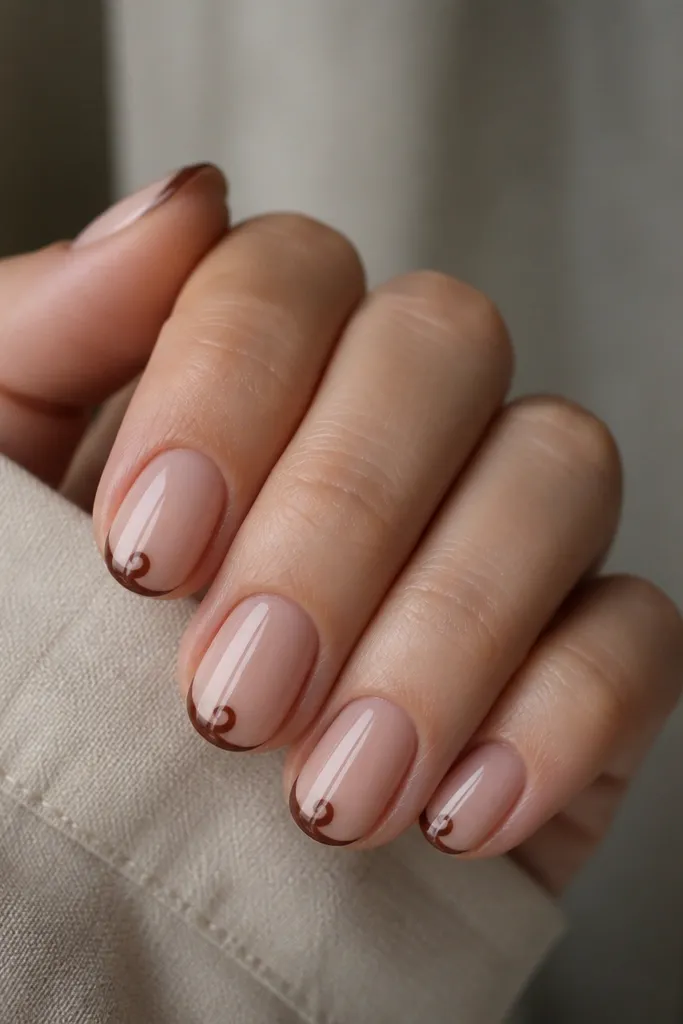
This is French that doesn't feel boring. The walnut tip gives structure, and the tiny swirl adds personality without taking up much space. Because the swirl sits in the center, it balances the nail width. Glossy finish keeps it looking smooth and intentional.
Paint a sheer nude base, then do a rounded French tip in walnut brown using a guide strip or a freehand French brush. On each tip, add a small swirl using a toothpick and a dotting tool. Cure/dry fully, then top coat.
Editor's noteMake the swirl about the size of a sesame seed so it reads cute, not busy.
Watch outDon't extend the French too wide at the sides; short nails need a narrow tip.
13. Chocolate outline nail art
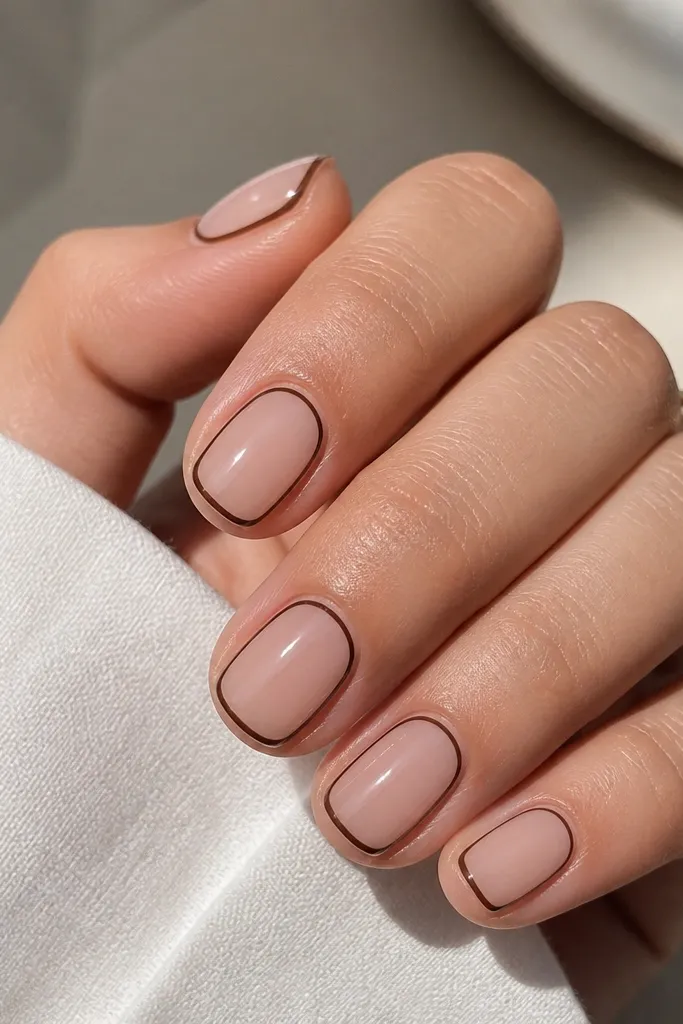
An outline gives a "framed" look that makes short nails appear more structured. The nude base keeps it fresh, while the dark brown outline adds clarity. This style is great if you want nail art but hate big shapes. It also forgives small nail shape differences because the border defines the nail shape.
Use a sheer nude base. With a fine liner brush, draw a thin border following the nail perimeter, leaving a small gap from the sidewalls. Add a second tiny line near the tip edge for definition if you want extra contrast. Seal with glossy top coat.
Editor's noteIf your line shakes, anchor your brush by touching the nail at the midpoint first, then glide toward the corners.
Watch outAvoid thick outlines; they make short nails look like they're wearing a frame that's too tight.
14. Caramel latte gradient glitter cuticle
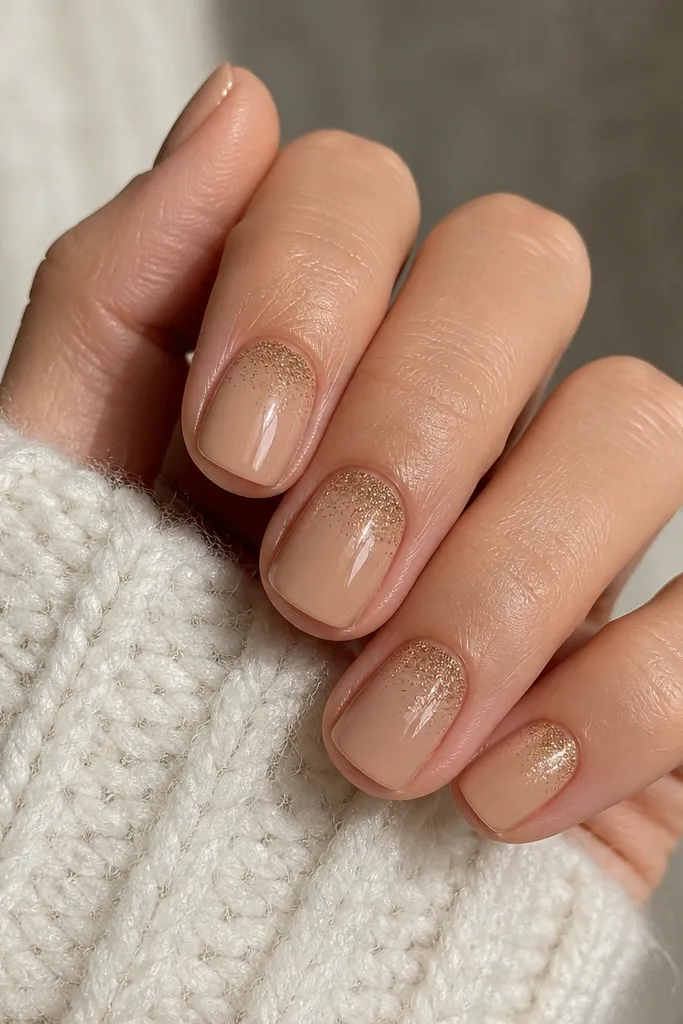
Glitter at the cuticle elongates the nail and keeps the rest clean. The latte nude base looks soft, while warm caramel micro-glitter adds that "coffee shop latte" glow. The gradient fade makes it look smooth instead of like glitter stuck in one place. This one is perfect for dates, events, or any day you want sparkle without full glitter coverage.
Paint a latte nude base. Sponge or tap warm caramel micro-glitter onto the cuticle area, then fade it downward with a makeup sponge lightly. Keep it to about 1/3 of the nail length. Top coat over glitter carefully so it doesn't look gritty.
Editor's noteUse a glitter top coat or a thicker gel top coat to smooth the glitter texture.
Watch outSkip full glitter nails on short length - they look heavy and can catch on hair and fabrics.
15. Espresso dot grid on nude
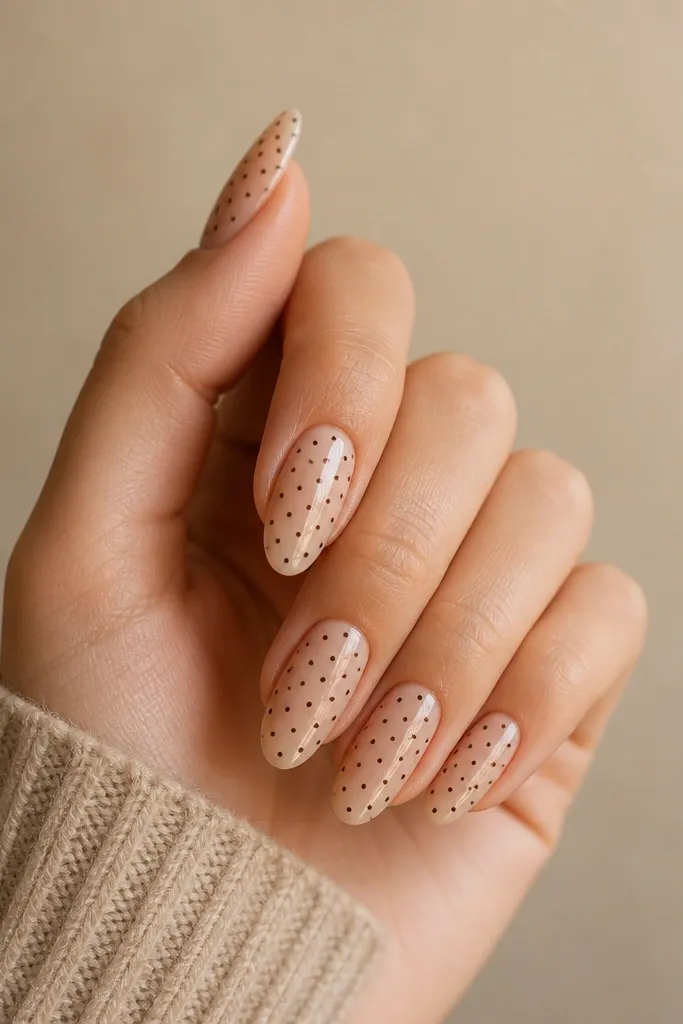
A dot grid is graphic but still soft, because the dots are small. Espresso-brown looks clean and sharp against nude, and the pattern adds structure to short nails. I like it because it's easy to repeat and it looks intentional even if your dots aren't perfect circles. Glossy finish makes the dots look crisp.
Use a sheer nude base. On accent nails, place nine dots in a 3x3 grid using a dotting tool size that matches the nail (start smaller than you think). Add one extra row only if your nail is wider. Seal with glossy top coat.
Editor's noteMark dot positions lightly with the tip of your dotting tool before you load polish.
Watch outAvoid random scattered dots - grid patterns look polished on short nails.