1. Milky Pink + Tiny White Star Clusters
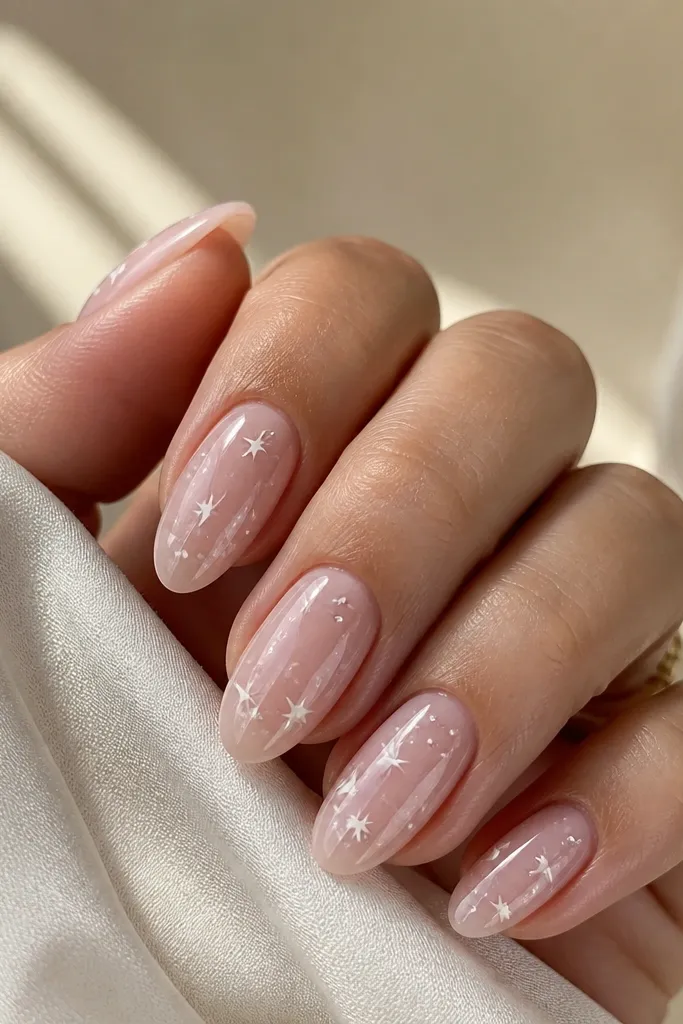
This look is the "concert camera" version of simple nail art. The milky pink base makes the white stars pop without looking harsh, and the cluster placement keeps it cute instead of busy. I like using pearl white because it looks softer under venue lighting than pure flat white.
Start with 2-3 thin coats of milky pink, then dot tiny star points using a dotting tool as placement guides. Draw each star with a liner brush - small and sharp - then leave a little negative space around the cluster. Finish with a glossy top coat that covers the edges so the stars don't lift.
Editor's noteIf your stars wobble, make them slightly uneven on purpose - one or two stars can be smaller and it still reads intentional.
Watch outDon't load the liner brush with too much paint; thick stars look like stickers instead of nail art.
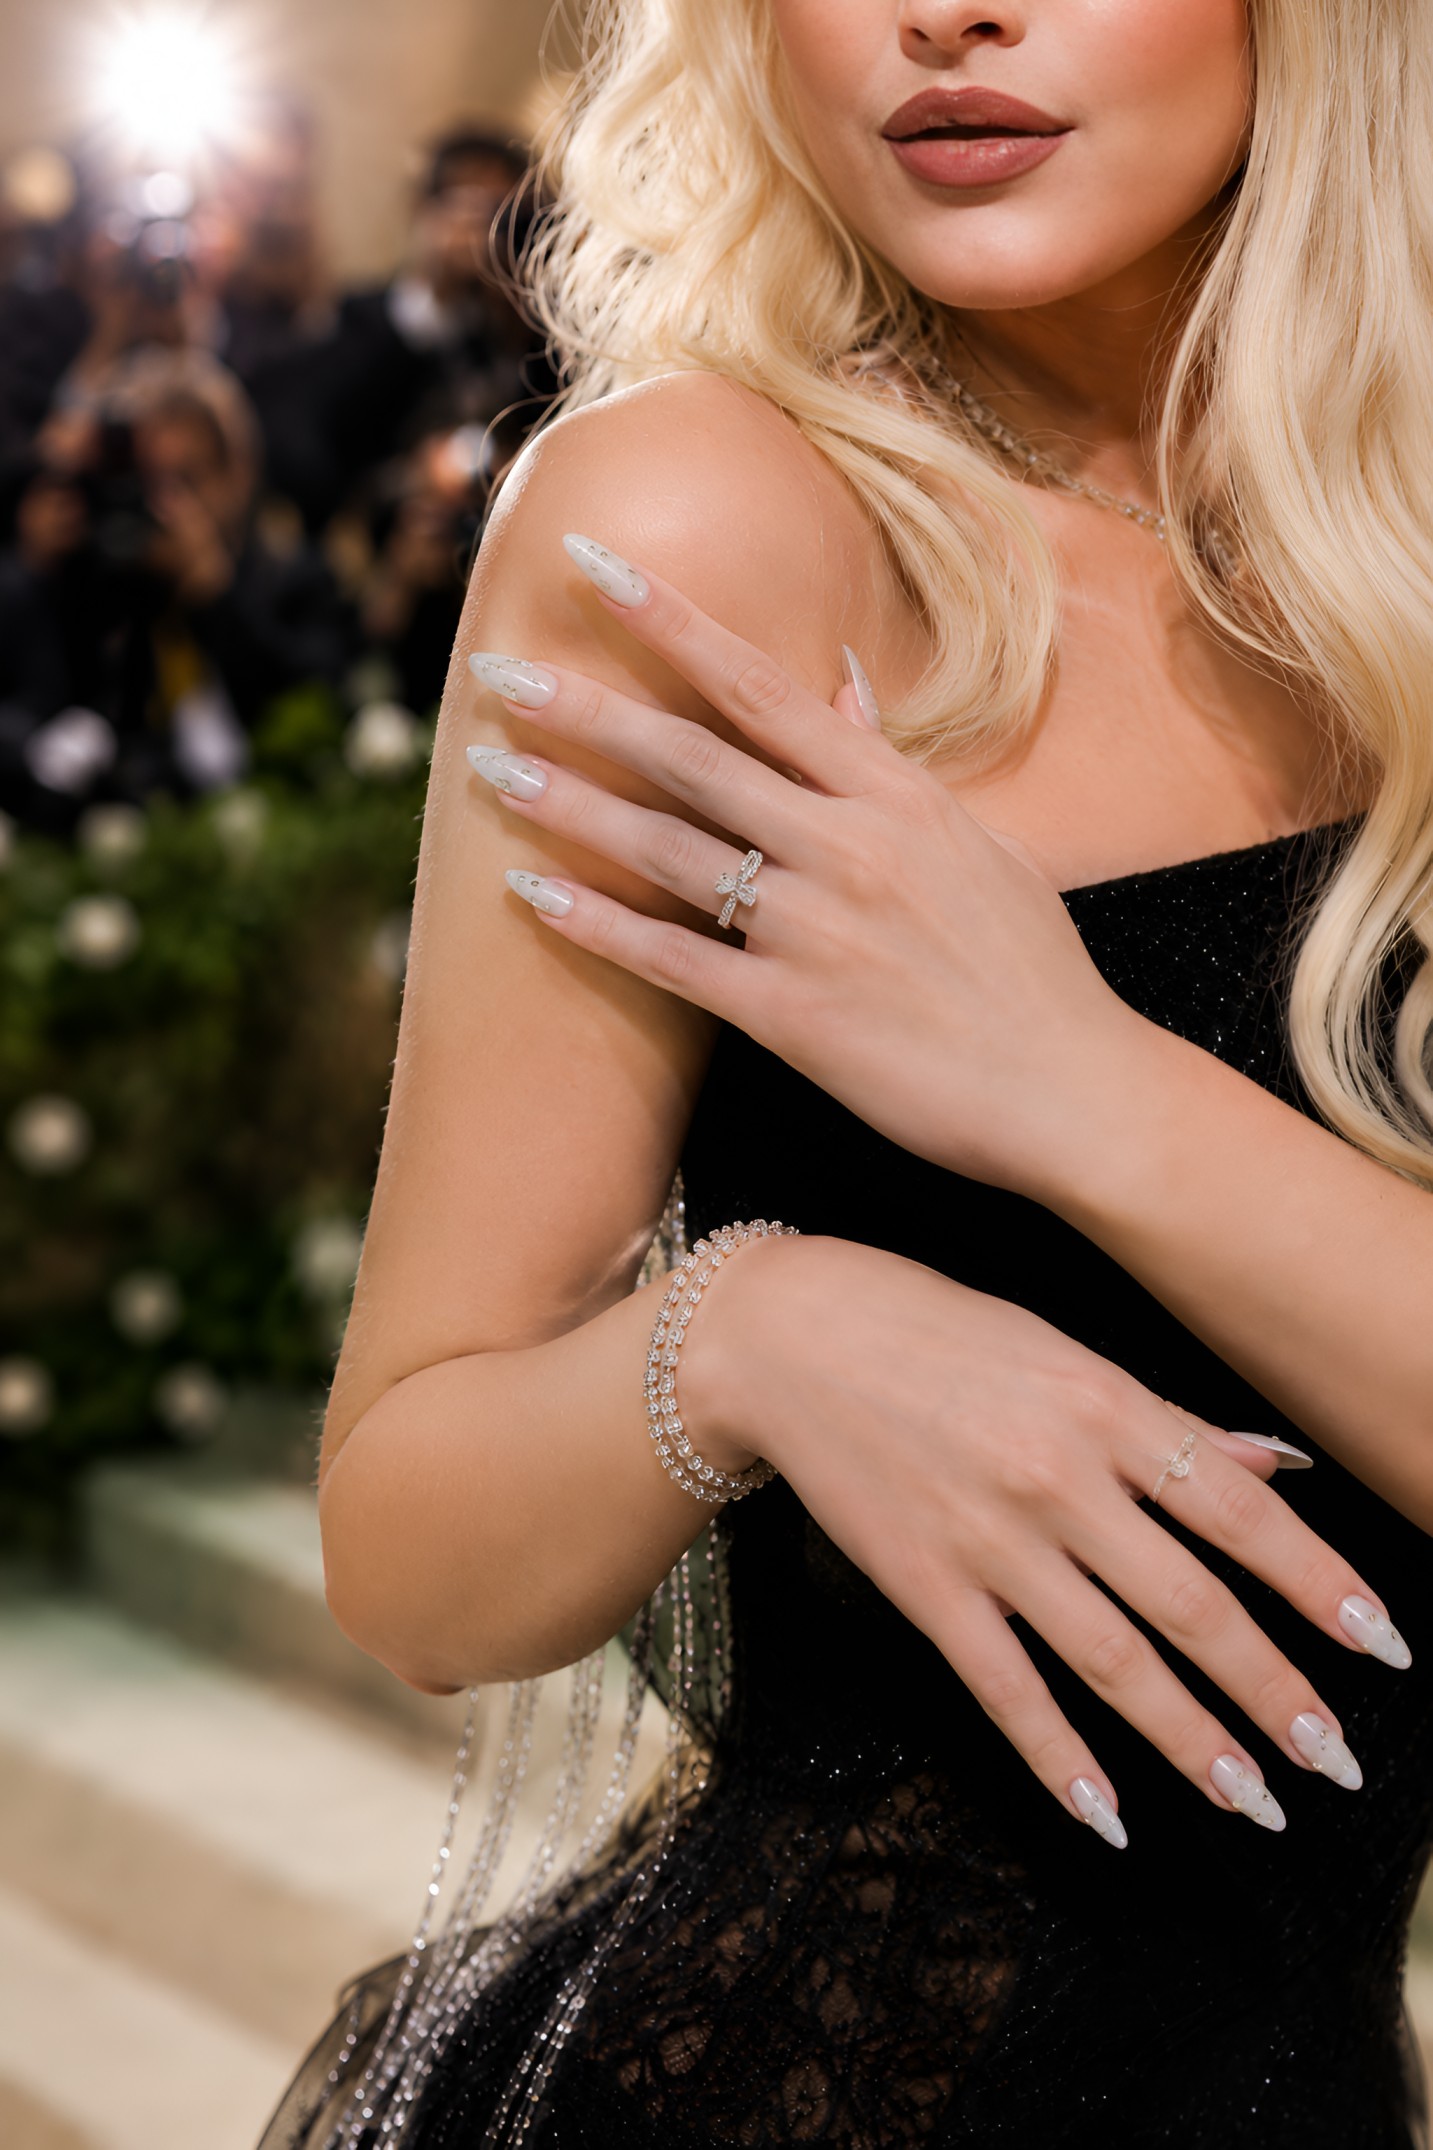
2. Soft Pink Bow on the Ring Finger
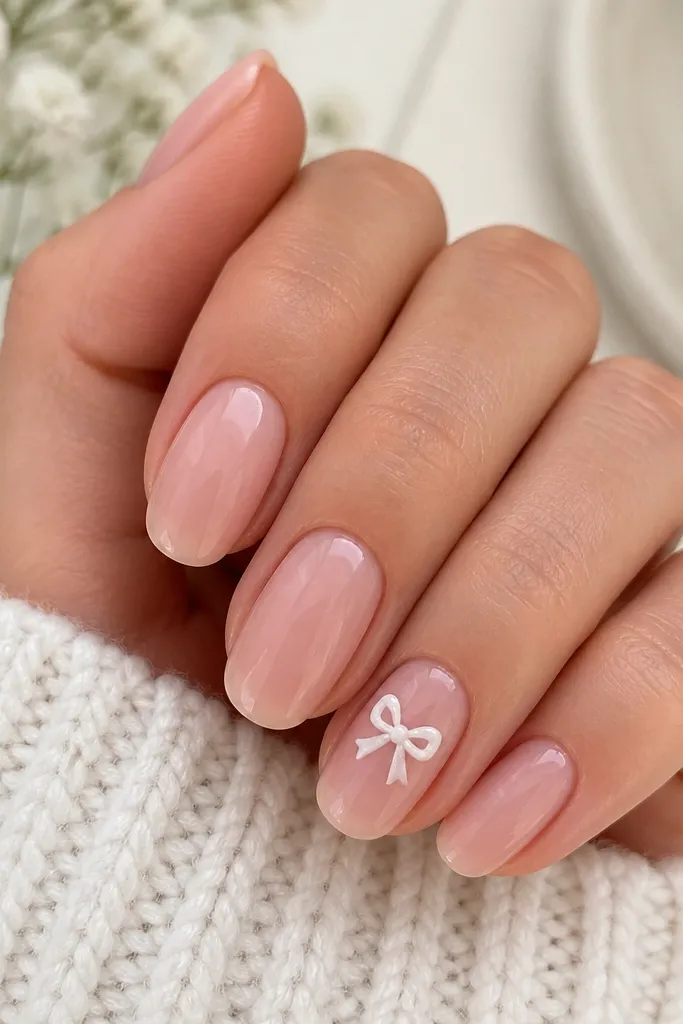
Bows read "Carpenter concert" fast because they're instantly recognizable. Keeping the bow only on the ring finger keeps the rest of your nails wearable and lets the bow be the focal point. Use white with a hint of pearl so it looks bright under flash without turning stark.
Paint the base on all nails. On the ring finger, draw the two bow loops first with thin curved lines, then add a tiny center knot. Add a second pass to thicken the bow outline lightly so it doesn't look sketched.
Editor's noteUse a toothpick to clean up the bow edges - it's easier than wiping with cotton and smearing.
Watch outSkip a full bow on every nail; it looks like a themed manicure from a distance and feels heavy up close.
3. Starburst Lines with Negative Space
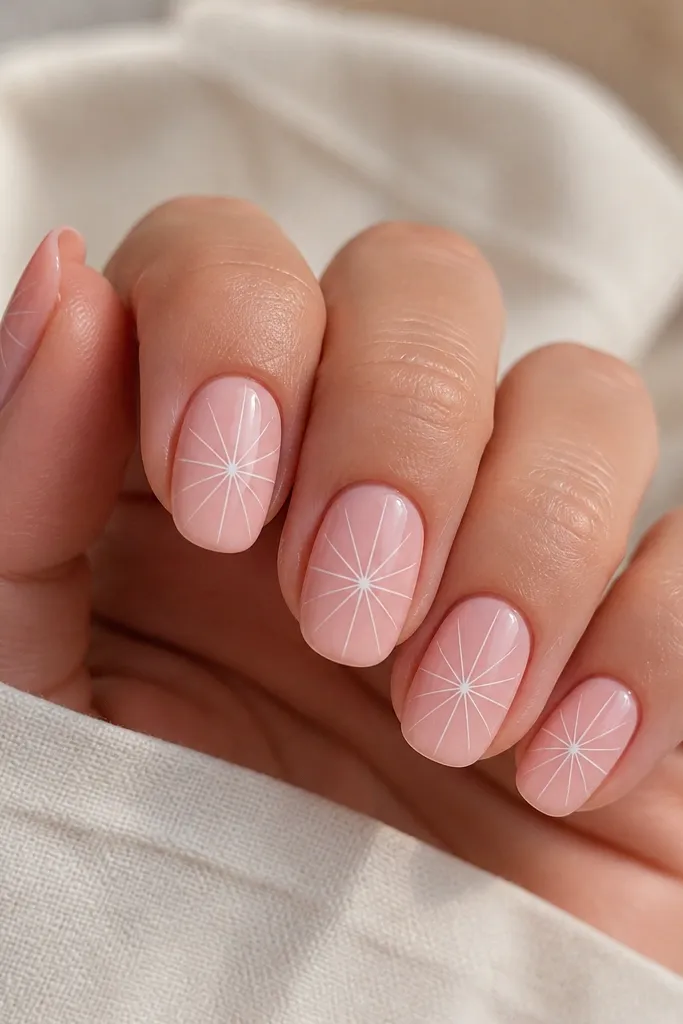
Starbursts look fancy because the lines catch light, but you don't need a steady hand for the whole thing. You only need one starting dot, then you fan the lines outward. Negative space keeps it airy and keeps your nails from looking over-decorated.
Mark one center dot near the middle of the nail. Draw 6-8 thin lines using the liner brush in white, stopping short of the sidewalls. Leave gaps between rays, then top coat over everything carefully to seal.
Editor's noteIf your lines go crooked, stop and repaint the line thinner; a thin correction looks better than a thick one.
Watch outDon't fill in the center with glitter - it makes the starburst look muddy instead of crisp.
4. Silver-Pink Glitter Fade (No Cuticle Mess)
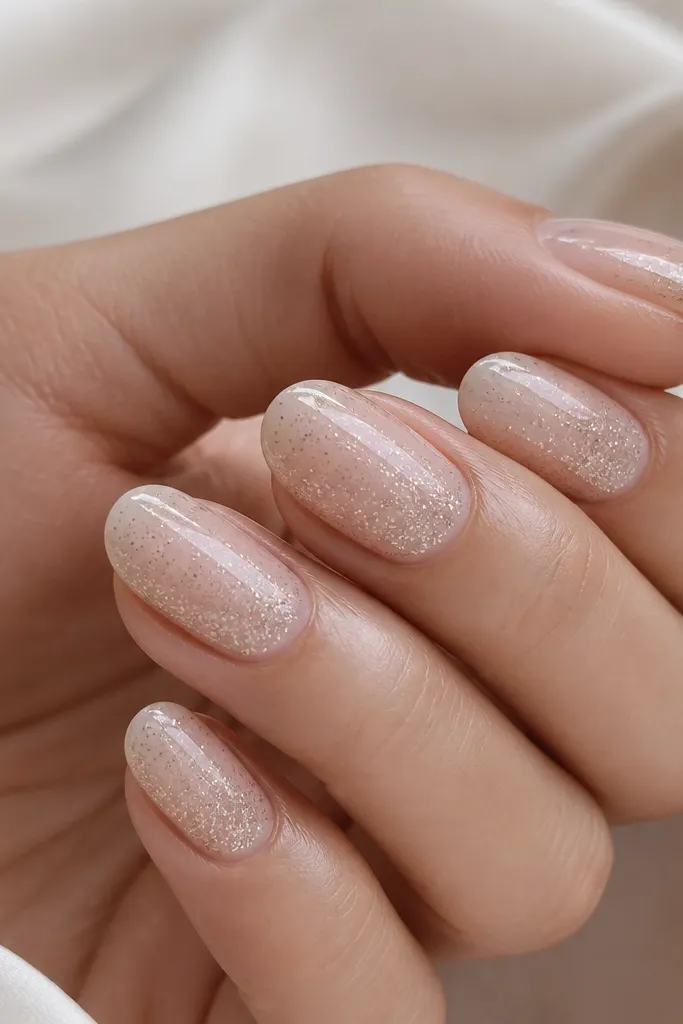
This is the "concert sparkle" look that still looks clean when you're sweating and touching your hair. The fade direction matters: denser near the tip makes your nails look longer. Use fine glitter so it blends without chunky texture.
After the milky pink base, sponge a tiny amount of silver-pink glitter near the top third and dab downward toward the tip. Build density gradually - two light layers beat one heavy layer. Seal with a gel or thick top coat so the texture smooths out.
Editor's noteTap off extra glitter on scrap paper first; it prevents that accidental blizzard near the cuticle.
Watch outDon't bring glitter all the way to the skin - the edge will lift and look messy fast.
5. Micro Stripes with a Single White Accent
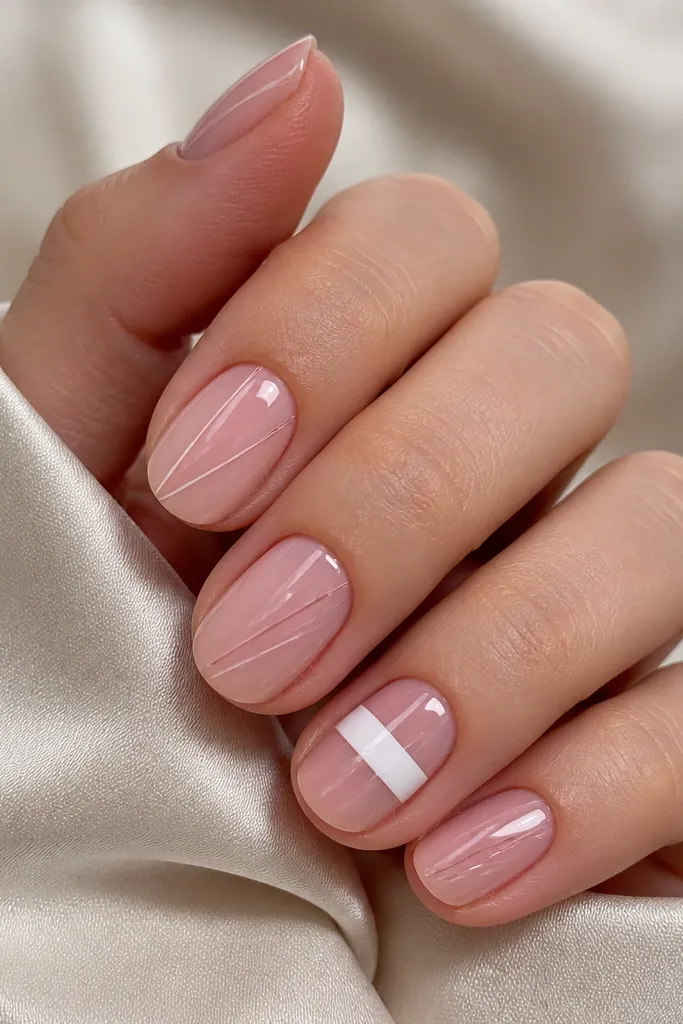
Micro stripes look like expensive nail design because they're controlled and minimal. The sheer base keeps everything soft, and the single thicker white stripe adds that flash-photo contrast. This one is great when you want Sabrina energy but you hate heavy art.
Use striping tape to place diagonal guides for each nail. Paint a thin line in a pale shade (or a near-white) and remove tape while polish is slightly tacky. On one accent nail, replace one micro stripe with a thicker white stripe.
Editor's noteAngle your stripes the same direction on every finger; consistency is what makes it look intentional.
Watch outDon't freehand stripes without tape - uneven angles scream "beginner" in a bad way.
6. Chrome Cuticle Halo
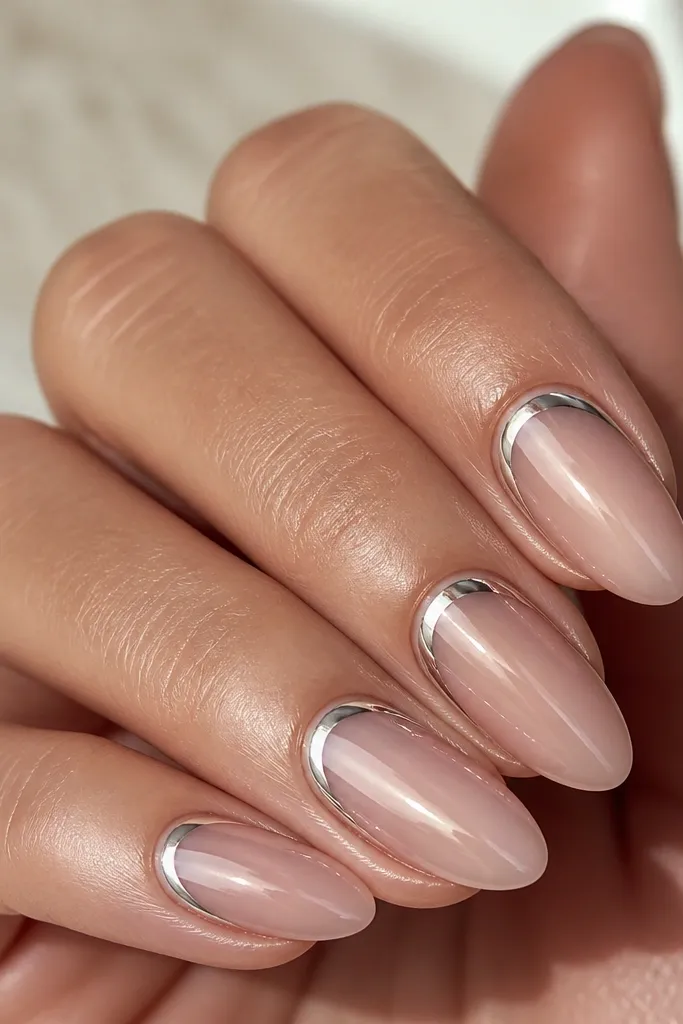
A cuticle halo gives you that mirror sparkle without coating the whole nail in chrome. It also frames your nail shape - it makes short nails look styled. The halo is small enough that you only need one clean arc.
After base color, apply chrome gel or a small patch of adhesive where you want the halo. Rub chrome powder over that area, then blend the edges with a soft brush so it fades out. Top coat gently so you keep the reflective look.
Editor's noteUse a small piece of foam to press chrome - it gives you a smoother arc than rubbing with your finger.
Watch outDon't overdo the halo thickness; a wide chrome band looks like a sticker and catches on hair.
7. Pearl Pink Swirl on the Thumb
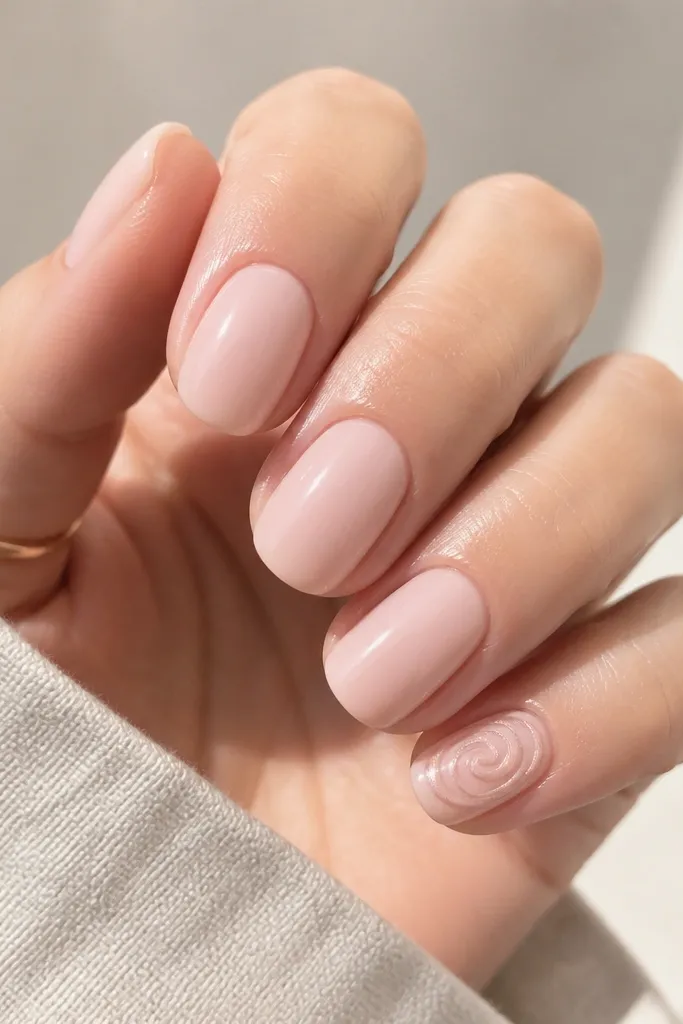
Swirls look artsy but are simple when you keep them single-line. A pearl-pink swirl blends with the base, so it looks soft and pretty in daylight and still shows in flash. I like doing it on the thumb because it's the easiest nail to see while you work.
Paint all nails in milky pink. On the thumb, draw one smooth spiral curve using a liner brush, then add one extra line to thicken one edge of the swirl. Seal with top coat in two thin layers.
Editor's notePractice one swirl on paper first - the stroke you use on practice is the one that stays steady on your nail.
Watch outSkip chunky swirls; thick lines make it look like a kid drew it.
8. Candy Pink Half-Moon Tips
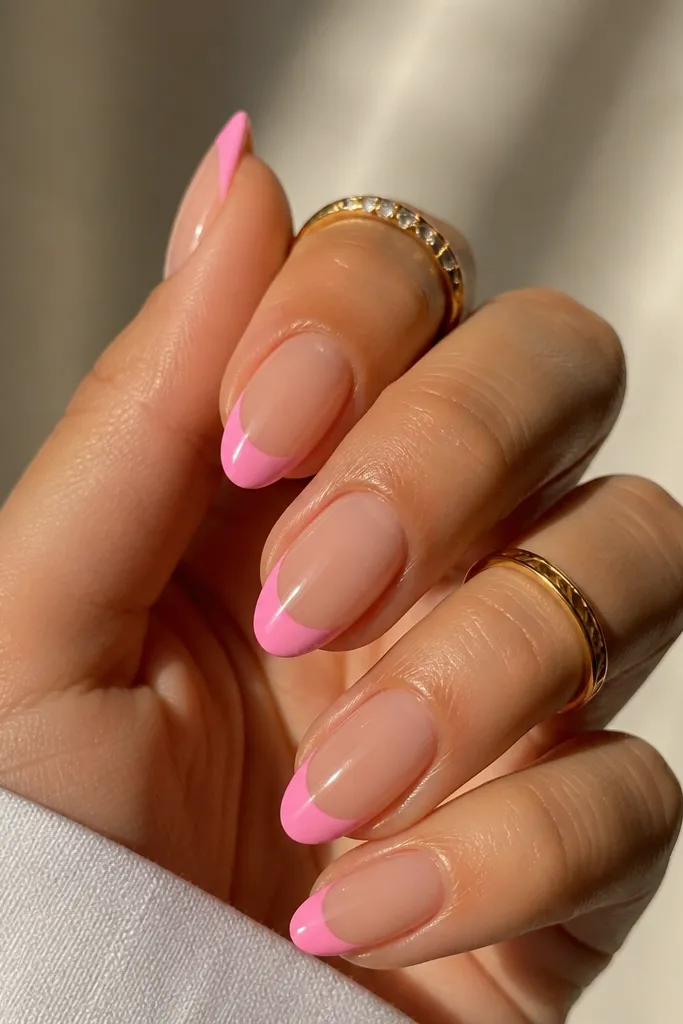
Half-moon tips look playful and are easier than a full French tip. The clean gap keeps it modern and stops the design from looking like a generic manicure. Candy pink adds warmth that looks great in concert photos where everything is cooler-toned.
After base, use striping tape to block off a curved half-moon shape. Paint candy pink inside the taped area, then remove tape while the polish is still slightly soft. Touch up edges with a small brush and seal with top coat.
Editor's noteIf tape bleeds, hold the tape down for 5 seconds and press it firmly along the curve.
Watch outDon't make the half-moon too close to the cuticle; it shortens the nail visually.
9. Glitter Teardrop Accent (One Nail Only)
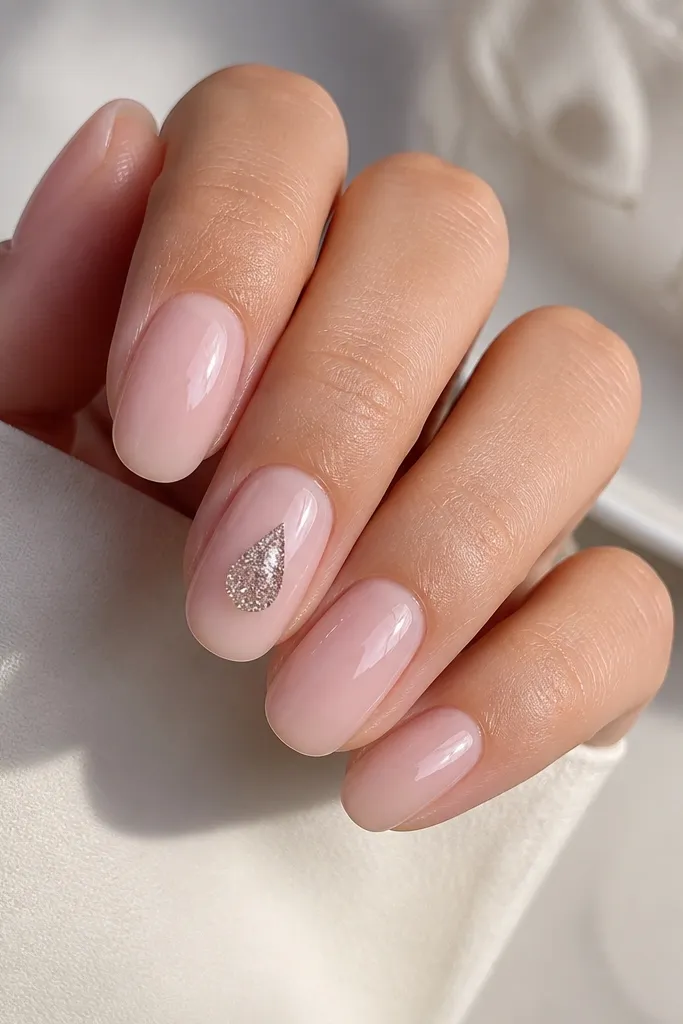
One teardrop accent looks like a "designer" detail but it's actually controlled placement. The teardrop shape gives you a focal point that reads clearly from across the room. Fine glitter keeps it from catching on fabric.
Base coat the nails. On the middle finger, tap a tiny dot of clear adhesive or top coat where the teardrop will sit, then sponge glitter onto it. Use a liner brush with a little top coat to sharpen the teardrop edges before curing or letting it dry fully.
Editor's noteMake the teardrop narrower near the bottom - it makes your nail look longer instantly.
Watch outDon't pour glitter directly from the bottle; it spreads and you lose the teardrop shape.
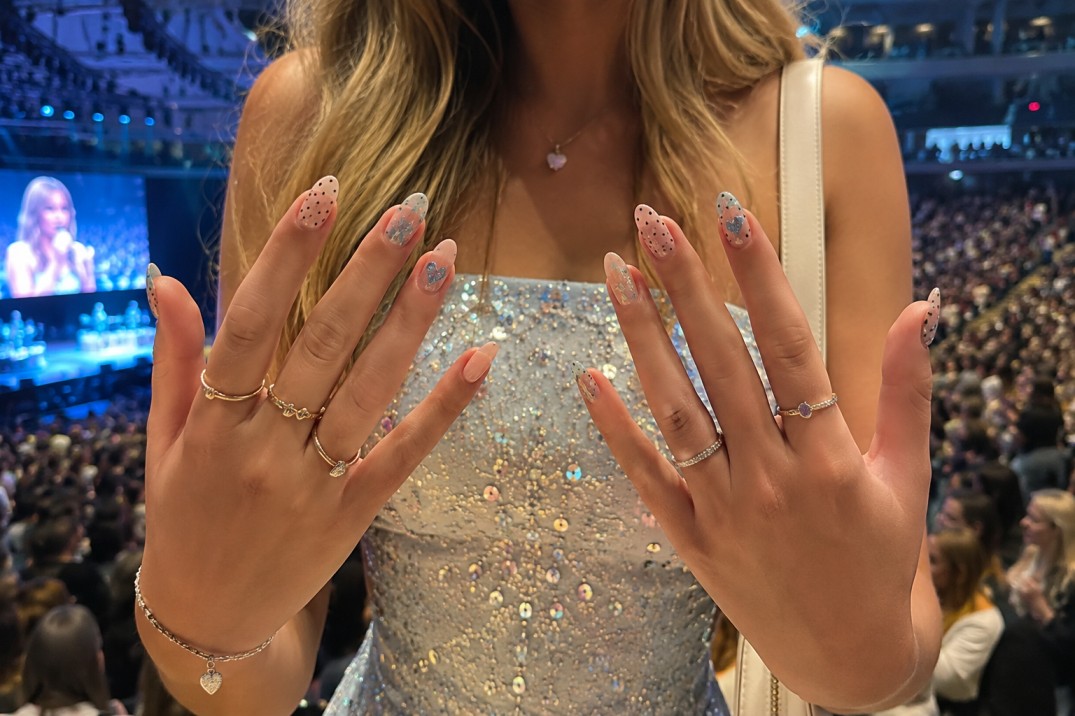
10. White Outline Hearts at the Sides
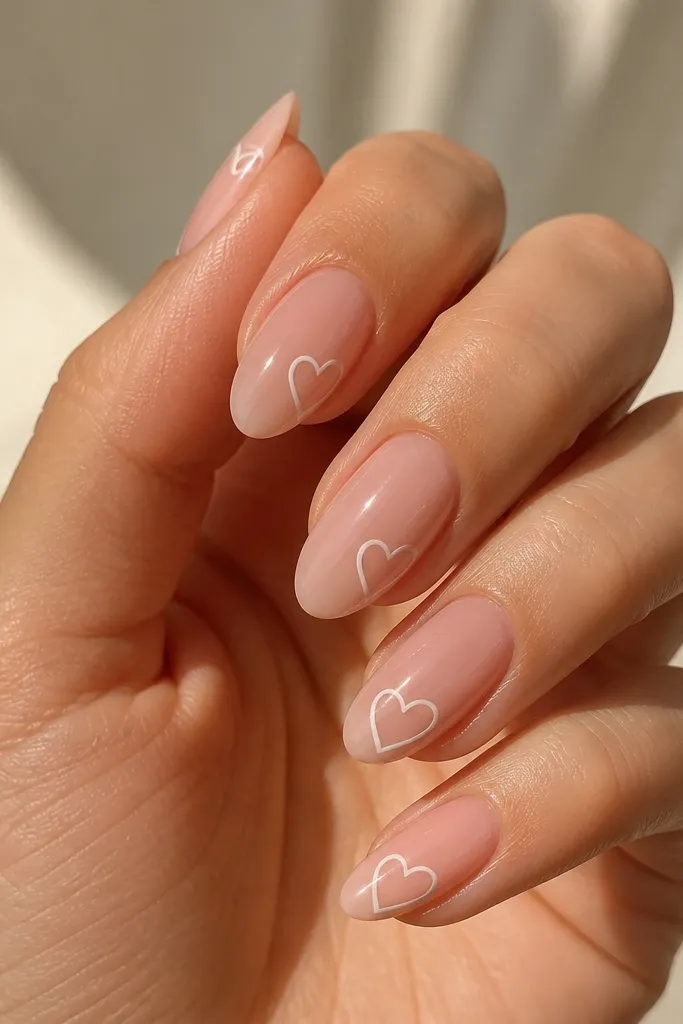
Side hearts look cute without taking over your whole nail. Outline hearts also hide small imperfections because you're not filling the whole shape with thick paint. This is the design I use when someone wants "romantic concert nails" but hates heavy glitter.
Paint the base. On each nail, draw one tiny heart outline on the left side and one on the right side, keeping them the same size. Add a dot at the center point if you want a slightly more defined heart tip, then top coat.
Editor's noteUse a dotting tool to start the heart bumps, then connect with two short curved lines.
Watch outSkip filled hearts; filled white blocks look bulky and chip faster.
11. Micro Star on Every Nail + One Black Detail
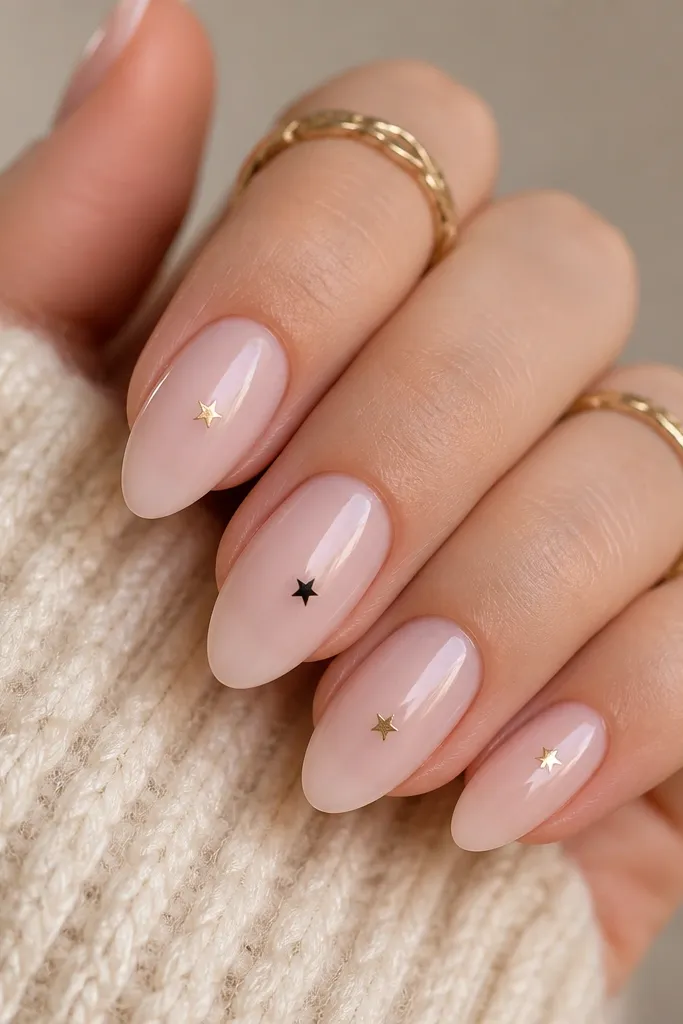
This is a beginner-friendly way to get consistent "theme nails" without drawing big shapes. The tiny star is repeatable, and the one black detail gives contrast that looks sharp in photos. It also makes the manicure feel intentional instead of random sticker art.
Base coat and cure/dry. Place one star per nail using the same height point each time. Add the black detail on one accent nail - a short line, small dot, or a thin outline star - then seal.
Editor's noteMeasure placement by using your nail's center point - keep every star aligned to that spot.
Watch outDon't vary the star size wildly; it looks like you rushed.
12. Stamped "Star Medallion" Look (No Freehand Needed)
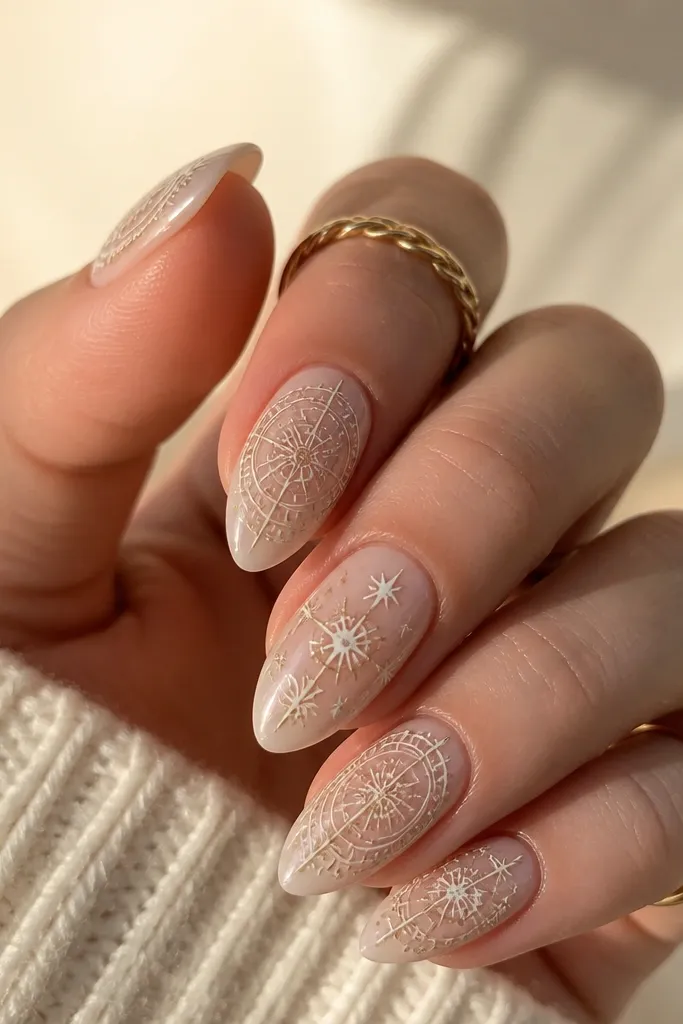
Stamping gets you the sharp edges that freehand struggles with, especially for tiny stars. The medallion placement keeps it balanced and makes your nails look like a set, not five separate drawings. White stamping on a milky base also looks clean in different lighting.
Stamp the pattern onto a stamper with white stamping polish. Press onto the nail once, then scrape clean. Seal with top coat in two layers so the stamped ink doesn't dull or lift.
Editor's noteWarm stamping plates with your hands for 10 seconds; it helps the polish transfer evenly.
Watch outDon't use too much stamping polish; blobs show through as thick spots.