1. Milky Pink Base with Cherry Micro-Glitter Tips
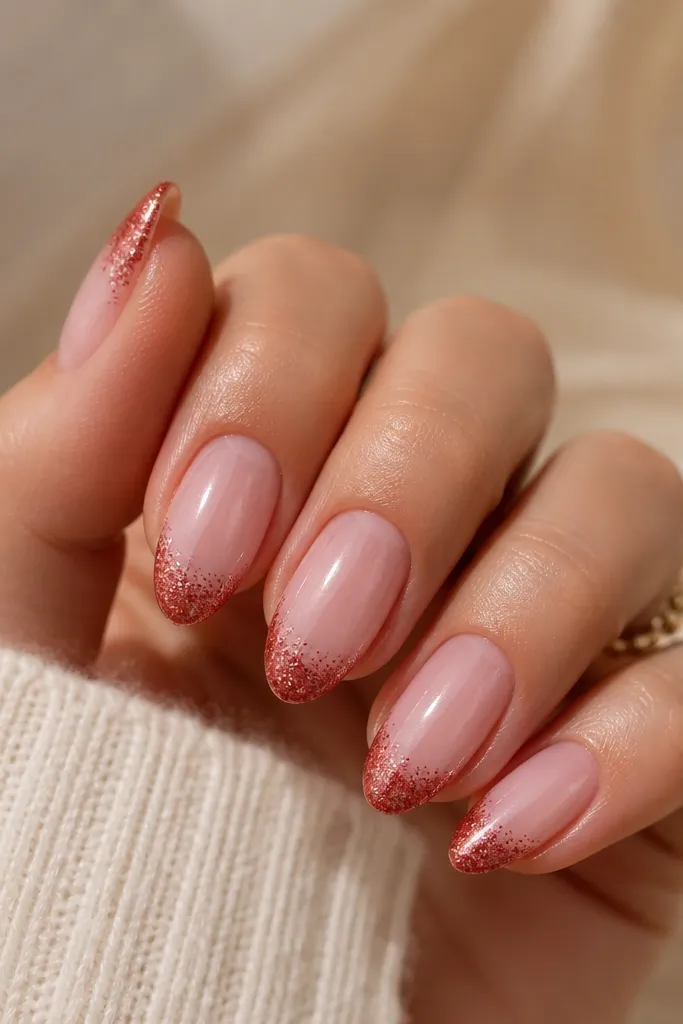
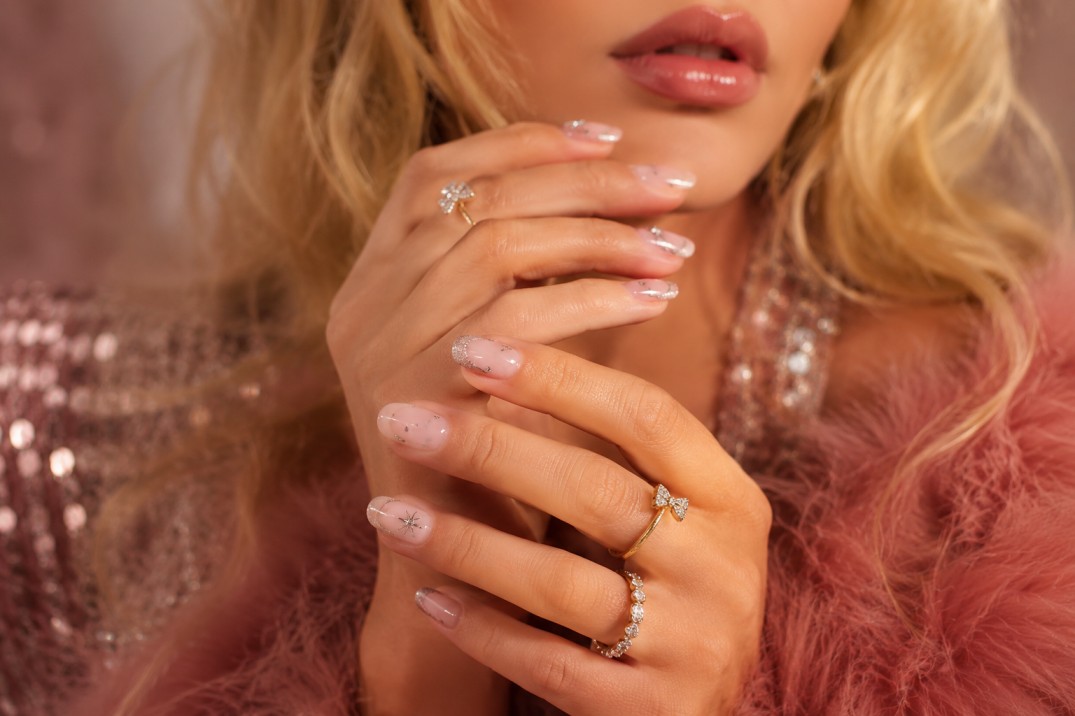
Start with a milky pink base that's semi-sheer, not opaque. Then place micro-glitter in cherry red just on the tip curve so it looks like a stained-glass gradient. The mix of creamy base + fine sparkle reads sweet without turning into full glitter overload. It also grows out gracefully because the glitter area is small.
Use a milky pink builder gel or polish (2 thin coats) and cure fully. For the tips, dab a thin brush into cherry micro-glitter gel and pat it onto the last 2-3 mm. Cap with a clear gel top coat over the whole nail and seal the tip edge.
Editor's noteIf you hate glitter fallout, press the glitter in with a silicone tool, cure, then add a second clear layer only at the tip.
Watch outDon't load too much glitter - thick glitter makes the tip look chunky and catches on fabric.
2. Sheer Rose French with Peach Heart Accent
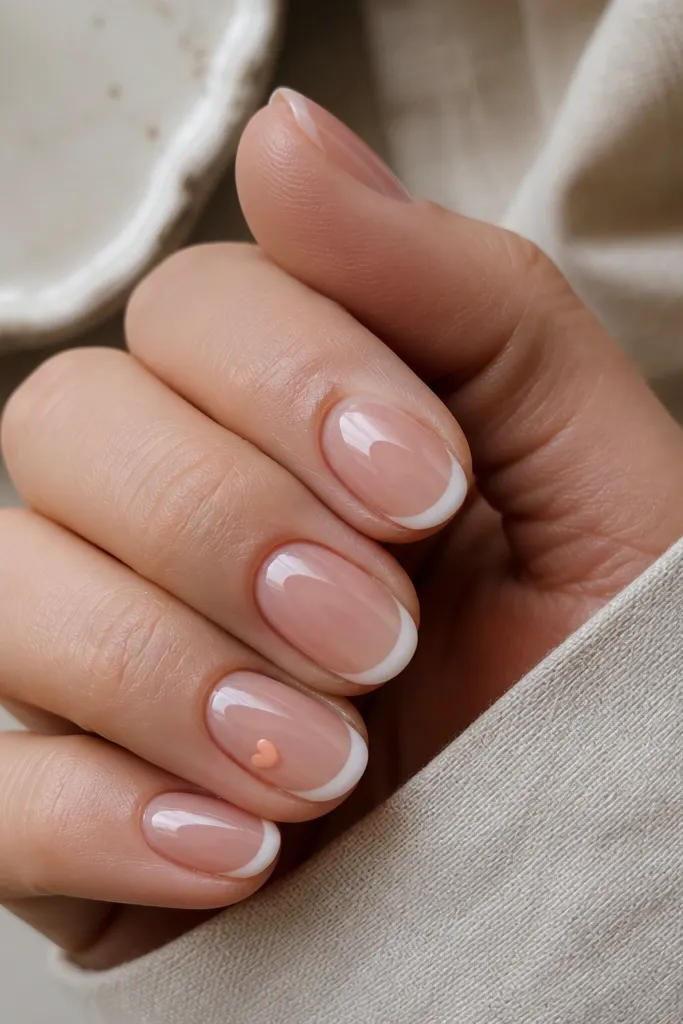
A sheer rose French looks like a "clean girl" version of celebrity nails. The accent heart adds the Sabrina vibe because it's small, placed high, and stays readable. Peach works better than bright orange because it looks warm and flattering against nude skin tones. The heart near the cuticle also hides small growth lines.
Paint a sheer rose base, then draw a thin French line with a nude-peach gel (keep it under 1 mm thick). On the ring finger, use a dotting tool to place two peach dots and drag one side to form a heart. Cure, then top coat with a glassy finish.
Editor's noteUse a nail art liner brush that's 0.5 mm wide so the French line stays crisp.
Watch outSkip big hearts - oversized hearts make nails look like holiday stickers.
3. Clear Nude with Frosty Pearl Chrome Midline
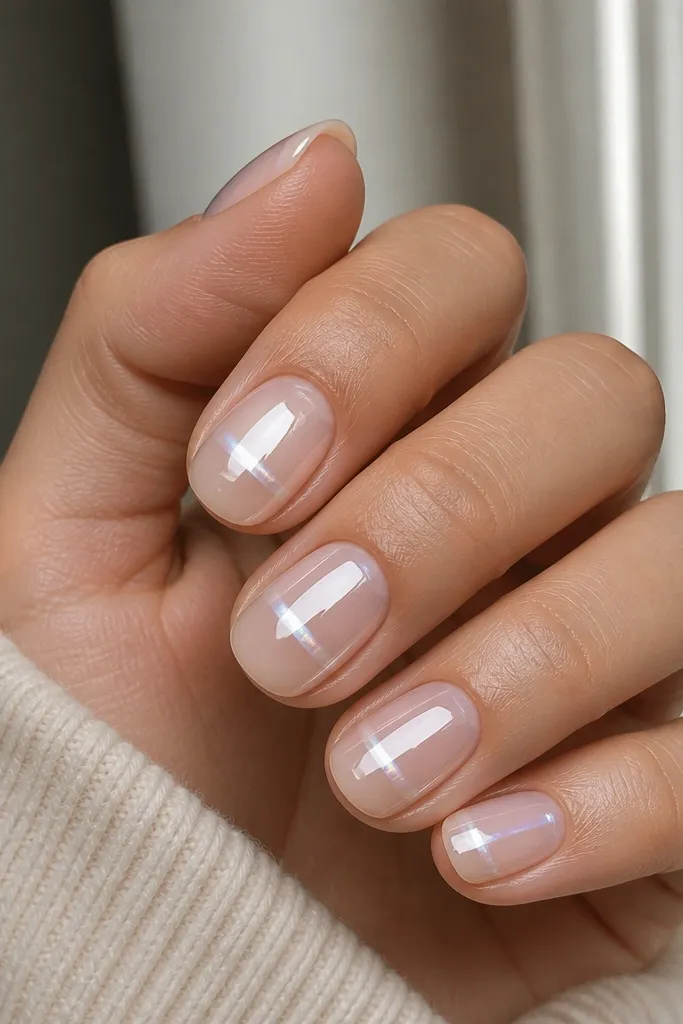
This one is all about the chrome placement. A clear nude base keeps everything light and wearable. The frosty pearl chrome midline creates a "jewelry" effect and makes your nails look longer because the reflective band sits across the nail. It feels modern and still matches the soft Sabrina palette.
Apply a clear nude gel base (thin, then cure). Buff the nail lightly if you're using chrome powder so it grips, then swipe pearl chrome at the center band (about 2-3 mm tall). Seal with a tack-free top coat that doesn't dull chrome.
Editor's noteIf your chrome looks dull, apply a slightly tackier top coat layer before the chrome and cure it briefly.
Watch outDon't put chrome at the tip only - it reads like accidental shimmer instead of a deliberate band.
4. Baby Pink Gloss with Tiny White Bow on Ring Finger
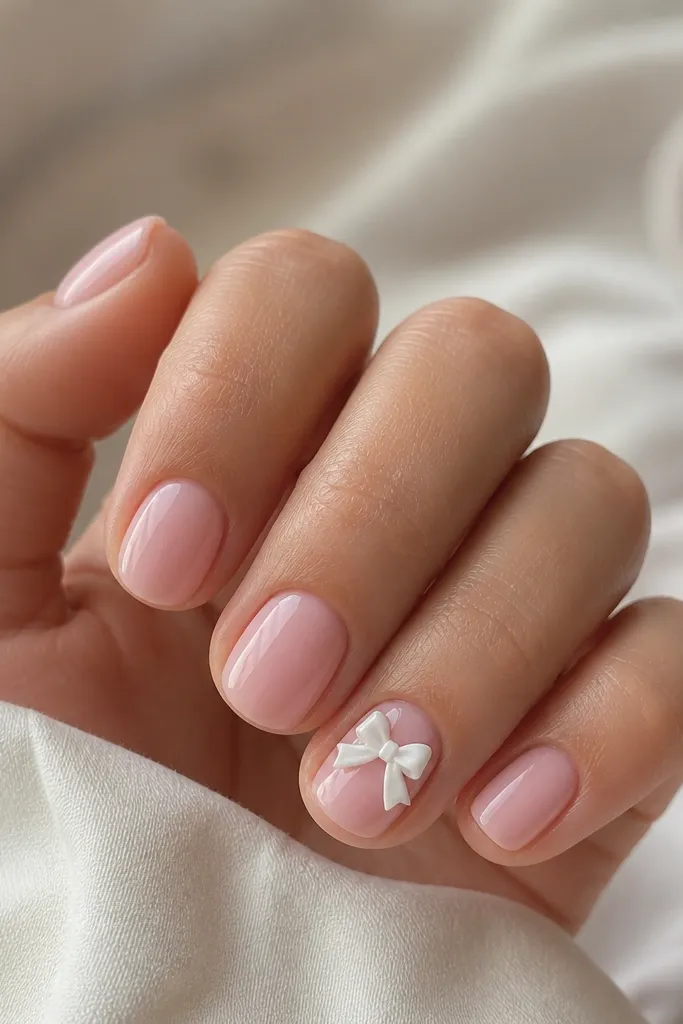
A baby pink base is the fastest way to get the sweet, photo-ready look. The tiny bow is the only 3D element, which keeps it from feeling costume-y. White bows also brighten your hand and make your cuticles look cleaner because the bow sits right above them. It's playful without covering the nail in clutter.
Use a smooth baby pink gel polish in 2 thin coats. Place a small 3D bow charm or sculpt one with gel (tiny loops, thin tails) on the ring finger only. Cure, then top coat carefully around the bow to avoid lifting edges.
Editor's noteIf you sculpt the bow, cure in two steps: one for the base shape, one for the details.
Watch outDon't top coat over the bow too thick - it blurs the bow edges.
5. Peachy Nude with Scattered Gold Dust on One Side
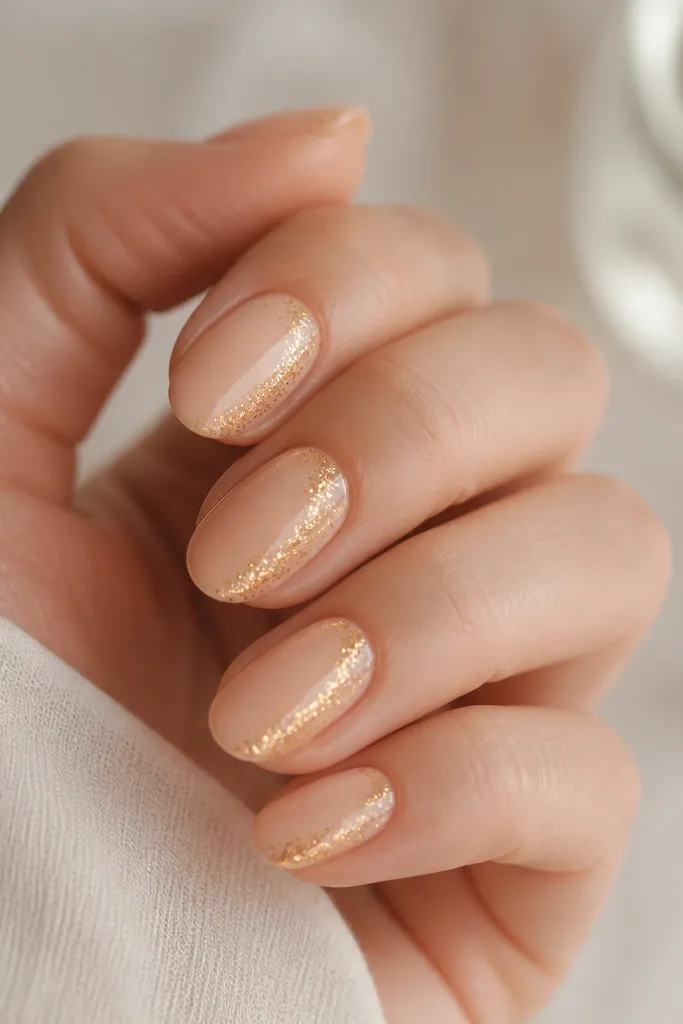
Gold dust placed off-center gives that "caught the light" effect. Peachy nude is warmer than milky pink, so it looks flattering with summer outfits and also under warm lighting. Keeping the gold dust to one side makes the nails look slimmer and more intentional. It's a subtle Sabrina-style detail you can wear daily.
Paint peachy nude base and cure. Add gold dust gel on one side (about 1-2 mm wide) using a small brush or sponge, then cure. Finish with a high-gloss top coat to smooth everything.
Editor's noteUse a small piece of tape as a shield while applying gold dust so you don't get stray specks.
Watch outDon't dust the whole nail - scattered everywhere looks messy, not designed.
6. Soft Pink Marble with One Clear Negative Space Swirl
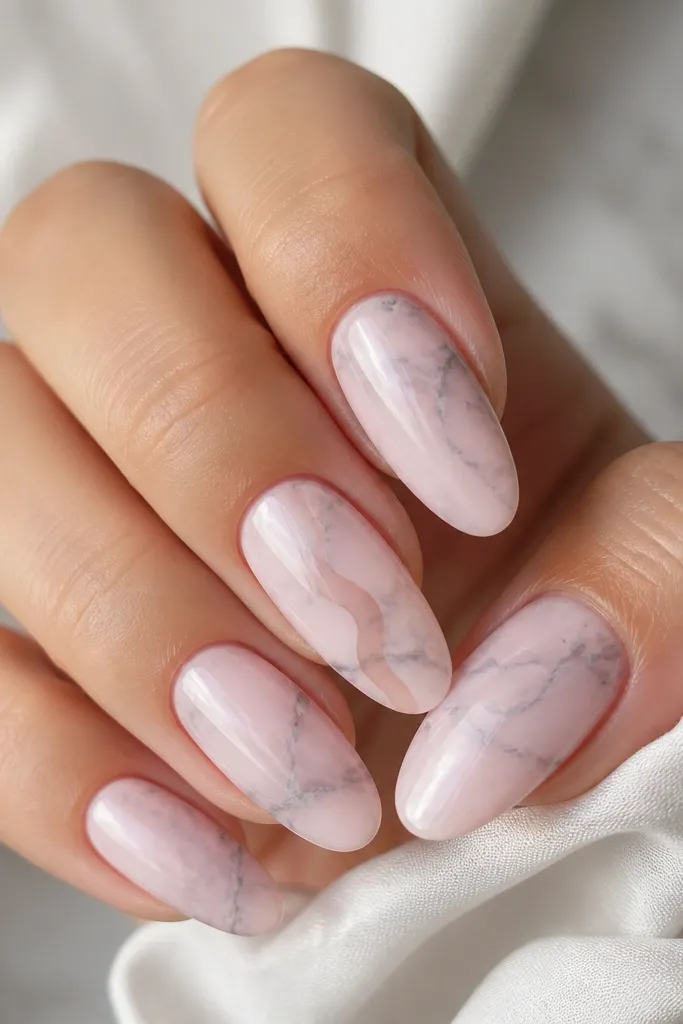
Marble looks premium when it's light and controlled. The negative space swirl adds a modern edge and keeps the design from looking like random stamping. Soft pink + faint gray veining makes your nails look like candy stone. This is a great option if you want something artsy but still wearable.
Paint a base of light pink jelly gel. For marble, use a thin liner brush to drag slightly darker pink and gray lines, then blend with a clean brush before curing. On one nail, leave a clear gap by covering that area with a tiny strip of gel-free tape while you marble, then remove after curing.
Editor's noteDo marble in one pass per nail - long fiddling kills the natural look.
Watch outAvoid thick marble swirls - heavy lines make nails look painted over, not marbled.
7. Nude French with Thin Espresso Brown Outline
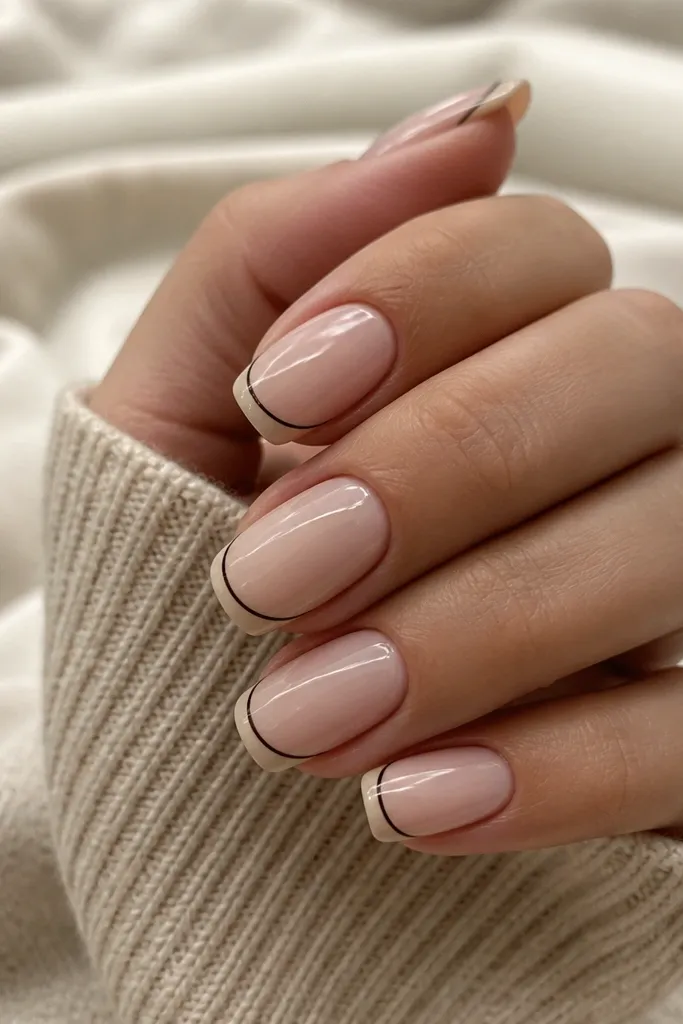
This is a "grown-up" Sabrina-inspired set. The nude French is gentle, and the espresso outline gives definition without adding loud color. Brown line work also photographs well because it creates a crisp edge under flash. The look stays neat even when nails grow out because the outline is at the tip.
Apply nude base (sheer to medium opacity). Create the French tip with nude-white gel, then outline the tip edge with a thin espresso-brown liner gel. Cure fully and top coat with a glossy layer.
Editor's noteUse a gel that self-levels slightly for line work so it doesn't streak.
Watch outDon't make the outline thick - wide brown lines turn it into a costume French.
8. Glazed Strawberry Pink with Clear Jelly Top Coat
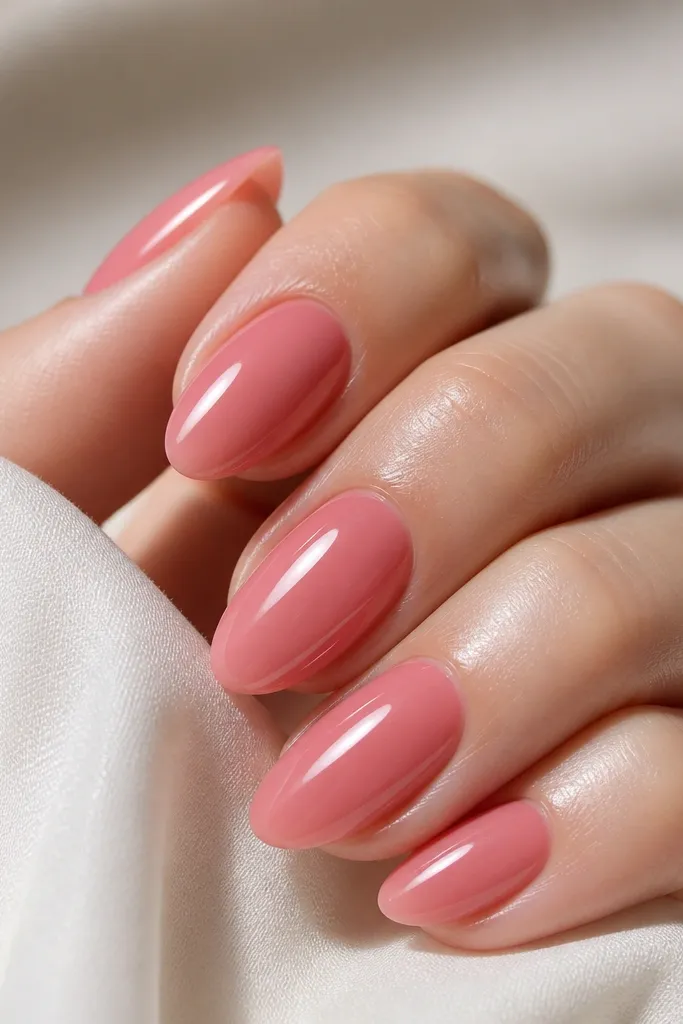
The glazed effect comes from a pink base under a clear jelly top coat. Strawberry pink gives that sweet, candy-fruit vibe Sabrina gets, but the clear layer makes it look like glass instead of flat polish. This is also forgiving - if your base isn't perfect, the jelly top coat smooths it. It's a great "beginner upgrade" because it hides minor imperfections.
Apply strawberry pink gel in 2 thin coats and cure. Add a thick-but-self-leveling clear jelly layer, cure, then repeat with a second clear layer if you want extra shine. Wipe tacky layer only if your top coat requires it.
Editor's noteCap the free edge with the clear jelly so shine lasts longer between fills.
Watch outSkip matte top coats here - glazed nails need gloss to look like glass.
9. Ivory Base with Micro Rhinestone Crescent
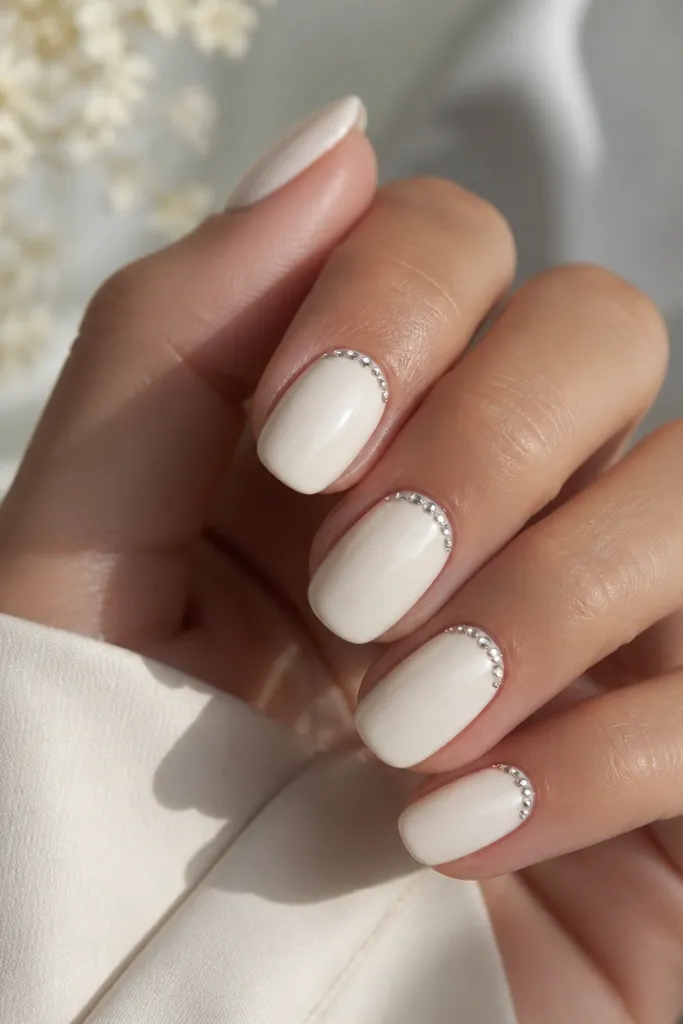
A small rhinestone crescent reads like jewelry and makes the nails look "done" without full stones. Ivory keeps it soft and bright, especially on lighter skin tones and under warm indoor lighting. The crescent placement near the cuticle gives a lifting visual effect, so your nails look longer. It's a good choice for events and date nights.
Use ivory polish or gel (2 coats for smooth opacity). Place 5-9 micro rhinestones in a shallow arc using rhinestone gel, then cure. Top coat around stones without burying them so they still sparkle.
Editor's noteSpace stones with tweezers by counting gaps - uneven spacing looks accidental.
Watch outDon't use big stones - they overpower the Sabrina-style delicacy.
10. Sheer Nude with Rose Gold Foil Confetti
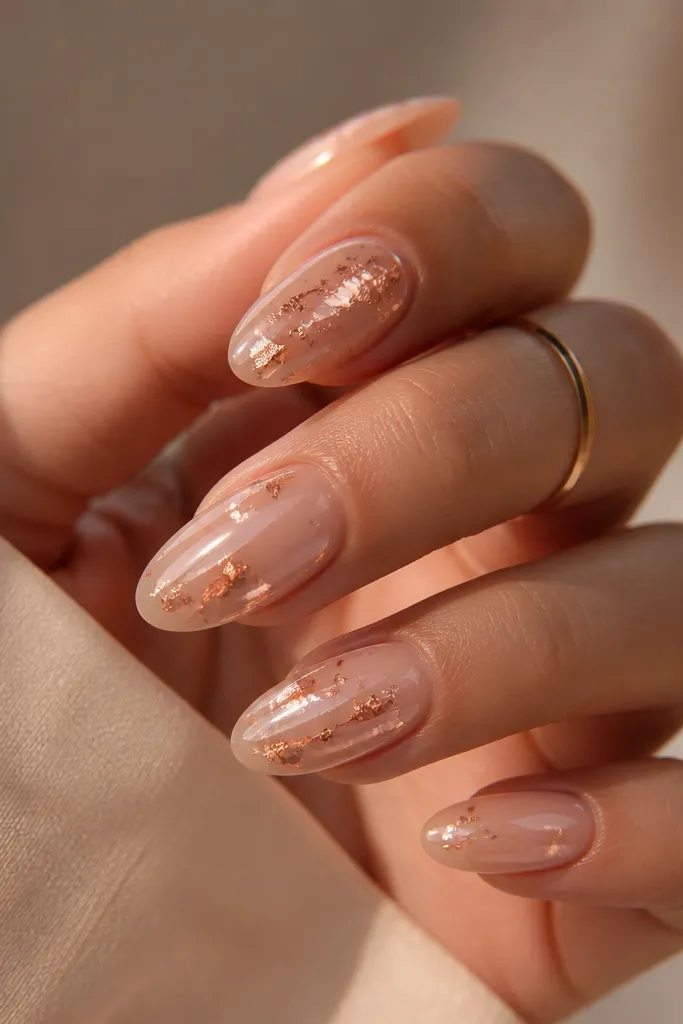
Foil confetti looks expensive when it's scattered lightly and sealed properly. Sheer nude gives the foil room to shine without turning the nail into a glitter bomb. Rose gold fits the warm, romantic Sabrina palette and looks good on both short and medium lengths. This set also hides tiny growth because there's no hard line at the tip.
Apply sheer nude gel base and cure. Add a thin layer of foil transfer gel only where you want foil, then press rose gold foil fragments in small clusters. Seal with 2 layers of clear top coat so foil edges don't lift.
Editor's notePress foil with light pressure using foam applicators - too hard makes foil smear.
Watch outAvoid skipping the extra top coat layer over foil - unsealed foil catches on hair and fabric.
11. Pink Chrome Gradient from Cuticle to Tip
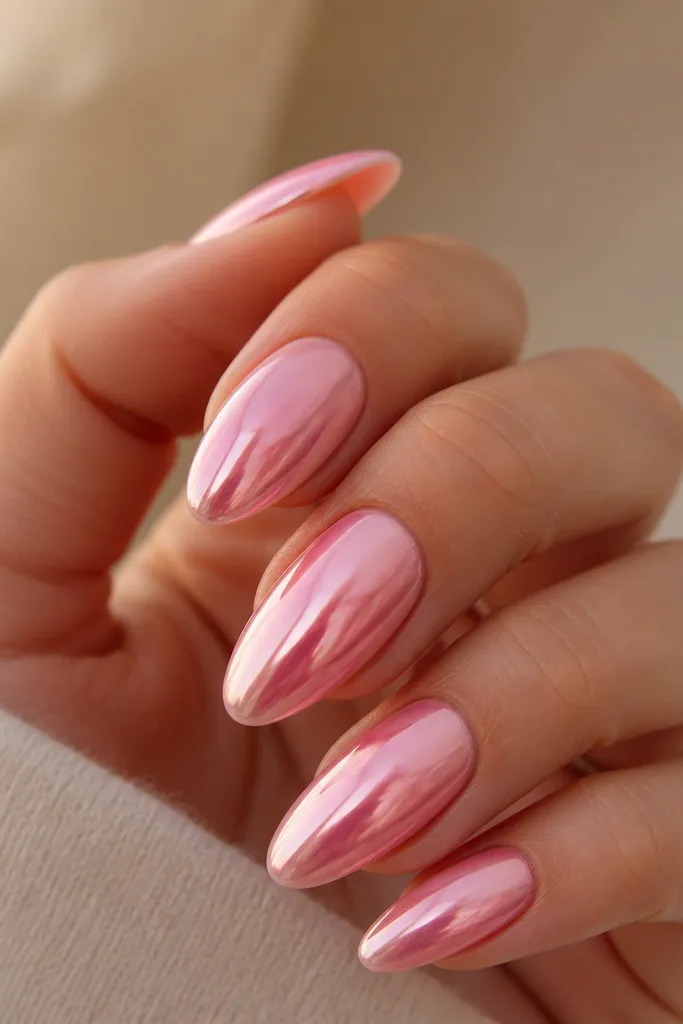
A chrome gradient is the quickest way to get that "celebrity chrome" effect at home. Starting brighter at the cuticle makes your nail bed look fuller and more lifted. Soft-to-strong pink also matches the Sabrina color story better than hot magenta. The result looks smooth and high-end in photos.
Start with a pale pink base or pink-tinted gel. Apply chrome powder with a makeup sponge or applicator, focusing at the cuticle first, then blend downward with lighter pressure. Seal with a chrome-safe top coat.
Editor's noteIf your gradient looks harsh, blend chrome with a clean sponge before curing.
Watch outDon't use a super dark base under pink chrome - it turns the gradient muddy.
12. Clear Jelly Base with Peachy Orange Dot Cluster
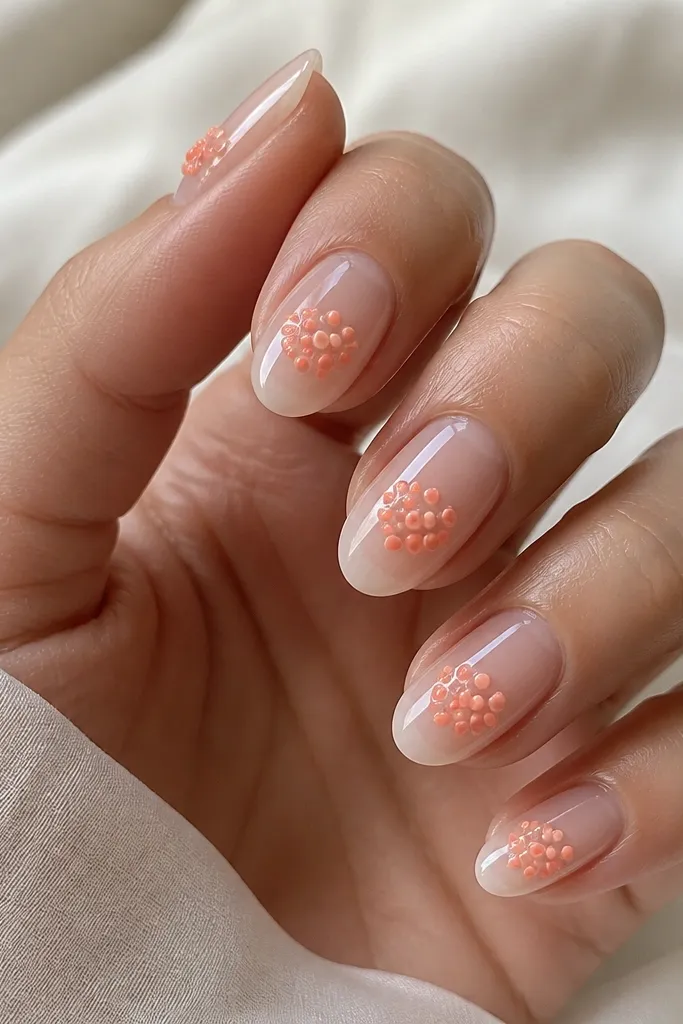
This is a "minimal but cute" set. Clear jelly base makes the dots pop and gives a soft 3D feel. Peachy orange is warm and youthful, and the dot cluster looks intentional when it's placed in one spot rather than scattered. It's also beginner-friendly because dots are hard to mess up.
Use clear jelly builder gel for a see-through base. With a dotting tool, place 7-12 peach dots in a tight cluster near mid-nail, cure. Add a thin clear overlay so the dots look embedded.
Editor's noteUse a slightly thicker gel for dots so they don't spread into circles.
Watch outDon't place dots too close to the sidewalls - they can look messy as the nail grows.
13. Sheer Pink Base with White Daisy on Accent Nail
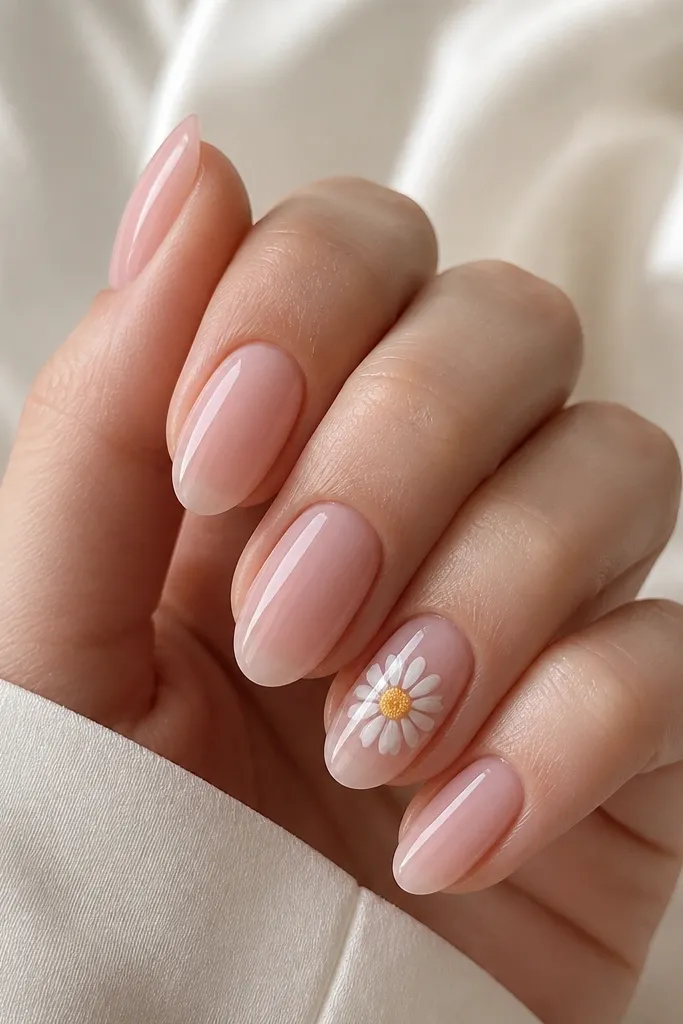
Daisies are the easiest floral to make look clean because the petals are simple arcs. A sheer pink base keeps the floral feeling fresh, not heavy. The yellow center adds the pop that makes it look like a real flower, not a sticker. This set also works for spring and summer without changing your entire wardrobe.
Paint sheer pink base and cure. On the accent nail, dot a small yellow circle, then draw 6-8 white petals with a liner brush. Cure and top coat with extra care around petal edges.
Editor's noteIf you mess up one petal, remove just that area with a small brush and acetone, then redo before curing.
Watch outAvoid thick petal lines - daisy petals should look thin and airy.
14. Chocolate Brown Tips with Milky Nude Middle
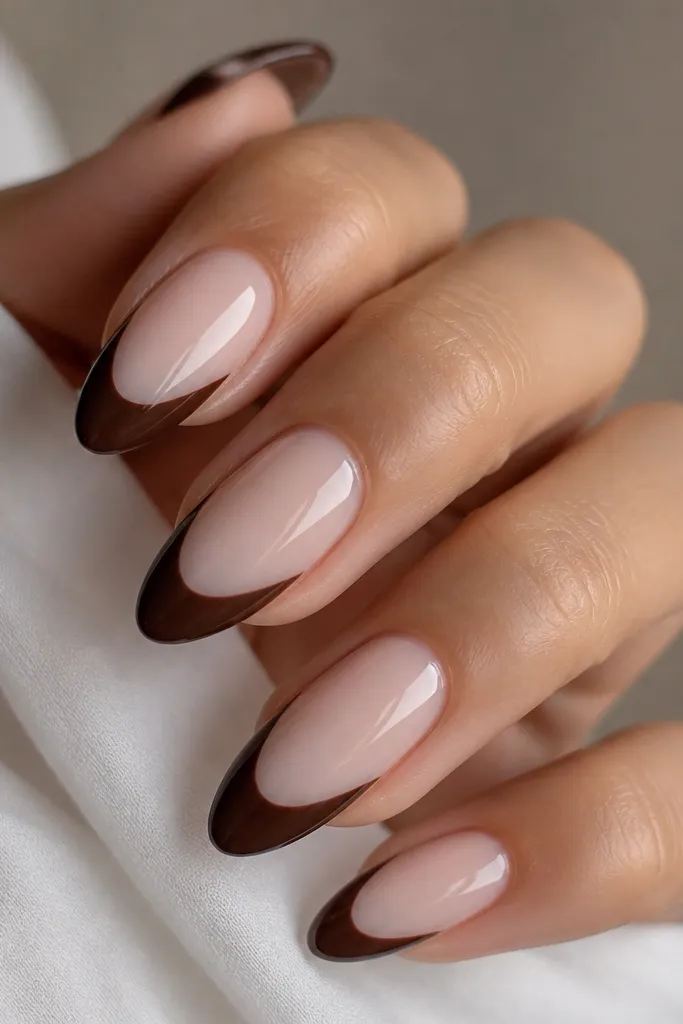
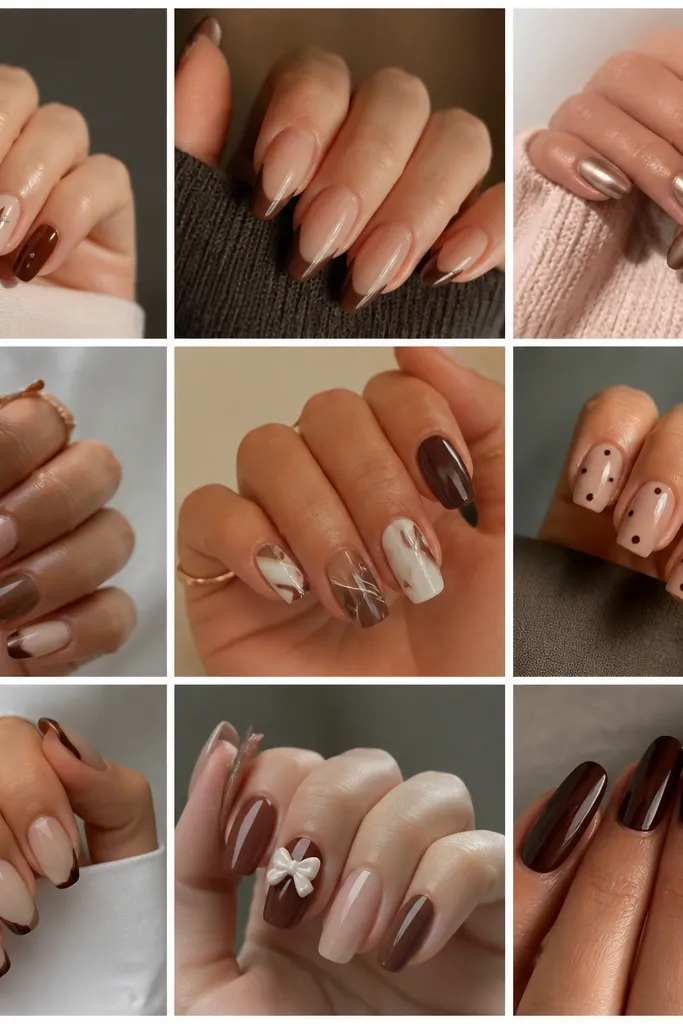
This nail reads like a dessert. Milky nude gives softness, and chocolate tips add drama without needing tiny art. The straight-ish tip line looks sharp and modern, which matches that polished Sabrina vibe. It also wears well because the contrast hides small chips at the tip.
Apply milky nude base in two thin coats. For tips, paint chocolate brown covering the last 30-35% of the nail, keeping the top edge neat. Cure and seal with top coat over the entire nail.
Editor's noteUse a nail tip guide strip to keep the tip line even across all fingers.
Watch outDon't make the brown too glossy before top coat - under-topcoat shine can look uneven.
15. Pink French with Tiny Gold Star at the Side
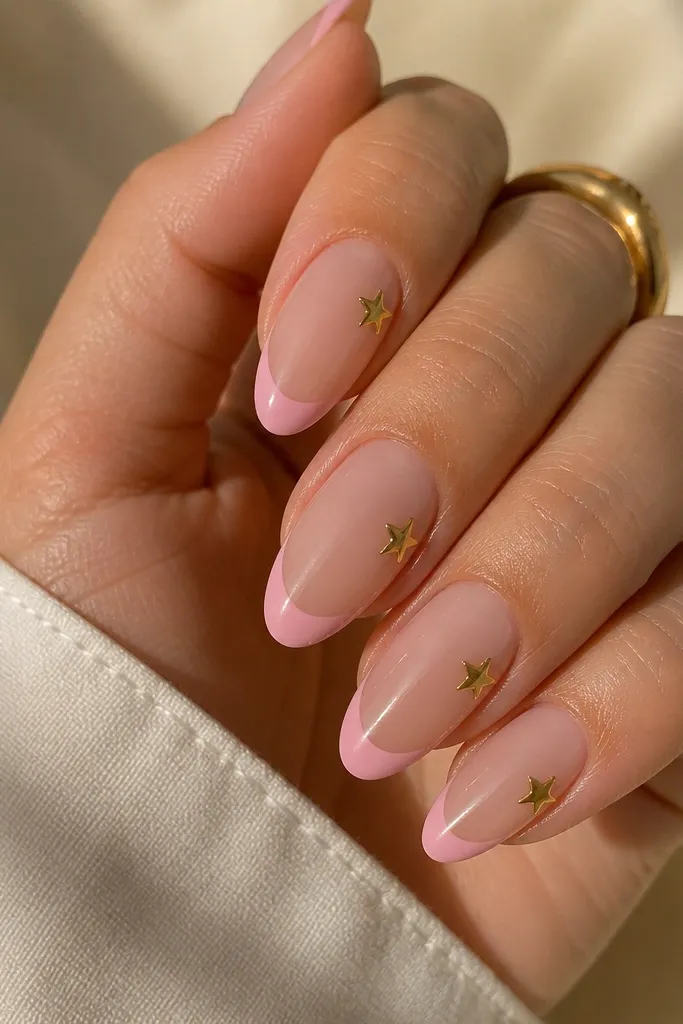
A pink French is sweet, and the tiny star adds that "sparkle detail" without covering the nail. Placing the star near the side gives a playful slant and makes each nail look slightly different. Gold star details also tie into rose gold and gold dust looks, so you can mix sets easily. It's cute for beginners because stars are small and forgiving.
Paint a nude base, then add pink French tips. On the accent nails, use gold star stickers or tiny star charms, and secure with a thin layer of gel. Cure, then top coat in one smooth pass.
Editor's noteIf using stickers, file the sticker edge flush before top coat so it doesn't lift.
Watch outDon't use large stars - they overwhelm the French and look costumey.
16. Soft Lavender Sheer with Silver Chrome Edge
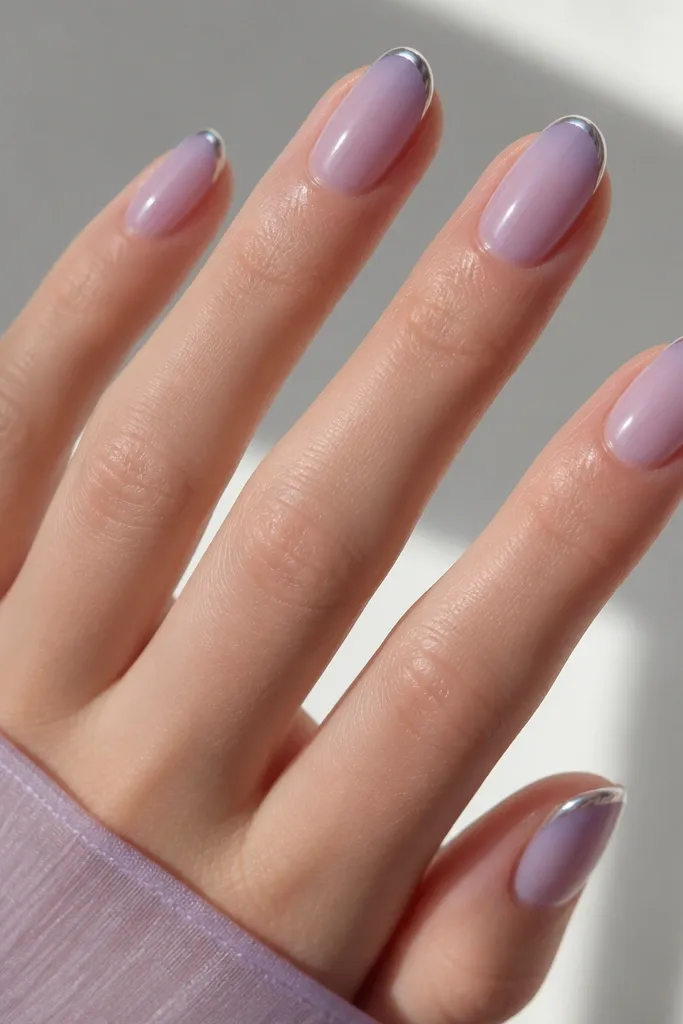
Lavender sheer is one of those colors that instantly looks "done" even with simple art. The silver chrome edge gives a clean border that frames the nail like jewelry. This is a great option if you want Sabrina-inspired nails but in a cooler tone. The thin chrome line also hides minor filing unevenness.
Use a lavender sheer base (2 thin coats) and cure. Add a thin chrome strip at the tip edge only, about 1 mm tall, and press lightly for a crisp line. Seal with a chrome-safe top coat.
Editor's noteDo the chrome line last so you can keep the rest of the nail perfect while you apply it.
Watch outSkip thick chrome blobs - they look like smudges at the tip.
17. Glitter Jelly Overlay in Strawberry Pink
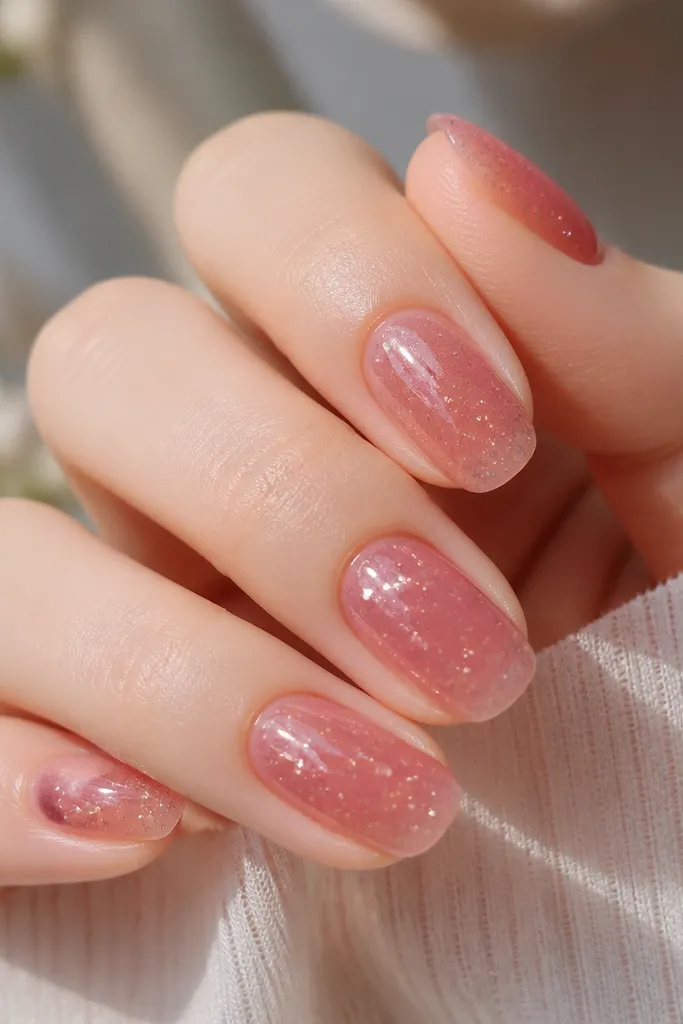
This is the "one layer" look that still looks expensive. The glitter is suspended inside a jelly pink, so it looks like candy glass instead of loose glitter on top. Strawberry pink keeps it in the Sabrina lane, and the semi-transparent coverage makes it flattering on short nails. It also grows out nicer because you don't have a hard tip line.
Base with a sheer pink gel (or clear jelly if you want it more sheer). Then apply strawberry glitter jelly - 1-2 coats depending on opacity, cure fully each time. Finish with a high-gloss top coat to smooth and lock in the glitter.
Editor's noteUse a thicker gel for the jelly overlay so it levels smooth and doesn't pool at the cuticle.
Watch outAvoid using loose glitter without a jelly binder - it lifts and looks gritty.
18. Classic Nude with Red Bow Accent and Tiny Dot Trail
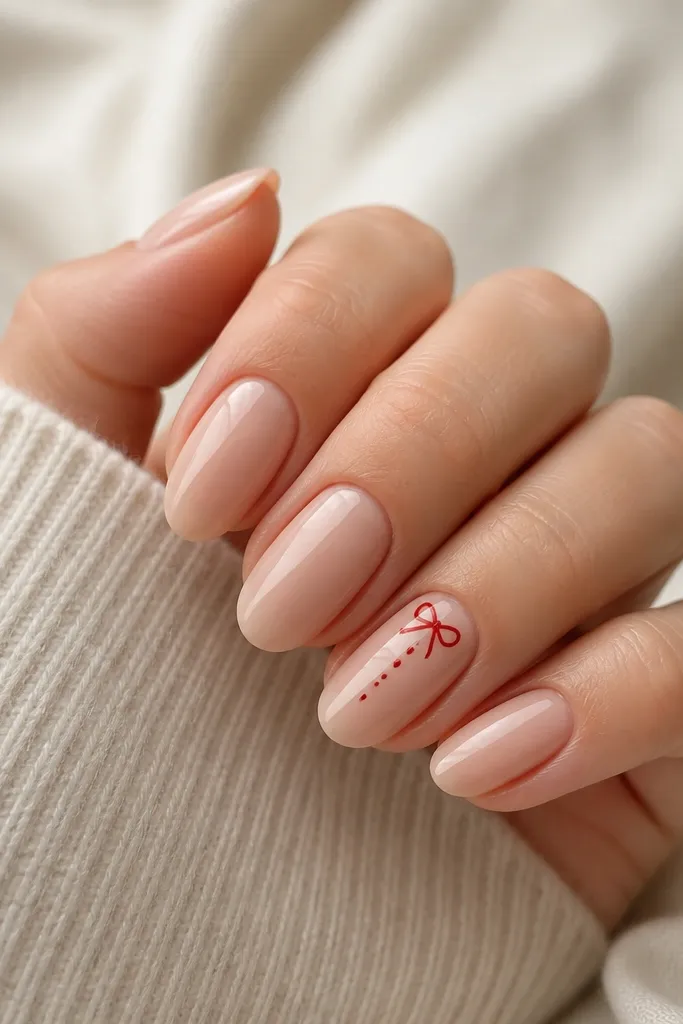
This set mixes the sweet bow with a small red detail trail, which gives movement. The nude base keeps it wearable, and the red bow adds that signature "cute but bold" energy. The dot trail makes the nail look like it has a design flow instead of a single sticker. It photographs well because the nude base reflects light evenly.
Apply a classic nude base in 2 thin coats. On the accent nail, place a tiny red bow charm or sculpt one, then add 4-6 micro red dots in a gentle curve. Cure, then cap with top coat over everything except the bow surface if it's raised.
Editor's noteKeep the dot trail thin - 1 dot wide - so it stays delicate.
Watch outDon't add multiple bows - one bow is enough for the whole set.
19. Rose Pink Aura with Clear Center Glow
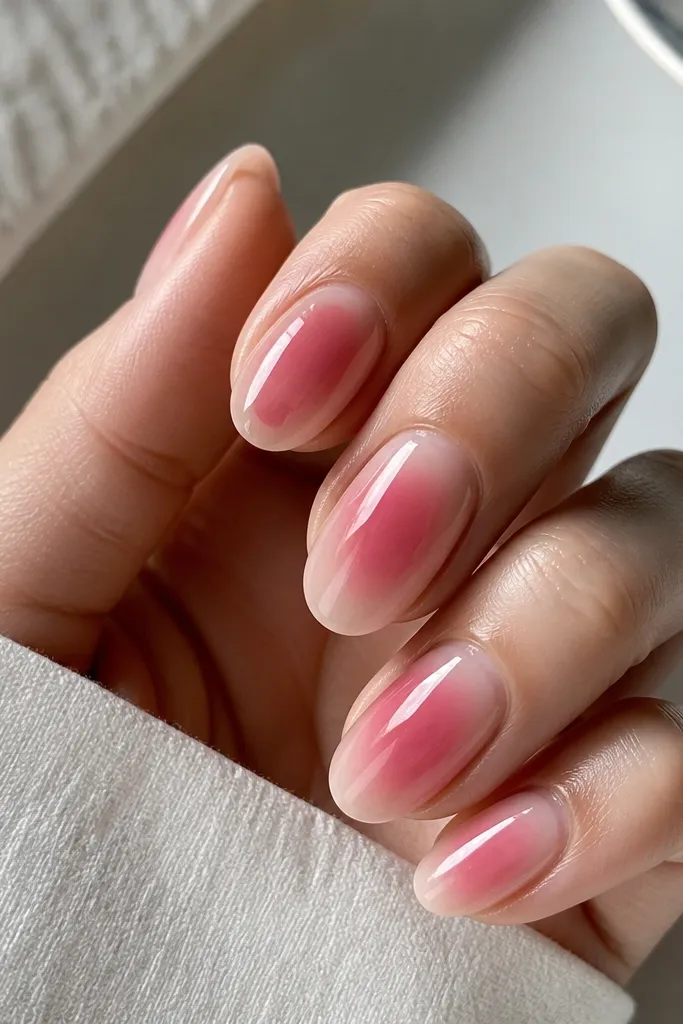
Aura nails look like airbrushed light. The clear center gives a "glow" effect that makes the nails look fresh and dimensional. Rose pink is the perfect Sabrina-friendly tone because it's soft, not neon. This design also hides small imperfections because the gradient blends them.
Start with a sheer nude or clear base. Use a makeup sponge to apply rose pink aura around a center area you keep clear, blending outward. Cure, then top coat with a glassy finish so the glow reads crisp.
Editor's noteOutline the clear center with a small piece of tape before you sponge to keep it perfectly round.
Watch outDon't over-saturate the aura - heavy pink at the edges looks muddy.
20. White Milk Nails with Blush Pink Side Tips
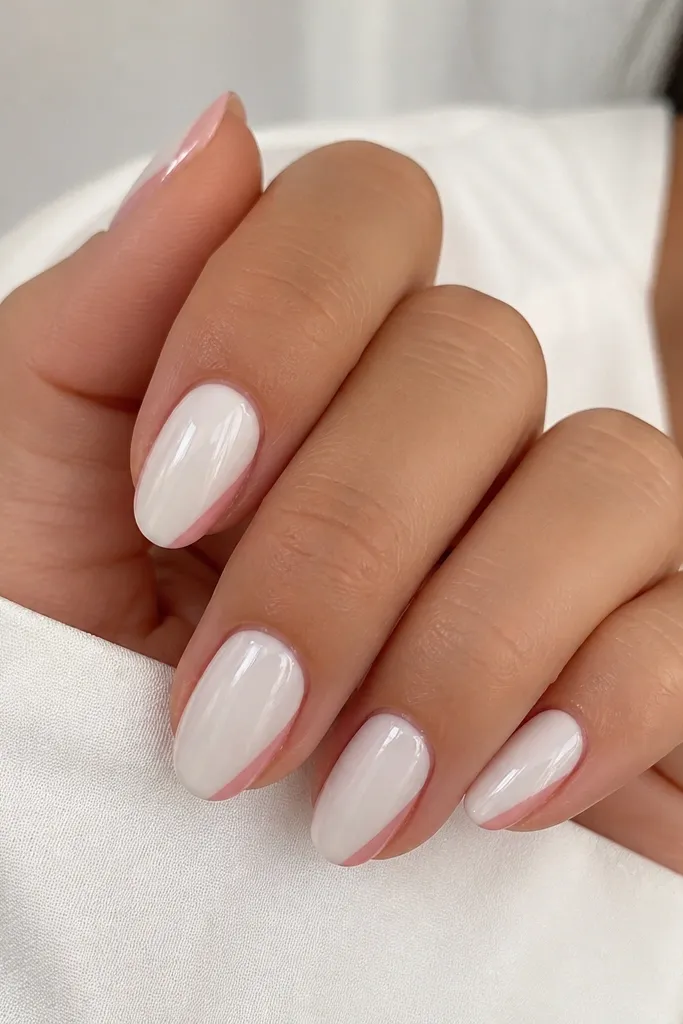
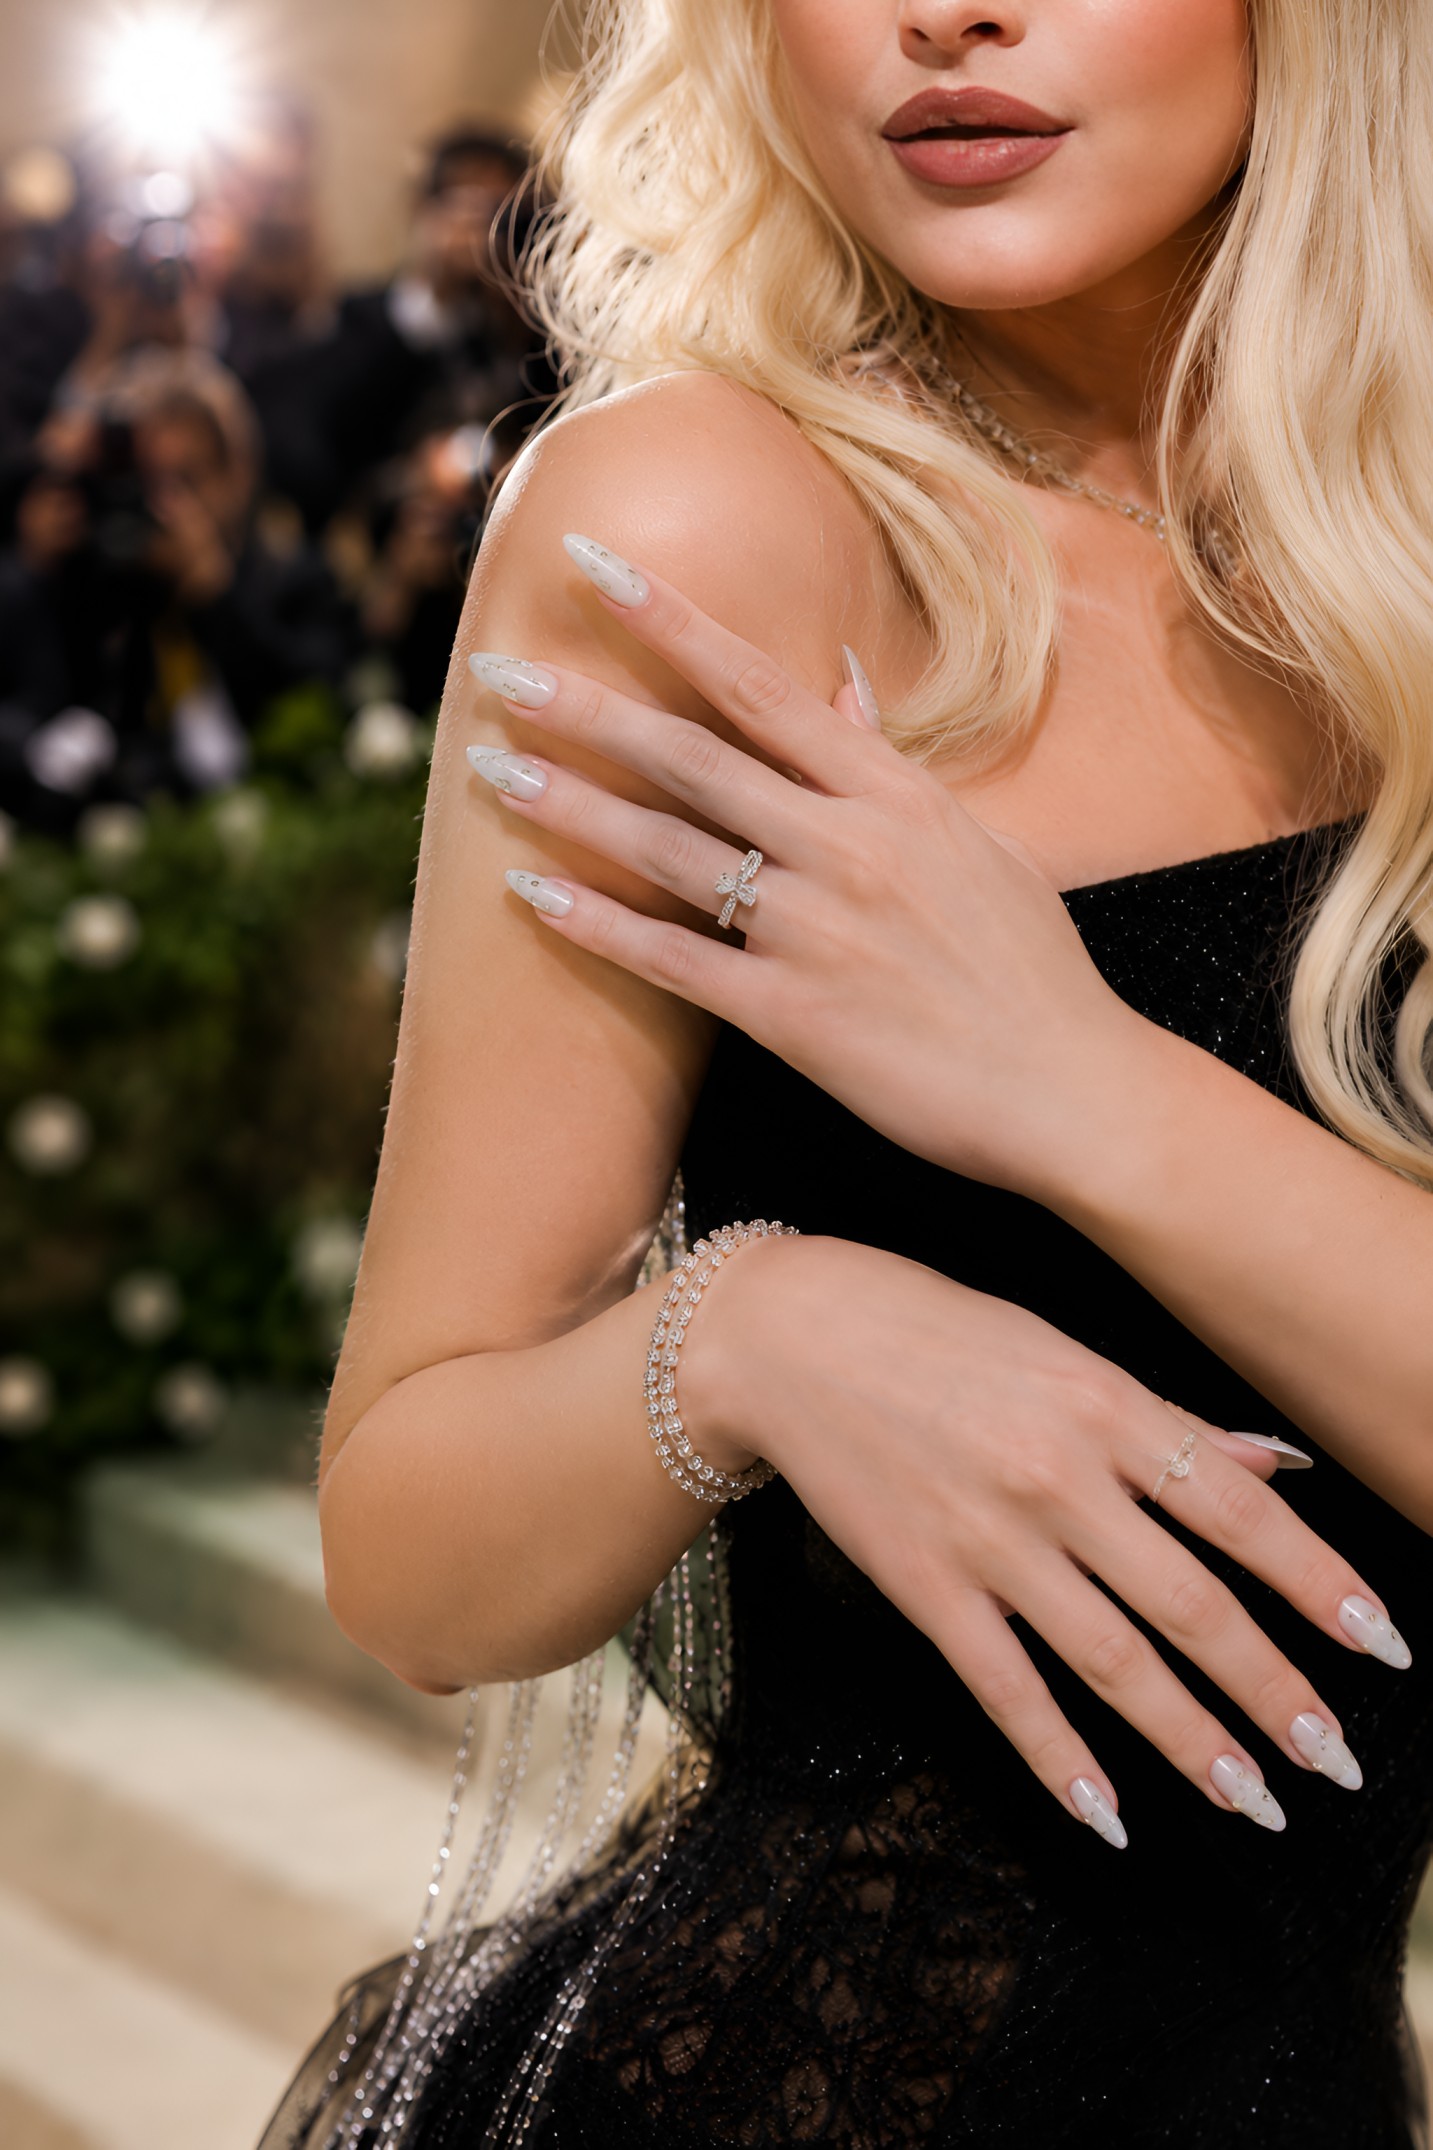
This is a twist on French that looks delicate. Milky white makes the whole set feel bright and smooth, while blush side tips add color without covering the entire tip. It creates a slimming look because the center stays light. The design also grows out better since the color is only on the edges.
Paint milky white gel in 2 coats. For side tips, paint blush pink only along the left and right corners starting 2-3 mm from the free edge, keeping the center white. Cure and top coat for a smooth finish.
Editor's noteUse a small strip of tape along the center line so the blush stays confined to the sides.
Watch outDon't paint blush across the full tip - it loses the slimming effect.
21. Nude Base with Pink Chrome Dot Cluster
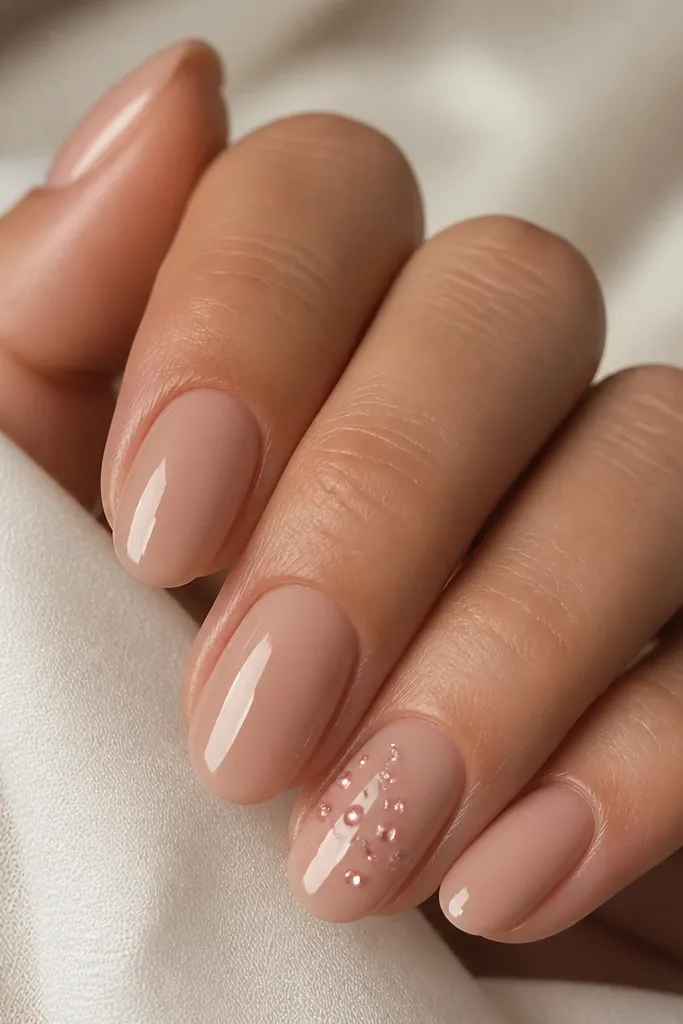
Chrome dots feel playful but still high-fashion when they're tiny and placed in a cluster. A nude base keeps everything grounded, and pink chrome brings the Sabrina glow factor. The cluster placement makes the design look intentional and not random. This is a great beginner set because dotting is controlled and repeatable.
Paint nude base and cure. On the accent nail, apply a small amount of gel where you want dots, then dot with a chrome powder applicator or sponge. Cure and seal with a smooth top coat.
Editor's noteCount your dots - 7-10 - so the cluster looks balanced.
Watch outDon't use large dots - bigger chrome dots look like glitter chunks.
22. Peach Glaze Nails with Thin White Lines
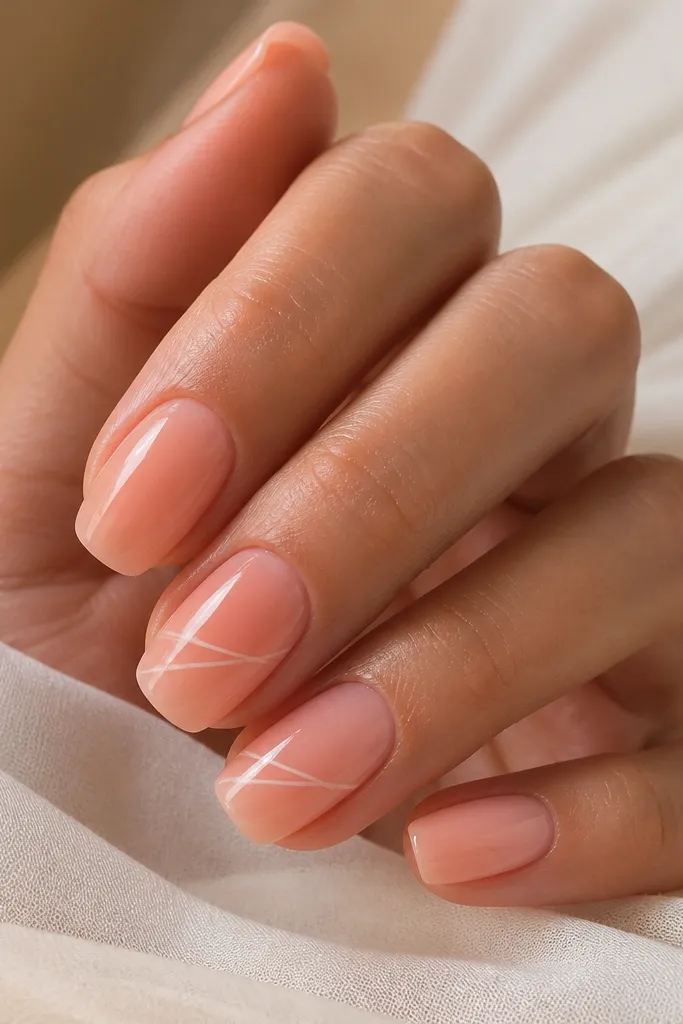
Peach glaze is a softer cousin to strawberry pink and it looks amazing in daylight. Thin white lines add graphic contrast without needing full nail art. The diagonal placement gives energy and makes the nails look longer. It's a clean way to get a Sabrina-inspired look when you want something modern.
Use a peach jelly gel or peachy pink builder gel for a glazed look in 2 thin coats. With a liner brush, paint one or two thin white diagonal lines across one or two accent nails, then cure. Finish with a high-gloss top coat to keep lines crisp.
Editor's noteLet the base gel cure hard before you draw lines so the brush doesn't drag.
Watch outAvoid thick white lines - they turn graphic art into heavy coating.
23. Sheer Nude with Red Outline Half-Moon
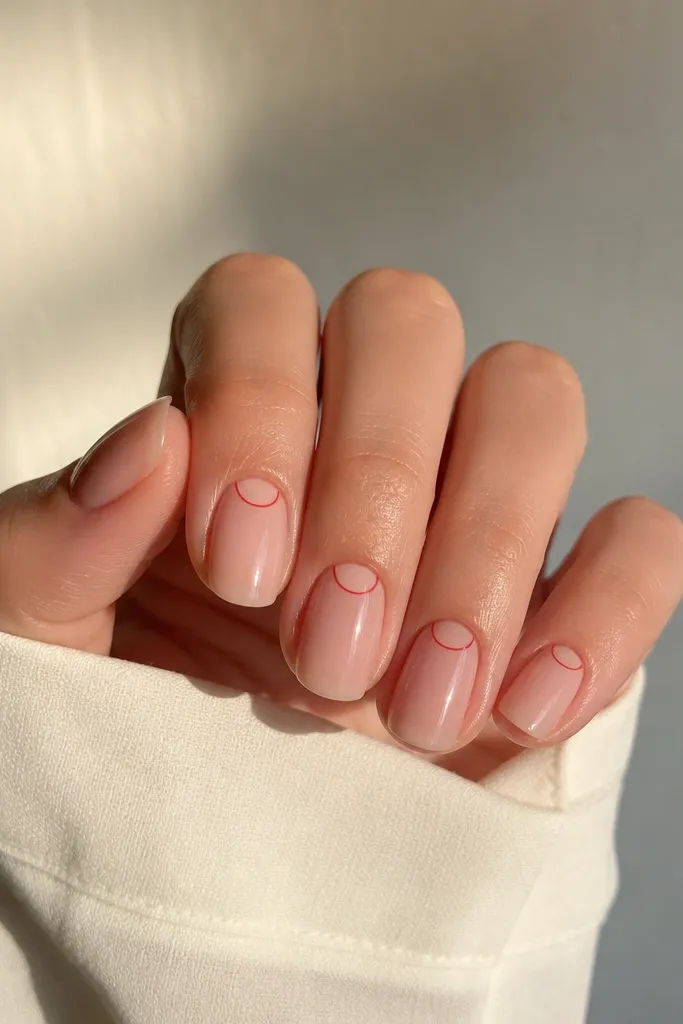
Half-moon accents near the cuticle look classy and cute at the same time. The sheer nude base makes the red outline feel light, not heavy. This design also hides cuticle imperfections because the outline draws the eye to the center and not the edges. It's perfect if you want a Sabrina vibe without flowers or bows.
Apply sheer nude base and cure. Use red liner gel to draw a thin half-moon arc at the cuticle area, leaving a small gap so it looks like an outline. Cure and top coat carefully around the arc.
Editor's noteUse a dotting tool to place two guide dots where the arc ends, then connect them with the liner brush.
Watch outDon't fill the half-moon solid - outline only keeps it elegant.