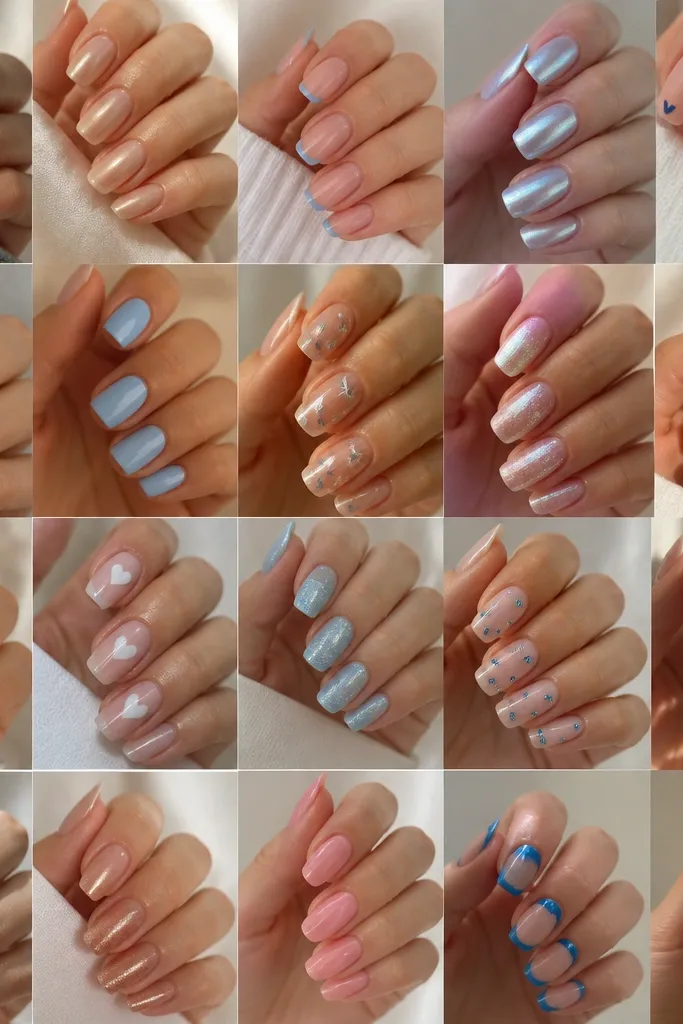
1. Milky Pink Base + Center Micro Hearts
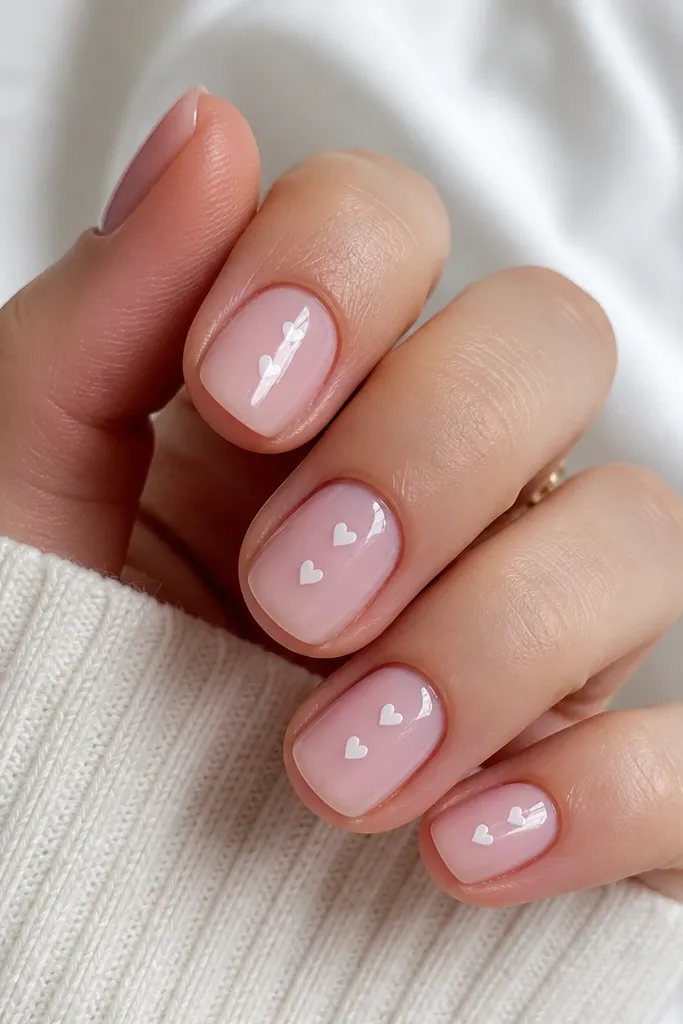
This look works because the base is soft and translucent, so the white hearts pop without looking loud. I like milky pink because it matches your nail bed and hides tiny imperfections. The hearts are small - think pinhead-to-pea size - so they stay cute on short length. Glossy top coat makes the hearts look crisp, not matte and chalky.
Paint two thin coats of milky pink gel or polish. Use a dotting tool or the tip of a toothpick with white polish to place one heart in the center of each nail. Add a second heart only on the ring finger if you want variety. Finish with a thick top coat and cap the free edge.
Editor's noteIf your hearts look lopsided, do one half first, let it dry 30 seconds, then mirror the second half.
Watch outSkip big chunky hearts - they swallow the nail when you're staying short.
2. Buttercream Nude + Tiny Bow Tips
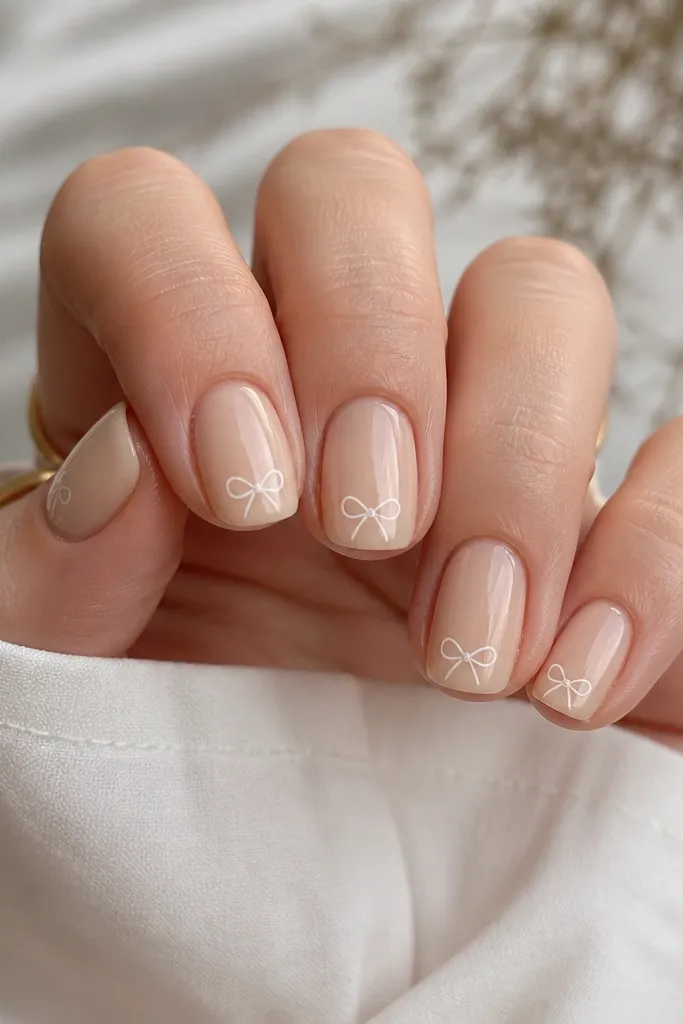
Bows at the tip read sweet because they're placed where your eye naturally goes. Buttercream nude keeps it warm and flattering, especially on cooler skin tones. The bow outline should be thin, not filled in - that keeps the set light. A glossy top coat makes the bow lines look like they were printed.
Use a nude that's slightly yellow-leaning, not gray. Paint two coats, then with white liner polish draw a small V for each side of the bow and add a tiny dot in the center for the knot. Keep bows about 1/6 of the nail width so it stays short-friendly. Top coat after the lines dry.
Editor's notePractice two bows on a spare nail or paper first so your line thickness matches.
Watch outDon't fill the bows solid white - it gets thick and looks raised on short nails.
3. Glossy Sheer Pink + Single Rhinestone Cuticle Spark
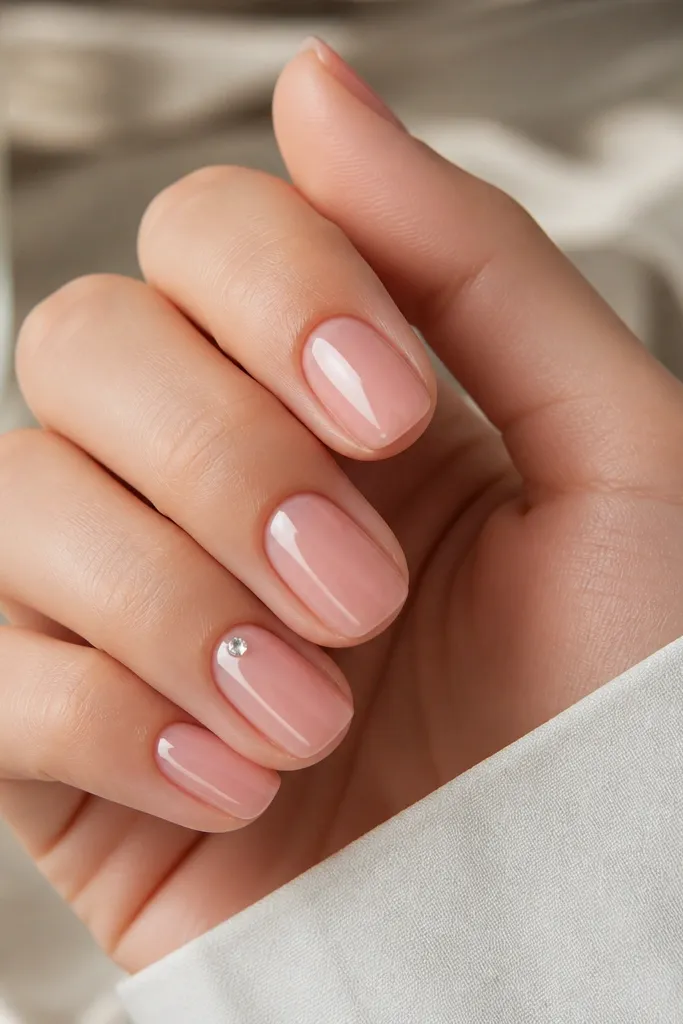
One stone is enough because it gives the "event" look without turning into heavy bling. Sheer pink makes the stone look like it's floating on your nail bed. The placement near the cuticle is flattering because it elongates visually. Keep the rest of the nails clean so the set stays budget and chic.
Start with a sheer pink base and one coat of top coat. Place a single flat-back rhinestone with nail glue or gel, then cap over it with a gel top coat so the edges don't snag. Cure fully if you're using gel. Finish with a final glossy coat.
Editor's noteUse tweezers and press the stone for 10 seconds so it doesn't shift while curing.
Watch outSkip multiple stones - clusters on short nails look messy and catch on sleeves.
4. French Tip But Make It Milky Cloud
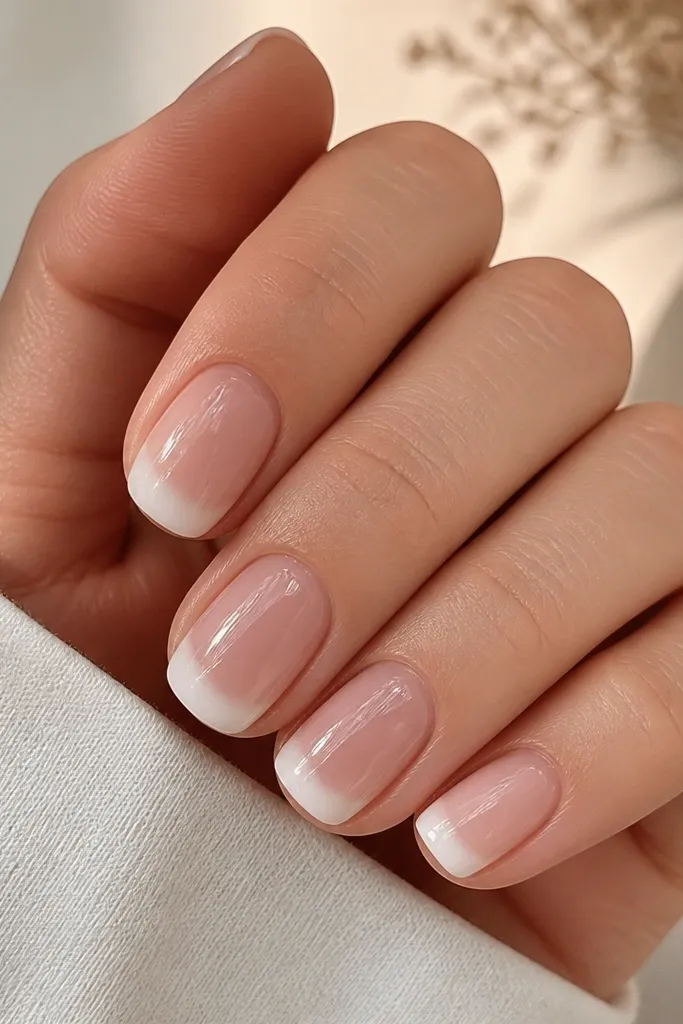
Classic French is the easiest path to "short n sweet," but the budget version looks best when the tip is milky and slightly diffused. That cloud effect hides tiny brush mistakes. The sheer nude base keeps everything youthful. Gloss makes it look salon-clean even when you're using drugstore products.
Use a sheer nude base in two thin coats. For tips, paint a milky white arc with a sponge or a small makeup sponge for a soft edge. Use a liner brush to neaten the center line only if needed. Apply top coat and cap the free edge.
Editor's noteWork with a slightly damp sponge for the soft blend - too dry creates streaks.
Watch outAvoid a super opaque, perfectly straight white line - it reads harsh on short nails.
5. Peachy Nude + Micro Glitter Fade at the Tips
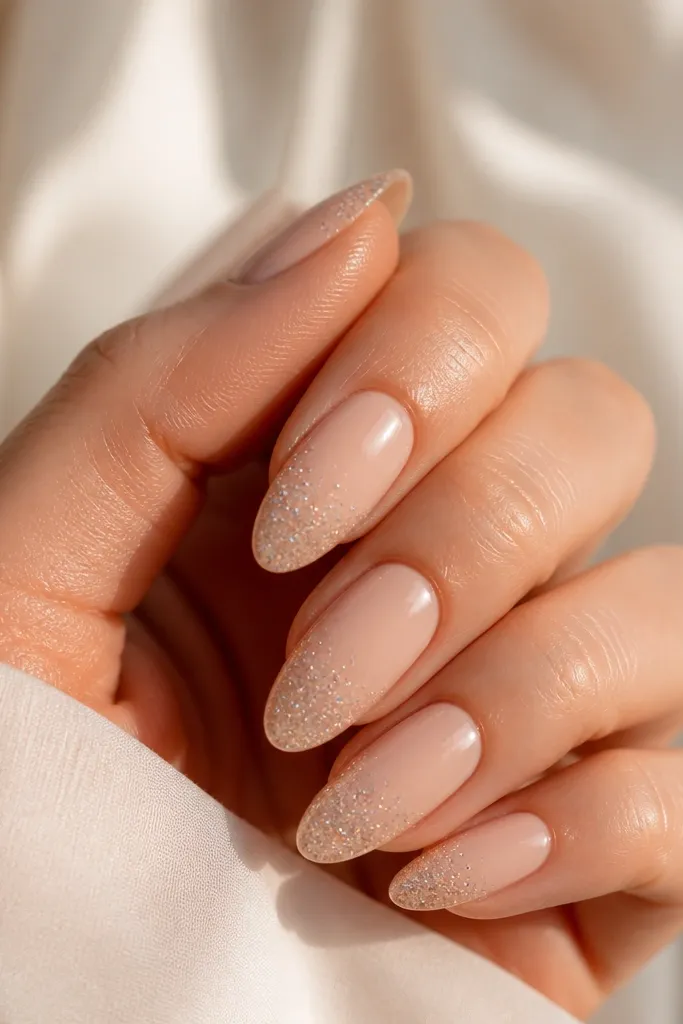
A micro glitter fade looks expensive because it transitions instead of sitting as chunks. Peachy nude is warm and flattering, and it pairs well with everyday outfits. The fade keeps glitter from snagging and makes the set feel "soft glam." Glossy top coat smooths the glitter so it feels even.
Paint two coats of peachy nude. Dab micro glitter polish at the very tip with a sponge, then pull it slightly upward with the sponge edge so it fades. Keep it only on the top third of the nail. Seal with a thick top coat and cap the edges.
Editor's noteIf glitter feels gritty, do an extra top coat after the first one dries.
Watch outDon't pack glitter all the way to the middle - it looks like loose sparkle.
6. Creamy Nude + Polka Dot Accent on Ring Finger
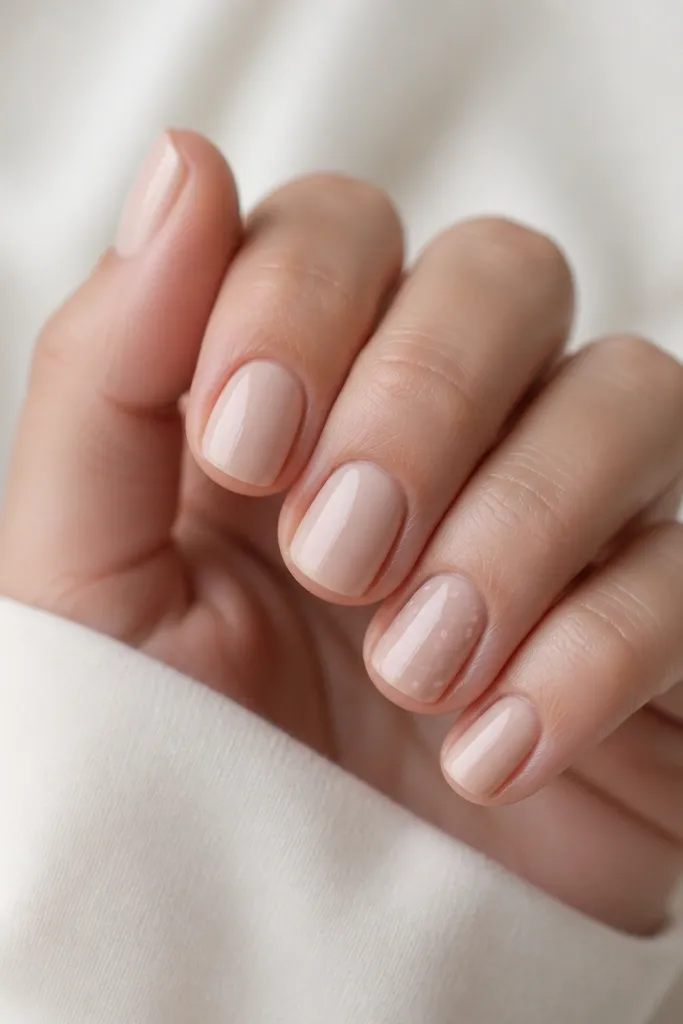
Polka dots look cute on short nails when they're small and placed in a tight cluster. Creamy nude makes the dots feel playful, not childish. Keeping dots on one accent nail gives you the "cute but grown" vibe. Glossy finish makes the dots look like they're under glass.
Paint all nails creamy nude with two thin coats. On the ring finger only, dot white and pale pink using a dotting tool. Keep dots spaced about a dot-width apart so it doesn't look crowded. Top coat all nails with a thicker coat on the accent nail.
Editor's noteLet the base dry fully before dots so the colors don't bleed.
Watch outSkip large dots - they take over the nail when the length is short.
7. Chocolate Brown Gloss + Heart Outline Half-Moons
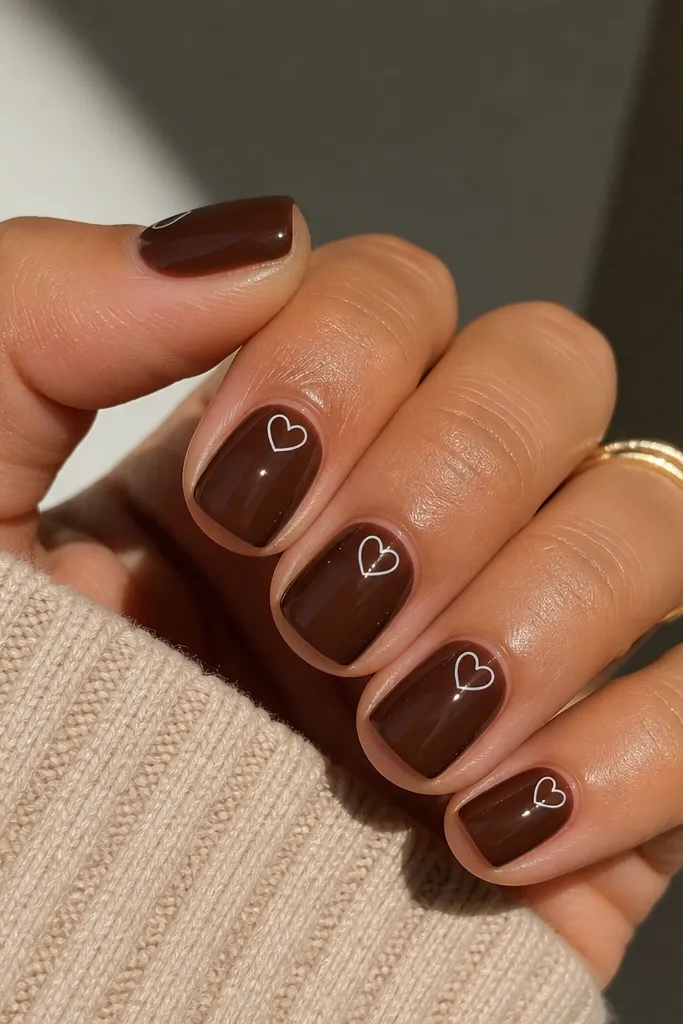
This one is a little moodier but still "sabrina" because the hearts stay tiny and the base is glossy. Chocolate brown makes the heart outline look crisp and high-contrast. The half-moon placement adds shape without clutter. It's a budget-friendly way to look styled even when you only have one accent color.
Use chocolate brown polish in two coats for full coverage. With white liner polish, draw a small half-moon shape in the middle third, then outline a heart inside it. Keep the heart about as tall as the half-moon. Top coat twice if your first coat pulls the liner.
Editor's noteIf liner smears, let it dry longer than you think - 5 minutes for regular polish.
Watch outDon't flood the heart with white - outlines look cleaner on short nails.
8. Sheer Pink + Tiny Star Scatter
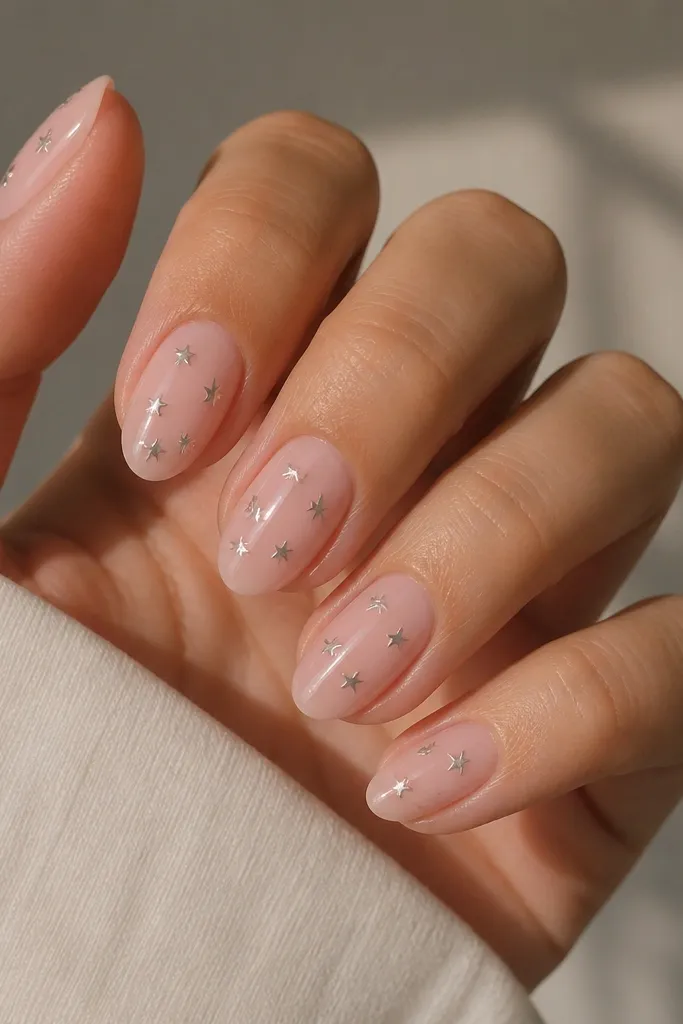
Tiny stars add that sweet "sparkle" without glitter overload. Sheer pink keeps everything light and lets the stars look like accents. I like silver because it reads cool and modern, especially with a glossy top coat. The stars are small enough to stay readable on short length.
Paint sheer pink in two thin coats. Use metallic silver nail art polish or a thin metallic pen to dot tiny stars. Place them in the middle third and keep at least one star away from the cuticle line. Seal with a glossy top coat, then cap the free edge.
Editor's noteUse a nail art sticker star if you need speed, then top coat to smooth the edges.
Watch outSkip big star shapes - they look like decals on short nails.
9. Rose Gloss + Diagonal French with Micro Pearl Dot
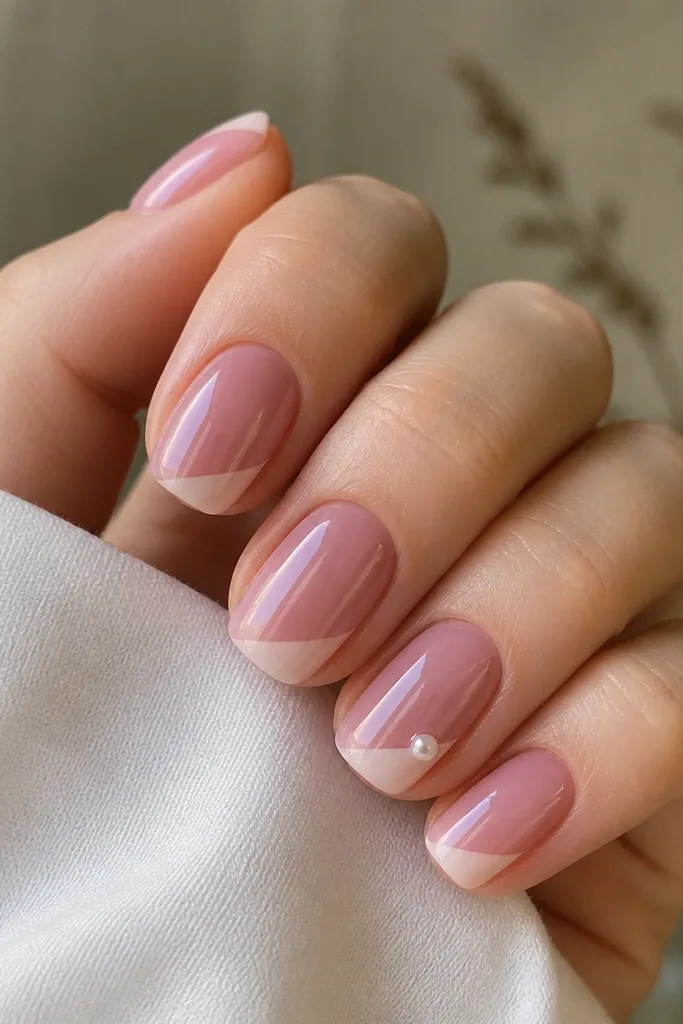
Diagonal French is cute because it breaks the straight-line rule and makes short nails look styled. The rose base is flattering and keeps the white tip from looking stark. One pearl dot at the corner gives you that "details" moment without going full rhinestone. Gloss makes the diagonal line look smooth.
Paint rose pink in two coats. For the diagonal tip, paint a milky white stripe from one corner toward the center of the free edge, keeping it thin. Add a tiny pearl dot where the diagonal starts on the ring finger only. Top coat and cap the edges carefully along the diagonal line.
Editor's noteUse painter's tape cut into a thin strip to guide the diagonal line, then remove while the polish is still tacky.
Watch outDon't make the diagonal too wide - it shortens the nail visually.
10. Clear Jelly Base + Pink Pressed-Glitter Confetti
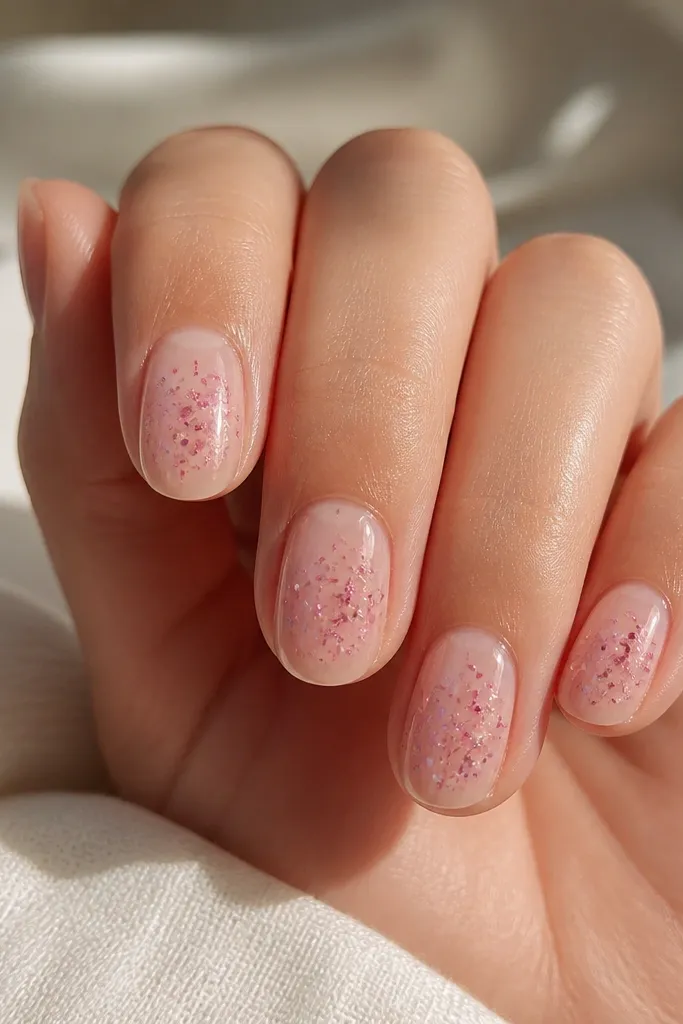
A clear jelly base is the cheat code for budget nail art because it makes glitter look suspended, not pasted on. Pink confetti feels "sweet" and keeps the set from looking too dark. The key is using small pieces, not chunky glitter. A smooth top coat helps it look like one layer.
Apply a clear jelly base (gel or jelly polish) and cure/dry. Dab tiny pink confetti glitter with a clean brush so it stays mostly in the middle third. Avoid piling glitter at the tip. Seal with a thick top coat in two layers if needed.
Editor's noteIf the glitter sinks, add a second top coat after 10 minutes instead of pressing it harder.
Watch outSkip chunky glitter - it makes short nails feel rough and snaggy.
11. Nude Almond + Pink Outline Smile Lines
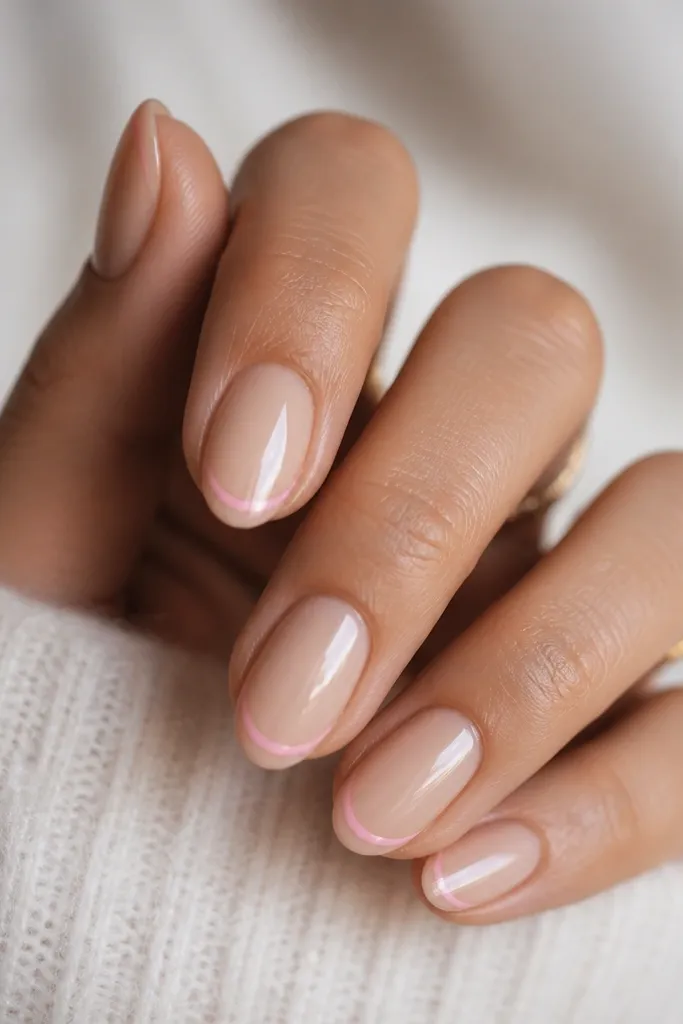
Smile lines are playful without being cartoonish. The pink outline stays delicate, and the nude base keeps it wearable. Because the line is thin, short nails still look clean and not overloaded. Gloss ties it together so the outline looks like it's printed.
Paint nude in two coats. With a fine liner brush, draw a short curved line near the tip, about 1-2 millimeters above the free edge. Keep it centered on each nail. Top coat twice if you're using regular polish so the line doesn't crease.
Editor's noteUse a dotting tool to mark the ends of the curve first, then connect them with the liner.
Watch outDon't make the smile line too thick - thick lines look like stickers.
12. Lavender Micro French + Clear Gloss Seal
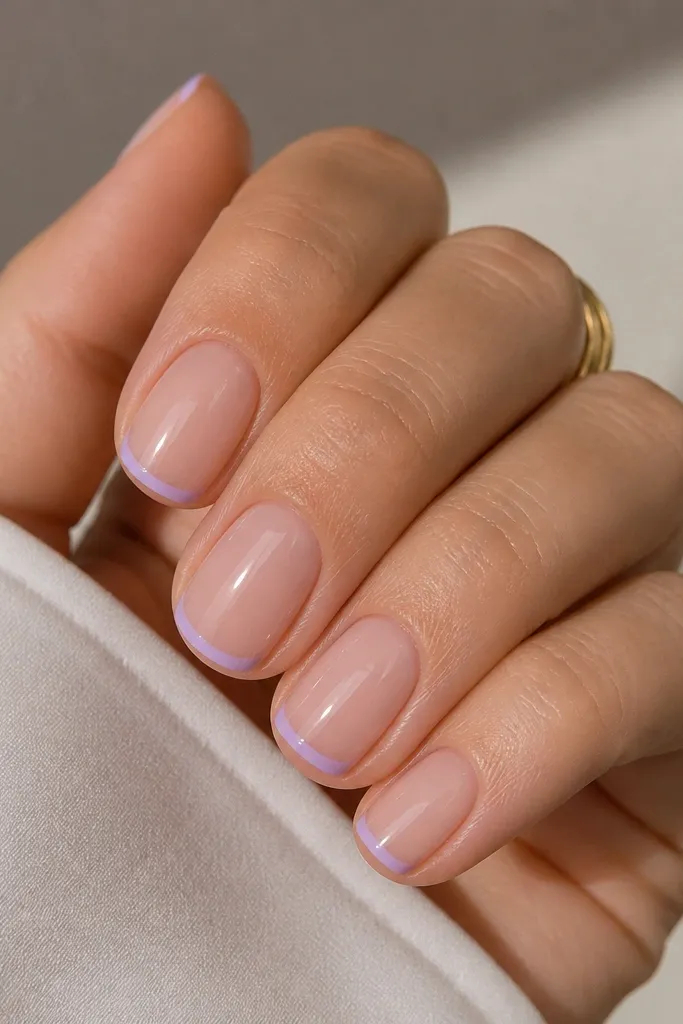
Micro French looks expensive because it's precise and minimal. Lavender adds that soft "cool girl" sweetness that still feels like candy. The sheer nude base keeps it light and makes the lavender line look intentional. A clear glossy seal keeps the edges smooth so it doesn't look like paint on top.
Use sheer nude as your base. Paint a thin lavender line across the tip, keeping it narrow - about the width of a paperclip. Use a steady hand or a striping brush. Finish with a clear top coat and cap the free edge.
Editor's noteIf your line wobbles, clean the edges with a small brush dipped in remover before top coat.
Watch outAvoid thick lavender tips - they overpower the short nail.
13. Pearl White Base + Soft Pink Half-Heart Tips
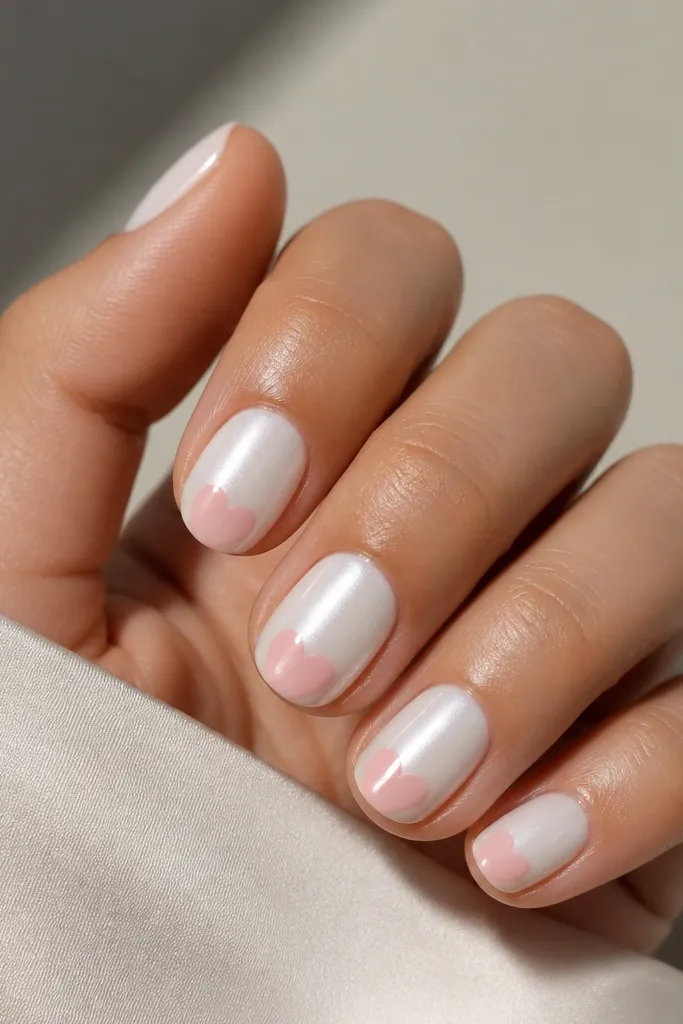
Half-hearts on the tip look cute because they mimic French placement but with a romantic twist. Pearl white gives a bright, clean background that hides imperfections. Soft pink keeps it subtle and young. The rounded half-heart shape flatters short nails and avoids the "sticker" look.
Paint pearl white in two thin coats. For each nail, draw a small U-shape in soft pink near the tip, then add two short curves upward to form a half-heart. Keep the half-heart smaller than your nail tip width. Top coat thoroughly, especially over the pink shape.
Editor's noteUse a matte base then top coat - it makes the half-heart edges look extra crisp after gloss hits.
Watch outSkip full hearts at the tip - they look too big on short length.
14. Rosy Nude + Side Swipe Glitter on One Nail
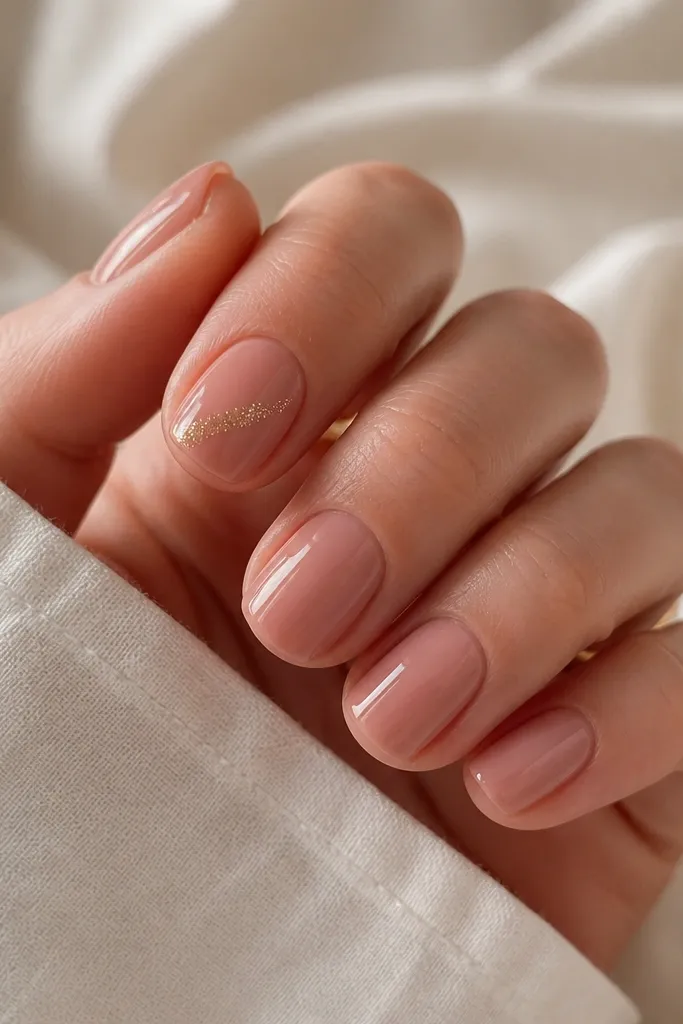
A diagonal side swipe is the easiest way to make a set look styled in minutes. Rosy nude keeps it flattering, and gold glitter adds that warm, "going out" feel. Because glitter is only on one nail, it stays budget and doesn't get messy. Gloss makes the glitter look like it's embedded instead of floating.
Paint all nails rosy nude in two coats. On one accent nail, apply a thin diagonal stripe of fine gold glitter using a sponge or glitter polish brush. Keep it in the middle third and stop before the edges. Seal with two layers of top coat to smooth the glitter texture.
Editor's noteUse a makeup sponge for the stripe - it gives a softer fade than brushing.
Watch outDon't swipe glitter all the way to the cuticle - it makes the nail look crowded.
15. Clear Nude + Tiny Pink Outline Flowers
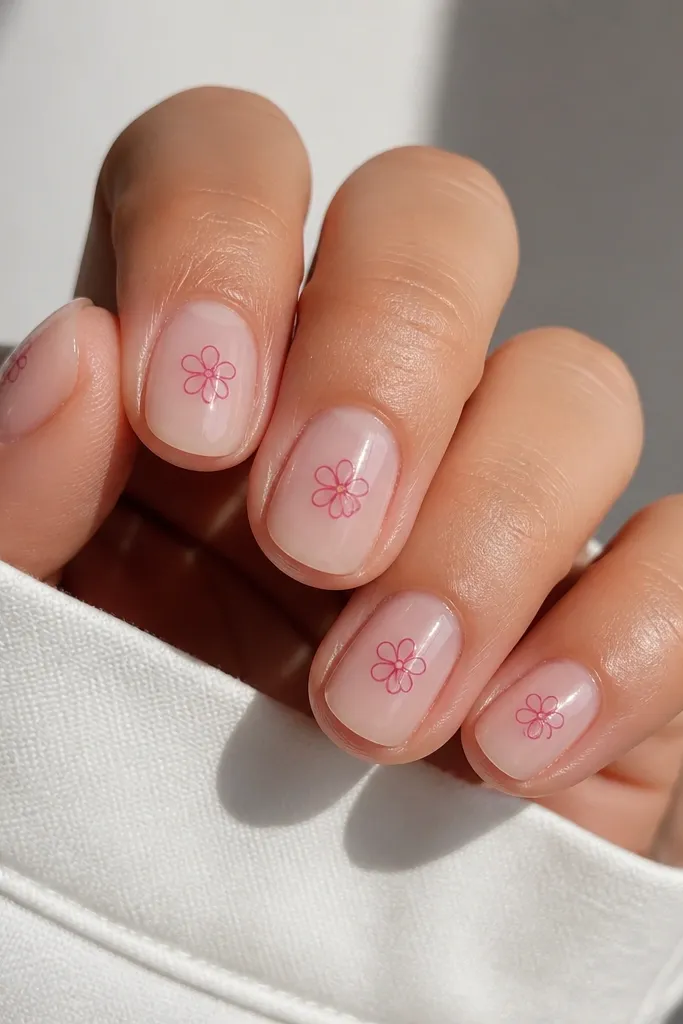
Outline flowers feel sweet because they're delicate and airy. Clear nude makes them look like they're drawn on, not painted over a thick layer. Pink outline is easier than filling - it also dries faster. This design reads "pretty" even with short length because the petals are small.
Apply clear nude gel in two thin coats for that jelly-clean look. Use a fine art brush with pink polish to draw 4-5 small petals around a tiny dot center. Keep the flower about the size of a dime on your nail. Top coat and cap the edges.
Editor's noteLet the outlines dry fully before top coat so they don't blur.
Watch outSkip filled-in flowers - solid shapes look bulky on short nails.
16. Warm Nude + Two-Line Heartbeat Accent
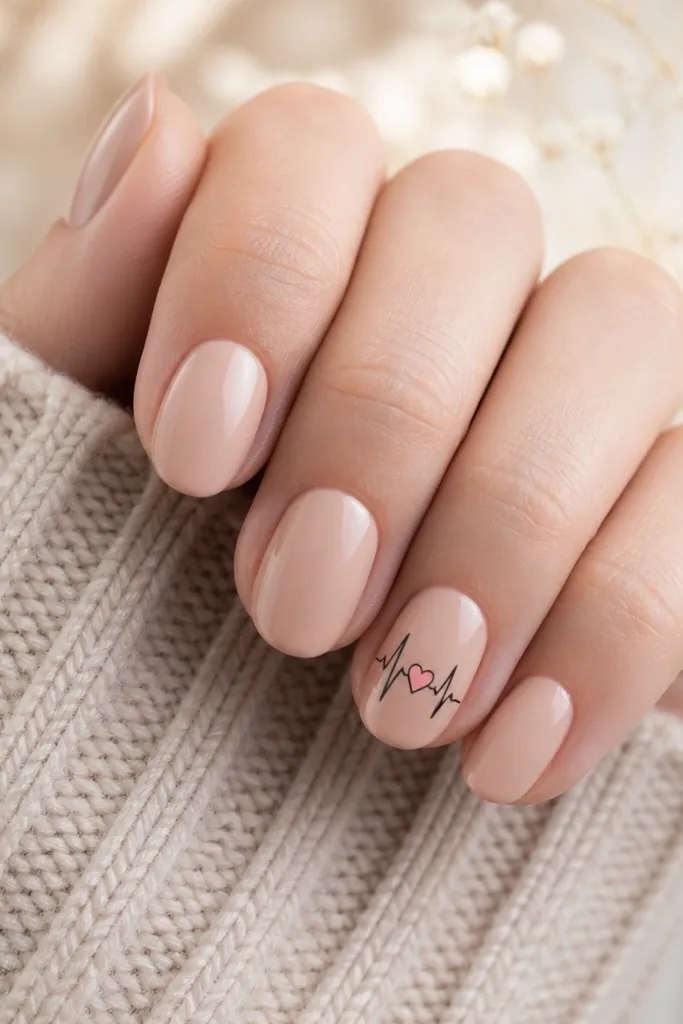
This is the "cool cute" version I reach for when I want something different from hearts-on-every-nail. The warm nude base keeps it flattering and soft. The black line adds contrast, and the tiny pink heart at the peak ties it to the sweet theme. Gloss makes it look crisp, like nail art pen work.
Paint warm nude on all nails. On the accent nail, draw a tiny heartbeat line with black polish - just 10-12 millimeters long on the middle third. Add a small pink heart at the highest point. Seal with top coat twice so the line doesn't lift.
Editor's noteUse a nail art liner pen if you have shaky hands - it's more consistent than a brush.
Watch outDon't make the heartbeat line long - it will crowd a short nail.
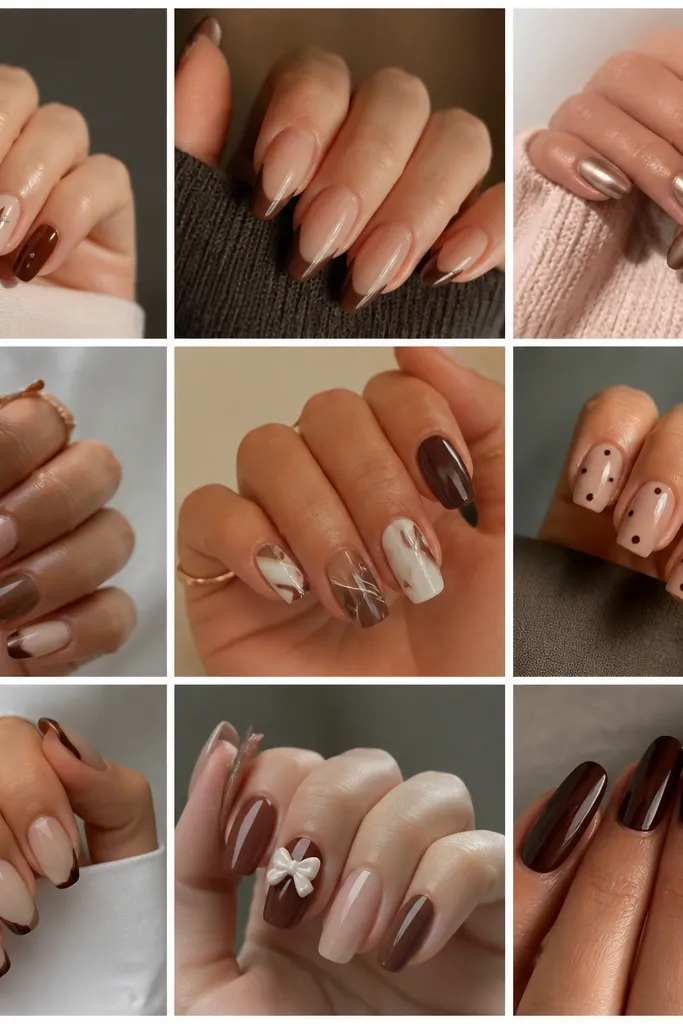
17. Caramel Latte Nude + Glossy Brown Micro Dots
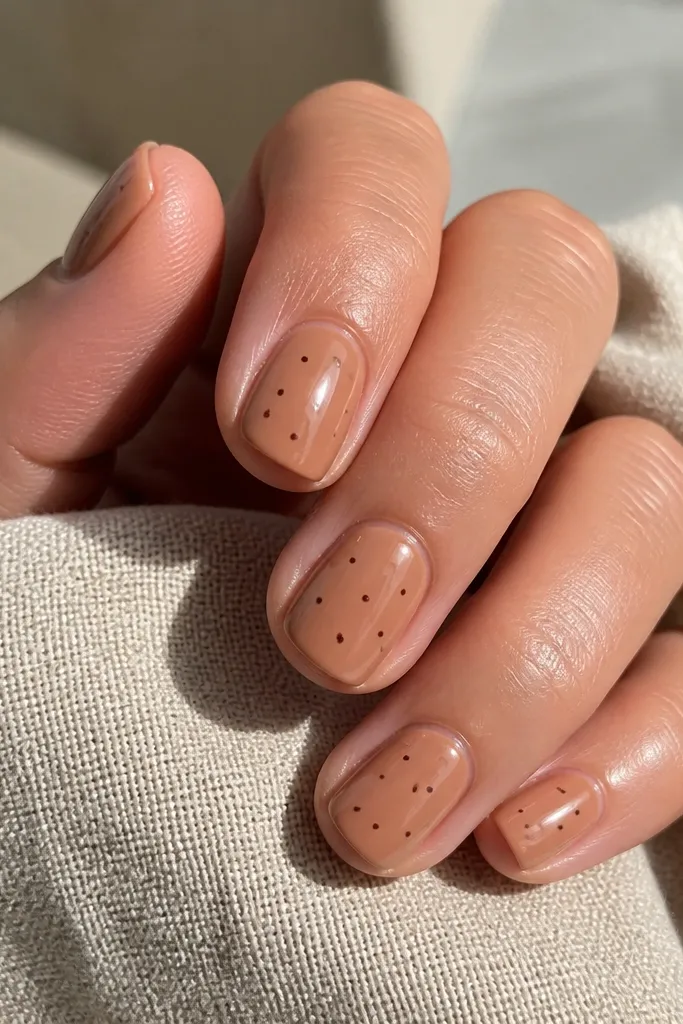
This looks like candy coffee - soft and cozy, still sweet. The caramel nude base makes the darker dots look intentional, not like smudges. Micro dots are perfect for short nails because they don't need space to read. Glossy finish makes the dots look raised and clean.
Use a caramel nude polish or gel, not a beige-gray. With a dotting tool, place 3-5 micro dots in dark brown per nail, keeping them centered and away from edges. Leave breathing room so the nail still looks neat. Top coat and cap the free edge.
Editor's noteIf dots look too dark, mix a tiny amount of brown with clear top coat and dot again.
Watch outSkip big dot clusters - they look like paint splatter.
18. Sheer Pink + Tiny Peach Half-Moons
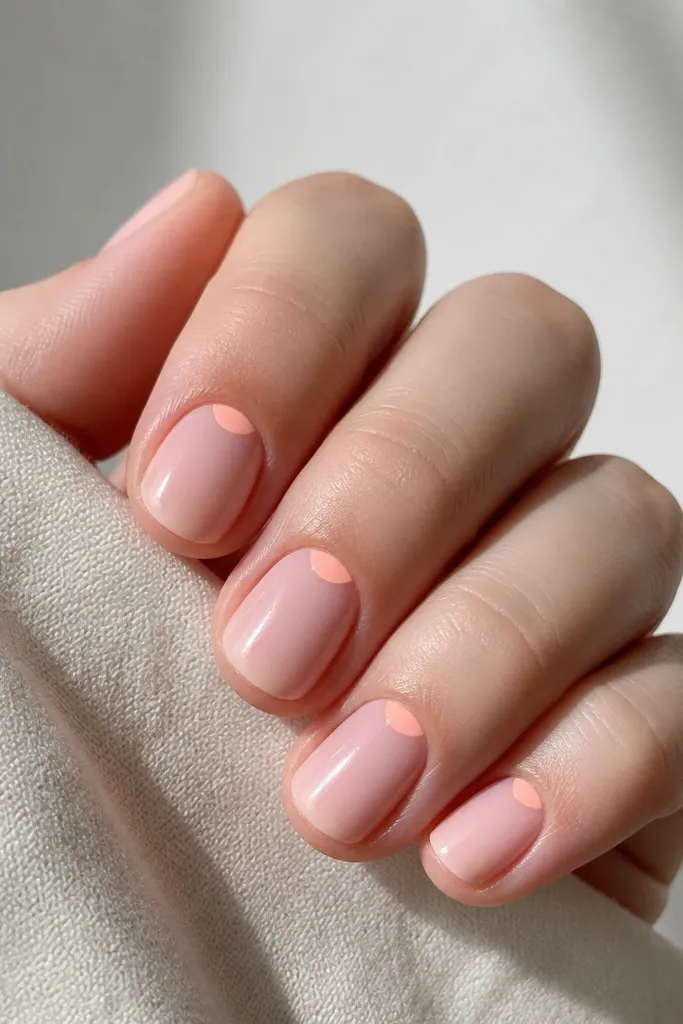
Half-moons at the cuticle give that "French but cuter" effect. Peach is warm and youthful, and the sheer pink base keeps it light. The crescents are tiny, so the set stays short n sweet instead of looking like a manicure with regrowth. Gloss makes the cuticle area look smooth and polished.
Apply sheer pink in two thin coats. Use peach polish on a fine brush or stencil to paint a small crescent right under the cuticle line on each nail. Keep the crescent height about 1-2 millimeters. Seal with top coat and cap the free edge.
Editor's noteIf you get polish on your skin, wipe immediately with a flat brush dipped in remover before it sets.
Watch outDon't drag the crescent toward the sidewalls - it makes the cuticle look messy.
19. Chocolate Brown + Glossy Nude Swirl Tips
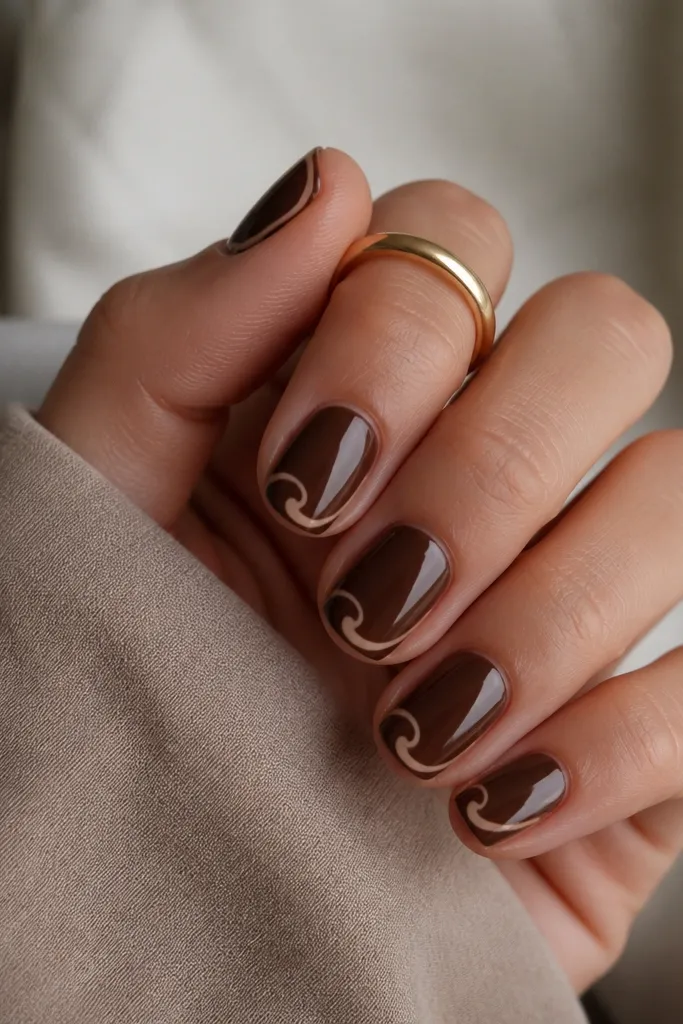
Swirl tips look cute because they're minimal and directional. Chocolate brown makes the nude swirls pop, and the swirl shape keeps it from looking like plain French. This is also forgiving: if your line isn't perfect, a swirl hides the wobble. Glossy finish makes the swirls look like they're under the surface.
Paint chocolate brown in two coats. With nude liner polish, draw a thin curved line starting near the side of the tip and curling toward the center, repeating once per nail. Keep swirls small - about the width of your thumbprint at the tip. Top coat twice for smoothness.
Editor's noteUse a nail art striping brush and keep your hand resting on a table for steadier curves.
Watch outSkip thick swirls - they look chunky on short nails.
20. Glossy Nude + Tiny White Lace Dot Grid
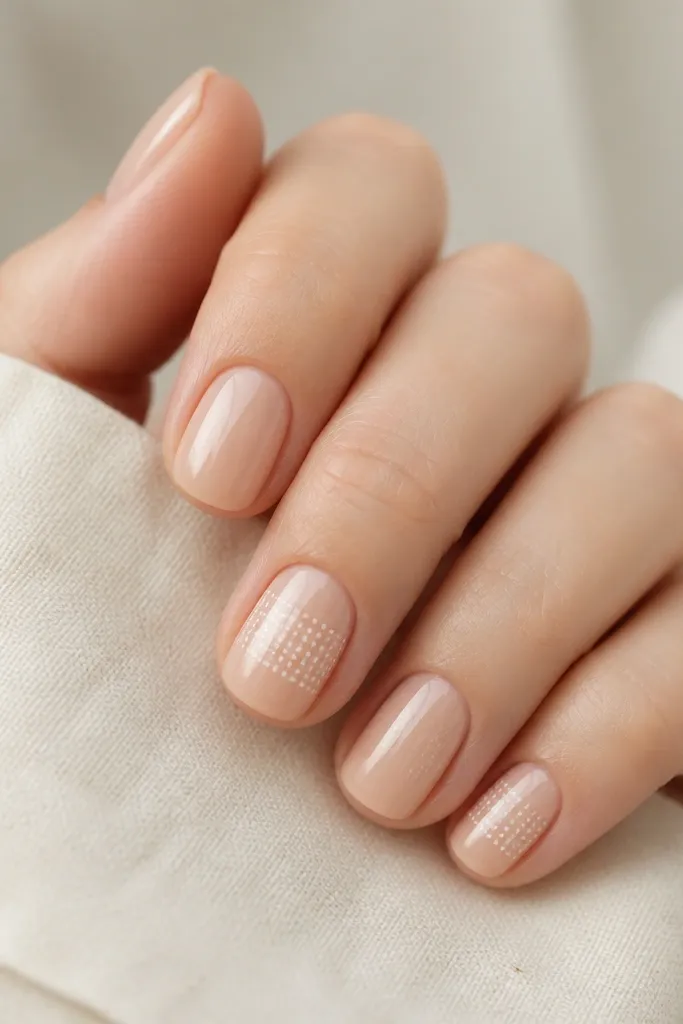
A dot grid looks like lace without needing actual lace. The white dots read clean against glossy nude, and the grid placement keeps it organized. I like doing it on two nails because the pattern is the statement and the rest stays simple. This design feels sweet but still neat.
Paint glossy nude in two coats. On the accent nails, use a dotting tool to place white dots in rows and columns, forming a rectangle in the middle third. Keep the grid small so it fits short length - about 6-8 dots per row. Seal with top coat and cap the edges.
Editor's noteCount rows in your head while placing dots so the grid stays even.
Watch outDon't spread dots to the edges - it looks like random specks.