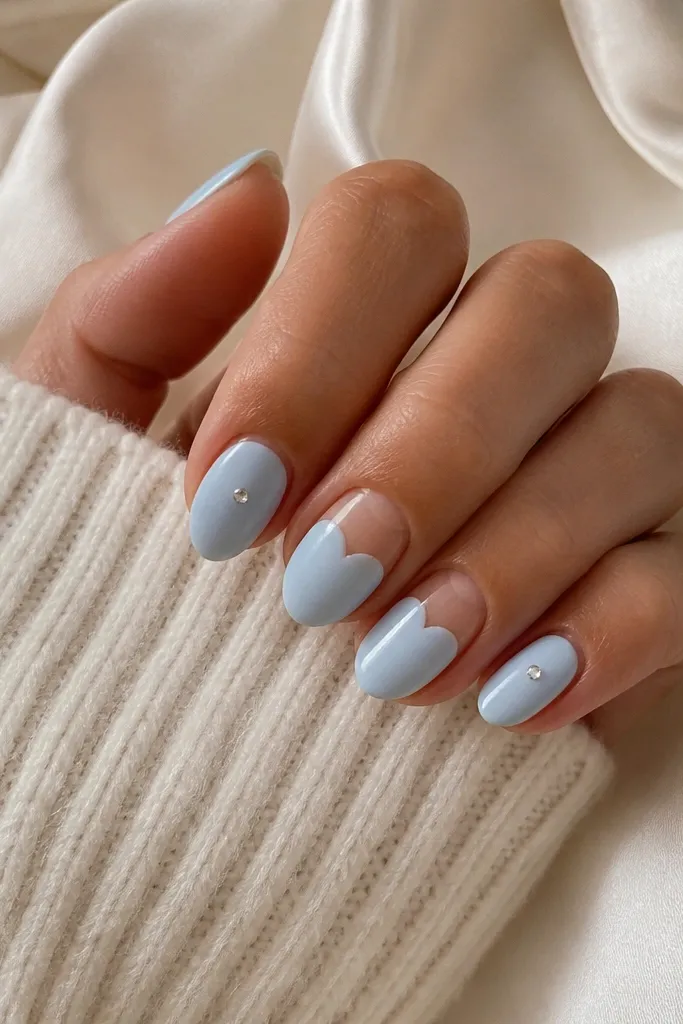
1. Milky Pink Half-Moon with Tiny Gold Specks
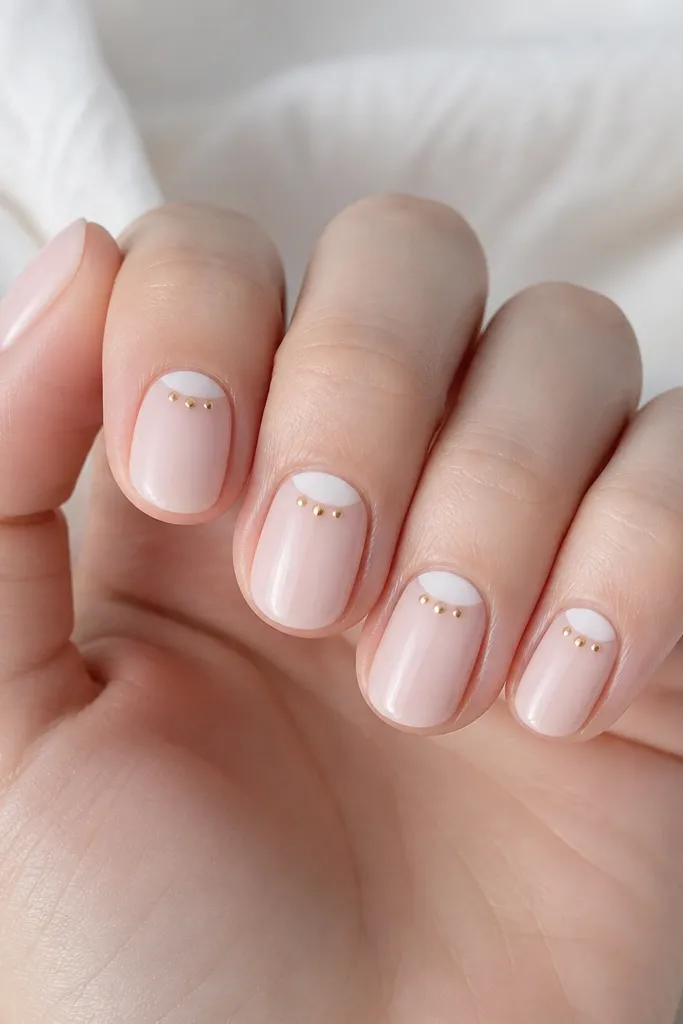
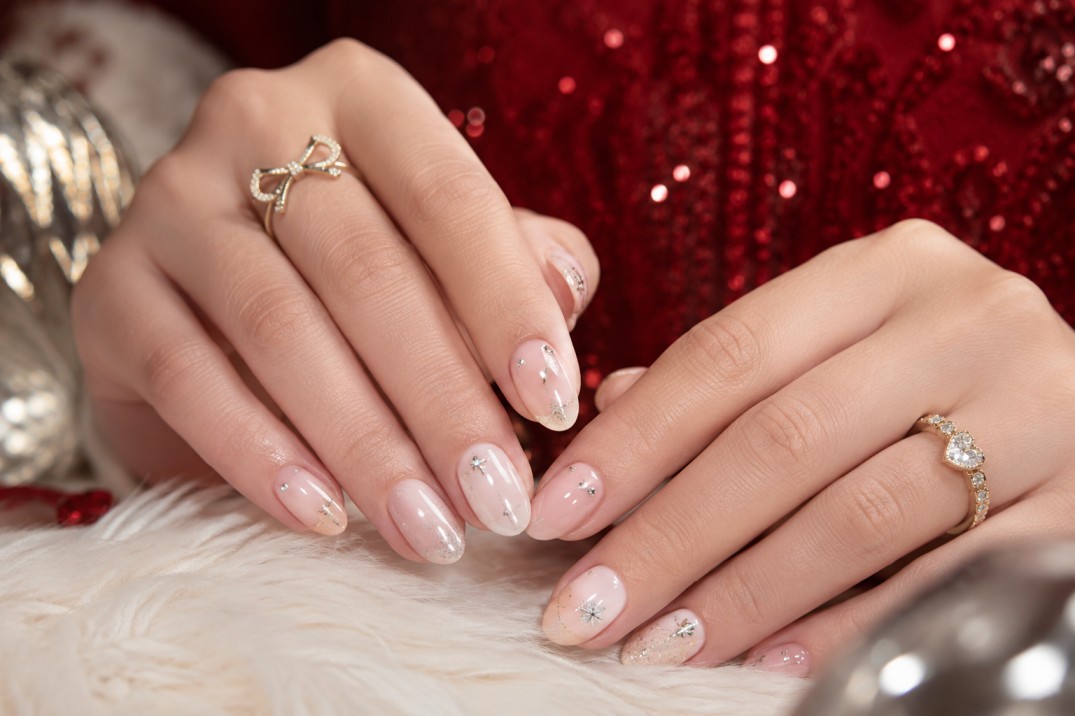
This look uses a cuticle half-moon to create a "lift" effect. On short nails, the half-moon gives structure without adding length. The gold specks stay tiny so they read as sparkly accents, not chunky glitter. I like milky pinks because they blend with your natural nail and look expensive in daylight.
Start with a rubber base, cure, then paint two thin coats of milky pink. For the half-moon, use a small liner brush and a slightly brighter milky shade, placing it in the center third at the cuticle. Add 3-5 gold specks with a dotting tool before top coat. Finish with glossy top coat over everything.
Editor's noteIf your specks smear, add them after the color is cured hard, then cap with a thin layer of top coat.
Watch outAvoid using chunky gold glitter - it makes short nails look textured and messy.
2. Cherry Gloss Tips on Squoval Short Nails
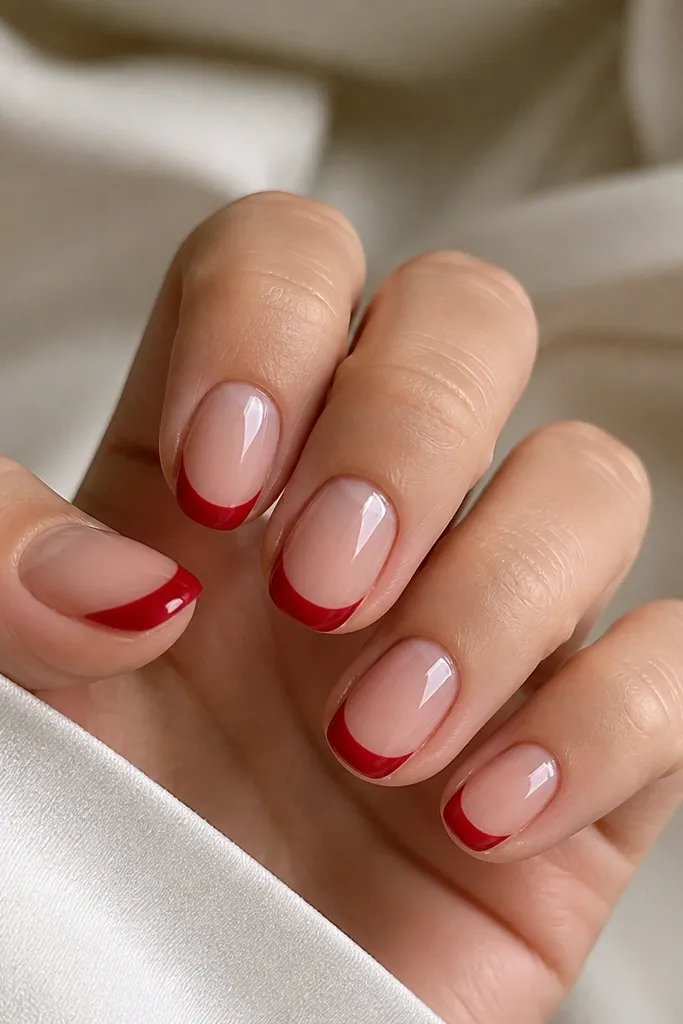
Cherry tips give that candy-pop look without needing long length. The arc tip shape makes fingers look more slender, especially on squovals. Keeping the red only on the tip keeps it from overpowering small nail beds. Gloss makes the red reflect light like a fresh gloss stain.
Use a sheer nude base (one to two coats). Cure fully. Paint the cherry red tip as a curved "smile" shape, leaving 1 mm of nude at the sidewalls. Cap with glossy top coat, then do a second thin top coat for extra smoothness.
Editor's noteUse a silicone nail guide strip under your hand for steadier curved tips.
Watch outDon't paint the red all the way to the sidewalls - that makes short nails look wider.
3. Buttercream French with Micro Heart Dot
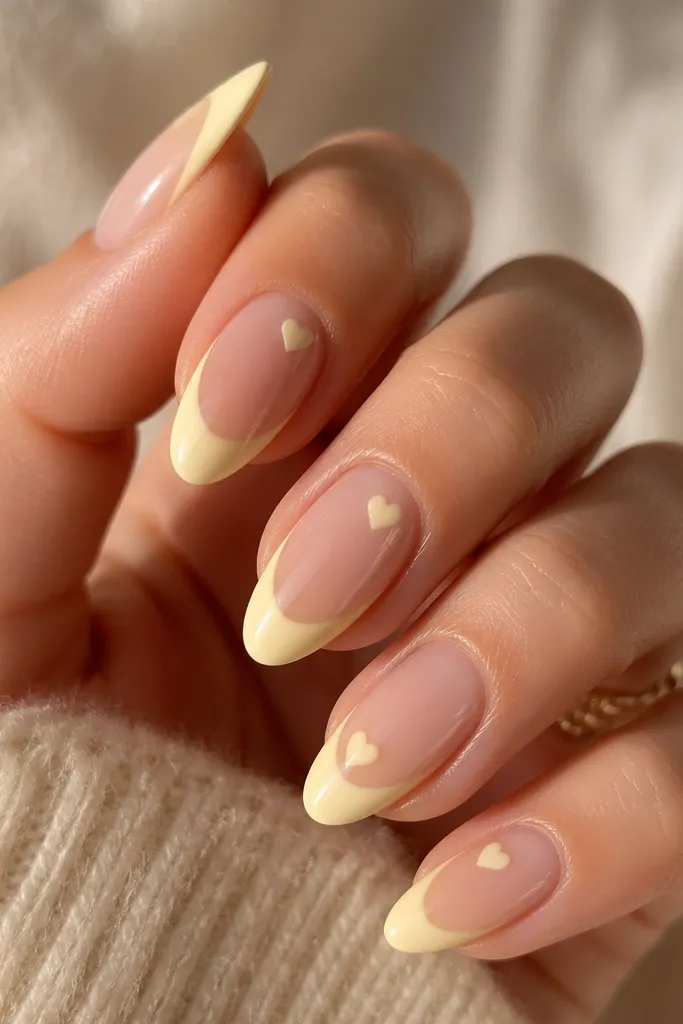
Pastel buttercream French looks sweet and clean on short nails because the color is light and the line stays crisp. The micro heart dot adds a playful Carpenter-ish detail without crowding the nail. White hearts near the cuticle also visually lengthen by pulling the eye upward. The glossy finish keeps the pastel looking smooth, not powdery.
Paint a sheer nude base and cure. For French, use a French tip guide or freehand with a striping brush, keeping the tip width around 1.5-2 mm. Place a tiny white heart using a dotting tool - make two small dots, then drag a line to connect. Top coat glossy on every nail.
Editor's noteIf the French line looks thick, do two thinner coats instead of one heavy coat.
Watch outSkip matte top coat here - it kills that "butter" shine.
4. Soft Jelly Pink with White Side Swoosh
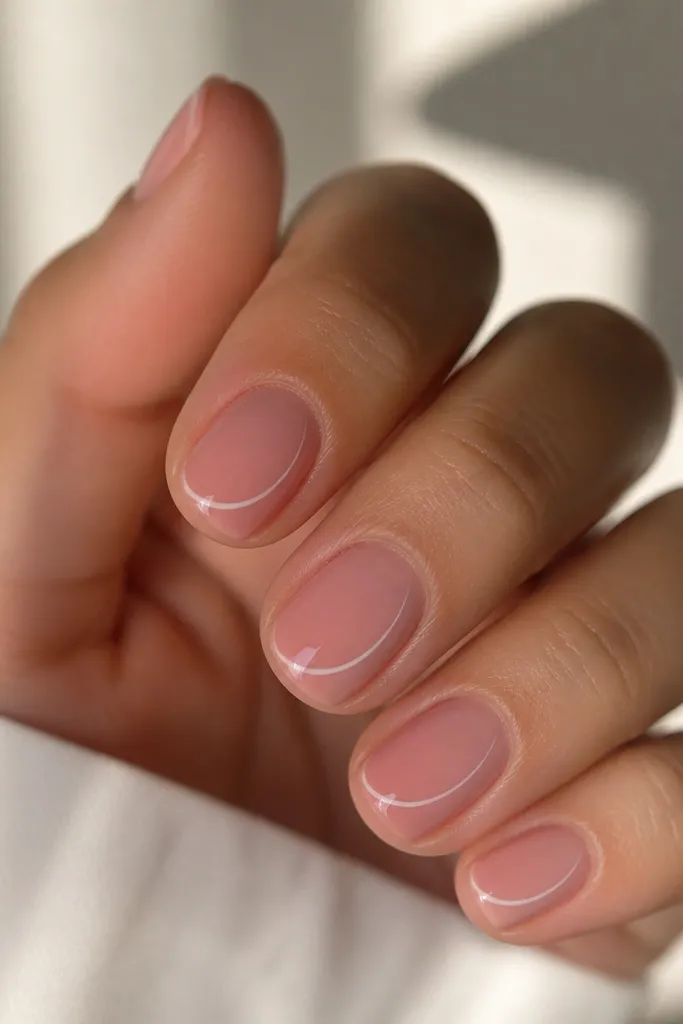
A one-sided swoosh gives motion while staying minimal. On small nail beds, asymmetry makes the nail look longer because your eye tracks the curve. Jelly pink keeps everything airy and close to the "natural but styled" look. White lines stay sharp when you use a fine brush and cure between steps.
After curing your jelly pink (two thin coats), draw the swoosh with a 00 liner brush. Start near the middle third and curve slightly upward toward the tip, keeping the line thickness like a hair. Cure, then top coat glossy. If the line is uneven, fix it before top coat with a tiny cleanup brush dipped in remover.
Editor's noteUse a separate brush for white paint so it doesn't get tinted by pink residue.
Watch outAvoid bold, wide swooshes - they look like sticker residue on short nails.
5. Milky Nude with Tiny Red Bow Accent
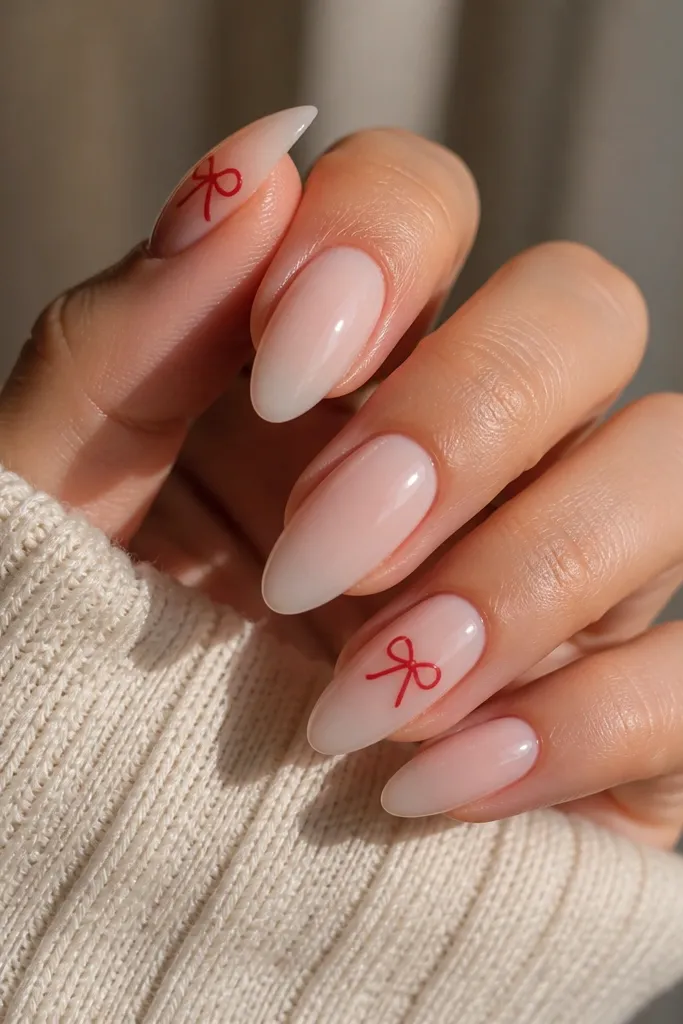
A tiny bow reads "cute" fast because bows have clear shapes even at small scale. Milky nude makes the red look intentional, not random. I like placing the bow near the cuticle on the center third so it doesn't sprawl. The bow also gives you an easy focal point when the rest of the nails are simple.
Do all nails in milky nude (two coats). On the accent nail, use a liner brush to draw two small loops, then add a tiny knot center. Keep the bow width around 2-3 mm. Cure, then add glossy top coat and cap the edges.
Editor's noteIf your bow looks lopsided, draw one loop first, cure, then do the second loop.
Watch outDon't make the bow bigger than the nail width - it overwhelms short nails.
6. Clear Pink Base with Confetti Micro Dots
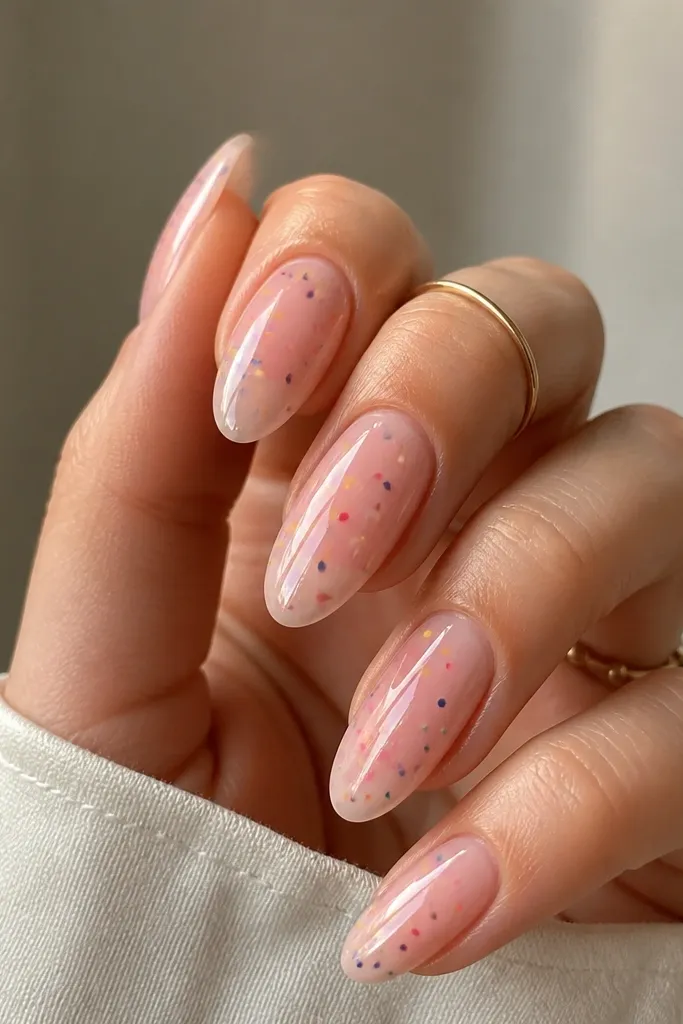
Micro confetti dots look fun without taking up space. The clear-pink base keeps it light, and the tiny dots create texture-like sparkle under shine. White and gold dots look clean together, and the pale pink dots blend so it doesn't look too busy. This design is forgiving because small misplacements still read as confetti.
Use a clear-pink jelly base. After curing, dot with a dotting tool - start with gold first, then add white. Keep the dots under 0.5 mm so they don't thicken. Finish with glossy top coat in two thin layers so the dots don't sink.
Editor's noteWant it to last longer? Avoid dragging top coat through the dots - place top coat around them and cap gently.
Watch outDon't use large glitter dots - they catch on sleeves and chip faster.
7. Soft Pink Gradient to Barely-There Tips
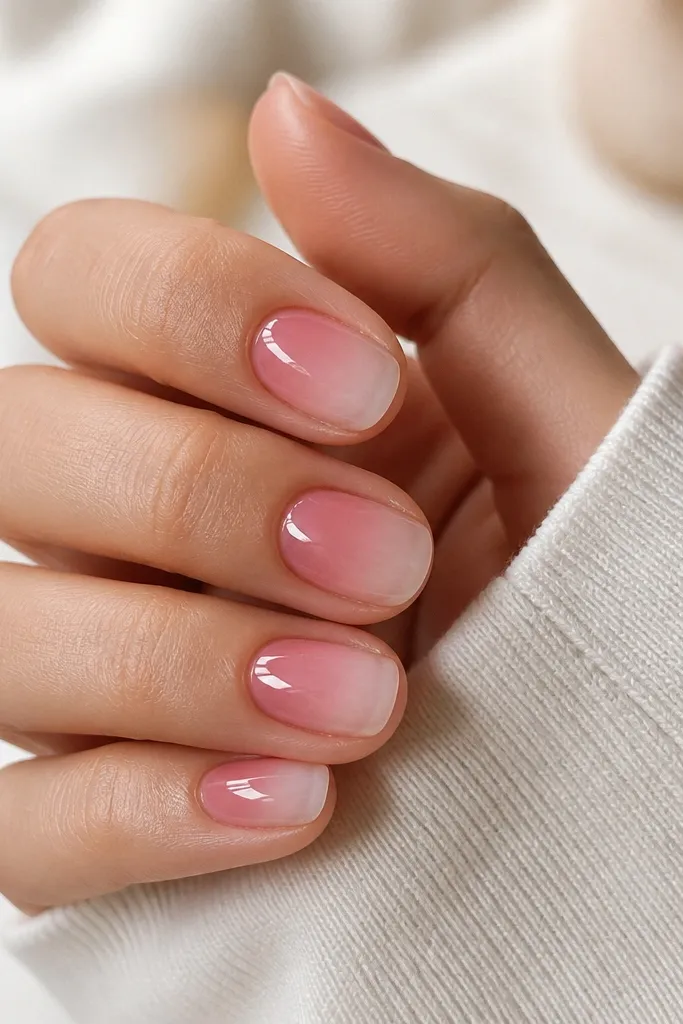
A cuticle-to-tip gradient creates length because the darkest point is near the base. On short nails, fading to near-clear at the tip keeps the nail looking airy. This is one of those designs that looks "done" even when you only add the gradient. Gloss makes the blend look like glass.
Apply a rubber base, cure. Sponge on rosy pink at the cuticle, then fade with a makeup sponge toward the tip. Use a nail sponge lightly so you don't get thick edges. Cure, then add a sheer layer of pink to smooth the fade. Top coat glossy twice for a smooth finish.
Editor's noteBlend in tiny taps - wiping the sponge smears the gradient edge.
Watch outAvoid a hard line at the fade point - it makes short nails look chopped.
8. Nude Base with Single Crystal at the Sidewall
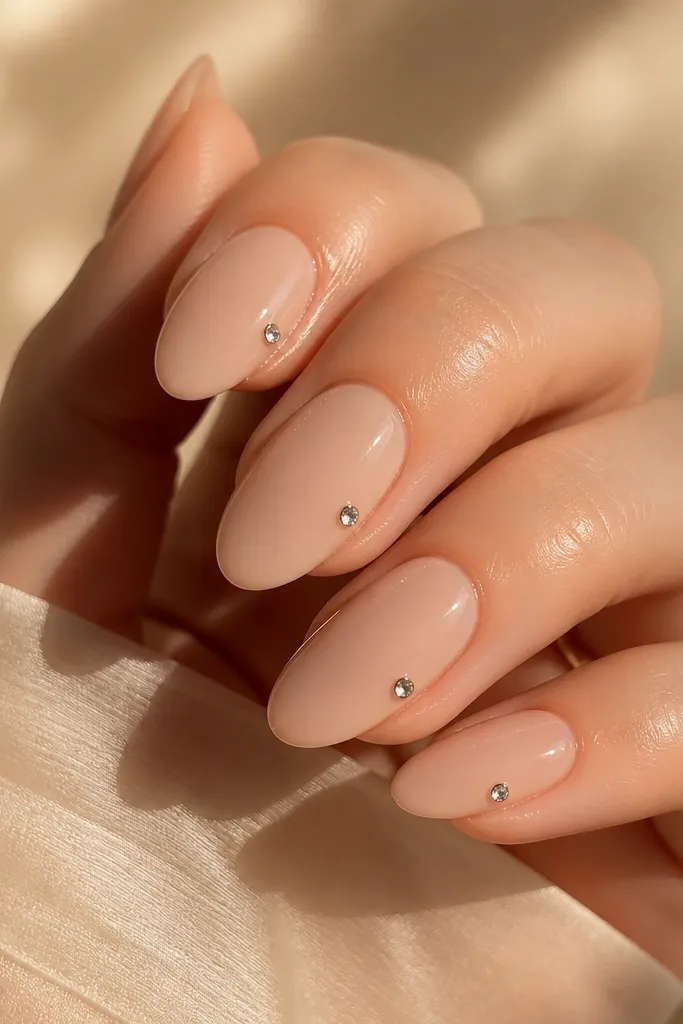
One crystal is enough drama for short nails. Sidewall placement looks like a "jewel" moment because it catches light as your hand moves. Keep the crystal small - it should sit like a highlight, not like a gem glued on top. Nude base keeps it clean and not costume-y.
Use glossy nude gel as base. Place a small crystal using gel adhesive or a tiny dot of thick builder gel. Cure carefully so the crystal stays put. Finish with top coat around the crystal, then cap the crystal tip area so it doesn't snag.
Editor's notePress the crystal with a silicone-tipped tool for 5 seconds before curing.
Watch outSkip large rhinestones - they lift and snag on short nail edges.
9. White Milky Nails with Tiny Peach Crescent
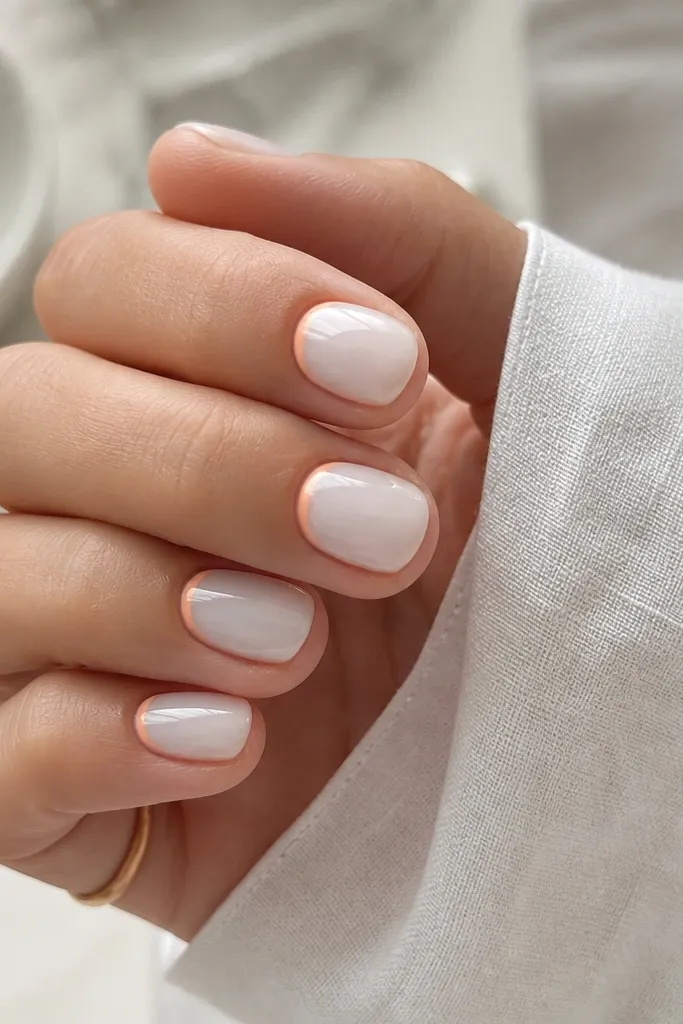
Milky white makes short nails look bright and fresh. A peach crescent adds warmth and a soft "two-tone" look without extra work. The crescent at the cuticle is a classic length trick because it frames the base. Gloss keeps it looking smooth instead of chalky.
Paint milky white in two thin coats, cure fully. With a striping brush, draw a tiny peach crescent at the cuticle center third. Keep the crescent height about 1 mm. Cure and then add glossy top coat.
Editor's noteIf the peach bleeds, wipe your brush on a lint-free pad before you draw the crescent.
Watch outDon't paint the crescent too low - it will look like a stain.
10. Rose Chrome Tip on Clear Pink Jelly
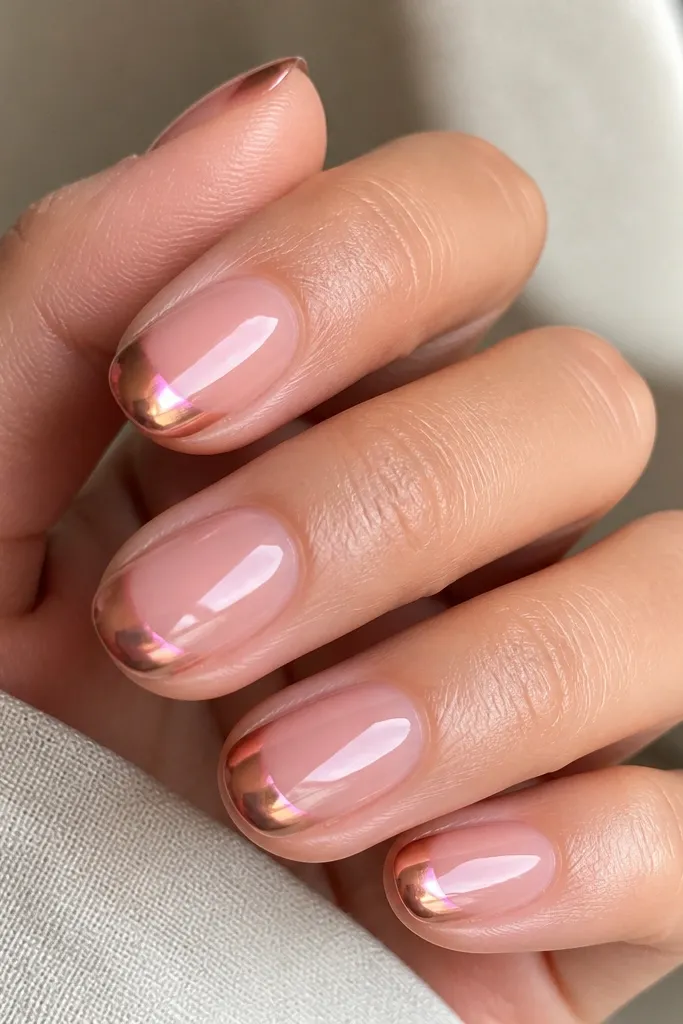
Chrome tips add that "photo filter" look without length. Rose chrome looks flattering because it's warmer than silver and matches pink skin tones. Keeping chrome only on the tip prevents the whole nail from looking too metallic. The jelly base makes the chrome look like it's floating.
Apply clear pink jelly base, cure. Add a thin layer of chrome gel or tacky layer at the tips only, cure per product directions. Rub rose chrome powder or apply chrome pigment with a sponge, then brush off extra. Seal with glossy top coat, avoiding too much matte sealer.
Editor's notePress the chrome pigment lightly with an applicator sponge so it doesn't streak.
Watch outAvoid heavy chrome over the full nail - it makes short nails look flat.
11. Tiny Daisy Center Dot on Sheer Pink
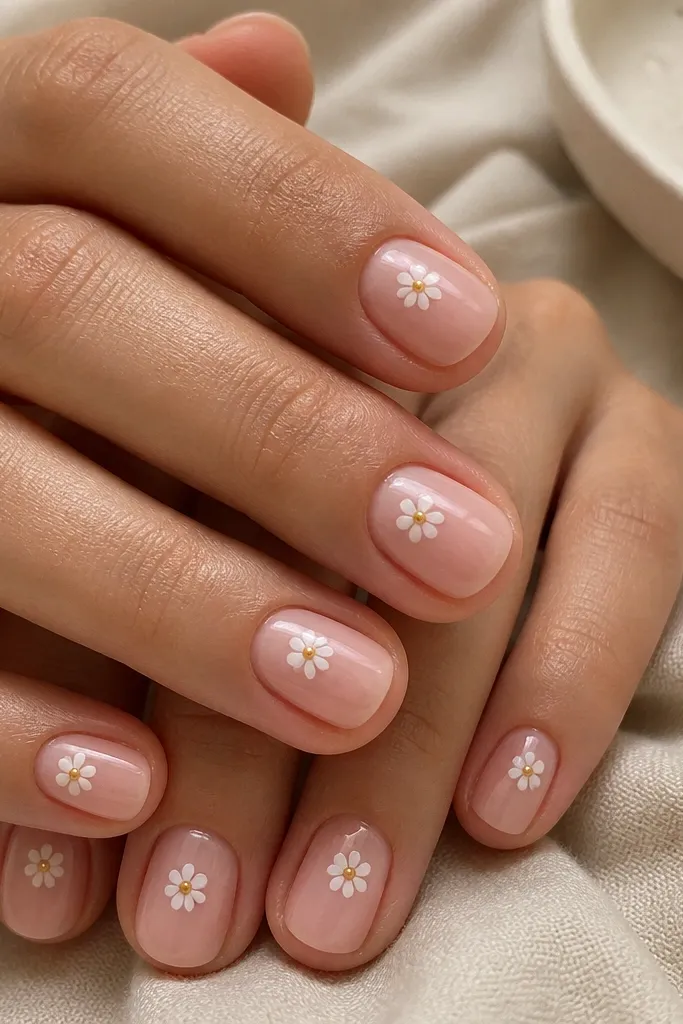
Daisies are readable at small size, which matters for short nails. The yellow center adds warmth and makes the flower look dimensional. Sheer pink keeps the look soft and sweet instead of loud. Glossy top coat makes the daisy dots look like tiny candies.
Paint sheer pink jelly base, cure. Dot a small yellow center first with a dotting tool. For petals, place 5 tiny white dots around the center, then drag each dot slightly outward using the tip of a toothpick. Cure and seal with glossy top coat.
Editor's noteUse toothpick for petals - it gives you more control than a brush when nails are short.
Watch outDon't make the petals too big - the flower turns into a white blob.
12. Caramel Nude with Micro Polka at Cuticle
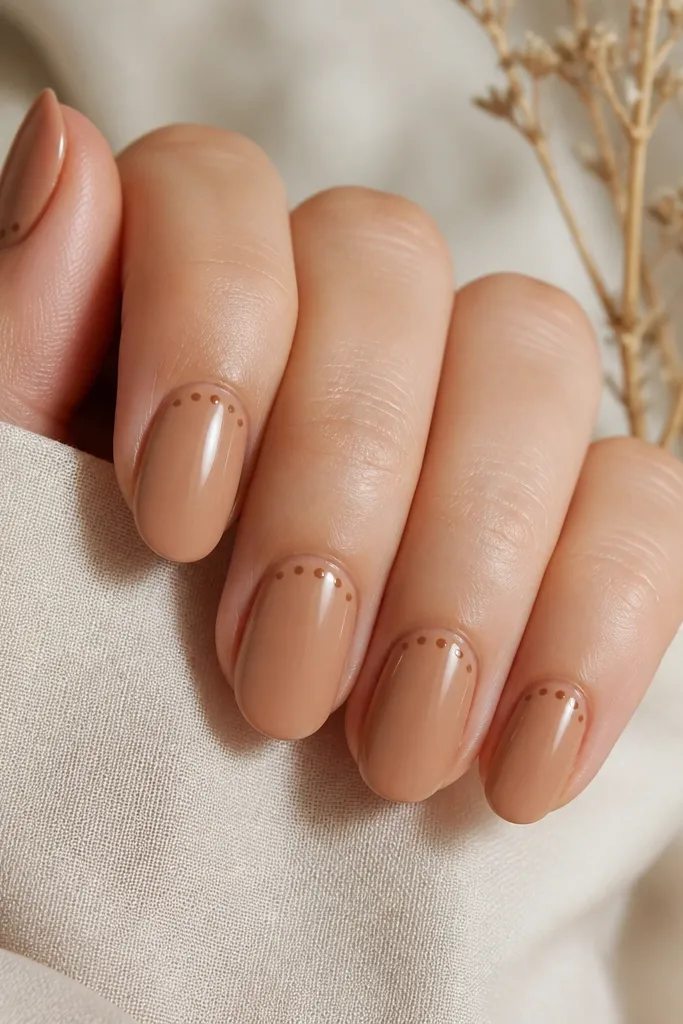
Warm caramel nude is a sneaky length trick because it matches your skin tone better than cool beige. Tiny polka dots at the cuticle edge create a "beaded" border effect. Keeping dots near the base draws attention upward and gives a tidy, intentional look. Gloss keeps the warm nude looking smooth and creamy.
Use caramel nude gel in two thin coats. With a dotting tool, place dots along a curved line at the cuticle edge, about 1 mm up from the skin. Keep dot size consistent and small. Cure, then apply glossy top coat and cap the free edge.
Editor's noteIf your cuticles are dry, clean the cuticle line first so dots don't look messy.
Watch outSkip big polka dots - they look childish on short nails.
13. Pink French with One Thin Rhinestone Line
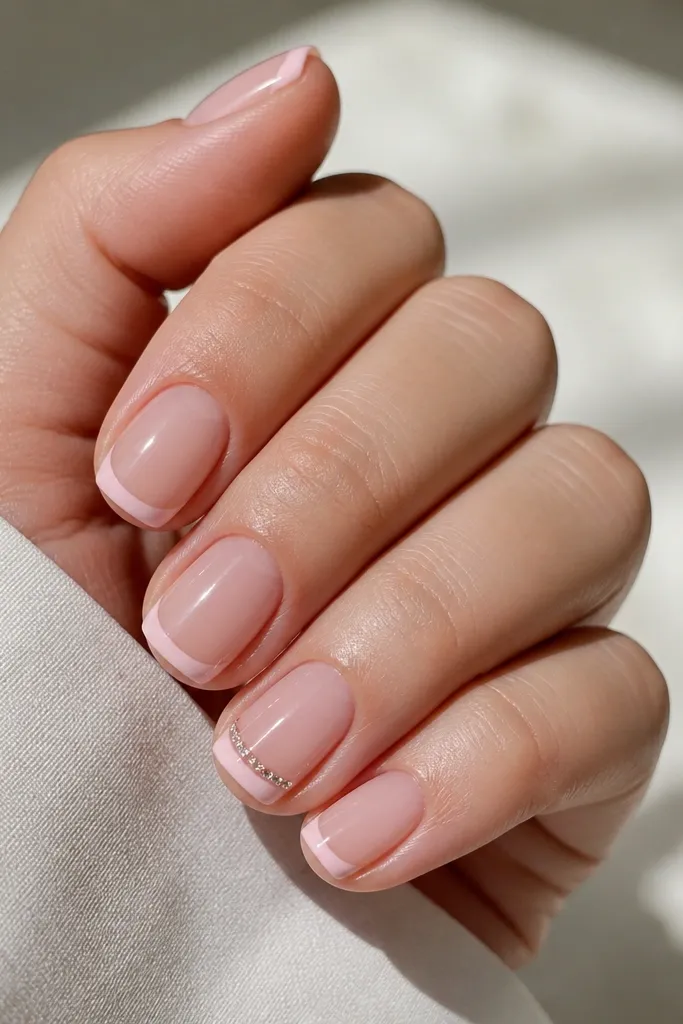
A thin French line keeps the look clean, and the rhinestone line adds sparkle at the exact place your eye already expects. This is the easiest way to add "event nails" without covering the whole nail. The tiny stones keep it dainty instead of heavy. Gloss makes the French line look crisp.
Paint a sheer pink base and cure. Draw a thin French line using a striping brush or guides. On the accent nail, place micro rhinestones only along the French border - one row, no gaps. Cure and top coat carefully around stones to seal.
Editor's noteUse nail tweezers and a light touch so you don't smear glue gel.
Watch outDon't add rhinestones to every nail - it makes short nails feel crowded.
14. Sheer Nude with Black Micro Scribble
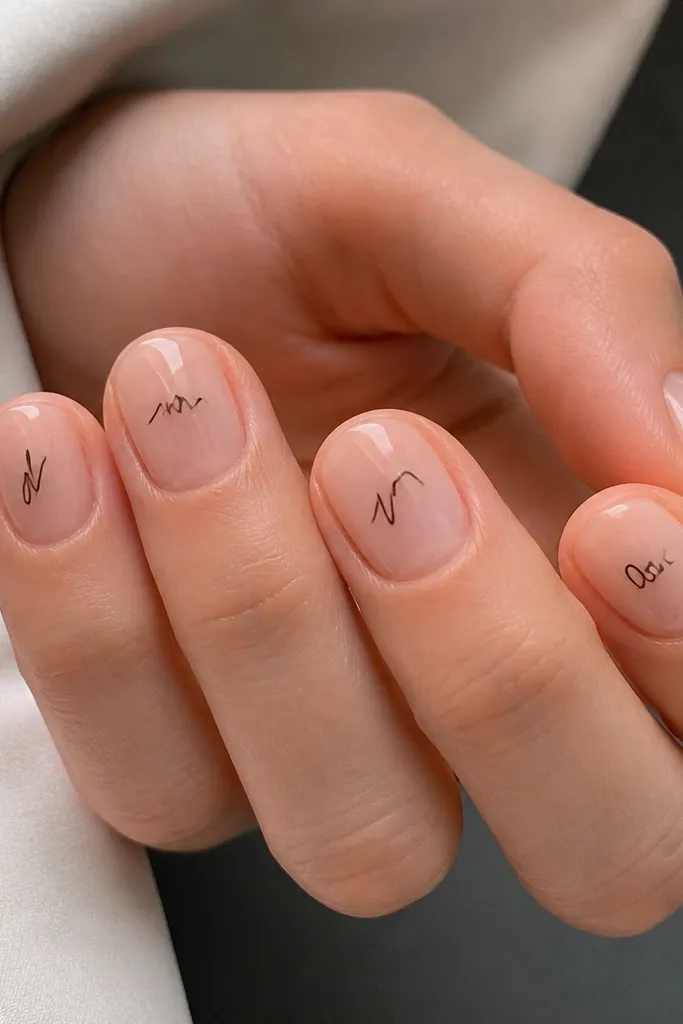
Micro scribbles feel cool and modern, and they're easy on short nails because you only need a small mark. Black against nude makes the design look intentional, not chaotic. I keep the scribble thin so it doesn't thicken after top coat. Gloss makes it look like ink on glass.
Apply sheer nude in two thin coats. Use a fine detail brush with black gel paint, then draw a small scribble about 3-4 mm wide in the center third. Cure. Add glossy top coat in a thin layer, then cap again for smoother edges.
Editor's noteIf you mess up, wipe the gel paint before curing. Once it cures, you'll need to remove it.
Watch outAvoid thick black lines - they look like a sticker on short nails.
15. Lavender Jelly with White Star Cluster
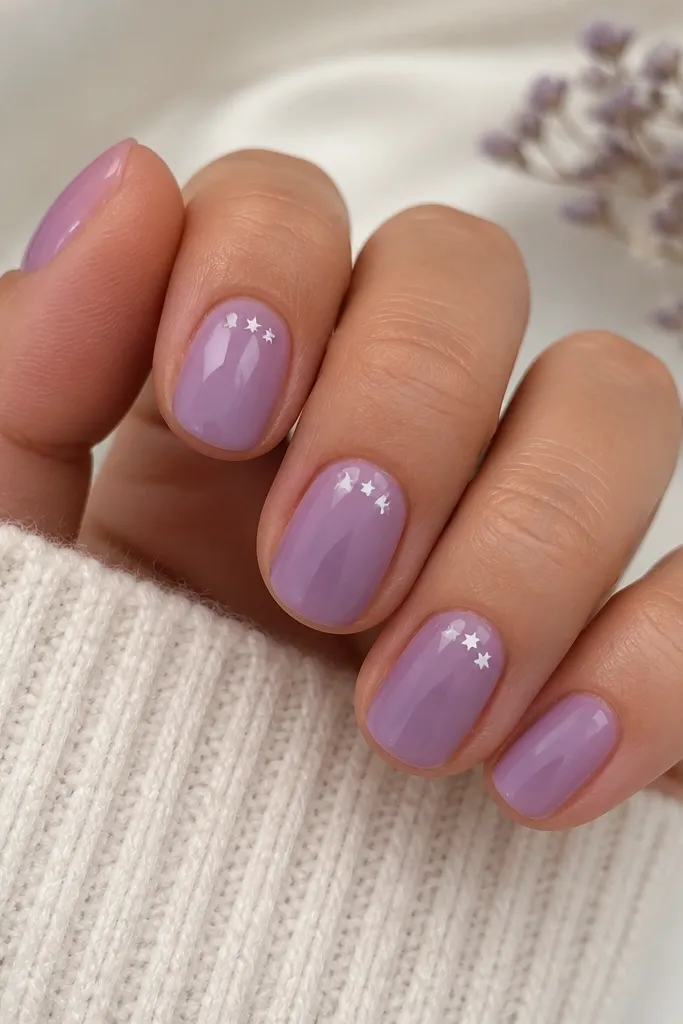
Lavender jelly makes short nails look soft and dreamy without needing length. White stars add a playful "night sky" vibe that reads well even when the stars are tiny. The cluster near the cuticle keeps the design balanced and prevents it from spreading. Gloss keeps the jelly looking juicy.
Paint lavender jelly base and cure. On accent nails, dot tiny white star shapes using a star stencil or freehand with a detail brush. Place 3 stars close together, keeping the cluster under 4 mm wide. Cure and top coat glossy.
Editor's noteIf you don't have star tools, draw a small plus sign then add two angled lines to form a star.
Watch outAvoid large star icons - they look cartoonish on short nails.
16. Nude Ombré with Blush Micro Glitter Fade
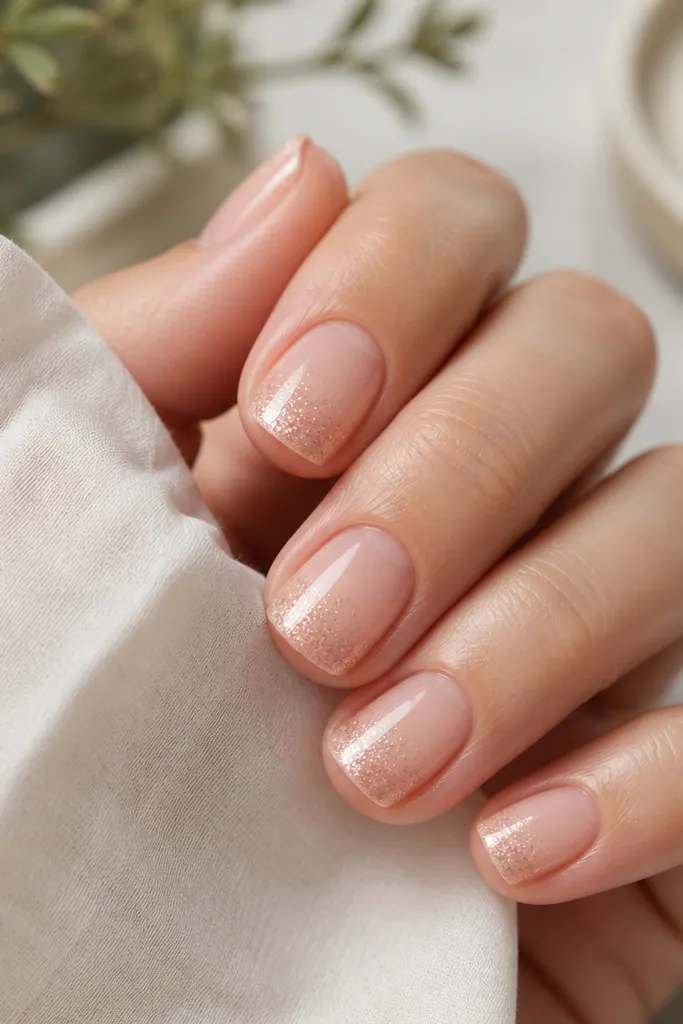
Glitter fade at the tip looks like a soft glow instead of scattered sparkle. On short nails, this placement gives a gentle "light trail" that reads longer. Nude ombré handles the transition so you don't see harsh lines. Micro glitter stays elegant under gloss.
Create a nude ombré using a sponge: deeper nude near cuticle, fading lighter toward tips. Add a thin layer of clear gel at the tip, then tap micro glitter into it. Don't overload - you want a soft gradient. Cure and seal with glossy top coat.
Editor's noteUse a fluffy brush to dust off loose glitter before top coat so it doesn't clump.
Watch outSkip chunky glitter - it catches and chips fast on short edges.
17. Pearl Milky Nails with One Tiny Side Pearl
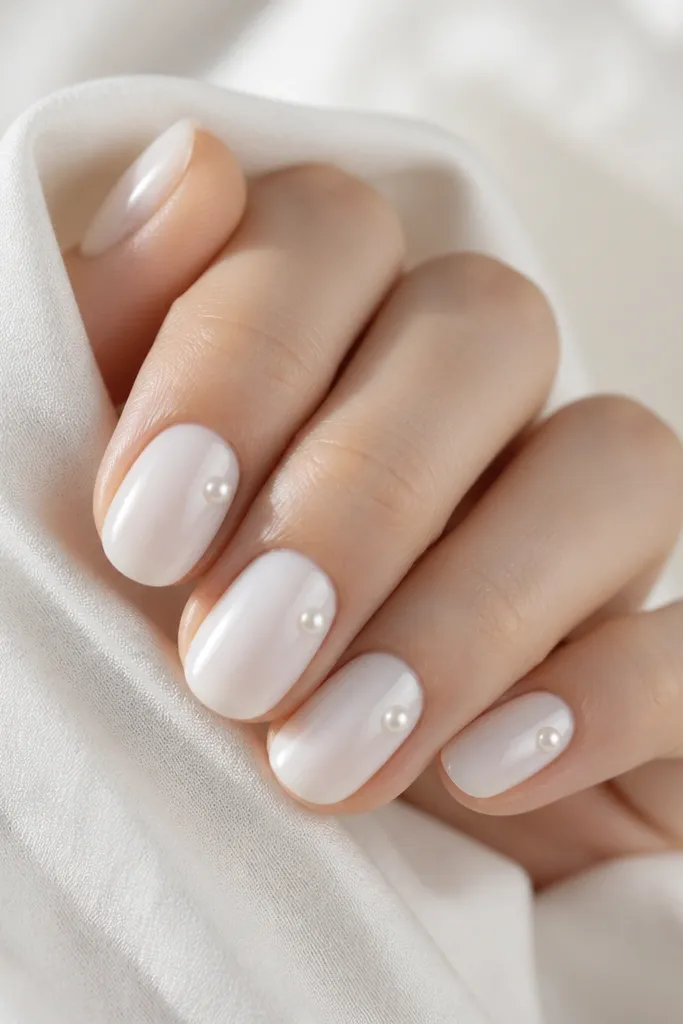
Pearly milky polish already looks like jewelry. Adding one tiny pearl gives you that "pretty detail" feel without needing long nails. Sidewall placement makes the pearl catch light as your hand moves. It's simple, but it looks like you tried.
Use a pearly milky base in two coats and cure. Place one tiny flat-back pearl using gel adhesive at mid-nail on the sidewall. Cure and then top coat around it, making sure the pearl is fully sealed at the base. Do not flood the pearl with thick gel.
Editor's notePick a pearl size that's smaller than your thumbnail's width - if it's too big, it looks heavy.
Watch outAvoid loose pearls without adhesive - they lift quickly.
18. Soft Blue Milky Base with White Dot Road
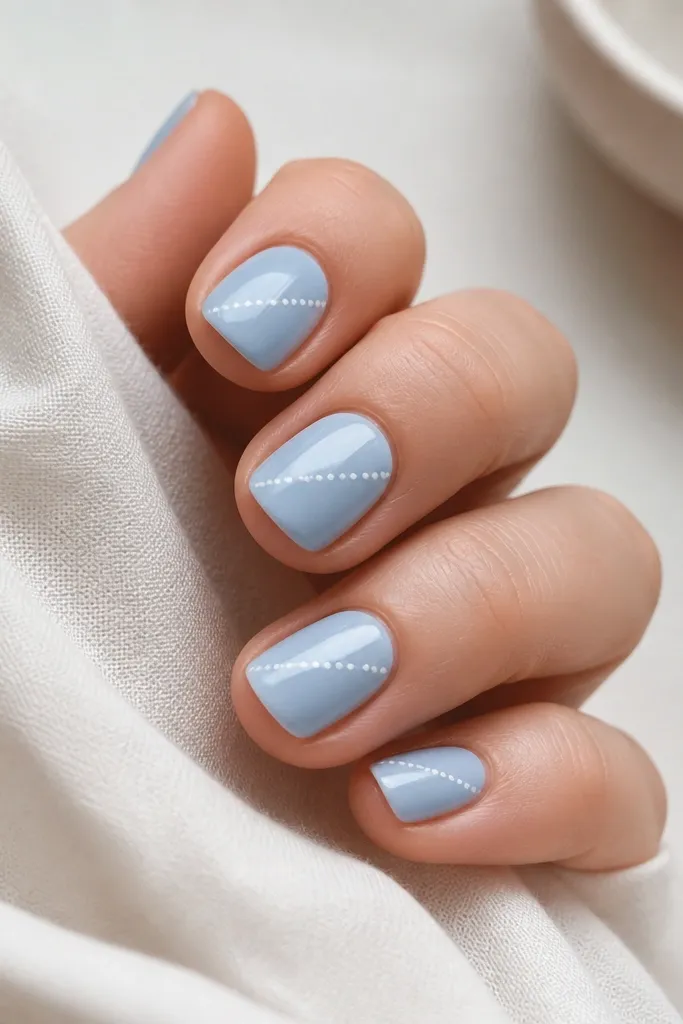
This design is playful but still clean because the dots are uniform. The diagonal placement makes the nail look longer and more dynamic. Milky blue keeps it pastel and wearable. White dots look crisp under gloss and don't blur when you use small dotting.
Paint milky baby blue in two thin coats and cure. Create the dot road by placing 5-7 tiny white dots diagonally in the center third. Keep the spacing even so it reads like a line. Cure and top coat glossy.
Editor's noteMark the start and end points lightly with a dot before filling in between.
Watch outAvoid uneven dot sizes - it breaks the "line" effect.
19. Nude Base with Micro Strawberry Dot on Accent Nail
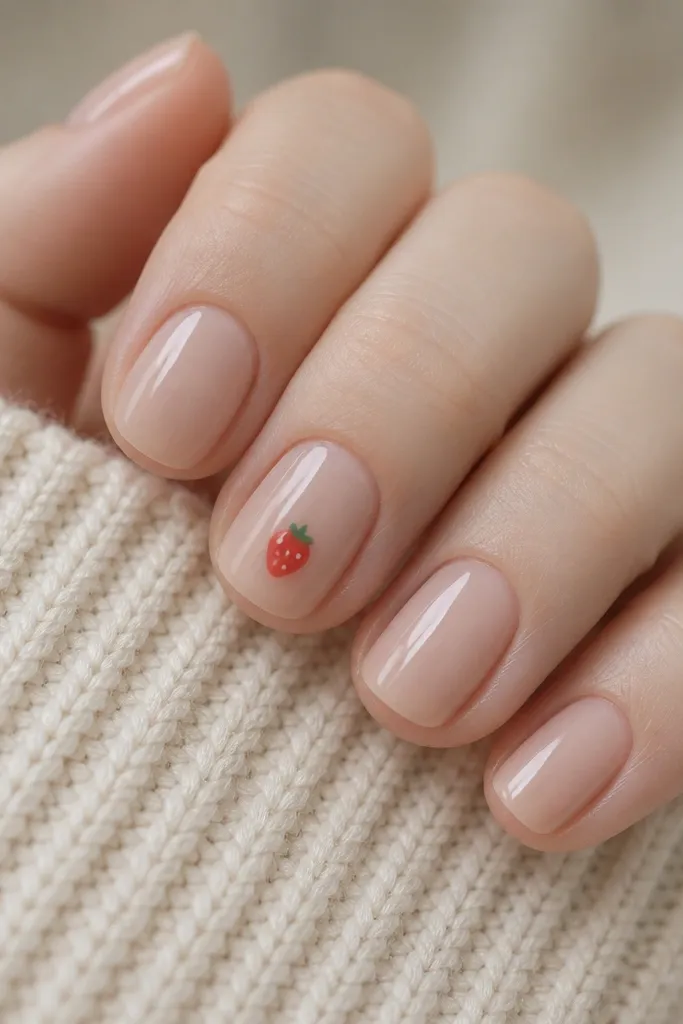
A micro strawberry is adorable and still fits small nail spaces. The red dot reads as fruit, and the green top makes it recognizable. Keeping it on one accent nail keeps your set classy. Gloss makes the highlight dots look like fresh fruit shine.
Paint all nails glossy nude. On the accent nail, use a dotting tool for the red body and a fine brush for the green leaves. Add 1-2 tiny white dots for highlights. Cure and seal with glossy top coat, capping the edges so it doesn't catch.
Editor's noteIf your green looks messy, use a tiny piece of tape as a mask while you paint the leaves.
Watch outDon't add tiny seeds all over - it turns into speckling on short nails.
20. Rose Quartz Swirl on Milky Pink
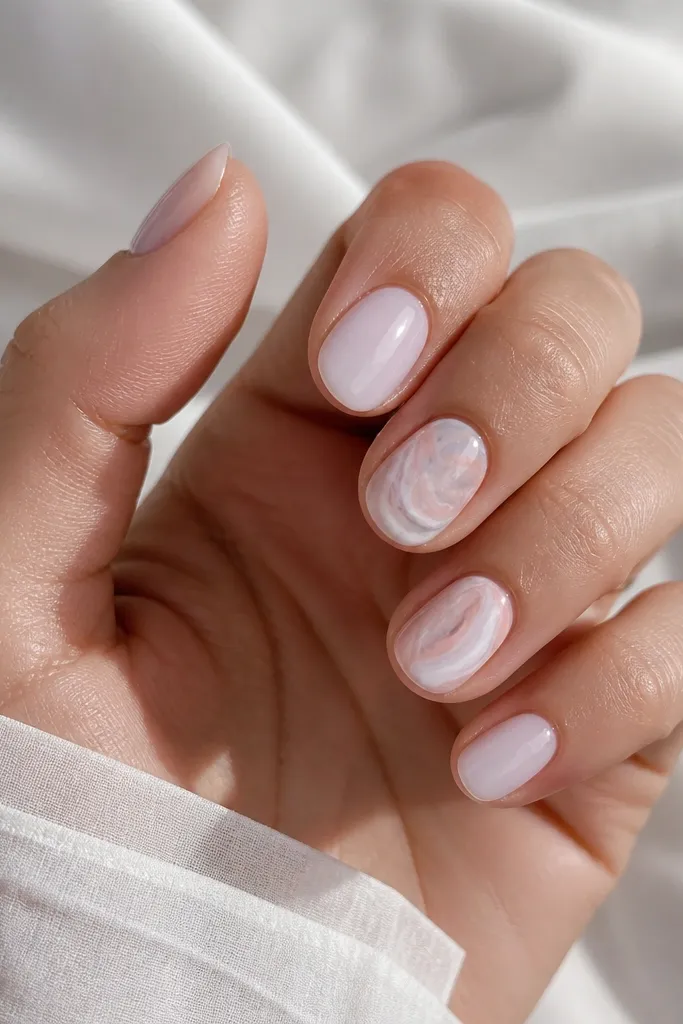
Swirls mimic the "stone" look without needing long nails. The thin gray-pink lines create depth while staying airy. Milky pink is the perfect background because it makes the swirl color pop without looking harsh. Gloss helps the marbling look smooth like gel stone.
Apply milky pink base in two coats and cure. Draw a thin swirl using gray gel paint, then add a pale pink line slightly offset. Keep lines under 1 mm thick. Cure and top coat glossy twice for a glass finish.
Editor's noteDo the swirl with one continuous hand motion, then stop - overworking makes it muddy.
Watch outAvoid thick marbling lines - they look like scribbles on short nails.
21. Classic Nude with Tiny Silver Line at Tip
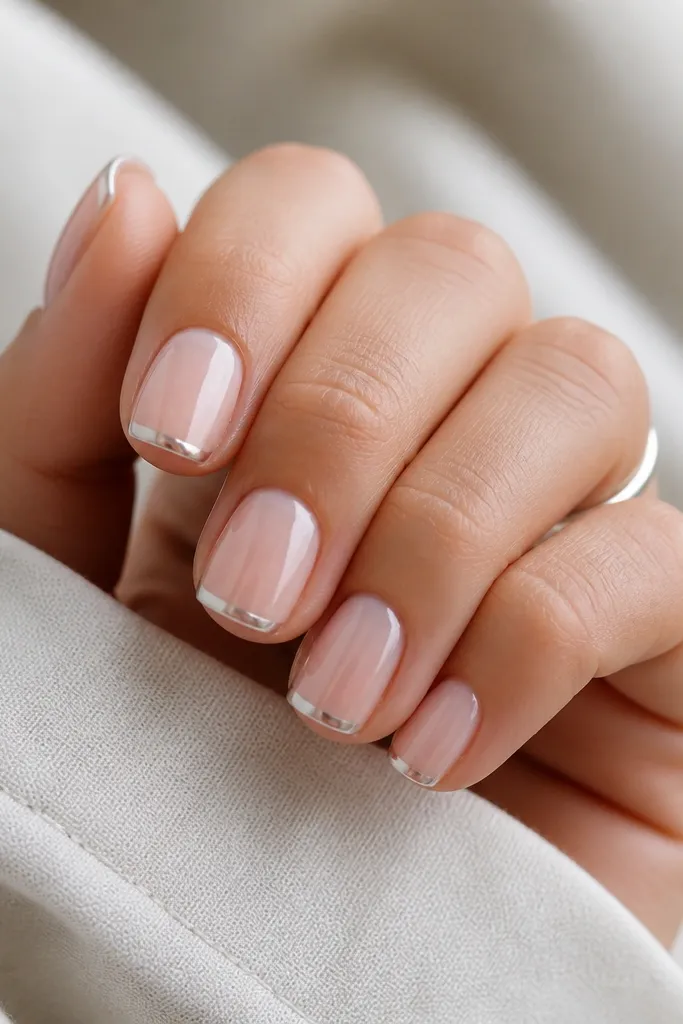
A micro silver line at the tip makes short nails look sharper and cleaner. It's subtle enough for everyday, but it catches light when you move your hands. The nude base keeps everything wearable. I like this one for workdays because it doesn't feel flashy.
Paint nude base and cure fully. Use a foil transfer strip or silver gel liner to paint a straight line across the tip, about 0.5-1 mm tall. Cure and apply glossy top coat, making sure the line is sealed so it doesn't lift.
Editor's noteIf the line wobbles, erase it with a cleanup brush before curing.
Watch outSkip thick metallic stripes - they look bulky on short nail edges.
22. Soft Pink Jelly with White Bow Tie at Side
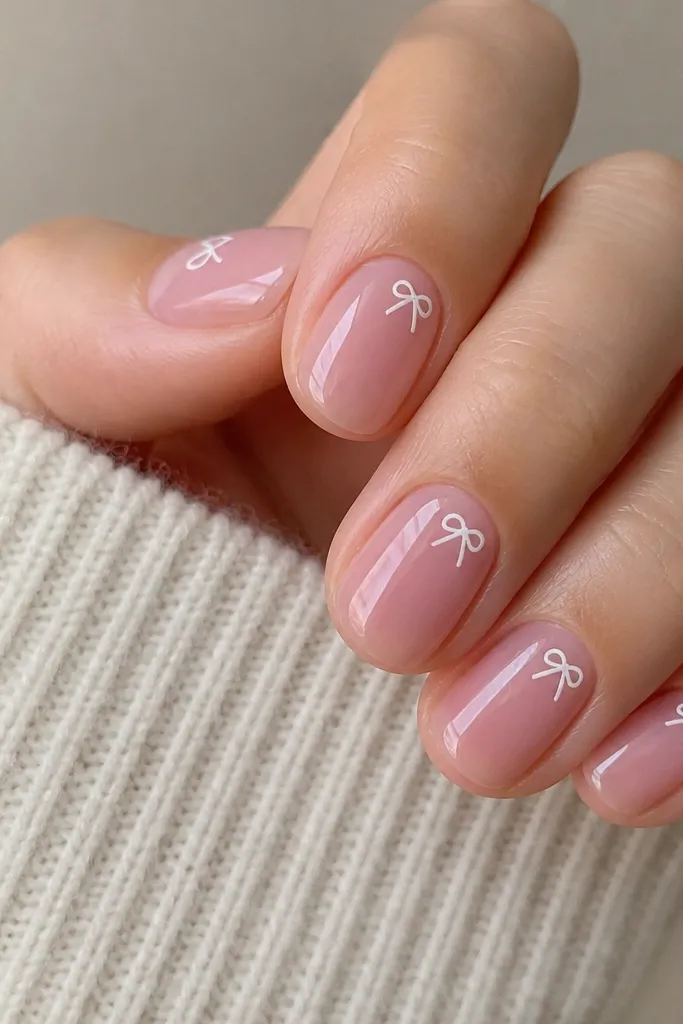
Side placement keeps the bow from looking too centered and "babyish." The jelly base makes the bow look like it's floating on top of a pink glow. White bow lines stay readable even when small. This is a sweet set that still looks grown-up because the base is sheer and the detail is crisp.
Use soft pink jelly and cure. Draw a tiny bow tie with a detail brush: two loops, then a small knot. Place it slightly off-center toward one sidewall, keeping it within the center third width. Cure and top coat glossy.
Editor's noteUse a toothpick to place the knot dot so it stays perfectly centered.
Watch outDon't place the bow too close to the free edge - it chips first.
23. Glazed Donut Nude with Pink Sugar Specks
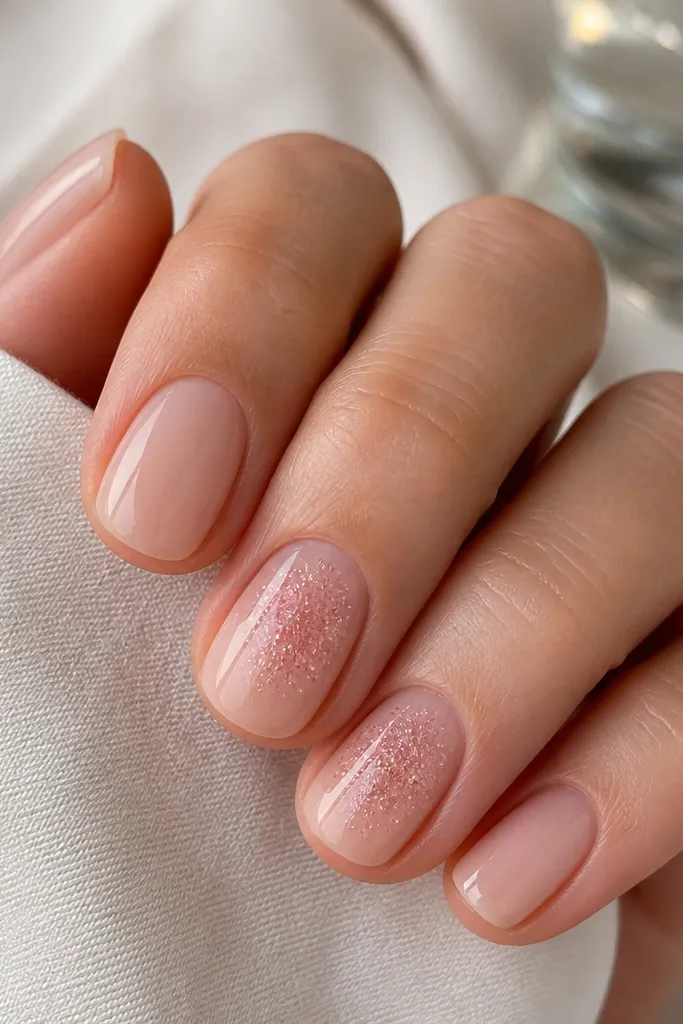
This one looks like you dipped your nails in a sweet drink. The nude base is warm and creamy, and the pink specks look like sugar dust instead of glitter chunks. Concentrating specks keeps it looking intentional. Gloss makes the base look smooth like a glazed donut.
Paint warm nude and cure. On accent nails, dab a tiny amount of clear gel in the center, then tap fine pink shimmer or micro glitter into it. Use a light hand so it fades naturally toward edges. Cure and seal with glossy top coat.
Editor's noteChoose micro shimmer that looks like powder, not flakes.
Watch outAvoid full coverage shimmer - it looks gritty on short nails.
24. Peachy Nude with Diagonal Micro French
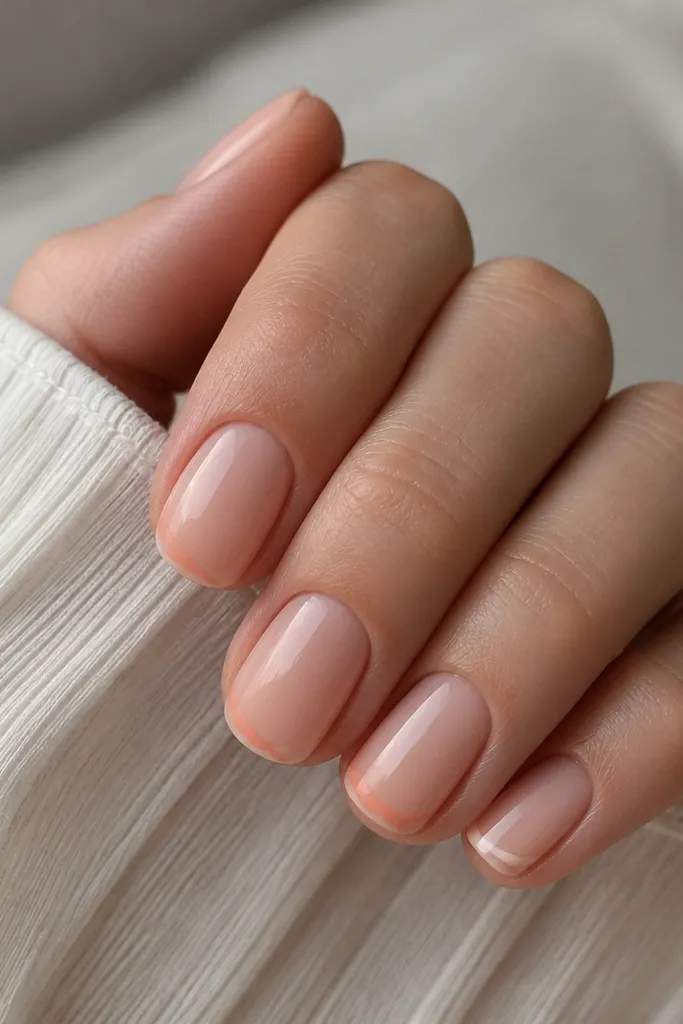
Diagonal French is the shortcut to that "styled" look because it breaks the straight-line boredom. On short nails, micro tips keep it from looking heavy. Peachy nude makes the design feel soft, not harsh. Gloss keeps the diagonal line sharp and reflective.
Paint peachy nude base in two thin coats. With a striping brush, draw a diagonal tip line about 1 mm wide starting near one side corner and finishing at the opposite tip corner. Leave the rest nude so the line stays crisp. Cure and top coat glossy.
Editor's noteUse a thin nail art tape strip as a stencil for your diagonal line.
Watch outDon't make the diagonal band too thick - it widens short nails.
25. Milky Pink with Gold Foil Corner Crush
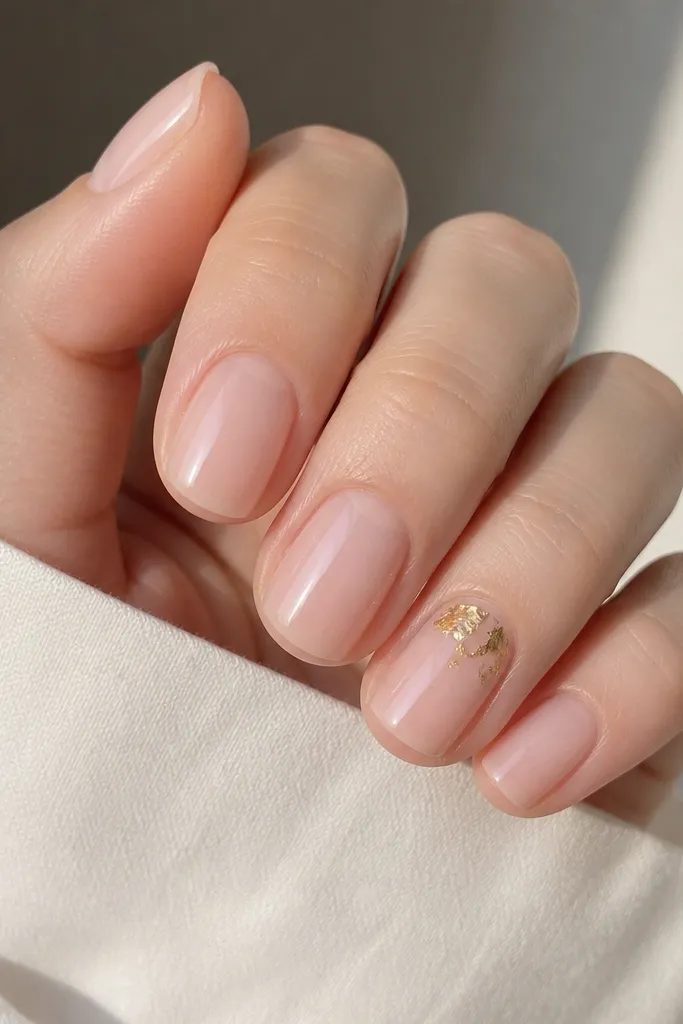
Gold foil in one corner gives that "designer detail" vibe without covering the nail. Milky pink makes the foil look warm and soft, not like cheap metallic tape. Corner placement keeps it contained, which matters for small nail spaces. Gloss seals the foil so it doesn't snag.
Apply milky pink base and cure. Use a small dot of tacky gel in the top corner on the accent nail. Press gold foil pieces in small bits, then cure. Add glossy top coat slowly, so the foil flattens and seals.
Editor's noteCut foil into smaller fragments for better control on short nails.
Watch outAvoid leaving sharp foil edges unsealed - they catch on fabric.
26. Sheer Pink with Tiny Heart Outline
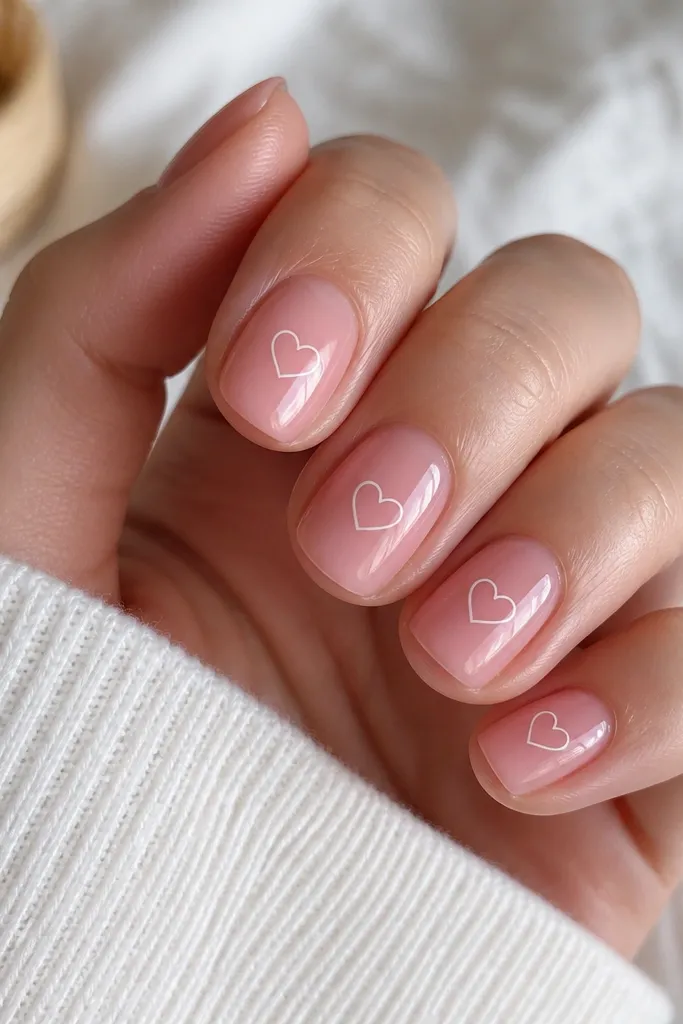
Heart outlines look clean because they're linework, not filled shapes. On short nails, the thin outline stays readable and doesn't bulk up. Sheer pink makes the white heart pop without looking stark. Gloss keeps the heart edges crisp.
Paint sheer pink and cure. Draw a small heart outline with a detail brush using white gel paint. Keep the heart about 3 mm wide and centered. Cure and top coat glossy carefully around the lines.
Editor's noteIf your heart point looks off, correct it with a cotton swab dipped in remover before curing.
Watch outDon't fill the heart solid - filled hearts can look thick on short nails.
27. Nude Base with White Micro French Smile
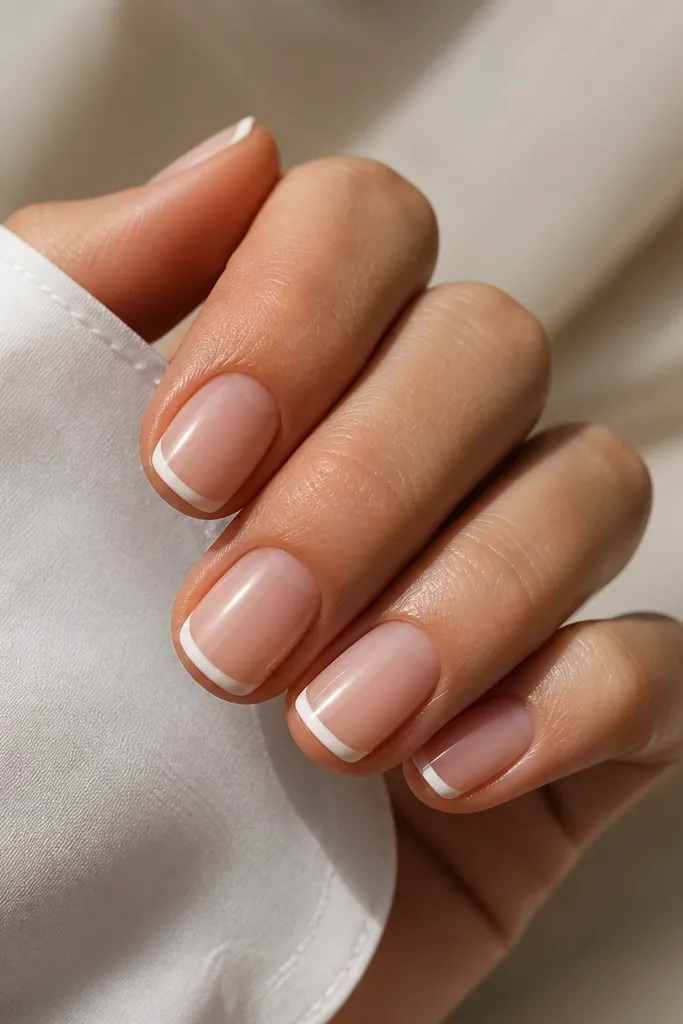
Micro French is the "clean girl" version that still feels playful. Thin smiles make nails look tidy and slightly longer because the line sits right at the edge. White on nude is classic and never fights your outfit. Gloss makes it look freshly done.
Paint nude base, cure. Use a striping brush to draw a thin white smile at the tip, about 0.8-1 mm tall. Keep symmetry from sidewall to sidewall. Cure and seal with glossy top coat.
Editor's noteDo one nail at a time - cure fast and keep your line steady.
Watch outAvoid uneven French height across fingers - it reads sloppy.
28. Rosy Chrome Accent on Ring Finger Only
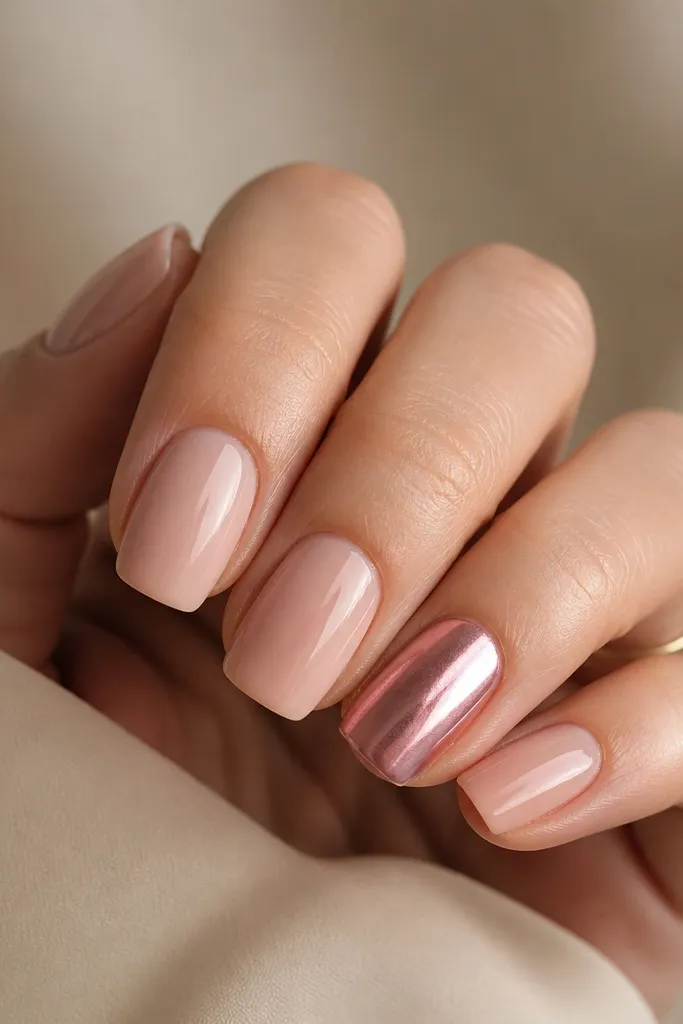
Using chrome only on one nail keeps the set balanced. The mid-to-tip placement makes the nail look longer without turning the whole set metallic. Rosy chrome flatters because it blends with pink nudes. Gloss seals the chrome so it stays smooth and not scratchy.
Apply rosy nude to all nails and cure. On the ring finger, add chrome gel from the middle third to the tip, then apply rosy chrome powder. Brush off excess and seal with glossy top coat. Keep the transition soft by feathering the chrome gel edge.
Editor's noteFeather the gel edge with a clean brush before curing so the chrome doesn't look like a harsh stripe.
Watch outDon't chrome the full nail - it can look flat and busy on short length.
29. Milky Nude with Tiny Blue Dot Ladder
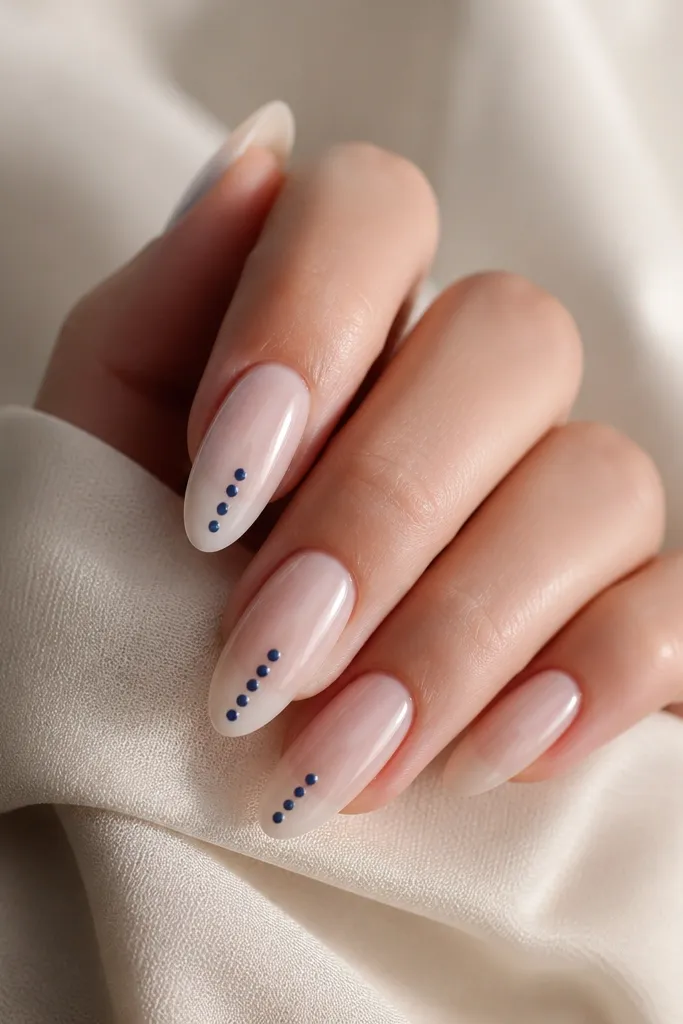
A dot ladder is a neat trick to create vertical rhythm on short nails. Blue dots give that Carpenter-ish pop while staying delicate. Because the dots are evenly spaced, the design looks intentional even if your hand shakes a little. Gloss keeps everything crisp and smooth.
Paint milky nude and cure. Place 4-5 tiny blue dots in a straight vertical line - use a dotting tool tip that makes a consistent dot size. Cure and top coat glossy. If dots drift, wipe the uncured gel and redo.
Editor's noteUse a dotting tool with a slightly smaller tip than you think so the dots stay micro.
Watch outAvoid random dot placement - it looks like smudged paint.
30. Clear Jelly Base with Pink Ribbon Lines
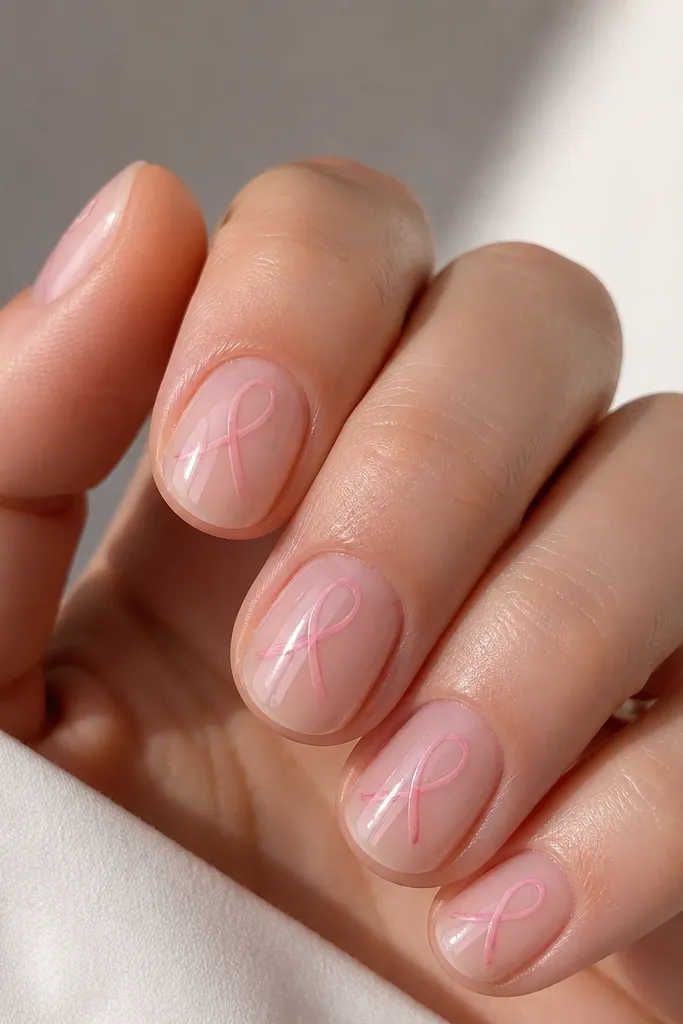
Ribbon lines read soft and feminine, and they're perfect for short nails because they're thin. The clear jelly base makes the pink lines look like they're drawn on glass. Semi-sheer pink prevents the lines from looking too heavy. Gloss makes the ribbon look smooth and lifted.
Apply clear jelly base and cure. Draw two thin curved ribbon lines with semi-sheer pink gel - don't overbuild thickness. Let the lines meet near the center third, then cure. Add glossy top coat in thin layers to avoid flooding the line detail.
Editor's noteIf the lines thicken when you top coat, use a thinner top coat layer first, cure, then add a second thin layer.
Watch outAvoid opaque, thick pink lines - they look like paint scribbles.