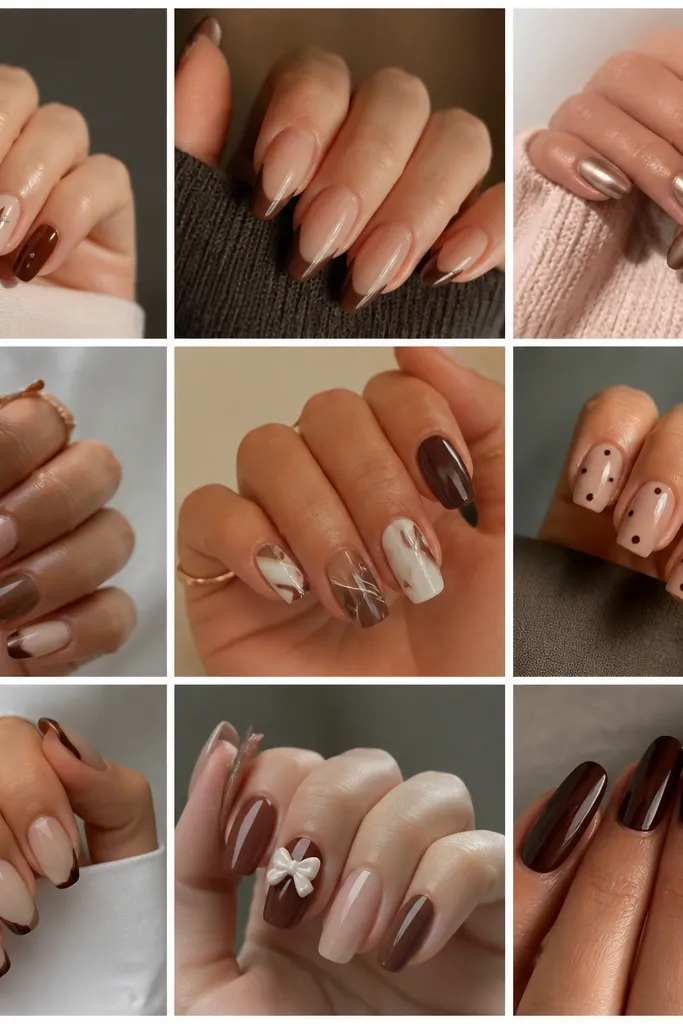
1. Milk Tea Nude with Micro-Gloss Tips
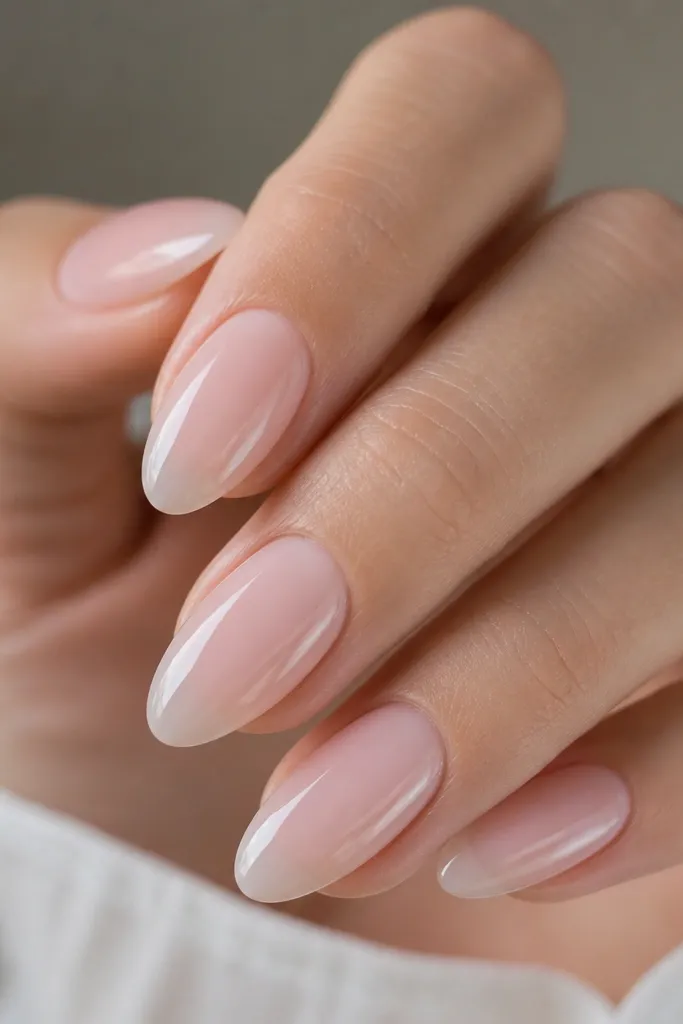
This look is "clean girl" but still sweet. The milky nude makes your nail bed look smooth and bright, and the tiny glossy tip reads like a salon finish in photos. I've worn it for dinners where my hands are in and out of sleeves and it still looks polished.
Use a milk-tea nude polish (pink-beige, not gray) in two thin coats. After it dries, paint a narrow band of clear gloss on the last 1-2 mm of the tip. Keep the band straight and skinny so it doesn't look like a French fade.
Editor's noteCap the free edge with top coat and press the brush along the side walls for 2 seconds each.
Watch outDon't use a glitter top coat here - it turns the look from "expensive gloss" into "cheap sparkle."
2. Blush Nude with One-Line Pink Heart Accent
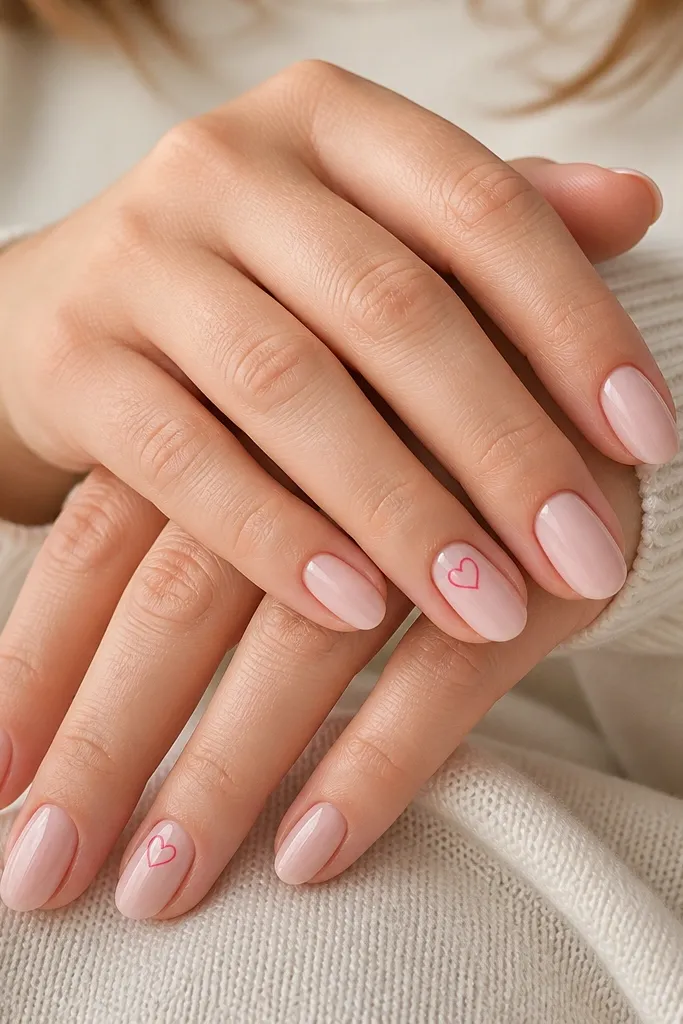
A single-line heart keeps it cute without going full "kid cartoon." The hot pink outline pops against a blush nude base, and the heart sits high near the cuticle so it looks intentional and fresh. I do this when I want something sweet but still workplace-friendly.
Paint all nails with a blush nude (two coats). On one nail per hand, use a fine liner brush or a nail art pen to draw a tiny heart outline about 2-3 mm wide. Let it dry fully, then seal with two top coats on that accent nail.
Editor's noteIf you mess up the heart, wipe only the outline with a tiny brush dipped in remover - don't scrub the nude base.
Watch outAvoid thick heart shapes - chunky lines look messy and cheap in close-up.
3. Creamy Strawberry Shortcake Pink
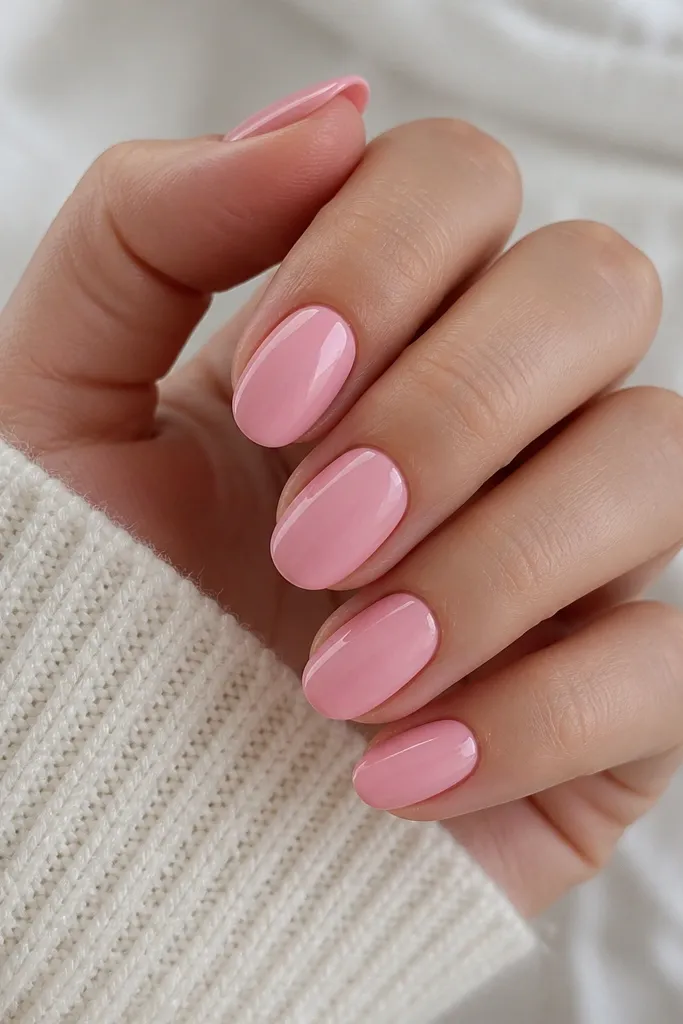
This color is the whole vibe. Strawberry cream pink gives that sweet, candy-girl look without needing extra art. I reach for it when I want my nails to look "put together" fast with minimal effort.
Choose a creme pink that leans creamy (not neon). Apply two thin coats, waiting 2 minutes between coats. Clean up the edges with a small brush and acetone-free remover, then top coat with a thick gloss.
Editor's notePaint the second coat slightly closer to the cuticle than the first coat for that smooth, even coverage.
Watch outDon't do one thick coat - it shrinks and shows streaks as it dries.
4. Sheer Rose Base with White Tip Fade
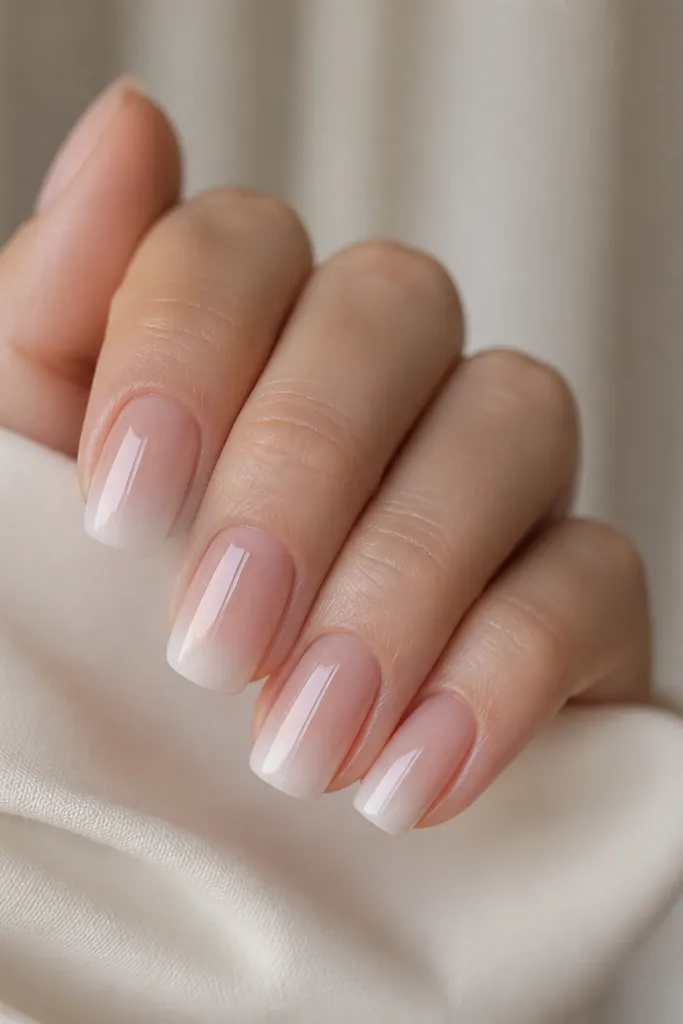
This is the "French but not harsh" version. The sheer rose base keeps it natural, while the white fade looks airy and photo-ready. It works on both short and medium nails because the gradient does the visual lifting.
Use a sheer rose or nude-rosy jelly polish. After two coats, sponge or brush a white polish onto only the top third. Blend with a clean makeup sponge using light taps, then seal with a high-gloss top coat.
Editor's noteFor the fade, wipe off most of the white on the sponge - you want foggy, not solid.
Watch outAvoid a hard line at the edge - it reads like cheap stickers.
5. Nude Almond with Champagne Micro-Sparkle
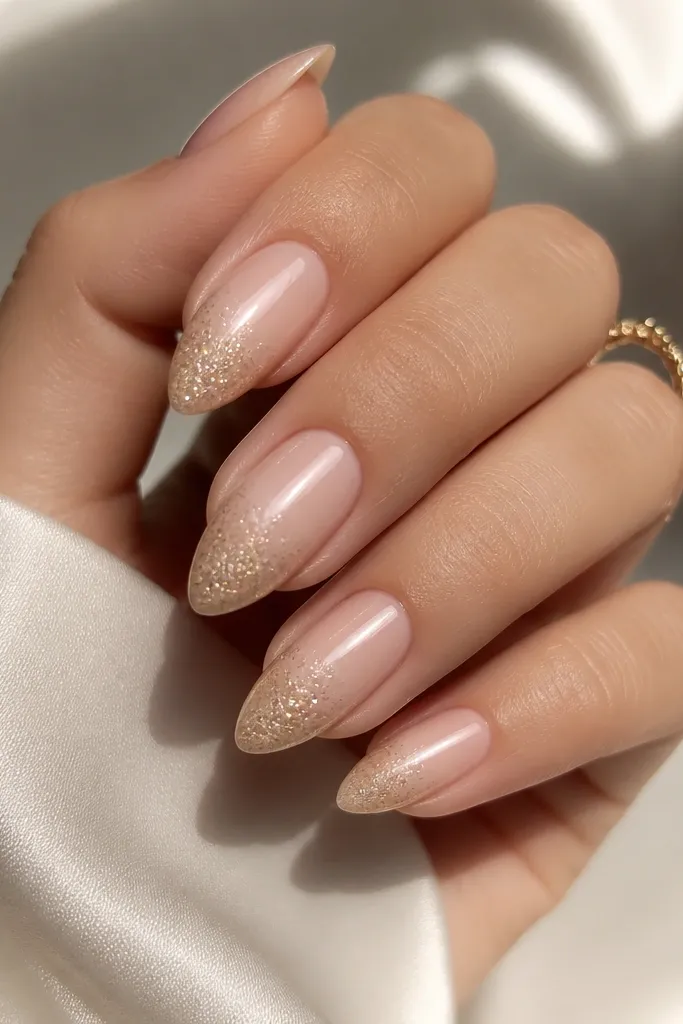
Fine champagne sparkle near the tip gives "glam" without looking like full glitter. The nude base keeps it wearable, and the shimmer catches light when your hands move. I like this for date nights because it looks expensive in motion.
Start with a nude base (two coats). Add a thin layer of champagne micro-sparkle only on the last 2-3 mm. If the sparkle polish is chunky, dab it with a sponge instead of brushing for a cleaner distribution.
Editor's noteSeal the glitter area twice: first top coat, wait 60 seconds, then another thin top coat.
Watch outDon't use large glitter chunks - they snag and look rough fast.
6. Glossy Mocha Nude with Straight Cuticle Line
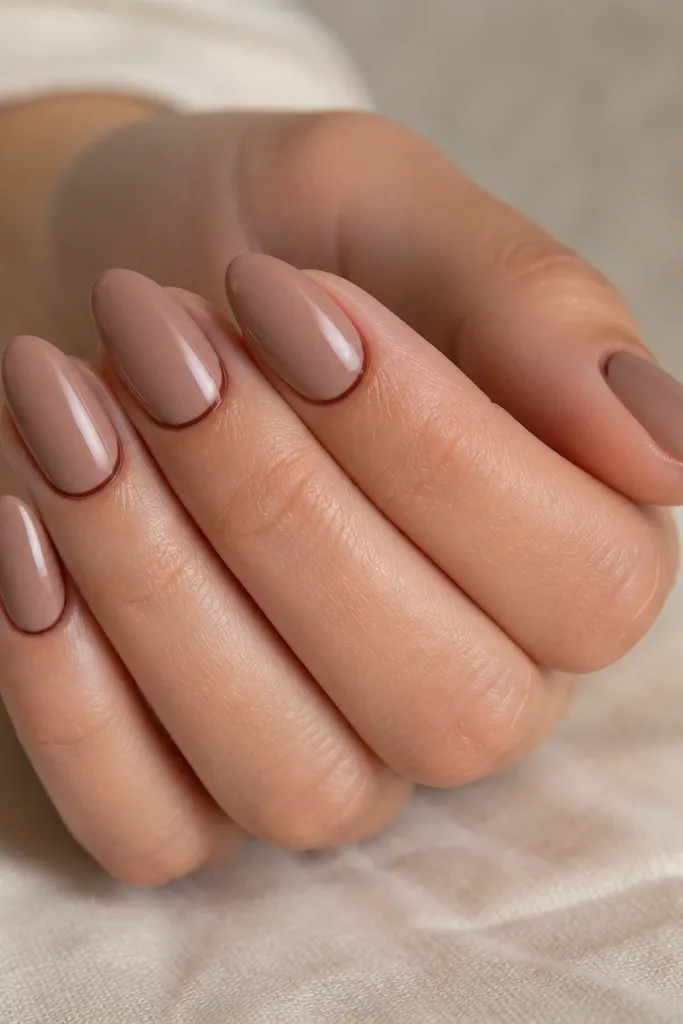
This design is clean and modern. The darker cuticle line makes your nail look longer and sharper, and the mocha nude keeps it warm and flattering. I wear it when I want a "grown" version of the Sabrina vibe.
Paint two coats of mocha nude. With a thin liner brush, draw a straight line just above the cuticle, about 1 mm thick. Keep it centered so it mirrors the nail shape, then top coat fully.
Editor's noteDo the line before the final top coat - it gives you control and lets you seal edges cleanly.
Watch outDon't over-thicken the cuticle line - it turns into a stripe that looks uneven.
7. Pearl Pink Chrome Accent on Ring Finger
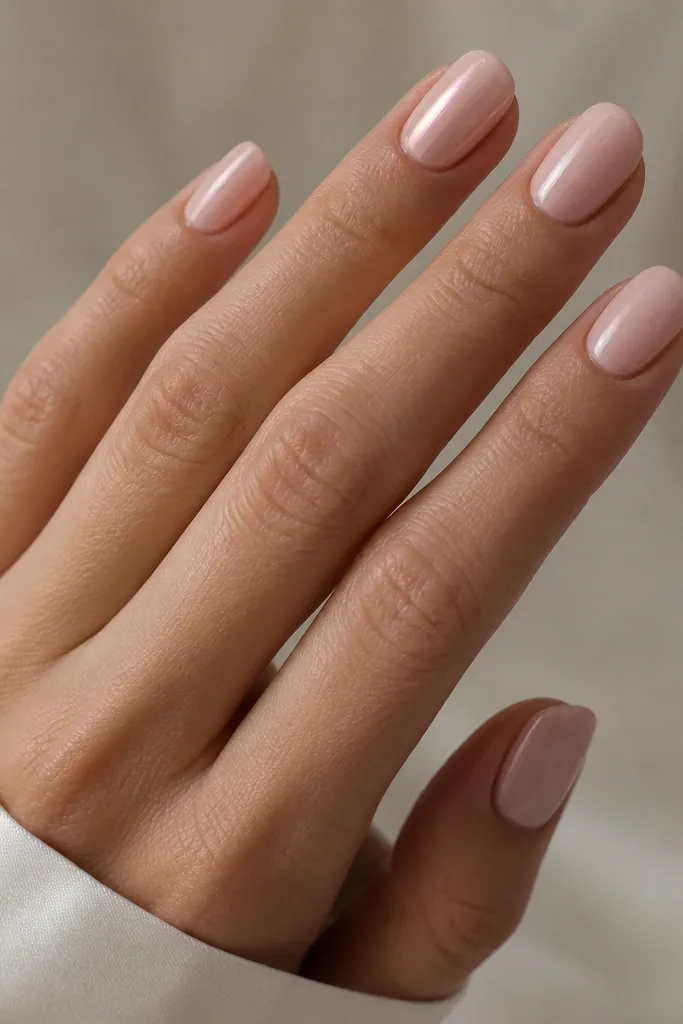
One chrome accent looks intentional and cuts through the "low effort" fear. The pearly pink stays wearable because it's not silver-bright. I've used this when I need one nail to look like it belongs in a photo set.
Paint all nails with a soft pink nude. On the ring finger only, apply a chrome powder over a tacky base (or chrome gel). Buff gently with the applicator until it turns pearly, then seal with a chrome-friendly top coat.
Editor's noteIf chrome feels patchy, press the powder in with small taps instead of swirling.
Watch outSkip regular glossy top coat right over chrome gel - it can dull the finish.
8. Clear Jelly Nude with Pink Jelly Dot Cluster
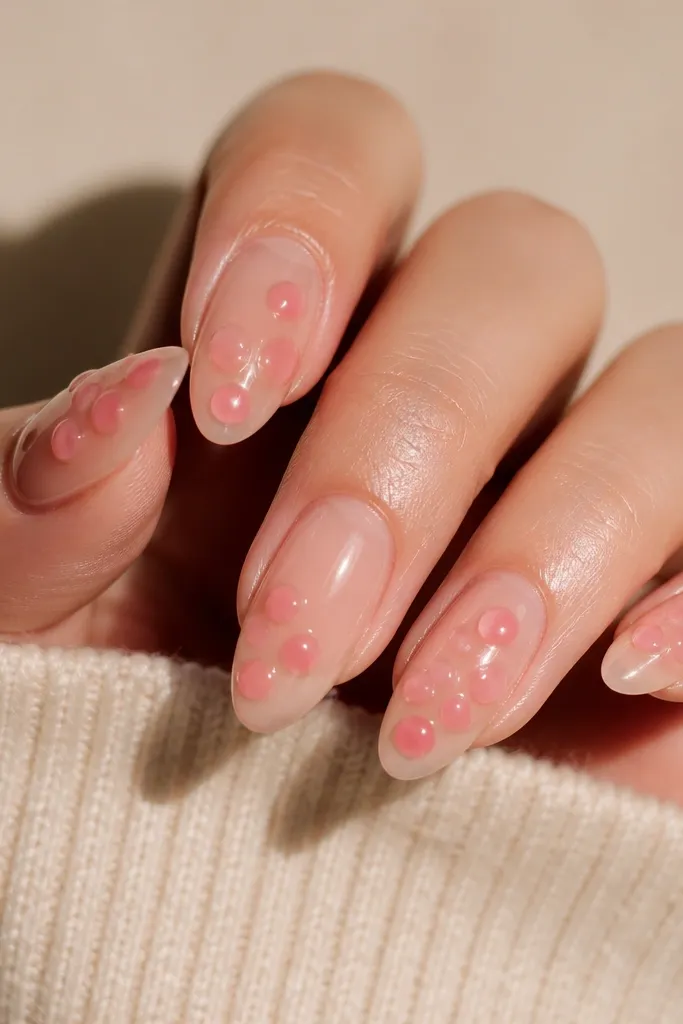
Jelly bases look expensive because they mimic the natural nail. The pink dot cluster adds a playful touch without needing big art. I wear this when I want something light that still looks cute up close.
Use a clear jelly nude (two coats, thin). For dots, use a pink jelly polish and a dotting tool. Place 3-5 dots in a small cluster near the cuticle, leaving space so it doesn't look crowded. Seal with a glossy top coat.
Editor's noteLet each dot layer dry 1-2 minutes before sealing, or the dots will smear.
Watch outDon't make dots too big - big dots look like paint blobs.
9. French Tips in Soft Peach on Short Almond
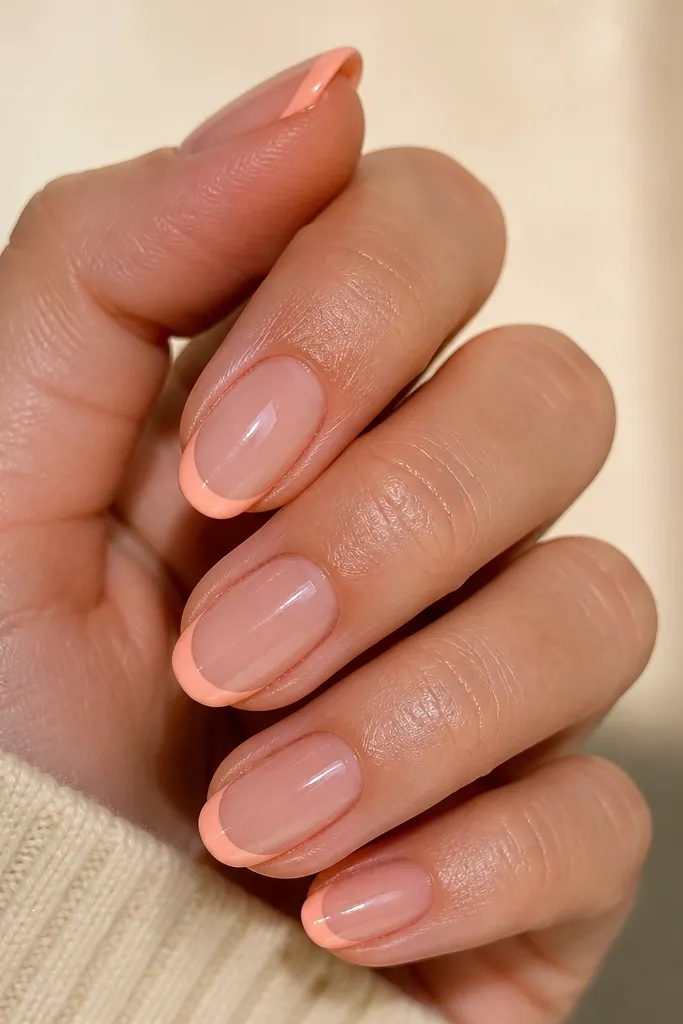
Peach French tips look warmer than white and still give that "done" look. On short almond, the peach tip makes your nails look tidy without over-lengthening. This is my go-to when I want an aesthetic that's still practical.
Paint a sheer nude base in two coats. Use French tip guides or a steady freehand smile line. Keep the peach tip thin (about 1-2 mm). Top coat twice if you want extra shine.
Editor's noteIf your smile line is wobbly, fix it with a thin brush dipped in base polish to sharpen the edge.
Watch outAvoid thick French tips - they look like press-on glue lines.
10. Rose Nude with Tiny Gold Foil Flecks
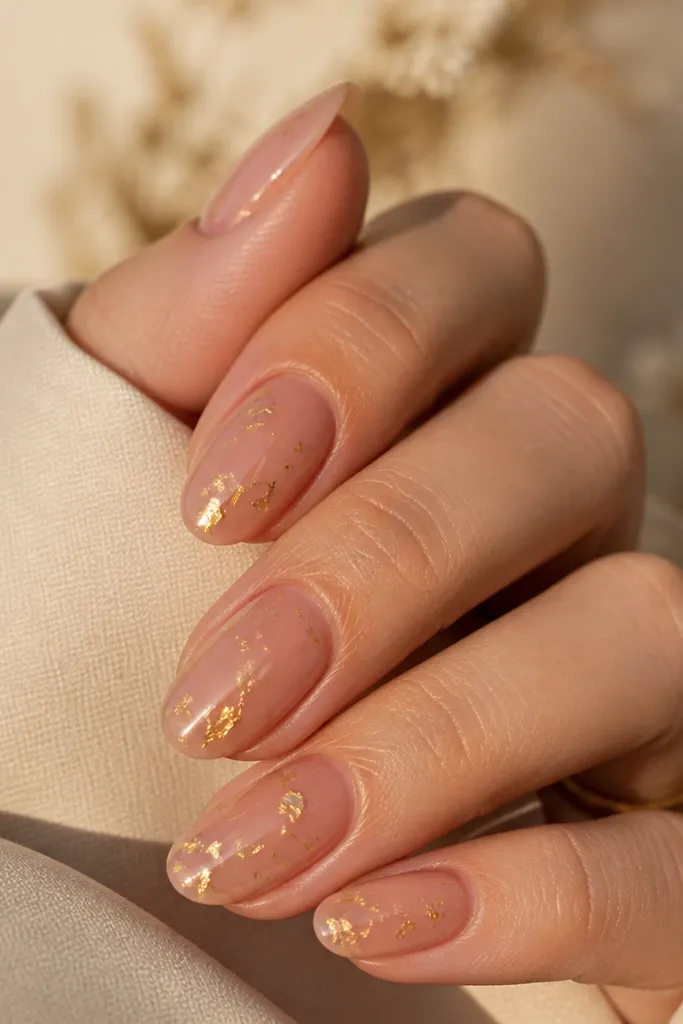
Gold foil flecks make the nails feel special without covering the whole nail. The rose nude keeps it sweet, and the foil placement near the cuticle looks delicate. I like this for brunch photos because it catches daylight.
Use a rose nude creme as your base. Add tiny bits of gold foil using foil glue or a tacky top coat - place only a few flecks per nail. Press lightly, then seal with two top coats to lock it down.
Editor's noteUse tweezers for placement. Fingers smear foil glue fast.
Watch outDon't scatter foil across the entire nail - it becomes glittery and messy.
11. Nude Pink with Diagonal Micro-Line Accent
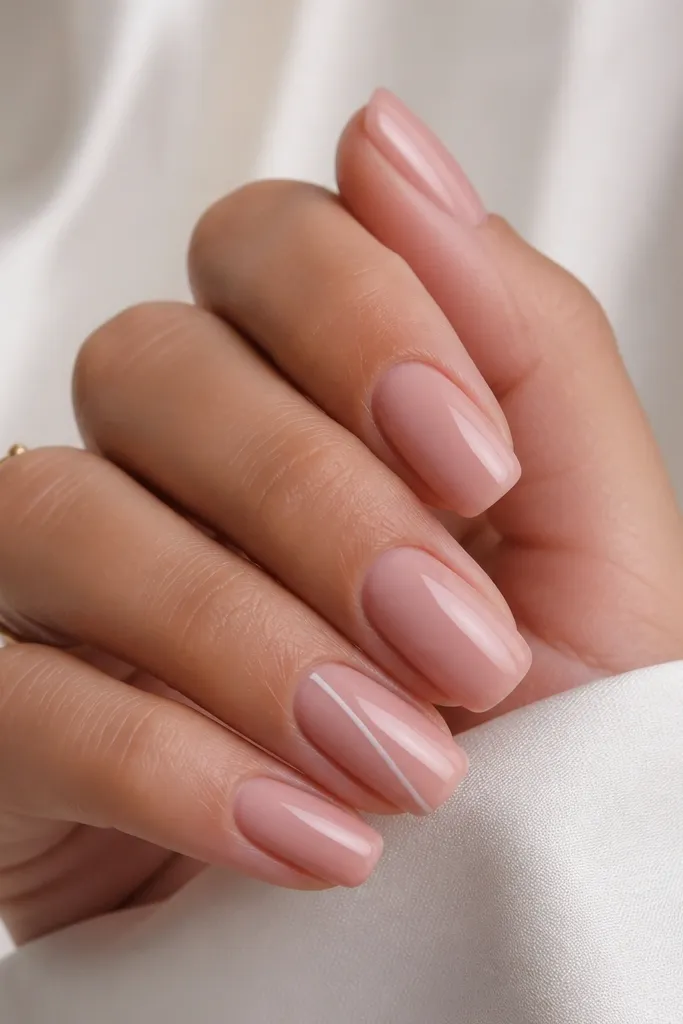
A diagonal micro-line gives that "fashion nail" feel without complicated work. The white line makes the nude look brighter and adds structure. I do this when I want something minimal but still eye-catching.
Paint all nails nude pink. On one nail per hand, place a diagonal line with a striping brush or nail art tape. The line should be thin, around 1 mm, and centered so it doesn't look random. Seal well.
Editor's noteUse nail art tape for the first try. Remove tape while the gel/top coat is still slightly tacky for crisp edges.
Watch outDon't let the line bleed - wipe brush edges before you touch the nail.
12. Soft Square Almond Nude with Cuticle Blush Gradient
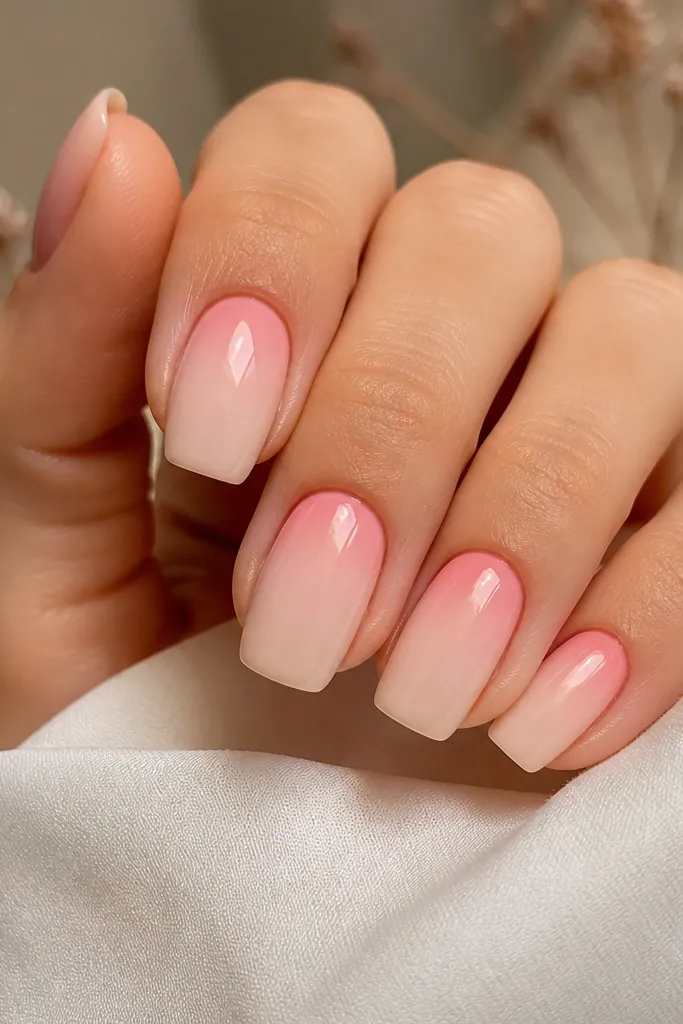
Cuticle gradients look like you paid for a custom mix. It gives depth at the base and keeps the rest of the nail neutral. This one is flattering on hands because it adds a little rosy frame around the nail bed.
Use a nude base polish first. For the gradient, use a blush-pink polish and a makeup sponge, tapping only the cuticle area and fading upward. Keep it subtle. Finish with a glossy top coat to smooth everything.
Editor's noteDo the gradient in two light passes instead of one heavy pass.
Watch outAvoid a harsh color block at the cuticle - it reads like a stain.
13. Cream Nude with Tiny Black Daisy on Accent Nail
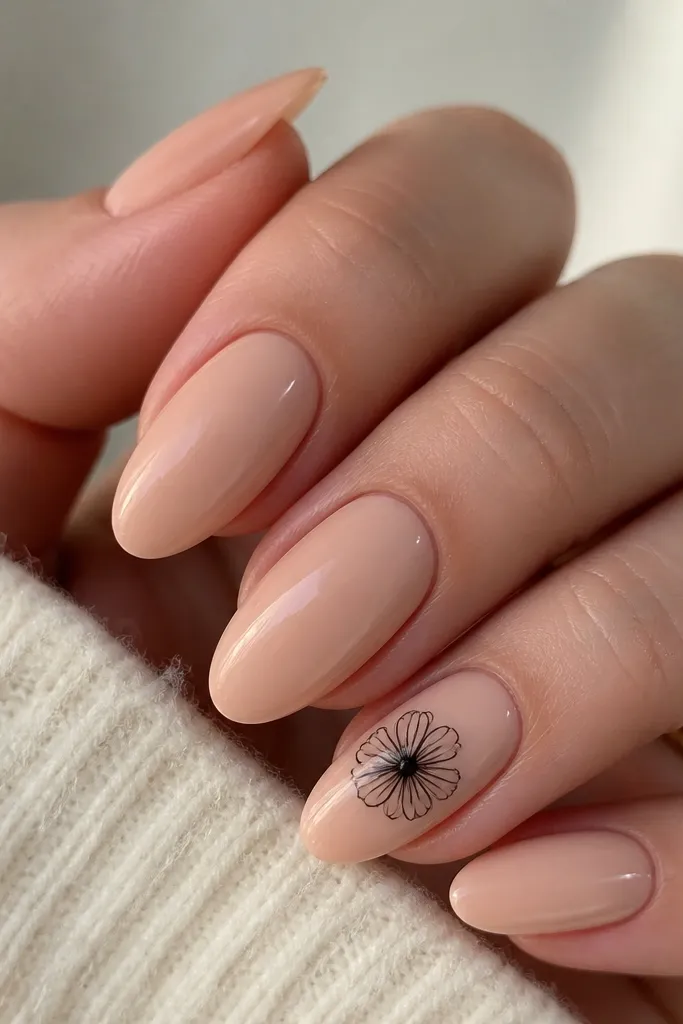
Black daisy details look sweet and slightly edgy, which is why it works for the Sabrina-adjacent aesthetic. The cream nude makes the daisy crisp instead of muddy. I wear this when I want a cute design that still feels grown up.
Paint all nails cream nude. Use a dotting tool to place five small black petals and a small dot for the center. Keep the daisy small - about the size of a pencil eraser head. Seal with top coat, especially around the petals.
Editor's noteIf you don't have yellow polish, use a tiny dab of gold shimmer for the center.
Watch outDon't draw big flowers - big daisies look cartoonish on short nails.
14. Clear Builder Gel Look with Nude Overlay
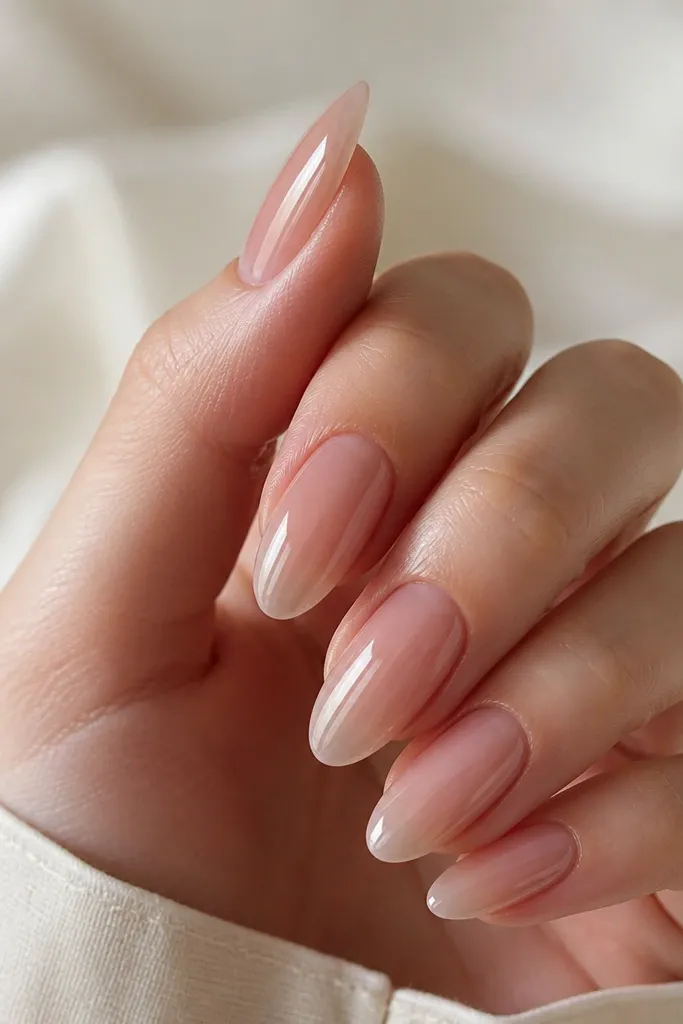
The "glassy base" look is what makes press-ons and low-cost polish feel expensive. A nude overlay gives the color, while the clear top makes it shine like gel. I've gotten compliments on this when I'm using basic materials.
If you have builder gel, apply a thin clear layer over the nail, cure, then add a nude overlay polish (or gel color) in thin coats. Finish with clear gel on top and cure again. If you're not using gels, use a very thick, high-shine top coat in two layers.
Editor's noteFile the surface lightly after the nude layer so the clear top sits smooth.
Watch outDon't skip thin layers - thick gel/polish traps bubbles and looks lumpy.
15. Peachy Nude with Glossy Half-Moon at Cuticle
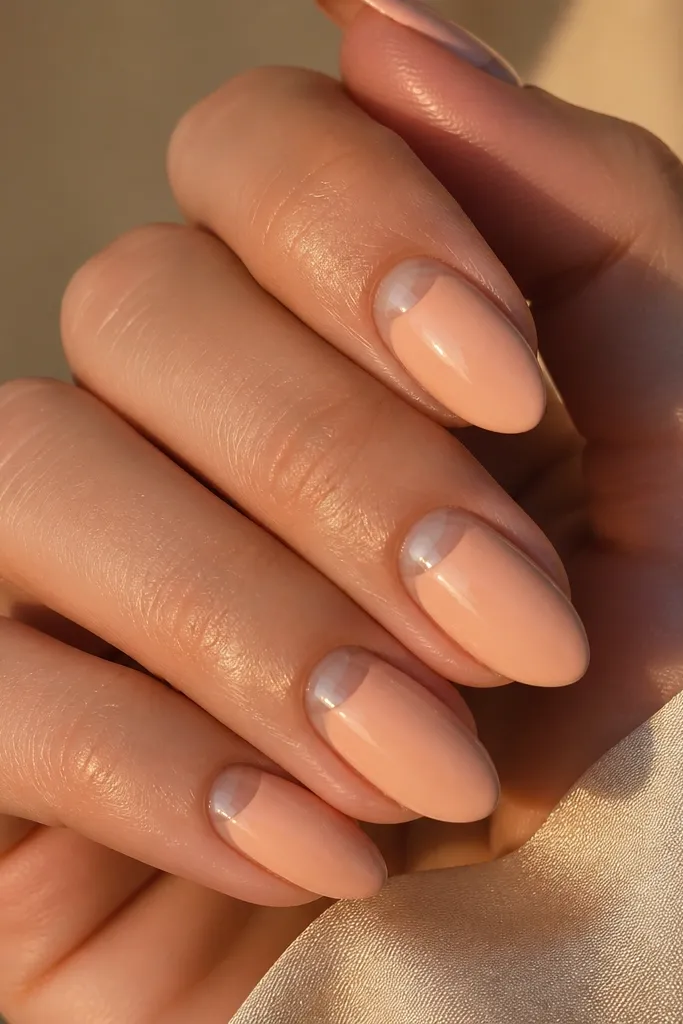
Half-moons make nails look tidy and intentional. The glossy cuticle area reflects light right where people look first. This version uses a peachy nude base so it stays warm and flattering.
Paint nails peachy nude in two coats. For the half-moon, use a small brush and add a thin layer of clear gloss or a lighter nude at the cuticle curve. Keep it tight to the cuticle so it looks like a natural nail highlight. Top coat over everything to blend.
Editor's noteUse a damp brush edge to clean up the half-moon line before it fully dries.
Watch outAvoid painting too far down the nail - the half-moon should stay near the cuticle.
16. Strawberry Milk Gloss with Fine Pink Shimmer
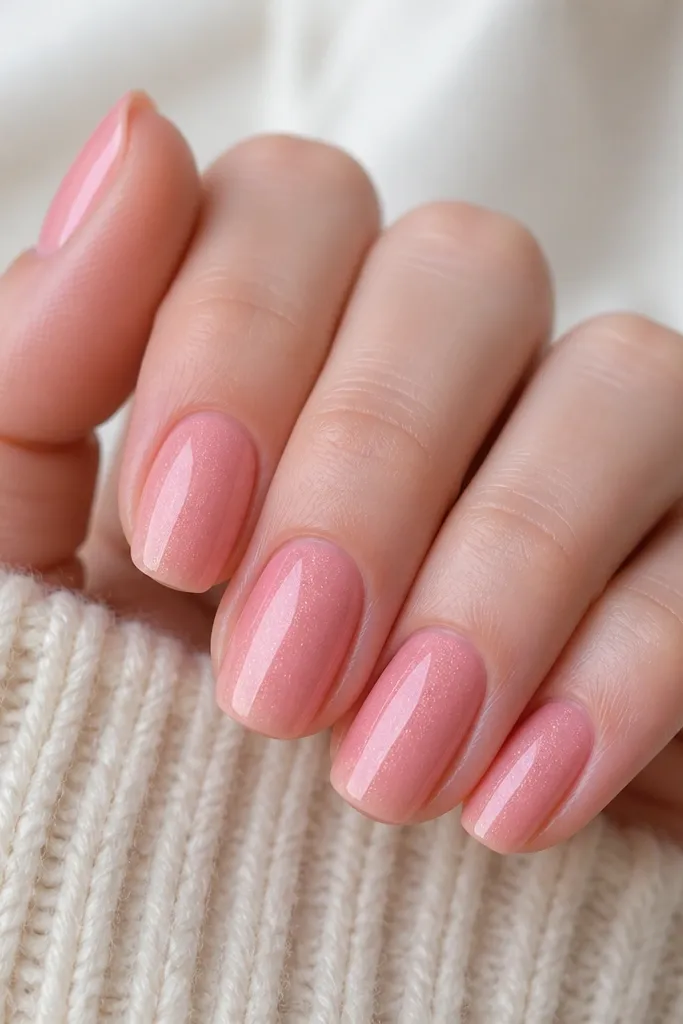
This polish style looks expensive because the shimmer is suspended, not glittery. The strawberry milk color reads sweet in daylight and still glows under indoor light. It's also low-effort - you don't need nail art.
Pick a pink polish that says "shimmer" but feels smooth, not gritty. Apply two thin coats for opacity. Seal with a thick top coat and cap the free edge so the shimmer stays glossy and doesn't dull.
Editor's noteIf the shimmer settles, roll the bottle between your hands before each coat.
Watch outDon't use a gritty topper - it turns the surface rough.
17. Nude Base with Tiny Rhinestone Teardrop on Middle Nail
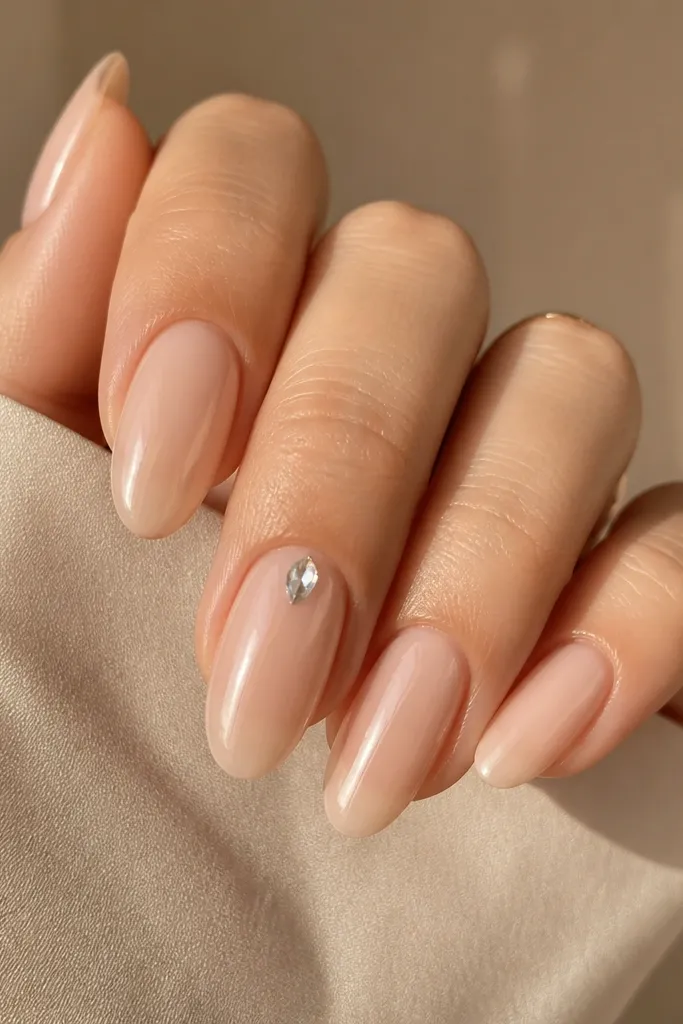
One teardrop stone looks cute and expensive because it has shape, not just sparkle. The nude base keeps it clean, and the stone placement on the middle nail draws the eye. I did this for a friend's wedding and it held up through photos and lots of hand movement.
Paint nude base in two coats. Apply a small dot of nail glue or gel at the placement spot. Place a tiny teardrop rhinestone, then seal with a thick top coat that covers the edges of the stone.
Editor's noteIf you feel the stone catching on fabric, add one more thin top coat just over the sides.
Watch outAvoid big stones - they look heavy and chip sooner.
18. Soft Pink Press-Ons with Clear Side French
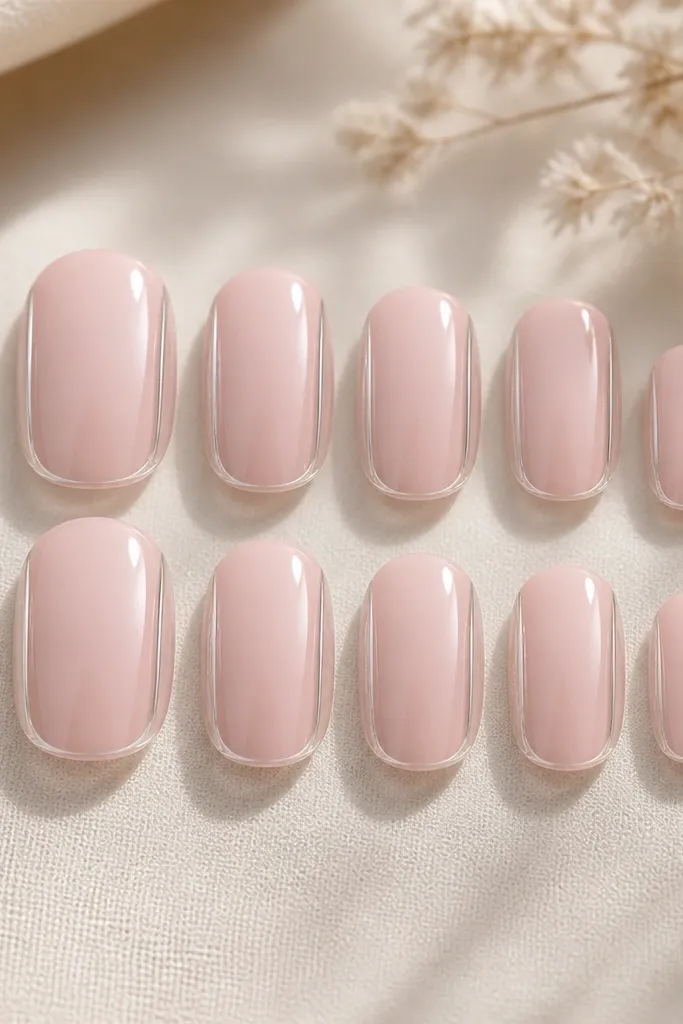
Side French is the shortcut to "designer nail" vibes. The clear strip makes the nail look longer and cleaner, and the soft pink keeps it sweet. Press-ons make this low cost because you can get a full set in 20 minutes.
Choose soft pink press-ons in short almond or medium almond. Apply a thin layer of glue, press for 30 seconds, then check symmetry in the mirror. Add a clear strip with clear polish or top coat along the side edges before the final seal.
Editor's noteTrim the press-on after placement, not before. It keeps the tip shape accurate to your fingers.
Watch outDon't use too much glue - squeeze-out makes the side French look messy.
19. Cream Nude with Candy Pink Micro-Check on Accent Nail
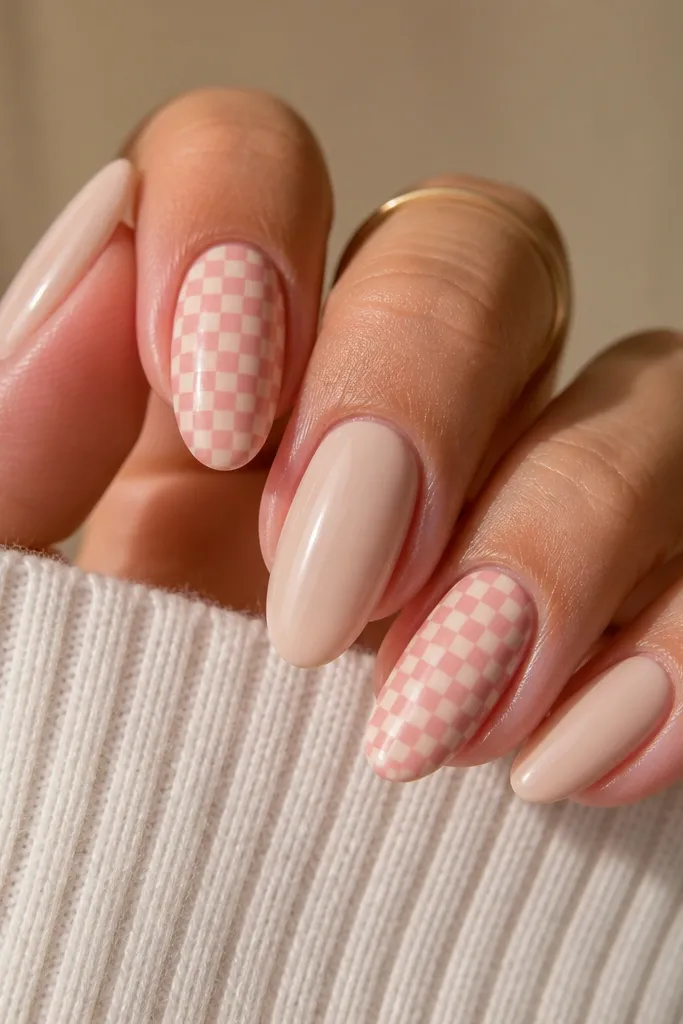
Micro-check looks playful but still crisp, especially on a nude base. The candy pink squares pop without covering the whole nail, so it stays wearable. I do this when I want an "aesthetic" nail that isn't hard to explain to myself.
Paint all nails cream nude in two coats. On the accent nail, use a fine liner brush to draw tiny squares near the tip - about 4-6 squares total. Fill in alternating squares with candy pink, then seal with a thick top coat.
Editor's noteUse a steady hand rest on the table. Your pinky should touch down so the line stays straight.
Watch outAvoid messy dots and uneven squares - it reads like smudged nail polish.