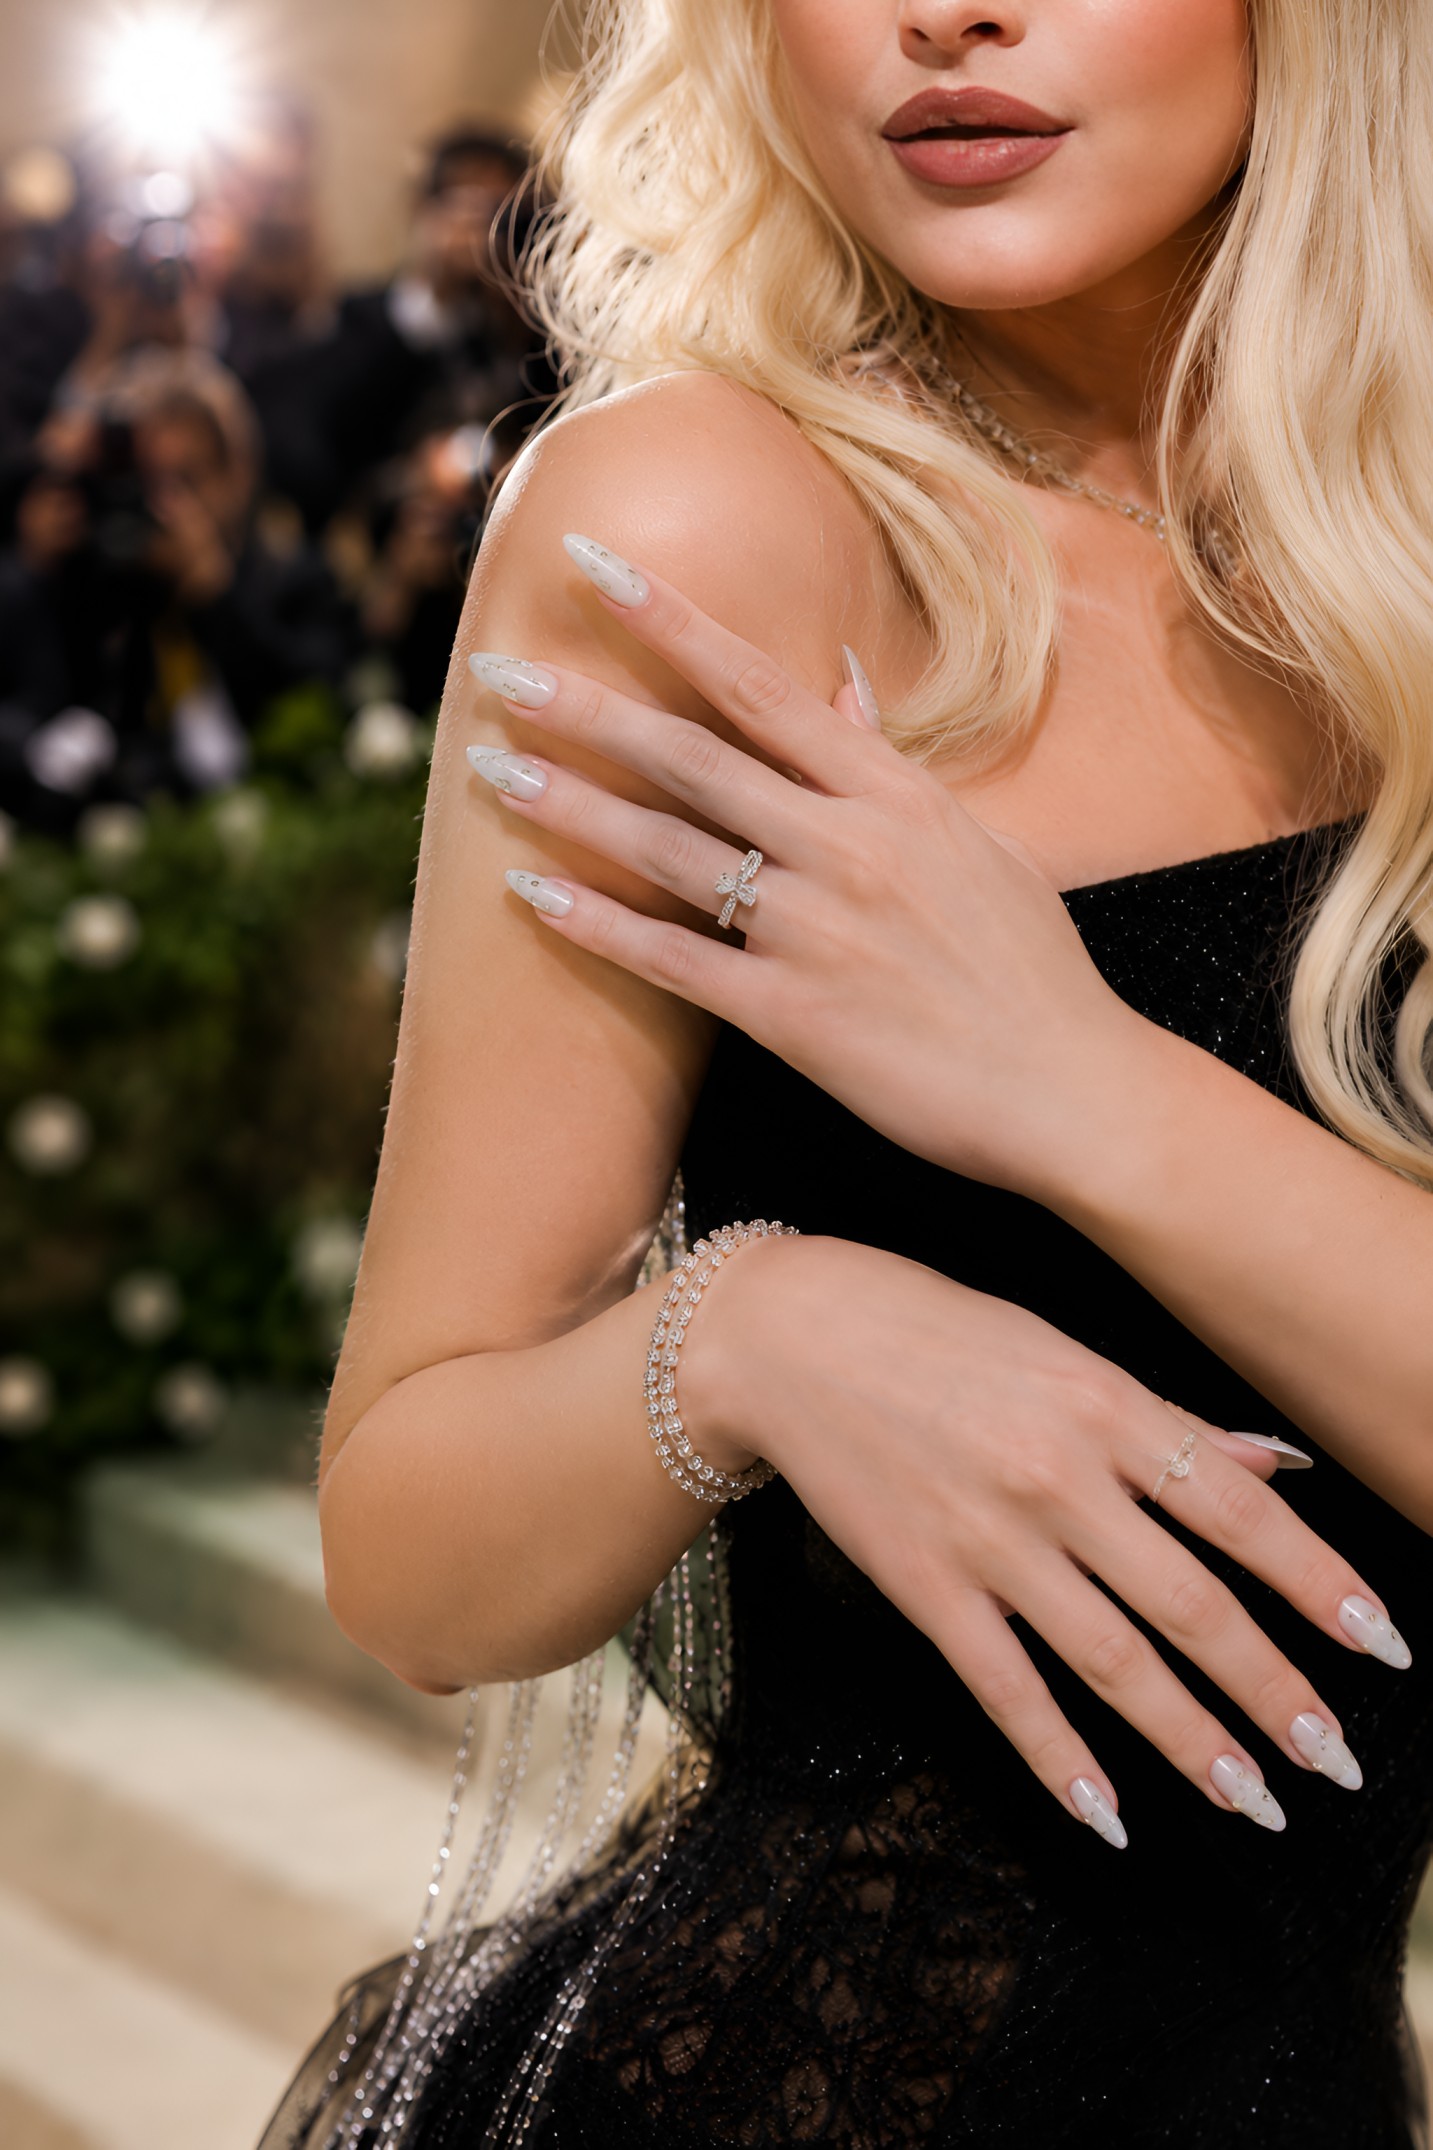
1. Milky Blush Almond with Micro-Glitter Halo
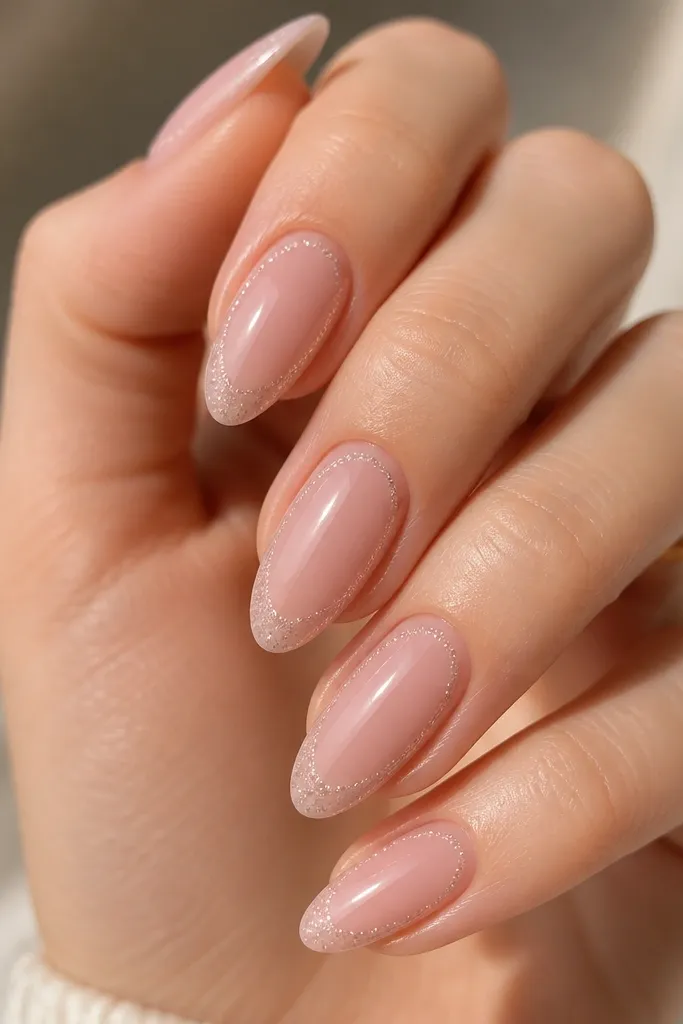
This look gives you that "flash-ready" shine without turning sparkly in a messy way. The milky blush base makes the nail look smooth and healthy, and the glitter halo is placed like a spotlight - not sprinkled everywhere. I like silver micro-glitter because it reads crisp against pink and doesn't go dull as fast as larger chunks. The halo placement also keeps your nails looking elegant when your cuticles grow out.
Start with two thin coats of milky blush gel, curing each layer. Add the glitter halo using a small brush or sponge tip near the center, then feather the edges so it fades. Finish with a high-gloss top coat in two thin layers, curing fully between coats.
Editor's noteIf you only do one thing, do the fade - crisp glitter edges look cheap on camera.
Watch outSkipping the fade and piling glitter to the cuticle makes it look rough and dusty.
2. Creamy Nude French with Thin Champagne Edge
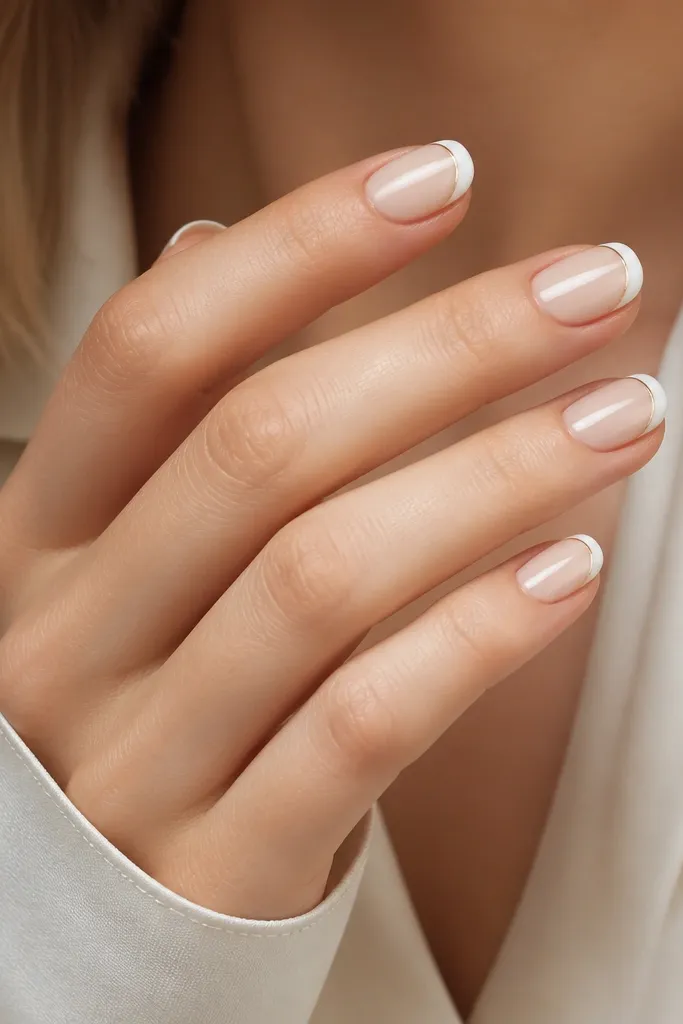
A French tip is the easiest way to look "dressed" instantly, and the thin champagne line makes it feel Met-level. The creamy nude base keeps it soft and wearable, while the gold edge adds that warm, expensive glow. I've used this combo for events where you want your nails to match everything from satin dresses to sequined tops. It photographs clean because the gold line is narrow and controlled.
Paint the nude base, then create the French tip with a sheer white or milky nude for the main tip. Use a striping brush to draw a thin champagne-gold line just inside the tip edge. Seal with two top-coat layers and wipe the tacky layer before the second coat if your gel does that.
Editor's noteKeep the gold line under 1mm thick so it reads like jewelry, not paint.
Watch outUsing a thick gold outline makes the nails look like costume art.
3. Sheer Peach Jelly with Floating Pearl Dots
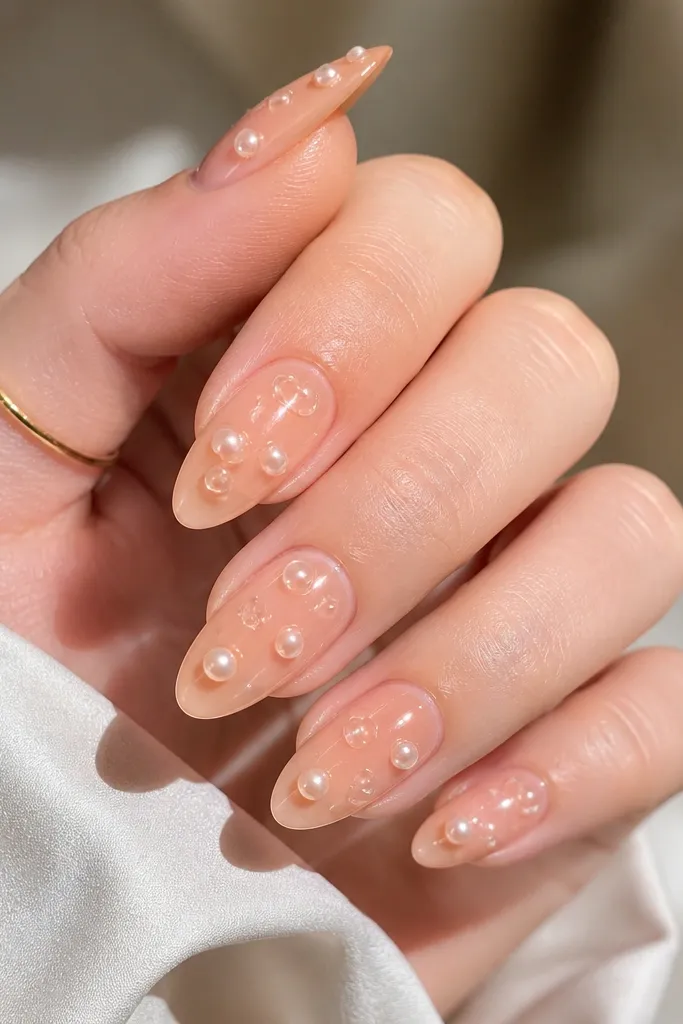
Jelly bases look expensive because they look like the nail is glowing from within. The floating pearls mimic delicate jewelry and keep the design light, not heavy. Peach works especially well with warm skin tones and gold accessories, and it stays flattering in natural lighting. I love placing the pearls near the cuticle because it frames the nail bed and makes your hands look tidy.
Use a sheer peach jelly gel as your base - one to two thin coats. Place 1-2 pearl dots per nail using gem gel or a dot of thick gel, then cure. Top coat around the pearls carefully so you don't flood and bury the shine.
Editor's noteUse a dotting tool to set pearl positions before you cure so you don't end up with lopsided clusters.
Watch outOverloading pearls turns the look into chunky 3D décor.
4. Rose Quartz Swirl with Clear Gloss Apex
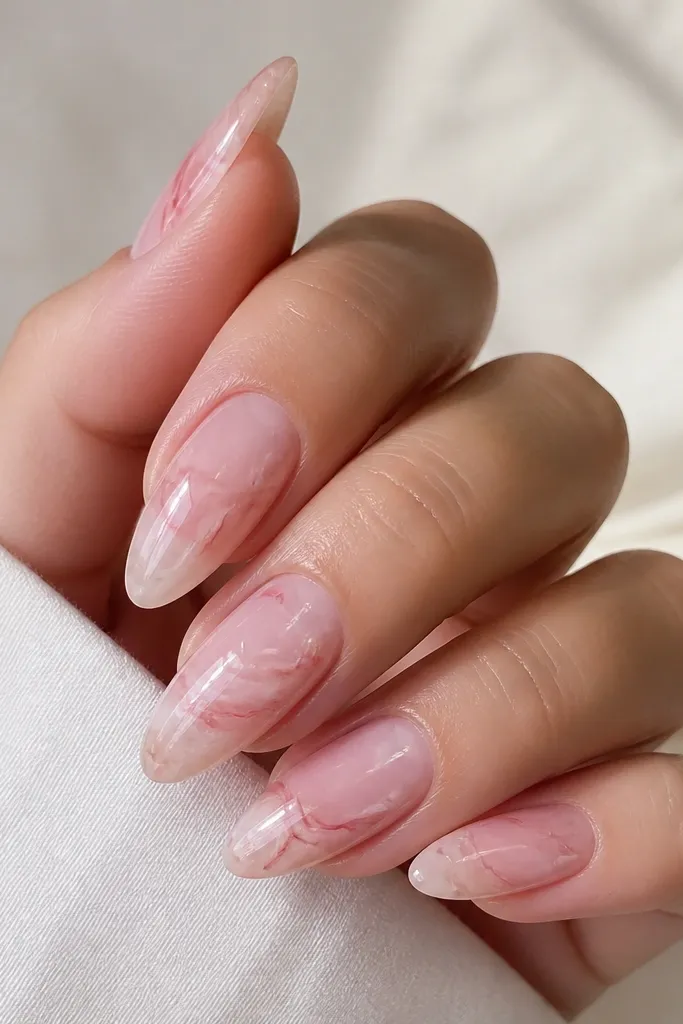
This one reads like gemstone nails without using thick stones. The rose quartz swirl gives you depth while staying soft and romantic, and the clear gloss apex makes the surface look like glass. It's a great choice when you want glamour that isn't just glitter or chrome. In photos, the marbling catches light along the curves.
Start with a pale rose translucent base. Use thin liner brushes with diluted pink gel to draw swirls, leaving some areas clear so it looks like stone veins. Build a clear gel apex for strength and finish with a glossy top coat.
Editor's noteKeep your swirls irregular. Perfect symmetry looks printed instead of stone-like.
Watch outGoing too opaque with the marble makes it look like regular nail art stickers.
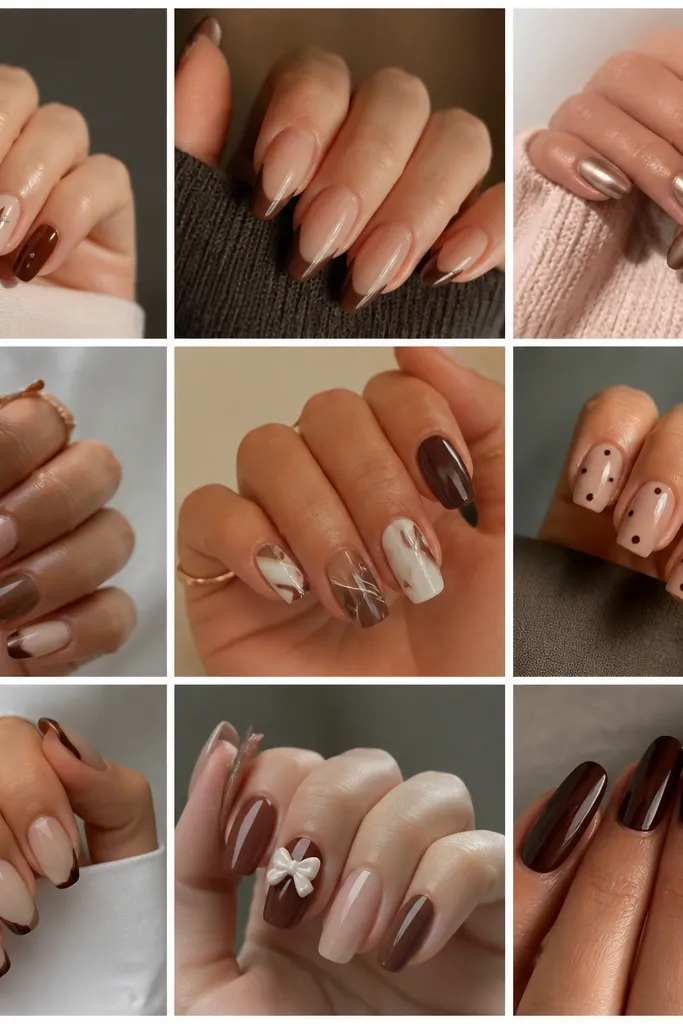
5. Chocolate Mocha Nude with Gold Foil Flicks
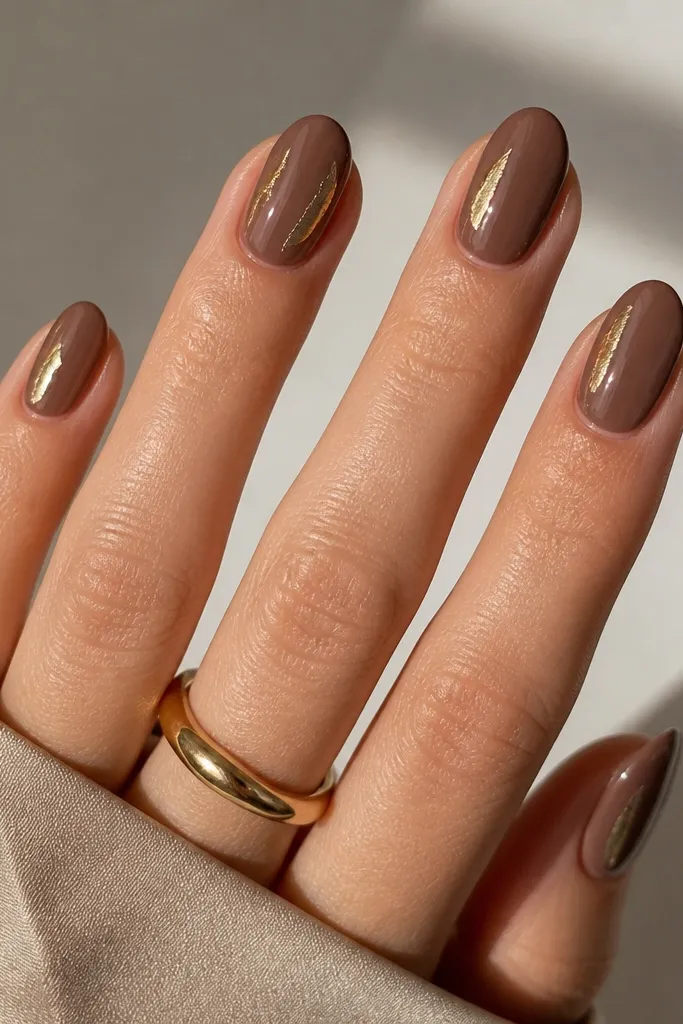
Mocha nude has that "grown-up glam" feel and looks amazing with warm lighting. Gold foil flicks give movement, like brushstrokes, and they photograph with sharp highlights. I like this for events because it feels luxe even when the dress is simple. The foil is thin and controlled, so it stays smooth under top coat.
Paint a deep mocha nude base with two coats for opacity. Press gold foil pieces using foil gel or tacky layer - place small flicks, not big sheets. Seal with two top coats to smooth the edges.
Editor's noteTrim foil with a small scissors before placing so you get clean flick shapes.
Watch outUsing large foil chunks makes the nail bumpy and catches on sleeves.
6. Pearl-White Micro French with Nude Center
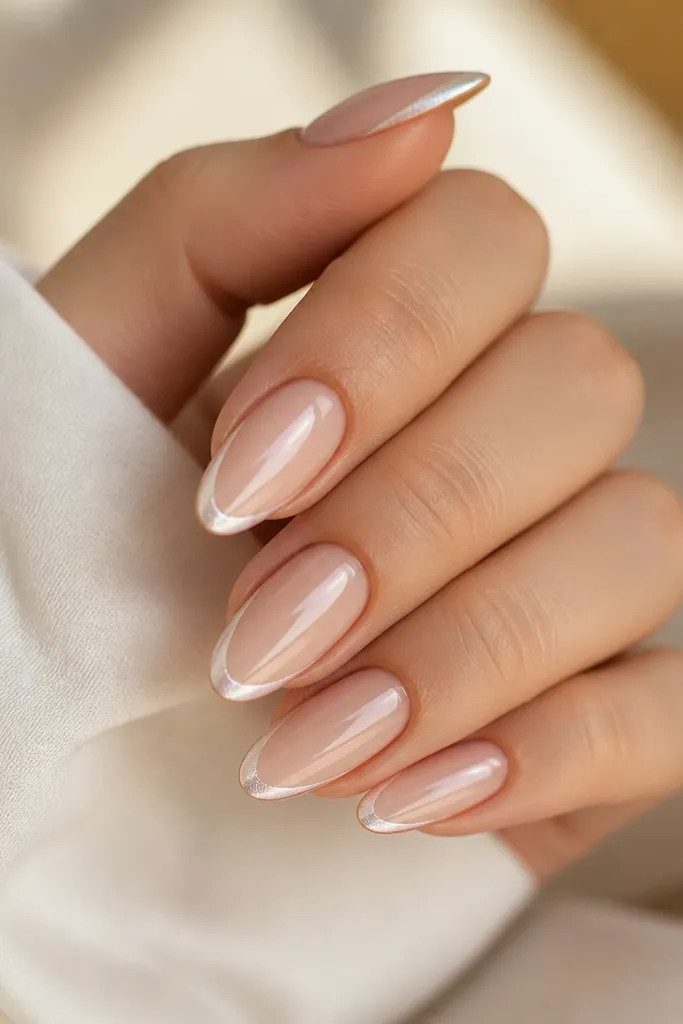
This is French, but softer - it keeps the look airy and expensive. Pearl-white is less harsh than bright white, so it flatters more skin tones and looks less "school uniform." The nude center also gives you that clean negative space vibe. In photos, the pearly tip catches light without looking like thick paint.
Use a nude sheer pink base. Paint a very thin pearl-white tip with a fine brush, keeping the curve tight. Add a thin top coat layer over the tip first, cure, then finish with full top coat.
Editor's noteIf your French line shakes, use a striping tape guide for one nail and mirror it on the others.
Watch outThick white tips look heavy and can make your nails look shorter.
7. Satin Nude with "Broken" Chrome Star Center
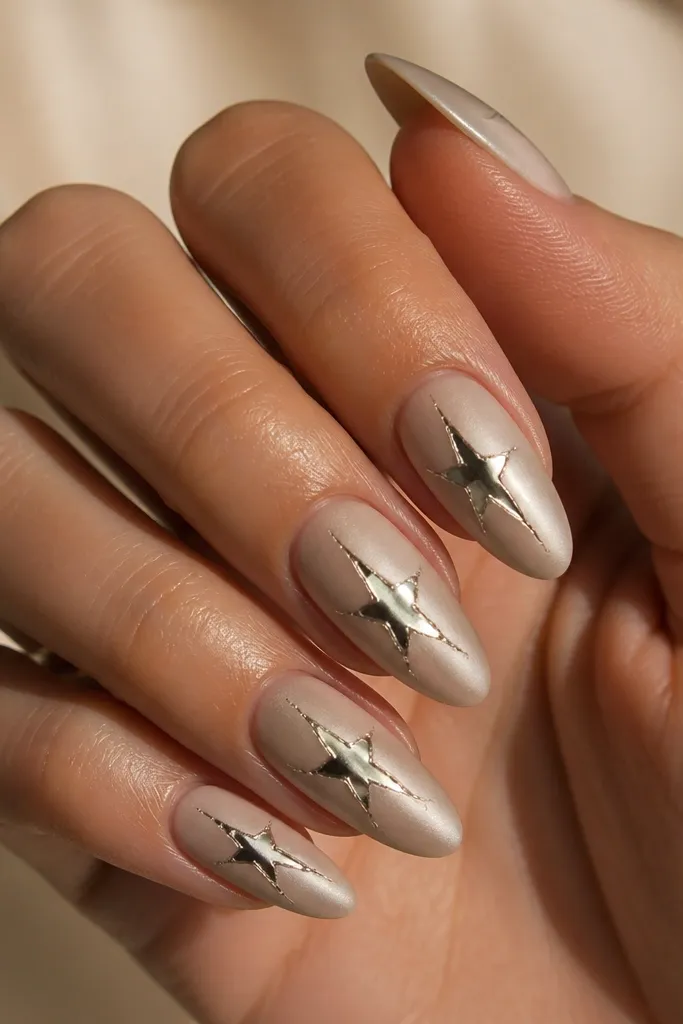
Satin nude makes chrome look intentional instead of shiny for no reason. The fractured star reads playful but still luxe because it's small and centered. I've worn this style on shoots where everything else is glam and you need nails that still feel light. Chrome also gives that sharp reflection that shows up even in indoor lighting.
Apply satin nude gel (not fully glossy) and cure. Use a small star stencil or freehand with chrome foil gel, then apply chrome powder and gently rub off excess so it stays broken. Seal with a glossy top coat, but keep it thin so you don't dull the shine.
Editor's noteUse a matte top coat on the nude base only. Then add glossy top coat just around the chrome star area if you want extra contrast.
Watch outPutting chrome over a fully glossy base can make the design look flat and smear under top coat.
8. Clear Jelly Pink with Raised Bow Outline
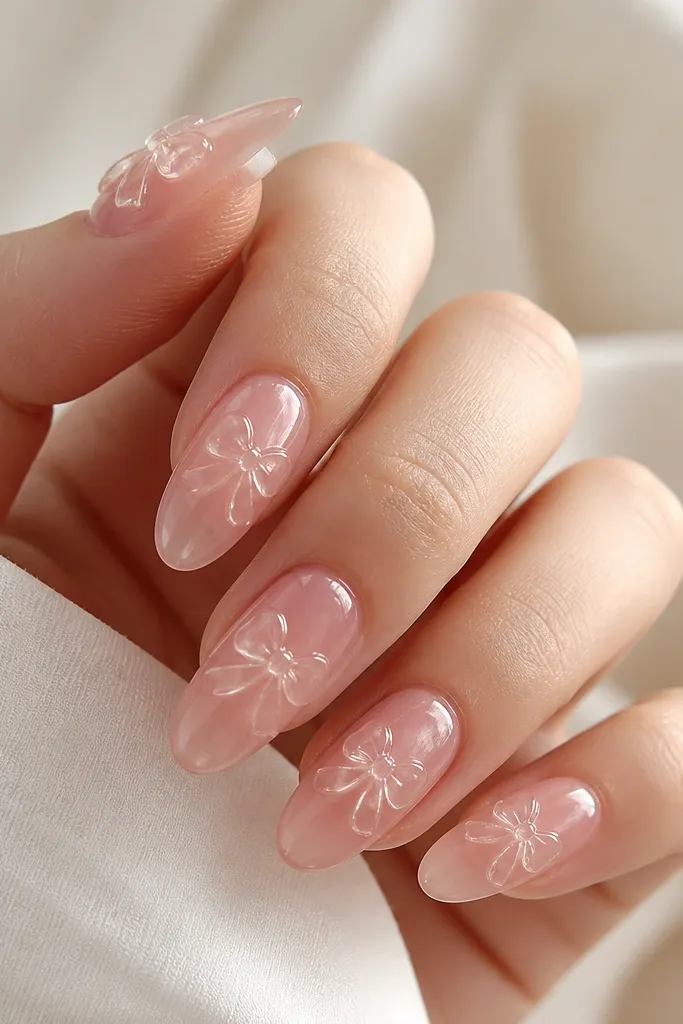
A bow outline gives you that Sabrina-style sweetness without going full cartoon. The raised outline creates dimension, and the jelly base keeps it looking soft and airy. I like darker pink gel for the bow lines because it shows up clearly but still matches the base. This design is perfect for events because it looks hand-detailed while staying neat.
Build a clear jelly pink base with one or two coats, leaving it translucent. Use striping gel or thick gel to draw a small bow near the cuticle - aim for about 2-3mm tall. Cure, then add top coat carefully around the raised lines.
Editor's noteDraw the bow with a striping brush and cure after the outline so it doesn't spread.
Watch outFilling the bow completely can make it bulky and hard to keep smooth.
9. Golden Hour Ombré with Sheer Nude Fade
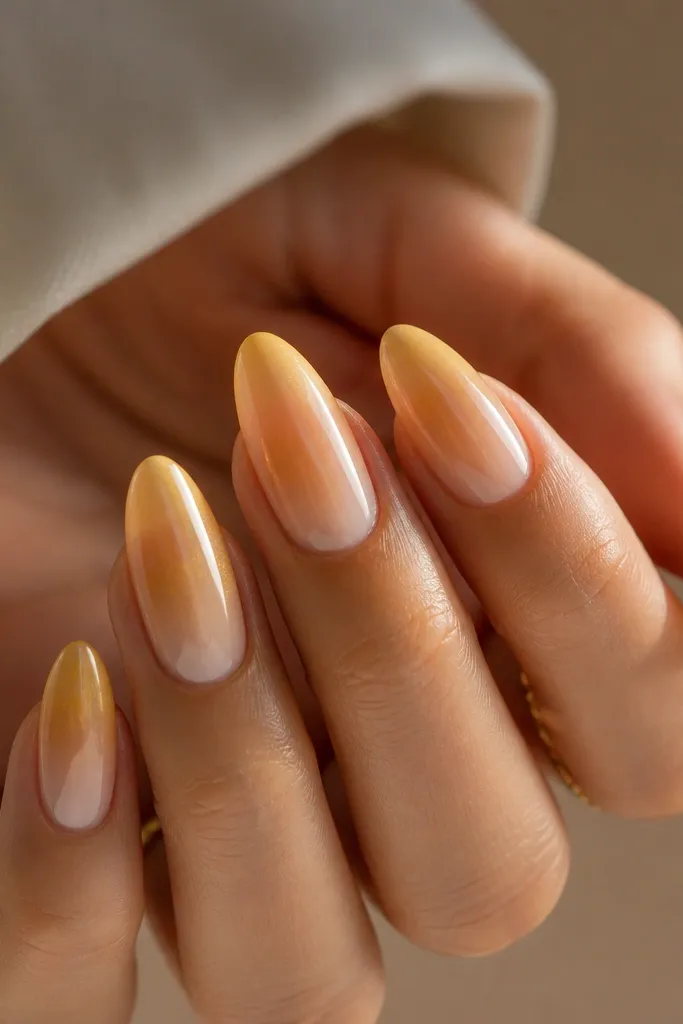
Ombré reads luxe when the fade is smooth and the color sits only near the edge. This golden hour palette looks expensive because it's warm, not orange-red, and it flatters in both daylight and flash. The sheer nude cuticle keeps it airy, so it doesn't look like you're wearing a heavy tint. It also grows out beautifully because the transition is already blended.
Start with sheer nude base. Sponge a golden amber gel from mid-nail to tip, then blend upward with a clean sponge edge. Finish with a glossy top coat and cure thoroughly.
Editor's noteUse two lighter sponge passes instead of one heavy pass for a smoother fade.
Watch outHard lines at the fade boundary make it look like a sticker or uneven dye.
10. Iced Vanilla Nude with Silver Line Art
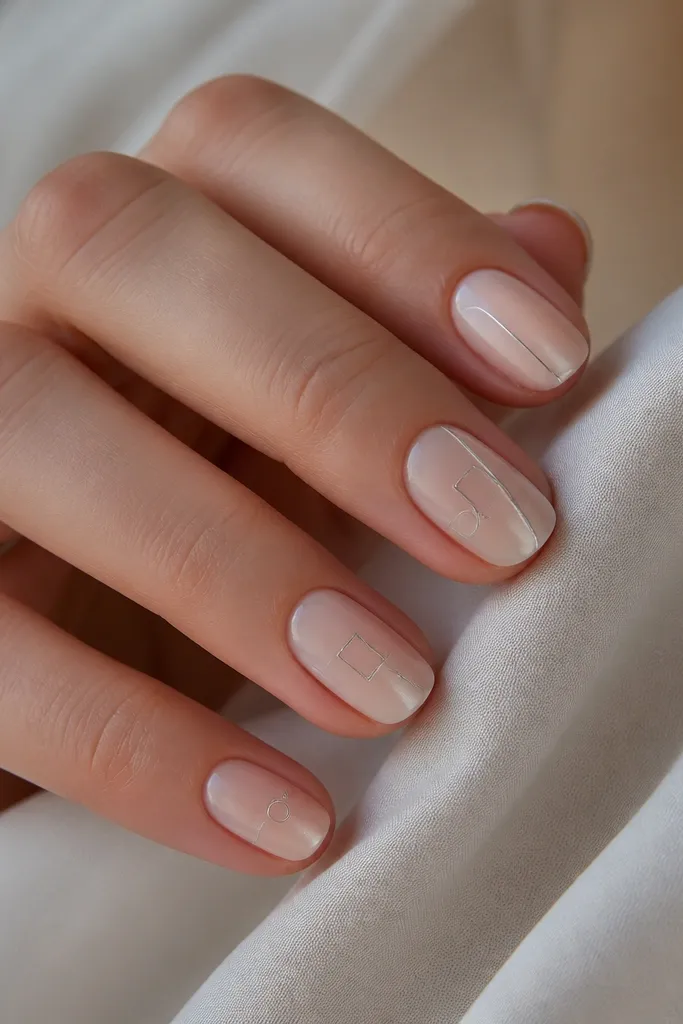
Iced vanilla is my go-to nude when you want nails to look clean and "snow-gloss" in photos. Silver line art adds sparkle without glitter, and it stays crisp because it's thin. The best part is control: you can keep it minimal and still feel like you did something intentional. This works great when your outfit has busy details and you don't want heavy nail art.
Use an iced vanilla gel base with a slightly frosted finish. Paint thin silver arcs using a liner brush or striping gel pen. Seal with two top coats so the lines stay sharp and glossy.
Editor's noteKeep line art under 1/3 of the nail length so it doesn't crowd the nail bed.
Watch outThick silver lines look like foil tape and feel cheap.
11. Milky Nude with Cuticle Sparkle Clusters
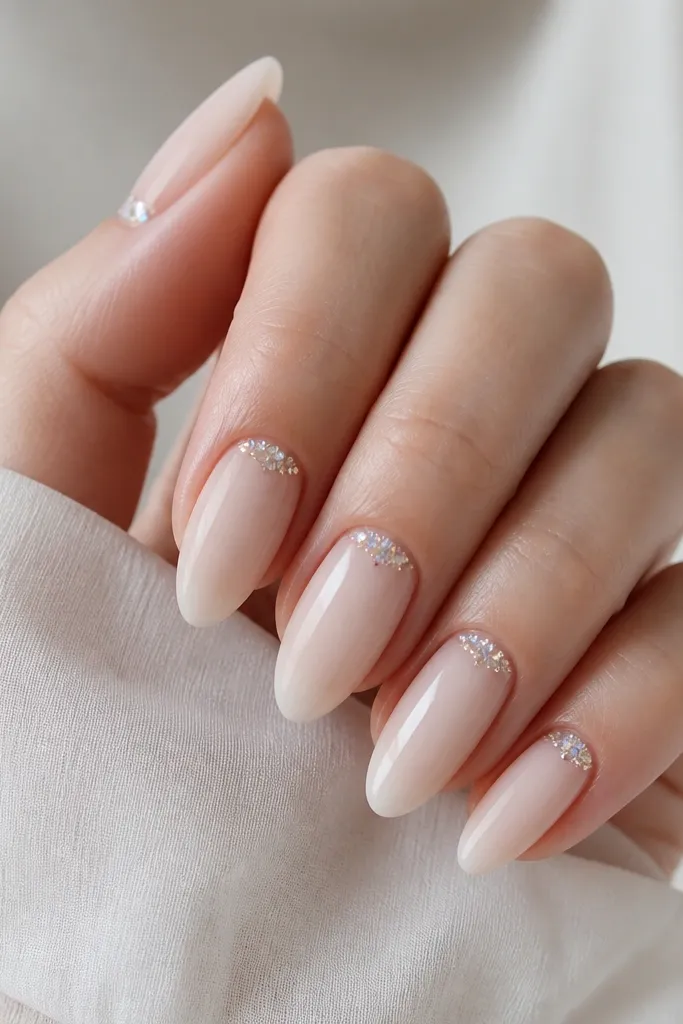
Cuticle sparkle is a cheat code for "luxe" because it frames the nail bed and makes your hands look styled. Using small micro-sparkles in a cluster keeps the look refined, not scattered. Milky nude makes the sparkle pop without looking harsh. I like this when you want glamour that doesn't cover the whole nail.
Paint milky nude base in two thin coats. Create a small cluster at the cuticle using micro-glitter gel or fine rhinestones set with gel. Cure, then top coat around the cluster so you don't blur the sparkle.
Editor's noteLeave a tiny gap between the cluster and the skin so it looks crisp, not grown-out messy.
Watch outSpilling glitter onto the cuticle area makes it look like fallout.
12. Soft Lavender Sheer with Silver Chrome Tips
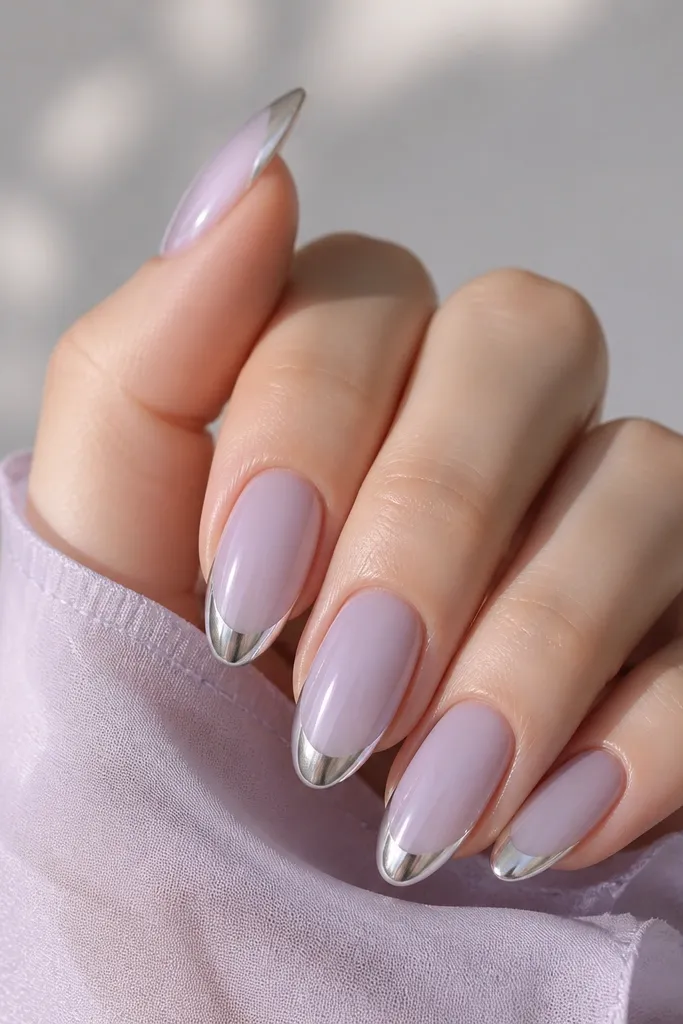
Lavender sheer makes everything feel dreamy, and silver chrome tips give you a sharp, expensive finish. The combination reads "Met Gala" because it looks like jewelry metal against a soft base. I like keeping the chrome only on the tip so it doesn't overpower the whole nail. It also makes your nails feel bold even if the rest of your look is minimal.
Use a lavender sheer gel base with two coats. Apply chrome at the tip with a sponge or applicator, blend the edge slightly inward. Seal with a glossy top coat that doesn't kill chrome shine.
Editor's noteDo a quick wipe of the tip edge before chrome so you don't trap dust under the mirror powder.
Watch outFull-nail chrome over a sheer base can look flat and too intense for the Sabrina Carpenter vibe.
13. Rose Nude with Tiny Crystal Teardrops
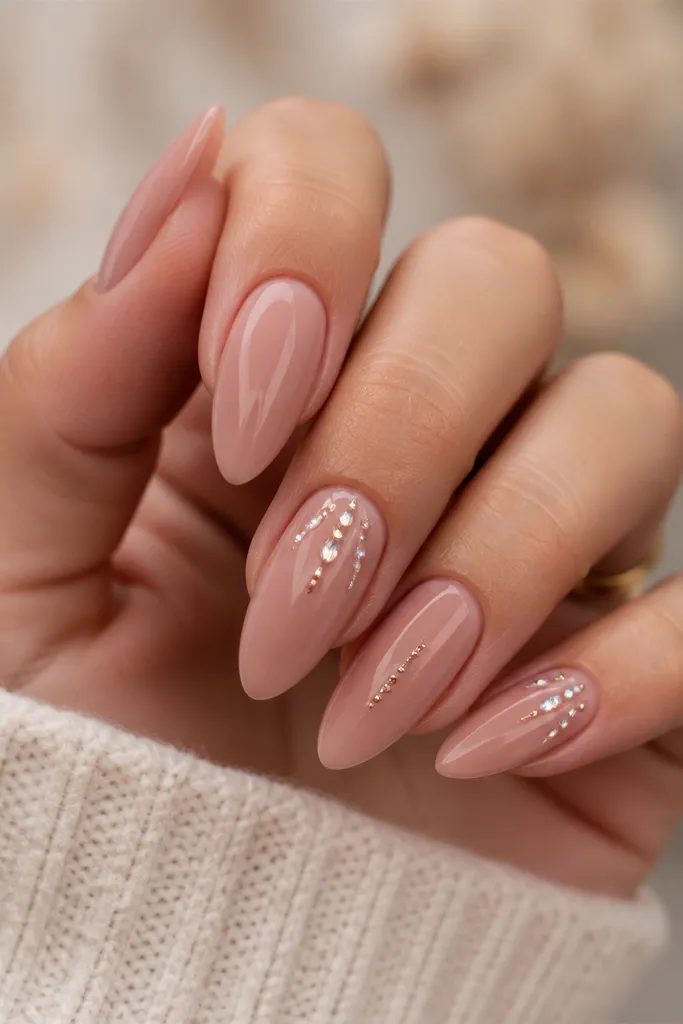
Teardrop crystals look like light caught on a necklace clasp. Placing one crystal per nail keeps it luxe and not cluttered, and rose nude makes the crystals look warm instead of icy. The angled placement adds movement, like the light is shifting when you move your hand. This is a great option if you want glam without heavy 3D bows.
Apply rose nude base, cure, then set one small crystal using gem gel. Position the crystal slightly off-center and cure. Top coat thinly around the crystal so it stays shiny and doesn't get submerged.
Editor's noteUse tweezers with a rubber tip grip - they prevent slipping and reduce smudges.
Watch outUsing large crystals on a short almond nail makes the nail look crowded.
14. Nude Pink Gel with Embedded Gold Micro Beads
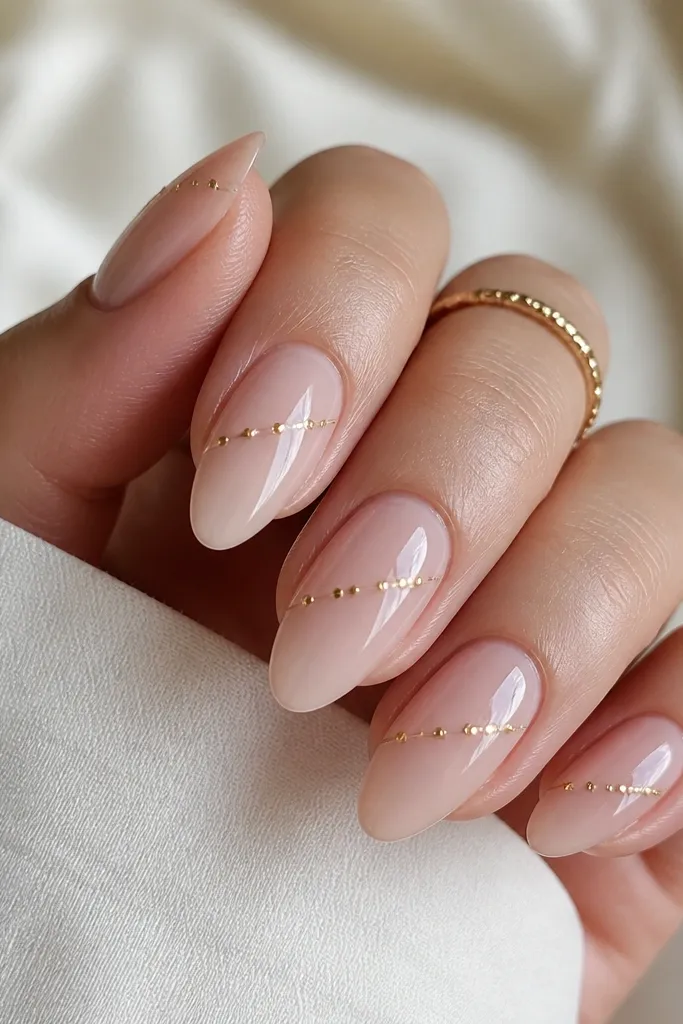
Micro beads look expensive because they catch light as individual points. The diagonal line placement feels modern, and embedding them under gel keeps the surface smooth. I like nude pink for this because it makes the gold look like it belongs there. It reads luxe in photos because the beads sparkle even when you're not moving.
Use nude pink base and cure. Place micro beads along a diagonal line using a thin strip of thick gel, then cover with clear gel and cure so beads are sealed in. Finish with a glossy top coat and buff lightly if needed.
Editor's noteKeep the diagonal line narrow - about 1-2mm - for a jewelry-like effect.
Watch outLeaving beads uncovered makes them snag on hair and snag fabric.
15. Clear Gloss with Pink Aura Center Glow
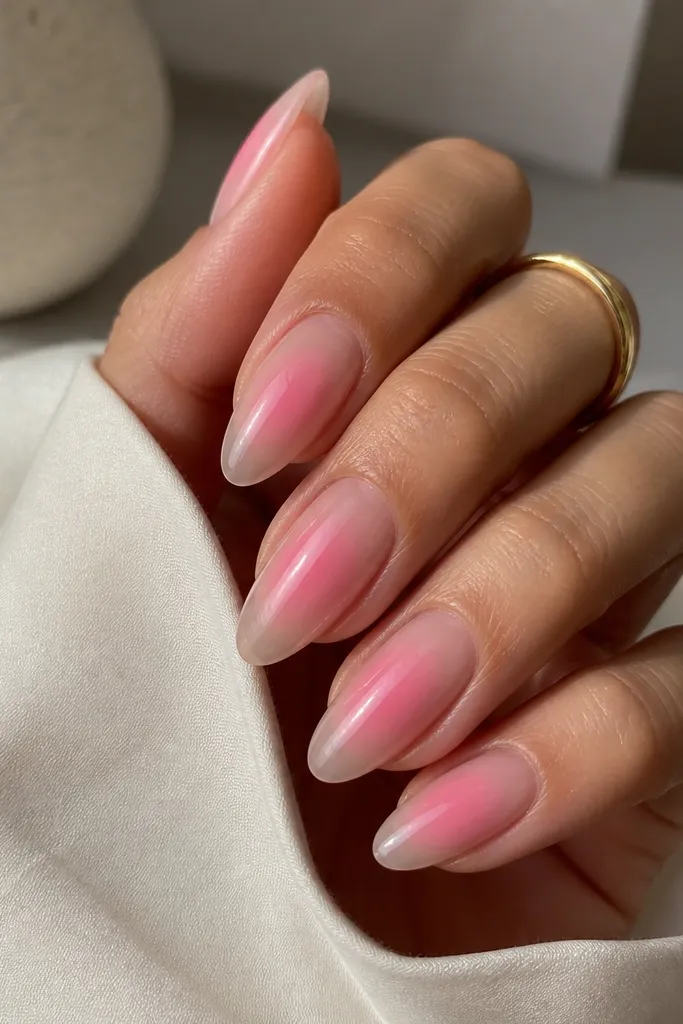
Aura nails look glam because the glow is diffused, not harsh. Using a clear base keeps the nail looking clean and "fresh," and the pink aura gives that soft Sabrina-style femininity. I like placing the aura center higher than you think so it shows in overhead photos. It also looks expensive because the transition is blended, not painted.
Apply a clear builder gel or clear base, cure. Airbrush or sponge pink gel in a soft circle in the middle, then blend edges with a clean sponge. Seal with high-gloss top coat to keep the aura smooth and luminous.
Editor's noteWork in layers: build the glow gradually so you avoid muddy edges.
Watch outPainting the aura as a solid circle looks like a sticker.
16. Classic Red-Brown Nude with Tiny Gold Chain Links
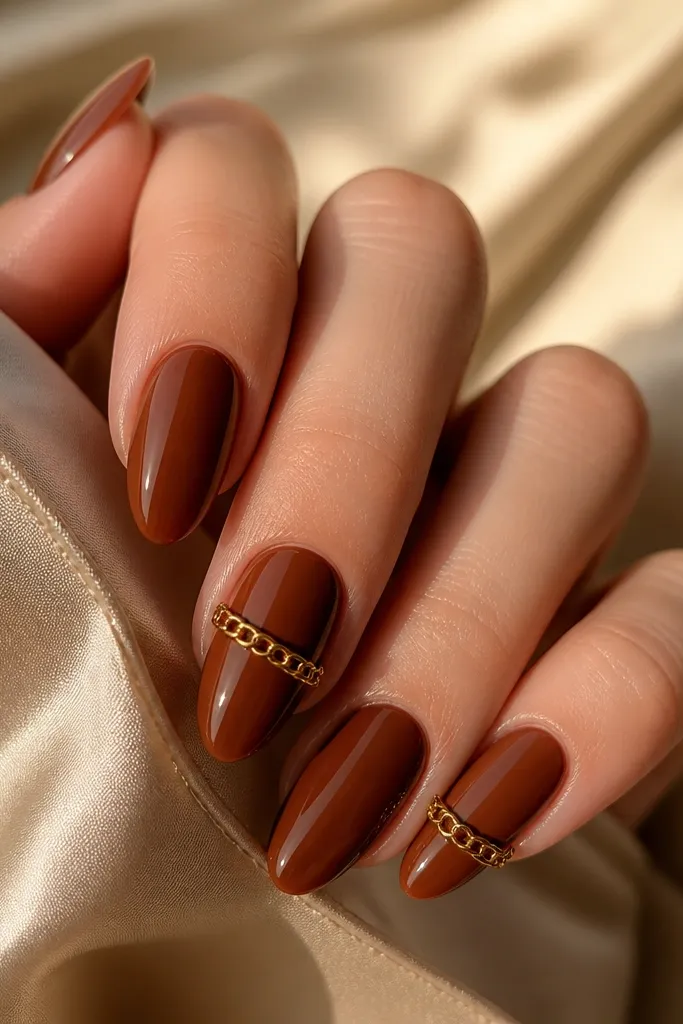
This is the "jewelry manicure" version of Met gala nails luxe. The red-brown nude gives warmth and depth, and the tiny chain links look like real metal. It's a strong look without being loud because the detail is narrow and placed on the side where light hits. I like it for date-night events and galas where you wear gold earrings.
Paint warm red-brown nude base. Place a thin strip of chain decal or micro chain pieces on the side using gel as adhesive. Cure, then top coat carefully so the chain sits flush.
Editor's noteIf using individual chain links, place only 3-5 links per nail for a clean line.
Watch outCovering chain details with thick gel makes them look bulky and dull.
17. Pearl Milk Chrome Tips on Short Almond
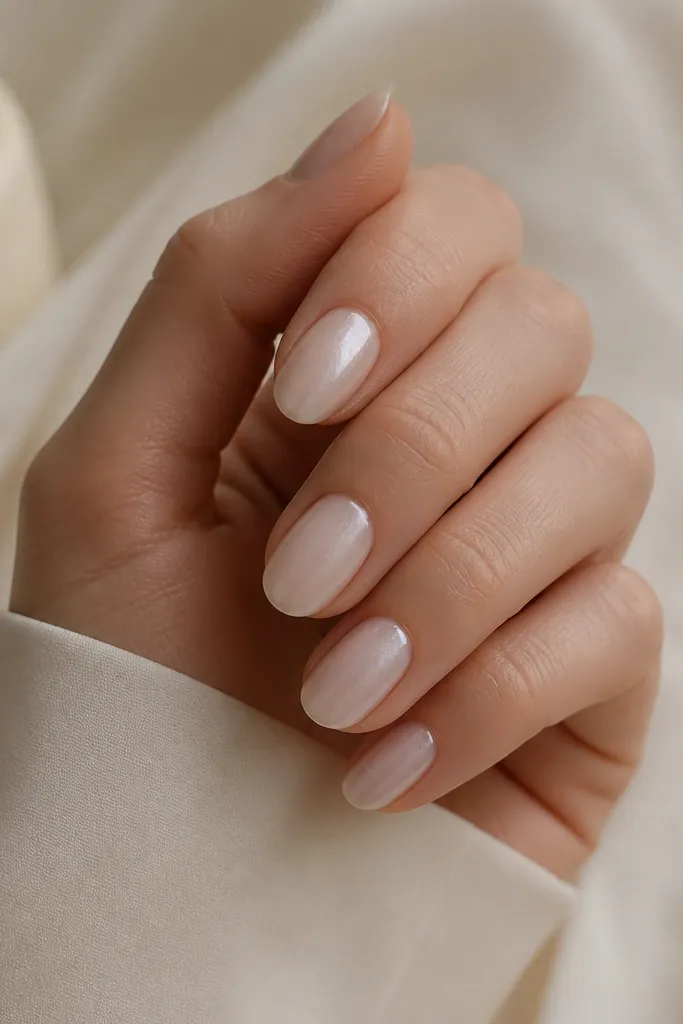
Pearl-milk chrome is the gentler cousin of mirror chrome. It gives you shine that looks like polished porcelain, and it pairs perfectly with the soft Sabrina Carpenter color palette. The gradient makes the nails look longer and more refined. This one is for when you want glam but you don't want the bright silver look.
Start with a milky pearl gel base. Apply pearl-milk chrome at the tips and lightly blend inward using an applicator so the edge is soft. Seal with glossy top coat in thin layers to keep the chrome reflective.
Editor's noteBlend the chrome edge while it's still tacky so it melts into the base.
Watch outLeaving a straight chrome line makes the nail look cut-out.
18. Sheer Nude with 3D Gold Half-Moons
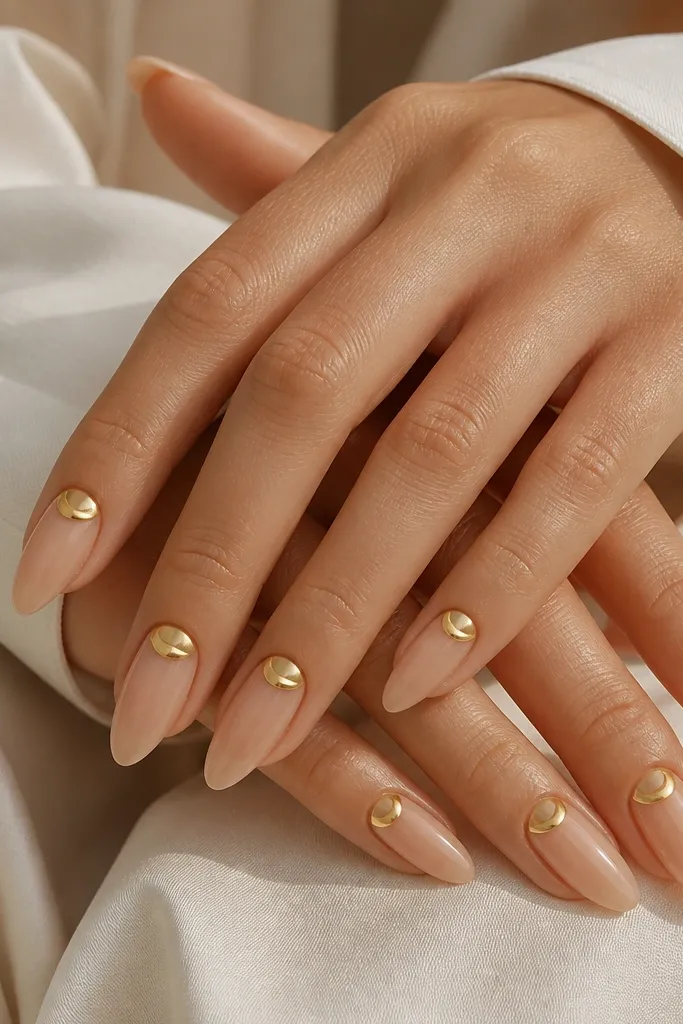
Half-moons look like tiny clasps or studs, and they add dimension without covering the whole nail. The sheer nude base keeps the look delicate, while the gold shapes read luxe and intentional. I've used this for weddings and formal dinners because it looks polished even when your outfit has a lot going on. It also photographs well because it catches light from multiple angles.
Use a sheer nude base and cure. Add small 3D gold half-moon studs or sculpted gel crescents near the cuticle, then cure. Top coat around the shapes without flooding - you want the edges to stay defined.
Editor's notePlace crescents slightly off-center so they look hand-set, not stamped.
Watch outOverlapping multiple half-moons per nail turns it into a heavy charm bracelet.
19. Icy Pink Marble with Clear Negative Space
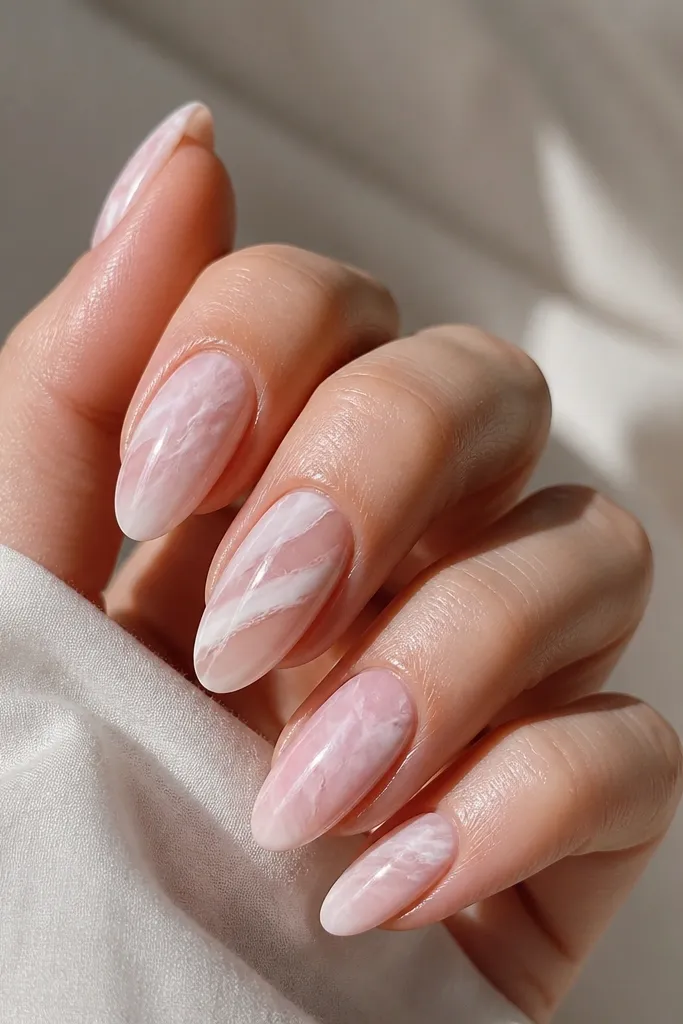
This marble uses clear negative space so it looks lighter and more modern. The icy pink color stays soft, and the transparent streaks make it feel like glass stone rather than thick paint. It's a good choice when you want "Met Gala nails luxe" but you hate glitter. Negative space also helps the design look intentional even if you're not perfect with symmetry.
Start with a clear base or very sheer icy pink. Use diluted pink gel to draw marbling streaks, intentionally leaving gaps where you keep it clear. Add a glossy top coat and cure fully.
Editor's noteUse a thin liner brush and wipe it on a lint-free pad between nails so lines stay crisp.
Watch outFilling all the negative space with opaque color makes the marble look muddy.
20. Nude Almond with Vertical Crystal Rain
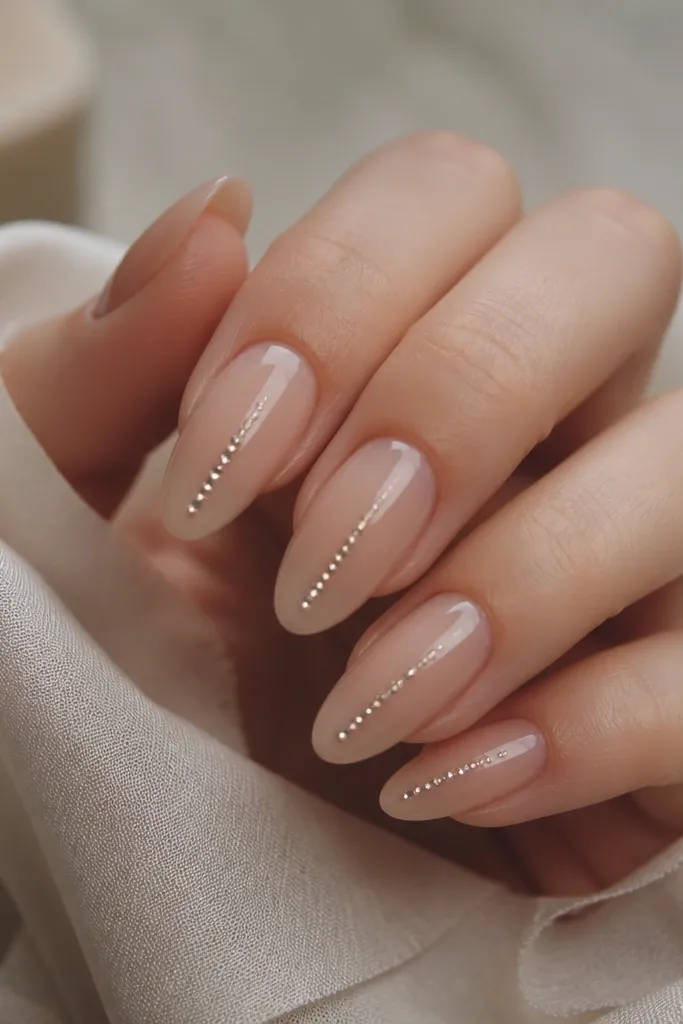
Vertical crystal placement makes nails look longer and more elegant. The nude base keeps everything clean, and the crystal column adds "sparkle in motion" when you walk. I like small crystals instead of big stones because they look like light specks, not heavy gems. This style works for formal events where you want shine that still looks refined.
Paint nude base, cure. Set small crystals in a straight column with gem gel, leaving a little space near the cuticle so it doesn't look crowded. Seal with top coat in thin layers so crystals stay visible.
Editor's noteKeep the crystal column straight by marking a faint center guide with a gel pen before placement.
Watch outPlacing crystals randomly makes it look like loose rhinestones.
21. Satin Taupe Nude with Copper Foil Edge
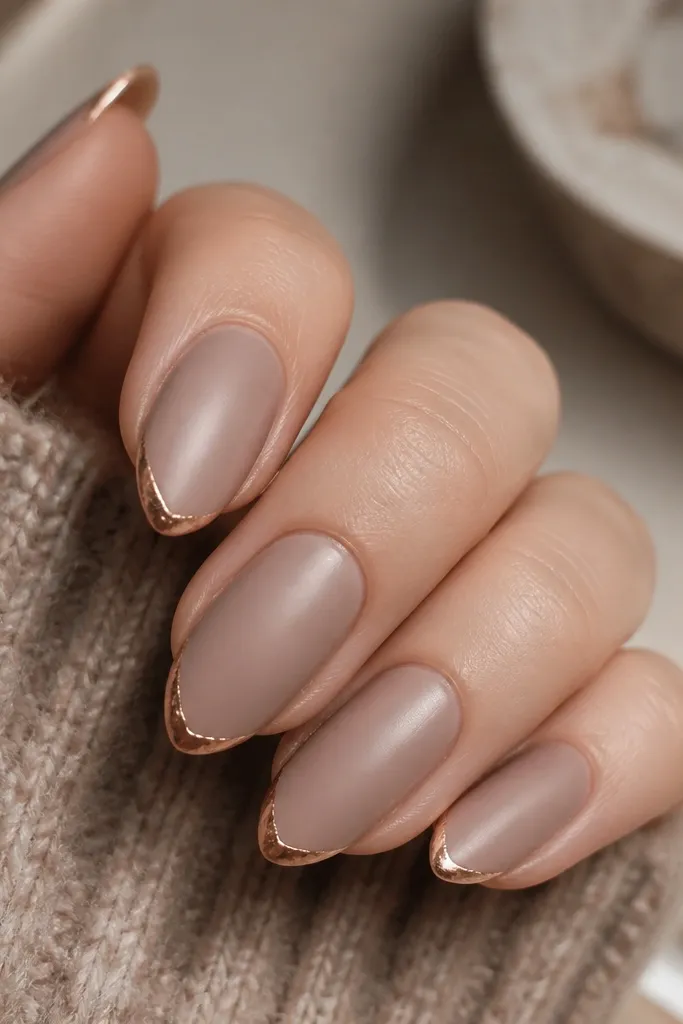
Taupe nude is underrated for glam because it looks expensive with both gold and bronze. The copper foil edge gives warmth and makes the nails look like they're wearing jewelry around the tip. Satin finish on the base makes the foil pop because it creates contrast. I use this when the dress is neutral and you need the nails to add color without going loud.
Apply satin taupe nude gel and cure. Add copper foil along the smile curve using foil gel, then press gently so it adheres. Finish with a glossy top coat only over the foil line so the rest stays satin.
Editor's noteUse a cotton swab with alcohol to clean the nail surface before foil - dust kills adhesion.
Watch outUsing bright red foil with taupe can look rusty instead of luxe.
22. Milky White with Blush Bow Accent on Two Nails
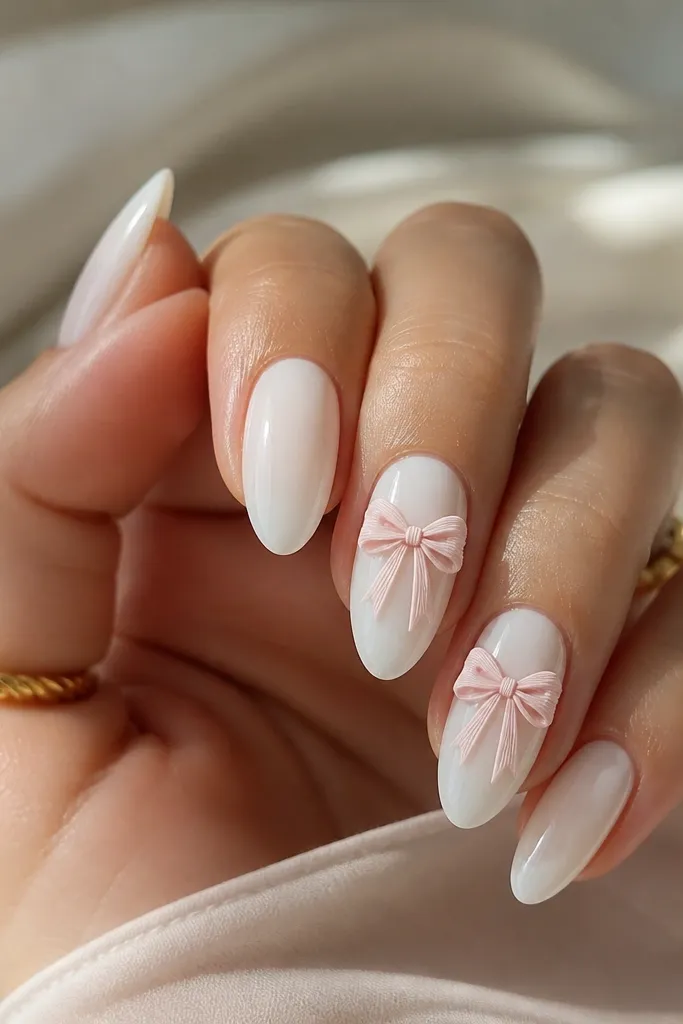
This is the "coordinated" look: clean milky white everywhere, then one or two signature details. The blush bow gives you that Sabrina Carpenter sweetness, and keeping it to two nails keeps it from turning into a theme manicure. I like adding a whisper of micro-glitter around the bow so it reads glamorous even when you're not close up. It also looks great when your outfit is already busy.
Paint all nails milky white, two coats. On two nails, add a small blush bow near the cuticle using thick gel or pre-made bow charms. Add a tiny halo of micro-glitter gel around the bow, then seal with top coat.
Editor's noteChoose which two nails to accent based on how you pose your hands. I usually pick ring and middle.
Watch outBow on every nail makes the design look like sticker overload.
23. Clear Base with Pink Chrome Side Swipe
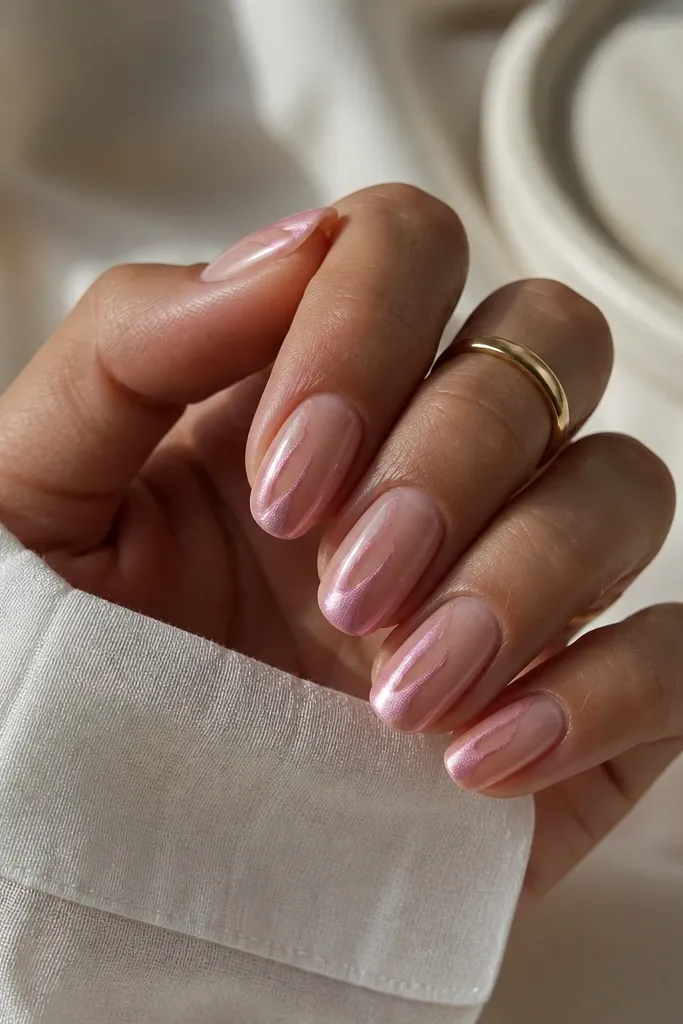
A side swipe gives you movement without covering the whole nail, which is why it looks luxe instead of busy. Pink chrome reads soft and romantic, and the clear base keeps the nail looking fresh and clean. I like this for events because it catches light when you turn your hand, especially with rings. It also grows out better because the design starts in the mid-nail area.
Apply clear base gel and cure. Apply pink chrome on one side using chrome gel and a small angled brush or applicator, then blend the edge lightly. Top coat with a glossy layer, keeping it thin so chrome stays reflective.
Editor's noteAngle the swipe slightly upward toward the tip so it flatters the nail shape.
Watch outPutting the swipe too close to the cuticle can look messy as you grow out.
24. Soft Pink Nude with Tiny Star Confetti
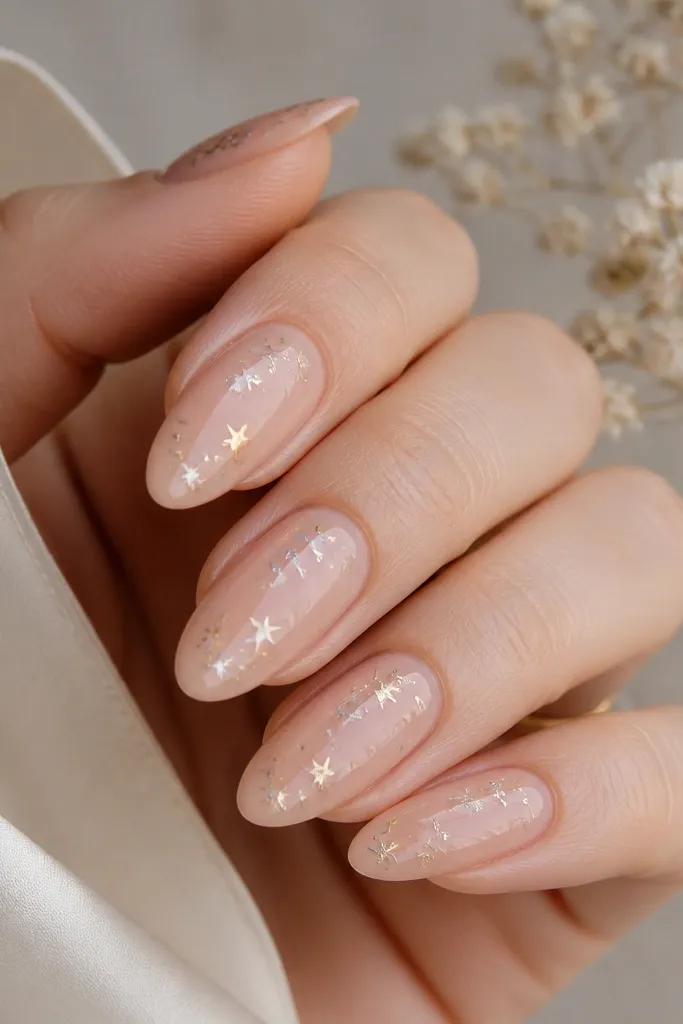
Star confetti gives you playful sparkle without the heavy glitter fallout. The trick is using tiny pieces and spacing them so each star has room to shine. Soft pink nude is the perfect background because it makes gold and silver look coordinated, not random. I've used this look for parties where you want "pretty" nails that still feel formal.
Use a soft pink nude gel base. Place micro star pieces with tweezers using a small dot of thick gel, then cure. Seal with glossy top coat in two thin layers, curing between.
Editor's noteTap off excess stars with a dry brush so you don't end up with a glitter blanket.
Watch outDumping confetti across the nail makes it look like craft glitter.
25. Champagne Nude with Raised Glitter Line at Tip
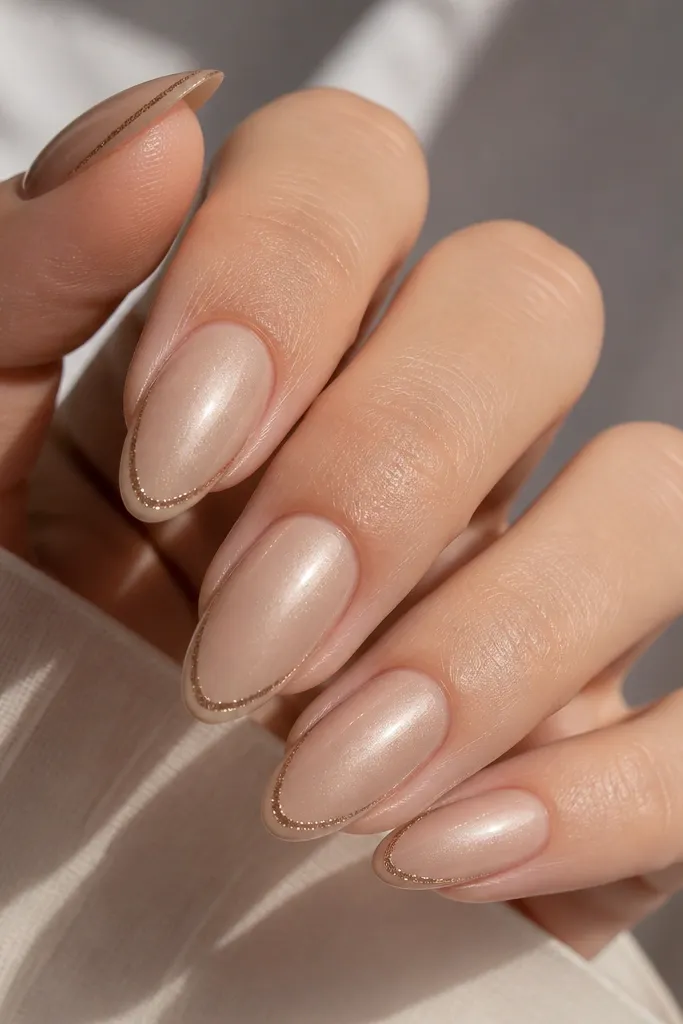
A raised line at the tip looks like jewelry trim. The champagne nude base makes the glitter look warm and expensive, and the raised effect adds dimension that catches flash. This style is great if you want something closer to French but more stylized. I like it for nights out because it reads glam even from across the room.
Apply champagne nude base in two coats. Paint a thin line of fine glitter gel right along the tip edge, then build a tiny amount of clear gel on top to raise it slightly. Cure and finish with top coat to smooth the surrounding area.
Editor's noteKeep the line super straight by using the natural nail curve as your guide.
Watch outThick raised glitter bumps can snag and look uneven in close photos.