
1. Black Dot Sheer Pink Confetti
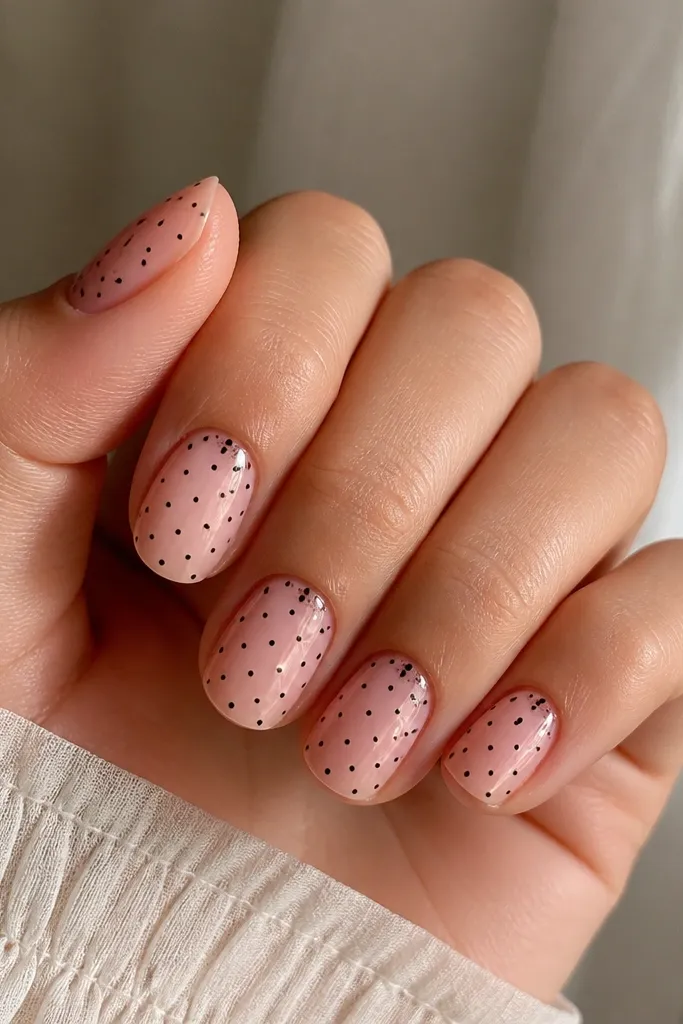
This set looks like classic polka dots but with a modern softness because the base is sheer and pink, not solid opaque. The black dots read crisp and graphic, especially in flash photos. I like adding a tiny cluster near the cuticle because it frames the nail bed and makes the dots look intentional instead of scattered.
Use a sheer pink builder gel or a thin sheer polish layer, then place 1.0-1.2 mm black dots. Keep dot spacing about one dot-width apart. Top coat glossy and make sure the edges around each dot are sealed.
Editor's noteIf your dots look fuzzy, wipe your dotting tool on a lint-free wipe before touching the polish again.
Watch outSkipping a full top coat seal makes the dot edges catch on fabric and peel.
2. White Dot Milky Nude with Micro Sparkle
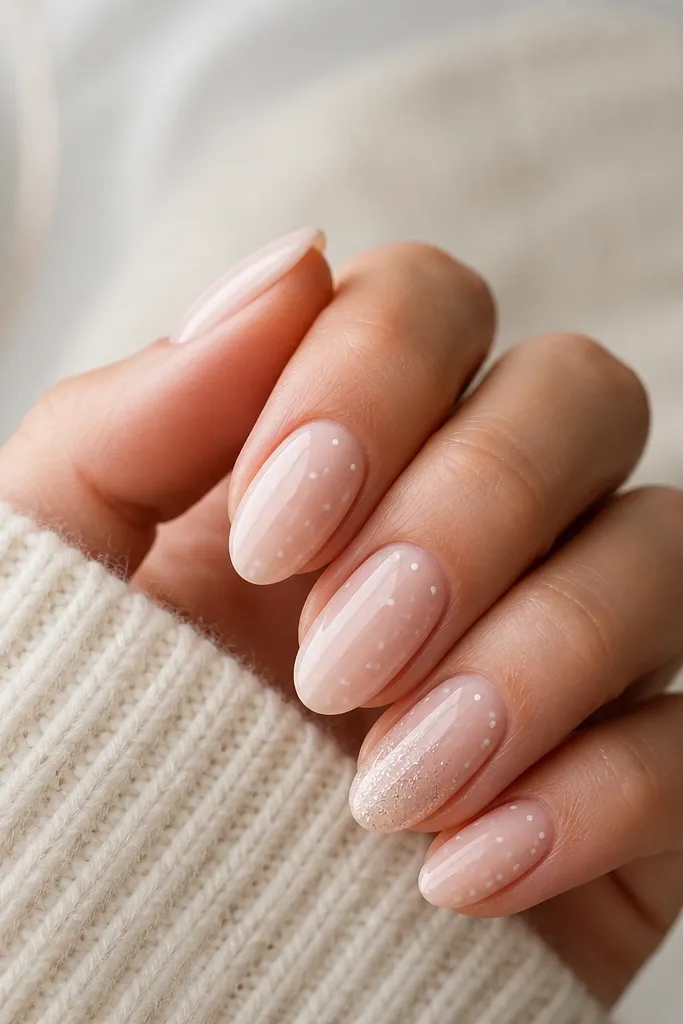
Milky nude makes the white dots look creamy instead of stark. The micro glitter near the tips adds that "sweet but styled" finish without turning it into full bling. The loose scatter pattern looks more like fashion nail art than a literal sticker layout.
Paint two thin coats of milky nude, then dot with white at about 1.0-1.3 mm. Leave negative space so the dots don't crowd. Add micro glitter to the last quarter of one nail only, then top coat glossy.
Editor's noteUse a small brush to clean around the dot edges with top coat before curing.
Watch outDon't pack glitter across the whole nail or it kills the clean polka dot look.
3. Red Dot Glossy Ballet Pink
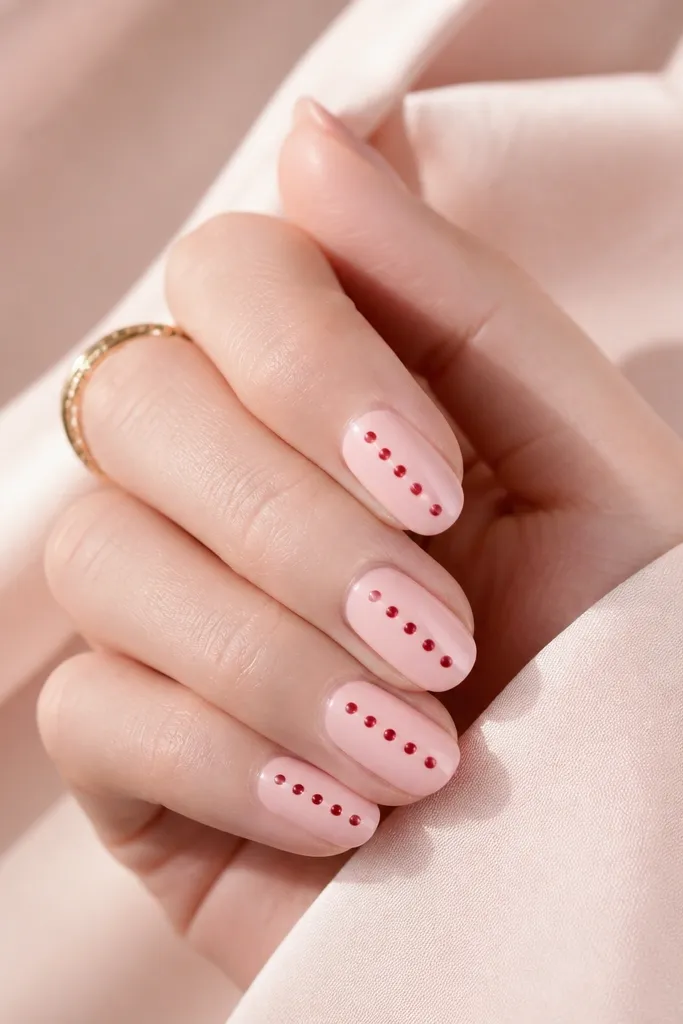
Two centered rows of red dots give you that clean, runway-like symmetry. Ballet pink keeps it sweet, while red makes it pop. The glossy base makes the dots look like they're printed, not painted.
Use a glossy ballet pink gel polish. Place 2.0 mm red dots in two vertical lines, leaving equal spacing between dots. Keep the top and side margins clear so the rows look sharp.
Editor's noteFor straight rows, rest your hand on the table and dot one line first, then mirror the second.
Watch outTrying to freehand both rows at once usually smears the first row.
4. Cocoa Brown Dot on Milky Pink Half-Moons
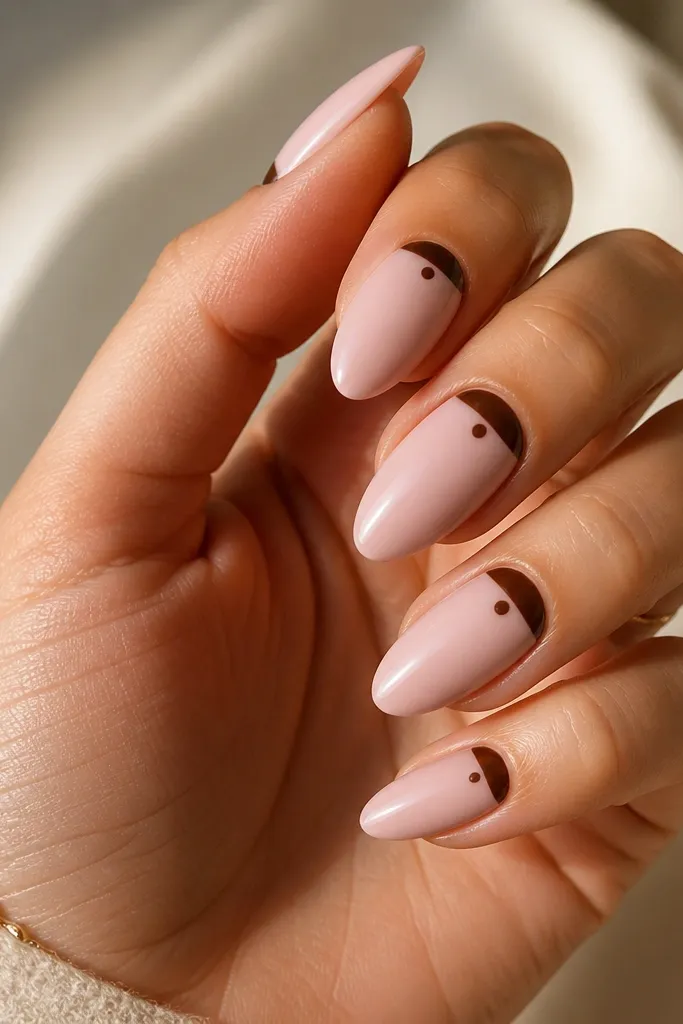
This one feels like "cozy cute" rather than candy bright. The cocoa half-moons anchor the design near the cuticle, and the matching dots keep the set cohesive. It looks great on warm skin tones and in indoor lighting.
Paint milky pink first. Add a cocoa half-moon at the cuticle using a striping brush, then dot cocoa brown at 1.2-1.5 mm across the nail body. One or two dots near the free edge make it feel balanced.
Editor's noteLet the half-moon dry fully before dotting, or the colors will blur together.
Watch outDon't put dots on top of wet half-moons - the edges will bleed.
5. Pastel Lavender Dot Gradient Base
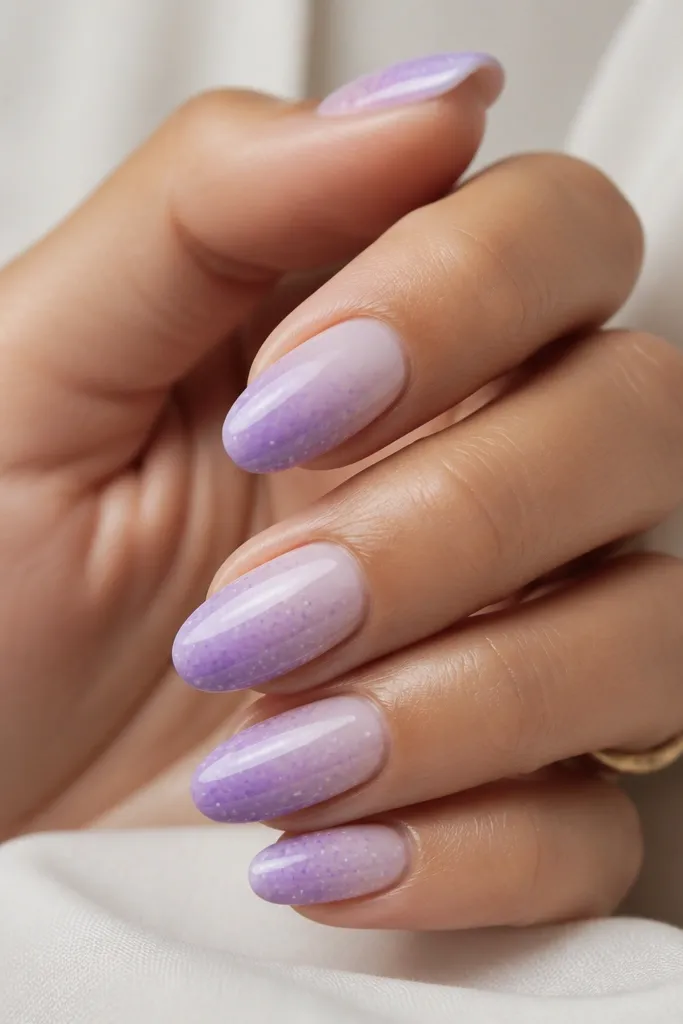
A subtle gradient makes the dots look more dimensional, like they're floating. Lavender dots on a pale base read gentle and pretty, not harsh. This is the set I reach for when I want polka dots but I'm wearing light colors.
Create a fade using a sponge: milky pink at the cuticle, then blend into pale lavender. Place 1.0-1.2 mm dots in the middle third only. Top coat glossy so the gradient looks smooth.
Editor's noteDo the dots after the gradient is fully cured so the dot color doesn't sink.
Watch outSkipping gradient blending makes the base look like stripes instead of a fade.
6. Black Dot French Tips with Sheer Rosy Base
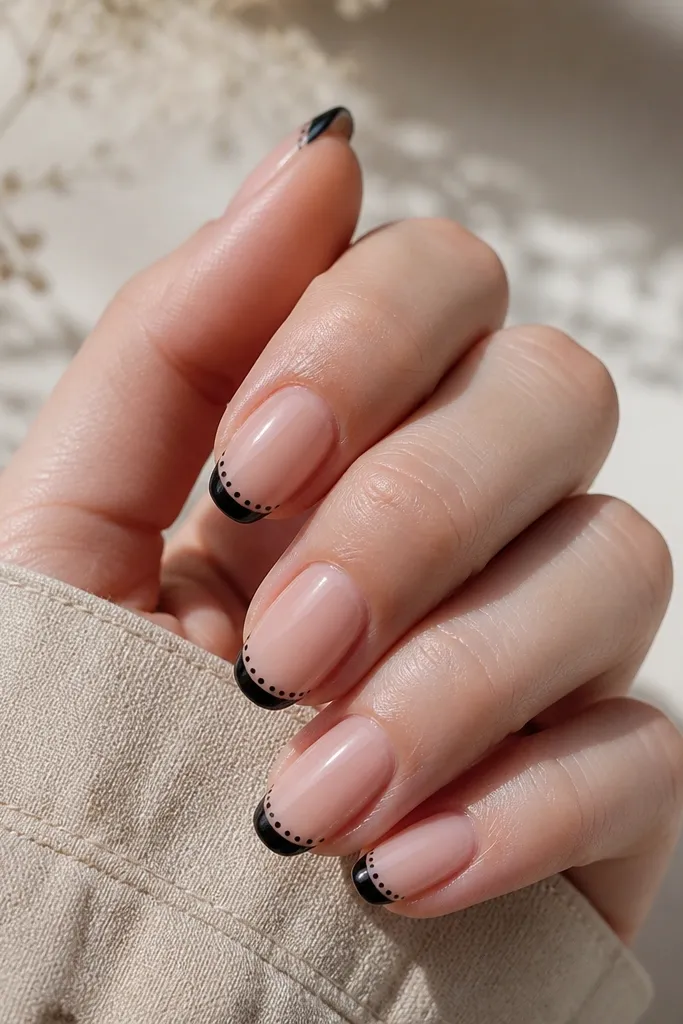
French tips already look polished, so polka dots become the playful twist. The dotted outline along the tip makes the nail edge look crisp. This set is super wearable because the base stays sheer and clean.
Use a sheer rosy base. Paint French tips in black, then add 1.0-1.2 mm dots along the tip line. Keep the dots inside the black area, not spilling onto the sheer base.
Editor's noteUse a striping tape edge for the French line, then remove it while the polish is still slightly tacky.
Watch outTrying to draw French freehand with dots right after usually smears the tip.
7. Teal Dot on Clear Glassy Jelly
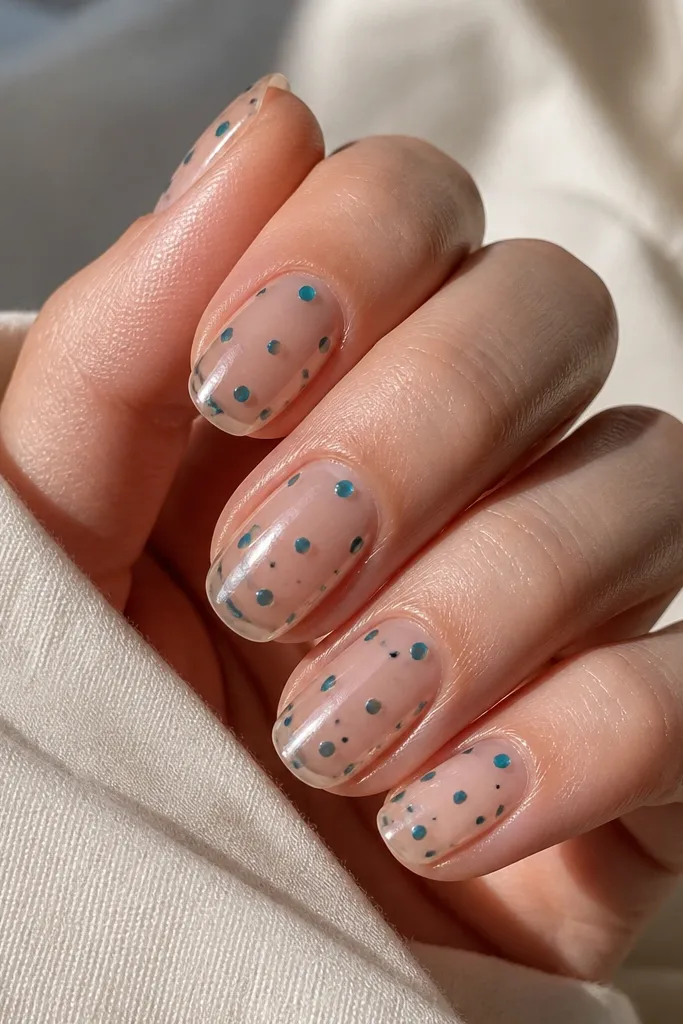
Clear jelly makes the dots look like they're under glass. Teal is bright without being neon, and it photographs really well because the light catches the jelly. This is one of those sets people ask about because it looks "expensive" even when it's simple.
Use a clear jelly gel base. Place teal dots at 1.2-1.8 mm, keeping them spaced so the clear parts show. Seal with a thick top coat to keep that glassy dome.
Editor's noteIf you're using regular polish, wait longer between coats so the jelly base doesn't stay tacky.
Watch outOverloading the dots makes the nail look bumpy under flash.
8. Gold Dot on Nude with Matte Top
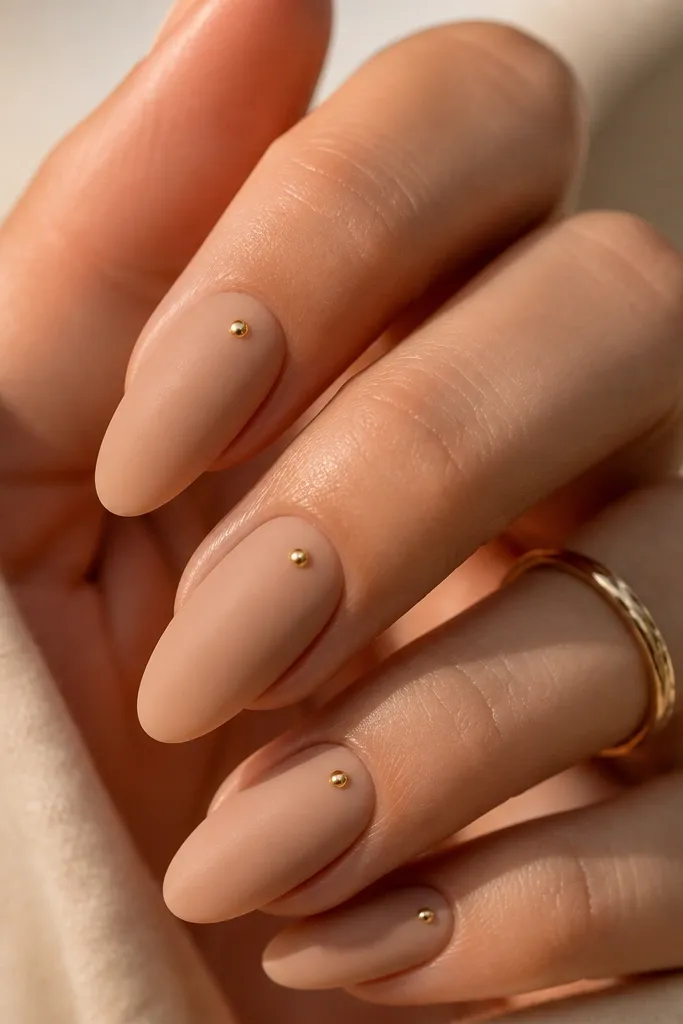
Gold dots on a nude matte base look like tiny jewelry pieces. The matte finish hides small imperfections, and the gold still catches light. Keep the dot placement near the cuticle so the design feels like it's framing your nail bed.
Apply a nude base and matte top coat. Add gold dots using a metallic gel or metallic polish at about 1.0-1.2 mm. Place 3-5 dots per nail, mainly around the cuticle corners.
Editor's noteUse a dotting tool with a clean metal tip so gold comes out opaque in one touch.
Watch outDon't use a glossy top coat over metallic dots if you want the jewelry look.
9. White Dot on Black Micro-Polka Base
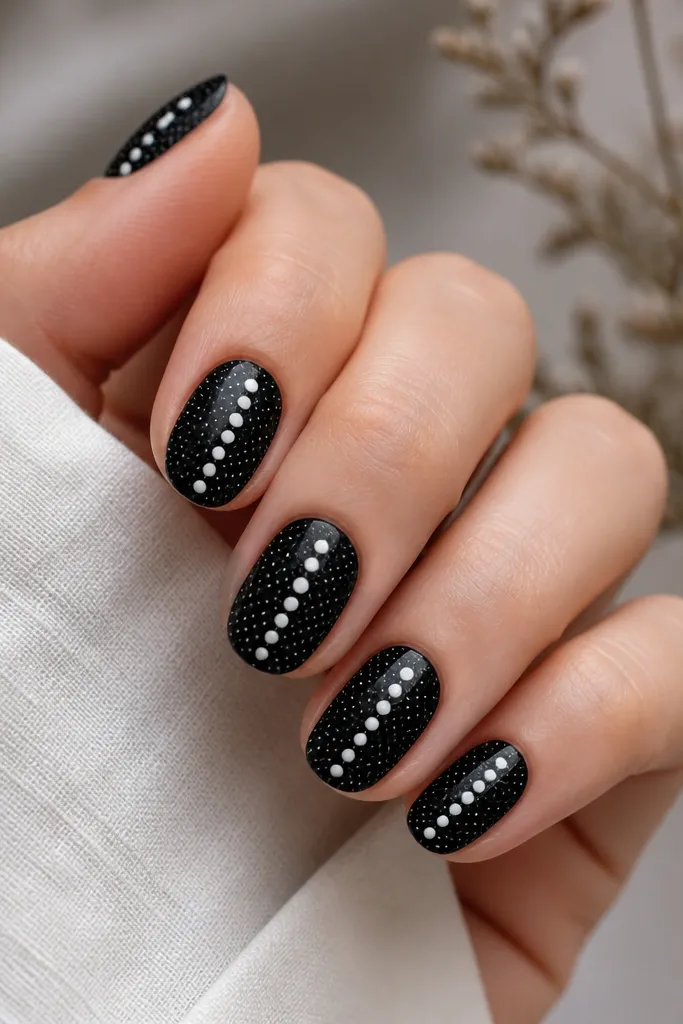
This one layers patterns: micro dots as the background, then bigger white dots as the focal point. The diagonal line pulls the eye and makes the nails look longer. It looks bold but still "polka dot coherent" because the color family stays black and white.
Start with a solid black base. Add tiny micro white dots all over (1.0 mm), then place larger 2.0-2.3 mm white dots diagonally. Finish with glossy top coat for a smooth, photo-ready surface.
Editor's noteLet the micro dots dry fully before you add the larger dots so they don't blur together.
Watch outDon't use watery white polish for the larger dots or they'll look gray.
10. Pink Dot on Clear Half-Glazed Tips
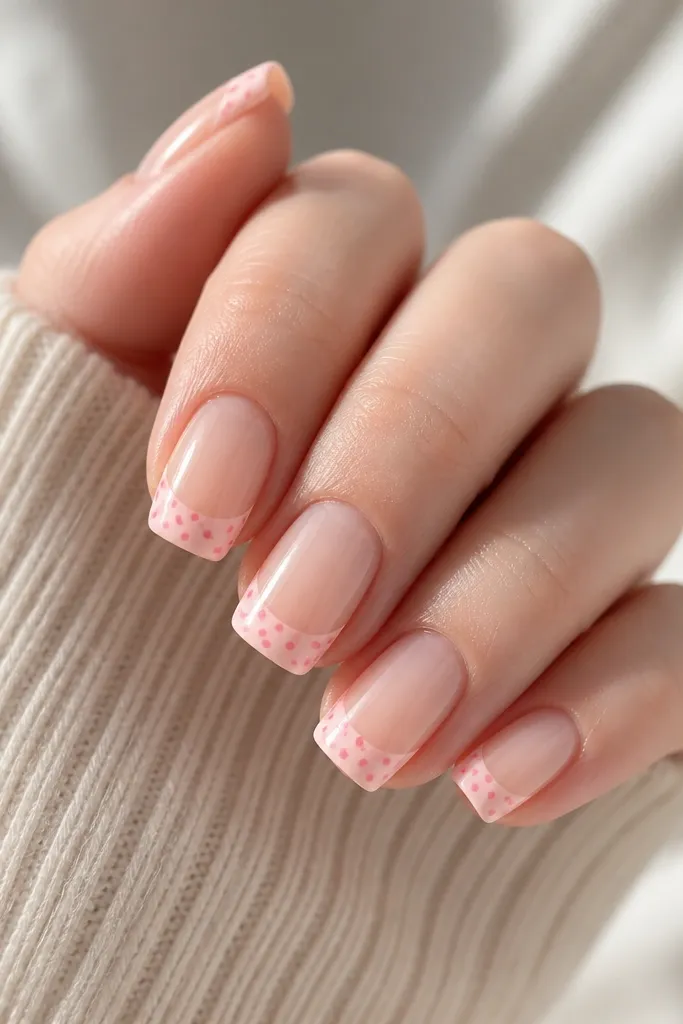
The half-glazed tip keeps the look light and airy, and it makes the dots feel like a design detail instead of full coverage. Pink-on-pink is subtle, so it reads more cute than loud. It's also easy to wear with casual outfits.
Use clear base. Paint milky pink glazed tips in the outer half of the nail. Add pink dots (slightly darker than the glaze) at 1.2-1.5 mm only within the glazed area. Seal with glossy top coat.
Editor's noteIf the dots blend into the glaze, switch to a slightly darker pink for the dot color.
Watch outDon't put dots on the clear part or the pattern looks unfinished.
11. Navy Dot on Soft Cream Base
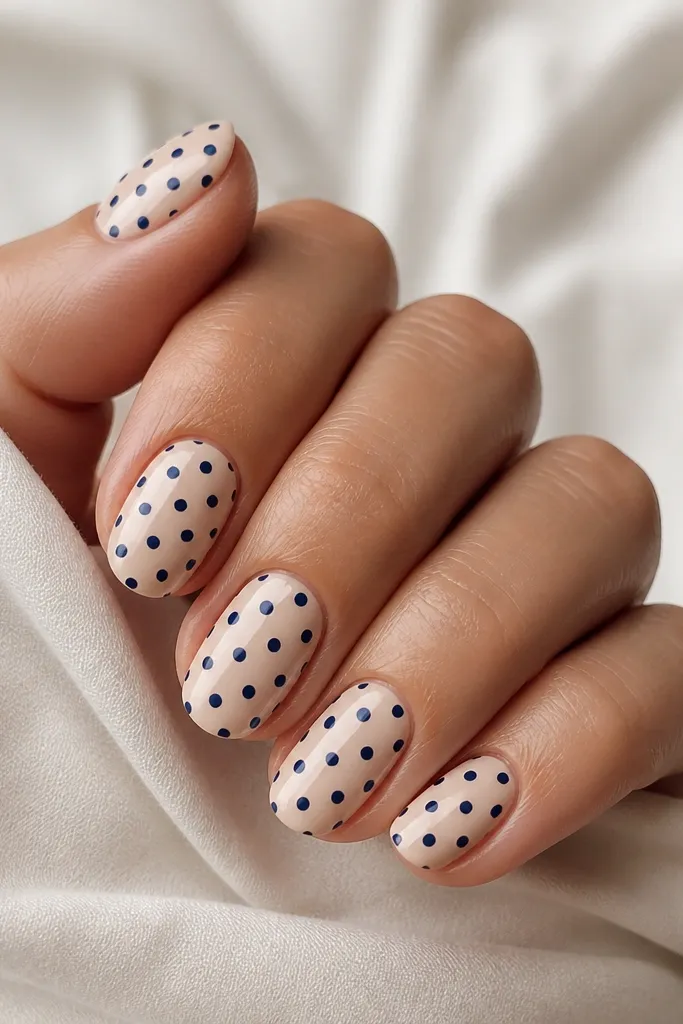
Navy dots look sharper than black but still classy. A cream base warms everything up, so the set feels cozy rather than school-uniform. The grid-like spacing makes the dots look deliberate.
Apply a cream nude polish or gel in two thin layers. Place navy dots at 1.6-2.0 mm in 3-4 columns depending on nail width. Keep the pattern centered and leave small gaps near the cuticle.
Editor's noteMark dot spots lightly with a dotting tool dipped once, then fully fill after you're happy with the layout.
Watch outAvoid random dot spacing if you want the clean grid look.
12. Baby Blue Dot on Milky White
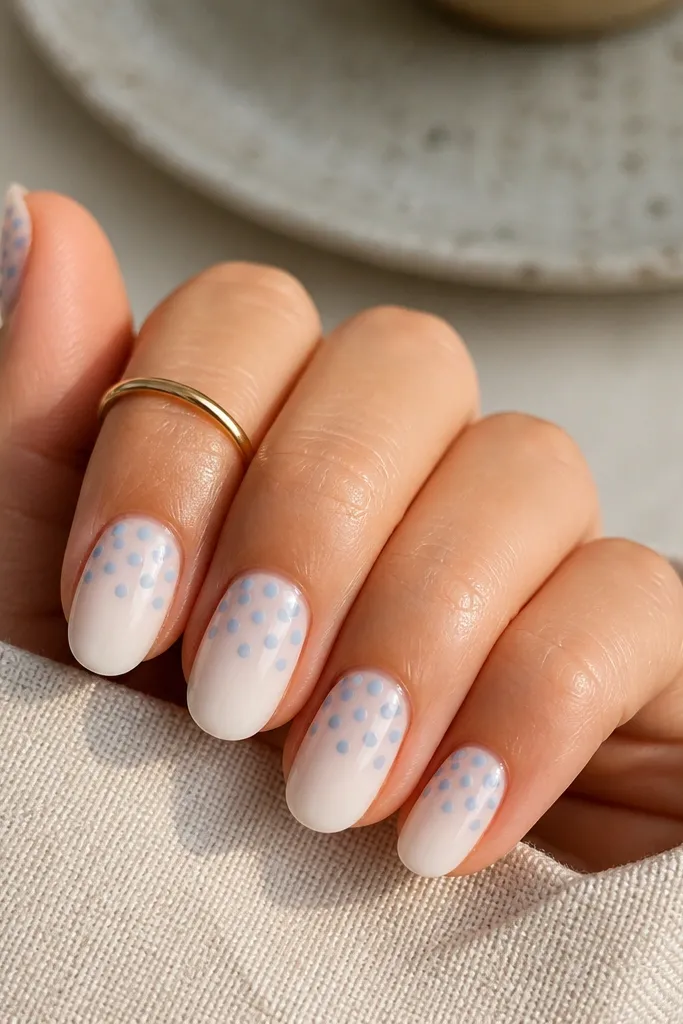
Milky white makes baby blue look airy and sweet. Keeping dots on the upper half gives a "lifted" look and prevents the set from feeling heavy. This is the kind of polka dot placement that looks great even when nails are a bit shorter.
Paint milky white opaque in two coats. Add baby blue dots at 1.0-1.3 mm from near the cuticle down to the middle. Leave the lower third mostly blank, then top coat glossy.
Editor's noteUse a smaller dot head for the upper half so the dots don't crowd.
Watch outDon't cover the entire nail if your dots are small - it turns busy fast.
13. Magenta Dot on Clear Pink Jelly
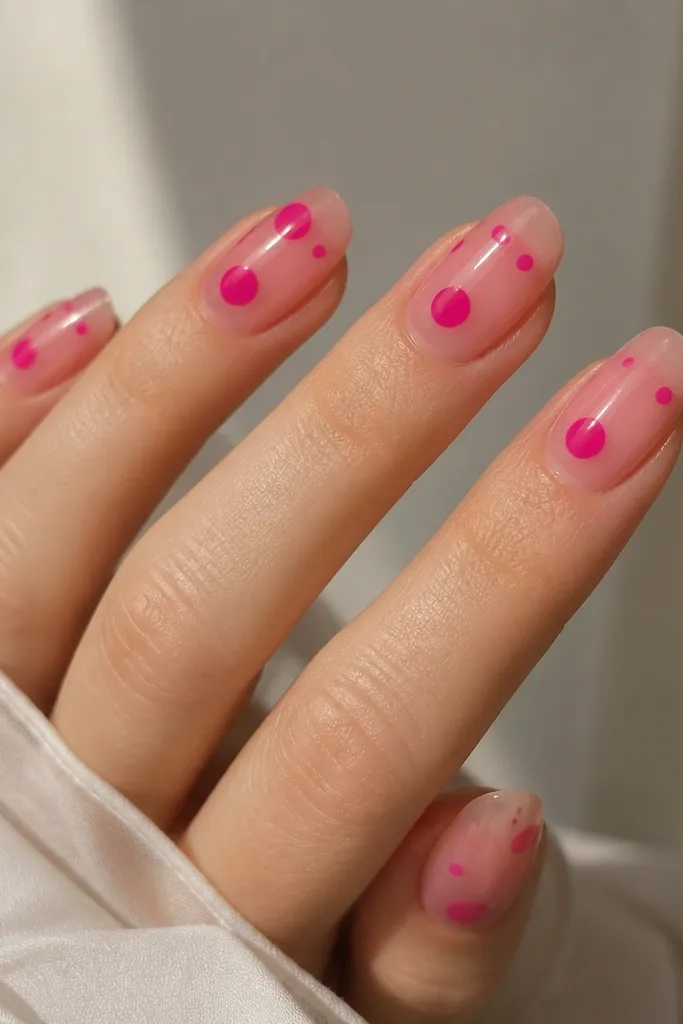
This is bold and cute: magenta pops against the translucent pink jelly. The clear base makes the dots feel suspended, not painted on top of thick color. I like adding one centered dot so every nail has a consistent anchor point.
Use clear pink jelly gel as your base. Place magenta dots at 1.3-1.8 mm, then add one centered dot slightly larger on each nail. Top coat thick to keep everything glassy.
Editor's noteCure each dot layer if you're using gel so the placement stays fixed.
Watch outDon't skip top coat thickness - jelly bases show texture more easily.
14. Glitter Outline Dots on Rose Quartz
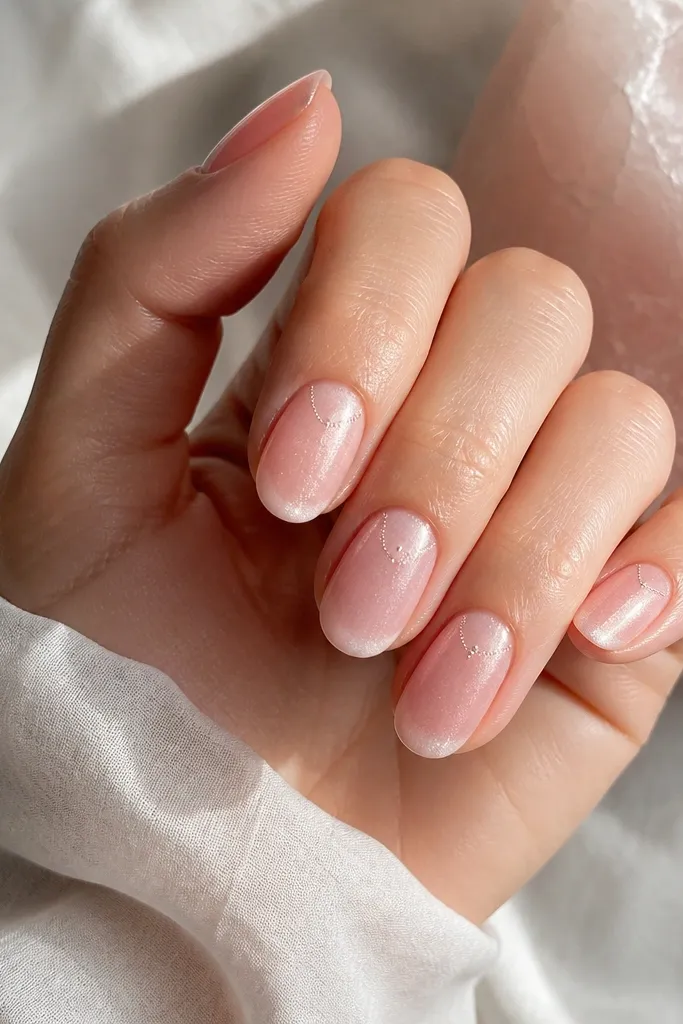
The halo effect makes the polka dots look raised and jeweled. Rose quartz shimmer underneath gives depth, so the glitter outlines don't look flat. This is the set that looks best in direct light because the outlines sparkle around each dot.
Paint rose quartz pink with a fine shimmer. Dot with a matte or semi-matte pink/white, then use fine glitter polish or gel to trace around each dot edge. Keep dots medium at 1.5-2.0 mm so the halo is visible.
Editor's noteTrace the halo with a thin brush and wipe the brush edge on the side of the bottle first.
Watch outDon't make the halo too thick or it turns into blobs instead of dot outlines.
15. Black Polka Dots with Nude Negative Space Half Patterns
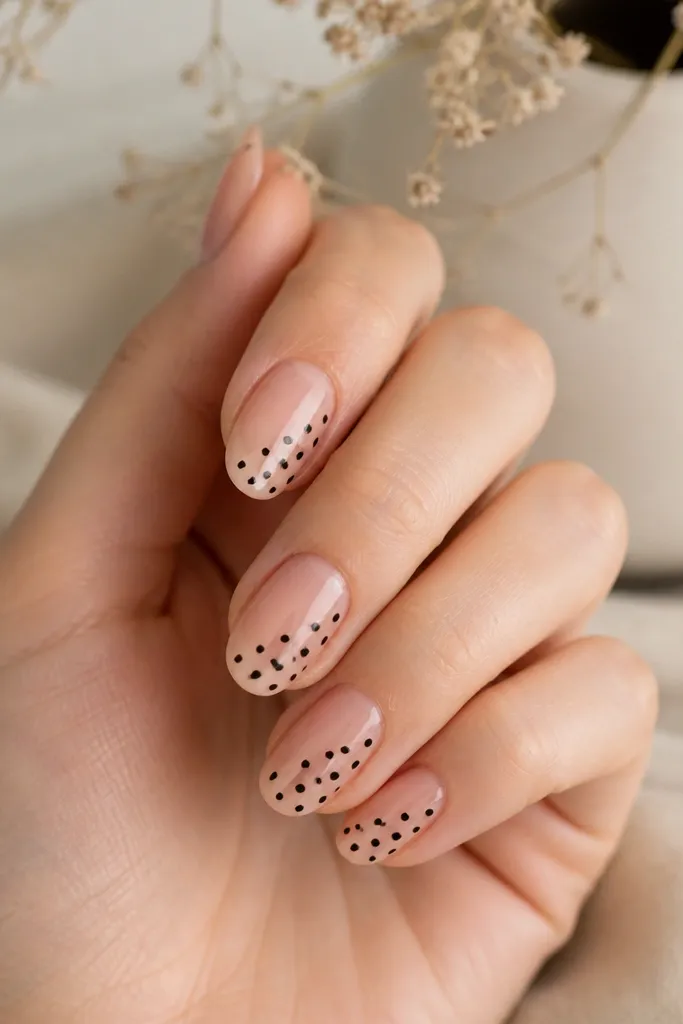
Negative space makes this look designer and less "kid craft." The diagonal panel adds motion, and the black dots keep it graphic. It's also forgiving if your nail shape varies, because the nude side hides minor placement differences.
Paint nude base. Use striping tape to mask a diagonal section, then fill that section with black dots at 1.2-1.6 mm. Remove tape carefully while polish is tacky. Glossy top coat over everything.
Editor's notePress tape down firmly at the edges so the diagonal line stays razor clean.
Watch outDon't use too much dot coverage - the panel should feel airy.
16. Sage Green Dot on Sheer Nude with Satin Top
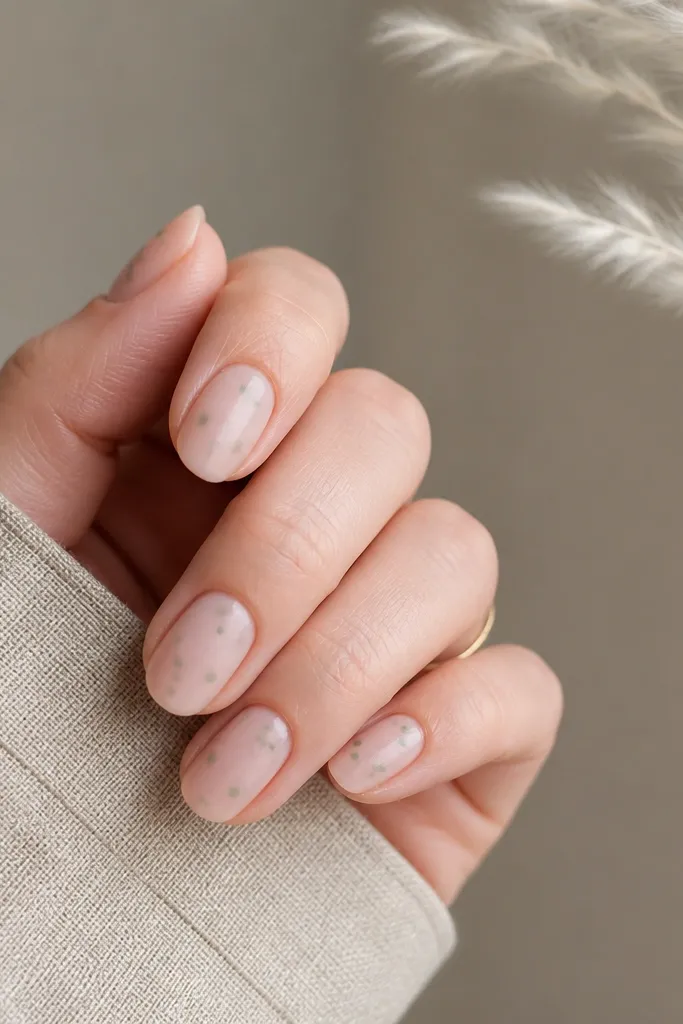
Sage green reads calm and pretty, and the satin top keeps it from looking glossy and sticky. Small scattered dots feel like an outfit accessory rather than loud nail art. This set is perfect for spring and it works with gold jewelry.
Start with sheer nude. Apply satin top coat so the base looks velvety. Add sage dots at 1.0-1.2 mm in a light scatter - 6-10 dots per nail depending on length. Seal lightly with satin-compatible top coat.
Editor's noteSatin finishes show streaks, so apply top coat in one steady direction and cap the free edge.
Watch outDon't put matte dots over glossy base - it looks mismatched.
17. White Dot on French Pink Gel with Thin Black Edge
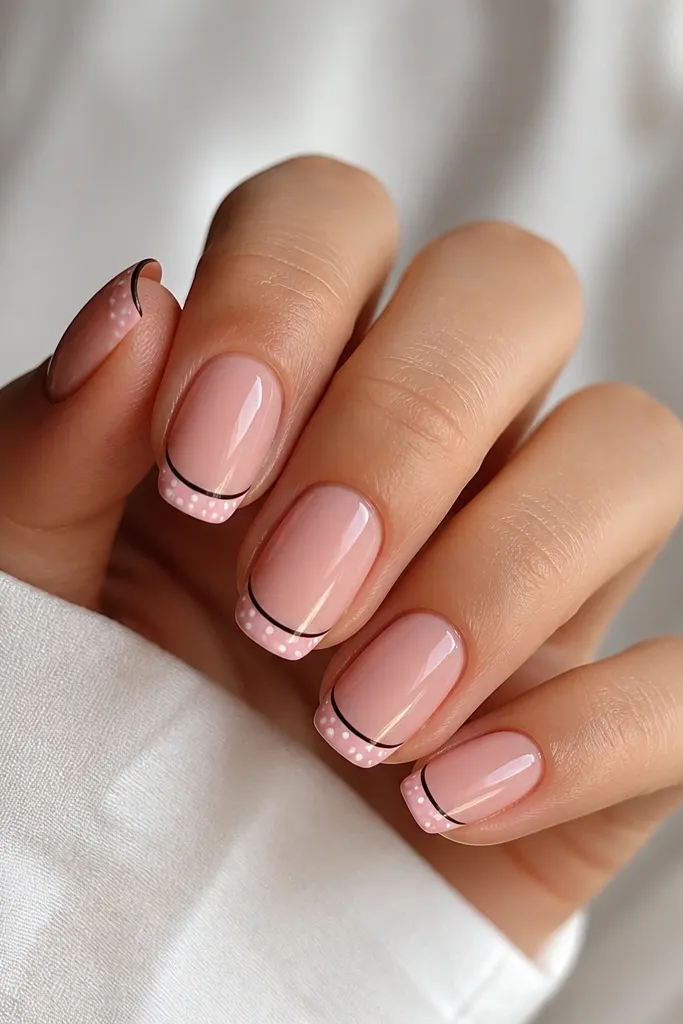
That thin black edge gives the French tip structure, and the white dots add the polka dot charm. It looks crisp and intentional, like a nail salon set. The black line also makes your tips look sharper on camera.
Paint sheer pink base, then do French tips in soft pink. Add a thin black line right at the tip edge, then place white dots at 1.2-1.5 mm centered over the French area. Top coat glossy.
Editor's noteUse a liner brush and wipe it on paper towel so the black line stays thin.
Watch outAvoid thick black lines or they overpower the dots.
18. Lavender Purple Dot with Tiny Heart Accent
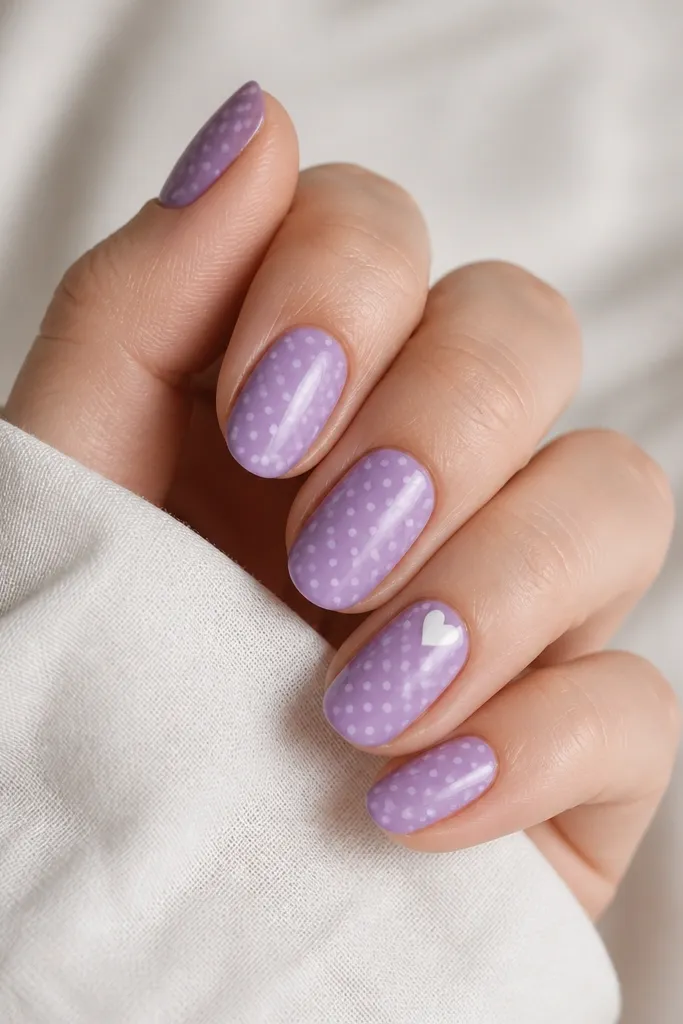
Polka dots with a heart feels sweet without going full cartoon. Using two close lavender shades makes it soft and cohesive. The heart near the cuticle is small, so it reads as detail rather than a sticker.
Base in medium lavender. Dot with a slightly lighter lavender at 1.1-1.3 mm across the nail. On one nail, add a tiny white heart (about 1.5 mm wide) near the cuticle corner. Glossy top coat.
Editor's noteKeep the heart off the center line so it looks like a natural accent.
Watch outDon't make the heart too big or it competes with the dots.
19. Gold Polka Dots on Champagne Nude with Glossy Dome
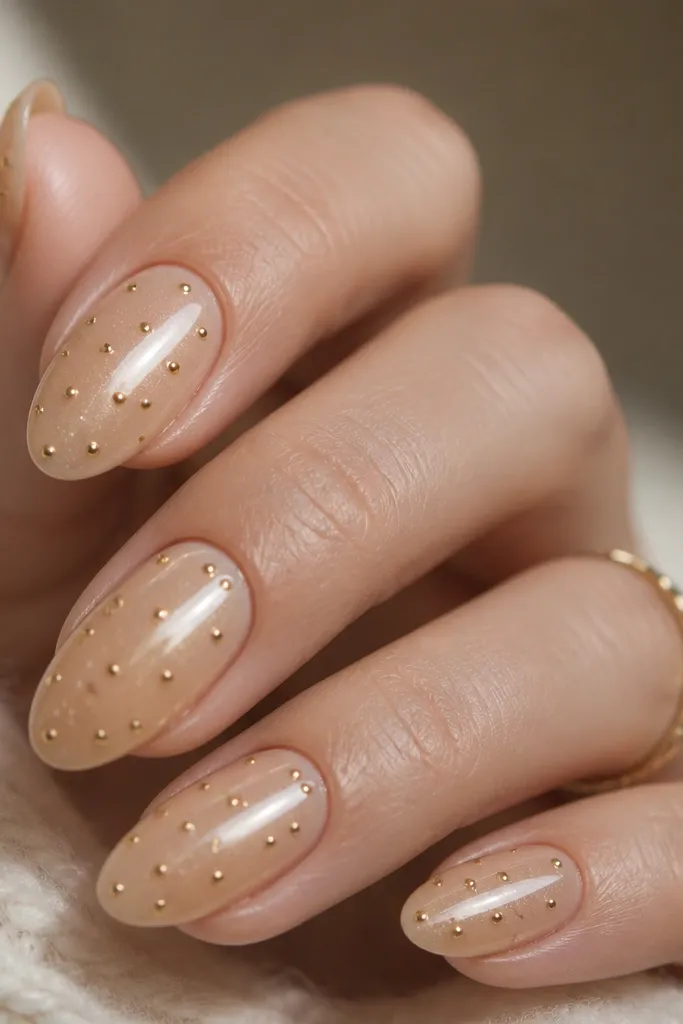
Gold dots on champagne nude look like tiny coins. The glossy dome finish makes the light roll across the nail, which makes the dots sparkle without needing extra glitter. Even spacing keeps it from looking messy.
Use champagne nude gel and build a smooth dome so the surface is curved. Add gold dots at 1.8-2.2 mm, 5-7 dots per nail depending on length. Cure fully, then top coat glossy again if needed for a glass finish.
Editor's noteIf gold looks patchy, do a second pass on each dot rather than loading one dot heavily.
Watch outAvoid watery gold polish; it dries textured and dull.
20. Black Dots with Clear Cuticle Frame
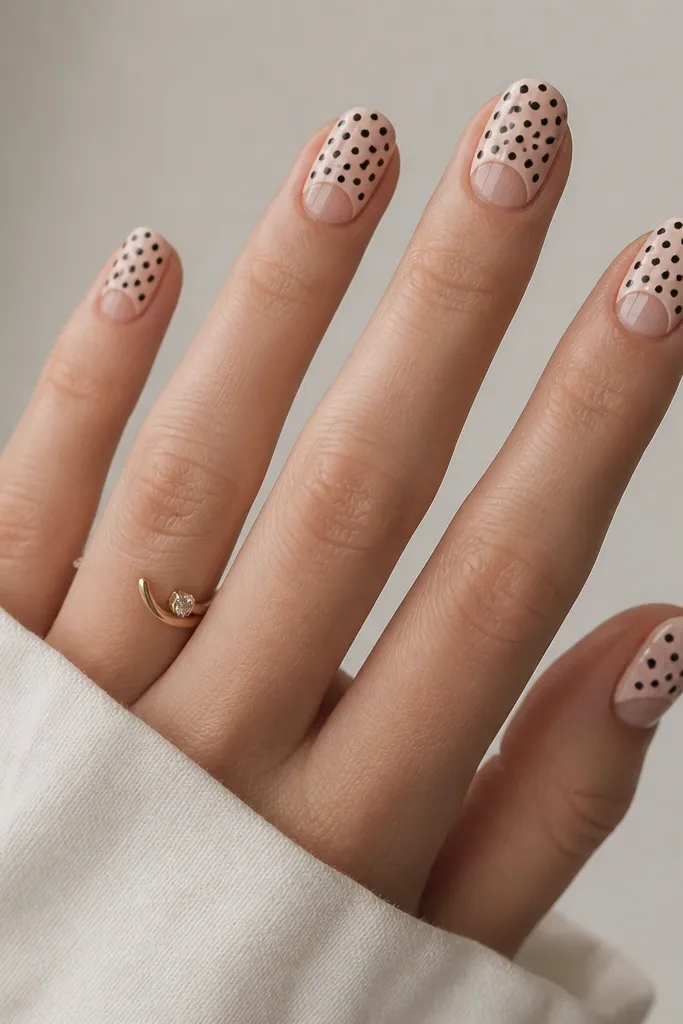
A clear cuticle frame makes the dots look framed like a photo. It also gives you a clean boundary, which makes the whole set look more expensive. The nude and black combo is the fastest way to get that "sabrina carpenter nails aesthetic" crispness.
Paint nude everywhere except a half-moon around the cuticle using a clear gel or leaving the nail natural. Add black dots at 1.2-1.6 mm across the dotted area. Top coat glossy, but keep the cuticle frame sealed.
Editor's noteUse a small brush to clean the cuticle frame edge before curing.
Watch outDon't let dots creep into the clear frame or the boundary disappears.
21. Coral Dot on Sheer Peach with Shiny Top
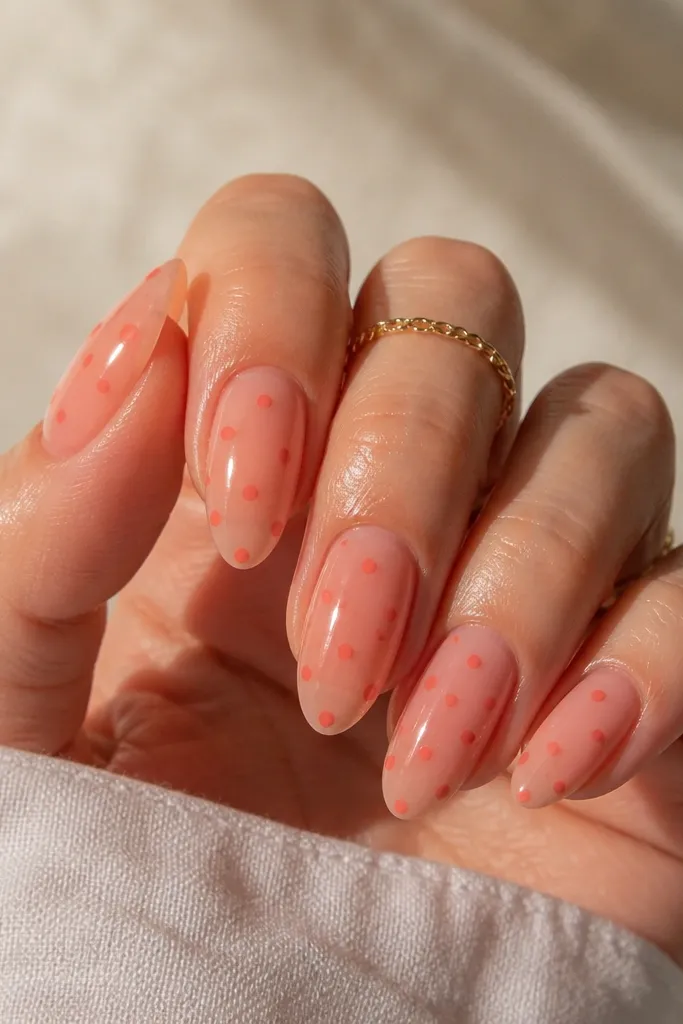
Coral on sheer peach is warm and flattering. The sidewall dot cluster makes the nail look longer because it pulls the eye diagonally. This set reads cute in everyday lighting and still looks good in photos.
Use sheer peach base, then place coral dots at 1.0-1.3 mm. Keep most dots in the center, and add 2-3 dots near one sidewall. Seal with a shiny top coat.
Editor's noteIf your dots look too bright, mix coral with a tiny drop of clear gel for a softer tone.
Watch outDon't scatter too many tiny dots - it turns into speckling.
22. Two-Tone Dots with Checker Accent Nail
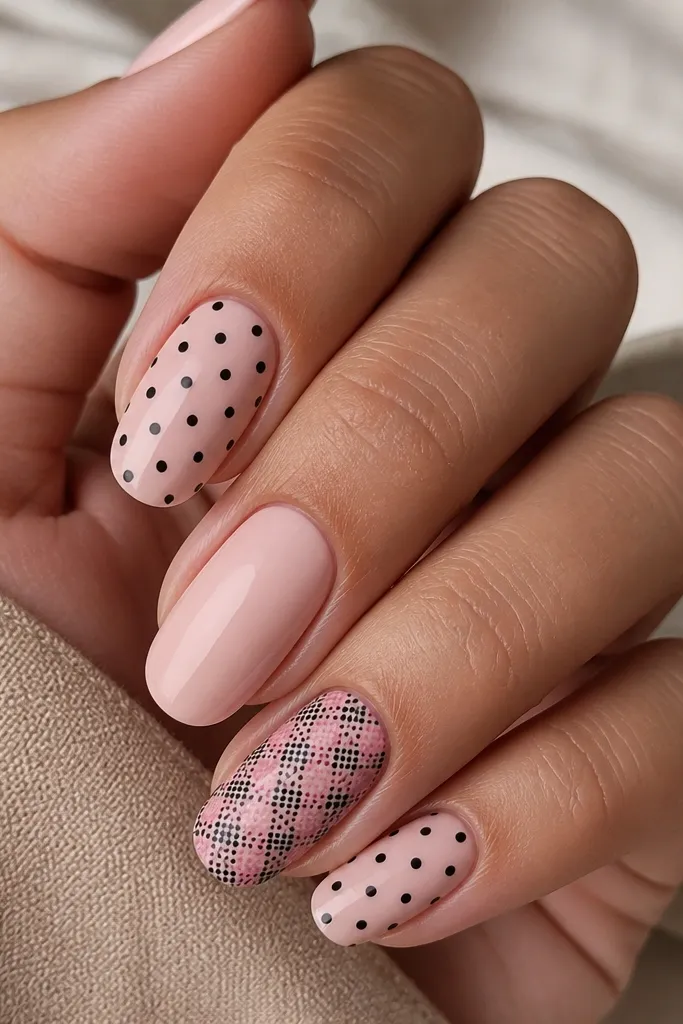
This set is fun because it repeats the same two colors but changes the pattern on one nail. The checker accent makes it feel intentional, not random. It also gives you variety without changing your base color every time.
Paint pale pink on all nails and add black dots at 1.2-1.5 mm. On one accent nail, create a checker grid using alternating dot colors (pink and black dots) with the same dot size. Glossy top coat to smooth everything.
Editor's noteDraw a simple grid with a dotting tool lightly, then fill squares one at a time.
Watch outDon't mix dot sizes between nails or the checker looks off.
23. Nude Marble Base with Black Polka Overlay
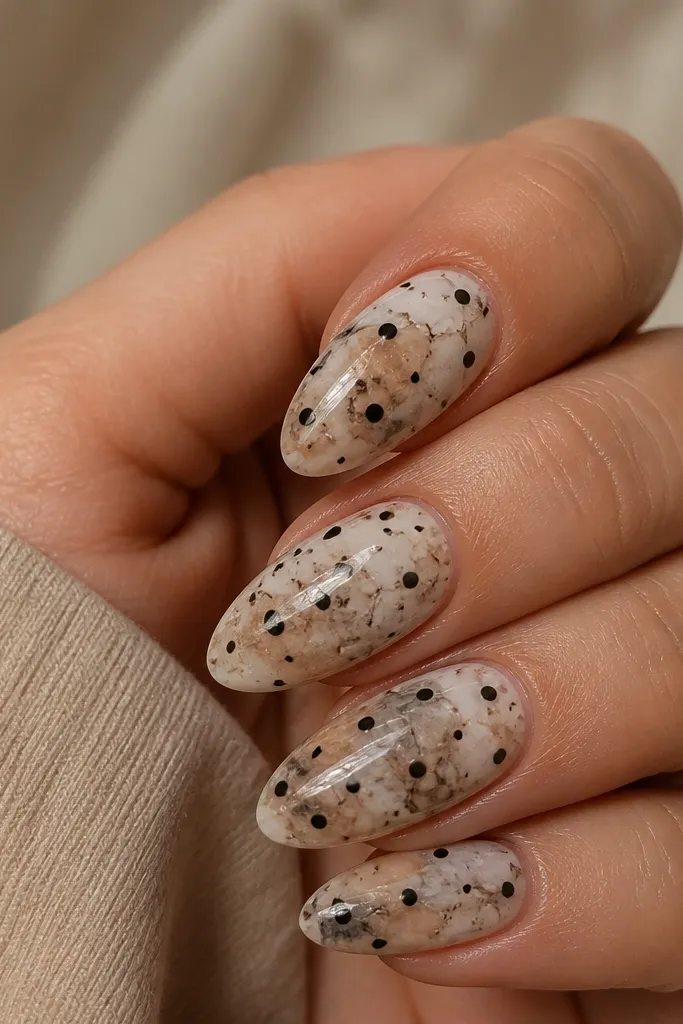
Marble gives texture, and black polka dots give structure. The dots sit on top of the swirls so the set looks layered and styled. Keep the dots centered so the marble doesn't make it feel busy.
Create a nude marble using beige and white swirl lines, then blend with a clear-ish layer so it stays soft. Add black dots at 1.8-2.2 mm centered, 3-4 dots per nail. Top coat glossy to unify the surface.
Editor's noteMarble looks best with thin swipes, not thick paint lines.
Watch outDon't place dots randomly across marble or it turns chaotic.
24. Blue Dot on Clear Base with Silver Side Line
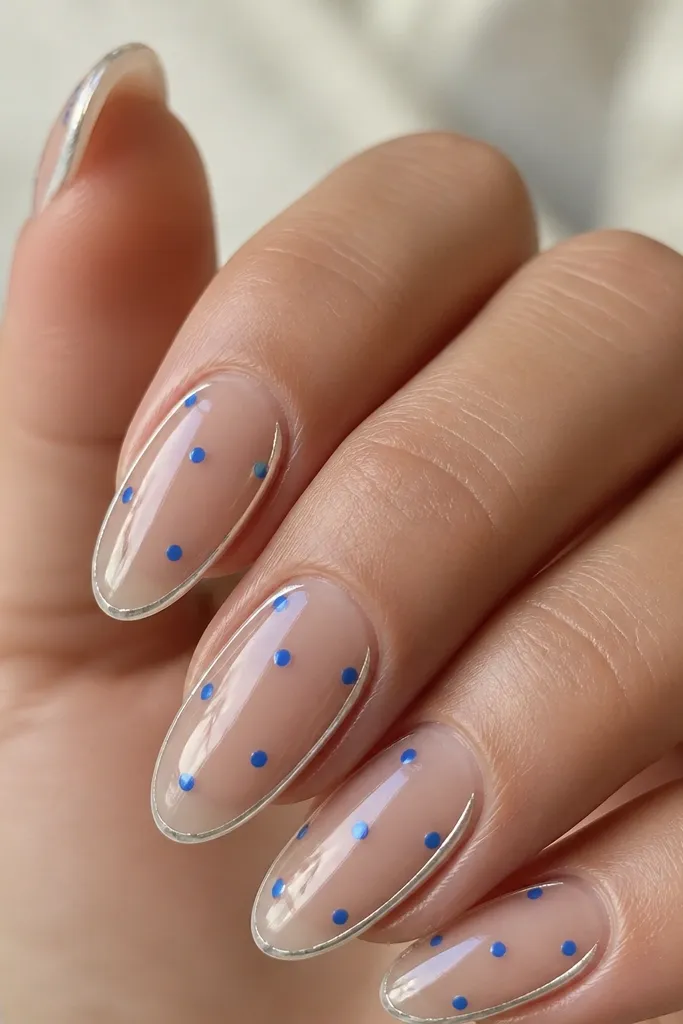
The silver side line gives a clean "fashion" reference point, and the blue dots add the polka dot fun. Clear base keeps it light, so the silver doesn't look heavy. This is a set that looks extra good with silver rings and cool-toned outfits.
Use clear base. Paint a thin silver line along one side at about 1-2 mm from the sidewall. Place blue dots at 1.2-1.6 mm across the center and toward the opposite side. Glossy top coat for a smooth finish.
Editor's noteLet the silver line fully set before dotting so the dot edges don't smear the metal.
Watch outAvoid thick silver striping; it will overpower the dots.
25. Burgundy Dot on Nude with Matte-Dot Finish
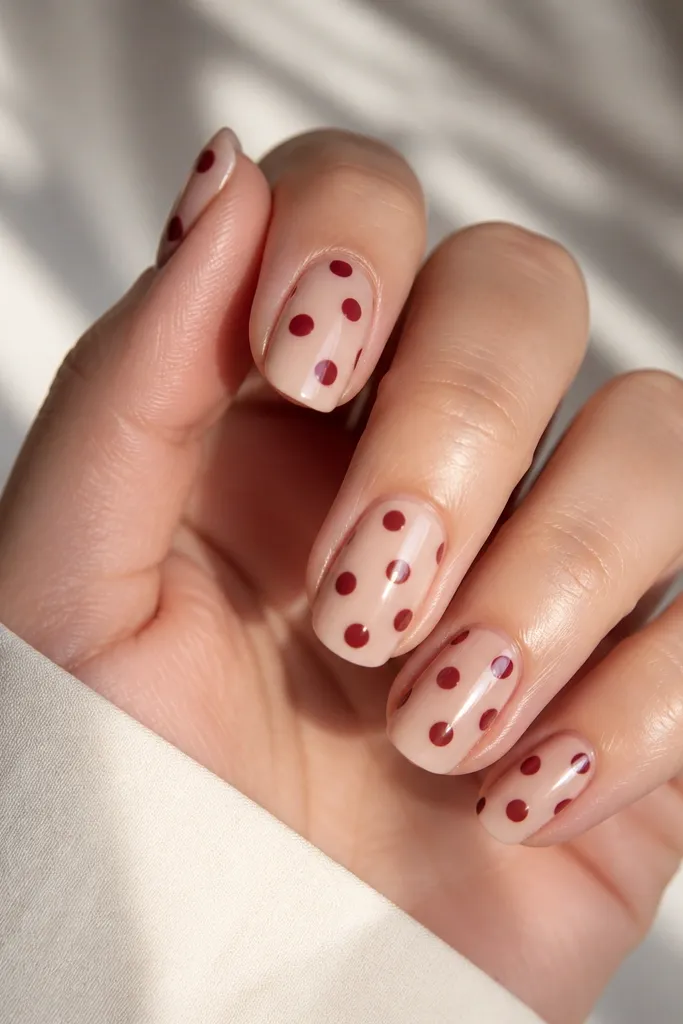
This is my favorite evening version because the dots look velvety. Glossy nude reflects light, while matte burgundy absorbs it, so the dots stand out without needing extra size. It looks very "done" even with fewer dots.
Paint glossy nude base. Add burgundy dots at 1.5-2.0 mm, then either use matte top coat only over the dots or use matte-finish burgundy polish for the dots. Keep dot count moderate - 4-6 per nail.
Editor's noteUse a small piece of tape to mask the base if you're top-coating only the dots.
Watch outDon't matte the whole nail if you want the contrast effect.