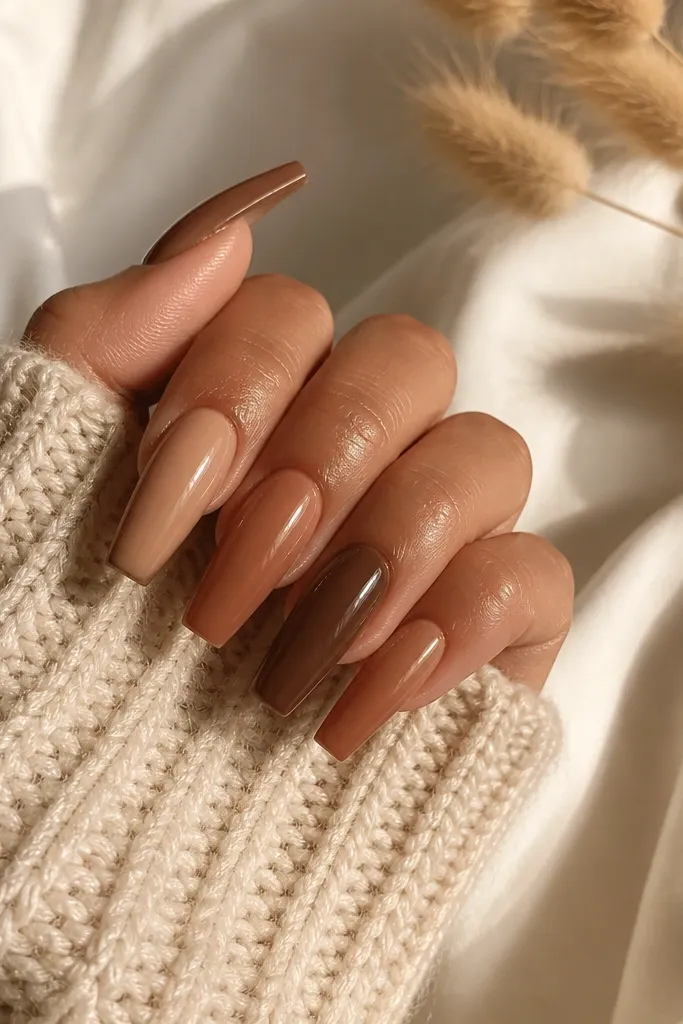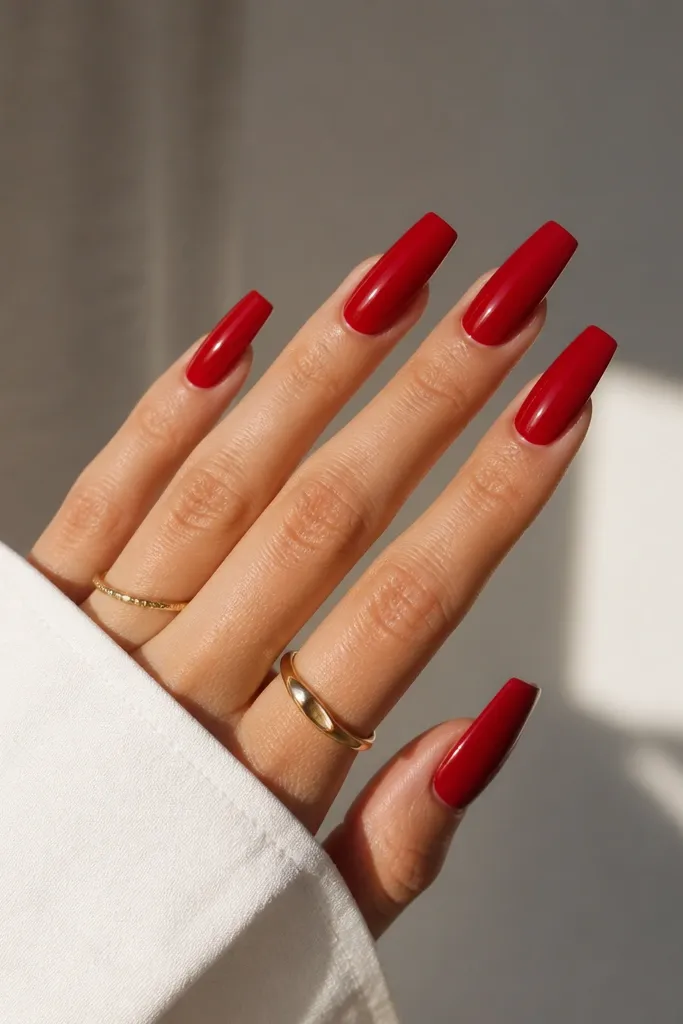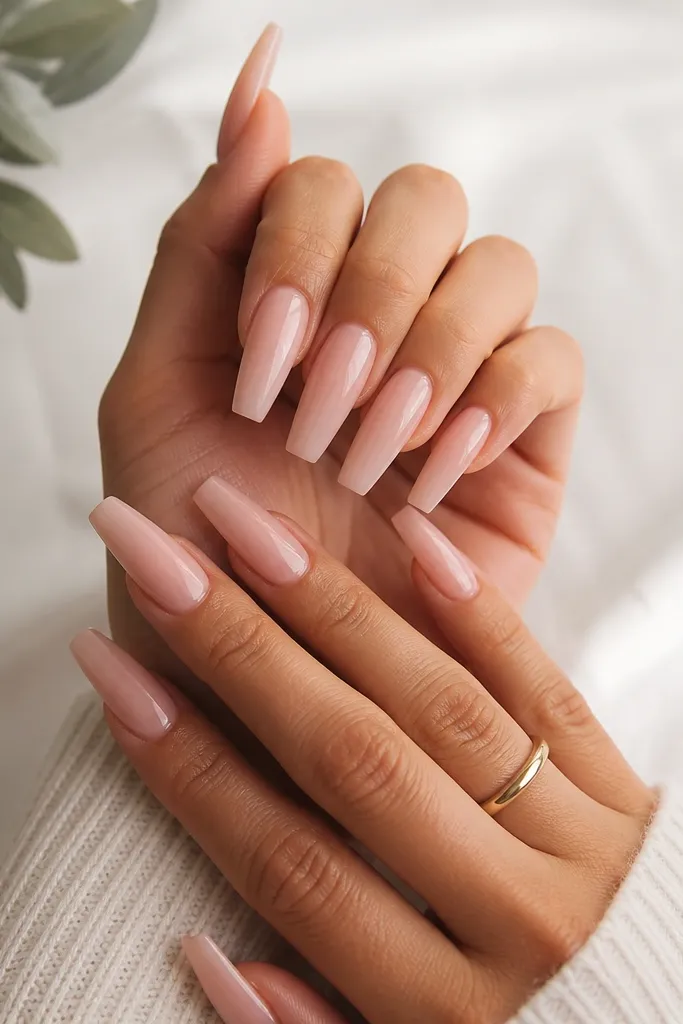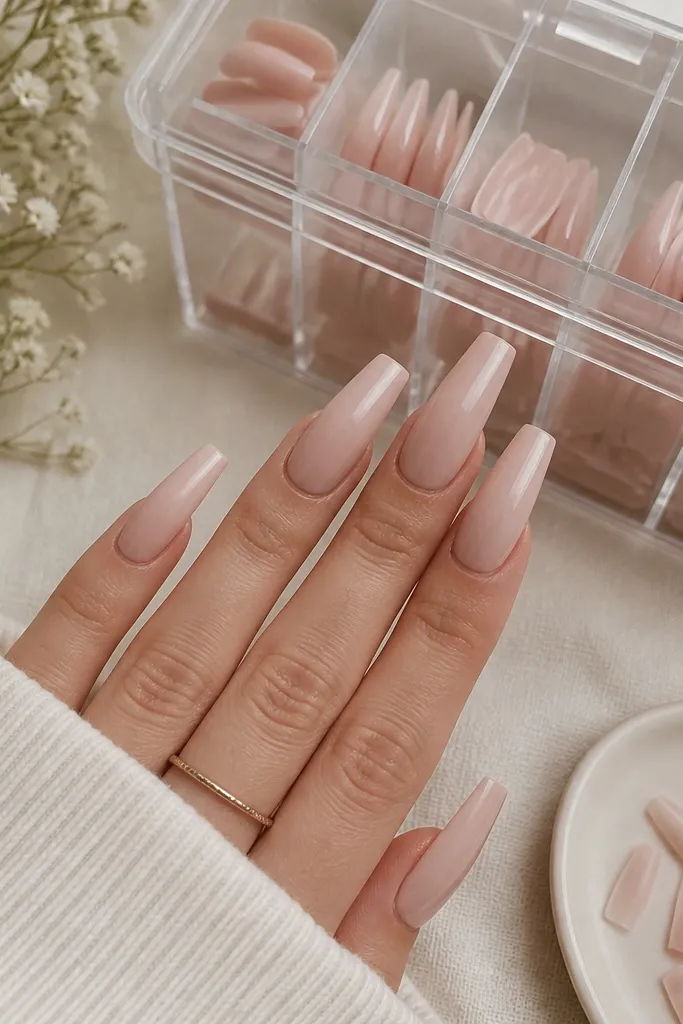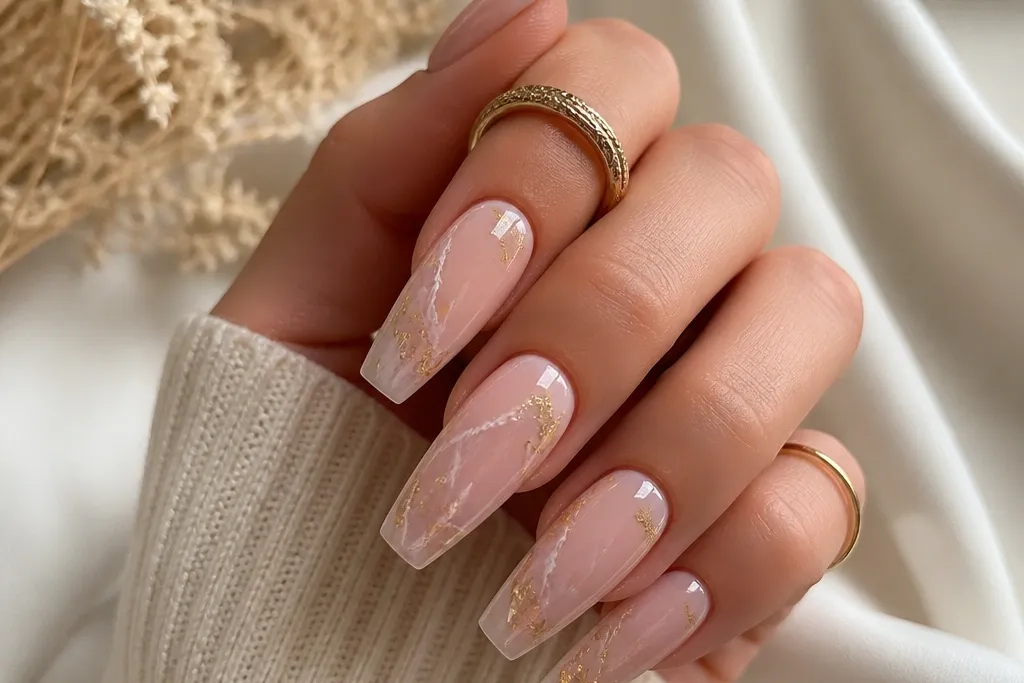
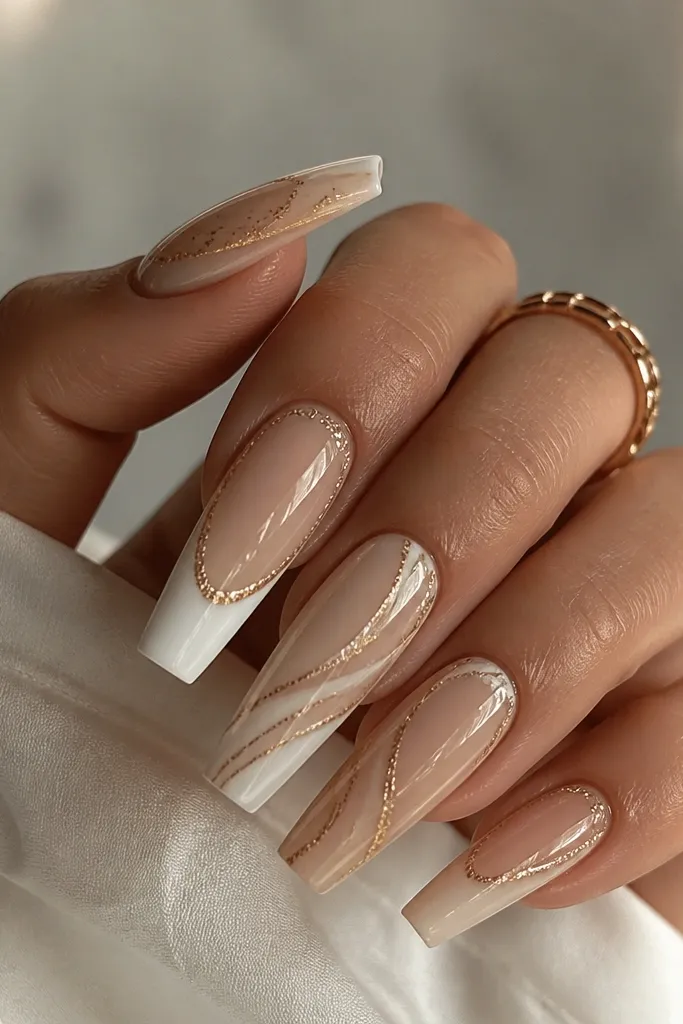
1. Classic sheer nude base with razor white French smile
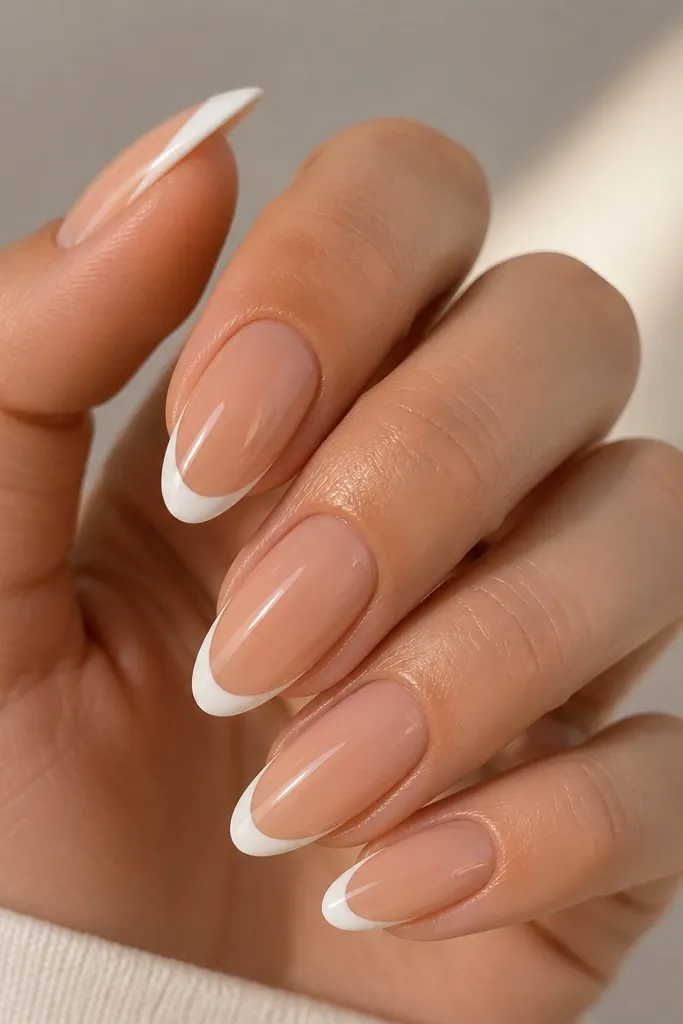
This is the cleanest "expensive" French tip combo because the sheer nude shows nail-bed depth while the white stays crisp. The trick is keeping the white tip thin so it looks like painted French, not a thick cap. Gloss makes the nude look healthy and the white look freshly done. It reads high-end even in plain daylight.
Apply a sheer pink/nude acrylic or sheer builder gel, then sculpt the coffin tip so the free edge is 6-8 mm. For the French, aim for a 2 mm tip width and keep the smile line slightly above center of the nail. Cure, file the edges smooth, then top coat to glassy shine.
Editor's noteUse a French guide strip for the first two nails, then freehand the rest with the same smile height. Keep the white tip opacity solid by doing one dense layer, not multiple thin ones.
Watch outAvoid a thick, rounded French edge - it makes the set look bulky and inexpensive.
2. Milky white French tips on a warm beige nude base
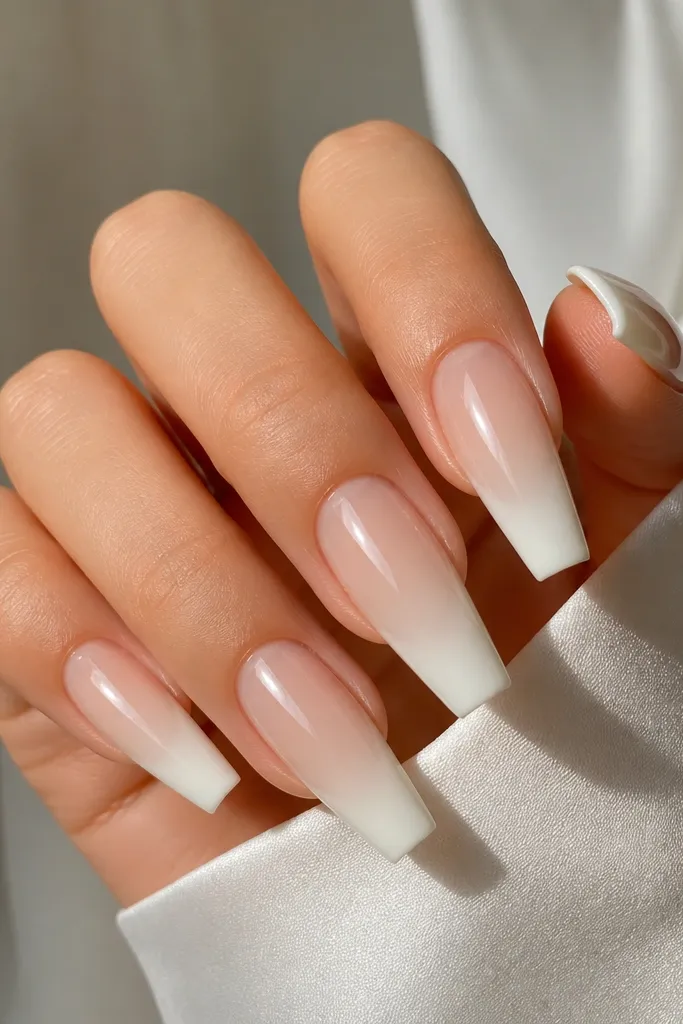
Milky white reads softer than pure bright white, so it looks expensive on people with warmer skin tones. The warm beige underlayer keeps everything cohesive instead of stark. This combo also photographs beautifully because the white has a subtle depth. It's a "clean but not sterile" look.
Build a warm beige nude base with a sheer pink-beige acrylic. Keep the French tip milky white and cover it evenly without streakiness. File the smile line smooth and finish with a high-shine gel top coat.
Editor's noteIf your white looks too stark, mix a tiny amount of milky white gel with your white liner before applying.
Watch outSkip chalky white that dries matte or patchy.
3. French tip + nude ombre coffin with micro white arc
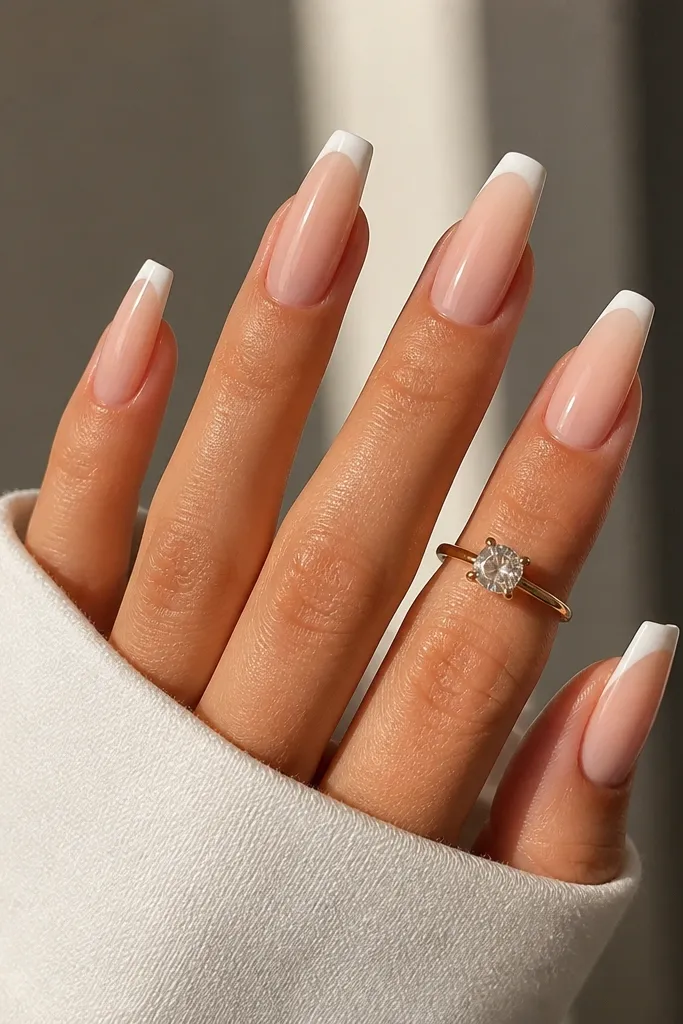
The nude ombre makes the nail look longer and more natural, while the micro arc adds a designer-level detail. The arc sits right at the top of the French, so it catches light like a thin highlight. This is one of my favorite ways to make French tips look custom without adding rhinestones.
Start with a sheer nude base and blend a nude ombre down from mid-nail using a sponge or brush technique with gel. Paint a French tip in white, then add a thin second line just along the smile edge using a liner brush. Seal with top coat.
Editor's noteKeep the micro arc line under 0.5 mm wide so it looks like a highlight, not a second smile.
Watch outDon't add the arc all the way down the sidewalls - it gets messy fast.
4. Black French tips on sheer pink coffin with glassy shine
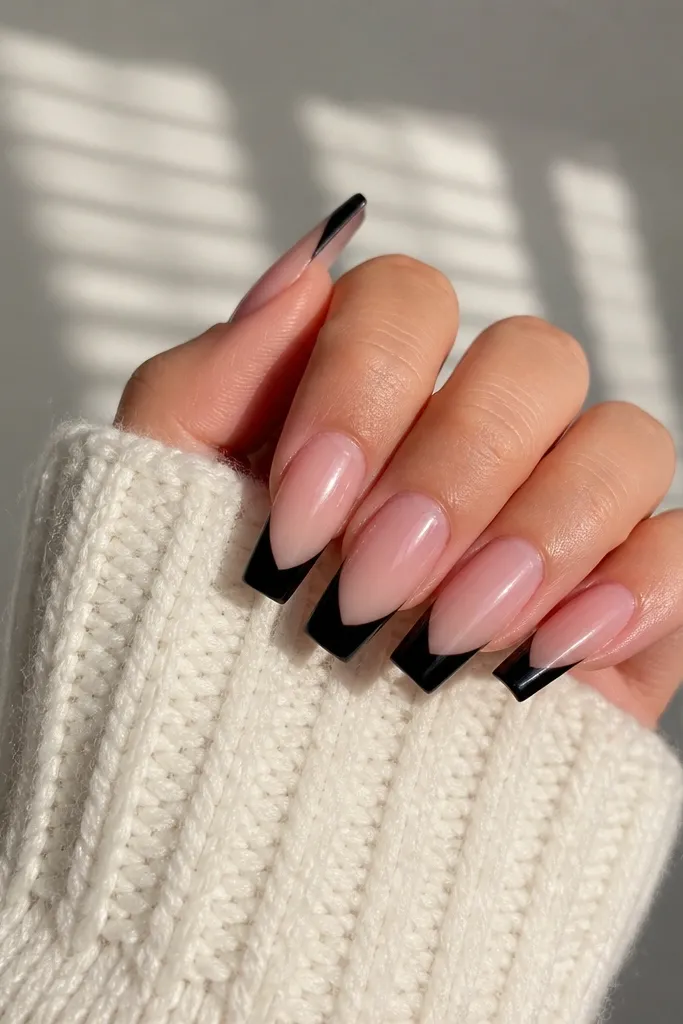
Black French tips make coffin nails look instantly sharper and more expensive because the contrast is controlled. On a sheer pink base, black looks luxe instead of harsh. The glossy finish makes the black look like lacquer. This is a great "going out" French that still looks refined.
Build a sheer pink base, then use a gel black liner or black acrylic that cures smooth. Keep the French tip width around 2 mm and file a crisp smile. Top coat until it's fully mirror-smooth.
Editor's noteWipe your brush with gel cleanser between nails so the black stays opaque and doesn't drag.
Watch outAvoid gray-ish black or streaks - it makes the set look unfinished.
5. Reverse French (nude tip) with white smile inside
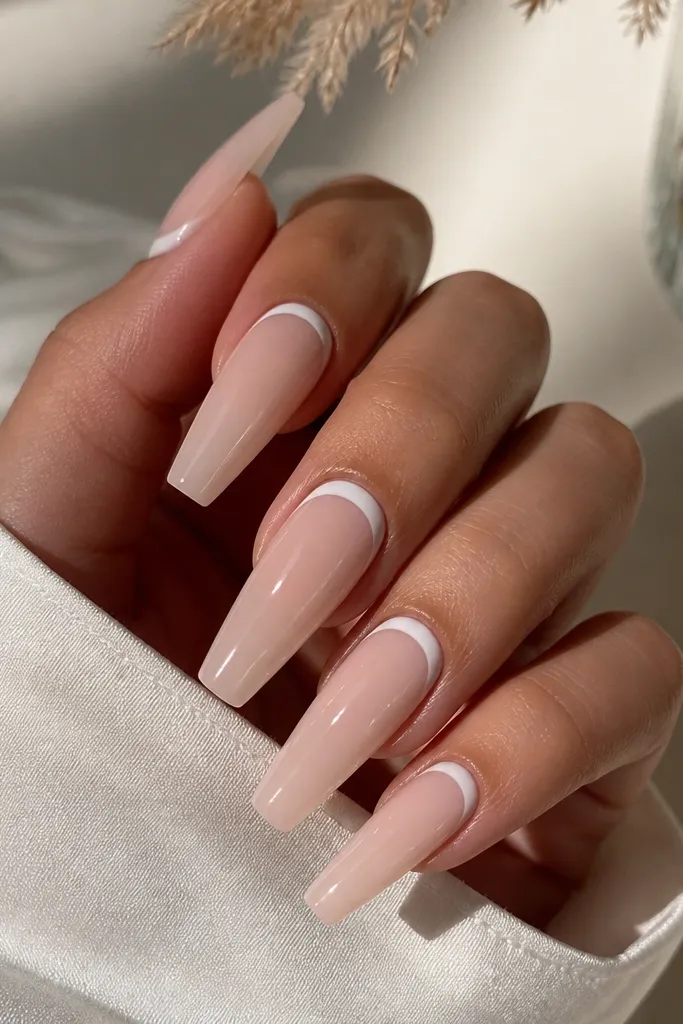
Reverse French flips the placement so the focus sits nearer the cuticle, which makes hands look extra polished. A clean white inside arc gives that "designer manicure" vibe without needing gems. The coffin shape helps the arc look intentional rather than random.
Apply a sheer nude base first. Then paint a thin white arc along the inner curve near the cuticle, staying about 1-2 mm from the skin. Seal edges well with top coat so it doesn't lift at the cuticle line.
Editor's noteUse the cuticle as your guide - keep the arc parallel so it looks balanced on every nail.
Watch outDon't paint over the skin; a messy cuticle edge reads cheap immediately.
6. Thin French tips with silver chrome line at the smile
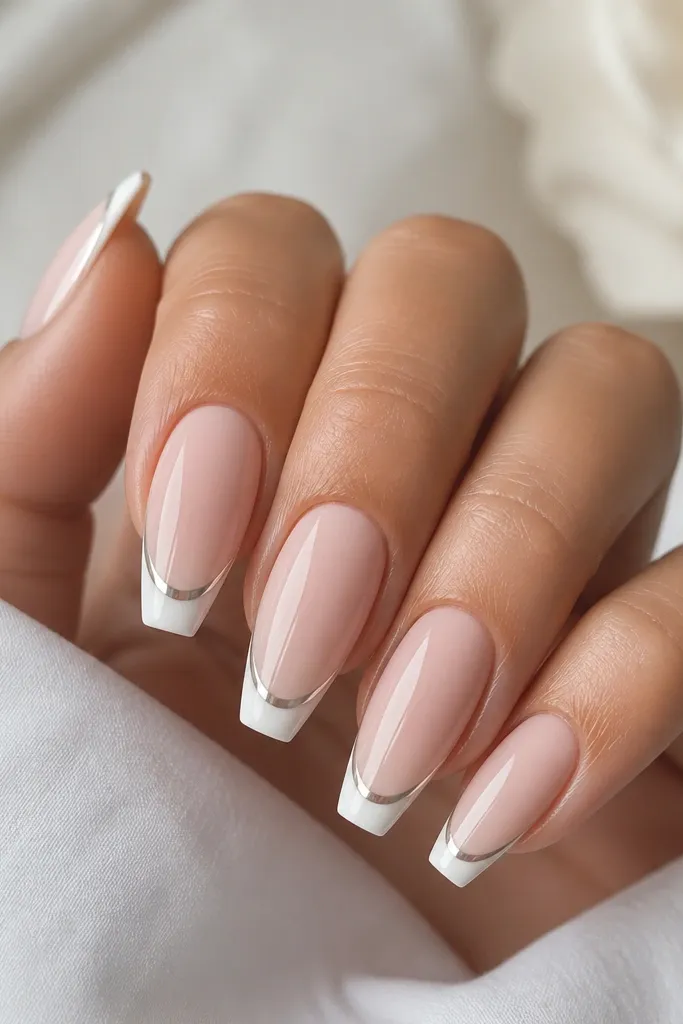
The chrome line is the "expensive finish" because it adds a reflective edge without stacking decorations. Keeping the French tip thin prevents the chrome from looking heavy. The chrome strip catches light in motion, especially in indoor lighting. It looks like jewelry for your nails.
Do your base and French first, then apply a strip of chrome powder on the smile line only. I press a thin gel strip along the smile, cure, then buff chrome powder onto just that band. Finish with a glassy top coat that doesn't dull the chrome.
Editor's noteUse a small flat brush to mask the sides so chrome stays inside the smile line.
Watch outDon't chrome the whole tip - it turns into a chunky "silver cap."
7. Pearlized off-white French with tiny pearl at the center
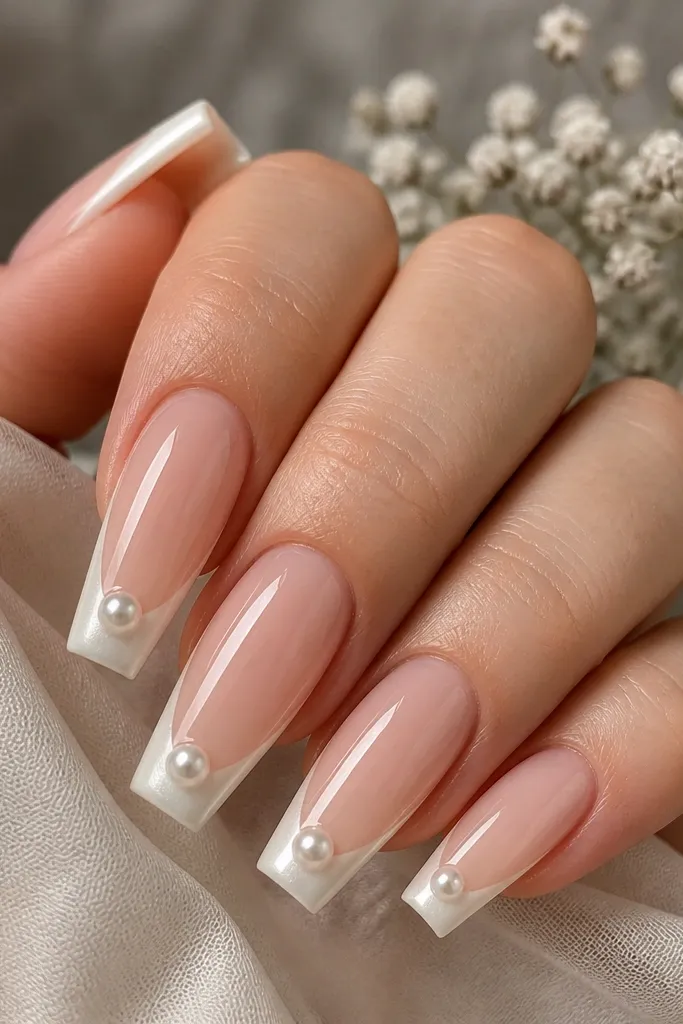
Pearlized off-white looks expensive because it isn't flat white - it has a soft glow. One tiny pearl at the center of the tip gives a clean focal point. This design reads bridal and classy, especially on medium-long coffin nails. It's subtle enough for work photos too.
Build a sheer nude base and apply off-white French with a pearl gel top coat layered over the white. Place a single small pearl (about 1.5-2 mm) at the center of each tip while the gel is slightly tacky. Cure and then top coat over everything carefully.
Editor's noteSeal around the pearl with a thin top coat so it doesn't snag hair or clothing.
Watch outAvoid oversized pearls - they make the tips look bulky.
8. French tip with champagne shimmer base and white line
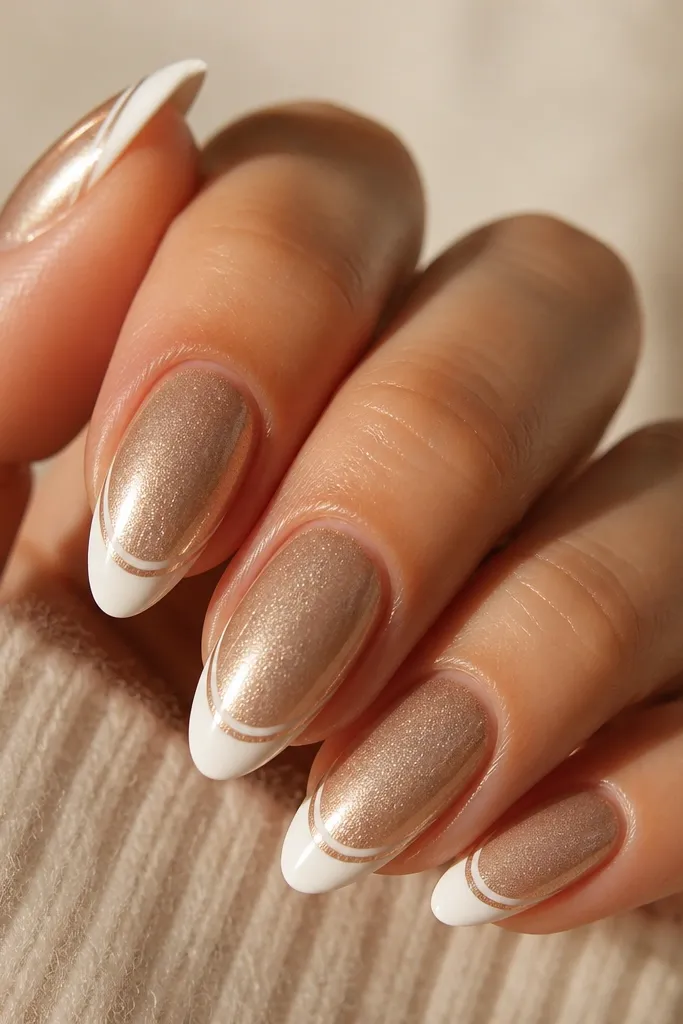
A champagne shimmer base makes the whole set look lit from within. The white French stays the star, but the shimmer gives depth so it doesn't look like plain nail polish. This is the "expensive in flash photos" combo I reach for. It also hides tiny surface imperfections better than super sheer nudes.
Use a sheer champagne shimmer builder gel or mix fine champagne microglitter into a clear base. Apply a white French tip and then add a second ultra-thin white line right along the smile edge. Top coat until it's smooth and reflective.
Editor's noteKeep glitter density higher near the cuticle and lighter toward the tip so the French still looks crisp.
Watch outSkip chunky glitter - it creates texture that looks messy under top coat.
9. Red French tips with nude base and gold foil flecks
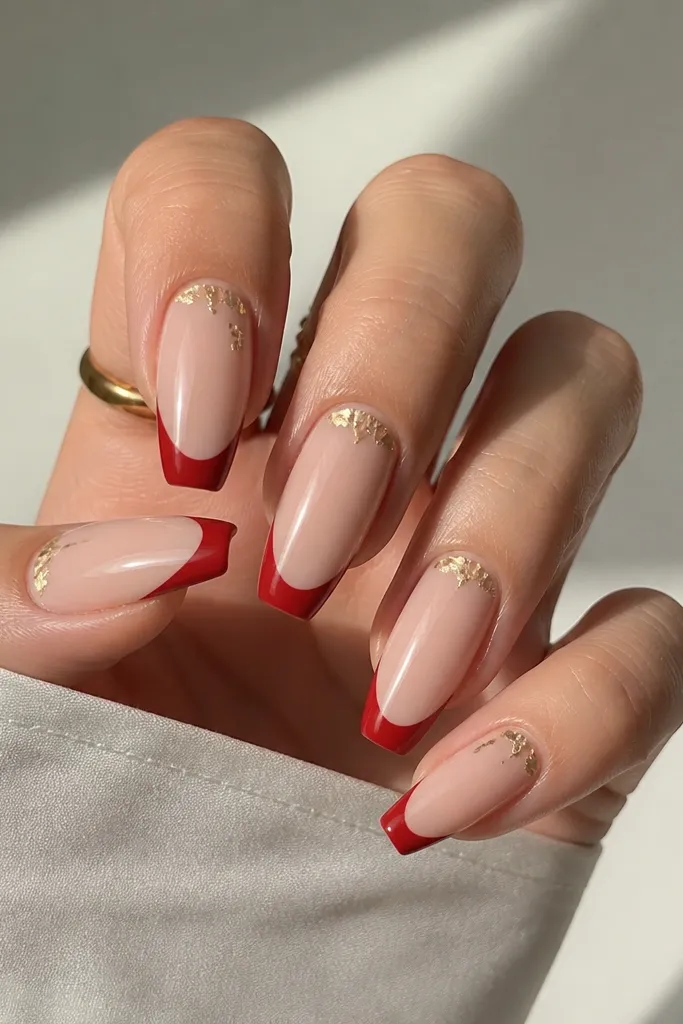
Red French tips look bold and expensive when the red is glossy and clean, not streaky. Gold foil flecks add a "luxury accessory" feel without making the nails heavy. I like placing foil mostly on the ring finger or two nails, then leaving the rest clean. It gives contrast that looks intentional.
Build a nude base, then paint a glossy true red French tip about 2 mm wide. Add gold foil flecks on one or two nails using a tacky gel spot near the cuticle. Cure, then top coat for a smooth finish.
Editor's notePress foil with a dry cotton swab so it lays flat before top coat.
Watch outAvoid placing foil on every nail; it turns into clutter fast.
10. Rose quartz French tips with translucent pink base
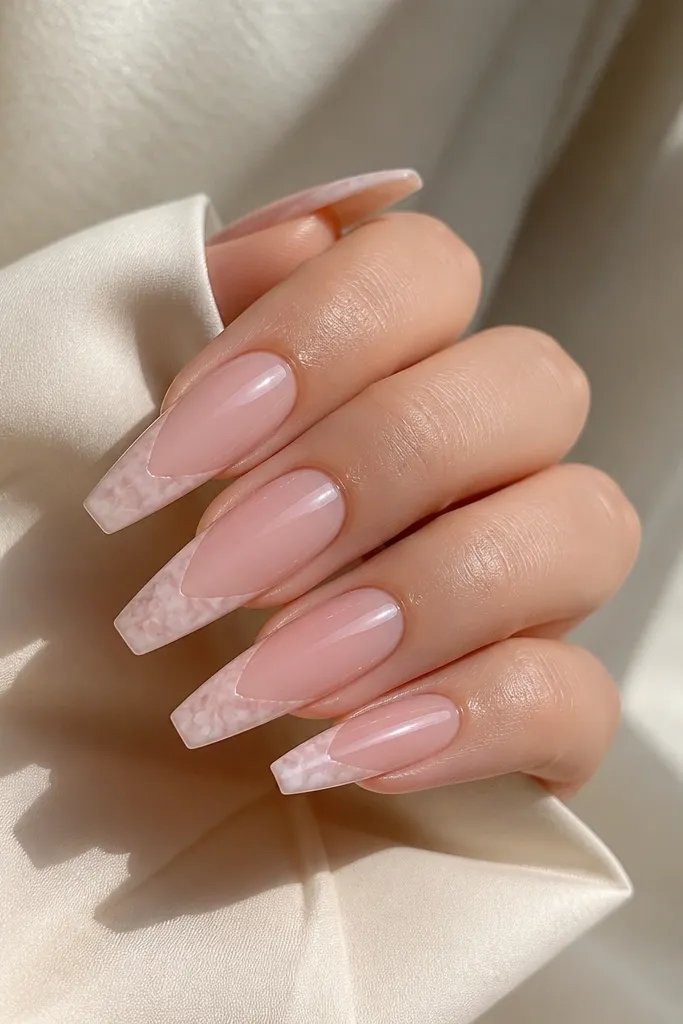
Rose quartz French looks like a custom marble nail without the mess of full marble coverage. The translucent pink base keeps it soft, while the French area has cloudy veining for depth. It looks expensive because the texture is controlled and the edges stay clean. This one is a crowd-pleaser at events.
Use a translucent pink builder gel or acrylic. Paint French tips in translucent milky white, then add thin rose-pink veining with a stripping brush. Blend the veining into the tip so it looks embedded, then seal with thick top coat.
Editor's noteKeep veining lines under 1 mm and vary their thickness so it looks like stone, not paint strokes.
Watch outDon't outline the whole tip with thick lines - it looks cartoonish.
11. Matte French tips with glossy nude base (high contrast)
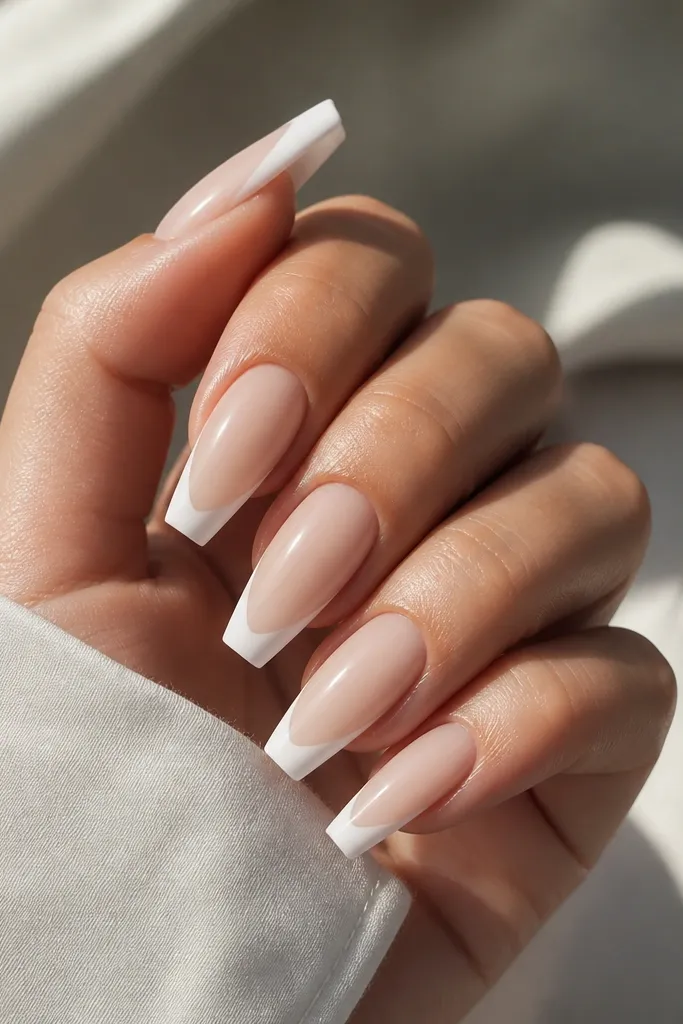
This contrast is why it looks expensive. The glossy nude base looks smooth and healthy, while the matte French tip gives a fashion finish. People notice texture differences more than they notice extra gems. Keep the matte only on the French so the set stays clean.
Do your base with a glossy top coat. Apply white French tips and cure. Then apply matte top coat only over the French area, avoiding the nude base so it stays shiny.
Editor's noteBuff the French edge lightly before matte top coat so it doesn't look fuzzy.
Watch outAvoid matte on the whole nail - it makes skin-tone bases look flat.
12. Chrome French tips with sheer nude coffin
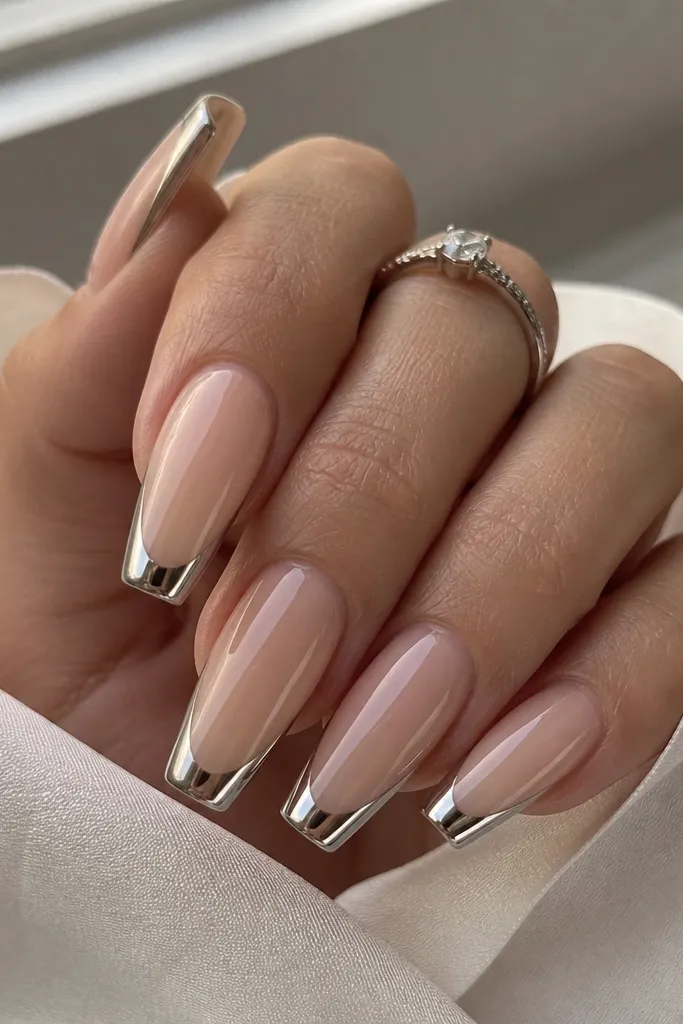
Chrome French tips read expensive because they look like custom jewelry. The key is thin French placement so the metal band looks like a refined edge, not a thick cap. Sheer nude underneath keeps it classy and makes the chrome pop. This is the set I wear when I want compliments fast.
Apply sheer nude acrylic, then create a thin French tip in a clear or white gel base. Cure, then apply chrome powder on just the French band with gel tack. Seal with a chrome-friendly top coat that doesn't dull it.
Editor's noteUse a lint-free wipe and avoid touching the chrome area with your fingers after powdering.
Watch outDon't over-file after chrome - you'll scratch the finish.
13. French tips with tiny rhinestone line only on two nails
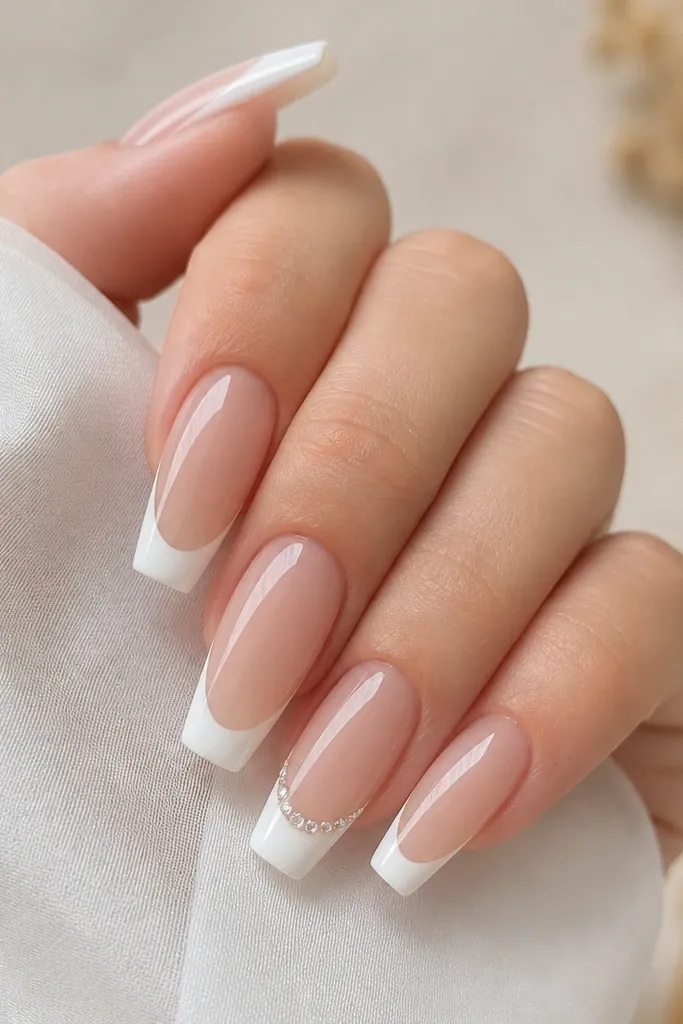
One rhinestone line on just two nails looks expensive because it's controlled. A full rhinestone set can look busy and dated quickly. The nude and white combo keeps it classic, while the stones add sparkle where the eye lands. It's perfect for parties without looking like you tried too hard.
Paint your French tips cleanly first. On two accent nails, place micro rhinestones (about SS3-SS5) along the smile line with clear gel, keeping spacing tight but not touching. Cure and then top coat thinly so stones don't sink.
Editor's noteChoose stones that are flat-backed and uniform size so the line looks even.
Watch outDon't add a rhinestone line down the sidewalls; it turns sloppy.
14. White French tips with gold micro studs at the corners
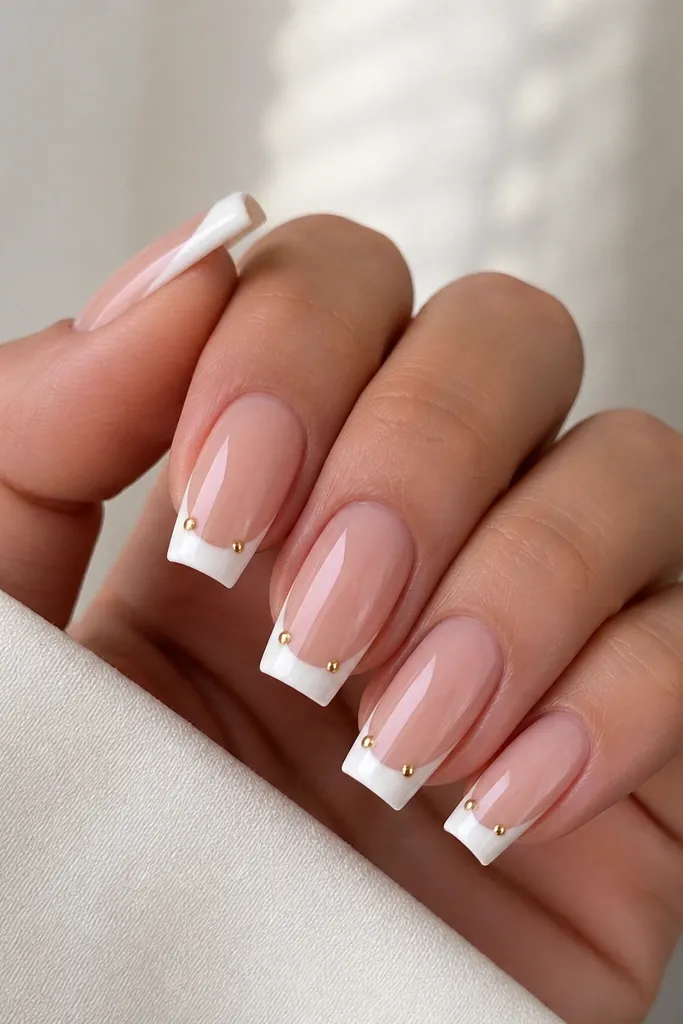
Corner studs look like fine hardware and they frame the smile line. Because they're at the corners only, the rest stays clean and airy. Gold on a nude/white base looks expensive because it matches jewelry tones. It's a subtle upgrade from plain French.
Apply sheer nude base, then white French with a crisp smile. Place one micro gold stud on each corner of the smile line (about 1.2-1.5 mm). Cure, then top coat with a thin layer so the studs stay secure.
Editor's noteUse a dotting tool to press studs into tacky gel so they sit flat.
Watch outAvoid bigger studs - corners should look delicate, not chunky.
15. French tips with black outline and sheer nude base
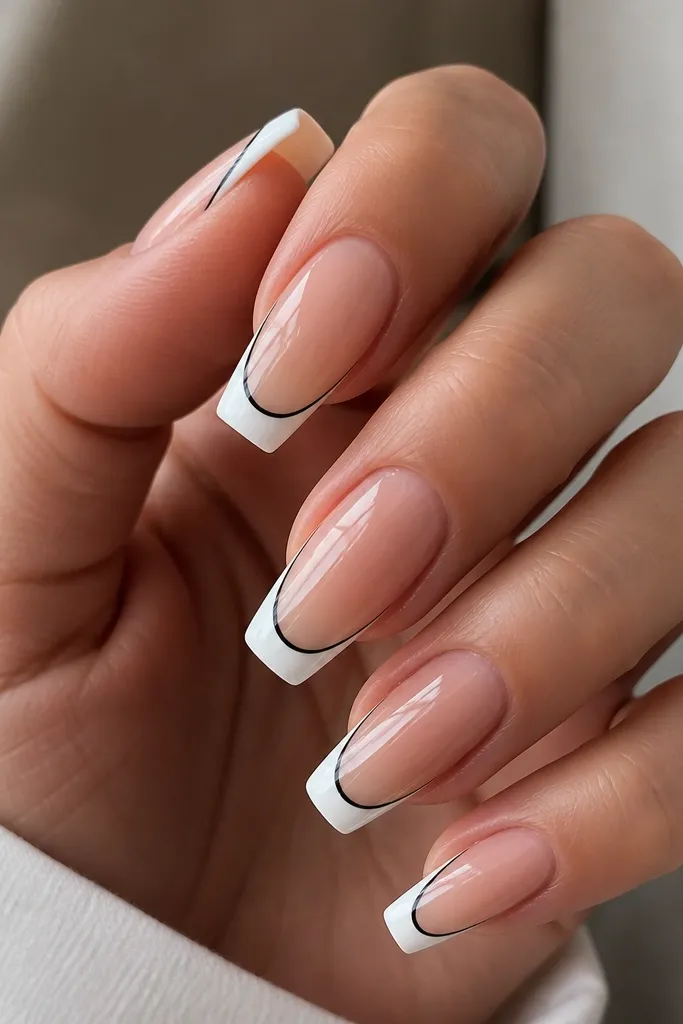
A black outline makes the French tip look like it was drawn with a pen. It adds definition and makes the white tip look sharper and more dimensional. This is one of those designs that looks simple in real life but expensive in photos. It also works with short coffin lengths because the outline keeps the tip crisp.
Do a standard white French tip first. Then use a fine liner brush to add a thin black line right along the smile curve. Keep the black line under 0.3 mm so it stays elegant.
Editor's noteIf your liner bleeds, wipe the brush tip and redraw once instead of going over it repeatedly.
Watch outDon't outline the entire tip surface - only the smile edge.
16. Icy blue French tips with nude base and clear snowflake dots
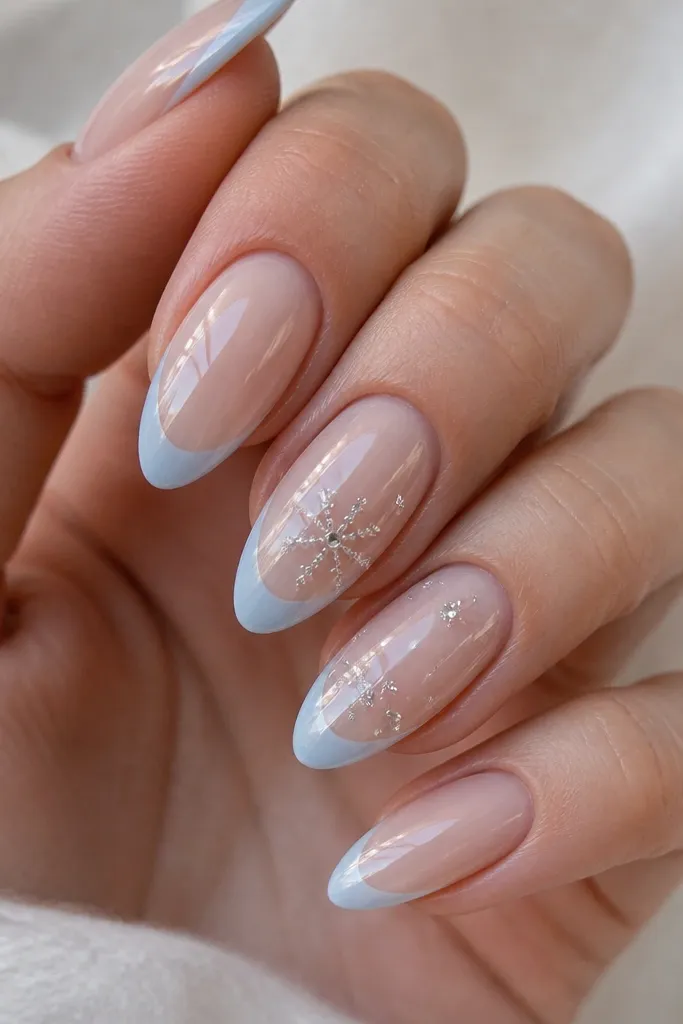
Icy blue French tips look expensive when they're translucent and cool-toned. The clear 3D snowflake dots add texture without turning the design into a theme nail. This one catches winter light and looks clean in close-ups. It's fun but still refined.
Use a nude base, then paint icy blue French with a semi-translucent gel so it looks like frosted glass. Add clear gel dots in a snowflake pattern at the tip center, then cure. Finish with glossy top coat to lock the raised dots.
Editor's noteKeep dot size tiny - about the head of a sewing needle - so it doesn't look like glitter glue.
Watch outSkip chunky snowflake charms; dots look more "nail art" and less "craft store."
17. French tips with tiny pearl halo around one accent nail
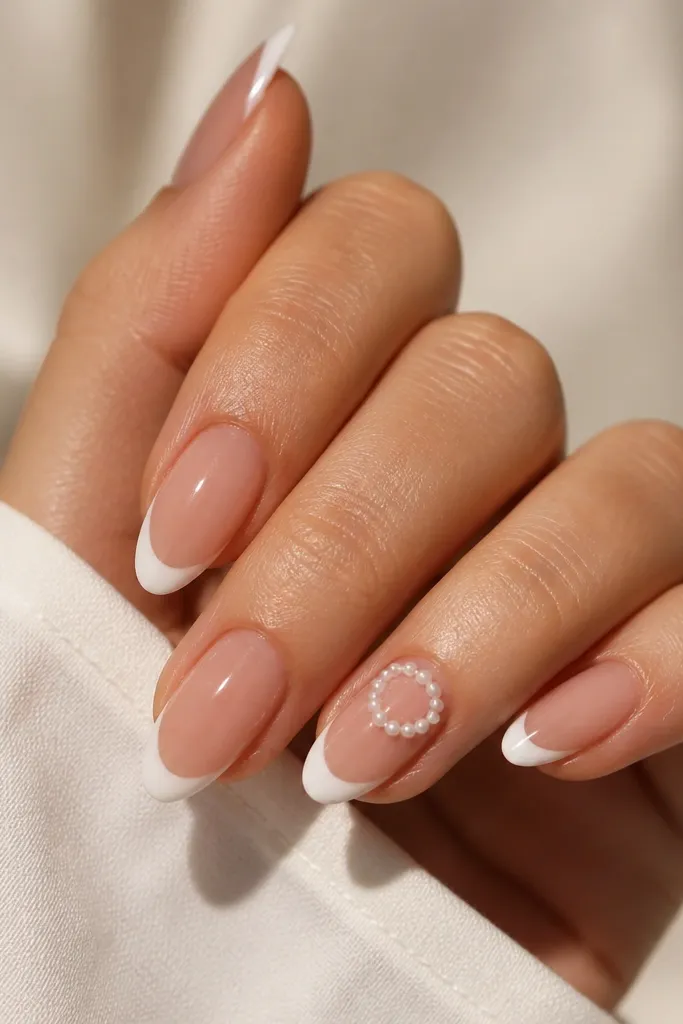
A pearl halo on one nail looks like a ring set to your nail. The other nails stay classic with plain French, so the accent feels intentional. Tiny pearls create sparkle through shape rather than just shine. It's one of the best ways I've found to make coffin French look "bridal expensive" without going overboard.
Paint white French tips on all nails. On the accent nail, use a half-circle placement of micro pearls along the smile, not the entire tip. Keep the halo height consistent across the curve and top coat carefully to keep pearls from lifting.
Editor's noteUse gel as the adhesive, then let it cure before adding top coat so pearls don't shift.
Watch outDon't cover the whole nail with pearls - keep it to the smile area.
18. Sheer nude French with glossy clear overlay and micro shimmer
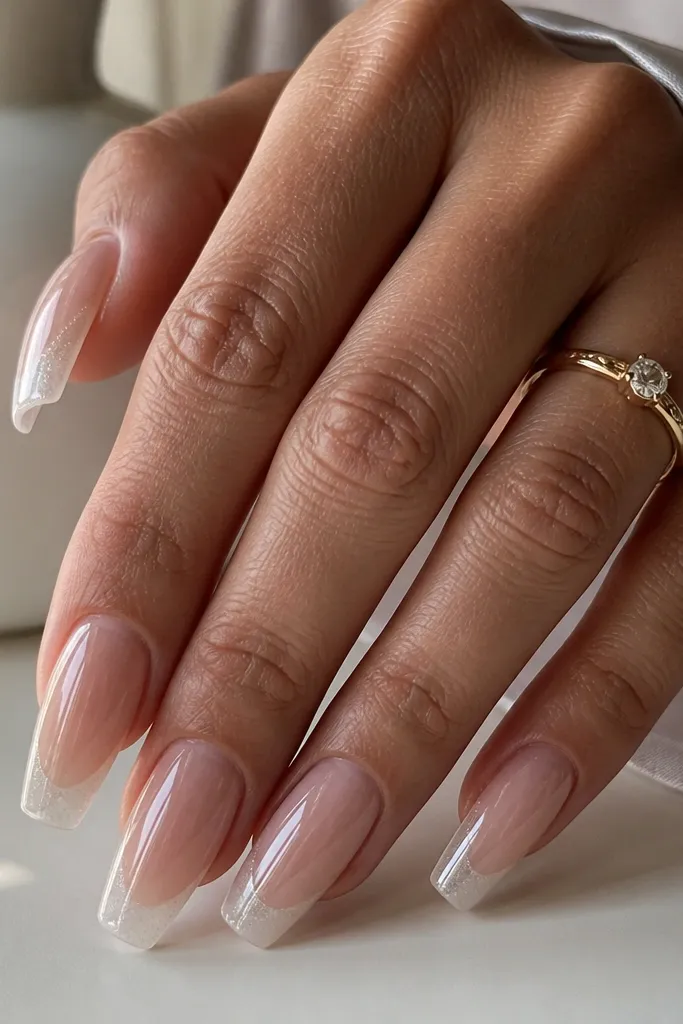
Translucent French with a clear overlay looks like the tip is suspended in glass. Micro shimmer inside the overlay adds depth without making the tip look glittery. This gives the expensive finish where highlights look smooth rather than sparkly and rough. It also grows out nicer because the base is sheer.
Build a sheer nude base. Create French tips with translucent milky white gel, leaving it slightly see-through. Add micro shimmer gel only on the French, then cap with clear builder gel and cure. File and top coat for full glass shine.
Editor's noteCap the free edge twice with clear gel so the overlay doesn't chip at the tip.
Watch outAvoid thick shimmer directly on the surface; it can look gritty.
19. Taupe nude base with white French and thin taupe line inside
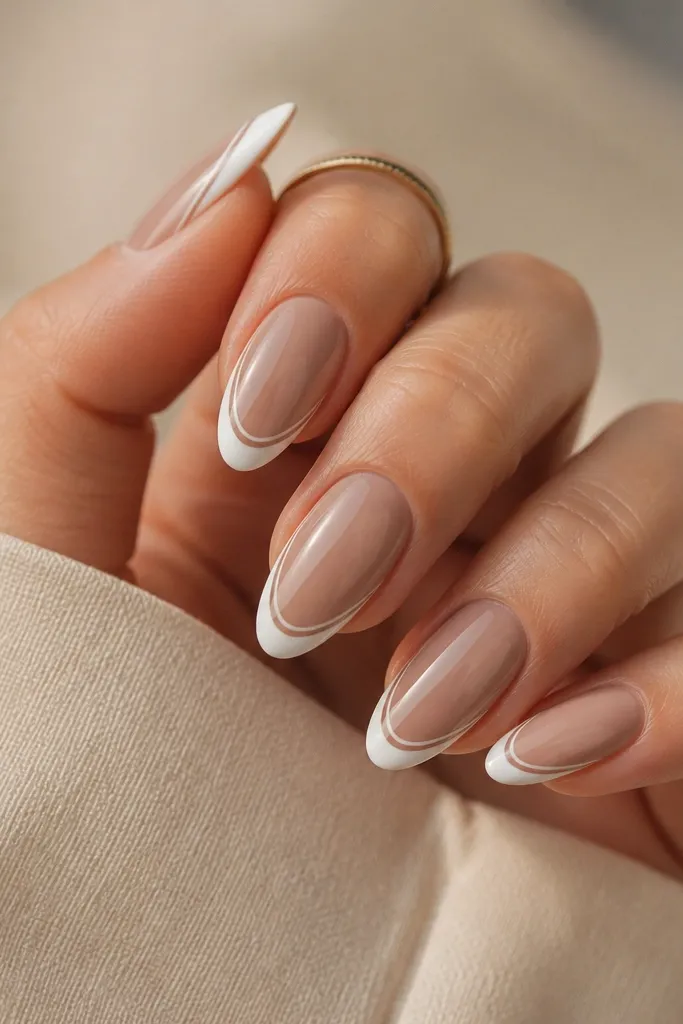
This is a grown-up French that looks expensive because the color palette is soft and controlled. The thin inner taupe line adds dimension and makes the white tip look custom. It flatters neutral outfits and looks great in office lighting. You get a design element without heavy decoration.
Use a taupe-beige nude acrylic or gel base. Paint a standard white French tip. Then add a thin taupe line just slightly inside the smile curve with a liner brush. Top coat until smooth.
Editor's noteMatch the inner line color to the undertone of your base so it looks intentional, not random.
Watch outDon't use a darker inner line - too much contrast looks harsh and cheap.
20. Lavender French tips with sheer nude base and chrome dot accent
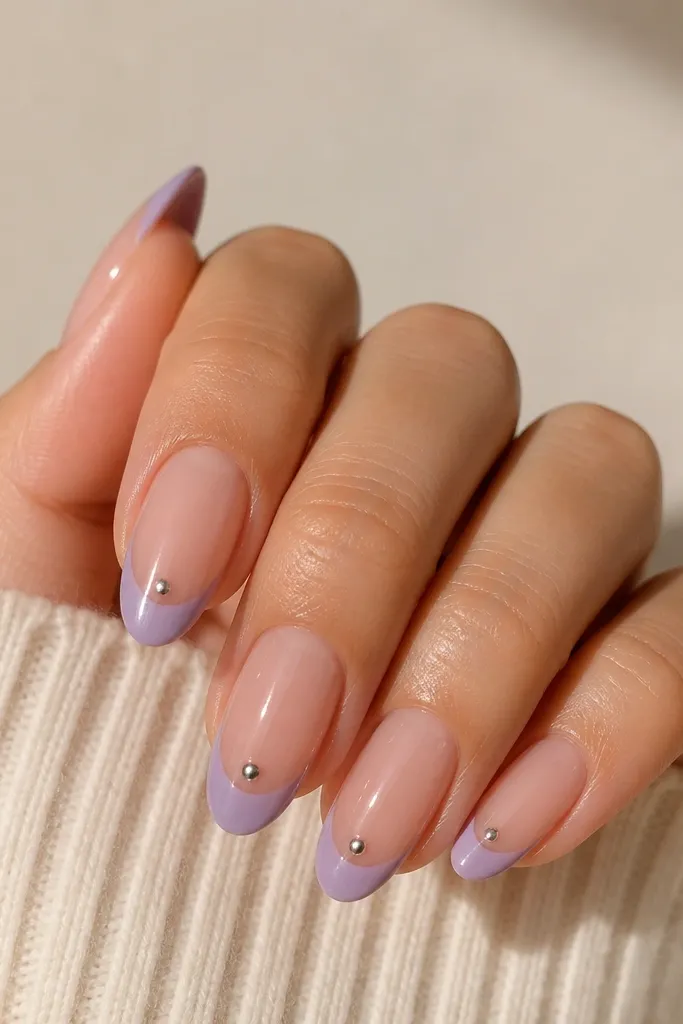
Lavender French looks luxurious when it's not neon and not too pale. The sheer nude base keeps it wearable, and the chrome dot adds a clean, modern sparkle. This reads "expensive" because it's minimal yet reflective. It's a great choice for spring events and photos with colored lighting.
Apply sheer nude base, then do lavender French tips using a dense lavender gel. Place one small chrome dot at the center of each tip using a tiny gel spot and chrome powder. Cure and seal with a top coat that keeps chrome reflective.
Editor's noteKeep dot size consistent across nails - about a pinhead so it looks like a highlight.
Watch outAvoid multiple dots per tip; it turns into confetti.
21. Black French tips with tiny white stud cluster at center
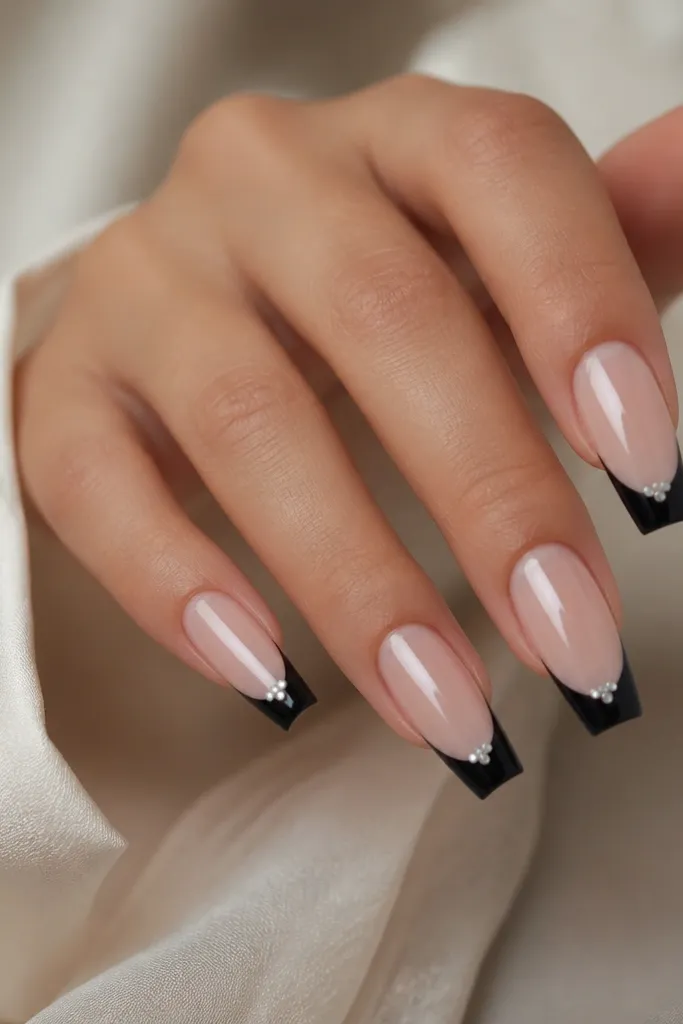
This combo looks like luxury street style. The black tip is bold, but the nude base keeps it elegant. A tiny white stud cluster at the center adds dimension and makes the tip look like it has a jewel setting. It's a strong "turn heads" design without being messy.
Paint black French tips around 2 mm wide. At the center of each tip, place 2-3 tiny white studs (small, flat-backed) close together. Cure and top coat carefully so the studs don't snag.
Editor's noteUse a clear gel cap over the studs to smooth the surface so it doesn't catch hair.
Watch outAvoid large studs - they make the tip look heavy and crooked.
22. French tips with gold leaf under clear cap (ring finger accent)
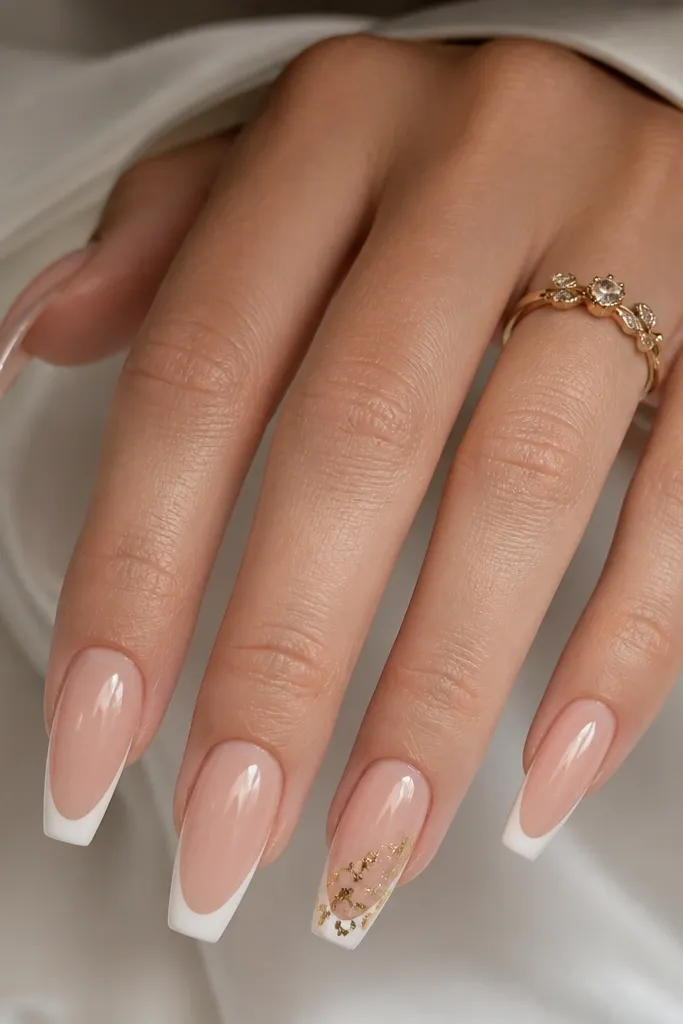
Trapped gold leaf looks like real jewelry because it's suspended under clear gel, not stuck on top. The rest of the nails stay classic with plain white French, so the accent looks intentional. This is one of the most "expensive" finishes because it has depth - you can see layers. It also looks amazing in sunlight.
Apply white French tips on all nails. On the ring finger, place thin gold leaf inside a clear gel layer over the French, then cap with more clear gel so the leaf is sealed. Cure, file lightly, then top coat for full gloss.
Editor's noteUse tiny torn pieces of leaf and keep them off the edges so they don't lift.
Watch outDon't glue gold leaf directly on top without a clear cap - it flakes.
23. Clear French tips with white micro line (negative space French)
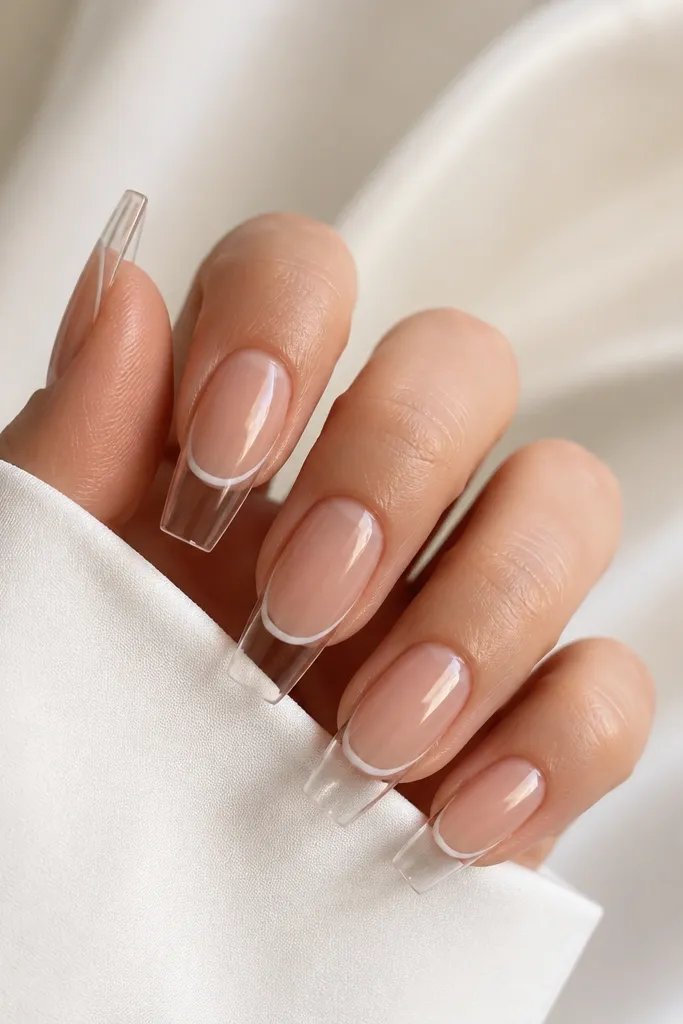
Negative-space French looks clean and expensive because it creates a light, airy tip. The white micro line acts like a crisp boundary, so it still reads as a French manicure even though the tip is mostly clear. This style is flattering on longer coffins and makes the nail look sleek. It feels modern without looking trendy-chaotic.
Build the nude base, then create a clear acrylic/gel cap on the tip area. Add a thin white line along the smile curve using a liner brush. Seal with top coat so the clear section is glassy and smooth.
Editor's noteKeep the clear tip thickness thin enough that it doesn't bulge - file the sides for a smooth coffin taper.
Watch outAvoid thick clear caps; they look like lumpy extensions.
24. White French tips with rose gold foil strip on one side
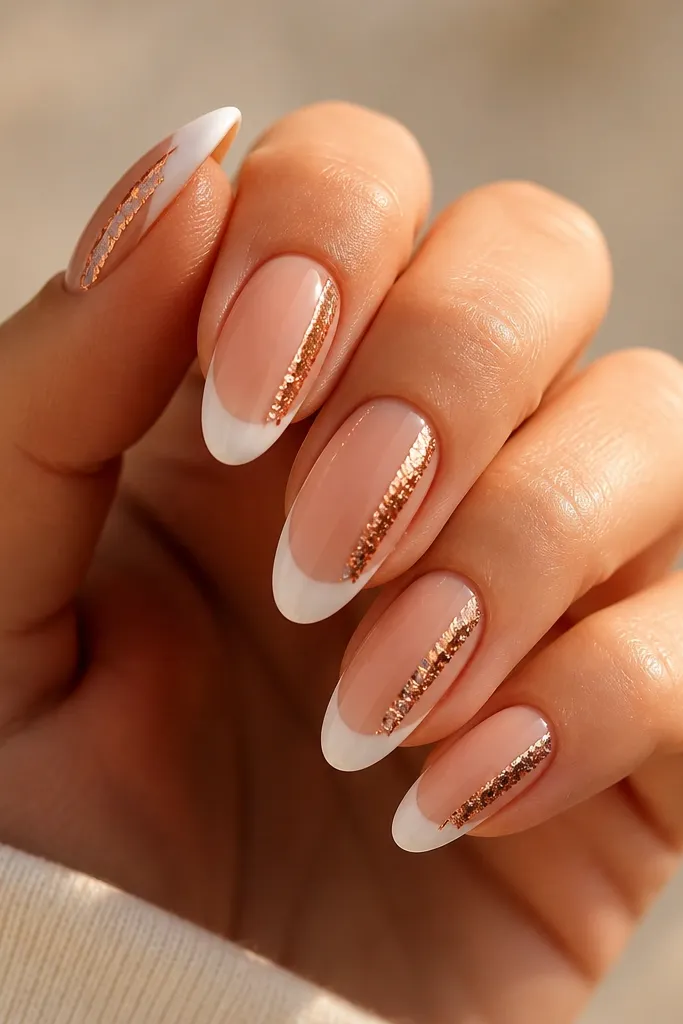
A single rose gold foil strip adds a designer diagonal detail that feels expensive without adding bulk. Because it sits on one side, it elongates the nail visually and keeps the composition clean. The nude base and white tip keep it classy, and the foil gives that jewelry shine. This is a great "special occasion but still minimal" look.
Paint white French tips cleanly. On selected nails, apply a thin gel strip along one side near the smile, cure, then press rose gold foil onto it. Cap lightly with top coat so the foil is sealed but still reflective.
Editor's notePlace the foil strip slightly closer to the center on the middle nails and closer to the side on the ring finger to keep balance.
Watch outAvoid foil across the entire smile - it turns into a metallic band.
25. Chocolate nude base with glossy white French and caramel micro dots
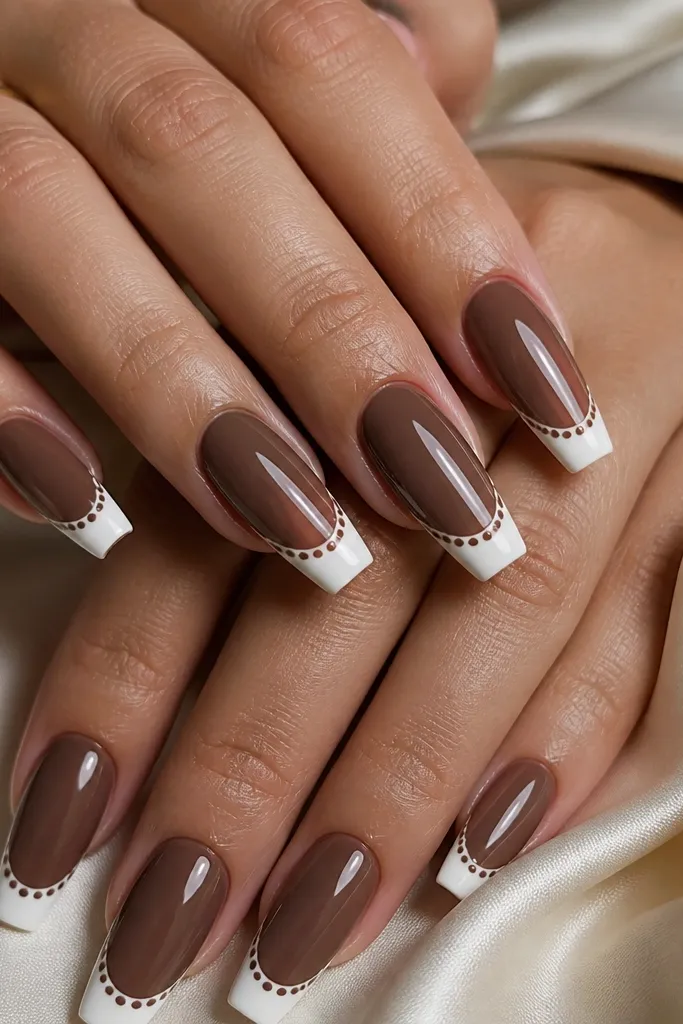
This is for people who want "expensive" that doesn't look like everyone else's nude and white. The chocolate base warms up the manicure, and the caramel micro dots add a soft, luxe pattern. It looks especially good with gold jewelry and warm-toned makeup. The dots also make the French tip look styled, not plain.
Use a chocolate nude base acrylic or builder gel. Apply glossy white French tips with crisp edges. Add caramel micro dots (use a dotting tool) in a short line near the smile, then top coat thick enough to smooth over the dots.
Editor's noteKeep the dot line short - stop before the sides of the nail to avoid a messy look.
Watch outSkip large dot sizes; big dots make it look like nail art stickers.