1. Cherry Red Coffin with 3D Micro-Rose Cluster
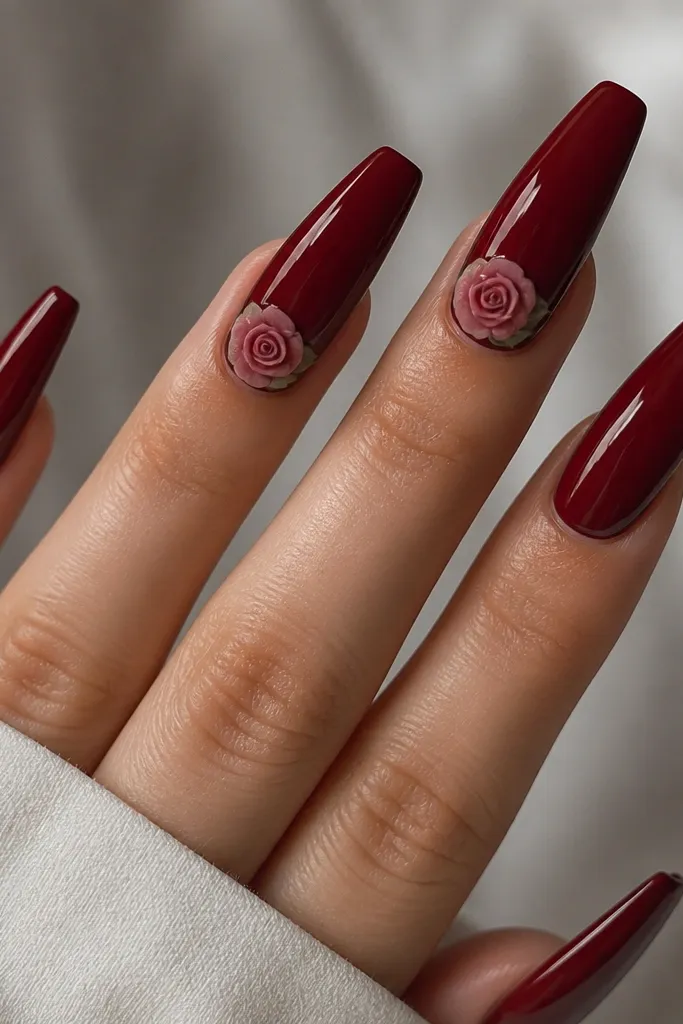
This look uses a cool cherry red as the base so the tiny rose buds pop without looking heavy. The roses sit close to the cuticle, so the design reads sweet instead of bulky. I keep the roses small - about the width of a pencil eraser - and I paint the petals with a darker edge for dimension. A glossy top coat ties it together and makes the 3D pieces look sealed, not pasted.
Use a cherry red acrylic powder, then cover with a gel top coat before adding roses if you're working over acrylic. Place one micro-rose cluster on the ring finger and a single bud on the middle finger. Cure or seal the 3D pieces so they don't lift at the edges when you file the nail surface.
Editor's noteStore your rose decals or 3D pieces in a small divided box by size so you grab the right bud without digging.
Watch outDon't make the roses too big - oversized 3D flowers look clumpy on coffin nails.
2. True Red Coffin with Gold Half-Moon Cuticle Line
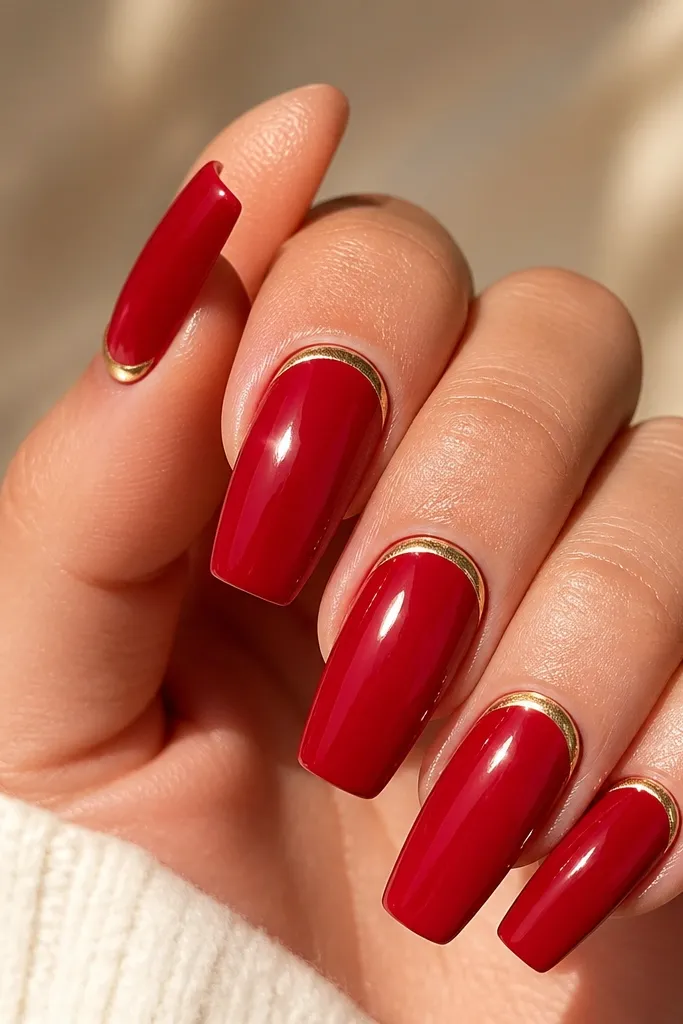
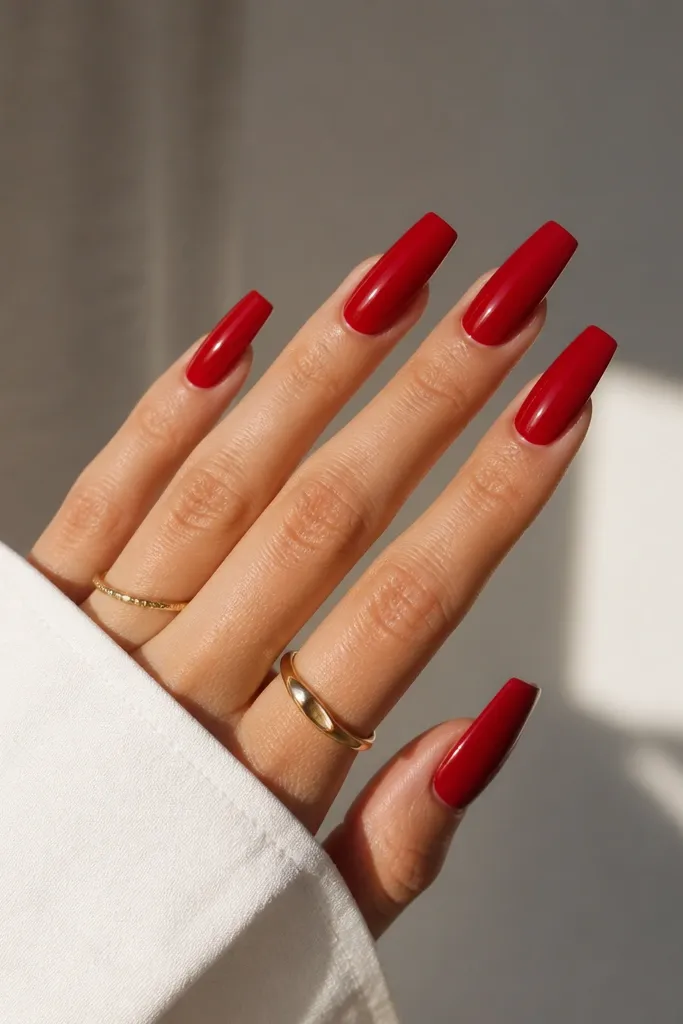
The gold half-moon line gives you that "expensive" cuticle moment without covering the whole nail. True red is the best base here because it doesn't fight the yellow tone of gold. I keep the gold line thin - like a bookmark underline - and I use it only around the cuticle curve so the nail still looks clean. The reflective finish makes even simple red look styled.
Apply true red acrylic, then after filing, paint a curved gold line using striping gel or a fine gold paint pen. Cure, then top coat over everything to level the surface. If you want extra crisp edges, trace the arc lightly with a damp brush, then go back for the final line.
Editor's noteKeep gold striping gel in a pen applicator and store it upright so the tip stays clean.
Watch outAvoid thick gold blobs at the cuticle; they catch on hair and lift faster.
3. Warm Red Coffin with Matte Red Velvet Top
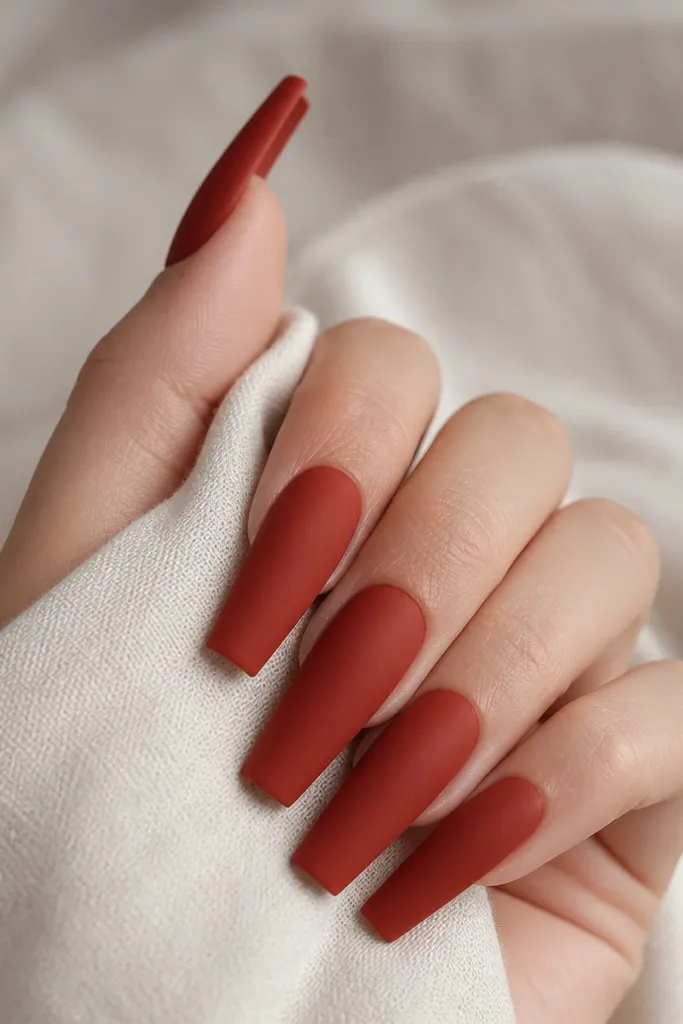
Warm red looks amazing in matte because the orange undertone reads cozy instead of harsh. Matte also hides tiny filing scratches, so it's forgiving if you're building at home. I like to keep the nail surface smooth before the matte top coat so it doesn't look fuzzy. The result is bold, modern, and easy to match with any outfit.
Build with warm red acrylic, file to a smooth coffin curve, then apply a matte top coat (not a regular glossy top coat). If you want one accent nail, pick the ring finger and add a single tiny gold dot near the cuticle using foil gel. Seal the dot with matte top coat so it stays consistent.
Editor's noteUse a matte top coat that says "matte" on the label - some "soft shine" products still look shiny under flash.
Watch outDon't apply matte over uneven acrylic; it will highlight bumps.
4. Classic Red Coffin with White V-French Tips
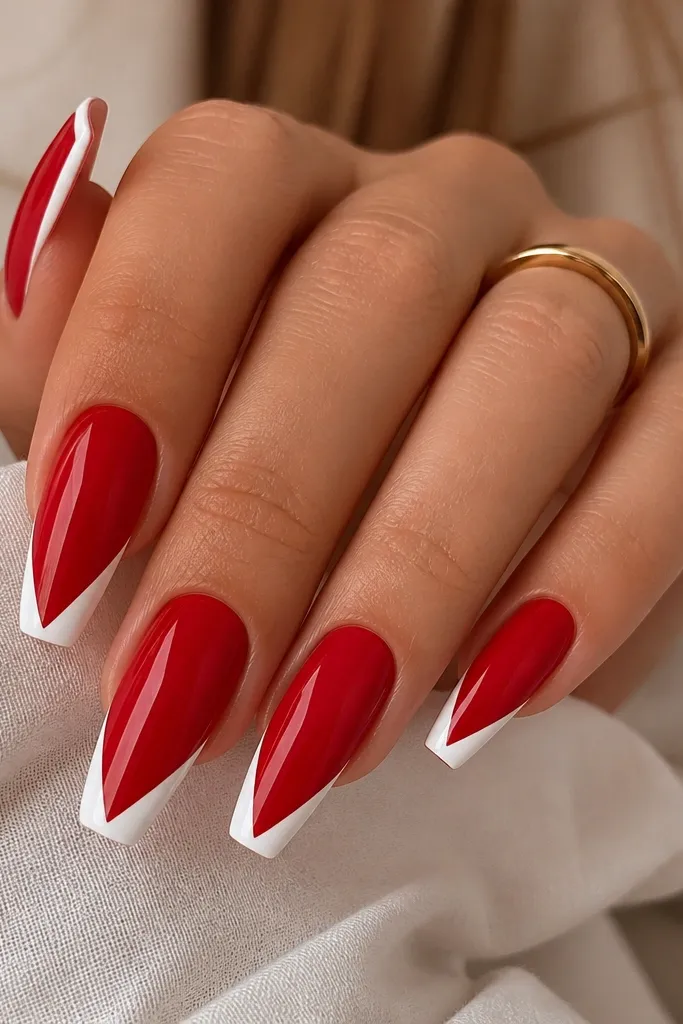
A V-French on coffin nails makes the shape look extra sharp. The white tip draws the eye to the taper and makes your free edge look longer. I keep the red glossy and let the white stay clean and opaque - no gray tint. This one is a weekly staple because it still looks neat when the nails start to grow out.
After acrylic, map the V with a thin striping brush and white gel. Keep the V arms even in width - about 1.5 to 2 mm at the widest point near the top of the tip. Cure, then top coat over the entire nail so the edges feel smooth.
Editor's noteStore thin nail art striping brushes in a hard case so the bristles don't flare.
Watch outAvoid wobbly V lines; uneven tips make coffin nails look crooked.
5. Red Ombré Coffin with Blush Fade
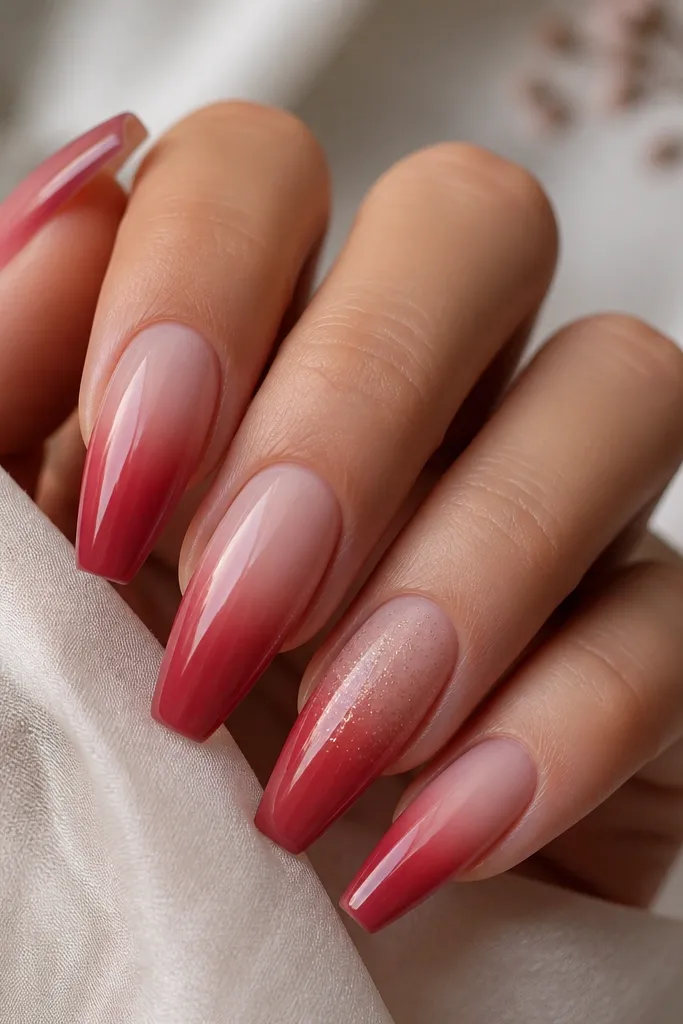
This ombré is gentle but still red-forward. The blush base makes the red look less aggressive and more wearable for everyday. I build the gradient by blending acrylic beads from mid-nail to the tip so the transition stays smooth. A tiny glitter dust on one nail adds sparkle without turning it into a full bling set.
Use a pale blush acrylic or sheer pink gel at the cuticle area, then blend into a deeper red toward the tip. Work in thin layers: one blend pass, file, then a second blend pass. For the glitter nail, add fine red micro-glitter or copper glitter at the center and top coat.
Editor's noteStore blush and red acrylic powders in separate labeled compartments so you don't cross-contaminate the undertones.
Watch outDon't skip filing between layers or you'll get a visible ridge in the gradient.
6. True Red Coffin with Clear Sidewalls and Red Core
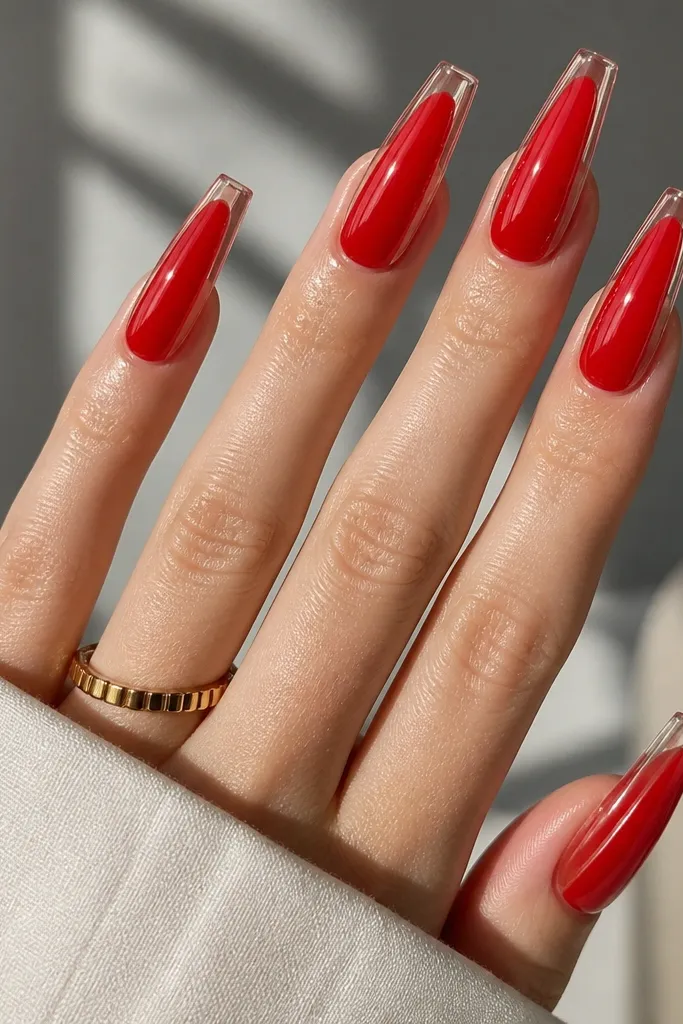
This design looks like a modern "glass French" because the clear sidewalls frame the red center. It's a great option if you like red but want something lighter. The clear sections make your nail look longer because the edges reflect light. The red core stays bold and clean.
Build the nail with clear acrylic first for the sidewalls, then place red acrylic only through the center. File so the clear edges are smooth and not cloudy. Top coat everything for a glassy finish; if you see haze, buff gently before top coat.
Editor's noteKeep clear acrylic and red powders in sealed containers - moisture makes clear acrylic turn cloudy fast.
Watch outAvoid thick red in the center; it can make the nail look bulky and ruin the coffin taper.
7. Cherry Red Coffin with Tiny Silver Star Specks
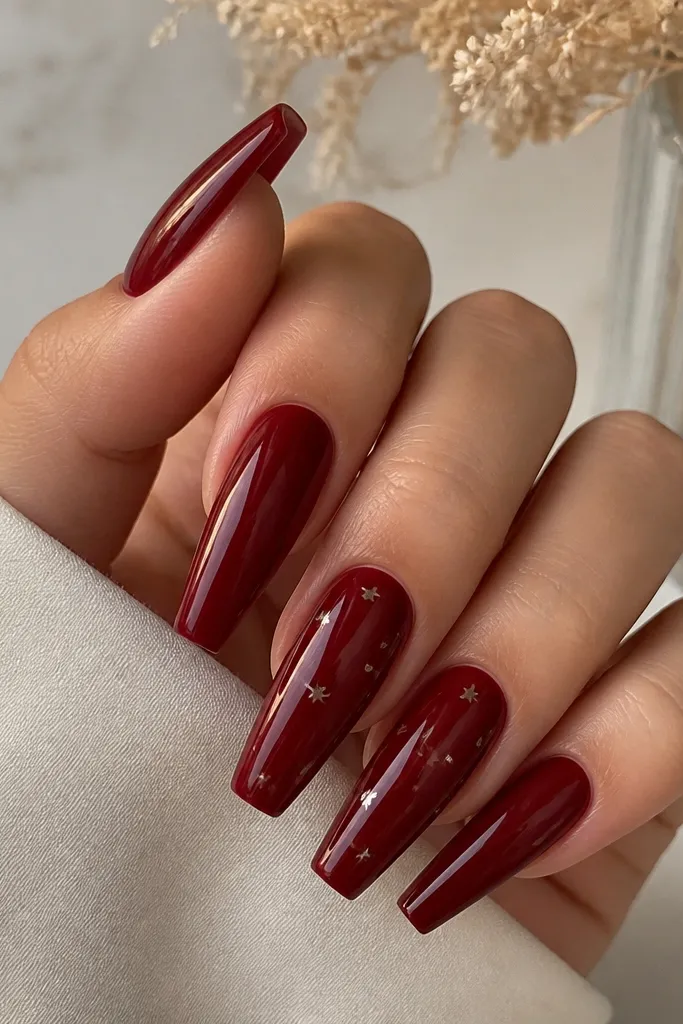
Star specks are the fastest way to make solid red feel designed. I keep the stars tiny and spaced so they don't look like confetti. Cherry red makes silver look icy and bright. This is perfect when you want red to look fun without adding thick lines or gems.
After filing, add small star charms or use a star stamp with silver gel. Place them randomly but keep the density consistent - about 6 to 10 stars per nail. Cure, then top coat to smooth the surface.
Editor's noteStore star charms in a divided bead organizer by size so you don't mix micro stars with larger ones.
Watch outAvoid placing stars too close to the free edge; they can snag and lift.
8. Warm Red Coffin with Copper Foil Drip
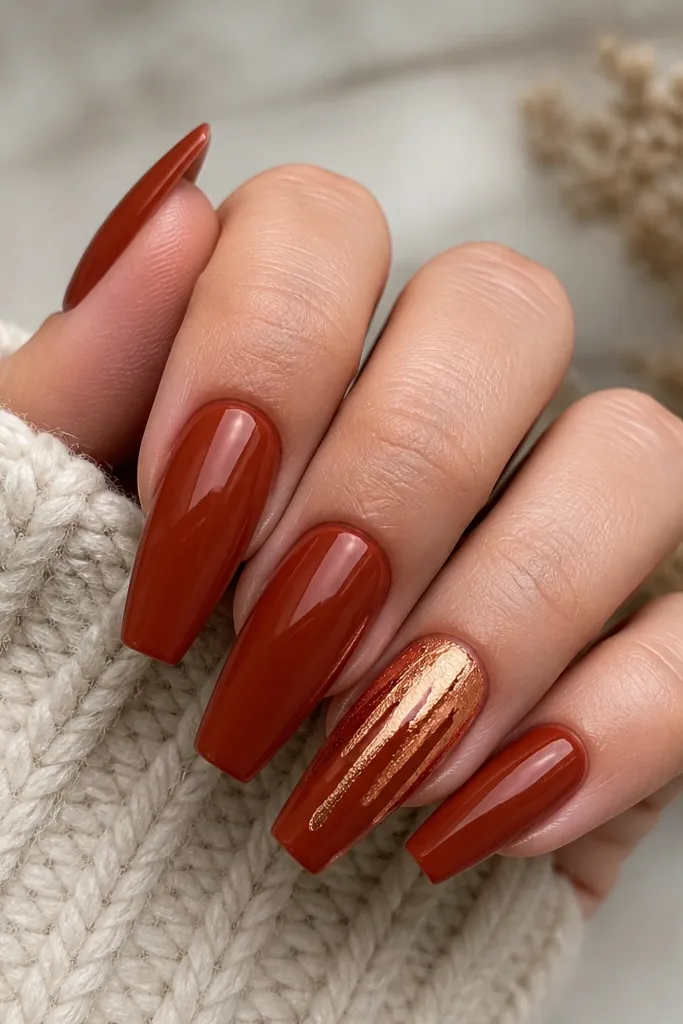
Copper foil drip makes warm red look like it has heat and movement. The foil texture catches light differently than chrome, so it looks dimensional even with minimal art. I keep the drip one nail only so the set stays wearable. Under daylight, the copper reads soft, not harsh.
Apply warm red acrylic, then add foil adhesive gel on the ring finger in a small curved drip shape. Press copper foil onto the adhesive, then top coat carefully in thin layers to avoid lifting the foil edges. For extra control, do the foil drip just slightly off-center so it looks natural.
Editor's noteStore foil sheets flat with a sheet of parchment between them so they don't crease.
Watch outDon't flood the foil with thick gel or it will look cloudy and uneven.
9. True Red Coffin with Black Micro-Line Reverse French
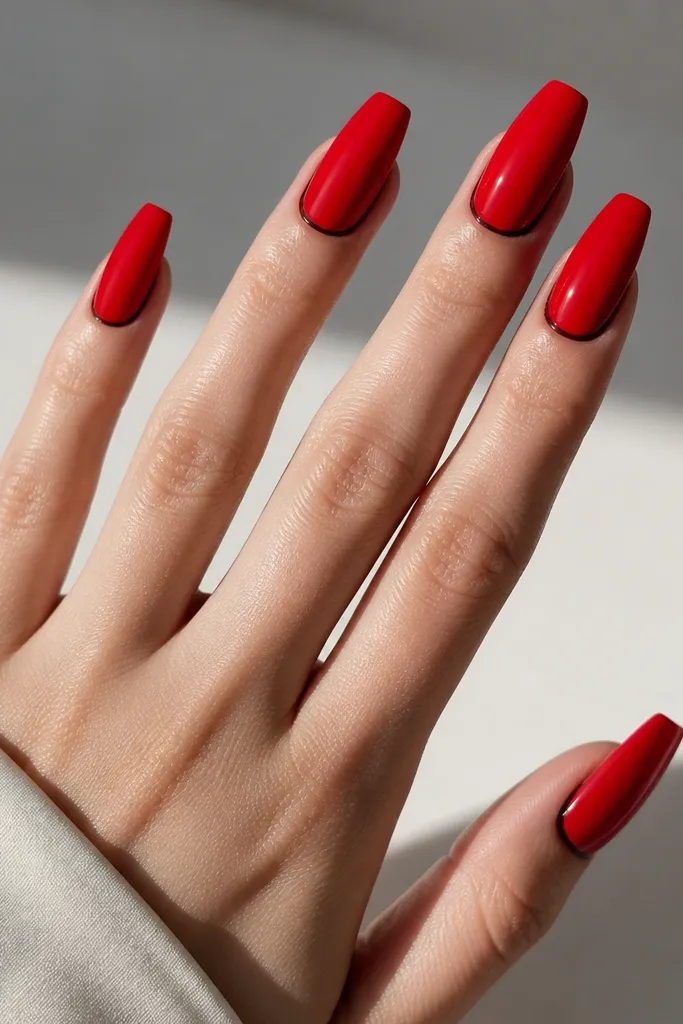
A reverse French outline in black makes red look graphic and sharp. The key is the line thickness - too thick and it turns into a thick border, too thin and it disappears. This works because coffin nails already have a tapered shape; the outline emphasizes it. It also looks clean as it grows out since the cuticle line stays crisp.
After you file the nail, trace a black arc at the cuticle using striping gel or a fine liner brush. Leave a tiny gap between the black line and the skin sidewall so it doesn't smear. Cure, then apply top coat over the whole nail.
Editor's noteUse a striping brush with a pointed tip and keep it in a brush cleaner jar between nails.
Watch outAvoid dragging the liner across dry acrylic; it will pull and cause jagged edges.
10. Cherry Red Coffin with Clear Rhinestone Ladder
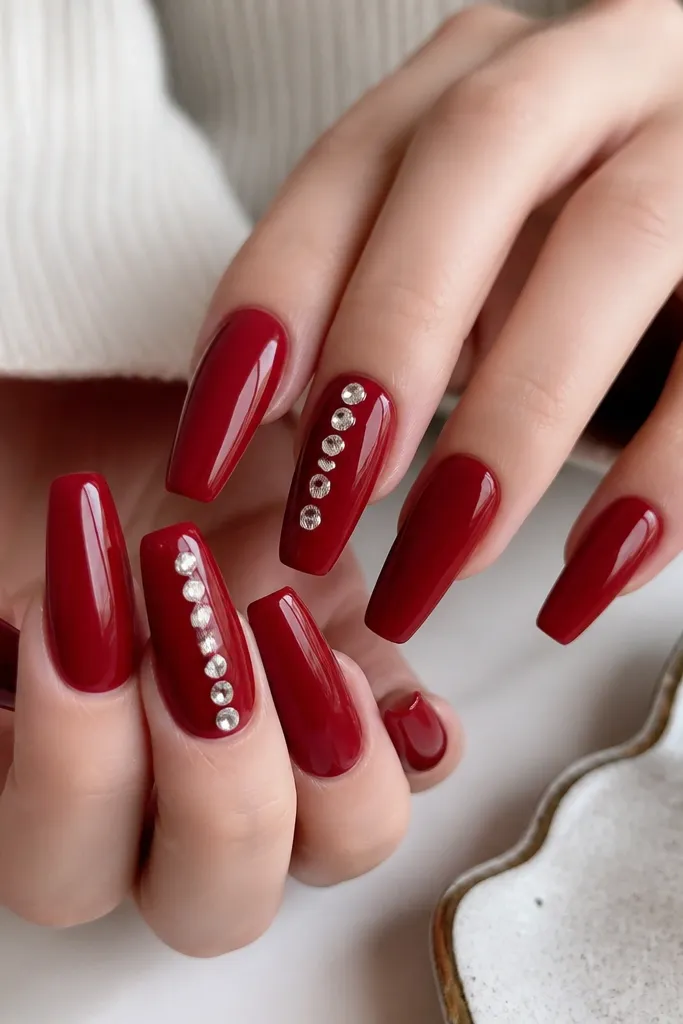
A rhinestone ladder gives you height and drama without covering the whole nail. Clear stones keep it bright and let the red do the talking. I place the stones in a straight line but stagger them slightly so the ladder catches light as you move your hand. It's a strong look for events, but it still feels neat when the line is tidy.
Apply cherry red, then use rhinestone gel in a thin vertical strip. Place stones starting about 2 mm from the cuticle and stop around the mid-nail to avoid the free edge. Cure and top coat thinly around the stones so they feel smooth.
Editor's noteStore rhinestones in a tray with a grid so you can pick sizes without dumping a pile.
Watch outAvoid putting stones near the tip; they pop off first there.
11. True Red Coffin with Pearlized Pink Accent Nail
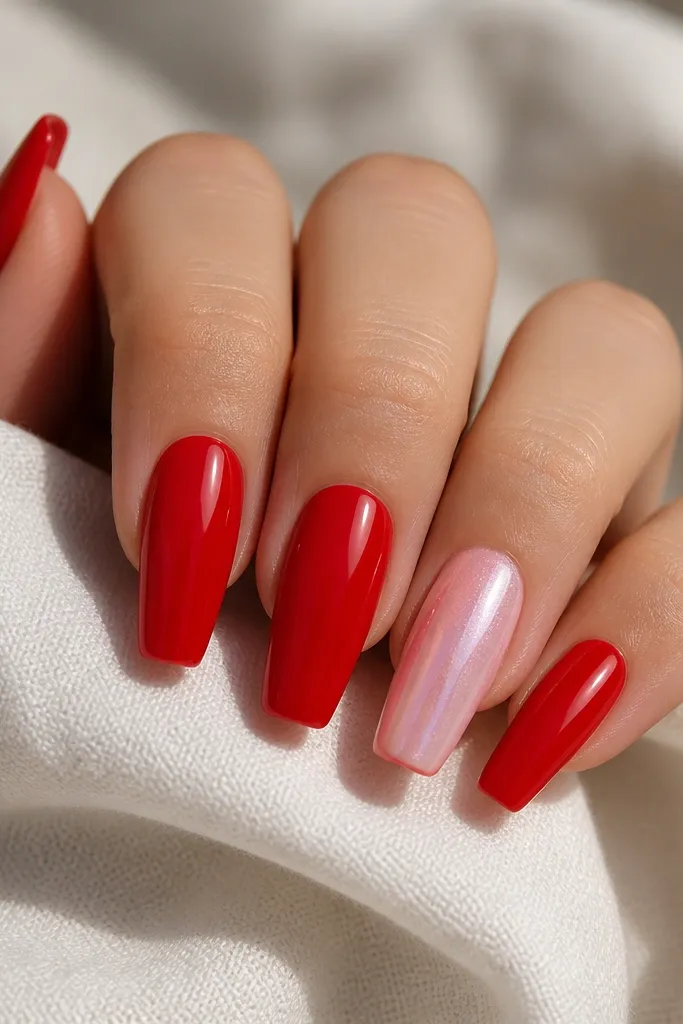
This set uses a pearlized accent to break up the red without changing the palette. Pearlized pink over a smooth base looks like candlelight - soft, not sparkly. I keep the red glossy and the accent nail more satin-pearl so the contrast reads intentional. It's a clean way to make red feel fresh for weekly rotation.
Do standard true red acrylic on four nails. For the accent, use a pearlized pink polish or acrylic powder, then seal with a glossy top coat. If you want extra dimension, add one tiny white dot near the cuticle on the pearl nail and top coat.
Editor's noteKeep pearl powders in a separate container; they stain easily if mixed with red dust.
Watch outAvoid using a glittery pink as the accent; it clashes with the clean coffin shape.
12. Warm Red Coffin with Red-Crystal Negative Space Heart
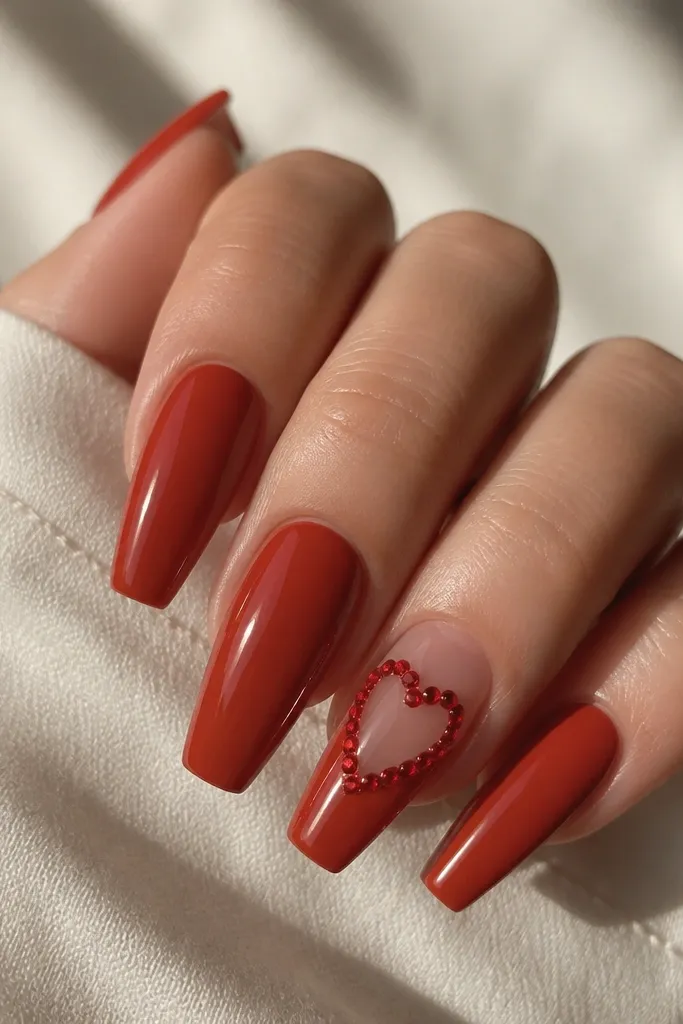
Negative space hearts look modern on coffin nails because the shape stays crisp. The clear center makes the heart feel lighter than a full red heart. I use small red crystals along the outline so it sparkles without being heavy. Warm red is the right base because it softens the crystal edge.
On the accent nail, leave the heart outline area clear while you build the warm red around it. Apply rhinestone gel along the heart outline, then place tiny red crystals. Cure and top coat, making sure the top coat covers the crystals without flooding the clear heart center.
Editor's noteUse a heart stencil cut from thin plastic so the outline stays symmetrical across the nail.
Watch outAvoid filling the heart center with red gel; it ruins the negative-space effect.
13. Cherry Red Coffin with White Rose Line Art
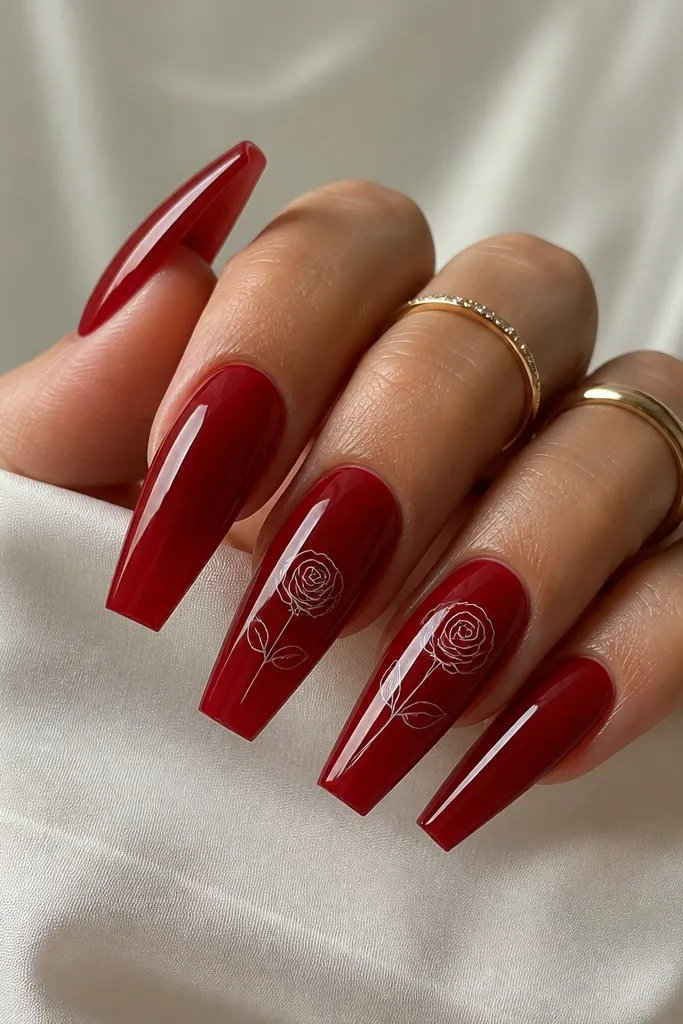
White line art gives you a "sketch" look that stays classy on long nails. Cherry red makes the white lines pop without needing glitter. I like to place the line art diagonally so it follows the coffin curve and looks natural. This set is easy to refresh because you can swap the line art with different roses next week.
After sealing the cherry red base, draw rose outlines with a white gel liner. Keep the lines thin and leave the center mostly solid red. Cure and top coat. If you want one nail extra, add a tiny white leaf near the cuticle edge.
Editor's noteStore gel liners in a drawer with the caps closed tight; dried liner ruins thin line art fast.
Watch outDon't thicken the lines - chunky line art makes coffin nails look cartoonish.
14. True Red Coffin with Black and Red Marble Swirl
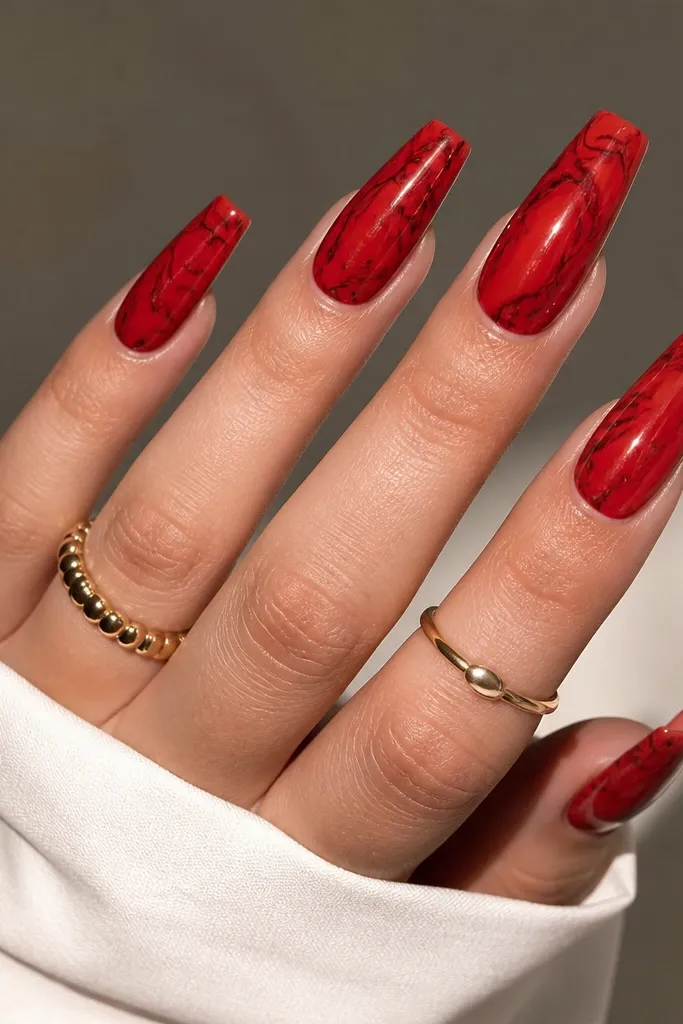
Marble swirls make red feel like a material, not just a color. The black lines add contrast and make the red look deeper. I keep the marble movement mostly in the center third of the nail so it doesn't cover the whole coffin shape. Glossy top coat makes the marble look like polished stone.
Build true red first, then on two nails add black and dark-red gel in thin lines using a liner brush. Drag the lines lightly with a dotting tool for a marble effect, then cure. Seal with gloss top coat in two thin layers so the surface stays smooth.
Editor's noteStore dotting tools in size order; the right tip size makes cleaner marble pulls.
Watch outAvoid over-blending; if you smear too much, the marble turns muddy.
15. Warm Red Coffin with Gold Glitter Tip Fade
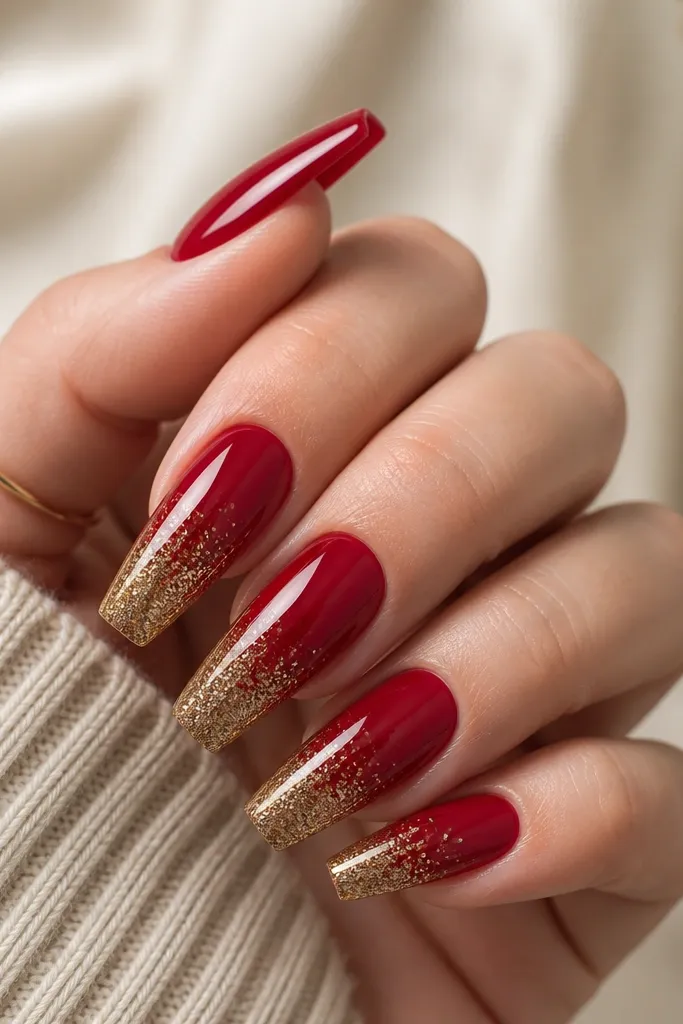
This is the cleanest way to do glitter without losing the red. The warm red base makes the gold look buttery. I place glitter only where the natural light hits when your nails move, so it sparkles but doesn't feel scratchy. The fade reads expensive because the glitter is graduated, not a solid block.
Apply warm red acrylic, then apply clear gel at the free edge area starting about 3 to 4 mm from the tip base. Sprinkle gold fine glitter and press lightly, then add another layer of clear gel to lock it down. File the edge lightly after curing so it doesn't feel gritty.
Editor's noteStore glitter in shaker jars with a pinhole top so you control the spread.
Watch outDon't stop the glitter coverage abruptly; leave a soft gradient or it looks like a sticker.
16. Cherry Red Coffin with Silver Chrome "Smoked" Half
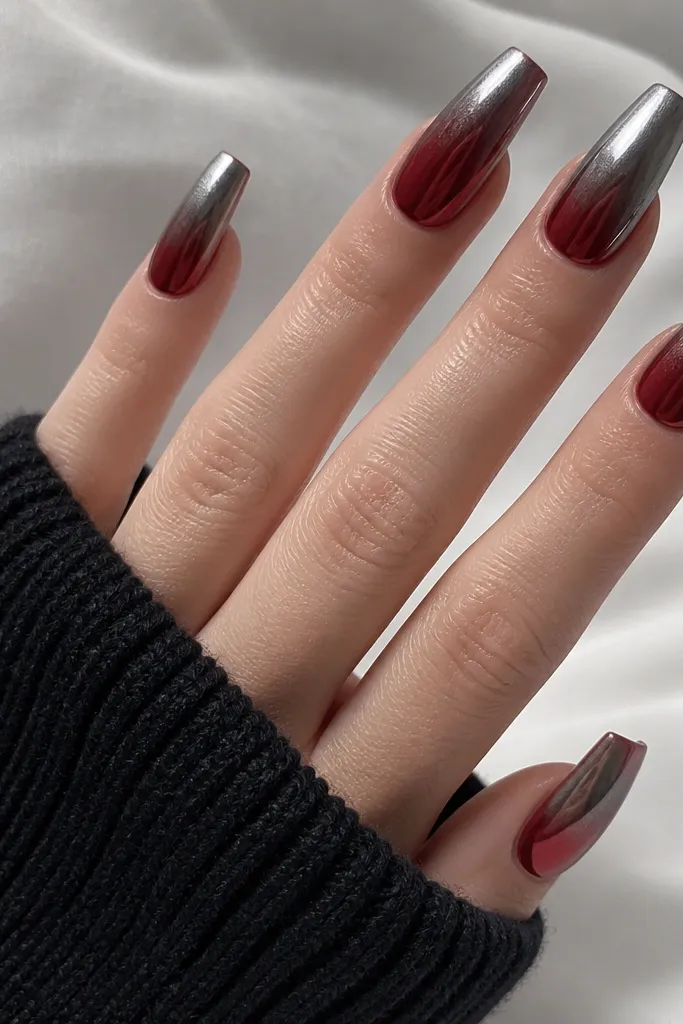
Smoked chrome over cherry red gives you a futuristic look without going fully silver. The red underneath keeps it from looking harsh. I apply chrome only to the upper half so the coffin shape stays readable. The smoky effect comes from lightly buffing or using less pressure when applying the chrome powder/leaf.
After acrylic and filing, apply a sticky layer or base gel to the top half of the nail. Use silver chrome powder or foil and press gently, then blend the edge with a soft brush before curing. Top coat lightly if your system requires it, but keep it minimal so the chrome doesn't dull too much.
Editor's noteStore chrome powders in sealed bags and keep them away from loose glitter; contamination ruins the finish.
Watch outAvoid pressing chrome too hard - it turns into a flat mirror and loses the smoked gradient.
17. True Red Coffin with Clear Gem "Tear" Drops
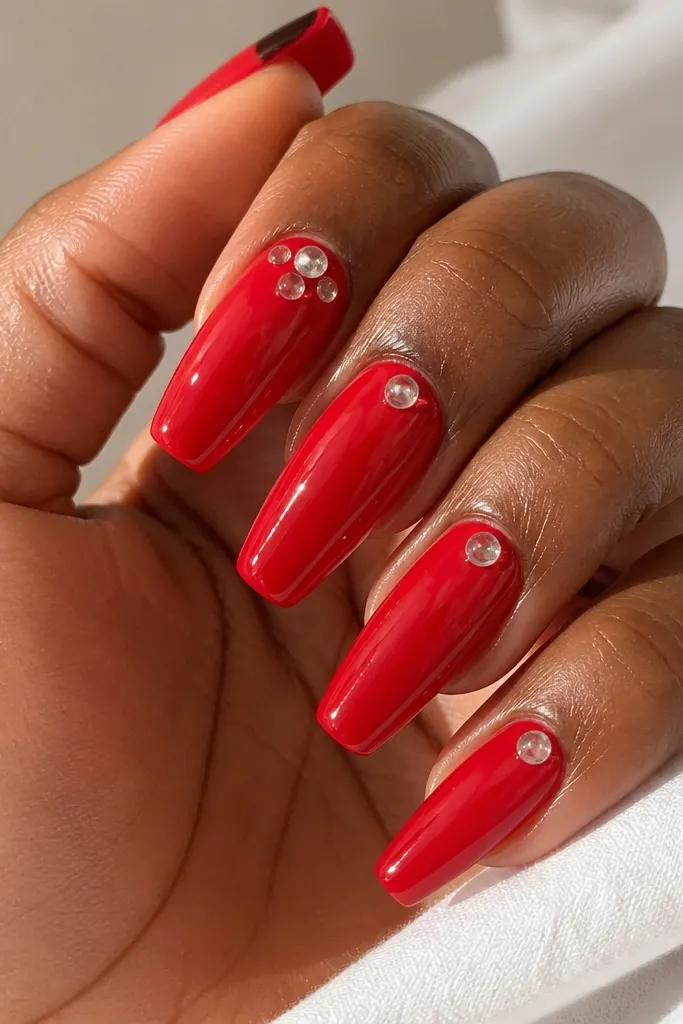
Tear drops give a high-end look because they sit like glass against the red. Clear gems also keep the set from feeling heavy. I place them slightly off-center so the reflections move when you turn your hand. This is a great beginner-friendly design because it uses a simple placement pattern.
After red acrylic and filing, add a small dot of rhinestone gel near the cuticle on one or two nails. Place a clear teardrop gem and cure. Seal with a thin top coat layer that covers the base of the gem so it doesn't catch on fabric.
Editor's noteStore gems in a foam pad tray so they stay aligned and you don't lose the smaller ones.
Watch outAvoid using too much gel under the gem; it can spread and make the gem slide.
18. Warm Red Coffin with Micro Gold Stud Row
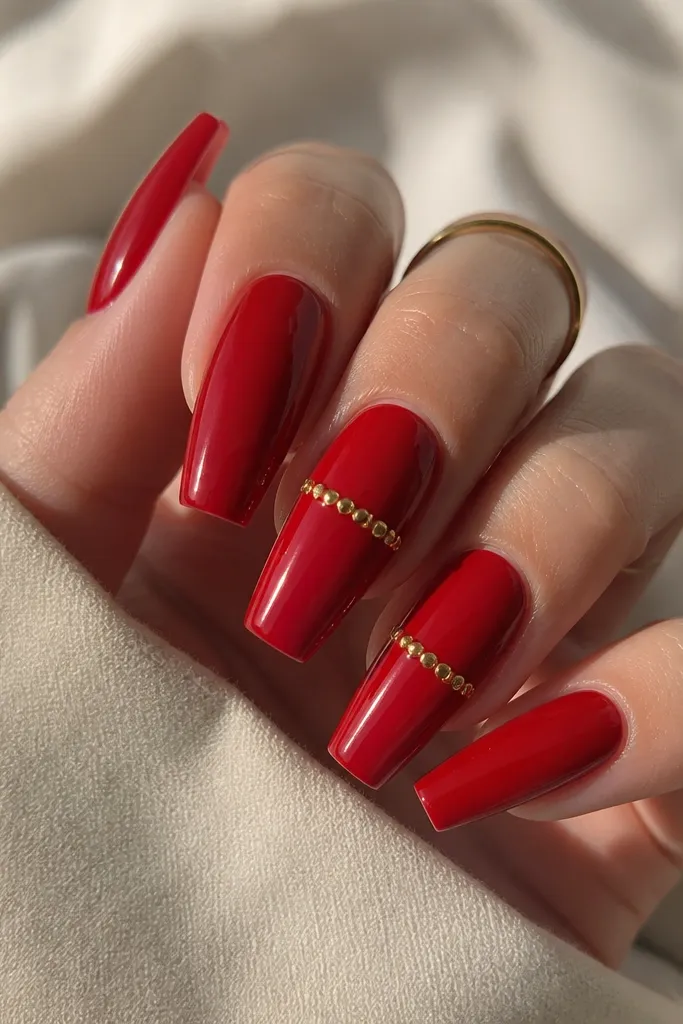
A micro stud row looks clean because it's controlled and linear. It adds texture and light without needing lots of art. I keep the studs small (think pinhead) and only on the middle third so the nail still looks sleek. Warm red makes the gold look softer than it does on cool cherry red.
Build warm red, then use stud gel or a thin line of rhinestone gel where the row should sit. Place studs one by one so the spacing stays even. Cure and top coat thinly, filing very lightly if you feel any edges.
Editor's noteUse a placement tool or tweezers with a flat grip so each stud lands straight.
Watch outAvoid uneven spacing; one crooked stud makes the whole row look messy.
19. Cherry Red Coffin with Faux Leather Crinkle Finish
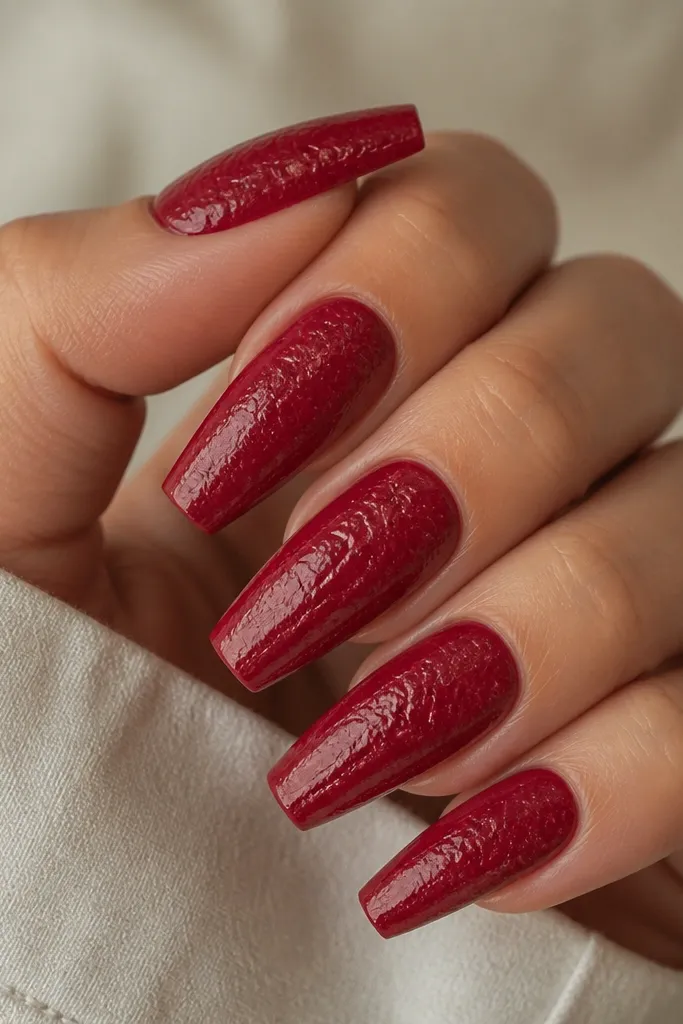
Crinkle texture makes red feel tactile and different from standard gloss or matte. I like it on coffin nails because the texture catches light along the ridges. Cherry red is deep enough that the texture still reads rich, even without extra art. This look lasts well because it doesn't show minor polish wear as quickly as glossy surfaces.
Use a semi-gloss base or a crinkle gel designed for texture. Apply the crinkle gel over a smooth cherry red base and cure according to the product instructions. After curing, avoid heavy buffing - you want the crinkle to stay crisp.
Editor's noteStore texture gels tightly capped and clean the nozzle after use so you don't get stringy blobs.
Watch outAvoid over-layering the crinkle gel; too much texture feels rough and catches on sleeves.