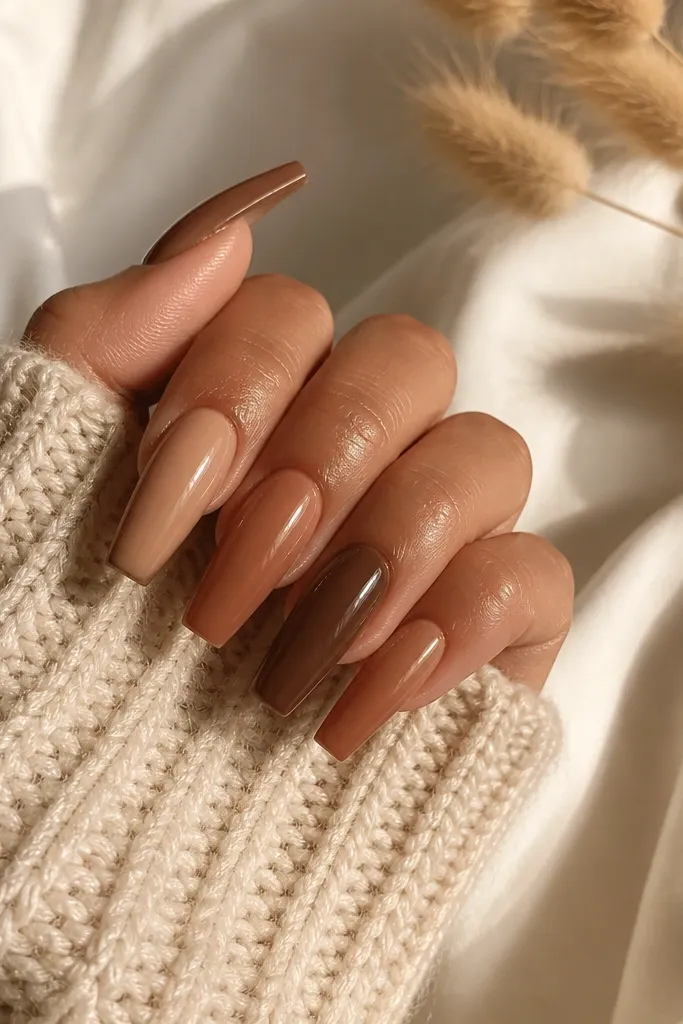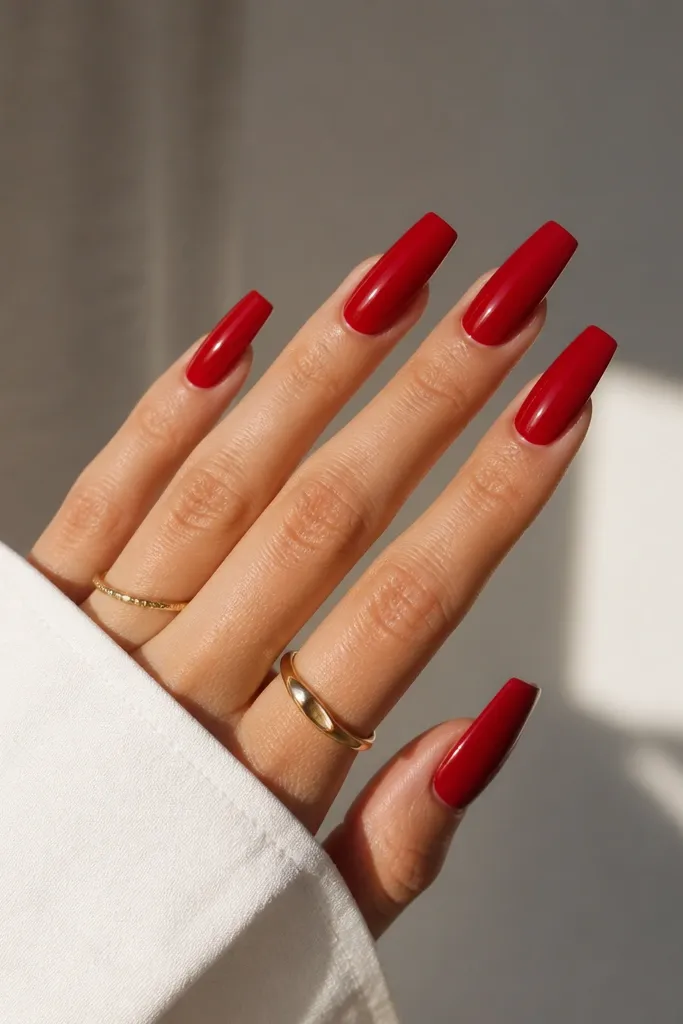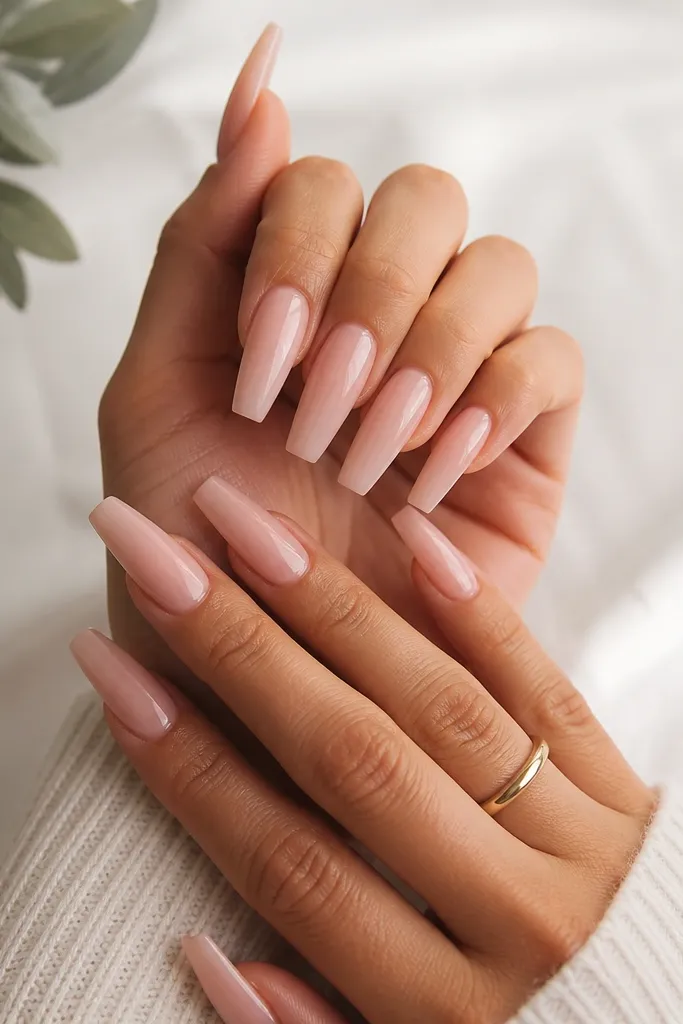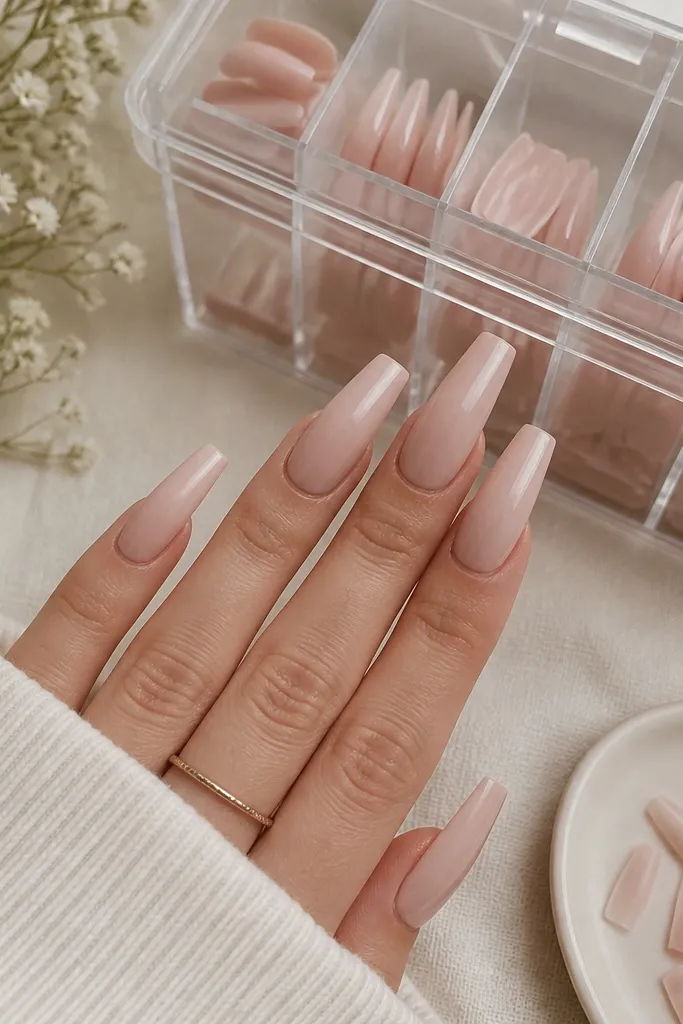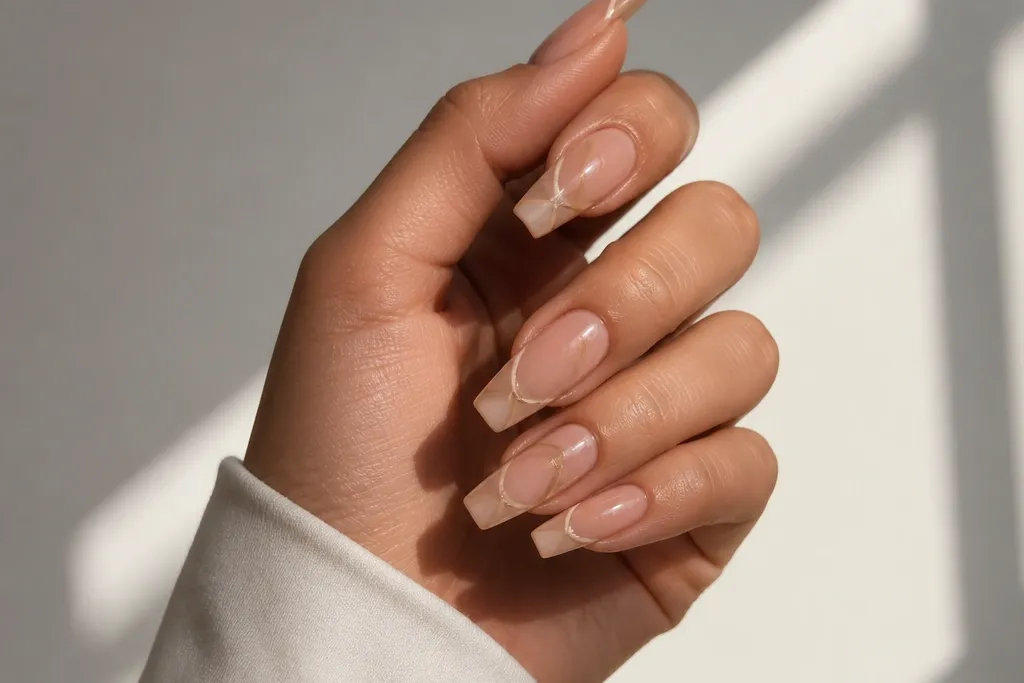
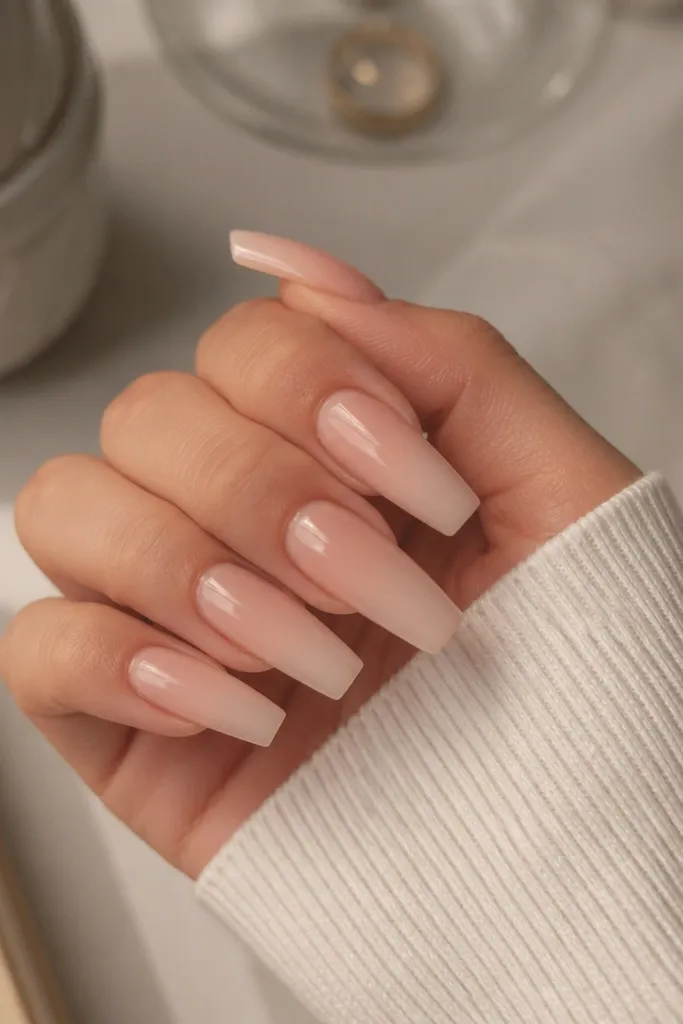
1. Barely-There Baby Pink Coffin with Clear Center
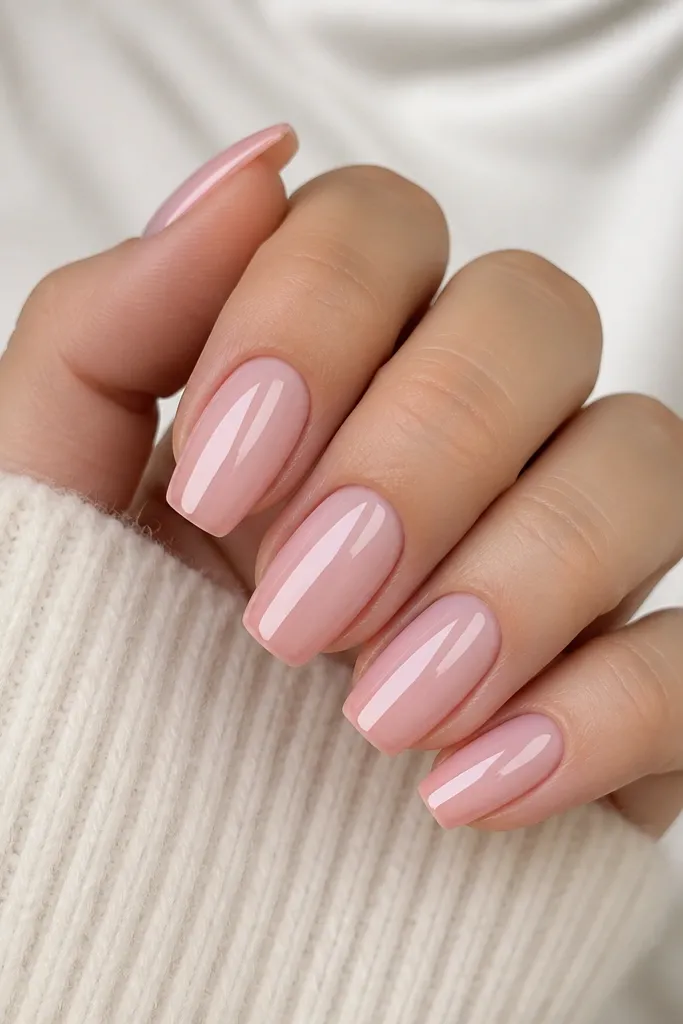
This look makes short coffin nails look longer because the clear center visually stretches the nail. The baby pink is thin and translucent, so your nail bed still shows through. The deeper sidewalls give shape without adding bulk. It reads clean in daylight and still feels dressed up at night.
Build a sheer baby pink base, then brush a thin clear gel or clear acrylic overlay down the center only. Keep the sidewall pink about 1-2 mm thick at the widest point. Finish with a high-gloss top coat so the clear strip catches light.
Editor's noteUse a flat brush and pull the clear strip straight - any wiggle makes it look uneven.
Watch outDon't cover the whole nail in clear - the effect needs that center-only line.
2. Milky Pink Coffin with Micro-White Tip Line
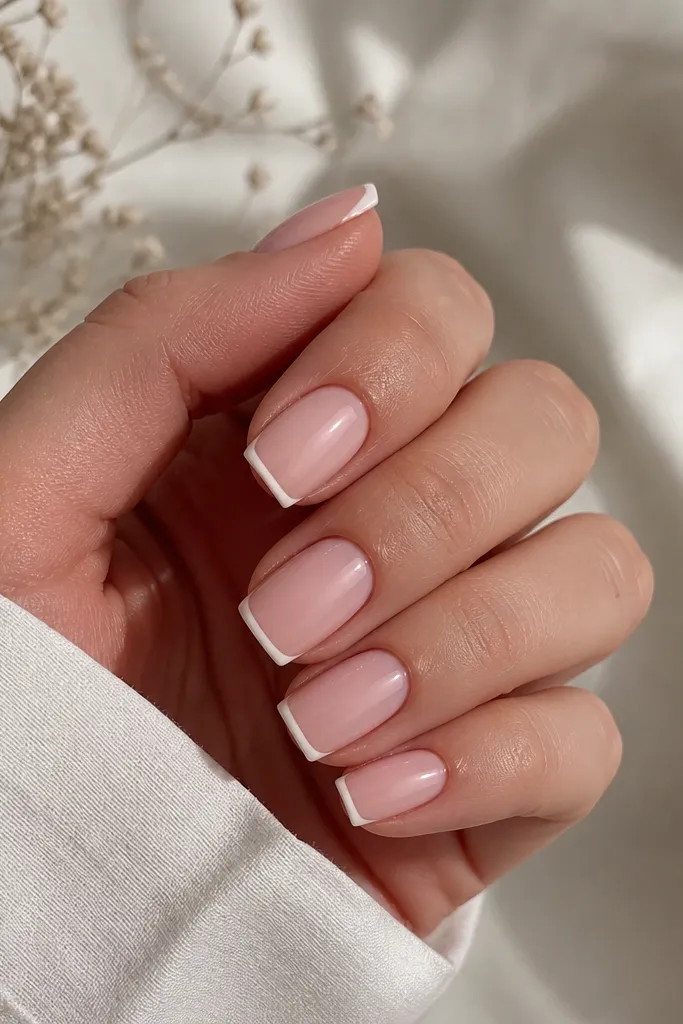
Milky pink adds softness while the micro white tip line gives the coffin a sharp edge. Because the white is thin, it doesn't overpower small nails. This is the "clean office" version of coffin. It also hides small filing dents better than super sheer pink.
Start with milky pink acrylic or gel, then outline the tip with a strip of white gel. Cure flat so the line stays even. Keep the white line under 0.5 mm tall.
Editor's notePractice the tip line on a spare nail form - your hand learns the pressure fast.
Watch outSkip a thick french tip band; it makes short coffin look stubby.
3. Bubblegum Pink Coffin with Frosted Cuticle Halo
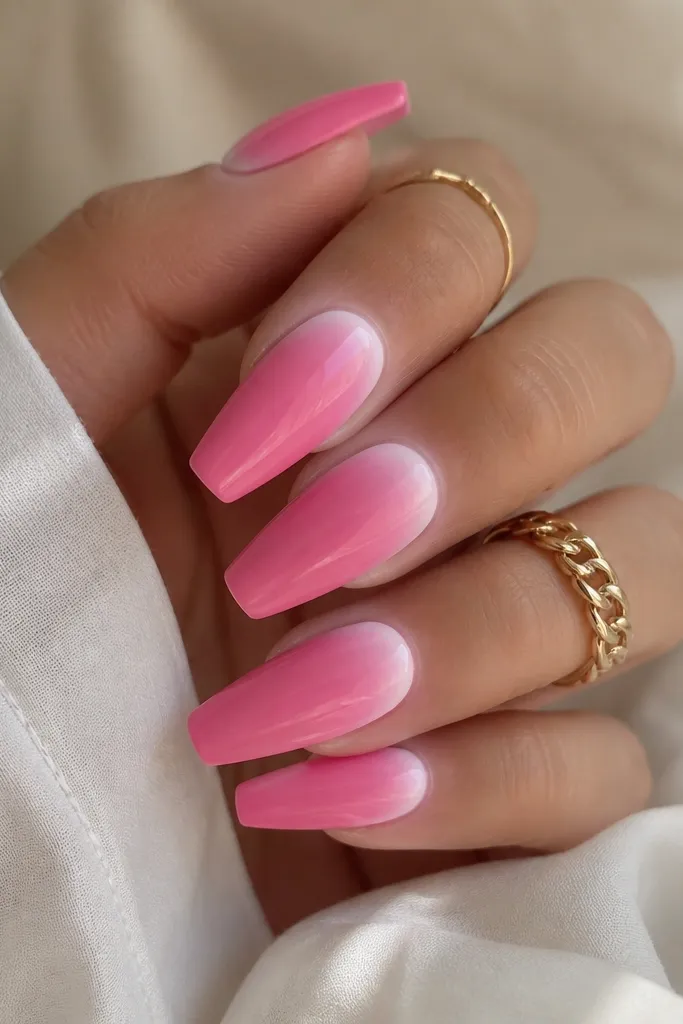
The frosted halo creates a highlight right at the cuticle, which makes the nail bed look wider and longer. Bubblegum pink is bold but still flattering when the frosting stays subtle. The fade keeps it airy instead of cartoonish. It looks great with warm skin tones.
Build bubblegum pink as your base, then use a fine brush to paint a semi-opaque frosted white ring at the cuticle edges. Blend outward with a dry brush so the halo fades. Top coat makes the frosting look like it's under glass.
Editor's noteKeep the halo slightly higher on the sidewalls than in the center for a longer look.
Watch outDon't paint a solid white crescent across the whole cuticle - it blocks the nail shape.
4. Sheer Rose Coffin with Blush Side Fade
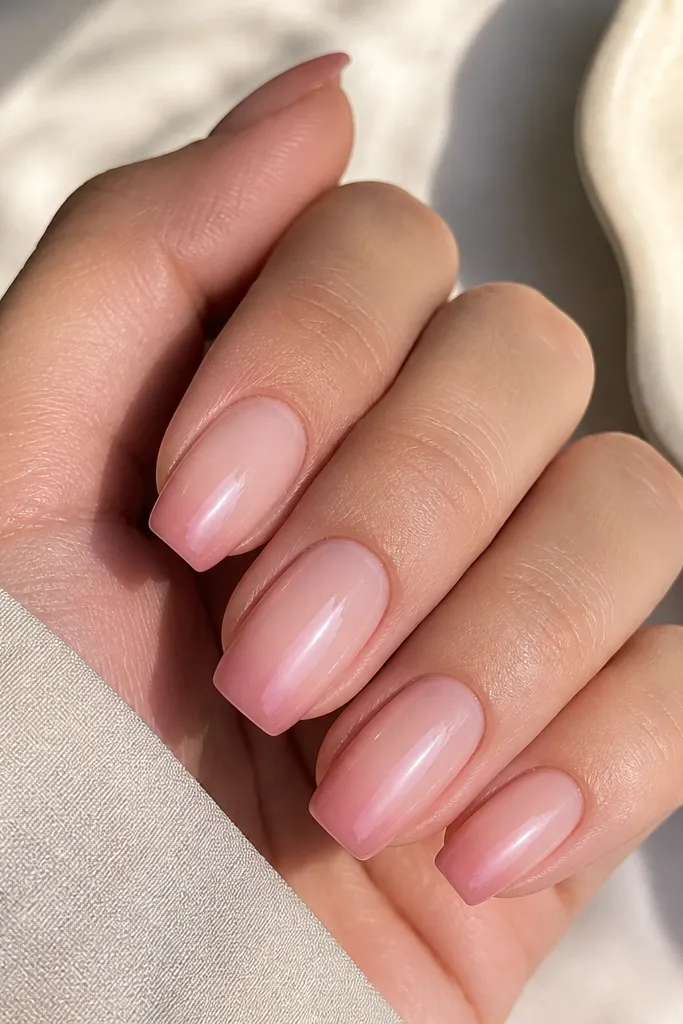
A side fade is one of the best tricks for nails acrylic coffin small space. The center stays light and reflective, so it reads longer. The blush on the sides gives structure and keeps the coffin point from looking too thin. It looks expensive because it's subtle.
Use a sheer rose base first. Then apply blush pink to the sidewalls in a narrow band, blending toward the center with minimal pressure. File to keep the gradient smooth at the apex. Finish with a glossy top coat.
Editor's noteBlend with the corner of your brush, not the flat - it keeps the gradient narrow.
Watch outSkip harsh ombre stripes; they show filing lines.
5. Pink Pearl Coffin with One-Sparkle Corner
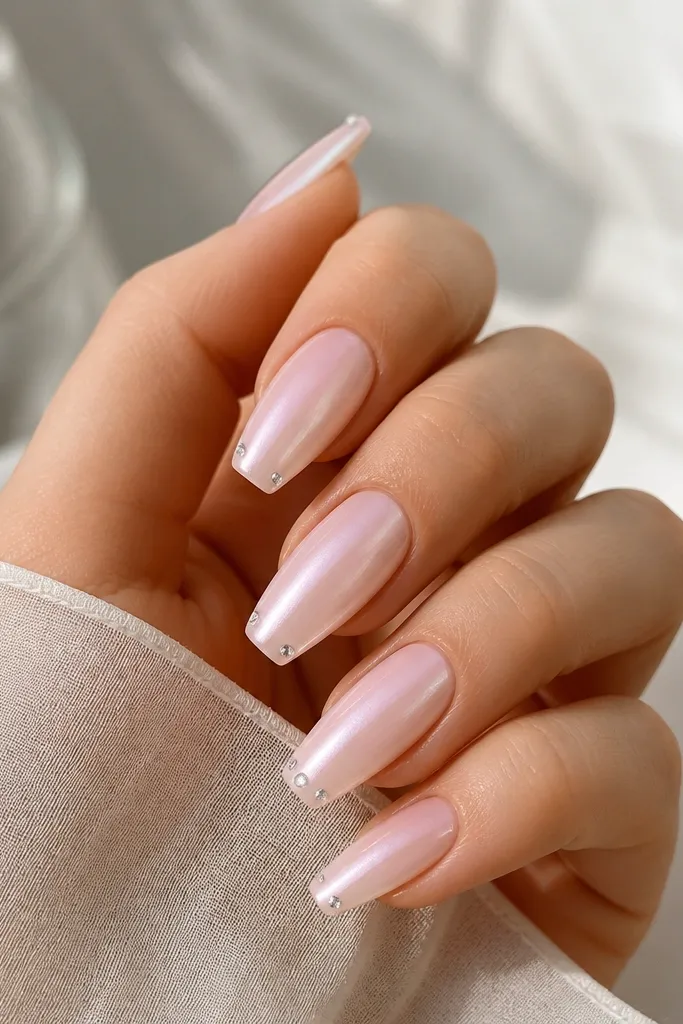
Pink pearl has that soft shimmer that makes short nails look polished without glitter bulk. One crystal at the corner draws the eye to the tip edge, which makes coffin shape look intentional. The single accent keeps it clean and wearable. It catches light when you move your hands.
Use pink pearl acrylic or pearl gel as your base. Place one small crystal (SS3-SS5 size) at the outer corner of the tip. Seal it with a thin top coat layer so it stays smooth.
Editor's noteSet crystals after you file and buff, then do a thin seal coat - thick coats lift edges.
Watch outDon't add crystals at the center of short nails; it shortens the visual line.
6. Rose Quartz Coffin with Clear Crackle Veins
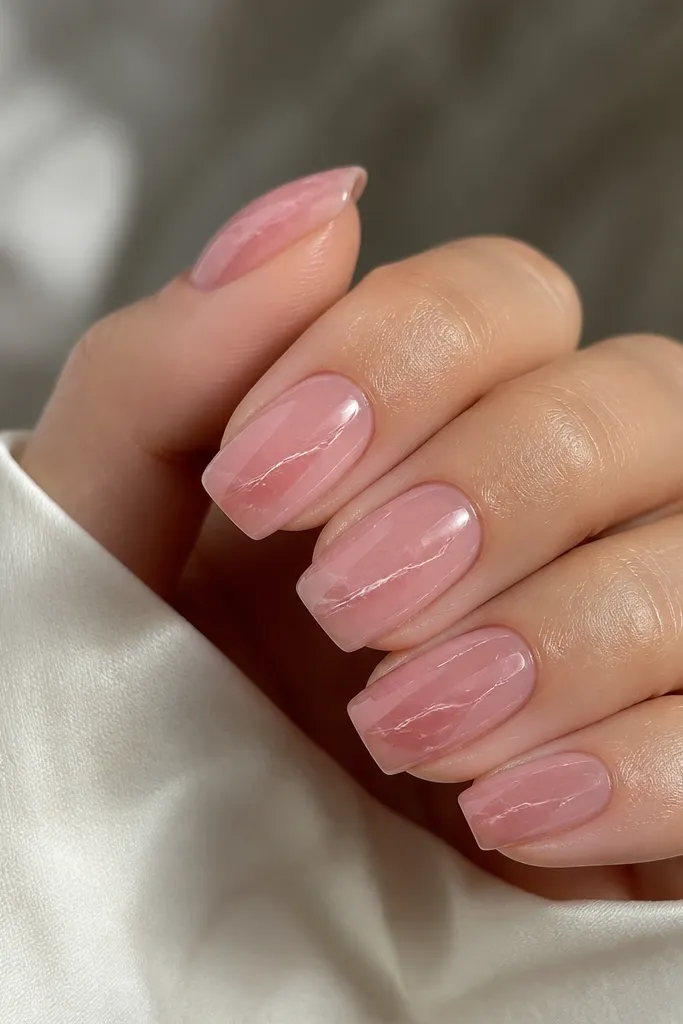
Rose quartz nails look good on small hands because the base is light and the veins are fine. The crackle lines keep it from looking flat, and the clear lines preserve the coffin length. It's airy, not chunky. You get that spa-stone vibe without heavy art.
Build a translucent rose pink base. Use a clear crackle gel or a thin clear acrylic line to draw veins - keep them under 1 mm wide. Finish with glossy top coat so the crackle looks suspended.
Editor's noteKeep the veins thinner near the tip and wider near the cuticle for a natural flow.
Watch outAvoid thick painted veins; they look like stickers on short nails.
7. Hot Pink Micro-French Coffin with Clear Base
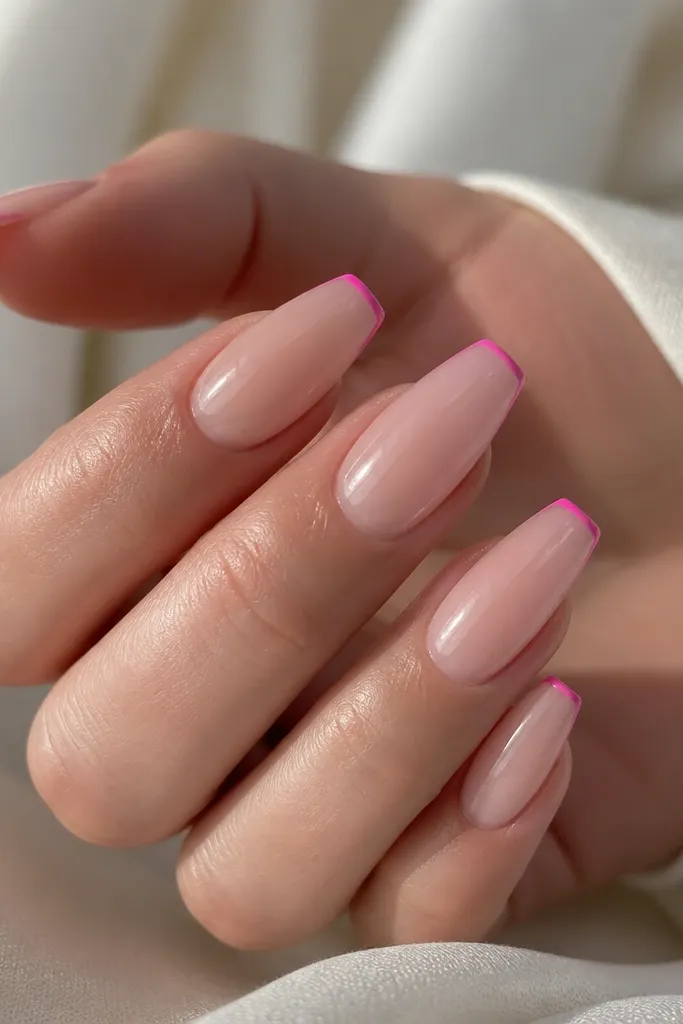
This design is bold but still small-space friendly because only the tip carries color. The clear base makes the nail look longer, and the thin hot pink line gives the coffin edge definition. It's perfect if you hate full coverage polish. The contrast looks sharp in photos.
Apply clear or sheer nude base acrylic/gel first. Paint a thin hot pink french line at the free edge and cap with top coat. Keep the line narrow and centered so it doesn't drift wide.
Editor's noteUse a striping brush and steady your hand on your table - micro lines punish shaky wrists.
Watch outDon't fill the whole tip with hot pink; it turns into a block.
8. Soft Pink Coffin with Two-Tone Cuticle Outline
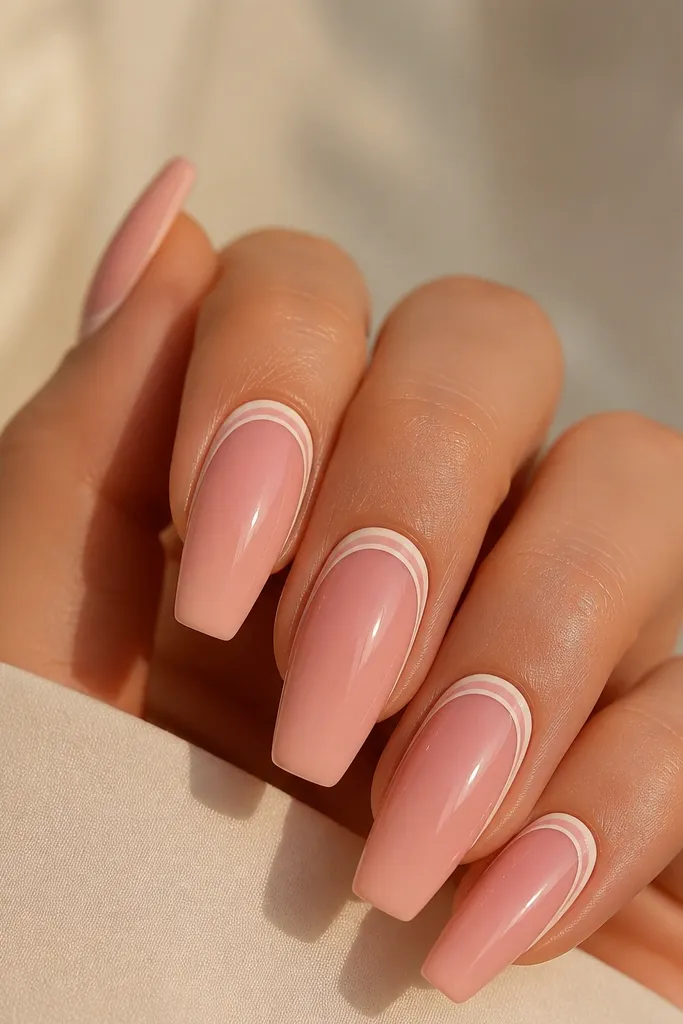
The two-tone cuticle outline gives structure in a place that makes nails look longer when it's crisp. The inner pale shade brightens the base, and the outer deeper shade frames the shape. It's clean enough for work and pretty enough for dates. This one looks great on short coffin because it defines the nail bed.
Use soft pink acrylic or gel as the base. With a fine detail brush, draw a thin inner cuticle line in pale pink, then a second line slightly farther out in deeper pink. Seal carefully so lines stay sharp.
Editor's noteStop the outline 1 mm before the side corners so it doesn't get messy during top coat.
Watch outSkip thick linework; it looks like marker and lifts at the cuticle.
9. Pink Marble Coffin with Clear Negative Space
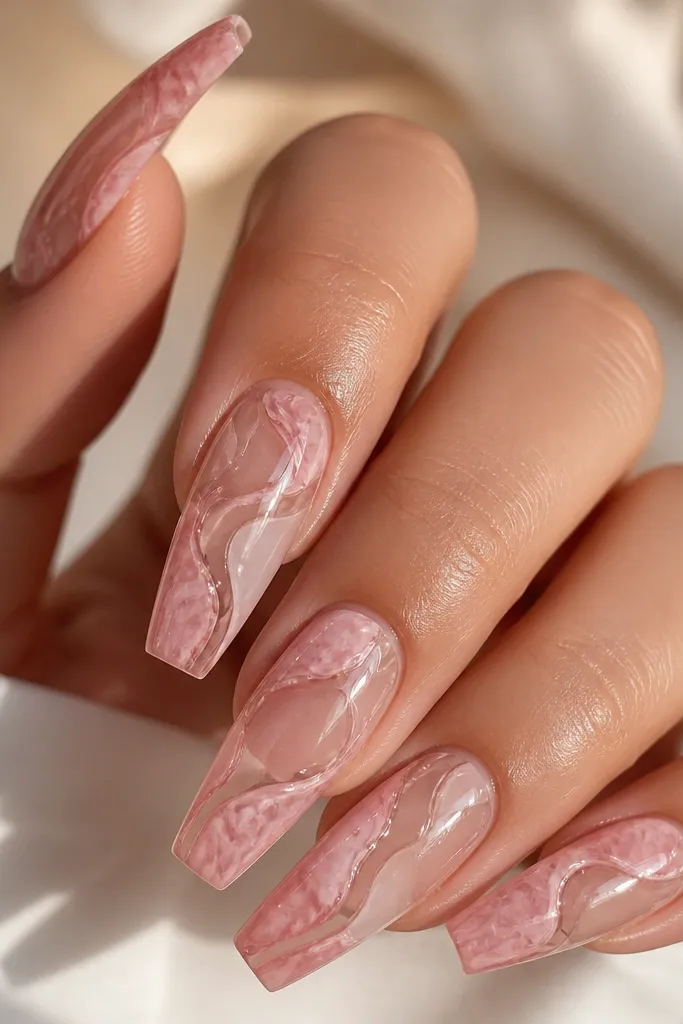
Negative space keeps marble from looking busy on small nails. The clear swirls preserve that length effect, and the pink marble adds movement. This is one of the few marble designs that doesn't crush short coffin shape. It looks modern, not "sticker marble."
Start with a sheer pink base. Add thin white and deeper rose lines, then use a clear gel to pull them into marble veins. Leave some areas unpainted so you get true negative space. Top coat smooths everything.
Editor's noteUse a toothpick for the tiniest vein breaks - it gives more organic lines than a brush.
Watch outDon't cover every millimeter with pigment; marble needs breathing room.
10. Blush Ombre Coffin with Glossy Center Stripe
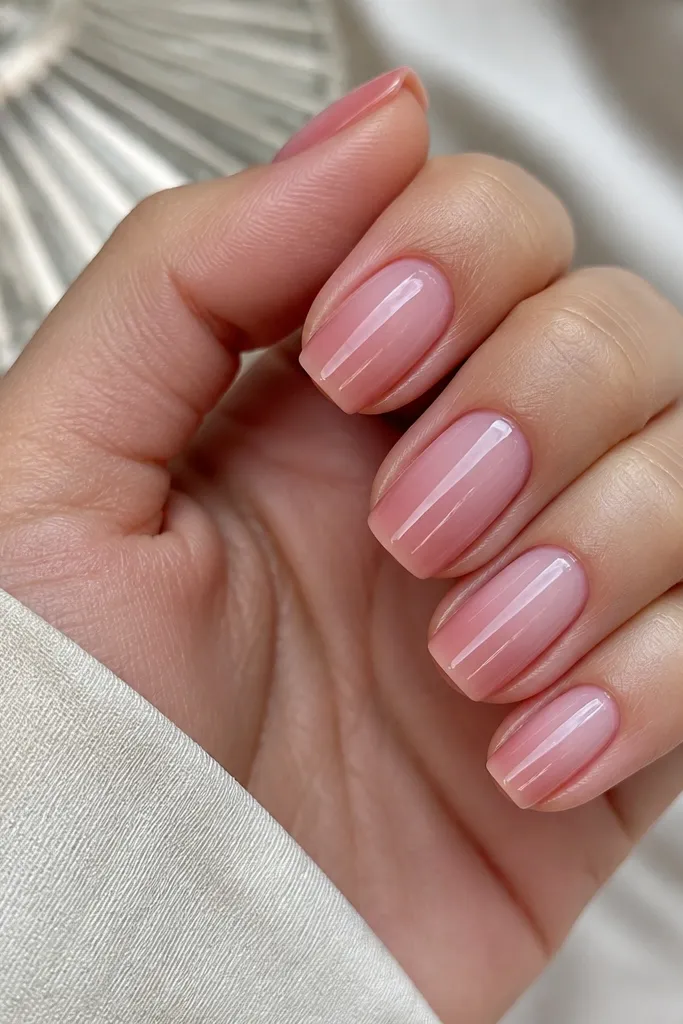
The raised glossy stripe makes the nail look dimensional, and the ombre keeps it flattering. Blush ombre is forgiving if your filing isn't perfect because the gradient hides small edges. The center stripe adds a "longer finger" visual cue. It looks like salon 3D work but stays simple.
Blend deeper blush at the sidewalls into a lighter center. Then paint a clear gel stripe down the middle and cap it with a thin layer so it's smooth. Keep the stripe about 1 mm wide on short nails.
Editor's noteCure the stripe in short bursts so it stays domed, not flooded.
Watch outDon't make the stripe too wide; it turns into a shiny stripe block.
11. Pink Chrome Coffin with Narrow Mirror Tip
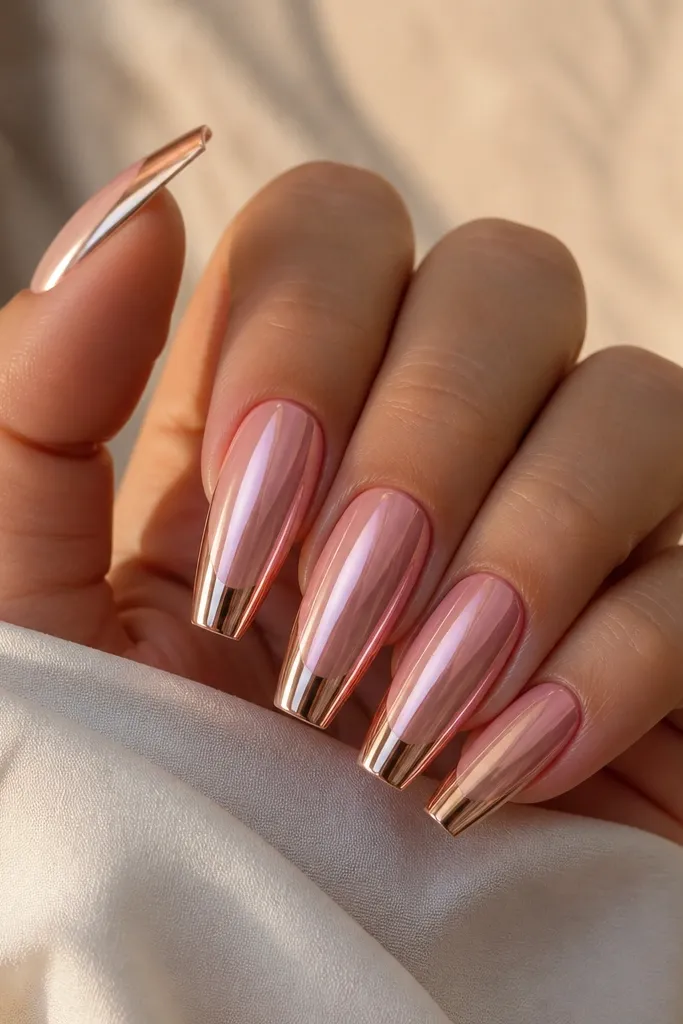
Chrome at the tip creates instant coffin definition without adding weight. The narrow mirror band keeps it from looking like full chrome you'll regret. Pink chrome also flatters small nails because the shine is concentrated at the free edge. It looks clean under overhead lights.
Apply a pink base gel, then cover the last 2-3 mm with a tacky gel layer. Buff the chrome powder onto that area only and wipe off excess. Seal with a chrome-safe top coat so it doesn't dull.
Editor's notePress the chrome gently with a foam applicator - hard pressure makes it patchy.
Watch outAvoid full chrome coverage on short coffin; it looks heavy.
12. Dusty Rose Coffin with Tiny Heart at the Cuticle
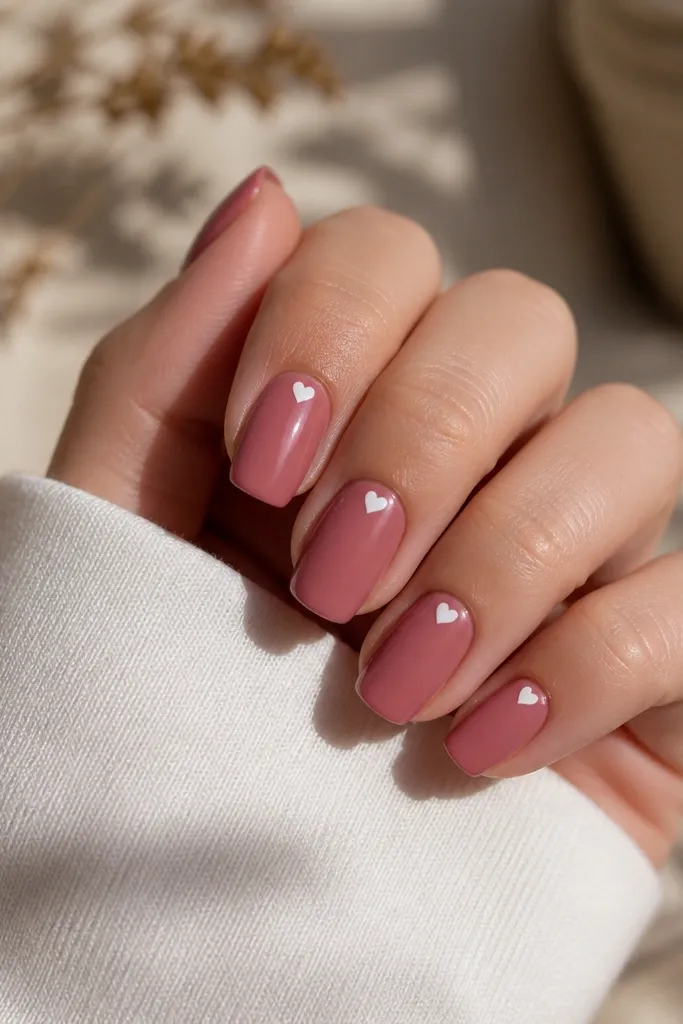
A tiny heart at the cuticle makes the nail feel sweet without crowding the tip. Dusty rose is muted enough to look grown-up, and the heart stays small so the coffin point still reads. It's cute in a subtle way. This one also works if you're doing a "pink but not childish" set.
Use dusty rose acrylic/gel as your base. Place a small heart charm or paint one with a dotting tool and a fine liner brush. Seal and file around it so the top coat is smooth.
Editor's noteIf painting hearts, make the top lobes first, then add the point last.
Watch outSkip big hearts on short nails; they block the nail bed.
13. Rose Pink Coffin with Two-Stripe Diagonal French
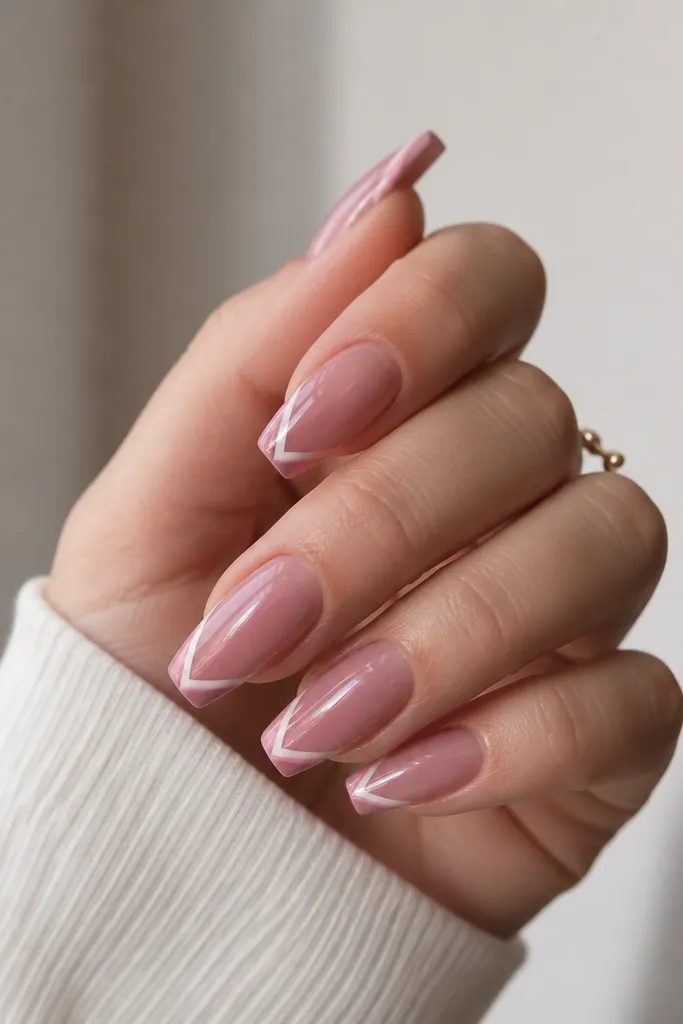
Diagonal tips elongate the nail because the line direction pulls the eye outward. Two thin stripes look more refined than one thick band. This design gives you a "styled" look without full nail art coverage. It's great for small nails because the design sits at the free edge.
Sheer rose base first. Paint a thin white diagonal line at the tip and add a second line in pale pink just beside it. Keep the stripes narrow and symmetrical across nails. Top coat seals everything.
Editor's noteUse nail tape strips as guides - it keeps the diagonals even.
Watch outDon't let the diagonal stripes cross the center too far; it shortens the visual line.
14. Pink Satin Coffin with Matte Middle and Glossy Tips
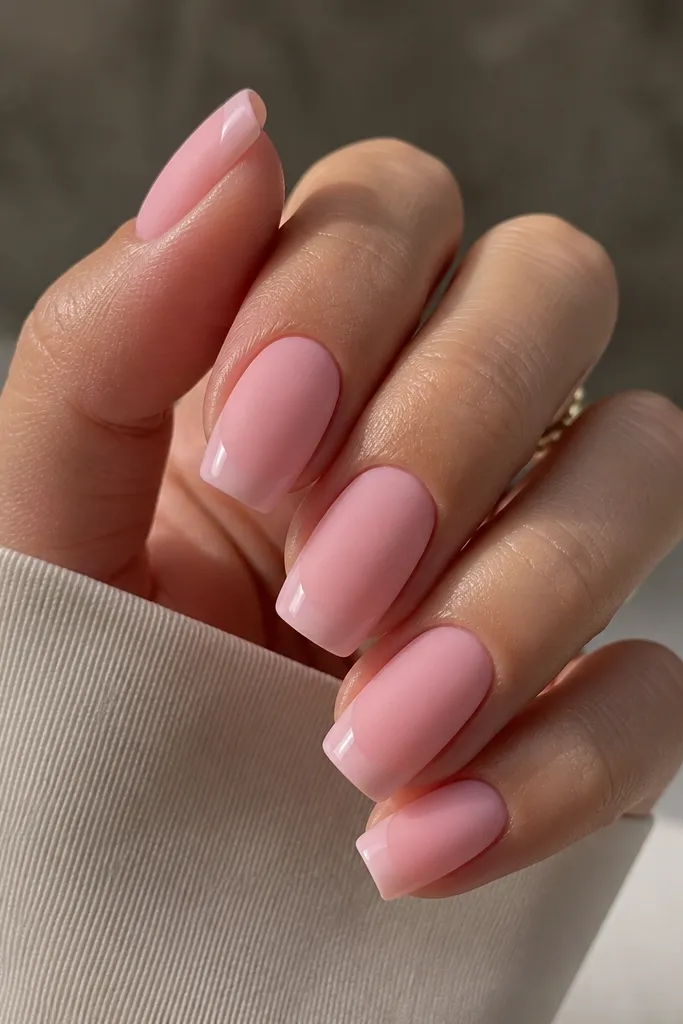
The finish contrast makes the nail look longer and more expensive. Matte in the middle hides tiny surface imperfections after filing. Glossy tips keep the coffin edge crisp and reflective. Pink satin gives a smooth, velvety look that still reads "pink" in daylight.
Apply pink satin acrylic or gel. After curing, apply matte top coat to the midsection only, leaving the tip glossy with a shiny top coat. You can mask the tip with a small strip of tape while top coating.
Editor's noteLightly buff before matte top coat so it doesn't grab on bumps.
Watch outAvoid full matte on short coffin; it can make the tip look dull and rounded.
15. Sheer Pink Coffin with Tiny Glitter Fade
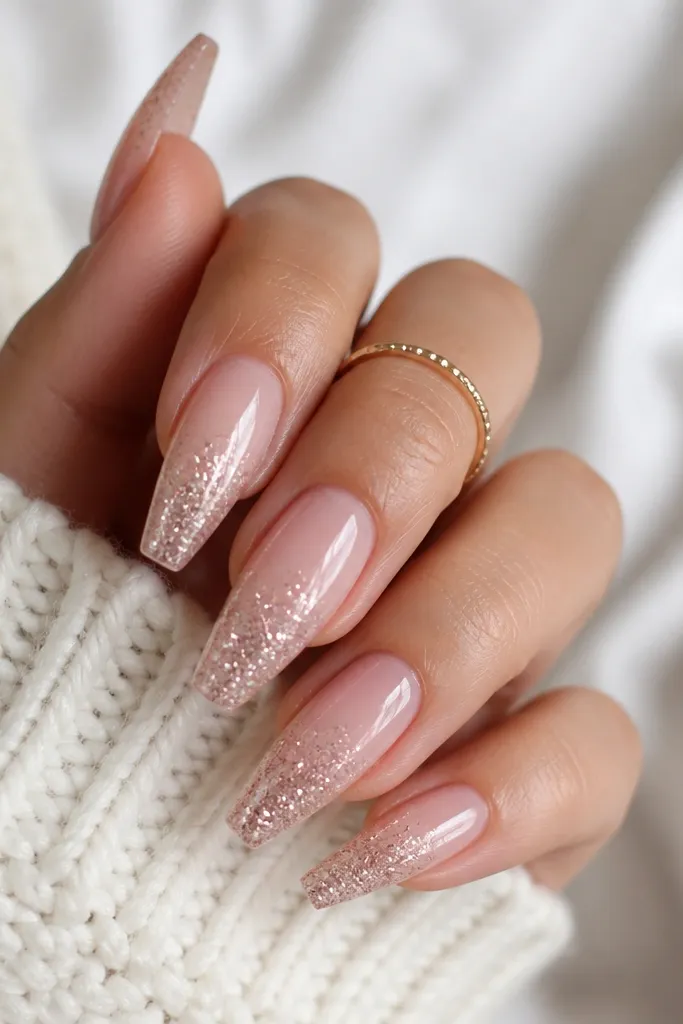
A glitter fade reads delicate and keeps short coffin from looking thick. The sheer base makes your nail bed visible, and the glitter only at the free edge adds sparkle where it counts. This is the easiest way to get "special" without heavy nail art. It also grows out nicer because the base stays light.
Use sheer pink as your base. Dab fine pink micro-glitter at the tip and blend upward with a clear gel, stopping around mid-nail. Cure and cap with top coat so glitter feels smooth.
Editor's noteUse micro-glitter, not chunky - chunky catches on everything and lifts faster.
Watch outSkip glitter all the way to the cuticle; it looks messy as it grows out.
16. Pink Skittle Coffin with 5 Different Sweet Shades
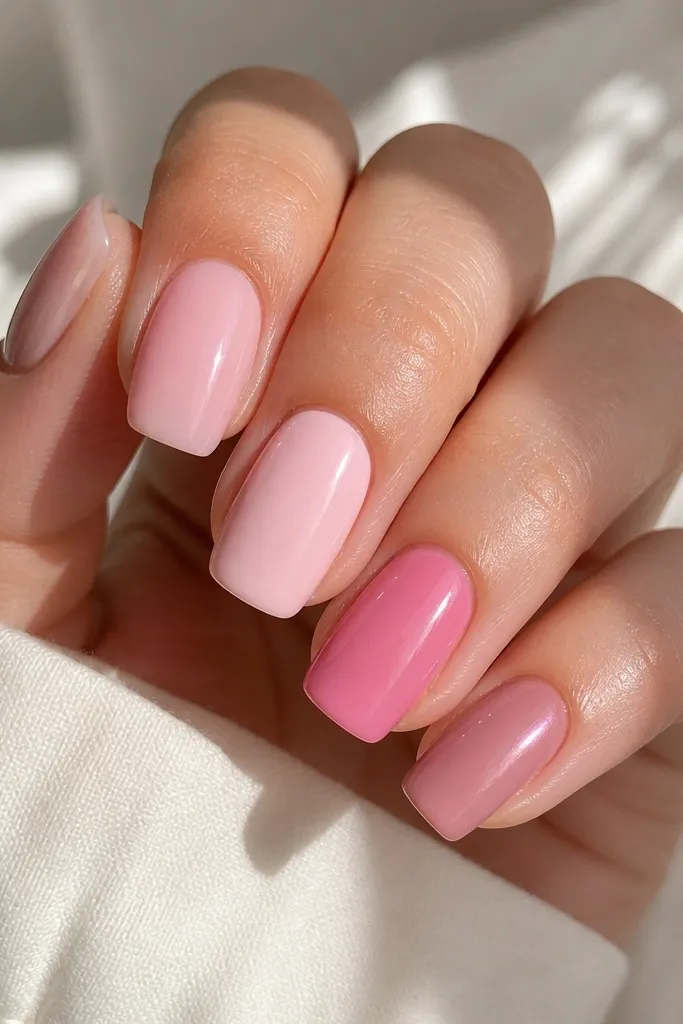
Skittle sets work on small-space nails because each nail gets a distinct look without needing heavy art. The key is keeping all shades in the same pink family so your hand still looks cohesive. I've done this in real life for events when I couldn't decide. It looks intentional instead of random when you choose one finish per nail.
Pick five pink finishes: sheer, milky, bubblegum, dusty rose, and pearl. Keep the coffin length consistent across nails and cap with the same glossy top coat. Apply each shade with a thin first layer so the nail bed stays light.
Editor's noteStart with the lightest pink on your smallest nail so the set feels balanced.
Watch outAvoid mixing non-pink colors like nude-brown - it clashes with the coffin shape.
17. Blush Coffin with Tiny Silver Stud Line at the Tip
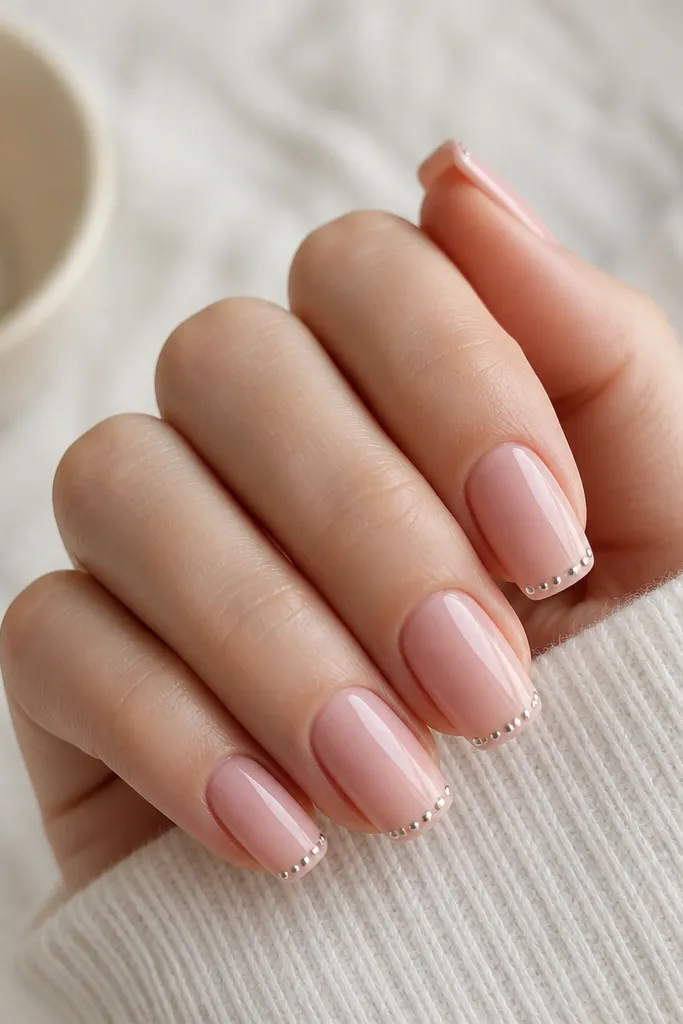
A stud line gives you crisp definition at the free edge, which is where short coffin needs help. The studs are small enough to stay sleek, and silver adds cool sparkle against warm pink. This design looks like jewelry without being loud. It also holds up well because the art stays near the tip.
Apply blush pink acrylic/gel as base. Place micro studs (around 0.8-1.2 mm) in a straight line across the tip, leaving 0.5 mm from side edges. Seal with a thin top coat and file to keep it smooth.
Editor's notePlace the studs before your final top coat, then cap lightly so the row doesn't snag.
Watch outDon't use big studs; they make short coffin look bulky.
18. Pink Ombre Coffin with Clear Apex Glow
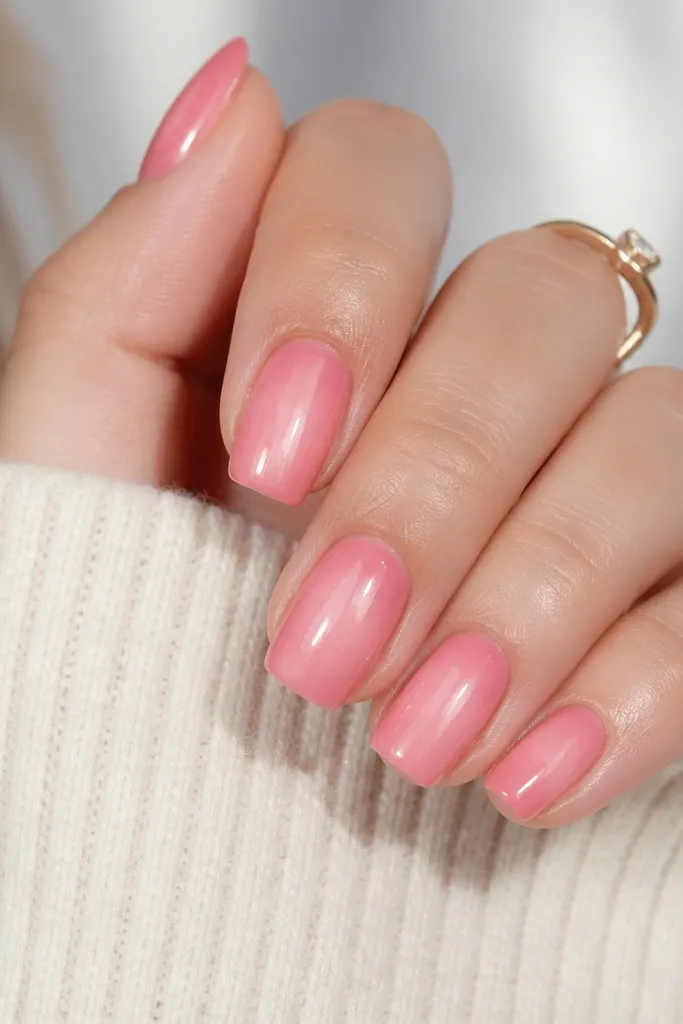
The clear apex is a trick I use when I want a "wet" look without painting extra art. Ombre gives softness, while the clear apex makes the nail look stronger and more dimensional. On small nails, this combo keeps the shape crisp even as you file. It reads glossy and salon-like.
Build an ombre: deeper pink near the sidewalls and lighter in the center. Then add a small clear gel/acrylic patch at the highest point of the apex and cap it. Keep the clear area small so it doesn't look like a bubble.
Editor's noteUse a lamp timer - too long makes the clear gel spread and lose shape.
Watch outAvoid thick clear blobs; they crack at the apex after a few days.
19. Pink Coffin with One Feather Detail in White
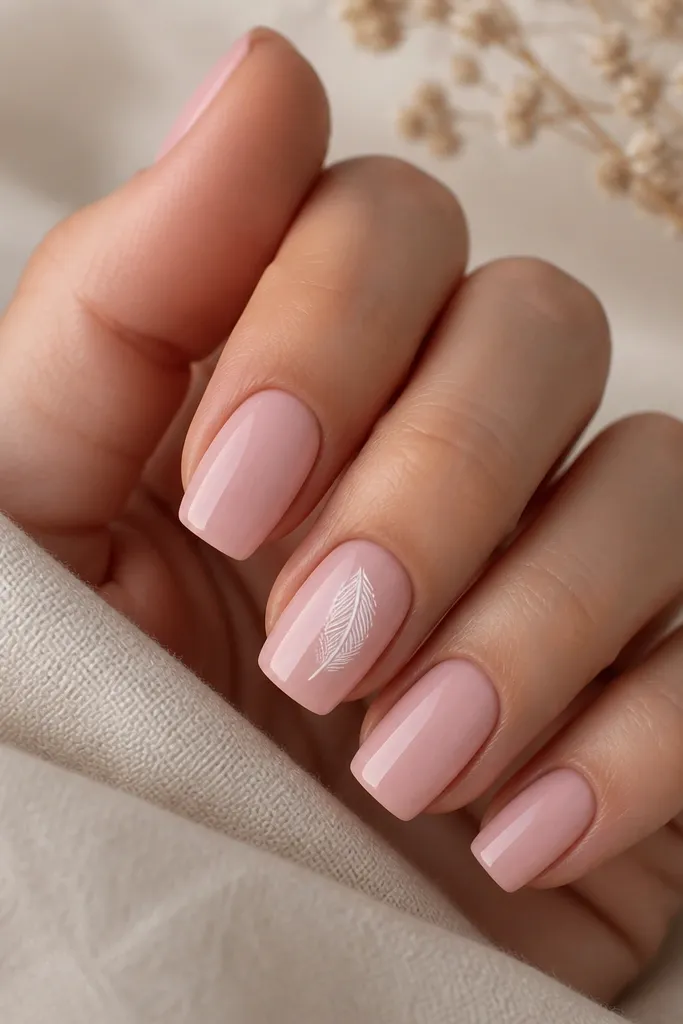
A single feather detail adds movement and keeps the rest of the nails clean. Soft pink makes the white feather look crisp, not harsh. This is a great "I want art but I still want it wearable" set. It also hides tiny growth lines because only one nail has detail.
Use soft pink acrylic/gel on all nails. On the accent nail, draw a small feather with white gel: a curved center spine and thin side strokes. Keep it under 6 mm tall on short coffin. Top coat over everything with a glossy finish.
Editor's noteDraw the feather lines in one direction so the barbs look consistent.
Watch outDon't put feather art on every nail; it turns into clutter on short coffin.
20. Cameo Pink Coffin with Half-Moon Silver at Cuticle
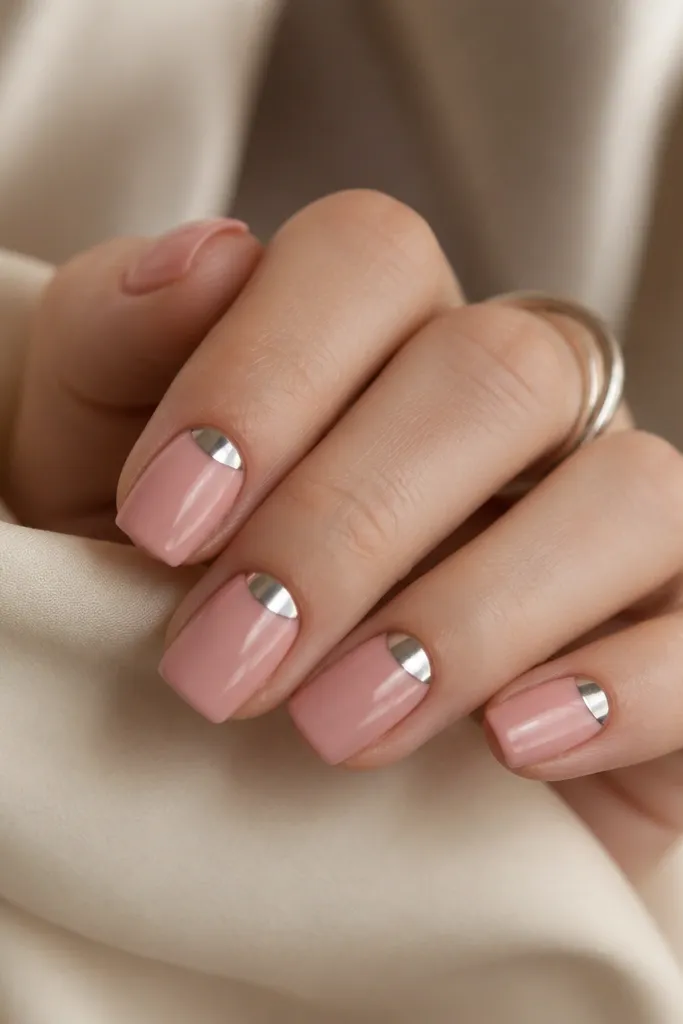
The half-moon at the cuticle frames the nail bed and makes the coffin shape look longer. Silver details add brightness without covering the whole nail. Cameo pink is slightly warmer than baby pink, so it looks flattering even with short length. This is a clean party look.
Apply cameo pink as base. Use a thin strip of silver foil or paint a half-moon with silver gel at the cuticle. Keep the half-moon radius small, about 2-3 mm wide. Seal with top coat and cap the edges.
Editor's noteIf using foil, press with a flat cotton pad and seal immediately.
Watch outSkip big reverse french moons; they widen short nails.
21. Pink Coffin with Tiny Bow on One Nail Only
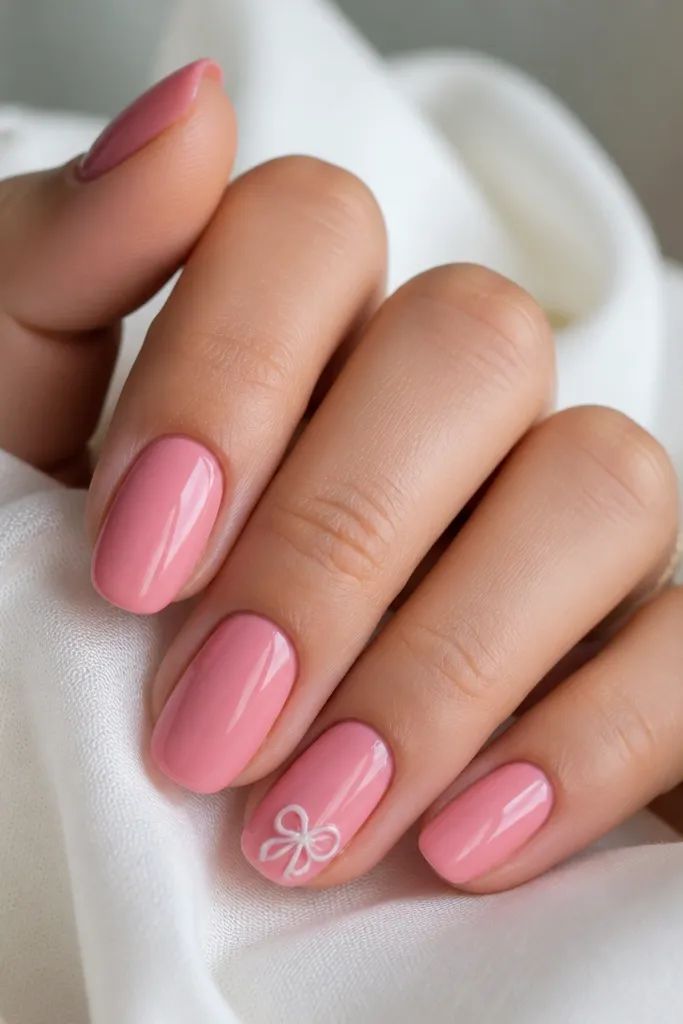
A tiny bow reads cute but still grown when it's placed small and only on one nail. Keeping the rest solid pink makes the hand look neat, which matters for nails acrylic coffin small space. The bow adds personality without breaking the coffin line. White also pops against pink in indoor lighting.
Paint all nails glossy pink (choose sheer or milky). On the accent nail, place the bow at the outer tip corner so it points toward the coffin point. Use white gel to sculpt the loops and cure in place. Top coat seals it smoothly.
Editor's noteMake the bow about one-third the width of the nail - small reads refined.
Watch outDon't add bow art to multiple nails; it makes short coffin look busy.
22. Dusty Rose Coffin with Blush Glitter Road at the Tip
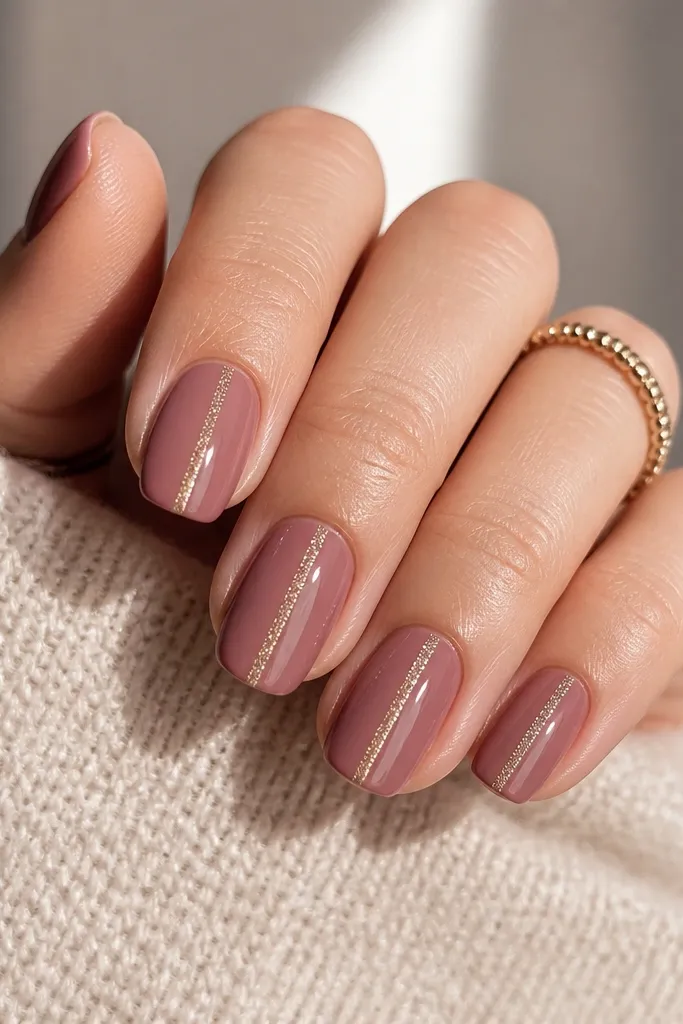
A center "glitter road" keeps the coffin silhouette sharp and draws the eye to the tip. Dusty rose keeps the glitter from looking too loud. This set looks like you spent more time than you did because the line is crisp. It also grows out cleaner since the glitter is near the edge.
Use dusty rose base. Apply a thin strip of clear gel down the center of the tip, then press fine blush glitter into it. Cure and cap with top coat so the strip is smooth. Keep the strip under 1 mm wide.
Editor's noteWipe your brush on a paper towel before pulling the gel strip so it stays narrow.
Watch outAvoid a wide glitter stripe; it makes short coffin look blunt.
23. Soft Pink Coffin with Clear Outline Flower
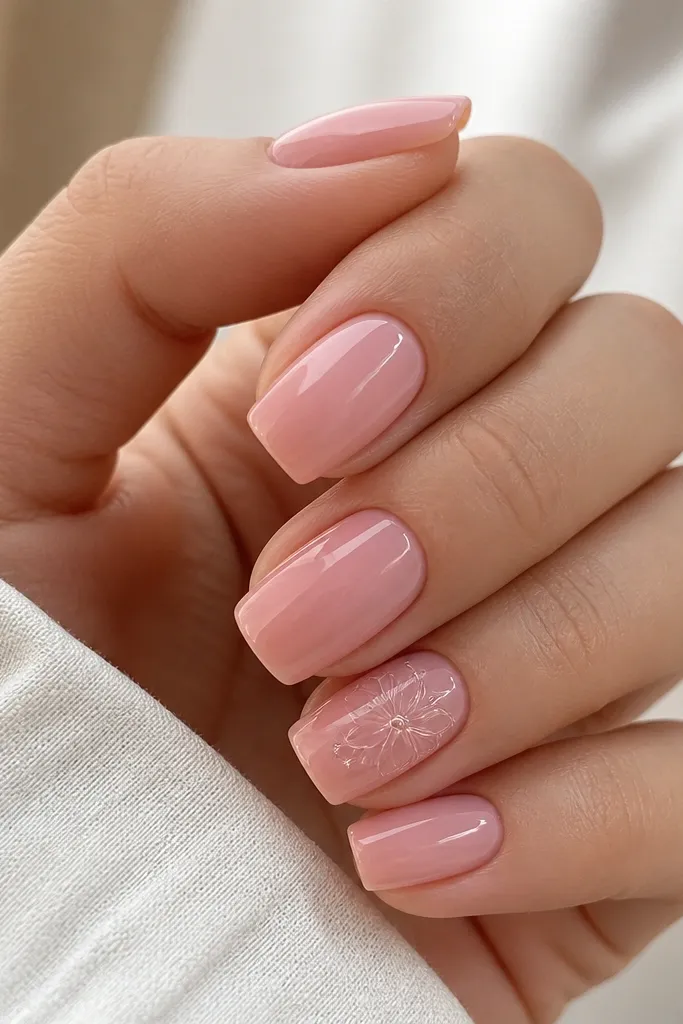
Clear outline art looks airy and modern on short coffin. Soft pink gives you a smooth background, and the clear lines create a raised look without extra color. It's the kind of nail art that doesn't fight your hand shape. It also looks good with glossy top coat because the lines catch light.
Use soft pink base on all nails. On the accent nail, draw a 5-petal flower in clear gel: outline each petal, then add a tiny dot for the center. Cure and top coat over gently so the outline stays visible.
Editor's noteUse a dotting tool for the center so it looks perfectly round.
Watch outDon't fill the flower with opaque paint; it turns into a flat sticker look.
24. Pink Coffin with Faint Diagonal Blush Confetti
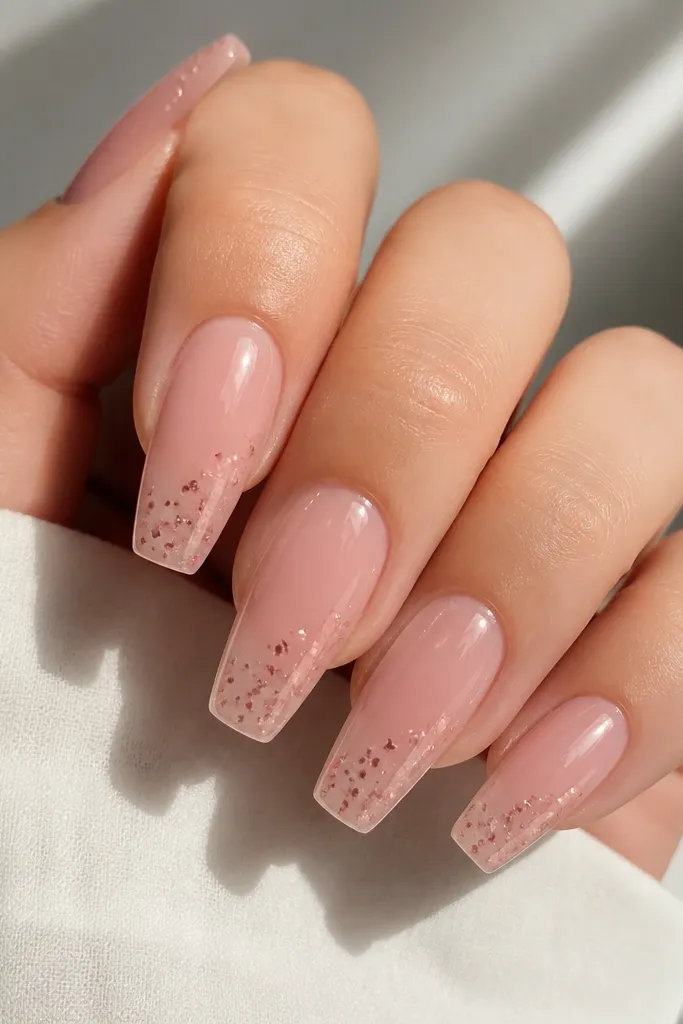
Sparse confetti adds texture without taking over the nail bed. The diagonal placement creates movement and makes short coffin look longer. Sheer pink keeps it light, and micro flecks sparkle just enough. This is a "pretty but not loud" set that works for everyday.
Apply a sheer pink base. Add micro glitter or confetti pieces diagonally using a clear gel swipe, stopping before the cuticle by 2-3 mm. Cure and cap with top coat to smooth edges.
Editor's noteUse tweezers for placement so dots don't clump.
Watch outAvoid big glitter chunks; they create bumps that catch on hair and fabric.
25. Hot Pink Coffin with White Star Cluster at Tip
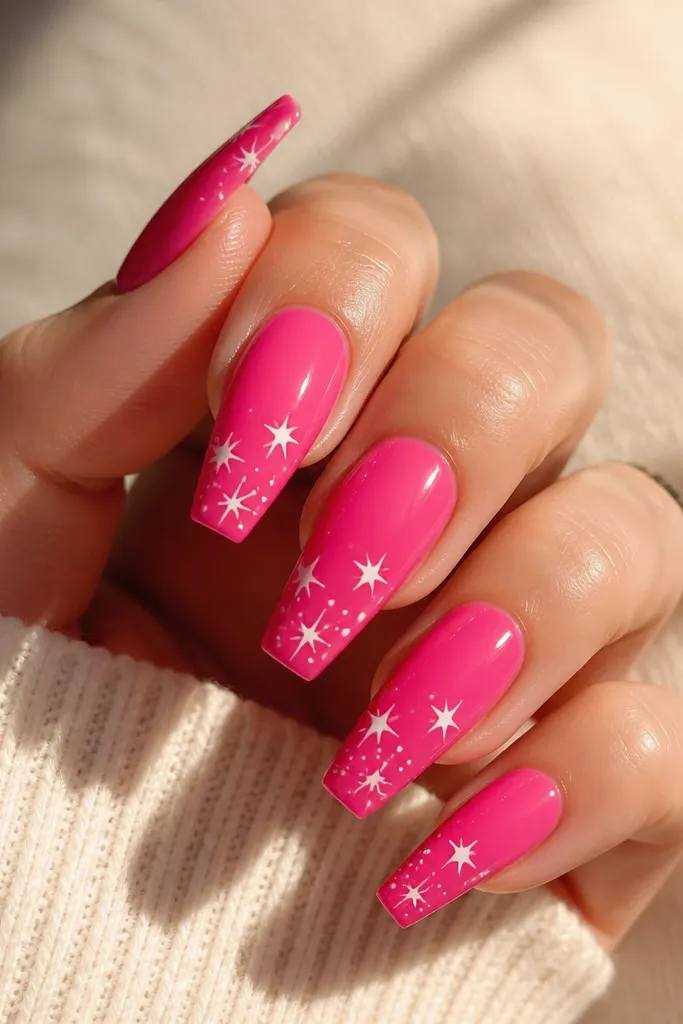
Stars at the tip keep the design focused and make the coffin point stand out. Hot pink gives a fun pop, and white stars look crisp without needing heavy outline work. Because the stars are small, short coffin doesn't look childish. It's a great set for birthdays or nights out.
Build hot pink in a glossy finish. Use white gel to paint tiny stars (5 points) and place them in a tight group near the tip center. Keep the cluster within 3-4 mm tall. Seal with top coat.
Editor's notePaint one star, then use it as a size reference for the rest.
Watch outDon't spread stars across the whole nail; it makes the nail look smaller.
26. Pink Coffin with Glossy Nude Base and Rosy Edge
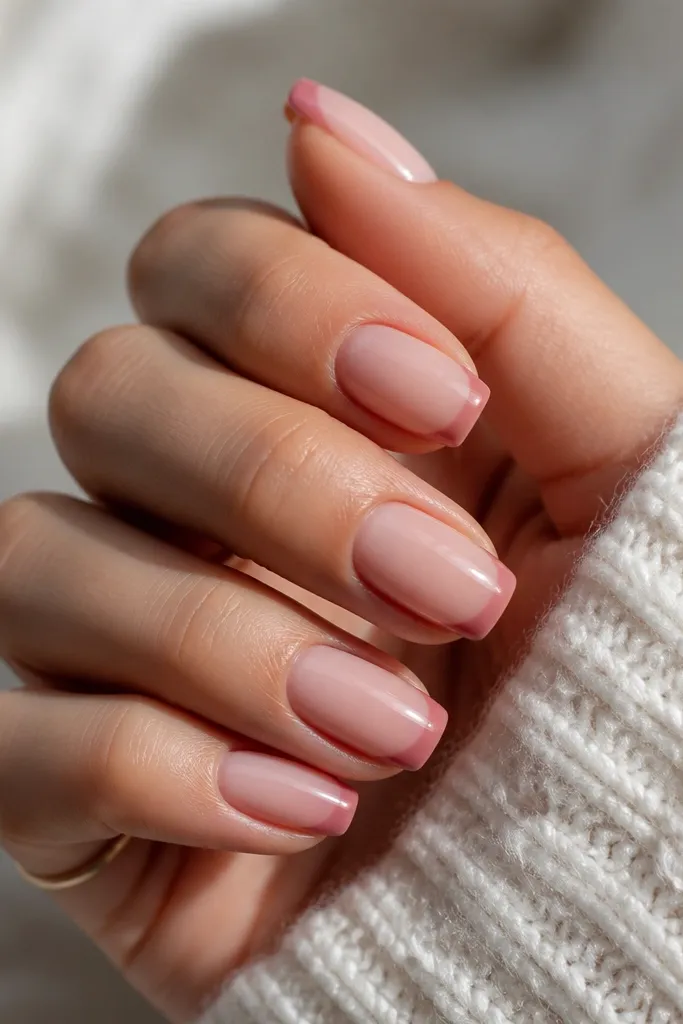
This is a grown-up version of a french that flatters small-space nails. The nude base keeps length visible, and the rosy edge adds definition at the free edge. It looks clean because there's no full nail coverage color shift. The gradient makes the coffin tip look sharper without a harsh line.
Use a nude-pink acrylic/gel base. Add rosy pink at the tip and blend upward slightly so you get a smooth edge gradient. Keep the darkest area at the very tip, fading as it approaches mid-nail. Top coat glossy.
Editor's noteBlend with a sponge using tiny dabs for a soft gradient.
Watch outSkip a hard edge line; it looks like tape residue on short nails.
27. Pink Coffin with Satin Bowtie Accent
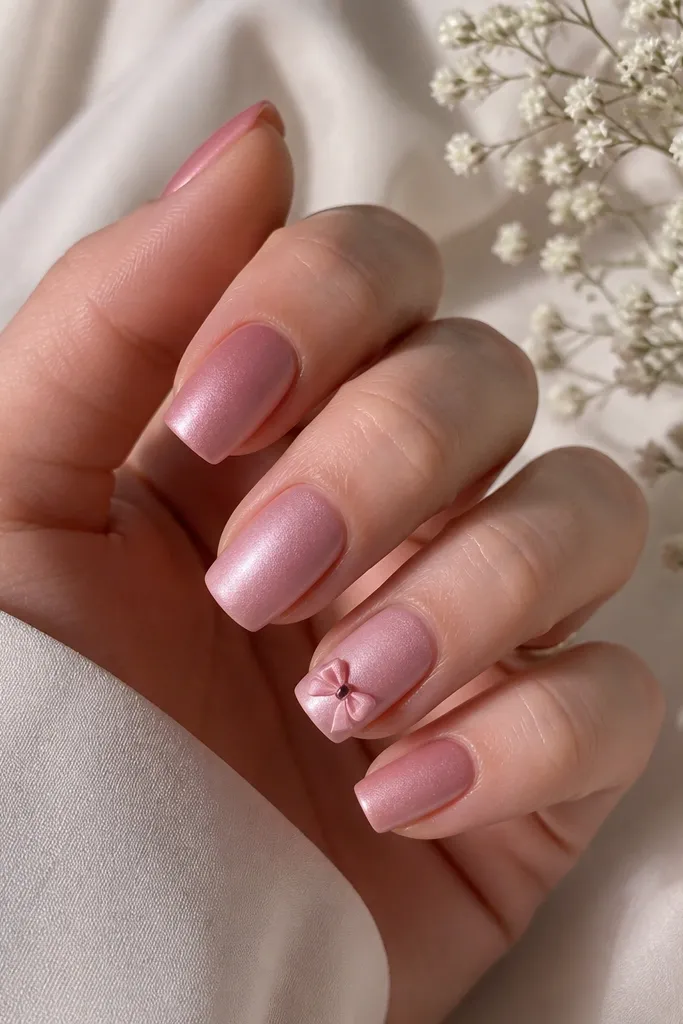
A bowtie accent looks fashion-forward, and satin finish hides tiny filing marks. Keeping the bowtie on one nail keeps the set classy and not busy. The darker center gives dimension even without heavy rhinestones. It's a good "pink but different" option for a short coffin shape.
Do satin pink on all nails using satin-top gel or a satin acrylic finish. On the accent nail, sculpt a bowtie using two slightly different pink gels and a darker center dot. Cure each layer so it doesn't smear. Seal with a glossy top only on the accent if you want contrast.
Editor's noteIf your bowtie edges look fuzzy, outline with a gel liner brush before curing.
Watch outAvoid adding rhinestones to satin sets; the shine mismatch makes it look off.
28. Pink Coffin with Tiny Butterfly Wing Lines
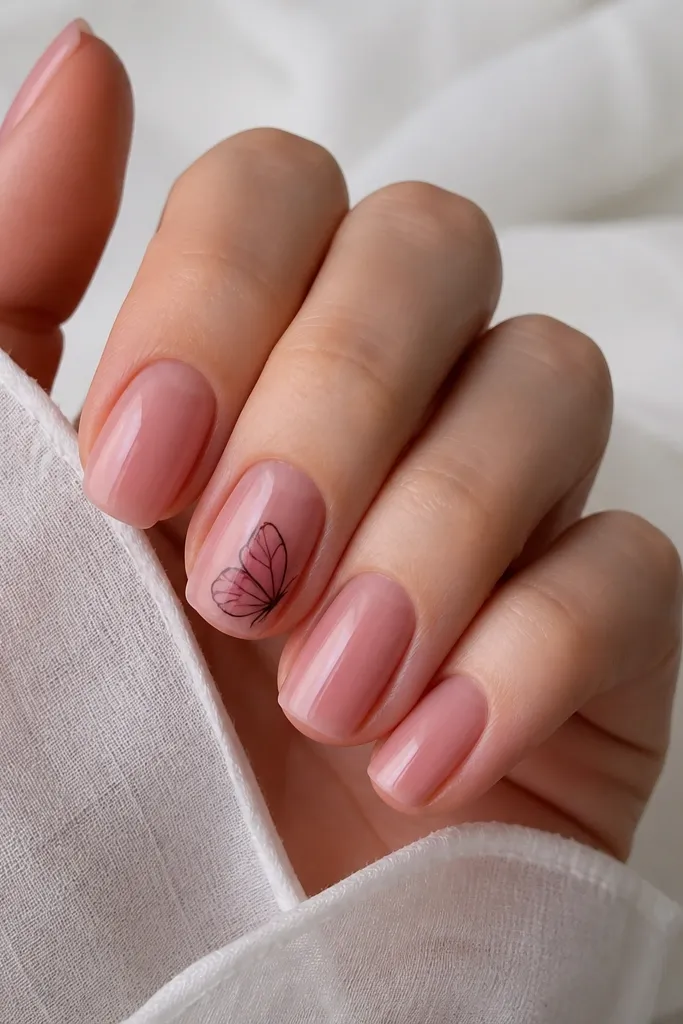
Butterfly wing line art reads delicate when it's small and outlined lightly. The sheer pink base keeps the nail looking airy, and the subtle rose behind the lines adds softness. This design looks good on short coffin because it doesn't demand a lot of surface area. It's also surprisingly wearable with neutral outfits.
Use a sheer pink base. On the accent nail, draw butterfly wing outlines with a thin brush using a dark brown gel (not pure black). Add a very light rose wash behind the lines using a translucent gel. Top coat glossy.
Editor's noteKeep lines under 1 mm thick so they stay dainty after top coat.
Watch outDon't use thick black outlines; they overpower short coffin nails.
29. Rose Pink Coffin with One-Line Rhinestone Curve
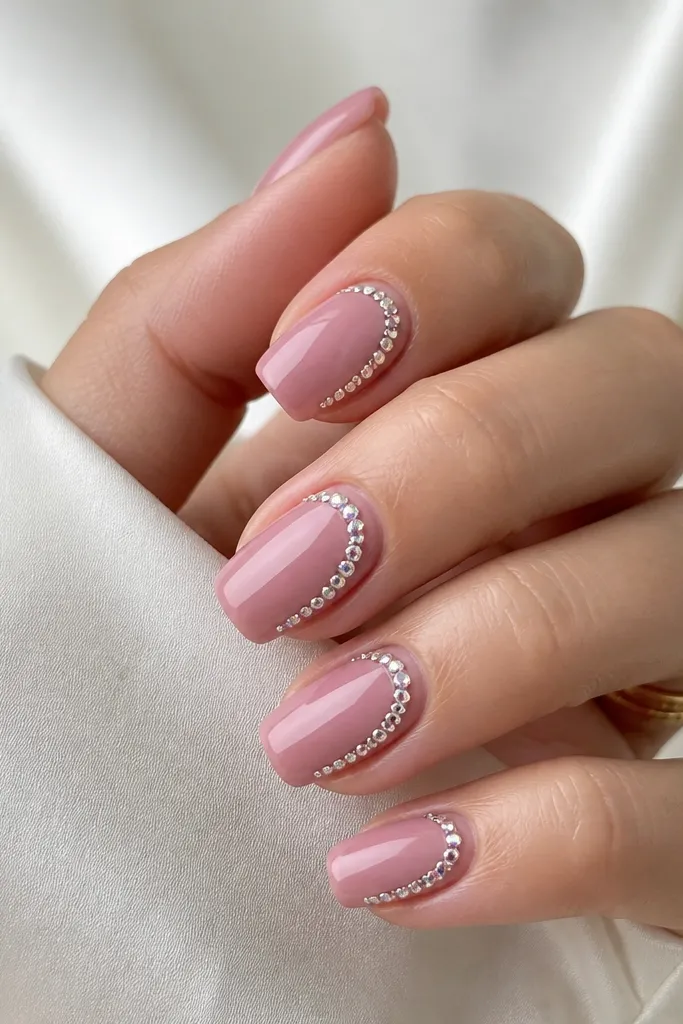
A curved rhinestone line adds movement and makes the coffin tip look intentional. Because it's one line, it doesn't bulk up the nail. Rose pink keeps it soft rather than glam-garish. The arc draws the eye along the nail length, which helps short nails look more balanced.
Apply rose pink base. Place tiny rhinestones (micro size) along a gentle arc that starts near the outer sidewall and ends near the tip corner. Seal with top coat and cap carefully so the rhinestones don't snag. Keep the arc length short - about the last third of the nail.
Editor's noteUse gel as your "track" for rhinestones so they don't slide while curing.
Watch outSkip full rhinestone coverage - it turns short coffin into a heavy block.
30. Pink Coffin with Watercolor Tips in Pale Lavender
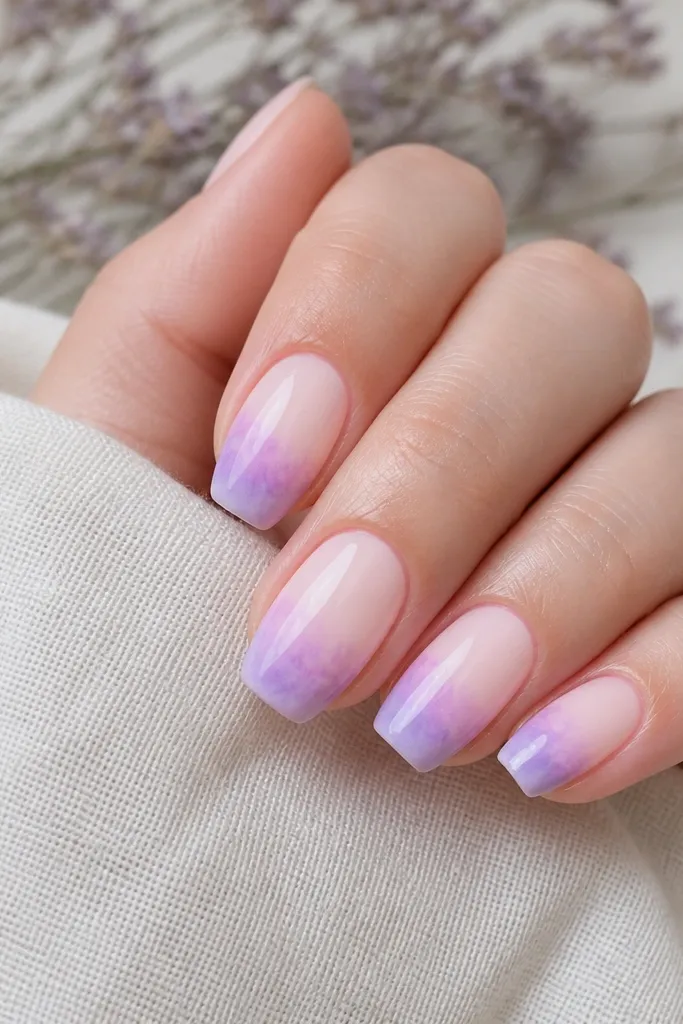
Lavender watercolor tips make pink look fresh and not too sweet. The soft fade works with small-space nails because it doesn't require crisp borders. It also makes the coffin point look lighter and longer. This is a "spring" look that still works in winter because the base is neutral.
Use a pale pink base acrylic/gel. At the tip, apply pale lavender gel in a watercolor style - blend edges with a clean brush dampened with slip solution. Keep lavender only at the last 2-4 mm. Top coat glossy to smooth the watercolor effect.
Editor's noteWork in thin layers so the fade stays translucent.
Watch outAvoid thick lavender bands; they make the tip look heavy.